

Page 1
Pro8432WT
Page 2

About This Manual
WARNING
Terms in this document
The following terms are used in this manual.
Note
● Indicates important information on operations. Make sure to read sections with this mark.
Memo
● Indicates additional information on operations. You should read sections with this mark.
Reference
● Indicates where to look when you want to know more detailed or related information.
● A warning provides additional information which, if ignored, may result in a risk of personal injury.
CAUTION
● A caution provides additional information which, if ignored, may result in equipment malfunction or damage.
Symbols in this document
The following symbols are used in this manual.
Symbols Description
[ ] ● Indicates menu names on the display screen.
● Indicates menu, window, and dialog names on the computer.
" "
< > button/key Indicates a hardware button on the operator panel or a key on the keyboard of the
> Indicates how to get to the item you want in the menu of this printer or the computer.
Your Printer
● Indicates messages and input text on the display screen.
● Indicates le names on the computer.
● Indicates reference titles.
computer.
Indicates a printer you want to use or select.
- 2 -
Page 3

Notation used in this manual
The following notations may be used in this manual.
● PostScript3 Emulation → PSE, POSTSCRIPT3 Emulation, POSTSCRIPT3 EMULATION
● Microsoft® Windows® 10 64-bit Edition operating system → Windows 10 (64bit version) *
● Microsoft® Windows® 8.1 64-bit Edition operating system → Windows 8.1 (64bit version) *
● Microsoft® Windows® 8 64-bit Edition operating system → Windows 8 (64bit version) *
● Microsoft® Windows® 7 64-bit Edition operating system → Windows 7 (64bit version) *
● Microsoft® Windows Vista® 64-bit Edition operating system → Windows Vista (64bit version) *
● Microsoft® Windows Server® 2016 64-bit Edition operating system → Windows Server 2016 *
● Microsoft® Windows Server® 2012 R2 64-bit Edition operating system → Windows Server 2012 *
● Microsoft® Windows Server® 2012 64-bit Edition operating system → Windows Server 2012 *
● Microsoft® Windows Server® 2008 R2 64-bit Edition operating system → Windows Server 2008 R2 *
● Microsoft® Windows Server® 2008 64-bit Edition operating system → Windows Server 2008 (64bit
version) *
● Microsoft® Windows® 10 operating system → Windows 10 *
● Microsoft® Windows® 8.1 operating system → Windows 8.1 *
● Microsoft® Windows® 8 operating system → Windows 8 *
● Microsoft® Windows® 7 operating system → Windows 7 *
● Microsoft® Windows Vista® operating system → Windows Vista *
● Microsoft® Windows Server® 2008 operating system → Windows Server 2008 *
● Generic name for Windows 10, Windows 8.1, Windows 8, Windows Server 2016, Windows Server
2012, Windows 7, Windows Vista, and Windows Server 2008 → Windows
* If there is no special description, 64bit version is included in Windows 10, Windows 8.1, Windows 8,
Windows 7, Windows Vista, and Windows Server 2008. (64bit version and Windows Server 2008 R2
is included in Windows Server 2008, Windows Server 2012 R2 is included in Windows Server 2012.)
If there is no special description, Windows 7 is used as Windows, OS X 10.11 is used as OS X, and
Pro8432WT is used as the printer for examples in this document.
Depending on your OS or model, the description on this document may be different.
- 3 -
Page 4

Contents
About This Manual ...................................................................................2
Terms in this document ............................................................................................. 2
Symbols in this document
Notation used in this manual
.......................................................................................... 2
...................................................................................... 3
1. Convenient Print Functions .................................................. 7
Description of Print Functions ..................................................................................... 7
Printing on Labels
Printing on Custom Size Paper
Manual Printing
Combining Multiple Pages Onto One Sheet of Paper (Multiple page printing).................... 14
Scaling to Pages
Collating Pages
Setting the Page Order
Cover Printing
Changing Print Quality (Resolution)
Printing with white toner only
Color printing with white toner.................................................................................. 18
How to print with application setting
................................................................................................... 10
.................................................................................. 11
...................................................................................................... 13
..................................................................................................... 15
....................................................................................................... 16
............................................................................................ 16
........................................................................................................ 17
........................................................................... 17
................................................................................... 18
.......................................................................... 19
Emphasizing Fine Lines
Auto Tray Selection
Auto Tray Switching
Changing the Driver's Default Settings
Using Printer Fonts
Using Computer Fonts
Using a Print Buffer
Printing to File
Downloading PS Files
Printing Out PS Errors
........................................................................................................ 24
............................................................................................ 20
................................................................................................. 20
................................................................................................ 21
....................................................................... 22
.................................................................................................. 23
............................................................................................. 23
................................................................................................. 24
.............................................................................................. 25
............................................................................................. 25
2. Adjusting Color .................................................................. 26
Adjusting Color on the Control Panel ........................................................ 26
Adjusting Color Registration ..................................................................................... 26
Adjusting the Density
Adjusting the Color Balance (Density)
.............................................................................................. 26
........................................................................ 27
Adjusting Color with PS Gamma Adjuster Utility ........................................ 28
Registering Half-tone ............................................................................................... 28
Printing a File with the Adjusted Gamma Curve
........................................................... 29
- 4 -
Page 5

Contents
3. Changing Printer Settings .................................................. 30
Checking the Current Settings ................................................................ 30
Printing Out Print Information ................................................................................... 30
Changing the Equipment Settings ............................................................ 31
Admin Setup .......................................................................................................... 31
Boot Menu
Other Settings
List of Each Setup Menu
............................................................................................................. 31
........................................................................................................ 32
.......................................................................................... 33
4. Using Utility Software ........................................................ 51
Overview of Utilities ..............................................................................51
Installing Utilities
Utilities common to Windows/OS X
Web page .............................................................................................................. 53
Windows Utilities................................................................................... 55
Conguration Tool ................................................................................................... 55
OKI LPR Utility........................................................................................................ 56
Network Extension
OS X Utilities ........................................................................................ 60
Network Card Setup ................................................................................................ 60
.................................................................................. 52
.......................................................... 53
.................................................................................................. 59
5. Network Settings ............................................................... 61
Network Setting Items ........................................................................... 61
Changing Network Settings From the Web Page
Informing the End of Consumable Life and Errors by E-mail (E-mail Alert) ...................... 61
Controlling Access Using IP Address (IP Filtering)
Controlling Access Using MAC Address (MAC Address Filtering)
Encrypting Communication by SSL/TLS
Encrypting Communication by IPSec
Using SNMPv3
Using IPv6
Using IEEE802.1X
........................................................................................................ 68
............................................................................................................. 69
................................................................................................... 70
...................................................................... 64
.......................................................................... 66
........................................ 61
........................................................ 63
..................................... 63
Other Operations ..................................................................................72
Initializing Network Settings ..................................................................................... 72
6. Troubleshooting ................................................................. 73
Initializing ............................................................................................ 73
Initializing an SD memory card ................................................................................. 73
Initializing Flash Memory
......................................................................................... 74
- 5 -
Page 6

Contents
Resetting the Printer Settings ................................................................................... 75
Deleting or Updating the Printer Drivers ................................................... 76
Deleting a Printer Driver .......................................................................................... 76
Updating a Printer Driver
......................................................................................... 77
Index ...................................................................................... 78
- 6 -
Page 7

1. Convenient Print Functions
1
This chapter explains advanced printing operations.
Description of Print Functions
For Windows PS Printer Driver
[Layout] tab
Item Description
Orientation Selects the document
Page Order Selects the page order of
Page Format Sets the number of pages to
Preview Display print image.
Advanced Sets the advanced settings.
[Paper/Quality] tab
orientation.
document.
be printed on one sheet of
paper.
[Job Options] tab
Item Description
Quality Controls the print resolution.
Copies Inputs the number of copies to
Scale Species the scale of
Special
Advanced Sets the advanced settings.
About
Default Returns the printer driver
[Color] tab
be printed at a time.
enlargement or reduction.
Prints the mirror image of the
document by ipping it horizontally.
Displays the printer driver version.
settings to the default values
for this tab only.
1. Convenient Print Functions
Item Description
Tray Selection Selects a paper tray.
Advanced Sets the advanced settings.
- 7 -
Item Description
Color Mode Adjusts the color settings for
color printing.
Print Mode Sets whether to use the
white toner for color printing.
Advanced Sets the advanced settings.
Default Returns the printer driver
settings to the default values
for this tab only.
Page 8

For OS X PS Printer Driver
1
[TextEdit] panel
1. Convenient Print Functions
Item
Print header and
footer
Rewrap contents
to t page
[Layout] Panel
Enable to print page
numbers, dates, and text
titles, etc.
Enable to print by aligning
to the text wrapping method
durign editing.
Description
[Color Matching] panel
Item
ColorSync Species the ColorSync
function.
In printer Implements printer color
matching.
Prole Species the prole.
Description
[Paper Handling] panel
Item
Pages per Sheet Selects the number of pages
to be printed on 1 sheet of
paper.
Layout Direction Species the layout when
printing multiple pages on a
single sheet of paper.
Border Species the boundary line
type.
Reverse page
orientation
Flip horizontally Enable to print by reversing
Enable to print by reversing
the page orientation.
left and right.
Description
Item
Pages to Print Species the pages to be
printed.
Page Order Species the order of the
pages to be printed.
Scale to t paper
size
Destination Paper
Size
Scale down only Species to print by reducing
Prints by aligning to the
paper size. Some items may
not be printed correctly
depending on the setup.
Species to print by scaling
to match the size of the
paper to be output.
only to match the size of the
paper to be output.
Description
- 8 -
Page 9

[Paper Feed] panel
Item
All Pages From Species the tray for the
paper feed. The tray is
selected automatically when
[Auto Select] is specied.
First Page From Select to print from the tray
that species the header
page.
Remaining From Prints from the tray that
species the remaining
pages.
Description
[Cover Page] panel
[Color] panel
Item
Gray Scale (White)
Print
Color Print Species alignment to color
Prints the data created as
grayscale in the application
with the white toner only.
mode when printing in color.
Description
[Print Options] panel
1
1. Convenient Print Functions
Item
Print Cover Page Species cover printing.
Cover Page Type Species the text during
printing.
Description
Print Options
Items Setup
Item
Description
Species alignment to the items
that have been set such as
print quality, paper type, etc.
Species the setup items
conforming to the print setup tab.
- 9 -
Page 10

Memo
● This section uses [MemoPad] for its Windows
1
1. Convenient Print Functions
explanations, and [TextEditor] for its OS X explanations.
Descriptions may differ depending on the applications and
printer drivers used.
● If setting details are not displayed in the print dialog
box for OS X, click [Show Details] at the bottom of the
dialog box.
Reference
● For detailed explanations of the printer driver setup items,
see the printer driver "Online Help".
Printing on Labels
You can print on labels by changing the media
type setting and using the MP tray and the
faceup stacker.
Set the paper size and type for MP tray on
the operator panel. Then, make print settings
including paper size and paper tray with the
printer driver.
Reference
● For available labels, refer to the User’s Manual (Setup).
● Manual printing is also available for printing on labels.
For details on manual printing, refer to "Manual Printing"
P.13.
1 Load paper on the MP tray.
Reference
● Refer to “Loading Paper” in the User’s Manual
(Setup).
2 Open the faceup stacker at the rear of
the printer.
Memo
● If always printing on labels from the MP tray, register
the paper on the operator panel. If printing once,
proceed to the printing procedures through the
printer driver.
3 Press the <Fn> key.
4 Press the <9> and <0> on the numeric
keypad and then press the <ENTER>
button.
5 Press the scroll button to select
[A4] or [Letter] and then press the
<ENTER> button.
6 Press the <BACK> button and make
sure that [MPTray Cong] is displayed.
7 Press the scroll button to select
[Media Type] and then press the
<ENTER> button.
8 Press the scroll button to select the
[Labels] and then press the <ENTER>
button.
9 Press the <ON LINE> button to exit the
menu mode.
- 10 -
10 Open the le you want to print on the
computer.
11 Congure the paper size and tray on the
printer driver.
Page 11

For Windows PS Printer Driver
1 From the [File] menu, select [Print].
2 Click [Preferences] or [Properties].
3 Select [Paper/Quality] tab.
4 Select [Multi-Purpose Tray] from
[Paper Source].
5 Click [Advanced].
6 Click [Paper Size] and then select [A4]
or [Letter] from the drop-down list.
7 Click [OK].
8 Congure other settings if necessary and
then start printing.
For OS X PS Printer Driver
1 From the [File] menu, select [Page
Setup].
2 Select [A4] or [Letter] from [Paper
Size].
3 Select [Print] from [File] menu.
4 Select [Paper Feed] from the panel
menu.
5 Select [All pages From] and then select
[Multi-Purpose Tray].
6 Congure other settings if necessary and
then start printing.
Memo
● If setting details are not displayed in the print dialog
box for OS X, click [Show Details] at the bottom of
the dialog box.
Printing on Custom Size Paper
You can register a customized paper size on the
printer driver so you can print on nonstandard
paper.
● Settable custom size range
Width: 64 to 297 mm
Length: 90 to 431 mm
Paper sizes that can be fed differ depending on
the tray.
Note
● Register the paper size as portrait, and load paper in
portrait orientation.
● This function may not be available in some applications.
● If paper is so long that it exceeds the paper supports of
the MP tray, support it by hand.
● When using tray 1, press the scroll button or on the
operator panel > [Menus] > [Tray Conguration] >
[Tray1 Cong] > [Paper Size] > [Custom] before
doing the following procedure.
● If images are not correctly printed on large size paper,
selecting [Standard (600x600dpi)] for [Print Quality],
image in the PS printer driver may allow for correct
printing.
● Use of paper with a width of less than 100 mm is not
recommended. Doing so may cause paper jams.
Reference
● For details on the paper sizes that can be fed on each
tray, refer to the User’s Manual (Setup).
● The [Auto Tray Switch] is enabled by default. When
the tray runs out of paper during printing, the printer
automatically begins feeding paper from that tray. If you
want to feed custom paper only from a particular tray,
disable auto tray switching. For auto tray change, refer to
"Auto Tray Switching" P.21.
Specifying Custom Sizes
To load custom size paper, you need to register
the width and length of the paper before
printing. The range of the sizes you can set
differs according to the paper tray.
Tray Available size range
Tray1 Width:
105 to 297 mm (4.1 to 11.7 inches)
Length:
148, 182 to 431 mm (5.8 to 17.0 inches)
MP tray Width:
64 to 297 mm (2.5 to 11.7 inches)
Length:
90 to 431 mm (3.5 to 17.0 inches)
1
1. Convenient Print Functions
- 11 -
Note
● You can congure the [Custom] setting only when
[Paper Size] is set to [Custom].
Page 12

1 Press the scroll button or on the
1
1. Convenient Print Functions
operator panel.
2 Press the scroll button several times
to select [Menus] and press the
<ENTER> button.
3 Check that [Tray Conguration]
is selected and press the <ENTER>
button.
4 Press the scroll button several times
to select [Tray Cong] of the paper
tray in which you loaded paper and then
press the <ENTER> button.
5 Check that [Paper Size] is selected and
press the <ENTER> button.
6 Press the scroll button several times
to select [Custom] and then press the
<ENTER> button.
7 Press the <BACK> button.
8 Press the scroll button to select
[X Dimension] and then press the
<ENTER> button.
9 Enter the paper width value using the
numeric keypad and then press the
<ENTER> button.
10 Press the <BACK> button.
For Windows PS Printer Driver
1 Click [Start] and select [Devices and
Printers].
2 Right-click the
select the type of driver you want to
specify from [Printing preferences].
Your Printer
icon and
3 On the [Layout] tab, click [Advanced].
4 Click [Paper Size] and select
[PostScript Custom Page Size] from
the drop-down list.
5 Enter the dimensions in the [Width] and
[Height] boxes, and press [OK].
Note
● [Offsets Relative to Paper Feed Direction] is not
available.
6 Press [OK] until the [Printing
preferences] dialog box is closed.
7 Open the le you want to print from the
application.
8 In the printer driver, select [PostScript
Custom Page Size] for the paper size
and start printing.
Reference
● For how to specify paper in the printer driver, refer to the
User’s Manual (Setup).
11 Press the scroll button to select
[Y Dimension] and then press the
<ENTER> button.
12 Enter the paper length value using the
numeric keypad and then press the
<ENTER> button.
13 Press the <ON LINE> button to exit the
menu mode.
- 12 -
Page 13

For OS X PS Printer Driver
Note
● In the OS X PS printer driver, paper size out of the
available range can be set. However, the image will not be
printed correctly, so set paper size within available range.
1 Open the le you want to print.
2 From the [File] menu, select [Page
Setup].
3 Select [Manage Custom Sizes] from
[Paper Size].
4 Click [+] to add an item to the list of
custom paper sizes.
5 Double-click [Untitled] and enter a
name for the custom paper size.
6 Enter the dimensions in the [Width] and
[Height] boxes.
7 Click [OK].
8 Click [OK].
9 From the [File] menu, select [Print].
10 Congure other settings if necessary and
then start printing.
Reference
● For how to specify paper in the printer driver, refer to the
User’s Manual (Setup).
Memo
● If setting details are not displayed in the print dialog
box for OS X, click [Show Details] at the bottom of the
dialog box.
Manual Printing
You can print a document feeding paper manually on
the MP tray. The printer prints on a sheet of paper
at a time. Every time a page is printed, the message
“Install Paper MPTray %MEDIA_SIZE% Press
ONLINE Button” appears. Press the <ON LINE>
button to continue to print.
1 Load paper on the MP tray.
Reference
● Refer to “Loading Paper” in the User’s Manual
(Setup).
2 Open the le you want to print.
3 Congure the manual printing settings in
the printer driver, and start printing.
For Windows PS Printer Driver
1 From the [File] menu, select [Print].
2 Click [Preferences] or [Properties].
3 Select the [Paper/Quality] tab.
4 Select [Multi-Purpose Tray] from
[Paper Source].
5 Click [Advanced].
6 Click [Multipurpose tray is handled
as manual feed] and select [Yes] from
the drop-down list.
7 Click [OK].
1
1. Convenient Print Functions
- 13 -
8 Congure other settings if necessary and
then start printing on the print dialog.
9 If a request message appears on the
operator panel for loading paper on the
MP tray, press the <ON LINE> button.
If you print a multi-page document, the same
message appears every time a page is printed.
Page 14
12
34
For OS X PS Printer Driver
1
1 From the [File] menu, select [Print].
1. Convenient Print Functions
2 Select [Paper Feed] from the panel
menu.
3 Select [All pages From] and then select
[Multi-Purpose Tray].
4 Select [Print Options] from the panel
menu.
5 Click the [Feed] button from [Print
Options].
6 Select [Multipurpose tray is handled
as manual feed] check box.
7 Congure other settings if necessary and
then start printing.
8 When a request message appears on the
operator panel for loading paper on the
MP tray, press the <ON LINE> button.
If you print a multi-page document, the same
message appears every time a page is printed.
Memo
● If setting details are not displayed in the print dialog
box for OS X, click [Show Details] at the bottom of the
dialog box.
Combining Multiple Pages Onto One
Sheet of Paper (Multiple page printing)
You can print multiple pages of a document onto
a single side of a sheet of paper.
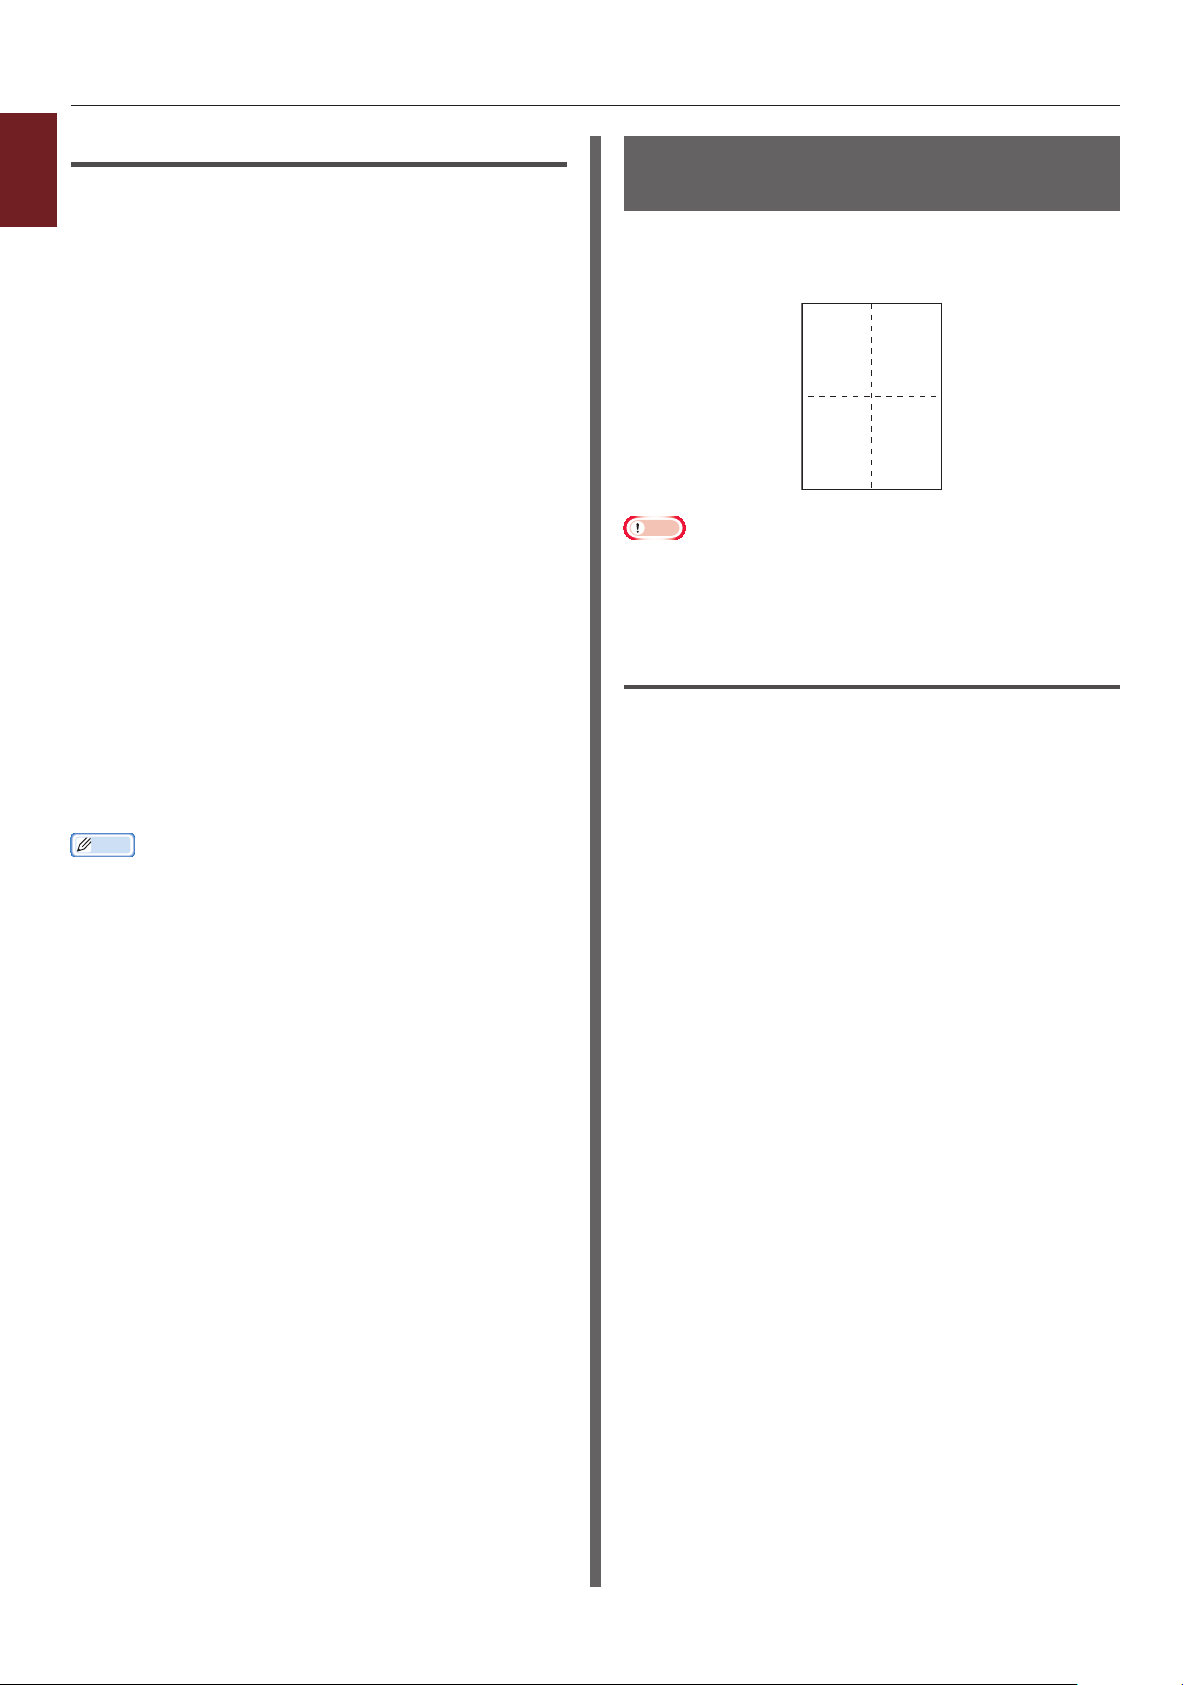
Note
● This function scales down the page size of your document
for printing. The center of the printed image may not be
in the center of the paper.
● This function may not be available in some applications.
For Windows PS Printer Driver
1 Open the le you want to print.
2 From the [File] menu, select [Print].
3 Click [Preferences] or [Properties].
4 On the [Layout] tab, select the number
of pages to print on each sheet from
[Pages per Sheet].
5 Specify the following settings.
- Select the [Draw Borders] check box
to draw borders between pages on each
sheet.
- Select [Advanced] > [Page per Sheet
Layout] to set the layout of pages on
each sheet.
6 Congure other settings if necessary and
then start printing.
- 14 -
Page 15

A3
For OS X PS Printer Driver
1 Open the le you want to print.
2 From the [File] menu, select [Print].
3 Select [Layout] from the panel menu.
4 Select the number of pages to print on
each sheet from [Pages per Sheet].
5 Specify the settings for [Border] and
[Layout Direction].
6 Congure other settings if necessary and
then start printing.
Memo
● If setting details are not displayed in the print dialog
box for OS X, click [Show Details] at the bottom of the
dialog box.
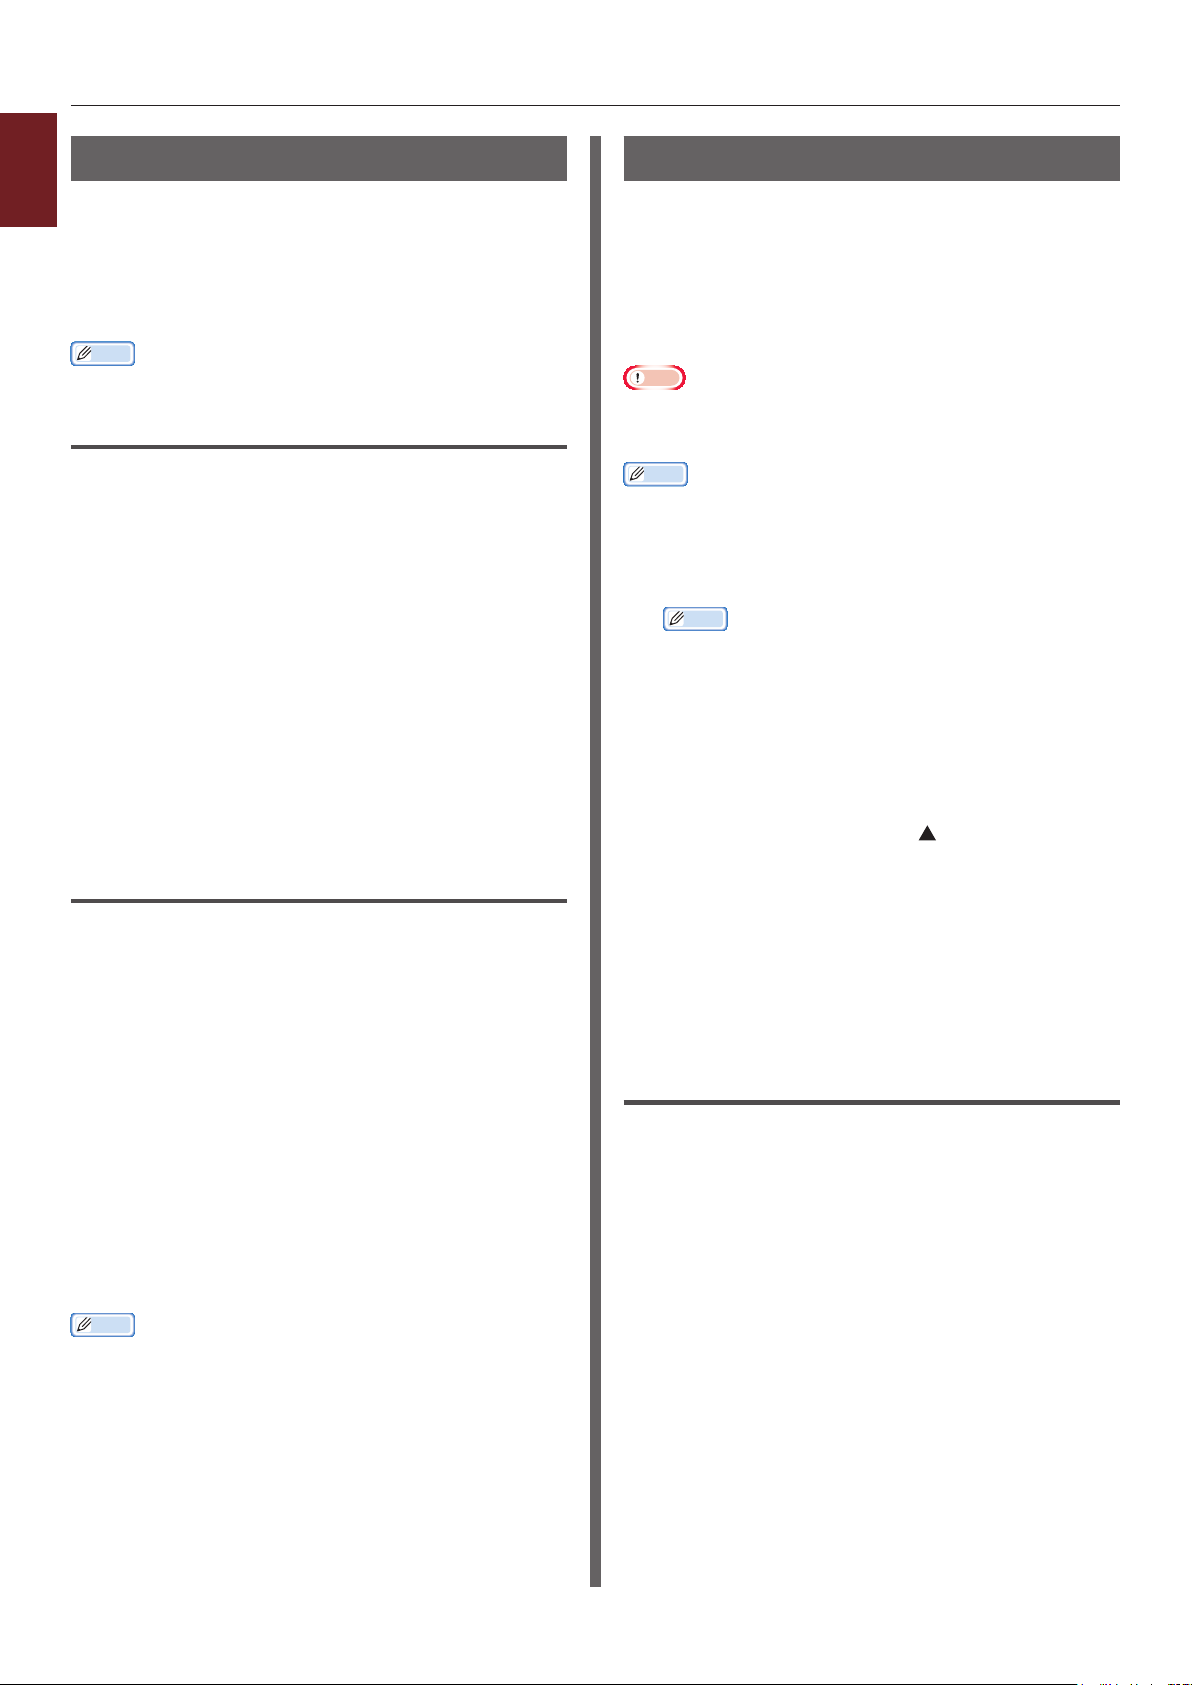
Scaling to Pages
You can print data formatted for one size page
onto a different size page without modifying the
print data.
A4
Note
● This function may not be available in some applications.
For Windows PS Printer Driver
1 Open the le you want to print.
2 From the [File] menu, select [Print].
3 Click [Preferences] or [Properties].
1
1. Convenient Print Functions
4 Turn on [Resize document to t
printer page] on the [Job Option] tab.
5 Select your desired size from the list.
6 Congure other settings if necessary and
then start printing.
For OS X PS Printer Driver
1 Open the le you want to print.
2 From the [File] menu, select [Print].
3 Select [Paper Handling] from the panel
menu.
4 Select the [Scale to t paper size]
check box.
5 Select the paper size you want to use
from [Destination Paper Size].
6 Congure other settings if necessary and
then start printing.
Memo
● If setting details are not displayed in the print dialog
box for OS X, click [Show Details] at the bottom of the
dialog box.
- 15 -
Page 16

Collating Pages
1
You can print copies of multiple sets of a
1. Convenient Print Functions
multipage document.
Note
● This function may not be available in some applications.
● Turn off the page collating mode in the application when
you use this function with the Windows PS printer driver.
For Windows PS Printer Driver
1 Open the le you want to print.
2 From the [File] menu, select [Print].
3 Click [Preferences] or [Properties].
4 Select the [Job Options] tab.
5 Select the number of copies to print
from the [Copies] scrolling list and
select the [Collate] check box.
6 Congure other settings if necessary and
then start printing.
Setting the Page Order
You can set whether pages are printed in
forward or reverse order to suit your needs.
If using a face down stacker, set the printing to
run in forward order to stack the paper in the
order of the pages.
If using a face up stacker, set the printing to run
in the reverse order to stack the paper in the
order of the pages.
Note
● If the face up stacker is not opened, pages are output on
the face down stacker.
For Windows PS Printer Driver
1 Open the le you want to print.
2 From the [File] menu, select [Print].
3 Click [Preferences] or [Properties].
4 On the [Layout] tab, select [Front to
Back] or [Back to Front] from [Page
Order].
For OS X PS Printer Driver
1 Open the le you want to print.
2 From the [File] menu, select [Print].
3 Enter the number of copies to print in
[Copies]. Deselect the [Collate pages]
check box in the [Paper Handling] tab.
4 Select [Print Options] from the panel
menu.
5 Click the [Paper] button from [Print
Options].
6 Select the check box of [Collate].
7 Congure other settings if necessary and
then start printing.
Memo
● Select the [Collated] box to print without using the
printer memory.
● If setting details are not displayed in the print dialog
box for OS X, click [Show Details] at the bottom of the
dialog box.
5 Congure other settings if necessary and
then start printing.
Memo
● If [Page Order] does not appear, click [Start] >
[Devices and Printers] > right-click the
icon > select [Printer Properties] > [
[Advanced] > [Enable advanced printing features].
Your Printer
Your Printer PS
] >
For OS X PS Printer Driver
1 Open the le you want to print.
2 From the [File] menu, select [Print].
3 Select [Paper Handling] from the panel
menu.
4 Select [Normal] or [Reverse] from
[Page Order] on the [Paper Handling]
panel.
5 Congure other settings if necessary and
then start printing.
Memo
● If setting details are not displayed in the print dialog
box for OS X, click [Show Details] at the bottom of the
dialog box.
- 16 -
Page 17

Cover Printing
You can feed the rst page of a print job from
one tray and the remaining pages from another
tray. This function is useful when you want to
use one kind of paper for a cover and another
for body pages.
For OS X PS Printer Driver
1 Open the le you want to print.
2 From the [File] menu, select [Print].
3 Select [Paper Feed] from the panel
menu.
4 Select [First Page From] and select
source trays for the rst page and the
remaining pages.
5 Congure other settings if necessary and
then start printing.
Memo
● If setting details are not displayed in the print dialog
box for OS X, click [Show Details] at the bottom of the
dialog box.
Changing Print Quality
(Resolution)
You can change the print quality to suit your
needs.
For Windows PS Printer Driver
1 Open the le you want to print.
2 From the [File] menu, select [Print].
3 Click [Preferences] or [Properties].
4 Select the [Job Options] tab.
5 Select a print quality level at [Quality].
6 Congure other settings if necessary and
then start printing.
For OS X PS Printer Driver
1 Open the le you want to print.
2 From the [File] menu, select [Print].
1
1. Convenient Print Functions
3 Select [Print Options] from the panel
menu.
4 Click the [Quality1] button from [Print
Options].
5 Select a print quality level from
[Quality].
6 Congure other settings if necessary and
then start printing.
Memo
● If setting details are not displayed in the print dialog
box for OS X, click [Show Details] at the bottom of the
dialog box.
- 17 -
Page 18

Printing with white toner only
1
You can print with the white toner only without
1. Convenient Print Functions
using the cyan, magenta, and yellow toner.
For Windows PS Printer Driver
1 Open the le you want to print.
2 Select [Print] from the [File] menu.
3 Click on [Preferences] or [Properties].
4 Select [Gray Scale (White) Print]
from [Color Mode] on the [Color] tab.
5 Click [OK].
For OS X PS Printer Driver
1 Open the le you want to print.
2 From the [File] menu, select [Print].
3 Select [Color] from the panel menu.
4 Select [Gray Scale (White) Print].
5 Congure other settings if necessary
and then start printing.
Memo
● If setting details are not displayed in the print dialog
box for OS X, click [Show Details] at the bottom of the
dialog box.
Color printing with white toner
You can specify whether to use the white toner
for color printing.
For Windows PS Printer Driver
1 Open the le you want to print.
2 Select [Print] from the [File] menu.
3 Click on [Preferences] or [Properties].
4 Select [White On] from [Print Mode]
on the [Color] tab.
5 Click [OK].
Memo
● If [White On] is selected, the white toner will be
used for printing.
● If [White Off] is selected, the white toner will not be
used for printing.
Note
● If [Gray Scale (White) Print] is selected from
[Color Mode] on the [Color] tab, the white toner
will be used regardless of the setting of [Print
Mode].
For OS X PS Printer Driver
1 Open the le you want to print.
2 From the [File] menu, select [Print].
3 Select [Color] from the panel menu.
- 18 -
4 Select [Color Print].
5 Select [White On] from [Print
Mode].
6 Congure other settings if necessary
and then start printing.
Memo
● If setting details are not displayed in the print dialog
box for OS X, click [Show Details] at the bottom of the
dialog box.
Page 19
How to print with application
setting
To print image data without the white
background, you need to congure the
application setting. If printing image data without
conguring the application setting, white is
printed on the whole background of the image.
The following pages explain how to congure the
setting in the Adobe applications.
Adobe Photoshop
This section describes how to print the image
data without white background by Adobe
Photoshop CS.
1 Load the image data.
2 Click the all of background to make a
selection area for background by using
Magic wand function.
3 Perform the [Inverse] menu to make
a selection area for print after selection
area for background was made.
4 Click the arrow of [Paths] and perform
the [Make Work Path] menu.
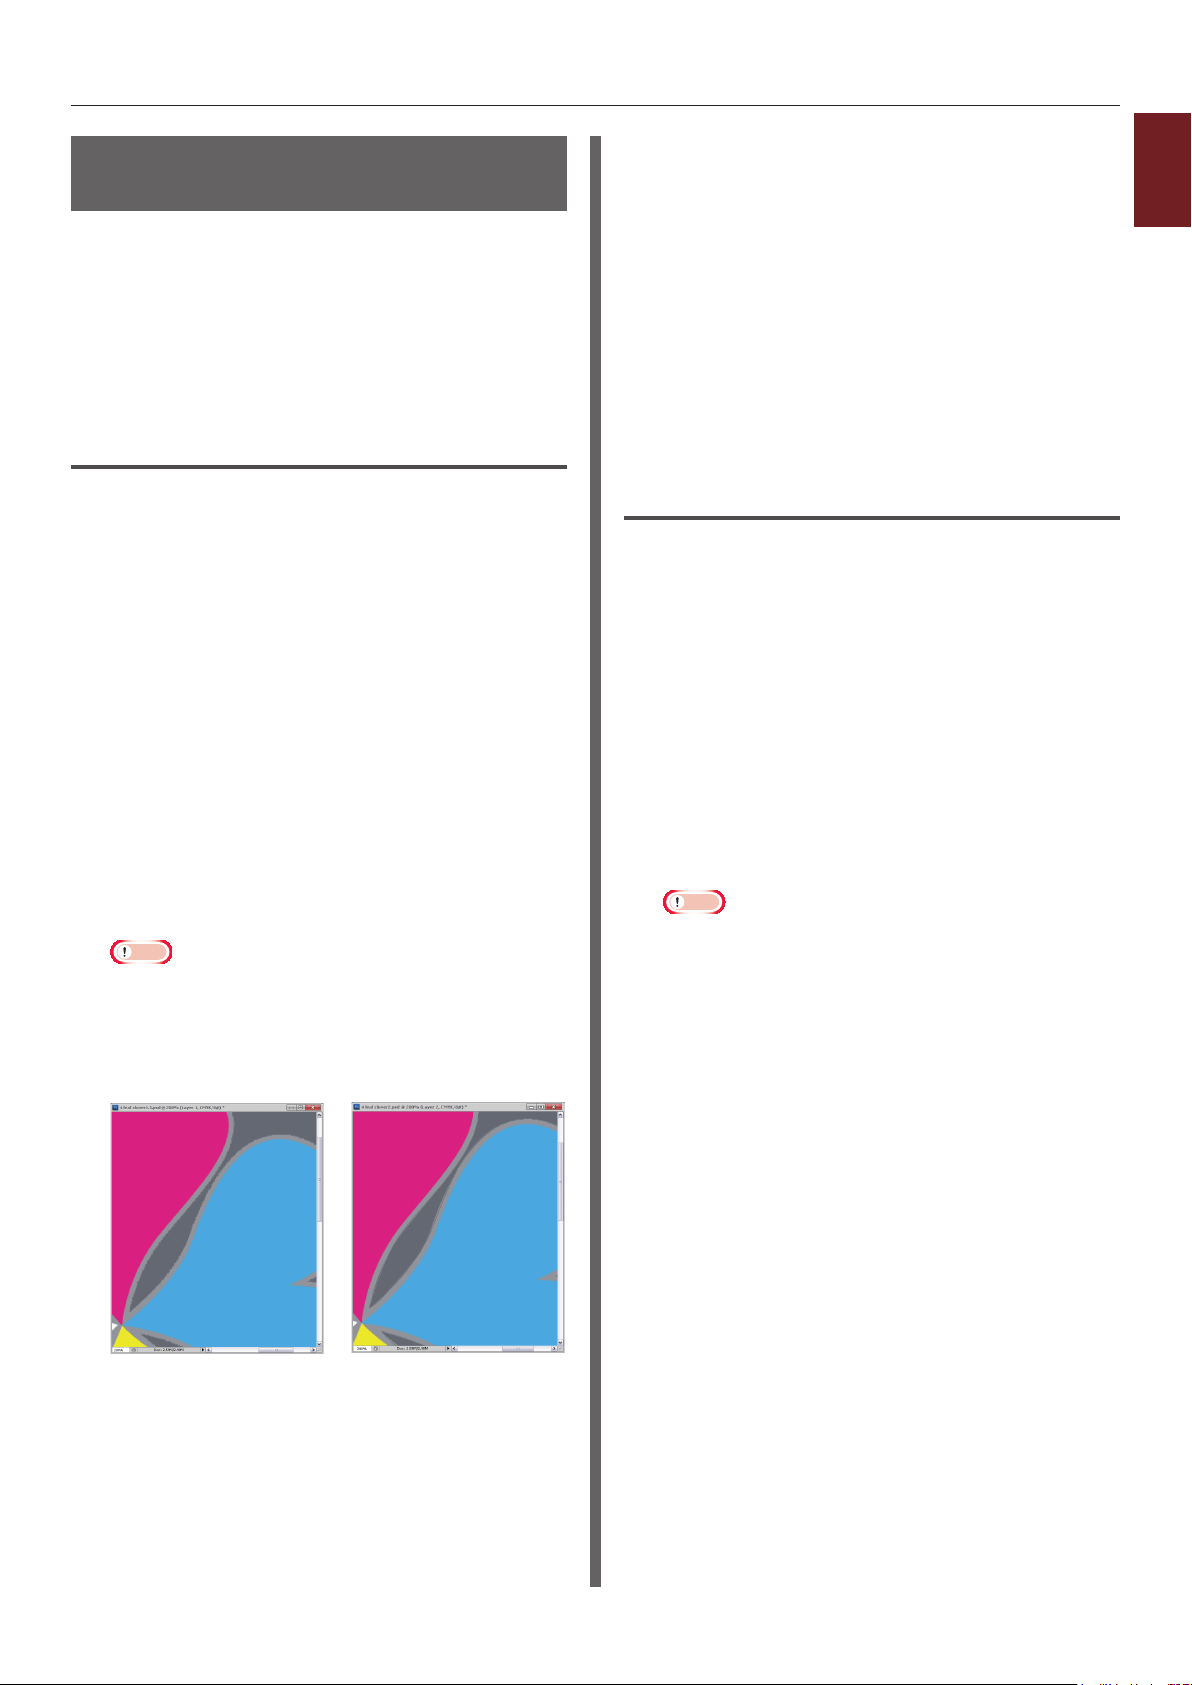
5 Input the value of [Tolerance].
Note
● If you want to select only printable image, you
should use small value, like 0.5. If you want to select
printable image together with the white edge, 2.0 is
maybe good value.
Example:
Tolerance is 0.5. Tolerance is 2.0.
7 Click the arrow of [Paths] and perform
the [Clipping Path] menu.
Click [OK] to select [Path 1] as
[Clipping Path].
8 Save the image data by Photoshop
format (PSD).
9 Select the [Print with Preview] menu.
10 Select the [No Color Management]
in [Color Handling] options then click
[Print] to print the image data.
Adobe Illustrator
This section describes how to print the image
data without white background by Adobe
Illustrator CS.
1 Load the image data.
2 Create a path around the area of the
placed picture image that you want to
mask.
3 Select the created path and the picture
image, and create a clipping mask.
4 Save the image data.
Note
● Do not apply overprint settings for the object's
ll and stroke. Otherwise they may be printed in
unexpected color. Be sure to clear the overprint
check boxes in the attributes panel.
1
1. Convenient Print Functions
It is minimum edge
but not smooth.
It is smooth but you can
see white on the edge.
6 Click the arrow of [Paths] and perform
the [Save Path] menu.
Click [OK] to save [Working Path] as
[Path 1].
- 19 -
Page 20
Emphasizing Fine Lines
1
You can print ne lines and small characters
1. Convenient Print Functions
clearer.
With some applications, if this function is turned
on, the spaces in bar codes may become too
narrow. If this happens, turn off this function.
Memo
● This function is turned on by default.
For Windows PS Printer Driver
1 Open the le you want to print.
2 From the [File] menu, select [Print].
3 Click [Preferences] or [Properties].
4 Select the [Job Options] tab.
5 Click the [Advanced].
6 Select the [Adjust ultra ne lines]
check box and then click [OK].
7 Congure other settings if necessary and
then start printing.
For OS X PS Printer Driver
Auto Tray Selection
You can set in the printer driver to automatically
switch paper feed trays with the same size of
paper loaded.
First, set on the operator panel for the MP tray
to be available for auto selection. Then, set the
auto selection of the tray with the printer driver.
Note
● Make sure to set a paper size for Tray1 and MP tray.
Available paper size differs depending on each tray. For
details, refer to the User’s Manual (Setup).
Memo
● In the default settings, the [Tray Usage] is [Do Not
Use]. When at default settings, the MP tray is not
supported by the auto tray switching function.
1 Press the <Fn> key.
Memo
● When a printer is in the power saving mode, press
the <POWER SAVE> button to restore from the
mode.
2 Press the <9> and <5> on the numeric
keypad and then press the <ENTER>
button.
3 Press the scroll button to select
[Normal Tray] and then press the
<ENTER> button.
1 Open the le you want to print.
2 From the [File] menu, select [Print].
3 Select [Print Options] from the panel
menu.
4 Click the [Quality1] button from [Print
Options].
5 Select the [Adjust ultra ne lines]
check box.
6 Congure other settings if necessary and
then start printing.
Memo
● If setting details are not displayed in the print dialog
box for OS X, click [Show Details] at the bottom of the
dialog box.
4 Press the <ON LINE> button to exit the
menu mode.
5 Specify a paper tray in the printer driver
and start printing.
For Windows PS Printer Driver
1 Open the le you want to print.
2 From the [File] menu, select [Print].
3 Click [Preferences] or [Properties].
4 Select the [Paper/Quality] tab.
5 Select [Automatically Select] from
[Paper Source].
6 Congure other settings if necessary and
then start printing.
- 20 -
Page 21

For OS X PS Printer Driver
1 Open the le you want to print.
2 From the [File] menu, select [Print].
3 Select [Paper Feed] from the panel
menu.
4 Select [All pages From] and select
[Auto Select].
5 Congure other settings if necessary and
then start printing.
Memo
● If setting details are not displayed in the print dialog
box for OS X, click [Show Details] at the bottom of the
dialog box.
Auto Tray Switching
You can switch paper feed trays automatically.
When a tray runs out of paper while printing, the
printer locates another tray with the same size
of paper on the printer driver and begins feeding
paper from that tray.
This function is effective for large print jobs of
the same paper size.
First, set on the operator panel for the MP tray
to be available for auto selection. Then, set the
auto switching of the tray with the printer driver.
Note
● Make sure to set the same values (paper size, media type,
media weight) for each tray used for auto tray switching.
Available paper size differs depending on each tray. For
details, refer to the User’s Manual (Setup).
Memo
● In the default settings, the [Tray Usage] is [Do Not
Use]. When at default settings, the MP tray is not
supported by the auto tray switching function.
1 Press the <Fn> key.
Memo
● When a printer is in the power saving mode, press
the <POWER SAVE> button to restore from the
mode.
1
1. Convenient Print Functions
2 Press the <9> and <5> on the numeric
keypad and then press the <ENTER>
button.
3 Press the scroll button to select
[Normal Tray] and then press the
<ENTER> button.
4 Press the <ON LINE> button to exit the
menu mode.
5 Congure the paper source setting on
the print dialog.
For Windows PS Printer Driver
1 Open the le you want to print.
2 From the [File] menu, select [Print].
3 Click [Preferences] or [Properties].
4 Click [Advanced] on the [Layout] tab.
- 21 -
5 Click [Tray Switch] under [Printer
Features] and select [On] from the
drop-down list.
Page 22

6 Click [OK].
1
7 Congure other settings if necessary and
1. Convenient Print Functions
then start printing.
For OS X PS Printer Driver
1 Open the le you want to print.
2 From the [File] menu, select [Print].
3 Select [Print Options] from the panel
menu.
4 Click the [Feed] button from [Print
Options].
5 Select the [Tray Switch] box.
6 Congure other settings if necessary and
then start printing.
Memo
● If setting details are not displayed in the print dialog
box for OS X, click [Show Details] at the bottom of the
dialog box.
Changing the Driver's Default
Settings
You can use as the printer driver’s default
settings print settings that you often use.
For Windows PS Printer Driver
1 Click [Start] and select [Devices and
Printers].
2 Right-click the
then select the type of driver you want
to change from [Printing preferences].
3 Congure the print settings to use as the
driver’s default setting.
4 Click [OK].
For OS X PS Printer Driver
1 Open a le.
Your Printer
icon and
2 From the [File] menu, select [Print].
3 Congure the print settings to use as the
driver’s default settings.
4 Select [Save Current Settings as
Preset] from [Presets].
5 Enter a name for the settings and click
[OK].
6 Click [Cancel].
Note
● To use the saved settings, select the name from
[Presets] in the print dialog.
Memo
● If setting details are not displayed in the print dialog
box for OS X, click [Show Details] at the bottom of the
dialog box.
- 22 -
Page 23

Using Printer Fonts
You can print your documents using pre-installed
printer fonts by substituting them for TrueType
fonts in the computer.
Note
● The printer fonts do not exactly duplicate the appearance
of the TrueType fonts seen on screen.
● This function is not available with the OS X PS printer
driver.
● To use this function with the Windows PS printer driver
you must be logged on your computer as an administrator.
● This function is not available in some applications.
For Windows PS Printer Driver
1 Click [Start] and select [Devices and
Printers].
2 Right-click the
then select [Printer properties] >
[
Your Printer PS
Your Printer
].
icon and
Using Computer Fonts
You can print your documents using TrueType
fonts in the computer to retain the same font
appearance as on the computer screen.
Note
● This function is not available with the OS X PS printer
driver.
For Windows PS Printer Driver
1 Open the le you want to print.
2 From the [File] menu, select [Print].
3 Click [Preferences] or [Properties].
4 On the [Layout] tab, click [Advanced].
5 Click [TrueType Font] and select
[Download as Softfont] from the
drop-down list.
1
1. Convenient Print Functions
3 Select the [Device Settings] tab.
4 Specify which printer fonts to use
instead of TrueType fonts in the [Font
Substitution Table].
To specify the font substitution, click each
TrueType font and select a printer font to
substitute that with from the pull-down menu.
5 Click [OK].
6 Open the le you want to print.
7 From the [File] menu, select [Print].
8 Click [Preferences] or [Properties].
9 On the [Layout] tab, click [Advanced].
10 Select [Substitute with Device Font]
at [TrueType Font] and then click
[OK].
11 Congure other settings if necessary and
then start printing.
6 Click [OK].
7 Congure other settings if necessary and
then start printing.
- 23 -
Page 24

Using a Print Buffer
1
You can spool a print job in the SD memory
1. Convenient Print Functions
card installed in the printer. This function frees
memory on your computer so it can handle other
tasks faster while the printer is running in the
background.
Note
● If the spooled data cannot be stored in the SD memory
card because of a memory shortage, a message indicating
that the data is invalid appears.
● This function is not available with the OS X PS printer
driver.
For Windows PS Printer Driver
1 Open the le you want to print.
2 From the [File] menu, select [Print].
3 Click [Preferences] or [Properties].
4 Select the [Job Options] tab.
Printing to File
You can print a document to a le, without
printing it out on paper.
Note
● You must be logged on your computer as an administrator.
For Windows PS Printer Driver
1 Click [Start] and select [Devices and
Printers].
2 Right-click the
then select the type of driver you want
to use from [Printer properties].
3 Select the [Ports] tab.
4 Select [FILE:] from the port list and
click [OK].
5 Start printing on the print dialog.
Your Printer
icon and
5 Click [Advanced].
6 Select the [Job Spool] check box and
click [OK].
7 Start printing on the print dialog.
6 Enter the name of a le and then click
[OK].
For OS X PS Printer Driver
1 Open the le you want to print.
2 From the [File] menu, select [Print].
3 Click [PDF] on the print dialog and
select a le format.
4 Enter the name of a le and select
where to save it in and click [Save].
- 24 -
Page 25

Downloading PS Files
You can download PostScript les to the printer
and print them.
Note
● This function is available only when you are using a TCP/
IP network.
● The OKI LPR Utility is not available with the OS X PS
printer driver.
For OKI LPR Utility
1 Launch the OKI LPR Utility.
2 Select [Download] from the [Remote
Print] menu.
3 Select the le to download and click
[Open].
After nishing the download, the PostScript le is
printed.
Printing Out PS Errors
You can print out the details of PostScript errors
when they occur.
For Windows PS Printer Driver
1 Open the le you want to print.
2 From the [File] menu, select [Print].
3 Click [Preferences] or [Properties].
4 On the [Layout] tab, click [Advanced].
5 Click [Send PostScript Error Handler]
under [PostScript Options] and select
[Yes] from the drop-down list.
6 Click [OK] until the print setup dialog
box is closed.
1
1. Convenient Print Functions
- 25 -
Page 26

2. Adjusting Color
This chapter explains various color adjustment methods.
Memo
● In this chapter, Notepad will be used as an example of Windows, and TextEdit will be used as an example for OS X. The
2
2. Adjusting Color
operation may differ depending on the application or the version of the printer driver you are using.
Adjusting Color on the Control Panel
This section explains the method of adjusting color for the printer using the control panel.
Adjusting Color Registration
The printer automatically adjusts the color
registration when the AC cord is plugged
or unplugged, the top cover is opened or
closed, and every time 400 pages are printed
continuously.
You can also adjust the color registration
manually if you are not satised with the quality
of the color on the printouts.
1 Press the <Fn> key.
Memo
● When a printer is in the power saving mode, press
the <POWER SAVE> button to restore from the
mode.
2 Press the <3>, <0> and <1> on the
numeric keypad and then press the
<ENTER> button.
3 Make sure that [Execute] is selected
and then press the <ENTER> button.
Memo
● The message [Color Adjusting] appears in the second
line (under [Ready To Print]) of the operator panel
display while adjusting the color registration.
Adjusting the Density
The printer automatically adjusts the density
when a toner cartridge, an image drum cartridge
or a belt is changed and every time 500 pages
are printed continuously.
You can also adjust the density manually if
you are not satised with the density of the
printouts.
1 Press the <Fn> key.
Memo
● When a printer is in the power saving mode, press
the <POWER SAVE> button to restore from the
mode.
2 Press the <3>, <0> and <0> on the
numeric keypad and then press the
<ENTER> button.
3 Make sure that [Execute] is selected
and then press the <ENTER> button.
Memo
● The message [Density Adjusting] appears in the second
line (under [Ready To Print]) of the operator panel
display while adjusting the color density.
- 26 -
Page 27

Adjusting the Color Balance
(Density)
You can adjust the density of each color. You can
select a light, medium, or dark density for each
color.
Adjusting Color on the Control Panel
2
Printing Color Swatch
1 Press the <Fn> key.
Memo
● When a printer is in the power saving mode, press
the <POWER SAVE> button to restore from the
mode.
2 Press the <3>, <0> and <2> on the
numeric keypad and then press the
<ENTER> button.
3 Make sure that [Execute] is selected
and then press the <ENTER> button.
A color swatch is printed.
Memo
● On the color tuning pattern, 33 squares are printed. The
present setting of the light, medium, and dark colors are
indicated with dashed lines. You can check the color to be
adjusted.
Adjusting the Color
2. Adjusting Color
1 Press the <ENTER> button.
2 Press the scroll button to select
[Calibration] and then press the
<ENTER> button.
3 Press the scroll button to select
[Cyan Tuning], [Magenta Tuning] or
[Yellow Tuning], and then press the
<ENTER> button.
4 Press the scroll button to select
[Highlight], [Mid-Tone] or [Dark],
and then press the <ENTER> button.
5 Press the scroll button or , select
the value you want and then press the
<ENTER> button.
6 Press the <ON LINE> button to exit the
menu mode.
- 27 -
Page 28

Adjusting Color with PS Gamma Adjuster Utility
Adjusting Color with PS Gamma Adjuster Utility
This section explains the PS Gamma Adjuster Utility. You can adjust the half-tone density of CMYK
colors printed by the printer. Use this function if the color in a photograph or graphic is too dark.
Note
2
● Printing speed may be slow if this function is used. If you want to prioritize the speed, select [Not Specied] from [Custom
Gamma Adjustment].
● Some applications can specify the half-tone settings. If you use these functions, select [Not Specied] from [Custom
2. Adjusting Color
Gamma Adjustment].
● If you are using Windows, [Custom Gamma Adjustment] menu or the contents may not be displayed on the [Color] tab of
the printer driver. In this case, restart your computer.
● If you are using an application before registering the half-tone adjustment name, restart the application before printing.
● The registered half-tone adjustment name is effective for all printers of the same type if multiple printers are saved in the
[Devices and Printers] folder.
● The adjustment result of this utility is not reected in normal white printing.
However, if [CMYW Link] is selected in the [CMYK Link Prole] setting of the printer driver, the black adjustment result in
this utility is reected in white printing.
To set [CMYK Link Prole], do as follows.
For Windows PS Printer Driver
[Color] tab > [Options] button > [CMYK Link Prole]
For Mac OS X PS Printer Driver
[Color] panel > [Input] button > [CMYK Link Prole]
Reference
● For details on how to install the PS Gamma Adjuster Utility, refer to “Installing Utilities” P.52.
Registering Half-tone
6 Click on [Add].
7 Click on [Apply].
For Windows PS Printer Driver
A dialog box appears.
8 Click on [OK].
9 Click on [Exit] to quit the PS Gamma
Adjuster Utility.
For OS X PS Printer Driver
1 Click [Start] and select [All Programs] >
[Okidata] > [PS Gamma Adjuster] >
[PS Gamma Adjuster].
1 Launch the PS Gamma Adjuster Utility.
2 Select the printer from [Select Printer].
2 Click on [New].
3 Click on [New].
4 Adjust the half-tone.
You can select a method to adjust the half-tone
from operating the graph line, entering the
gamma value, or entering the density value into
the text box.
3 Adjust the half-tone.
You can select a method to adjust the half-tone
from operating the graph line, entering the
gamma value, or entering the density value into
the text box.
5 Enter setting name in [Gamma Curve
Name] and then click [OK].
4 Enter a setting name in [Gamma Curve
Name] and then click [Save].
- 28 -
Page 29
Adjusting Color with PS Gamma Adjuster Utility
5 Click on [Select PPD].
6 Select the PPD le to register the half-
tone adjustment and click [Open].
7 Select the half-tone adjustment and click
[Add].
8 Click on [Save].
9 Exit the PS Gamma Adjuster.
10 Select [Printers & Scanners] from
[System Preferences] to delete
and reregister all printers for which
adjustments were made.
Printing a File with the
Adjusted Gamma Curve
For Windows PS Printer Driver
2
1 Open the le you want to print.
2. Adjusting Color
2 Select [Print] from the [File] menu.
3 Click on [Preferences] or [Properties].
4 Select the [Color] tab, [Custom
Calibration] and select the halftone
adjustment settings and then click [OK].
For OS X PS Printer Driver
1 Open the le you want to print.
2 From the [File] menu, select [Print].
3 Select [Print Options] from the panel
menu.
4 Select the created halftone adjustment
from [Custom gamma] in the
[Quality2] tab.
Memo
● If setting details are not displayed in the print dialog box
for macOS, click [Show Details] at the bottom of the
dialog box.
- 29 -
Page 30

3. Changing Printer Settings
This chapter explains how to congure the equipment settings from the <ENTER> button on the
operator panel.
Checking the Current Settings
This section explains the basic procedure to print out print information. By printing out the print
3
information, you can check the current settings of the printer.
3. Changing Printer Settings
Printing Out Print Information
You can print and check the printer
congurations and a usage report.
Reference
● For details on the print information you can print and
the structure of the [Print Information] menu, refer to
“Print Information Menu” P.35.
1 Press the <Fn> key.
Memo
● When a printer is in the power saving mode, press
the <POWER SAVE> button to restore from the
mode.
2 Press the <1>, <0> and <0> on the
numeric keypad and then press the
<ENTER> button.
3 Make sure that [Execute] is selected
and then press the <ENTER> button.
- 30 -
Page 31

Changing the Equipment Settings
Changing the Equipment Settings
This section explains the basic procedure to change the equipment settings.
Reference
● For details on the menu structure of the equipment settings, refer to “List of Each Setup Menu” P.33.
Admin Setup
To enter the [Admin Setup] menu, an
administrator password is necessary.
Memo
● The default password is “999999”.
1 Press the scroll button or to open
the equipment setting menu.
2 Press the scroll button to select
[Admin Setup] and then press the
<ENTER> button.
3 Enter the administrator password using
the numeric keypad.
4 Press the <ENTER> button.
5 Press the scroll button to select the
setup menu on which you want to
change a setting and then press the
<ENTER> button.
Boot Menu
Boot Menu is used to change system settings.
Only the administrator should use this menu.
To enter [Boot Menu] menu, an administrator
password is necessary.
Memo
● The default password is “999999”.
1 Hold down the <ENTER> button and
press power switch.
2 Press the <ENTER> button.
3 Enter the administrator password using
the numeric keypad.
4 Press the <ENTER> button.
5 Press the scroll button to select the
setup menu on which you want to
change a setting and then press the
<ENTER> button.
3
3. Changing Printer Settings
6 Change the setting and then press the
<ENTER> button.
7 Press the <ON LINE> button to exit the
menu mode.
6 Change the setting and then press the
<ENTER> button.
7 Press the <ON LINE> button to exit the
menu mode.
- 31 -
Page 32

Changing the Equipment Settings
Other Settings
1 Press the scroll button or to open
the equipment setting menu.
2 Press the scroll button to select the
setup menu on which you want to
change a setting and then press the
<ENTER> button.
3
3 Change the setting and then press the
3. Changing Printer Settings
<ENTER> button.
4 Press the <ON LINE> button to exit the
menu mode.
- 32 -
Page 33

Changing the Equipment Settings
List of Each Setup Menu
Conguration Menu
Item Explanation
Tray Count MP Tray
Tray 1
A4/Letter Impressions Count Color Displays the converted number of pages for A4/
Supplies Life Cyan Toner (n.nK)
Magenta Toner (n.nK)
Yellow Toner (n.nK)
White Toner (n.nK)
Cyan Drum
Magenta Drum
Yellow Drum
White Drum
Belt
Fuser
Network
* When there is no built-in wireless LAN
support, or the Wireless Module is set to
“Disable” even with built-in wireless LAN
support
Network
* When there is
built-in wireless
LAN support and
the Wireless Module
is set to “Enable”
Network
Information
Printer Name
Short Printer Name
Enabling Default Gateway
Wired
IPv4 Address
Subnet Mask
Gateway Address
MAC Address
NIC Program Version
Web Remote Version
IPv6 Address (Local)
IPv6 Address
(Stateless Address)
IPv6 Address
(Stateful Address)
Printer Name
Short Printer Name
Enabling Default Gateway
Wired
IPv4 Address
Subnet Mask
Gateway Address
MAC Address
NIC Program Version
Web Remote Version
IPv6 Address (Local)
IPv6 Address
(Stateless Address)
IPv6 Address
(Stateful Address)
Select an item to display the total number of pages
printed from the relevant tray.
Letter printed in color.
Select item to display the percentage of a
consumable remaining.
Displays the full printer name.
Displays the abbreviated printer name.
Displays the valid default gateway.
Displays the status (enabled/disabled) of the wired
LAN.
Displays the IPv4 Address of the network.
Displays the Subnet Mask of the network.
Displays the Gateway Address of the network.
Displays the MAC Address of the printer.
Displays the Network rmware revision.
Displays the Web remote version.
Displays the IPv6 Address(Local) of the network.
Displays the IPv6 Address(Stateless Address) of the
network.
Displays the IPv6 Address(Stateful Address) of the
network.
3
3. Changing Printer Settings
- 33 -
Page 34

Changing the Equipment Settings
Item Explanation
Network
* When there is
built-in wireless
LAN support and
the Wireless Module
is set to “Enable”
(cont.)
3
3. Changing Printer Settings
System Serial Number
Wireless
(Infrastructure)
Information
Wireless
(AP Mode)
Information
Firmware Version
Wireless
(Infrastructure)
SSID
Security
State
Band
Channel
RSSI
IPv4 Address
Subnet Mask
Gateway Address
MAC Address
IPv6 Address (Local)
IPv6 Address
(Stateless Address)
IPv6 Address
(Stateful Address)
Wireless (AP Mode)
SSID
Password
Connected Devices
IPv4 Address
Asset Number
Firmware Version
CU Version
PU Version
Panel Version
RAM
Flash Memory
SD Card
Date and Time
Wireless LAN Firmware version.
Displays the status (enabled/disabled) of the
wireless LAN (Infrastructure mode).
SSID of the connection destination.
Security of the wireless LAN function.
Wireless connection status.
Band in use.
Channel number in use.
Receiving signal strength. Percentage of signal
strength.
Displays the IPv4 Address of the network.
Displays the Subnet Mask of the network.
Displays the Gateway Address of the network.
Displays the MAC Address of the printer.
Displays the IPv6 Address(Local) of the network.
Displays the IPv6 Address(Stateless Address) of the
network.
Displays the IPv6 Address(Stateful Address) of the
network.
Displays the status (enabled/disabled) of the
wireless LAN (AP mode).
Displays the SSID of the connection destination.
Displays the password.
Displays the number of connected devices.
Displays the IPv4 address.
Displays information for these items.
- 34 -
Page 35

Changing the Equipment Settings
Print Information Menu
This menu provides a quick method of listing various items stored within the printer.
Item Action Explanation
Conguration Execute Select execute to print out a conguration report.
Network Execute Scroll down to this parameter and select execute to print out
Network information.
Demo Page
DEMO1 Execute Scroll down to this parameter and select execute to print out a
demonstration page.
File List Execute Scroll down to this parameter and select execute to print out a
list of job les.
(Displayed only if FileSystem is installed).
PS Font List Execute Scroll down to this parameter and select execute to print out a
Postscript emulation typeface list.
Error Log Execute Scroll down to this parameter and select execute to print out
the error log.
Color Prole List Execute Scroll down to this parameter and select execute to print out a
list of colour proles.
Job Log Execute Prints a job history.
3
3. Changing Printer Settings
- 35 -
Page 36
Changing the Equipment Settings
Menus
Item Action Explanation
Tray Conguration MPTray Cong
Paper Size: A3/A4
3
3. Changing Printer Settings
A5
B5
B6 Half/Legal14/
Legal13.5/Legal13/
Tabloid/Letter
Letter /Executive/
8.5” SQ/Folio/
4x6 inch/5x7 inch/
16K(184x260mm)
16K(195x270mm) /
16K(197x273mm) /
16K(184x260mm) /
16K(195x270mm) /
16K(197x273mm) /
8K(260x368mm)/
8K(270x390mm)/
8K(273x394mm)/
Statement
Statement /Custom/
Com-10 Envelope/
DL Envelope/
C5/C4/Hagaki/
Oufuku Hagaki/
Nagagata#3/
Nagagata#4/
Nagagata#40/
Yougata#0/
Yougata#4/
Kakugata#2/
Kakugata#3/
Index Card
/A4 /A5 /
/A6/B4/B5 /
/B6 /B6 /
/
/
/
* Boldface indicates default settings.
Congure Paper Size/Media Type/Media
Weight/Tray Usage. Select by scroll and <Enter>
button.
X Dimension: 2.5inch
Y Dimension: 5.0inch
~
8.3inch
~
8.5inch
~
11.7inch
64millimeter
~
210millimeter
~
216millimeter
~
297millmeter
~
11.0inch
~
11.7inch
~
52.0inch
127millimeter
~
279millimeter
~
297millimete
~
431millimeter
- 36 -
Page 37

Item Action Explanation
Tray Conguration
(cont.)
Media Type: Plain/Letterhead/
Transparency/Labels/
Bond/Recycled/
Card Stock/Rough/
Glossy/USERTYPE1/
USERTYPE2/
USERTYPE3/
USERTYPE4/
USERTYPE5/
USERTYPE6/
USERTYPE7/
USERTYPE8/
USERTYPE9/
USERTYPE10
Media Weight: Light/Medium Light/
Medium/Heavy/
Ultra Heavy1/
Ultra Heavy2/
Ultra Heavy3
Changing the Equipment Settings
USERTYPE 1 to 10 are displayed only if registered in
the host PC.
3
3. Changing Printer Settings
Tray Usage: Normal Tray/
When Mismatching/
Do Not Use
Tray1 Cong
Paper Size: Cassette/Custom
X Dimension: 4.1inch
~
8.3inch
~
8.5inch
~
11.7inch
105millimeter
~
210millimeter
~
216millimeter
~
297millimeter
Sets MPTray usage.
[Normal Tray]: (Tray selection/switching) uses as
a normal tray.
[When Mismatching]: if paper mismatch occurs,
paper is requested from the MPTray instead of the
specied tray.
[Do Not Use]: sets MPTray unavailable both in Auto
Tray Select and Auto Tray Switch.
Congure Paper Size/Media Type/Media Weight/
Legal Paper/Other Size. Select by scroll and
<Enter> button.
Y Dimension: 5 . 8 i n ch
~
11.0inch
~
11.7inch
~
17.0inch
148millimeter
~
279millimeter
~
297millimeter
~
431millimeter
- 37 -
Page 38

Changing the Equipment Settings
Item Action Explanation
Tray Conguration
(cont.)
Media Type: Plain/Letterhead/
Bond/Recycled/
Card Stock/Rough/
Glossy/USERTYPE1/
USERTYPE2/USERTYPE3/
USERTYPE4/USERTYPE5/
USERTYPE6/USERTYPE7/
USERTYPE8/USERTYPE9/
USERTYPE10
USER TYPE 1 to 10 are displayed only if registered
in the host PC.
3
Media Weight: Light/Medium Light/
3. Changing Printer Settings
Legal Paper
Default: Legal14
Other Size
Default:
Paper Feed
Default: Tray 1
Auto Tray Switch
Default: On
Tray Sequence
Default: Down
System Adjust Power Save Time
Default: 1
Sleep Time
Default: 15
Auto Power Off Time
Default: 4
Silent Mode
Default: On
Clearable Warning
Default: ONLINE
Auto Continue
Default: Off
Manual Timeout
Default: 60
Timeout InJob
Default: 40
Timeout Local
Default: 40
Medium/Heavy/Ultra
Heavy1/Ultra Heavy2
Species the Legal paper size in Tray 1.
Species other xed paper sizes in Tray 1.
16K(184x260mm)
is indicated by the icon of portrait feeding.
is indicated by the icon of landscape feeding.
B6
Statement
8.5” SQ
Folio
16K(184x260mm)
16K(195x270mm)
16K(197x273mm)
16K(184x260mm)
16K(195x270mm)
16K(197x273mm)
8K(260x368mm)
8K(270x390mm)
8K(273x394mm)
Select tray. Select by scroll and <ENTER> button.
Switches Auto ON/OFF. Select by scroll and
<ENTER> button.
Selects Tray sequence Down/Up/Paper feed.
Select by scroll and <ENTER> button.
Select from 1/2/3/4/5/10/15/30/60 Minutes.
Select by scroll and <ENTER> button.
Select from 1/2/3/4/5/10/15/30/60 Minutes.
Select by scroll and <ENTER> button.
Select from 1/2/3/4/8/12/18/24 hours.
Select by scroll and <ENTER> button.
Select from On/Off. Select by scroll and <ENTER>
button.
Select from: ONLINE/Job. Select by scroll and
<ENTER> button. PS job only.
Select from On/Off. Select by scroll and <ENTER>
button.
Select from Off/30 seconds/60 seconds.
Select by scroll and <ENTER> button.
Select from Off/5/10/20/30/40/50/60/90/12
0/150/180/210/240/270/300 seconds. Select
by scroll and <ENTER> button.
Select from 0~40~300 seconds.
Select by scroll and <ENTER> button.
- 38 -
Page 39

Item Action Explanation
System Adjust
(cont.)
Print Adjust Print Position Adjust
Timeout Network
Default: 90
Low Toner
Default: Continue
Print Mode w/o Color Toner
Default: Alarm
Jam Rcovery
Default: On
Error Report
Default: Off
Hex Dump Execute Prints out data received from the host PC in the
Default: 0.00
Paper Color Setting
-2/-1/0/+1/+2
Default: 0
Trans. Color Setting
-2/-1/0/+1/+2
Default: 0
SMR
Setting
BG
Setting
HU Setting
Default: Off
VL Cleaning Exeute If you do this when there are white stripes in
Drum Cleaning
Default: Off
High Humid Mode
Default: Off
Moisture Control
Default: Off
Narrow Paper Speed
Default: Mode1
Warmup Control
Default: Off
Quiet Mode
Default: Off
Cyan +3/+2/+1/0/
Magenta
Yellow
White
Cyan +3/+2/+1/0/
Magenta
Yellow
White
-1/-2/-3
Default: 0
-1/-2/-3
Default: 0
Changing the Equipment Settings
Select from 0~90~300 seconds.
Select by scroll and <ENTER> button.
Select action to take when toner sensor indicates
low toner. Select from Continue/Stop. Select by
scroll and <ENTER> button.
Select from Alarm/Cancel.
Select by scroll and <ENTER> button.
Select from On/Off. Select by scroll and <ENTER>
button.
Select from On/Off. Select by scroll and <ENTER>
button.
hexadecimal Dump. Turning off the power supply
switch restores Normal Mode.
Select from X Adjust/Y Adjust/Duplex X
Adjust/Duplex Y adjust. Select by scroll and
<ENTER> button. Dene measurement.
* Can be set per tray.
Used for ne adjustment of the colour print on
paper.
Used for ne adjustment of the colour print on
lms.
To correct variations in print results caused by
temperature/humidity conditions and difference in
print density/frequency.
Change the setting when print quality is uneven.
To correct variations in print results caused by
temperature/humility conditions and difference in
print density/frequency.
Change the setting when background is dark.
Set the device before using it if it is not used for a
long time.
the perpendicular direction, printing quality may
improve.
Sets whether to rotate the drum in idle prior to
printing in order to reduce horizontal white lines.
Be warned that this will shorten the ID life by
as much as this rotation. Select by scroll and
<ENTER> button.
Sets the curling reduction mode to on/off.
Sets the condensation control. When the
condensation control is set, it may take more time
to print the rst page.
[Mode1]: Performs condensation control.
[Mode2]: Performs stronger condensation control.
[Off]: Does not perform condensation control.
Sets the speed of printing on narrow paper.
[Normal]: The print speed is not changed when
narrow paper is printed.
[Mode1]: The print speed is slowed when narrow
paper is printed.
[Mode2]: You need to wait for a while when using
wide paper after printing on narrow paper.
If you mind the sound at startup, switch it to [On].
In normal conditions, keep it [Off].
If you mind the operation sound during printing,
switch it to [On]. The print speed will be slowed.
3
3. Changing Printer Settings
- 39 -
Page 40

Changing the Equipment Settings
Admin Setup
Item Settings Explanation
Enter Password xxxxxxxxxxxx Enter a password to gain entry to the Admin
Setup menu.
Password should be from 6 to 12 digits
of alpha/numeric characters (or mix) The
default value is “999999”
Network Setup Enabling Default Gateway Wired
Wired Enable
3
TCP/IP Enable
3. Changing Printer Settings
NetBIOS over TCP Enable
IP Address Set Auto
IPv4 Address xxx.xxx.xxx.xxx Sets the IP Address.
Subnet Mask xxx.xxx.xxx.xxx Sets the Subnet Mask.
Gateway Address xxx.xxx.xxx.xxx Sets the Gateway (default router) address.
DHCPv6 Enable
Web Enable
Telnet Enable
FTP Enable
IPSec (if enabled) Enable
SNMP Enable
Network Scale Normal
Wireless(Infrastructure)
Disable
Disable
Disable
Manual
Disable
Disable
Disable
Disable
Disable
Disable
Small
When a wireless LAN is available, set a valid
default gateway.
Enables/Disables the wired LAN.
Sets TCP/IP Protocol.
[Enable]: TCP/IP Protocol is available.
[Disable]: TCP/IP Protocol is not available.
Sets enable/disable of NetBIOS over TCP protocol.
Display Conditions:
● TCP/IP should be enabled.
Sets the IP Address setting method.
Display Conditions:
● TCP/IP should be enabled.
Display Conditions:
● TCP/IP should be enabled.
Display Conditions:
● TCP/IP should be enabled.
0.0.0.0 means that there is no router.
Display Conditions:
● TCP/IP should be enabled.
Sets enable/disable of DHCPv6.
Sets enable/disable of Web.
[Enable]: Web/IPP is available.
[Disable]: Web/IPP is not available.
Display Condition: TCP/IP should be enabled.
Sets enable/disable of Telnet.
[Enable]: Telnet is available.
[Disable]: Telnet is not available.
Display Condition: TCP/IP should be enabled.
Sets enable/disable of FTP.
[Enable]: FTP is available.
[Disable]: FTP is not available.
Display Condition: TCP/IP should be enabled.
Sets enable/disable of IPSec. Enable via the web.
[Enable]: IPSec is available.
[Disable]: IPSec is not available.
Sets enable/disable of SNMP.
[Enable]: SNMP is available.
[Disable]: SNMP is not available.
Display Condition: TCP/IP or NetWare should
be enabled.
When [Normal] is selected, the network can
work effectively even when it is connected
to a HUB that has a spanning tree feature.
However, printer start up time gets longer
when computers are connected with two or
three small LANs.
When [Small] is selected, computers can
cover from two or three small LANs to a
large LAN, but may not work effectively
when the network is connected to a HUB
with a spanning tree feature.
- 40 -
Page 41

Changing the Equipment Settings
Item Settings Explanation
Network Setup
(cont.)
USB Setup USB Enable/Disable Enables/Disables the USB port.
Print Setup Personality Auto
Gigabit Network Enable
Disable
Hub Link Setting Auto Negotiate
100Base-TX Full
100Base-TX Half
10Base-T Full
10Base-T Half
Network Factory
Defaults
Speed 480Mbps/12Mbps Selects the interface speed. After setting
Soft Reset Enable/Disable Enables/Disables the Soft Reset command.
Serial Number Enable/Disable Species whether to ENABLE or DISABLE a
Ofine Receive Enable/Disable Ofine receive.
USB Memory Interface Enable/Disable Sets enable/disable of USB memory I/F.
Connected Host Normal
Copies 1-999 Selects the number of copies.
Media Check Enable
A4/Letter Override No/Yes When the A4 size is specied in the driver
Resolution 600dpi
Execute Species whether to initialize the network
Specic
PostScript
PCL
Disable
600x1200dpi
600dpi multi-level
Sets whether to support a gigabit network.
When it is disabled, 1000Base-T Full/Half
duplex connection cannot be made.
Sets a method to link to a HUB. When
Auto is set, a connection method to a HUB
is selected automatically and attempts to
connect.
If another method is selected, attempts
to connect to a HUB only by the selected
connection method.
factory default settings for the Network.
change the menu, the printer restarts on exit.
USB serial number.
The USB serial number is used to identify
the USB device connected to your PC.
If the printer is connected to a specic host
by USB, set it to [Specic] to print from
this specic host.
Selects a printer language.
This setting is disabled for Local Print except
for Demo Page.
Sets whether the printer checks the
matching of printed data size and that of the
tray. Only standard sizes are checked.
but there is no tray set for A4 in the printer,
the printing will be done from the tray with
Letter paper loaded without a paper request.
When the Letter size is specied in the
driver but there is no tray set for Letter in
the printer, the printing will be done from
the tray with A4 paper loaded without a
paper request.
* There is no switching from the printer
driver.
Sets default resolution.
3
3. Changing Printer Settings
- 41 -
Page 42

Changing the Equipment Settings
Item Settings Explanation
Print Setup
(cont.)
X Dimension 2.5 inch
3
3. Changing Printer Settings
Y Dimension 3.5 inch
PS Setup L1 Tray Type1
Network Protocol ASCII/RAW Species PS communication protocol mode
USB Protocol ASCII/RAW Species PS communication protocol mode
Private Print Setup
* Only when the SD card
is installed
Verify job option Enable
Erase job option No overwrite
Keep job for 15minutes
Job Limitation Disable
Verify job password On
~
8.3 inch
~
8.5 inch
~
11.7inch
64 mm
~
210 mm
~
216 mm
~
297mm
~
11.0 inch
~
11.7 inch
~
17.0 inch
90 mm
~
279 mm
~
297 mm
~
431 mm
Type2
Disable
Zero out once
30minutes
1hour
2hours
4hours
8hours
12hours
1day
2days
3days
4days
5days
6days
7days
Private Print only
Off
Species paper width of Custom paper as a
default value.
Sets a paper size at right angles to the
paper run direction.
Species paper length of Custom paper as a
default value.
Sets a paper size in the same direction as
the paper run direction.
The selectable tray number on the level
1 operator ranges from 1 with the setting
Type1 and from 0 with Type2.
of data from NIC port.
(In RAW mode, Ctrl-T is invalid). PS models
only.
of data from USB port.
(In RAW mode, Ctrl-T is invalid). PS models
only.
Selects whether or not to perform job
verication prior to printing an encrypted
secure job.
Sets the method of erasing encrypted secure
jobs from the device storage (SD card).
Sets the retention period of encrypted
secure jobs in the device storage (SD card).
After the retention period, the encrypted
secure jobs will be erased from the device
storage (SD card) automatically.
If [Private Print only] is selected, other
jobs than private print will be excluded.
Selects whether or not to verify the job
password when access control is enabled.
- 42 -
Page 43
Item Settings Explanation
Private Print Setup
(cont.)
Color Setup CMY 100% Density Enable
Panel Setup Near Life Status Enable
Buzzer Setup Paper Jam Error Buzzer
Time Setup Date Format yyyy/mm/dd
Job Auto Search On
Off
Disable
Disable
Near Life LED Enable
Disable
Idle Display Toner Gauge
Paper Size
Panel Contrast -10
~
0
~
+10
Off
Volume
Time Zone -12:00
Low
High
mm/dd/yyyy
dd/mm/yyyy
~
0:00
~
+13:00
Changing the Equipment Settings
Selects whether or not to perform a job
search once the panel is unlocked when
access control is enabled.
Enables/Disables 100% output against the
CMY100% TRC compensation. Ordinarily,
the TRC compensation function holds control
for the appropriate print density; thus 100%
output is not always possible.
Selecting [Enable] will enable 100% output
in any individual color. The actual print,
including the TRC compensation function is
limited to an appropriate area. This function
is for special purposes such as specication
in CMYK color reduction in PS.
Sets the LCD display control when a near life
warning occurs for the drum, fuser and belt.
With [Enable], a near life warning will be
displayed.
With [Disable], a near life warning will not
be displayed (not output to the Attention
LED/PJL/MIB/Web as well).
Excludes the temporary recovery status (life
warning) by opening and then closing the
cover after a life warning has occurred.
Sets the LED lighting control when a near
life warning occurs for the toner, drum,
fuser, belt and waste toner box.
With [Enable], the Attention LED will light
on.*
With [Disable], the Attention LED will not
light on.
Excludes the temporary recovery status (life
warning) by opening and then closing the
cover after a life warning has occurred.
* For the drum, fuser, belt and waste toner
box, this setting is applied only when [Panel
Setup] > [Near Life Status] is set to
[Enable].
For the toner, this setting is applied
regardless of the setting of [Panel Setup] >
[Near Life Status].
Selects the information to be displayed on
the standby screen. With [Paper Size],
displays the paper size for each tray. The
default is the [Toner Gauge].
Adjusts the contrast value of the operator
panel LCD.
Sets the buzzer volume when a paper jam
occurs.
Set desired date format.
Enter the time zone for your country in
relation to GMT.
Set in quarter units within the range.
Use the Menu up/down buttons to
increment/decrement and press the
<ENTER> button to set and proceed to the
next digit.
3
3. Changing Printer Settings
- 43 -
Page 44

Changing the Equipment Settings
Item Settings Explanation
Time Setup
(cont.)
3
3. Changing Printer Settings
Power Setup Auto Power Off Enable
Tray Setup Unit of Measurement inch/millimeter Species the unit for custom paper sizes.
Others Setup RAM Setup Receive
Daylight Saving On
Off
Setting method Auto Setup
Manual Setup
SNTP Server (Primary) xxx.xxx.xxx.xxx Sets the SNTP server (primary)
SNTP Server (Secondary) xxx.xxx.xxx.xxx Sets the SNTP server (secondary).
Time Setting 01/01/2000
00:00
~
01/01/2009
00:00
~
12/31/2091
23:59
Auto Cong
Disable
Default Paper Size A4/Letter Sets the default paper size.
Auto
Flash
Memory
Setup
SD Card
Setup
* Only when
the SD card is
installed
Buffer Size
Resource
Save
Initialize Execute Initialize the ash memory.
This item is displayed only if the SD card (option) is installed.
Initialize Execute Initializes the SD Card to the factory default
Format
Partition
Erase SD
Card
0.5 megabyte
1 megabyte
2 megabyte
4 megabyte
8 megabyte
16 megabyte
32 megabyte
Auto
Off
0.5 megabyte
1 megabyte
2 megabyte
4 megabyte
8 megabyte
16 megabyte
32 megabyte
PCL
Common
PS
Execute
Enables/Disables daylight saving setting.
Sets the time setting method.
[Display Conditions]
[Admin Setup] > [Time Setup] >
[Setting method] is set to [Auto Setup].
[Display Conditions]
[Admin Setup] > [Time Setup] >
[Setting method] is set to [Auto Setup].
Set current date and time.
Display format follows the settings selected
in Date Format.
Sets the behavior of [Auto Power Off].
[Enable]: Changes to the off mode even
when the network is connected.
[Auto Cong]: Does not change to the
off mode when the network is connected.
Changes to the off mode even when the USB
cable is connected.
[Disable]: Disables the off mode transition
by the elapsed time.
Sets the incoming buffer size.
Sets the resource saving area size.
setting.
Formats a specied partition.
It features of the deletion of all the data
stored in the SD Card not to be recovered
them.
- 44 -
Page 45

Others Setup
(cont.)
Changing the Equipment Settings
Item Settings Explanation
Storage
Common
Setup
Job Log
Setup
Security
Setup
Language
Setup
Job Cancel
Setup
Check File
System
Check All
Sectors
Enable
InitializationNoYes
Save Job
Log
Access
Control
User
Counter
Report
Select
Language
Language
Initialize
Cancel Key
Behavior
Inquiry
Display
Execute Resolves mismatch between actual memory
Execute Performs recovery of defective SD Card
Enable
Disable
Enable
Disable
Execute Prints the User Counter Report.
Bosnian
Bulgarian
Catalan
Chinese (Traditional)
Croatian
Czech
Danish
Dutch
English
Finnish
French
German
Greek
Hungarian
Italian
Japanese
Korean
Macedonian
Norwegian
Polish
Portuguese (Brazil)
Portuguese
Romanian
Russian
Serbian
Slovenian
Spanish
Swedish
Turkish
Execute Initializes the LCD display language.
Short
Long
Off
On
Off
and displayed memory available in a le
system. Performs administration data (FAT
information) recovery.
Performs recovery only for an SD Card.
sector information and a le system
mismatch mentioned above.
* Only when the SD card is installed
Prevents a setting change accompanying
initialization of Block Device (SD Card,
FLASH).
Enables/Disables the job history.
Sets the Access Control.
Selects the LCD display language and report
print language.
However, when Korean or Chinese
(Traditional) is selected, the report will be
printed in English.
Sets the action when the <CANCEL> button
is pressed.
[Short]: Cancels the job by a short press
(for 2 seconds or less).
[Long]: Cancels the job by a long press (for
2-5 seconds).
[Off]: Ignores the press of the <CANCEL> button.
In other words, disables the action of canceling
the job by pressing the <CANCEL> button.
Sets whether to display the inquiry screen
when the job is canceled.
On: Displays the inquiry screen.
Off: Cancels the job without displaying the
inquiry screen.
3
3. Changing Printer Settings
- 45 -
Page 46

Changing the Equipment Settings
Item Settings Explanation
Others Setup
(cont.)
3
3. Changing Printer Settings
Settings Reset Settings Execute Resets EEPROM of CU. Resets User menu to
Change Password New Password xxxxxxxxxxxxxx Sets a new password to enter Admin Setup
Job Cancel
Setup
(cont.)
Near Life
Setup
Erase Privacy Data Execute Erase the registered privacy data and the
Business
Phone Setup
Save Settings Execute Saves menus currently set. With this
Restore Settings Execute Changes to the menu setting saved.
Verify password xxxxxxxxxxxxxx Forces the User to input the new password
Focus
Position
Display
Timeout
Fuser Near
Life Timing
Belt Near
Life Timing
Business
Phone
Cooperation
Connection
IP Address
Connection
Port No.
Yes
No
60
~
180
~
300
500
1000
1500
2000
2500
3000
3500
4000
4500
5000
500
1000
1500
2000
2500
3000
3500
4000
4500
5000
Enable
Disable
0.0.0.0
~
255.255.255.255
1
~
65535
Sets whether to focus on [Yes] or [No] in
the job cancel inquiry screen.
[Yes]: Focuses on [Yes].
[No]: Focuses on [No].
Sets the display timeout value of the job
cancel inquiry screen. If timeout occurs,
the canceling operation will be disabled and
printing will be executed.
Sets the timing of displaying the Fuser Near
Life warning.
Sets the timing of displaying the Belt Near
Life warning.
stored data in the printer.
Enables/Disables the CrosCore cooperation.
Sets the IP address of the connection
destination of the CrosCore cooperation.
Sets the port number of the connection
destination of the CrosCore cooperation.
the factory default.
If [Execute] is selected, exits from the menu.
function, the menus with which operation
was last performed are saved, and
overwrites with the menus that were
previously saved.
Display Condition: The menu settings are
saved.
menu.
From 6 to 12 alpha/numeric digits can be
entered.
to enter Admin Setup.
From 6 to 12 alpha/numeric digits can be
entered.
- 46 -
Page 47
Calibration
Item Settings Explanation
Auto Density
Mode
Adjust Density Execute
Adjust
Registration
Color Density Cyan/Magenta/
Yellow/White
Density
Print Tuning
Pattern
Cyan/Magenta/
Yellow Tuning
Highlight -3,-2,-1,
Mid-Tone -3,-2,-1,
Dark -3,-2,-1,
On/Off Selects whether density adjustment and TRC
compensation is automatically performed.
[On]: Density adjustment is automatically run
under the engine-specied conditions, and
reected in TRC compensation.
[Off]: The printer does not voluntarily run
density adjustment.
If Execute is selected, the printer will immediately
adjust density and reect it in TRC compensation
This adjustment must be executed when
the printer is idling. It can become invalid if
executed in any other state.
Execute When this menu is selected, the printer performs
AutoAdjust Registration.
This adjustment must be executed when the
printer is idling.
-3,-2,-1,
0,+1,+2,+3
Execute Prints the pattern for the user to adjust TRC.
0,+1,+2,+3
0,+1,+2,+3
0,+1,+2,+3
Adjusts the engine density.
Ordinarily, this function is not needed
because TRC is automatically adjusted to the
recommended levels through density adjustment
and TRC compensation.
Adjustment results will be reected as offset
values (addition) to the corrections through the
Adjust Density/TRC Compensation function.
Adjusts highlight (light area) of the TRC.
+ = Darker
- = Lighter
Adjusts mid-tone area of the TRC.
+ = Darker
- = Lighter
Adjusts dark area of the TRC.
+ = Darker
- = Lighter
Changing the Equipment Settings
.
3
3. Changing Printer Settings
- 47 -
Page 48

Changing the Equipment Settings
Wireless(Infrastructure) Setting
Item Settings Explanation
Wireless
(Infrastructure)
Setting
Wireless(Infrastructure) Enable
Network
Setting
IP Address Set Auto
IPv4 Address xxx.xxx.xxx.xxx Sets the IP Address.
Subnet Mask xxx.xxx.xxx.xxx Sets the Subnet Mask.
Gateway Address xxx.xxx.xxx.xxx Sets the Gateway (default
3
DHCPv6 Enable
3. Changing Printer Settings
Automatic
setup (WPS)
Wireless
Network
Selection
WPS-PBC Executes WPS-PBC.
WPS-PIN Executes WPS-PIN.
xxxxxx
......
Manual
Setup
Enables/Disables the wireless
Disable
Manual
Disable
SSID Input the SSID.
Security Disable
WEP
WPA/WPA2-PSK
WPA2-PSK
WPA/WPA2-EAP
WPA2-EAP
WEP Key Input the WEP key.
WPA
Encryption
Type
AES
TKIP/AES
LAN (Infrastructure).
Sets the IP Address setting
method.
router) address.
Sets enable/disable of
DHCPv6.
Lists the detected wireless LAN
(AP mode).
Sets the security function of
the wireless LAN.
* [WPA/WPA2-EAP] or
[WPA2-EAP] can be displayed
only when it is set from the
web, and it cannot be set from
the menu.
Displays the WPA encryption
type.
The setting is carried out
automatically according to the
setting of [Security]. (You
cannot change the setting
manually with this menu.)
It changes to [AES] when
[Security] is set to [WPA2-
PSK] or [WPA2-EAP] and to
[TKIP/AES] when [Security]
is [WPA/WPA2-PSK] or
[WPA/WPA2-EAP].
[Display Conditions]
[Security] is set to any other
item than [Disable] and
[WEP].
WPA
Preshared
Key
Execute Enables the setting.
Wireless reconnection Execute Reconnects to the wireless
Input the pre-shared key.
LAN.
- 48 -
Page 49

Wireless(Ap Mode) Setting
Item Settings Explanation
Wireless(AP Mode)
Setting
Wireless(AP Mode) Enable
Automatic Setup
(PushButton)
Manual Setup Displays the SSID and the password.
Connection
Sstting
AP Mode User Setting Disclose user
SSID Input the SSID.
Password Input the password.
IPV4
Address
Execute Sets the SSID and the password.
Boot Menu
Changing the Equipment Settings
Enables/Disables the wireless LAN (AP
Disable
xxx.xxx.xxx.xxx Input the IP address.
Don’t disclose
user
mode).
When the <ENTER> button is pressed and
the Yes/No conrmation screen is displayed,
if Yes is selected, automatic connection can
be started with a push-button.
Sets whether or not to disclose the AP
mode information to users other than the
administrator.
3
3. Changing Printer Settings
This menu should only be changed by the System Administrators. In order to gain access to this menu,
follow the instructions in “Boot Menu” P.31.
This menu is in ENGLISH only.
Network Factory Defaults
Item Settings Explanation
Network Factory
Defaults
Execute Species whether to initialize the network menu.
Wireless Module
Item Settings Explanation
Wireless Module Enable
Disable
Enables the wireless LAN board.
With [Enable], this setting will still remain enabled even after
the wireless LAN board is removed.
Since the factory default is [Disable] even for devices provided
with wireless LAN as standard, please change this setting to
[Enable] to use wireless LAN.
SD Card Setup
Item Settings Explanation
Enable SD Card No
Yes
Even if a machine is inoperable at installation because of a
faulty SD Card, the machine can be made operable by setting
this parameter to [No] (ignores the existence of the SD Card).
When No is set, access to the SD Card results in FAIL because
the SD Card is regarded as not attached.
After setting change and exit from the menu, the printer will
restart.
- 49 -
Page 50

Changing the Equipment Settings
Storage Common Setup
Item Settings Explanation
Check File System Execute Resolves mismatch between actual memory and displayed
memory available in a le system. Performs administration data
(FAT information) recovery. Performs recovery only for an SD
Card.
Check All Sectors Execute Performs recovery of defective SD Card sector information and
a le system mismatch mentioned above.
3
Menu Lockout
3. Changing Printer Settings
Menu Lockout On
Item Settings Explanation
Panel Lockout
Item Settings Explanation
Panel Lockout Mode1
Off
Mode2
Off
Sets the menu lockout function to on/off.
[On]: The menu other than [Shared Print]/[Private Print]
will not be visible.
[Off]: The menu lockout function will not work.
Sets the panel lockout function to on/off.
[Mode 1]: All keys except <ON LINE>, <ENTER>,
<CANCEL>, <POWER SAVE> and <HELP> are disabled.
[Mode 2]: All keys except <ON LINE> and <ENTER> are
disabled.
[Off]: The panel lockout function will not work.
- 50 -
Page 51
4. Using Utility Software
This chapter explains useful software functions for using your printer.
Overview of Utilities
The following is a list of utilities that you can use for your printer. For details on how to use these
utilities, refer to their respective sections.
Utilities common to Windows OS X
Item
PS Gamma Adjuster Utility Printing You can adjust the density
Function
Scope
Details
of pictures by adjusting the
CMYK color and halftone
density of each color.
Windows Utilities
Item
Conguration Tool Printer
OKI LPR Utility Printing You can print a document
Network Extension Managing
Function
Scope
settings
the printer
Details
Registers the network
settings of the printer.
via the network connection,
manage print jobs, and check
the printer status. And, when
an IP address of a printer
is changed, the setting is
changed automatically.
You can check the printer
settings from the print
driver, and can set options.
This utility is automatically
installed when installing
a print driver through a
network connection.
System
Requirements
● Windows 10/Windows 8.1/
Windows 8/Windows 7/
Windows Vista/
Windows Server 2016/
Windows Server 2012 R2/
Windows Server 2012/
Windows Server 2008 R2/
Windows Server 2008
● OS X 10.8.5-macOS
Sierra
System
Requirements
Windows 10/Windows 8.1/
Windows 8/Windows 7/
Windows Vista/
Windows Server 2016/
Windows Server 2012 R2/
Windows Server 2012/
Windows Server 2008 R2/
Windows Server 2008
Windows 10/Windows 8.1/
Windows 8/Windows 7/
Windows Vista/
Windows Server 2016/
Windows Server 2012 R2/
Windows Server 2012/
Windows Server 2008 R2/
Windows Server 2008
Windows 10/Windows 8.1/
Windows 8/Windows 7/
Windows Vista/
Windows Server 2016/
Windows Server 2012 R2/
Windows Server 2012/
Windows Server 2008 R2/
Windows Server 2008
A computer operating with
TCP/IP.
Refer to
page. 28
Refer to
page. 55
page. 56
page. 59
4
4. Using Utility Software
- 51 -
Page 52

Installing Utilities
Installing Utilities
If there is a utility that you would like to use,
follow the procedure below for Windows. For OS
X, you can copy it by dragging and dropping to
the place you want. You can also run this directly
from the Software DVD-ROM.
For Windows
1 Insert the included “Software DVD-ROM”
into a computer.
2 When [AutoPlay] is displayed, click
4
4. Using Utility Software
[Run Setup.exe].
Memo
● If the [User Account Control] dialog box is
displayed, click [Yes].
3 Select a language from the drop-down
list.
4 Read the license agreement, and then
click [Accept].
5 In the interface selection screen,
select [USB] or [Network (Wired/
Wireless)], and then click [Next].
6 Click [Custom Install].
7 Click [Separate Install].
8 Select the utility you would like to
install and click the button to install
collectively.
9 Click [Exit].
For OS X
Drag and drop to copy it to the place you want.
You can also run this directly from the “Software
DVD-ROM”.
1 Insert the Software DVD-ROM into the
computer.
2 Double click on the [OKI] > [Utilities]
folder.
3 Copy the folder you want to install by
dragging and dropping to the folder you
want.
Memo
● To launch, double click on the utility icon within the folder.
- 52 -
Page 53

Utilities common to Windows/OS X
Utilities common to Windows/OS X
This section explains web pages that can be used by both Windows and OS X.
When using web pages, the following conditions must be met.
● TCP/IP must be enabled.
● One of the following must be installed: Microsoft Internet Explorer 6.0 or later, Safari 3.0 or later, or
Firefox 3.0 or later.
Memo
● Either set your web page security settings to a medium level, or enable cookies.
● In order to access the [Admin Setup] menu, the administrator password is required. The default password is “999999”.
● To change the device settings on the web page, it is necessary to log in as a device administrator.
Web page
You can carry out the following operations from
the web page.
● Display the printer status.
● Congure tray, network, function default, and
printer settings.
● Display the job list.
● Print out a PDF without a printer driver.
● Link to frequently used web pages.
Memo
● In order to change the printer settings on the web page,
you need to be logged in as the administrator.
Reference
● For details on how to congure the network settings, refer
to “Changing Network Settings From the Web Page” P.61.
Accessing the Printer Web page
1 Launch your web browser.
2 Type in “http:// (printer’s IP address)”
in the address bar and press the
<Enter> key.
Reference
● For the printer's IP address, please refer to the User's
Manual (Setup).
s
Logging In as the Administrator
Note
● You must be authorized as the administrator.
Memo
● The default administrator password of the printer is
“999999”.
1 Click on [Administrator Login] on the
main page.
2 Enter “admin” in [Username] and
enter the administrator password in
[Password], and then click [OK].
For OS X, type in “admin” for [Name] and
enter the printer administrator’s password in
[Password], and then click [Login].
4
4. Using Utility Software
Note
● If the IP address includes values of 1 or 2 digits,
do not add “0” before such values.Otherwise,
communication may fail.
Correct: http: //192.168.0.2/
Wrong: http: //192.168.000.002/
- 53 -
Page 54

Utilities common to Windows/OS X
3 Click [SKIP].
If you have made changes to the settings on this
screen, click [OK].
4
4. Using Utility Software
The menus available only for the administrator
will be displayed.
Changing the Administrator’s
password
You can change the printer administrator’s
password from the web page.
The administrator’s password set on the web page
can be used when logging into the printer through
the operator panel or through the web page.
Memo
● The password should be 6-12 characters long, and should
be in one-byte (alphanumeric) characters.
● The password is case sensitive.
1 Launch your web browser and log in as
the administrator.
Checking Printer Status
You can check the status of your printer from
the web page.
1 Launch your web browser and enter the
printer’s IP address.
The status of the printer is displayed.
Memo
● When logging in as the administrator, you can also click
on [Status Window] in order to view the simplied
display of the printer status.
Changing Printer Settings
You can change the main unit’s settings from the
web page.
1 Launch your web browser and log in as
the administrator.
2 Change the settings and click [Submit].
Getting the Date and Time
Automatically
You can get date and time information
automatically from an internet time server, and
reect this on your printer.
1 Launch your web browser and log in as
the administrator.
2 Select [Admin Setup].
3 Select [Network] > [SNTP].
4 Specify your time zone.
2 Select [Admin Setup].
3 Select [Management] > [Change
Password].
4 Enter a new password in [New
Password].
5 Reenter the password in [Verify
Password].
The entered password will not be displayed. Write
down your password and store it in a safe place.
6 Click on [Submit].
Memo
● You do not need to restart the printer. Next time when
you log in as the administrator, use the new password.
5 Select [Enable] from [SNTP].
6 Enter the SNTP server in [SNTP Server
(Primary)].
7 If required, enter another SNTP server in
[SNTP Server (Secondary)].
8 Click on [Submit].
The network system reboots to enable the new
settings.
- 54 -
Page 55

Windows Utilities
This section explains utilities you can use in Windows.
Windows Utilities
Conguration Tool
In the Conguration Tool, you can manage
multiple units and change settings.
The Conguration Tool functions are as follows.
● Display device information
Registering the Printer
When using the Conguration Tool or introducing
a new printer, register the printer in the
Conguration Tool.
1 Select [Start], [All Programs] >
[Okidata] > [Conguration Tool] >
[Conguration Tool].
2 Select [Register Device] from the
[Tools] menu.
Search results are displayed.
3 Select the printer and click on
[Register].
4 On the conrmation screen, click on
[Yes].
Removing a Printer
You can remove a registered printer.
4
4. Using Utility Software
● Network settings
Memo
● Please read Black Toner and Black Drum displayed in
Supplies Status on the Device Info screen as White
Toner and White Drum for this model.
● Other plug-ins are not applicable to this printer.
Setup
Plugins can be installed if necessary.
To change the network settings of the device,
install the following plugins.
● Network Setting Plugin
Memo
● You can install additional plugins later.
Reference
● For how to install Conguration Tool, please refer to
“Installing Utilities” P.52.
1 Right-click on the printer from
[Registered device Table].
2 Select [Remove device].
3 On the conrmation screen, click on
[Yes].
Checking the Status of the Printer
You can check the status and information of the
printer.
1 Select the printer from the [Registered
Device Table].
2 Select the [Device Info] tab.
Memo
● When the printer is connected to the network,
[Device Status] will be displayed.
● If you want to update information, click on [Update
Device Information].
- 55 -
Page 56

Windows Utilities
Network Setting Plugin
You can set the network with the Conguration
Tool. Prior to setting, please install the Network
Setting plugin.
Reference
● For how to install Conguration Tool, please refer to
“Installing Utilities” P.52.
Icon
The meaning of each icon is as shown below.
Icon Details
Searches again for the printer.
4
4. Using Utility Software
Changes search conditions for the printer.
Changes IP address for the printer.
Restarts the printer.
Changes network password.
Displays the printer web page.
Searches for the machine on the
network
Searches for the printer.
1 Select [Network Setting] from the
[Plug-ins] menu.
OKI LPR Utility
You can use the OKI LPR utility to perform a
print job via network, manage print jobs, and
check the printer status.
Reference
● For how to install OKI LPR utility, please refer to
“Installing Utilities” P.52.
In order to use OKI LPR Utility, TCP/IP must be
activated.
Note
● The OKI LPR utility cannot be used for shared printers.
● Please use the standard TCP/IP port.
Launching the Utility
1 Click on [Start], and select [All
Programs] > [Okidata] > [OKI LPR
Utility] > [OKI LPR Utility].
Adding a Printer
2 Select [Discover Devices].
Search results are displayed.
Change the IP Address
Changes IP address for the printer.
1 Select the printer from the device list.
2 Click icon.
3 Change the settings as required.
4 Click on [OK].
5 Enter the network password and click
[OK].
The default password is the last 6 alphanumerical
digits of the MAC address.
6 Click on [OK] to restart the printer.
You can add a printer to the OKI LPR utility.
Note
● Administrator privileges are required.
● If you cannot add a printer in Windows, shut down the
OKI LPR utility, right-click on [Start] > [All Programs] >
[Okidata] > [OKI LPR Utility] > [OKI LPR Utility], and
then select [Run as administrator] to launch.
Memo
● You cannot add the printer already registered in the
OKI LPR utility. If you want to change the port, select
[Conrm Connections] in [Remote Print] menu.
1 Launch the OKI LPR utility.
2 Select [Add Printer] from the [Remote
Print] menu.
3 Select [Printer Name] and enter the IP
address.
Network printers and printers connected to the
LPR port are not displayed.
4 When selecting a network printer, select
[Discover].
- 56 -
5 Click on [OK].
Page 57
Windows Utilities
Downloading Files
You can download a le to the printer you have
added to the OKI LPR utility.
1 Launch the OKI LPR utility.
2 Select the download destination printer.
3 Select [Download] from the [Remote
Print] menu.
4 Select a le and click on [Open].
Displaying the Printer Status
1 Launch the OKI LPR utility.
2 Select a printer.
3 Select [Printer Status] from [Remote
Print].
Checking/Deleting/Forwarding Jobs
Forwarding Jobs Automatically
If you cannot print because the selected printer
is busy, ofine or out of paper, you can congure
the settings to forward the print jobs to another
OKI printer automatically.
Note
● Print jobs can only be forwarded to the same OKI model
printer as the one you are using.
● Before forwarding a job, you need to add another same
OKI printer.
● This requires administrator rights.
1 Launch the OKI LPR utility.
2 Select the printer you would like to set.
3 Select [Conrm Connections] from
[Remote Print] menu.
4 Click on [Advanced].
5 Select the [Automatic Job Redirect
Used] checkbox.
4
4. Using Utility Software
You can conrm and delete print jobs. Also, if
you cannot print because the selected printer is
busy, ofine or out of paper, you can forward the
print jobs to another OKI printer.
Note
● Print jobs can only be forwarded to the same OKI printer
as the one you are using.
● Before forwarding a job, you need to add another same
OKI printer.
1 Launch the OKI LPR utility.
2 Select [Job Status] from the [Remote
Print] menu.
3 If you want to delete a print job, select
the job and then select [Delete Job]
from the [Job] menu.
4 If you want to forward a print job, select
the job and then select [Redirect] from
the [Job] menu.
6 To forward jobs only when errors occur,
select the [Redirect only at the time
of an error] checkbox.
7 Click on [Add].
8 Enter the IP address of the printer to
forward to, and click on [OK].
9 Click on [OK].
Printing with Multiple Printers
You can print with multiple printers with a single
command.
Note
● This function sends remote print jobs to multiple printers
and prints simultaneously.
● Administrator privileges are required.
1 Launch the OKI LPR utility.
2 Select the printer you would like to
congure.
- 57 -
3 Select printer [Conrm Connections]
from [Remote Print] menu.
4 Click on [Details].
5 Select the [Print to more than one
printer at a time] checkbox.
Page 58

Windows Utilities
6 Click on [Options].
7 Click on [Add].
8 Enter the IP address of the printer for
simultaneously printing and click on
[OK].
9 Click on [OK].
Opening a Webpage
You can open the printer web page from the OKI
LPR utility.
4
1 Launch the OKI LPR utility.
2 Select a printer.
4. Using Utility Software
3 Select [Web Setting] from the
[Remote Print] menu.
Memo
● You cannot open the web page when the web port
number has been changed. Carry out the following
procedure, and recongure the OKI LPR utility port
number.
Automatically Conguring the IP
Address
You can set it to ensure that the connection with
the original printer is maintained even if the
printer’s IP address is changed.
Memo
● The IP address may change if DHCP is being used
to dynamically assign IP addresses or the network
administrator manually changes the printer’s IP address.
Note
● Administrator privileges are required.
1 Launch the OKI LPR utility.
2 Select [Setup] from the [Option]
menu.
3 Select the [Auto Reconnect] checkbox
and click on [OK].
Uninstalling the OKI LPR Utility
Note
● Administrator privileges are required.
a Select a printer.
b Select [Conrm Connections] from
[Remote Print].
c Click on [Advanced].
d Enter the port number into [Port
Numbers].
e Click on [OK].
Adding Comments to Printers
You can add comments to the printers added
into the OKI LPR utility in order to identify them.
1 Launch the OKI LPR utility.
2 Select a printer.
3 Select [Conrm Connections] from
[Remote Print].
1 Conrm that the OKI LPR utility is
closed.
2 Click on [Start], and then select [All
Programs] > [Okidata] > [OKI LPR
Utility] > [Uninstall OKI LPR Utility].
If the [User Account Control] dialog box
appears, click [Yes].
3 On the conrmation screen, click on
[Yes].
4 Enter a comment and click on [OK].
5 Select [Show comments] from the
[Option] menu.
- 58 -
Page 59

Windows Utilities
Network Extension
In Network Extension, you can check the
settings on the printer and set the composition
of the options.
In order to use Network Extension, TCP/IP must
be activated.
Note
● Administrator privileges are required.
Memo
● Network Extension is automatically installed when
installing a print driver through a TCP/IP network.
● Network Extension is operated in conjunction with
the print driver. You cannot opt to only have Network
Extension installed.
● Network Extension only functions when the printer driver
is connected to OKI LPR port or the standard TCP/IP port.
4 Click [OK].
Reference
● Click [Web Setting] to automatically launch the web
page. You can change printer settings on this web page
screen. For details, refer to “Web page” P.53.
Setting Options Automatically
You can get the composition of options of the
connected printer and automatically set the print
driver.
Memo
● You cannot congure this when using Network Extension
in unsupported environments.
For Windows PS Printer Driver
1 Open the printer properties screen.
Reference
● “Launching the Utility” P.59
2 Select the [Device Settings] tab.
3 Click on [Get installable options
automatically] and then click on
[Setup].
4 Click [OK].
Uninstalling the Utility
4
4. Using Utility Software
Launching the Utility
To use Network Extension, open the printer
properties screen.
1 Click on [Start] and then select
[Devices and Printers].
2 Right click on the printer icon and select
[Printer properties].
Checking Printer Settings
You can check the settings of the printer.
Memo
● If you use Network Extension in an environment that is
not supported, the [Option] tab may not be displayed.
1 Open the printer properties screen.
Reference
● “Launching the Utility” P.59
2 Select the [Status] tab.
1 Click on [Start], and then select
[Control Panel] > [Add or Remove
Programs].
2 Select [OKI Network Extension] and
click on [Remove].
3 Follow the instructions on the screen and
complete the uninstallation.
3 Click [Update].
- 59 -
Page 60
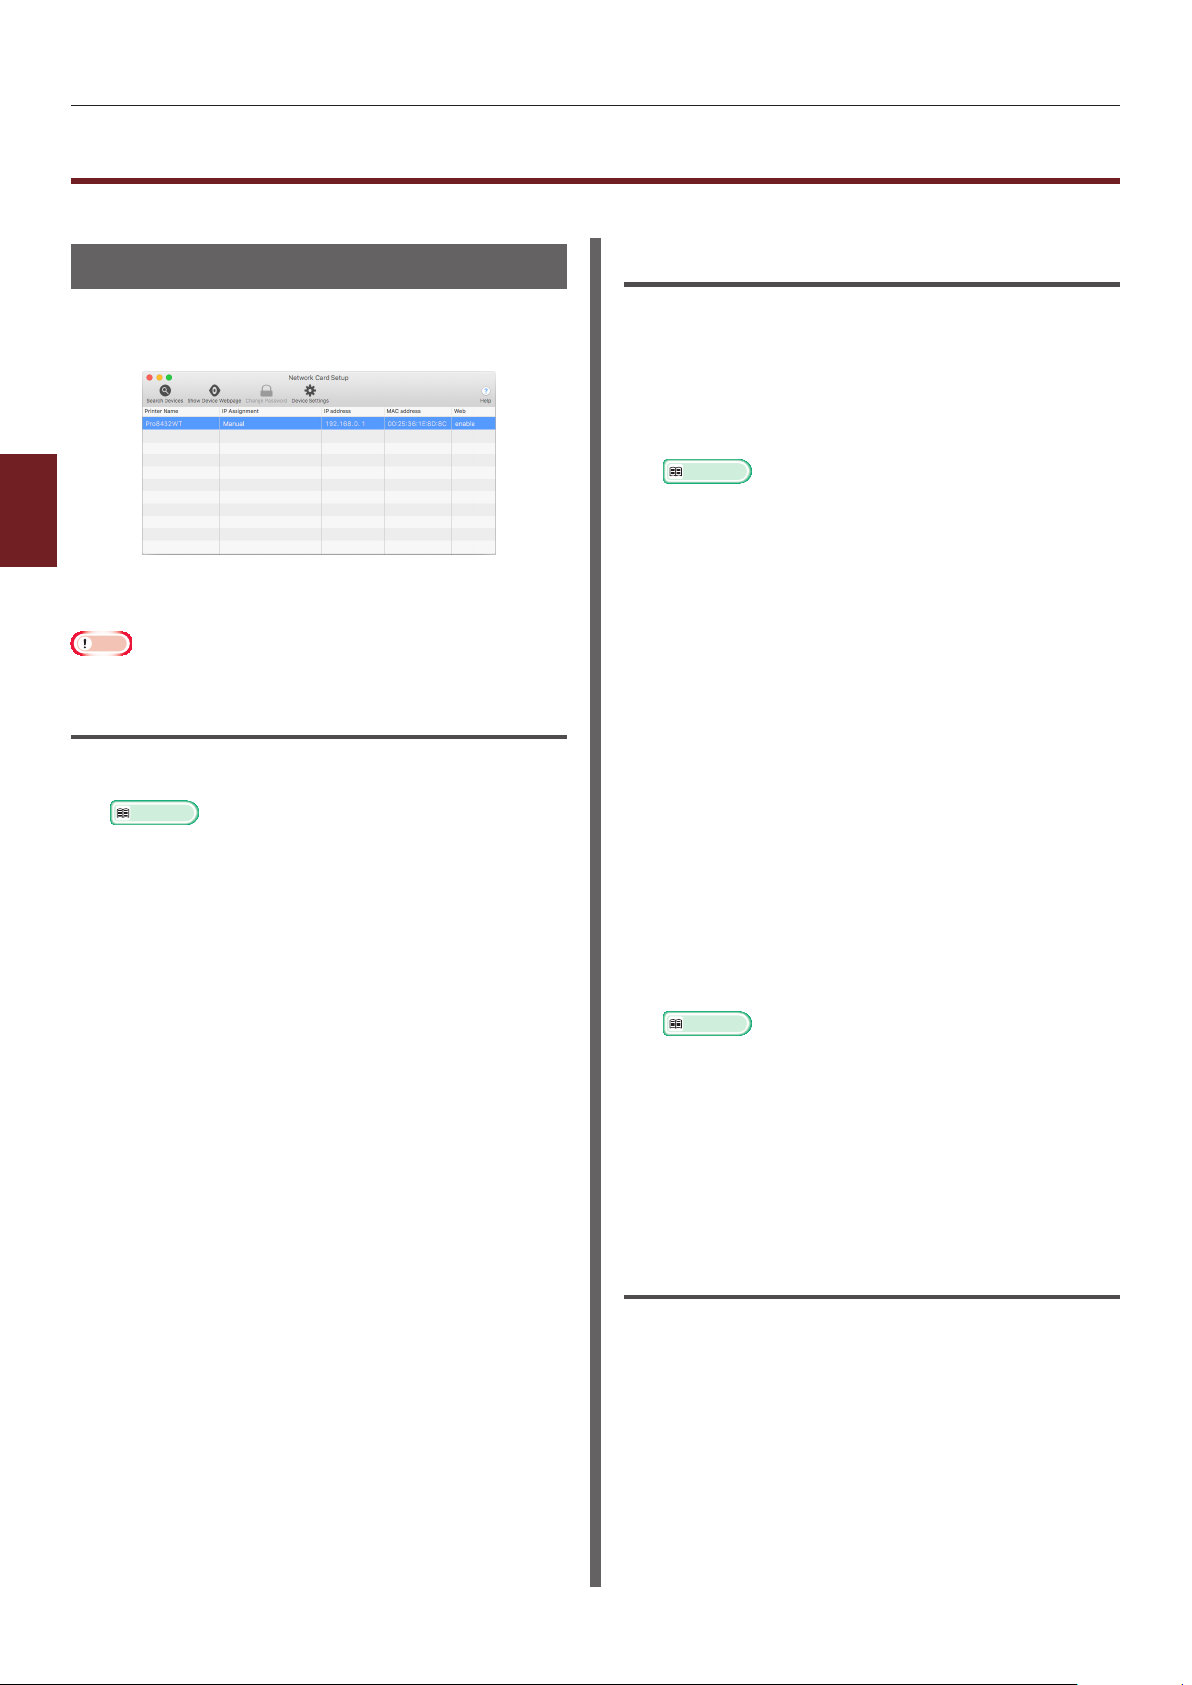
OS X Utilities
OS X Utilities
This section explains utilities you can use in OS X.
Network Card Setup
You can use the Network Card Setup to
congure the network.
4
4. Using Utility Software
In order to use Network Card Setup, TCP/IP
needs to be activated.
Note
● Congure the TCP/IP settings.
Conguring the IP Address
1 Start Network Card Setup.
Reference
● “Installing Utilities” P.52
Conguring Web Settings
You can launch the web page, and congure the
printer network settings.
Enabling Web Settings
1 Start Network Card Setup.
Reference
● “Installing Utilities” P.52
2 Select this machine from the list.
3 Select [Web Settings] from the
[Operations] menu.
4 Check [Device web settings will be
enabled], and then click [Save].
5 Enter the administrator password, and
then click [OK].
- The factory default password is “999999”.
- The password is case sensitive.
2 Select this machine from the list.
3 Select [IP Address Settings] from the
[Operations] menu.
4 Change other settings if necessary, and
then click [Save].
5 Enter the administrator password, and
then click [OK].
- The factory default password is “999999”.
- The password is case sensitive.
6 Click [OK] to enable new settings.
The network card of this machine restarts.
6 Click [OK] in a conrmation window.
Opening a Web page
1 Start Network Card Setup.
Reference
● “Installing Utilities” P.52
2 Select this machine from the list.
3 Select [Show Device Web page] from
the [Operations] menu.
The Web page opens, and the machine status
page is displayed.
Quitting Network Card Setup
1 Select [Quit] from the [Network Card
Setup] menu.
- 60 -
Page 61
5. Network Settings
This chapter explains network settings for your printer.
Network Setting Items
This section explains the items that can be set with network functions.
You can print the network setting list and check the current network settings by pressing the
button and selecting [Print Information] > [Network] > [Execute] on the operator panel.
Reference
● For details on how to print the network settings list, refer to “Printing Out Print Information” P.30.
You can change the network settings from your printer’s web page, Conguration Tool, TELNET, and
Network Card Setup.
or
Changing Network Settings From the Web Page
This section explains the items that can be set with network functions.
To access the printer’s web page, your computer must meet the following conditions.
● TCP/IP must be enabled.
Memo
● Ensure that the security setting of the web browser is set to a medium level.
● To enter the [Admin Setup] menu, it is necessary to log in as the administrator. The factory default administrator password is
“999999”.
Reference
● Some of the following settings can be performed on other utilities.
Informing the End of Consumable Life
and Errors by E-mail (E-mail Alert)
1 Access the printer’s web page and log in
as the administrator.
5
5. Network Settings
You can set the printer to send an error
notication e-mail when an error occurs. You can
set when to be notied:
● On a periodical basis
● Only when an error occurs
Conguring Your Printer
You can congure the settings for e-mail alert
using the web page.
Memo
● When you specify a domain name in [SMTP Server],
congure the DNS server in the [TCP/IP] setting.
● You need to set the mail server to allow the printer to
send E-mail. For details on the mail server setting, ask to
your network administrator.
● If you use Internet Explorer 7, be sure to congure the
settings below before you send a test mail. In the browser,
select [Tools] > [Internet Options], then click [Custom
Level] on the [Security] tab. Then select [Enable] in
[Allow websites to prompt for information using
scripted windows].
2 Select [Admin Setup].
3 Select [Network] > [E-mail] > [Alert
Settings].
4 Follow the on-screen instructions to
specify detailed settings.
5 If necessary, you can congure [Security
settings], [Congure attached
information], and [Others] below [Set
detail of the SMTP Protocol].
6 Click [Submit].
The network card reboots to enable the new
settings.
- 61 -
Page 62

Changing Network Settings From the Web Page
Periodic Alerts
1 Access the printer’s web page and log in
as the administrator.
2 Select [Admin Setup].
3 Select [Network] > [E-mail] > [Alert
Settings].
4 Enter an e-mail address in the [Address]
of [Alert Settings], to receive the alerts.
5 Click [Setting] for the specied address.
[Copy] is useful when you want to apply the alert
conditions to another address.
6 Follow the on-screen instructions to
specify detailed settings.
5
7 Click [OK].
5. Network Settings
8 Click [View a summary of current
conguration] to check the current
settings, and then click [X] to close the
window.
You can also check the current settings of up to
two addresses on the main window. Select the
desired addresses to check from the list box.
4 Click [View a summary of current
conguration] to check the current
settings, and then click [X] to close the
window.
You can also check the current settings of up to
two addresses on the main window. Select the
desired addresses to check from the list box.
5 Click [Submit].
The network card reboots to enable the new
settings.
9 Click [Submit].
The network card reboots to enable the new
settings.
Memo
● Alert e-mail will not be sent if errors to notify about have
not occurred.
Alert When Error Occurs
1 Perform steps 1 to 6 in “Periodic Alerts”
P.62.
When an error or warning requiring notication is
selected, a window will display to specify the time
between error occurrence and sending the alert.
2 Specify the time before sending error
alerts and then click [OK].
If you specify a longer time, you are only notied
of persisting errors.
3 Click [OK].
- 62 -
Page 63

Changing Network Settings From the Web Page
Controlling Access Using IP
Address (IP Filtering)
You can control access to the printer using IP
addresses. You can set whether to allow
conguration or printing from the IP addresses
specied. By factory default, IP ltering is disabled.
Note
● Be sure to specify the correct IP address. If you specify a
wrong IP address, you cannot access the printer using the
IP protocol.
● When you enable IP ltering, access by hosts that are not
specied in these steps is rejected.
Memo
● You can use only IPv4 for IP ltering.
1 Access the printer’s web page and log in
as the administrator.
2 Select [Admin Setup].
3 Select [Network] > [Security] > [IP
Filtering].
4 Follow the on-screen instructions to
specify detailed settings.
Note
● If nothing is registered in [Administrator IP
Address that has been registered], you may
not be able to access the printer depending on the
specied IP address range.
● If you use a proxy server, [Your Current Local
Host/Proxy IP Address] and the IP address of
your host may not match.
5 Click [Submit].
The network card reboots to enable the new
settings.
Controlling Access Using MAC
Address (MAC Address Filtering)
You can control access to the printer using MAC
addresses. You can allow or reject access from
the specied MAC addresses.
Note
● Be sure to specify the correct MAC address. If you specify
the wrong MAC address, you cannot access the printer via
a network.
Memo
● You cannot specify to accept or to reject for each address
individually.
1 Access the printer’s web page and log in
as the administrator.
2 Select [Admin Setup].
3 Select [Network] > [Security] > [MAC
Address Filtering].
4 Follow the on-screen instructions to
specify detailed settings.
Note
● If nothing is registered in [Administrator MAC
Address that has been registered], you may
not be able to access the printer depending on the
specied MAC address.
● If you use a proxy server, [Your Current Local
Host/Proxy MAC Address] and the MAC address of
your host may not match.
5 Click [Submit].
The network card reboots to enable the new
settings.
5
5. Network Settings
- 63 -
Page 64

Changing Network Settings From the Web Page
Encrypting Communication by
SSL/TLS
You can encrypt communication between your
computer and the printer. Communication is
encrypted by SSL/TLS in the following cases.
● Changing printer settings from the web page
● IPP printing
● Direct printing
Creating a Certicate
You can create a certicate on the web page.
The following two certicates are available.
● A self-signed certicate.
● A certicate created by a certicate authority.
5
5. Network Settings
Note
● If you change the printer IP address after you create a
certicate, the certicate becomes invalid. Be sure not to
change the printer’s IP address after creating a certicate.
1 Access the printer’s web page and log in
as the administrator.
10 Click [Submit].
The setting procedure for a certicate issued by a
certicate authority is nished.
Opening the Web Page
Memo
● Ensure to enable the protocol on which encryption is
applied in “Opening the Web Page” P.64.
1 Launch a web browser.
2 Enter “http://your printer’s IP address”
in the URL address bar and then press
the <Enter> key.
IPP Printing
IPP printing allows you to transmit your print job
data from your computer to the printer via the
Internet.
2 Select [Admin Setup].
3 Select [Network] > [Security] >
[SSL/TLS].
4 Select a certicate type.
5 Enter the required information in
[Common Name], [Organization],
etc.
6 Click [Submit].
The information entered is displayed.
7 Check the information entered and click
[OK].
When you are creating a self-signed certicate,
the setting procedure is nished. Follow the on-
screen instructions and close the web page.
When you are obtaining a certicate issued by a
certicate authority, go to step 8.
8 Follow the on-screen instructions to send
a CSR to a certicate authority.
9 Follow the on-screen instructions to
install a certicate from the certicate
authority.
Copy the text between [----- BEGIN CERTIFICATE
-----] and [----- END CERTIFICATE -----], and
paste it in the text box.
Enabling IPP Printing
IPP printing is disabled by factory default. To
perform IPP printing, enable IPP rst.
1 Access the printer’s web page and log in
as the administrator.
2 Select [Admin Setup].
3 Select [Network] > [IPP] > [Settings].
4 Select [Enable] in [IPP].
5 Click [Submit].
Setting Up Your Printer As an IPP
Printer (for Windows Only)
Add the printer to your computer as an IPP
printer.
1 Click [Start] and select [Devices and
Printers] > [Add a printer].
2 On the [Add Printer] wizard, select
[Add a network, wireless or
Bluetooth printer].
3 In the list of available printers, select
[The printer that I want isn’t listed].
- 64 -
Page 65

Changing Network Settings From the Web Page
4 Select [Select a shared printer by
name].
5 Enter “http://your printer’s IP address/
ipp” or “http://your printer’s IP address/
ipp/lp” and then click [Next].
6 Click [Have Disk].
7 Insert the software DVD-ROM into the
computer.
8 Enter the following value in [Copy
from], and then click [Use].
- For PS driver, “D:\Drivers\PS”.
Memo
● In the above examples, the DVD-ROM drive is setup
as the D drive.
9 Select the NFL le and click [Open].
10 Click [OK].
8 Enter “ipp/Ip” in [Queue].
9 Click [Add].
10 Click [Continue].
11 Conrm that the printer is registered in
[Printers & Scanners].
Performing IPP Printing
Memo
● The following steps are explained using NotePad as an
example. The steps and menus may differ depending on
the application you use.
1 Open the le you want to print.
2 From the [File] menu, select [Print].
3 Select the IPP printer you created from
[Select Printer], and then click [Print].
5
5. Network Settings
11 Select a model and click [OK].
12 Click [Next].
13 Click [Finish].
14 Print the test page after installation is
complete.
Setting Up Your Printer As an IPP
Printer (for OS X Only)
Add the printer to your computer as an IPP
printer.
1 Insert the software DVD-ROM into the
computer and install the driver.
Reference
● "User's Manual (Setup)"
2 Select [System Preferences] from the
Apple menu.
3 Click [Printers & Scanners].
4 Click [ + ].
5 Click the [IP] tab.
6 From [Protocol], select [Internet
Printing Protocol - IPP].
7 Enter the printer’s IP address in
[Address].
- 65 -
Page 66

Changing Network Settings From the Web Page
Encrypting Communication by
IPSec
You can encrypt communication between your
computer and the printer.
The communication is encrypted by IPSec. When
IPSec is enabled, encryption is applied for all the
applications using IP protocols.
You can specify up to 50 hosts by their IP
addresses. When a host that is not registered
tries to access the printer, it is rejected. When
you try to access a host that is not registered,
the attempt is invalid.
Be sure to congure the printer before
conguring your computer.
Memo
● You must have a pre-shared key readied in advance.
5
Conguring Your Printer
5. Network Settings
In order to enable IPSec, your printer must rst
be congured from the web page.
Note
● When you enable IPSec, communication with a host not
specied in this procedure is rejected.
Memo
● Be sure to make a note of the values you specify in these
steps. They are necessary when you congure the IPSec
settings on your computer.
Conguring Your Computer
Memo
● Be sure to congure the printer before conguring your
computer.
1 Click [Start] and select [Control Panel] >
[Administrative Tools].
2 Double-click [Local Security Policy].
3 On the [Local Security Policy] window,
click [IP Security Policies on Local
Computer].
4 From the [Action] menu, select [Create
IP Security Policy].
5 On the [IP Security Policy Wizard],
click [Next].
6 Enter a [Name] and a [Description]
and then click [Next].
7 Deselect the [Activate the default
response rule (earlier versions of
Windows only)] check box and then
click [Next].
8 Select [Edit Properties] and then click
[Finish].
1 Access the printer’s web page and log in
as the administrator.
2 Select [Admin Setup].
3 Select [Network] > [Security] >
[IPSec].
4 Follow the on-screen instructions to
specify detailed settings.
Memo
● Either [ESP] or [AH] must be enabled in the
conguration for "Phase2 Proposal".
5 Click [Submit].
The network card reboots to enable the new
settings.
Note
● If you were unable to set up IPSec because of an
inconsistency between the parameters that were
specied, you will be unable to access the web page. In
this case, either disable IPSec from the operation panel of
the printer, or initialize the network settings.
9 On the IP security policy properties
window, select the [General] tab.
10 Click [Settings].
11 On the [Key Exchange Settings]
window, enter a value (minutes) for
[Authenticate and generate a new
key after every].
Note
● Specify the same value as [Lifetime] specied in the
conguration for "Phase1 Proposal" in “Conguring
Your Printer” P.66. Although [Lifetime] is specied
in seconds, enter a value in minutes for this step.
12 Click [Methods].
13 On the [Key Exchange Security
Methods] window, click [Add].
14 Specify [Integrity algorithm],
[Encryption algorithm] and
[Dife-Hellman group].
- 66 -
Page 67

Changing Network Settings From the Web Page
Note
● Select the same value that was specied in [IKE
Encryption Algorithm], [IKE Hush Algorithm],
and [Dife-Hellman group] at the time of
conguration for "Phase1 Proposal" in “Conguring
Your Printer” P.66.
15 Click [OK].
16 On the [Key Exchange Security
Methods] window, click [OK].
17 On the [Key Exchange Settings]
window, click [OK].
18 On the IP security policy properties
window, select the [Rules] tab.
19 Click [Add].
20 On the [Security Rule Wizard], click
[Next].
21 On the [Tunnel Endpoint] screen,
select [This rule does not specify a
tunnel] and then click [Next].
22 On the [Network Type] screen, select
[All Network Connections] and then
click [Next].
33 On the [Filter Action] screen, click
[Add].
34 On the [Filter Action Wizard], click
[Next].
35 On the [Filter Action Name] screen,
enter a [Name] and a [Description]
and then click [Next].
36 On the [Filter Action General Options]
screen, select [Negotiate security] and
then click [Next].
37 On the [Communicating with
computers that do not support IPsec]
screen, select [Do not allow unsecured
communication] and then click [Next].
38 On the [IP Trafc Security] screen,
select [Custom] and then click [Settings].
39 On the [Custom Security Method
Settings] window, congure the
settings and then click [OK].
Note
● Congure the AH and ESP settings to the same
settings as congured for the "Phase2 Proposal" in
“Conguring Your Printer” P.66.
5
5. Network Settings
23 On the [IP Filter List] screen, click
[Add].
24 On the [IP Filter List] window, click
[Add].
25 On the [IP Filter Wizard], click [Next].
26 On the [IP Filter Description and
Mirrored Property] screen, click [Next].
27 On the [IP Trafc Source] screen, click
[Next].
28 On the [IP Trafc Destination] screen,
click [Next].
29 On the [IP Protocol Type] screen, click
[Next].
30 Click [Finish].
31 On the [IP Filter List] window, click
[OK].
40 On the [IP Trafc Security] screen,
click [Next].
41 Select [Edit Properties] and then click
[Finish].
42 On the lter action properties window,
select [Use session key perfect
forward secrecy (PFS)] if you want to
enable Key PFS.
43 Select [Accept unsecured
communication, but always respond
using IPsec] if you perform IPSec
communication by the IPv6 global address.
44 Click [OK].
45 Select [New Filter Action] and then
click [Next].
46 On the [Authentication Method]
screen, select the authentication method
you want and then click [Next].
32 On the [Security Rule Wizard], select
the new IP lter from the list and then
click [Next].
47 Click [Finish].
- 67 -
Page 68

Changing Network Settings From the Web Page
48 On the IP security policy properties
window, click [OK].
49 On the [Local Security Policy] window,
select the new IP security policy.
50 From the [Action] menu, select [Assign].
51 Make sure that for the new IP security
policy, [Policy Assigned] is displayed
as [Yes].
52 Click [X] on the [Local Security Policy]
screen.
5
5. Network Settings
Using SNMPv3
When you use a SNMP manager that supports
SNMPv3, management of the printer can be
encrypted by SNMP.
1 Access the printer’s web page and log in
as the administrator.
2 Select [Admin Setup].
3 Select [Network] > [SNMP] >
[Settings].
4 Follow the on-screen instructions to
specify detailed settings.
5 Click [Submit].
The network card reboots to enable the new
settings.
- 68 -
Page 69

Changing Network Settings From the Web Page
Using IPv6
Your printer supports IPv6. The printer obtains
the IPv6 address automatically. You cannot set
the IPv6 address manually.
The printer supports the following protocols.
● For Printing:
- LPR
- IPP
- RAW (Port9100)
- FTP
● For Conguration:
- HTTP
- SNMPv1/v3
- Telnet
Operation is conrmed under specic conditions
for the following applications.
Protocol
LPD
Port9100
FTP
HTTP
Telnet
OS Application
● Windows LPR
(Command
Prompt)
● Windows LPRng *1, 2, 3
● Windows FTP
(Command
Prompt)
● OS X FTP (Terminal) *1, 2, 3
● Windows Internet
Explorer
● OS X Safari *1, 2, 3,
● Windows Telnet
(Command
Prompt)
● OS X Telnet
(Terminal)
Condition
*1, 2, 3
*1, 2, 3
*1, 2, 3
4
*1, 2, 3
*1, 2, 3
Checking IPv6 Address
The IPv6 address is automatically assigned.
1 Select [View Info].
2 Select [Network] > [TCP/IP].
Memo
● When the global address is displayed only as zeros, it may
be an error due to the router being used.
Reference
● You can also check the IPv6 address in the network report
from the printer by pressing the <ENTER> button and
then selecting [Print Information] > [Network]. For
details on the report and how to print it, refer to “Printing
Out Print Information” P.30.
5
5. Network Settings
*1) To specify a host name, edit the host’s le or
access via the DNS server.
*2) With Telnet, when only IPv6 is enabled you
cannot specify a host name by the DNS
server.
*3) You cannot specify a host name when you
use a link local address to access.
*4) Enter an IPv6 address enclosed with square
brackets.
- 69 -
Page 70

Changing Network Settings From the Web Page
Using IEEE802.1X
Your printer supports IEEE802.1X authentication.
Be sure to congure the printer and your
computer before performing the following steps.
Reference
● For details on the initial setup and the IP address, refer to
the User’s Manual (Setup).
Conguring Your Printer for
IEEE802.1X
Using PEAP
1 Access the printer’s web page and log in
as the administrator.
2 Select [Admin Setup].
5
3 Select [Network] > [IEEE802.1X].
5. Network Settings
4 Select [Authenticate Server] and then
click [Import].
5 Enter the le name of the CA certicate
and then click [OK].
Specify a certicate issued by the certicate
authority from which the RADIUS server obtained
a certicate. A PEM, DER, and PKCS#7 le can be
imported.
Using EAP-TLS
1 Access the printer’s web page and log in
as the administrator.
2 Select [Admin Setup].
3 Select [Network] > [IEEE802.1X].
4 Select [Not use SSL/TLS Certicate
for EAP authentication] and then click
[Import].
5 Enter the le name of the certicate.
Only a PKCS#12 le can be imported.
6 Enter the password of the certicate and
then click [OK].
7 Click [Return to Previous Page].
8 Select [Authenticate Server] and then
click [Import].
9 Enter the le name of the CA certicate
and then click [OK].
Specify a certicate issued by the certicate
authority from which the RADIUS server obtained
a certicate. A PEM, DER, and PKCS#7 le can be
imported.
10 Click [Return to Previous Page].
6 Click [Return to Previous Page].
7 Select [Enable] for [IEEE802.1X].
8 Select [PEAP] for [EAP Type].
9 Enter a user name in [EAP User].
10 Enter a password in [EAP Password].
11 Click [Submit].
The network card reboots to enable the new
settings.
12 When the standby screen appears on the
printer, turn off the printer.
13 Go to “Connecting Your Printer to an
Authentication Switch” P.71.
11 Select [Enable] for [IEEE802.1X].
12 Select [EAP-TLS] for [EAP Type].
13 Enter a user name in [EAP User].
14 Click [Submit].
The network card reboots to enable the new
settings.
15 When the standby screen appears on the
printer, turn off the printer.
16 Go to “Connecting Your Printer to an
Authentication Switch” P.71.
- 70 -
Page 71

Changing Network Settings From the Web Page
Connecting Your Printer to an
Authentication Switch
1 Make sure that the printer is turned off.
2 Connect an Ethernet cable to the
network interface port.
3 Connect the Ethernet cable to the
authentication port of an authentication
switch.
4 Turn on the printer.
5 Set up the printer.
Reference
● For details on the initial setup, refer to the User's
Manual (Setup).
Setting Wireless LAN (WPA/WPA2EAP)
Make a setting in the [IEEE802.1 X] menu
before making this setting.
Note
● IEEE802.1X functions cannot be used with wired LAN and
wireless LAN at the same time.
● To use IEEE802.1X functions with wireless LAN, make
necessary settings of IEEE802.1X and set the IEEE802.1X
menu to “Disable”.
1 Open the Web page of this machine.
2 Log in as the administrator.
3 Click [Admin Setup].
4 Select [Network Menu] > [Wireless
(Infrastructure)] > [Manual Setup].
5 Select [Enable] for [Wireless
(Infrastructure)] in [Basic Settings].
5
5. Network Settings
6 Enter SSID name for wireless access
point you want to connect in [SSID].
7 Select [WPA/WPA2-EAP] for
[Security] in [Security Settings].
8 When all the settings in Basic Settings
and Security Settings are complete,
press [Submit] on the bottom left of
the web page to reect the settings. It
may take approximately one minute to
establish the wireless AP connection.
If connection fails, retry the wireless
setting on the operator panel or switch
to a wired LAN on the operator panel,
and then retry the wireless setting on
the web page of the machine.
- 71 -
Page 72

Other Operations
Other Operations
This section explains how to initialize the network settings and how to set up your printer and computer
to use DHCP.
Initializing Network Settings
Note
● This procedure initializes all the network settings.
1 Press the <ENTER> button.
2 Press to select [Admin Setup] and
then press the <ENTER> button.
3 Enter the administrator password using
the numeric keypad.
The factory default administrator password is
5
5. Network Settings
“999999”.
4 Press the <ENTER> button.
5 Make sure that [Network Setup] is
selected and then press the <ENTER>
button.
6 Press to select [Network Factory
Defaults] and then press the <ENTER>
button.
7 Make sure that [Execute] is selected
and then press the <ENTER> button.
The network settings are initialized.
- 72 -
Page 73

6. Troubleshooting
This chapter explains initializing, deleting and updating drivers.
Initializing
This section explains how to initialize an SD memory card and ash memory and how to reset the
equipment settings to their defaults.
You can delete data or settings stored on the printer to restore the settings to how they were at the
time of purchase.
Note
● To enable/disable SD card initialization, in the [Admin Setup] menu go to [Others Setup] > [Storage Common Setup] >
[Enable Initialization] and select [Yes]/[No].
Memo
● In order to access the [Admin Setup] menu, an administrator password is required. The default password is “999999”.
Initializing an SD memory
card
Carry out initialization of an SD card when
inserting a card that has been used in other
equipment or when the SD Card is not properly
recognized.
An SD memory card is used as storage for
spooling when making multiple copies, for saving
secure print/ encrypted print data, and for form
data and macros. Initialization deletes stored
data.
An SD memory card has three partitions. They
are PS, Common, and PCL. When an SD memory
card is initialized, each partition is respectively
divided into the percentage specied (in the
factory default setting, PS: 30%, Common:
50%, PCL: 20%). You can also format particular
partitions individually.
If an SD memory card that has been installed to
another device is installed to the printer, or if the
SD memory card installed to the printer cannot
be detected anymore, [To SD format, press
[Enter] To shut down, press [Cancel]] may
appear on the display when the printer is turned
on. In such a case, press the <ENTER>. (Data
stored in the SD memory card is deleted.)
Formatting the Entire Area
You can format the entire area of the SD
memory card installed in the printer.
Note
● When you initialize the entire area of an SD memory card,
the following data is deleted.
- Stored job data subject for [Shared Print], [Private
Print].
- Custom demo data
- Form data
1 Press to select [Admin Setup] and
then press the <ENTER> button.
2 Enter the administrator password using
the numeric keypad.
The default password is “999999”.
3 Press the <ENTER> button.
4 Select [Others Setup], press
<ENTER>, and press to select [SD
Card Setup].
5 Press to select [SD Card Setup] and
then press the <ENTER> button.
6
6. Troubleshooting
If you select <CANCEL>, the device shuts down.
6 Make sure that [Initialize] is selected
and then press the <ENTER> button.
7 Make sure that [Execute] is selected
and then press the <ENTER> button.
A message appears notifying you that continuing
will automatically restart the system. Select
[Yes] to continue.
- 73 -
Page 74

Initializing
Formatting a Particular Partition
You can initialize a particular partition within the
SD memory card’s 3 partitions (PS, Common,
and PCL).
Note
● When you initialize a partition, the following data is
deleted.
- PS: Form data in PS area
- Common: Job data and demo data stored with
[Private Print], [Shared Print].
- PCL: Form data in the PCL area
1 Press to select [Admin Setup] and
then press the <ENTER> button.
2 Enter the administrator password using
the numeric keypad.
The default password is “999999”.
3 Press the <ENTER> button.
4 Press to select [Others Setup] and
6
then press the <ENTER> button.
5 Press to select [SD Card Setup] and
6. Troubleshooting
then press the <ENTER> button.
6 Press to select [Format Partition]
and then press the <ENTER> button.
7 Press to select the partition you
want to initialize and then press the
<ENTER> button.
A message appears notifying you that continuing
will automatically restart the system. Select
[Yes] to continue.
Initializing Flash Memory
Flash memory stores data such as form data,
etc.
Use the following steps to initialize.
Note
● When you initialize ash memory, the following data is
deleted.
- Custom demo data
- Form data
1 Press to select [Admin Setup] and
then press the <ENTER> button.
2 Enter the administrator password using
the numeric keypad.
The default password is “999999”.
3 Press the <ENTER> button.
4 Press to select [Others Setup] and
then press the <ENTER> button.
5 Press to select [Flash Memory Setup]
and then press the <ENTER> button.
6 Make sure that [Initialize] is selected
and then press the <ENTER> button.
7 Make sure that [Execute] is selected
and then press the <ENTER> button.
A message appears notifying you that continuing
will automatically restart the system. Select
[Yes] to continue.
- 74 -
Page 75

Resetting the Printer Settings
You can return the congured settings to their
default.
1 Press to select [Admin Setup] and
then press the <ENTER> button.
2 Enter the administrator password using
the numeric keypad.
The default password is “999999”.
3 Press the <ENTER> button.
4 Press to select [Settings] and then
press the <ENTER> button.
5 Press to select [Reset Settings] and
then press the <ENTER> button.
6 Make sure that [Execute] is selected
and then press the <ENTER> button.
Initializing
6
6. Troubleshooting
- 75 -
Page 76

Deleting or Updating the Printer Drivers
Deleting or Updating the Printer Drivers
This section explains how to delete or update the printer drivers you are using.
Note
● The procedure and display may differ according to the printer driver and version of Windows or OS X you are using.
Deleting a Printer Driver
You can uninstall printer drivers.
For Windows
Note
● You must be logged on as an administrator to complete
this procedure.
● Restart the computer before you remove a driver.
1 Click on [Start] and then select
[Devices and Printers].
2 Right-click the
select [Remove device].
6
6. Troubleshooting
If you have specied multiple printer drivers,
select the type of driver you want to delete from
[Remove device].
3 If a conrmation message appears, click
[Yes].
Note
● If a message appears stating that the device is in
use, restart the computer and try again from step 1
to 2.
Your Printer
icon and
10 If the [Remove Driver and Package]
dialog box appears, click [Remove
driver only.] or [Remove driver and
driver package.] > [OK].
Note
● If deletion is rejected, restart the computer, and
carry out procedures 4-10 again.
11 Click [Close] in the [Printer Server
Properties] dialog box.
12 Restart the computer.
For OS X
1 From the Apple menu, select [System
Preferences].
2 Select [Printers & Scanners].
3 Select the device you want to remove
and then click [-].
4 Close the [Printers & Scanners] dialog
box.
4 Click [Printer server properties]
on the top bar with one of any icons
selected in [Printers and Faxes].
5 Select the [Drivers] tab.
6 If [Change Driver Settings] is
displayed, click on it.
7 Select the printer driver you want to
remove and click [Remove].
8 If a message appears asking you
whether to remove the printer driver
only or the printer driver and driver
package from your system, select
to remove the driver and the driver
package and then click [OK].
9 If a conrmation message appears, click
[Yes].
5 Insert the software DVD-ROM into the
computer.
6 Double-click [OKI] > [Drivers] > [PS] >
[Uninstaller].
7 Check the device to delete displayed in
the dialog box and click [OK].
8 Enter the administrator password using
the numeric keypad and click [OK]
twice.
9 Remove the software DVD-ROM from the
computer.
- 76 -
Page 77

Updating a Printer Driver
You can update printer drivers.
For Windows PS Printer Driver
Note
● You must be logged in as an administrator to complete
this procedure.
● Restart the computer before you start removing a printer
driver.
1 Click on [Start] and then select
[Devices and Printers].
Deleting or Updating the Printer Drivers
2 Right-click the
Your Printer
icon and
select [Printing preferences].
If you have installed multiple printer drivers,
select the type of driver you want to update from
[Printer Properties].
3 Select the [Print Options] tab, and
click on [About].
4 Check the version information and then
click [OK].
5 Delete the printer driver you want to
update.
Note
● Delete all the printer drivers to ensure updating.
Reference
● “Deleting a Printer Driver” P.76
6 Install a new printer driver.
Reference
● For details on how to install a printer driver, refer to
the User’s Manual (Setup).
6
6. Troubleshooting
For OS X
1 Delete the printer driver you want to
update.
Reference
● “Deleting a Printer Driver” P.76
2 Install a new printer driver.
Reference
● For details on how to install a printer driver, refer to
the User’s Manual (Setup).
- 77 -
Page 78

Index
A
Automatically set the date .... 54
B
Blurred Fine Lines ................ 20
C
Conguration Tool ................ 55
Custom Sizes ...................... 11
E
Elongated Printing ............... 11
F
FTP .................................... 69
L
T
TELNET .............................. 69
U
Uninstall
Printer Driver .............. 76
LPD ................................... 69
M
Maintaining Paper Size ......... 21
Multi-Purpose Tray ............... 13
O
OKI LPR Utility .................... 25
P
Paper Size .....................11, 15
Paper Tray .......................... 11
PostScript ........................... 25
Printer drivers
OS X PS printer drivers ... 8
S
Setting Key ......................... 30
- 78 -
Page 79

1-7-12 Toranomon, Minato-ku, Tokyo
105-8460, Japan
www.oki.com/printing/
46611102EE Rev3
 Loading...