

Page 1

MB460 MFP, MB470 MFP, MB480 MFP
RT322
Setup and Reference Guide
Guide d’installation et de référence
Guía de instalación y de referencia
Guia de configuração e de referência
59402701 my.okidata.com
Page 2

Page 3

Contents Table des matières
Installing MFP Drivers and Utilities . . . . . . 5
Printer Driver . . . . . . . . . . . . . . . . . . . . . . . . . 5
Network Software . . . . . . . . . . . . . . . . . . . . . .5
Optional Utilities . . . . . . . . . . . . . . . . . . . . . . . 5
Internet Downloads . . . . . . . . . . . . . . . . . . . . .5
User Guides . . . . . . . . . . . . . . . . . . . . . . . . . .5
MFP Setup Utility
(Windows only) . . . . . . . . . . . . . . . . . . . . . . .6
MFP Settings . . . . . . . . . . . . . . . . . . . . . . . . 6
Address Book Manager . . . . . . . . . . . . . . . . . 6
Phone Book Manager . . . . . . . . . . . . . . . . . . 6
Profile Manager . . . . . . . . . . . . . . . . . . . . . . 6
PIN Manager . . . . . . . . . . . . . . . . . . . . . . . . 6
Actkey Utility (Windows only, USB only) . . . . . . .6
ScanSoft Utilities . . . . . . . . . . . . . . . . . . . . . . .6
PaperPort . . . . . . . . . . . . . . . . . . . . . . . . . . 6
OmniPage SE. . . . . . . . . . . . . . . . . . . . . . . . 7
Configuring the MFP . . . . . . . . . . . . . . . . . 7
Default Passwords/PIN . . . . . . . . . . . . . . . . . . .7
Fax Receiving (MB470 & MB480 only) . . . . . . . . 7
Setting Fax Parameters. . . . . . . . . . . . . . . . . 7
Setting the Ring Response . . . . . . . . . . . . . . 7
Setting Access Control . . . . . . . . . . . . . . . . . . .8
Enable/Disable Access Control . . . . . . . . . . . . 8
Entering PIN ID . . . . . . . . . . . . . . . . . . . . . . 8
Logout operation . . . . . . . . . . . . . . . . . . . . . 8
Operation Time-out . . . . . . . . . . . . . . . . . . . 8
Minimum Configuration Requirements . . . . . . . . 9
Internet Communication Features . . . . . . . . . . .9
Pre-Installation Information. . . . . . . . . . . . . . 9
Scan to E-mail . . . . . . . . . . . . . . . . . . . . . . . 9
Setting up an SMTP Server . . . . . . . . . . . . . . 9
Operating the MFP . . . . . . . . . . . . . . . . . . . 9
Scanning and Copying Documents . . . . . . . . . . .9
Printing Documents . . . . . . . . . . . . . . . . . . . . .9
Clearing Media Jams . . . . . . . . . . . . . . . . 10
ADF Document Jam . . . . . . . . . . . . . . . . . . . . 10
Printer Jams . . . . . . . . . . . . . . . . . . . . . . . . . 10
Maintenance . . . . . . . . . . . . . . . . . . . . . . 12
Replacing Toner Cartridges & the Image Drum . 12
Where to Purchase . . . . . . . . . . . . . . . . . . . . . 12
Installation des pilotes et utilitaires
du MPF . . . . . . . . . . . . . . . . . . . . . . . . . . .13
Pilote d'imprimante . . . . . . . . . . . . . . . . . . . . 13
Logiciels réseau . . . . . . . . . . . . . . . . . . . . . . . 13
Utilitaires optionnels . . . . . . . . . . . . . . . . . . . . 13
Téléchargements Internet . . . . . . . . . . . . . . . . 13
Guides de l'utilisateur . . . . . . . . . . . . . . . . . . . 13
Outil de configuration du MPF (Windows
uniquement) . . . . . . . . . . . . . . . . . . . . . . . . 14
MFP Settings (Paramétrage MFP) . . . . . . . . . 14
Address Book Manager (Gestionnaire de
carnet d'adresses) . . . . . . . . . . . . . . . . . . 14
Phone Book Manager (Gestionnaire de
répertoire téeléphonique) . . . . . . . . . . . . . 14
Profile Manager (Gestionnaire de profils) . . . 14
PIN Manager (Gestionnaire d’identificateurs
PIN) . . . . . . . . . . . . . . . . . . . . . . . . . . . . 14
Utilitaire Actkey (Windows uniquement,
USB uniquement) . . . . . . . . . . . . . . . . . . . . . 15
Utilitaires ScanSoft . . . . . . . . . . . . . . . . . . . . 15
PaperPort . . . . . . . . . . . . . . . . . . . . . . . . . 15
OmniPage SE. . . . . . . . . . . . . . . . . . . . . . . 15
Configuration du MFP . . . . . . . . . . . . . . . 15
Mots de passe/code PIN . . . . . . . . . . . . . . . . . 15
Réception de fax (MB470 & MB480 uniquement) 15
Configuration des paramètres de fax . . . . . . 15
Délai de prise de ligne . . . . . . . . . . . . . . . . 16
Contrôle d'accès . . . . . . . . . . . . . . . . . . . . . . 16
Activation/Désactivation du contrôle d'accès . 16
Saisie de l’identificateur PIN . . . . . . . . . . . . 16
Déconnexion . . . . . . . . . . . . . . . . . . . . . . . 16
Expiration de délai pour une opération . . . . . 17
Configuration minimale requise . . . . . . . . . . . . 17
Fonctionnalités de communication internet . . . . 17
Informations de préinstallation . . . . . . . . . . 17
Numérisation vers la messagerie
électronique . . . . . . . . . . . . . . . . . . . . . . 17
Configuration d'un serveur SMTP . . . . . . . . . 17
Utilisation du MFP . . . . . . . . . . . . . . . . . . 18
Numérisation et copie des documents . . . . . . . 18
Impression des documents . . . . . . . . . . . . . . . 18
Dégagement des bourrages . . . . . . . . . . 19
Bourrage de document dans ADF . . . . . . . . . . . 19
Bourrages dans l’imprimante . . . . . . . . . . . . . . 19
Maintenance . . . . . . . . . . . . . . . . . . . . . . 21
Remplacement des cartouches de toner et de
tambour d'impression . . . . . . . . . . . . . . . . . . 21
Endroits où se procurer . . . . . . . . . . . . . . . . . 21
3
Page 4

Sumário Contenido
Instalación de controladores y utilidades
de la MFP . . . . . . . . . . . . . . . . . . . . . . . . .22
Controladores de la impresora . . . . . . . . . . . . . 22
Software de Redes . . . . . . . . . . . . . . . . . . . . . 22
Utilidades Opcionales . . . . . . . . . . . . . . . . . . . 22
Descargas de la Internet . . . . . . . . . . . . . . . . . 22
Guías del Usuario . . . . . . . . . . . . . . . . . . . . . . 22
Herramienta de configuración de la MFP (sólo
Windows) . . . . . . . . . . . . . . . . . . . . . . . . . . 23
MFP Settings (Ajustes de la MFP) . . . . . . . . . 23
Address Book Manager (Gestor de libretas
de direcciones) . . . . . . . . . . . . . . . . . . . . 23
Phone Book Manager (Gestor de la guía de
teléfonos) . . . . . . . . . . . . . . . . . . . . . . . . 23
Profile Manager (Gestor de perfiles) . . . . . . . 23
PIN Manager (Gestor de PIN) . . . . . . . . . . . 23
Utilidad Actkey (sólo Windows, sólo USB) . . . . . 23
Utilidades Scansoft . . . . . . . . . . . . . . . . . . . . . 24
PaperPort . . . . . . . . . . . . . . . . . . . . . . . . . 24
OmniPage SE. . . . . . . . . . . . . . . . . . . . . . . 24
Configuración de la MFP . . . . . . . . . . . . . 24
Contraseñas/PIN . . . . . . . . . . . . . . . . . . . . . . 24
Recepción de fax (sólo MB470 & MB480) . . . . . 24
Configuración de los parámetros del fax . . . . 24
Respuesta Timbre . . . . . . . . . . . . . . . . . . . 25
Control de acceso . . . . . . . . . . . . . . . . . . . . . 25
Activación o desactivación del Control
de acceso . . . . . . . . . . . . . . . . . . . . . . . . 25
Introducción del ID de PIN . . . . . . . . . . . . . 25
Operación de salida . . . . . . . . . . . . . . . . . . 26
Tiempo de espera de la operación . . . . . . . . 26
Requisitos mínimos de configuración . . . . . . . . 26
Características de las comunicaciones por
internet . . . . . . . . . . . . . . . . . . . . . . . . . . . . 26
Información sobre la preinstalación . . . . . . . 26
Enviar digitalización a correo electrónico. . . . 26
Configuración de un servidor SMTP . . . . . . . 27
Funcionamiento de la MFP. . . . . . . . . . . . 27
Escaneo y Copiado de Documentos . . . . . . . . . 27
Impresión de Documentos . . . . . . . . . . . . . . . 27
Cómo solucionar atascos . . . . . . . . . . . . . 28
Atasco documento en ADF . . . . . . . . . . . . . . . 28
En la impresora . . . . . . . . . . . . . . . . . . . . . . . 28
Mantenimiento. . . . . . . . . . . . . . . . . . . . . 30
Reemplazo de los cartuchos de tóner y del
Cilindro imagen . . . . . . . . . . . . . . . . . . . . . . 30
Dónde comprar . . . . . . . . . . . . . . . . . . . . . . . 30
Instalação dos drivers e utilitários
do MFP . . . . . . . . . . . . . . . . . . . . . . . . . .31
Driver da impressora . . . . . . . . . . . . . . . . . . . 31
Software de rede . . . . . . . . . . . . . . . . . . . . . . 31
Utilitários opcionais . . . . . . . . . . . . . . . . . . . . 31
Downloads da Internet . . . . . . . . . . . . . . . . . . 31
Manual do Usuário . . . . . . . . . . . . . . . . . . . . . 31
Utilitário de configuração do MFP (somente
Windows) . . . . . . . . . . . . . . . . . . . . . . . . . 32
MFP Settings (Configurações do MFP) . . . 32
Address Book Manager (Gerenciador de
Catálogo de Endereços) . . . . . . . . . . . . . . 32
Phone Book Manager (Gerenciador de Lista
Telefônica) . . . . . . . . . . . . . . . . . . . . . . . 32
Profile Manager (Gerenciador de Perfis) . . . . 32
PIN Manager (Gerenciador de NIP). . . . . . . . 32
Utilitário Actkey (somente Windows,
somente USB) . . . . . . . . . . . . . . . . . . . . . . . 32
Utilitários ScanSoft . . . . . . . . . . . . . . . . . . . . 33
PaperPort . . . . . . . . . . . . . . . . . . . . . . . . . 33
OmniPage SE. . . . . . . . . . . . . . . . . . . . . . . 33
Configuração da MFP . . . . . . . . . . . . . . . 33
Senhas/NIP . . . . . . . . . . . . . . . . . . . . . . . . . . 33
Recepção de fax (somente MB470 & MB480) . . . 33
Configuração dos parâmetros de fax . . . . . . 33
Resposta a toque de chamada . . . . . . . . . . . 34
Controle de acesso . . . . . . . . . . . . . . . . . . . . . 34
Ativação/desativação do controle de acesso . 34
Inserção do NIP . . . . . . . . . . . . . . . . . . . . . 34
Operação de logout . . . . . . . . . . . . . . . . . . 34
Tempo limite de operação . . . . . . . . . . . . . . 35
Requisitos mínimos de configuração . . . . . . . . . 35
Recursos de comunicação pela internet . . . . . . 35
Informações de pré-instalação. . . . . . . . . . . 35
Escanear para e-mail . . . . . . . . . . . . . . . . . 36
Configuração de um servidor SMTP . . . . . . . 36
Funcionamento da MFP . . . . . . . . . . . . . . 36
Escaneamento e cópia de documentos . . . . . . . 36
Impressão de documentos . . . . . . . . . . . . . . . 36
Eliminação de atolamentos de papel. . . . 37
Documento atolado no AAD . . . . . . . . . . . . . . . 37
Na impressora . . . . . . . . . . . . . . . . . . . . . . . . 37
Manutenção . . . . . . . . . . . . . . . . . . . . . . . 39
Troca dos cartuchos de toner e do cilindro OPC . 39
Onde comprar . . . . . . . . . . . . . . . . . . . . . . . . 39
Service and Support . . . . . . . . . . . . . . . . . . . . 40
Service et soutien . . . . . . . . . . . . . . . . . . . . . 40
Assistencia Técnica y Soporte . . . . . . . . . . . . . 40
Assistência Técnica e Suporte . . . . . . . . . . . . . 40
4
Page 5
Installing MFP Drivers and Utilities
Note: You must be logged on as an administrator or a
member of the Administrators group in order to
complete this procedure. If your computer is
connected to a network, network policy settings
may also prevent you from completing this
procedure.
10. When prompted, select one or more printer
emulations:
•PCL
• PS (Postscript) (MB470 & MB480 only)
• FAX: (MB470 & MB480 only) The fax printer driver
allows you to send faxes directly from your
computer without printing the document first.
With Oki’s fax driver you are sending the fax data
from your computer to the MFP, and then the MFP
automatically sends the document.
11. Follow the on-screen instructions.
Printer Driver
Note: Install the printer driver before connecting the
cable to the printer.
1. Turn the printer OFF.
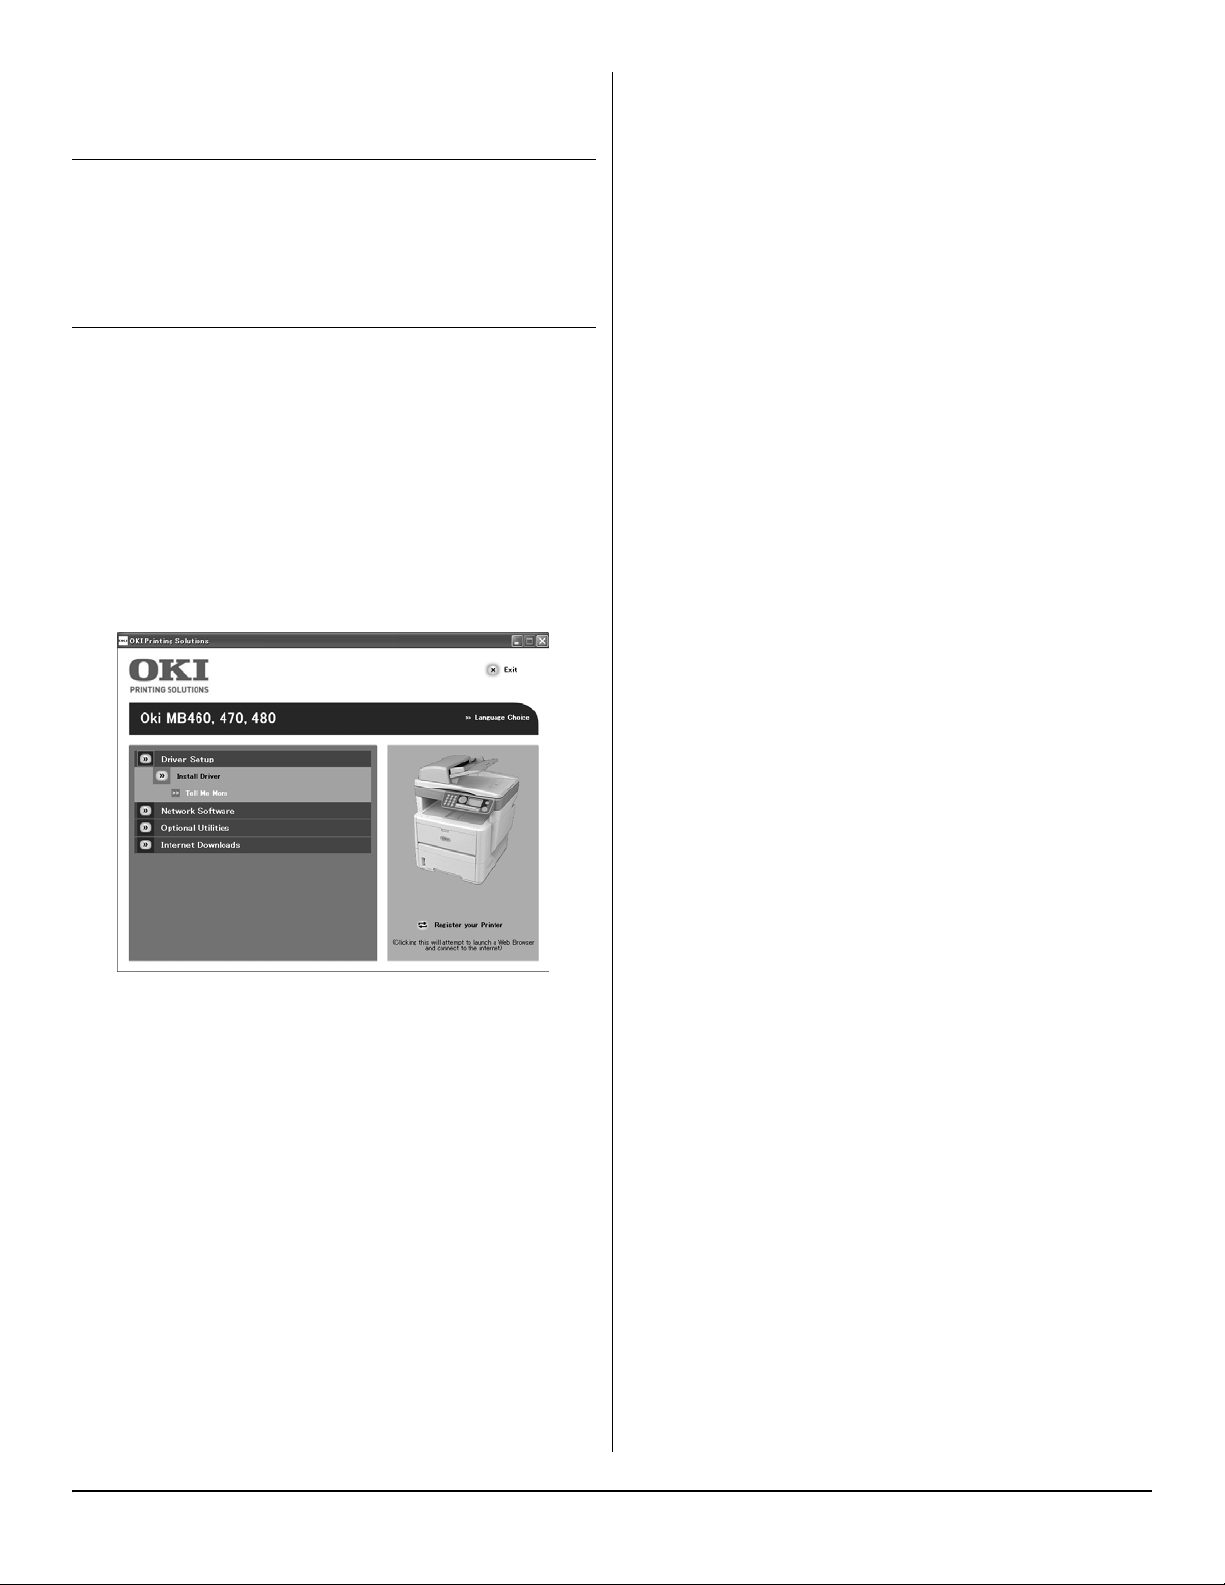
2. Insert CD1 in the CD-ROM drive. The CD will autorun.
3. Select your language.
4. Accept the license agreement.
5. Under Driver Setup, click Install Driver.
12. When prompted, connect the appropriate cable and
turn the printer on.
Network Software
Installation of the Network Software utilities is optional.
They can be found on CD1. Utilities include: Network Card
Setup Utility, Direct Network Printing Utility (LPR), and
Network Extension.
Optional Utilities
Installation of the Optional utilities can be found on CD1.
Utilities include: Change the Printer Display Language,
and Install PS Gamma Adjuster.
Internet Downloads
Installation of the Internet Downloads is optional. They
can be found on CD1.
When installed, launch your web browser for access to the
Oki website. On the Oki website you will find downloads
for the selected printer model.
6. Select local or network printer.
7. If you selected “local”:
Select the port you want your printer to use: USB
(Universal Serial Bus), LPT (a local port), or FILE (a
local port).
If you selected “network”:
You are prompted to select how your printer is
connected to the network:
- Directly using TCP/IP (select this option if your
printer is connected directly to the network)
- Indirectly via another PC (if the printer is shared on
another PC, type its name in the box; if you don’t
know the name, click Next to search for shared
printers)
8. Enter the IP address of the printer.
9. Select the printer model.
User Guides
Installation of the User Guide is optional. It can be found
on CD1.
5 English
Page 6

MFP Setup Utility
(Windows only)
Profile Manager
A profile is a set of saved settings for scanning to a
networked PC. A profile consists of the following:
• Details for connecting to the networked PC
(protocol, port, user name, password etc)
•Paper size
• File format to scan to (PDF, TIFF, JPEG) and
format settings such as resolution, compression
• Import and export settings to CSV files
• Import settings from other Oki MFP devices
Installation of the MFP setup utility is optional and can be
found on CD2 of the MFP Software under the MFP Utilities
folder. Select the Install Configuration Tool option.
The MFP setup tool can discover MB4x0 MFP devices over
USB or network connections.
The setup program does not automatically place an icon
on your desktop. If you wish, you can drag and drop the
icon on to your desktop for ease of future use.
There are 5 main functions included in this software:
• MFP Settings
• Address Book Manager
• Phone Book Manager
• Profile Manager
•PIN Manager
MFP Settings
Allows you to change most of the same settings as you'd
see on the MFP's operator panel, on a locally connected
PC.
The settings include an Admin. menu. This is password
protected and hidden by default. To enable the Admin
menu, select: Setting>MFP Setting>Display >
Administrator menu and enter the MFP's password.
PIN Manager
The MFP can have access control switched on the front
panel. If this is the case, a PIN (Personal Identification
Number) is required to use the MFP. The PIN Manager
creates PIN numbers and assigns them rights such as
whether they can copy, print, scan to email, scan to
network PC or fax.
• Import and export settings to CSV files.
• Import settings from other Oki MFP devices.
Actkey Utility (Windows only,
USB only)
Installation of the Actkey utility is optional and can be
found on CD2 of the MFP Software under the MFP Utilities
folder.
The Actkey utility is a tool for performing common scan
actions. It enables the unit to receive one-key touch
commands from a locally connected computer.
ScanSoft Utilities
Installation of the ScanSoft utilities is optional and can be
found on CD2 of the MFP Software under the MFP Utilities
folder.
Address Book Manager
Adds names, e-mail addresses, assign them to IDs (for
scan to e-mail feature of MFP).
• Arrange people into groups.
• Import and export settings to CSV files.
• Import settings from other Oki MFP devices.
Phone Book Manager
For managing people and fax numbers (for “scan to fax”
feature of MFP). Add names, fax numbers, assign them to
speed dial numbers.
• Arrange people into groups.
• Import and export settings to CSV files.
• Import settings from other Oki MFP devices.
6 English
PaperPort
PaperPort is a paper management application to organize,
access, share, and manage documents and image files on
your personal computer. Key features include:
• Scan documents and photos directly to the desktop in
popular file formats, such as PDF, JPEG, and TIFF.
• Use the Explorer-like folder system to organize all your
documents and photos on your computer or on the
network. You can color-code your folders and add any
existing folder to PaperPort without moving it within
your file system.
• View large, clear thumbnail images of your scanned
image files.
Page 7

OmniPage SE
ScanSoft OmniPage SE converts paper and Adobe PDF
files into editable digital documents. Using OCR (optical
character recognition) and page layout preservation
capabilities, OmniPage eliminates re-typing of static
documents and unlocks content in PDF files. Key features
include:
• Set up custom workflows, such as a template to
automatically recognize a 20 page PDF file, convert it
into a Word document, e-mail it, and save a copy to
your local hard drive.
• OmniPage Pro 14 Office lets you automate the
conversion of paper and PDF documents into industrystandard XML documents.
Configuring the MFP
Note: In the United States, as required by FCC
regulations, a heading must be included on all
FAX messages. The heading must include the
date and time it is sent and an identification of
the business or other entity, or other individual
sending the message, and the telephone
number of the sending machine or such
business, other entity, or individual.
3. Using the arrow keys and on-screen keypad, enter
the Administrator password. Highlight Done and
press Enter.
4. Using the Down arrow key, scroll to Fax Setup and
press Enter.
5. Press Enter to select the Clock Adjustment menu.
6. Using the arrow keys and keypad, enter the time and
date.
7. Press Enter to confirm.
8. Using the Down arrow key, scroll to Basic Setup and
press Enter.
9. Using the Down arrow key, scroll to Country Code
and press Enter.
10. Using the arrow keys, scroll to the country in which
the MFP is situated and press Enter to confirm.
11. Using the Down arrow key, scroll to Local Phone No.
and press Enter
12. Using the keypad or arrow keys, type in the local
phone number press Enter to confirm.
13. Using the Down arrow key, scroll to Sender ID and
press Enter.
14. Using the keypad or arrow keys and the on-screen
keypad, type in the sender ID.
Default Passwords/PIN
Before using this MFP, a few basic settings have to be
carried out.
Ensure that you have the relevant permission/PIN
numbers before starting.
The Factory set default passwords/PIN are:
Administrator aaaaaa
PIN 000000
Network (web page) aaaaaa
Fax Receiving (MB470 &
MB480 only)
This MFP’s fax will automatically answer the telephone
after the Ring Response delay. For information on setting
this, see “Setting the Ring Response” on page 7.
Setting Fax Parameters
Follow these instructions to set the Date and Time (clock
adjustment), Country Code, Local Phone No., and Sender
ID.
1. Using the Down arrow key, scroll to Menu and press
Enter.
15. Highlight Done and press Enter.
Setting the Ring Response
The fax facility of this MFP will automatically answer the
incoming ringtone after the delay period set by the ring
response.
The factory default for ring response is 1 ring. This can be
set up to 20 seconds in the Admin Menu as follows (you
need to have administrator rights to alter this setting):
1. In the top level screen, scroll down to Menu and
select using the Enter key.
2. In the drop down menu, scroll down to the Admin
Menu and select using the Enter key. Enter the
password.
3. In the drop down menu, scroll down to Fax Setup
and select using the Enter key.
4. In the drop down menu, scroll down to Basic Setup
and select using the Enter key.
5. In the drop down menu, scroll down to the Ring
Response and select using the Enter key.
6. In the drop down menu, scroll down to the response
time required and select using the Enter key.
7. Using the Left arrow key, return to the top level
menu.
2. Using the Down arrow key, scroll to Admin Setup
and press Enter.
7 English
Page 8

Setting Access Control
The operation and functionality of this machine can be
limited only to authorized personnel by the simple
introduction of a 4-9 digit PIN (Personal Identification
Number). This is known as Access Control. The greater the
number of digits in the PIN, the more secure it is.
Enable/Disable Access Control
To enable Access Control, use the menu to go to: Menu
>Admin Setup>System Setup>Access Control and
select Enable.
• With Access Control set to Enable, the display reverts
to the System Setup screen immediately following the
setting change. If one of the functions such as Print,
Fax Send or PC Scan is running however, the display
will only revert to the System Setup screen when the
task has been completed.
Entering PIN ID
• With Access Control Enabled, entering a PIN ID is
required to enable setting up various utilities.
• Enter the PIN ID via the Ten Key pad.
• A valid PIN ID consists of 4 to 9 digits.
• The numbers entered are not displayed on the Enter
PIN ID screen, being replaced by '*'.
• The MFP supports the following 2 kinds of PIN ID:
Administrator PIN ID — This is the PIN ID for the
system administrator(s). If a PIN ID is registered as
an administrator, the Admin password entry screen is
displayed, and, when an Admin password is entered,
it will be authenticated as an administrator.
User PIN ID — This is PIN ID for general users. If a
PIN ID is registered as a general user, the function
selection screen is displayed, also after PIN ID entry
the function selection screen is displayed.
• Invalid PIN ID: If the PIN number entered is invalid,
Incorrect Password is displayed for 3 seconds and
the display reverts to the Enter PIN ID screen.
Operation Time-out
• When the MFP operation panel is left inactive for a
prescribed length of time (Operation Time-out), the
display automatically reverts to the Idle screen if
Access Control is disabled.
• If an error state occurs, Operation Time-out is
disabled.
• After Operation Time-out, the display automatically
reverts to the Enter PIN ID screen if Access Control is
enabled.
• The length of the Operation Time-out depends on the
setting in Menu Mode>Admin Setup >System
Setup > Return to Stand-by Time.
Logout operation
If Logout is selected or an Operation Time-out occurs, the
display reverts to the Enter PIN ID screen.
Logout by user
With Access Control enabled, Logout options are displayed
in the Menu on the Mode Selection screen.
When the cursor is moved to Logout and the Enter key is
pressed, the display reverts to the Confirm Logout screen.
If Yes is selected with the Enter key on the Confirm Logout
screen, the display reverts to the Enter PIN ID screen.
8 English
Page 9
Minimum Configuration
Requirements
To make the best of this MFP, the following configuration
is required:
To send Faxes (MB470 & MB480 only):
• A PSTN telephone line connection.
To send e-mail:
•TCP/IP network.
•A SMTP and an optional POP3 server.
• Default “From” Address (this MFP’s Address).
To file document(s) via intranet:
• FTP, or CIFS Protocol environment.
• Windows 2000, Windows XP, Windows Vista,
Mac OS X, Linux (PS3 only), or FTP server.
Internet Communication
Features
Pre-Installation Information
The MFP has to be set up properly on your network to
perform scan to e-mail and other functions. In order for
other network devices to find the MFP on the network, the
following network parameters have to be set:
1. IP Address Set:
2. IP Address: . . .
3. Subnet mask: . . .
4. Gateway IP: . . .
5. DNS server: . . .
6. SMTP server: . . .
7. SMTP port: 25
8. POP3 server: . . .
9. POP3 Port: 110
For an Explanation of these settings, see the online
User’s Guide on the CD.
Setting up an SMTP Server
This section explains setting up an SMTP server.
1. Using the Down arrow keys, scroll to the Menu
function and press Enter.
2. Using the Down arrow key, scroll to Admin Setup
and press Enter.
3. Using the arrow keys and on-screen keypad, enter
the Administrator password. Highlight Done and
press Enter.
4. Using the Down arrow key, scroll to Network Setup
and press Enter.
5. Using the Down arrow key, scroll to Mail Server
Setup and press Enter.
6. Press Enter to select SMTP server and then press
Enter again.
7. Enter your IP address.
Numbers are entered using the Ten Key pad. When a
number is entered from the Ten Key pad, the number
currently displayed is cleared and the number just
entered is displayed as the first digit. When another
number is entered, the number in the first digit
moves to the next, and so on.
8. To confirm, press the Enter key. To cancel the IP
address, move the cursor to the first field and then
press the Left arrow key.
Operating the MFP
Scanning and Copying
Documents
The MFP can scan/copy/send document(s) using either the
ADF (Automatic Document Feeder) or manually on the
glass.
If you want to scan/copy/send multiple pages, use the
ADF. The ADF can hold up to 50 pages at one time.
If you want to scan/copy/send pages from books,
newspaper clippings, or paper with wrinkles or curls, use
the glass.
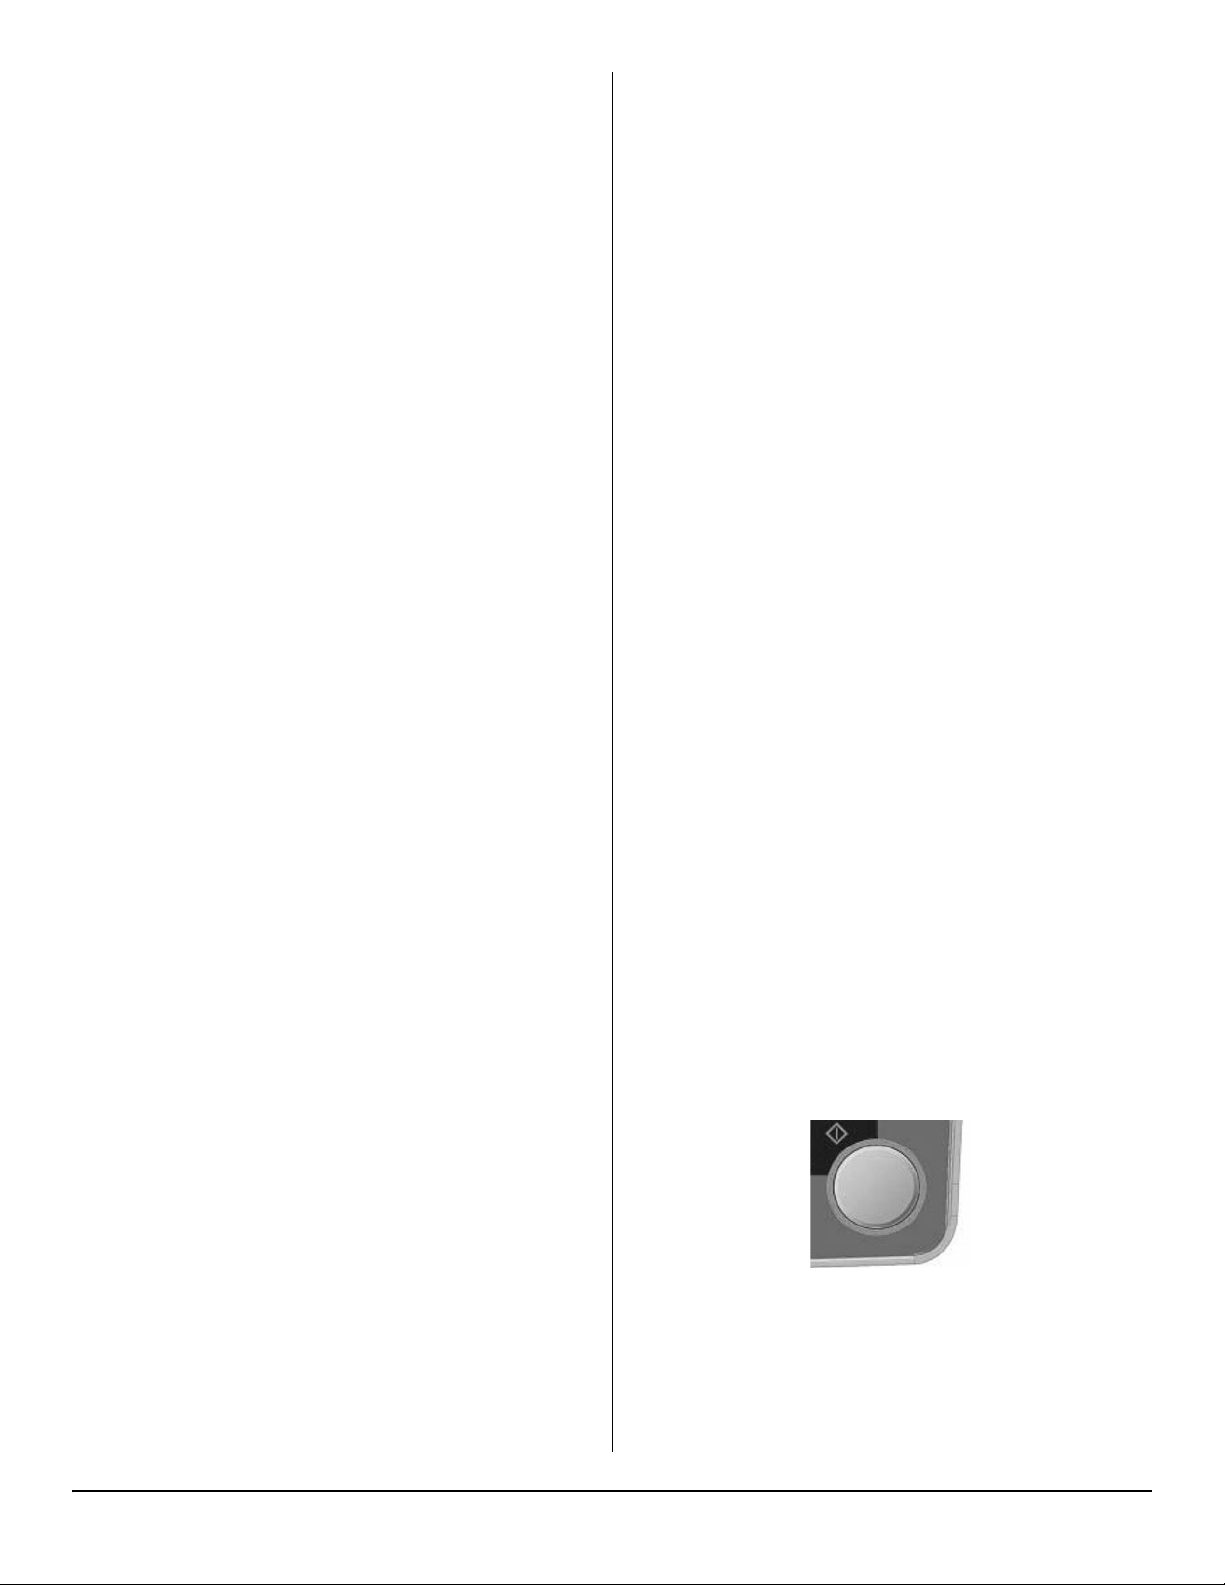
To make an instant copy, press the START button.
Scan to E-mail
The MFP allows you to deliver your scanned document to
e-mail addresses on the network. The document is first
scanned and converted to a standard PDF, JPEG, or TIFF
file format and then transmitted to remote recipients
simultaneously as an e-mail attachment.
When you send an e-mail to someone using this MFP it
uses Si m pl e Ma il T ra n sf e r P r ot oco l ( S MT P ) t o tr a ns fe r yo u r
outgoing e-mails to your SMTP mail server, and then send
these e-mails to your recipients via the internet.
9 English
Printing Documents
Your MFP will handle a variety of print media including a
range of paper weights and sizes.
See the User’s Guide on CD1 for general advice on choice
of media, and an explanation of how to use each type.
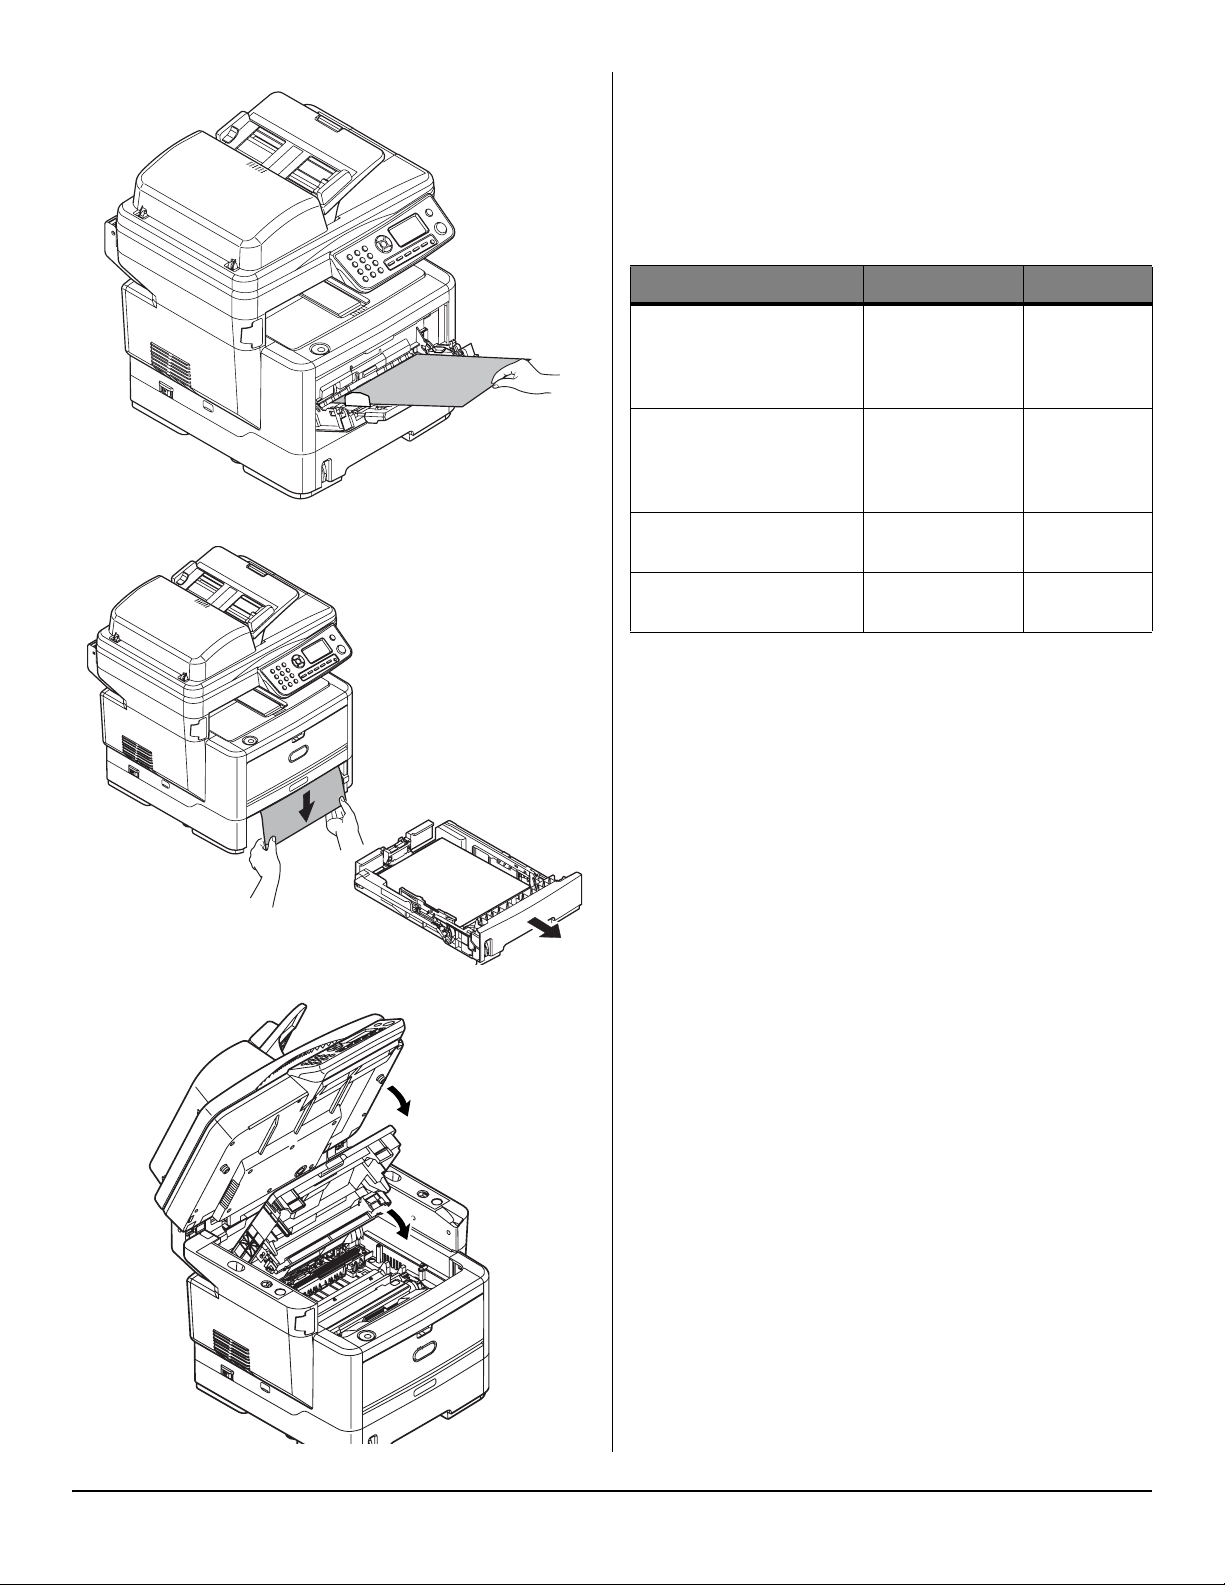
Page 10
Clearing Media Jams
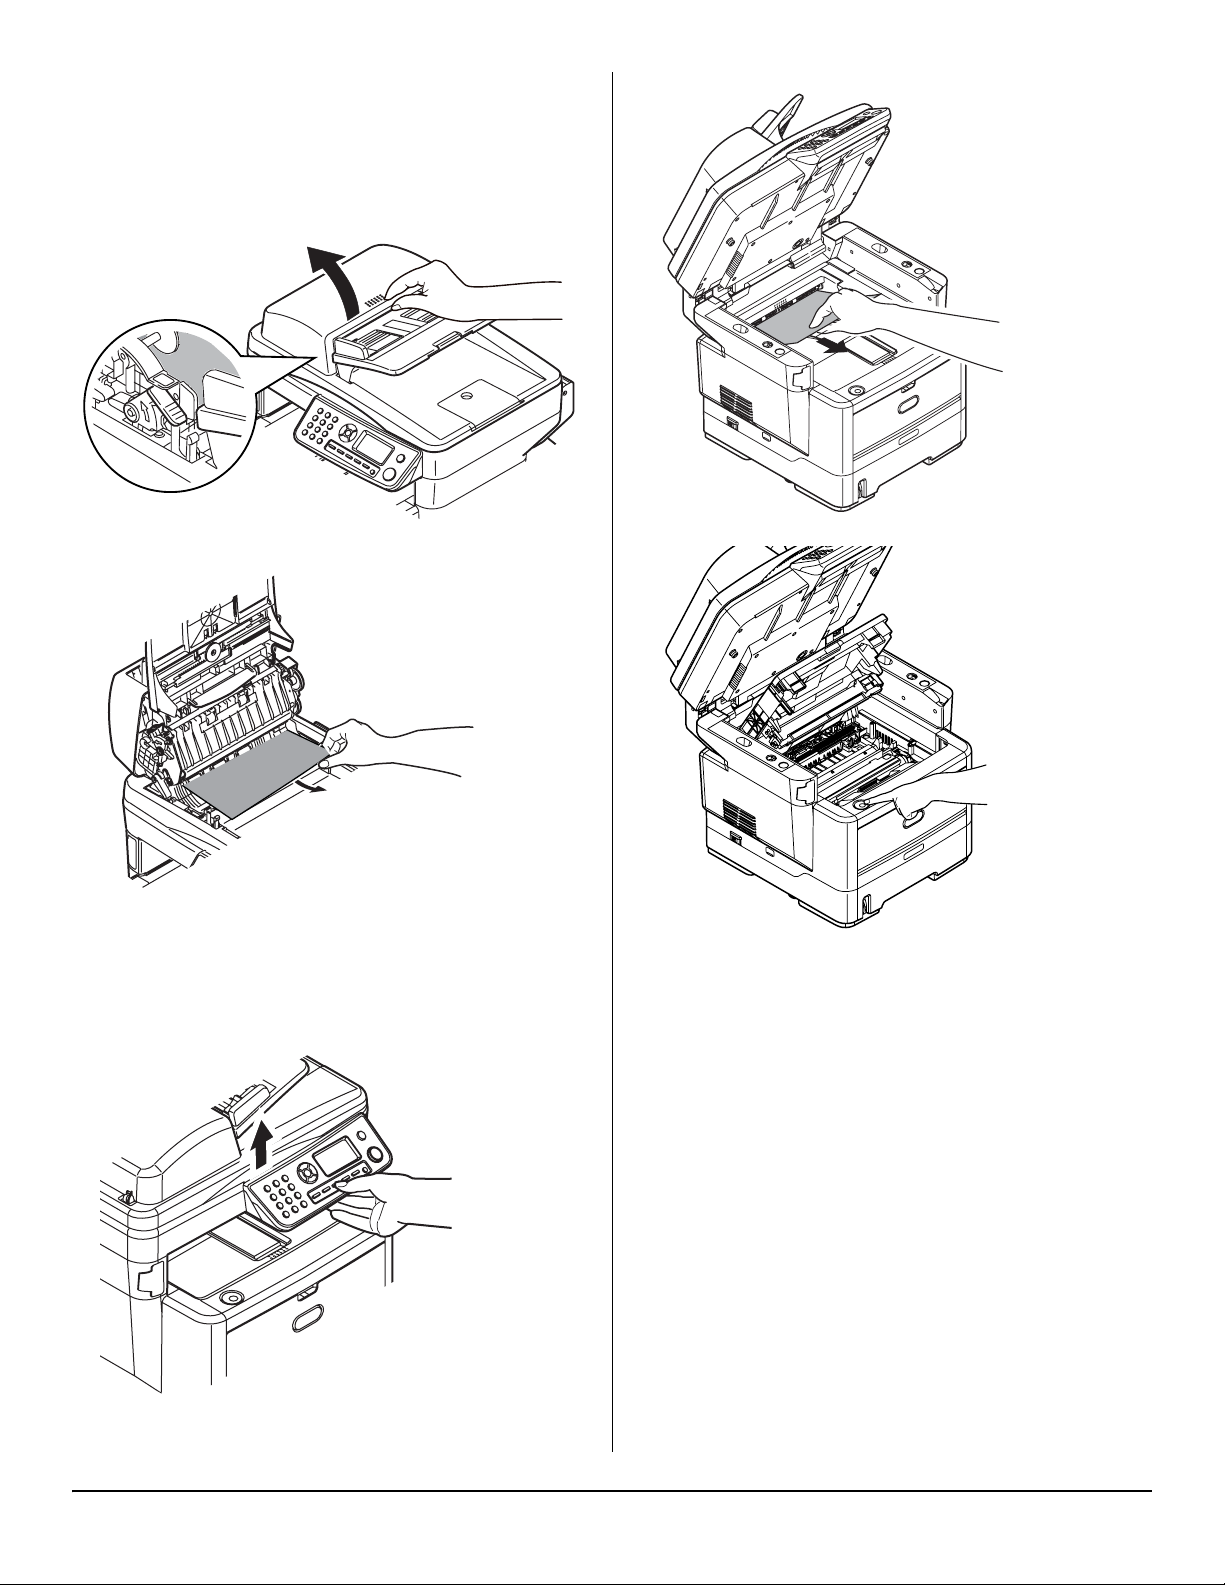
ADF Document Jam
1.
2.
2.
Printer Jams
1.
3.
CAUTION! The fuser may be hot! It is clearly labelled.
Do not touch.
10 English
Page 11
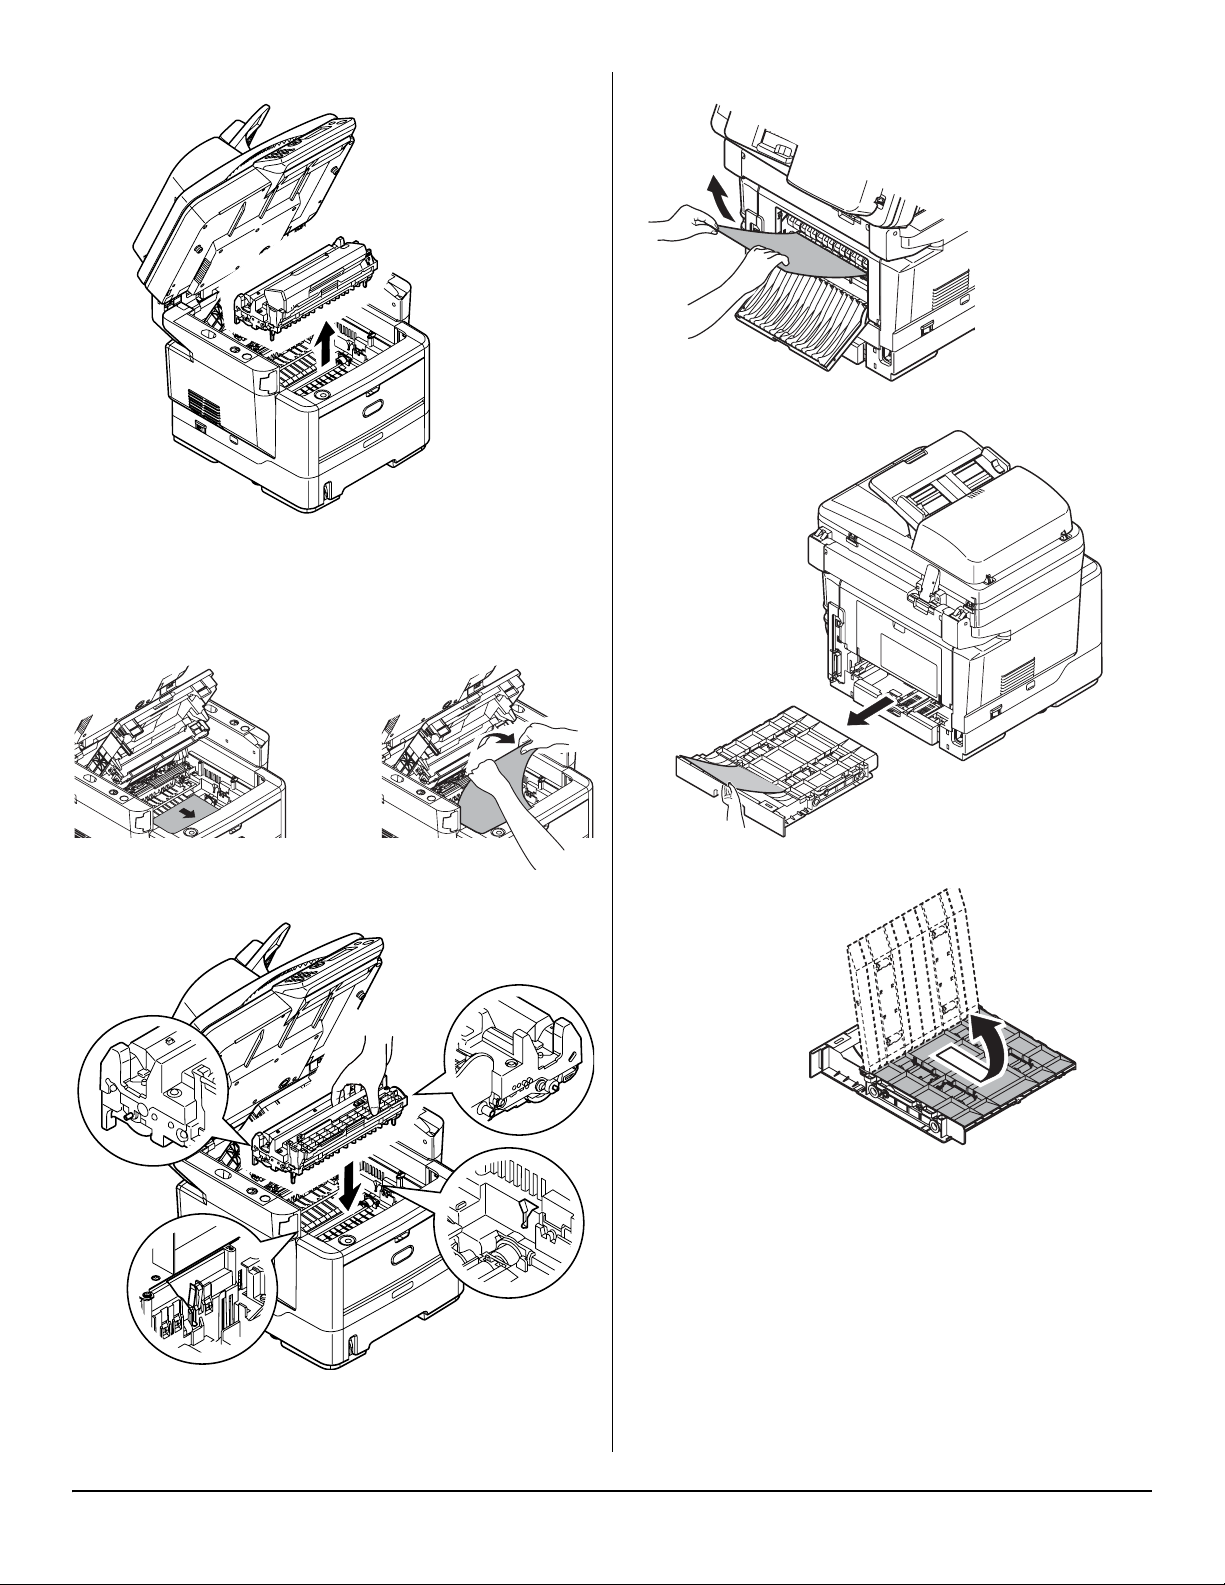
4.
CAUTION! Do not touch the green image drum
surface or expose it to light for more than 5
minutes.
5.
7.
8.
6.
11 English
Page 12
9.
Maintenance
Replacing Toner Cartridges &
the Image Drum
Item Life Order No.
10.
11.
Toner standard
MB460 MFP,
MB470 MFP,
MB480 MFP
Toner high capacity
MB460 MFP,
MB470 MFP,
MB480 MFP
Toner high capacity
MB480 only
Image Drum 25,000 A4
Only use genuine original consumables to ensure the best
quality and performance from your hardware. Non original
products may adversely affect your printer's performance
and invalidate your warranty.
3,500 A4@
ISO/IEC19752
7,000 A4@
ISO/IEC19752
12,000 A4@
ISO/IEC19752
pages
43979101
43979201
43979215
43979001
Where to Purchase
• Consult the dealer where you purchased your
system.
• Consult an Oki Data Authorized Sales or Service
Dealer. For the nearest dealer, call 1-800-654-
3282.
• U.S., Puerto Rico, Guam, U.S. Virgin Islands: Order
on the Internet www.okiprintingsolutions.com.
• U.S. only: Order toll-free at 1-800-654-3282, using
®
, MasterCard®, AMEX®.
VISA
12 English
Page 13

Installation des pilotes et utilitaires du MPF
9. Sélectionnez de modèle de l’imprimante.
10. À l'invite, sélectionnez une ou les deux émulations de
l'imprimante :
Note :
Vous devez être connecté en tant qu’administrateur ou appartenir au groupe des administrateurs
pour exécuter cette procédure. Si votre ordinateur
est connecté à un réseau, les paramètres de règle
du réseau peuvent également vous empêcher
d’effectuer cette procédure.
Pilote d'imprimante
Note : Installez le logiciel avant de connecter le câble à
l’imprimante.
1. Éteignez l’imprimante.
2. Insérez le CD1 dans l’unité de CD. Le CD est lancé
automatiquement.
3. Sélectionnez la langue d’installation.
4. Acceptez le contrat de license.
5. Dans Driver Setup (Paramétrage du pilote), cliquez
sur Installer le pilote d’impression.
•PCL
• PS (Postscript) (MB470 & MB480 uniquement)
• FAX : (MB470 & MB480 uniquement) Le pilote
d'imprimante télécopieur permet d’envoyer des
fax directement à partir de l’ordinateur sans
imprimer les documents au préalable. Avec le
pilote de télécopieur d’OKI, vous envoyez des
données de fax directement à partir de
l’ordinateur vers le MPF et ce dernier envoie
automatiquement le document.
11. Observez les directives à l’écran.
12. À l'invite, branchez le câble approprié et mettez sous
tension l'imprimante.
Logiciels réseau
L'installation des utilitaires Network Software (Logiciels
réseau) est facultative. On les retrouve sur le CD1 et
comprennent les suivants : Network Card Setup Utility
(Utilitaire de configuration de la carte réseau), Direct
Network Printing Utility (LPR) (Utilitaire d'impression
réseau directe) et Network Extension (Extension réseau).
Utilitaires optionnels
Vous pouvez également installer les utilitaires optionnels
fournis sur le CD1, qui comprennent les suivants : Change
the Printer Display Language (Modifier la langue
d'affichage de l'imprimante) et PS Gamma Adjuster Install
(Installer le correcteur gamma PS).
6. Cliquez sur imprimante locale ou network.
7. Si vous sélectionnez l'« imprimante locale » :
Sélectionnez le port à utiliser avec l'imprimante : USB
(Universal Serial Bus), LPT (un port local) ou FICHIER
(un port local).
Si vous sélectionnez « network » :
Sélectionnez ensuite la méthode de raccordement de
l'imprimante au réseau :
- Utilisant directement TCP/IP (sélectionnez cette
option si votre imprimante est raccordée directement
au réseau)
- Indirectement par l'intermédiaire d'un autre
ordinateur (si l'imprimante est partagée sur un autre
ordinateur, entrez son nom dans le champ prévu à cet
effet; si vous ne connaissez pas son nom, cliquez sur
Suivant pour rechercher les imprimantes partagées)
8. Entrez l'adresse IP de l'imprimante.
Téléchargements Internet
L'installation de l'utilitaire Internet Downloads
(Téléchargements Internet) est facultative. On retrouve
cet utilitaire sur le CD1.
Une fois installé, lancez votre navigateur Web pour
accéder au site Web d'Oki. Vous trouverez sur ce site des
téléchargements pour le modèle d'imprimante
sélectionné.
Guides de l'utilisateur
L'installation des guides de l'utilisateur est facultative. On
les retrouve sur le CD1.
13 Français
Page 14

Outil de configuration du MPF
(Windows uniquement)
L’installation de l’utilitaire de configuration du MPF est
facultative et peut être effectuée à partir du CD2 de
utilitaires (MFP Utilities) sous le dossier des utilitaires
(Utilities). Sélectionnez l'option Install Configuration Tool
(Installer l'Outil de configuration).
L’outil de configuration du MPF peut repérer des
périphériques MB4x0 MFP via des connexions USB ou
réseau.
Comme le programme de configuration ne place pas
automatiquement d’icône sur le bureau, y accéder via si
vous le souhaitez, vous pouvez faire glisser cette icône sur
le bureau pour faciliter toute utilisation ultérieure.
Ce logiciel comprend 5 fonctions principales :
• MFP Settings (Paramètres MFP)
• Address Book Manager (Gestionnaire de carnet
d'adresses)
• Phone Book Manager (Gestionnaire de
répertoire téléphonique)
• Profile Manager (Gestionnaire de profils)
• PIN Manager (Gestionnaire d’identificateurs
PIN)
MFP Settings (Paramétrage MFP)
Permet de modifier la plupart des paramètres que vous
pourriez voir sur le panneau de commande du MFP sur un
PC connecté en local.
Les paramètres comprennent un menu d’administration.
Celui-ci est protégé par un mot de passe et masqué par
défaut. Pour activer le menu d’administration,
sélectionnez : Setting (Paramétrage) > MFP Setting
(Paramétrage MFP) > Display (Affichage) > Administrator
Menu (Menu administrateur) et entrez le mot de passe du
MFP.
Address Book Manager (Gestionnaire
de carnet d'adresses)
Ajoute des noms et des adresses électroniques et les
affecte à des identificateurs (pour la fonction de
numérisation vers la messagerie électronique du MFP).
• Répartit les personnes en groupes.
• Importe et exporte des paramètres vers des
fichiers CSV.
• Importe des paramètres à partir d'autres
périphériques MPF Oki.
Phone Book Manager (Gestionnaire
de répertoire téeléphonique)
Permet de géerer des personnes et des numéros de fax
(pour la fonction de numérisation vers un télécopieur de
MFP). Ajoute des noms et des numéros de fax et les
affecte à des numéros de composition abrégée.
• Répartit les personnes en groupes.
• Importe et exporte des paramètre vers des
fichiers CSV.
• Importe des paramètre à partir d’autres
périphériques MPF Oki.
Profile Manager (Gestionnaire de
profils)
Un profil est un ensemble de paramètres enregistrés pour
la numérisation vers un PC en réseau. Il est constitué par
les éléments suivantes :
• Informations permettant la connexion au PC en
réseau (protocole, port, nom d’utilisateur, mot
de passe, etc.)
• Format de papier
• Format de fichier vers lequel effectuer la
numérisation (PDF, TIFF, JPEG) et paramètres
de format, tels que la résolution et la
compression
• Importation et exportation de paramètres vers
des fichiers CSV
• Importation de paramètres à partir d'autres
périphériques MPF Oki
PIN Manager (Gestionnaire
d’identificateurs PIN)
Le contrôle d’accès au MFP peut être activé sur le panneau
avant. Dans ce cas, un numéro d’identification personnel
(PIN - Personal Identification Number) est requis pour
utiliser le MFP. PIN Manager crée des codes PIN et leur
affecte des droits indiquant si les personnes
correspondantes peuvent copier, imprimer ou numériser
vers une messagerie électronique, vers un PC du réseau
ou vers un télécopieur.
• Importe et exporte des paramètres vers des
fichiers CSV.
• Importe des paramètres à partir d'autres
périphériques MPF Oki.
14 Français
Page 15

Utilitaire Actkey
(Windows uniquement,
USB uniquement)
L'installation de l'utilitaire Actkey est facultative et on le
retrouve sur le CD 2 des logiciels MFP dans le dossier des
utilitaires (MFP Utilities).
Cet utilitaire est un outil permettant d'effectuer des
opérations de numérisation courantes. Grâce à lui,
l'appareil peut recevoir des commandes à une touche de
l'ordinateur raccordé à l'appareil.
Configuration du MFP
Note: Aux États-Unis, conformément aux règlements
de la FCC, une en-tête doit étre incluse avec tous
les messages par fax. L'en-tête doit comprendre
la date et l'heure auxquelles la télécopie est
envoyée ainsi qu'une identification de
l'entreprise ou de l'entité ou de toute personne
envoyant la télécopie, ainsi que le numéro de
téléphone du télécopieur, de l'entreprise, de
l'entité ou de la personne envoyant la télécopie.
Utilitaires ScanSoft
L'installation des utilitaires ScanSoft est optionnelle et on
les retrouve sur le CD 2 des logiciels MFP dans le dossier
des utilitaires (MFP Utilities).
PaperPort
PaperPort est une application de gestion des documents
utilisée pour organiser, accéder, partager et gérer les
fichiers de documents et d'images sur votre ordinateur
personnel. Voici quelques caractéristiques clés de cette
application :
• Numérisez des documents et des photos directement
depuis le bureau et sauvegardez les fichiers de
numérisation dans les formats populaires, notamment
PDF, JPEG et TIFF.
• Utilisez le système de dossiers semblable à
l'Explorateur pour organiser tous vos documents et
toutes vos photos sur votre ordinateur ou le réseau.
Vous pouvez coder vos dossiers par couleur et ajouter
tout dossier existant à PaperPort sans le déplacer au
sein de votre système de fichiers.
• Visualisez de grosses images miniatures nettes de vos
fichiers d'images numérisées.
OmniPage SE
OmniPage SE de Scansoft convertit les documents papier
et les fichiers PDF d'Adobe en documents numériques
modifiables. En utilisant les fonctions de ROC
(reconnaissance optique des caractères) et de
conservation de la disposition des pages, OmniPage
élimine le besoin de retaper le texte des documents
statiques et déverrouille le contenu des fichiers PDF. Voici
quelques caractéristiques clés de cette application :
• Créez des flux de travail personnalisés, comme un
modèle pour traiter automatiquement un fichier PDF
de 20 pages, le convertir en document Word, l'envoyer
par courriel et en sauvegarder une copie sur votre
disque dur local.
• OmniPage Pro 14 Office permet d'automatiser la
conversion des documents papier et PDF en documents
XML aux normes de l'industrie.
Mots de passe/code PIN
Avant d’utiliser ce MFP, vous devez définir quelques
paramètres de base.
Assurez-vous que vous disposez des droits/codes PIN
appropriés avant de commencer.
Les mots de passe/code PIN par défaut définis en usine
sont les suivants :
Administrateur aaaaaa
Code PIN 000000
Réseau (page Web) aaaaaa
Réception de fax (MB470 &
MB480 uniquement)
Le télécopieur du MFP répond automatiquement au
téléphone à l’issue du délai de prise de ligne. Pour plus
d'informations sur ce paramètre, reportez-vous à la
section “Délai de prise de ligne” sur la page 16.
Configuration des paramètres de fax
Suivez les directives suivantes pour régler la date et
l'heure (réglage de l'horloge), le code de pays, le numéro
de téléphone local et l'ID de l'expéditeur.
1. Utilisez la flèche vers le bas et faites défiler l'affichage
jusqu'à Menu et appuyez sur Entrée.
2. Utilisez la flèche vers le bas et faites défiler l'affichage
jusqu'à Configuration admin. et appuyez sur
Entrée.
3. Utilisez les touches fléchées et le clavier à l'écran
pour entrer le mot de passe de l'administrateur.
Mettez en surbrillance Terminé et appuyez sur
Entrée.
4. Utilisez la flèche vers le bas et faites défiler l'affichage
jusqu'à Paramétrage fax et appuyez sur Entrée.
5. Appuyez sur Entrée pour sélectionner le menu
Réglage horloge.
6. Utilisez les touches fléchées et le clavier pour entrer
la date et l'heure.
7. Appuyez sur Entrée pour confirmer.
15 Français
Page 16

8. Utilisez la flèche vers le bas et faites défiler l'affichage
jusqu'à Réglages de base et appuyez sur Entrée.
9. Utilisez la flèche vers le bas et faites défiler l'affichage
jusqu'à Code de pays et appuyez sur Entrée.
10. Utilisez les touches fléchées pour faire défiler l'écran
jusqu'au pays où se situe l'appareil MFP et appuyez
sur Entrée pour confirmer.
11. Utilisez la flèche vers le bas et faites défiler l'affichage
jusqu'à N° de téléphone local et appuyez sur
Entrée.
12. Utilisez le clavier ou les touches fléchées pour entrer
le numéro de téléphone local et appuyez sur Entrée
pour confirmer.
13. Utilisez la flèche vers le bas et faites défiler l'affichage
jusqu'à ID expéditeur et appuyez sur Entrée.
14. Utilisez le clavier, les touches fléchées ou le clavier en
ligne pour entrer l'ID de l'expéditeur.
15. Mettez en surbrillance Terminé et appuyez sur
Entrée.
Contrôle d'accès
L’exploitation et les fonctionnalités de cet appareil
peuvent être limitées au personnel autorisé. Il suffit pour
cela de saisir un code PIN de 4 à 9 chiffres (Personal
Identification Number – numéro d’identification
personnel). Cette fonction est appelée Contrôle d’accès.
Plus les chiffres du code PIN sont nombreux, mieux
l’appareil est protégé.
Activation/Désactivation du contrôle
d'accès
Pour activer le contrôle d'accès, utilisez le menu pour
accéder à : Menu > Configuration admin. > Réglages
système > Contrôle d'accès et sélectionnez Activer.
• Lorsque le contrôle d'accès a pour valeur Activer,
l’écran Réglages système réapparaît immédiatement
après la modification du paramètre. Toutefois, si l’une
des fonctions telles que l’impression, l’envoi d’un fax
ou la numérisation PC s’exécute, l’écran Réglages
système réapparaît qu’une fois la tâche terminée.
Délai de prise de ligne
La fonction télécopieur de ce MFP répond
automatiquement à la sonnerie à l’issue de la période
définie pour le délai de prise de ligne.
La valeur par défaut définie par le fabricant pour le délai
de prise de ligne est d’une sonnerie. Ce délai peut être
porté à 20 secondes dans le menu d’administration en
procédant comme suit (vous devez disposer des droits
d’administrateur pour modifier ce paramètre) :
1. Dans l’écran de niveau supérieur, faites défiler
l’affichage jusqu’à Menu et sélectionnez à l’aide de la
touche Entrée.
2. Dans le menu déroulant, faites défiler l’affichage
jusqu’à Admin Menu (Menu Admin.) et sélectionnez
à l’aide de la touche Entrée. Entrez le mot de passe.
3. Dans le menu déroulant, faites défiler l’affichage
jusqu’à Paramétrage fax et sélectionnez à l’aide de
la touche Entrée.
4. Dans le menu déroulant, faites défiler l’affichage
jusqu’à Réglages de base et sélectionnez à l’aide de
la touche Entrée.
5. Dans le menu déroulant, faites défiler l’affichage
jusqu’à Délais prise de ligne et sélectionnez à l’aide
de la touche Entrée.
6. Dans le menu déroulant, faites défiler l’affichage
jusqu’au temps de réponse requis et sélectionnez à
l’aide de la touche Entrée.
7. Utilisez la flèche vers la gauche pour revenir au menu
de niveau supérieur.
Saisie de l’identificateur PIN
• Lorsque le contrôle d'accès a pour valeur Activer, la
saisie d’un identificateur PIN est requise pour
permettre la configuration de différents utilitaires.
• Entrez l’identificateur PIN à l’aide du clavier à dix
touches.
• Un identificateur PIN correct comprend 4 à 9 chiffres.
• Les chiffres entrés ne s’affichent pas sur l’écran Entrer
code PIN ; ils sont remplacés par des astérisques (*).
• Le MFP prend en charge deux types d’identificateur
PIN.
Identificateur PIN administrateur — Il s’agit de
l’identificateur PIN de l’administrateur ou des
administrateurs système. Si un identificateur PIN est
enregistré comme étant celui d’un administrateur,
l’écran de saisie du mot de passe administrateur
s’affiche. Lorsqu’un mot de passe administrateur est
entré, l’utilisateur est authentifié comme étant un
administrateur.
Identificateur PIN utilisateur — Il s’agit de
l’identificateur PIN des utilisateurs quelconques. Si un
identificateur PIN est enregistré comme étant celui d’un
utilisateur quelconque, l’écran de sélection de fonction
s’affiche. Après la saisie de l’identificateur PIN, c’est
également cet écran qui apparaît.
• Identificateur PIN incorrect : Si le code PIN entré est
incorrect, le message Mot de passe incorrect
s’affiche pendant trois secondes et l’écran Entrer code
PIN réapparaît.
Déconnexion
Si Sortir est sélectionné ou si une expiration de délai a lieu
pour une opération, l’écran Entrer code PIN réapparaît.
16 Français
Page 17

Déconnexion par l’utilisateur
Lorsque le contrôle d’accès est activé, des options de
sortie s’affichent dans le menu de l’écran de sélection de
mode.
Si vous placez curseur sur Sortir et que vous appuyez sur
la touche Entrée, l’écran de confirmation de sortie
s’affiche.
Si Oui est sélectionné avec la touche Entrée sur l’écran de
confirmation de sortie, l’écran Entrer code PIN réapparaît.
Expiration de délai pour une
opération
• Lorsque le panneau de commande du MFP reste inactif
pendant une durée définie (délai d’expiration pour une
opération), l’écran de veille réapparaît
automatiquement si le contrôle d’accès est désactivé.
• Si un état d’erreur survient, le délai d’expiration est
désactivé.
• Si une expiration de délai a lieu pour une opération,
l’écran Entrer code PIN réapparaît automatiquement si
le contrôle d’accès est activé.
• La durée de l’expiration de délai est fonction de la
valeur de Mode menu > Configuration admin. >
Réglages système > Délai ret. par déf.
Fonctionnalités de
communication internet
Informations de préinstallation
Le MFP doit être correctement configuré sur votre réseau
pour exécuter les fonctions de numérisation vers
messagerie et d’autres fonctions. Pour que les autres
périphériques réseau trouvent le MFP sur le réseau, les
paramètres ci-après doivent être définis :
1. Adresse IP définie :
2. Adresse IP : . . .
3. Masque sous-réseau : . . .
4. Passerelle IP : . . .
5. Serveur DNS : . . .
6. Serveur SMTP : . . .
7. Port SMTP : 25
8. Serveur POP3 : . . .
9. Port POP3 : 110
Pour plus d’information sur le fonctionnement de
l’apparell, consultez le Guide de l’utilisateur en ligne
sur le CD.
Configuration minimale
requise
La configuration suivante permet d’optimiser l’utilisation
de ce MFP :
Pour envoyer des fax (MB470 & MB480
uniquement)
• Une connexion de ligne téléphonique PSTN.
Pour envoyer des courriers
électroniques :
• Réseau TCP/IP
• Un serveur SMTP et un serveur POP3 facultatif
• Adresse d’expéditeur par défaut (adresse de ce MFP)
Pour archiver des documents via un
intranet :
• Environnement de protocole FTP ou CIFS
• Windows 2000, Windows XP, Windows Vista,
Mac OS X, Linux (PS3 uniquement) ou serveur FTP.
:
Numérisation vers la messagerie
électronique
Le MFP vous permet d’envoyer vos documents numérisés
à des adresses de courrier électronique via le réseau. Le
document est d’abord numérisé et converti dans un
format de fichier PDF, JPEG ou TIFF standard, puis est
transmis simultanément à des destinataires distants sous
forme de pièce jointe.
Lorsque vous envoyez un courrier électronique à l’aide du
MFP, ce dernier utilise le protocole SMTP (Simple Mail
Transfer Protocol) pour transférer vos courriers sortants
vers votre serveur de messagerie SMTP, puis envoie ces
courriers à vos destinataires via Internet.
Configuration d'un serveur SMTP
Cette section explique comment configurer un serveur
SMTP.
1. Utilisez la flèche vers le bas et faites défiler l'affichage
jusqu'à Menu et appuyez sur Entrée.
2. Utilisez la flèche vers le bas et faites défiler l'affichage
jusqu'à Configuration admin. et appuyez sur
Entrée.
3. Utilisez les touches fléchées et le clavier à l'écran
pour entrer le mot de passe de l'administrateur.
Mettez en surbrillance Terminé et appuyez sur
Entrée.
4. Utilisez la flèche vers le bas et faites défiler l'affichage
jusqu'à Réseau et appuyez sur Entrée.
17 Français
Page 18

5. Utilisez la flèche vers le bas et faites défiler l'affichage
jusqu'à Serveur réseau et appuyez sur Entrée.
6. Appuyez sur Entrée pour sélectionner Serveur
SMTP et appuyez de nouveau sur Entrée.
7. Entrez votre adresse IP.
Les nombres sont entrés à l’aide du clavier à dix
touches. Lorsqu’un chiffre est entré à partir du
clavier à dix touches, le nombre actuellement affiché
s’efface et le chiffre entré s’affiche en tant que
premier chiffre. Lorsqu’un autre chiffre est entré, le
premier chiffre se décale, et ainsi de suite.
8. Pour confirmer, appuyez sur la touche Entrée. Pour
annuler l’adresse IP, placez le curseur sur le premier
champ et appuyez sur la flèche gauche.
Utilisation du MFP
Numérisation et copie des
documents
Le MFP peut numériser/copier/envoyer des documents se
trouvant soit dans le chargeur automatique de documents
(ADF - Automatic Document Feeder), soit sur la vitre de
numérisation.
Si vous souhaitez numériser/copier/envoyer plusieurs
pages, utilisez le chargeur automatique de documents. Ce
dernier peut contenir jusqu’à 50 pages.
Si vous souhaiter numériser/copier/envoyer des pages
d'un livre, des coupures de journaux ou du papier corné
ou ondulé, servez-vous de la vitre de numérisation.
Pour faire une copie instantanée, appuyez sur la touche
START.
Impression des documents
Votre MFP peut employer divers supports d'impression
incluant une gamme d'épaisseurs et de dimensions de
papier.
Consultez le Guide de l'utilisateur sur le CD1 pour obtenir
des conseils généraux sur le choix de supports et une
explication de leur usage respectif.
18 Français
Page 19

Dégagement des
bourrages
Bourrage de document dans
ADF
1.
2.
Bourrages dans l’imprimante
1.
2.
3.
19 Français
Page 20

MISE EN GARDE! L’unité de fusion peut être très
chaude. Une étiquette est apposée clairement sur
cette partie. Ne pas toucher.
4.
MISE EN GARDE! Ne touchez pas la surface verte
du tambour d'impression. N'exposez jamais la
cartouche du tambour d'impression à la lumière
pendant plus de 5 minutes.
7.
8.
5.
6.
20 Français
Page 21

9.
Maintenance
Remplacement des cartouches
de toner et de tambour
d'impression
10.
Élément Usage
Cartouche de toner
ordinaire
MB460 MFP,
MB470 MFP,
MB480 MFP
Cartouche de toner
haute capacité
MB460 MFP,
MB470 MFP,
MB480 MFP
Cartouche de toner
haute capacité
MB480 uniquement
Tambour d'image 25,000 A4
Utilisez uniquement des consommables d'origine pour
obtenir une qualité et des performances supérieures avec
l'appareil. Les produits qui ne sont pas d'origine peuvent
avoir un effet néfaste sur les performances de
l'imprimante et annuler votre garantie.
3,500 A4@
ISO/IEC19752
7,000 A4@
ISO/IEC19752
12,000 A4@
ISO/IEC19752
pages
N° de
commande
43979101
43979201
43979215
43979001
11.
Endroits où se procurer
• Consultez le revendeur qui vous a vendu votre
système.
• Consultez un revendeur ou un service après-vente Oki
Data agréé. Pour connaître le revendeur le plus
proche, composez le 1 800 654 3282.
• É.-U., Porto Rico, Guam, Îles Vierges des É.-U. :
Commandez sur Internet à l'adresse.
21 Français
Page 22

Instalación de controladores y utilidades de la
MFP
Nota: Para realizar este procedimiento debe haber ini-
ciado sesión como un administrador o un miembro del grupo de administradores. Si el
ordenador está conectado a una red, los ajustes
de directivas de red también pueden suponer un
impedimento para completar este procedimiento.
Controladores de la impresora
Nota: Instale el software antes de conectar el cable a la
impresora.
1. Apague la impresora.
2. Inserte el CD1 viene con su impresora en la unidata
CD El CD se ejecuta automáticamente.
3. Seleccione su idioma.
4. Aceptar el contrato de licencia.
5. Bajo Driver Setup (Config. de controlador), clique
Instalar el controlador de impresora.
(Siguiente) para buscar en la lista de impresoras
compartidas
8. Entre la dirección IP de la impresora.
9. Seleccione modelo de impresora.
10. Cuando se le indica, seleccione las emulaciones de la
impresora:
•PCL
• PS (Postscript) (sólo MB470 & MB480)
• FAX: (sólo MB470 & MB480) El controlador de
impresora de fax permite enviar faxes
directamente desde el ordenador sin tener que
imprimir antes el documento. Con el controlador
de fax de Oki los datos de fax se envían desde el
ordenador a la MFP y, a continuación, la MFP envía
el documento automáticamente.
Windows XP dispone de soporte de fax integrado,
es decir, puede usar el módem del ordenador para
enviar faxes directamente desde el ordenador.
11. Siga las instrucciones en pantalla.
12. Cuando se le indique, conecte el cable apropiado y
encienda la impresora.
Software de Redes
La instalación de las utilidades del software de redes es
opcional. Las mismas se encuentran en el CD1. El CD
incluye las siguientes utilidades: Network Card Setup
Utility, Direct Network Printing Utility (LPR), y Network
Extension.
6. Seleccione de impresoras local o network.
7. Si selecciona “local”:
Seleccione el puerto que desea utilizar con la
impresora: USB (Universal Serial Bus) LPT (un puerto
local), o FILE (ARCHIVO) (un puerto local)
Si selecciona “network” (red):
Deberá indicar en la ventana como está conectada su
impresora a la red:
- Directamente, utilizando TCP/IP (seleccione esta
opción si su impresora está conectada directamente
a la red)
- Indirectamente, a través de otro PC (si la impresora
está compartida con otro PC, indique el nombre en
el cuadro; si desconoce el nombre, haga clic en Next
Utilidades Opcionales
La instalación de las utilidades opcionales se encuentran
en el CD1. El CD incluye las siguientes utilidades: Cambio
del idioma de visualización de la impresora e instalación
del ajuste de PS Gamma.
Descargas de la Internet
La instalación de los archivos a través de las descargas de
la Internet es opcional. Las mismas se encuentran en el
CD1.
Si los instala, abra su navegador Web para lograr acceso
al sitio Web de Oki. En el sitio Web de Oki encontrará los
archivos que puede bajar para el modelo de su impresora.
Guías del Usuario
La instalación de las Guías del Usuario es opcional. Las
mismas se encuentran en el CD1.
22 Español
Page 23

Herramienta de configuración
de la MFP (sólo Windows)
La instalación de la utilidad de configuración de la MFP es
opcional y está disponible en el CD2 de utilidades, en la
carpeta de utilidades. Seleccione la opción de instalación
de la herramienta de configuración.
La herramienta de configuración de la MFP puede detectar
dispositivos MB4x0 MFP a través de conexiones USB o de
red.
El programa de instalación no coloca automáticamente un
icono en el escritorio. Si lo desea, puede arrastrar y soltar
este icono en el escritorio para facilitar su uso en futuras
ocasiones.
Este software incluye 5 funciones principales:
•Ajustes de la MFP
• Gestor de la libreta de direcciones
• Gestor de la guía de teléfonos
• Gestor de perfiles
• Gestor de PIN
Phone Book Manager (Gestor de la
guía de teléfonos)
Para gestionar personas y números de fax (para la función
“enviar digitalización a fax” de la MFP). Añade nombres y
números de fax y les asigna números de marcación
rápida.
• Distribuye las personas en grupos.
• Importa y exporta los ajustes a archivos CSV.
• Importa los ajustes de otros dispositivos MFP de
Oki.
Profile Manager (Gestor de perfiles)
Un perfil es un conjunto de ajustes guardados para
realizar la digitalización a un PC conectado en red. Un
perfil está compuesto por:
• Detalles para la conexión a un PC conectado en
red (protocolo, puerto, nombre de usuario,
contraseña, etc.)
• Tamaño de papel
• Formato del archivo digitalizado (PDF, TIFF,
JPEG) y ajustes de formato, como la resolución
y la compresión
• Importa y exporta los ajustes a archivos CSV
• Importa los ajustes de otros dispositivos MFP de
Oki
PIN Manager (Gestor de PIN)
MFP Settings (Ajustes de la MFP)
Permite cambiar la mayoría de los mismos ajustes que
están disponibles en un panel de operador de la MFP en un
PC conectado localmente.
Los ajustes incluyen un menú de administrador. Este
menú está protegido mediante contraseña y está oculto de
forma predeterminada. Para habilitar el menú de
administración, seleccione: Ajustes>Ajustes de la
MFP>Pantalla> Administrador e introduzca la contraseña
de la MFP.
Address Book Manager (Gestor de
libretas de direcciones)
Añade nombres y direcciones de correo electrónico y les
asigna identificadores (para la función de envío de
digitalización a correo electrónico de la MFP).
• Distribuye las personas en grupos.
• Importa y exporta los ajustes a archivos CSV.
• Importa los ajustes de otros dispositivos MFP de
Oki.
El control de acceso a la MFP se puede cambiar en el panel
frontal. A tal efecto se necesita un PIN (número de
identificación personal) para poder usar la MFP. El Gestor
de PIN crea los números PIN y les asigna derechos de
copia, impresión, envío de digitalización a correo
electrónico, envío de digitalización a red o fax.
• Importa y exporta los ajustes a archivos CSV.
• Importa los ajustes de otros dispositivos MFP de
Oki.
Utilidad Actkey (sólo
Windows, sólo USB)
La instalación de la utilidad Actkey es opcional y ésta se
encuentra en el CD2 del Software de la MFP en la carpeta
MFP Utilities.
La utilidad Actkey es una herramienta para realizar tareas
de escaneado comunes. Sirve para que la unidad pueda
recibir los comandos de las teclas programadas de la
computadora que tiene conectada.
23 Español
Page 24

Utilidades Scansoft
La instalación de las utilidades Scansoft es opcional y
éstas se encuentran en el CD 2 del Software de la MFP en
la carpeta MFP Utilities.
PaperPort
PaperPort es un programa de gestión de archivos que le
permite organizar, acceder, compartir y gestionar los
archivos de documentos e imágenes que se encuentran en
su computadora. Funciones claves:
• Escanee documentos y fotos directamente a su
computadora bajo los formatos de archivo más
populares, PDF, JPEG y TIFF.
• Utilice el sistema de carpetas muy parecido al de
Explorer para organizar todos los documentos y fotos
que se encuentran en su computadora o en la red.
Puede clasificar sus carpetas de acuerdo a diferentes
colores y agregar sus carpetas sin necesidad de
moverlas de su ubicación en su sistema de archivos.
• Vea las imágenes escaneadas como imágenes grandes
y claras en el formato de miniaturas.
OmniPage SE
Configuración de la MFP
Nota: En los Estados Unidos, todos los mensajes de
fax deben contener un encabezado de acuerdo a
las regulaciones de la FCC. El encabezado debe
contener la fecha y hora de envío y la identificación del negocio, entidad o persona que envía
el mensaje, además del número de teléfono de
la máquina remitente de dicho negocio, entidad
o persona.
Contraseñas/PIN
Antes de usar la MFP, es preciso realizar algunos ajustes
básicos.
Asegúrese de que dispone de los números de permiso/PIN
necesarios antes de comenzar.
Las contraseñas/PIN ajustados de fábrica de forma
predeterminada son:
Administrador aaaaaa
PIN 000000
Red (página web) aaaaaa
Scansoft OmniPage SE convierte sus documentos en papel
y sus archivos PDF en documentos digitales que puede
editar. Utilizando OCR (reconocimiento óptico de
caracteres) y con su capacidad para conservar la
distribución de la página, OmniPage elimina la tarea de
tipear documentos nuevamente y extrae el contenido de
los archivos PDF. Las funciones claves incluyen:
• Personalizar las tareas como por ejemplo, crear una
plantilla para que reconozca un archivo de 20 páginas
de un archivo PDF, convertirlo en un documento Word,
enviarlo por correo electrónico y guardar una copia en
su disco duro.
• OmniPage Pro 14 Office le permite automatizar la
conversión de documentos en papel y de formato PDF
en documentos XML que son un estándar de la
industria.
Recepción de fax (sólo MB470
& MB480)
El fax de esta MFP responderá automáticamente al
teléfono una vez transcurrido el retraso de respuesta de
timbre. Para obtener información acerca de este ajuste,
consulte “Respuesta Timbre” en la página 25.
Configuración de los parámetros del
fax
Siga estas instrucciones para configurar la fecha y hora
(reloj), código de país, número de teléfono local y la
identificación del remitente.
1. Con la tecla de flecha abajo desplácese hasta Menu y
pulse Enter.
2. Con la tecla de flecha abajo desplácese hasta Admin
Setup (Config. de administrador) y pulse Enter.
3. Con las teclas de flecha y el teclado en pantalla, entre
la contraseña del administrador. Seleccione Done
(Listo) y pulse Enter.
4. Con la tecla de flecha abajo desplácese hasta Fax
Setup (Config. de fax) y pulse Enter.
5. Pulse Enter para seleccionar el menú Clock
6. Utilizando las teclas de flecha y el teclado, entre la
7. Pulse Enter para confirmar.
24 Español
Adjustment (Ajuste del reloj).
fecha y hora.
Page 25

8. Con la tecla de flecha abajo desplácese hasta Basic
Setup (Config. básica) y pulse Enter.
9. Con la tecla de flecha abajo desplácese hasta
Country Code (Código de país) y pulse Enter.
10. Con las teclas de flecha, seleccione el país en donde
está ubicada la MFP y pulse Enter para confirmar.
11. Con la tecla de flecha abajo desplácese hasta Local
Phone No. (No. de teléfono local) y pulse Enter.
12. Con las teclas de flecha o el teclado, entre el número
de teléfono local y pulse Enter para confirmar.
13. Con la tecla de flecha abajo desplácese hasta Sender
ID (ID del remitente) y pulse Enter.
14. Con el teclado, las teclas de flecha o el teclado en
pantalla, entre el ID del remitente.
15. Seleccione Done (Listo) y pulse Enter.
Respuesta Timbre
La función de fax de esta MFP responderá
automáticamente al tono de timbre entrante una vez
transcurrido el periodo de retraso establecido por la
respuesta de timbre.
El valor por defecto de fábrica de la respuesta de timbre
es de 1 tono. Este valor se puede ajustar en 20 segundos
en el menú de administración de la siguiente manera
(para modificar este ajuste se necesitan derechos de
administrador):
1. En la pantalla de nivel superior, desplácese hasta
Menú y seleccione con la tecla Enter.
2. En el menú desplegable, desplácese hasta Admin
Menu (Menú de administración) y seleccione con la
tecla Enter. Introduzca la contraseña.
3. En el menú desplegable, desplácese hasta Config.
Fax y seleccione con la tecla Enter.
4. En el menú desplegable, desplácese hasta
Config.Básica y seleccione con la tecla Enter.
5. En el menú desplegable, desplácese hasta
Respuesta Timbre y realice su selección con la tecla
Enter.
6. En el menú desplegable, desplácese hasta el tiempo
de respuesta necesario y realice su selección con la
tecla Enter.
7. Utilice la tecla de flecha izquierda para regresar al
menú de nivel superior.
Control de acceso
Para que únicamente los usuarios autorizados puedan
utilizar esta máquina, puede introducir un PIN (número de
identificación personal) de 4 a 9 dígitos. Esta medida se
conoce como control de acceso. Este PIN será más seguro
cuantos más dígitos incluya en él.
Activación o desactivación del
Control de acceso
Para habilitar Access Control (Control de Acceso), utilice el
menú: Menu >Admin Setup>System Setup>Access
Control y seleccione Enable (Habilitar).
• Cuando el Control de acceso está ajustado en
Activado, la pantalla vuelve a Config. del sistema
inmediatamente después de efectuar el cambio. Sin
embargo, si las funciones Imprimir, Envío Fax o
Escanear a PC se están ejecutando, la pantalla Config.
del sistema sólo se volverá a mostrar cuando estas
tareas hayan finalizado.
Introducción del ID de PIN
• Cuando Control de acceso está Activado, es preciso
introducir un ID de PIN para permitir el ajuste de las
utilidades.
25 Español
Page 26

• Introduzca el ID de PIN con el teclado numérico.
• Un ID de PIN válido debe estar formado por un número
de 4 a 9 dígitos.
• Los números que escribe no se muestran en la pantalla
de introducción del ID de PIN. En su lugar se muestran
asteriscos (*).
• La MFP admite los dos siguientes tipos de ID de PIN.
ID de PIN de administrador: ID de PIN del
administrador o administradores del sistema. Si un
ID de PIN está registrado como administrador, se
mostrará la pantalla de entrada de contraseña del
administrador y, una vez introducida la contraseña,
se autenticará como un administrador.
ID de PIN de usuario: ID de PIN utilizado para
usuarios en general. Si un ID de PIN ID está
registrado como un usuario normal, se mostrará la
pantalla de selección de función. Después de
introducir el ID de PIN se volverá a mostrar la
pantalla de selección de función.
• ID de PIN no válido: Si el número PIN introducido no
es válido, la pantalla Contraseña incorr. se mostrará
durante 3 segundos tras los cuales la pantalla regresa
a la pantalla de introducción del ID de PIN.
Requisitos mínimos de
configuración
Para obtener el máximo rendimiento de la MFP, se debe
realizar la siguiente configuración:
Para enviar faxes (sólo MB470 & MB480):
• Conexión a una línea telefónica conmutada pública
(PSTN).
Para enviar mensajes de correo
electrónico:
•Red TCP/IP
• Un servidor SMTP y un servidor POP3 opcional.
• Dirección “De” predeterminada (la dirección de esta
MFP).
Para archivar los documentos por
intranet:
• Entorno de protocolo FTP o CIFS.
• Windows 2000, Windows XP, Windows Vista,
Mac OS X, Linux (sólo PS3), o servidor FTP.
Características de las
Operación de salida
Si se selecciona Salir o se produce un tiempo de espera de
la operación, se muestra la pantalla de introducción de ID
de PIN.
Salida por usuario
Con el Control de acceso activado, las opciones de Salir se
muestran en el menú de la pantalla de selección de modo.
Cuando el cursor se desplaza sobre Salir y se pulsa la tecla
Enter, se muestra la pantalla de confirmación de salida.
Al seleccionar Sí con la tecla Enter en la pantalla de
confirmación de salida, se muestra la pantalla de
introducción de ID de PIN.
Tiempo de espera de la operación
• Cuando el panel de operación de la MFP está inactivo
durante un periodo de tiempo predefinido (tiempo de
espera de la operación), se muestra automáticamente
la pantalla de inactividad si Control de acceso está
desactivado.
• Si se produce un error, el tiempo de espera de
operación se desactiva.
• Después del tiempo de espera de la operación, se
muestra automáticamente la pantalla de introducción
de ID de PIN si Control de acceso está desactivado.
• La duración del tiempo de espera de la operación
depende del ajuste realizado en Modo menú>Config.
admin >Config. del sistema > Volver a tiempo en
espera.
comunicaciones por internet
Información sobre la preinstalación
La MFP debe configurarse correctamente en la red para
que pueda realizar las funciones de envío de la
digitalización por correo electrónico y otras funciones.
Para que los demás dispositivos de la red encuentren la
MFP en la red, se deben configurar los siguientes
parámetros de red:
1. Grupo de direcciones IP:
2. Dirección IP: . . .
3. Máscara de subred: . . .
4. IP de puerta de enlace: . . .
5. Servidor DNS: . . .
6. Servidor SMTP: . . .
7. Puerto SMTP: 25
8. Servidor POP3: . . .
9. Puerto POP3: 110
Para obtener más información vea l Gúia del Usuario
en línea que viene en el CD1.
Enviar digitalización a correo
electrónico
La MFP permite enviar los documentos digitalizados a las
direcciones de correo electrónico de la red. El documento
se digitaliza en primer lugar y se convierte a un archivo
con formato PDF, JPEG, o TIFF para trasmitirlo
simultáneamente a los destinatarios en forma de archivo
adjunto de un mensaje de correo electrónico.
26 Español
Page 27

Cuando envía un mensaje de correo electrónico utilizando
esta MFP, utiliza SMTP para transferir los mensajes
salientes al servidor de correo SMTP y, a continuación,
envía estos mensajes a los destinatarios a través de
Internet.
Configuración de un servidor SMTP
En esta sección se describe cómo se configura un servidor
SMTP.
1. Con la tecla de flecha abajo desplácese hasta Menu y
pulse Enter.
2. Con la tecla de flecha abajo desplácese hasta Admin
Setup (Config. de administrador) y pulse Enter.
3. Con las teclas de flecha y el teclado en pantalla, entre
la contraseña del administrador. Seleccione Done
(Listo) y pulse Enter.
4. Con la tecla de flecha abajo desplácese hasta
Network Setup (Config. de red) y pulse Enter.
5. Con la tecla de flecha abajo desplácese hasta Mail
Server Setup (Config. de servidor de correo) y pulse
Enter.
6. Pulse Enter para seleccionar el servidor SMTP y
luego vuelva a pulsar Enter.
7. Introduzca su dirección IP.
Los números se introducen mediante el teclado
numérico. Cuando se introduce un número con el
teclado numérico, el número actualmente mostrado
se borra y el número que se acaba de introducir
aparece como el primer dígito. Cuando se introduce
otro número, el número del primer dígito se desplaza
al siguiente, y así sucesivamente.
8. Para confirmar, pulse la tecla Enter. Para cancelar la
dirección IP, mueva el cursor hasta el primer campo
y, a continuación, pulse la tecla de flecha izquierda.
Funcionamiento de la
MFP
Escaneo y Copiado de
Documentos
La MFP puede digitalizar/copiar/enviar los documentos
mediante el ADF (Automatic Document Feeder,
alimentador automático de documentos) o manualmente
sobre el cristal.
Si tiene que digitalizar/copiar/enviar varias páginas,
utilice el ADF. El ADF puede admitir hasta 50 páginas de
una vez.
Si necesita digitalizar/copiar/enviar páginas de libros,
recortes de periódicos o papel con arrugas u ondulaciones,
utilice el cristal.
Para hacer una copia inmediatamente, pulse el botón
START.
Impresión de Documentos
La MFP manejar una gran variedad de medios de
impresión, incluyendo una gran variedad de gramajes y
tamaños de papel.
Vea la Guía del Usuario en el CD1 para obtener
información sobre los diferentes medios y cómo utilizar
cada uno de ellos.
27 Español
Page 28

Cómo solucionar atascos
Atasco documento en ADF
1.
2.
2.
En la impresora
1.
3.
¡PRECAUCIÓN! El fusor puede estar caliente. Esta
zona está claramente marcada. No la toque.
28 Español
Page 29

4.
¡PRECAUCIÓN! No toque la superficie verde
brillante del cilindro de imagen. No exponga los
cilindros a la luz durante más de 5 minutos.
5.
7.
8.
6.
29 Español
Page 30

9.
Mantenimiento
Reemplazo de los cartuchos
de tóner y del Cilindro imagen
10.
11.
Elemento Vida útil
Tóner estándar
MB460 MFP,
MB470 MFP,
MB480 MFP
Tóner de alta
capacidad
MB460 MFP,
MB470 MFP,
MB480 MFP
Tóner de alta
capacidad
sólo MB480
Cilindro de imagen 25,000 A4
Utilice sólo consumibles genuinos de Oki para garantizar
la mejor calidad y rendimiento de su hardware. Los
productos de otras marcas pueden afectar el rendimiento
de su impresora y anular la garantía.
3,500 A4@
ISO/IEC19752
7,000 A4@
ISO/IEC19752
12,000 A4@
ISO/IEC19752
páginas
Nº de
pedido
43979101
43979201
43979215
43979001
Dónde comprar
• Consulte el distribuidor donde compró su sistema.
• Consulte un Distribuidor autorizado o un Proveedor de
Servicios de Oki Data.
• EE.UU., Puerto Rico, Guam, Islas Vírgenes (EE.UU.):
Haga sus pedidos en la Internet
www.okiprintingsolutions.com.
• Solo EE.UU: Haga su pedido con una llamada gratuita
al 1-800-654-3282 (1-800-OKI-DATA) usando VISA®,
MasterCard®, AMEX®.
30 Español
Page 31

Instalação dos drivers e
utilitários do MFP
Nota: É preciso estar conectado como administrador
ou membro do grupo de administradores para
realizar este procedimento. Se o computador
utilizado estiver conectado a uma rede, políticas
referentes às configurações da rede também
podem impedir que este procedimento seja
realizado.
Driver da impressora
Nota: Instale o driver primeiro antes de ligar o cabo ao
impressora.
1. Desligue a impressora.
2. Insira o CD1 na unidade de CD-ROM. O CD será
executado automaticamente.
3. Selecione o idioma.
4. Aceite o Contrato de Licença.
8. Digite o endereço IP da impressora.
9. Selecione do modelo da impressora.
10. Quando solicitado, selecione uma ou mais emulações
de impressora:
•PCL
• PS (Postscript) (somente MB470 & MB480)
• FAX: (somente MB470 & MB480) O driver do fax
permite o envio de faxes diretamente do
computador do usuário, sem imprimir antes os
documentos. O Windows XP oferece
compatibilidade nativa com a função de fax - é
possível usar o modem do computador para
enviar faxes diretamente a partir do computador.
Com o driver do fax da Oki os dados são enviados
do computador do usuário para o MFP e, em
seguida, o MFP envia automaticamente o
documento.
11. Siga as instruções exibidas na tela para concluir a
instalação.
12. Quando solicitado, conecte o cabo apropriado e ligue
a impressora.
5. Em Driver Setup (Configuração do driver), clique em
Install Drivers (Instalar drivers).
6. Selecione impressora local ou de rede.
7. Se selecionar "local":
Selecione a porta que deseja que a impressora use:
USB (Barramento Universal Serial), LPT (uma porta
local) ou FILE (uma porta local).
Se selecionar "rede":
Precisará selecionar como a impressora está
conectada à rede:
- Diretamente usando TCP/IP (selecione esta opção se
a impressora estiver conectada diretamente à rede)
- Indiretamente através de outro PC [se a impressora
for compartilhada em outro PC, digite seu nome na
caixa; se não souber o nome, clique em Next
(Avançar) para procurar por impressoras
compartilhadas]
Software de rede
A instalação dos utilitários de rede é opcional. Eles se
encontram no CD1. Os utilitários incluem: Network Card
Setup Utility (Utilitário de configuração de placa de rede),
Direct Network Printing Utility (Utilitário de impressão
direta em rede) (LPR), e Network Extension (Extensão de
rede).
Utilitários opcionais
Os utilitários opcionais podem ser instalados a partir do
CD1. Os utilitários incluem: Change the Printer Display
Language (Mudar o idioma exibido na impressora) e
Install PS Gamma Adjustor (Instalar ajustador Gama PS).
Downloads da Internet
A instalação dos downloads da Internet é opcional. Eles se
encontram no CD1.
Quando instalados, abra seu navegador para acessar o
website da Oki. Os downloads para o modelo de
impressora selecionado estão disponíveis no website da
Oki.
Manual do Usuário
A instalação do Manual do Usuário é opcional. Ele se
encontra no CD1.
31 Português
Page 32

Utilitário de configuração do
MFP (somente Windows)
Phone Book Manager (Gerenciador de
Lista Telefônica)
Para gerenciar contatos e números de fax (para a função
“escanear para fax” do MFP). Adiciona nomes e números
de fax e os atribui a números de discagem rápida.
• Organiza os contatos em grupos.
• Importa e exporta as configurações para
arquivos CSV.
• Importa as configurações de outros dispositivos
Oki MFP.
A instalação do utilitário de configuração do MFP é
opcional. O utilitário está disponível na pasta Utilities
(Utilitários) no CD2 de drivers/utilitários. Selecione a
opção Install Configuration Tool (Instalar Ferramenta
de Configuração).
A ferramenta de configuração do MFP consegue detectar
dispositivos MB4x0 MFP através de conexões USB ou de
rede.
O programa de instalação não coloca automaticamente
um ícone na área de trabalho do computador. Se desejar,
é possível arrastar e soltar o ícone na área de trabalho do
computador para facilitar seu acesso no futuro.
O software inclui 5 funções principais:
• MFP Settings ((Configurações do MFP)
• Address Book Manager (Gerenciador de
Catálogo de Endereços)
• Phone Book Manager (Gerenciador de Lista
Telef ô ni ca )
• Profile Manager (Gerenciador de Perfis)
• PIN Manager (Gerenciador de NIP)
MFP Settings (Configurações do MFP)
Permite a alteração da maioria das configurações exibidas
no painel de operação do MFP, em um PC conectado
localmente.
As configurações incluem um menu de administrador, que
é protegido por senha e permanece oculto. Para ativá-lo,
selecione: Setting (Configuração)>MFP Setting
(Configuração do MFP)>Display (Exibir)>Administrator
menu (Menu do administrador) e digite a senha do MFP.
Profile Manager (Gerenciador de
Perfis)
Um perfil é um conjunto de configurações salvas utilizadas
para escanear para um PC conectado em rede.
Componentes de um perfil:
• Detalhes para estabelecer a conexão ao PC
conectado em rede (protocolo, porta, nome do
usuário, senha, etc.)
• Tamanho do papel
• Formato a ser usado para o arquivo escaneado
(PDF, TIFF, JPEG) e configurações do formato,
como resolução e compressão
• Importa e exporta as configurações para
arquivos CSV
• Importa as configurações de outros dispositivos
Oki MFP
PIN Manager (Gerenciador de NIP)
É possível ativar o controle do acesso ao MFP usando o
painel frontal. Neste caso, um NIP (número de
identificação pessoal) é necessário para usar o MFP. O
Gerenciador de NIP cria números de identificação pessoal
e atribui a eles direitos específicos, como o direito de
copiar, imprimir, escanear para e-mail, escanear para PC
em rede ou fax.
• Importa e exporta as configurações para
arquivos CSV.
• Importa as configurações de outros dispositivos
Oki MFP.
Address Book Manager (Gerenciador
de Catálogo de Endereços)
Adiciona nomes, endereços de e-mail e atribui
identificações a eles (para a função “escanear para e-mail”
do MFP).
• Organiza os contatos em grupos.
• Importa e exporta as configurações para
arquivos CSV.
• Importa as configurações de outros dispositivos
Oki MFP.
32 Português
Utilitário Actkey (somente
Windows, somente USB)
A instalação do utilitário Actkey é opcional. Ele está
disponível no CD2 do software do MFP, na pasta MFP
Utilities (Utilitários do MFP).
O utilitário Actkey é uma ferramenta para realizar ações
de escaneamento comuns. Ele permite que a unidade
receba comandos de uma tecla a partir de um computador
conectado localmente.
Page 33

Utilitários ScanSoft
A instalação dos utilitários ScanSoft é opcional e está
disponível na pasta Utilities MFP (Utilitários) no CD 2 do
software MFP.
PaperPort
PaperPort é um aplicativo de gestão de papel que serve
para organizar, acessar, compartilhar e gerenciar
documentos e arquivos de imagens em seu computador
pessoal. Principais características:
• Escaneamento de documentos e fotos diretamente
para o computador em formatos conhecidos como PDF,
JPEG e TIFF.
• Sistema de pastas similar ao do Explorer que permite a
organização de todos os documentos e fotos no
computador ou na rede. É possível classificar as pastas
por cores e adicionar qualquer pasta existente ao
PaperPort precisar movimentá-la no sistema de
arquivos.
• Visualização de imagens em miniaturas claras e de
bom tamanho dos arquivos de imagens escaneadas.
OmniPage SE
O Scansoft OmniPage SE converte documentos de papel e
arquivos PDF da Adobe em documentos digitais
modificáveis. Usando os recursos de OCR
(reconhecimento óptico de caracteres) e de preservação
do formato da página, o OmniPage elimina a redigitação
de documentos estáticos e desbloqueia o conteúdo de
arquivos PDF. Principais características:
• Defina fluxos de trabalho personalizados, tal como a
criação de um modelo para reconhecer
automaticamente um arquivo PDF de 20 páginas,
convertê-lo em um documento Word, enviá-lo por email e salvar uma cópia no disco rígido.
• OmniPage 14 Office permite automatizar a conversão
de documentos em papel e arquivos PDF em
documentos no padrão setorial XML.
Configuração da MFP
Nota: Nos Estados Unidos, conforme exigido pelas
regulamentações da FCC, todas as mensagens
de fax devem conter um cabeçalho. O cabeçalho
deve incluir a data e hora em que é enviado e a
identificação da empresa, entidade ou indivíduo
que envia a mensagem, além do número do
telefone da máquina remetente ou da empresa,
entidade ou indivíduo.
Senhas/NIP
Antes de usar o MFP, é necessário fazer algumas
configurações básicas.
Certifique-se de ter a permissão/números de identificação
pessoal (NIP) relevantes antes de começar.
Estas são as senhas/NIP padrão de fábrica:
Administrator aaaaaa
NIP 000000
Rede (página de Internet) aaaaaa
Recepção de fax (somente
MB470 & MB480)
O fax do MFP atenderá automaticamente o telefone depois
do número de toques configurado. Para obter informações
sobre esta configuração, consulte “Resposta a toque de
chamada” na página 34.
Configuração dos parâmetros de fax
Siga estas instruções para configurar a data e a hora
(ajuste do relógio), o código de país, o número de telefone
local e a identidade do emissor.
1. Usando o botão da seta para baixo, acesse Menu e
pressione Enter.
2. Usando o botão da seta para baixo, acesse Admin
Setup (Configuração do administrador) e pressione
Enter.
3. Usando os botões das setas e o teclado na tela, digite
a senha do Administrador. Realce Done (Concluído) e
pressione Enter.
4. Usando o botão da seta para baixo, acesse Fax
Setup (Configuração do fax) e pressione Enter.
5. Pressione Enter para selecionar o menu Clock
Adjustment (Ajuste do relógio).
6. Usando os botões das setas e o teclado, digite a hora
e a data.
7. Pressione Enter para confirmar.
8. Usando o botão da seta para baixo, acesse Basic
Setup (Configuração básica) e pressione Enter.
33 Português
Page 34

9. Usando o botão da seta para baixo, acesse Country
Code (Código do país) e pressione Enter.
10. Usando os botões das setas, acesse o nome do país
no qual o MFP se encontra e pressione Enter para
confirmar.
11. Usando o botão da seta para baixo, acesse Local
Phone No. (Número de telefone local) e pressione
Enter.
12. Usando o teclado ou os botões de setas, digite o
número de telefone local e pressione Enter para
confirmar.
13. Usando o botão da seta para baixo, acesse Sender
ID (Identificação do emissor) e pressione Enter.
14. Usando o teclado ou os botões de setas e o teclado
na tela, digite a identificação do emissor.
15. Realce Done (Concluído) e pressione Enter.
Resposta a toque de chamada
O fax deste MFP atenderá automaticamente o telefone
depois de transcorrido o período de tempo configurado
para o parâmetro de resposta a toque de chamada.
O parâmetro padrão de fábrica é 1 toque e pode ser
configurado para até 20 segundos no Admin Menu (Menu
do administrador) da seguinte maneira (é preciso ter
direitos de administrador para alterar esta configuração):
1. Na tela inicial, acesse Menu e selecione esta opção
usando o botão Enter.
2. No menu suspenso, acesse Admin Menu (Menu do
administrador) e selecione esta opção usando o botão
Enter. Digite a senha.
3. No menu suspenso, acesse Fax Setup (Configuração
do fax) e selecione esta opção usando o botão Enter.
4. No menu suspenso, acesse Basic Setup
(Configuração básica) e selecione esta opção usando
o botão Enter.
5. No menu suspenso, acesse Ring Response
(Resposta a toque de chamada) e selecione esta
opção usando o botão Enter.
6. No menu suspenso, acesse o tempo de resposta
necessário e selecione-o usando o botão Enter.
7. Usando o botão da seta para a esquerda, volte ao
menu principal.
Controle de acesso
A operação e as funções deste equipamento podem ser
limitadas apenas a pessoal autorizado. Para isso, basta
introduzir um número de identificação pessoal (NIP) de 4
a 9 dígitos. Este recurso é conhecido como controle de
acesso. Quanto maior o número de dígitos no NIP, mais
seguro ele é.
Ativação/desativação do controle de
acesso
Para habilitar o Controle de Acesso, use o menu para ir
para: Menu >Admin Setup>System Setup>Access
Control (Menu>Config. do Administrador>Config.
do Sistema>Controle de Acesso) e selecione Enable
(Habilitar).
• Com o controle de acesso ativado, o display passa a
exibir imediatamente a tela de configuração do
sistema depois de o parâmetro ser alterado. No
entanto, se uma das funções, como imprimir, enviar
fax ou escanear para PC, estiver em execução, o
display só passará a exibir a tela de configuração do
sistema quando a tarefa estiver concluída.
Inserção do NIP
• Quando o controle de acesso está ativado, é necessário
digitar um NIP para poder configurar várias funções.
• Digite o NIP usando o teclado numérico.
• Um NIP válido é composto de 4 a 9 dígitos.
• Os números digitados não são exibidos no display e
são substituídos por asteriscos '*'.
• O MFP aceita dois tipos de NIPs:
NIP de administrador: Este é o NIP do(s)
administrador(es) do sistema. Se um NIP for
registrado como sendo de administrador, a tela de
inserção da senha do administrador será exibida e,
quando for digitada, será autenticada como sendo de
um administrador.
NIP de usuário: Este é o NIP para usuários em geral.
Se um NIP for registrado como sendo de usuário, a
tela de seleção de funções será exibida. Esta tela
também é exibida depois de o usuário digitar o NIP.
• NIP inválido: Se o NIP digitado for inválido, a
mensagem Incorrect Password (Senha incorreta)
será exibida durante 3 segundos e o display passará a
exibir a tela de inserção do NIP.
Operação de logout
Se Logout for selecionado ou o tempo limite de uma
operação for ultrapassado, o display passará a exibir a tela
de inserção do NIP.
Logout feito pelo usuário
Com o controle de acesso ativado, as opções de logout são
exibidas no Menu na tela Mode Selection (Seleção de
modos).
Quando o cursor é movido para Logout e o botão Enter é
pressionado, o display passa a exibir a tela de confirmação
de logout.
Se a opção Yes (Sim) for selecionada com o botão Enter
na tela de confirmação de logout, o display passará a
exibir a tela de inserção do NIP.
34 Português
Page 35

Tempo limite de operação
• Quando o painel de operação do MFP não é utilizado
durante um intervalo de tempo predefinido (tempo
limite de operação), o display passa automaticamente
a exibir a tela de repouso se o controle de acesso
estiver desativado.
• Se ocorrer um estado de erro, o tempo limite de
operação será desativado.
• Depois de transcorrido o tempo limite de operação, o
display passará a exibir automaticamente a tela de
inserção de NIP se o controle de acesso estiver
ativado.
• A duração do tempo limite de operação depende da
configuração definida em Menu Mode (Modo
Menu)>Admin Setup (Configuração do
administrador)>System Setup (Configuração do
sistema)>Return to Stand-by Time (Voltar ao
tempo de espera).
Requisitos mínimos de
configuração
Para aproveitar ao máximo os recursos do MFP, é preciso
dispor da seguinte configuração:
6. SMTP server (Servidor SMTP): . . .
7. SMTP Port (Porta SMTP): 25
8. POP3 server (Servidor POP3): . . .
9. POP3 Port (Porta POP3): 110
Consulte a explicação destas configurações no
manual do usuário eletrônico no CD.
Para enviar faxes (somente MB470 &
MB480):
• Uma conexão de linha telefônica (PSTN).
Para enviar e-mails:
•Rede TCP/IP.
• Um servidor SMTP e um servidor POP3 opcional.
• Endereço de origem padrão (o endereço do MFP).
Para arquivar documentos através de
intranet:
• Ambiente de protocolo FTP ou CIFS.
• Servidor Windows 2000, Windows XP, Windows Vista,
Mac OS X, Linux (somente PS3), ou FTP.
Recursos de comunicação pela
internet
Informações de pré-instalação
O MFP precisa ser configurado corretamente na rede para
executar as funções de escaneamento para e-mail e
outras funções. Para que outros dispositivos de rede
detectem o MFP na rede, é necessário configurar os
seguintes parâmetros:
1. IP Address Set: (Conjunto de endereços IP:):
2. IP Address (Endereço IP): . . .
3. Subnet mask (Máscara de subrede): . . .
4. Gateway IP (IP do Gateway): . . .
5. DNS server (Servidor DNS): . . .
35 Português
Page 36

Escanear para e-mail
O MFP permite o envio dos documentos escaneados a
endereços de e-mail na rede. Os documentos são primeiro
escaneados e convertidos em um formato de arquivo
padrão, como PDF, JPEG ou TIFF e depois transmitidos a
destinatários remotos simultaneamente como anexos de
e-mail.
Quando um e-mail é enviado a alguém através do MFP, a
unidade usa o protocolo SMTP (Simple Mail Transfer
Protocol) para transferir os e-mails enviados para o
servidor de e-mail SMTP e depois enviá-los aos
destinatários através da Internet.
Configuração de um servidor SMTP
Esta seção explica como configurar um servidor SMTP.
1. Usando o botão da seta para baixo, acesse Menu e
pressione Enter.
2. Usando o botão da seta para baixo, acesse Admin
Setup (Configuração do administrador) e pressione
Enter.
3. Usando os botões das setas e o teclado na tela, digite
a senha do Administrador. Realce Done (Concluído) e
pressione Enter.
4. Usando o botão da seta para baixo, acesse Network
Setup (Configuração de rede) e pressione Enter.
5. Usando o botão da seta para baixo, acesse Mail
Server Setup (Configuração do servidor de correio)
e pressione Enter.
6. Pressione Enter para selecionar SMTP server
(Servidor SMTP) e pressione Enter novamente
7. Digite o endereço IP.
Funcionamento da MFP
Escaneamento e cópia de
documentos
O MFP consegue escanear/copiar/enviar documentos
usando o AAD (alimentador automático de documentos)
ou manualmente por meio do vidro do escâner.
Para escanear/copiar/enviar várias páginas, use o AAD. O
AAD tem capacidade para 50 páginas de cada vez.
Se desejar escanear/copiar/enviar páginas de livros,
recortes de jornais ou papéis amassados ou curvados, use
o vidro.
Para fazer uma cópia instantânea, pressione o botão
START.
Impressão de documentos
O MFP pode imprimir em várias mídias, inclusive papéis de
diversos tamanhos e gramaturas.
Consulte as recomendações gerais sobre as opções de
mídias e explicações sobre como usar cada uma delas no
Manual do Usuário no CD1.
Os números são digitados por meio do teclado
numérico. Quando um número é digitado no teclado
numérico, o número exibido atualmente é apagado e
o número que acabou de ser digitado é exibido como
o primeiro dígito. Quando outro número é digitado, o
número no primeiro espaço muda para o próximo, e
assim por diante.
8. Para confirmar a informação, pressione o botão
Enter. Para cancelar o endereço IP, mova o cursor
para o primeiro campo e depois pressione o botão da
seta para a esquerda.
36 Português
Page 37

Eliminação de
atolamentos de papel
Documento atolado no AAD
1.
2.
Na impressora
1.
2.
3.
37 Português
Page 38

ATENÇÃO! A unidade de fusão pode estar quente!
Esta área está bem identificada. Não toque nesta
área.
4.
ATENÇÃO! Não toque na superfície verde brilhante do
cilindro. Não exponha os cilindros à luz por mais
de cinco minutos.
7.
8.
5.
6.
38 Português
Page 39

9.
Manutenção
Troca dos cartuchos de toner e
do cilindro OPC
10.
11.
Opção Vida útil
Toner padrão
MB460 MFP,
MB470 MFP,
MB480 MFP
Toner de alta
capacidade
MB460 MFP,
MB470 MFP,
MB480 MFP
Toner de alta
capacidade
somente MB480
Cilindro OPC 25,000 A4
Só use consumíveis originais para assegurar a melhor
qualidade e desempenho do equipamento. Produtos não
originais podem prejudicar o desempenho da impressora
e anular a garantia.
3,500 A4@ ISO/
IEC19752
7,000 A4@ ISO/
IEC19752
12,000 A4@
ISO/IEC19752
páginas
Nº para
encomenda
43979101
43979201
43979215
43979001
Onde comprar
• Consulte o revendedor onde adquiriu a sistema.
• Consulte um representante autorizado de vendas ou
assistência técnica da Oki Data. Para se informar a
respelto do revendedor mais próximo, ligue para
0800-11-55-77.
39 Português
Page 40

Service and Support
Available 24 hours a day, 7 days a week
• Visit our multilingual web site:
• Visit MY.OKIDATA.COM
• Call 1-800-654-3282
WWW.OKIPRINTINGSOLUTIONS.COM
Service et soutien
Offert 24 heures sur 24, 7 jours sur 7
• Visitez notre site Web multilingue :
• Visitez MY.OKIDATA.COM (Anglais uniquement).
• Composez le 1-800-654-3282
WWW.OKIPRINTINGSOLUTIONS.COM
Assistencia Técnica y Soporte
• Visite nuestro sitio Web multilingue: WWW.OKIPRINTINGSOLUTIONS.COM
• Visite MY.OKIDATA.COM (Inglés solamente).
• Estados Unitos: llame al 1-856-222-7496
• Mêxico: llame al (525) 263-8780
Assistência Técnica e Suporte
• Visite nosso site multilingüe na Web: WWW.OKIPRINTINGSOLUTIONS.COM
• Visite MY.OKIDATA.COM (somente em inglê).
• Ligue para 55-11-3444-6746 (Grande São Paulo) ou 0800-11-5577 (demais
localidades).
OKI, OkiLAN ® Oki Electric Industry Company, Ltd.
Microsoft, Windows, Internet Explorer ®/™ Microsoft Corporation
Novell, NetWare ® Novell Corporation
dobe, Acrobat, Acrobat Reader, PostScript ®/™ Adobe Systems, Inc..
Ethernet ® Digital Equipment Corporation.
EtherTalk, LaserWriter, Mac, Macintosh ® Apple Computer, Inc.
© 2009 Oki Data Americas, Inc.
 Loading...