

Page 1
Basic
User's Manual
This manual contains cautions on how to use this product safely.
Before you use this product, please make sure that you read this manual.
This manual supports the following models:
MB441, MB451, MB451w, MB461, MB461+LP, MB471
MB471w, MB491, MB491+, MB491+LP, ES4161 MFP
ES4191 MFP, MPS4200mb, MPS4700mb
Page 2
P
REFACE
Every effort has been made to ensure that the information in this document is complete, accurate, and
up-to-date. The manufacturer assumes no responsibility for the results of errors beyond its control. The
manufacturer also cannot guarantee that changes in software and equipment made by other
manufacturers and referred to in this manual will not affect the applicability of the information in it.
Mention of software products manufactured by other companies does not necessarily constitute
endorsement by the manufacturer.
While all reasonable efforts have been made to make this document as accurate and helpful as possible,
we make no warranty of any kind, expressed or implied, as to the accuracy or completeness of the
information contained herein.
All rights are reserved by Oki Data Corporation. Unauthorized copying, transferring, translating, or
related actions are prohibited. You must obtain written permission from Oki Data Corporation before
doing any of the above.
© 2011 Oki Data Corporation
OKI is a registered trademark of Oki Electric Industry Co., Ltd.
Energy Star is a trademark of the United States Environmental Protection Agency.
Microsoft, Windows, Windows Server and Windows Vista are registered trademarks of Microsoft
Corporation.
Apple, Macintosh, Rosetta, Mac and Mac OS are registered trademarks of Apple Inc.
Other product names and brand names are registered trademarks or trademarks of their proprietors.
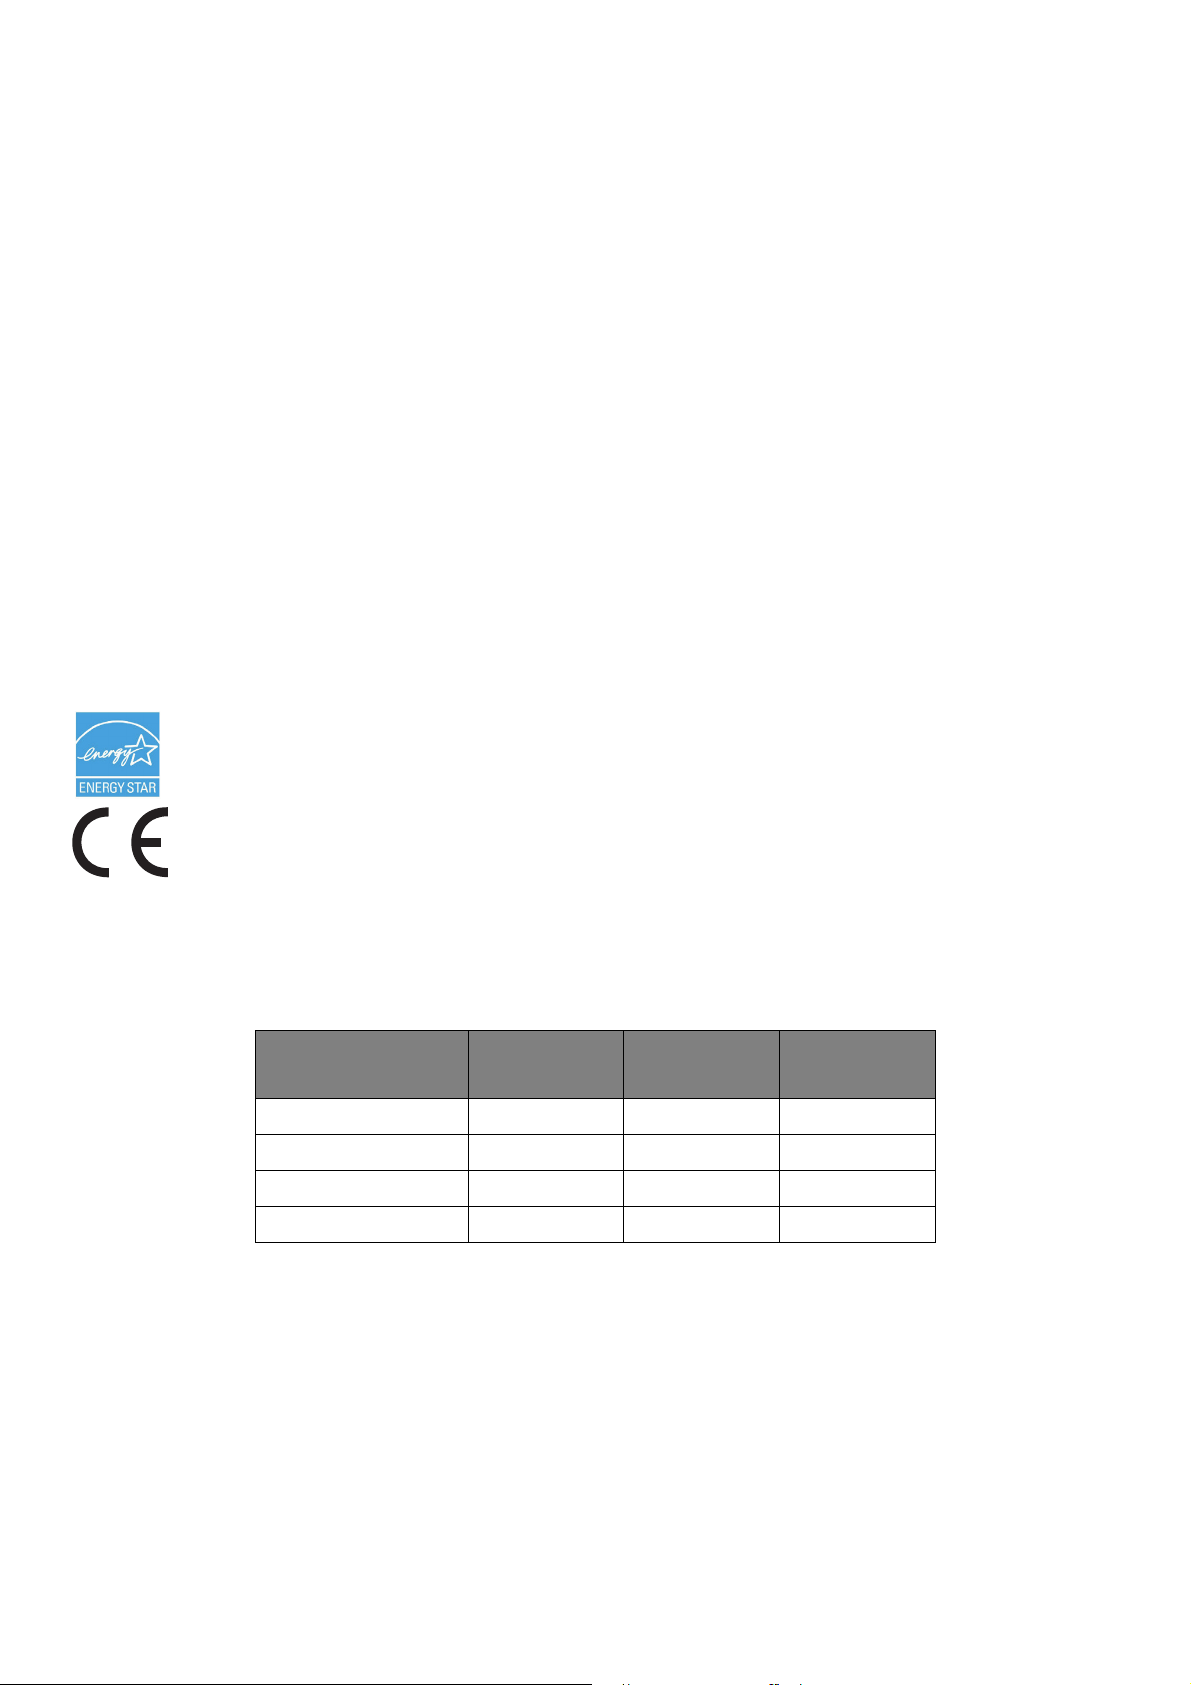
As an Energy Star Program Participant, the manufacturer has determined that this product
meets the Energy Star guidelines for energy efficiency.
This product complies with the requirements of the Council Directives 2004/108/EC (EMC),
2006/95/EC (LVD),1999/5/EC (R&TTE), 2009/125/EC (ErP) and 2011/65/EU(RoHS), as
amended where applicable, on the approximation of the laws of the member states relating
to Electromagnetic Compatibility, Low Voltage, Radio & Telecommunications Terminal
Equipment, Energy related Products and Restriction on the use of certain Hazardous
Substances in electrical and electronic equipment.
The following cables were used to evaluate this product to achieve EMC directive
2004/108/EC compliance and configurations other than this may affect that compliance.
CABLE TYPE LENGTH
(METRE)
Power 1.8
USB 5.0
LAN 15.0
Tel e p ho n e 3.0
CORE SHIELD
-2-
Page 3

E
MERGENCY FIRST AID
Take care with toner powder:
If swallowed, give small amounts of cold water and seek medical attention. DO NOT
attempt to induce vomiting.
If inhaled, move the person to an open area for fresh air. Seek medical attention.
If it gets into the eyes, flush with large amounts of water for at least 15 minutes
keeping eyelids open. Seek medical attention.
Spillages should be treated with cold water and soap to help reduce risk of staining
skin or clothing.
M
ANUFACTURER
Oki Data Corporation,
4-11-22 Shibaura, Minato-ku,
Tokyo 108-8551,
Japan
For all sales, support and general enquiries contact your local distributor.
I
MPORTER TO THE
OKI Europe Limited (trading as OKI Printing Solutions)
EU/A
UTHORISED REPRESENTATIVE
Blays House
Wick Road
Egham
Surrey, TW20 0HJ
United Kingdom
For all sales, support and general enquiries contact your local distributor.
E
NVIRONMENTAL INFORMATION
-3-
Page 4
For Your Safety
WARNING
CAUTION
Read the User's Manual (this manual) for your safety before using the product.
Cautions related to safety
Indicates additional information which, if ignored or not followed, may result in personal injury
or death.
Indicates additional information which, if ignored, may result in personal injury.
General cautions
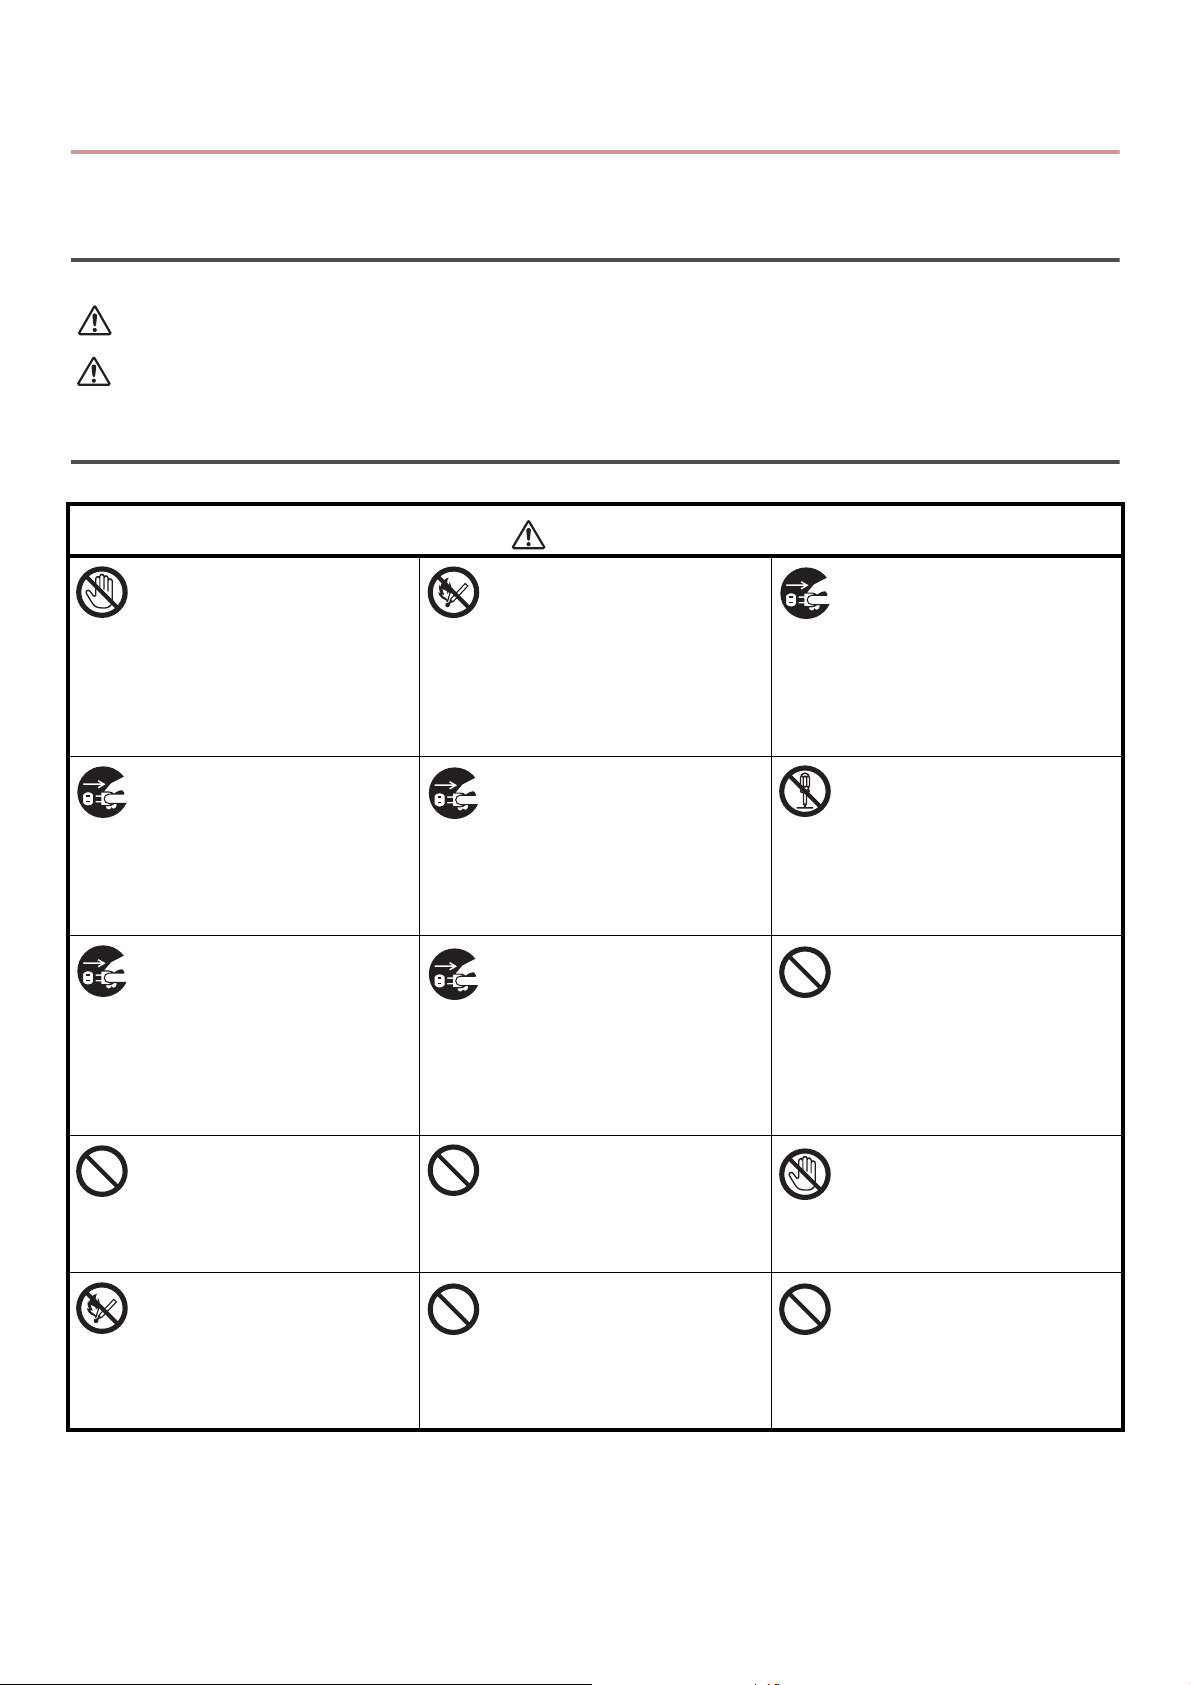
WARNING
Do not touch the safety
switch inside the machine.
Doing so may cause electric
shock when high voltage
occurs. In addition, the gears
can rotate, which may result
in personal injury.
Pull the power plug out of the
socket and contact with a
customer service centre when
a liquid such as water enters
in the internal parts of the
machine.
Failure to do so may cause
fire.
Unplug the power cord and
contact with a customer
service center if the machine
is dropped or the cover is
damaged.
Failure to do so may cause
electric shock and/or fire
leading to personal injury.
Do not insert materials in the
vent hole.
Doing so may cause electric
shock and/or fire leading to
personal injury.
Do not throw toner cartridges
and image drum cartridges
into fire. Doing so may cause
dust explosion leading to
burns.
Do not use an inflammable
spray near the machine.
Doing so may cause fire since
there is an area heating up
within the machine.
Pull the power plug out of the
socket and remove foreign
materials such as clips when
they fall inside the machine.
Failure to do so may cause
electric shock and/or fire
leading to personal injury.
Unplug the power cord
periodically to clean plug
blades and root section
between the blades.
If the power plug remains
inserted for a long time, the
root section will get dusty,
and the plug may be shorted
out, which may cause fire.
Do not put cups with liquids
such as water on the
machine.
Doing so may cause electric
shock and/or fire leading to
personal injury.
Do not use power cords,
cables, or ground wires other
than those that are indicated
in User's Manual.
Doing so may cause fire.
Pull the power plug out of the
socket and contact with a
customer service centre when
the cover is unusually hot,
smoking, giving off
questionable odour, or
making a strange noise.
Failure to do so may cause
fire.
Do not operate and/or
disassemble the machine
other than that directed in
User's Manual.
Doing so may cause electric
shock and/or fire leading to
personal injury.
Do not clean spilled toner
with a vacuum cleaner.
Cleaning spilled toner with a
vacuum cleaner may cause
fire due to the sparks from
electric contact.
Toner spilled on the floor
should be wiped off with a
wet cloth.
Do not touch the fuser and
other parts when opening the
cover of the machine.
Doing so may cause burns.
Operation using UPS
(uninterruptible power
source) or inverters is not
guaranteed. Do not use
uninterruptible power source
or inverters.
Doing so may cause fire.
-4-
Page 5

CAUTION
Do not come closer to the paper's exit area when
the power is turned on while printing.
Doing so may result in personal injury.
Do not touch a damaged liquid-crystal display.
If liquid (liquid crystal) leaked from the liquidcrystal display gets into the eyes or mouth, flush
with large amount of water. Seek medical
attention if necessary.
This product contains software developed by the Heimdal Project.
Copyright (c) 1995 - 2008 Kungliga Tekniska Högskolan
(Royal Institute of Technology, Stockholm, Sweden).
All rights reserved.
Redistribution and use in source and binary forms, with or without modification, are permitted
provided that the following conditions are met:
1. Redistributions of source code must retain the above copyright notice, this list of conditions
and the following disclaimer.
2. Redistributions in binary form must reproduce the above copyright notice, this list of
conditions and the following disclaimer in the documentation and/or other materials
provided with the distribution.
3. Neither the name of the Institute nor the names of its contributors may be used to endorse
or promote products derived from this software without specific prior written permission.
THIS SOFTWARE IS PROVIDED BY THE INSTITUTE AND CONTRIBUTORS "AS IS" AND ANY
EXPRESS OR IMPLIED WARRANTIES, INCLUDING, BUT NOT LIMITED TO, THE IMPLIED
WARRANTIES OF MERCHANTABILITY AND FITNESS FOR A PARTICULAR PURPOSE ARE
DISCLAIMED. IN NO EVENT SHALL THE INSTITUTE OR CONTRIBUTORS BE LIABLE FOR ANY
DIRECT, INDIRECT, INCIDENTAL, SPECIAL, EXEMPLARY, OR CONSEQUENTIAL DAMAGES
(INCLUDING, BUT NOT LIMITED TO, PROCUREMENT OF SUBSTITUTE GOODS OR SERVICES;
LOSS OF USE, DATA, OR PROFITS; OR BUSINESS INTERRUPTION) HOWEVER CAUSED AND ON
ANY THEORY OF LIABILITY, WHETHER IN CONTRACT, STRICT LIABILITY, OR TORT (INCLUDING
NEGLIGENCE OR OTHERWISE) ARISING IN ANY WAY OUT OF THE USE OF THIS SOFTWARE,
EVEN IF ADVISED OF THE POSSIBILITY OF SUCH DAMAGE.
-5-
Page 6

Table of Contents
Preface . . . . . . . . . . . . . . . . . . . . . . . . . . . . . . . . . . . . . . . . . . . . . . . . . .2
Emergency first aid . . . . . . . . . . . . . . . . . . . . . . . . . . . . . . . . . . . . . . . . .3
Manufacturer . . . . . . . . . . . . . . . . . . . . . . . . . . . . . . . . . . . . . . . . . . . . . .3
Importer to the EU/Authorised representative . . . . . . . . . . . . . . . . . . . . . . .3
Environmental information . . . . . . . . . . . . . . . . . . . . . . . . . . . . . . . . . . . .3
For Your Safety . . . . . . . . . . . . . . . . . . . . . . . . . . . . . . . . . . . . . . . . . . . .4
Manual Composition . . . . . . . . . . . . . . . . . . . . . . . . . . . . . . . . . . . . . . . . 11
About This Manual . . . . . . . . . . . . . . . . . . . . . . . . . . . . . . . . . . . . . . . . . 11
1 Setup . . . . . . . . . . . . . . . . . . . . . . . . . . . . . . . . . . . . . . . . . 13
Overview of Machine . . . . . . . . . . . . . . . . . . . . . . . . . . . . . . . . . . . . . . . 13
Contents of the Package. . . . . . . . . . . . . . . . . . . . . . . . . . . . . . . . . . . . . . . . . . . . . . 13
Available Options. . . . . . . . . . . . . . . . . . . . . . . . . . . . . . . . . . . . . . . . . . . . . . . . . . . 14
Installation Requirements. . . . . . . . . . . . . . . . . . . . . . . . . . . . . . . . . . . . . . . . . . . . . 14
Names of Components . . . . . . . . . . . . . . . . . . . . . . . . . . . . . . . . . . . . . . . . . . . . . . . 15
Installing Your Machine . . . . . . . . . . . . . . . . . . . . . . . . . . . . . . . . . . . . . . 17
Unpacking Your Machine . . . . . . . . . . . . . . . . . . . . . . . . . . . . . . . . . . . . . . . . . . . . . 17
Turning On and Off Your Machine . . . . . . . . . . . . . . . . . . . . . . . . . . . . . . . . . . . . . . . 19
Installing Options . . . . . . . . . . . . . . . . . . . . . . . . . . . . . . . . . . . . . . . . . . 22
Installing a Second Tray Unit (MB461, MB461+LP, MB471, MB471w, MB491, MB491+,
MB491+LP, ES4161 MFP, ES4191 MFP, MPS4200mb, MPS4700mb only) . . . . . . . . . . . . 22
Operator Panel. . . . . . . . . . . . . . . . . . . . . . . . . . . . . . . . . . . . . . . . . . . . 25
Default Screen . . . . . . . . . . . . . . . . . . . . . . . . . . . . . . . . . . . . . . . . . . . . . . . . . . . . 26
Entering Text Using the Operator Panel . . . . . . . . . . . . . . . . . . . . . . . . . . . . . . . . . . . 27
Loading Paper and Documents. . . . . . . . . . . . . . . . . . . . . . . . . . . . . . . . . 29
Paper. . . . . . . . . . . . . . . . . . . . . . . . . . . . . . . . . . . . . . . . . . . . . . . . . . . . . . . . . . . 29
Supported Paper Types . . . . . . . . . . . . . . . . . . . . . . . . . . . . . . . . . . . . . . . . . . . . . . . . . . . . 29
Paper Recommendations . . . . . . . . . . . . . . . . . . . . . . . . . . . . . . . . . . . . . . . . . . . . . . . . . . . 31
Storing Paper. . . . . . . . . . . . . . . . . . . . . . . . . . . . . . . . . . . . . . . . . . . . . . . . . . . . . . . . . . . 31
Loading Paper . . . . . . . . . . . . . . . . . . . . . . . . . . . . . . . . . . . . . . . . . . . . . . . . . . . . . . . . . . 32
Paper Output . . . . . . . . . . . . . . . . . . . . . . . . . . . . . . . . . . . . . . . . . . . . . . . . . . . . . . . . . . . 37
Documents . . . . . . . . . . . . . . . . . . . . . . . . . . . . . . . . . . . . . . . . . . . . . . . . . . . . . . . 37
Document Requirements . . . . . . . . . . . . . . . . . . . . . . . . . . . . . . . . . . . . . . . . . . . . . . . . . . . 37
Scannable Area . . . . . . . . . . . . . . . . . . . . . . . . . . . . . . . . . . . . . . . . . . . . . . . . . . . . . . . . . 38
Loading Documents . . . . . . . . . . . . . . . . . . . . . . . . . . . . . . . . . . . . . . . . . . . . . . . . . . . . . . 38
Basic Settings for Faxing (for MB451, MB451w, MB471, MB471w, MB491,
MB491+, MB491+LP, ES4191 MFP, MPS4200mb, MPS4700mb only) . . . . . . 40
Setting for Country Code . . . . . . . . . . . . . . . . . . . . . . . . . . . . . . . . . . . . . . . . . . . . . 40
Connecting a Telephone Line. . . . . . . . . . . . . . . . . . . . . . . . . . . . . . . . . . . . . . . . . . . 41
-6-
Page 7

Table of Contents
Other cases . . . . . . . . . . . . . . . . . . . . . . . . . . . . . . . . . . . . . . . . . . . . . . . . . . . . . . 42
Settings for each dialing type . . . . . . . . . . . . . . . . . . . . . . . . . . . . . . . . . . . . . . . . . . 43
Setup of Date/Time . . . . . . . . . . . . . . . . . . . . . . . . . . . . . . . . . . . . . . . . . . . . . . . . . 44
Specifying Sender Information . . . . . . . . . . . . . . . . . . . . . . . . . . . . . . . . . . . . . . . . . 44
PBX Connecting. . . . . . . . . . . . . . . . . . . . . . . . . . . . . . . . . . . . . . . . . . . . . . . . . . . . 45
Setting for Super G3 . . . . . . . . . . . . . . . . . . . . . . . . . . . . . . . . . . . . . . . . . . . . . . . . 45
Specifying Reception Mode . . . . . . . . . . . . . . . . . . . . . . . . . . . . . . . . . . . . . . . . . . . . 45
Connecting to a Computer. . . . . . . . . . . . . . . . . . . . . . . . . . . . . . . . . . . . 46
Network Connection . . . . . . . . . . . . . . . . . . . . . . . . . . . . . . . . . . . . . . . . . . . . . . . . 47
USB Connection . . . . . . . . . . . . . . . . . . . . . . . . . . . . . . . . . . . . . . . . . . . . . . . . . . . 60
Configuring the Network Settings. . . . . . . . . . . . . . . . . . . . . . . . . . . . . . . 65
Checking the Common Setup Information . . . . . . . . . . . . . . . . . . . . . . . . . . . . . . . . . 66
Setting Up Scan To E-mail and Internet Fax . . . . . . . . . . . . . . . . . . . . . . . . . . . . . . . . 66
Setting Up Scan To Network PC . . . . . . . . . . . . . . . . . . . . . . . . . . . . . . . . . . . . . . . . 68
Managing Profiles . . . . . . . . . . . . . . . . . . . . . . . . . . . . . . . . . . . . . . . . . . . . . . . . . . 77
Printing Configuration . . . . . . . . . . . . . . . . . . . . . . . . . . . . . . . . . . . . . . . 78
Printing Procedure. . . . . . . . . . . . . . . . . . . . . . . . . . . . . . . . . . . . . . . . . . . . . . . . . . 78
2 Copying. . . . . . . . . . . . . . . . . . . . . . . . . . . . . . . . . . . . . . . . 79
Basic Operation . . . . . . . . . . . . . . . . . . . . . . . . . . . . . . . . . . . . . . . . . . . 79
Starting a Copy Job . . . . . . . . . . . . . . . . . . . . . . . . . . . . . . . . . . . . . . . . . . . . . . . . . 79
Canceling a Copy Job in Progress . . . . . . . . . . . . . . . . . . . . . . . . . . . . . . . . . . . . . . . 79
Configuring Copy Settings . . . . . . . . . . . . . . . . . . . . . . . . . . . . . . . . . . . . 80
Changing the Scan Size (Scan Size) . . . . . . . . . . . . . . . . . . . . . . . . . . . . . . . . . . . . . 80
Changing the Paper Tray (Paper Feed). . . . . . . . . . . . . . . . . . . . . . . . . . . . . . . . . . . . 80
Changing Image Orientation of Document (Direction) . . . . . . . . . . . . . . . . . . . . . . . . . 81
Making Enlarged or Reduced Copies (Zoom). . . . . . . . . . . . . . . . . . . . . . . . . . . . . . . . 81
Enabling Continuous Scan Mode (Continuous Scan). . . . . . . . . . . . . . . . . . . . . . . . . . . 82
Making Duplex Copies (Duplex Copy) . . . . . . . . . . . . . . . . . . . . . . . . . . . . . . . . . . . . 83
Adjusting Copy Density (Density) . . . . . . . . . . . . . . . . . . . . . . . . . . . . . . . . . . . . . . . 83
Changing Document Type (Document Type). . . . . . . . . . . . . . . . . . . . . . . . . . . . . . . . 83
Adjusting the Background Removal . . . . . . . . . . . . . . . . . . . . . . . . . . . . . . . . . . . . . . 84
Changing Scan Resolution . . . . . . . . . . . . . . . . . . . . . . . . . . . . . . . . . . . . . . . . . . . . 84
Resetting Copy Settings . . . . . . . . . . . . . . . . . . . . . . . . . . . . . . . . . . . . . . . . . . . . . . 85
3 Faxing (for MB451, MB451w, MB471, MB471w, MB491,
MB491+, MB491+LP, ES4191 MFP, MPS4200mb,
MPS4700mb only) . . . . . . . . . . . . . . . . . . . . . . . . . . . . . . . 86
Basic Procedure for Faxing . . . . . . . . . . . . . . . . . . . . . . . . . . . . . . . . . . . 86
Sending a Fax . . . . . . . . . . . . . . . . . . . . . . . . . . . . . . . . . . . . . . . . . . . . . . . . . . . . . 86
Specifying a Destination. . . . . . . . . . . . . . . . . . . . . . . . . . . . . . . . . . . . . . . . . . . . . . 87
-7-
Page 8

Table of Contents
Deleting Specified Destinations . . . . . . . . . . . . . . . . . . . . . . . . . . . . . . . . . . . . . . . . . 89
Configuring Fax Settings . . . . . . . . . . . . . . . . . . . . . . . . . . . . . . . . . . . . . 90
Changing Scan Size (Scan Size) . . . . . . . . . . . . . . . . . . . . . . . . . . . . . . . . . . . . . . . . 90
Changing Resolution (Resolution) . . . . . . . . . . . . . . . . . . . . . . . . . . . . . . . . . . . . . . . 90
Adjusting Density (Density) . . . . . . . . . . . . . . . . . . . . . . . . . . . . . . . . . . . . . . . . . . . 90
Printing the Sender Name . . . . . . . . . . . . . . . . . . . . . . . . . . . . . . . . . . . . . . . . . . . . 90
Checking and Canceling Fax Transmission. . . . . . . . . . . . . . . . . . . . . . . . . 91
Canceling Fax Transmission . . . . . . . . . . . . . . . . . . . . . . . . . . . . . . . . . . . . . . . . . . . 91
Canceling a Reserved Job. . . . . . . . . . . . . . . . . . . . . . . . . . . . . . . . . . . . . . . . . . . . . 91
Checking Transmission and Reception History. . . . . . . . . . . . . . . . . . . . . . . . . . . . . . . 91
Machine Behavior in Fax Reception. . . . . . . . . . . . . . . . . . . . . . . . . . . . . . 92
Reception Behavior . . . . . . . . . . . . . . . . . . . . . . . . . . . . . . . . . . . . . . . . . . . . . . . . . 92
Printing Received Faxes . . . . . . . . . . . . . . . . . . . . . . . . . . . . . . . . . . . . . . . . . . . . . . 94
Phone Book . . . . . . . . . . . . . . . . . . . . . . . . . . . . . . . . . . . . . . . . . . . . . . 95
Speed Dial . . . . . . . . . . . . . . . . . . . . . . . . . . . . . . . . . . . . . . . . . . . . . . . . . . . . . . . 95
Registering and Editing . . . . . . . . . . . . . . . . . . . . . . . . . . . . . . . . . . . . . . . . . . . . . . . . . . . . 95
Registering From History. . . . . . . . . . . . . . . . . . . . . . . . . . . . . . . . . . . . . . . . . . . . . . . . . . . 95
Deleting . . . . . . . . . . . . . . . . . . . . . . . . . . . . . . . . . . . . . . . . . . . . . . . . . . . . . . . . . . . . . . 96
Group Dial (Group Number) . . . . . . . . . . . . . . . . . . . . . . . . . . . . . . . . . . . . . . . . . . . 96
Registering and Editing . . . . . . . . . . . . . . . . . . . . . . . . . . . . . . . . . . . . . . . . . . . . . . . . . . . . 96
Deleting . . . . . . . . . . . . . . . . . . . . . . . . . . . . . . . . . . . . . . . . . . . . . . . . . . . . . . . . . . . . . . 96
One-Touch Key Pad . . . . . . . . . . . . . . . . . . . . . . . . . . . . . . . . . . . . . . . . . . . . . . . . . 97
Register all telephone numbers . . . . . . . . . . . . . . . . . . . . . . . . . . . . . . . . . . . . . . . . . 97
Registering the Machine . . . . . . . . . . . . . . . . . . . . . . . . . . . . . . . . . . . . . . . . . . . . . . . . . . . 97
Basic Procedure for Scan To Fax Server . . . . . . . . . . . . . . . . . . . . . . . . . . 98
Transmitting Data to Fax Server . . . . . . . . . . . . . . . . . . . . . . . . . . . . . . . . . . . . . . . . 98
Specifying the destination . . . . . . . . . . . . . . . . . . . . . . . . . . . . . . . . . . . . . . . . . . . . 98
Deleting the specified destination . . . . . . . . . . . . . . . . . . . . . . . . . . . . . . . . . . . . . . . 99
Stopping the fax transmission. . . . . . . . . . . . . . . . . . . . . . . . . . . . . . . . . . . . . . . . . . 99
Basic Procedure for Internet Faxing . . . . . . . . . . . . . . . . . . . . . . . . . . . . 100
Sending an Internet Fax. . . . . . . . . . . . . . . . . . . . . . . . . . . . . . . . . . . . . . . . . . . . . .100
Specifying a Destination. . . . . . . . . . . . . . . . . . . . . . . . . . . . . . . . . . . . . . . . . . . . . .101
Checking, Deleting, and Changing Destinations. . . . . . . . . . . . . . . . . . . . . . . . . . . . . .102
Canceling Transmission . . . . . . . . . . . . . . . . . . . . . . . . . . . . . . . . . . . . . . . . . . . . . .103
Receiving Internet Faxes . . . . . . . . . . . . . . . . . . . . . . . . . . . . . . . . . . . . . . . . . . . . .103
4 Scanning . . . . . . . . . . . . . . . . . . . . . . . . . . . . . . . . . . . . . . 104
Installing Scanner Drivers (TWAIN/WIA/ICA Driver) . . . . . . . . . . . . . . . . . 104
Installation Procedure . . . . . . . . . . . . . . . . . . . . . . . . . . . . . . . . . . . . . . . . . . . . . . .104
For Windows . . . . . . . . . . . . . . . . . . . . . . . . . . . . . . . . . . . . . . . . . . . . . . . . . . . . . . . . . . 104
For Mac OS X. . . . . . . . . . . . . . . . . . . . . . . . . . . . . . . . . . . . . . . . . . . . . . . . . . . . . . . . . . 105
-8-
Page 9

Table of Contents
Using ActKey Software . . . . . . . . . . . . . . . . . . . . . . . . . . . . . . . . . . . . . . . . . . . . . . .107
Installing the Software . . . . . . . . . . . . . . . . . . . . . . . . . . . . . . . . . . . . . . . . . . . . . . . . . . . 107
Starting the Software . . . . . . . . . . . . . . . . . . . . . . . . . . . . . . . . . . . . . . . . . . . . . . . . . . . . 107
Setup to use the WSD Scan. . . . . . . . . . . . . . . . . . . . . . . . . . . . . . . . . . 108
Installation procedure . . . . . . . . . . . . . . . . . . . . . . . . . . . . . . . . . . . . . . . . . . . . . . .108
Scanning Methods . . . . . . . . . . . . . . . . . . . . . . . . . . . . . . . . . . . . . . . . 109
Scan to E-mail . . . . . . . . . . . . . . . . . . . . . . . . . . . . . . . . . . . . . . . . . . . . . . . . . . . .109
Scan to Network PC. . . . . . . . . . . . . . . . . . . . . . . . . . . . . . . . . . . . . . . . . . . . . . . . .111
Scan to USB Memory . . . . . . . . . . . . . . . . . . . . . . . . . . . . . . . . . . . . . . . . . . . . . . . .111
Scan to Local PC . . . . . . . . . . . . . . . . . . . . . . . . . . . . . . . . . . . . . . . . . . . . . . . . . . .112
Scan to Remote PC . . . . . . . . . . . . . . . . . . . . . . . . . . . . . . . . . . . . . . . . . . . . . . . . .113
Canceling the Current Scan Job. . . . . . . . . . . . . . . . . . . . . . . . . . . . . . . . . . . . . . . . .118
Registering Address Book . . . . . . . . . . . . . . . . . . . . . . . . . . . . . . . . . . . 119
Address Book . . . . . . . . . . . . . . . . . . . . . . . . . . . . . . . . . . . . . . . . . . . . . . . . . . . . .119
Group List . . . . . . . . . . . . . . . . . . . . . . . . . . . . . . . . . . . . . . . . . . . . . . . . . . . . . . .120
Register all E-mail addresses . . . . . . . . . . . . . . . . . . . . . . . . . . . . . . . . . . . . . . . . . .120
Registering the Machine . . . . . . . . . . . . . . . . . . . . . . . . . . . . . . . . . . . . . . . . . . . . . . . . . . 120
Importing Addresses from a File. . . . . . . . . . . . . . . . . . . . . . . . . . . . . . . . . . . . . . . . . . . . . 120
Registering Network Scan Destinations . . . . . . . . . . . . . . . . . . . . . . . . . . 121
5 Using as a Printer . . . . . . . . . . . . . . . . . . . . . . . . . . . . . . . 122
Printing from a Computer . . . . . . . . . . . . . . . . . . . . . . . . . . . . . . . . . . . 122
Printing . . . . . . . . . . . . . . . . . . . . . . . . . . . . . . . . . . . . . . . . . . . . . . . . . . . . . . . . .122
Canceling a Print Job . . . . . . . . . . . . . . . . . . . . . . . . . . . . . . . . . . . . . . . . . . . . . . . .124
Printing From USB Memory . . . . . . . . . . . . . . . . . . . . . . . . . . . . . . . . . . 125
Starting a Print Job . . . . . . . . . . . . . . . . . . . . . . . . . . . . . . . . . . . . . . . . . . . . . . . . .125
Configuring Print Settings. . . . . . . . . . . . . . . . . . . . . . . . . . . . . . . . . . . . . . . . . . . . .126
Canceling a Print Job . . . . . . . . . . . . . . . . . . . . . . . . . . . . . . . . . . . . . . . . . . . . . . . .127
6 User Authentication and Access Control . . . . . . . . . . . . . 128
About User Authentication and Access Control . . . . . . . . . . . . . . . . . . . . . 128
Authentication by PIN . . . . . . . . . . . . . . . . . . . . . . . . . . . . . . . . . . . . . . 129
Registering a PIN . . . . . . . . . . . . . . . . . . . . . . . . . . . . . . . . . . . . . . . . . . . . . . . . . .129
Enabling Access Control . . . . . . . . . . . . . . . . . . . . . . . . . . . . . . . . . . . . . . . . . . . . . .129
Operation When PIN Authentication Is Enabled . . . . . . . . . . . . . . . . . . . . . . . . . . . . . .129
Authentication by User Name and Password . . . . . . . . . . . . . . . . . . . . . . 132
Registering User Name and Password . . . . . . . . . . . . . . . . . . . . . . . . . . . . . . . . . . . .132
Enabling Access Control . . . . . . . . . . . . . . . . . . . . . . . . . . . . . . . . . . . . . . . . . . . . . .132
Operation When User Name and Password Authentication is Enabled. . . . . . . . . . . . . . .132
-9-
Page 10

Table of Contents
7 Troubleshooting . . . . . . . . . . . . . . . . . . . . . . . . . . . . . . . . 135
Paper Jams . . . . . . . . . . . . . . . . . . . . . . . . . . . . . . . . . . . . . . . . . . . . . 135
Checking Error Messages . . . . . . . . . . . . . . . . . . . . . . . . . . . . . . . . . . . . . . . . . . . . .135
Clearing Paper Jams . . . . . . . . . . . . . . . . . . . . . . . . . . . . . . . . . . . . . . . . . . . . . . . .135
Error Messages . . . . . . . . . . . . . . . . . . . . . . . . . . . . . . . . . . . . . . . . . . 141
Error Messages Displayed on the Screen . . . . . . . . . . . . . . . . . . . . . . . . . . . . . . . . . .141
Checking the Machine's Status From the <STATUS> Key . . . . . . . . . . . . . . . . . . . . . . .152
Other Issues . . . . . . . . . . . . . . . . . . . . . . . . . . . . . . . . . . . . . . . . . . . . 153
Unable to Print from a Computer. . . . . . . . . . . . . . . . . . . . . . . . . . . . . . . . . . . . . . . .153
Unable to Install a Printer Driver Successfully . . . . . . . . . . . . . . . . . . . . . . . . . . . . . . .155
Restrictions on Each OS . . . . . . . . . . . . . . . . . . . . . . . . . . . . . . . . . . . . . . . . . . . . . .156
Copying Issues . . . . . . . . . . . . . . . . . . . . . . . . . . . . . . . . . . . . . . . . . . . . . . . . . . . .159
Faxing Issues . . . . . . . . . . . . . . . . . . . . . . . . . . . . . . . . . . . . . . . . . . . . . . . . . . . . .161
Scanning Issues . . . . . . . . . . . . . . . . . . . . . . . . . . . . . . . . . . . . . . . . . . . . . . . . . . .162
Image Quality Issues. . . . . . . . . . . . . . . . . . . . . . . . . . . . . . . . . . . . . . . . . . . . . . . .163
Feeding Issues . . . . . . . . . . . . . . . . . . . . . . . . . . . . . . . . . . . . . . . . . . . . . . . . . . . .166
Machine Issues . . . . . . . . . . . . . . . . . . . . . . . . . . . . . . . . . . . . . . . . . . . . . . . . . . . .167
When the Power Goes Out . . . . . . . . . . . . . . . . . . . . . . . . . . . . . . . . . . . . . . . . . . . .170
8 Maintenance . . . . . . . . . . . . . . . . . . . . . . . . . . . . . . . . . . . 171
Replacing Consumable Items . . . . . . . . . . . . . . . . . . . . . . . . . . . . . . . . . 171
Replacing Toner Cartridges . . . . . . . . . . . . . . . . . . . . . . . . . . . . . . . . . . . . . . . . . . . .172
Replacing the Image Drum (MB461, MB461+LP, MB471, MB471w, MB491, MB491+,
MB491+LP, ES4161 MFP, ES4191 MFP, MPS4200mb, MPS4700mb only) . . . . . . . . . . . .173
Replacing the Image Drum (MB441, MB451, MB451w only) . . . . . . . . . . . . . . . . . . . . .174
Cleaning Your Machine . . . . . . . . . . . . . . . . . . . . . . . . . . . . . . . . . . . . . 176
Cleaning the Surface of the Machine . . . . . . . . . . . . . . . . . . . . . . . . . . . . . . . . . . . . .176
Cleaning the Document Glass . . . . . . . . . . . . . . . . . . . . . . . . . . . . . . . . . . . . . . . . . .176
Cleaning Document Feeding Rollers in the ADF . . . . . . . . . . . . . . . . . . . . . . . . . . . . . .176
Cleaning Paper Feed Rollers . . . . . . . . . . . . . . . . . . . . . . . . . . . . . . . . . . . . . . . . . . .177
Cleaning LED Heads. . . . . . . . . . . . . . . . . . . . . . . . . . . . . . . . . . . . . . . . . . . . . . . . .178
Moving Your Machine . . . . . . . . . . . . . . . . . . . . . . . . . . . . . . . . . . . . . . 179
9 Appendix. . . . . . . . . . . . . . . . . . . . . . . . . . . . . . . . . . . . . . 181
Specifications (MB461/MB461+LP/MB471/MB471w/MB491/MB491+/
MB491+LP/ES4161 MFP/ES4191 MFP/MPS4200mb/MPS4700mb) . . . . . . . 181
Specifications (MB441/MB451/MB451w) . . . . . . . . . . . . . . . . . . . . . . . . . 189
Basic steps in Windows . . . . . . . . . . . . . . . . . . . . . . . . . . . . . . . . . . . . . 198
Index . . . . . . . . . . . . . . . . . . . . . . . . . . . . . . . . . . . . . . . . . . . 199
Oki contact details . . . . . . . . . . . . . . . . . . . . . . . . . . . . . . . . . 201
-10-
Page 11
Manual Composition
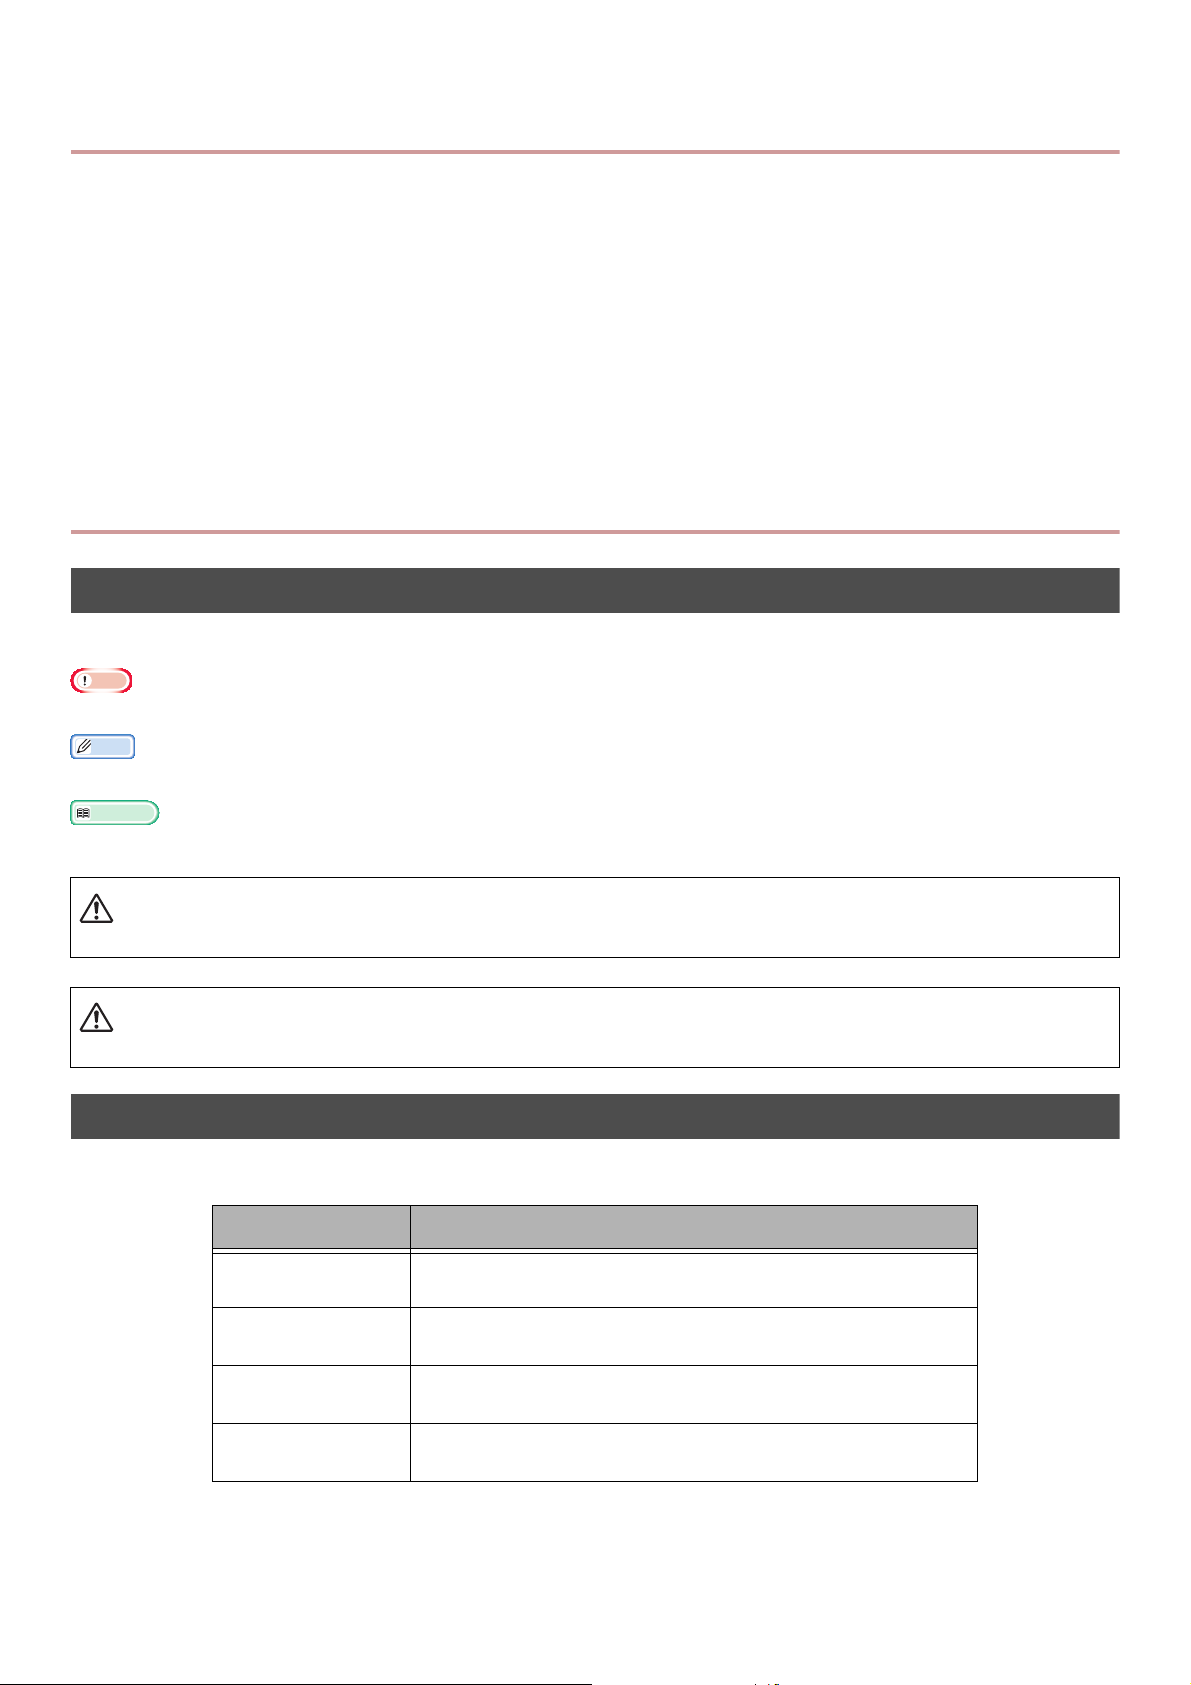
Note
Memo
Reference
CAUTION
The following manual is attached to this product.
Quick Start Guide
The Quick Start guide describes the initial setup for each function. The basic operation of each
function is also described.
User's Manual (Basic) ---- This document
In order to understand this machine, the basic operation is described. The initial setup,
Troubleshooting and maintenance procedures are also described.
User's Manual (Advanced)
The Advanced guide describes the advanced operations of each function. The utility and network
setting information is included.
About This Manual
Terms in this document
The following terms are used in this manual:
Indicates important information on operations. Please ensure you read these.
Indicates important information on operations. Please ensure you read these.
Indicates where to look when you want to know more detailed or related information.
WARNING
Indicates additional information which, if ignored or not followed, may result in personal injury or death.
Indicates additional information which, if ignored, may result in personal injury.
Symbols in this document
The following symbols are used in this manual:
Symbols Description
[ ] Indicates menu names on the display screen.
Indicates menu, window, dialog names on the computer.
" " Indicates file names on the computer.
Indicates reference titles.
< > key Indicates a hardware key on the operator panel or a key on
the keyboard of the computer.
> Indicates how to get to the menu you want on the menu of
the machine or the computer.
-11-
Page 12

Legends used in this manual
This document contains the following legends.
PostScript3 Emulation PSE, POSTSCRIPT3 Emulation, POSTSCRIPT3 EMULATION
®
Microsoft
Microsoft® Windows Server® 2012 64-bit Edition operating system Windows Server 2012
Microsoft
Microsoft® Windows Vista® 64-bit Edition operating system Windows Vista (64bit version)
Microsoft
Microsoft
Microsoft
Microsoft
Microsoft® Windows® 8 operating system Windows 8
Microsoft
Microsoft® Windows Vista® operating system Windows Vista
Microsoft
Microsoft® Windows® XP operating system Windows XP
Microsoft
Generic name for Windows 8, Windows Server 2012, Windows 7, Windows Vista, Windows Server 2008, Windows
XP, and Windows Server 2003 Windows
Web Services on Devices WSD
Windows® 8 64-bit Edition operating system Windows 8 (64bit version)
®
Windows® 7 64-bit Edition operating system Windows 7 (64bit version)
®
Windows Server® 2008 R2 64-bit Edition operating system Windows Server 2008
®
Windows Server® 2008 64-bit Edition operating system Windows Server 2008(64bit version)
®
Windows® XP x64 Edition operating system Windows XP (x64 version)
®
Windows Server® 2003 x64 Edition operating system Windows Server 2003 (x64 version)
®
Windows® 7 operating system Windows 7
®
Windows Server® 2008 operating system Windows Server 2008
®
Windows Server® 2003 operating system Windows Server 2003
Unless otherwise noted, 64bit version is included in Windows 8, Windows 7, Windows Vista, Windows
Server 2008, Windows XP, and Windows Server 2003. (64bit version and Windows Server 2008 R2 is
included in Windows Server 2008.)
If there is no special description, Windows 7 is used as Windows, Mac OS X 10.7 is used as Mac OS X,
and MB491 is used as the machine for examples in this document.
Depending on your OS or model, the description on this document may be different.
-12-
Page 13
1. Setup
Reference
Note
In this chapter, the basic setup and operations of this machine are described.
Overview of Machine
This section describes the overview of the machine.
AC cord
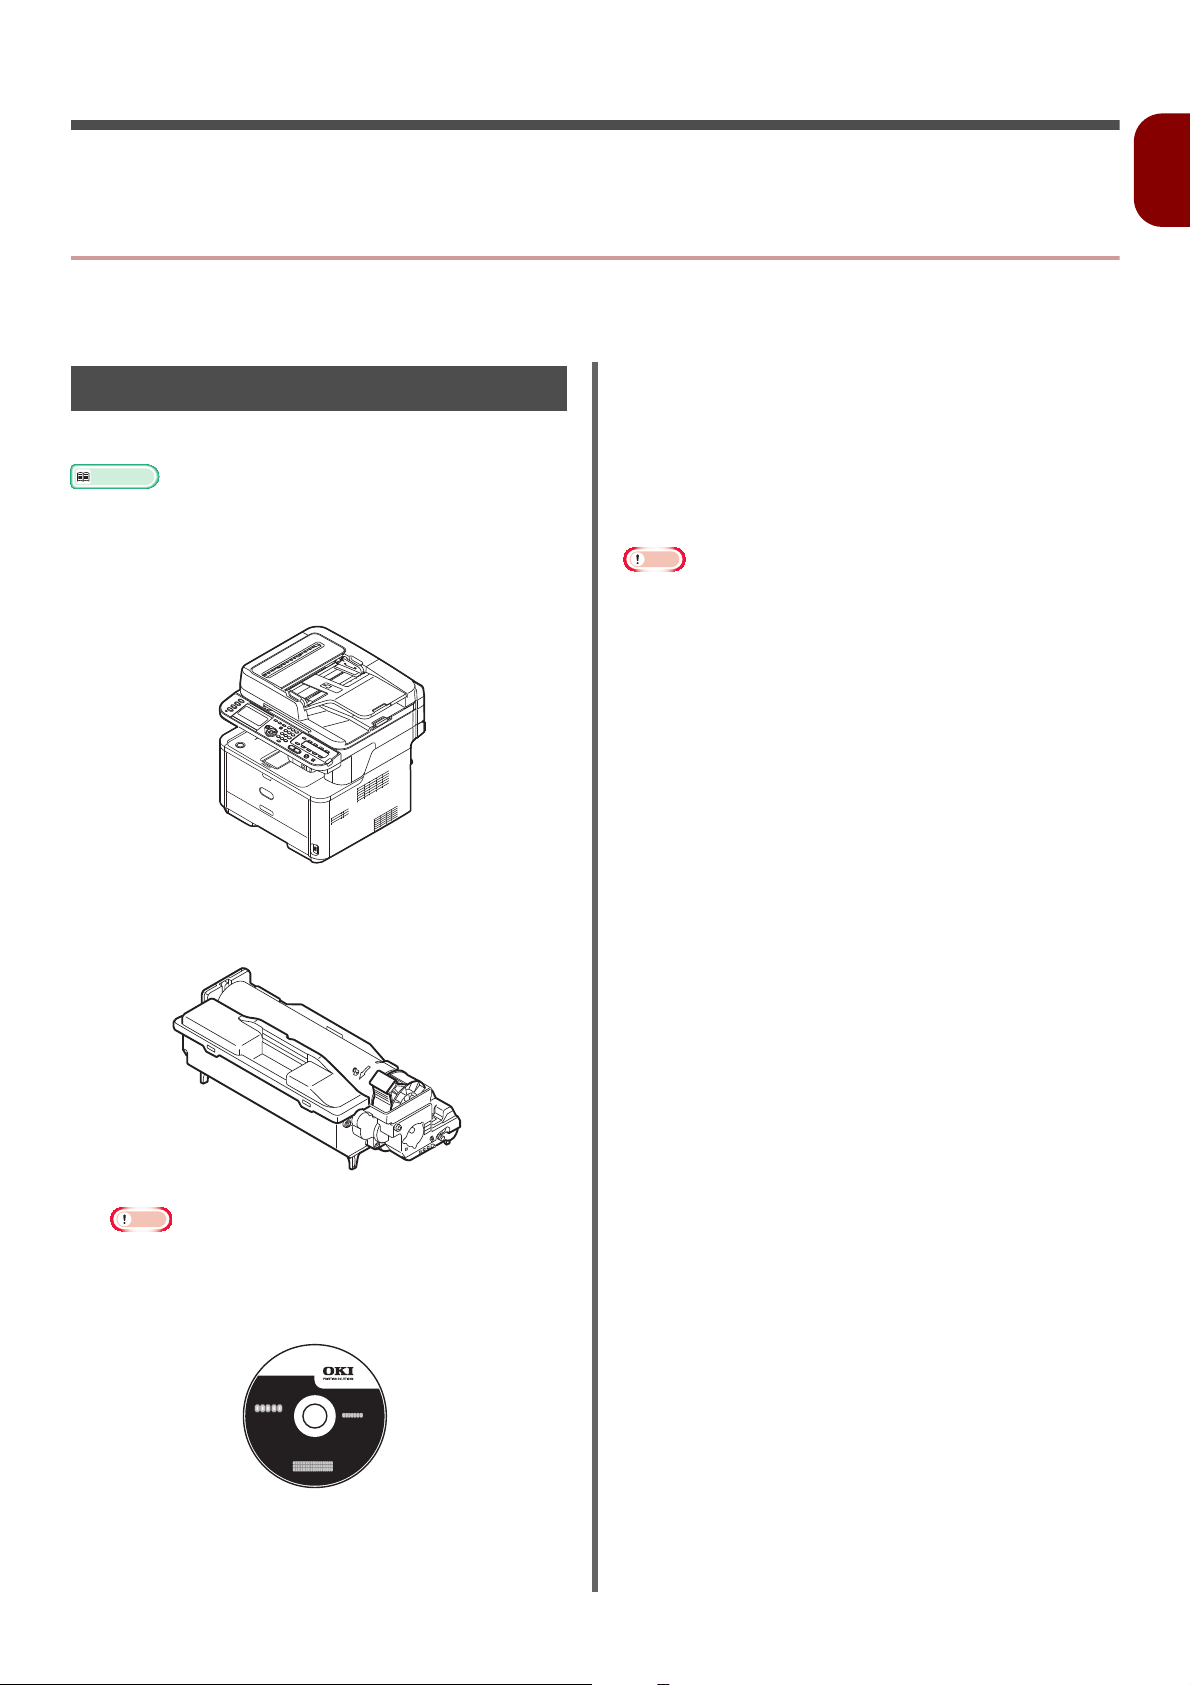
Contents of the Package
Check that you have everything shown below.
For details on how to open the package, refer to
"Unpacking Your Machine" P. 17.
Machine
Telephone connector cover
The Telephone Connector Cover is installed on the
Telephone Connector of the main unit.
Telephone cable
In some countries the cables are not supplied.
An Ethernet cable and USB cable are not supplied with
your machine. Procure them separately.
Packaging and cushioning material is required at the time
of shipping the machine. Please keep it as you will need it
should you wish to transport the machine at some point in
the future.
1
Setup
Image drum cartridge
Starter toner cartridge
Note
The starter toner cartridges are installed in the image
drum which is installed in the machine before
shipment.
Software DVD-ROM
-13-
Page 14
Overview of Machine
Reference
Note
CAUTION
Available Options
The following options are available for your
machine:
Second tray unit (tray 2)
For details on how to install the options, refer to "Installing
Options" P. 22.
Installation Requirements
Installation Environment
Your machine must be installed in the following
environment:
Temperature: 10°C~32°C
Humidity: 20%~80% RH(relative
humidity)
Maximum wet
bulb temperature: 25°C
Be careful of condensation. It may cause a malfunction.
If installing your machine where the humidity of the
surrounding air is less than 30% RH, use a humidifier or
antistatic mat.
WARNING
Do not install near high temperature or the fire.
Please do not install in a place from which
chemical reactions take place (laboratory etc.).
Do not install near inflammable solutions, such as
alcohol and thinner.
Do not install in places easily accessible to small
child.
Do not install in an unstable place (the shaky
stand, leaning place, etc.).
Do not install in a place exposed to high humidity,
dust or direct sunlight.
Do not install in an environment exposed to briny
air or corrosive gas.
Do not install in a place with much vibration.
Do not install in a place where the ventilation hole
of the machine is blocked.
Do not place directly on a rug or carpet with long
strands.
Do not install in a closed room with poor
ventilation and circulation.
If you use the machine in a small room for a long
time, please make sure that you ventilate the
room.
Install away from strong magnetic fields and
sources of noise.
Install away from monitors or TVs.
When moving the machine, hold it on both sides,
and move it by slightly letting the back of it fall.
-14-
Page 15

Installation Space
20cm
(193cm)
20cm
50cm
100cm
*
50cm
(96cm)
50cm
(110cm)
12
Install your machine on a flat surface that is wide
enough to accommodate the machine.
Allow for enough room around your machine
according to the images below.
Top v iew
Overview of Machine
Names of Components
1
11
10
9
8
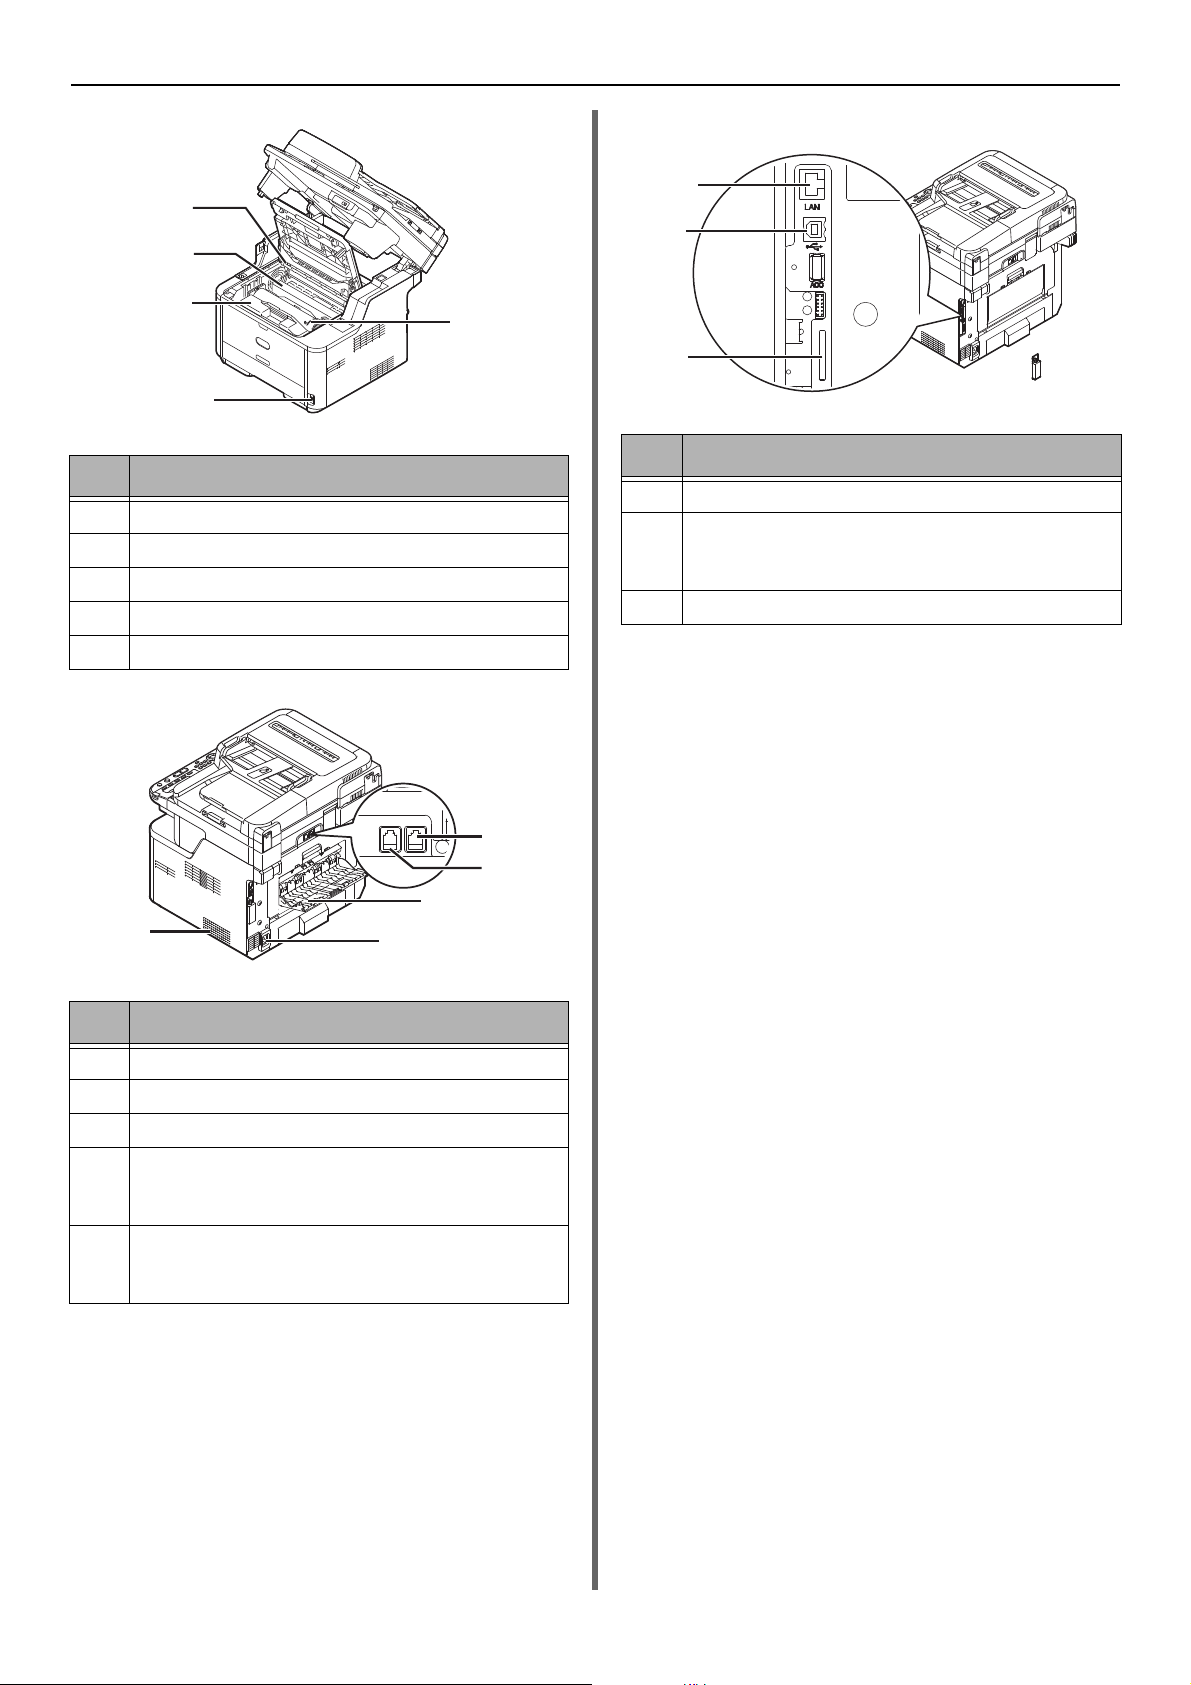
No. Name
1 Auto document feeder (ADF) cover
1
2
3
4
5
6
7
Setup
* MB461+LP/MB491+LP/MPS4700mb: 89cm
Other: 83cm
Side view
Side view (tray 2 installed)
2 Document tray
3 Scanner unit
4 Document glass cover
5Operator panel
6USB port
7Air vents
8Tray 1
9 Manual Feeder (for MB441/MB461/MB461+LP/
ES4161 MFP only)
Multipurpose (MP) tray (for MB451/MB451w/
MB471/MB471w/MB491/MB491+/MB491+LP/
ES4191 MFP/MPS4200mb/MPS4700mb only)
10 Top cover open button
11 Top cover
No. Name
12 Document glass
-15-
Page 16
Overview of Machine
16
13
15
17
14
LINE TEL
22
21
18
19
20
25
23
24
No. Name
13 Fuser unit
14 Starter toner cartridge
15 Image drum
16 LED head
17 Power Switch
Internal part of the connector cover
No. Name
23 USB interface connection
24 SD memory card slot (for MB491/MB491+/
MB491+LP/ES4191 MFP/MPS4200mb/
MPS4700mb only)
25 Network interface connection
No. Name
18 Faceup stacker
19 AC power socket
20 Air vents
21 LINE connection (for MB451/MB451w/MB471/
MB471w/MB491/MB491+/MB491+LP/ES4191
MFP/MPS4200mb/MPS4700mb only)
22 TEL connection (for MB451/MB451w/MB471/
MB471w/MB491/MB491+/MB491+LP/ES4191
MFP/MPS4200mb/MPS4700mb only)
-16-
Page 17
Installing Your Machine
Note
Note
2
3
4
5
Installing Your Machine
This section explains how to unpack your machine and how to turn it on and off.
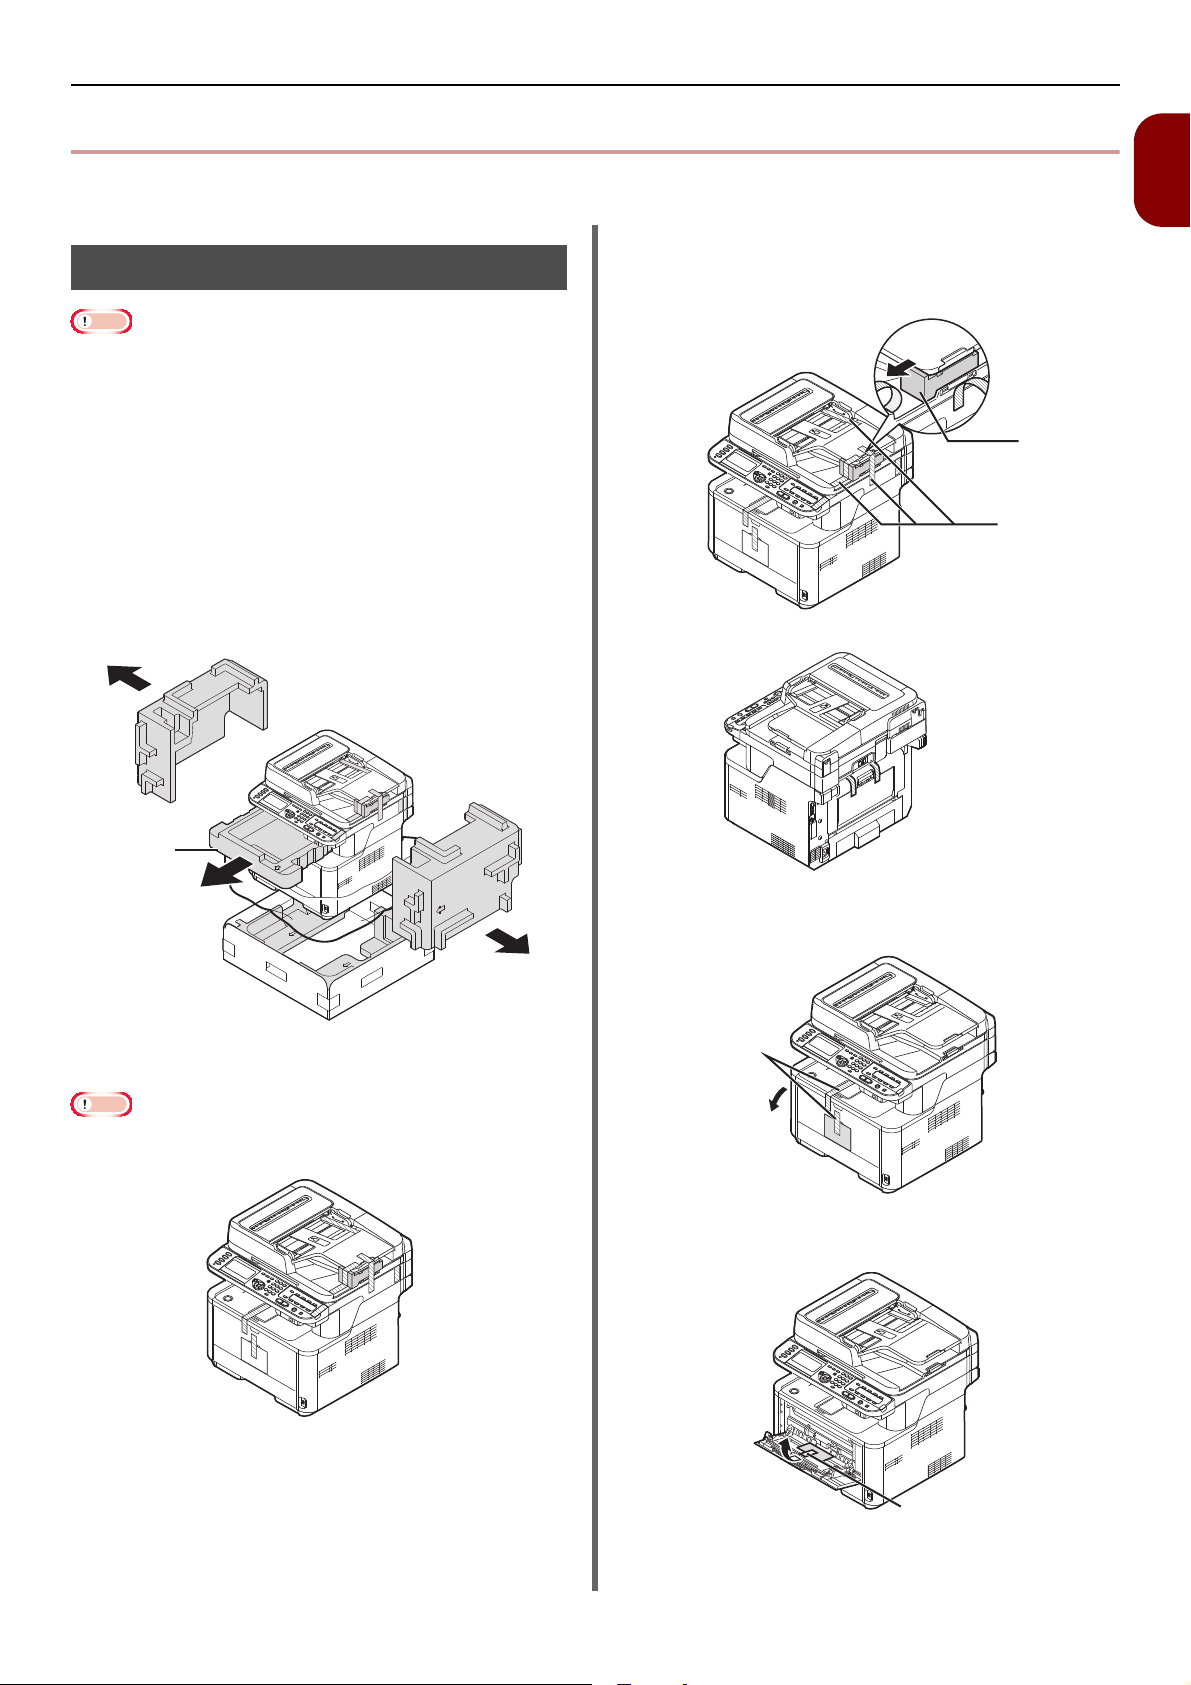
3 Remove the protection tapes (2) at the
Unpacking Your Machine
The image drum (the green tube) is very delicate. Handle
it carefully.
Do not expose the image drum to direct sunlight or very
bright interior light (approximately more than 1500lux).
Even under the normal interior light, do not leave it for
more than 5 minutes.
Packaging and cushioning material is required at the time
of shipping the machine. Please keep it as you will need it
should you wish to transport the machine at some point in
the future.
top and sides of your machine to take
out cushioning materials (3).
1 Remove your machine from the box and
remove cushioning materials and the
plastic bag from your machine.
The accessories are packed within the cushioning
material (1).
1
Setup
1
2 Lift your machine and place it where it is
to be installed.
Do not open the scanner unit till procedure no.9 is
completed.
4 Remove the protection tapes (4) to open
the MP tray.
5 Remove the protection tape (5) to pull
the paper up.
6 Close the MP tray.
-17-
Page 18
Installing Your Machine
Note
6
8
7 Open the document glass cover.
8 Remove the protection tapes (6).
Open the ADF and remove packing tapes.
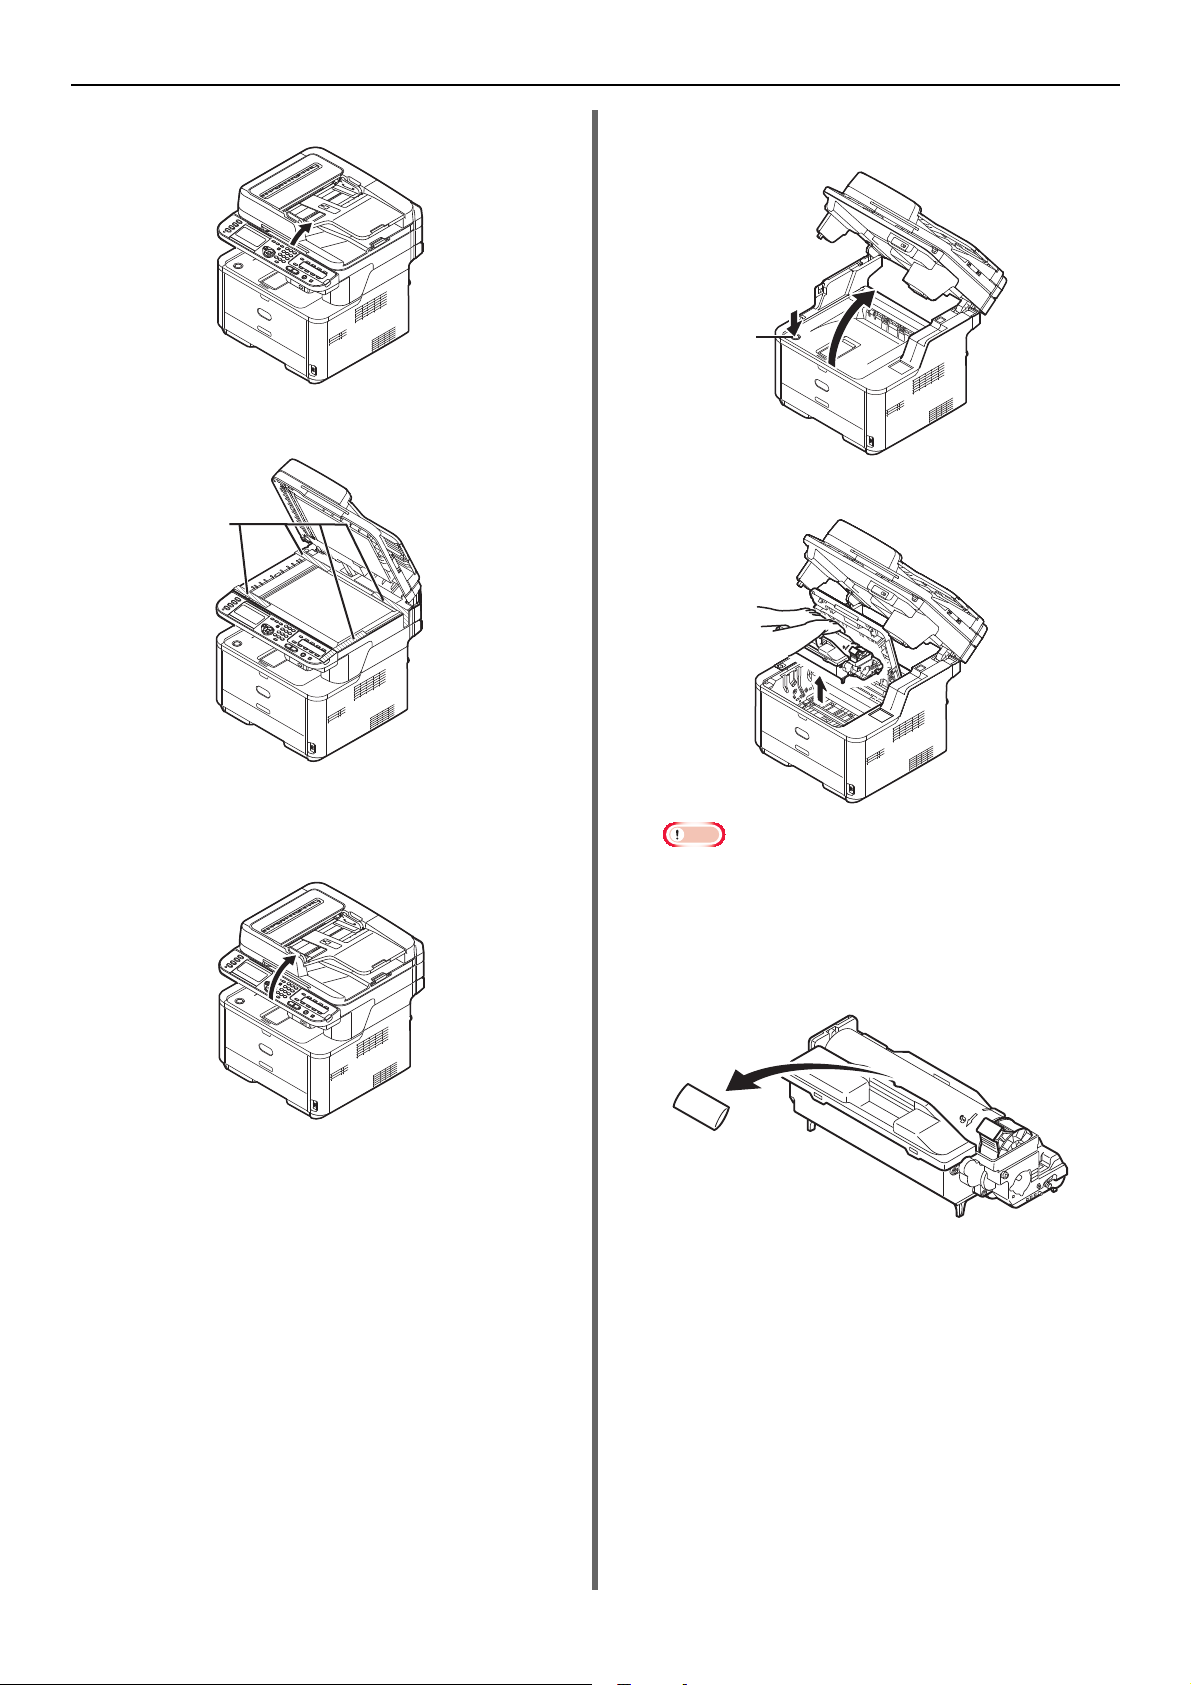
12 Press the top cover open button (8) and
open the top cover.
13 Lift the image drum from printer.
9 Close the document glass cover.
Now, you can open or close the scanner.
10 Open the scanner unit.
11 Remove the protection tapes, and
remove desiccants and films.
Do not expose image drum to light for more than
5 minutes
Do not touch shiny green surface at bottom of image
drum.
14 Remove the silica gel pack before
installation.
-18-
Page 19
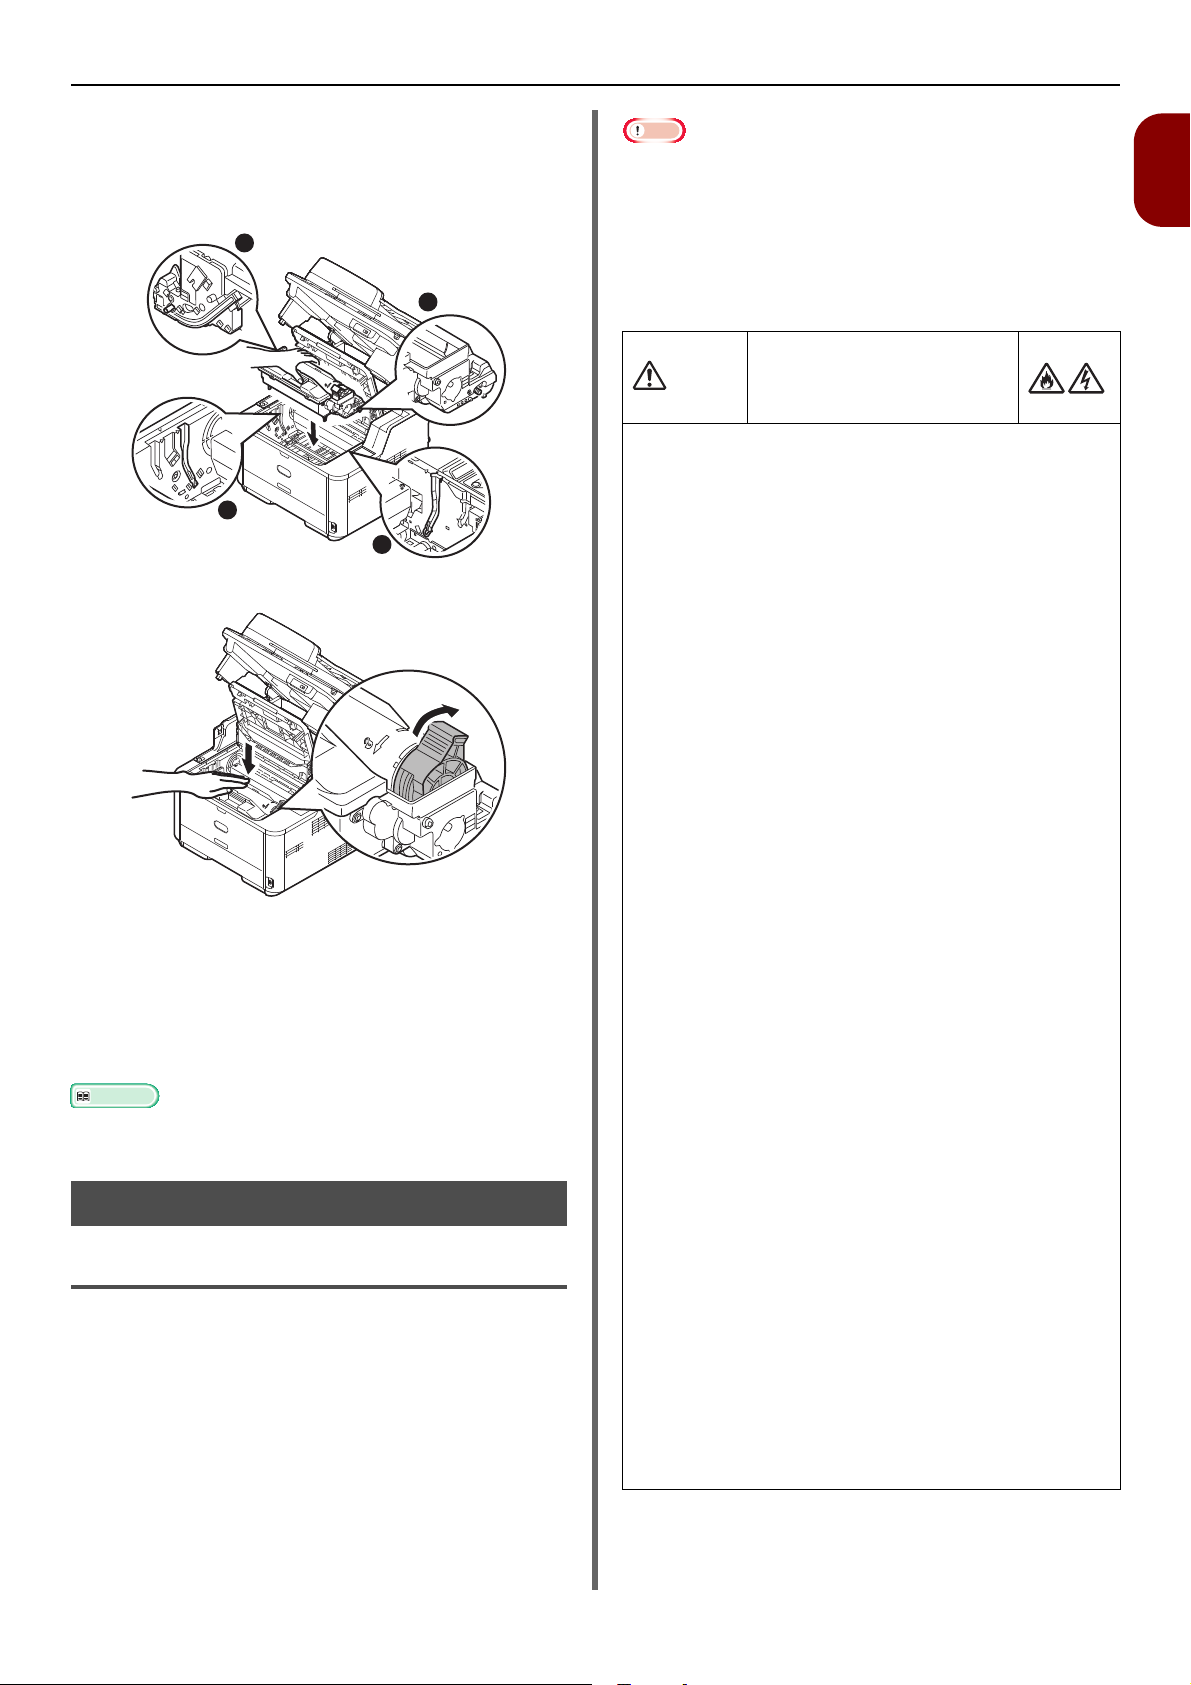
15 Reinstall the image drum in the
Reference
Note
1
1
2
2
WARNING
printer:lower it into place in the printer
locating the pegs (1) at each end into
their slots in the sides of the printer
cavity (2).
16 Turn the lever in the direction shown.
The arrow on the lever should align with the arrow on
the image drum.
When the toner cartridge is not fully fixed , a decline in
print quality may occur.
17 Close the top cover.
18 Close the scanner unit.
Please refer to "Loading Paper" P. 32 for information on
how to load paper into the machine.
Turning On and Off Your Machine
Power Supply Conditions
The power supply must meet the following
conditions:
Current: 110 - 127VAC
(Range 99 - 140 VAC)
220 - 240VAC
(Range 198 - 264VAC)
Frequency: 50/60 Hz ± 2%
Installing Your Machine
If the power supply is unstable, use a voltage regulator.
The maximum power consumption of this machine is
950W. Ensure that the power supply is sufficient to operate
this machine.
We do not guarantee the operation where an uninterruptible
power system (UPS) or inverter is used. Do not use an
uninterruptible power system (UPS) or inverter.
There is a risk of getting
an electric shock and/or
causing fire.
Be sure to cut off the power supply when attaching
or removing the power supply plug or the earth
wire.
Be sure to connect an earth wire to the grounding
terminal of exclusive use.
Please do not connect with the ground of a water
pipe, a gas pipe, and a telephone wire, or lightning
rod without fail.
Make sure to connect with the ground terminal
before connecting the power cord to the power
supply plug.
Be sure to perform extraction and insertion of the
power cord with a power supply plug.
Insert the power supply plug into the wall socket
securely.
Do not touch the power cord, or machine, if your
hands are wet.
Install the power cord in a location where it will not
be stepped on, and do not place objects on the
power cord.
Do not twist, bind, or knot the power cord.
Please do not use a damaged power cord.
Do not carry out foot wiring.
Do not connect this machine and other electric
products to the same wall socket. If connected
simultaneously with an air-conditioner, a copy
machine, shredder, etc., electric noise may
interfere with operation. When the connection with
the same wall socket is unavoidable, please use a
commercial noise filter or a commercial noise cut
transformer.
Use the attached power cord and insert it directory
with the ground terminal. Do not use power cords
intended for other products with this machine.
Do not use an extension cord. When use is
unavoidable, use a cord rated higher than 15A.
Use of an extended cord may cause AC voltage
decrease and interfere with normal operation.
During printing, do not shut off the power supply
or pull out the power supply plug.
When not in use for consecutive holidays or long-
term travel, pull out the power cord.
Do not use the attached power cord for other
products.
1
Setup
-19-
Page 20
Installing Your Machine
Note
Note
Memo
Turning On Your Machine
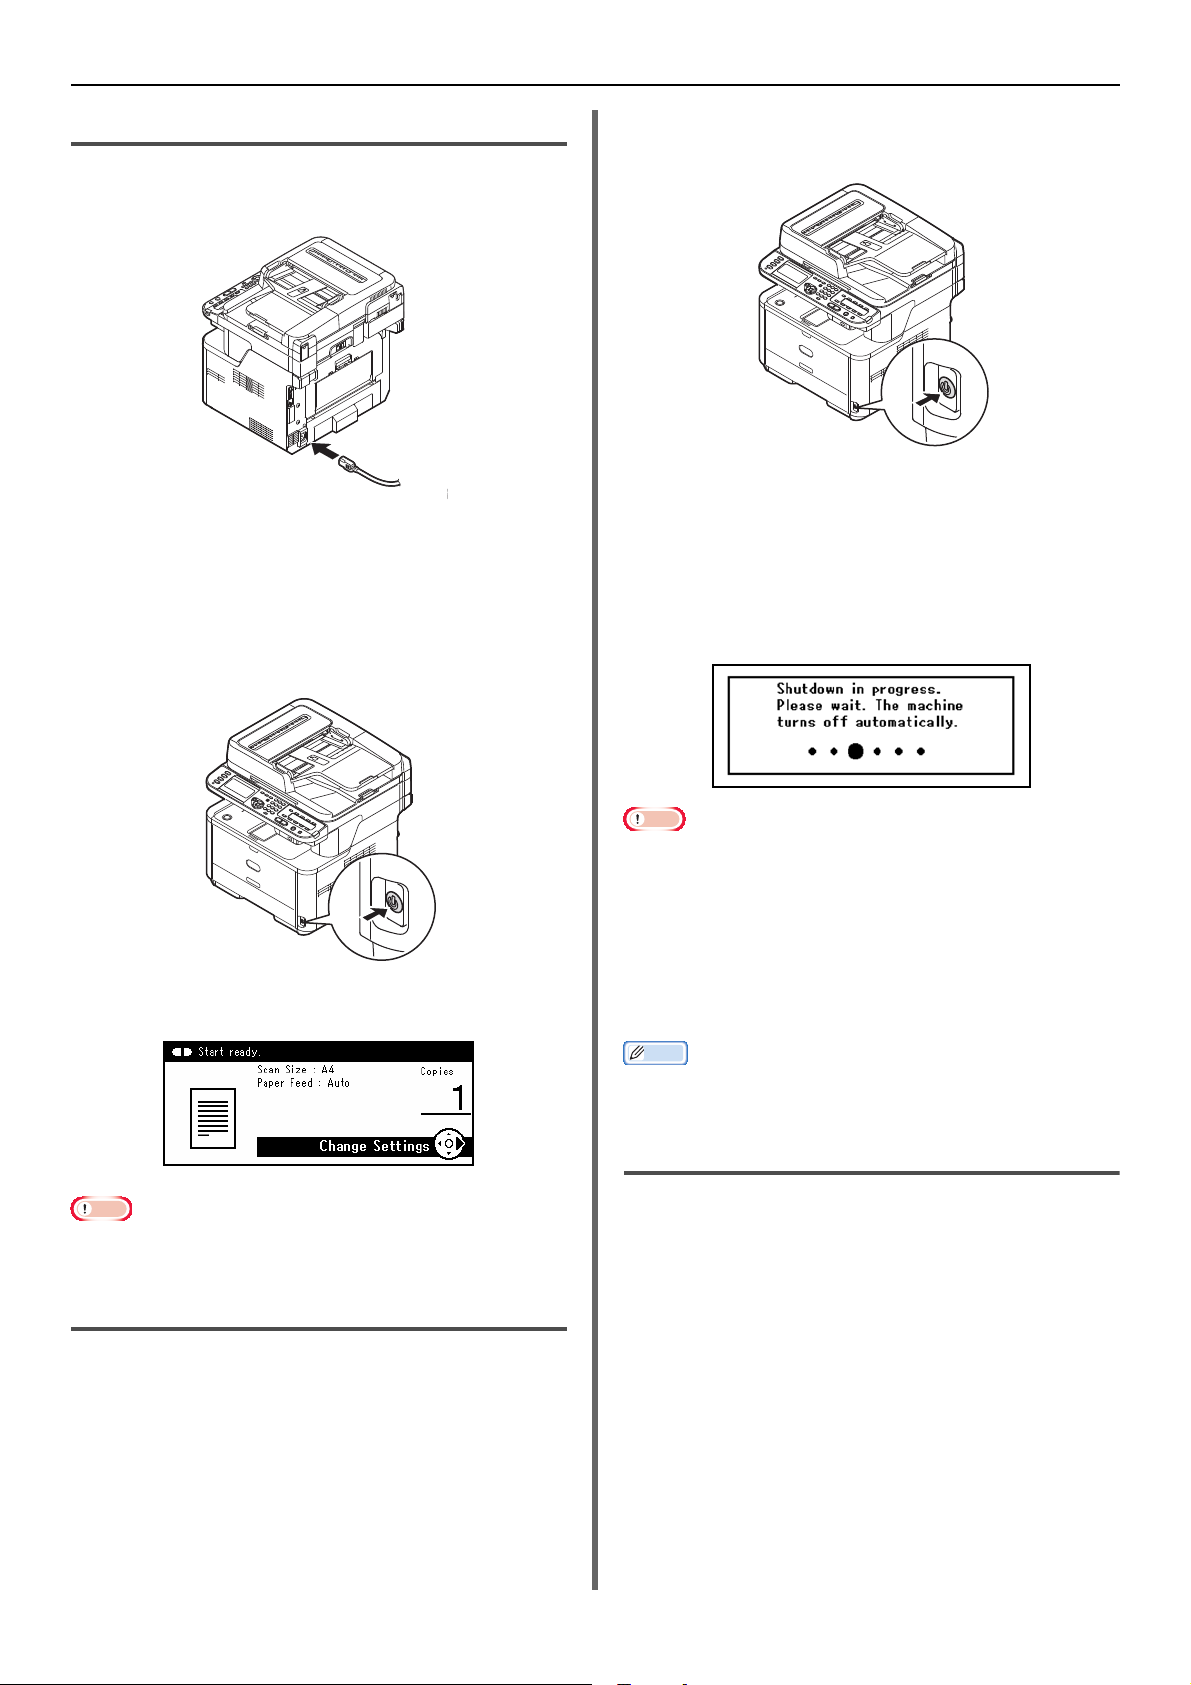
1 Plug the AC cable into the AC power
socket of your machine.
2 Plug the AC cable into the electric socket.
3
Check that no documents are on the document
glass or ADF, and the ADF cover is closed.
4 Hold down the power switch for about a
second to turn on the power.
1 Hold down the power switch for about a
second.
The message [Shutdown in progress.
Please wait. The machine turns off
automatically.] appears in the operator
panel, and power switch indicator blinks
every 1 second. Then the machine turns
off automatically and power switch
indicator goes out.
The copy standby screen is displayed after
your machine enters ready status.
Turn the power off, and when turning the power back on
again, push the power switch after waiting for a few seconds.
Turning Off Your Machine
Be sure to follow the procedure below every time
you turn off the machine.
Turn the power off, and when turning the power back on
again, push the power switch after waiting for a few seconds.
When the machine is not used for
long time
When the machine is not used for long time due
to holidays or trips, pull the power cord from the
socket.
The machine does not have functional failures if removing
the power plug for long time (more than 4 weeks).
Power Save Mode and Sleep Mode
The two-phase power saving mode enables you
to reduce machine power consumption.
Power Save Mode
When your machine is not used for a certain
period of time, it automatically enters a power
saving mode to reduce power consumption.
You can enter the power saving mode manually
by pressing the <
operator panel.
POWER SAVE> key on the
-20-
Page 21
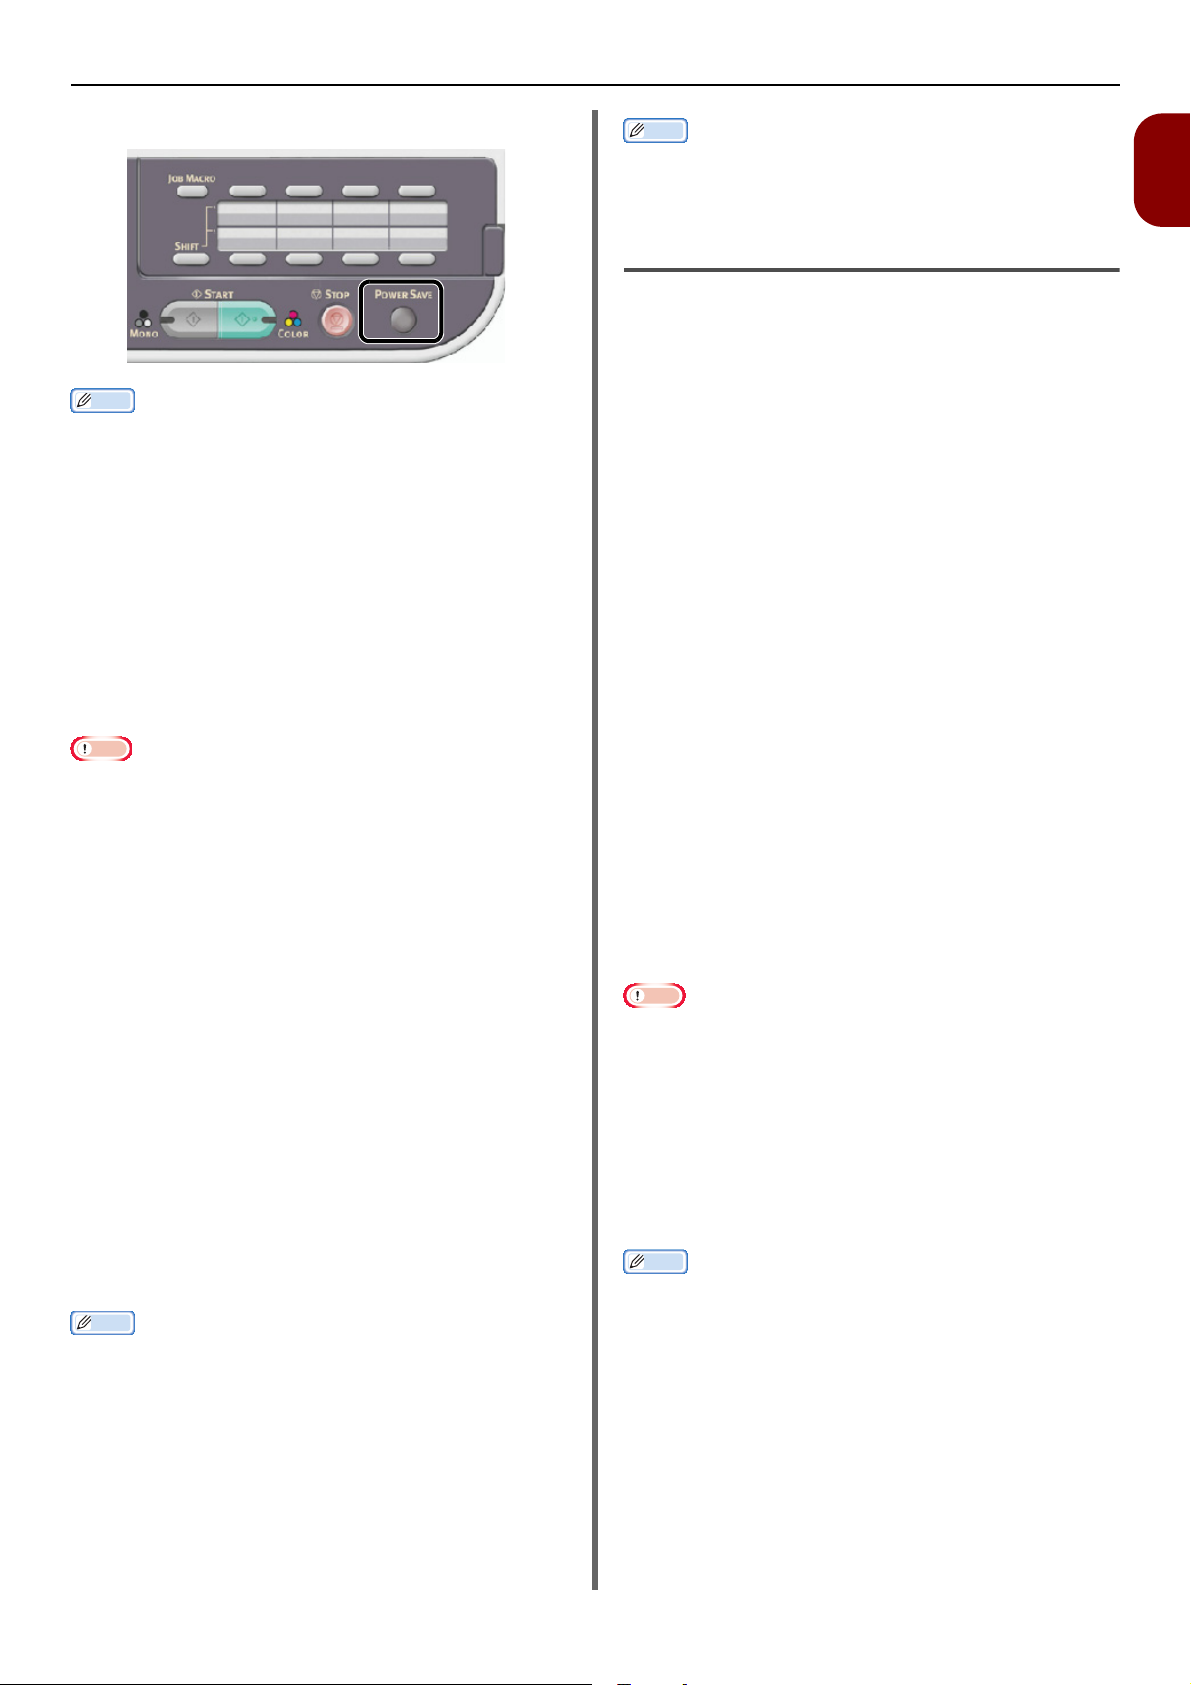
The <
Memo
Note
Memo
Memo
Note
Memo
POWER SAVE
Installing Your Machine
> key lights up while in the mode.
By factory default, the time interval to enter the power
saving mode is set to 1 minute. You can change the time
interval by pressing the <SETTING> key on the operator
panel and selecting [Admin Setup] > [Management] >
[Power Save] > [Power Save Time].
Sleep Mode
Your machine goes from the power saving mode
into the sleep mode after a set period of time. In
the sleep mode, the status of your machine is
almost the same as when it is turned off.
The <POWER SAVE> key blinks while in the
sleep mode.
The machine does not enter the sleep mode if an error
occurs.
If time-set transmission is scheduled, the machine will not
go into sleep mode.
If the fax transmission is waiting for a redial, the machine
cannot enter sleep mode.
When the network connection is switched from wired to
wireless, sleep mode is disabled. To enable sleep mode for
devices connected using wireless LAN, enable sleep mode
from the sleep mode setting menu. (MB451w and MB471w
only)
When a device using the wireless LAN connection goes into
sleep mode, the wireless LAN connection is broken. To
reconnect to the wireless LAN, press the power save key
on the device to recover from sleep mode. (MB451w and
MB471w only)
After the device connected to the wireless LAN has
recovered from sleep mode, it automatically connects to
the wireless access point using the same settings as before
it went into sleep mode. However, it may take up to 1
minute to connect. (MB451w and MB471w only)
When the network connection is switched from wireless
LAN to wired LAN, sleep mode is enabled. (MB451w and
MB471w only)
By factory default, the time interval to enter the sleep
mode is set to 30 minutes. You can change the time
interval by pressing the <SETTING> key on the operator
panel and then selecting [Admin Setup] >
[Management] > [Power Save] > [Sleep Time].
Returning to the Standby Mode
To return the machine to the standby mode from
the power saving or sleep modes, press the
<POWER SAVE> key on the operator panel.
When your machine receives a print job from a computer
or other devices, it automatically returns to the standby
mode.
Auto Power Off
When your machine is not used for a certain
period of time, the power turns off automatically.
Once the machine turns off, you need to turn on
to use it.
The machine has three settings to select the
machine's behavior on Auto Power Off.
Enable
Auto Config
Disable
Enable
When your machine is not used for a certain
period of time, it turns off the power
automatically.
Auto Config
The machine will not turn off automatically under
the conditions listed below.
- An Ethernet cable is attached to network
interface connection
- A telephone cable is attached to LINE
connection
Disable
The Auto Power Off function is disabled. The
machine will not turn off automatically.
In the following cases, the Auto Power Off function is also
disabled.
- When an error occurs
- When time-set transmission is scheduled
- When the fax transmission is waiting for a redial
-When [Auto Power Off] is [Auto Config.] and
Ethernet cable is attached
-When [Auto Power Off] is [Auto Config.] and
telephone cable is attached
By factory default, the time interval to turn off the power
is set to 4 hours. You can change the time interval by
pressing the <SETTING> key on the operator panel and
then selecting [Admin Setup] > [Management] >
[Power Save] > [Auto Power Off Time].
By factory default, [Auto Power Off] is set to [Auto
Config] or [Disable]. You can change the setting by
pressing the <SETTING> key on the operator panel and
then selecting [Admin Setup] > [User Install] >
[Power Save] > [Auto Power Off]
1
Setup
-21-
Page 22

Installing Options
Note
Reference
Reference
Model Number : N22204A
Installing Options
This section explains how to install options on your machine. The following options are available:
Second tray unit (MB461, MB461+LP, MB471, MB471w, MB491, MB491+, MB491+LP, ES4161 MFP, ES4191 MFP,
MPS4200mb, MPS4700mb only)
Be sure to hold down the power switch for about a second to turn off the power and unplug the AC cable and Ethernet or USB
cable before installing options. Installing options while your machine is turned on may damage your machine and options.
For details on the location of each component of the machine, refer to "Names of Components" P. 15.
Installing a Second Tray Unit (MB461, MB461+LP, MB471, MB471w, MB491, MB491+, MB491+LP, ES4161 MFP, ES4191 MFP, MPS4200mb, MPS4700mb only)
Install an optional second tray unit (tray 2) when
you want to increase the paper capacity of your
machine. After installation, you need to configure
the printer driver settings.
For the specification of the second tray unit (Tray2), refer
to "Loading Paper" P. 32.
Installation
2 Lift your machine and align the three
pins of the second tray unit with the
holes at the bottom of your machine.
3 Place your machine on the second tray
unit gently.
1 Hold down the power switch for about a
second to turn off the power, and then
unplug the AC cable and the Ethernet or
USB cable.
Reference
"Turning Off Your Machine" P. 20
4 Attach the lock parts.
5 Plug the AC cable and Ethernet or USB
cable into your machine, and then push
the power switch.
-22-
Page 23
Installing Options
Note
Reference
Printer Driver Configuration
You must be logged in as an administrator to complete this
procedure.
If the following conditions are met for Mac OS X, it is not
necessary to configure the printer driver, as the configured
option information is automatically taken from the
machine.
-USB connection
- When options have been configured on the machine
prior to installing the driver, where there is a connection
to a network using EtherTalk
Windows PCL XPS printer driver is not available for
Windows Vista, Windows Server 2008, Windows Server
2003, and Windows XP.
The printer driver needs to be installed on the computer
before doing this procedure. For details on how to install the
printer driver, refer to "Connecting to a Computer" P. 46.
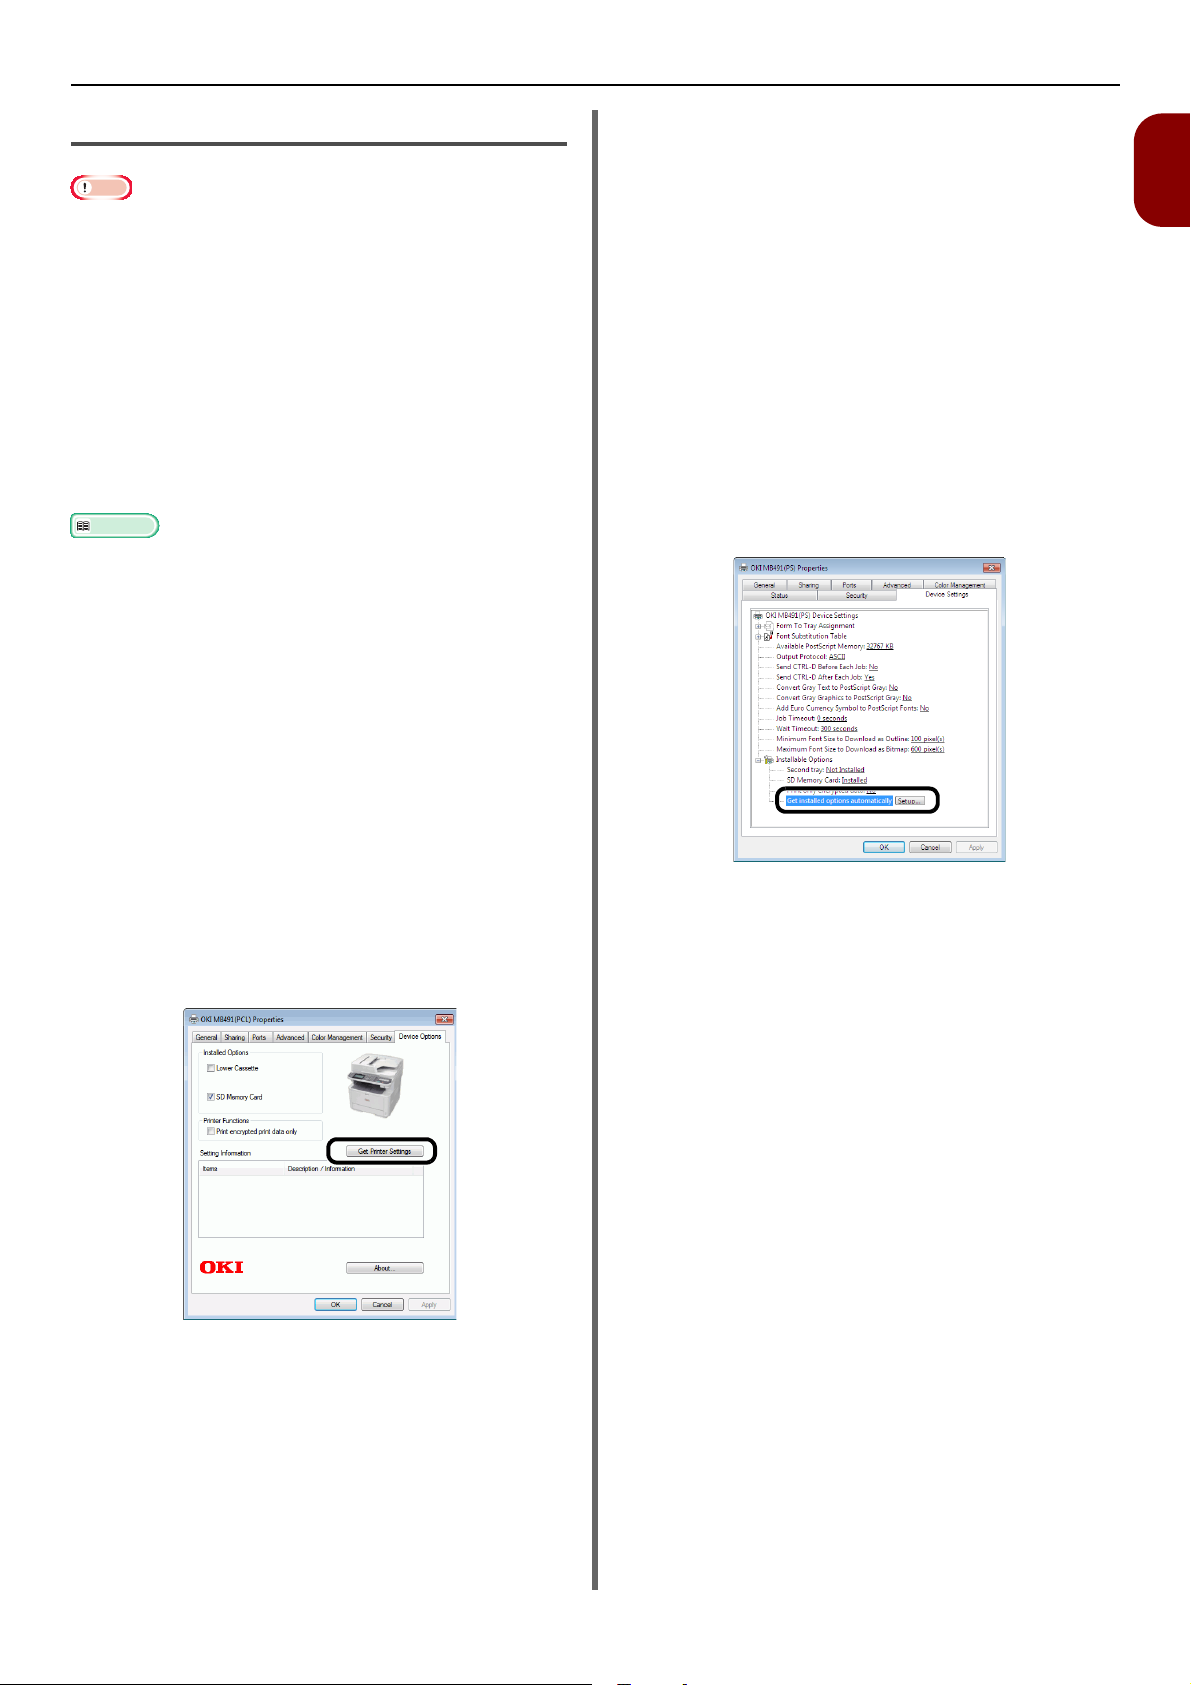
For Windows PCL/PCL XPS Driver
1 Click [Start] > [Devices and Printers].
For Windows PS Driver
1 Click [Start] > [Devices and Printers].
2 Right-click the [OKI MB491(PS)] icon
and then select [Printer properties].
(If you have installed multiple printer
drivers, select [Printer properties] >
[OKI MB491(PS)].)
3 Select the [Device Settings] tab.
4 For the network connection, select [Get
installed options automatically]
under [Installable Options], and then
click [Setup].
For the USB connection, select [Installed] for
[Second tray] under [Installable Options].
1
Setup
2 Right-click the OKI MB491 icon and
select [Printer properties]. (If you
have installed multiple printer drivers,
select [Printer properties] >[OKI
MB491(PCL)] or [OKI MB491(PCL
XPS)]).
3 Select the [Device Options] tab.
4 For the network connection, select [Get
Printer Settings].
For the USB connection, check [
Lower Cassette
].
5 Click [OK].
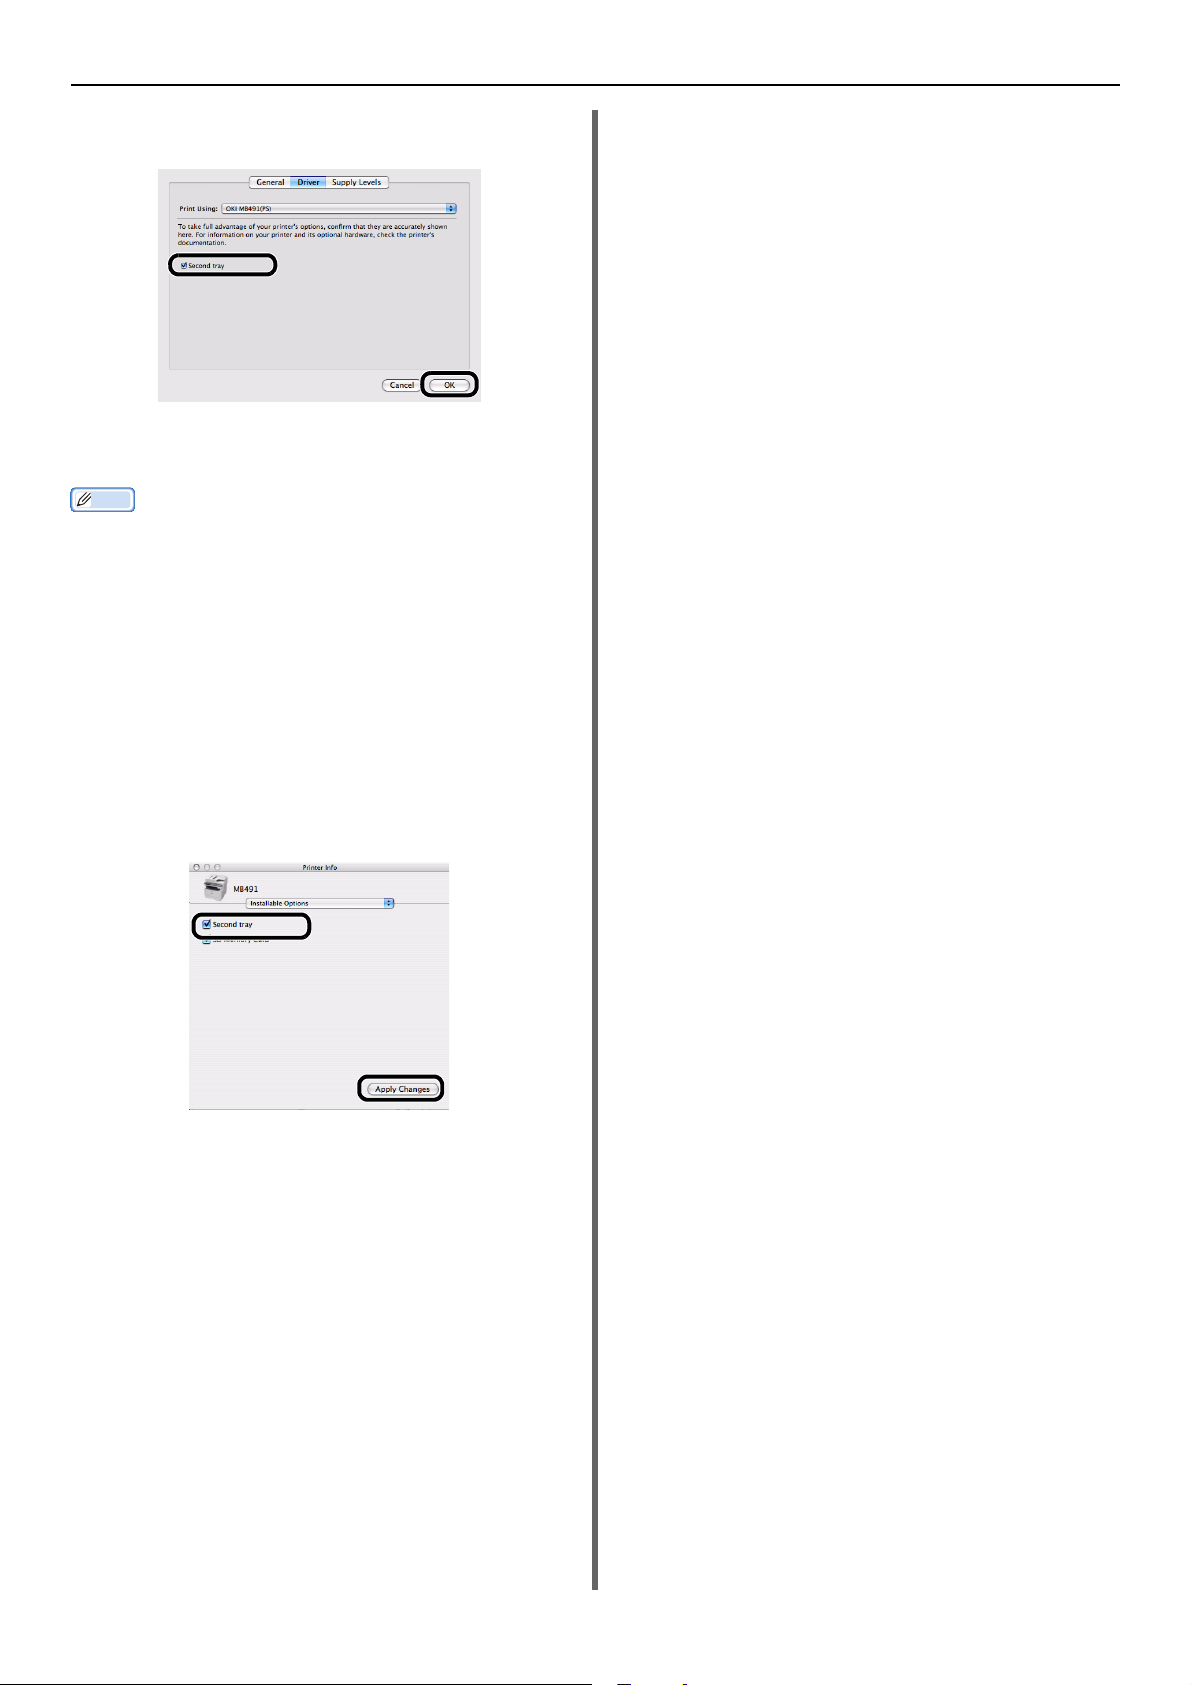
For Mac OS X PCL/PS Driver
(Mac OS X 10.5 to 10.8)
1 Select [System Preferences] from the
Apple menu.
2 Click [Print & Scan] (For Mac OS X 10.5
and 10.6:[Print & Fax]).
3 Select the name of your machine and
then click [Options & Supplies].
4 Select the [Driver] tab.
5 Click [OK].
-23-
Page 24
Installing Options
Memo
5 If the optional tray is already mounted,
click [Second Tray], and then click [OK].
For Mac OS X PCL/PS Driver
(Mac OS X 10.4.0 to 10.4.11)
The following procedure uses Mac OS X 10.4.11 as an
example. Depending on an OS, the description may be
different.
1 From [Go], select [Utilities] and then
double-click [Printer Setup Utility].
2 Select the name of your machine and
then click [Show Info].
3 Select [Installable Options].
4 If the optional tray is already mounted,
click [Second Tray], and then click
[Apply Changes].
5 Close [Printer Info].
-24-
Page 25
Operator Panel
2
19
1
22
20
1854317
12 1413
11
16
15
6789 10
21
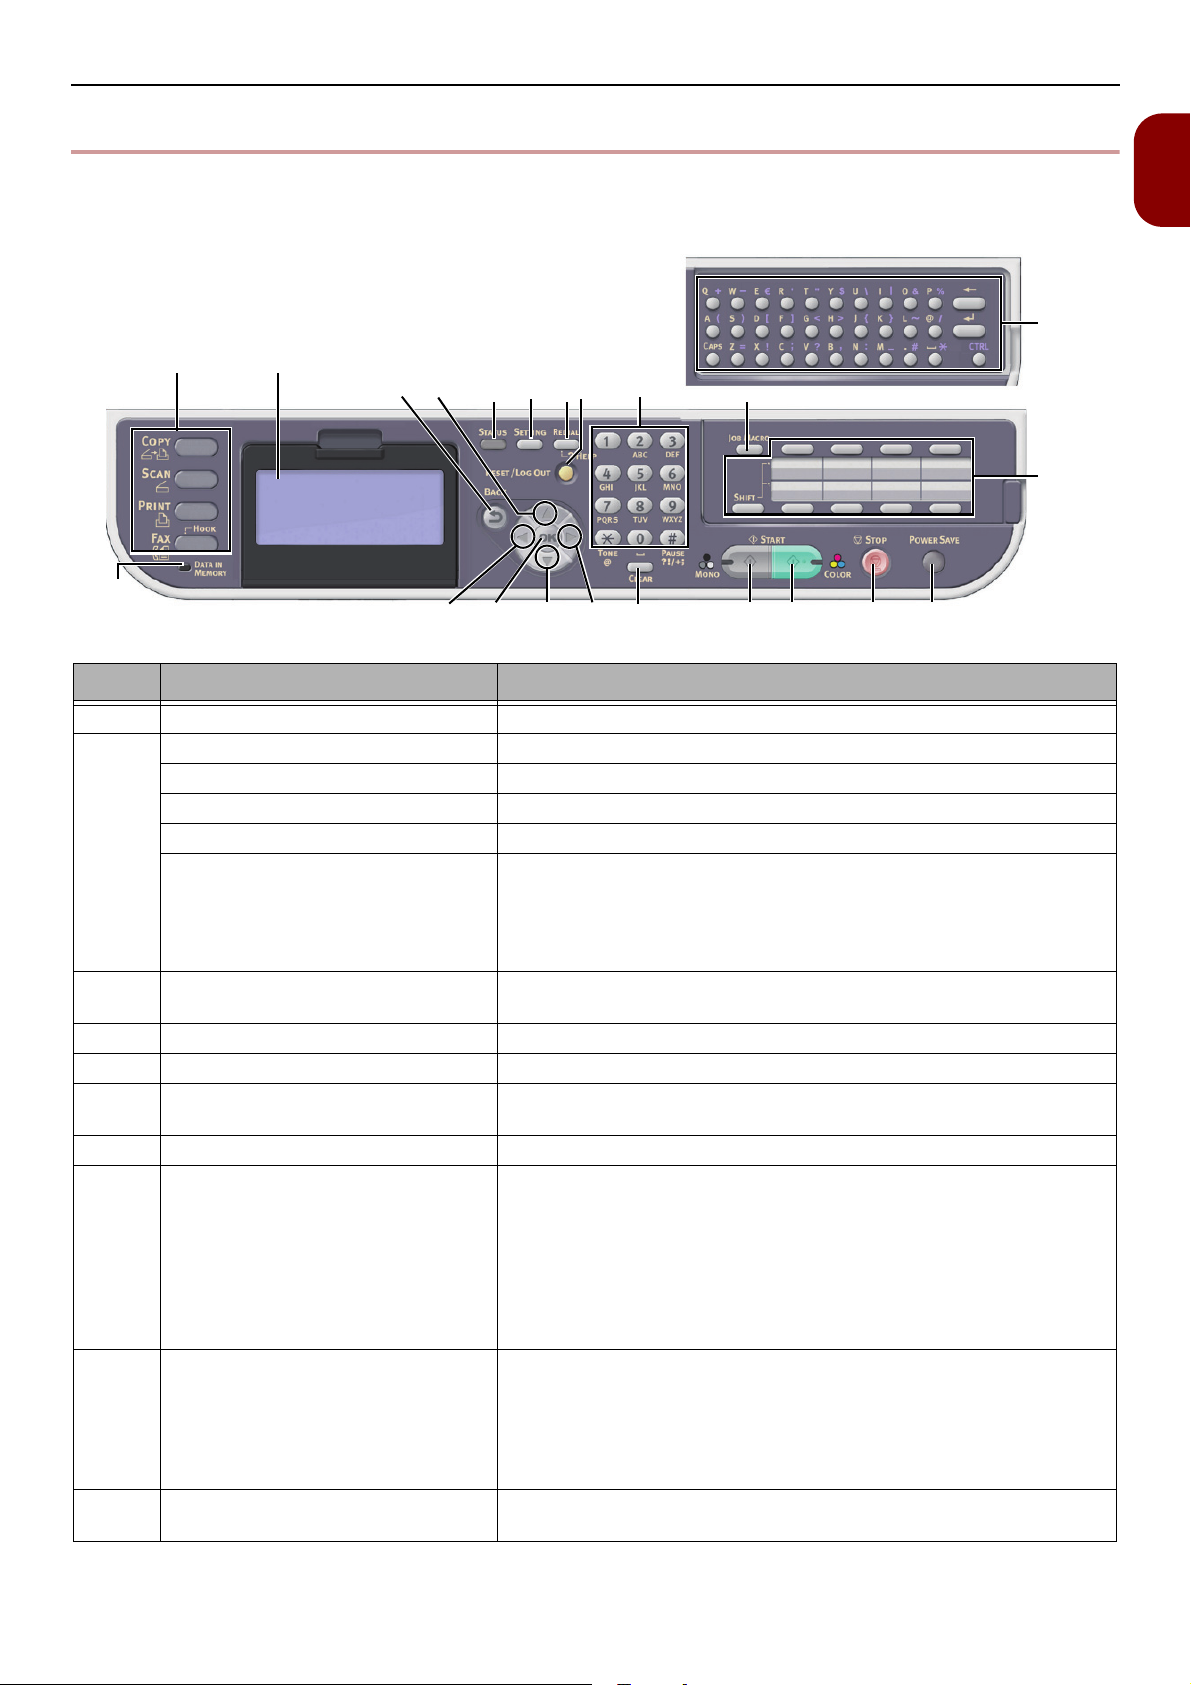
Operator Panel
This section explains the names and functions of components on the operator panel and how to enter
text.
No. Name Function
1 Display screen Displays operating instructions and the status of the machine.
2 Main function keys Switches functions. The selected key lights up in blue.
<COPY> key Switches to the copy start screen.
<SCAN> key Switches to the scanner menu screen.
<PRINT> key Switches to the print menu screen.
<FAX/HOOK> key
(for MB451/MB451w/MB471/
MB471w/MB491/MB491+/
MB491+LP/ES4191 MFP/
MPS4200mb/MPS4700mb)
3<START (MONO)> key Starts copying, scanning, faxing, or printing from USB memory in
4<START (COLOR)> key Starts scanning in color.
5<STOP> key Cancels the current job immediately.
6<STATUS> key Displays the status menu screen.
7<SETTING> key Displays the equipment setting menu screen.
8<REDIAL/?HELP> key
(for MB451/MB451w/MB471/
MB471w/MB491/MB491+/
MB491+LP/ES4191 MFP/
MPS4200mb/MPS4700mb)
<?HELP> key
(for MB441/MB461/MB461+LP/
ES4161 MFP)
9<RESET/LOG OUT> key In the top screen of each function, logs out.
10 Ten-key pad Enters numbers.
Switches to the fax/Internet fax menu. On the Fax Menu, hooks
the phone line.
black and white.
Flashes/turns on if there is a status item to be displayed.
Displays the help screen. When closing, press the <
?HELP
certain screens,dial the phone number which is dialed the last time.
In the start screen of each function, returns to the top screen.
In the setting screen, resets a setting value and returns to the
Enters alphanumeric characters and symbols.
> key, <
*In the copy function, the top screen is the same as the start
screen.
Return
> key, or <
RESET/LOG OUT
start screen.
REDIAL/
> key. On
1
Setup
-25-
Page 26
Operator Panel
No. Name Function
11 <UP> key Shifts the highlighted selection up while an item is selected or
characters are entered.
12 <DOWN> key Shifts the highlighted selection down while an item is selected or
characters are entered.
13 <LEFT> key Returns to the previous screen.
Shifts the highlighted selection to the left while an item is
selected or characters are entered.
14 <RIGHT> key Proceeds to the next screen.
Shifts the highlighted selection to the right while an item is
selected or characters are entered.
15 <OK> key Confirms the highlighted item.
Selects an item to be checked.
16 <BACK> key Returns to the previous screen.
17 <CLEAR> key Executes the following action
Minimizes a setting value.
Enters zero for a setting value.
Clears what is entered.
Cancels a selected item.
18 <POWER SAVE> key Enters or exits the power saving mode.
Exits the sleep mode.
Lights up in green while in the modes.
19 <DATA IN MEMORY> indicator
(for MB451/MB451w/MB471/
MB471w/MB491/MB491+/
MB491+LP/ES4191 MFP/
MPS4200mb/MPS4700mb)
20 One-Touch key pad Accesses a registered e-mail address or fax number.
21 <JOB MACRO> key
(for MB471/MB471w/MB491/
MB491+/MB491+LP/ES4191 MFP/
MPS4200mb/MPS4700mb)
22 Qwerty keyboard
(for MB471/MB471w/MB491/
MB491+/MB491+LP/ES4191 MFP/
MPS4200mb/MPS4700mb)
Lights up when data is in memory.
* Sleep mode does not light up even if there is data in the memory.
8 keys x 2 groups which is 16 entries in total (Press the <SHIFT>
key to switch the groups)
Switches to the job macro screen.
Enters text.
It is under the one-touch key pad.
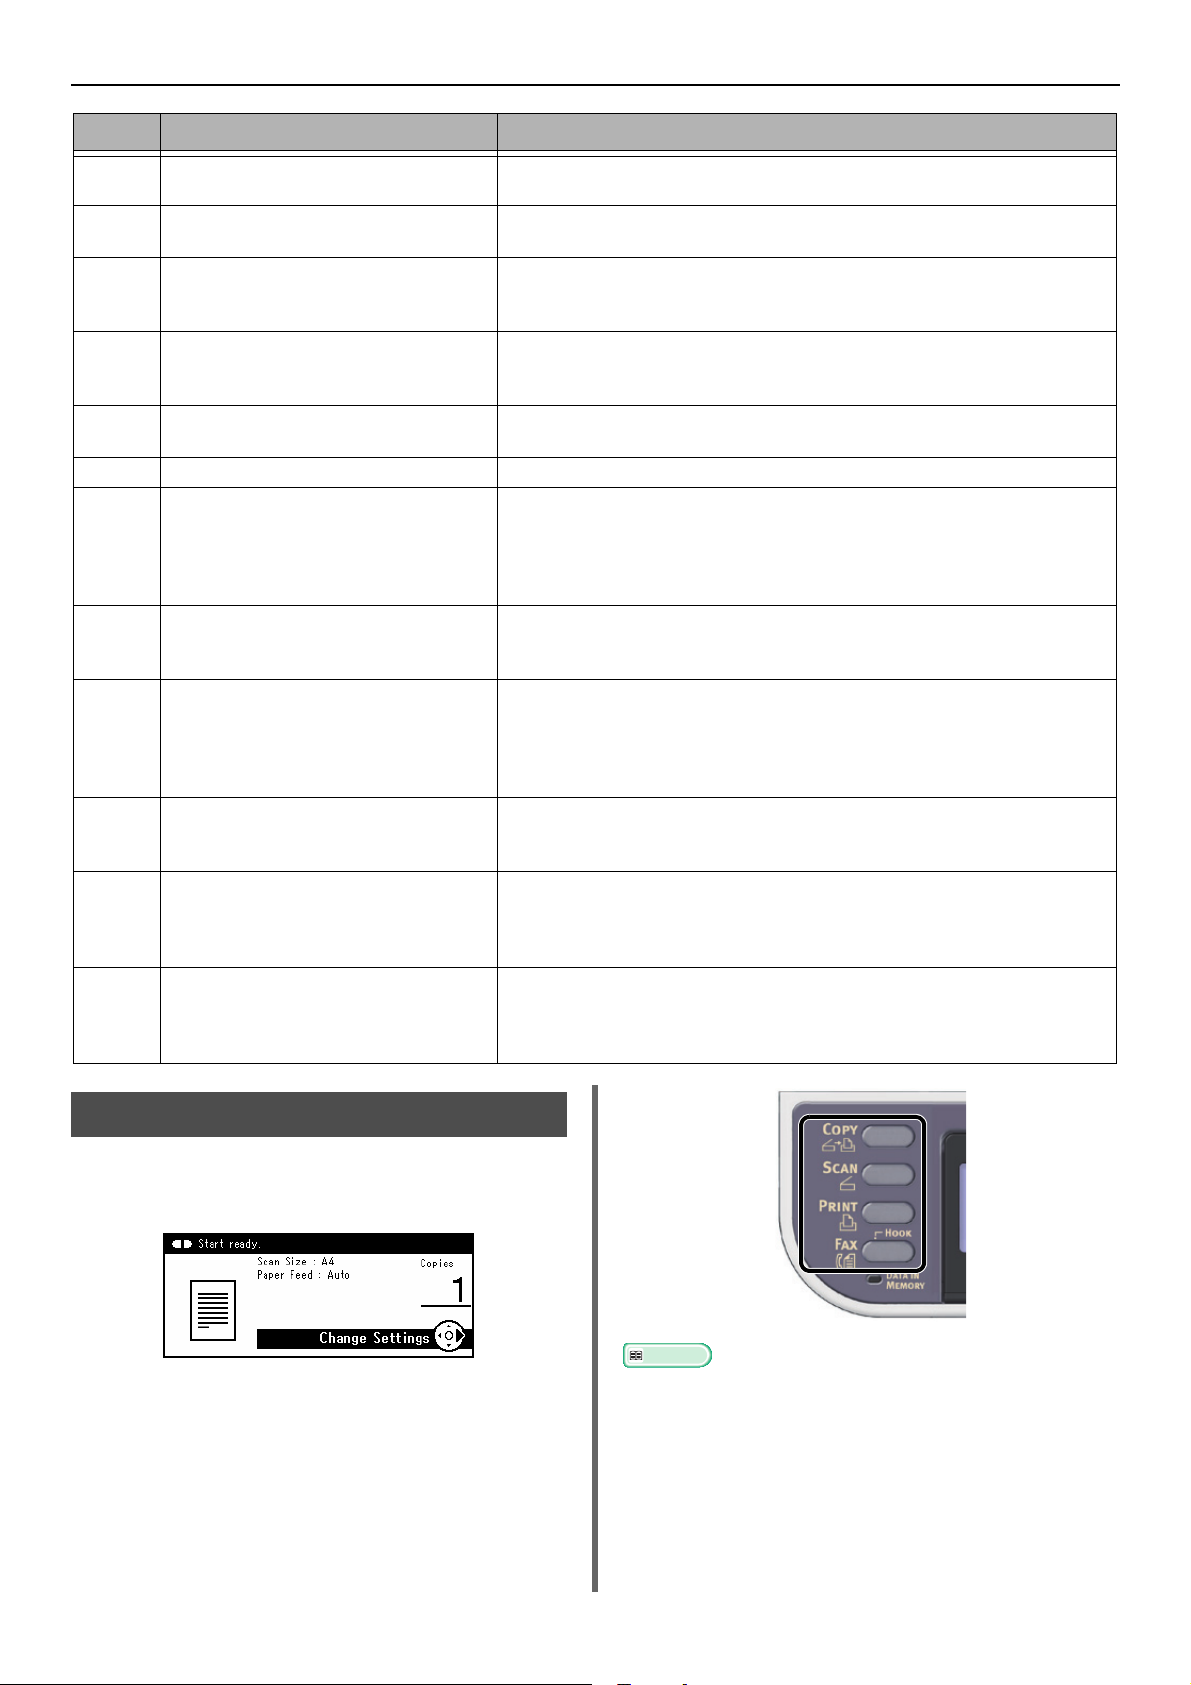
Default Screen
Turn the power on, and when the machine is
ready for use, the Copy Start screen will be
displayed as the default mode.
You can switch to other functions by using the
main function keys.
Reference
You can change the default screen by pressing the
<SETTING> key on the operator panel and then selecting
[Admin Setup] > [Management] > [Default Mode].
For details, refer to the User's Manual Advanced.
-26-
Page 27
Entering Text Using the
Memo
Memo
OK
Operator Panel
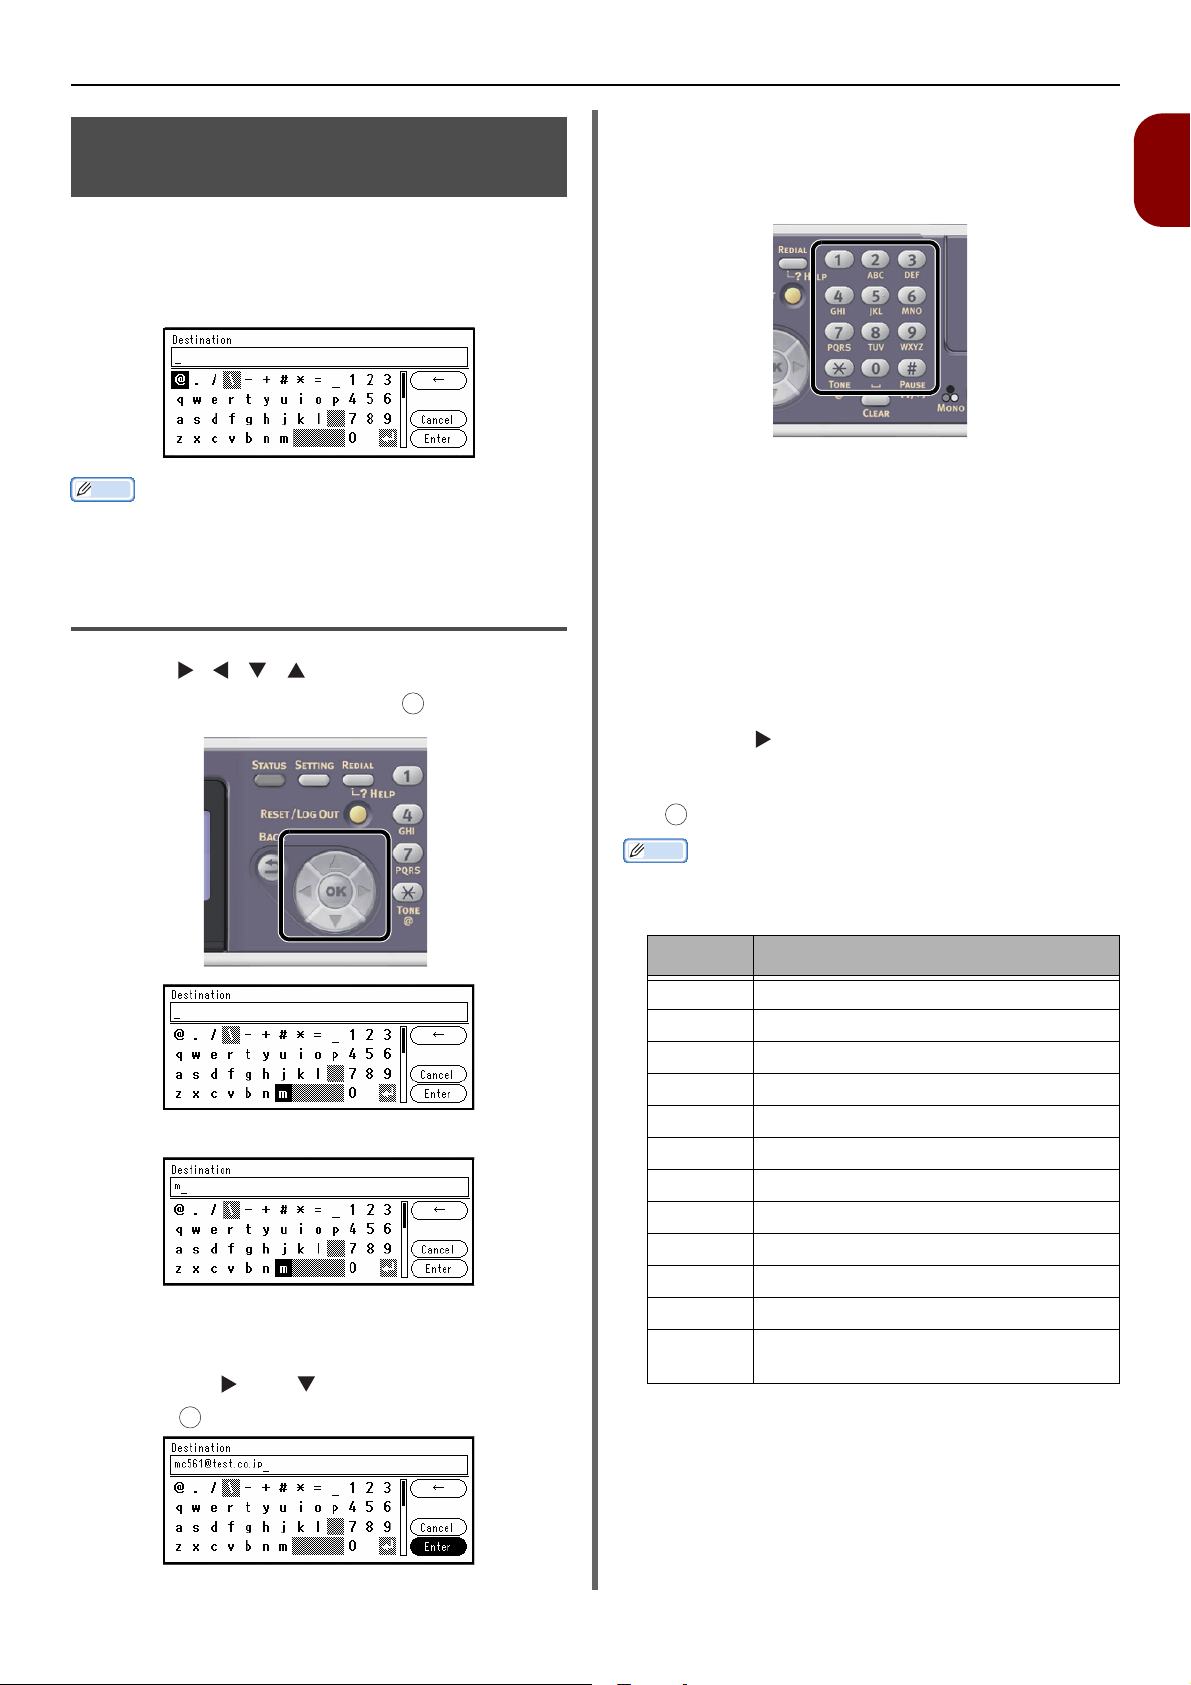
When you need to enter text while setting an
item, the entry screen shown below appears.
You can enter upper and lower case letters,
numbers and symbols with the screen keyboard.
When you need to enter only numbers, the screen
keyboard may not appear. In this case, enter numbers
using the ten-key pad.
Entering Text
Operator Panel
Using the Ten-key Pad
You can also use the ten-key pad to enter
alphanumeric characters and symbols in the
entry screen.
You can enter the numbers labeled on each key,
as well as the other characters by pressing the
keys repeatedly.
1 Press a key on the ten-key pad until the
character you want appears in the text
file.
1
Setup
1
Press , , , to select the character
you want, and then press .
The selected character is entered in the text field.
OK
2 Repeat step 1 until all the characters
required are entered.
3 Press the and to select [Enter] and
press to complete the entry process.
2 Repeat step 1 until all the characters
required are entered.
If you continuously press the same key, you can
press the button to move the cursor.
3 Check that [Enter] is selected and press
OK
to complete the entry process.
You can enter the following characters by pressing the
keys on the ten-key pad.
Ten-key Characters
1 1
2 abc2ABC
3 def3DEF
4 ghi4GHI
5 jkl5JKL
6 mno6MNO
7 pqrs7PQRS
8 tuv8TUV
9 wxyz9WXYZ
0 (Space) 0
* @*
# ._-(Space)+!"$%&'(),/
:;<=>?[\]^#
-27-
Page 28
Operator Panel
Note
OK
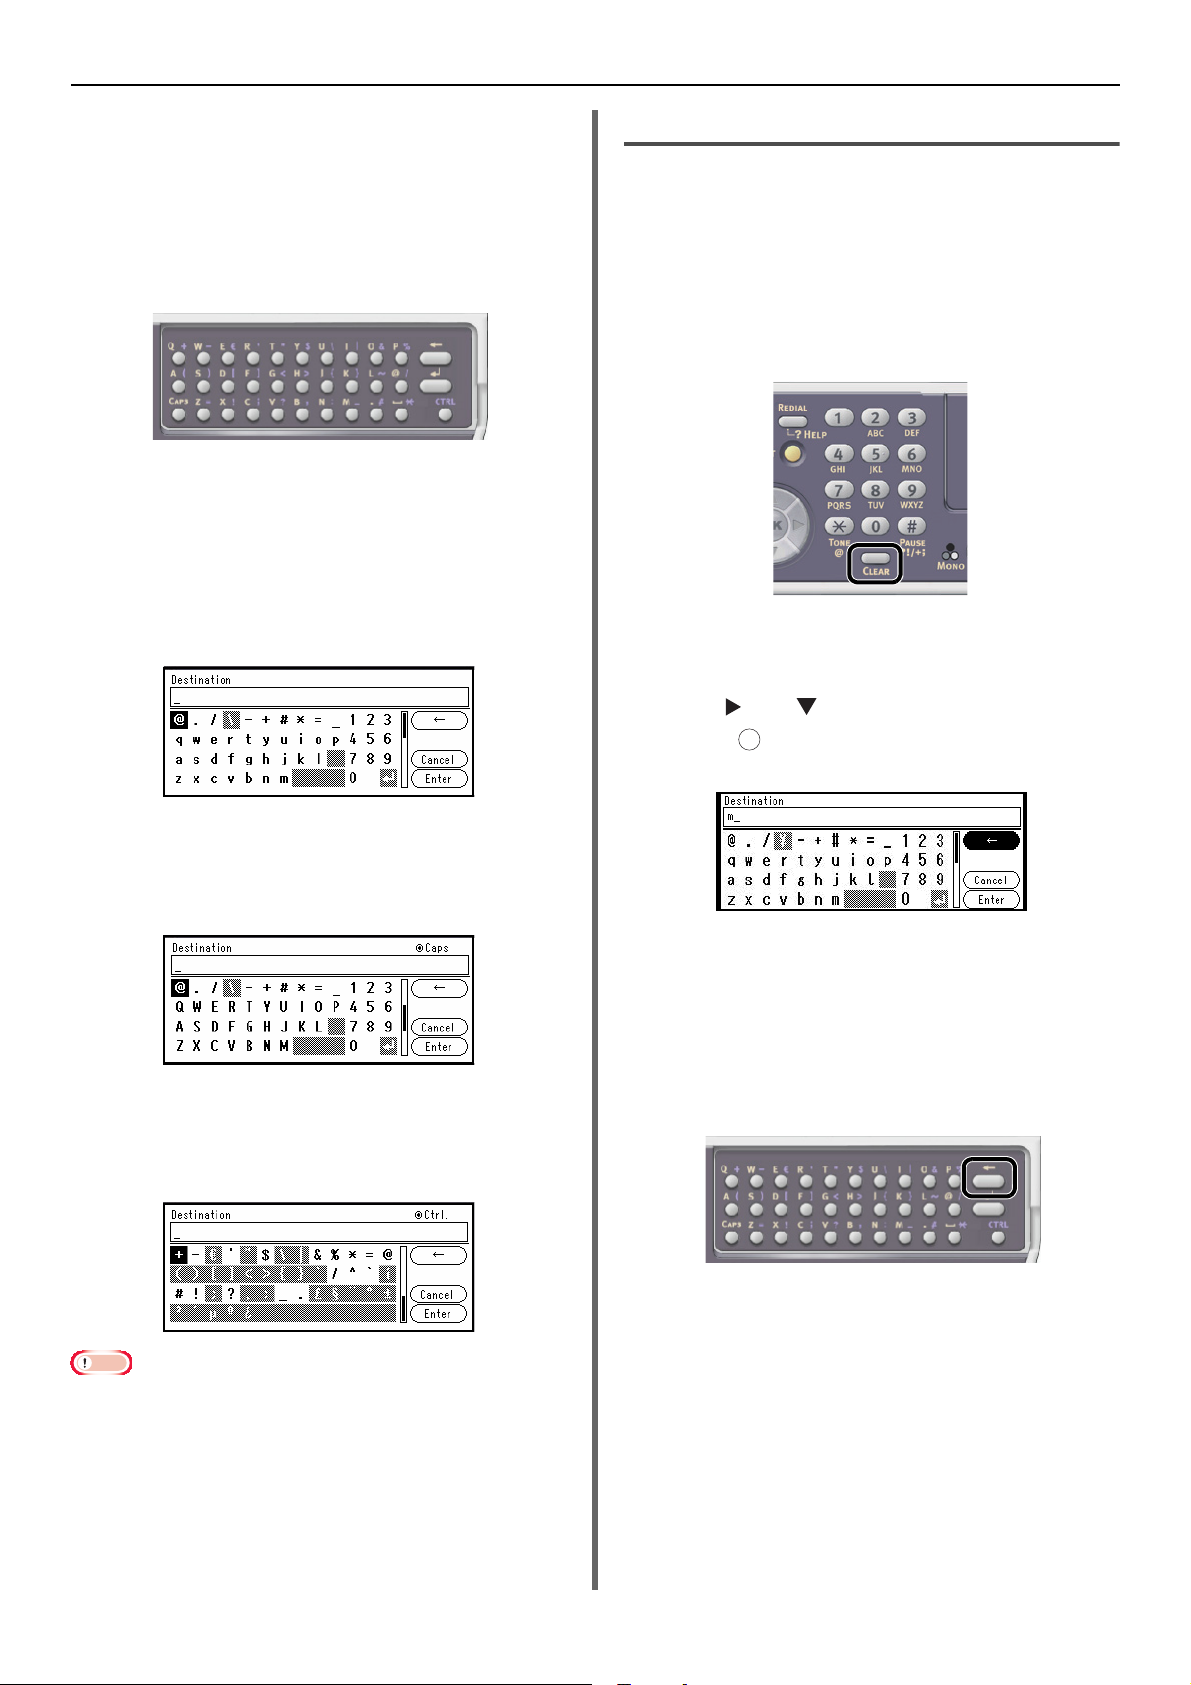
Using the QWERTY Keyboard
(MB471, MB471w, MB491,
MB491+, MB491+LP, ES4191 MFP,
MPS4200mb, MPS4700mb)
You can also use the QWERTY keyboard to enter
alphanumeric characters and symbols in the
entry screen.
The keyboard enables you to switch the entry
mode to the standard mode, CAPS mode, or
CTRL mode. The changed mode is reflected to
the screen keyboard display.
Standard mode
It enables you to enter small alphabetical letters.
The following screen keyboard is displayed.
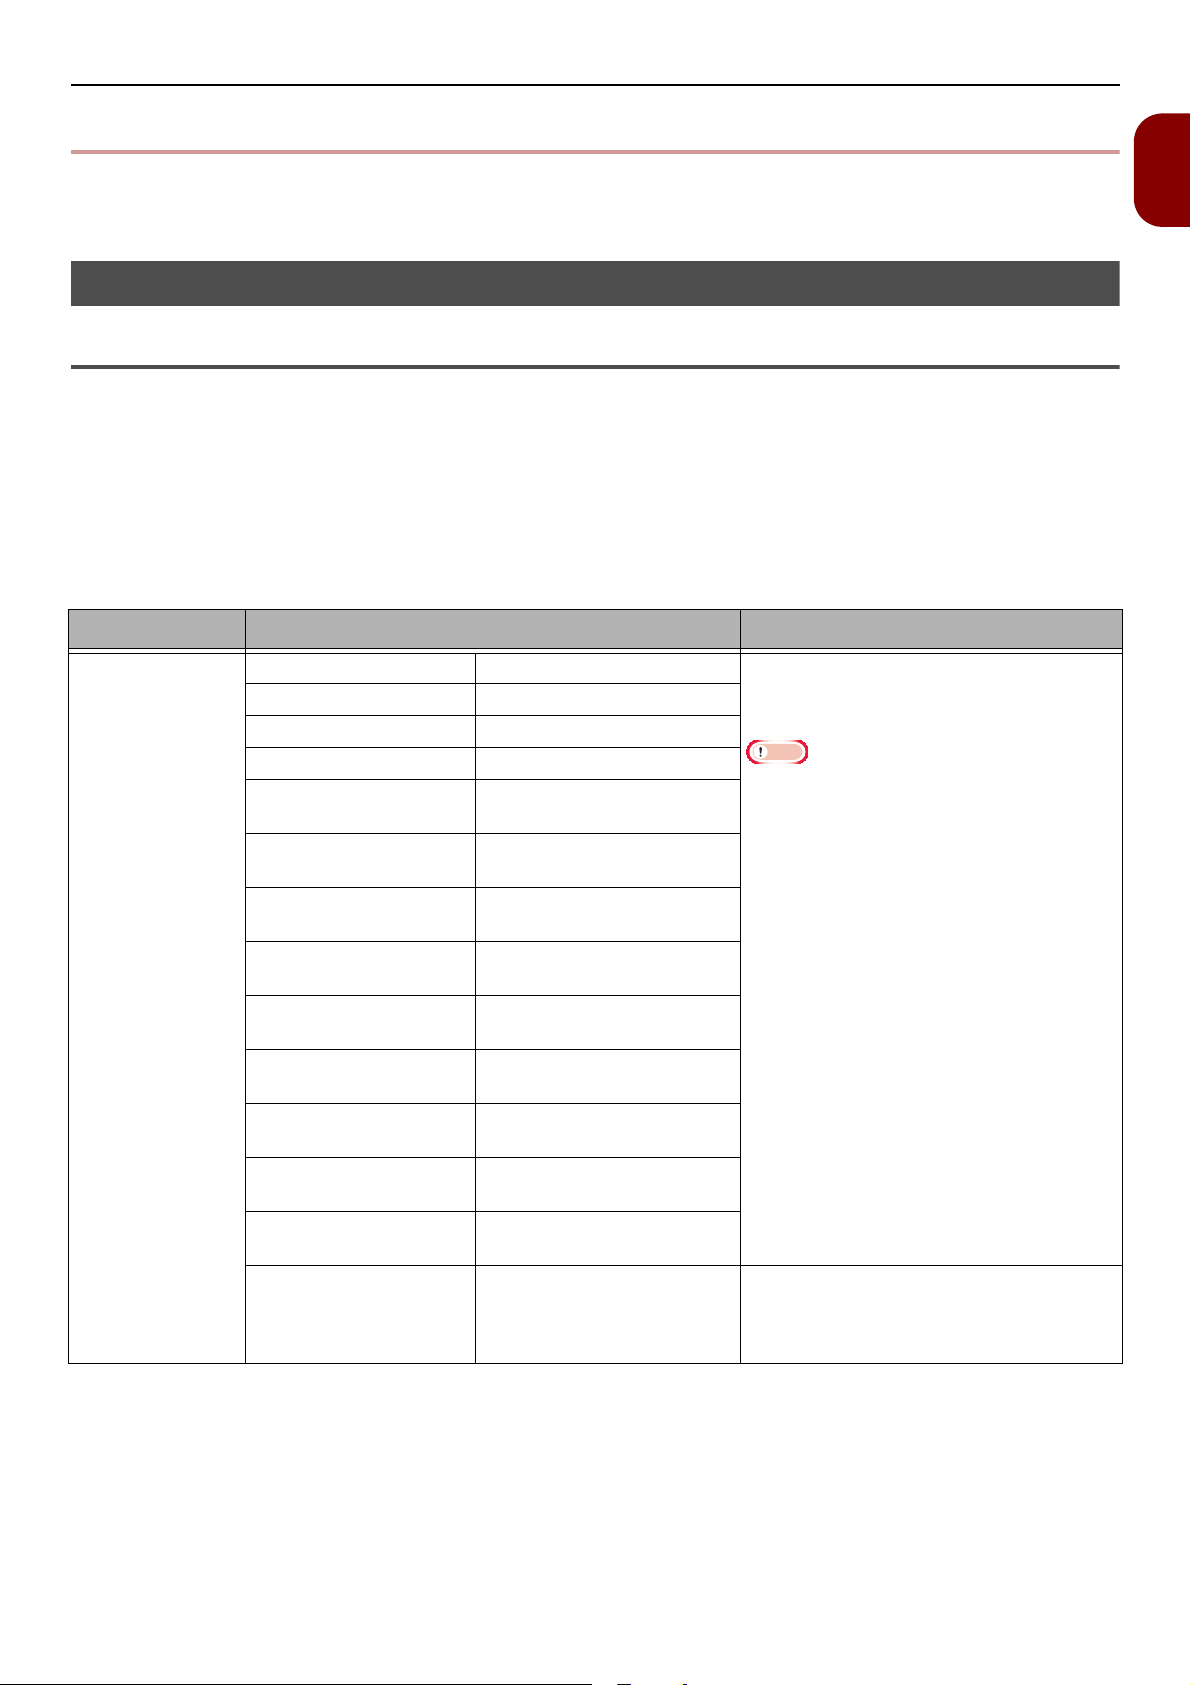
Deleting the Entered Text
You can delete text in the text field in the
following ways.
Pressing the <CLEAR> key
Press the <CLEAR> key to delete the last
character entered.
Hold the <CLEAR> key to delete all the
characters you have entered.
Selecting [BS] on the Screen Key-
board
Press the and and to highlight [BS] and
then press to delete the last character
entered.
CAPS mode
Pressing the <CAPS> key enables you to enter
capital alphabetical letters.
The following screen keyboard is displayed.
CTRL mode
Pressing the <CTRL> key enables you to enter
symbols.
The following screen keyboard is displayed.
When the QWERTY keyboard cover is open, the numerical
keypad can only be used for entering numbers.
Pressing the Backspace Key on the
Qwerty Keyboard (for MB471,
MB471w, MB491, MB491+,
MB491+LP, ES4191 MFP,
MPS4200mb, MPS4700mb)
Press the backspace key to delete the last
character entered.
-28-
Page 29
Loading Paper and Documents
Note
Loading Paper and Documents
This section explains the specifications for paper and documents, and how to load them.
Paper
Supported Paper Types
For high-quality printing and to avoid printing problems, be sure to use the supported paper types.
Please use digital photo print paper.
Please check the print quality and the movement of the paper thoroughly beforehand to make sure that
there are no problems. Your machine supports the below-listed types of paper.
Using paper other than the recommended print paper may result in unstable paper output depending on
how the front/back of the paper is loaded. In this case, check beforehand by inserting the paper in the
reverse orientation etc, and confirm that the paper is output correctly before use.
Paper Type Paper Size mm (inch) Paper Weight
Standard paper A4 210 x 297
A5 148 x 210
A6 105 x 148
B5 182 x 257
Letter 215.9 x 279.4
(8.5 x 11)
Legal (13 inch) 215.9 x 330.2
(8.5 x 13)
Legal (13.5 inch) 215.9 x 342.9
(8.5 x 13.5)
Legal (14 inch) 215.9 x 355.6
(8.5 x 14)
Executive 184.2 x 266.7
(7.25 x 10.5)
Statement 139.7 x 215.9
(5.5 x 8.5)
16K
(184 x 260 mm)
16K
(195 x 270 mm)
16K
(197 x 273 mm)
Custom *1*2*3 Width:
184 x 260
195 x 270
197 x 273
64~216
Length:
148~1321
60 to 163 g/m
For duplex print, 60 to 163 g/m
43lb)
If the paper size is set at A6, A5, or with a
paper width narrower than 148 mm (A5
width), the printing will be slower.
60 to 163 g/m2 (16 to 43lb)
2
(16 to 43lb)
2
(16 to
1
Setup
*1 Tray 1 can contain paper 100 to 216 mm (3.94 to 8.5 inches) wide and 148 to 355.6 mm (5.83 to 14
inches) long.
*2 Tray 2 can contain paper 148 to 216 mm (5.83 to 8.5 inches) wide and 210 to 355.6 mm (8.27 to 14
inches) long.
*3 The MP Tray (MB451/MB451w/MB471/MB471w/MB491/MB491+/MB491+LP/ES4191 MFP/
MPS4200mb/MPS4700mb) or Manual Feeder (MB441/MB461/MB461+LP/ES4161 MFP) can contain
paper 86 to 216 mm (3.4 to 8.5 inches) wide and 140 to 1320.8 mm (5.5 to 52 inches) long.
-29-
Page 30

Loading Paper and Documents
Paper Type Paper Size mm (inch) Paper Weight
Envelope Monarch 98.4 x 190.5
(3.875 x 7.5)
Com-9 98.4 x 225.4
(3.875 x 8.875)
Com-10 104.8 x 241.3
(4.125 x 9.5)
DL 110 x 220
(4.33 x 8.66)
C5 162 x 229
(6.4 x 9)
Index card Index card 76.2 x 127.0
(3 x 5)
Label A4 210 x 297 0.1~0.2 mm
Letter 215.9 x 279.4
(8.5 x 11)
Partly-printing
paper
Color paper Subject to the standard paper
Subject to the standard paper
Envelopes should be 88 g/m
paper, and flap parts of envelopes should
be folded
64 to 163 g/m2 (18 to 43lb)
64 to 163 g/m2 (18 to 43lb)
2
(24lb)
-30-
Page 31

Loading Paper and Documents
Note
Paper Recommendations
Your MFP will handle a variety of print media,
including a range of paper weights and sizes.
This section provides general advice on choice of
media, and explains how to use each type.
The best performance will be obtained when
2
using standard 75~90g/m
paper designed for
use in copiers and laser printers.
Use of heavily embossed or very rough textured
paper is not recommended.
Pre-printed stationery can be used, but the
ink must not offset when exposed to the high
fuser temperatures used in the printing process.
Envelopes
Envelopes should be free from twists, curls or
other deformations.
They should also be of the rectangular flap type,
with glue that remains intact when subjected to
hot roll pressure fusing used in this type of
printer. Window envelopes are not suitable.
Labels
Labels should also be of the type recommended
for use in copiers and laser printers, in which the
base carrier page is entirely covered by labels.
Other types of label stock may damage the
printer due to the labels peeling off during the
printing process.
Storing Paper
Store paper under the following conditions to
maintain quality:
Inside a cabinet or other dry and dark place
On a flat surface
Temperature: 20°C
Humidity: 50% RH (relative humidity)
Avoid placing:
Directly on the floor
In the direct sunlight
Near the inside of an exterior wall
On an uneven surface
Where static electricity may be generated
Where temperature rapidly changes
Near a printer, air conditioner, heater, or duct
Do not unwrap the paper until you are ready to use the
paper.
Do not leave paper unwrapped for a long period. Doing so
may result in paper handling and print quality issues.
1
Setup
-31-
Page 32

Loading Paper and Documents
Note
Loading Paper
Your machine has two built-in trays (tray 1 and the MP tray) (MB441, MB461, MB461+LP and ES4161
MFP is Manual Feeder) and an optional tray (tray 2). The Optional tray (Tray2) is only available on
MB461, MB461+LP, MB471, MB471w, MB491, MB491+, MB491+LP, ES4161 MFP, ES4191 MFP,
MPS4200mb, and MPS4700mb. Refer to the list below to check the supported paper and capacities of
each tray.
Duplex printing cannot be performed on paper indicated by an "*".
Tray
Supported paper
Tray1 A4
A5*
B5
A6*
Letter
Legal 13
Legal 13.5
Legal 14
Executive
Statement*
16K (184 x 260 mm)
16K (195 x 270 mm)
16K (197 x 273 mm)
Custom
Tray2
(optional)
(MB461,
MB461+LP,
MB471,
MB471w,
MB491,
MB491+,
MB491+LP,
ES4161 MFP,
ES4191 MFP,
MPS4200mb,
A4
A5*
B5
Letter
Legal 13
Legal 13.5
Legal 14
Executive
16K (184 x 260 mm)
16K (195 x 270 mm)
16K (197 x 273 mm)
Custom
MPS4700mb
only)
size
Paper capacity Paper weight
250 sheets
(when paper weight is 80
2
)
g/m
530 sheets
(when paper weight is 80
2
)
g/m
Light
60 to 63 g/m2 (16 to 17 lb)
Medium Light
2
64 to 74 g/m
(18 to 19 lb)
Medium
2
75 to 87 g/m
(20 to 23 lb)
Medium Heavy
88 to 104 g/m
2
(24 to 27 lb)
Heavy
105 to 122 g/m
Light
60 to 63 g/m2 (16 to 17 lb)
Medium Light
2
64 to 74 g/m
(18 to 19 lb)
Medium
2
75 to 87 g/m
(20 to 23 lb)
Medium Heavy
88 to 104 g/m
2
(24 to 27 lb)
Heavy
105 to 122 g/m
2
(28 to 32 lb)
2
(28 to 32 lb)
-32-
Page 33

Loading Paper and Documents
Memo
1
Tray
MP Tray
(MB451/
MB451w/
MB471/
MB471w/
MB491/
MB491+/
MB491+LP/
ES4191 MFP/
MPS4200mb/
Manual Feeder
(MB441/
MB461/
MB461+LP/
ES4161 MFP)
Supported paper
size
A4
A5
B5
A6*
Letter
Legal 13
Legal 13.5
Legal 14
Executive
Statement*
16K (184 x 260 mm)
16K (195 x 270 mm)
16K (197 x 273 mm)
Custom
Com-9 Envelope*
Com-10 Envelope*
Monarch Envelope*
DL Envelope*
C5 Envelope*
C6 Envelope*
Paper capacity Paper weight
100 sheets
(when paper weight is
80 g/m
10 envelopes
1 sheet
1 envelope
2
)
Loading Paper in Tray 1 and Tray 2
The following procedure explains how to load
paper in tray 1 or tray 2 (optional).
Light
60 to 63 g/m
Medium Light
64 to 74 g/m
Medium
75 to 87 g/m
Medium Heavy
88 to 104 g/m
Heavy
105 to 122 g/m
Ultra Heavy
123 to 163 g/m
2
(16 to 17 lb)
2
(18 to 19 lb)
2
(20 to 23 lb)
2
(24 to 27 lb)
2
(28 to 32 lb)
2
(33 to 43 lb)
2 Slide the paper guide (1) to the width of
paper to be loaded.
1
Setup
The following procedure uses tray 1 as an example but the
same is applied to tray 2.
1 Pull out the paper tray.
Note
The paper size selection screen will be displayed when
you pull out the Tray. Register the loaded paper on
your machine. Proceed to "Configuring the Tray
Settings" P. 36.
3 Slide the paper stopper (2) to the length
of paper to be loaded.
2
-33-
Page 34

Loading Paper and Documents
[ ▼ ▼ ▼ ]
3
4 Flex paper back and forth, and then fan
it. Straighten the edges of the paper
stack on a level surface.
5 Load paper with the print side face down.
Note
Do not load paper above the fill line (3).
Loading Paper on the MP Tray
(MB451/MB451w/MB471/
MB471w/MB491/MB491+/
MB491+LP/ES4191 MFP/
MPS4200mb/MPS4700mb)
The following procedure explains how to load
paper in the MP tray.
1 Open the MP tray.
2 Pull out the paper support.
6 Push the paper tray until it stops.
Register the loaded paper on your machine.
Proceed to "Configuring the Tray Settings" P. 36.
3 Pull out the sub support.
-34-
Page 35

Loading Paper and Documents
Note
Memo
Note
1
2
4 Adjust the manual feeding paper guide to
the width of paper to be loaded.
5 Insert the paper with the print side face
up until its edge touches the paper feed
entrance.
Note
Do not load paper above the fill line (1).
Loading Paper in the Manual
Feeder (MB441/MB461/
MB461+LP/ES4161 MFP)
The following procedure explains how to load
paper in the Manual Feeder.
1 Open the Manual Feeder.
2 Adjust the manual feeding paper guide to
the width of paper to be loaded.
1
Setup
6 Press the Set button (2).
Register the loaded paper on your machine.
Proceed to "Configuring the Tray Settings".
Do not load paper of different sizes, types or weights at
the same time.
When adding paper, remove the paper in the MP tray and
straighten the edges of both stacks of paper, and then load
them again.
Do not put anything other than paper for printing.
3 Load a paper.
Only one sheet can be set in the Manual Feeder each time.
The machine will not load paper when it is in the sleep
mode or power save mode. If it is in either mode when you
use the manual feeder, press the <POWER SAVE> key on
the operator panel. Then it goes to the standby mode.
After that, load paper.
When loading envelopes in the MP tray, load them face up
with the orientation as stated below.
- Your envelopes (Monarch, Com-9, Com-10, DL and C5)
are loaded with the flap folded and the flap should come
to the right side to the feeding direction.
-35-
Page 36

Loading Paper and Documents
Note
OK
OK
OK
OK
OK
OK
Configuring the Tray Settings
After you load paper in tray 1, tray 2 (optional),
or the MP tray, you need to register the loaded
paper on your machine.
Wit h Tray 1/Tr a y 2 : Th e pa per siz e se lec tio n
screen will be displayed automatically when you
pull out the Tray. Please use settings from
Section 4.
With MP Tray: Please use settings from Section 1.
1
Press the <
SETTING
> key on the operator panel.
2 Press the to select [Paper Setup] and
then press .
3
Press the to s
which you loaded paper and then press .
4
S
elect [Paper Size] and then press .
OK
elect the paper tray in
5 Press the to select the size of the
loaded paper and then press .
Reference
If [Custom] is selected for [Paper Size], you need to
register the custom size. For how to register the
custom size, refer to "Registering Custom Sizes" P. 36.
6 Press the to select [Media Type] and
then press .
OK
7 Press the to select the type of media
loaded and then press .
8 Press the to select [Media Weight]
and then press .
Registering Custom Sizes
To load custom size paper, you need to register
the width and length of the paper before printing.
The range of the sizes you can set differs
according to the paper tray.
Tray Available size range
Tray 1 Wi d th :
100 to 216 mm (3.94 to 8.5 inches)
Length:
148 to 355.6 mm (5.83 to 14.0
inches)
Tray 2
(Optional)
(MB461,
MB461+LP,
MB471,
MB471w,
MB491,
MB491+/
MB491+LP,
ES4161 MFP,
ES4191 MFP,
MPS4200mb,
MPS4700mb
only)
MP tray
(MB451/
MB451w/
MB471/
MB471w/
MB491/
MB491+/
MB491+LP/
ES4191 MFP/
MPS4200mb/
MPS4700mb)
Manual
Feeder
(MB441/
MB461/
MB461+LP/
ES4161 MFP)
Width:
148 to 216 mm (5.83 to 8.5 inches)
Length:
210 to 355.6 mm (8.27 to 14.0
inches)
Width:
86 to 216 mm (3.4 to 8.5 inches)
Length:
140 to 1320.8 mm (5.5 to 52.0
inches)
9 Press the to select the weight of the
loaded paper and then press .
For tray 1 and tray 2, you can configure the [Custom]
setting only when [Paper Size] is set to [Custom].
The available size range for duplex printing is the same as
that for tray 2.
10 Press the until the top screen is
displayed.
1 Press the <SETTING> key on the
operator panel.
2 Press the to select [Paper Setup] and
press .
OK
-36-
Page 37

3
Note
Note
Note
OK
OK
Press the to select the paper tray in
which you loaded paper and then press .
4 Press the to select [Custom] and then
press .
5 Enter the desired value using the ten-key
pad and then press .
Press the or to move to the next box.
OK
Loading Paper and Documents
Check that the faceup stacker on the rear side of the
machine is closed. If the faceup stacker is open, paper is
always outputted to the faceup stacker.
1
Setup
6 Press the until the top screen is
displayed.
Paper Output
Your machine outputs to the facedown or faceup
stacker. Paper types that can be outputted to
each stacker are as follows.
Output
Stacker
Facedown Standard
Supported
paper type
Recycled
paper
Paper output
capacity
150 sheets (when
paper weight is less
than 80 g/m
2
)
When performing duplex printing, paper outputs
to the facedown stacker.
Do not open or close the faceup stacker while printing as it
may result in a paper jam.
Using the Facedown Stacker
Delivers paper with the print side face down.
Using the Faceup Stacker
Delivers paper with the print side face up.
The faceup stacker is not available in duplex printing.
1 Pull the faceup stacker on the rear side
of the machine and open it toward you.
2 Unfold the faceup stacker.
Documents
You can use the auto document feeder (ADF) or
the document glass to load documents for
copying, scanning or faxing.
Document Requirements
You cannot load the following documents on the
ADF. Use the document glass instead:
Torn or perforated paper
Curled or rolled paper
Wet paper
Static paper
Carbon-backed paper
Fabrics, metallic sheets or Transparency films
Paper with staples, paper clips, ribbons, or tape
Pasted paper, paper with glue
Glossy paper
Specially coated paper
-37-
Page 38

Loading Paper and Documents
Memo
Note
2 mm
2 mm
2 mm
2 mm
Keep the following in mind to avoid damaging the
document glass:
Do not hold a document firmly on the glass when
copying a thick document.
Place hard documents gently.
Avoid loading documents with sharp projections.
Scannable Area
The text or images on the shaded area shown
below are not scanned.
Loading Documents on the ADF
1
Load your documents face up on the ADF.
If your documents are portrait, load them with the
top edge of the documents in first.
If your documents are landscape, load them with
the left edge of the documents in first.
The arrow in the above drawing indicates the feeding
direction in the auto document feeder, or the scanning
start side on the document glass.
Loading Documents
Scanner
type
ADF A4
Document
glass
Scannable
size
A5
B5
A6*
Letter
Legal 13
Legal 13.5
Legal 14
Executive
A4
A5
B5
A6
Letter
Executive
Legal 13**
Legal
13.5**
Legal 14**
Paper
capacity
50 sheets
(80 g/m
-20 mm
60 to 105 g/m2
2
)
(16 to 28 lb)
Paper
weight
2 Adjust the document guides to the width
of your documents.
Loading Documents on the Docu-
ment Glass
Lift and open the document glass cover.
1
2 Place a document face down on the
document glass.
If your document is portrait, align its top edge to
the upper-left corner of the glass.
For documents using adhesives, ink, or correction fluid, set
them after checking that these have completely dried.
Duplex scanning cannot be performed on paper indicated
by an "*".
"**" supported only MB461+LP/MB491+LP/MPS4700mb.
-38-
Page 39

If your document is landscape, align its right edge
Reference
Note
to the upper-left corner of the glass.
3 Close the document glass cover gently.
Set [Document Direction] according to the direction of
your document to get the output you want. The factory
default is [Portrait]. Refer to "Changing Image
Orientation of Document (Direction)" P. 81.
Loading Paper and Documents
1
Setup
When you take a copy with the document glass, do not
apply an excessive load to the document glass.
-39-
Page 40

Basic Settings for Faxing (for MB451, MB451w, MB471, MB471w, MB491, MB491+, MB491+LP, ES4191 MFP, MPS4200mb, MPS4700mb only)
Note
Memo
OK
OK
OK
OK
OK
OK
OK
Basic Settings for Faxing (for MB451, MB451w,
MB471, MB471w, MB491, MB491+, MB491+LP,
ES4191 MFP, MPS4200mb, MPS4700mb only)
This section explains basic settings for faxing. Be sure to configure the following settings before you transmit faxes.
b Repeat step a until all characters
Setting for Country Code
Please select the correct country code.
If [
Country Code
that fax transmission and reception may not function correctly.
Though the line connection is correctly, if the fax transmission or
reception fails, ensure the [
1 Hold down the power switch for about a
second to turn on the power.
2
Press the <
] is set to the wrong value, there is a possibility
Country Code
SETTING
> key on the operator panel.
] setting first.
5 Press the to select [Fax Setup] and
6 Press the to select [Fax Setting] and
7 Press the to select [Country Code]
8 Press the or to select your country
required are entered.
c Press the and to select [Enter] and
press .
then press .
then press .
and then press .
name and then press .
OK
3 Press the to select [Admin Setup]
and then press .
4 Enter the administrator password.
The default password is "aaaaaa".
a Press , , , to select the
character you want, and then press .
- The selected character is entered as "*"
in the text filed.
- If you have entered an incorrect value,
press the <CLEAR> key and then
enter the correct value.
If your country name is not displayed, select
the following value.
- If your country is Czech Republic or
Slovakia, select [Czech/Slovakia].
- If your country is Canada, select [U.S.A].
- If the region of your country is Latin
America, select [Latin America].
- If the region of your country is Europe or
Middle East, select [International].
Settable Country Code:
U.S.A. International United Kingdom Ireland
Norway Sweden Finland Denmark
Germany Hungary Czech/Slovakia Poland
Switzerland Austria Belgium Netherlands
France Portugal Spain Italy Greece Australia
New Zealand Singapore Hong Kong Latin
America Mexico China Russia Taiwan Japan
Korea Thailand Malaysia Jordan Argentina
Brazil South Africa Belarus Moldova Turkey
Ukraine
9 If the confirmation message is displayed
then press .
The machine will re-start automatically
and the default screen will be displayed a
few minutes later.
10 Hold down the power switch for about a
second to turn off the power.
If the Country Code is changed, the values of [PBX Line]
and [MF (Tone)/DP (Pulse)] are changed to the default
values for each Country Code.
-40-
Page 41

Basic Settings for Faxing (for MB451, MB451w, MB471, MB471w, MB491, MB491+, MB491+LP, ES4191 MFP, MPS4200mb, MPS4700mb only)
Note
Memo
Note
Note
LINE connection
Telephone cable
Public Line
(Analog)
LINE connection
Telephone cable
Public Line
(Analog)
TEL connection
Connecting to the Public Line
Connecting a Telephone Line
Depending on your environment, a method to
connect the telephone line is different. Based on
the following figures, connect the line for your
environment.
Turn off the machine when you connect the telephone line
with the machine.
You cannot connect to the ISDN line directly. To connect to
it, use the terminal adopter (TA) and connect to the LINE
connection of the machine.
Don't connect with USB cable or LAN cable at this point.
Depending on your environment of the machine, Checking
the reception mode, refer to "Specifying Reception Mode"
P. 4 5 .
Checking the dial type settings, refer to "Settings for each
dialing type" P. 43.
Connecting to the Public Line
(Connecting for Fax and Telephone)
1 Plug one end of the [Telephone cable]
into the [LINE connection] of your
machine and the other end into a
[Public Line (Analog)].
2
Remove the [
Telephone connector cover].
(Connecting for Fax Only)
1
Setup
1 Plug one end of the [Telephone cable]
into the [LINE connection] of your
machine and the other end into a
[Public Line (Analog)].
Connect telephone cable to [
fail. Never connect it to [
LINE connection
TEL connection
] without
].
Telephone connector
cover
3 Plug the external telephone's cable into
TEL connection
the [
The telephone that is connected to the machine
is called an external telephone.
] of your machine.
Only one telephone can be connected to this machine.
Don't connect the telephone to the machine in parallel. If you
connect the telephone to the machine in parallel, the following
problem will occur and the machine will not work correctly.
-41-
Page 42

Basic Settings for Faxing (for MB451, MB451w, MB471, MB471w, MB491, MB491+, MB491+LP, ES4191 MFP, MPS4200mb, MPS4700mb only)
Memo
Note
Memo
Memo
Public Line (Analog) Public Line (Analog) first floor second floor
TEL connection
LINE connection
Telephone cable
Splitter
ADSL modem
Public Line
(Analog)
LINE connection
TEL connection
Telephone cable
Optical IP telephone
Corresponding telephone
*Insert into the
telephone cable jack.
Optical Network Unit (ONU)
Optical cable
LAN
cable
LINE connection
TEL connection
CS tuner or digital
television
Telephone cable
Public Line
(Analog)
- Picking up the telephone receiver when sending or
receiving a fax may interrupt pictures or cause
communication error to occur.
- The fax transfer function is not able to work from the
external telephone.
In the case of direct interconnection, separate construction is
needed. Please contact the telephone company that you use.
Other cases
Connecting to IP Telephone
Plug the [Telephone cable] connected to the IP
telephone into the [LINE connection] of your
machine.
Remove the telephone connector cover.
Plug the external telephone's cable into the [TEL
connection] of your machine.
Turn off the machine when you connect the telephone line
with the machine.
Connecting to the ADSL Environment
Plug the [Telephone cable] connected to the
ADSL modem into the [LINE connection] of
your machine.
Remove the telephone connector cover.
Plug the external telephone's cable into the [TEL
connection] of your machine.
Check the dial tone detection if it is unable to dial and refer
to "Admin Setup - User install" P.103 Advanced.
If you cannot send or receive faxes well, set [
off. Refer to "Setting for Super G3" P. 45.
Super G3
] to
-42-
Check the dial tone detection if it is unable to dial and refer
to "Admin Setup - User install" P.103 Advanced.
If you cannot send or receive faxes well, set [
off. Refer to "Setting for Super G3" P. 45.
Super G3
] to
Connecting CS Tuner or Digital
Television
Plug the [Telephone cable] connected to the
[Public Line (Analog)] into the [LINE
connection] of your machine.
Remove the telephone connector cover.
Plug the telephone cable connected to the CS tuner
or digital television into the [TEL connection] of
your machine.
Page 43

Basic Settings for Faxing (for MB451, MB451w, MB471, MB471w, MB491, MB491+, MB491+LP, ES4191 MFP, MPS4200mb, MPS4700mb only)
Memo
LINE connection
TEL connection
Telephone cable
Public Line
(Analog)
Control device
including PBX,
etc.
OK
OK
OK
Connecting PBX, Home Telephone or
Business Phone
Plug the [Telephone cable] connected to the
[Public Line (Analog)] into the [LINE
connection] of your machine.
Remove the telephone connector cover.
Plug the telephone cable connected to a control
device including PBX, etc. into the [TEL
connection] of your machine.
Connecting as an Internal Telephone
Plug the [Telephone cable] connected to a
control device including PBX, etc. into the [LINE
connection] of your machine.
Public Line
(Analog)
LINE connection
Control device
including PBX,
etc.
Telephone cable
1
Setup
- Home Telephone -
A number of telephones are connected with one or
two telephone lines to allow internal and door
phone communication. This is simple switching
equipment for household.
- Business Phone -
More than two telephone lines can be
accommodated, and these telephone lines can be
shared with a number of telephones to allow
internal communication. This is simple switching
equipment.
Set [PBX Line] to [ON]. Refer to "PBX Connecting" P. 45.
Settings for each dialing type
The factory default [MF (Tone)/DP (Pulse)] is
set to [Tone].
For push-button phones, if you hear a "Beep, boop,
beep" sound, leave [MF (Tone)/DP (Pulse)] as
[Tone].
For push-button type phones, if you do not hear a
"Beep, boop, beep" sound, or if you are using a
rotary-dial type phone, set [MF (Tone)/DP
(Pulse)] to [Pulse].
How to Configure Settings
Press the <SETTING> key on the
1
operator panel.
2 Press the to select [Admin Setup],
and press .
3 Enter the administrator password.
The factory default password is "aaaaaa".
4 Select [Enter], and press .
5 Press the to select [User Install],
6 Press , select [MF (Tone)/DP
7 Press , select Dial Type, and then press
-43-
OK
and press .
(Pulse)], and then press .
OK
.
Page 44

Basic Settings for Faxing (for MB451, MB451w, MB471, MB471w, MB491, MB491+, MB491+LP, ES4191 MFP, MPS4200mb, MPS4700mb only)
Reference
Memo
OK
OK
OK
OK
OK
10
8
Press the until the top screen is displayed.
When the setup menu screen is displayed,
press to complete the setup.
Setup of Date/Time
Setup of Date/Time of your region.
You can set up date and time automatically using Webpage.
For details, refer to the User's Manual Advanced.
Specifying Sender Information
1
Press the <
2 Press the select [Easy Setup] and
then press .
3 Enter the administrator password.
The factory default password is "aaaaaa".
SETTING
> key on the operator panel.
Specify the fax number and sender name for
your machine.
1
Press the <
SETTING
> key on the operator panel.
2 Press the to select [Easy Setup] and
press .
OK
4 Select [Enter], and press .
5 Press the to select [Date/Time
Setting] and then press the
.
6 Press the to select the appropriate
time zone and then press .
OK
7 Press the to select [Manual] and then
press .
8 Press the or to select the current
date and then press .
To move to the next box, press the .
3 Enter the administrator password.
The factory default password is "aaaaaa".
4 Select [Enter], and press .
OK
5 Press the to select [Fax Setting] and
then press the .
6 Press to select the [Fax Number]
entry box.
7 Enter the fax number of your machine
with the numerical keypad.
9 Press the or to select the current
time and then press .
To move to the next box, press the .
8 Select [Enter] and then press .
9
10 Enter arbitrary sender information.
11 Select [Enter] and then press .
-44-
OK
Press to select the [
Up to 22 characters can be entered.
When a receiver prints faxes, sender information
entered here is printed on the top of the faxes.
Sender ID
] entry box.
OK
Page 45

Basic Settings for Faxing (for MB451, MB451w, MB471, MB471w, MB491, MB491+, MB491+LP, ES4191 MFP, MPS4200mb, MPS4700mb only)
OK
OK
OK
OK
OK
OK
OK
OK
OK
OK
OK
12
When the setup menu screen is displayed,
press to complete the setup.
Specifying Reception Mode
The optimal reception mode differs depending on
the environment for your machine. Refer to the
following description.
Fax Ready Mode
This mode is recommended when you use the
machine as a fax machine.
PBX Connecting
When connecting to PBX (internal exchange), put
[PBX Line] to [ON].
1 Press the <SETTING> key.
Tel/Fax Ready Mode
This mode is recommended when you connect an
external phone to the machine.
Ans/Fax Ready Mode
This mode is recommended when you connect an
2 Press the to select [Admin Setup]
external answering machine to the machine.
and then press .
Tel Ready Mode
3 Enter the administrator password.
The default password is "aaaaaa".
4 Select [Enter] and then press .
5 Press the to select [Fax Setup] and
then press .
OK
This mode is recommended when you generally
use an external phone connected to the machine.
DRD
This mode is recommended when you use the
distinctive ring detection (DRD) function provided
by a telephone company.
6 Press the to select [Fax Setting] and
then press .
OK
1
Setup
7 Press the to select [PBX Line] and
then press .
OK
8 Press the to select [ON] and then
press .
9 Press the until the top screen appears.
Setting for Super G3
1 Press the <SETTING> key.
2 Press the to select [Admin Setup]
and then press .
3 Enter the administrator password.
The default password is "aaaaaa".
4 Select [Enter] and then press .
5 Press the to select [User Install] and
then press .
6 Press the to select [Super G3] and
then press .
OK
1 Press the <SETTING> key on the
operator panel.
2 Press the to select [Admin Setup]
and press .
3 Enter the administrator password.
The factory default password is "aaaaaa".
4 Select [Enter] and press .
5 Press the to select [User Install] and
press .
OK
6 Press the to select [Reception Mode]
and press .
7 Press the to specify the reception
mode and press .
7 Press the to select [OFF] and then
press .
8 Press the until the top screen appears.
Settable Reception Mode:
Fax Ready Mode* Tel/Fax Ready Mode
Ans/Fax Ready Mode Tel Ready Mode DRD
*indicates the factory default.
8 Press the until the fax start screen
appears.
-45-
Page 46

Connecting to a Computer
Note
Connecting to a Computer
This section explains how to connect your machine to a computer and install a printer and fax driver.
Connecting method
You can select either of the following connection methods:
"Network Connection" P. 47
"USB Connection" P. 60
Product Requirements
Your machine supports the following operating systems:
Windows 8/Windows 8 (64bit Version)
Windows Server 2012
Windows 7/Windows 7 (64bit Version)
Windows Vista/Windows Vista (64bit Version)
Windows Server 2008 R2
Windows Server 2008/Windows Server 2008 (x64 Version)
Windows XP/Windows XP (x64 Version)
Windows Server 2003/Windows Server 2003 (x64 Version)
Mac OS X 10.4.0 to 10.8
Types of Drivers
The types of the drivers that can be installed are as follows.
For Windows
Type Description
PCL The PCL printer driver is suitable for printing of business documents.
PS The PS printer driver is suitable for printing of documents including PostScript fonts and EPS
data.
PCL XPS The PCL XPS printer driver is suitable for printing from an application for XPS.
* It does not support Windows Vista/Windows Server 2008/Windows XP/ Windows Server 2003.
FAX It is installed when directly sending faxes to destinations from the computer via the machine.
For Mac OS X
Type Description
PS The PS printer driver is suitable for printing of documents including PostScript fonts and EPS
data.
It can be also used for normal printing.
PCL The PCL printer driver is suitable for printing of business documents.
Depending on a version of a printer driver, Windows or Mac OS X, the description may be different.
-46-
Page 47

Network Connection
Reference
2
OK
Perform the following procedure to connect your
machine to a computer via network.
Connecting using wired LAN
Connecting an Ethernet Cable
Be sure to connect your machine to a network
with an Ethernet cable before driver installation.
1 Prepare an Ethernet cable and a hub.
Prepare an Ethernet cable (category 5, twisted
pair, straight) and a hub separately.
2 Hold down the power switch for about a
second to turn on the power and
computer.
Connecting to a Computer
Connecting using wireless LAN
(MB451w, MB471w only)
Configuring automatically using
push-button method
Use the WPS (push button) function to set the
wireless LAN.
1 Log in as the administrator.
2 Press the to select [Network Menu],
and then press the .
3 Press the to select [Network Setup],
and then press the .
1
Setup
"Turning Off Your Machine" P. 20
3 Plug one end of the Ethernet cable into
the network interface connection on the
back of the machine.
4 Plug the other end of the Ethernet cable
into the hub.
4 Press the to select [Wireless
Setting], and then press the .
5 Press the to select [Automatic setup
(WPS)], and then press the .
6 Press the to select [WPS-PBC], and
then press .
7 Press the to select [Yes], and then
press .
OK
-47-
Page 48

Connecting to a Computer
Memo
Memo
Note
OK
Start the WPS push button for wireless AP after
clicking [Yes] in the confirmation screen.
Alternatively, if WPS push button for wireless AP is
started first, start the WPS push button on this
equipment.
If [No] is selected, the screen returns to that from
step 6.
8 If [Yes] is selected in step 7, [Running
pushbutton method...] is displayed in
the screen.
Note
Panel operations cannot be performed during WPS
execution.
When [Connection successful] is displayed, this
equipment is connected to the wireless LAN.
4 Press the to select [Wireless
Setting], and then press the .
5 Press the to select [Automatic setup
(WPS)], and then press the .
6 Press the to select [WPS-PIN], and
then press .
Memo
If [Timeout] is displayed, it is possible that the
wireless AP of the connection destination could not be
found within the time limit. Select [Yes] again in step
7 within 2 minutes of starting WPS push button for
wireless AP.
If [Overlap] is displayed, WPS-push button is being
executed on 2 or more wireless AP. Please wait for a
short time and then retry.
Configuring automatically using
PIN method
1 Log in as the administrator.
2 Press the to select [Network Menu],
and then press the .
7 Press the to select [Yes], and then
press .
If [Yes] is selected in step 7, [Implementing PIN
If [No] is selected, the screen returns to that from
OK
method...] is displayed in the screen.
step 6. Each time the confirmation screen is displayed,
the PIN code is automatically generated and changed.
8 Enter the displayed 8 character PIN code
to the wireless AP, and start WPS-PIN for
the wireless AP.
3 Press the to select [Network Setup],
and then press the .
Panel operations cannot be performed during WPS
execution.
When [WPS connection successful] is displayed,
this equipment is connected to the wireless LAN.
Alternatively, if WPS-PIN for wireless AP is started
first, start the WPS-PIN on this equipment.
-48-
Page 49

Memo
If [Timeout] is displayed, it is possible that the
OK
OK
wireless AP of the connection destination could not be
found within the time limit. After entering the PIN
code from this equipment into the wireless AP and
starting WPS-PIN, select [Yes] in step 7 again within 2
minutes.
Configuring wireless network selection
1 Log in as the administrator.
2 Press the to select [Network Menu],
and then press the .
Connecting to a Computer
8 Enter the security password of the
selected access point.
(1) With WEP
a) [Enter the WEP key] will be displayed.
Enter the encryption key using the
keys, and press .
1
Setup
3 Press the to select [Network Setup],
and then press the .
4 Press the to select [Wireless
Setting], and then press the .
5 Press the to select [Wireless
Network Selection], and then press
the .
Go to Section 9
(2) With WPA-PSK or WPA2-PSK
a) [Enter the Pre-shared key] will be
displayed. Enter the encryption key using
the
Go to Section 9
(3) With WPA-EAP or WPA2-EAP
a) Configure settings from Web Page.
keys, and press .
OK
6 The product starts to search the wireless
access point.
7 A list of access points found by the
search will be displayed. Select the
access point you wish to connect to using
the keys, then press .
OK
(4) With Disable
a) The password input screen will not be
displayed. Go to Section 9.
9 In the confirmation screen, please check
the contents on the confirmation screen,
select [Yes], and press .
-49-
Page 50

Connecting to a Computer
Memo
Memo
Memo
Note
OK
10 Connection successful will be displayed
once you have successfully connected to
the wireless LAN.
If unable to connect to a wireless LAN, [Connection
failed] will be displayed and you will be returned to
the Wireless Settings screen in Section 5.
Configuring manually
Log in as the administrator.
1
2 Press the to select [Network Menu],
and then press the .
3 Press the to select [Network Setup],
and then press the .
7 A list of access points found by the
search will be displayed. With the key,
select [Manual Setup], which will be
displayed at the very bottom.
OK
8 Press the to select [SSID], and then
press the .
When the [OK] button is pressed, the screen switches
to the security settings screen in step 5 without
switching to the screen in step 6. If the SSID is not
set, a warning screen is displayed.
9 Enter the SSID name (within 1-32
characters) of the wireless AP that you
want to connect to.
After entering the SSID, move the cursor
to the [Done] field and press .
4 Press the to select [Wireless
Setting], and then press the .
5 Press the to select [Wireless
Network Selection], and then press
the .
6 The product starts to search the wireless
access point.
10 In the security settings screen, select the
same security setting as the wireless AP
that you want to connect to.
The default is [Disable].
Depending on the model of wireless AP, mixed WPA-
PSK/WPA2-PSK may be supported. In this case, we
recommend using WPA2-PSK.
Security settings (WPA-EAP/WPA2-EAP) using an
authentication server are also supported, but this can
only be set from the Web. For details, see the
Advanced section of the User Manual.
-50-
Page 51

Connecting to a Computer
Memo
Memo
Memo
OK
OK
11 Depending on the security setting
selected in step 8, execute the settings
from either (1) or (2) below. If [Disable]
is selected, proceed to step 10. (For
security reasons, we do not recommend
setting [Disable].)
(1) When WEP is selected:
a) Press the on the WEP KEY input screen.
Memo
Nothing is set by default. If the WEP KEY is already
set, it is displayed using "*" symbols. When the [OK]
button is pressed, the screen switches to the screen in
step 10 without switching to the screen in step b). If
the right button is pressed to switch to the screen in
step b) when a WEP KEY is set, the set KEY is cleared.
Note
There is not setting for the WEP KEY index. The WEP
KEY index communications with the wireless AP as 1.
b) Enter the same KEY as the WEP KEY set
for the wireless AP that you want to
connect to.
After entering the WEP KEY, move the
cursor to the [Done] field and press .
b) Press the on the Pre-shared KEY input
screen.
Nothing is set by default. If a Pre-shared KEY is
already set, "*" is displayed. When the [OK] button is
pressed, the screen switches to that shown in step 10
without switching to the screen shown in step c). If
the right button is pressed to switch to step c) when a
Pre-shared KEY is set, the set KEY is cleared.
c) Enter the same KEY as the Pre-shared KEY
set for the wireless AP that you want to
connect to.
After entering the Pre-shared KEY, move
the cursor to the [Done] field and
press .
After entering the KEY, the key is displayed as "*"
symbols for security reasons.
OK
1
Setup
After entering the KEY, the key is displayed as "*"
symbols for security reasons.
(2) When WPA-PSK or WPA2-PSK is
selected:
a) Press the to select the encryption type,
and then press .
Memo
The default is [TKIP].
Depending on the model of wireless AP, the mixed
TKIP/AES may be supported. In this case, we
recommend using AES.
OK
12 In the confirmation screen, check the
entered SSID and selected security
settings.
If there are no problems, press the to
select [Yes], and then press .
13 If [Yes] is selected in step 10,
[Searching for connection...] is
displayed in the screen.
When [Connection successful] is
displayed, this equipment is connected to
the wireless LAN.
-51-
Page 52

Connecting to a Computer
Memo
Memo
OK
OK
If [
Timeout
AP may not have been found within the specified time. Check
the SSID, security settings, and KEY settings, and retry.
] is displayed, the connection destination wireless
Reconnect to the wireless LAN
When the wireless is enabled, restart the wireless
function. If a problem has occurred in the wireless
AP communication or performance, the wireless
function can be restarted.
(If the wired is enabled, the wireless function is
enabled with the configured wireless settings.)
1 Log in as the administrator.
2 Press the to select [Network Menu],
and then press the .
After this, [Connection successful] is
displayed, and the wireless LAN can be
used on this equipment.
If [A Timeout occurred.] is displayed, the connection
destination wireless AP may not have been found within
the required time. The SSID, security settings, and KEY
need to be configured to match the wireless AP settings.
Check each of the settings. For details on each of the
setting items, see "Using the wireless LAN".
3 Press the to select [Network Setup],
and then press the .
4 Press the to select [Wireless
Setting], and then press the .
5 Press the to select [Wireless
Network Selection], and then press .
6 Press the to select [Yes], and then
press .
Switching from wireless to wired
The network connection can be switched from
wireless to wired.
1 Log in as the administrator.
2 Press the to select [Network Menu],
and then press the .
3 Press the to select [Network Setup],
and then press the .
4 Press the to select [Enabling Wired
Communications], and then press .
OK
7 When [Yes] is selected in step 6,
[Searching for connection...] is
displayed in the screen.
5 Press the to select [Yes], and then
-52-
press .
OK
Page 53

Connecting to a Computer
Note
Memo
OK
OK
OK
OK
Install a Printer and Fax Driver
(for Windows)
To complete the network connection with a
Windows computer, first set IP addresses for the
machine, and then install a printer and fax driver
on the computer.
If there is no DHCP server or BOOTP server on
the network, you need to manually configure the
IP address on the computer or machine.
Your network administrator or Internet service
provider specifies a unique IP address for the
computer and your machine. Set the IP
addresses manually.
You need to complete the network setting of the computer
before this procedure.
To complete this procedure, you must be logged in as an
administrator.
When setting an IP address manually, ask the network
administrator or your Internet service provider which IP
address to use. If the IP address is set wrong, the network
may go down or Internet access may be disabled.
4 Enter the administrator password.
The factory default password is "aaaaaa".
5 Select [Complete], and press .
6 Press the and [Network Setting],
and then press the .
7 If setting the IP address manually, check
that [Manual] is selected, and press .
If obtaining the IP address automatically, press
the and select [Auto], and press . Proceed
to step 12.
OK
OK
1
Setup
If configuring a small network consisting of only your
machine and a computer, set IP addresses as shown below
(according to RFC1918).
For the computer
IP address : 192.168.0.1~254
Subnet mask : 255.255.255.0
Default gateway : not used
DNS server : not used
For the machine
IP address Set : Manual
IP address: 192.168.0.1~254 (select a dif-
ferent value from the com-
puter)
Subnet Mask : 255.255.255.0
Default Gateway : 0.0.0.0
Network Scale : Small
To se t [Network Scale], press the <SETTING> key and
then select [Admin Setup] > [Network Menu] >
[Network Setup] > [Network Scale].
First, Set the IP address of the machine.
1 Hold down the power switch for about a
second to turn on the power.
2 Press the <SETTING> key on the
operator panel.
3 Press the to select [Easy Setup], and
press .
8 Enter the IP address and press .
To move to the next box, press the .
9 Enter the subnet mask and press .
To move to the next box, press the .
OK
10 Enter the default gateway address and
press .
To move to the next box, press the .
OK
11 Enter the DNS server and WINS server if
needed.
If it is not necessary to connect the DNS server or
WINS server to the network, press until the
pop-up message showing the setting completion is
displayed.
12 When the setup menu screen is
displayed, press to complete the
setup.
-53-
Page 54

Connecting to a Computer
Note
Memo
Next, install the printer and fax driver into the
computer.
To complete this procedure, you must be logged in as an
administrator.
1 Ensure that your machine and the
computer are turned on and connected,
"
and then insert the
Software DVD-ROM"
into the computer.
2 Click [
Run Setup.exe
] after [
AutoPlay
]
is displayed.
If the [User Account Control] dialog box
appears, click [Yes].
3
Select the language and then click [
Next
].
4 Select the device of your machine, and
then click [Next].
7
Select the checkbox for the printer driver
and fax driver you wish to install, and click
the Install bunch button.
By factory default, [PCL driver], [Scanner driver],
and [ActKey] are selected.
All drivers and software packages are installed by the
collective installation if their boxes are checked. If you
wish to install drivers and software separately, click
the Install button on their right and follow the onscreen instructions.
8 If the [Windows Security] dialog box
appears, click [Install this driver
software anyway].
5 Read the license agreement and then
click [I Agree].
6
Read the "Environmental advice for Users"
and click [
Next
].
9 Click the [Network] button.
The device search starts.
If the machine is detected, it is automatically
installed. Proceed to step 11.
- If the machine is not detected, the
[Review your installation settings.]
screen is displayed. Proceed to step 10.
10 click [Restart search] to restart the
device search.
After the machine is displayed, select the machine
and click [Next].
-54-
Page 55

Memo
Note
Reference
OK
OK
OK
If the machine is not displayed by clicking [Restart
search], select [Printer name/IP Address] and
enter the IP address assigned to your machine, and
then click [Next].
11 If the [Windows Security] dialog box
appears, click [Install this driver
software anyway].
12 Click the [Exit] button.
Connecting to a Computer
Installing a Printer Driver
(For Mac OS X)
To complete the network connection with a Mac
operating system, install a printer driver on the
computer and set your machine as a network
printer.
Select the protocol for your network connection
from the following:
EtherTalk
Bonjour
EtherTalk is not supported in Mac OS X 10.6 or later.
Disable the anti-virus software before starting this
procedure.
EtherTalk is not supported in Mac PCL.
Using EtherTalk (For Mac OS X
10.5)
When connecting to the network with EtherTalk,
it is necessary to enable EtherTalk in the
machine. Then, install the driver in the computer.
1
Setup
13 Remove the "Software DVD-ROM" from
the computer.
The installation is complete.
Print a test page to check that the printer
driver is successfully installed on the
computer.
1 Click [Start] > [Devices and Printers].
2 Right-click the OKI MB491 icon and
select [Printer properties] (> a desired
printer driver if you have installed
multiple drivers) from the pop-up menu.
First, enable EtherTalk in the machine.
1 Ensure that your machine and the
computer are turned on and connected.
"Connecting an Ethernet Cable" P. 47
2 Press the <SETTING> key on the
operator panel.
3 Press the to select [Admin Setup],
and press .
4 Enter the administrator password.
The factory default password is "aaaaaa".
5 Select [Complete], and press .
OK
6 Press the to select [Network Menu],
and press .
7 Press the to select [Network Setup],
and press .
8 Press the to select [EtherTalk], and
press .
OK
3 On the [General] tab, click [Print Test
Page].
9 Press the to select [Enable], and
10 Press the until the top screen is
-55-
press .
OK
displayed.
Page 56

Connecting to a Computer
Note
Next, install the driver in the computer.
1 Insert the "Software DVD-ROM" into the
computer.
2 Double-click the [OKI] icon on the
desktop.
3 Double-click [Driver] > [Printer] >
[Installer for OS X 10.5-10.8].
4 Enter the administrator password, and
then click [OK].
Follow the instructions displayed on the screen to
complete the installation.
5 From the Apple menu, select [System
Preferences].
6 Click [Print & Fax].
7 Click [+].
9 Select the name of your machine and
then check that [OKI MB491(PS)] is
displayed in [Print Using].
10 Click [Add].
11 Check that your machine is displayed in
[Printers] and [OKI MB491(PS)] is
displayed in [Kind].
8 Click [AppleTalk].
If [OKI MB491(PS)] is not correctly displayed in
[Kind], click [-] to remove your machine from [Print
& Fax] and then redo the procedure from steps 7 to
10.
12 Close [Print & Fax].
13 Remove "Software DVD-ROM" from the
computer.
The installation is complete.
-56-
Page 57

Connecting to a Computer
Memo
Note
OK
OK
OK
Using EtherTalk
(For Mac OS X 10.4.0 to 10.4.11)
When connecting to the network with EtherTalk,
it is necessary to enable EtherTalk in the
machine. Then, install the driver in the computer.
The following procedure uses Mac OS X 10.4.11 as an
example. Depending on an OS, the description may be
different.
First, enable EtherTalk in the machine.
1 Ensure that your machine and the
computer are turned on and connected.
Reference
"Connecting an Ethernet Cable" P. 47
2 Press the <SETTING> key on the
operator panel.
3 Press the to select [Admin Setup],
and press .
OK
4 Enter the administrator password.
The factory default password is "aaaaaa".
3 Select [Network Port Configurations]
from [Show], and then check that
[Built-in Ethernet] is selected.
4 Select [Built-in Ethernet] from [Show]
and select the [AppleTalk] tab, and
then check that [Make AppleTalk
Active] is selected.
1
Setup
5 Select [Complete], and press .
6 Press the to select [Network Menu],
and press .
OK
7 Press the to select [Network Setup],
and press .
OK
8 Press the to select [EtherTalk], and
press .
9 Press the to select [Enable], and
press .
10 Press the until the top screen is
displayed.
Next, install the driver in the computer.
1 From the Apple menu, select [System
Preferences].
2 Select [Network].
5 Close [Network].
6 Insert "Software DVD-ROM" in the
computer.
7 Double-click the [OKI] icon on the
desktop.
8
Double-click [
PCL
] folder > [
[
Driver
] folder > [PS] Or
Installer for OS X 10.4
9 Enter the administrator password, and
then click [OK].
Follow the instructions displayed on the screen to
complete the installation.
].
10 From the [Go] menu, select [Utilities]
and then double-click [Printer Setup
Utility].
If [Printer Setup Utility] is already running, close it
and open it again.
-57-
Page 58

Connecting to a Computer
Reference
11 Click [Add].
If the [You have no printers available] dialog
box appears, click [Add].
12 Select the name of your machine whose
[Connection] is [AppleTalk], and then
check that [OKI MB491(PS)] is
displayed in [Print Using].
19 Click [OK].
20 Remove "Software DVD-ROM" from the
computer.
The installation is complete.
Using Bonjour
(For Mac OS X 10.5 to 10.8)
Then, install the driver in the computer and set
the machine as a network printer.
Install the driver in the computer.
1 Ensure that your machine and the
computer are turned on and connected.
"Connecting an Ethernet Cable" P. 47
2 Insert "Software DVD-ROM" into the
computer.
3 Double-click the [OKI] icon on the
desktop.
4 Double-click [Driver] folder > [PS] or
[PCL] folder > [Installer for OS X
10.5-10.8].
13 Click [Add].
14 Check that the name of your machine is
displayed in [Printer List], and then
close the window.
15 From the [Go] menu, select
[Applications] and then double-click
[TextEdit].
16 Select the [File] menu > [Page Setup].
17 Select the name of your machine from
[Format for].
18 Check that the [OKI MB491(PS)] is
displayed correctly under [Format for].
5 Enter the administrator password, and
then click [OK].
Follow the instructions displayed on the screen to
complete the installation.
6 From the Apple menu, select [System
Preferences].
7 Click [Print & Scan] (For Mac OS X 10.5
and 10.6:[Print & Fax]).
8 Click [+].
-58-
Page 59

9 Click [Default].
Note
Memo
Reference
Connecting to a Computer
10 Select the name of your machine whose
[Kind] is [Bonjour], and then check
that [OKI MB491(PS)] or [OKI
MB491(PCL)] is displayed in [Print
Using].
The name of your machine is displayed with the
format of "OKI-MB491- (the last six digits of the
MAC address)".
If [OKI MB491(PS)] or [OKI MB491(PCL)] is not
correctly displayed in [Kind], click [-] to remove your
machine from [Print & Fax] and then Redo the
procedure from step 8 to 12.
14 Close [Print & Scan] (For Mac OS X
10.5 and 10.6:[Print & Fax]).
15 Remove "Software DVD-ROM" from the
computer.
The installation is complete.
Using Bonjour (for Mac OS X 10.4.0
to 10.4.11)
Install the driver in the computer and set the
machine as a network printer.
The following procedure uses Mac OS X 10.4.11 as an
example. Depending on an OS, the description may be
different.
Install the driver in the computer.
1 Ensure that your machine and the
computer are turned on and connected.
1
Setup
11 Click [Add].
12 If the [Installable Options] window is
displayed, click [Continue].
If you have installed the optional second tray unit
before the driver installation, configure each item
and then click [Continue].
13 Check that your machine is displayed in
[Printers] and [OKI MB491(PS)] or
[OKI MB491(PCL)] is displayed in
[Kind].
"Connecting an Ethernet Cable" P. 47
2 From the Apple menu, select [System
Preferences].
3 Select [Network].
4 Select [Network Port Configurations]
from [Show], and then check that
[Built-in Ethernet] is selected.
5 Close [Network].
6 Insert "Software DVD-ROM" into the
computer.
7 Double-click the [OKI] icon on the
desktop.
-59-
Page 60

Connecting to a Computer
Note
Memo
8 Double-click [Driver] folder > [PS] or
[PCL] folder [Installer for OS X 10.4].
9 Enter the administrator password, and
then click [OK].
Follow the instructions displayed on the screen to
complete the installation.
10 From the [Go] menu, select [Utilities]
and then double-click [Printer Setup
Utility].
If [Printer Setup Utility] is already running, close it
and open it again.
11 Click [Add].
If the [You have no printers available] dialog
box appears, click [Add].
15 Check that the name of your machine is
displayed in [Printer List], and then
close the window.
16 From the [Go] menu, select
[Applications] > [TextEdit].
17 Select the [File] menu > [Page setup].
18 Select the name of your machine from
[Format for].
19 Check that [OKI MB491(PS)] or [OKI
MB491(PCL)] is displayed correctly
under [Format for].
12 Select the name of your machine whose
[Connection] is [Bonjour], and then
check that [OKI MB491(PS)] or [OKI
MB491(PCL)] is displayed in [Print
Using].
The name of your machine is displayed with the
format of "OKI-MB491- (the last six digits of the
MAC address)".
13 Click [Add].
14 If the [Installable Options] window is
displayed, click [Continue].
If you have installed the optional second tray unit
before the driver installation, configure each item
and then click [Continue].
20 Click [OK].
21 Remove "Software DVD-ROM" from the
computer.
The installation is complete.
USB Connection
Perform the following procedure to connect your
machine to a computer via USB.
Connecting a USB Cable
1
Prepare a USB cable.
A USB cable is not supplied with your machine.
Prepare an USB 2.0 cable separately.
Use a USB 2.0 Hi-Speed cable for a USB 2.0 Hi-Speed
connection.
-60-
Page 61

Connecting to a Computer
Reference
Note
Note
2
2 Hold down the power switch for about a
second to turn on the power and the
computer.
"Turning Off Your Machine" P. 20
3 Plug one end of the USB cable into the
USB interface connector on the back of
the machine.
4 Plug the other end of the USB cable into
the computer's USB interface connector.
Installing a Printer and Fax Driver
(For Windows)
You must be logged in as an administrator to complete this
procedure.
1 Ensure that your machine is turned off
and the USB cable is unplugged from the
computer.
2 Turn on the computer.
3 Insert "Software DVD-ROM" into the
computer.
4 Click [Run setup.exe] after [Auto
Play] is displayed.
If the [User Account Control] dialog box
appears, click [Yes].
5 Select the language and then click
[Next].
6 Select the device of your machine, and
then click [Next].
1
Setup
Note
For Windows OSs, do not plug the other end of the
USB cable into the computer until prompted during
driver installation.
Do not plug the USB cable into the network interface
connection. Doing so may damage your machine.
7 Read the license agreement and then
click [I Agree].
8 Read the "Environmental advice for
Users" and click [Next].
-61-
Page 62

Connecting to a Computer
Note
Reference
9 Select the checkbox of the printer driver,
fax driver or both you want to install, and
click the Install bunch button.
Memo
By factory default, [PCL driver], [Scanner driver],
and [ActKey] are selected.
All of drivers and software packages are installed by
the collective installation if their boxes are checked. If
you wish to install drivers and software separately,
click the Install button at the right to them and follow
the on-screen instructions.
10 If the [Windows Security] dialog box
appears, click [Install this driver
software anyway].
12 Click the [Exit] button.
13 Remove "Software DVD-ROM" from the
computer.
The installation is complete.
Print a test page to check that the printer
driver is successfully installed on the
computer.
1 Click [Start] > [Devices and Printers].
2 Right-click the OKI MB491 icon and
select [Printer properties] (> a desired
printer driver if you have installed
multiple drivers) from the pop-up menu.
3 On the [General] tab, click [Print Test
Page].
11 When the instruction prompting to
connect the machine to the computer
and turn on the machine appears, plug
the other end of the USB cable into the
computer’s USB interface connector and
turn on your machine.
Installing a Printer Driver
(For Mac OS X)
Disable the anti-virus software before starting this
procedure.
For Mac OS X 10.5 to 10.8
1 Ensure that your machine and the
computer are turned on and connected.
"Connecting a USB Cable" P. 60
2 Insert "Software DVD-ROM" into the
computer.
3 Double-click the [OKI] icon on the
desktop.
4
Double-click [
folder [
Installer for OS X 10.5-10.8
Driver
] folder > [PS] or [
].
PCL
]
Note
Do not plug the USB cable into the network interface
connection. Doing so may cause a malfunction.
5 Enter the administrator password, and
then click [OK].
Follow the instructions displayed on the screen to
complete the installation.
6 From the Apple menu, select [System
Preferences].
7 Click [Print & Scan] (Mac OS X 10.5 and
10.6:[Print & Fax]).
-62-
Page 63

Connecting to a Computer
Memo
Reference
Note
Note
8 Click [+].
Note
If the machine is already shown in [Printers], select
your machine, and click on [-] to delete. After this,
click [+].
9 Select the name of your machine whose
[Connection] is [USB], and then check
that [OKI MB491(PS)] or [OKI
MB491(PCL)] is displayed in [Print
Using].
12 Close [Print & Scan](Mac OS X 10.5
and 10.6:[Print & Fax]).
13 Remove "Software DVD-ROM" from the
computer.
The installation is complete.
For Mac OS X 10.4.0 to 10.4.11
The procedure below uses Mac OS X 10.4.11 as an
example. Depending on your OS, the description may be
different.
1 Ensure that your machine and the
computer are turned on and connected.
"Connecting a USB Cable" P. 60
2 Insert "Software DVD-ROM".
3 Double-click the [OKI] icon on the
desktop.
4
Double-click [
PCL
] folder > [
[
Driver
] folder > [PS] or
Installer for OS X 10.4
1
Setup
].
10 Click [Add].
11 Check that the name of your machine is
displayed in [Printers] and [OKI
MB491(PS)] or [OKI MB491(PCL)] is
displayed.
5 Enter the administrator password, and
then click [OK].
Follow the instructions displayed on the screen to
complete the installation.
6 From the [Go] menu, select [Utilities],
and then double-click [Printer Setup
Utility].
If [Printer Setup Utility] is already running, close it
and open it again.
7 Click [Add].
If the [You have no printers available] dialog
box appears, click [Add].
If the name of your machine whose [connection] is
[USB] is already displayed, select it and click
[Delete], and then click [Add].
Note
If [OKI MB491(PS)] or [OKI MB491(PCL)] is not
correctly displayed, click [-] to remove your machine
from [Printers] and then redo the procedure from
steps 8 to 10.
-63-
Page 64

Connecting to a Computer
8 Select the name of your machine whose
[Connection] is [USB], and then check
that [OKI MB491(PS)] or [OKI
MB491(PCL)] is displayed in [Print
Using].
9 Click [Add].
10 Check that the name of your machine is
displayed in [Printer List], and then
close the window.
11 Remove "Software DVD-ROM" from the
computer.
The installation is complete.
-64-
Page 65

Configuring the Network Settings
Reference
Configuring the Network Settings
This section describes the setup required for using Scan To E-mail, Scan To Network PC, Scan To Fax
Server, Internet Fax functions.
The above functions enable you to send scanned data to a computer via the network connection. To use
them, you need to set up your machine and the computer to which you want to send scanned data.
First check the settings of the computer and fill in the information in the [
Information Form below. Then, configure your machine and the computer using the information in [
Be sure to configure the network connection before performing the procedures below. For the network connection, refer to
"Network Connection" P. 47.
User Value
] column of the Setup
User Value
Setup Information Form
User Value
No. Item Outline Introduction Example
Common Setup Information
A-1 Administrator pass-
word for your machine
A-2 IP address of your
machine
A-3 DNS server address DNS server address 192.168.0.1
The password you use to change the
machine's system settings
The IP address allocated to your machine 192.168.0.2
aaaaaa
Setup Information Required for Scan To E-mail, Scan To Fax Server and Internet Fax
B-1 E-mail address for
your machine
B-2 SMTP server address The address of the server used when
B-3 POP3 server address The address of the server used when
B-4 Authentication
method
B-5 SMTP user ID Sending mail server account name OKIMB491
The e-mail address used when sending emails from the machine
sending e-mails
receiving e-mails
Sending mail server authentication SMTP
mb491@test.
com
smtp.test.com
pop3.test.com
*You can look at the following
page and write memos here
on the details you have
checked or the settings you
have configured.
(Up to 80 characters)
1
Setup
].
B-6 SMTP password Sending mail server password okimb491
B-7 POP user ID Receiving mail server account name user
B-8 POP password Receiving mail server password okimb491
B-9 Name of the e-mail
destination
B-10 E-mail address of the
e-mail destination
The name of the recipient to whom you
are sending a scan-to-mail/Internet fax
from the machine
The e-mail address of the recipient to
whom you are sending a scan-to-mail/
Internet fax from the machine
User
user@test.com
Setup Information Required for Scan To Network PC
C-1 Name of the destina-
tion computer
C-2 User name to log into
the destination computer
C-3 Password to log into
the destination computer
C-4 Profile name to regis-
ter the settings
C-5 Shared folder name
on the destination
computer
C-6 File name of the
scanned data
The name of the computer to which you
are forwarding scanned data
User name to log in to the computer to
which you are forwarding scanned data
Password to log in to the computer to
which you are forwarding scanned data
Name when registering the machine
settings
Folder name of the computer to which
you are forwarding scanned data
Scanned data folder name ScanData
PC1
mb491
mb491
Sales
SalesDev
(Up to 32 characters)
(Up to 32 characters)
(Up to 16 characters)
(Up to 64 characters)
(Up to 64 characters)
-65-
Page 66

Configuring the Network Settings
Memo
Note
Note
Memo
OK
Checking the Common Setup Information
Check the common setup information for Scan To
E-mail, Scan To Network PC, Scan To Fax Server
and Internet Fax, and fill in the corresponding
columns of the Setup Information Form.
Administrator Password for Your
Machine
Enter the administrator password of your
machine in A-1 of the Setup Information Form.
If you are not the administrator of the machine,
ask the administrator the password.
Passwords are case-sensitive.
The administrator password is set to "aaaaaa" as the
factory default setting.
Gateway address/DNS server
1 Press the <SETTING> key on the
operator panel.
2 Check that [Reports] is selected and
press .
3 Check that [Configuration] is selected
and press .
4 On the confirmation screen press or ,
select [Yes], and press .
OK
OK
Setting Up Scan To E-mail and Internet Fax
The Scan To E-mail, Scan To Fax Server and
Internet Fax functions enable you to send
scanned images as an attached file of an e-mail
to the specified e-mail address on the network.
To use these functions, set up the e-mail setting
for your machine.
When using Auto Delivery or Transmission Data
Save function (MB491/MB491+LP/ES4191 MFP/
MPS4200mb/MPS4700mb only), the following
setup is required.
Checking the E-mail Settings of the
Computer
If a network administrator specifies the values such as a
mail server account, password and e-mail address for your
machine, enter them in the Setup Information Form.
The procedure below uses Windows Live Mail on Windows
7. If you are using different mail software, refer to the
manual for the e-mail software.
1 Click [Start] and select [Windows Live
Mail].
2 Select the [Tools] menu > [Accounts].
If the menu bar is not displayed, click the
[Menus] icon and then select [Show menu bar].
5 Enter the address written on the gateway
address line at the bottom right of page
3 of the printed configuration into A-2 on
the setting information sheet.
6 Enter the address written on the DNS
server (primary) line on the bottom right
of the same page into A-3.
It is necessary that the gateway address be configured
beforehand. Also, if using an Internet service provider, it is
necessary that the DNS server be configured. If it has not
been configured (0.0.0.0), follow the procedure on
55 page to configure it.
3 Select the mail account and then click
[Properties].
-66-
Page 67

Configuring the Network Settings
Note
Note
B-9
B-10
B-3
B-2
B-7
B-8
4 On the [General] tab, enter the contents
of [Name] and [E-mail address] in B-9
and B-10 of the Setup Information Form.
5 Click the [Servers] tab, and then note
each setting in the corresponding
columns of the Setup Information Form.
Setting the E-mail Address for Your
Machine
When sending data scanned from the machine by
e-mail, the e-mail address for the machine is
necessary.According to the following procedure,
set the e-mail address of the machine and enter
an e-mail address to be used by your machine in
B-1 of the Setup Information Form.
If the e-mail address for your machine is specified
by the network administrator, enter the e-mail
address in B-1.
If you are using an Internet service provider, obtain
an e
-mail address for your machine from the
provider and then enter the e
If the e
specified nor obtained, determine the e
address according to the value you entered in B-4
(authentication method):
- If B-4 is "SMTP", determine an e
- B-4 is "POP", enter the same e
If you want your machine to receive e-mail, you must
obtain an e-mail address for your machine from a network
administrator or your Internet service provider.
-mail address for your machine is neither
enter it in B-1.
10 in B-1.
-mail address in B-1.
-mail
-mail address and
-mail address as B-
1
Setup
- If there is a check in the [My server requires
authentication] checkbox, enter "SMTP" into B-4
and follow procedure 6.
- If there is no check in the [My server requires
authentication] checkbox, enter [POP or not
yet authenticated] in B-4. At this point the
confirmation of e-mail settings is complete.
If using an Internet service provider, enter [POP].
6 Click [Settings].
7 Check the login information on the
[Outgoing Mail Server] dialog.
-If [Use same settings as my incoming mail
server] is selected, enter the same values as B-7
and B-8 on B-5 and B-6.
-If [Log on using] is selected, note the content of
[Accountname] and [Password] in B-5 and B6, respectively.
Configuring Your Machine for Scan To
E-mail, Scan To Fax Server and Internet Fax
Set up your machine for Scan To E-mail and
Internet Fax using the information in the Setup
Information Form.
1 Press the <SETTING> key on the
operator panel.
2 Press the to select [Easy Setup] and
press .
OK
3 Enter the administrator password (A-1).
4 Select [Enter] and then press .
OK
5 Press the to select [E-mail Setting]
and then press the .
6 Press the and then enter the
information in B-2.
-67-
Page 68

Configuring the Network Settings
Note
Memo
OK
OK
OK
OK
OK
OK
OK
OK
OK
OK
OK
7 Select [Enter] and then press .
8 Press the and then enter the
information in B-1.
9 Select [Enter] and then press .
10 Press the and then select a protocol
for receiving e-mail for the machine, and
then press .
- If you want your machine to receive e-mail from
the POP3 server, select [POP3]. Proceed to step
11.
- If you want your machine to receive e-mail
without using a mail server, select [SMTP].
Proceed to step 13.
- If you do not want your machine to receive e-mail,
select [Disable]. Proceed to step 13.
11 Press the and then enter the
information in B-3.
12 Select [Enter] and then press .
13 Press the and then select an
authentication method based on the
information in B-4. Then, press .
- If B-4 is "Do not authenticate", select [Do not
authenticate]. Proceed to step 24.
- If B-4 is "SMTP", select [SMTP Auth]. Proceed to
step 14.
- If B-4 is "POP", select [POP Before SMTP].
Proceed to step 18.
14 Press the and then enter the
information in B-5.
15 Select [Enter] and then press .
16 Press the and then enter the
information in B-6.
17 Select [Enter] and then press .
Proceed to step 24.
24 When the setup menu screen is
displayed, press .
The setup for Scan To E-mail, Scan To Fax Server
and Internet Fax is complete.
Reference
For details on how to use Scan To E-mail, refer to "Scan to
E-mail" P. 109.
For details on how to use Scan To Fax Server, refer to
"Basic Procedure for Scan To Fax Server" P. 98.
For details on how to use Internet Fax, refer to "Basic
Procedure for Internet Faxing" P. 100.
Setting Up Scan To Network PC
The Scan To Network PC function enables you to
send and save scanned images to the "shared
folder" of a computer on the network. To use this
function, register your machine on the computer
as a user and create a shared folder, and then
create a profile on your machine to register the
settings for the computer.
Before starting the setup, get permission from the network
administrator to create a shared folder on the computer by
following the procedure below.
The CIFS protocol is used in this procedure.
Checking the Name of the Computer
Check the name of the computer following the
procedure below, and fill in C-1 of the Setup
Information Form.
18 Press the and then enter the
information in B-3.
19 Select [Enter] and then press .
20 Press the and then enter the
information in B-7.
21 Select [Enter] and then press .
22 Press the and then enter the
information in B-8.
23 Select [Enter] and then press .
For Windows 7, Windows Server
2008 R2, Windows Server 2008
and Vista
1 Click [Start] and select [Control
Panel].
2 Select [System and Security].
For Windows Server 2008 and Windows Vista,
select [System and Maintenance].
-68-
Page 69

3 Select [See the name of this
Memo
Note
Memo
C-1
C-1
computer] under [System].
4 Enter the name in [Computer name] in
C-1 of the Setup Information Form.
5 Close the window.
Configuring the Network Settings
If the computer name is over 16 characters, for Mac OS X
10.4.11 enter the first 15 characters in C-1. For Mac OS X
10.5-10.6, select the network service you are using from
[System Environment Settings] > [Network], and
enter the NetBios field name into C-1 within WINS in
Detailed Settings.
4 Close [Sharing].
Determining the Names of the Items
Required for Scan To Network PC
Determine the names of the following items and
fill in C-2 to C-6 on the Setup Information Form.
User name to log into the destination computer (C-2)
1
Setup
For Windows Server 2003 and
Windows XP
click [start] > [Control Panel] >
1
[Performance and Maintenance] >
[System].
For Windows Server 2003, click [Start] >
[Operator panel] > [System].
2 Select the [Computer Name] tab and
then click [Change].
3 Enter the name in [Computer Name] in
C-1 of the Setup Information Form.
4 Click [Cancel] to close the window.
For Mac OS X
1 From the Apple menu, select [System
Preferences].
2 Click [Sharing].
3 Enter the name in [Computer Name] in
C-1 of the Setup Information Form.
If the username is managed on the domain, enter
"Username@Domainname" in C-2. To check the
domain name, click on [Change] within the
[Computer Name] tab in the [System Properties]
dialogue box.
Password to log into the destination computer (C-3)
Profile name to register the settings on your
machine (C-4)
Shared folder name on the destination computer
(C-5)
File name of the scanned data (C-6)
Configuring the Computer for Scan
To Network PC
With the setup information form, create an
account and shared folder for the machine in the
computer.
If the computer is in a domain, the procedure for adding a
user account may be different to the procedure below.
Refer to the Microsoft Windows manual.
For Windows 7, Windows Server
2008 R2, Windows 2008 and Windows Vista
1
2 Select [Add or remove user
3 Select [Create a new account].
-69-
Click [Start] > [Control Panel].
accounts].
Page 70

Configuring the Network Settings
4 Enter the information in C-2 in the text
box.
5 Ensure that [Standard user] is
selected, and then click [Create
Account].
6 Click the icon of the user account created
in step 5.
7 Select [Create a password].
8 Enter the information in C-3 in [New
password] and [Confirm new
password], and then click [Create
password].
12 Select the [Sharing] tab and then click
[Share].
13 Select the user account created in step 5
from the drop down box, and then click
[Add].
14 Check that the user added in step 13 is
displayed and then click [Share].
9 Close the operator panel.
10 Create a new folder on the computer
with the name entered in C-5.
Memo
It is recommended to create a folder in the local drive
(C drive or D drive), not on the desktop, [My
Documents], or network drive.
11 Right-click the folder created in step 10
and select [Properties].
After the [Network discovery and file sharing]
dialog box is displayed, click [No, make the
network that I am connected to a private
network].
15 Click [Done].
16 Click [Advanced Sharing] on the
[Sharing] tab.
17 Click [Permissions].
For Windows Vista/Windows Server 2008, proceed
to step 20.
-70-
Page 71

Configuring the Network Settings
Memo
18 Click [Add].
19 Enter the value in C-2 in the entry field
and then click [OK].
20 Select the user added in step 13 and
select the [Allow] check box for [Full
Control], and then click [OK].
5 Select [Limited] and click [Create
Account].
1
Setup
6 Click the icon of the user account created
in step 5.
7 Select [Create a password].
8 Enter the value of C-3 in [Type a new
password] and [Type the new
password again to confirm], and then
click [Create Password].
21 click [OK].
22 Click [Close].
Proceed to "Creating a Profile for Scan To Network
PC" P. 76.
For Windows XP
Click [start] > [Control Panel].
1
2 Double-click [User Accounts].
3 Select [Create a new account].
4 Enter the value of C-2 in the text box and
click [Next].
9 Close the operator panel.
10 Create a new folder on the computer
with the name entered in C-5.
It is recommended to create a folder in the local drive
(C drive or D drive), not on the desktop, [My
Documents], or network drive.
11 Right-click the folder created in step 10,
and then select [Sharing and
Security].
-71-
Page 72

Configuring the Network Settings
12 Click [If you understand the security
risks but want to share files without
running the wizard, click here.].
If the screen below appears, select [Share this
folder] and click [Permissions]. Proceed to step
15.
15 Click [Add].
16 Enter the value in C-2 in the entry field
and click [OK].
17 Select the [Allow] check box for [Full
Control], and then click [OK].
13 Select [Just enable file sharing] in
Windows Firewall, and then click [OK].
14 Select the [Share this folder on the
network] and [Allow network users
to change my files] check box, and
then click [OK].
Proceed to "Creating a Profile for Scan To Network
PC" P. 76
Proceed to "Creating a Profile for Scan To Network
PC" P. 76
-72-
Page 73

Configuring the Network Settings
Memo
For Windows Server 2003
The items here may differ depending on the edition you
are using.
1 Click [Start] > [Administrative Tools] >
[Computer Management].
2 In the right window, double-click
[System Tools] > [Local Users and
Groups], and then Right-click [Users]
and select [New User].
3 Enter the value of C-2 in [User name]
and the value of C-3 in [Password] and
[Confirm password].
10 Select [Share this folder] and then
click [Permissions].
1
Setup
11 Click [Add].
4 Select [User cannot change
password] and [Password never
expires], and then click [Create].
Memo
If [User must change password at next logon] is
selected, clear it so that you can select [User can not
change password] and [Password never expires].
5 Click [Close].
6 Double-click [User] and check that the
user created in step 4 is displayed.
7 Close the window.
12 Enter the value in C-2 in the entry field
and click [OK].
Proceed to step 15.
13 Select the [Allow] check box for [Full
Control], and then click [OK].
8 Create a new folder on the computer
with the name entered in C-5.
Memo
It is recommended to create a folder in the local drive
(C drive or D drive), not on the desktop, [My
Documents], or network drive.
9 Right-click the folder created in step 8
and then select [Sharing].
14 Ensure that the icon of the shared folder
created in step 8 changes into the icon
with a hand, and then close the window.
"Creating a Profile for Scan To Network PC" P. 76
-73-
Page 74

Configuring the Network Settings
For Mac OS X 10.5 to 10.7
1 From the Apple menu, select [System
Preferences].
2 Click [Users & Groups] (for Mac OS X
10.5 and 10.6: [Accounts]).
3 Click [Click the lock to make
changes.] at the bottom left of the
screen and enter the administrator
password. Then, click [Unlock] (for Mac
OS X 10.5 and 10.6: [OK]).
4 Click [+].
9 Check that an account is added to
[Other Users] (for Mac OS X 10.5 and
10.6: [Other Accounts]) with the name
of C-2, and close [Users & Groups] (for
Mac OS X 10.5 and 10.6: [Accounts]) .
10 Create a new folder on the computer
with the name entered in C-5.
11 From the Apple menu, select [System
Preferences].
5 Select [Standard] from [New
Account].
6 Enter the value of C-2 in [Name].
For Mac OS X 10.5, enter the value of C-2 in
[Name].
7 Enter the value in C-3 in both
[Password] and [Verify].
8 Click [Create User] (for Mac OS X 10.5
and 10.6: [Create Account]).
Memo
After the dialog box for auto login appears, disable the
auto login.
12 Click [Sharing].
13 Check the check box of [File Sharing].
14 Click [+] under [Shared Folder].
15 Select the folder created in step 10 and
click [Add].
16 Select the folder added in step 15 and
click [+] under [Users].
-74-
Page 75

Configuring the Network Settings
Memo
Memo
17 Select the account created in step 8 and
click [Select].
18 Click the triangle button at the right side
of the user added in step 17 and select
[Read & Write].
For Mac OS X 10.4.0 to 10.4.11
The following procedure uses Mac OS X 10.4.11 as an
example. Depending on an OS, the description may be
different.
1 From the Apple menu, select [System
Preferences].
2 Click [Accounts].
3 Click [Click the lock to make
changes.] at the bottom left of the
screen and enter the administrator
password. Then, click [OK].
4 Click [+].
1
Setup
19 Click [Options].
20 Check the checkbox of [Share files and
folders using SMB (Windows)].
For Mac OS X 10.5, check the checkbox of [Share
files and folders using SMB].
21 Check the checkbox of the account
added in step 16.
22 Enter the value of C-3 in [Password]
and click [OK].
5 Enter the value of C-2 in [Name].
6 Enter the value in C-3 in both
[Password] and [Verify].
7 Click [Create Account].
After the dialog box for auto login appears, disable the
auto login.
23 Click [Done].
24 Close [Sharing].
Proceed to "Creating a Profile for Scan To Network
PC" P. 76
-75-
Page 76

Configuring the Network Settings
Note
Memo
OK
OK
OK
OK
8 Check that an account is added to
[Other Accounts] with the name of C-2,
and close [Accounts].
9 Create a new folder on the computer
with the name entered in C-5.
10 From the Apple menu, select [System
Preferences].
11 Click [Sharing].
12 Check the checkbox of [Windows
Sharing].
17 Close [Sharing].
Proceed to "Creating a Profile for Scan To Network
PC".
Creating a Profile for Scan To
Network PC
Register the information on the Information form
on the computer as a profile. It is necessary to
specify the profile to send data when you
perform Scan To Network PC with the computer.
1 Press the the <SETTING> key on the
operator panel.
2 Press the to select [Profile] and then
press .
OK
3 Press the to select the profile number
you want to register and then press .
13 Click [Enable Accounts...].
14 Check the checkbox of the account
created in step 7.
4 Press the to select [Register] and
then press .
5 Press to select [Profile Name] and then
press the .
6 Enter the information in C-4.
7 Select [Enter] and then press .
OK
8 Press the to select [Target URL] and
then press .
9 Enter the value of C-1 and C-5 as "\\C-
1\C-5".
Example: \\PC1\SalesDev
If there is no DNS server on the network, you cannot
specify the computer by using the computer name
(C-1). In such a case, you can configure the settings
by using the computer's IP address.
Example: \\192.168.0.3\SalesDev
15 Enter the value in C-3 in [Password]
and click [OK].
16 Click [Done].
In order to enter the "\" sign while using a QWERTY
keyboard, press <CTRL> and then press <\>.
10 Select [Enter] and then press .
11 Press the to select [User Name] and
then press .
-76-
Page 77

Configuring the Network Settings
Reference
Reference
OK
OK
OK
OK
OK
OK
OK
OK
12 Enter the information in C-2.
Note
If domain management is performed, enter
"C-2@domain name".
When carrying out domain management, if you cannot
connect even after entering "C-2@Domainname",
delete "@Domainname".
Access the machine's website again, and set the
NetBIOS domain name in [Workgroup name] within
[Admin Setup] > [Network Menu] > [NBT/
NetBEUI].
*For the domain name, please check with the network
manager.
13 Select [Enter] and then press .
14 Press the to select [Password] and
then press .
OK
15 Enter the value of C-3.
16 Select [Enter] and then press .
17 Press the to select [File Name] and
then press .
OK
Modifying a Profile
1 Press the <SETTING> key on the
operator panel.
2 Press the to select [Profile] and then
press .
OK
3 Press the to select the profile you
want to modify and then press .
OK
4 Press the to select [Edit] and then
press .
5 Press the to select the item you want
to modify and then press .
6 Modify the item.
7 Select [Enter] and then press .
8 If you want to modify more than one
item, repeat steps 5 and 7.
1
Setup
18 Enter the information in C-6.
- By adding "#n" to the end of the file name, a
serial number is automatically assigned to the end
of the name of sent files.
- By adding "#d" to the end of the file name, a date
is automatically assigned to the end of the name
of sent files.
19 Select [Enter] and then press .
20 Configure other items if necessary.
21 Press to register the settings.
The setup for Scan To Network PC is complete.
For details how to use Scan To Network PC, refer to "Scan
to Network PC" P. 111.
9 Press to register the settings.
OK
Deleting a Profile
1 Press the <SETTING> key on the
operator panel.
2 Press the to select [Profile] and then
press .
OK
3 Press the to select the profile you
want to delete and then press .
4 Press the to select [Delete] and then
press .
OK
5 Press the or to select [Yes] on the
confirmation message and then press .
OK
Managing Profiles
To perform the Scan To Network PC, Auto
Delivery or Transmission Data Save function (for
MB491/MB491+LP/ES4191 MFP/MPS4200mb/
MPS4700mb Only), a profile for each destination
must be created. You can register up to 50
profiles.
Refer to "Creating a Profile for Scan To Network PC" P. 76
-77-
Page 78

Printing Configuration
Reference
OK
OK
Printing Configuration
This section explains how to print the Configuration on which you can check the detailed information of
your machine, such as the settings and status of your machine.
Printing Procedure
1 Press the <SETTING> key on the
operator panel.
2 Press the to select [Reports] and
press .
3 Press the to select [Configuration]
and press .
4 On the confirmation message, press the
or to select [Yes] and press .
OK
You can also print reports and lists for each function. Refer
to the User's Manual Advanced.
-78-
Page 79

2. Copying
Reference
Note
MONO
This chapter explains the basic operation and settings for your machine's copy function.
Basic Operation
This section explains how to start and cancel copy jobs.
Starting a Copy Job
1 Press the <COPY> key on the operator
panel to open the copy standby screen.
2 Place your document with text face up in
the ADF or face down on the document
glass.
3 Configure the copy settings if necessary.
4 Enter the number of copies using the
ten-key pad.
- You can enter up 1 to 99 sets.
- If you have entered an incorrect value, press the
<CLEAR> key and then enter the correct value.
2
Copying
Canceling a Copy Job in Progress
You can cancel copying until the message
showing the copy completion is displayed.
1 Press the <STOP> key on the operator
panel.
When you make a copy with the document glass, do not
apply an excessive load to the document glass.
5 Press to start copying.
For details on how to configure each copy setting, refer to
"Configuring Copy Settings" P. 80.
For details on how to load your documents in the ADF or on
the document glass, refer to "Loading Documents" P. 38.
-79-
Page 80

Configuring Copy Settings
Reference
Note
Memo
OK
MONO
Configuring Copy Settings
You can change the copy settings to alter the output to suit your needs. Each setting can be configured
from the [Change Settings] menu on the copy standby screen.
Perform the following procedures at step 3 of "Starting a Copy Job" P. 79 described above.
The changes made in the [Change Settings] menu on the copy standby screen are temporary. You can change the default
settings by configuring [Admin Setup] from the <SETTING> key. For details, refer to the User's Manual Advanced.
Changing the Scan Size (Scan Size)
You can select the appropriate size of the
document to be scanned.
1 Press the to enter the [Change
Settings] menu.
2 Check that [Scan Size] is selected and
then press .
3 Press the to select a scan size and
then press .
Settable Values:
A4* A5 A6 B5 Letter Legal 13
Legal 13.5 Legal 14 Executive
4 Press the until the start screen is displayed.
If you select the scan size of less than or equal to
177.8mm (7 inches) wide, and make copies from ADF,
Scan Resolution is changed to High Quality automatically.
OK
OK
*indicates the factory default.
3 Press the to select a tray and then
press .
OK
Settable Values:
Auto* Tray 1 Tray 2 MP Tray**
*indicates the factory default.
**Not displayed in MB441,
MB461, MB461+LP and
ES4161 MFP.
4 Press the until the start screen is displayed.
[Tray 2] is displayed only when the optional second tray
unit is installed.
When set to [Auto], the MP tray is not selected in the
default setting. To use the MP tray, press the <SETTING>
key and select [Paper Setup] > [Select Tray] > [Copy] >
[MP tray], and then select [ON] or [ON (Prior)].
When set to [Auto], the paper tray that holds paper other
than A4, B5, A5, A6, letter, legal 13/13.5/14, or executive
is not selected. To use a different paper size, select the
desired paper tray in the [Paper Feed Tray] setting.
Copying Using the MP Tray
If you have selected [MP Tray], you can copy your
documents onto the paper loaded in the MP tray.
Changing the Paper Tray (Paper Feed)
You can select the size of the document to be copied.
1 Press the to enter the [Change
Settings] menu.
2 Press the to select [Paper Feed] and
then press .
1 Place your document with text face up in the
ADF or face down on the document glass.
2 Load the paper in the MP tray.
3 Press .
-80-
Page 81

Configuring Copy Settings
Reference
Reference
Note
Memo
Memo
4 When the pop-up message is displayed,
press the or to select [Start] and
then press .
For details on how to load the paper in the MP tray, refer to
"Loading Paper on the MP Tray (MB451/MB451w/MB471/
MB471w/MB491/MB491+/MB491+LP/ES4191 MFP/
MPS4200mb/MPS4700mb)" P. 34.
OK
Changing Image Orientation of Document (Direction)
You can select [Portrait] or [Landscape] for the
document's orientation. Specify an appropriate
orientation to get the copy result you want.
For details on how to load documents in each orientation,
refer to "Loading Documents" P. 38.
1 Press the to enter the [Change
Settings] menu.
Using [Auto]
By selecting [Auto], the zoom ratio is
automatically determined according to the
selected scan size and paper tray.
You can use [Auto] only when copying on A4, A5, A6, B5
letter, legal 13/13.5/14, and executive paper.
1 Press the to enter the [Change
Settings] menu.
2 Press the to select [Zoom] and then
press .
OK
3 Press the to select [Auto] and then
press .
OK
4 Press the until the start screen is
displayed.
Setting the [Paper Tray] to [Automatic] will
automatically set [Enlarge/Reduce] to [100%]. When
selecting another scaling factor, initially set [Paper Tray],
and then set [Enlarge/Reduce].
Selecting a Preset Zoom Ratio
2
Copying
2 Press the to select [Direction] and
then press .
OK
3 Press the to select the orientation of a
document and then press .
Settable Values:
Portrait* Landscape
*indicates the factory default.
OK
4 Press the until the start screen is
displayed.
Making Enlarged or Reduced Copies (Zoom)
You can make enlarged or reduced copies by
setting [Zoom]. You can set the zoom ratio in
the following three ways:
Using [Auto]
Selecting a preset zoom ratio
Setting the zoom ratio using the ten-key pad
1 Press the to enter the [Change
Settings] menu.
2 Press the to select [Zoom] and then
press .
OK
3 Press the to select the desired value
and then press .
Values:
100% * A4-> A 5(7 0 % )
Leg14->Let(78%) Leg13.5->Let(81%)
Leg13->Let(84%) A4->B5(86%)
A4->Let(94%) Let->A4(9 7%)
Fit to page(98%) B5->A4(115%)
A5->A4(141%)
By selecting [Fit to page(98%)], if the sizes of the
document and the paper are the same, the document
is reduced to fit onto the paper.
OK
*indicates the factory default.
-81-
Page 82

Configuring Copy Settings
Note
Memo
Memo
Reference
Note
Memo
OK
OK
OK
MONO
OK
OK
4 Press the until the start screen is
displayed.
When [Paper Feed] is set to [Auto], some values cannot
be selected. The selectable values differ according to the
selected scan size.
With some ratios, parts of the document's image may be
missing or margins may appear on the copied outputs.
When [Paper Feed] is set to [Auto], the paper tray is
automatically selected according to the selected zoom
ratio. If you want to use a specific paper tray, reconfigure
the [Paper Feed] setting.
A paper tray that holds paper other than A4, B5, A5, A6,
letter, legal 13/13.5/14, or executive is not selected even if
[Paper Feed] is set to [Auto]. To select the desired paper
tray, reconfigure the [Paper Feed] setting.
Setting the Zoom Ratio Using the
ten-key pad
1 Press the to enter the [Change
Settings] menu.
2 Press the to select [Zoom] and then
press .
3 Press the to select [Zoom
(25~400%)] and then press .
4 Enter the zoom ratio from 25 to 400%
using the ten-key pad and then press .
- You can set the ratio in 1% increments.
- If you have entered an incorrect value, press the
<CLEAR> key and then enter the correct value.
1 Press the to enter the [Change
Settings] menu.
2 Press the to select [Continuous
Scan] and then press .
OK
3 Press the to select [ON] and then
press .
OK
4 Press the until the start screen is
displayed.
Copying With Continuous Scan
Mode
With the continuous scan mode, you can copy
your documents from the ADF or document
glass, or both of them.
1 Place the first document with text face
up in the ADF or face down on the
document glass.
2 Configure the copy settings if necessary.
Change other copy settings as required.
3 Enter the number of copies with the ten-
key pad.
4 Press to start scanning the first
document.
5
When the [
screen is displayed, place the next document
in the ADF or on the document glass.
Please set next document
]
5 Press the until the start screen is
displayed.
Enabling Continuous Scan Mode (Continuous Scan)
If you want to copy multiple sets of documents
as a single copy job, enable the continuous scan
mode. It is useful when using [Sort], [N-in-1],
or [Duplex Copy] functions.
Continuous Scan Mode is also available for faxes, Internet
faxes, as well as for scan functions. You can configure
faxes from [Applied Settings], and Internet faxes and
scans from [Reading Settings].
For details on the [DuplexCopy] functions, refer to
"Making Duplex Copies (Duplex Copy)".
For details on the [Sort] and [N-in-1] functions, refer to
the User's Manual Advanced.
When changing the place to load the next document, be
sure to remove the document from the place you used first.
6 Press the to select [Start Scan] and
then press .
7 When all sets of the documents are
scanned, press the to select [Scan
Complate] and then press .
When making N-in-1 and/or duplex copies using the
document glass, the [Please set next document] screen
is displayed after scanning the documents even if
[Continuous Scan] is set to [OFF].
For fax, Internet fax and scan functions, please follow
procedures 5-7 after the first page of the document has
started to be read.
-82-
Page 83

Configuring Copy Settings
Note
Reference
Reference
Note
Memo
Memo
OK
OK
OK
Making Duplex Copies (Duplex Copy)
You can copy 1-sided (simplex) and 2-sided
(duplex) documents on to one side (simplex) or
both sides (duplex) of a sheet of paper. You can
also select the binding position from either longedge or short-edge binding.
Specify the appropriate orientation of the
document in [Direction] beforehand to get the
copy result you want.
Use standard size plain paper for duplex copies. Using
non-standard paper may cause a paper jam in the duplex
unit of your machine.
Duplex printing cannot be done while paper is fed by
Manual Feeder in MB441, MB461, MB461+LP and ES4161
MFP.
For details on the available paper for your machine, refer
to "Loading Paper" P. 32.
For details on how to configure the [Direction] setting,
refer to "Changing Image Orientation of Document
(Direction)" P. 81.
Long-Edge Binding
Copies your document to be bound along the
long edge of the paper.
3 Press the to select the desired value
and then press .
Settable Values for Printing Method:
OFF (Simplex)*
Simplex document Duplex LE
Simplex document Duplex SE
Duplex documentDuplex printing
Duplex LE Simplex printing
Duplex SE Simplex printing
OK
*indicates the factory default.
4 Press the until the start screen is
displayed.
You can co py "duplex to duplex" or "duplex to simplex"
copies only when scanning the documents from the ADF.
When making duplex copies using the document glass, the
continuous scan mode is automatically enabled. Follow the
on-screen instructions.
Adjusting Copy Density (Density)
You can adjust the copy density from 7 levels.
1 Press the to enter the [Change
Settings] menu.
2
Copying
Short-Edge Binding
Copies your document to be bound along the
short edge of the paper.
To set margins for binding, refer to the User's Manual
Advanced.
Enabling Duplex Copies
1 Press the to enter the [Change
Settings] menu.
2 Press the to select [Duplex Copy]
and then press .
2 Press the to select [Image Settings]
and then press .
OK
3 Check that [Density] is selected and
then press .
4 Press the or to select the desired
density and then press .
Settable Density Values:
+3 +2 +1 0* -1 -2 -3
*indicates the factory default.
[0] is the standard value. To darken the document
image, select [+1], [+2] or [+3] (most dense).
Conversely, to lighten the document image, select
[-1], [-2] or [-3] (least dense).
5 Press the until the start screen is
displayed.
Changing Document Type (Document Type)
You can select the document type to make copies
at the most suitable quality for your needs.
1 Press the to enter the [Change
Settings] menu.
-83-
Page 84

Configuring Copy Settings
Note
Memo
Note
Memo
Note
OK
OK
OK
OK
OK
OK
OK
OK
OK
2 Press the to select [Image Settings]
and then press .
3 Press the to select [Document Type]
and then press .
4 Press the to select a document type
and then press .
Settable Types:
Text Text&Photo* Photo Photo (Glossy)
*indicates the factory default.
Memo
[Text]: Set when copying a text document.
[Text&Photo]: Set when copying a document having
texts and photos.
Images are reproduced with a balance between texts
and photos.
[Photo]: Set when copying photos and graphic
documents.
This reproduces grayscale for images in which it is
important.
[Photo (Glossy)]: Set when copying photo
documents printed on a glossy sliver halide
photography or glossy inkjet paper.
Images are reproduced by focusing on the gray level
in consideration of the glossy.
If Photo or Photo (Glossy) is selected, Scan Resolution
is fixed to Normal.
5 Press the until the start screen is
displayed.
When selecting [Text], the gray level may be reduced on
some document.
When selecting [Photo], [Photo (Glossy)], fine texts or
lines may be blurred on some documents.
When selecting [Photo(Glossy)], images may be bright.
Adjusting the Background Removal
You can turn off the background erasing for
documents or adjust the background density
from 6 levels.
1 Press the to enter the [Change
Settings] menu.
4 Press the or to select the desired
value and then press .
Settable Values:
OFF 1 2 3* 4 5 6
*indicates the factory default.
[3] is the standard value. To lighten the background
(base) for the document, select [4], [5] or [6].
Conversely, to darken, select [2], [1] or [OFF] (not
removal).
5 Press the until the start screen is
displayed.
When lightening the setting of the background removal
fine lines, texts or light color may not be reproduced on
some documents.
Changing Scan Resolution
You can change the scan resolution of a
document.
1 Press the to enter the [Change
Settings] menu.
2 Press the to select [Image Settings]
and then press .
3 Check that [Resolution] is selected and
then press .
4 Press the or to select the desired
value and then press .
Settable Resolution:
High Speed* Normal High Quality
*indicates the factory default.
[High Speed] provides quick copy. By selecting
[Normal] or [High Quality], the reproduction and
gray level of fine lines or texts can be improved.
2 Press the to select [Image Settings]
and then press .
3 Check that [Background Removal] is
selected and then press .
If you select the scan size of less than or equal to
177.8mm (7 inches) wide, and make copies from ADF,
Scan Resolution is changed to High Quality automatically.
5 Press the until the start screen is
displayed.
-84-
Page 85

Resetting Copy Settings
Reference
Auto Reset
All settings you configured for your copy job
return to their default values if no operation is
made for a set period of time. The auto reset
time is set to 3 minutes as the factory default
setting.
You can change the auto reset time by configuring [Admin
Setup] from the <SETTING> key. For details, refer to the
User's Manual Advanced.
Using the <RESET/LOG OUT> key
By pressing the <RESET/LOG OUT> key, the
settings you configured for your copy job return
to their default values.
Configuring Copy Settings
2
Copying
After copying, press the <RESET/LOG OUT>
key to reset the default settings for the next
user.
-85-
Page 86

3.
Memo
Reference
Memo
Reference
Reference
Reference
Note
OK
OK
MONO
C
OLOR
Faxing (for MB451, MB451w, MB471, MB471w, MB491, MB491+, MB491+LP, ES4191 MFP, MPS4200mb, MPS4700mb only)
This chapter explains basic settings and operations for faxing, scanning to fax server and Internet faxing
and operations on managing the phone book.
Basic Procedure for Faxing
This section explains basic operations for transmitting faxes. You need to configure the initial settings
before using the fax function.
You can load only A4, letter or legal size documents in the ADF, and only A4, letter or legal (MB491+LP/MPS4700mb only) size
documents on the document glass.
You cannot load mixed size documents for faxing.
For details on initial settings for the fax function, refer to "Basic Settings for Faxing (for MB451, MB451w, MB471, MB471w,
MB491, MB491+, MB491+LP, ES4191 MFP, MPS4200mb, MPS4700mb only)" P. 40.
Sending a Fax
The machine puts priority on the ADF when scanning
documents. Be sure not to place documents on the ADF
when you use the document glass.
1
Press the <
operator panel.
2 Place your document with text face up in the
ADF or face down on the document glass.
3 Check that [Fax] is selected and press
to open the fax start screen.
4 Check that [Add Destination] is
selected on the start screen and then
press .
FAX/HOOK
> key on the
5 Specify a destination.
You can specify a destination from the ten-key pad, the
speed dial list, the group list, the transmission histories,
the reception histories, or the one-touch key pad.
For details on each procedure, refer to "Specifying a
Destination" P. 87.
6 Configure the advanced functions if
necessary.
"Configuring Fax Settings" P. 90
7 Press to start transmission.
When you want to scan multiple documents as a
single fax job using the document glass, enable
the continuous scan mode.
For details on the continuous scan mode, refer to "Enabling
Continuous Scan Mode (Continuous Scan)" P. 82.
You cannot use the button.
If <STATUS> is pressed and is pressed twice, the
information is displayed on the display screen.
Reference
For details on how to load your documents in the ADF or on
the document glass, refer to "Loading Documents" P. 38.
When you want to specify multiple destinations, refer to
the User's Manual Advanced.
-86-
Page 87

Basic Procedure for Faxing
Note
Memo
OK
When you take a copy with the document glass, do not
apply an excessive load to the document glass.
Specifying a Destination
You can specify a destination in the following six
ways:
Using the ten-key pad
Using a speed dial
Using a group
Using the transmission histories
Using the reception histories
Using the one-touch key pad
Perform the following procedures at step 5 of
"Sending a Fax" P. 86 described above.
Direct Input
You can enter a destination fax number directly
by using the ten-key pad. You can enter up to 40
digits.
1 Press the to select [Direct Input] and
then press .
3
Faxing (for MB451, MB451w, MB471, MB471w, MB491, MB491+,
MB491+LP, ES4191 MFP, MPS4200mb, MPS4700mb only)
2 Enter a destination fax number using the
ten-key pad on the operator panel.
3 Select [Enter] and then press .
You can use the ten-key pad to enter a destination also on
the screen that is displayed after pressing the <FAX/
HOOK> key. In this case, the fax start screen appears
after entering a destination.
OK
Dialing Functions
You can use the following functions when
entering a destination fax number.
Select the function you want and then press on
the fax number entry screen.
-(Hyphen)
Inserts a hyphen to the entered fax number.
PreFix
Inserts a prefix number registered in advance.
"N" is inserted when entering.
Flash
Orders your PBX(Private Branch Exchange) to
connect you with PSTN(Public Switched
Telephone Network). When inputting, enter "F".
-87-
Page 88

Basic Procedure for Faxing
Reference
Reference
Memo
OK
OK
OK
Enter "Pause" and "#" by pressing <#> on the
ten-key pad. When you press <#>, you toggle
between "P" and "#".
Pause
Pauses a few seconds when dialing. You can use
multiple pauses. "P" is inserted when entering.
# (Hash symbol)
When the tone dial is set, "#" sends through a
circuit. When inputting, enter "#".
Enter "Tone" and "*" by pressing <*> on the
ten-key pad. When you press <*>, you toggle
between "T" and "*".
To ne
Switches to tone dialing if pulse dialing is set. "T"
is inserted when entering.
* (Asterisk)
When the tone dial is set, "*" sends through a
circuit. When inputting, enter "*".
For details on prefix numbers, refer to the User's Manual
Advanced.
Using Transmission and Reception
History
You can select a destination from the 50 most
recent transmissions or receptions.
1 Press the to select [Tx History] or
[Rx History] and then press .
OK
2 Press the to select an entry and then
press .
The check box is selected. You can select multiple
entries.
OK
3 When you have selected all the
destinations, press the .
4 Check that [Complete] is selected and
then press .
Using One-Touch Key Pad
Using Speed Dial List and Group List
You can select a destination from numbers
registered in the speed dial list or the group list.
You must register them in advance.
For details on how to register numbers to Speed Dial List
and Group List, refer to "Phone Book" P. 95.
1 Press the to select [Speed Dial List]
or [Group List] and then press .
2 Press the to select a destination or
group and then press .
The check box is selected. You can select multiple
entries.
3 When you have selected all the
destinations, press the .
The one-touch key pad can hold fax numbers
registered in Speed Dial List.
The speed dials no.1 to 16 are automatically
registered to the one-touch key pad.
1 Press the desired one-touch key on the
start screen.
Press the <SHIFT> key to select the speed dials
no.9 to 16 assigned to the one-touch key pad.
4 Check that [Complete] is selected and
then press .
OK
You can use the one-touch key pad also on the screen that
is displayed after pressing the <FAX/HOOK> key. In this
case, the fax standby screen appears after pressing a onetouch key so that you can configure other advanced
settings for fax functions.
-88-
Page 89

Deleting Specified Destinations
OK
OK
1 Select the specified destination on the
fax start screen by pressing and then
press .
2 Press the to select a destination you
want to delete and then press .
The check box is selected. You can select multiple
entries.
3 When you have selected all the
destinations to be deleted, press .
4 Check that [Delete The Address] is
selected and then press .
- If all recipients have been deleted, you will be
taken back automatically to the start screen.
OK
Basic Procedure for Faxing
3
Faxing (for MB451, MB451w, MB471, MB471w, MB491, MB491+,
MB491+LP, ES4191 MFP, MPS4200mb, MPS4700mb only)
- If not all recipients have been deleted, press to
go back to the start screen.
-89-
Page 90

Configuring Fax Settings
Memo
Memo
OK
OK
OK
OK
OK
OK
OK
Configuring Fax Settings
You can configure the fax settings to alter the output to suit your needs. Each setting can be configured
from the [Fax Functions] menu on the fax start screen.
Perform the following procedures at step 6 of "Sending a Fax" P. 86 described above.
Changing Scan Size (Scan Size)
You can select the appropriate scan size for your
document.
1 Press the to select [Fax Functions]
on the fax start screen and then press
.
2 Check that [Scan Size] is selected and
then press .
OK
3 Press the to select a size and then
press .
Settable Size Values:
A4* Letter Legal 13 Legal 13.5
Legal 14
*indicates the factory default.
4
Press the until the fax standby screen
appears.
Changing Resolution (Resolution)
Adjusting Density (Density)
You can adjust the scan density from 7 levels.
1
Press to select [
fax standby screen and then press .
2 Press the to select [Density] and
then press .
3
Press the
then press .
Values:
+3 +2 +1 0* -1 -2 -3
[0] is the standard value. To darken the document
image, select [+1], [+2] or [+3] (most dense).
Conversely, to lighten the document image, select
[- 1], [-2] or [-3] (least dense).
4
Press the until the fax standby screen
appears.
or to select a density and
Fax Functions
*indicates the factory default.
] on the
You can select an appropriate resolution to scan
your fax document to get optimum image quality.
1 Press the to select [Fax Functions]
on the fax standby screen and then
press .
2 Press the to select [Resolution] and
then press .
OK
3 Press the to select a resolution and
then press .
Settable Resolution:
Normal* Fine Extra-Fine Photo
[Extra-Fine] may be unavailable depending on the
recipient machine.
In the [Fine], [Extra-Fine], or [Photo] mode,
scanning takes longer.
4
Press the until the fax standby screen
appears.
OK
*indicates the factory default.
Printing the Sender Name
You can set the machine to print a sender name
on faxes you send. By default, the name you
specified in [Sender ID] is printed.
Reference
For details on [Sender ID], refer to "Specifying Sender
Information" P. 44.
1 Press the to select [Fax Functions]
on the fax standby screen and then
press .
2 Press the to select [TTI] and then
press .
3 Press the to select [ON] and then
press .
4
Press the
appears.
Reference
For details on how to register a sender name and change
the sender name to be used, refer to the Use's Manual
Advanced.
OK
OK
until the fax start screen
-90-
Page 91

Checking and Canceling Fax Transmission
Note
Memo
Memo
Note
OK
OK
OK
OK
OK
OK
OK
Checking and Canceling Fax Transmission
This section explains how to check or cancel fax jobs.
Canceling Fax Transmission
You can cancel a job that is being transmitted as
long as the message indicating the job has been
completed has not appeared.
1 Press the <STOP> key on the operator
panel.
Canceling a Reserved Job
You can cancel reserved jobs.
1 Press the <FAX/HOOK> key on the
operator panel.
2 Check that [Fax] is selected and then
press to open the fax start screen.
3 Press the to select [Fax Job View/
Cancel] and then press .
4 Press the to select the job you want to
cancel and then press .
5 Check the job contents and then press
the .
OK
Checking Transmission and Reception History
You can check transmission and reception history
and results.
If a fax is being transmitted, you can check the
transmission on the [Fax Job View/Cancel] screen.
1 Press the <FAX/HOOK> key on the
operator panel.
2 Check that [Fax] is selected and then
press to the fax start screen.
3 Press the to select [Fax History] and
then press .
4 Press the to select [Tx History] or
[Rx History] and then press .
5 Press the to select the history you
want to check and then press .
OK
OK
3
Faxing (for MB451, MB451w, MB471, MB471w, MB491, MB491+,
MB491+LP, ES4191 MFP, MPS4200mb, MPS4700mb only)
6 Press the to select [Delete Reserved
Tx] and then press .
7 Press the or select [Yes] and then
press .
When you select a broadcast job, the job itself is cancelled.
The job that is being transmitted is displayed at the top of
the list.
6 Check the history contents and then
press .
The received message history displayed on the panel is
only for messages received with F code polling.
-91-
Page 92

Machine Behavior in Fax Reception
Memo
Reference
Memo
Memo
MONO
MONO
Machine Behavior in Fax Reception
This section explains how your machine behaves when receiving and printing faxes.
Reception Behavior
The machine behavior differs depending on the
specified reception mode.
Your machine is set by factory default to [Fax
Ready Mode] so that it automatically receives
faxes. If you have changed the fax reception
mode, see the following descriptions for the
machine behavior.
When the machine is receiving faxes, the <DATA
IN MEMORY> indicator is lit. If <STATUS> is
pressed and is pressed twice, the information
is displayed on the display screen. Even if the
reception is finished, the indicator remains lit
while the data is stored in memory.
If you often receive calls, it is recommended that you
activate [Tel Priority Mode]. For more detailed
information on [Tel Priority Mode], please refer to User's
Manual Advanced.
If connecting to a telephone unit that is far away, you can
receive faxes by dialing the remote switchover number.
Please dial the remote switchover number within three
seconds. For more details on the remote switch over
number, please refer to User's Manual Advanced.
When Connecting An Answering
Machine (Ans/Fax Ready Mode)
When the machine is set to [Ans/Fax Ready
Mode], you can use an answering machine and
receive faxes automatically. Be sure to connect
an external answering machine in advance.
Depending on the answering machine and the sender
machine, [Ans/Fax Ready Mode] may not operate
correctly.
Reference
For details on how to connect an answering machine, refer
to "Connecting a Telephone Line" P. 41.
If the memory overflows while the machine is receiving
data, the reception is cancelled. If this happens, ask the
sender to resend the fax.
When Receiving Calls and Faxes
(Tel/Fax Ready Mode)
When the machine is set to [Tel/Fax Ready
Mode], you can receive calls and faxes. You
must connect an external telephone in advance
to receive calls.
For details on how to connect an external telephone, refer
to "Connecting a Telephone Line" P. 41.
Receiving Faxes
The machine automatically starts fax reception.
Receiving Calls
The telephone starts ringing when it receives calls.
1
Pick up the handset when the machine rings.
You can talk with someone on it.
2
If you want to receive a fax, press .
If you keep picking up the handset, you can talk to
the sender after receiving faxes.
Receiving Faxes
The answering machine rings, the reply message
starts, and the machine automatically starts fax
reception.
Receiving Calls
The answering machine rings, the reply message
starts, and then it starts recording a message.
When Often Using Telephone (Tel
Ready Mode)
[
Tel Ready Mode
] is recommended if you often use
the external telephone connected to the machine.
Receiving Calls
The telephone starts ringing when it receives
calls.
Receiving Faxes
The telephone starts ringing when it receives a
signal.
1
Pick up the handset when the machine rings.
2 Press .
To restart a conversation after receiving a fax, just
pick up the receiver. After the fax has been
received, you can talk on the phone.
-92-
Page 93

Machine Behavior in Fax Reception
OK
OK
OK
OK
When using two numbers with distinct rings(DRD)
This mode is programmed for the fax to answer only on a distinctive ring. You can have a signal phone line to have
two numbers with distinct rings, one for regular phone calls and one for fax. If the phone line is in use, and there is
an incoming fax, the sender will receive a busy signal.
There are several type of DRD ring pattern. The length of ring ON time and ring OFF time is different.
It depends on the Country Code.
Please set the Country Code and DRD Type for your suitable DRD ring pattern.
Country Code : except New Zealand, Australia and Hong Kong (This pattern is to apply to USA's DRD.)
DRD Type The length of ring ON time and ring OFF time
3
Type1 2 sec ON - 4 sec OFF repeat
Type2 0.8 sec ON - 0.4 sec OFF - 0.8 sec ON - 4 sec OFF repeat
Type3 0.4 sec ON - 0.2 sec OFF - 0.4 sec ON - 0.2 sec OFF - 0.8 sec ON - 4 sec OFF repeat
Type4 0.3 sec ON - 0.2 sec OFF - 1 sec ON - 0.2 sec OFF - 0.3 sec ON - 4 sec OFF repeat
Country Code : New Zealand (This pattern is to apply to New Zealand's DRD.)
DRD Type The length of ring ON time and ring OFF time
Type1 0.4 sec ON - 0.2 sec OFF - 0.4 sec ON - 2 sec OFF repeat
Type2 0.4 sec ON - 2.6 sec OFF repeat
Type3 0.4 sec ON - 0.2 sec OFF - 0.4 sec ON - 0.2 sec OFF - 0.4 sec ON - 1.4 sec OFF repeat
Type4 0.4 sec ON - 0.8 sec OFF - 0.4 sec ON - 1.4 sec OFF repeat
Country Code : Australia (This pattern is to apply to Australia's DRD.)
DRD Type The length of ring ON time and ring OFF time
Type1 0.4 sec ON - 0.2 sec OFF - 0.4 sec ON - 2 sec OFF repeat
Type2 0.2 sec ON - 0.4 sec OFF - 0.2 sec ON - 0.4 sec OFF - 0.2 sec ON - 1.6 sec OFF repeat
Country Code : Hong Kong (This pattern is to apply to Hong Kong's DRD.)
DRD Type The length of ring ON time and ring OFF time
Faxing (for MB451, MB451w, MB471, MB471w, MB491, MB491+,
MB491+LP, ES4191 MFP, MPS4200mb, MPS4700mb only)
Type1 1.2 sec ON - 3 sec OFF repeat
Type2 0.4 sec ON - 0.2 sec OFF - 0.4 sec ON - 0.2 sec OFF - 0.8 sec ON - 0.4 sec OFF repeat
Type3 0.5 sec ON - 0.5 sec OFF - 1 sec ON - 0.5 sec OFF - 0.5 sec ON - 3 sec OFF repeat
Setting method to change the DRD
pattern
1 Press the <SETTING> key.
7 Press the to select DRD Type and then
press .
8 Press the until the top screen appears.
2 Press the to select [Admin Setup]
and then press .
3 Enter the administrator password.
The default password is "aaaaaa".
4 Select [Enter] and then press .
5 Press the to select [User Install] and
then press .
OK
6 Press the to select [DRD Type] and
then press .
-93-
Page 94

Machine Behavior in Fax Reception
Note
Memo
Reference
OK
OK
OK
Printing Received Faxes
The machine automatically prints out the received
fax. You can specify the paper tray to use.
Do not pull out the paper trays when the machine is
printing.
When Unable to Print Received
Faxes
When the machine cannot print received faxes
due to a lack of paper or paper jams, it stores
the received fax data temporarily in memory.
When the problem is resolved, it starts printing
automatically.
Use only standard or recycled paper.
Available paper sizes are A4, letter, or legal.
Images larger than the specified paper are reduced,
discarded, or printed onto multiple sheets of paper
depending on the reception print settings. For details, refer
to the User's Manual Advanced.
Selecting the Tray to Use
1 Press the <SETTING> key on the
operator panel.
2 Press the to select [Paper Setup] and
then press .
OK
3 Press the to select [Select Tray] and
then press .
OK
Reference
For details on how to load paper, refer to "Loading Paper"
P. 3 2 .
For details on how to clear paper jams, refer to "Paper
Jams" P. 135.
To check the reception history, refer to "Checking
Transmission and Reception History" P. 91.
4 Check that [Fax] is selected and then
press .
5 Press the to select a paper tray and
then press .
6 Press the to select a value and then
press .
Settable Values:
ON* OFF ON (Prior)
*indicates the factory default.
- When you select [ON (Prior)] for a paper tray,
the tray is used in priority to other trays
containing the same size paper.
- The MP tray is set to [OFF] by factory default.
7 Press the until the top screen is
displayed.
-94-
Page 95

Phone Book
Reference
Memo
OK
OK
OK
OK
OK
OK
Phone Book
This section explains how to register fax numbers in the phone book, and how to edit or delete
registered numbers. In the phone book, you can set frequently used numbers to speed dial and also
create groups of numbers to which you can broadcast faxes.
8 Enter a phone number.
Speed Dial
You can register up to 100 favorite destinations
to speed dial.
Registering and Editing
For details on how to enter text, refer to "Entering Text
Using the Operator Panel" P. 27.
1 Press the <SETTING> key on the
operator panel.
2 Press the to select [Phone Book] and
then press .
OK
Enter a phone number up to 40 digits.
9 Select [Enter] and then press .
OK
10 If necessary, specify a group number.
a) Press the to select [Group No] and
then press the .
b) Press the to select a group number
(1 to 20).
The check box is selected. You can select
multiple entries.
c) When you have selected all the groups,
press the .
d) Check that [
is selected and then press .
11 Press .
OK
Group Selection Completed]
3
Faxing (for MB451, MB451w, MB471, MB471w, MB491, MB491+,
MB491+LP, ES4191 MFP, MPS4200mb, MPS4700mb only)
3 Check that [Speed Dial] is selected and
then press .
OK
4 Press the to select a speed dial
number and then press .
You cannot select a speed dial which is specified as
a reserved fax job or for the auto delivery function.
5 Check that [Register] is selected and
then press .
When editing a registered speed dial number,
select [Edit].
OK
6 If necessary, specify an entry name.
a) Check that [Name] is selected and then
press the .
b) Enter a name.
Enter a name up to 24 characters.
c) Select [Enter] and then press .
Numbers registered to groups from the [Speed Dial]
function are synchronized with the numbers that are
registered to groups using the [Group No] function.
Registering From History
You can register phone numbers as speed dial
numbers from fax transmission and reception
histories.
1 Press the <FAX/HOOK> key on the
operator panel.
2 Check that [Fax] is selected and then
press to open the fax start screen.
OK
3 Press the to select [Fax History] and
then press .
4 Press the to select [Tx History] or
[Rx History] and then press .
5 Press the to select an entry and then
press .
6 Check the entry contents and then press
the .
7 Press the to select [Fax Number] and
then press .
7 Check that [Register To Speed Dial] is
-95-
selected and then press .
OK
Page 96

Phone Book
Note
Reference
Memo
OK
OK
OK
OK
OK
OK
OK
OKOKOK
OK
8 Repeat steps 4 to 11 in "Registering and
Editing" P. 95.
The fax number is automatically entered. You do
not have to enter it manually.
Deleting
1 Press the <SETTING> key on the
operator panel.
2 Press the to select [Phone Book] and
then press .
3 Check that [Speed Dial] is selected and
then press .
OK
4 Press the to select an entry number
and then press .
5 Press the to select [Delete] and then
press .
6 Press the or to select [Yes] and
then press .
OK
4 Press the to select a group number
and then press .
OK
5 Check that [Register] is selected and
then press .
When editing registered group numbers, select
[Edit].
6 Check that [Name] is selected and then
press .
7 Enter a name.
Enter a name up to 16 characters.
8 Select [Enter] and then press .
9 Press the to select [Speed Dial] and
then press the .
10 Press the to select a speed dial
number (1 to 100) and then press .
The check box is selected. You can select multiple
entries.
11 When you have selected all the numbers,
press the .
You cannot delete an entry which is specified as a reserved
fax job or for the auto delivery function.
Group Dial (Group Number)
You can create up to 20 groups and register the
entire group as a speed dial number.
Registering and Editing
For details on how to enter text, refer to "Entering Text
Using the Operator Panel" P. 27.
1 Press the <SETTING> key on the
operator panel.
2 Press the to select [Phone Book] and
then press .
OK
12 Check that [Complete] is selected and
then press .
13 Press .
Numbers registered to groups from the [Speed Dial]
function are synchronized with the numbers that are
registered to groups using the [Group No.] function.
Deleting
Press the <SETTING> key on the
1
operator panel.
2 Press the to select [Phone Book] and
then press .
3 Press the to select [Group No] and
then press .
3 Press the to select [Group No] and
4 Press the to select a group number
-96-
then press .
and then press .
OK
Page 97

Phone Book
Memo
Memo
OK
5 Press the to select [Delete] and then
press .
6 Press the or to select [Yes] and
then press .
You cannot delete an entry which is specified as a reserved
fax job or for the auto delivery function.
OK
One-Touch Key Pad
The speed dials no.1 to 16 are automatically
registered to the one-touch key pad.
Register all telephone numbers
All contents of Phone Book can be registered by
using Configuration Tool. For setting up of
Configuration Tool, see User's Manual (Advanced),
"7. Useful Software".
Registering the Machine
Importing Addresses from a File.
1 Select from which device to import, from
[Registered Device Table].
2 Select the [User Setting] tab.
3 Click on [Speed Dial Manager].
4 Enter the administrator password and
click [OK].
5 Click .
6 Select [Open] from [Select CSV File].
7 Select the file you want to import and
click on [Open].
8 Click on [Next].
9 Select the settings to import and click
[Import].
10 Click .
3
Faxing (for MB451, MB451w, MB471, MB471w, MB491, MB491+,
MB491+LP, ES4191 MFP, MPS4200mb, MPS4700mb only)
When using the Configuration Tool or introducing
a new machine, register the machine in the
Configuration Tool.
1 Select [Start], [All Programs]>
[Okidata]>[Configuration Tool]>
[Configuration Tool].
2 Select [Register Device] from the
[Tools] menu. Search results are
displayed.
3 Select the machine and click on
[Register].
4 On the confirmation screen, click on
[Yes].
CSV files exported by Outlook Express (Windows email and
Windows Live email) can also be restored.
-97-
Page 98

Basic Procedure for Scan To Fax Server
Memo
Reference
Reference
OK
OK
OK
OK
Basic Procedure for Scan To Fax Server
This section explains basic operations for data transmission to the fax server.
The FaxServer function allows you to transmit fax data as a file attached to an e-mail. A document is
scanned and converted to a TIFF file. The data is transmitted immediately after scanning without being
saved in memory. You can specify only e-mail addresses for the destination.
The Scan To Fax Server function must be enabled by Admin Setup (see the Advanced manual). Once the
Scan To Fax Server function is enabled, the analog fax is disabled to send and receive messages.
You can load only A4, letter or legal size documents in the ADF, and only A4, letter or legal (MB491+LP/MPS4700mb only) size
documents on the document glass. You cannot load mixed size documents for fax transmission.
Depending on the recipient's machine, the document data sent by the FaxServer function may not be printed correctly.
The detailed settings on the FaxServer function are the same as in the scan to e-mail function. For details, refer to the "User's
Manual Advanced".
Before using the FaxServer function, you must set up the server. For the server setup, refer to "Setting Up Scan To E-mail and
Internet Fax" P. 66.
7 Press the Start button to start fax
Transmitting Data to Fax Server
1 Press the <FAX/HOOK> key on the
operator panel.
transmission.
When you scan multiple documents on the
document glass, enable the Continuous Scan
mode.
2 The original can be set by an automatic
document feeder or the document glass.
3 Select [FAX], and then press .
4 Set the scan options as required.
Reference
"User's Manual Advanced".
5 Check that [Add Destination] is
selected, and then press .
6 Specify the destination fax number.
You can specify the destination using either the
Speed Dial List, Group List, Direct Input, or Tx
History.
"Enabling Continuous Scan Mode (Continuous Scan)"
P. 8 2 .
Specifying the destination
You can specify fax destination in any of the following
four ways:
• Using the Speed Dial List
• Using the Group List
• Using the Direct Input
• Using the Tx History
Use any of the following operations in the procedure of
"Transmitting Data to Fax Server" P. 98.
Using the Speed Dial List or Group List
You can quickly select fax destinations from the
Speed Dial List or Group List. You need to
register recipients on the Speed Dial List or
Group List in advance.
Reference
For fax number entry on the Speed Dial List or Group List,
refer to the
"Phone Book" P. 95
.
1 Press the to select [Speed Dial List]
or [Group List], and then press .
2 Press the to select the destination or
group, and then press .
-98-
Page 99

The box is checked. You can select multiple entries.
OK
OK
3 When you have selected all the
destinations, press the .
4 Check that [Complete] is selected, and
then press .
OK
Direct Input
This is the same as the fax function.
Using the Tx History
You can select a destination from the recently
called 50 recipients listed on the transmission
history.
Basic Procedure for Scan To Fax Server
3
Faxing (for MB451, MB451w, MB471, MB471w, MB491, MB491+,
MB491+LP, ES4191 MFP, MPS4200mb, MPS4700mb only)
1 Press the to select [Transmission
History], and then press .
2 Press the to select an entry, and then
press .
The box is checked. You can select multiple
entries.
3 When you have selected all the
destinations, press the .
4 Check that [Complete] is selected, and
then press .
OK
Using the one-touch keys
This is the same as the fax function. Enter the
text in the similar way.
Deleting the specified destination
This is the same as the fax function. Enter the
text in the similar way.
Stopping the fax transmission
This is the same as the Internet fax function.
Enter the text in the similar way.
-99-
Page 100

Basic Procedure for Internet Faxing
Memo
Reference
Memo
Reference
Reference
OK
OK
MONO
Basic Procedure for Internet Faxing
This section explains basic operations for transmitting Internet faxes.
The Internet fax function allows you to transmit fax data as a file attached to an e-mail. A document is
scanned and converted to a TIFF file. The data is transmitted immediately after scanning without being
saved in memory. You can specify only e-mail addresses for the destination.
You can load only A4, letter or legal size documents in the ADF, and only A4, letter or legal (MB491+LP/MPS4700mb only) size
documents on the document glass. You cannot load mixed size documents for Internet faxing.
Depending on the recipient's machine, the document data sent by the Internet fax function may not be printed correctly.
The detailed settings on the Internet fax function are the same as in the scan to e-mail function. For details, refer to the User's
Manual Advanced.
Before using the Internet fax function, you need to configure the server settings. For details, refer to "Setting Up Scan To E-mail
and Internet Fax" P. 66.
6 Check that [To] is selected and then
Sending an Internet Fax
press .
OK
1 Press the <FAX/HOOK> key on the
operator panel.
2 Place your document with text face up in
the ADF or face down on the document
glass.
3 Press the to select [Internet Fax]
and then press .
4 Configure the Internet fax settings if
necessary.
Reference
For details on the Internet fax settings, refer to the
User's Manual Advanced.
5 Check that [Add Destination] is
selected and then press .
Press to select [Cc] or [Bcc] if necessary.
7 Specify a destination.
- You can set the recipient by directly entering them
or by using the address book, group list, sending
history, LDAP search or one-touch key.
Refer to "Specifying a Destination" P. 101.
8 Press to start transmission.
If you want to scan multiple documents with the
document glass, enable the continuous scan
mode.
"Enabling Continuous Scan Mode (Continuous Scan)"
P. 8 2
Reference
For details on how to load your documents in the ADF or on
the document glass, refer to "Loading Documents" P. 38.
Here you can add addressees by using one-touch keys. You
can add addresses with [To]. Thereafter, you can add
multiple addresses using the one-touch keys.
-100-
 Loading...