


MC361/MC561/CX2731 MFP
Advanced User Guide
59101501 my.okidata.com

Copyright Information
Copyright © 2010 by Oki Data. All Rights Reserved
MC361/MC561/CX2731 MFP Advanced User’s Guide
P/N 59101501, Revision 1.0
December, 2010
Disclaimer
Every effort has been made to ensure that the information in this
document is complete, accurate, and up-to-date. The manufacturer
assumes no responsibility for the results of errors beyond its control.
The manufacturer also cannot guarantee that changes in software and
equipment made by other manufacturers and referred to in this guide
will not affect the applicability of the information in it. Mention of
software products manufactured by other companies does not
necessarily constitute endorsement by the manufacturer.
While all reasonable efforts have been made to make this document
as accurate and helpful as possible, we mak e n o warranty o f any kind ,
expressed or implied, as to the accuracy or completeness of the
information contained herein.
The most up-to-date drivers and manuals are available from the web
site: http://www.okiprintingsolutions.com
Trademark Information
Oki and Oki Data are registered trademarks of Oki Electric Industry
Company Ltd.
Apple, Macintosh and Mac OS are registered trademarks of Apple
Computers Inc.
Hewlett-Packard, HP, and LaserJet are registered trademarks of
Hewlett-Packard Company.
Microsoft, MS-DOS and Windows are either registered trademarks or
trademarks of Microsoft Corporation in the United States and/or other
countries.
Other product names and brand names are registered trademarks or
trademarks of their proprietors.
2
– Copyright Information
MC361/MC561/CX2731 MFP Advanced User’s Guide

Emergency First Aid _____________
Take care with toner powder:
If swallowed, give small amounts of cold water and seek
medical attention. DO NOT attempt to induce vomiting.
If inhaled, move the person to an open area for fresh air.
Seek medical attention.
If it gets into the eyes, flush with large amounts of water
for at least 15 minutes keeping eyelids open. Seek medical
attention.
Spillages should be treated with cold water and soap to
help reduce risk of staining skin or clothing.
Note
Images used in this manual may include optional features that
your product does not have installed.
3
– Copyright Information
MC361/MC561/CX2731 MFP Advanced User’s Guide

Contents
About This Guide . . . . . . . . . . . . . . . . . . . . . . . . . . . . . 10
Note, Important, Caution, Warning . . . . . . . . . . . . . . . . . . . . 10
Conventions Used . . . . . . . . . . . . . . . . . . . . . . . . . . . . . . . . 11
The Term MFP . . . . . . . . . . . . . . . . . . . . . . . . . . . . . . . . . . 11
Copying . . . . . . . . . . . . . . . . . . . . . . . . . . . . . . . . . . . . 12
Loading Documents for Copying . . . . . . . . . . . . . . . . . . . . . . 13
Auto Document Feed (ADF) . . . . . . . . . . . . . . . . . . . . . . . 13
Manual Feed: Document Glass . . . . . . . . . . . . . . . . . . . . . 13
Collating Copies . . . . . . . . . . . . . . . . . . . . . . . . . . . . . . . . . 14
Multiple Pages on One Sheet . . . . . . . . . . . . . . . . . . . . . . . . 15
Two Pages to One Sheet . . . . . . . . . . . . . . . . . . . . . . . . . 15
Four Pages to One Sheet, Vertical Setting . . . . . . . . . . . . . 15
Four Pages to One Sheet, Horizontal Setting . . . . . . . . . . . 15
Multiple Copies on One Sheet . . . . . . . . . . . . . . . . . . . . . . . . 17
Repeat Two . . . . . . . . . . . . . . . . . . . . . . . . . . . . . . . . . . 17
Repeat Four . . . . . . . . . . . . . . . . . . . . . . . . . . . . . . . . . . 17
Copying Identification Cards. . . . . . . . . . . . . . . . . . . . . . . . . 19
Erasing Edge Shadows. . . . . . . . . . . . . . . . . . . . . . . . . . . . . 20
Setting Margins . . . . . . . . . . . . . . . . . . . . . . . . . . . . . . . . . ‘21
Margins: Simplex (One-Sided) Copies . . . . . . . . . . . . . . . . 21
Margins: Duplex Copies . . . . . . . . . . . . . . . . . . . . . . . . . . 22
Copy Different Length Documents. . . . . . . . . . . . . . . . . . . . . 24
Incompatible Settings . . . . . . . . . . . . . . . . . . . . . . . . . . . . . 26
Disabling an Incompatible Function. . . . . . . . . . . . . . . . . . 26
Faxing . . . . . . . . . . . . . . . . . . . . . . . . . . . . . . . . . . . . . 27
Loading Documents. . . . . . . . . . . . . . . . . . . . . . . . . . . . . . . 28
Auto Document Feed (ADF) . . . . . . . . . . . . . . . . . . . . . . . 28
Manual Feed: Document Glass . . . . . . . . . . . . . . . . . . . . . 28
Duplex Documents . . . . . . . . . . . . . . . . . . . . . . . . . . . . . . . 29
ADF and Document Glass. . . . . . . . . . . . . . . . . . . . . . . . . . . 29
Sender Name (TTI) . . . . . . . . . . . . . . . . . . . . . . . . . . . . . . . 30
Registering a Sender Name. . . . . . . . . . . . . . . . . . . . . . . . 31
Changing the Sender Name (TTI) Printed on a Fax . . . . . . . 31
Changing the Standard Sender Name (TTI) . . . . . . . . . . . . 32
Setting a Prefix. . . . . . . . . . . . . . . . . . . . . . . . . . . . . . . . . . 33
Registering a Prefix . . . . . . . . . . . . . . . . . . . . . . . . . . . . . 33
Using a Prefix When Transmitting Faxes. . . . . . . . . . . . . . . 33
Using a Prefix When Registering a Number to Speed Dial . . . 34
4 – Contents
MC361/MC561/CX2731 MFP Advanced User’s Guide

Transmission Functions . . . . . . . . . . . . . . . . . . . . . . . . . . . . 35
Redialing . . . . . . . . . . . . . . . . . . . . . . . . . . . . . . . . . . . . 35
Transmission in Real Time . . . . . . . . . . . . . . . . . . . . . . . . 36
Manual Transmission . . . . . . . . . . . . . . . . . . . . . . . . . . . . 37
Transmit to Multiple Destinations. . . . . . . . . . . . . . . . . . . . 38
Transmit at a Specified Time. . . . . . . . . . . . . . . . . . . . . . . 39
Fcode Transmission. . . . . . . . . . . . . . . . . . . . . . . . . . . . . . . 40
Fcode Confidential Communication . . . . . . . . . . . . . . . . . . 40
Fcode Bulletin Board Communication . . . . . . . . . . . . . . . . . 40
Registering Fcode Boxes. . . . . . . . . . . . . . . . . . . . . . . . . . 41
Fcode Transmission Using a Sub Address . . . . . . . . . . . . . . 44
Security Functions. . . . . . . . . . . . . . . . . . . . . . . . . . . . . . . . 48
ID Check Transmission. . . . . . . . . . . . . . . . . . . . . . . . . . . 49
Check Broadcast Destination. . . . . . . . . . . . . . . . . . . . . . . 50
Press Dial Twice (Confirm Dial) . . . . . . . . . . . . . . . . . . . . . 51
Fax Reception Settings . . . . . . . . . . . . . . . . . . . . . . . . . . . . 53
Reducing Received Images Larger than the Paper Size. . . . . 53
Specifying a Reduction Margin. . . . . . . . . . . . . . . . . . . . . . 54
Changing the Buzzer Volume . . . . . . . . . . . . . . . . . . . . . . 55
Automatically Forwarding Faxes . . . . . . . . . . . . . . . . . . . . 56
Setting Up Fax Forward . . . . . . . . . . . . . . . . . . . . . . . . . . 56
Setting the Wait Time for a Response . . . . . . . . . . . . . . . . 57
Faxing from a Computer . . . . . . . . . . . . . . . . . . . . . . . . . . . 58
Sending a Fax from a Computer . . . . . . . . . . . . . . . . . . . . 58
Adding a Fax Number to the Phone Book . . . . . . . . . . . . . . 59
Grouping Entries . . . . . . . . . . . . . . . . . . . . . . . . . . . . . . . 60
Sending a Fax to a Group . . . . . . . . . . . . . . . . . . . . . . . . . 61
Canceling a Fax Job from a Computer . . . . . . . . . . . . . . . . 61
Copying Phone Book Data from one Computer to Another . . 62
Scanning . . . . . . . . . . . . . . . . . . . . . . . . . . . . . . . . . . . 65
Scan to E-mail . . . . . . . . . . . . . . . . . . . . . . . . . . . . . . . . . . 65
Setting Sender and Reply To Addresses . . . . . . . . . . . . . . . 65
Creating Templates . . . . . . . . . . . . . . . . . . . . . . . . . . . . . 66
Using a Template. . . . . . . . . . . . . . . . . . . . . . . . . . . . . . . 67
Scanning and Internet Faxing. . . . . . . . . . . . . . . . . . . . . . . . 68
Specifying the File Name . . . . . . . . . . . . . . . . . . . . . . . . . 68
Changing the Scan Size . . . . . . . . . . . . . . . . . . . . . . . . . . 69
Changing the Resolution. . . . . . . . . . . . . . . . . . . . . . . . . . 69
Adjusting the Density. . . . . . . . . . . . . . . . . . . . . . . . . . . . 70
Specifying the File Format . . . . . . . . . . . . . . . . . . . . . . . . 70
Encrypting PDFs: for Scanning Only. . . . . . . . . . . . . . . . . . 71
Setting the Compression Level . . . . . . . . . . . . . . . . . . . . . 75
Setting Grayscale . . . . . . . . . . . . . . . . . . . . . . . . . . . . . . 75
Drivers and Software. . . . . . . . . . . . . . . . . . . . . . . . . . . . . . 77
5 – Contents
MC361/MC561/CX2731 MFP Advanced User’s Guide

Using the TWAIN Driver: Windows. . . . . . . . . . . . . . . . . . . 77
Changing Settings . . . . . . . . . . . . . . . . . . . . . . . . . . . . . . 78
Using the TWAIN Driver: Macintosh OS X . . . . . . . . . . . . . . 80
Using WIA Driver: Windows Only. . . . . . . . . . . . . . . . . . . . 82
ActKey Software: Windows Only . . . . . . . . . . . . . . . . . . . . 84
Using Network Configuration. . . . . . . . . . . . . . . . . . . . . . . 86
Internet FAX & Scan To E-mail . . . . . . . . . . . . . . . . . . . . . . . 90
Enabling MDN and DSN Requests . . . . . . . . . . . . . . . . . . . 90
Enabling MDN Response . . . . . . . . . . . . . . . . . . . . . . . . . . 90
Scan to Local & Remote PCs. . . . . . . . . . . . . . . . . . . . . . . . . 91
Setting the PC Scan Mode. . . . . . . . . . . . . . . . . . . . . . . . . 91
Enable the Network TWAIN Settings . . . . . . . . . . . . . . . . . 92
Printing . . . . . . . . . . . . . . . . . . . . . . . . . . . . . . . . . . . . 93
Manual Printing‘ . . . . . . . . . . . . . . . . . . . . . . . . . . . . . . . . . 93
Envelopes . . . . . . . . . . . . . . . . . . . . . . . . . . . . . . . . . . . . . 95
Labels . . . . . . . . . . . . . . . . . . . . . . . . . . . . . . . . . . . . . . . . 97
Custom Size Paper . . . . . . . . . . . . . . . . . . . . . . . . . . . . . . 100
Settable Custom Size Range . . . . . . . . . . . . . . . . . . . . . . 100
Windows PCL Printer Driver . . . . . . . . . . . . . . . . . . . . . . 101
Multiple Pages on One Sheet . . . . . . . . . . . . . . . . . . . . . . . 103
Duplex Printing . . . . . . . . . . . . . . . . . . . . . . . . . . . . . . . . . 105
Reducing/Enlarging Pages . . . . . . . . . . . . . . . . . . . . . . . . . 107
Collating Pages . . . . . . . . . . . . . . . . . . . . . . . . . . . . . . . . . 108
Setting the Page Order . . . . . . . . . . . . . . . . . . . . . . . . . . . 109
Booklet Printing . . . . . . . . . . . . . . . . . . . . . . . . . . . . . . . . 111
Cover Printing. . . . . . . . . . . . . . . . . . . . . . . . . . . . . . . . . . 113
Poster Printing . . . . . . . . . . . . . . . . . . . . . . . . . . . . . . . . . 114
Changing Print Quality. . . . . . . . . . . . . . . . . . . . . . . . . . . . 116
Enhancing Photos . . . . . . . . . . . . . . . . . . . . . . . . . . . . . . . 117
Emphasizing Fine Lines . . . . . . . . . . . . . . . . . . . . . . . . . . . 118
Auto Tray Selection . . . . . . . . . . . . . . . . . . . . . . . . . . . . . . 119
Auto Tray Switching . . . . . . . . . . . . . . . . . . . . . . . . . . . . . 121
Saving Toner . . . . . . . . . . . . . . . . . . . . . . . . . . . . . . . . . . 123
Secure Print . . . . . . . . . . . . . . . . . . . . . . . . . . . . . . . . . . . 126
Encrypted Secure Print . . . . . . . . . . . . . . . . . . . . . . . . . . . 128
Watermark Printing . . . . . . . . . . . . . . . . . . . . . . . . . . . . . . 130
Overlays . . . . . . . . . . . . . . . . . . . . . . . . . . . . . . . . . . . . . 131
Store Print Data . . . . . . . . . . . . . . . . . . . . . . . . . . . . . . . . 134
Change Default Settings . . . . . . . . . . . . . . . . . . . . . . . . . . 135
Using Printer Fonts . . . . . . . . . . . . . . . . . . . . . . . . . . . . . . 136
Using Computer Fonts . . . . . . . . . . . . . . . . . . . . . . . . . . . . 138
Using a Print Buffer . . . . . . . . . . . . . . . . . . . . . . . . . . . . . . 139
Change Mono Print Speed . . . . . . . . . . . . . . . . . . . . . . . . . 140
Printing to File . . . . . . . . . . . . . . . . . . . . . . . . . . . . . . . . . 141
6 – Contents
MC361/MC561/CX2731 MFP Advanced User’s Guide

Downloading PS Files. . . . . . . . . . . . . . . . . . . . . . . . . . . . . 142
OKI LPR Utility . . . . . . . . . . . . . . . . . . . . . . . . . . . . . . . 142
Printing Out PS Errors . . . . . . . . . . . . . . . . . . . . . . . . . . . . 142
Changing Emulation Mode . . . . . . . . . . . . . . . . . . . . . . . . . 143
Job Macros (MC561 and CX2731 MFP Only) . . . . . . . 145
The <JOB MACRO> Key. . . . . . . . . . . . . . . . . . . . . . . . . . . 146
Creating a Macro. . . . . . . . . . . . . . . . . . . . . . . . . . . . . . . . 146
Using Macros . . . . . . . . . . . . . . . . . . . . . . . . . . . . . . . . . . 146
Editing a Macro Title . . . . . . . . . . . . . . . . . . . . . . . . . . . . . 147
Deleting a Macro. . . . . . . . . . . . . . . . . . . . . . . . . . . . . . . . 148
MFP Menu . . . . . . . . . . . . . . . . . . . . . . . . . . . . . . . . . 149
Change Menu Settings. . . . . . . . . . . . . . . . . . . . . . . . . . . . 150
Admin Setup . . . . . . . . . . . . . . . . . . . . . . . . . . . . . . . . . 150
Easy Setup . . . . . . . . . . . . . . . . . . . . . . . . . . . . . . . . . . 150
Print Current Settings . . . . . . . . . . . . . . . . . . . . . . . . . . . . 151
Basic Menu. . . . . . . . . . . . . . . . . . . . . . . . . . . . . . . . . . . . 152
Reports . . . . . . . . . . . . . . . . . . . . . . . . . . . . . . . . . . . . . . 153
Paper Setup . . . . . . . . . . . . . . . . . . . . . . . . . . . . . . . . . . . 155
Address Book . . . . . . . . . . . . . . . . . . . . . . . . . . . . . . . . . . 157
Phone Book . . . . . . . . . . . . . . . . . . . . . . . . . . . . . . . . . . . 158
Profile . . . . . . . . . . . . . . . . . . . . . . . . . . . . . . . . . . . . . . . 159
Network Scan Destination . . . . . . . . . . . . . . . . . . . . . . . . . 163
Store Document Settings . . . . . . . . . . . . . . . . . . . . . . . . . 164
View Information . . . . . . . . . . . . . . . . . . . . . . . . . . . . . . . 165
Shutdown . . . . . . . . . . . . . . . . . . . . . . . . . . . . . . . . . . . . 167
Easy Setup. . . . . . . . . . . . . . . . . . . . . . . . . . . . . . . . . . . . 168
Admin Setup . . . . . . . . . . . . . . . . . . . . . . . . . . . . . . . . . . 171
Software Utilities . . . . . . . . . . . . . . . . . . . . . . . . . . . 205
Summary of Utilities . . . . . . . . . . . . . . . . . . . . . . . . . . . . . 205
Windows Utilities . . . . . . . . . . . . . . . . . . . . . . . . . . . . . . 207
Macintosh OS X Utilities . . . . . . . . . . . . . . . . . . . . . . . . . 212
Installing Utilities . . . . . . . . . . . . . . . . . . . . . . . . . . . . . . . 212
For Windows . . . . . . . . . . . . . . . . . . . . . . . . . . . . . . . . . 212
For Macintosh . . . . . . . . . . . . . . . . . . . . . . . . . . . . . . . . 213
Adjusting Color . . . . . . . . . . . . . . . . . . . . . . . . . . . . . 215
Control Panel . . . . . . . . . . . . . . . . . . . . . . . . . . . . . . . . . . 215
Using the Control Panel Arrow Keys . . . . . . . . . . . . . . . . . 215
Adjusting Color Registration . . . . . . . . . . . . . . . . . . . . . . 215
Adjusting Density . . . . . . . . . . . . . . . . . . . . . . . . . . . . . 216
Fine Adjustment of Color Registration . . . . . . . . . . . . . . . 217
7 – Contents
MC361/MC561/CX2731 MFP Advanced User’s Guide

Adjusting the Color Balance (Density) . . . . . . . . . . . . . . . 217
For Copying/Scanning . . . . . . . . . . . . . . . . . . . . . . . . . . 219
Using the Printer Driver . . . . . . . . . . . . . . . . . . . . . . . . . . . 220
About Color Matching . . . . . . . . . . . . . . . . . . . . . . . . . . . 220
Color Matching (Office Color) . . . . . . . . . . . . . . . . . . . . . 220
Black Finish: Using Office Color or Graphics Pro. . . . . . . . . 222
Printing in Grayscale . . . . . . . . . . . . . . . . . . . . . . . . . . . 223
Overprinting Black . . . . . . . . . . . . . . . . . . . . . . . . . . . . . 224
Simulating Print Results in Ink . . . . . . . . . . . . . . . . . . . . 225
Color Separation Printing . . . . . . . . . . . . . . . . . . . . . . . . 226
ColorSync for Macintosh . . . . . . . . . . . . . . . . . . . . . . . . . 227
Color Correct Utility. . . . . . . . . . . . . . . . . . . . . . . . . . . . . . 228
Changing Palette Color . . . . . . . . . . . . . . . . . . . . . . . . . . 229
Changing Gamma Value or Hue. . . . . . . . . . . . . . . . . . . . 233
Printing Using Adjusted Color Settings . . . . . . . . . . . . . . . 235
Saving Color Correction Settings . . . . . . . . . . . . . . . . . . . 236
Importing Color Correction Settings . . . . . . . . . . . . . . . . . 237
Deleting Color Correction Settings . . . . . . . . . . . . . . . . . . 238
Color Swatch Utility: Windows only . . . . . . . . . . . . . . . . . . . 239
Printing a Color Swatch . . . . . . . . . . . . . . . . . . . . . . . . . 240
Printing a File with the Color You Want. . . . . . . . . . . . . . . 240
Issues . . . . . . . . . . . . . . . . . . . . . . . . . . . . . . . . . . . . 241
Error Messages . . . . . . . . . . . . . . . . . . . . . . . . . . . . . . . . . 241
General Error Messages . . . . . . . . . . . . . . . . . . . . . . . . . 241
Error Messages: Copying . . . . . . . . . . . . . . . . . . . . . . . . 255
Error Messages: Faxing . . . . . . . . . . . . . . . . . . . . . . . . . 256
Error Messages: Scanning . . . . . . . . . . . . . . . . . . . . . . . 257
Error Messages: Printing. . . . . . . . . . . . . . . . . . . . . . . . . 263
The Status Key . . . . . . . . . . . . . . . . . . . . . . . . . . . . . . . . . 267
Checking the MFP’s Status From the <STATUS> Key . . . . . 267
Unable to Print . . . . . . . . . . . . . . . . . . . . . . . . . . . . . . . . . 268
General Causes . . . . . . . . . . . . . . . . . . . . . . . . . . . . . . . 268
Network Connection Problems. . . . . . . . . . . . . . . . . . . . . 269
USB Connection Problems. . . . . . . . . . . . . . . . . . . . . . . . 270
Unable to Install Driver . . . . . . . . . . . . . . . . . . . . . . . . . . . 271
USB . . . . . . . . . . . . . . . . . . . . . . . . . . . . . . . . . . . . . . . 271
OS Restrictions . . . . . . . . . . . . . . . . . . . . . . . . . . . . . . . . . 273
Restrictions: Windows 7 and Windows Server 2008 R2. . . . 273
Copying Issues . . . . . . . . . . . . . . . . . . . . . . . . . . . . . . . . . 279
Unable To Copy . . . . . . . . . . . . . . . . . . . . . . . . . . . . . . . 279
The Copied Output Is Different from the Original Document 281
Trouble after Starting to Copy. . . . . . . . . . . . . . . . . . . . . 283
Fax Issues . . . . . . . . . . . . . . . . . . . . . . . . . . . . . . . . . . . . 283
Unable to Send a Fax . . . . . . . . . . . . . . . . . . . . . . . . . . . 284
8 – Contents
MC361/MC561/CX2731 MFP Advanced User’s Guide

Unable to Receive a Fax . . . . . . . . . . . . . . . . . . . . . . . . . 285
Unable to Send or Receive a Fax . . . . . . . . . . . . . . . . . . . 285
Wrong Paper Used for Received Faxes . . . . . . . . . . . . . . . 286
Scan Issues . . . . . . . . . . . . . . . . . . . . . . . . . . . . . . . . . . . 286
Print Issues . . . . . . . . . . . . . . . . . . . . . . . . . . . . . . . . . . . 288
Paper Feed Issues. . . . . . . . . . . . . . . . . . . . . . . . . . . . . . . 296
MFP Issues. . . . . . . . . . . . . . . . . . . . . . . . . . . . . . . . . . . . 299
Power Outages . . . . . . . . . . . . . . . . . . . . . . . . . . . . . . . . . 303
Stored Fax Data . . . . . . . . . . . . . . . . . . . . . . . . . . . . . . 303
MFP Memory . . . . . . . . . . . . . . . . . . . . . . . . . . . . . . . 305
SD Memory Card. . . . . . . . . . . . . . . . . . . . . . . . . . . . . . . . 305
Initializing the SD Card (MC561 and CX2731 MFP only) . . . 305
Flash Memory . . . . . . . . . . . . . . . . . . . . . . . . . . . . . . . . . . 309
Initializing the Flash Memory. . . . . . . . . . . . . . . . . . . . . . 309
Resetting to Defaults . . . . . . . . . . . . . . . . . . . . . . . . . . . . . 311
9 – Contents
MC361/MC561/CX2731 MFP Advanced User’s Guide
About This Guide
Note, Important, Caution,
Warning ___________________
Note
Provides additional information to supplement the main text to
help you use and understand the product.
Important!
Indicates important information which you should read.
CAUTION!
Provides information which, if ignored, may result in
equipment malfunction or damage.
WARNING!
Provides information which, if ignored, may result in a risk
of personal injury.
10
– About This Guide: Note, Important, Caution, Warning
MC361/MC561/CX2731 MFP Advanced User’s Guide

Conventions Used ____________
The following symbols are used in this guide:
•[ ]
Placed around display screen menu items.
•< >
Indicates the name of a button on the control panel.
•“ ”
Placed around messages which appear on the display screen
The Term MFP _______________
The units described in this manual are all multifunction units (copy,
scan, fax, print). They are referred to throughout this book as “MFP,”
an abbreviation for multi-function product.
11
– About This Guide: Conventions Used
MC361/MC561/CX2731 MFP Advanced User’s Guide
Copying
Note
The following procedures assume that [Continuous Scan] is
disabled.
For the basic procedures when [Continuous Scan] is enabled,
refer to the Basic User’s Guide on the DVD supplied with your
MFP.
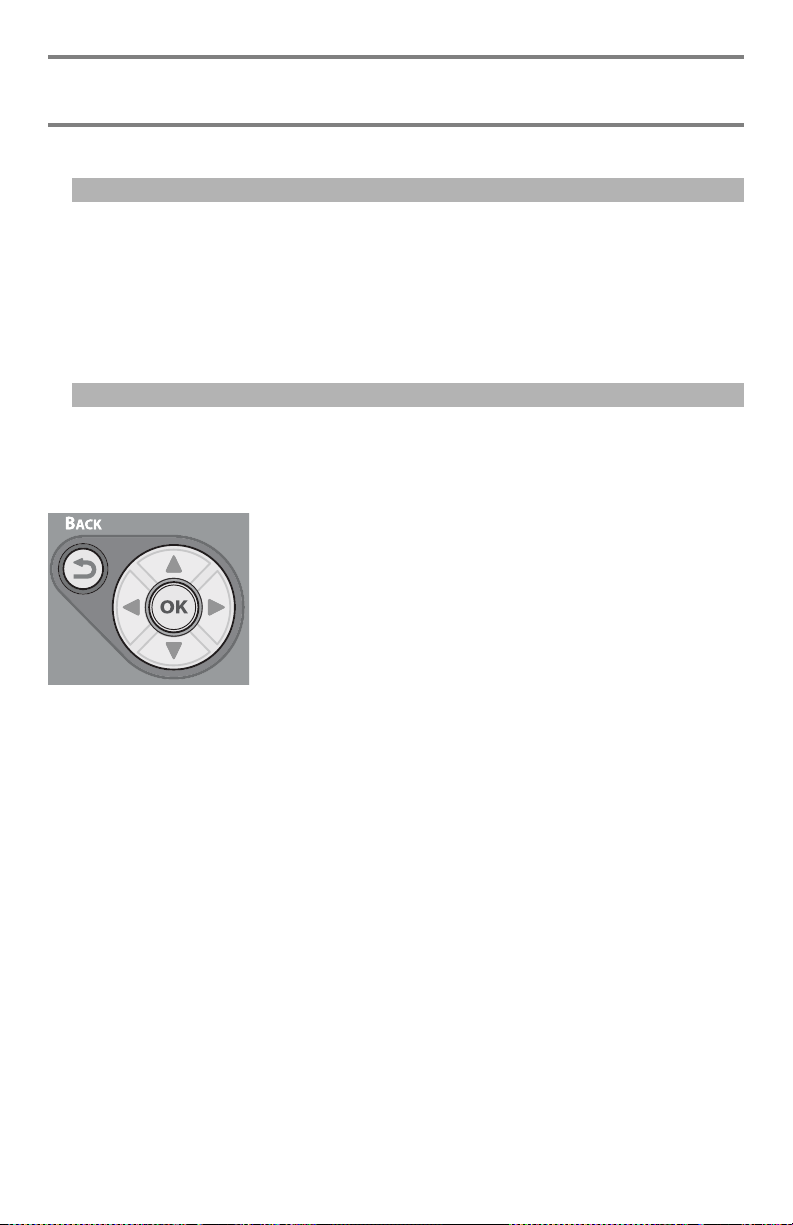
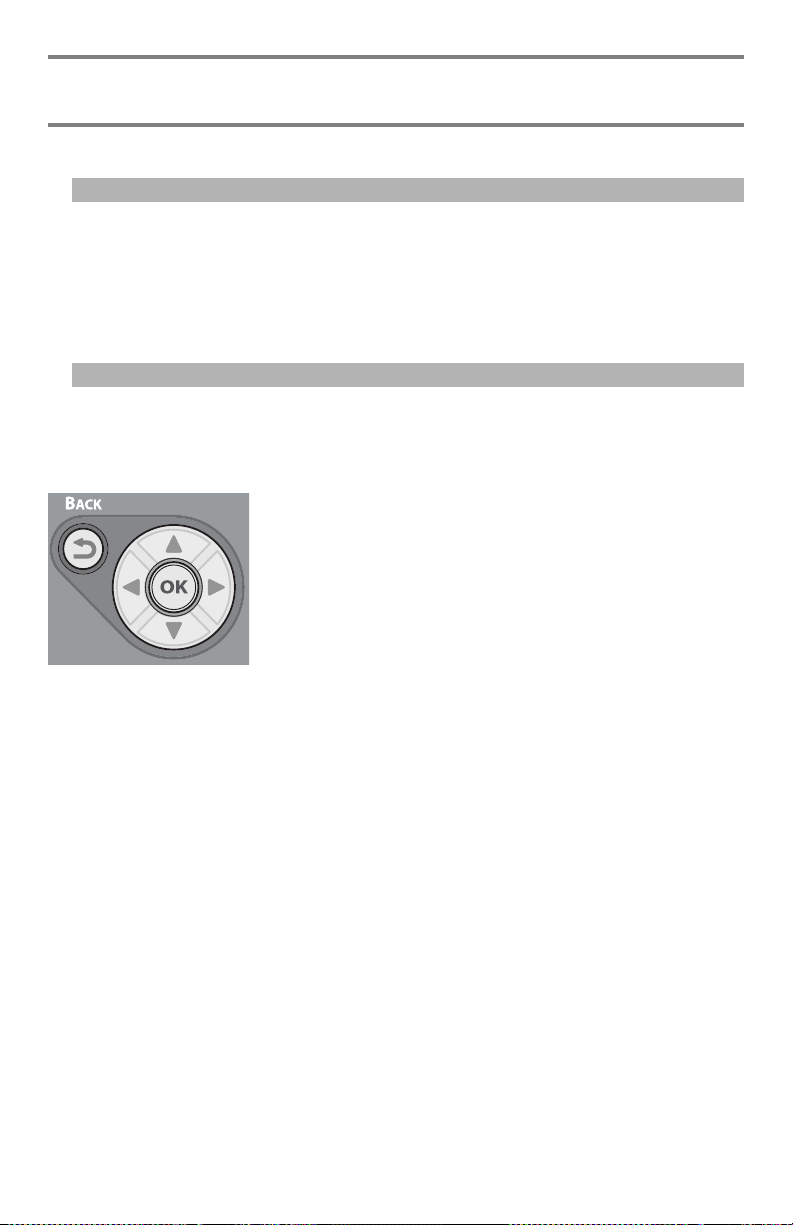
Using the Control Panel Arrow Keyss
When using the arrow keys, press the key
repetitively to go to the selection.
12
– Copying:
MC361/MC561/CX2731 MFP Advanced User’s Guide
Loading Documents for Copying _
Note
For details on loading documents for scanning, see the Basic
User’s Guide on the DVD supplied with your MFP.
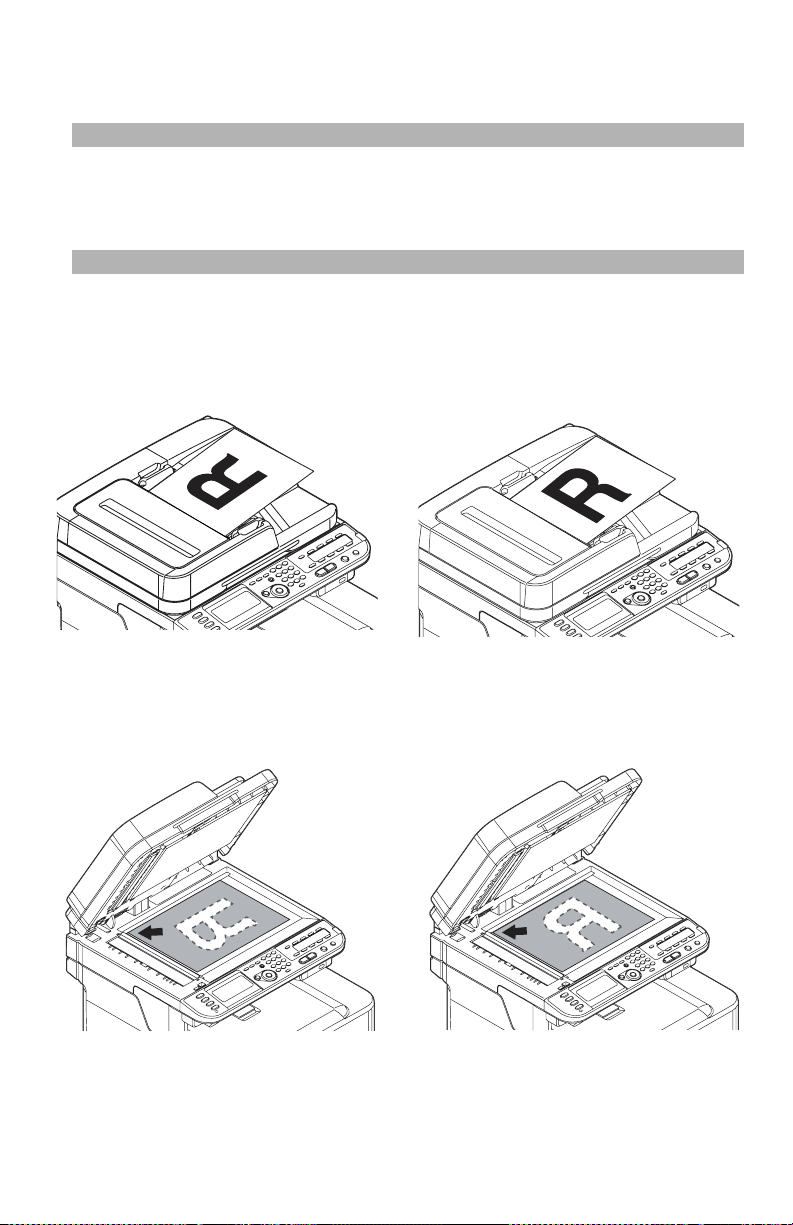
Auto Document Feed (ADF)
Portrait Landscape
Manual Feed: Document Glass
Portrait Landscape
13
– Copying: Loading Documents for Copying
MC361/MC561/CX2731 MFP Advanced User’s Guide

Collating Copies ______________
Use the collating copies function to save you the effort of sorting
copies manually.
1 Press the <COPY> key.
2 Place your document face up in the ADF or face down on the
document glass.
3 Press the right arrow key to enter the [Change settings] menu.
4 Press the down arrow key to select [Sort], then press <OK>.
5 Press the down arrow key to select [ON], then press <OK>.
6 Press the left arrow key repetitively to back out to the copy
standby screen.
7 Use the numeric keypad to enter the number of copies required.
8 Press the Mono Start or Color Start key.
Note
You can use both the ADF and document glass for a single job if
you use the continuous scan mode. For details, refer to the Basic
User’s Guide on the DVD supplied with your MFP.
14
– Copying: Collating Copies
MC361/MC561/CX2731 MFP Advanced User’s Guide
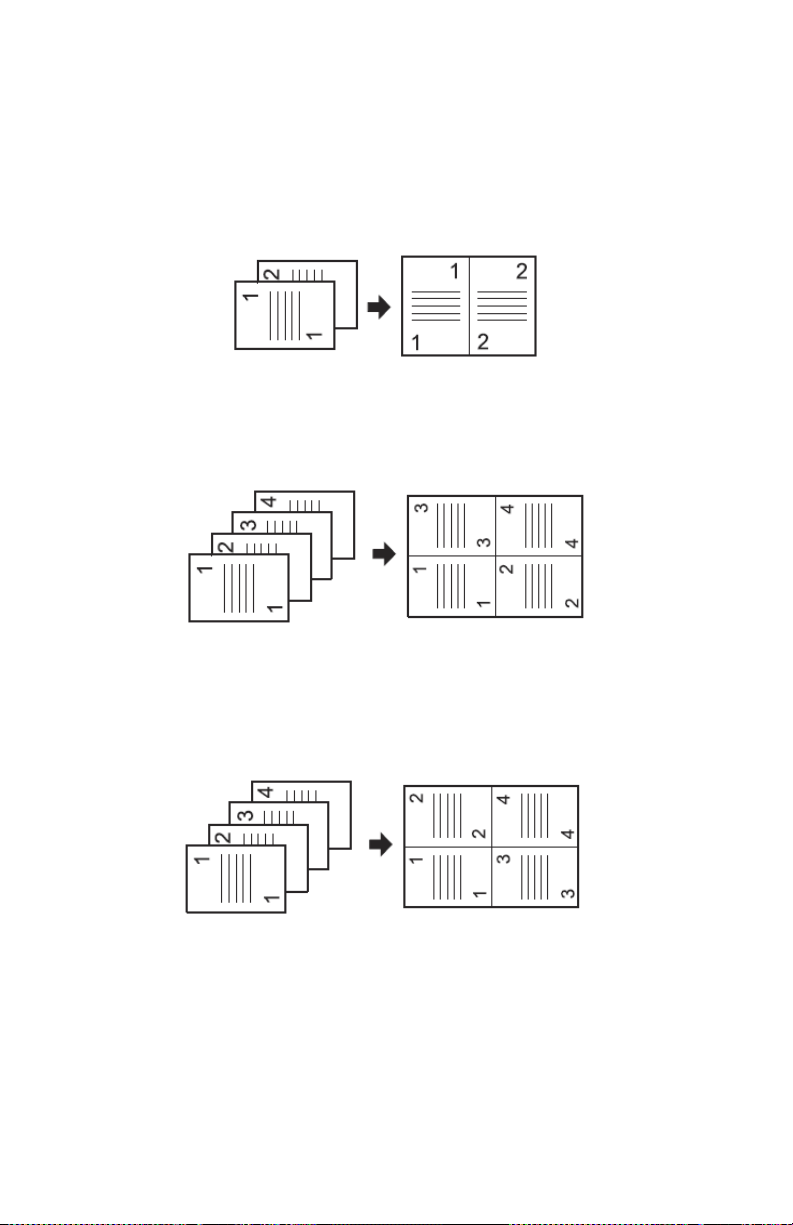
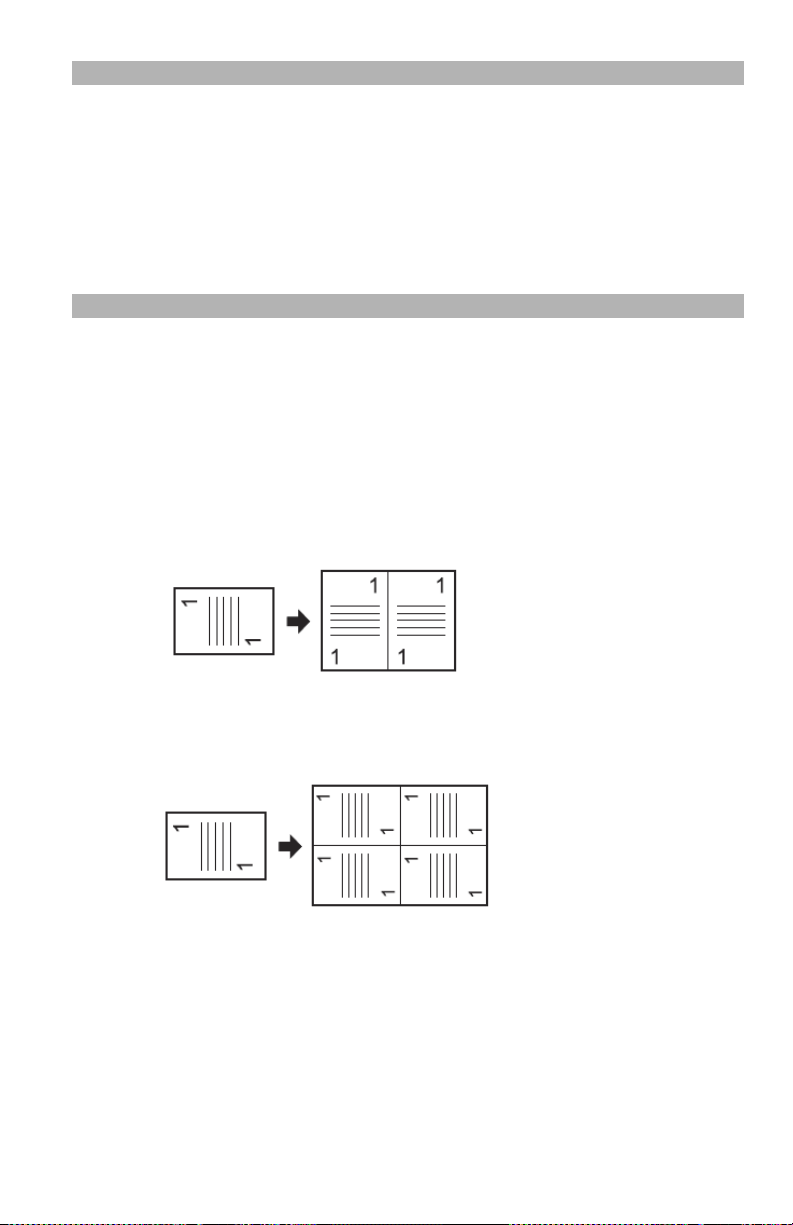
Multiple Pages on One Sheet ____
Known as N-in-1, this function allows you to copy multiple pages of
documents onto one side of a single sheet of paper. Two or four pages
can be printed onto one side.
Two Pages to One Sheet
Four Pages to One Sheet, Vertical Setting
Four Pages to One Sheet, Horizontal Setting
15
– Copying: Multiple Pages on One Sheet
MC361/MC561/CX2731 MFP Advanced User’s Guide

Notes
• Place your document so that the top is fed in first.
• Specify the appropriate orientation of the image in [Direction] to
get the copy result you want.
• [Zoom] is automatically set to [Auto] when [N-in-1] is enabled.
To specify the desired zoom ratio, set [N-in-1] first and then set
[Zoom].
• A part of the document image may be missing on the copy
depending on paper, document, and zoom ratio.
• The paper tray is automatically selected when [N-in-1] is
enabled.
For details on loading documents for scanning, see the Basic
User’s Guide on the DVD supplied with your MFP.
1 Press the <COPY> key.
2 Place your document face up in the ADF or face down on the
document glass.
3 Press the right arrow key to enter the [Change settings] menu.
4 Press the down arrow key to select [N-in-1], then press <OK>.
5 Press the down arrow key to select a value, then press <OK>.
6 Press the left arrow repetitively to back out to the copy standby
screen appears.
7 Use the numeric keypad to enter the number of copies required.
8 Press the Mono Start or Color Start key.
16
– Copying: Multiple Pages on One Sheet
MC361/MC561/CX2731 MFP Advanced User’s Guide
Note
• When you use the document glass, the continuous scan mode is
automatically enabled. Follow the instructions which appear on
the display.
• You can use both the ADF and document glass for a single job if
you use the continuous scan mode. For details, refer to the
Basic User’s Guide on the DVD supplied with your MFP.
Multiple Copies on One Sheet____
Known as Repeat, this function allows you to copy two or four copies
of the image on a document onto one side of a single sheet of paper.
Repeat Two
Repeat Four
17
– Copying: Multiple Copies on One Sheet
MC361/MC561/CX2731 MFP Advanced User’s Guide

Note
• [Zoom] is automatically set to [Auto] when [Repeat] is enabled.
To specify the desired zoom ratio, set [Repeat] first and then set
[Zoom].
• Specify the appropriate orientation of the image in [Direction] to
get the copy result you want.
• A part of the document image may be missing on the copy
depending on paper, document, and zoom ratio.
• The paper tray is automatically selected when this function is
enabled.
1 Press the <COPY> key.
2 Place your document with text face up in the ADF or face down
on the document glass.
3 Press the right arrow key to enter the [Change settings] menu.
4 Press the down arrow key to select [Repeat], then press <OK>.
5 Press the down arrow key to select a value, then press <OK>.
6 Press the left arrow key repetitively to back out to the copy
standby screen.
7 Use the numeric keypad to enter the number of copies required.
8 Press the <Mono Start> or <Color Start> key.
Note
You can use both the ADF and document glass for a single job if
you use the continuous scan mode. For details, refer to the Basic
User’s Guide on the DVD supplied with your MFP.
18
– Copying: Multiple Copies on One Sheet
MC361/MC561/CX2731 MFP Advanced User’s Guide

Copying Identification Cards ____
This function allows you to copy both sides of an ID card, such as a
driver’s license, onto one side of a piece of paper.
Notes
• Works only with the document glass. You cannot use the ADF for
this function.
• Place the card so that the top of it is on the upper-left corner of
the document glass, leaving a 2 mm scan margin.
• The MFP scans an area half the size of the specified paper. If the
document is more than half the size of the paper size, the
excess part is discarded.
1 Press the <COPY> key.
2 Press the right arrow key to enter the [Change settings] menu.
3 Press the down arrow key to select [ID Card Copy], then press
<OK>.
4 Press the down arrow key to select [ON], then press <OK>.
5 Press the left arrow key Eruptively to go back to the copy
standby screen.
6 Place the card face down on the document glass.
7 Use the numeric keypad to enter the number of copies.
8 Press the Mono Start or Color Start key.
9 When the [Set the back side.] screen appears, turn the card over
so that the back is face down on the document glass.
10 Press the down arrow key to select [Start scanning], then press
<OK>.
19
– Copying: Copying Identification Cards
MC361/MC561/CX2731 MFP Advanced User’s Guide

Erasing Edge Shadows ________
When you copy a document with the document cover open or when
you copy a book, the edges may be printed with black shadows.
This function allows you to erase such shadows.
Note
You can set [Edge Erase] as a default so that you do not have to
perform the following procedure every time you make copies.
1 Press the <COPY> key.
2 Place your document with text face up in the ADF or face down
on the document glass.
3 Press the right arrow key to enter the [Change settings] menu.
4 Press the down arrow key to select [Edge Erase], then press
<OK>.
5 Press the down arrow key to select [ON], then press <OK>.
6 Enter a value for width using the numeric pad, then press <OK>.
7 Press the left arrow key eruptively to back out to the copy
standby screen.
8 Use the numeric keypad to enter the number of copies.
9 Press the Mono Start or Color Start key.
20
– Copying: Erasing Edge Shadows
MC361/MC561/CX2731 MFP Advanced User’s Guide

Setting Margins _____________ ‘
Setting margins is useful when you staple or punch holes in copies.
You can set the top, right, bottom, or left margin by specifying the
[Top] and [Left] values.
Note
• Depending on where you set the margins, a part of the
document image may be missing on the copy.
• The specified margin values stay the same even when you
change the zoom ratio.
• Specify the appropriate orientation of the image in [Direction] to
get the copy result you want.
• You can set [Margin] as a default so that you do not have to
perform the following procedure every time you make copies.
Margins: Simplex (One-Sided) Copies
1 Press the <COPY> key.
2 Place your document with text face up in the ADF or face down
on the document glass.
3 Press the right arrow key to enter the [Change settings] menu.
4 Press the down arrow key to select [Margin], then press <OK>.
5 Press the down arrow key to select [ON], then press <OK>.
6 Press the up or down arrow key to specify the [Top] margin for
[Front Margin], then press the right arrow key.
• To create a margin at the top of the output, specify a
positive value.
• To create a margin at the bottom of the output, specify a
negative value.
7 Press the down or up arrow key to specify the [Left] margin for
[Front Margin], then press <OK>.
• To create a margin on the left side of the output, specify a
positive value.
21
– Copying: Setting Margins ‘
MC361/MC561/CX2731 MFP Advanced User’s Guide

• To create a margin on the right side of the output, specify a
negative value.
8 Press the left arrow key to back out to the copy start screen.
9 Use the numeric keypad to enter the number of copies.
10 Press the Mono Start or Color Start key.
Margins: Duplex Copies
Note
When you make duplex copies with [Margin] engaged, you must
specify the [Back] margin.
1 Press the <COPY> key.
2 Place your document with text face up in the ADF or face down
on the document glass.
3 Specify [Duplex Copy]
4 Press the right arrow key to enter the [Change settings] menu.
5 Press the down arrow key to select [Margin], then press <OK>.
6 Press the down arrow key to select [ON], then press <OK>.
7 Press the down or up key to specify the [Top].
• To create a margin at the top of the output, specify a
positive value.
• To create a margin at the bottom of the output, specify a
negative value.
8 Press the down or up arrow key to specify the [Left] margin for
[Front Margin], then press the right arrow key.
• To create a margin on the left side of the output, specify a
positive value.
• To create a margin on the right side of the output, specify a
negative value.
9 Press the down or up arrow key to specify the [Top] margin for
the [Back Margin], then press the right arrow key.
22
– Copying: Setting Margins ‘
MC361/MC561/CX2731 MFP Advanced User’s Guide

• To create a margin at the top of the output, specify a
negative value.
• To create a margin at the bottom of the output, specify a
positive value.
Note
Specify the same absolute value (if one value is positive and the
other is negative) set in the [Top] margin for both the [Front]
and [Back] margins.
10 Press the down or up arrow key to specify the [Left] margin for
[Back Margin], then press <OK>.
• To create a margin on the left side of the output, specify a
negative value.
• To create a margin on the right side of the output, specify a
positive value.
Note
Specify the same absolute value (if one value is positive and the
other is negative) set in the [Left] margin for both the [Front]
and [Back] margins.
11 Press the left arrow key repetitively to back out to the copy
standby screen.
12 Use the numeric keypad to enter the number of copies.
13 Press the Mono Start or Color Start key.
23
– Copying: Setting Margins ‘
MC361/MC561/CX2731 MFP Advanced User’s Guide

Note
• The position of the margin is related to the [Direction] setting
for the document.
- If [Direction] is set to [Portrait], the short edges are located
at the top and bottom and long edges are located to the right
and left.
- If [Direction] is set to [Landscape], the short edges are
located to the right and left and the long edges are located at
the top and bottom.
• When you use the document glass, the continuous scan mode is
automatically enabled. Follow the instructions which appear on
the display.
• [Margin] is disabled when all the values are set to [0].
Copy Different Length Documents
When you use the ADF, you can copy multiple documents having the
same width but two different lengths at the same time onto their
respective paper sizes.
Usable for the following length combinations:
• Letter and Legal-14
or
• Letter and Legal 13.5
The default paper size must be set to letter.
24
– Copying: Copy Different Length Documents
MC361/MC561/CX2731 MFP Advanced User’s Guide

Notes
• Enabling [Mixed Size] sets [Paper Feed] to [Auto]. [Mixed Size]
is disabled when [Paper Feed] is set to other than [Auto].
• [Mixed Size] is available only when [Zoom] is set to [Fit to
page(98%)] or [100%].
• You cannot set [Edge Erase] and [Mixed Size] at the same time.
• To enable more than one paper tray, press the <SETTING> key,
then select [Paper Setup] > [Select Tray] > [Copy].
• When you use the MP tray, load paper in the MP tray before
entering the [Mixed Size] menu.
In the instructions below, Tray1 and the MP tray are used. Legal 14 is
loaded in Tray1 and Letter is loaded in the MP tray.
1 Load legal-14 paper in Tray 1 and letter paper in the MP Tray.
2 Press the <SETTING> key.
3 Press the down arrow key to select [Paper], then press <OK>.
4 Select [Leal 14] as the [Paper Size] for Tray1 and [Letter] as the
[Paper Size] for the MP Tray.
5 Press the left arrow key repetitively to go back to the main
screen.
6 Press the <COPY> key.
7 Place your documents face up in the ADF.
8 Press the right arrow key to enter the [Change settings] menu.
9 Press the down arrow key to select [Mixed Size], then press
<OK>.
10 Press the down arrow key to select [ON], then press <OK>.
11 Press the left arrow key repetitively until the copy standby screen
appears.
25
– Copying: Copy Different Length Documents
MC361/MC561/CX2731 MFP Advanced User’s Guide

12 Check that the following settings are displayed on the start
screen:
[Mixed Size]: ON
[Paper Feed]Auto
[Zoom]: 100%
[Scan Size]: Legal 14
13 Use the numeric keypad to enter the number of copies.
14 Press the Mono Start or Color Start key.
Incompatible Settings _________
Some functions cannot be used in combination with other functions.
For example, when you have specified [Margin], you cannot specify
[N-in-1] and [Repeat].
If you try to select incompatible functions, a message explaining the
problem appears on the display.
If you get such a message, you must disable the incompatible
functions and then try again.
Disabling an Incompatible Function
To disable incompatible functions, return the function’s setting to the
default.
1 Press the <COPY> key.
2 Press the right arrow key to enter the [Change settings] menu.
3 Press the down arrow key to select the function you want to
disable, then press <OK>.
4 Press the down arrow key to select the default value, then press
<OK>.
5 Press the left arrow key repetitively to back out to the copy
standby screen.
Note
For the default value of each function, see “Admin Setup” on
page 171.
26
– Copying: Incompatible Settings
MC361/MC561/CX2731 MFP Advanced User’s Guide
Faxing
Note
• To enter the [Admin Setup] menu, the administrator password is
necessary. The default password is “aaaaaa”.
• For details on how to specify a destination, refer to the Basic
User’s Guide on the DVD supplied with your MFP.
Using the Control Panel Arrow Keyss
When using the arrow keys, press the key
repetitively to go to the selection.
27
– Faxing:
MC361/MC561/CX2731 MFP Advanced User’s Guide

Loading Documents ___________
Note
For details on loading documents for scanning, see the Basic
User’s Guide on the DVD supplied with your MFP.
Auto Document Feed (ADF)
Portrait Landscape
Manual Feed: Document Glass
Portrait Landscape
28
– Faxing: Loading Documents
MC361/MC561/CX2731 MFP Advanced User’s Guide

Duplex Documents ____________
You can transmit duplex documents using the ADF.
Note
You cannot use the document glass for this procedure.
1 Place your document with text face up in the ADF.
2 Press the <FAX> key.
3 Make sure that [Fax] is selected, then press the <OK> key to
open the fax standby screen.
4 Press the down arrow key to select [Fax Functions], then press
<OK>.
5 Press the down arrow key to select [DuplexScan], then press
<OK>.
6 Press the down arrow key to select a value, then press <OK>.
You can specify [Long edge bind] or [Short edge bind].
7 Press the left arrow key until the fax standby screen appears.
8 Specify a destination.
9 Press the <Mono Start> key to start transmission.
ADF and Document Glass _______
You can use both the ADF and the document glass when scanning
documents for a fax job. This allows you to send a document and a
part of a book as one fax.
1 Press the <FAX> key.
2 Make sure that [Fax] is selected, then press <OK> to open the
fax standby screen.
3 Press the down arrow key to select [Fax Functions], then press
<OK>.
4 Press the down arrow key to select [Continue Scan], then press
<OK>.
29
– Faxing: Duplex Documents
MC361/MC561/CX2731 MFP Advanced User’s Guide

5 Press the down arrow key to select [ON], then press <OK>.
6 Press the left arrow key until the fax standby screen appears.
7 Place your document with text face up in the ADF or face down
on the document glass.
8 Specify a destination.
9 Press the <Mono Start> key.
10 When the [Set next document.] screen appears, place the next
document with text face up in the ADF or face down on the
document glass.
11 Press the down arrow key to select [Scan next page], then press
<OK>.
12 Repeat steps 10 and 11 as necessary for each document you
want to fax.
13 When all the documents are all scanned, press the down arrow
key to select [Start Sending], then press <OK>.
Note
For details on how to stop scanning and to cancel transmission,
refer to the Basic User’s Guide on thee DVD supplied with your
MFP.
Sender Name (TTI) ___________
You can specify the sender name to be printed on faxes you send.
You must register a Sender Name in advance.
Note
Make sure that [Sender Name] is enabled before using the
following functions. For details, see the Setup Guide supplied
with your MFP.
30
– Faxing: Sender Name (TTI)
MC361/MC561/CX2731 MFP Advanced User’s Guide
 Loading...