

Page 1

Page 2

About This Manual
WARNING
Terms in this document
The following terms are used in this manual.
Note
● Indicates important information on operations. Make sure to read sections with this mark.
Memo
● Indicates additional information on operations. You should read sections with this mark.
Reference
● Indicates where to look when you want to know more detailed or related information.
● A warning provides additional information which, if ignored, may result in a risk of personal injury.
CAUTION
● A caution provides additional information which, if ignored, may result in equipment malfunction or damage.
Symbols in this document
The following symbols are used in this manual.
Symbols Description
[ ] ● Indicates menu names on the display screen.
● Indicates menu, window, and dialog names on the computer.
" "
< > button/key Indicates a hardware button on the operator panel or a key on the keyboard of the
> Indicates how to get to the item you want in the menu of this printer or the computer.
Your Printer
● Indicates messages and input text on the display screen.
● Indicates le names on the computer.
● Indicates reference titles.
computer.
Indicates a printer you want to use or select.
- 2 -
Page 3

Notation used in this manual
The following notations may be used in this manual.
● C822n/C822dn→ C822
● Microsoft® Windows® 7 64-bit Edition operating system → Windows 7 (64bit version)
● Microsoft® Windows Vista® 64-bit Edition operating system → Windows Vista (64bit version)*
● Microsoft® Windows Server® 2008 R2 64-bit Edition operating system → Windows Server 2008 R2*
● Microsoft® Windows Server® 2008 64-bit Edition operating system → Windows Server 2008 (64bit
version)*
● Microsoft® Windows® XP x64 Edition operating system → Windows XP (x64 version)*
● Microsoft® Windows Server® 2003 x64 Edition operating system → Windows Server 2003 (x64
version)*
● Microsoft® Windows® 7 operating system → Windows 7 *
● Microsoft® Windows Vista® operating system → Windows Vista *
● Microsoft® Windows Server® 2008 operating system → Windows Server 2008 *
● Microsoft® Windows® XP operating system → Windows XP *
● Microsoft® Windows Server® 2003 operating system → Windows Server 2003 *
● Microsoft® Windows® 2000 operating system → Windows 2000
● Generic name for Windows 7, Windows Vista, Windows Server 2008, Windows XP, Windows Server
2003, and Windows 2000 → Windows
* If there is no special description, 64bit version is included in Windows 7, Windows Vista, Windows
Server 2008, Windows XP, and Windows Server 2003. (64bit version and Windows Server 2008 R2 is
included in Windows Server 2008.)
If there is no special description, Windows 7 is used as Windows, Mac OS X 10.7 is used as Mac OS X,
and C822dn is used as the printer for examples in this document.
Depending on your OS or model, the description on this document may be different.
- 3 -
Page 4

Contents
About This Manual ...................................................................................2
Terms in this document ............................................................................................. 2
Symbols in this document
Notation used in this manual
.......................................................................................... 2
...................................................................................... 3
1. Convenient Print Functions .................................................. 8
Printing on Envelopes ................................................................................................ 8
Printing on Labels
Printing on Custom Size Paper
Manual Printing
Combining Multiple Pages Onto One Sheet of Paper (Multiple page printing).................... 13
Duplex Printing
Scaling to Pages
Collating Pages
Booklet Printing
Cover Printing
Poster Printing
Changing Print Quality (Resolution)
Enhancing Photos
..................................................................................................... 9
.................................................................................. 10
...................................................................................................... 12
....................................................................................................... 14
..................................................................................................... 15
....................................................................................................... 16
...................................................................................................... 17
........................................................................................................ 17
........................................................................................................ 18
........................................................................... 18
................................................................................................... 19
Printing Color Data in Grayscale
Emphasizing Fine Lines
Auto Tray Selection
Auto Tray Switching
Saving Toner
Secure Printing
Encrypted Secure Printing
Watermark Printing
Overlay Printing
Storing Print Data
Saving the Driver Settings
Changing the Driver's Default Settings
Using Printer Fonts
Using Computer Fonts
Using a Print Buffer
Changing the Mono-Print Mode
Printing to File
.......................................................................................................... 22
....................................................................................................... 23
...................................................................................................... 26
........................................................................................................ 31
............................................................................................ 20
................................................................................................. 20
................................................................................................ 21
........................................................................................ 24
................................................................................................. 25
................................................................................................... 27
.................................................................................................. 29
............................................................................................. 29
................................................................................................. 30
................................................................................ 19
....................................................................................... 28
................................................................................. 30
....................................................................... 28
Changing Emulation Mode
........................................................................................ 31
- 4 -
Page 5

Contents
2. Adjusting Color .................................................................. 32
Adjusting Color on the Control Panel ........................................................ 32
Adjusting Color Registration ..................................................................................... 32
Adjusting the Density
Adjusting the Color Balance (Density)
.............................................................................................. 32
........................................................................ 33
Adjusting Color on the Computer.............................................................34
Color Matching (Automatic) ...................................................................................... 34
Color Matching (Ofce Color)
Color Matching (Graphic Pro)
Color Matching (No Color Matching)........................................................................... 35
Changing Black Finish
Eliminating White Gap Between Text and Background (Overprinting black)
Simulating Printing Results for Ink
.............................................................................................. 36
.................................................................................... 34
.................................................................................... 35
..................... 37
........................................................................... 37
Adjusting Color with Color Correct Utility .................................................. 38
Changing Palette Color ............................................................................................ 38
Changing Gamma Value or Hue
Printing in Adjusted Color Settings
Saving Color Correction Settings
Importing Color Correction Settings........................................................................... 40
Deleting Color Correction Settings
................................................................................ 39
............................................................................ 39
............................................................................... 40
............................................................................. 41
Setting Color with Color Swatch Utility .....................................................42
Printing Color Swatch .............................................................................................. 42
Printing a File With the Color You Want
...................................................................... 43
3. Changing Printer Settings .................................................. 44
Checking the Current Settings ................................................................ 44
Printing Out Print Information ................................................................................... 44
Changing the Equipment Settings ............................................................ 45
Admin Setup .......................................................................................................... 45
Other Settings
List of Each Setup Menu
........................................................................................................ 45
.......................................................................................... 46
- 5 -
Page 6

Contents
4. Using Utility Software ........................................................ 58
Overview of Utilities ..............................................................................58
Installing Utilities
Utilities common to Windows/Mac OS X
Web page .............................................................................................................. 61
.................................................................................. 60
................................................... 61
Windows Utilities................................................................................... 63
Conguration Tool ................................................................................................... 63
Operator Panel Language Setup
Network Card Setup
OKI LPR Utility........................................................................................................ 69
Network Extension
TELNET
................................................................................................................. 73
................................................................................................ 68
.................................................................................................. 72
................................................................................ 66
Mac OS X Utilities .................................................................................. 74
Panel Language Setup ............................................................................................. 74
Network Card Setup
................................................................................................ 74
5. Network Settings ............................................................... 76
Network Setting Items ........................................................................... 76
Setting IP Address
Changing Network Settings From the Web Page
Informing the End of Consumable Life and Errors by E-mail (E-mail Alert) .....................104
Controlling Access Using IP Address (IP Filtering)
Controlling Access Using MAC Address (MAC Address Filtering)
Printing Without Printer Driver (Direct Print)
Encrypting Communication by SSL/TLS
Encrypting Communication by IPSec
Using SNMPv3
Using IPv6
Using IEEE802.1X
Changing EtherTalk Settings (for Mac OS X only)
............................................................................................................112
.............................................................................. 101
...................................... 104
.......................................................105
....................................106
..............................................................106
.....................................................................107
.........................................................................109
.......................................................................................................112
..................................................................................................113
........................................................114
Other Operations ................................................................................ 115
Initializing Network Settings ....................................................................................115
Using DHCP
..........................................................................................................115
- 6 -
Page 7

Contents
6. Troubleshooting ............................................................... 117
Initializing .......................................................................................... 117
Initializing an SD memory card ................................................................................117
Initializing Flash Memory
Resetting the Printer Settings
........................................................................................118
..................................................................................119
Deleting or Updating the Printer Drivers ................................................. 120
Deleting a Printer Driver .........................................................................................120
Updating a Printer Driver
........................................................................................121
Index .................................................................................... 123
- 7 -
Page 8
1. Convenient Print Functions
1
This chapter explains advanced printing operations.
1. Convenient Print Functions
Memo
● The display and procedure may differ according to the operating system, the applications, and the version of the printer driver
you are using. This section uses Notepad and TextEdit in Windows and Mac OS X as examples.
Reference
● For additional information on the setting items on the printer driver, refer to its online help.
Printing on Envelopes
You can print on envelopes by changing the
paper size setting and using the MP tray and the
face up stacker.
Set the paper size of MP tray on the operator
panel, and then make print settings including
paper size and paper tray with the printer driver.
Note
● Warping or creasing may appear after printing. Make sure
that there is no problem by test printing.
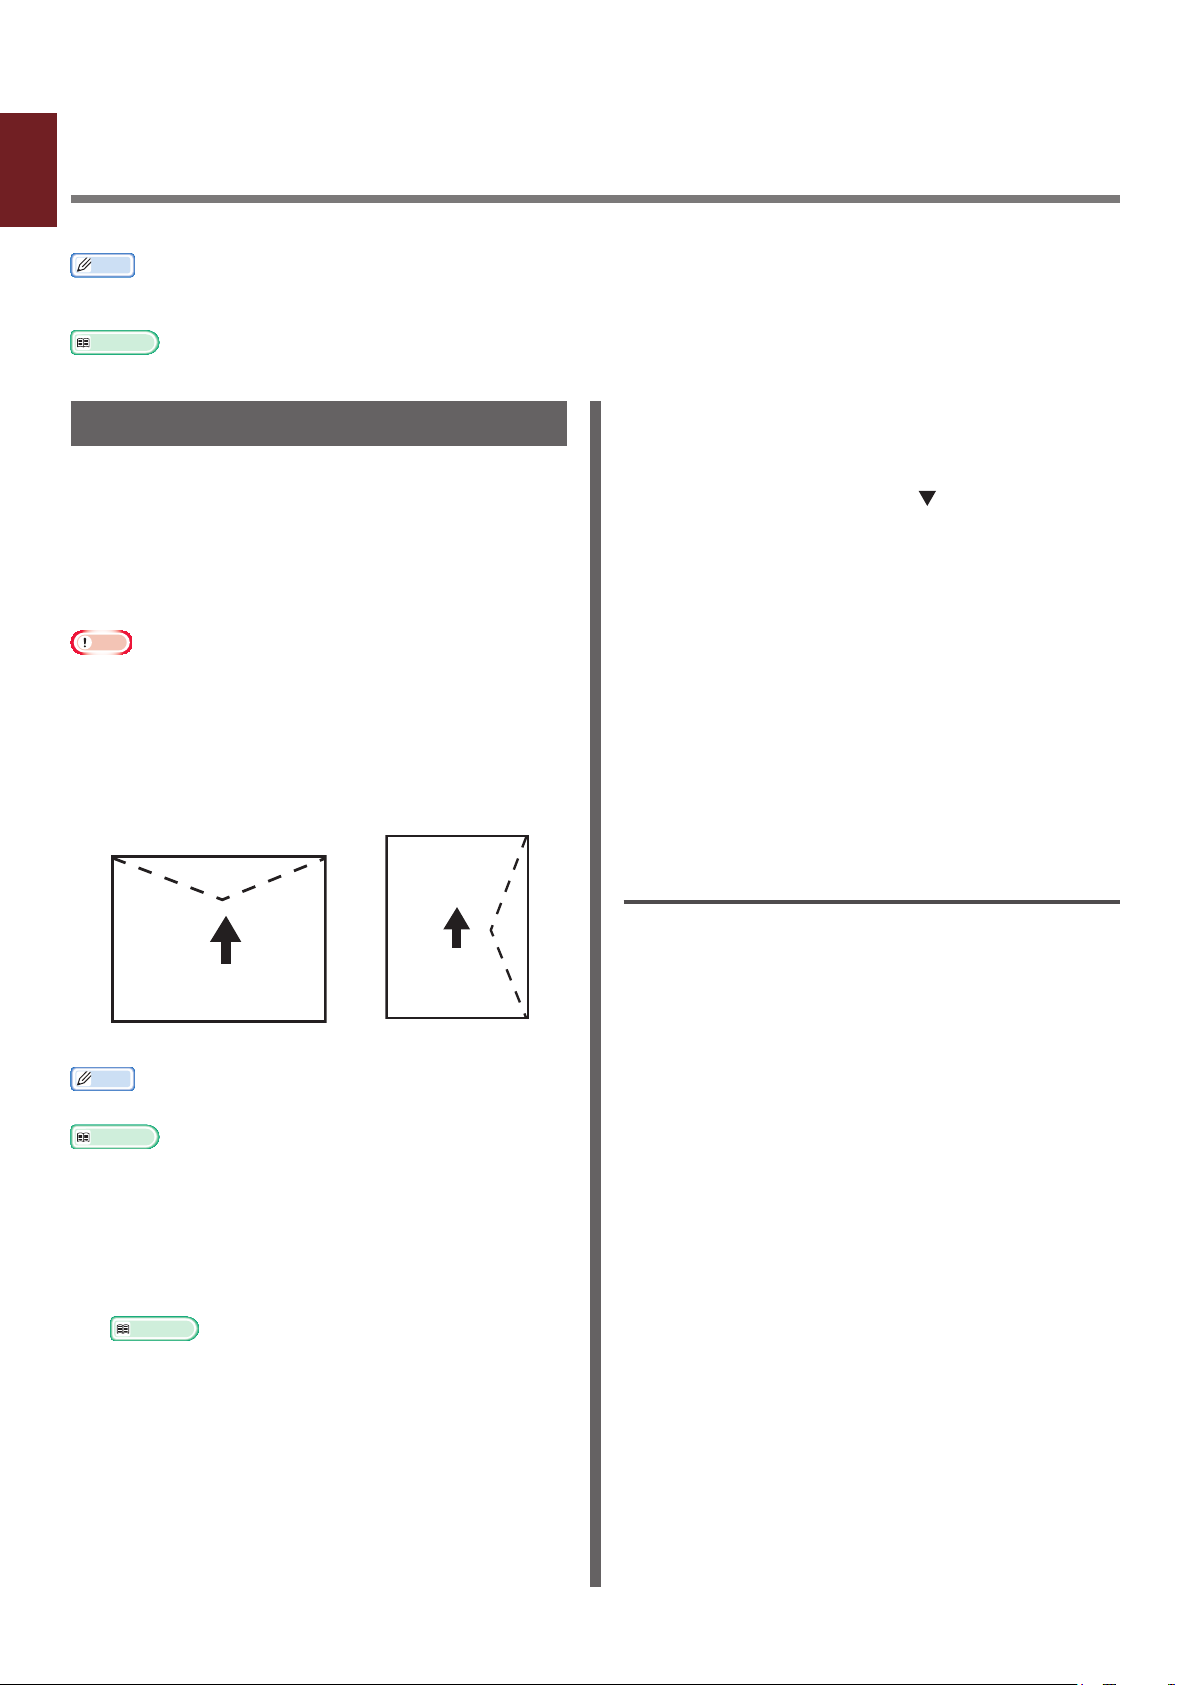
● Envelopes should be loaded with the address side up.
- Com-10, DL, and C5 envelopes should be loaded so
that the ap is on the top side in the feeding direction.
- C4 envelope should be loaded so that the ap is on the
right side in the feeding direction.
4 Press the <9>, <0> keys and then
press the <ENTER> button.
5 Press the scroll button to select
[Envelope*] and then press the
<ENTER> button.
*Select a type of envelope.
6 Press the <ON LINE> button to exit the
menu mode.
7 Open the le you want to print on the
computer.
8 Congure the paper size, paper source
and orientation in the printer driver and
then start printing.
For Windows
1 From the [File] menu, select [Print].
2 Click [Preferences] or [Properties].
Com-10, DL, C5 C4
Memo
● Do not select duplex printing on envelopes.
Reference
● For envelopes that can be used, refer to the User’s Manual
(Setup).
● Manual printing is also available for printing on envelopes.
For details on manual printing, refer to “Manual Printing”
P.12.
1 Load paper on the MP tray.
Reference
● Refer to “Loading Paper” in the User’s Manual
(Setup).
2 Open the face up stacker at the rear of
the printer.
3 Press the <Fn> key on the operator
panel.
3 On the [Setup] tab, select [Envelope*]
from [Size].
* Select a type of envelope.
4 Select [Multipurpose Tray] from
[Source].
5 Select orientation at [Orientation].
- Select [Portrait] for side-opening
envelopes.
- Select [Landscape] for top-opening
envelopes.
6 Congure other settings if necessary and
then start printing.
- 8 -
Page 9

For Mac OS X
1 From the [File] menu, select [Page
Setup].
2 Select [Envelope*] from [Paper Size].
* Select a type of envelope.
3 Select orientation from [Orientation]
and then click [OK].
- Select [Portrait] for side-opening
envelopes.
- Select [Landscape] for top-opening
envelopes.
4 From the [File] menu, select [Print].
5 Select [Setup] from the panel menu.
6 Select [Multipurpose Tray] from
[Paper Source].
Printing on Labels
You can print on labels by changing the media
type setting and using the MP tray and the
faceup stacker.
Set the paper size and type for MP tray on
the operator panel. Then, make print settings
including paper size and paper tray with the
printer driver.
Memo
● Do not select duplex printing for labels.
Reference
● For available labels, refer to the User’s Manual (Setup).
● Manual printing is also available for printing on labels.
For details on manual printing, refer to “Manual Printing”
P.12.
1 Load paper on the MP tray.
Reference
● Refer to “Loading Paper” in the User’s Manual
(Setup).
1
1. Convenient Print Functions
7 Congure other settings if necessary and
then start printing.
Memo
● If the print dialog does not contain the options you expect
to see on Mac OS X 10.7, click the [Show Details] button
on the bottom of the [Printer] menu.
● If the print dialog contains only two menu items and
does not contain the options you expect to see on Mac
OS X 10.5 to 10.6, click the button on the side of the
[Printer] menu.
2 Open the faceup stacker at the rear of
the printer.
Memo
● If always printing on labels from the MP tray, register
the paper on the operator panel. If printing once,
proceed to the printing procedures through the
printer driver.
3 Press the <Fn> key.
4 Enter <9> and <0> using the ten-key
pad and press the <ENTER> button.
5 Press the scroll button to select
[A4] or [Letter] and then press the
<ENTER> button.
6 Press the <BACK> button and make
sure that [MPTray Cong] is displayed.
7 Press the scroll button to select
[Media Type] and then press the
<ENTER> button.
8 Press the scroll button to select the
[Labels] and then press the <ENTER>
button.
9 Press the <ON LINE> button to exit the
menu mode.
10 Open the le you want to print on the
computer.
- 9 -
Page 10
11 Congure the paper size and tray on the
1
1. Convenient Print Functions
printer driver.
For Windows
1 From the [File] menu, select [Print].
2 Click [Preferences] or [Properties].
3 On the [Setup] tab, select [A4] or
[Letter] from [Size].
4 Select [Multipurpose Tray] from
[Source].
5 Congure other settings if necessary and
then start printing.
For Mac OS X
1 From the [File] menu, select [Page
Setup].
2 Select [A4] or [Letter] from [Paper
Size].
3 Select [Print] from [File] menu.
4 For Mac OS X 10.3.9, select [Printer
Features] from the panel menu.
5 Select [Setup] from the panel menu.
6 Select [Multipurpose Tray] from
[Paper Source].
7 Congure other settings if necessary and
then start printing.
Memo
● If the print dialog does not contain the options you expect
to see on Mac OS X 10.7, click the [Show Details] button
on the bottom of the [Printer] menu.
● If the print dialog contains only two menu items and
does not contain the options you expect to see on Mac
OS X 10.5 to 10.6, click the button on the side of the
[Printer] menu.
Printing on Custom Size Paper
You can register a customized paper size on the
printer driver so you can print on nonstandard
paper such as banners.
● Settable custom size range
Width: 64 to 297 mm
Length: 90 to 1320.8 mm
Paper sizes that can be fed differ depending on
the tray.
Note
● Register the paper size as portrait, and load paper in
portrait orientation.
● For banner media that is over 432 mm long, use the
faceup stacker.
● This function may not be available in some applications.
● If paper length exceeds 432 mm, we do not guarantee
print quality.
● If paper is so long that it exceeds the paper supports of
the MP tray, support it by hand.
● When using tray 1 or tray 2, select the <ENTER>
button on the operator panel>[Menus]>[Tray
Conguration]>[Using Tray Cong]> [Paper
Size]>[Custom] before doing the following procedure.
● If images are not correctly printed on large size paper,
selecting [Standard (600x600dpi)] for [Print Quality],
image in the PS printer driver may allow for correct
printing.
● Use of paper with a width of less than 100 mm is not
recommended. Doing so may cause paper jams.
Reference
● For details on the paper sizes that can be fed on each tray
or used for duplex printing, refer to the User’s Manual
(Setup).
● The [Auto Tray Change] is enabled by default. When
the tray runs out of paper during printing, the printer
automatically begins feeding paper from that tray. If you
want to feed custom paper only from a particular tray,
disable auto tray switching. For auto tray change, refer to
“Auto Tray Switching” P.21.
Specifying Custom Sizes
To load custom size paper, you need to register
the width and length of the paper before
printing. The range of the sizes you can set
differs according to the paper tray.
Tray Available size range
Tray1 Width:
105 to 297 mm (4.1 to 11.7 inches)
Length:
148 to 431 mm (5.8 to 17.0 inches)
Tray2
(Option)
Width:
148 to 297 mm (5.8 to 11.7 inches)
Length:
182 to 431 mm (7.2 to 17.0 inches)
- 10 -
Page 11
Tray Available size range
MP tray Width:
64 to 297 mm (2.5 to 11.7 inches)
Length:
90 to 1321 mm (3.5 to 52.0 inches)
Note
● You can congure the [Custom] setting only when
[Paper Size] is set to [Custom].
● The available size range for duplex printing is the same as
that for tray 2.
1 Press the <ENTER> button on the
operator panel.
2 Press the scroll button several times
to select [Menus] and press the
<ENTER> button.
3 Check that [Tray Conguration]
is selected and press the <ENTER>
button.
4 Press the scroll button several times
to select [Tray Cong] of the paper
tray in which you loaded paper and then
press the <ENTER> button.
5 Check that [Paper Size] is selected and
press the <ENTER> button.
6 Press the scroll button several times
to select [Custom] and then press the
<ENTER> button.
7 Press the <BACK> button.
8 Press the scroll button to select
[X Dimension] and then press the
<ENTER> button.
For Windows
1 Click [Start] and select [Devices and
Printers].
2 Right-click the
Your Printer
icon and
select the type of driver you want to
specify from [Printing preferences].
3 On the [Setup] tab, click [Paper Feed
Options].
4 Click [Custom Size].
5 Enter a name and the dimensions.
a Enter a name for the new size in the
[Name] box.
b Enter its dimensions in the [Width]
and [Length] boxes.
6 Click [Add] to save the custom paper
size to the list and then click [OK].
You can save up to 32 custom sizes.
7 Press [OK] until the [Printing
preferences] dialog box is closed.
8 Open the le you want to print.
9 Select the registered paper size in the
printer driver, and start printing on the
print dialog.
Reference
● For how to specify paper in the printer driver, refer to the
User’s Manual (Setup).
1
1. Convenient Print Functions
9 Enter the paper width value using
the ten-key pad and then press the
<ENTER> button.
10 Press the <BACK> button.
11 Press the scroll button to select
[Y Dimension] and then press the
<ENTER> button.
12 Enter the paper length value using
the ten-key pad and then press the
<ENTER> button.
13 Press the <ON LINE> button to exit the
menu mode.
- 11 -
Page 12
For Mac OS X
1
1. Convenient Print Functions
Note
● In the Mac OS X printer driver, paper size out of the
available range can be set. However, the image will not be
printed correctly, so set paper size within available range.
1 Open the le you want to print.
2 From the [File] menu, select [Page
Setup].
3 Select [Manage Custom Sizes] from
[Paper Size]
4 Click [+] to add an item to the list of
custom paper sizes.
5 Double-click [Untitled] and enter a
name for the custom paper size.
6 Enter the dimensions in the [Width] and
[Height] boxes.
7 Click [OK].
Manual Printing
You can print a document feeding paper
manually on the MP tray. The printer prints
on a sheet of paper at a time. Every time a
page is printed, the message “Install Paper
MPTray %MEDIA_SIZE% Press ONLINE
Button” appears. Press the [ON LINE] button
to continue to print.
1 Load paper on the MP tray.
Reference
● Refer to “Loading Paper” in the User’s Manual
(Setup).
2 Open the le you want to print.
3 Congure the manual printing settings in
the printer driver, and start printing.
For Windows
1 From the [File] menu, select [Print].
8 Click [OK].
9 From the [File] menu, select [Print].
10 Congure other settings if necessary and
then start printing.
Memo
● If the print dialog does not contain the options you expect
to see on Mac OS X 10.7, click the [Show Details] button
on the bottom of the [Printer] menu.
● If the print dialog contains only two menu items and
does not contain the options you expect to see on Mac
OS X 10.5 to 10.6, click the button on the side of the
[Printer] menu.
2 Click [Preferences] or [Properties].
3 On the [Setup] tab, select
[Multipurpose Tray] from [Source].
4 Click [Paper Feed Options].
5 Select the [Use MP tray as manual
feed] check box and then click [OK].
6 Congure other settings if necessary and
then start printing.
7 When a request message appears on the
operator panel for loading paper on the
MP tray, press the <ON LINE> button.
If you print a multi-page document, the same
message appears every time a page is printed.
- 12 -
Page 13

12
34
For Mac OS X
1 From the [File] menu, select [Print].
2 For Mac OS X 10.3.9, select [Printer
Features] from the panel menu.
3 Select [Setup] from the panel menu.
4 Select [Multipurpose Tray] from
[Paper Source].
5 Click [Printer Options].
6 Select [Use MP tray as manual feed]
check box.
7 Congure other settings if necessary and
then start printing.
8 When a request message appears on the
operator panel for loading paper on the
MP tray, press the <ON LINE> button.
If you print a multi-page document, the same
message appears every time a page is printed.
Memo
● If the print dialog does not contain the options you expect
to see on Mac OS X 10.7, click the [Show Details] button
on the bottom of the [Printer] menu.
● If the print dialog contains only two menu items and
does not contain the options you expect to see on Mac
OS X 10.5 to 10.6, click the button on the side of the
[Printer] menu.
Combining Multiple Pages Onto One
1
Sheet of Paper (Multiple page printing)
You can print multiple pages of a document onto
a single side of a sheet of paper.
Note
● This function scales down the page size of your document
for printing. The center of the printed image may not be
in the center of the paper.
● This function may not be available in some applications.
For Windows
1 Open the le you want to print.
2 From the [File] menu, select [Print].
3 Click [Preferences] or [Properties].
4 On the [Setup] tab, select the number
of pages to print on each sheet at
[Finishing Mode].
1. Convenient Print Functions
5 Click [Options].
6 Specify the settings for [Pages per
sheet], [Page Borders], [Page
layout] and [Bind Margin], and then
click [OK].
7 Congure other settings if necessary and
then start printing.
- 13 -
Page 14
For Mac OS X
1
1 Open the le you want to print.
1. Convenient Print Functions
2 From the [File] menu, select [Print].
3 Select [Layout] from the panel menu.
4 Select the number of pages to print on
each sheet from [Pages per Sheet]
5 Specify the settings for [Border] and
[Layout Direction].
6 Congure other settings if necessary and
then start printing.
Memo
● If the print dialog does not contain the options you expect
to see on Mac OS X 10.7, click the [Show Details] button
on the bottom of the [Printer] menu.
● If the print dialog contains only two menu items and
does not contain the options you expect to see on Mac
OS X 10.5 to 10.6, click the button on the side of the
[Printer] menu.
Duplex Printing
You can print on both sides of a sheet of paper.
● Paper size that can be used for duplex printing
A3, A4, A5, B4, B5, Letter, Legal 13, Legal 13.5,
Legal 14, Executive, Tabloid, 8K (260x368 mm,
270x390 mm, 273x394 mm), 16K (197x273 mm,
195x270 mm, 184x260 mm), Custom size
A6 can not be used for duplex printing.
● Media weight that can be used for duplex
printing
64 to 220 g/m
Do not use media weight other than the above.
Doing so causes paper jams.
Note
● This function may not be available in some applications.
Memo
● The width and length of custom sizes that can be used for
duplex printing are as follows.
- Width: 148 to 297 mm (5.8 to 11.7 inch)
- Length: 182 to 431.8 mm (7.2 to 17.0 inch)
2
For Windows
1 Open the le you want to print.
2 From the [File] menu, select [Print].
3 Click [Preferences] or [Properties].
4 On the [Setup] tab, select [Long
Edge] or [Short Edge] from [2-Sided
Printing].
5 Congure other settings if necessary and
then start printing.
For Mac OS X
1 Open the le you want to print.
2 From the [File] menu, select [Print].
3 For Mac OS X 10.3.9, select [Printer
Features] from the panel menu.
- 14 -
4 Select [Setup] from the panel menu.
5 Select [Long-Edge binding] or [Short-
Edge binding] from [Duplex] on the
[Setup] panel.
Page 15

"
6 Congure other settings if necessary and
then start printing.
Memo
● If the print dialog does not contain the options you expect
to see on Mac OS X 10.7, click the [Show Details] button
on the bottom of the [Printer] menu.
● If the print dialog contains only two menu items and
does not contain the options you expect to see on Mac
OS X 10.5 to 10.6, click the button on the side of the
[Printer] menu.
Scaling to Pages
You can print data formatted for one size page
onto a different size page without modifying the
print data.
"
Note
● This function may not be available in some applications.
● This function is not available with the Windows PS printer
driver.
For Windows
1 Open the le you want to print.
2 From the [File] menu, select [Print].
1
1. Convenient Print Functions
3 Click [Preferences] or [Properties].
4 On the [Setup] tab, select the [Resize
document to t printer page] check
box.
5 Select a scaling value from the drop-
down list.
6 Congure other settings if necessary and
then start printing.
For Mac OS X
1 Open the le you want to print.
2 From the [File] menu, select [Print].
3 Select [Paper Handling] from the panel
menu.
4 Select the [Scale to t paper size]
check box.
5 Select the paper size you want to use
from [Destination Paper Size].
- 15 -
Page 16
6 Congure other settings if necessary and
1
1. Convenient Print Functions
then start printing.
Memo
● If the print dialog does not contain the options you expect
to see on Mac OS X 10.7, click the [Show Details] button
on the bottom of the [Printer] menu.
● If the print dialog contains only two menu items and
does not contain the options you expect to see on Mac
OS X 10.5 to 10.6, click the button on the side of the
[Printer] menu.
Collating Pages
You can print copies of multiple sets of a
multipage document.
Note
● This function may not be available in some applications.
For Windows
1 Open the le you want to print.
2 From the [File] menu, select [Print].
3 Click [Preferences] or [Properties].
4 Select the [Job Options] tab.
5 Select the number of copies to print
from the [Copies] scrolling list and
select the [Collate] check box.
6 Congure other settings if necessary and
then start printing.
For Mac OS X
1 Open the le you want to print.
2 From the [File] menu, select [Print].
3 For Mac OS X 10.7, select [Paper
Handling] from the panel menu.
4 Select the [Collate Pages] ([Collate]
for Mac OS X 10.5 and 10.6) check box
and enter the number of copies to print
in [Copies].
For Mac OS X 10.3.9 to 10.4.11, select the check
box of [Collate] on the [Copies & Pages] and
enter a number of printed copies in [Copies].
5 Congure other settings if necessary and
then start printing.
Memo
● If the print dialog does not contain the options you expect
to see on Mac OS X 10.7, click the [Show Details] button
on the bottom of the [Printer] menu.
● If the print dialog contains only two menu items and
does not contain the options you expect to see on Mac
OS X 10.5 to 10.6, click the
[Printer] menu.
button on the side of the
- 16 -
Page 17

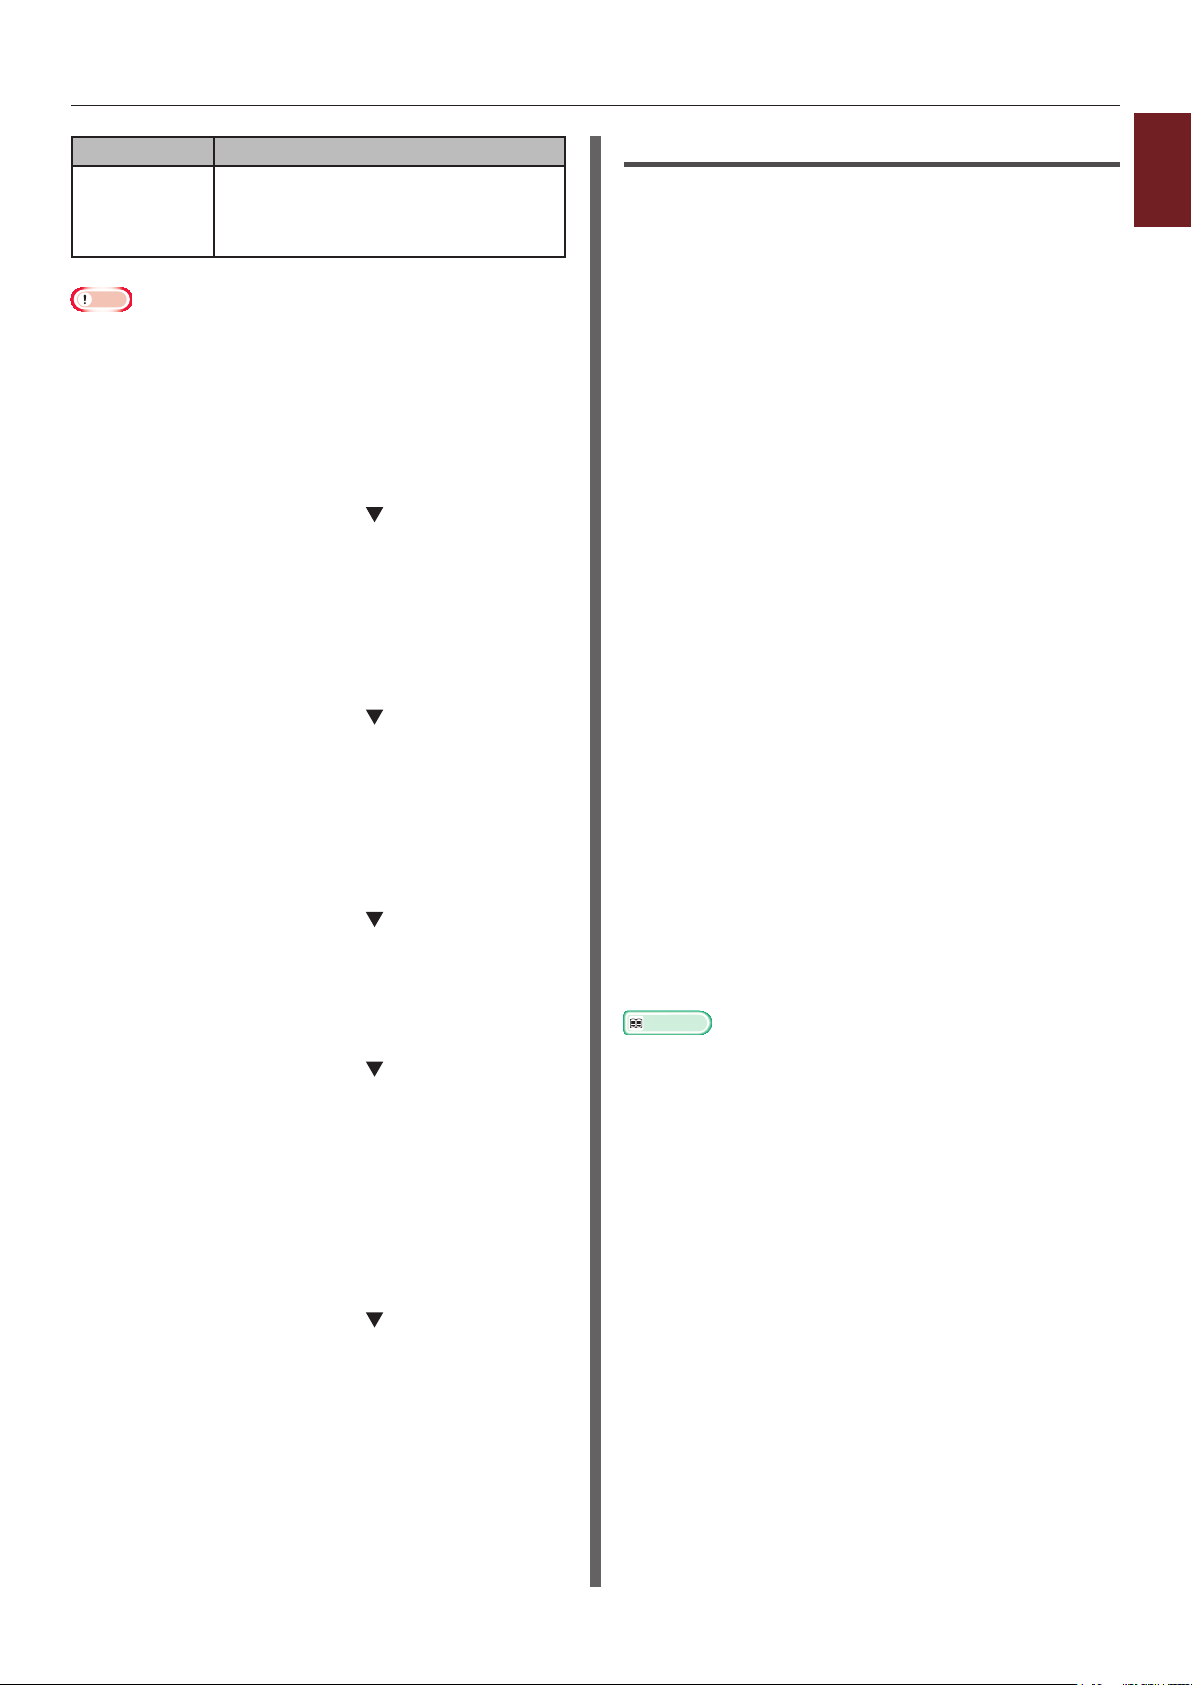
Booklet Printing
You can print multipage documents with their
pages ordered and arranged so that the nal
printed output can be folded into a booklet.
12
11
9
7
5
3
1
Note
● This function may not be available in some applications.
● This function is not available with Mac OS X printer driver.
● Watermarks are not printed properly with this function.
● This function is invalid when you use the encrypted secure
printing mode from a client computer sharing the printer
with a print server.
For Windows
1 Open the le you want to print.
Cover Printing
You can feed the rst page of a print job from
one tray and the remaining pages from another
tray. This function is useful when you want to
use one kind of paper for a cover and another
for body pages.
For Windows
1 Open the le you want to print.
2 From the [File] menu, select [Print].
3 Click [Preferences] or [Properties].
4 On the [Setup] tab, click [Paper Feed
Options].
5 Select the [Use different source for
rst page] check box.
6 Select a source tray from [Source] and
click [OK].
If necessary, select a paper weight from the
[Weight] drop-down list.
1
1. Convenient Print Functions
2 From the [File] menu, select [Print].
3 Click [Preferences] or [Properties].
4 On the [Setup] tab, select [Booklet] at
[Finishing Mode].
5 Click [Options] and then set the booklet
printing options if necessary.
- [Signature]: Specify the number of pages
per side of each sheet of paper.
- [Right to Left] Print the booklet for
binding on the right.
6 Click [OK].
7 Congure other settings if necessary and
then start printing.
Memo
● When you want to make an A5 booklet using A4 sheets,
select [A4] for the paper size.
● When you cannot select this function, click [Start]>
[Devices and Printers]> right-click the
icon > select [Properties]>[
[Advanced]>[Print Processor]>[OPLAPP3]>[OK].
Your Printer (PCL)
Your Printer
]>
7 Congure other settings if necessary and
then start printing.
- 17 -
Page 18
12
34
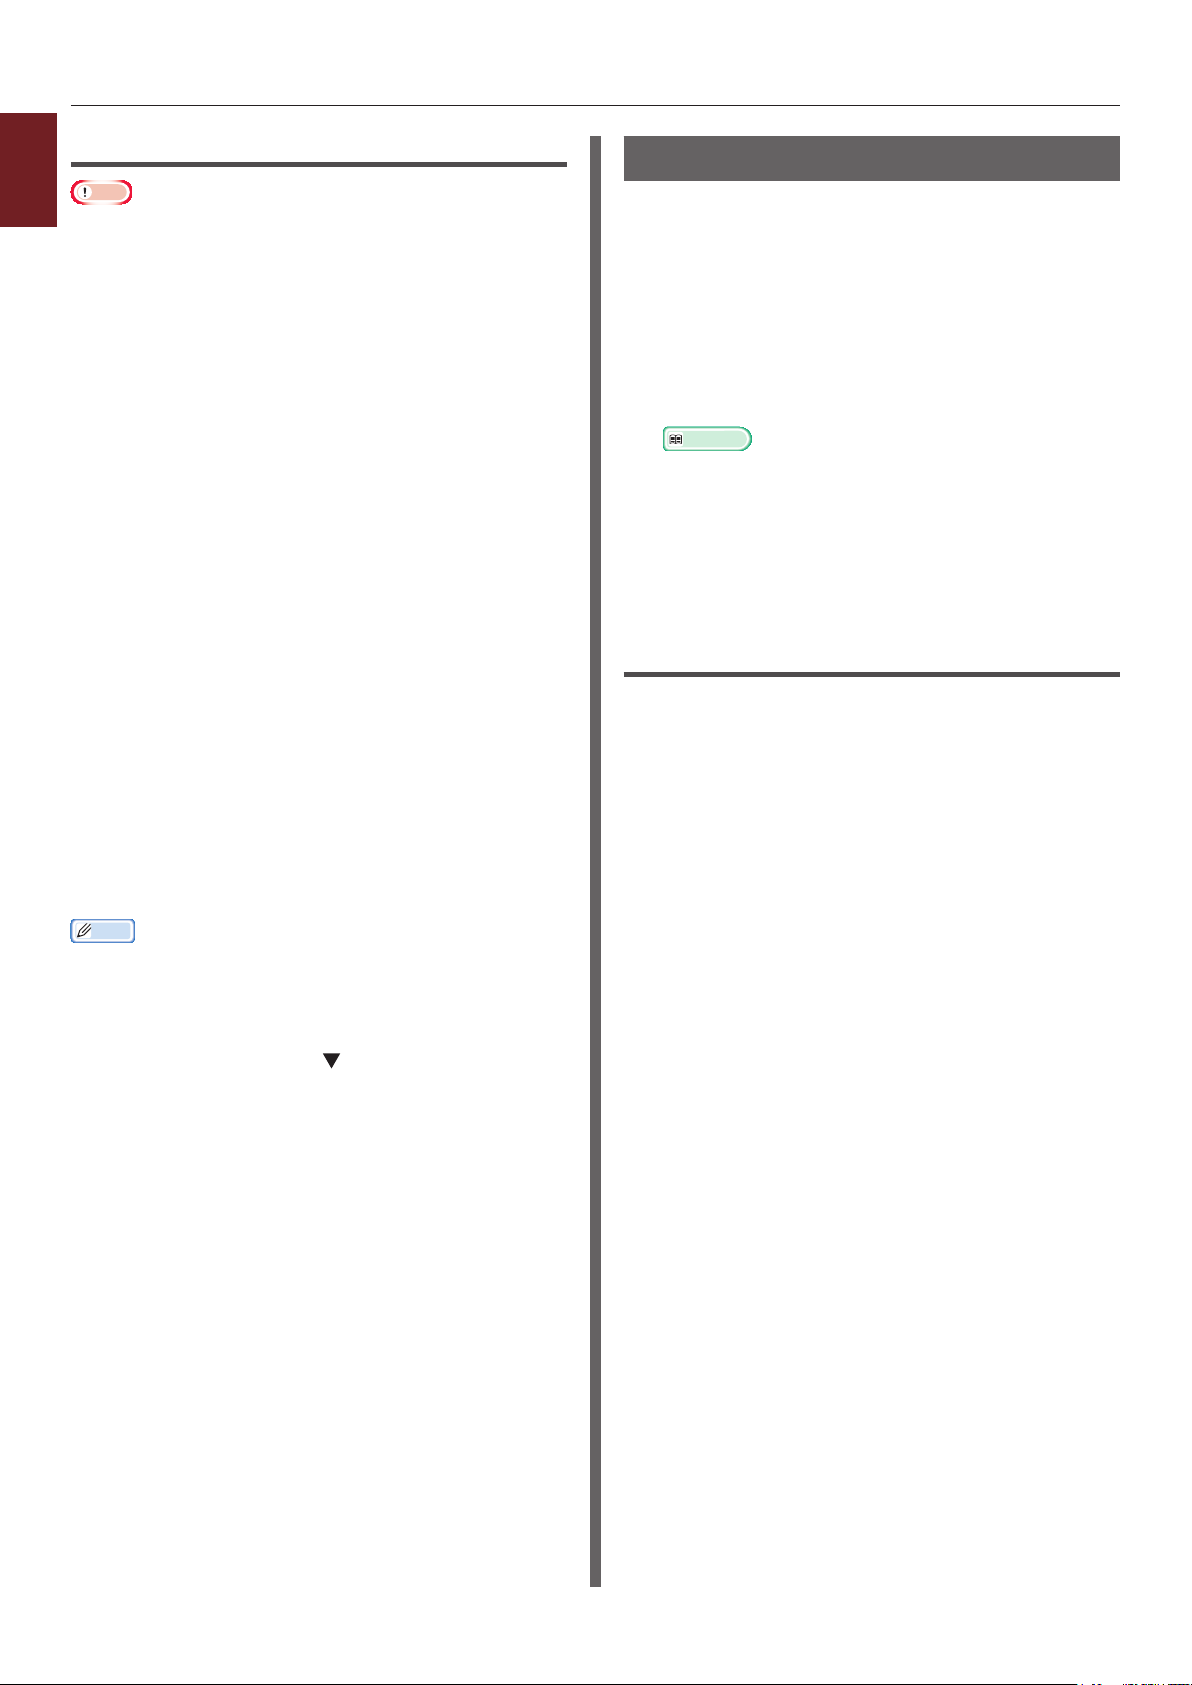
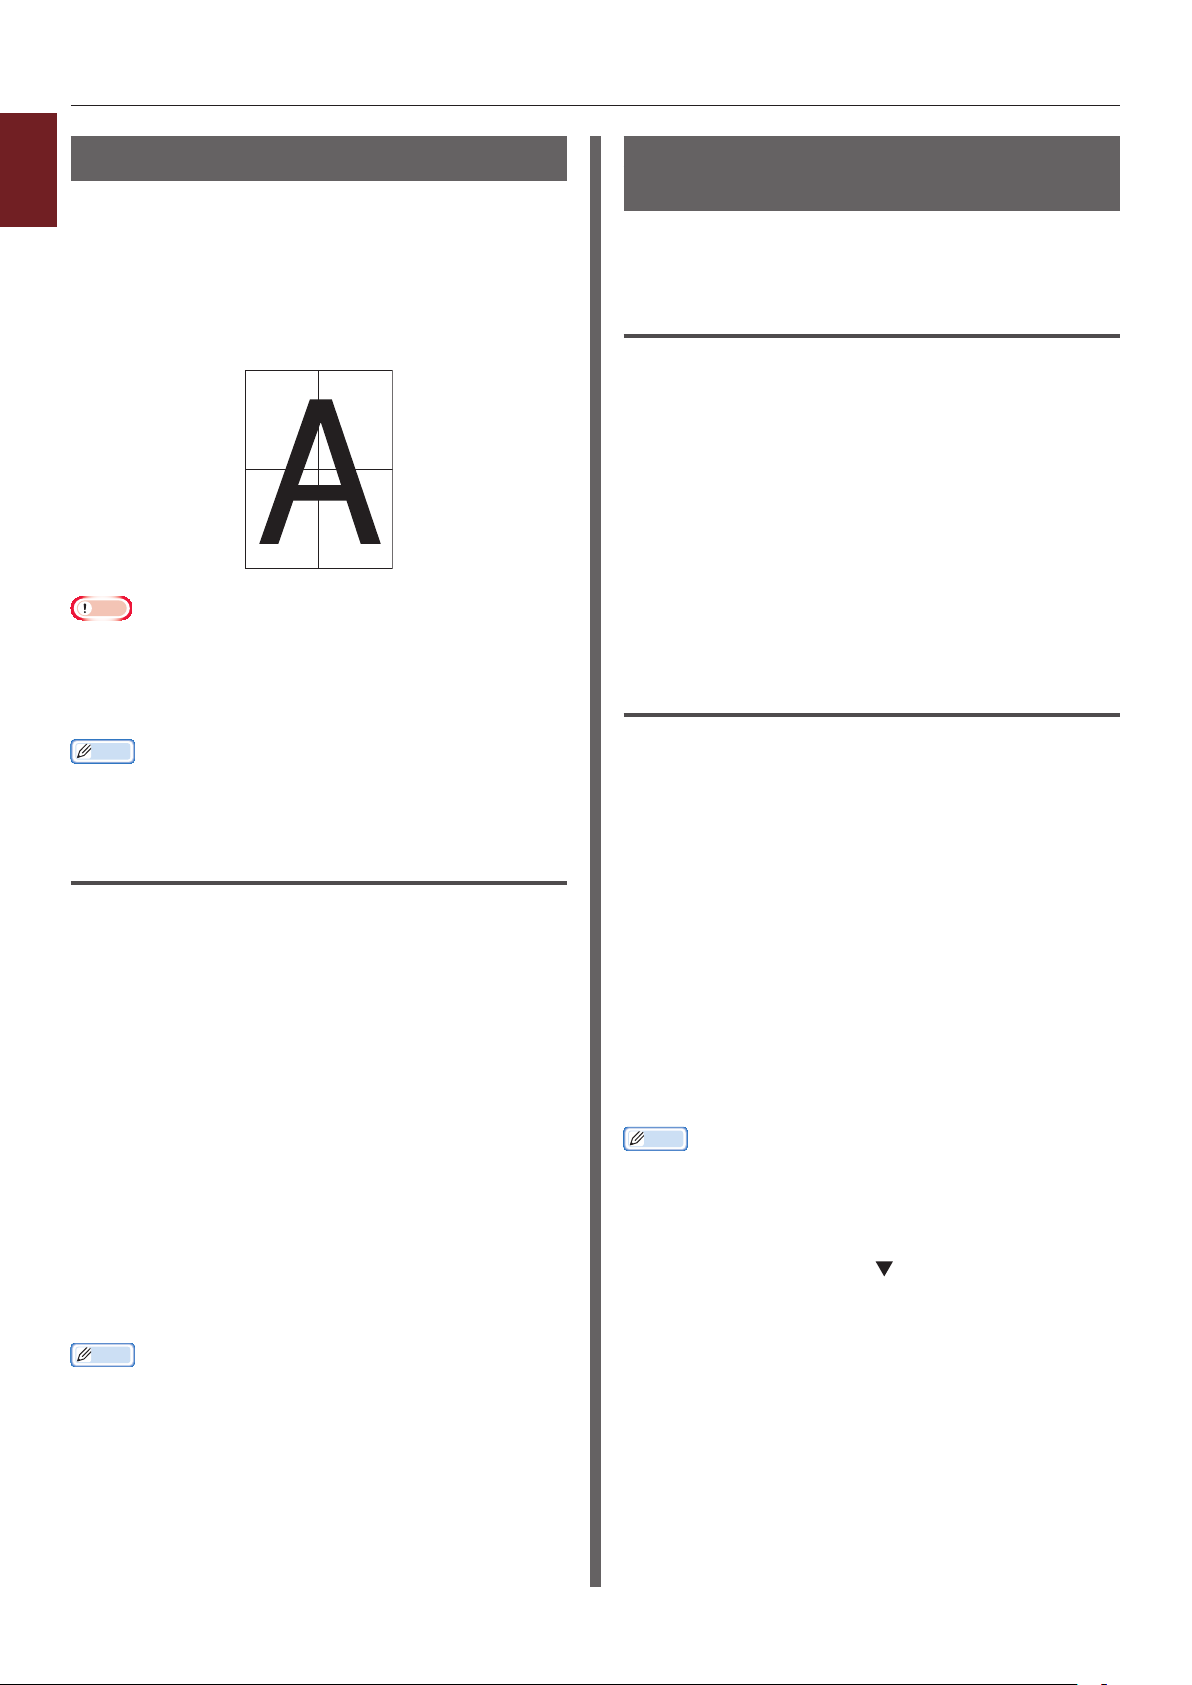
Poster Printing
1
You can print a poster by dividing a single
1. Convenient Print Functions
document into parts and printing it onto multiple
sheets of paper. Each part is enlarged and
printed on separate sheets of paper. You can
then combine the separate sheets to create a
poster.
Note
● This function is not available when you use a NetBEUI or
IPP network.
● This function is invalid when you use the encrypted secure
printing mode from a client computer sharing the printer
with a print server.
Memo
● When making an A3 size poster using two A4 size papers,
select [A4] for the paper size and [2] in [Enlarge]
respectively.
Changing Print Quality (Resolution)
You can change the print quality to suit your
needs.
For Windows
1 Open the le you want to print.
2 From the [File] menu, select [Print].
3 Click [Preferences] or [Properties].
4 Select the [Job Options] tab.
5 Select a print quality level at [Quality].
6 Congure other settings if necessary and
then start printing.
For Mac OS X
1 Open the le you want to print.
2 From the [File] menu, select [Print].
For Windows
1 Open the le you want to print.
2 From the [File] menu, select [Print].
3 Click [Preferences] or [Properties].
4 On the [Setup] tab, select
[PosterPrint] at [Finishing Mode].
5 Click [Options].
6 Set values for [Enlarge], [Add
Registration Marks], or [Add
Overlap] if necessary and press [OK].
7 Congure other settings if necessary and
then start printing.
Memo
● If you cannot select this function, click
[Start]>[Devices and Printers]> rightclick the
properties] > [
[Advanced]>[Print Processor]>[OPLAPP3]>[OK].
Your Printer
Your Printer (PCL)
icon > select [Printer
]>
3 For Mac OS X 10.3.9, select [Printer
Features] from the panel menu.
4 Select [Job Options] from the panel
menu.
5 Select a print quality level from [Print
Quality].
6 Congure other settings if necessary and
then start printing.
Memo
● If the print dialog does not contain the options you expect
to see on Mac OS X 10.7, click the [Show Details] button
on the bottom of the [Printer] menu.
● If the print dialog contains only two menu items and
does not contain the options you expect to see on Mac
OS X 10.5 to 10.6, click the button on the side of the
[Printer] menu.
- 18 -
Page 19

Enhancing Photos
You can print photographs more vividly.
For Windows
1 Open the le you want to print.
2 From the [File] menu, select [Print].
3 Click [Preferences] or [Properties].
4 Select the [Job Options] tab.
5 Select the [Photo Enhance] check box.
6 Congure other settings if necessary and
then start printing.
For Mac OS X
1 Open the le you want to print.
2 From the [File] menu, select [Print].
3 Select [Job Options] from the panel
menu.
Printing Color Data in Grayscale
You can print color documents in grayscale.
For Windows
1 Open the le you want to print.
2 Select [Print] from the [File] menu.
3 Click on [Preferences] or [Properties].
4 On the [Setup] tab, select
[Monochrome].
5 Click on [OK].
Memo
● Selecting [Monochrome] on the printer driver enables
you to print a color document in grayscale even when the
cyan, magenta, and yellow toners are empty.
For Mac OS X
1 Open the le you want to print.
2 From the [File] menu, select [Print].
1
1. Convenient Print Functions
4 Select the [Photo Enhance] check box.
5 Congure other settings if necessary and
then start printing.
Memo
● If the print dialog does not contain the options you expect
to see on Mac OS X 10.7, click the [Show Details] button
on the bottom of the [Printer] menu.
● If the print dialog contains only two menu items and
does not contain the options you expect to see on Mac
OS X 10.5 to 10.6, click the button on the side of the
[Printer] menu.
3 For Mac OS X 10.3.9, select [Printer
Features] from the panel menu.
4 Select [Color] from the panel menu.
5 Select [Grayscale].
6 Click on [Print].
Memo
● Selecting [Grayscale] on the printer driver enables you
to print a color document in grayscale even when the
cyan, magenta, and yellow toners are empty.
● If the print dialog does not contain the options you expect
to see on Mac OS X 10.7, click the [Show Details] button
on the bottom of the [Printer] menu.
● If the print dialog contains only two menu items and
does not contain the options you expect to see on Mac
OS X 10.5 to 10.6, click the button on the side of the
[Printer] menu.
- 19 -
Page 20

Emphasizing Fine Lines
1
You can print ne lines and small characters
1. Convenient Print Functions
clearer.
Memo
● This function is turned on by default.
● With some applications, if this function is turned on,
the spaces in bar codes may become too narrow. If this
happens, turn off this function.
For Windows
1 Open the le you want to print.
2 From the [File] menu, select [Print].
3 Click [Preferences] or [Properties].
4 Select the [Job Options] tab.
5 Click the [Advanced].
6 Set the [Adjust ultra ne lines] to
[On] and then click [OK].
7 Congure other settings if necessary and
then start printing.
Auto Tray Selection
You can set in the printer driver to automatically
switch paper feed trays with the same size of
paper loaded.
First, set on the operator panel for the MP tray
to be available for auto selection. Then, set the
auto selection of the tray with the printer driver.
Note
● Make sure to set a paper size for Tray1, Tray2 (option)
and MP tray. Available paper size differs depending on
each tray. For details, refer to the User’s Manual (Setup).
Memo
● In the default settings, the [Tray Usage] is [Do Not
Use]. When at default settings, the MP tray is not
supported by the auto tray switching function.
1 Press the <Fn> key.
Memo
● When a printer is in the power saving mode, press
the <POWER SAVE> button to restore from the
mode.
2 Enter <9> and <5> using the ten-key
pad and press the <ENTER> button.
3 Press the scroll button to select
[When Mismatching] and then press
the <ENTER> button.
4 Press the <ON LINE> button to exit the
menu mode.
5 Specify a paper tray in the printer driver
and start printing.
For Windows
1 Open the le you want to print.
2 From the [File] menu, select [Print].
3 Click [Preferences] or [Properties].
4 On the [Setup] tab, select [Auto] from
[Source].
5 Congure other settings if necessary and
then start printing.
- 20 -
Page 21

For Mac OS X
1 Open the le you want to print.
2 From the [File] menu, select [Print].
3 For Mac OS X 10.3.9, select [Printer
Features] from the panel menu.
4 Select [Setup] from the panel menu.
5 Select [Auto] from [Paper Source].
6 Congure other settings if necessary and
then start printing.
Memo
● If the print dialog does not contain the options you expect
to see on Mac OS X 10.7, click the [Show Details] button
on the bottom of the [Printer] menu.
● If the print dialog contains only two menu items and
does not contain the options you expect to see on Mac
OS X 10.5 to 10.6, click the
[Printer] menu.
button on the side of the
Auto Tray Switching
You can switch paper feed trays automatically.
When a tray runs out of paper while printing, the
printer locates another tray with the same size
of paper on the printer driver and begins feeding
paper from that tray.
This function is effective for large print jobs of
the same paper size.
First, set on the operator panel for the MP tray
to be available for auto selection. Then, set the
auto switching of the tray with the printer driver.
Note
● Make sure to set the same values (paper size, media type,
media weight) for each tray used for auto tray switching.
Available paper size differs depending on each tray. For
details, refer to the User’s Manual (Setup).
Memo
● In the default settings, the [Tray Usage] is [Do Not
Use]. When at default settings, the MP tray is not
supported by the auto tray switching function.
1 Press the <Fn> key.
Memo
● When a printer is in the power saving mode, press
the <POWER SAVE> button to restore from the
mode.
1
1. Convenient Print Functions
2 Enter <9> and <5> using the ten-key
pad and press the <ENTER> button.
3 Press the scroll button to select
[When Mismatching] and then press
the <ENTER> button.
4 Press the <ON LINE> button to exit the
menu mode.
5 Congure the paper source setting on
the print dialog.
- 21 -
Page 22

For Windows
1
1 Open the le you want to print.
1. Convenient Print Functions
2 From the [File] menu, select [Print].
3 Click [Preferences] or [Properties].
4 On the [Setup] tab, click [Paper Feed
Options].
5 Select the [Auto Tray Change] check
box in [Paper Feed Options] and then
click [OK].
6 Congure other settings if necessary and
then start printing.
For Mac OS X
1 Open the le you want to print.
2 From the [File] menu, select [Print].
Saving Toner
You can print your documents using less toner.
This function controls the amount of toner by
brightening up the whole page image.
You can adjust the amount of toner in three
levels as noted below:
[Printer setting]: Conforms to the printer
setting.
[Off]: Prints at normal density without saving
toner.
[Saving amount Small]: Prints at a somewhat
lower density.
[Saving amount Intermediate]: Prints at a
low density.
[Saving amount Large]: Prints at a very low
density.
Memo
● The density of the printed images with this function may
vary depending on the document being printed.
3 For Mac OS X 10.3.9, select [Printer
Features] from the panel menu.
4 Select [Setup] from the panel menu.
5 Click [Printer Options].
6 Select [Auto tray switch] check box.
7 Congure other settings if necessary and
then start printing.
Memo
● If the print dialog does not contain the options you expect
to see on Mac OS X 10.7, click the [Show Details] button
on the bottom of the [Printer] menu.
● If the print dialog contains only two menu items and
does not contain the options you expect to see on Mac
OS X 10.5 to 10.6, click the button on the side of the
[Printer] menu.
For Windows
1 Open the le you want to print.
2 From the [File] menu, select [Print].
3 Click [Preferences] or [Properties].
4 On the [Setup] tab, select an
appropriate value from the drop-down
list in [Toner Saving].
5 Congure other settings if necessary and
then start printing.
- 22 -
Page 23

For Mac OS X
1 Open the le you want to print.
2 From the [File] menu, select [Print].
3 For Mac OS X 10.3.9, select [Printer
Features] from the panel menu.
4 Select [Color] from the panel menu.
5 Select an appropriate value in
[Toner save].
6 Congure other settings if necessary and
then start printing.
Memo
● If the print dialog does not contain the options you expect
to see on Mac OS X 10.7, click the [Show Details] button
on the bottom of the [Printer] menu.
● If the print dialog contains only two menu items and
does not contain the options you expect to see on Mac
OS X 10.5 to 10.6, click the button on the side of the
[Printer] menu.
Secure Printing
You can assign a password to a print job so it
can only be printed if the password is input at
the operator panel.
In order to use this function, the printer must be
equipped with the optional SD memory card kit.
Note
● If the spooled data cannot be stored in the SD memory
card because of a memory shortage, a message indicating
that the data is invalid appears.
For Windows
1 Open the le you want to print.
2 From the [File] menu, select [Print].
3 Click [Preferences] or [Properties].
4 Select the [Job Options] tab.
5 Select [Secure Print] at [Job Type].
1
1. Convenient Print Functions
6 Enter a job name in the [Job Name]
box and a password in the [Job
Password] box.
If you select the [Request Job Name for each
print job] check box, a prompt for the job name
appears when you send the print job to the
printer.
7 Click [OK].
8 Congure other settings if necessary and
then start printing.
The print job is sent to the printer, but is not
printed.
9 Press the <Fn> key.
Memo
● When a printer is in the power saving mode, press
the <POWER SAVE> button to restore from the
mode.
10 Enter <0>, <0> and <2> using the
ten-key pad and press the <ENTER>
button.
- 23 -
Page 24

11 Enter your password set in the step 6
1
1. Convenient Print Functions
in the [Password] box and then press
the <ENTER> button to start a job
searching.
- Press the <CLEAR> key if you enter a
wrong number.
- Press the <CANCEL> button if you want
to stop the job search.
12 Make sure that [Print] is selected and
press the <ENTER> button.
If you select [Delete], you can cancel the print
job.
13 Enter the number of copies and then
press the <ENTER> button.
Note
● If you forget your password set for a job and do not print
the job transmitted to the printer, the job remains in the
SD memory card.
For how to delete the job stored in the SD memory card,
refer to “Delete Unwanted Jobs From an SD Memory Card”
P.66
Encrypted Secure Printing
You can encrypt your documents before sending
them from a computer to the printer. That
way, you can prevent unauthorized access to
condential information.
The document remains unprinted and stored in
an encrypted format on the SD memory card
in the printer until you enter the registered
password at the operator panel.
The print job stored on the SD memory card is
automatically deleted after printing or if it is not
printed for more than a certain period of time.
If an error occurs when the data is sent or if an
unauthorized person is detected trying to access
the job, it is automatically deleted.
Note
● The period of time a printer is turned off is not included in
the storage period of the SD memory.
● If a printer turned off automatically through the sleep
mode, the period of time a printer had been in the sleep
mode is not included in the storage period of the SD
memory card.
● If the spooled data cannot be stored in the SD memory
card because of a memory shortage, a message indicating
that the data is invalid appears.
● If the spooled data cannot be stored in the SD memory
card because of a memory shortage, a message indicating
that the data is invalid appears and the print job does not
start. In this case, shortening the storing period of a print
job specied in a printer driver prevents spooled data
from increasing.
● You cannot use this function with the poster printing mode
and the booklet mode if you share the printer with a print
server.
● When you use this function, clear the [Give Priority to
the host release] check box. For details, refer to “Using
a Print Buffer” P.30.
- 24 -
Page 25
For Windows
1 Open the le you want to print.
2 From the [File] menu, select [Print].
3 Click [Preferences] or [Properties].
4 Select the [Job Options] tab.
5 Select [Encrypted Secure Print].
6 Enter a password in the [Password]
box and congure other options if
necessary.
Reference
● For details on the options, refer to the on-screen
explanations of the driver.
7 Click [OK].
8 Congure other settings if necessary and
then start printing.
The print job is sent to the printer, but is not
printed.
Watermark Printing
You can print a watermark in addition to the text
of the printed le.
Note
● Watermarks are not printed properly for booklet printing.
For Windows
1 Open the le you want to print.
2 From the [File] menu, select [Print].
3 Click [Preferences] or [Properties].
4 Select [Extend] tab.
5 Click [Watermarks].
6 Click [New].
7 Specify a text, size, angle, trim and
position for the watermark and then click
[OK].
1
1. Convenient Print Functions
9 Press the <Fn> key.
Memo
● When a printer is in the power saving mode, press
the <POWER SAVE> button to restore from the
mode.
10 Enter <0>, <0> and <1> using the
ten-key pad and press the <ENTER>
button.
11 Enter the password you set in step 6
in the [Password] box and then press
the <ENTER> button to start a job
searching.
- Press the <CLEAR> key if you enter a
wrong number.
- Press the <CANCEL> button if you want
to stop the job search.
12 Make sure that [Print] is selected and
press the <ENTER> button.
If you select [Delete], you can delete the print
job, and all of the encrypted jobs with the same
password are deleted as well.
8 Click [OK].
9 Congure other settings if necessary and
then start printing.
- 25 -
Page 26

Overlay Printing
1
You can print overlays such as logos or forms on
1. Convenient Print Functions
documents.
In order to use this function, the printer must be
equipped with the optional SD memory card kit.
Reference
● For details of the Conguration Tool and how to install the
Conguration Tool, refer to “Conguration Tool” P.63.
1 Create an overlay with the Conguration
Tool and register it on the printer.
Reference
● “Printing Out Print Information” P.44.
2 Dene the overlay on the printer driver
and start printing.
For Windows
Memo
● Overlay is a group of forms. Three forms can be
registered in an overlay.
The forms are printed overlaid in the order that they were
registered. The form registered last is printed at the top.
14 Click [OK].
15 Congure other settings if necessary and
then start printing.
Reference
● “Conguration Tool” P.63.
1 Open the le you want to print.
2 From the [File] menu, select [Print].
3 Click [Preferences] or [Properties].
4 Select the [Extend] tab.
5 Click [Overlays].
6 Select the [Print Using Active
Overlays] check box.
7 Click [Dene Overlays].
8 Enter a name for the overlay in
[Overlay Name].
9 Enter the ID of the form you registered
in the Conguration Tool in the [ID].
10 Select the pages of the document on
which to print the overlay from the
[Print on Pages] drop-down list.
11 Click [Add].
12 Click [Close].
13 Select the overlay to use from the
[Dened Overlays] and click [Add].
- 26 -
Page 27

Storing Print Data
You can store print data on the SD memory card
installed on the printer and print it as needed
from the operator panel by entering a password.
Note
● If the spooled data cannot be stored in the SD memory
card because of a memory shortage, a message indicating
that the data is invalid appears.
For Windows
1 Open the le you want to print.
2 From the [File] menu, select [Print].
3 Click [Preferences] or [Properties].
4 Select the [Job Options] tab.
5 Check [Store for Re-print].
6 Enter a job name in the [Job Name]
box and a password in the [Job
Password] box.
If you check the [Request Job Name for each
print job] box, a prompt for the job name
appears when you send the job to the printer.
11 Enter the password you set in step 6
in the [Password] box and then press
the <ENTER> button to start a job
searching.
- Press the <CLEAR> key if you enter a
wrong number.
- Press the <CANCEL> button if you want
to stop the job search.
12 Make sure that [Print] is selected and
then press the <ENTER> button.
If you select [Delete], you can delete the print
job.
13 Enter the number of copies and then
press the <ENTER> button.
Reference
● You can delete stored print data with the Conguration
Tool. For details, refer to “Delete Unwanted Jobs From an
SD Memory Card” P.66.
1
1. Convenient Print Functions
7 Click [OK].
8 Congure other settings if necessary and
then start printing.
The print job is sent to the printer, but is not
printed.
9 Press the <Fn> key.
Memo
● When a printer is in the power saving mode, press
the <POWER SAVE> button to restore from the
mode.
10 Enter <0>, <0> and <2> using the
ten-key pad and press the <ENTER>
button.
- 27 -
Page 28
Saving the Driver Settings
1
You can save the printer driver settings.
1. Convenient Print Functions
For Windows
Saving the Settings
1 Click [Start] and select [Devices and
Printers].
2 Right-click the
Your Printer
icon and
then select the type of driver you want
to specify from [Printing preferences].
3 Congure the print settings to save.
4 On the [Setup] tab, select [Current
setting] from the drop-down list in
[Driver Setting] and then click [Save].
5 Specify a name for the setting to save
and then click [OK].
If you select the [Form information is kept.]
check box, the paper conguration on the
[Setup] tab is also saved.
Changing the Driver's Default Settings
You can use as the printer driver’s default
settings print settings that you often use.
For Windows
1 Click [Start] and select [Devices and
Printers].
2 Right-click the
then select the type of driver you want
to change from [Printing preferences].
3 Congure the print settings to use as the
driver’s default setting.
4 Click [OK].
For Mac OS X
1 Open a le.
2 From the [File] menu, select [Print].
Your Printer
icon and
6 Click [OK] to close the print setup dialog
box.
Memo
● Up to 14 forms can be stored.
Using the Saved Settings
1 Open the le you want to print.
2 From the [File] menu, select [Print].
3 Click [Preferences] or [Properties].
4 On the [Setup] tab, select a setting you
want to use from [Driver Setting].
5 Start printing.
3 Congure the print settings to use as the
driver’s default settings.
4 Select [Save Current Settings as
Preset] ([Save As] for Mac OS X 10.3.9
to 10.6) from [Presets].
5 Enter a name for the settings and click
[OK].
6 Click [Cancel].
Note
● To use the saved settings, select the name from
[Presets] in the print dialog.
Memo
● If the print dialog does not contain the options you expect
to see on Mac OS X 10.7, click the [Show Details] button
on the bottom of the [Printer] menu.
● If the print dialog contains only two menu items and
does not contain the options you expect to see on Mac
OS X 10.5 to 10.6, click the button on the side of the
[Printer] menu.
- 28 -
Page 29

Using Printer Fonts
You can print your documents using pre-installed
printer fonts by substituting them for TrueType
fonts in the computer.
Note
● The printer fonts do not exactly duplicate the appearance
of the TrueType fonts seen on screen.
● This function is not available in some applications.
For Windows
1 Open the le you want to print.
2 From the [File] menu, select [Print].
3 Click [Preferences] or [Properties].
4 Select the [Extend] tab.
5 Click [Fonts].
6 Select the [Font Substitution] check
box.
7 Specify which printer fonts to use
instead of TrueType fonts in the [Font
Substitution Table].
8 Click [OK].
Using Computer Fonts
You can print your documents using TrueType
fonts in the computer to retain the same font
appearance as on the computer screen.
For Windows
1 Open the le you want to print.
2 From the [File] menu, select [Print].
3 Click [Preferences] or [Properties].
4 Select the [Extend] tab.
5 Click [Fonts].
6 Deselect the [Font Substitution] check
box, select either of the following fonts
and then click [OK].
- [Download as Outline Font]
Font images are created by the printer.
- [Download as Bitmap Font]
Font images are created by the printer driver
7 Congure other settings if necessary and
then start printing.
1
1. Convenient Print Functions
9 Congure other settings if necessary and
then start printing.
- 29 -
Page 30
Using a Print Buffer
1
You can spool a print job in the SD memory
1. Convenient Print Functions
card installed in the printer. This function frees
memory on your computer so it can handle other
tasks faster while the printer is running in the
background.
Note
● If the spooled data cannot be stored in the SD memory
card because of a memory shortage, a message indicating
that the data is invalid appears.
For Windows
1 Open the le you want to print.
2 From the [File] menu, select [Print].
3 Click [Preferences] or [Properties].
4 Select the [Job Options] tab.
5 Click [Advanced].
6 Scroll the screen downward, the
[Job Spool] to [On] and click [OK].
7 Start printing on the print dialog.
Changing the Mono-Print Mode
You can adjust the print mode for monochrome
pages.
Memo
● To enter the [Admin Setup] menu, an administrator
password is necessary. The default password is “aaaaaa”.
1 Press the <ENTER> button on the
operator panel.
2 Press the scroll button to select
[Admin Setup] and then press the
<ENTER> button.
3 Enter the administrator password using
the ten-key pad.
4 Press the <ENTER> button.
5 Press the scroll button to select
[Print Setup] and then press the
<ENTER> button.
6 Press the scroll button to select
[Mono-Print Mode] and then press the
<ENTER> button.
7 Select a speed mode and then press the
<ENTER> button.
- [Auto]:
When the rst page is a monochrome
page, it is printed only with a black image
drum, and when a color page appears, it is
printed with four color image drums. After
that, even a monochrome page is printed
using four color image drums.
- [Color Mode]:
Always printed with four color image
drums.
- [Normal Mode]:
For a monochrome page, it is printed with
a black image drum, and for a color page,
it is printed with four color image drums.
8 Press the <ON LINE> button to exit the
menu mode.
- 30 -
Page 31

Printing to File
You can print a document to a le, without
printing it out on paper.
Note
● You must be logged on your computer as an administrator.
For Windows
1 Click [Start] and select [Devices and
Printers].
2 Right-click the [OKI C822] icon and
then select [Printer properties].
3 Select the [Ports] tab.
4 Select [FILE:] from the port list and
click [OK].
5 Start printing on the print dialog.
6 Enter the name of a le and then click
[OK].
Changing Emulation Mode
You can select the emulation mode.
Memo
● To enter the [Admin Setup] menu, an administrator
password is necessary. The default password is “aaaaaa”.
1 Press the <ENTER> button on the
operator panel.
2 Press the scroll button to select
[Admin Setup] and then press the
<ENTER> button.
3 Enter the administrator password using
the ten-key pad.
4 Press the <ENTER> button.
5 Press the scroll button to select
[Print Setup] and then press the
<ENTER> button.
6 Make sure that [Personality] is selected
and then press the <ENTER> button.
1
1. Convenient Print Functions
For Mac OS X
Note
● This function is available when the printer is in a state
where it can print.
1 Open the le you want to print.
2 From the [File] menu, select [Print].
3 For Mac OS X 10.3.9, select [Printer
Features] from the panel menu.
4 Select [Job Options] from the panel
menu.
5 Click [Advanced].
6 Select [Output to le] check box.
7 Congure other settings if necessary and
then start printing.
8 Launch the Finder and select [Go to
Folder] from [Go] menu.
7 Press the scroll button to select an
emulation mode and then press the
<ENTER> button.
8 Press the <ON LINE> button to exit the
menu mode.
9 Enter [/tmp].
10 Click [Go].
11 [_OkiOutput_.dat] le is created in the
displayed folder.
- 31 -
Page 32

2. Adjusting Color
This chapter explains various color adjustment methods.
Memo
● In this chapter, Notepad will be used as an example of Windows, and TextEdit will be used as an example for Mac OS X. The
2
2. Adjusting Color
operation may differ depending on the application or the version of the printer driver you are using.
Adjusting Color on the Control Panel
This section explains the method of adjusting color for the printer using the control panel.
Adjusting Color Registration
The printer automatically adjusts the color
registration when the AC cord is plugged
or unplugged, the top cover is opened or
closed, and every time 400 pages are printed
continuously.
You can also adjust the color registration
manually if you are not satised with the quality
of the color on the printouts.
1 Press the <Fn> key.
Memo
● When a printer is in the power saving mode, press
the <POWER SAVE> button to restore from the
mode.
2 Enter <3>, <0> and <1> using the
ten-key pad and press the <ENTER>
button.
3 Make sure that [Execute] is selected
and then press the <ENTER> button.
Memo
● The message [Color Adjusting] appears in the second
line (under [Ready To Print]) of the operator panel
display while adjusting the color registration.
Adjusting the Density
The printer automatically adjusts the density
when a toner cartridge, an image drum cartridge
or a belt is changed and every time 500 pages
are printed continuously.
You can also adjust the density manually if
you are not satised with the density of the
printouts.
1 Press the <Fn> key.
Memo
● When a printer is in the power saving mode, press
the <POWER SAVE> button to restore from the
mode.
2 Enter <3>, <0> and <0> using the
ten-key pad and press the <ENTER>
button.
3 Make sure that [Execute] is selected
and then press the <ENTER> button.
Memo
● The message [Density Adjusting] appears in the second
line (under [Ready To Print]) of the operator panel
display while adjusting the color density.
- 32 -
Page 33

Adjusting the Color Balance (Density)
You can adjust the density of each color. You can
select a light, medium, or dark density for each
color.
Adjusting Color on the Control Panel
2
Printing Color Swatch
1 Press the <Fn> key.
Memo
● When a printer is in the power saving mode, press
the <POWER SAVE> button to restore from the
mode.
2 Enter <3>, <0> and <2> using the
ten-key pad and press the <ENTER>
button.
3 Make sure that [Execute] is selected
and then press the <ENTER> button.
A color swatch is printed.
Memo
● On the color tuning pattern, 44 squares are printed. The
present setting of the light, medium, and dark colors are
indicated with dashed lines. You can check the color to be
adjusted.
Adjusting the Color
2. Adjusting Color
1 Press the <ENTER> button.
2 Press the scroll button to select
[Calibration] and then press the
<ENTER> button.
3 Press the scroll button to select
[Cyan Darkness], [Magenta
Darkness], [Yellow Darkness] or
[Black Darkness], and then press the
<ENTER> button.
4 Press the scroll button to select
[Highlight], [Mid-Tone] or [Dark],
and then press the <ENTER> button.
5 Press the scroll button or , select
the value you want and then press the
<ENTER> button.
6 Press the <ON LINE> button to exit the
menu mode.
- 33 -
Page 34

Adjusting Color on the Computer
Adjusting Color on the Computer
This section explains how to adjust color when printing. You can adjust the color using a printer driver
to print out more satisfactory documents.
Color Matching means managing and adjusting documents color to keep it consistent between input
2
and output devices.
There are two color matching functions: [Ofce Color] and [Graphic Pro] ([Color (User Settings)]
2. Adjusting Color
if you use a XPS driver). If you use Mac OS X, you can also use [ColorSync] function to do color
matching.
Color Matching (Automatic)
If you use business documents mainly,
Automatic is suitable. Color matching is applied
when RGB color space print data is converted to
CMYK color space for the printer.
Note
● This function can support only RGB color data.
● If you want to manage CMYK color data, use the Graphic
Pro function.
For Windows
1 Open the le you want to print.
2 Select [Print] from the [File] menu.
3 Click on [Preferences] or [Properties].
4 Click [Detail] on the [Color Setting]
and select [Automatic], and then click
[OK].
Color Matching (Ofce Color)
If you use business documents mainly, Ofce
Color is suitable. Color matching is applied when
RGB color space print data is converted to CMYK
color space for the printer.
Note
● This function can support only RGB color data.
● If you want to manage CMYK color data, use the Graphic
Pro function.
For Windows
1 Open the le you want to print.
2 Select [Print] from the [File] menu.
3 Click on [Preferences] or [Properties].
4 Click [Detail] on the [Color Setting]
and select [Ofce Pro], and then click
[OK].
For Mac OS X
1 Open the le you want to print.
2 From the [File] menu, select [Print].
3 For Mac OS X 10.3.9, select [Printer
Features] from the panel menu.
4 Select [Color] from the panel menu.
5 Select [Automatic] and then click
[Print].
Memo
● If the print dialog does not contain the options you expect
to see on Mac OS X 10.7, click the [Show Details] button
on the bottom of the [Printer] menu.
● If the print dialog contains only two menu items and
does not contain the options you expect to see on Mac
OS X 10.5 to 10.6, click the button on the side of the
[Printer] menu.
For Mac OS X
1 Open the le you want to print.
2 From the [File] menu, select [Print].
3 For Mac OS X 10.3.9, select [Printer
Features] from the panel menu.
4 Select [Color] from the panel menu.
5 Select [Ofce Color] or [Automatic]
and then click [Print].
Memo
● If the print dialog does not contain the options you expect
to see on Mac OS X 10.7, click the [Show Details] button
on the bottom of the [Printer] menu.
● If the print dialog contains only two menu items and
does not contain the options you expect to see on Mac
OS X 10.5 to 10.6, click the button on the side of the
[Printer] menu.
- 34 -
Page 35

Adjusting Color on the Computer
Color Matching (Graphic Pro)
The Graphic Pro function is suitable for using the
DTP software. You can specify the simulation of
printing with the CMYK output devices.
If using ICC proles for an input/output device in
a color matching, registering an ICC proles in
a printer is required in advance. For registering
ICC proles, refer to “Registering an ICC Prole”
P.64.
Note
● Link proles for CMYK cannot be specied.
● When installing ICC proles with the Windows PC printer
driver, on the [Layout] tab, click [Advanced] and select
[ICM Method] in [ICM Disabled].
● This function is not available with the Windows XPS
printer driver
For Windows
1 Open the le you want to print.
2 Select [Print] from the [File] menu.
Color Matching (No Color Matching)
You can print in the specied color without colors
being adjusted by a printer or a printer driver.
This function is suitable for colors matched with
an application.
For Windows
1 Open the le you want to print.
2 Select [Print] from the [File] menu.
3 Click on [Preferences] or [Properties].
4 Click [Detail] on the [Color Setting]
and select [No Color Matching], and
then click [OK].
For Mac OS X
1 Open the le you want to print.
2
2. Adjusting Color
3 Click on [Preferences] or [Properties].
4 Click [Detail] on the [Color Setting]
and select [Graphic Pro], and then click
[OK].
2 From the [File] menu, select [Print].
3 For Mac OS X 10.3.9, select [Printer
Features] from the panel menu.
4 Select [Color] from the panel menu.
5 Select [No Color Matching] or
[Automatic] and then click [Print].
Memo
● If the print dialog does not contain the options you expect
to see on Mac OS X 10.7, click the [Show Details] button
on the bottom of the [Printer] menu.
● If the print dialog contains only two menu items and
does not contain the options you expect to see on Mac
OS X 10.5 to 10.6, click the button on the side of the
[Printer] menu.
- 35 -
Page 36

Adjusting Color on the Computer
Changing Black Finish
You can change the black nish when printing in
color. The black nish setting can be used when
[Ofce Color] or [Graphic Pro] is selected in
the printer driver.
2
There are two types of black nish: composite
black (made from CMYK toner) and true black
2. Adjusting Color
(made from black toner only).
There are two types of black nishes; one is
composed of cyan (C), magenta (M), yellow (Y)
and black (K) toners, and the other is composed
of a black (K) toner only. A black nish using
CMYK toners is suitable for printing photographs.
A black nish using a black toner only is suitable
for printing black text or graphics.
If you use the [Ofce Color] function, you can
also select the auto. For the auto, the suitable
method is selected automatically to print out
the document. If Automatic is selected the
appropriate method will be set when printing.
For Windows
7 Click on [OK].
Memo
● If the print dialog does not contain the options you expect
to see on Mac OS X 10.7, click the [Show Details] button
on the bottom of the [Printer] menu.
● If the print dialog contains only two menu items and
does not contain the options you expect to see on Mac
OS X 10.5 to 10.6, click the button on the side of the
[Printer] menu.
1 Open the le you want to print.
2 Select [Print] from the [File] menu.
3 Click on [Preferences] or [Properties].
4 Click [Detail] on the [Color Setting]
and select [Ofce Pro] or [Graphic
Pro].
5 Select the method to create black from
[Black Finish].
6 Click [OK] to close the Details window.
7 Click on [OK].
For Mac OS X
1 Open the le you want to print.
2 From the [File] menu, select [Print].
3 For Mac OS X 10.3.9, select [Printer
Features] from the panel menu.
4 Select [Color] from the panel menu.
5 Select [Ofce Color] and then click
[Options].
6 Select the method to create black from
[Black Finish].
- 36 -
Page 37

Adjusting Color on the Computer
Eliminating White Gap Between Text and Background (Overprinting black)
Depending on the conditions of use, you can
set black to overprint and reduce the white gap
between black letters and colored background.
Note
● This function cannot be used with some applications.
● This function can be used when printing only text over a
background color.
● If the toner layer is thick, the toner may not be xed
rmly.
For Windows
1 Open the le you want to print.
2 Select [Print] from the [File] menu.
3 Click on [Preferences] or [Properties].
4 On the [Job Options] tab, Select
[Advanced].
5 Set [Overprint Black] to [On] and then
click [OK].
Simulating Printing Results for Ink
You can simulate output such as that of an offset
printing press by adjusting the CMYK color data.
Note
● Windows XPS printer driver cannot be used for this
function.
● This function can be used when the [Ofce Color] or
[Graphic Pro] is selected for [Color Mode].
For Windows
1 Open the le you want to print.
2 Select [Print] from the [File] menu.
3 Click on [Preferences] or [Properties].
4 Click [Detail] on the [Color Setting]
and select [Graphic Pro].
5 Select [Printer Simulation].
6 Select an ink feature you want to
simulate from [Simulation Target
Prole] on [Input Prole] and click
[OK].
2
2. Adjusting Color
- 37 -
Page 38

Adjusting Color with Color Correct Utility
Adjusting Color with Color Correct Utility
This section explains the Color Correct Utility. You can specify the colors on the palette selected in
software such as Microsoft Excel with the Color Correct Utility.
Note
2
● Apply settings for each printer driver.
● You must be logged in as an administrator to perform color matching using the Color Correct Utility.
2. Adjusting Color
Reference
● For details on how to install the Color Correct Utility, refer to “Installing Utilities” P.60.
Changing Palette Color
For Windows
1 Click [Start] and select [All
Programs]> [Okidata]>[Color
Correct Utility]> [Color Correct
Utility].
2 Select [Ofce Palette Tuning] and
then click [Next].
9 Check each adjustable range from the
pull-down menu for X and Y.
The adjustable value varies depending on the
color.
10 Check the printed color swatch to select
the most suitable color you want within
the adjustable range, and then check the
X and Y values.
11 Select the values you checked at step
10, and then click [OK].
12 Click [Print Palette] and check if the
adjusted color is closer to the color you
want and then click [Next].
If you want to change the color more or change
other colors, repeat steps 8 to 11.
13 Enter a name to save as, and then click
[Save].
A dialog box appears.
14 Click on [OK].
3 Select the printer and click [Next].
4 Select the name the setting you want
and then click [Print Sample].
The color sample is printed.
5 Click on [Next].
6 Click on [Print Palette].
The color sample for adjustment is printed.
7 Compare the colors of the color palette
on the screen with those of the printed
color sample for adjustment.
Colors marked with cross cannot be adjusted.
8 Click the color you want to adjust.
15 Click on [Finish].
- 38 -
Page 39

Adjusting Color with Color Correct Utility
Changing Gamma Value or Hue
You can adjust tone by adjusting the gamma
value and output color by adjusting the hue.
For Windows
1 Click [Start] and select [All
Programs]> [Okidata]>[Color
Correct Utility]> [Color Correct
Utility].
2 Select [Hue & Saturation Tuning.] and
then click [Next].
3 Select the printer and click [Next].
4 Select the standard mode and click
[Next].
5 Apply settings as necessary by adjusting
the slide bar.
If you select the [Use printer’s unadjusted
color] check box, 100 percent of each color is
used for printing, and the slide bar of hue is xed.
Printing in Adjusted Color Settings
For Windows
2
1 Open the le you want to print.
2. Adjusting Color
2 Select [Print] from the [File] menu.
3 Click on [Preferences] or [Properties].
4 Click [Detail] on the [Color Setting]
and select [Ofce Pro].
5 Select the [Color Correct Utility
Settings] and select the setting you
created with the Color Correct Utility and
then click [OK].
6 Click on [Print Test].
7 Check the print result.
If you are not satised with the result, repeat
steps 5 to 6.
8 Click on [Next].
9 Enter a name and then click [Save].
A dialog box appears.
10 Click on [OK].
11 Click on [Finish].
- 39 -
Page 40

Adjusting Color with Color Correct Utility
Saving Color Correction Settings
You can save the adjusted color settings to a le.
2
2. Adjusting Color
Note
● The administrator’s authority is needed for this function.
For Windows
1 Click [Start] and select [All
Programs]> [Okidata]>[Color
Correct Utility]> [Color Correct
Utility].
2 Select [Import/Export Color
Settings.] and then click [Next].
3 Select the printer and click [Next].
4 Click on [Export].
5 Select the settings to export and click
[Export].
Importing Color Correction Settings
You can import color correct settings from les.
For Windows
1 Click [Start] and select [All
Programs]> [Okidata]>[Color
Correct Utility]> [Color Correct
Utility].
2 Select [Import/Export Color
Settings.] and then click [Next].
3 Select the printer, and click [Next].
4 Click [Import].
5 Select the le and click on [Open].
6 Select the settings to import and click on
[Import].
6 Specify the le name and the folder to
save to, and then click [Save].
7 Click on [OK].
8 Click on [Finish].
7 Check that the setting is imported
properly and then click [Finish].
- 40 -
Page 41

Deleting Color Correction Settings
You can delete unnecessary setting les.
Adjusting Color with Color Correct Utility
For Windows
1 Click [Start] and select [All
Programs]> [Okidata]>[Color
Correct Utility]> [Color Correct
Utility].
2 Select [Import/Export Color
Settings.] and then click [Next].
3 Select the printer, and click [Next].
4 Select the le you want to delete and
click [Delete].
A dialog box appears.
5 On the conrmation screen, click on
[Yes].
6 Check that the setting is deleted
properly and then click [Finish].
2
2. Adjusting Color
- 41 -
Page 42

Setting Color with Color Swatch Utility
Setting Color with Color Swatch Utility
This section explains the Color Swatch Utility. You can print the RGB color swatch built in to the printer
using the Color Swatch Utility. You can check the RGB values with the RGB color swatch and print out
the colors as needed.
2
2. Adjusting Color
Note
● This utility cannot be used on Mac OS X.
Memo
● When the printer driver is installed, the color swatch utility software is installed at the same time.
Printing Color Swatch
1 Click on [start], and select
[All Programs]> [Okidata]>[Color
Swatch Utility]> [Color Swatch
Utility].
2 Click [Print].
3 Select the printer from [Name].
4 Click on [OK].
A color swatch is printed.
5 Check the color swatch for the colors
you want to print, and then write down
the RGB values.
Customizing the Color Swatch
If you cannot nd the color you want in “Printing
Color Swatch” step 5, follow the procedures
below to customize the color.
6 Select the printer from [Name].
7 Click on [OK].
8 Check that the color is adjusted as you
want.
Memo
● If you are not satised with the printing result, repeat
from step 1 to 8.
1 Click on [Switch].
2 Click on [Detail].
3 Adjust the three slide bars until the color
you want appears.
4 Click [Close].
5 Click [Print].
- 42 -
Page 43

Printing a File With the Color You Want
1 Open the le you want to print.
2 Select the text or graphic to adjust the
RGB values in an application.
3 Print out the le.
Memo
● For details on how to specify the color in the application,
refer to the application’s manual.
● When printing color swatches and the le you want, use
the same printer driver settings.
Setting Color with Color Swatch Utility
2
2. Adjusting Color
- 43 -
Page 44

3. Changing Printer Settings
This chapter explains how to congure the equipment settings from the <ENTER> button on the
operator panel.
Checking the Current Settings
This section explains the basic procedure to print out print information. By printing out the print
3
information, you can check the current settings of the printer.
3. Changing Printer Settings
Printing Out Print Information
You can print and check the printer
congurations and a usage report.
Reference
● For details on the print information you can print and
the structure of the [Print Information] menu, refer to
“Print Information” P.47.
1 Press the <Fn> key.
Memo
● When a printer is in the power saving mode, press
the <POWER SAVE> button to restore from the
mode.
2 Enter <1>, <0> and <0> using the
ten-key pad and press the <ENTER>
button.
3 Make sure that [Execute] is selected
and then press the <ENTER> button.
- 44 -
Page 45

Changing the Equipment Settings
Changing the Equipment Settings
This section explains the basic procedure to change the equipment settings.
Reference
● For details on the menu structure of the equipment settings, refer to “List of Each Setup Menu” P.46.
Admin Setup
To enter the [Admin Setup] menu, an
administrator password is necessary.
Memo
● The default password is “aaaaaa”.
1 Press the <ENTER> button to open the
equipment setting menu.
2 Press the scroll button to select
[Admin Setup] and then press the
<ENTER> button.
3 Enter the administrator password using
the ten-key pad.
4 Press the <ENTER> button.
5 Press the scroll button to select the
setup menu on which you want to
change a setting and then press the
<ENTER> button.
Other Settings
1 Press the <ENTER> button to open the
equipment setting menu.
2 Press the scroll button to select the
setup menu on which you want to
change a setting and then press the
<ENTER> button.
3 Change the setting and then press the
<ENTER> button.
4 Press the <ON LINE> button to exit the
menu mode.
3
3. Changing Printer Settings
6 Change the setting and then press the
<ENTER> button.
7 Press the <ON LINE> button to exit the
menu mode.
- 45 -
Page 46

Changing the Equipment Settings
List of Each Setup Menu
Device Setting Menu
Item Description
Conguration Indicates information about the printer, such as Tray Count, Supplies Life, Network, and
System.
Print Information Prints various information about the printer.
Print Secure Job Prints an encrypted authentication print job (Encrypted Job) or an authentication print job
3
Menus Menus for general users.
3. Changing Printer Settings
Admin Setup Menus for the administrator.
Calibration Adjusts the settings for color and density of the printer.
Boot Menu Boot menu.
Print Statistics Menu for print statistics.
Conguration
(Secure Job) stored in SD memory card.
This menu is displayed when an SD memory card is installed in the printer.
This menu is displayed only in English.
Item Description
Tray Count Tra y 1 Indicates the total number of pages printed from Tray 1.
The number of pages fed from Tray 1 is indicated.
Tray2 Indicates the total number of pages printed from Tray 2.
The number of pages fed from Tray 2 is indicated.
MPTray Indicates the total number of pages printed from MP Tray (Multi-Purpose
Tray).
The number of pages fed from MP Tray is indicated.
Supplies Life Cyan Drum Indicates the remaining life of the CYAN drum in %.
Magenta Drum Indicates the remaining life of the MAGENTA drum in %.
Yellow Drum Indicates the remaining life of the YELLOW drum in %.
Black Drum Indicates the remaining life of the BLACK drum in %.
Belt Indicates the remaining life of the BELT unit in %.
Fuser Indicates the remaining life of the FUSER unit in %.
Cyan Toner
(n.nK)*
Magenta Toner
(n.nK)*
Yellow Toner
(n.nK)*
Black Toner
(n.nK)*
Indicates the remaining amount of toner in %.
* Differs depending on the type of the toner cartridge :
- 46 -
Page 47

Item Description
Network Printer Name Indicates the printer name.
Short Printer
Name
IPv4 Address Indicates the IPv4 address of the printer.
Subnet Mask Indicates the subnet mask of the printer.
Gateway Address Indicates the gateway address of the printer.
MAC Address Indicates the MAC address of the printer.
Network FW
Version
Web Remote
Version
IPv6 Address
(Local)
IPv6 Address
(Global)
System Serial Number Indicates the serial number of the printer.
Asset Number Indicates the asset number of the printer.
Lot Number Indicates the production lot number of the printer.
CU Version Indicates the version number of the control unit rmware.
PU Version Indicates the version number of the print unit rmware.
Total Memory Indicates the total capacity of all RAM installed.
Flash Memory Indicates the total capacity of all ash memory installed.
SD Card Indicates the capacity of the SD memory card.
Indicates the short printer name.
Indicates the version of the network rmware.
Indicates the version of web page.
Indicates the IPv6 address (local) of the printer.
Indicates the IPv6 address (global) of the printer.
Changing the Equipment Settings
3
3. Changing Printer Settings
Print Information
Item Description
Print Information Conguration Prints information about the conguration of the printer.
Network Prints information about the network settings.
Demo Page Prints a demo page.
File List Prints a job le list.
PCL Font List Prints the list of PCL font samples.
HP-GL2 Palette Prints the color samples of the pens set on the menu.
Usage Report Prints the total of the job logs.
Error Log Prints an error log.
Color Prole List Prints the list of color proles.
ID Check Pattern Prints a built-in ID check pattern used for detection of a defective ID.
Engine Status Prints information about the printer engine.
Print Secure Job
Item Description
Encrypted Job Enter Password Enter the password to execute the encrypted authentication print job.
Encrypted Job Select this to print an encrypted authentication print job (Encrypted Job)
stored in SD memory card.
Stored Job Enter Password Enter the password to execute the authentication print job.
Stored Job Select this to print an authentication print job (Secure Job) stored in SD
memory card.
- 47 -
Page 48

Changing the Equipment Settings
Menus
Note
● Factory default setting values are different according to the region where the machine is used.
Item Factory Default Description
Tray
Conguration
3
3. Changing Printer Settings
MPTray
Cong
Tray1 Cong Paper Size Cassette Size Selects a paper size for Tray 1.
Tray2 Cong
* Displayed
when an
optional tray
is installed.
Paper Feed Tray1 Selects a paper tray.
Auto Tray Switch On Sets whether to enable the auto tray
Tray Sequence Down Sets the priority of tray order for auto tray
Unit of Measurement millimeter Sets the unit of measurement used for the
Duplex Last Page Skip Blank Page When [Skip Blank Page] is selected, the last
Paper Size A4 [LEF] Selects a paper size for MP tray.
X Dimension 210millimeters Sets a width of a custom paper for MP tray.
Y Dimension 297millimeters Sets a length of a custom paper for MP tray.
Media Type Plain Selects a paper type for MP tray.
Media Weight Light Selects a paper weight for MP tray.
Tray Usage Do Not Use Sets an MP tray usage.
X Dimension 210millimeters Sets a width of a custom paper for Tray 1.
Y Dimension 297millimeters Sets a length of a custom paper for Tray 1.
Media Type Plain Select a paper type for Tray 1.
Media Weight Light Selects a paper weight for Tray 1.
Legal Paper Legal14 Sets a legal paper size for Tray 1.
Other Size 16K(184x260mm)
[SEF]
Paper Size Cassette Size Selects a paper size for Tray 2.
X Dimension 210millimeters Sets a width of a custom paper for Tray 2.
Y Dimension 297millimeters Sets a length of a custom paper for Tray 2.
Media Type Plain Select a paper type for Tray 2.
Media Weight Light Selects a paper weight for Tray 2.
Legal Paper Legal14 Sets a legal paper size for Tray 2.
Other Size 16K(184x260mm)
[SEF]
Sets other standard paper size for Tray 1.
Sets other standard paper size for Tray 2.
switching function.
selection/auto tray switching.
custom paper size.
page of an odd-numbered duplex print job is
printed in simplex.
When [Always Print] is selected, the printer
always prints a document in the duplex
mode if the duplex mode is selected. Some
applications may not work properly.
- 48 -
Page 49

System
Adjust
Changing the Equipment Settings
Item Factory Default Description
Power Save time 1 minute Sets how many minutes the printer waits
before activating the power save mode.
Sleep Time 15 minutes Sets the time to switch from the power save
mode to the sleep mode.
Auto Power Off Time 4 hours Sets the time to switch from the standby
mode to the power off mode.
Clearable Warning ONLINE Sets the timing for deletion of clearable
warnings.
Auto Continue Off Sets whether to recover the printer
automatically when a memory overow or
tray requesting occurs.
Manual Timeout 60 seconds Sets how many seconds the printer waits for
the paper to be fed from the manual paper
tray.
Wait Timeout 40 seconds Sets how many seconds the printer will wait
before force printing a job after the data stops
coming.
Low Toner Continue Sets whether to continue or stop printing
when a low on toner error occurs.
Jam Recovery On Sets whether the printer will attempt to re-
print any pages lost due to a paper jam once
the jam has been cleared.
Error Report Off Sets whether to print out the error details
when an internal error occurs.
Print Position
Adjust
Paper Black Setting 0 Sets values to make a ne adjustment if
Paper Color Setting 0 Sets values to make a ne adjustment if
X Adjust 0.00millimeter Adjusts the position of the whole printing
image perpendicular (landscape orientation)
to the direction of paper movement (at 0.25
mm intervals).
Y Adjust 0.00millimeter Adjusts the position of the whole printing
image parallel (portrait orientation) to the
direction of paper movement (at 0.25 mm
intervals).
Duplex X Adjust 0.00millimeter Adjusts the position of the whole printing
image on the reverse side of duplex printing
perpendicular (landscape orientation) to the
direction of paper movement (at 0.25 mm
intervals).
Duplex Y Adjust 0.00millimeter Adjusts the position of the whole printing
image on the reverse side of duplex printing
parallel (portrait orientation) to the direction
of paper movement (at 0.25 mm intervals).
the printing result is faded or there are dust
specks on the print when printing in the
plain paper and black mode. Decrease the
value when there are dust specks in the area
printed with high density. Increase the value
when the printing result is faded.
the printing result is faded or there are dust
specks on the print when printing in the
plain paper and color mode. Decrease the
value when there are dust specks in the area
printed with high density. Increase the value
when the printing result is faded.
3
3. Changing Printer Settings
- 49 -
Page 50

Changing the Equipment Settings
Item Factory Default Description
System
Adjust
Trans. Black Setting 0 Sets values to make a ne adjustment if
Trans. Color Setting 0 Sets values to make a ne adjustment if
3
3. Changing Printer Settings
SMR Setting 0 Corrects variations in print results caused
BG Setting 0 Corrects variations in print results caused
Drum Cleaning Off Sets whether to perform drum rotating before
Hex Dump (NULL) Prints out the data received from the host
the printing result is faded or there are dust
specks on the print when printing in OHP and
black mode. Decrease the value when there
are dust specks in the area printed with high
density. Increase the value when the printing
result is faded.
the printing result is faded or there are dust
specks on the print when printing in OHP and
color mode. Decrease the value when there
are dust specks in the area printed with high
density. Increase the value when the printing
result is faded.
by temperature and humidity conditions and
differences in print density and frequency.
Change the setting if the print quality is
uneven.
by temperature and humidity conditions and
difference in print density and frequency.
Change the setting if the background is dark.
printing to reduce lateral white lines on the
print. Note that drum rotating shortens the ID
life.
computer in hexadecimal dump format.
Turning off the power switches the printer to
the normal print mode from the HEX Dump
mode.
- 50 -
Page 51

Admin Setup
Admin Setup Network
Setup
Print Setup Personality Auto Selects the printer language.
Changing the Equipment Settings
Item Factory Default Description
TCP/IP Enable Sets whether to enable TCP/IP.
IP Version IP v4 Selects the version of IP.
NetBEUI Disable Sets whether to enable NetBEUI.
NetBIOS over TCP Enable Sets whether to enable NetBIOS over
T C P.
NetWare Disable Sets whether to enable NetWare.
EtherTalk Disable Sets whether to enable EtherTalk.
IP Address Set Auto Sets the setting method of IP address.
IPv4 Address xxx.xxx.xxx.xxx Sets the IP address.
Subnet Mask xxx.xxx.xxx.xxx Sets the subnet mask.
Gateway Address xxx.xxx.xxx.xxx Sets the gateway (default router)
address.
Web Enable Sets whether to enable Web.
Telnet Disable Sets whether to enable Telnet.
FTP Disable Sets whether to enable FTP.
IPSec Disable Displayed only when [IPSec] is enabled
and only the change to disable is
available.
SNMP Enable Sets whether to enable SNMP.
Network Scale Normal When [Normal] is selected, the printer
works effectively even if connected to a
hub that has the spanning tree feature.
However, the start-up time of printer
becomes longer when the printer is
connected to a small LAN that consists of
two or three computers.
Hub Link Setting Auto Negotiate Sets the method for linking to a hub.
TCP ACK Type1 Sets the type of TCP acknowledgment.
Factory Defaults? (NULL) Resets the Network Setup menu.
Copies 1 Sets the number of copies.
Duplex Off Sets the duplex printing.
Binding Long Edge Sets the binding position for duplex
printing.
Media Check Enable Sets whether to check if the paper size
of the tray and the page size of the
document do not match.
Resolution 600dpi Sets the resolution.
Toner
Save
Mono-Print Mode Auto Sets the print mode for black-and-white
Default Orientation Portrait Sets the print orientation. Not available
Form Length 64lines Sets the number of lines of text per
Edit Size Cassette Size Sets the size of the printable page area
Toner Save
Level
Color All Sets whether to apply the toner save
Off Sets the toner save level. [Off] disables
the toner save mode. 15% of the toner
is saved in [Low], 35% in [Middle], and
50% in [High].
mode to the 100% black color.
pages.
for PS data.
page.
when no command to specify the paper
edit size is sent from the computer.
3
3. Changing Printer Settings
- 51 -
Page 52

Changing the Equipment Settings
Item Factory Default Description
Admin Setup Print Setup X Dimension 210millimeters Sets the default width of the custom
paper.
Y Dimension 297millimeters Sets the default length of the custom
paper.
PCL Setup Font Source Resident2 Sets the location of the PCL default font.
Font Number C1 Sets the PCL font number.
Font Height 12.00 point Sets the height of the PCL default font.
The height is displayed to two decimal
points (at 0.25 point intervals).
3
3. Changing Printer Settings
XPS Setup DigitalSignature Off Sets the DigitalSignature function.
IBM PPR
Setup
Symbol Set WIN3.1J Selects a PCL symbol set.
A4 Print Width 78 column Sets the number of columns for
automatic line feed on A4 paper for
PCL. The number of columns is based
on when the font pitch is 10CPI and the
Auto CR/LF mode is set to off.
White Page Skip Off Sets whether to eject a blank page when
an FF command (0CH) is received in PCL.
CR Function CR Sets the printer operation when a CR
code is received in PCL.
LF Function LF Sets the printer operation when a LF
code is received in PCL.
Print Margin Normal Sets the non-printable area of page.
True Black Off PCL: Sets whether to use composite
black (CMYK mixed) or true black (K
only) for the 100% black area of an
image.
Pen Width Adjust On Adjusts the width of thin lines so that the
lines become visible.
Tray
ID#
DiscardControl Auto Sets the DiscardControl function.
MC Mode On Sets the MarkupComaptibility function.
Unzip Mode Speed Set the extraction method for XPS les.
White Page Skip Off Sets whether to eject a blank page in
Character Pitch 10 CPI Species character pitch in IBM PPR
Font Condense 12CPI to 20CPI Species 12CPI pitch for Condense
Character Set SET-2 Sets a character set.
Symbol Set IBM-437 Sets a symbol set.
Letter O Style Disable Species the style that replaces φ (9B)
Zero Character Normal Species the style of 0(zero).
Line Pitch 6 LPI Sets line space.
White Page Skip Off Sets ejecting or not ejecting a blank
CR Function CR Sets performance when CR code is
Tray 2 5 Sets a number of tray 2 for the paper
feed destination command (ESC&l#H) in
PCL5 emulation.
This menu is displayed only when the
tray 2 is installed.
MP Trays 4 Sets a number of MP tray for the paper
feed destination command (ESC&l#H) in
PCL5 emulation.
XPS.
emulation.
Mode.
and ¥ (9D) with φ (ou) and Φ (zero).
sheet. Available only when simplex is
set.
received.
- 52 -
Page 53

Admin Setup IBM PPR
Setup
EPSON FX
Setup
Color Setup Ink Simulation Off The built-in unique process simulation
Memory
Setup
Changing the Equipment Settings
Item Factory Default Description
LF Function LF Sets performance when LF code is
received.
Line Length 80 column Species the number of characters per
line.
Form Length 11.7 inch Species the length of paper.
TOF Position 0.0 inch Sets the position from the top edge of
paper.
Left Margin 0.0 inch Sets the amount to shift the horizontal
print start position to the right.
Fit to Letter Disable Sets the printing mode that can t print
data, equivalent to 11 inches (66 lines),
in the LETTER-size printable area.
Text Height Same Sets height of a character.
Continuous Paper
Mode
Character Pitch 10 CPI Species character pitch.
Character Set SET-2 Species a character set.
Symbol Set IBM-437 Species a symbol set.
Letter O Style Disable Species the style that replaces φ (9B)
Zero Character Normal Species the style of O (zero).
Line Pitch 6 LPI Sets line spacing.
White Page Skip Off Sets whether ejecting a blank sheet or
CR Function CR Sets performance when CR code is
Line Length 80 column Species the number of characters per
Form Length 11.7 inch Species the length of paper.
TOF Position 0.0 inch Sets the position from the top edge of
Left Margin 0.0 inch Sets the amount of shifting the
Fit to Letter Disable Sets the printing mode that can t print
Text Height Same Sets height of a character.
Continuous Paper
Mode
UCR Low Selects the limit value of toner layer
CMY 100% Density Disable Selects whether to enable 100% output
CMYK Conversion On When [OFF] is selected, the printer
Receive Buffer Size Auto Sets the reception buffer size.
Resource Save Off Sets the resource save area.
Off Sets to Landscape the edit direction of
paper supported by A3 printer.
and ¥ (9D) with φ (ou) and Φ (zero).
not.
Available only when simplex is set.
received.
line.
paper.
horizontal print start position to the
right.
data, equivalent to 11 inches (66 lines),
in the Letter-size printable area.
Off Sets to Landscape the edit direction of
paper supported by A3 printer.
engine enables the printer to simulate
the standard printing colors.
thickness. When paper curl occurs in
dark color printing, selecting [Medium]
or [High] may reduce the volume of curl.
for the CMY100% tone value.
simplies the conversion process of
CMYK data in PostScript printing, which
reduces processing time.
3
3. Changing Printer Settings
- 53 -
Page 54

Changing the Equipment Settings
Admin Setup Flash Memory
Setup
SD Card
Setup
3
System Setup Near Life Status Enable Sets whether to display the warning that
3. Changing Printer Settings
Buzzer Setup Invalid Operation
Power Setup Power Save Enable Sets whether to enable the power save
Change
Password
Settings Reset Settings (NULL) Resets EEPROM of CU to initialize the
Item Factory Default Description
Initialize (NULL) Initializes the resident ash memory.
Initialize (NULL)
Resize
Partition
Format Partition PCL
Near Life LED Enable Sets the LED lamp control of the warning
Idle Display Toner Gauge Selects the information shown on the
Panel Contrast 0 Adjust the contrast of the LCD of
Volume
Error Volume Off Sets the volume of the buzzer for errors.
Sleep Enable Sets whether to enable the sleep mode.
Auto Power Off Auto Cong Sets the auto power off function.
New Password (NULL) Sets a new password to enter the
Verify Password (NULL) Enter the new password set in
Save Settings (NULL) Saves the current menu settings.
Restore Settings (NULL) Restores the stored menu settings.
PCL nn% 20% Sets the partition size.
Common
mm%
Common
ll%
<Apply> (NULL)
50%
30%
informs the drum, fuser, or belt is near
the end of life on the LCD display.
that informs the toner, drum, fuser, or
belt is near the end of life.
display during idling.
operation panel.
Off Sets the volume of the buzzer for the
invalid operations.
mode.
[Admin Setup] menu and [Boot Menu].
[New Password] to verify.
Enter the password consisting of 6 to
12 digits with alphanumeric characters
(lower case).
user menu settings.
- 54 -
Page 55

Calibration
Item Factory Default Description
Calibration Auto Density Mode On
Adjust Density (NULL)
Adjust Registration (NULL)
Print Tuning Pattern (NULL)
Cyan Tuning Highlight 0 Adjusts the highlight tone (light color) of cyan.
Mid-Tone 0 Adjusts the mid tone of cyan.
Dark 0 Adjusts the dark tone (dark color) of cyan.
Magenta
Tuning
Yellow
Tuning
Black Tuning Highlight 0 Adjusts the highlight tone (light color) of black.
Cyan Darkness 0
Magenta Darkness 0
Yellow Darkness 0
Black Darkness 0
Highlight 0 Adjusts the highlight tone (light color) of magenta.
Mid-Tone 0 Adjusts the mid tone of magenta.
Dark 0 Adjusts the dark tone (dark color) of magenta.
Highlight 0 Adjusts the highlight tone (light color) of yellow.
Mid-Tone 0 Adjusts the mid tone of yellow.
Dark 0 Adjusts the dark tone (dark color) of yellow.
Mid-Tone 0 Adjusts the mid tone of black.
Dark 0 Adjusts the dark tone (dark color) of black.
Changing the Equipment Settings
The tone becomes darker in plus direction and
becomes lighter in minus direction.
The tone becomes darker in plus direction and
becomes lighter in minus direction.
The tone becomes darker in plus direction and
becomes lighter in minus direction.
The tone becomes darker in plus direction and
becomes lighter in minus direction.
The tone becomes darker in plus direction and
becomes lighter in minus direction.
The tone becomes darker in plus direction and
becomes lighter in minus direction.
The tone becomes darker in plus direction and
becomes lighter in minus direction.
The tone becomes darker in plus direction and
becomes lighter in minus direction.
The tone becomes darker in plus direction and
becomes lighter in minus direction.
The tone becomes darker in plus direction and
becomes lighter in minus direction.
The tone becomes darker in plus direction and
becomes lighter in minus direction.
The tone becomes darker in plus direction and
becomes lighter in minus direction.
3
3. Changing Printer Settings
- 55 -
Page 56

Changing the Equipment Settings
Boot Menu
Item Factory Default Description
Boot Menu USB Setup USB Enable Sets whether to enable USB I/F.
Speed 480Mbps Sets the maximum transfer speed of USB I/F.
Soft Reset Disable Sets whether to enable the Soft Reset
command.
Ofine Receive Disable Sets whether to enable the function that
keeps the data receivable state with no
change of the I/F signal in case an error
3
3. Changing Printer Settings
Security Setup Job Limitation Off Sets the limited job mode.
Storage Setup Check File
Language Setup Language
System Setup High Humid
Serial Number Enable Sets whether to enable the USB serial
Make Secure
SD Card
Make Normal
SD Card
Reset Cipher
Key
System
Check All
Sectors
Enable SD Card Yes If the printer is not able to turn on due to a
Erase SD Card (NULL) This item is displayed only when an SD
Enable
Initialization
Initialize
Mode
Moisture
Control
Menu Lockout Off Turns on/off the menu lockout function.
(NULL) Enables encryption of data saved on an SD
(NULL) Disables encryption of data saved on an SD
(NULL) Resets the cipher key used on an encrypted
(NULL) Resolves mismatch between the actual
(NULL) Performs recovery of the defective sector
No Disables any changes that involve
(NULL) Initializes the message le loaded on the ash
Off Turns on/off the curl reduction mode.
Off Sets whether to enable the condensation
occurs.
number.
When the mode is set to [Encrypted Job],
printing data other than specied (only an
encrypted authentication print job can be
specied) is restricted. This item is displayed
only when the optional SD memory card is
installed to the printer.
memory card.
memory card.
SD memory card.
After this operation has been completed, all
data stored on the SD memory card cannot
be restored.
(available) memory and the available memory
displayed and performs recovery of the
administration data (FAT information) for a
le system. This operation is applied to each
le system.
information on SD memory card and resolves
mismatch between the actual (available)
memory and the available memory displayed.
damaged SD memory card, selecting [No]
enables the printer to turn on as if there is
no SD memory card installed even if an SD
memory card is installed to the printer.
memory card is installed.
This function erases all data on the SD
memory card.
initialization of the block device (SD memory
card, ash memory).
memory.
control.
- 56 -
Page 57

Print Statistics
Print
Statistics
Usage Report Enable Sets whether to enable the usage report.
Supplies Report Disable Sets whether to display or hide the number of
Reset Main Counter (NULL) Resets the main counter.
Reset Supplies Counter (NULL) Resets the count of the number of times
Change Password New Password (NULL) Sets a new password to enter the
Changing the Equipment Settings
Item Factory Default Description
times consumables are replaced.
consumables are replaced.
[Print Statistics] menu.
Verify Password (NULL) Enter the new password set in
[New Password] to verify.
3
3. Changing Printer Settings
- 57 -
Page 58

4. Using Utility Software
This chapter explains useful software functions for using your printer.
Overview of Utilities
The following is a list of utilities that you can use for your printer. For details on how to use these
utilities, refer to their respective sections.
Utilities common to Windows/Mac OS X
4
Network Card Setup Printer
Item
4. Using Utility Software
Print display language setup/
Panel Language Setup
Function
Scope
settings
Printer
settings
Details
You can congure settings for
the network.
You can change the operator
panel or menu display
language.
Windows Utilities
Item
Color Correct Utility Printing Adjusts color matching. It
Conguration Tool Printer
Color Swatch Utility Printing Prints a color swatch. You
Function
Scope
settings
Details
can adjust the tone of palette
color output. Also, you can
adjust the hue and change
the overall shade of the color
output.
Registers the network
settings of the printer or
an ICC prole in the SD
memory card of this printer,
and manages the settings or
prole. The registered ICC
prole can be used for the
color matching function in
the [Graphic Pro] mode of
the printer driver. Registering
and deleting form data and
managing stored jobs are
also available.
can use this utility to check
printed colors. This utility is
automatically installed when
installing a print driver.
System
Requirements
● Windows 7/
Windows Vista/
Windows Server 2008
R2/
Windows Server 2008/
Windows XP/
Windows Server 2003/
Windows 2000
● Mac OS X 10.3.9-10.7
System
Requirements
Windows 7/
Windows Vista/
Windows Server 2008 R2/
Windows Server 2008/
Windows XP/
Windows Server 2003/
Windows 2000
Windows 7/
Windows Vista/
Windows Server 2008 R2/
Windows Server 2008/
Windows XP/
Windows Server 2003/
Windows 2000
Windows 2000 requires
the following to be
installed
● Service Pack 4
● Internet Explorer 5.5
SP1 or a higher version
● KB891861 (http://
support.microsoft.com/
?kbid=891861)
Windows 7/
Windows Vista/
Windows Server 2008 R2/
Windows Server 2008/
Windows XP/
Windows Server 2003/
Windows 2000
Refer to
page. 68
page. 74
page. 66
page. 74
Refer to
page. 38
page. 63
page. 33
- 58 -
Page 59

Overview of Utilities
Item
OKI LPR Utility Printing You can print a document
Network Extension Managing
Function
Scope
the printer
Details
via the network connection,
manage print jobs, and check
the printer status. When
an IP address of a printer
is changed, the setting is
changed automatically.
You can check the printer
settings from the print
driver, and can set options.
This utility is automatically
installed when installing
a print driver through a
network connection.
System
Requirements
Windows 7/
Windows Vista/
Windows Server 2008 R2/
Windows Server 2008/
Windows XP/
Windows Server 2003/
Windows 2000
Windows 7/
Windows Vista/
Windows Server 2008 R2/
Windows Server 2008/
Windows XP/
Windows Server 2003/
Windows 2000
A computer operating
with TCP/IP.
Refer to
page. 69
page. 72
4
4. Using Utility Software
- 59 -
Page 60

Installing Utilities
Installing Utilities
If there is a utility that you would like to use,
follow the procedure below for Windows. For Mac
OS X, you can copy it by dragging and dropping
to the place you want. You can also run this
directly from the Software DVD-ROM
For Windows
1 Insert the Software DVD-ROM into your
computer
2 Click [Run Setup.exe].
4
4. Using Utility Software
If the [User Account Control] dialog box
appears, click [Yes].
3 Select a language and click [Next].
4 Select a device and click [Next].
5 Read the user license agreement and
select [I Agree].
6 Read the [Environmental advice for
Users] and then click [Next].
7 Select the utility you would like to
install and click the button to install
collectively.
8 Click [Finish].
For Mac OS X
1 Insert the Software DVD-ROM into the
computer
2 Double click on the [OKI]>[Utilities]
folder.
3 Copy the folder you want to install by
dragging and dropping to the folder you
want.
Memo
● To launch, double click on the utility icon within the folder.
- 60 -
Page 61

Utilities common to Windows/Mac OS X
Utilities common to Windows/Mac OS X
This section explains web pages that can be used by both Windows and Mac OS X.
When using web pages, the following conditions must be met.
● TCP/IP must be enabled.
● One of the following must be installed: Microsoft Internet Explorer 6.0 or later, Safari 3.0 or later, or
Firefox 3.0 or later.
Memo
● Either set your web page security settings to a medium level, or enable cookies.
● In order to access the [Admin Setup] menu, the administrator password is required. The default password is “aaaaaa”.
Web page
You can carry out the following operations from
the web page.
● Display the printer status.
● Create proles.
● Congure tray, network, function default, and
printer settings.
● Display the job list.
● Print out a PDF without a printer driver.
● Congure the auto delivery and transmission
data save functions.
● Link to frequently used web pages.
Memo
● In order to change the printer settings on the web page,
you need to be logged in as the administrator.
Reference
● For details on how to congure the network settings,
refer to “Changing Network Settings From the Web Page”
P.104.
Logging In as the Administrator
Note
● You must be authorized as the administrator.
Memo
● The default administrator password of the printer is
“aaaaaa”.
1 Click on [Administrator Login] on the
main page.
4
4. Using Utility Software
Accessing the Printer Web page
1 Launch your web browser.
2 Type in “http:// (printer’s IP address)”
in the address bar and press the
<Enter> key.
Reference
● For the printer's IP address, please refer to the User's
Manual (Setup).
2 Enter “root” in [Username] and
enter the administrator password in
[Password], and then click [OK].
For Mac OS X, type in “root” for [Name] and
enter the printer administrator’s password in
[Password], and then click [Login].
- 61 -
Page 62

Utilities common to Windows/Mac OS X
3 Click [SKIP].
If you have made changes to the settings on this
screen, click [OK].
4
4. Using Utility Software
The menus available only for the administrator
will be displayed.
Changing the Administrator’s
password
You can change the printer administrator’s
password from the web page.
The administrator’s password set on the web
page can be used when logging into the printer
through the operator panel or through the web
page.
Memo
● The password should be 6-12 characters long, and should
be in one-byte (alphanumeric) characters.
● The password is case sensitive.
1 Launch your web browser and log in as
the administrator.
Checking Printer Status
You can check the status of your printer from
the web page.
1 Launch your web browser and enter the
printer’s IP address.
The status of the printer is displayed.
Memo
● When logging in as the administrator, you can also click
on [Status Window] in order to view the simplied
display of the printer status.
Changing Printer Settings
You can change the main unit’s settings from the
web page.
1 Launch your web browser and log in as
the administrator.
2 Change the settings and click [Submit].
Getting the Date and Time
Automatically
You can get date and time information
automatically from an internet time server, and
reect this on your printer.
1 Launch your web browser and log in as
the administrator.
2 Select [Admin Setup].
3 Select [Network Setup]> [SNTP].
4 Specify your time zone.
2 Select [Admin Setup].
3 Select [Management]> [Change
Password].
4 Enter a new password in [New Admin
Password].
5 Reenter the password in [Verify Admin
Password].
The entered password will not be displayed. Write
down your password and store it in a safe place.
6 Click on [Submit].
The network system reboots to enable the new
settings.
Memo
● You do not need to restart the printer. Next time when
you log in as the administrator, use the new password.
5 Select [Enable] from [SNTP].
6 Enter the SNTP server in [SNTP Server
(Primary)].
7 If required, enter another SNTP server in
[SNTP Server (Secondary)].
8 Click on [Submit].
The network system reboots to enable the new
settings.
- 62 -
Page 63

Windows Utilities
This section explains utilities you can use in Windows.
Windows Utilities
Conguration Tool
In the Conguration Tool, you can manage
multiple units and change settings.
The Conguration Tool functions are as follows.
● Display device information
● Registering and managing an ICC prole
● Registering and deleting form data
● Managing stored jobs
● Network settings
To use the Conguration Tool in Windows 2000,
you need to have the following installed.
● Service Pack 4
● Internet Explorer 5.5 SP1 or a higher version
● KB891861 (http://support.microsoft.
com/?kbid=891861)
Setup
Plugins can be installed if necessary.
The following 2 types of plugin are available.
● Network Setting Plugin
● Storage Manager Plugin
Memo
● You can install additional plugins later.
Reference
● For how to install Conguration Tool, please refer to
“Installing Utilities” P.60.
Registering the Printer
When using the Conguration Tool or introducing
a new printer, register the printer in the
Conguration Tool.
1 Select [Start], [All Programs]>
[Okidata]>[Conguration Tool]>
[Conguration Tool].
2 Select [Register Device] from the
[Tools] menu.
Search results are displayed.
3 Select the printer and click on
[Register].
4 On the conrmation screen, click on
[Yes].
Removing a Printer
You can remove a registered printer
1 Right-click on the printer from
[Registered device Table].
2 Select [Remove device].
3 On the conrmation screen, click on
[Yes].
Checking the Status of the Printer
You can check the status and information of the
printer.
1 Select the printer from the [Registered
Device Table].
2 Select the [Device Info] tab.
Memo
● When the printer is connected to the network,
[Device Status] will be displayed.
● If you want to update information, click on [Update
Device Information].
4
4. Using Utility Software
- 63 -
Page 64

Windows Utilities
Network Setting Plugin
You can set the network with the Conguration
Tool. Prior to setting, please install the Network
Setting plugin.
Reference
● For how to install Conguration Tool, please refer to
“Installing Utilities” P.60.
Icon
The meaning of each icon is as shown below.
Icon Details
Searches again for the printer.
4
4. Using Utility Software
Changes search conditions for the printer.
Changes IP address for the printer.
Restarts the printer.
Changes network password.
Displays the printer web page.
Searches for the machine on the
network
Searches for the printer.
1 Select [Network Setting] from the
[Plug-ins] menu.
2 Select [Discovery Devices].
Search results are displayed.
Change the IP Address
Changes IP address for the printer.
1 Select the printer from the device list.
2 Click icon.
3 Change the settings as required.
Storage Manager Plugin
Using Storage Manager Plug-in makes it possible
to manage jobs to be stored in devices and store
forms, fonts, and ICC proles used for printing.
Note
● Encrypted secure jobs are not supported with the job
management function.
● Functions such as overlay are available even if the model
is not equipped with an SD memory card.
Icon
The meaning of each icon is as shown below.
Icon Details
Creates a new project.
Opens an existing project.
Overwrites and saves the le with the
currently selected project.
Assigns a new name to the currently
selected project and stores it to a le.
Adds a le to a project.
Deletes the selected le from the project.
Displays the Filter Macro File dialog box.
Converts the currently selected project into
a format that is downloadable directly into
a device, and creates a new le.
Sends an existing download le to the
device selected in the device selection
area.
Sends the currently selected project to
the device selected in the device selection
area.
Sends the le selected from the project
window to the device selected in the device
selection area.
Displays a Job Management window for
the device selected in the device selection
area.
Displays an Administrator Functions
window for the device selected in the
device selection area.
4 Click on [OK].
5 Enter the network password and click
[OK].
The default password is the last 6 alphanumerical
digits of the MAC address.
6 Click on [OK] to restart the printer.
Registering an ICC Prole
You can register and edit printer proles.
The following explains some of the functions.
Note
● When using the prole manager, please install the User
Setting plugin.
Reference
● For how to install the plugin, please refer to “Setup” P.63.
- 64 -
Page 65

Windows Utilities
Registering an ICC Prole
1 Select [Storage Manager] from the
[Plug-ins] menu.
2 Click icon and create a new project.
3 Click icon and select [Color matching
le (.ICC, .ICM)] from [Files of type]
4 Select a prole you want to register and
then click [Open].
5 Select the type of the prole you want to
register from [Prole Type].
6 Click [Component] of the registered
prole, and [Storage Manager] dialog
is displayed.
7 Select a number you want to register for
the prole.
The registered numbers are displayed in yellow
back ground.
8 Enter comments in [Comment] eld, if
necessary.
9 Click on [OK].
2 Right click on the
Your Printer
icon,
and select the type of driver you need
from [Printer Properties].
3 Select the [Ports] tab, check [FILE:]
from [Print Port], and click on [OK].
4 Create a form you want to register on
the printer.
When using the Windows PCL printer driver, go to
step 9.
5 Select [Print] from the [File] menu.
6 Click on [Preferences].
7 Select the [Job Options] tab, and click
on [Overlay].
8 Select [Create Form].
9 Start a print job.
10 Enter the le name you would like to
save as.
11 Return to [Printer Port] from the
[Ports] tab.
4
4. Using Utility Software
10 Select the printer from the device list.
11 Click icon and send the registered
prole to the printer.
12 Check that the completion message is
displayed and click [OK].
Registering Forms (Form Overlay)
You can create and register overlays such as
logos or forms for printing. This explains how to
register forms.
Reference
● For how to print overlays, please refer to “Overlay
Printing” P.26.
Memo
● When using a Windows PS printer driver, administrator
privileges are required.
● The Windows XPS printer driver cannot be used.
Create a Form
1 Click on [Start] and then select
[Devices and Printers].
Registering a Form on the Printer
Using the Storage Manager Plugin
1 Click icon.
2 Click icon, and select the created
form.
3 Click on the form le.
4 Enter the [ID], and click [OK].
Note
● Do not change [Target Volume] and [Path].
Memo
● When using the Windows PS printer driver, enter
[Component].
5 Select the device in the device selection
area at the bottom of the Storage
Manager Plug-in window.
6 Select [Send Project Files to Printer]
from the [Projects] menu.
7 Click icon.
- 65 -
8 Click on [OK].
Page 66

Windows Utilities
Check the Free Space in SD Memory
Cards or Flash Memory
You can check the free space in SD memory
cards and ash memory.
1 Clicking a device name in the device
selection area at the bottom of the
Storage Manager Plug-in window opens
a device resource window of the selected
device.
2 The dialog box shows storage, partitions,
directories and les by communicating
4
4. Using Utility Software
with the device.
Delete Unwanted Jobs From an SD
Memory Card
You can delete print jobs in an SD memory
card’s [COMMON] partition.
Memo
● Even after a conrmatory printing or saving of print data,
as the job remains in the [COMMON] partition, if it is not
deleted the capacity of the SD card will decrease.
Note
● Encrypted authorized prints cannot be deleted on the
Storage Manager Plug-in.
1 Clicking icon, opens the Job
Management dialog.
Operator Panel Language Setup
You can change the operator panel display
language.
Note
● This program uses the print driver. Please install the
printer driver on the computer beforehand.
Starting Up
1 Turn on the printer.
2 Plug in the computer, and insert the
Software DVD-ROM.
3 Click [Run Setup.exe].
If the [User Account Control] dialog box
appears, click [Yes].
2 To view a specic user’s print jobs, enter
the password and click on [Apply job
password].
To view all print jobs, enter the
administrator password and click on
[Apply administrator password].
“Administrator password” is the
password for administration of the
device.
3 Select the job you want to delete and
click icon.
4 Click on [OK].
4 Select the model and click [Next].
5 Read the user license agreement and
click [I Agree].
6 Read the recommendation on the
environment and click [Next].
7 Select [Device Conguration].
8 Click [Operator Panel Language
Setup].
9 Click on [Next].
10 Select the printer and click [Next].
11 Select the model name of the printer
and click on [Next].
12 Select the language and click on [Next].
13 Click on [Print Test Page] and click on
[Next].
- 66 -
Page 67

14 Check whether the menu language
format value printed in step 12 is in the
value range displayed on the screen.
15 Click on [Next].
16 Check the content to be set and, click on
[Setup].
17 Click [Finish].
18 Check that the language you want is
displayed is on the screen of the printer.
19 Restart the printer.
Note
● If the language selection screen is not selected, carry
out the following procedure.
a Click on [Start] and select [Search].
b Enter “D:/Utilities/PanelDwn/
oppnlngs.exe” and press the
<Enter> key.
(This example uses the DVD-ROM
drive (D:))
Windows Utilities
4
4. Using Utility Software
c Go to step 8.
- 67 -
Page 68

Windows Utilities
Network Card Setup
You can use Network Card Setup to congure
the network.
In order to use Network Card Setup, TCP/IP
needs to be activated.
Note
● Administrator privileges are required.
4
4. Using Utility Software
Memo
● To check the printer MAC address, press the <ENTER>
button, and then select [View Information]>[Network]
on the printer operator panel.
Launching the Utility
1 Turn on the printer.
2 Turn on you computer, and insert the
Software DVD-ROM.
3 Click [Run Setup.exe].
If the [User Account Control] dialog box
appears, click [Yes].
4 Select the model and click [Next].
5 Enter your password into [Password]
and click on [OK].
- The default password is the last 6
alphanumerical digits of the Ethernet
address.
- The password is case sensitive.
6 Click [OK] on the conrmation window.
The new settings are enabled when the printer
restarts. During the restart, the printer status
icon changes to red. The printer will restart, the
new settings will become active, and the status
icon will turn green.
Conguring Web Settings
You can launch the web page to congure the
printer’s network setting.
Enabling Web Settings
1 Launch Network Card Setup.
2 Select the printer from the list.
3 Select [Setting Printer] from the
[Setting] menu.
4 Select the [Printer Web Page] tab.
5 Select [Printer Web Page - Enable]
and click on [OK].
5 Read the user license agreement and
click on [I Agree].
6 Read the recommendation on the
environment and click [Next].
7 Select [Device Conguration].
8 Click [Network Card Setup].
Conguring Network Settings
1 Launch Network Card Setup.
2 Select the printer from a list.
3 Select [Setting Printer] from the
[Setting] menu.
4 Change the items required and click on
[OK].
6 Enter your password into [Password]
and click on [OK].
- The default password is the last 6
alphanumerical digits of the ethernet
address.
- The password is case sensitive.
7 Click [OK] on the conrmation window.
The new settings are enabled when the printer
restarts. During the restart, the printer status
icon changes to red. The printer network card will
restart, the new settings will be active, and the
status icon will turn green.
- 68 -
Page 69

Windows Utilities
Opening the Web Page
1 Launch Network Card Setup.
2 Select your printer from the list.
3 Select [View Web Page] from the
[Setting] menu.
The web page will start, and the printer status
page will be displayed.
Changing the Password
1 Launch Network Card Setup.
2 Select your printer from the list.
3 Select [Change Password] from the
[Setting] menu.
4 Enter the current password.
- The default password is the last 6
alphanumerical digits of the ethernet
address.
- The password is case sensitive.
5 Enter the new password, and reenter it
for conrmation.
The password is case sensitive.
6 Click [OK] on the conrmation window.
OKI LPR Utility
You can use the OKI LPR Utility to perform a
print job via network, manage print jobs, and
check the printer status.
Reference
● For how to install OKI LPR Utility, please refer to
“Installing Utilities” P.60.
In order to use OKI LPR Utility, TCP/IP must be
activated.
Note
● The OKI LPR Utility cannot be used for shared printers.
● Please use the standard TCP/IP port.
Launching the Utility
1 Click on [Start], and select [All
Programs] ([Program] in windows
2000)>[Okidata]>[OKI LPR Utility]>
[OKI LPR Utility].
Adding a Printer
You can add a printer to the OKI LPR Utility.
4
4. Using Utility Software
Changing the Environment
You can congure the printer search conditions,
time-out value for each setting, and items to be
displayed on the list.
1 Launch Network Card Setup.
2 Select your printer from the list.
3 Select [Environment Settings] from
the [Option] menu.
4 Congure the settings required and click
[OK].
Note
● Administrator privileges are required.
● If you cannot add a printer in Windows 7/Windows
Vista/Windows Server 2008 R2/Windows Server
2008, shut down the OKI LPR Utility, right-click
on [Start] > [All Programs] > [Okidata] >
[OKI LPR Utility] > [OKI LPR Utility], and then select
[Run as administrator] to launch.
Memo
● You cannot add the printer already registered in the
OKI LPR Utility. If you want to change the port, select
[Conrm Connections] in [Remote Print] menu.
1 Launch the OKI LPR Utility.
2 Select [Add Printer] from the [Remote
Print] menu.
3 Select [Printer Name] and enter the IP
address.
Network printers and printers connected to the
LPR port are not displayed.
4 When selecting a network printer, select
[Discover].
- 69 -
Page 70

Windows Utilities
5 Click on [OK].
Downloading Files
You can download a le to the printer you have
added to the OKI LPR Utility.
1 Launch the OKI LPR Utility.
2 Select the download destination printer.
3 Select [Download] from the [Remote
Print] menu.
4 Select a le and click on [Open].
4
Displaying the Printer Status
4. Using Utility Software
1 Launch the OKI LPR Utility.
2 Select a printer.
3 Select [Printer Status] from [Remote
Print].
Forwarding Jobs Automatically
If you cannot print because the selected printer
is busy, ofine or out of paper, you can congure
the settings to forward the print jobs to another
OKI printer automatically.
Note
● Print jobs can only be forwarded to the same OKI model
printer as the one you are using.
● Before forwarding a job, you need to add another same
OKI model printer.
● Administrator privileges are required.
1 Launch the OKI LPR Utility.
2 Select the printer you would like to set.
3 Select [Conrm Connections] from
[Remote Print] menu.
4 Click on [Details].
5 Select the [Automatic Job Redirect
Used] checkbox.
Checking/Deleting/Forwarding Jobs
You can conrm and delete print jobs. Also, if
you cannot print because the selected printer is
busy, ofine or out of paper, you can forward the
print jobs to another OKI printer.
Note
● Print jobs can only be forwarded to the same OKI printer
as the one you are using.
● Before forwarding a job, you need to add another same
OKI printer.
1 Launch the OKI LPR Utility.
2 Select [Job Status] from the [Remote
Print] menu.
3 If you want to delete a print job, select
the job and then select [Delete] from
the [Job] menu.
4 If you want to forward a print job, select
the job and then select [Forward] from
the [Job] menu.
6 To forward jobs only when errors occur,
select the [Redirect only at the time
of an error] checkbox.
7 Click on [Add].
8 Enter the IP address of the printer to
forward to, and click on [OK].
9 Click on [OK].
Printing with Multiple Printers
You can print with multiple printers with a single
command.
Note
● This function sends remote print jobs to multiple printers
and prints simultaneously.
● Administrator privileges are required.
1 Launch the OKI LPR Utility.
2 Select the printer you would like to
congure.
- 70 -
3 Select printer [Conrm Connections]
from [Remote Print] menu.
4 Click on [Details].
5 Select the [Print to more than one
printer at a time] checkbox.
Page 71

Windows Utilities
6 Click on [Options].
7 Click on [Add].
8 Enter the IP address of the printer for
simultaneously printing and click on
[OK].
9 Click on [OK].
Opening a Webpage
You can open the printer web page from the OKI
LPR Utility.
1 Launch the OKI LPR Utility.
2 Select a printer.
3 Select [Web Setting] from the
[Remote Print] menu.
Memo
● You cannot open the web page when the web port
number has been changed. Carry out the following
procedure, and recongure the OKI LPR Utility port
number.
Automatically Conguring the IP
Address
You can set it to ensure that the connection with
the original printer is maintained even if the
printer’s IP address is changed.
Memo
● The IP address may change if DHCP is being used
to dynamically assign IP addresses or the network
administrator manually changes the printer’s IP address.
Note
● Administrator privileges are required.
1 Launch the OKI LPR Utility.
2 Select [Setup] from the [Option]
menu.
3 Select the [Auto Reconnect] checkbox
and click on [OK].
Uninstalling the OKI LPR Utility
Note
● Administrator privileges are required.
4
4. Using Utility Software
a Select a printer.
b Select [Conrm Connections] from
[Remote Print].
c Click on [Details].
d Enter the port number into [Port
Numbers].
e Click on [OK].
Adding Comments to Printers
You can add comments to the printers added
into the OKI LPR Utility in order to identify them.
1 Launch the OKI LPR Utility.
2 Select a printer.
3 Select [Conrm Connections] from
[Remote Print].
1 Conrm that the OKI LPR Utility is
closed.
2 Click on [Start], and then select [All
Programs] ([Program] in Windows
2000)>[Okidata]>[OKI LPR Utility]>
[Uninstall OKI LPR Utility].
If the [User Account Control] dialog box
appears, click [Yes].
3 On the conrmation screen, click on
[Yes].
4 Enter a comment and click on [OK].
5 Select [Show comments] from the
[Option] menu.
- 71 -
Page 72

Windows Utilities
Network Extension
In Network Extension, you can check the
settings on the printer and set the composition
of the options.
4
4. Using Utility Software
In order to use Network Extension, TCP/IP must
be activated.
Note
● Administrator privileges are required.
Memo
● Network Extension is automatically installed when
installing a print driver through a TCP/IP network.
● Network Extension is operated in conjunction with
the print driver. You cannot opt to only have Network
Extension installed.
● Network Extension only functions when the printer driver
is connected to OKI LPR port or the standard TCP/IP port.
Launching the Utility
3 Click [Update].
4 Click [OK].
Reference
● Click [Web Setting] to automatically launch the web
page. You can change printer settings on this web page
screen. For details, refer to “Web page” P.61.
Setting Options Automatically
You can get the composition of options of the
connected printer and automatically set the print
driver.
Memo
● You cannot congure this when using Network Extension
in unsupported environments.
For Windows
1 Open the printer properties screen.
Reference
● “Launching the Utility” P.72
2 Select the [Device Options] tab.
3 Click on [Get Printer Settings].
4 Click [OK].
Uninstalling the Utility
1 Click on [Start], and then select
[Control Panel]>[Add or Remove
Programs].
To use Network Extension, open the printer
properties screen.
1 Click on [Start] and then select
[Printers and Faxes].
2 Right click on the printer icon and select
[properties].
Checking Printer Settings
You can check the settings of the printer.
Memo
● If you use Network Extension in an environment that is
not supported, the [Device Options] tab may not be
displayed.
1 Open the printer properties screen.
Reference
● “Launching the Utility” P.72
2 Select the [Status] tab.
2 Select [OKI Network Extension] and
click on [Remove].
3 Follow the instructions on the screen and
complete the uninstallation.
- 72 -
Page 73

Windows Utilities
TELNET
You can congure settings with Telnet
commands.
Note
● Telnet access to the printer settings is turned off in the
initial settings.
In order to use Telnet commands, set [Telnet] to
[Active], either on the webpage or on the printer control
panel.
● For Windows 7/Windows Vista/Windows Server 2008 R2/
Windows Server 2008, Telnet commands are inactive in
the initial settings.
In order to use Telnet commands, select [Start] >
[Control Panel] > [Programs] > [Programs &
Functions] > [Activate or Deactivate Windows
Functions]. Set [Telnet Client] to active in the displayed
dialog box.
Memo
● For the next procedure, the following environment will be
used as an example. The details may differ depending on
the OS you are using.
- OS: Windows 7
- IP Address: 192.168.0.2
7 Change the settings if necessary.
8 Save settings and log out of the printer.
4
4. Using Utility Software
- MAC Address: 00:80:87:84:9C:9B
1 Click on [Start] and select [All
Programs]>[Accessories]>
[Command Prompt].
2 Following “(Driver Password): /Users/
Username>” enter “ping (Space) printer
IP Address”. Press the <Enter> key and
check that access is enabled.
E.g.: “C:/Users/WINDOWS > ping 192.168.0.2”
3 Following “telnet (Space)”, enter the
IP address of the printer and press the
<Enter> key in order to access the
printer through Telnet.
E.g.: “C:/Users/WINDOWS>telnet 192.168.0.2”
4 After “login:”, enter “root” and press the
<Enter>.
5 If a prompt is displayed, enter your
password following “Password” and press
the <Enter> key.
Enter E.g: “password: 849C9B”.
Memo
● The default "root" password is the last 6
alphanumerical digits of the printer's MAC address.
6 If a menu command is displayed, enter
the menu number you would like to
change, and press the <Enter> key.
- 73 -
Page 74

Mac OS X Utilities
Mac OS X Utilities
This section explains utilities you can use in Mac OS X.
Panel Language Setup
You can change the operator panel display
language.
4
1 Output a menu map for the printer.
4. Using Utility Software
To output settings, press the <ENTER> button,
and select [Print Setup]>[Conguration].
2 Launch the panel language setup utility.
Reference
● “Installing Utilities” P.60
3 Select a method of connection.
When selecting [TCP/IP], enter an IP address.
You can check the IP address on the menu map
output in step 1.
Network Card Setup
You can use the Network Card Setup to
congure the network.
In order to use Network Card Setup, TCP/IP
needs to be activated.
Note
● Congure the TCP/IP settings.
Conguring the IP Address
1 Launch Network Card Setup.
Reference
● “Installing Utilities” P.60
4 Click [OK].
5 For the menu map “Language Format”
value, check that the value displayed
on the screen matches the following
conditions.
Condition 1:
Condition 2:
Memo
● If Condition 1 is not met, an error will be displayed
in the operator panel when downloading. If Condition
1 is not met, an error will be displayed in the control
panel when downloading. In order to restore,
restart the printer. In case that Condition 1 is met
but Condition 2 is not met, though the printer can
be used, some setting names may be displayed in
English.
The rst digit of the version
number matches.
The value displayed on the screen
is the same as or newer (higher)
than the Language Format value.
6 Select a language.
7 Click on [Download].
The language setting le will be sent to the
printer, and when sending is complete, a message
will be displayed.
2 Select the printer.
3 Select [IP Address...] from the
[Printer] menu.
4 Congure the settings if necessary and
click [Save].
5 Enter the password and click on [OK].
- The default password is the last 6
alphanumerical digits of the Mac address.
- The password is case sensitive.
6 Click on [OK] to activate the new
settings.
Restart the printer network card.
8 Restart the printer.
- 74 -
Page 75

Conguring Web Settings
You can launch the web page, and congure the
printer network settings.
Enabling Web Settings
1 Select [Web Page Settings...] from the
[Printer] menu.
2 Select [Enable] and click on [Set].
3 Enter your password into [Enter
Password] and click on [OK].
Mac OS X Utilities
- The default password is the last 6
alphanumerical digits of the MAC address.
- The password is case sensitive.
4 Click [OK] on the conrmation window.
Opening a Web page
1 Launch Network Card Setup.
2 Select the printer.
3 Select [View Printer Web Pages] from
the [Printer] menu .
The web page will start, and the printer status
page will be displayed.
Quitting Network Card Setup
1 Select [Quit] from the [File] menu.
4
4. Using Utility Software
- 75 -
Page 76

5. Network Settings
This chapter explains network settings for your printer.
Network Setting Items
This section explains the items that can be set with network functions.
You can print the network setting list and check the current network settings by pressing the <ENTER>
button and selecting [Print Information] > [Network] > [Execute] on the operator panel.
Reference
● For details on how to print the network settings list, refer to “Printing Out Print Information” P.44.
You can change the network settings from your printer’s web page, Conguration Tool, TELNET, and
Network Card Setup. For the menus available for each utility, refer to the following tables.
TCP/IP
5
5. Network Settings
TELNET
TCP/IP - - - - ENABLE Set whether to use TCP/
IP Address
Set
IP Address IP Address IP Address IP Address IP Address 192.168.100.100 Specify an IP address.
Subnet
Mask
Default
Gateway
DNS
Server
(Pri.)
DNS
Server
(Sec.)
Dynamic
DNS
Web
browser
IP Address
Set
Subnet Mask Subnet Mask Subnet Mask Subnet
Gateway
Address
DNS Server
(Primary)
DNS Server
(Secondary)
Dynamic DNS - - - ENABLE Set whether to register
Item
Conguration
Tool
(Network
Setting Plug-in)
Obtain from a
DHCP/BOOTP
sever
Default Gateway Default
- - - 0.0.0.0 Specify the IP address of
- - - 0.0.0.0 Specify the IP address
Network
Card Setup
(Windows)
Obtain from a
DHCP/BOOTP
sever
Gateway
Network
(Mac)
Obtain from
a DHCP/
BOOTP
sever
Mask
Default
Gateway
Shaded text indicates the factory default setting.
Card
Setup
Setting Description
DISABLE
AUTO Set whether to obtain an
MANUAL
255.255.255.0 Specify a subnet mask.
0.0.0.0 Specify the gateway
DISABLE
I P.
IP address from a DHCP/
BOOTP server.
(default router) address.
When the setting is
˝0.0.0.0”, no router is
specied.
the primary DNS server.
Set this item when SMTP
(E-Mail protocol) is used.
When an IP address is
used to set the SMTP
server name, this item
does not need to be set.
of the secondary DNS
server. Set this item when
SMTP (E-Mail protocol) is
used. When an IP address
is used to set the SMTP
server name, this item
does not need to be set.
the information to the
DNS server when a
setting such as IP address
has been changed.
- 76 -
Page 77

TELNET
Domain
Name
WINS
Server
(Pri.)
WINS
Server
(Sec.)
Network Setting Items
Shaded text indicates the factory default setting.
Item
Conguration
Web
browser
Tool
(Network
Setting Plug-in)
Domain Name - - - (NULL) Set the name of the
WINS Server
(Primary)
WINS Server
(Secondary)
- - - 0.0.0.0 Specify the IP address
- - - 0.0.0.0 Specify the IP address
Network
Card Setup
(Windows)
Network
Card
Setup
(Mac)
Setting Description
domain to which the
printer belongs.
or name of name server
(a server that translates
computer names into
IP addresses) when an
name sever is used in a
Windows environment.
or name of name server
(a server that translates
computer names into
IP addresses) when an
name sever is used in a
Windows environment.
5
Scope ID Scope ID - - - (NULL) Specify the scope ID for
WINS. From 1 to 223
alphanumeric characters
can be used.
Windows Windows - - - ENABLE Set whether to use the
DISABLE
Macintosh Macintosh - - - ENABLE Set whether to use the
DISABLE
Printer
Name
IP Version IPv6 - - - ENABLE Set whether to use IPv6.
WSD Print WSD Print - - - ENABLE Set whether to use WSD
LLTD LLTD - - - ENABLE Set whether to use LLTD.
Printer Name - - - [OKI] + [-] +
[printer name]
+ [-] + [last six
digits of MAC
address]
DISABLE
([IPv4 Only],
[IPv4+v6], and
[IPv6 Only] for
TELNET )
DISABLE
DISABLE
auto-detection function
for Windows.
auto-detection function
for Macintosh.
Specify the rule of
displaying the printer
name when the autodetection function is
enabled.
Print.
5. Network Settings
- 77 -
Page 78

Network Setting Items
SNMP
Shaded text indicates the factory default setting.
Item
Conguration
TELNET
Web
browser
Tool
(Network
Setting Plug-in)
Contact to
Admin
Printer
Name
Printer
Location
5
Printer
Asset
Number
5. Network Settings
SNMP
Version
User
Name
Auth
Passphrase
Auth Key - - - - (NULL) Set the authentication
Auth
Algorithm
Privacy
Passphrase
Privacy
Key
Contact to
Admin
Printer Name - - - [OKI] + [-] +
Printer
Location
Printer Asset
Number
Use SNMP
Settings
User Name - - - root Specify the user name in
Authentication
Settings
Passphrase
Authentication
Settings
Algorithm
Encryption
Settings
Passphrase
- - - - (NULL) Set the password
- - - (NULL) Enter the contact
- - - (NULL) Enter the printer
- - - (NULL) Enter the number for
- - - SNMPv1
- - - (NULL) Set the password to
- - - MD5
- - - (NULL) Set the password to
Network
Card Setup
(Windows)
Network
Card
Setup
(Mac)
Setting Description
information of the system
administrator. Up to 255
one-byte characters can
be entered.
Enter the printer
[printer name]
+ [-] + [last six
digits of MAC
address]
SNMPv3
SNMPv3
SHA
+
SNMPv1
name. Up to 31 one-
byte characters can be
entered.
location. Up to 255 one-
byte characters can be
entered.
asset management of the
printer. Up to 32 one-
byte characters can be
entered.
Set the version of SNMP.
SNMPv3. From 1 to 32
alphanumeric characters
can be used.
create an authentication
key for SNMPv3 packet
authentication. From
8 to 32 alphanumeric
characters can be used.
key for SNMPv3 packet
authentication in HEX
code. For MD5: Sixteen
octets (32 characters
of HEX code), for SHA:
twenty octets (40
characters of HEX code).
Set the algorithm
for SNMPv3 packet
authentication.
create a privacy key
for SNMPv3 packet
encryption. From 8 to 32
alphanumeric characters
can be used.
for SNMPv3 packet
encryption in HEX code.
For MD5: Sixteen octets
(32 characters of HEX
code).
- 78 -
Page 79

TELNET
Privacy
Algorithm
Read
Community
Write
Community
Web
browser
Encryption
Settings
Algorithm
Read
Community
Write
Community
Item
Conguration
Tool
(Network
Setting Plug-in)
- - - DES Set the algorithm
- - - public Set the Read Community
- - - public Set the Write Community
Network
Card Setup
(Windows)
Shaded text indicates the factory default setting.
Network
Card
Setup
(Mac)
Network Setting Items
Setting Description
for SNMPv3 packet
encryption. This setting is
xed to [DES].
for SNMPv1. Up to 15
alphanumeric characters
can be used.
for SNMPv1. Up to 15
alphanumeric characters
can be used.
NetWare
Shaded text indicates the factory default setting.
Item
Conguration
TELNET
Web
browser
Tool
(Network
Setting Plug-in)
NetWare NetWare - - - ENABLE Set whether to use
TCP or IPX
Frame
Type
Printer
Name
- Print Mode - - - RPRINTER
NetWare
Mode
Communication
protocol
Frame Type - - - AUTO Set the frame type
Printer Name - - - [OKI] + [-] +
- - - - NDS Set the NetWare priority
- - - IPX Select IPX or TCP/IP for
Network
Card Setup
(Windows)
Network
Card
Setup
(Mac)
Setting Description
DISABLE
TCP/IP
ETHER- II
(ETHERNET-II)
802.2
(IEEE802.2)
803.3
(IEEE802.3)
SNAP (SNAP)
[printer name]
+ [-] + [last
six digits of
Ethernet address
(alphanumeric)]
+ [-] + [PR]
(Remote Printer)
PSERVER (Print
Server)
NDS+BIN
RPINTER
NetWare.
the protocol used on
NetWare.
that the printer uses
on NetWare. Normally,
use the factory default
setting.
Enter the printer name
for using a remote
printer. The setting needs
to be identical to the one
specied in the le server.
Select the print server
mode or remote printer
mode as the operating
mode of the printer.
mode.
5
5. Network Settings
- 79 -
Page 80

Network Setting Items
Print Server
Shaded text indicates the factory default setting.
Item
Conguration
TELNET
Web
browser
Tool
(Network
Setting Plug-in)
NDS Tree Tree - - - (NULL) Specify a NDS tree name.
5
NDS
Context
Print
Server
Name
Context - - - (NULL) Specify a NDS context
Print Server
Name
- - - [OKI] + [-] +
Network
Card Setup
(Windows)
5. Network Settings
Password File Server
Login
Password
Job Polling
Time
(Sec.)
Job Polling
Interval
- - - (NULL) Specify a password to log
- - - 2 seconds Specify a interval time for
Network
Card
Setup
(Mac)
Setting Description
Specify the name of a
tree to which a le server
that has a print server
registered belongs, using
up to 31 alphanumeric
characters.
name. Specify the name
of context to which a print
server belongs, using
up to 77 alphanumeric
characters.
Specify a print server
[printer name]
+ [-] + [last
six digits of
Ethernet address
(alphanumeric)]
+ [-] + [PR]
4 seconds
255 seconds
name. Specify the same
print server name as
that specied on a le
server, using up to 31
alphanumeric characters.
in to a le server, using
up to 31 alphanumeric
characters. This setting is
necessary when specifying
a printer password on a
le server.
nding a job in a queue. If
you shorten the interval,
printing will start soon but
a network congestion will
occur.
- Bindery Mode - - - Checked Set whether to use
a bindery mode. For
NetWare is 6.0, 5.0 or 4.1
on a bindery network, or
when connecting to 3.12,
set to [ENABLE]. For
NetWare version 6.0, 5.0
or 4.1 using NDS, set to
[DISABLE].
names, using up to 47
alphanumeric characters.
Up to 8 le servers can be
specied.
File
Server
Name
#1-8
File Server
Name
Not checked
- - - (NULL) Specify le server
- 80 -
Page 81

Remote Server
TELNET
Print
Server
Name
#1-8
Job
Timeout
(Sec.)
Web
browser
Print Server
Name
Job Timeout - - - 4 seconds Specify the time that
Item
Conguration
Tool
(Network
Setting Plug-in)
- - - (NULL) Specify the names of
Network
Card Setup
(Windows)
Shaded text indicates the factory default setting.
Network
Card
Setup
(Mac)
Network Setting Items
Setting Description
print servers to be
connected, using up to 47
alphanumeric characters.
Up to 8 print servers can
be specied.
10 seconds
255 seconds
elapses before releasing
a port after receiving a
last job packet. Normally,
a default setting is used.
If this value is too small,
printing is not performed
correctly; if the value is
too large, a print job sent
using other protocols
does not start smoothly.
5
5. Network Settings
EtherTalk
Shaded text indicates the factory default setting.
Item
Conguration
TELNET
Web
browser
Tool
(Network
Setting Plug-in)
EtherTalk EtherTalk - - - ENABLE Set whether to use
Printer
Name
Zone
Name
EtherTalk
Printer Name
EtherTalk
Zone Name
- - - Printer name Specify a printer name for
- - - * Specify an EtherTalk zone
Network
Card Setup
(Windows)
Network
Card
Setup
(Mac)
Setting Description
DISABLE
EtherTalk.
EtherTalk, using up to 31
alphanumeric characters.
If the specied name
is not unique on the
network, a number is
automatically added to
the end of the name.
name, using up to 32
alphanumeric characters.
- 81 -
Page 82

Network Setting Items
NBT/NetBEUI
Shaded text indicates the factory default setting.
Item
Conguration
TELNET
Web
browser
Tool
(Network
Setting
Network
Card Setup
(Windows)
Plug-in)
NetBEUI NetBEUI - - - ENABLE Set whether to use
NetBIOS
over TCP
Short
Printer
Name
NetBIOS over
TCP
Short Printer
Name
- - - ENABLE Set whether to use
- - - [printer name] +
5
Work
group
5. Network Settings
Name
Comment Comment - - - Ethernet Board
Master
Browser
Setting
Work group
Name
Master
Browser
- - - PrintServer Specify a work group
- - - ENABLE Set whether to use a
Network
Card
Setup
(Mac)
Setting Description
DISABLE
DISABLE
[last six digits of
Ethernet address
(alphanumeric)]
OkiLAN 8450e
DISABLE
NetBEUI.
NetBIOS over TCP.
Specify a computer
name, using up to 15
alphanumeric characters.
The specied name is
identied in NetBIOS
over TCP/NetBEUI.
The specied name is
displayed in the Windows
network computers.
name, using up to 15
alphanumeric characters.
The specied name is
displayed in the Windows
network computers.
Specify a comment, using
up to 48 alphanumeric
characters. The specied
comment is displayed
when detailed display
format is selected
in Windows network
computers.
master browser function.
Printer Trap
TELNET
Prn-Trap
Community
TCP #1-5
Trap
Enable
TCP #1-5
Printer
Reboot
Trap
Web
browser
Printer Trap
Community
Name Set
Trap Enable
1-5
Printer Reboot
1-5
Item
Conguration
Tool
(Network
Setting Plug-in)
- - - public Specify a printer trap
- - - ENABLE Set whether to use a
- - - ENABLE Set whether to send an
Network
Card Setup
(Windows)
- 82 -
Shaded text indicates the factory default setting.
Network
Card
Setup
(Mac)
Setting Description
community name, using
up to 31 alphanumeric
characters.
DISABLE
DISABLE
printer trap in TCP #1-5.
SNMP message when a
printer is restarted.
Page 83

TELNET
TCP #1-5
Receive
Illegal
Trap
Web
browser
Receive Illegal
Trap 1-5
Item
Conguration
Tool
(Network
Setting Plug-in)
- - - ENABLE Set whether to use a
Network
Card Setup
(Windows)
Shaded text indicates the factory default setting.
Network
Card
Setup
(Mac)
Network Setting Items
Setting Description
DISABLE
trap when accessing a
printer with a community
name other than that
specied in [Printer Trap
Community Name Set].
TCP #1-5
Online
Trap
TCP #1-5
Ofine
Trap
TCP #1-5
Paper Out
Trap
TCP #1-5
Paper Jam
Trap
TCP #1-5
Cover
Open Trap
TCP #1-5
Printer
Error Trap
TCP #1-5
Trap
Address
IPX Trap
Enable
IPX Online
Trap
IPX Ofine
Trap
IPX Paper
Out Trap
Online 1-5 - - - ENABLE Set whether to send an
DISABLE
Ofine 1-5 - - - ENABLE Set whether to send an
DISABLE
Paper Out 1-5 - - - ENABLE Set whether to send an
DISABLE
Paper Jam 1-5 - - - ENABLE Set whether to send an
DISABLE
Cover Open
1-5
Printer Error
1-5
Address 1-5 - - - 0.0.0.0 Specify a trap destination
IPX Trap
Enable
IPX Online - - - ENABLE Set whether to send an
IPX Ofine - - - ENABLE Set whether to send an
IPX Paper Out - - - ENABLE Set whether to send an
- - - ENABLE Set whether to send an
DISABLE
- - - ENABLE Set whether to send an
DISABLE
- - - ENABLE Set whether to use a
DISABLE
DISABLE
DISABLE
DISABLE
SNMP message every
time a printer changes to
online.
SNMP message every
time a printer changes to
ofine.
SNMP message when
paper runs out.
SNMP message when a
paper jam has occurred.
SNMP message every
time a printer cover is
opened.
SNMP message when
a printer error has
occurred.
address for TCP/IP.
Enter the value in a
decimal number format
“000.000.000.000”. If
an IP address is 0.0.0.0,
a trap will not be sent.
Up to 5 trap destination
addresses can be
specied.
printer trap for IPX.
SNMP message every
time a printer changes to
online.
SNMP message every
time a printer changes to
ofine.
SNMP message when
paper runs out.
5
5. Network Settings
- 83 -
Page 84

Network Setting Items
TELNET
IPX Paper
Jam Trap
Web
browser
IPX Paper Jam - - - ENABLE Set whether to send an
Item
Conguration
Tool
(Network
Setting Plug-in)
Network
Card Setup
(Windows)
Shaded text indicates the factory default setting.
Network
Card
Setup
(Mac)
Setting Description
DISABLE
SNMP message when a
paper jam has occurred.
5
IPX Cover
Open Trap
IPX
Printer
Error Trap
IPX Trap
Net/
Address
IPX Cover
Open
IPX Printer
Error
IPX - - - 00000000:
5. Network Settings
E-mail reception
TELNET
POP or
SMTP
- - - ENABLE Set whether to send an
DISABLE
- - - ENABLE Set whether to send an
DISABLE
000000000000
Shaded text indicates the factory default setting.
SNMP message every
time a printer cover is
opened.
SNMP message when
a printer error has
occurred.
Specify a trap destination
address for IPX. Enter
a network address
(8 digits) and a node
address (12 digits). If
a specied address is
00000000:000000000000,
a trap will not be issued.
Only one trap destination
address can be specied.
Item
Conguration
Web
browser
Tool
(Network
Setting Plug-in)
Using Protocol - - - POP Set whether to use the
Network
Card Setup
(Windows)
Network
Card
Setup
(Mac)
Setting Description
SMTP
DISABLE
E-mail Receive function.
Specify a protocol (POP/
SMTP) to be used.
POP3
Server
POP port
number
POP3
Server User
ID
POP3
Server
Password
Use APOP APOP Support - - - NO Set whether to use APOP.
POP Server
Name
POP Port
Number
POP User ID - - - (NULL) Specify a user ID to
POP Password - - - (NULL) Specify a password to
- - - (NULL) Specify a POP server
name. Specify a domain
name or an IP address.
- - - 110 Specify a port number to
access a POP server.
access a POP server.
access a POP server.
YES
- 84 -
Page 85

Network Setting Items
Shaded text indicates the factory default setting.
Item
Conguration
TELNET
Web
browser
Tool
(Network
Setting Plug-in)
Mail Polling
Time (min)
Domain
lter
Filter Policy Email with
Domain 1-5 Domain 1-5 - - - (NULL) Specify a domain name
SMTP Send SMTP Sending - - - ENABLE Set whether to use an
SMTP
Server
Name
SMTP Port
Number
Printer
Email
Address
Reply-To
Address
POP Receive
Interval
Domain Filter - - - ENABLE Set whether to use the
Domains
specied in
the followings
SMTP Server
Name
SMTP Port
Number
Printer Email
Address
Return Email
Address
- - - OFF Specify an interval time
- - - DENY Set whether to accept
- - - (NULL) Specify an SMTP server
- - - 25 Specify an SMTP port
- - - (NULL) Specify a printer E-mail
- - - (NULL) Specify a return E-mail
Network
Card Setup
(Windows)
Network
Card
Setup
(Mac)
Setting Description
1
5
10
30
60
DISABLE
ACCEPT
DISABLE
for accessing a POP
server to obtain incoming
mails.
domain lter function.
E-mail from specied
domain.
that the domain lter
function applies to.
SMTP (E-mail) sending
protocol.
name. Specify a domain
name or IP address.
When specifying a domain
name, DNS (Pri) (sec)
settings are necessary.
number. Normally, set to
a default setting.
address.
address. Normally, specify
a network administrator’s
email address.
5
5. Network Settings
Email
Address
1-5
Notify Mode
1-5
Email Alert
Interval
(Hours) 1-5
Email Address
1-5
Error
Notication
Method
Mail Sending
Interval
- - -
- - - EVENT
- - - 1 Specify a notication
(NULL) Specify a recipient
address. Up to 5
addresses can be
specied.
Specify an error
(Notication
when an error
occurs)
PERIOD (Periodic
notication)
-
24
notication method.
interval. This setting
is available only when
selecting [PERIOD].
- 85 -
Page 86

Network Setting Items
TELNET
Consumable
Warning
Event 1-5
Web
browser
Consumables
Warning
Item
Conguration
Tool
(Network
Setting Plug-in)
- - - DISABLE Set whether to notify
Network
Card Setup
(Windows)
Shaded text indicates the factory default setting.
Network
Card
Setup
(Mac)
Setting Description
Immediate
-
48H 45M
ENABLE
of warnings concerning
printer consumables
(Toner cartridge, Image
drum unit, etc.). This
setting is available only
when selecting [EVENT].
Consumable
Warning
Period 1-5
5
Consumable
Error Event
1-5
5. Network Settings
Consumable
Error Period
1-5
Maintenance
Warning
Event 1-5
Maintenance
Warning
Period 1-5
Maintenance
Error Event
1-5
Consumables
Warning
Consumables
Error
Consumables
Error
Maintenance
Unit Warning
Maintenance
Unit Warning
Maintenance
Unite Error
- - - ENABLE Set whether to notify
DISABLE
- - - DISABLE Set whether to notify of
Immediate
-
48H 45M
ENABLE
- - - ENABLE Set whether to notify of
DISABLE
- - - DISABLE Set whether to notify of
Immediate
-
2H 0M
-
48H 45M
ENABLE
- - - ENABLE Set whether to notify of
DISABLE
- - - DISABLE Set whether to notify
Immediate
-
48H 45M
ENABLE
of warnings concerning
printer consumables
(Toner cartridge, Image
drum unit, etc.). This
setting is available
only when selecting
[PERIOD].
errors concerning printer
consumables (Toner
cartridge, Image drum
unit, etc.). This setting
is available only when
selecting [EVENT].
errors concerning printer
consumables (Toner
cartridge, Image drum
unit, etc.). This setting
is available only when
selecting [PERIOD].
a warnings concerning
maintenance units (fuser
unit, belt unit etc.). This
setting is available only
when selecting [EVENT].
a warnings concerning
maintenance units (fuser
unit, belt unit etc.).
This setting is available
only when selecting
[PERIOD].
of errors concerning
maintenance units (fuser
unit, belt unit etc.). This
setting is available only
when selecting [EVENT].
- 86 -
Page 87

TELNET
Maintenance
Error Period
1-5
Paper
Supply
Warning
Event 1-5
Paper
Supply
Warning
Period 1-5
Paper
Supply
Error Event
1-5
Paper
Supply
Error Period
1-5
Web
browser
Maintenance
Unite Error
Paper Loading
Warning
Paper Loading
Warning
Paper Loading
Error
Paper Loading
Error
Item
Conguration
Tool
(Network
Setting Plug-in)
- - - ENABLE Set whether to notify
- - - DISABLE Set whether to notify
- - - ENABLE Set whether to notify
- - - DISABLE Set whether to notify of
- - - ENABLE Set whether to notify of
Network
Card Setup
(Windows)
Shaded text indicates the factory default setting.
Network
Card
Setup
(Mac)
Network Setting Items
Setting Description
DISABLE
Immediate
-
0H 15M
-
48H 45M
ENABLE
DISABLE
Immediate
-
48H 45M
ENABLE
DISABLE
of errors concerning
maintenance units (fuser
unit, belt unit etc.).
This setting is available
only when selecting
[PERIOD].
of warnings concerning
paper. This setting is
available only when
selecting [EVENT].
of warnings concerning
paper. This setting is
available only when
selecting [PERIOD].
errors concerning paper.
This setting is available
only when selecting
[EVENT].
errors concerning paper.
This setting is available
only when selecting
[PERIOD].
5
5. Network Settings
Printing
Paper
Warning
Event 1-5
Printing
Paper
Warning
Period 1-5
Printing
Paper Error
Event 1-5
Printing Paper
Warning
Printing Paper
Warning
Printing Paper
Error
- - - DISABLE Set whether to notify
Immediate
-
48H 45M
ENABLE
- - - ENABLE Set whether to notify
DISABLE
- - - DISABLE Set whether to notify
Immediate
-
2H 0M
-
48H 45M
ENABLE
of warnings concerning
paper feed. This setting
is available only when
selecting [EVENT].
of warnings concerning
paper feed. This setting
is available only when
selecting [PERIOD].
of errors concerning
paper feed. This setting
is available only when
selecting [EVENT].
- 87 -
Page 88

Network Setting Items
TELNET
Printing
Paper Error
Period 1-5
Storage
Device
Event 1-5
Storage
Device
Period 1-5
5
Web
browser
Printing Paper
Error
Storage
Device
Storage
Device
Item
Conguration
Tool
(Network
Setting Plug-in)
- - - ENABLE Set whether to notify
- - - DISABLE Set whether to notify of
- - - ENABLE Set whether to notify of
Network
Card Setup
(Windows)
Shaded text indicates the factory default setting.
Network
Card
Setup
(Mac)
Setting Description
DISABLE
Immediate
-
48H 45M
ENABLE
DISABLE
of errors concerning
paper feed. This setting
is available only when
selecting [PERIOD].
errors concerning storage
devices. This setting
is available only when
selecting [EVENT].
errors concerning storage
devices. This setting
is available only when
selecting [PERIOD].
Print Result
5. Network Settings
Warning
Event 1-5
Print Result
Warning
Period 1-5
Printing
Paper Error
Event 1-5
Print Result
Error Period
1-5
Interface
Warning
Event 1-5
Interface
Warning
Period 1-5
Print Result
Warning
Print Result
Warning
Printing Paper
Error
Printing Paper
Error
Interface
Warning
Interface
Warning
- - - DISABLE Set whether to notify
Immediate
-
48H 45M
ENABLE
- - - ENABLE Set whether to notify of
DISABLE
- - - DISABLE Set whether to notify of
Immediate
-
2H 0M
-
48H 45M
ENABLE
- - - ENABLE Set whether to notify an
DISABLE
- - - DISABLE Set whether to notify
Immediate
-
48H 45M
ENABLE
- - - ENABLE Set whether to notify
DISABLE
of warnings concerning
troubles affecting print
results. This setting
is available only when
selecting [EVENT].
errors concerning troubles
affecting print results.
This setting is available
only when selecting
[PERIOD].
errors concerning troubles
affecting print results.
This setting is available
only when selecting
[EVENT].
error relating a trouble
affecting a print result.
This setting is available
only when selecting
[PERIOD].
of warnings concerning
interfaces (network, etc.).
This setting is available
only when selecting
[EVENT].
of warnings concerning
interfaces (network, etc.).
This setting is available
only when selecting
[PERIOD].
- 88 -
Page 89

TELNET
Interface
Error Event
1-5
Interface
Error Period
1-5
Security
Warning
Event 1-5
Security
Warning
Period 1-5
Network Setting Items
Shaded text indicates the factory default setting.
Item
Conguration
Web
browser
Tool
(Network
Setting Plug-in)
Interface
Error
Interface
Error
Security - - - DISABLE Set whether to notify of
Security - - - ENABLE Set whether to notify of
- - - DISABLE Set whether to notify
- - - ENABLE Set whether to notify
Network
Card Setup
(Windows)
Network
Card
Setup
(Mac)
Setting Description
Immediate
-
2H 0M
-
48H 45M
ENABLE
DISABLE
Immediate
-
2H 0M
-
48H 45M
ENABLE
DISABLE
of errors concerning
interfaces (network, etc.).
This setting is available
only when selecting
[EVENT].
of errors concerning
interfaces (network, etc.).
This setting is available
only when selecting
[PERIOD].
warnings occurring in the
security functions. This
setting is available only
when selecting [EVENT].
warnings occurring in
the security functions.
This setting is available
only when selecting
[PERIOD].
5
5. Network Settings
Other Error
Event 1-5
Other Error
Period 1-5
Attached
Info Printer
Model
Attached
Info
Network
Model
Others - - - DISABLE Set whether to notify of
Immediate
-
2H 0M
-
48H 45M
ENABLE
Others - - - ENABLE Set whether to notify
DISABLE
Attached
Information
Printer Mode
Attached
Information
Network
Interface
- - - ENABLE Set whether to include
DISABLE
- - - ENABLE Set whether to include
DISABLE
other critical errors. This
setting is available only
when selecting [EVENT].
of other critical errors.
This setting is available
only when selecting
[PERIOD].
the printer name in
printer information
described in outgoing
E-mail.
the network interface
name in printer
information described in
outgoing E-mail.
- 89 -
Page 90

Network Setting Items
TELNET
Attached
Info Printer
Serial
Number
Web
browser
Attached
Information
Printer Serial
Number
Item
Conguration
Tool
(Network
Setting Plug-in)
- - - ENABLE Set whether to include
Network
Card Setup
(Windows)
Shaded text indicates the factory default setting.
Network
Card
Setup
(Mac)
Setting Description
DISABLE
the printer serial number
in printer information
described in outgoing
E-mail.
Attached
Info Printer
Asset
Number
Attached
Info Printer
Name
5
Attached
Info Printer
Location
5. Network Settings
Attached
Info IP
Address
Attached
Info MAC
Address
Attached
Info Short
Printer
Name
Attached
Info Printer
URL
Comment
Line 1-4
SMTP Auth SMTP
User ID User ID - - - (NULL) Specify a user ID for
Attached
Information
Printer Asset
Number
Attached
Information
Printer Name
Attached
Information
Printer
Location
Attached
Information IP
Address
Attached
Information
MAC Address
Attached
Information
Short Printer
Number
Attached
Information
Printer URL
Comment - - - (NULL) Specify a comment that
Authentication
Setting
- - - ENABLE Set whether to include
DISABLE
- - - ENABLE Set whether to include
DISABLE
- - - ENABLE Set whether to include
DISABLE
- - - ENABLE Set whether to include
DISABLE
- - - ENABLE Set whether to include
DISABLE
- - - ENABLE Set whether to include
DISABLE
- - - ENABLE Set whether to include
DISABLE
- - - ENABLE Set whether to enable
DISABLE
the printer asset number
in printer information
described in outgoing
E-mail.
the system name in
printer information
described in outgoing
E-mail.
the system location
in printer information
described in outgoing
E-mail.
the IP address in printer
information described in
outgoing E-mail.
the MAC address in
printer information
described in outgoing
E-mail.
the short printer name
in printer information
described in outgoing
E-mail.
the printer URL in printer
information described in
outgoing E-mail.
is added to the end
of the sentence in an
outgoing E-mail. 4 lines
can be specied. Up to
63 characters per line can
be entered. If characters
exceeds the limit per line,
a new line is inserted
automatically.
SMTP authentication.
SMTP authentication.
User
Password
Password - - - (NULL) Specify a password for
SMTP authentication.
- 90 -
Page 91

Maintenance
TELNET
LAN Scale
Setting
HEX Dump
Mode
HUB Link
Setting
-
browser
LAN Scale
Setting
HEX Dump - - - NO All received print data is
HUB Link
Setting
TCP ACK
Web
Item
Conguration
Tool
(Network
Setting Plug-in)
- - - NORMAL [NORMAL]: Normally,
- - - AUTO
- - - Type1 Select the type of TCP
Network
Card Setup
(Windows)
Shaded text indicates the factory default setting.
Network
Card
Setup
(Mac)
Network Setting Items
Setting Description
SMALL
YES
NEGOTIATION
100BASE-TX
FULL
100BASE-TX
HALF
10BASE-T FULL
10BASE-T HALF
Type2
use this setting. Even if
connecting to a hub with
a spanning tree function,
the printer works
efciently. If connecting
to a small LAN only for
few computers, it will
take a long time to start
up the printer.
[SMALL]: This setting
supports from a small
LAN for few computers to
a large LAN. If connecting
to a hub with a spanning
tree function,
the printer may not work
efciently.
displayed in hexadecimal.
Restart the printer to exit
this mode.
Specify the
communication speed and
communication method
between the printer and
a hub. Normally, set to
[AUTO NEGOTIATION].
Acknowledgement.
When [Type1] is
selected, the printer
returns the response for
each packet.
When [Type2] is
selected, the printer
returns the response for
multiple packets at a
time.
Selecting [Type2] may
improve the printing time
in case the printing time
has become longer due
to the setting of the hub.
Normally, select [Type1].
5
5. Network Settings
- 91 -
Page 92

Network Setting Items
Security
Shaded text indicates the factory default setting.
Item
Conguration
TELNET
Web
browser
Tool
(Network
Setting Plug-in)
FTP FTP - - - ENABLE Set whether to access the
Telnet Telnet - - - ENABLE Set whether to access the
Network
Card Setup
(Windows)
Network
Card
Setup
(Mac)
Setting Description
printer using FTP.
DISABLE
DISABLE
printer using the telnet
protocol.
Web
(Default
Port 80)
5
Web (IPP) Web - - - 1 Specify a port number to
5. Network Settings
IPP
(Default
Port 631)
SNMP SNMP - - - ENABLE Set whether to access the
SMTP
(E-mail)
SMTP SMTP - - - 1 Specify a port number for
POP
(E-mail)
POP POP - - - 1 Specify a port number for
SNTP
Local Ports Local Ports - - - ENABLE Set whether to use a
TCP/IP - - - - ENABLE Set whether to use the
Web (Port
No.: 80)
IPP (Port No.:
631)
- - - - ENABLE Set whether to use SMTP
POP - - - ENABLE Set whether to use the
SNTP - - - ENABLE Set whether to use the
Web Settings Web Settings Web Page
Settings
- - - ENABLE Set whether to use the
ENABLE Set whether to access
DISABLE
-
80
-
65535
DISABLE
DISABLE
DISABLE
-
25
-
65535
DISABLE
-
110
-
65535
DISABLE
DISABLE
DISABLE
the printer through a web
browser.
access the web page for
the printer.
IPP protocol.
printer using the SNMP
protocol. Normally, set to
[ENABLE].
sending.
the SMTP protocol.
POP3 protocol.
the POP3 protocol.
SNTP protocol.
unique protocol.
TCP/IP protocol.
- 92 -
Page 93

Network Setting Items
Shaded text indicates the factory default setting.
Item
Conguration
TELNET
Web
browser
Tool
(Network
Setting Plug-in)
NetBEUI NetBEUI - - - ENABLE Set whether to use the
NetBIOS
over TCP
NetWare NetWare - - - ENABLE Set whether to use the
EtherTalk EtherTalk - - - ENABLE Set whether to use the
Password Network
NetBIOS over
TCP
Password
- - - ENABLE Set whether to use
Password
Change
Network
Card Setup
(Windows)
Password
Change
Network
Card
Setup
(Mac)
Change
Password
Setting Description
NetBEUI protocol.
DISABLE
DISABLE
DISABLE
DISABLE
(last six digits of
MAC address)
the NetBIOS over TCP
protocol.
NetWare protocol.
EtherTalk protocol.
Change the network
administrator’s
password, using up
to 15 alphanumeric
characters. The password
is case sensitive. If you
forget the password you
specied, the password
cannot be changed.
5
5. Network Settings
IP Filtering
Shaded text indicates the factory default setting.
Item
Conguration
TELNET
Web
browser
Tool
(Network
Setting Plug-in)
IP Filtering IP Filtering - - - ENABLE Set whether to use IP
Start
Address #110
End Address
#1-10
Start Address
1-10
End Address
1-10
- - - 0.0.0.0 Specify the IP addresses
- - - 0.0.0.0
Network
Card Setup
(Windows)
Network
Card
Setup
(Mac)
Setting Description
DISABLE
ltering, the function
to restrict access by IP
address. This function
requires thorough
knowledge of IP
addresses. Normally,
select [DISABLE].
Set the items below
properly when selecting
[ENABLE]; otherwise,
no access using TCP/IP is
allowed.
that are allowed to
access the printer. You
can specify an individual
address or an address
range. Specify the start
address and end address
when setting the address
range. Entering “0.0.0.0”
disables the setting.
- 93 -
Page 94

Network Setting Items
TELNET
IP Address
Range #110 Printing
Web
browser
Printing 1-10 - - - ENABLE Set whether to allow
Item
Conguration
Tool
(Network
Setting Plug-in)
Network
Card Setup
(Windows)
Shaded text indicates the factory default setting.
Network
Card
Setup
(Mac)
Setting Description
DISABLE
to changes to the
conguration from the IP
addresses specied in IP
Address Range #1-10.
IP Address
Range #1-10
Conguration
Admin IP
Address
5
5. Network Settings
MAC Address Filtering
TELNET
MAC
Address
Filtering
MAC
Address
Access
Conguration
1-10
Administrator’s
IP Address to
Register
Web
browser
MAC Address
Filtering
MAC Address
Access
- - - ENABLE Set whether to allow to
- - - 0.0.0.0 Set the IP address of
Item
Conguration
Tool
(Network
Setting Plug-in)
- - - ENABLE Set whether to use
- - - ACCEPT Set whether to allow or
Network
Card Setup
(Windows)
Shaded text indicates the factory default setting.
Network
Card
Setup
(Mac)
DISABLE
change conguration from
the IP addresses specied
in IP Address Range #1-
10.
the administrator. Only
this address can always
access the printer.
Remember that when the
administrator accesses
the printer via a proxy
server, this item is set
to the address of the
proxy server and all
access via the proxy
server is allowed. It is
recommended that the
administrator accesses
the printer without using
a proxy server.
Setting Description
DISABLE
DENY
MAC address ltering,
the function to allow
access only from MAC
addresses specied.
This function requires
thorough knowledge of
MAC addresses. Normally,
select [DISABLE].
Set the items below
properly when selecting
[ENABLE]; otherwise,
no access is allowed from
the network.
deny access from the
MAC addresses specied
in MAC Address #1-50.
- 94 -
Page 95

TELNET
MAC
Address
#1-50
Admin MAC
Address
Web
browser
MAC Address
#1-50
Administrator’s
MAC Address
to Register
Item
Conguration
Tool
(Network
Setting Plug-in)
- - - 00:00:00:
- - - 00:00:00:
Network
Card Setup
(Windows)
Shaded text indicates the factory default setting.
Network
Card
Setup
(Mac)
Network Setting Items
Setting Description
Specify the MAC
00:00:00
00:00:00
addresses that are
allowed to access
the printer. Entering
“00:00:00:00:00:00”
disables the setting.
Set the MAC address
of the administrator.
Only this address can
always access the
printer. Remember that
when the administrator
accesses the printer via
a proxy server, this item
is set to the address of
the proxy server and
all access via the proxy
server is allowed. It is
recommended that the
administrator accesses
the printer without using
a proxy server.
5
5. Network Settings
SSL/TLS
Shaded text indicates the factory default setting.
Item
Conguration
TELNET
Web
browser
Tool
(Network
Setting Plug-in)
Cipher
(SSL/TLS)
Cipher
Strength
- Certicate
- Common
- Organization - - - (NULL) Organization name:
SSL/TLS - - - ON Set whether to use SSL/
Cipher
Strength
Generation
Name
- - - Weak Set the cypher strength.
- - - Use a Self-signed
- - - (IP address of
Network
Card Setup
(Windows)
Network
Card
Setup
(Mac)
Setting Description
OFF
Standard
Strong
certicate (Selfsigned certicate)
Use a certicate
signed by a
certicate
authority
(Certicate-
authority-signed
certicate)
printer)
TLS.
Generate a self-signed
certicate. Or, generate
a CSR to send to a
certicate authority and
install a certicate issued
by a certicate authority.
This item is xed to the
IP address of the printer
when generating a self-
signed certicate.
Specify the ofcial name
of your organization. Up
to 64 characters can be
entered.
- 95 -
Page 96

Network Setting Items
TELNET
- Organization
- Locality - - - (NULL) Name of city: Specify
- State/Province - - - (NULL) State/Province: Specify
5
5. Network Settings
- Country/
- Key Type - - - RSA Set the type of
- Key Size - - - 2048 bit Set the size of
Web
browser
Unit
Region
Item
Conguration
Tool
(Network
Setting Plug-in)
- - - (NULL) Organization unit: Specify
- - - (NULL) Country code: Enter the
Network
Card Setup
(Windows)
Shaded text indicates the factory default setting.
Network
Card
Setup
(Mac)
Setting Description
a subgroup such as
department or division
within the organization.
Up to 64 characters can
be entered.
the name of the city
or place where your
organization is located.
Up to 128 characters can
be entered.
the name of the state
or province where your
organization is located.
Up to 128 characters can
be entered.
two-letter ISO code of
the country or region
where your organization
is located. (Example:
JP (Japan), US (United
States of America)). Up
to 2 characters can be
entered.
key for encrypted
communication.
1024 bit
512 bit
key for encrypted
communication.
SNTP
Shaded text indicates the factory default setting.
Item
Conguration
TELNET
Web
browser
Tool
(Network
Setting Plug-in)
SNTP SNTP - - - ENABLE Set whether to use the
NTP Server
(Pri.)
NTP Server
(Sec.)
NTP Server
(Pri.)
NTP Server
(Sec.)
- - - (NULL) Set the IP address of
- - - (NULL) Set the IP address of the
Network
Card Setup
(Windows)
Network
Card
Setup
(Mac)
Setting Description
DISABLE
SNTP protocol.
the primary NTP server
from which the time
information is obtained.
secondary NTP server
from which the time
information is obtained.
- 96 -
Page 97

TELNET
Adjust
Interval
Local Time
Zone
Network Setting Items
Shaded text indicates the factory default setting.
Item
Conguration
Web
browser
Tool
(Network
Setting Plug-in)
Adjust
Interval
Time Zone - - - 00:00 Set the time difference
- - - 1 hour Set the interval to obtain
Network
Card Setup
(Windows)
Network
Card
Setup
(Mac)
Setting Description
12 hours
24 hours
the time information from
the primary or secondary
NTP server.
from GMT.
Daylight
Saving
Daylight
Saving
Job List
TELNET
- Job queue
Web
browser
display setting
Web printing
- - - ON Set whether to use
Item
Conguration
Tool
(Network
Setting Plug-in)
- - - Document Name
Network
Card Setup
(Windows)
Shaded text indicates the factory default setting.
Network
Card
Setup
(Mac)
OFF
daylight saving time.
Setting Description
Select the items
Job Condition
Job Type
Computer Name
User Name
Number of sheets
printed
Transmit Time
Transmit Port
displayed on the list of
jobs (print data) waiting
to be printed. When
no selection has been
made for the setting, the
items set by default are
displayed.
5
5. Network Settings
Shaded text indicates the factory default setting.
Item
Conguration
TELNET
Web
browser
Tool
(Network
Setting Plug-in)
- Paper Tray - - - Tra y 1 Select the tray used for
- Copies - - - 1 Enter the number of
- Collate - - - Checked Set whether to collate the
Network
Card Setup
(Windows)
Network
Card
Setup
(Mac)
Setting Description
MPTray
Tray 2
-
999
Not checked
printing.
(Tray 2 will be displayed
when the optional tray
unit is installed.)
copies to print. Up to 999
can be entered.
output.
- 97 -
Page 98

Network Setting Items
Shaded text indicates the factory default setting.
Item
Conguration
TELNET
Web
browser
Tool
(Network
Setting Plug-in)
- Fit to page - - - Checked Set whether to t the
Network
Card Setup
(Windows)
Network
Card
Setup
(Mac)
Setting Description
Not checked
size of PDF le to the size
of the paper in the tray
if the paper size of PDF
le is different from the
paper size of the tray.
- Duplex
- Page Select - - - Checked Set the pages to print by
5
- PDF Password - - - Checked Select this item and
5. Network Settings
printing
- - - (NULL) Select the binding method
Long edge
Short edge
Not checked
Not checked
in duplex printing.
specifying the start and
end pages.
enter the password when
printing an encrypted
PDF le.
IEEE802.1X
Shaded text indicates the factory default setting.
Item
Conguration
TELNET
Web
browser
Tool
(Network
Setting Plug-in)
802.1X IEEE802.1X - - - ENABLE Set whether to use
EAP Type EAP Type - - - EAP-TLS Select the EAP method.
EAP User EAP User - - - (NULL) Specify the user name
EAP
Password
Use SSL
Certicate
EAP Password - - - (NULL) Set the password for
Use SSL
Certicate
- - - ENABLE Set whether to use
Network
Card Setup
(Windows)
Network
Card
Setup
(Mac)
Setting Description
DISABLE
PEAP
DISABLE
IEEE802.1X.
used for EAP. This item
is valid when EAP-TLS/
PEAP is selected. Up to 64
alphanumeric characters
can be entered.
the EAP user. This item
is valid only when PEAP
is selected. Up to 64
alphanumeric characters
can be entered.
an SSL/TLS certicate
for IEEE802.1X
authentication. When
no SSL/TLS certicate
is installed, “ENABLE”
cannot be selected. This
item is valid only when
EAP-TLS is selected.
- 98 -
Page 99

Network Setting Items
Shaded text indicates the factory default setting.
Item
Conguration
TELNET
Web
browser
Tool
(Network
Setting Plug-in)
Authenticate
Server
EAP retry - - - - 1 Set the number of
EAP
timeout
Authenticate
Server
- - - - 10 Set the timeout to wait
- - - ENABLE Set whether to
Network
Card Setup
(Windows)
Network
Card
Setup
(Mac)
Setting Description
DISABLE
-
3
-
9
-
60
authenticate a certicate
sent from the RADIUS
server by using a CA
certicate.
retries of IEEE802.1X
authentication. Up to
9 times can be set.
Normally, use the factory
default setting.
for the response from the
server during IEEE802.1X
authentication. Set the
value within the range
of 10 to 60 seconds.
Normally, use the factory
default setting.
5
5. Network Settings
IPSec
Shaded text indicates the factory default setting.
Item
Conguration
TELNET
Web
browser
Tool
(Network
Setting Plug-in)
IPSec IPSec - - - ENABLE Set whether to use IPSec.
- IP Address
1-50
- IKE
Encryption
Algorithm
- IKE Hash
Algorithm
- - - 0.0.0.0 Specify the host address
- - - 3DES-CBC Set the IKE encryption
- - - SHA-1 Set the IKE hash method.
Network
Card Setup
(Windows)
Network
Card
Setup
(Mac)
Setting Description
DISABLE
allowed to communicate
by IPSec.
● Use one-byte
characters separated
by a dot for an IPv4
address.
● Use one-byte
alphanumeric
characters separated
by a colon for an IPv6
global address.
● IPv6 link-local address
is not supported.
DES-CBC
MD5
method.
- Dife-Hellman
Group
- - - Group1 Set the Dife-Hellman
Group2
group used in Phase1
Proposal.
- 99 -
Page 100

Network Setting Items
Shaded text indicates the factory default setting.
Item
Conguration
TELNET
Web
browser
Tool
(Network
Setting Plug-in)
- LifeTime - - - 600 Set the lifetime of
- Pre-shared
Key
- Key PFS - - - KEYPFS Set whether to use Key
- Dife-Hellman
Group when
Key PFS
Enable
- - - (NULL) Set the pre-shared key.
- - - Group2 Set the Dife-Hellman
Network
Card Setup
(Windows)
Network
Card
Setup
(Mac)
Setting Description
86400
28800
NOPFS
Group1
None
ISAKMP SA. Normally,
use the factory default
setting.
PFS (Perfect Forward
Secrecy).
group used for Key PFS.
5
5. Network Settings
- ESP - - - Enable Set whether to use ESP
- ESP
- ESP
- AH - - - Enable Set whether to use AH
- AH
- LifeTime - - - 600 Set the lifetime of IPSec
Encryption
Algorithm
Authentication
Algorithm
Authentication
Algorithm
Disable
- - - 3DES-CBC Set the encryption
DES-CBC
- - - SHA-1 Set the authentication
MD5
OFF
Disable
- - - SHA-1 Set the encryption
MD5
3600
86400
(Encapsulating Security
Payload).
algorithm for ESP.
algorithm for ESP.
(Authentication Header).
algorithm for AH.
SA. Normally, use the
factory default setting.
- 100 -
 Loading...