

Page 1

Memory DIMM
Installation Instructions
DIMM PART NUMBERS
C5100/ C5150n/ C5200ne/C5200n
64 MB: 70042801
256 MB: 70042901
C5300/ C5400/C5400n
64 MB: 70043001
128 MB: 70043101
256 MB: 70043201
Page 2

Every effort has been made to ensure that the information in this document is
complete, accurate, and up-to-date. Oki Data assumes no responsibility for the
results of errors beyond its control. Oki Data also cannot guarantee that
changes in software and equipment made by other manufacturers and referred
to in this guide will not affect the applicability of the information in it. Mention
of software products manufactured by other companies does not necessarily
constitute endorsement by Oki Data.
© 2004 by Oki Data Americas, Inc. All rights reserved.
Written and produced by the Oki Data Training & Publications Department.
Please address any comments on this publication:
Training & Publications Dept.
Oki Data Americas, Inc.
2000 Bishops Gate Blvd.
Mt. Laurel, NJ 08054-4620
For the latest product information, printer drivers, manuals, special offers, etc.,
go to http://my.okidata.com.
OKI is a registered trademark/marque déposée/marca registrada Oki Electric Industry
Company, Ltd. Macintosh is a trademark of Apple Computer, Inc., registered in the
U.S. and other countries. Windows and Windows NT are either registered trademarks
or trademarks of Microsoft Corporation in the United States and other countries.
Page 3
Getting Started
The printers have one socket for an optional memory DIMM board.
You can expand the printer's memory by adding up to 256 MB of additional
memory.
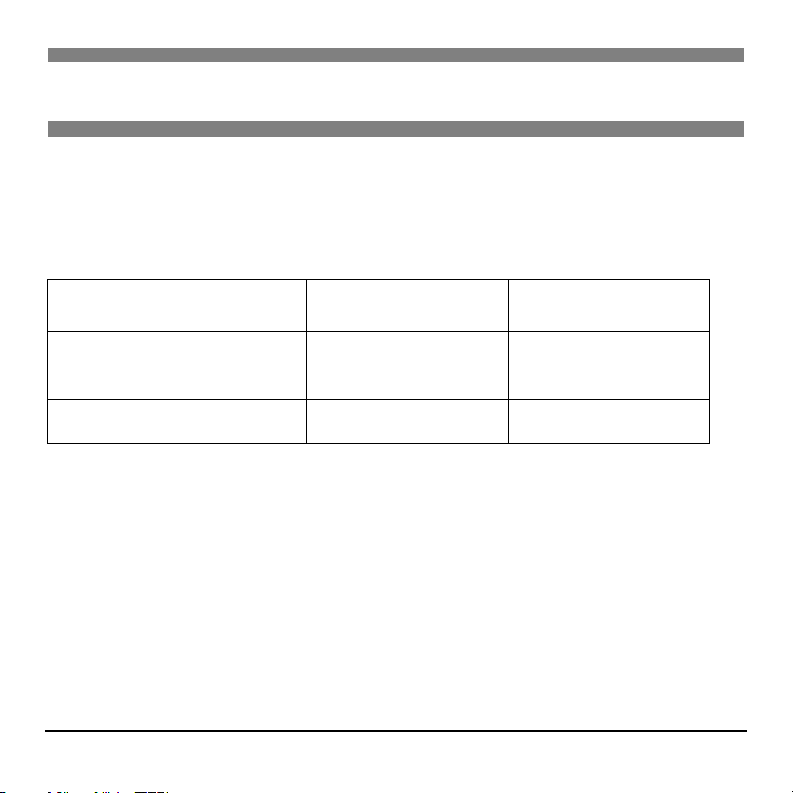
Model Memory Provided Maximum Memory
C5100, C5150n,
C5200ne, C5200n
C5300, C5400, C5400n 64 MB 320 MB (256 + 64)
Caution!
To avoid damage by static electricity or rough handling, keep the DIMM board in
its packaging until you're ready to install it
32 MB 288 MB (256 + 32)
1
Page 4
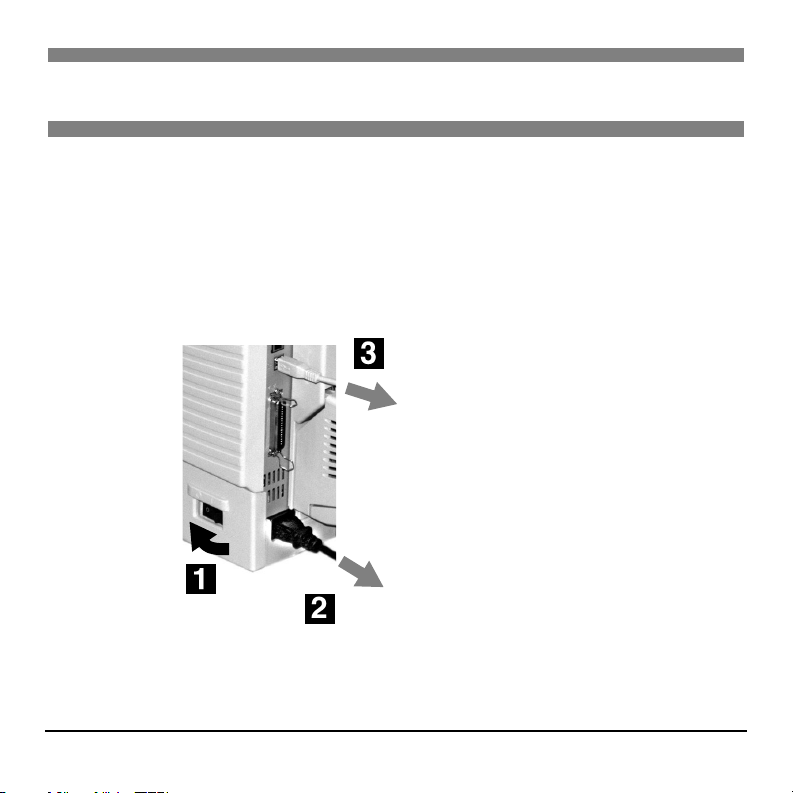
Prepare the Printer
1. First:
• Turn off the printer (1).
• Unplug the power cord (2).
• Detach the interface cable—USB, parallel, or Ethernet—from the back of the
printer (3).
2
Page 5

2. Open the top cover.
3. Loosen the thumbscrew holding the printer side cover in place.
3
Page 6
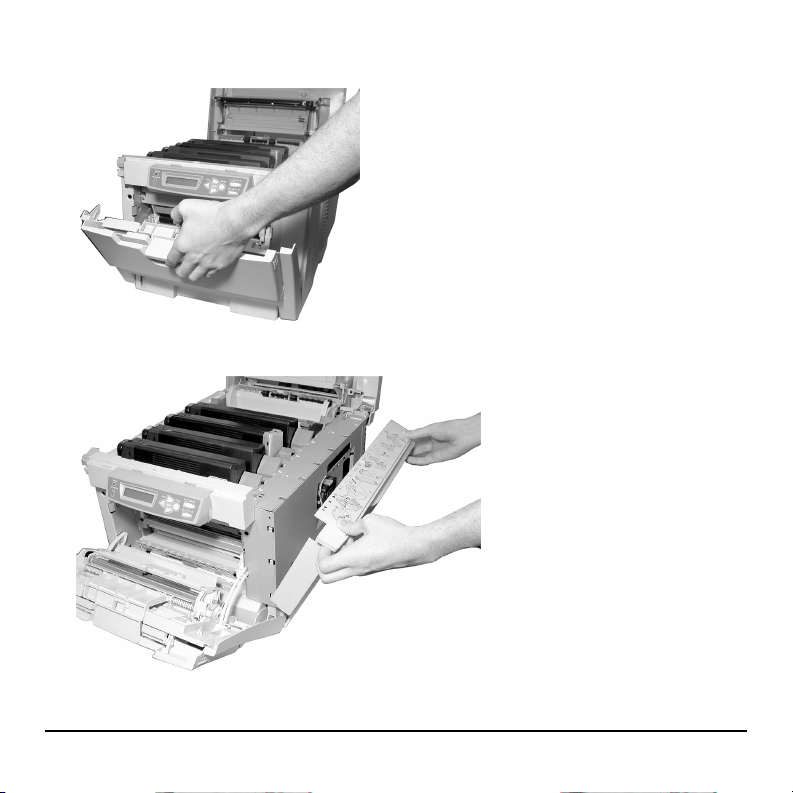
4. Open the front cover.
5. Lift up on the ends and remove the side panel from the printer.
4
Page 7

Install the DIMM
Caution!
Circuit boards can be damaged by static electricity and rough handling. Keep
the board in its packaging until you're ready to install it.
1. Locate the DIMM socket.
C5100, C5150n, C5200ne, C5200n C5300, C5400, C5400n
5
Page 8

2. Push out the lock tabs at either end of the DIMM socket.
C5100, C5150n,
C5200ne, C5200n
C5300, C5400, C5400n
Caution!
To avoid damage, ground yourself (touch metal) before handling DIMMs.
3. Remove the DIMM from its shipping package.
6
Page 9

4. Insert the DIMM in the socket:
C5100, C5150n,
C5200ne, C5200n
C5300, C5400, C5400n
• C5100, C5150n, C5200ne, C5200n
: Hold the DIMM vertically, with the
narrower metallic contact edge (1) at the bottom.
• C5300, C5400, C5400n: Hold the DIMM horizontally, with the narrower
metallic contact edge (1) to the right.
5. Press the DIMM in firmly, until you feel the tabs snap to lock it in place.
Note: You may need to push the tabs in manually to secure the DIMM.
7
Page 10

Complete the Installation
1. Replace the side panel on the printer and secure it in place with the
thumbscrew.
8
Page 11

2. Close the front cover.
3. Close the top cover.
4. Reattach the computer interface cable.
5. Plug in the power cord and turn on the printer.
9
Page 12

Check for Proper Installation
Generate a MenuMap printout:
OLN INE
CANCEL
1. Press
BACK ENTER
MENU
+ one or more times until INFORMATION MENU appears on the
display.
2. Press
ENTER twice.
The MenuMap prints.
3. Check the top of the MenuMap printout to verify that the Total Memory Size
indicated matches the combined total of the printer’s standard memory
(C5100, C5150n, C5200ne, C5200n = 32 MB; C5300, C5400, C5400n = 64
MB) and the memory of the DIMM you installed.
4. If the Total Memory listed at the top of the MenuMap printout does not
include the memory you just installed, remove the printer’s side panel and
reinstall the DIMM, making sure it is firmly in place, then replace the side
panel and print the MenuMap again.
10
Page 13

Change the Memory Setting in the Driver(s)
Windows
®
Postscript Emulation Driver, C5300/C5400n
1. Click Start → Settings → Printers [Printers and Faxes for XP].
2. Right click the appropriate printer icon, then click Properties.
Windows XP, 2000 and NT 4.0:
a. Click the Device Settings tab.
b. Scroll down to Installable Options and click Memory Configuration.
c. Select the new total memory installed
Windows Me:
*
from the drop-down list.
a. Click the Device Options tab.
b. Scroll down to Installable Options and click Memory Configuration.
c. Select the new total memory installed
Windows 98:
*
from the drop-down list.
a. Click the Device Options tab.
b. Scroll down to Installable Options and click VMOptions.
c. Select the new total memory installed
*
from the drop-down list.
3. Click OK, then close the Printers (Printers and Faxes) dialog box.
* New DIMM + 64 MB
11
Page 14

PCL Driver, C5300/C5400/C5400n
No changes are necessary in the PCL driver.
Hiper-C Driver, C5100/C5150n/C5200ne/C5200n
No changes are necessary in the Hiper-C driver.
Macintosh®, C5300/C5400n
Mac OS 9.1+
1. Activate Chooser from the Apple menu.
2. Select LaserWriter 8.
3. Click Printer → Setup.
4. Click Configure.
5. Select Memory Configuration in the Change drop down menu. Select the
installed available memory to enable the option.
6. Click OK twice.
7. Close Chooser.
Mac OS X to X.1
No activation is required.
12
Page 15

Mac OS X.2
1. Activate Print Center from Local Hard Drive → Applications →
Utilities → Print Center.
2. Highlight the printer name and select from the menu Printers → Show
Info.
3. Next to Memory Configuration, click on the drop drown menu to select the
total installed available memory (new DIMM + 64 MB resident) to enable
the option.
4. Click Apply Changes and exit to the desktop.
Mac OS X.3+
1. Activate the Printer Setup Utility from Local Hard
Drive → Applications → Utilities → Printer Setup Utility.
2. Highlight the printer name and select from the menu Printers → Show
Info.
3. Next to Memory Configuration, click on the drop drown menu to select the
total installed available memory (new DIMM + 64 MB resident) to enable
the option.
4. Click Apply Changes and exit to the desktop.
13
Page 16

Limited Warranty: U.S and Canada
Oki Data Americas, Inc. (Oki Data) warrants this OPTION to be free from
defect in material and workmanship and will remedy any such defect according
to the terms of this Limited Warranty.
Oki Data will repair (or at its option, replace) at no charge, any defective part(s)
of the OPTION for one (1) year from the date of purchase. This Limited War-
ranty extends to the original purchaser only.
To make request or claim for service under this Limited Warranty the original
purchaser must return the Oki Data product, shipping prepaid, in the original
shipping container or equivalent, to Oki Data or an authorized Oki Data service
center and assume the risk of loss or damage in transit. A written receipt for the
product, showing the date of purchase, dealer's name, and item purchased must
accompany any request or claim for work to be performed under this Limited
War ra nt y.
This Limited Warranty shall not apply if the product has been damaged due to
abuse, misuse, misapplication, accident, or as a result of service or modification
by any other than an authorized Oki Data service center.
THERE ARE NO EXPRESS WARRANTIES OTHER THAN THOSE ON
THE FACE HEREOF AND DESCRIBED ABOVE. NO WARRANTIES
WHETHER EXPRESS OR IMPLIED, INCLUDING, BUT NOT LIMITED
TO, ANY IMPLIED WARRANTIES OF MERCHANTABILITY OR FITNESS FOR A PARTICULAR PURPOSE, SHALL EXTEND BEYOND THE
14
Page 17

RESPECTIVE WARRANTY PERIOD DESCRIBED ABOVE OF ONE (1)
YEAR. Some states do not allow limitations on how long an implied warranty
lasts, so the above limitation may not apply to you.
OKI DATA SHALL NOT BE RESPONSIBLE OR LIABLE FOR ANY SPECIAL, INCIDENTAL OR CONSEQUENTIAL DAMAGES OR LOSS ARISING FROM THE USE OF THIS PRODUCT. Some states do not allow the
exclusion or limitation of incidental or consequential damages, so the above
exclusion may not apply to you.
Additional information on obtaining service under this Limited Warranty is
available by contacting the Oki Data dealer from whom the product was purchased, by contacting Oki Data directly at 1-800-654-3282 (1-800-OKI-DATA,
U.S. and Canada, English only) or at 1-856-222-5276 (Spanish only), or by
contacting one of the listed service locations.
This warranty gives you specific legal rights, and you may also have other
rights which vary from state to state.
For the most up-to-date listing of Oki Data authorized Service Centers, call
1-800-654-3282 (1-800-OKI-DATA).
15
Page 18

Oki Data Service Depot Information
UNITED STATES
Oki Data Americas, Inc.
2020 Bishops Gate Blvd.
Mt Laurel, NJ 08054
Tel : 1-800-654-3282
Fax: 1-856-222-5247
MEXICO
Oki Data de Mexico, S.A. de C.V.
Mariano Escobedo No. 748 - 8 Piso
Col Anzures, e.p. 11590
Mexico, DF
Tel : 52-555-263-8780
Fax: 52-555-250-3501
CANADA
Oki Data Americas, Inc.
2735 Matheson Blvd. East, Unit 1
Mississauga, Ontario
Canada L4W 4MB
Tel : 800-654-3282
Fax: 905-238-4427
BRAZIL
Oki Data do Brasil, Ltda.
Rua Alexandre Dumas,
2220 - 8 andar
Chácara Sto Antonio
São Paulo 04717-004, Brasil
Support Center: 0800-11-55-77
e-mail: okidata@okidata.com.br
Tel : 55 11-3444-3500
Fax: 55 11-3444-3501
16
Page 19

Page 20

Oki Data Americas, Inc.
2000 Bishops Gate Blvd.
Mt. Laurel, NJ 08054-4620
Phone: (800) 654-3282
FAX: (856) 222-5320
www.okidata.com
59358901
 Loading...