

Odys League 19 Quick Start Guide
/
V1.1.0
League 19 – Quick Start Guide
1. Mounting
Please pay attention to the instructions of the stand mounting provided
in the manual.
2. Switch ON
Step 1: Connect the TV with the power supply.
Attention!
Use only the power adapter delivered with the TV.
Do not directly connect the TV with a 12V boardnet; this may cause serious damage
to the unit. When necessary only use a stabilised switch mode with at least 12V
(DC/DC Converter) with short-circuit and overload protection! If you have further
questions, please contact our support.
Step 2: Please establish the connection for the antenna to the desired
mode of reception.
The antenna connection for DVB-C and DVB-T you will find on the
backside, face to the left if viewed from the front.
DVB-C /
DVB-T
4. System Setup
Step 1: With the help of /-button,
select „home“ for usage at
home. Confirm with „OK“.
Step 2: Select the region where you are
located.
Step 3: With the help of /-button
select the desired osd language.
Step 4: The integral switch-off feature automatically switches off the
unit after 2 hours without any operation. If desired please
change the automatic switch-off feature here and confirm
with „OK“.
Step 5: Select the mode of reception. Choose DVB-T using an
antenna or outdoor antenna. Using a cable connection,
choose DVB-C.
Step 6: With the help of /-button select if analogue (ATV), digital
(DTV), or both types of programs should be searched. The
LCN setting will be set automatically.
Step 7: Wait until channel search is finished and the first channel will
be displayed.
Remote Control Importan Buttons
Indication for DVB-T
Whether and how many DVB-T channels can be received by this device is strongly
depending on the operational place and the DVB-T signal strength in this area.
DVB-T radio in particular is very limited and not available in most locations
Please note that for using of DVB-T after each larger local change, a new channel
search should be accomplished. Since the frequency of the Channels may vary from
region to region. Channels marked with (Internet) are linked with the internet and are
not usable.
Indication DVB-C Reception
Via DVB-C the programs can be received analogue or digital. If possible you should
prefer the digital reception mode. In this mode there are available more channels with
a better picture quality.
Encrypted Channels
Via DVB-C you can receive also encrypted TV channels. Therefore you need a Cam
Module and a SMART CARD of your service provider. Which programs are usable
depends on the contract.
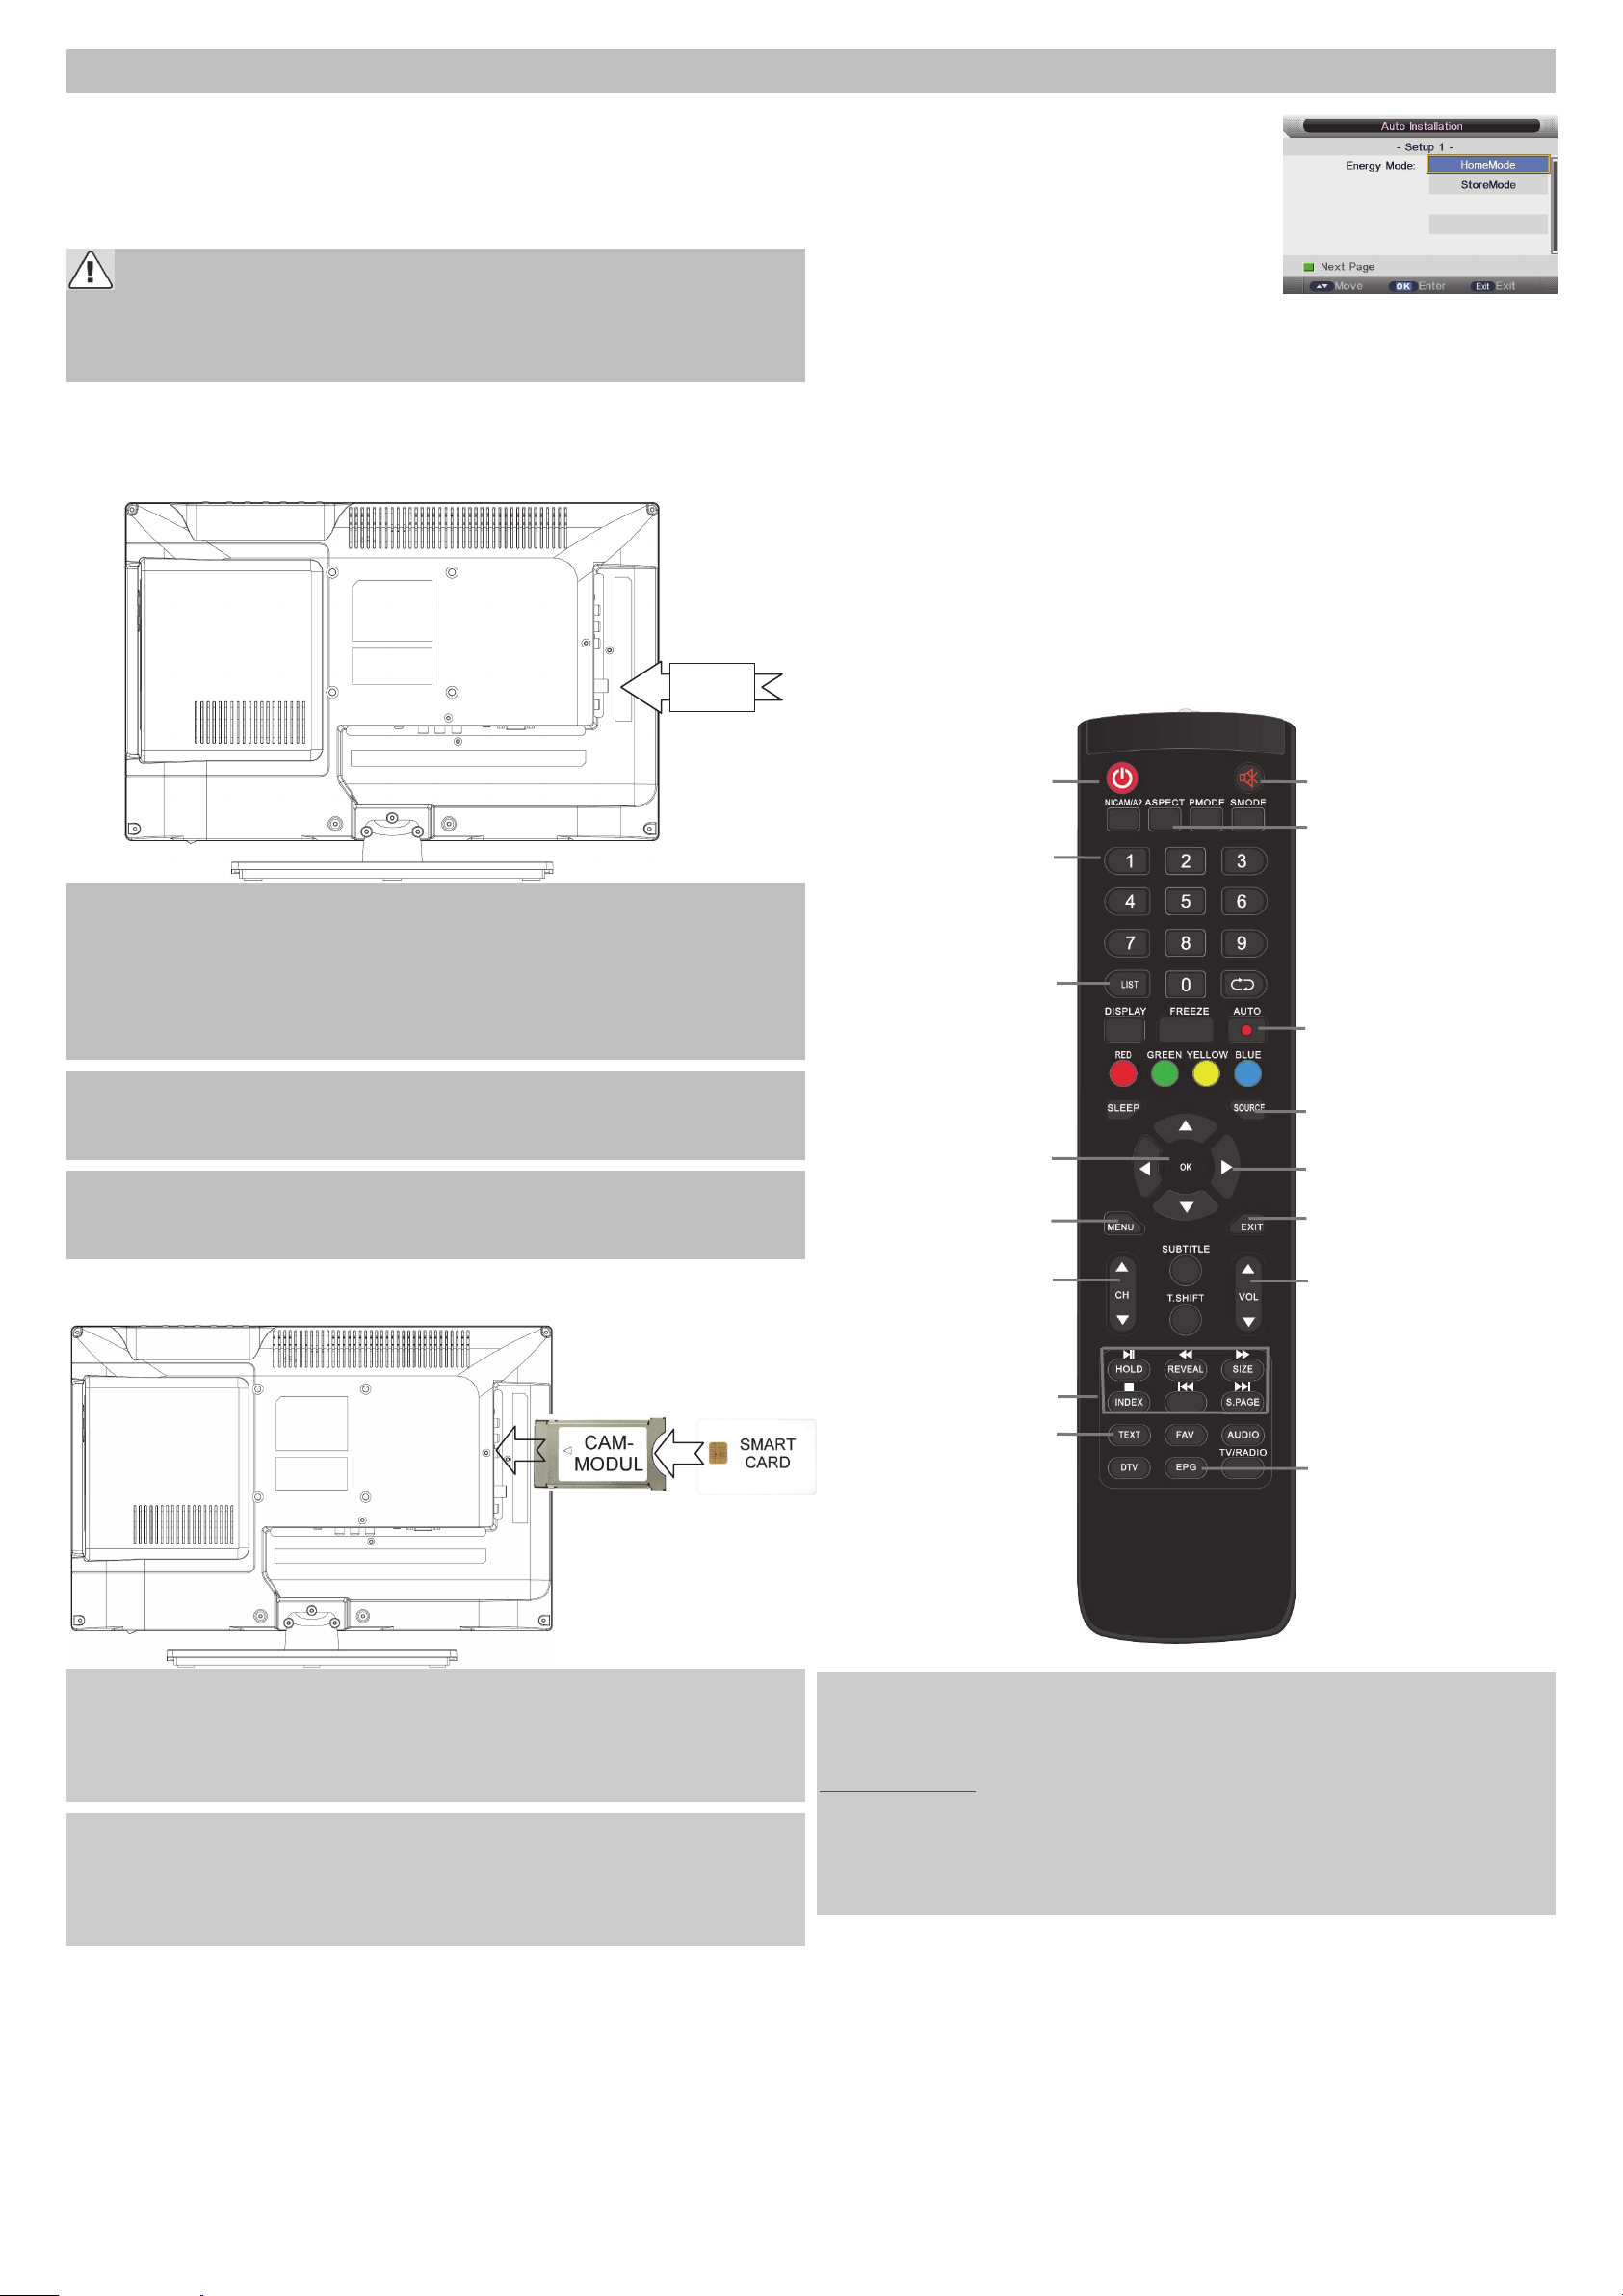
Step 3: If desired you can insert a CAM Module and a Smart Card of
your service provider into the CI+ Slot.
On- / off button (Power)
Number keys used to select
channel numbers
Open channel list (List)
(OK) Used to confirm a
selection within a menu
TV MENU: open the menu
of the current title
Next channel
Previous channel
Playback control in
USB mode
Open Teletext (Text)
(Mute)
Change ratio
(Aspect)
Start record (REC)
SOURCE: select input
source. (Digital TV, Scart,
HDMI, USB)
ARROW KEYS: Move
within the menus.
Exit Menu (Exit)
Volume control
Open to display information
about the program being
viewed (EPG)
Indication
Module and Smartcard are not included in the delivery.
The activation of the card can take a few minutes when it will be used fort the first
time. The device controls the module after every switching on. Please pay attention to
the manual of CI+ Module and Smartcard.
Just CI+ Modules and Cards are usable. Other models are not supported.
Indication to CI+
Please pay attention that record and time shift function can be limited on some
channels.
Recorded files from channels which were encrypted over CI+ Card can just be played
on this device.
This is limited by the program and the manufacturer is not responsible for this.
3. Switch ON
Step 1: Insert the batteries making sure the polarity into the remote
control.
Step 2: To switch on press the red “power button” on the top left on
your remote control.
Step 3: The device will start and the first time setup will be shown.
Indication
For detailed Information about operating and about the device please read the
enclosed manual carefully.
If you have any further questions please refer to our customer service
support@axdia.de
In order to handle your issue quickly we kindly ask you to provide us with the following
information:
- Name of ODYS - Product
- Serial number and date of purchase
- Description of problem
 Loading...