

Page 1
User Guide
Page 2

Table Of Contents
About PrintShop Mail............................................................................................................................................5
Contact Information.............................................................................................................................................7
Using PrintShop Mail Help.....................................................................................................................................9
Getting Started......................................................................................................................................................... 11
Installing PrintShop Mail.....................................................................................................................................11
What is New in PrintShop Mail ............................................................................................................................13
Upgrading PrintShop Mail...................................................................................................................................15
Getting Started..................................................................................................................................................17
Installing a Printer Driver ...................................................................................................................................18
Installing the Hardware Key ...............................................................................................................................19
How to... .................................................................................................................................................................21
Create a New Document ....................................................................................................................................21
Default Settings.................................................................................................................................................23
Specify the Layout Size ......................................................................................................................................24
Link a Database to a Document .............................................................................................................................26
Open a Database...............................................................................................................................................26
Connect to SQL Server.......................................................................................................................................31
Add Text ..............................................................................................................................................................36
Add Variable Text ..............................................................................................................................................36
Formatting Variables..........................................................................................................................................39
Creating Serial Numbers.....................................................................................................................................42
Add Images.......................................................................................................................................................... 44
Add Static and Variable Images..........................................................................................................................44
Layout Conditioning ........................................................................................................................................... 48
Layout Repetition............................................................................................................................................... 51
Select Paper Trays.............................................................................................................................................53
Number of copies...............................................................................................................................................55
Verify a Document.............................................................................................................................................58
Save a Document...............................................................................................................................................60
Publish to PrintShop Web ......................................................................................................................................61
Publishing Documents........................................................................................................................................ 61
Print a Document..................................................................................................................................................70
Printing Basics...................................................................................................................................................70
Print Technologies .............................................................................................................................................72
Standard PostScript............................................................................................................................................72
Optimized PostScript..........................................................................................................................................73
AHT..................................................................................................................................................................74
Creo VPS...........................................................................................................................................................75
Fiery FreeForm ..................................................................................................................................................76
Fiery FreeForm 2 ...............................................................................................................................................77
PPML ................................................................................................................................................................78
PPML/VDX 7 ......................................................................................................................................................80
PrintStreamer ....................................................................................................................................................81
VIPP ........................................................................................................................... ......................................82
Page Setup........................................................................................................................................................ 83
Subset Finishing ................................................................................................................................................84
Automated Printing............................................................................................................................................85
Automated Printing Overview .............................................................................................................................85
Command Line Arguments .................................................................................................................................86
Extended Scripting.............................................................................................................................................87
DDE..................................................................................................................................................................91
HotFolder..........................................................................................................................................................92
Document Fundamentals ..........................................................................................................................................93
Properties Window.............................................................................................................................................93
Properties Panel.................................................................................................................................................97
PDF Page Properties...........................................................................................................................................99
Image Properties............................................................................................................................................. 102
Text Properties................................................................................................................................................ 105
Formatting Text.................................................................................................................................................. 109
Text Style........................................................................................................................................................ 109
Paragraph Style............................................................................................................................................... 111
Layout Basics...................................................................................................................................................... 115
Layout Basics ..................................................................................................................................................115
1
Page 3

Guide Lines ..................................................................................................................................................... 117
Folding Lines ................................................................................................................................................... 118
Bleed Margin ................................................................................................................................................... 119
Crop Marks...................................................................................................................................................... 121
Manipulating Objects........................................................................................................................................... 122
Selecting Objects.............................................................................................................................................122
Moving and Resizing Objects ............................................................................................................................ 123
Copying Objects............................................................................................................................................... 124
Aligning Objects............................................................................................................................................... 125
Arranging Objects............................................................................................................................................ 127
Locking Objects ............................................................................................................................................... 128
Linking Text Objects ........................................................................................................................................ 129
Toolbar Reference...............................................................................................................................................130
Toolbars Overview........................................................................................................................................... 130
Database Toolbar.............................................................................................................................................131
Objects Toolbar............................................................................................................................................... 132
Standard Toolbar............................................................................................................................................. 133
Text Formatting Toolbar................................................................................................................................... 134
Text Link Toolbar............................................................................................................................................. 135
Tools Toolbar ..................................................................................................................................................136
View Toolbar ................................................................................................................................................... 137
Supported File Formats........................................................................................................................................ 138
Supported Database Formats............................................................................................................................ 138
Supported Image Formats................................................................................................................................ 139
Preferences Settings...............................................................................................................................................141
Program Settings............................................................................................................................................. 141
Print Job Settings............................................................................................................................................. 143
Repetition Settings...........................................................................................................................................145
Imposition Settings.......................................................................................................................................... 147
PrintShop Web Settings....................................................................................................................................149
Using Expressions................................................................................................................................................... 151
Expressions Overview ......................................................................................................................................151
Favorite Expressions............................................................................................................................................ 155
Favorite Expressions Overview..........................................................................................................................155
Favorite Expressions- Capitalizing names........................................................................................................... 156
Favorite Expressions- Salutations...................................................................................................................... 157
Favorite Expressions- Custom Serial Numbers.................................................................................................... 158
Functions and Operators...................................................................................................................................... 159
Functions Overview..........................................................................................................................................159
Expressions Operators...................................................................................................................................... 161
Barcode Functions ...........................................................................................................................................162
Barcode Functions Overview............................................................................................................................. 162
CODABAR........................................................................................................................................................ 166
CODE128 ........................................................................................................................ ................................167
CODE39 .......................................................................................................................................................... 168
EAN13............................................................................................................................................................. 169
EAN8 ..............................................................................................................................................................170
ITF (Interleaved 2 of 5).................................................................................................................................... 171
JAN13............................................................................................................................................................. 172
JAN8............................................................................................................................................................... 173
KIX ................................................................................................................................................................. 174
MSI Plessey..................................................................................................................................................... 175
NW7 ............................................................................................................................................................... 176
ONECODE .......................................................................................................................................................177
POSTNET ........................................................................................................................................................ 178
UPCA .............................................................................................................................................................. 179
UPCE ..............................................................................................................................................................180
Rolan Barcode Function.................................................................................................................................... 181
YUBAR ............................................................................................................................................................ 181
Layout Functions .............................................................................................................................................182
Layout Functions Overview............................................................................................................................... 182
BLANK............................................................................................................................................................. 183
PRINT............................................................................................................................................................. 184
SKIP ...............................................................................................................................................................185
Logical Functions ............................................................................................................................................. 186
Logical Functions Overview............................................................................................................................... 186
AND................................................................................................................................................................ 187
2
Page 4

FALSE ............................................................................................................................................................. 188
FILE_EXIST ..................................................................................................................................................... 189
IF ................................................................................................................................................................... 190
NOT................................................................................................................................................................ 191
OBJECT_EMPTY............................................................................................................................................... 192
OR.................................................................................................................................................................. 193
TRUE .............................................................................................................................................................. 194
Number Functions............................................................................................................................................ 195
Number Functions Overview............................................................................................................................. 195
ABS................................................................................................................................................................. 196
CHR................................................................................................................................................................ 197
COUNTER........................................................................................................................................................ 198
DIV................................................................................................................................................................. 199
INT................................................................................................................................................................. 200
LAYOUT_COUNT..............................................................................................................................................201
LAYOUT_NR .................................................................................................................................................... 202
MOD............................................................................................................................................................... 203
PAGE_COUNT.................................................................................................................................................. 204
PAGE_NR ........................................................................................................................................................ 205
RECORD_COUNT ............................................................................................................................................. 206
RECORD_NR.................................................................................................................................................... 207
ROUND ........................................................................................................................................................... 208
SGN................................................................................................................................................................ 209
VAL................................................................................................................................................................. 210
String Functions............................................................................................................................................... 211
String Functions Overview................................................................................................................................ 211
ASC.................................................................................................................................................................212
CONTAINS.......................................................................................................................................................213
DATE .............................................................................................................................................................. 214
LEFT............................................................................................................................................................... 216
LEN................................................................................................................................................................. 217
LOWER ...........................................................................................................................................................218
LTRIM............................................................................................................................................................. 219
MID ................................................................................................................................................................ 220
POS ................................................................................................................................................................ 221
PROPER .......................................................................................................................................................... 222
REPLACE.........................................................................................................................................................223
RIGHT............................................................................................................................................................. 224
RTRIM ............................................................................................................................................................225
STR.................................................................................................................................................................226
TEXT_FILE ...................................................................................................................................................... 227
TODAY............................................................................................................................................................ 228
TRIM...............................................................................................................................................................229
UPPER.............................................................................................................................................................230
Pluggins.......................................................................................................................................................... 231
Windows Shortcuts .......................................................................................................................................... 233
Macintosh Shortcuts......................................................................................................................................... 235
License Agreement ..........................................................................................................................................237
Glossary................................................................................................................................................................. 239
Index..................................................................................................................................................................... 241
3
Page 5

Page 6

About PrintShop Mail
PrintShop Mail User Guide
Leverage the real pote ntial of your data by print ing va riable images and text base d
upon unique information on each individual recipient!
Overview
PrintShop Mail is a fast, efficient and very easy to use professional software tool that makes personalized printing quick
and easy. It allows you to optimize the process of merging variable database information with a design. For
advertisements, direct mailing, flyers or any other type of promotional documents, you can rely on PrintShop Mail.
PrintShop Mail enables users to perform simple and complex Variable Data Printing jobs for medium to high volume
output quantities.
By simply dragging and dropping database fields onto the document layout, PrintShop Mail creates a link between the
database field and your document. PrintShop Mail gives you an instant preview and provides you with a powerful
resource checking option to ensure proper printing. Utilize the comprehensive set of conditional rules for database driven
composition.
• Verify Document before printing.
• Preview repetition settings.
• Support for vertical text and double byte characters.
During the printing process, the variable information from the database is sent to the printer on the fly. The static portion
of the job does not need to be re-ripped. This greatly shortens the printing process and prevents network congestion.
PrintShop Mail then allows your PostScript® printer to print at or near rated speed, depending on RIP capability. This
makes variable information printing an efficient process.
Benefits
•
Easy to use: no programming experience needed
• No need to change your design application, database, PostScript RIP or printer
• Variable Information Printing at rated speed of the printer!
• Reduced print cost and print wastage
• Efficient production process saves time and money
• Open architecture - plugs in easily into your existing workflow
• Instant preview to see results before printing to facilitate accuracy
• Layout and database can be created separate from each other
• Resource check on print stream reliability
• Finishing options per record or per set
• Nine free bar code fonts included!
Business applications
Targeted Advertisements
•
• High Speed Mail Merges
• Direct Mailings
• Discount Coupons
• Postcards
• Flyers
• Tickets
• Certificates
• Letters and more…
5
Page 7

Page 8

Contact Information
PrintShop Mail User Guide
To find an Objectif Lune office near you and for more information on our products and services, visit
www.objectiflune.com.
7
Page 9

Page 10

Using PrintShop Mail Help
Getting Started with PrintShop Mail
Here are some tips on how to use this PrintShop Mail on-line Help.
About the Help Display
You can use several navigation tools in this Help system. The Help is divided into a left-hand and right-hand frame. The
right-hand frame shows the actual texts and some navigational aids , the left-hand frame is the mainstay for the
navigational aids. You can select four options above the left-hand frame:
• Hide/Show :To display or hide the Contents.
• Back :To display the previous topic you selected.
• Forward :To display the next topic you selected.
• Print :To print one or more topics.
Contents, Index, Search, and Glossary Tabs
The left-hand frame contains the following tabs, which access these navigation aids:
• Contents
• Index
• Search
• Glossary
Hyperlinks and Relate d T opics
The right-hand frame contains the following navigation aids:
• Hyperlinks
• Related topics
To use the Help naviga tion tools
Contents
Note: The Contents are displayed by default. Click the other tabs to access the corresponding navigational aids.
1. If not selected, click the Contents tab.
The table of contents appears in the left-hand frame. It is represented in the form of a tree structure with book
icons. These books are structured hierarchically.
2. Click a book icon.
3. Click a page icon.
Index
Search
The corresponding Help text appears in the right-hand frame.
1. Click the Index tab.
2. In the text box, begin to type the first letters of the keyword you want information on or the entire keyw ord.
The list below will jump to the first word beginning with the letters you typed.
The selected keyword is highlighted.
3. Continue to type more letters to narrow down the choice, or click the correct keyword if you can identify it.
4. Click Display.
The corresponding Help text is shown in the right-hand frame.
1. Click the Search tab.
At the top of the Search tab sheet, there is a box in which you can type the keyword.
2. Click List Topics.
A list with topics containing the keyword is disp layed.
3. Click the topic you want.
9
Page 11

4. Click Display.
The Help text is displayed in the right-hand frame. The selected keyword is highlighted.
Glossary
1. Click the Glossary tab to display PrintShop Mail terms.
2. Click a term in the list to display its definition.
Hyperlinks
The Help texts contain hyperlinks. These are underlined texts. Click the underlined text
to view the Help topic.
Related topics
The Related Topics buttons provide access to topics that deal with similar subjects.
Click the Related Topics button.
• If there is only one related topic, it is displayed straightaway.
• If there are more than one related topics, a menu appears where you can make your selection.
10
Page 12

Getting Started
Installing PrintShop Mail
Getting Started with PrintShop Mail
Before you start
If you are installing PrintShop Mail on a computer with Windows 2000, XP or 2003, make sure you are logged in with full
administrative rights before running the installation program.
To install PrintShop Mail
Windows
1. Locate the setup.exe file on the CD-ROM.
2. Double click this file to start the installation wizard.
3. Select the language you want to use for the installation.
4. Click OK.
5. Click Next.
6. Read the license agreement and select I accept the terms in the license agreement. (If you select I do
not accept the terms in the license agreement, the installation stops).
7. Click Next.
8. Specify whether you want PrintShop Mail to be available for all user s on the computer, or just for the current
user.
9. Click Next.
10. Choose between a Complete or Custom setup.
• If you select Complete, all necessary program features will be installed. This option automatically installs all
available languages.
• If you select Custom, use the next screen to select or clear program features.
To create a custom installation
1. Click the hard disk icon to view four choices for the selected feature:
This feature will be installed on local hard drive.
This feature, and all subfeatures, will be installed on local hard drive.
This feature will be installed when required.
This feature will not be available.
2. Select the options you want.
3. To change the default installation directory, click the Change button and select the directory for the PrintShop
With either selection you have the option to verify your installation settings.
11. After you have set the option you want, click Next.
12. Press Install to continue the installation wizard.
13. Click Finish.
Mac OS
Mail installation.
1. Locate the PrintShop Mail installer on the CD-ROM .
2. Double click this file to start the installation wizard. You will see the PrintShop Mail start up screen.
3. Click Continue.
4. Read the license agreement and select I accept the terms in the license agreement. (If you select I do
not accept the terms in the license agreement, the installation stops).
5. Click Continue.
6. By default PrintShop Mail will be installed in the application folder. You can select other place where you want
to install PrintShop Mail.
7. Click Continue.
8. Choose the Installation Type:
11
Page 13

If you select Easy Install, all necessary program features will be installed.
If you select Custom, you can select or clear program features.
9. Press Install to continue the installation wizard.
10. A dialog will open saying "Installation was successful. If you are finished, click Quit to leave the Installer. If
you wish to perform additional installations click Continue."
You can install the Hardware key from this window or install it later. For more information, see Installing the
Hardware Key.
11. Everything has been installed into one folder called "PrintShop Mail".
12
Page 14

What is New in PrintShop Mail
Getting Started with PrintShop Mail
Click a heading to display information on these new features:
Windows
Printing
• PrintShop Mail no longer depends on Adobe Acrobat for processing PDF pages.
• Print Preview has been implemented for viewing an on-screen representation of the printed output.
Variables
• USPS OneCode barcode support has been added.
• XML database support has been added.
Documents
• Two Color support has been added. Images can be displayed and printed in Two Colors.
• It is possible to save PrintShop Mail documents as PrintShop Mail templates. Templates are PrintShop Mail
documents that are designed for later use, for example templates can be used as base for new documents and
for Publishing to PrintShop Web. These templates contain the basic (background) layout and document
settings.
• It is possible to use plugins.
User Interface
• The user interface has been further improved, for example:
Docking windows, which allows you to customize the user inter face to your personal preferences.
Interface theme (Skins), which allows you to change the appearance of the application user interface.
• In the File menu a new Operator Instructions submenu has been added, a document designer can enclose
a note containing directions about duplex settings, paper weight etc. This is a shortcut to the Comments edit
box in the first step of the Publishing to PrintShop Web wizard.
Mac OS
Printing
• Support for printing technology AHT has been implemented.
Variables
• USPS OneCode barcode support has been implemented.
Documents
• Editing text properties (attributes) of multiple text objects at a time is now possible.
• You can now store your favorite expressions in PrintShop Mail, making it possible to reuse expressions easily in
other documents and export/import your favorites to other computers.
13
Page 15

User Interface
• Text toolbar has been added.
14
Page 16

Upgrading PrintShop Mail
Getting Started with PrintShop Mail
To use certain features in PrintShop Mail, for example a specific print technology or automated printing, your hardware
key must be upgraded before you are allowed to use it. When executing the upgrade, the application will detect which
upgrade options are available, and will allow you to make your choices.
Single-user licenses as well as multi-user, or Network License are available.
For information about the official retail prices, go to the PrintShop Mail Web Site and click on
Order Now/Price List.
Single-User Licenses:
Single-user license versions that are programmed for either an unlimited or a specified number of records are available:
1. Unlimited or Professional version, allows unlimited records to be printed.
2. Limited or Standard version, allows 200,000 records to be printed.
Multi-User Licenses (Windows only)
A Multi-user license is a license that will allow multiple users to print a PrintShop Mail job simultaneously to a printer that
is found within the Local Area Network (LAN).
All Multi-user license versions allow an unlimited number of database records to be merged.
PrintShop Mail upgrade options
Upgrade Options PrintShop Mail 6 Upgrades
PrintShop Mail Version
Upgrade
PrintShop Mail 98 Yes Not available
PrintShop Mail 4.X Yes Yes
PrintShop Mail 5.X Yes No
PrintShop Mail Product
Upgrades
Standard or
Professional
Technology Upgrade Windows Macintosh
Standard Production Standard Production
VIPP Not available Yes Not available Yes
Automated Printing Not available Yes Not available Not
Windows Macintosh
Yes Yes
To upgrade your hardware key
From the Help menu, you can select three different upgrade options:
• Voucher
• Upgrade request
• Activate dongle
Voucher
If you have a PrintShop Mail voucher number, click on the "Voucher" option. A PrintShop Mail voucher web page will
open. Here you need to enter the voucher number and some additional information to confirm the request.
Windows Macintosh
available
15
Page 17

Upgrade
If you want to add credits, upgrade the version, add OL CARE or another option to your dongle click on the "Upgrade"
option. The PrintShop Mail Upgrade page will open. Here you select the options you want and some additional
information to confirm the request.
Activate dongl e
If you have get an Authorization code back from your voucher or upgrade request (by email) you have to enter that code
in the Activate dongle screen. Then you have to select the "Activate dongle" option and click "Activate".
To view the hardware key information, select Help/Credit Information.
The Upgrade options are only enabled when the PrintShop Mail hardware key is attached to the computer where the
upgrade procedure is performed.
Older PrintShop Mail documents
The new versions of PrintShop Mail can read your existing PrintShop Mail documents, but PrintShop Mail documents
created in older versions will not be able to interpret the new PrintShop Mail document format. For more information, see
How to Save a Document .
To recognize new versions of PrintShop Mail, you need to upgrade the hardware key.
16
Page 18

Getting Started
PrintShop Mail User Guide
These are the basic steps to install PrintShop Mail and create PrintShop Mail documents.
Click each topic to follow this step by step guide.
Installing PrintShop Mail
Step by Step Guide
After you create and verify the PrintShop Mail document, it is ready to print or publish to PrintShop Web.
•
Installation Procedure
• Starting a New Document
• Opening the Database
• Inserting Static and Variable Images
• Creating Variable Text
• Layout Conditioning (also known as "page picking" )
• Selecting Paper Trays
• Layout Repetitions
• Print Preview
• Verifying the Layout
• Saving Your Document
• Choosing Your Printing Technology
• Setting the Print Options
• Publishing Documents
17
Page 19

Installing a Printer Driver
Getting Started with PrintShop Mail
To produce PostScript output, PrintShop Mail must communicate with a PostScript printer driver. We recommend that you
use either the Adobe or the Microsoft PostScript printer driver.
Adobe PostScript Driver
Printer installation using the Adobe PostScript driver requires the AdobePS installer and a PPD (PostScript Printer
Description) file.
The PrintShop Mail CD-ROM includes both the AdobePS installer and a set of commonly used PPD files.
For more information about Adobe PostScript Driver, please visit www.adobe.com.
Microsoft PostScript Driver (Windows only)
You can install a printer using the Microsoft PostScript driver with the Add Printer wizard in the Windows Control
Panel. The wizard prompts for an INF file containing printer specific information.
The PrintShop Mail CD-ROM does not include INF files, but you should be able to acquire the correct files by contacting
your printer manufacturer.
18
Page 20

Installing the Hardware Key
Getting Started with PrintShop Mail
About the hardware key
Without a hardware key, also known as "Dongle", PrintShop M ail runs in Designer mode. In this mode, all PrintShop Mail
functions are available, but you can only print up to 25 records per session and PrintShop Mail is printed over each layout.
If you have a hardware key from older versions of PrintShop Mail, it will need to be upgraded. Otherwise, PrintShop Mail
will run in Designer mode. For more information, see Upgrading PrintShop Mail.
This is a picture of the USB hardware key (though your key may differ slightly in appearance).
You can use each credit on your hardware key to print one record.
To install the hardware key
Windows
Attach the hardware key to the USB port on your computer.
To view the amount of credits available on the hardware key:
1. Start PrintShop Mail.
2. From the Help menu, select Credit Information.
Mac OS
1. Attach the hardware key to the USB port.
2. Locate the folder "Dongle Drivers".
3. Double click the "AKSUSB Install.pkg".
4. A Welcome message will be displayed, click on Continue.
5. A Read Me file will be displayed, click on Continue.
6. By default the HASP software will be installed on the volume "Macintos h HD". Click Continue.
7. Click Install.
8. A dialog will be displayed "Installation was successful".
9. Click the Close button to finish the installation.
10. To check if the driver has been installed correctly, start up PrintShop Mail, from the Help menu, select Credit
Notes:
To view the amount of credits available on the hardware key:
Information.
1. To install the hardware key driver, you need to log on as "root".
2. Before installing the hardware key for Mac OS X, make sure that the hardware key drivers for the OS 9x
platform are deleted from the system. The drivers of OS 9x are not compatible with OS X. If these drivers
remain installed, the hardware key for OS X will not work. You can do this as follow: press command + F and
search for MacHasp on your local disks (usually this can be found on the system folder of OS 9 - extensions
folder). When a list is shown with MacHasp4Shim and MacHaspUsbDD, delete them and make sure to empty
the trash.
1. Start PrintShop Mail.
19
Page 21

2. From the Help menu, select Credit Information.
20
Page 22

How to...
Create a New Document
How to...
Windows
You can create a new PrintShop Mail document in two ways:
To start with a blank document
On startup, PrintShop Mail always starts out with a blank layout. You can also instruct PrintShop Mail to create a new
blank document by selecting New Blank Document from the File menu, or press CTRL+N.
The size of this blank layout is set to Fit to Page. For more information on layout sizes, see How to Specify the Layout
Size.
Now you can use the design tools in PrintShop Mail to add static and variable objects to your layouts. For more
information, see How to open a database, How to add images and How to add variable text.
To base the layout contents on a PDF or image file
From the File menu, select New PDF based Document, or press CTRL+SHIFT+N. This option also offers the possibility
to import a Microsoft Word document, which will automatically be converted to a PDF file. This will create layouts that
match the pages in the PDF file.
Note: After you create a new PDF based document, the PDF pages are treated as separate objects. It is possible to scale
the PDF pages around on the layout. You can also place a PDF by choosing PDF from the Insert menu or click the
Place PDF button in the Tools toolbar. Importing a PDF in this way allows you to not only proportionally scale, but also
place the PDF anywhere on the layout.
PrintShop Mail Templates
PrintShop Mail allows you to create PrintShop Mail templates. Templates are PrintShop Mail documents that you can
design for later use, for example for Publishing to PrintShop Web. These templates contain the (background) layout and
the document settings.
Creating a template
You can create a PrintShop Mail template in two ways:
PrintShop Mail templates are saved with the extension ".PSMT ". By default PrintShop Mail templates will be saved in the
Template folder which is located in the PrintShop Mail application folder.
• Start with a blank layout
• Base the contents and size of your layouts on a PDF or an image file.
• From a PrintShop Mail document:
1. Start PrintShop Mail.
2. Create the desired PrintShop Mail document.
3. From the File menu, select Save as Template.
• New Template document:
1. Start PrintShop Mail.
2. From the File menu, select New Template-based Document.
3. Browse for a template file.
4. Click Open.
5. Make the desired changes.
6. From the File menu, select Save As Template.
21
Page 23

Modifying the template
It is possible to modify PrintShop Mail templates to change the document settings or content.
1. From the File menu, select Open Template.
2. Make the desired changes.
3. From the File menu select Save As Template.
Note: A template does not save the link to the database you may have used in the designed stage of the PrintShop Mail
document.
Mac OS
On startup, PrintShop Mail always starts out with a blank layout. The size of the blank layout is set to Automatic. To
change the layout size, see How to Specify the Layout Size.
22
Page 24

Default Settings
How to...
Default settings in PrintShop Mail are time savers . If the default settings don't fit the way you work, you may find yourself
repeatedly customizing each document individually before you can get started.
In PrintShop Mail it is possible to reset the default settings in the Preferences, to do that:
Note: Adjust the settings while no documents are open and those settings become the default for all new documents.
Changes made while a document is open affect that document only.
The default settings that can be fine tuned for all documents are:
1. Start PrintShop Mail.
2. From the File menu, select Close. On startup, PrintShop Mail always starts out with a blank layout.
(Windows): From the Edit menu (Ctrl+K), select Preferences.
(Mac OS): from the PrintShop Mail menu (Command,), select Preferences.
3. Make the appropriate changes.
• Program
• Print Job
• Repetition
• Imposition
• PrintShop Web
23
Page 25

Specify the Layout Size
How to...
Windows
A PrintShop Mail document may consist of one or more layouts, which can be of different sizes. PrintShop Mail supports
multiple layout sizes within one document.
On startup, PrintShop Mail always starts out with a blank layout. The size of this blank layout is set to Fit to Page. The
layout size and shape (tall or wide) can be specified per each layout by selecting Size in the Layout menu or by
selecting the layout in Layouts Panel.
Locating this dialog box
Layout > Size
The table below shows more information on the options in the Layout Size dialog.
Setting Description
Size Select a standard size for the PrintShop Mail document, A3, A4, A5, B5, US Letter, US Legal. Select
Custom Size to enter customized settings.
Width Enter custom width. This setting is editable if you select "Custom Size".
Height Enter custom height. This setting is editable if you select "Custom Size".
Shape Select either Tall or Wide.
Apply to Current Layout
This point forward
Whole document
Mac OS
A PrintShop Mail document may consist of one or more layouts, all having the same size. There are tw o ways to specify
the layout size and orientation.
Automatic Layout Size
You can choose to base your layout size on the currently selected paper size in the Print Setup dialog, by selecting
Layout Size Automatic in the Layout menu. This will cause PrintShop Mail to dynamically resize your layouts to fit on
the paper, even when you are using layout repetition.
24
Page 26

Fixed Layout Size
You can specify a fixed layout size in the Layout Size dialog. This will force your layout size to stay the same,
independent of the currently selected printer and paper size.
Locating this dialog box
Layout > Size > Fixed
The table below shows more information on the options in the Layout Setup dialog.
Setting Description
Size Select a standard size for the PrintShop Mail document, A4, A5, B5, US Letter, US Legal. Select
Custom Size to enter customized settings.
Width Enter custom width. This setting is editable if you select "Custom Size".
Height Enter custom height. This setting is editable if you select "Custom Size".
Orientation Select either Tall or Wide.
25
Page 27

Link a Database to a Document
Open a Database
How to...
Traditional databases are organized by fields, records and files. A field is a single piece of information, a record is one
complete set of fields and a file is a collection of records.
Database example
ZIP CAR CAR TYPE
91335 Mustang A
75038 Explorer B
60173 Windstar C
33351 Explorer B
Where ZIP, CAR, and CAR TYPE are fields and the rest are the records.
To open a database
Windows
Note: You can define new data sources or modify existing data sources in the ODBC Administrator dialog box. This dialog
box is in the Control Panel. In Windows 2000, XP and 2003, it's located in Administrative Tools.
Limitations:
To browse the cont ents of your databa s e
After you open the database, the contents are displayed in the Data Fields Panel. You can browse the records in the
database by clicking the browse buttons in the Database toolbar, or by making the following selections from the
Database menu:
To sort the databa s e
For a list of supported database formats, see Support Database Formats.
1. From the Database menu, select Open.
2. Browse for a database file.
3. Alternatively to connect to a server based d ata source, in the left pane click the ODBC Data Sources icon.
4. Double click a data source name.
PrintShop Mail only supports one active table at a time. If a database contains multiple tables, you will be
•
presented with another dialog box prompting you to select one of the tables.
• PrintShop Mail does not support relational databases.
Data Fields
For the purpose of publishing PrintShop Mail documents to PrintSho p Web, you can design a
PrintShopMail document with or without linking it to a database. The entries you will find in the
Data Field panel in PrintShop Mail, represent data fields that occur in the document. These fields
are either referred to in expressions (for variables or layout conditions, without the need to be
directly linked to a database), or they refer to actual database fields (when the document is
already linked to a specific database). Data Field Properties are relevant for Publishing to
PrintShop Web. For more information about Data Fields, see Publishing Documents.
• First Record (ALT+Up)
• Previous Record (ALT+Left)
• Next Record (ALT+Right)
• Last Record (ALT+Down)
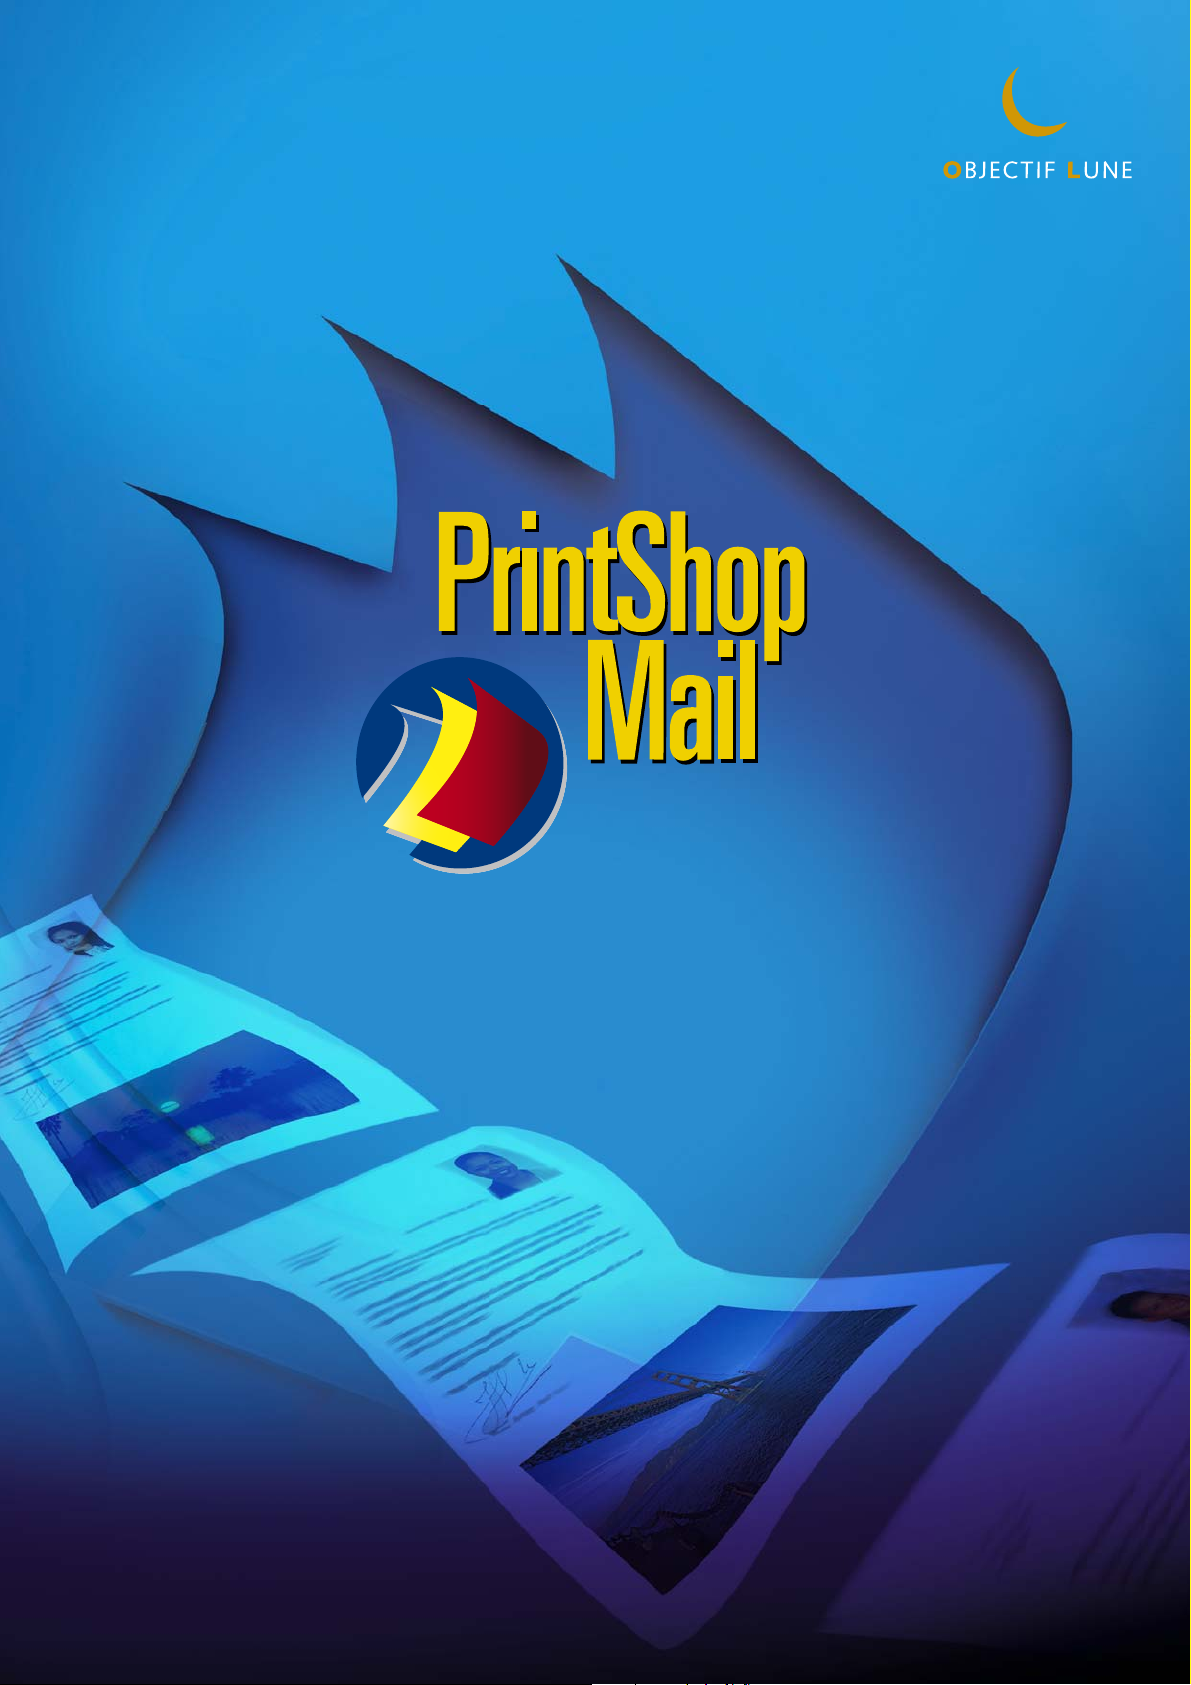
1. Select from the menu Database : Sort > Edit.
26
Page 28
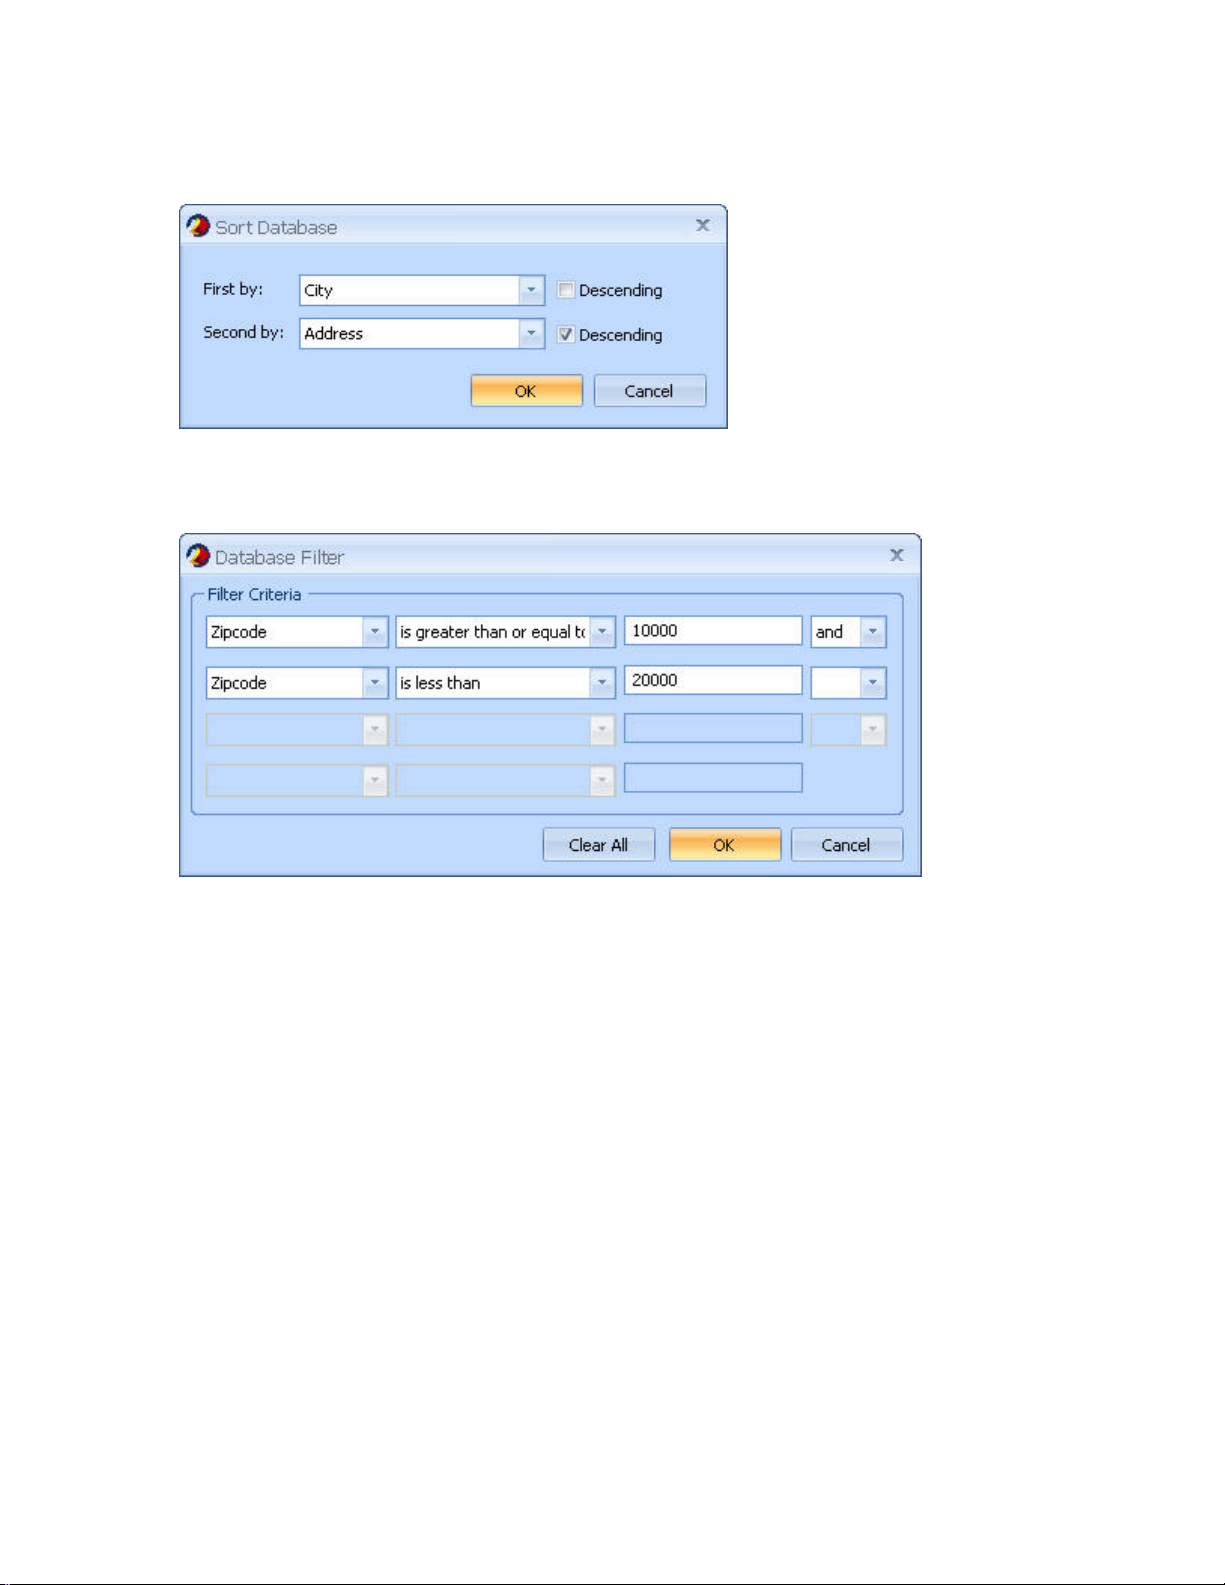
2. Specify your sort conditions.
3. Click OK.
To filter the database
You can set up a filter in the Database by selecting Filter > Edit from the Database menu, for example if you only need
to print a certain range of ZIP codes (10000 up to 19999).
You can choose from:
Equals
Does not equal
Is less than
Is less than or equal to
Is greater than
Is greater than or equal to
Is empty
Is not empty
If you have more than one filter rule and you want ALL to be applicable, select AND to combine them.
If you want either one or the other, select OR.
Another way to filter the database is using Extended Scripting. See Extended Scripting for more information.
Mac OS
PrintShop Mail supports the following database formats: DBF, TXT and XLS
1. From the Database menu, select Open.
Note: A dialog will be displayed with the message " When your database file is not a DBF file, PrintShop Mail
will save a copy with DBF format".
2. Browse for the database file.
27
Page 29

Using a Native (DBF) Database
The following rules apply to a file in native database format, for example .dbf, if you want to link it to a PrintShop Mail
document:
• The first line in your database should contain the field names.
• Field names should only contain alphanumeric characters and underscores, and have a maximum length of 10
characters.
• The variable data should be listed below the first line.
• Variable data items should not contain quote.
• Though PrintShop Mail supports dbf3 and dbf4 format, the filename should have the ending ".dbf" (not dbf3 or
dbf4).
Using a Text File as Database
The following rules apply when using a text file as database:
• The first line in your text file should contain the field names.
• Field names should only contain alphanumeric characters and underscores.
• The records should be listed on the following lines.
• The field separator is either a tab, a comma, a space, a semicolon or a user-defined character (not
alphanumeric or underscore) and these separators cannot be used in field contents.
• If a field contains a field separator character, it should be enclosed in double quotes in order to be treated as
one string.
• Two adjacent field separators imply that an empty field is placed between them.
• The record separator is a newline character.
• Any missing fields at the end of a line are left empty.
Opening a Text File as Database
1. From the Database menu select Open.
2. Browse to the folder where the database file is located.
3. Select the text database file and click Open.
4. Select the Separation mark you wish to use in the dialog box.
Opening a XLS file as database
Note: This option requires Microsoft Excel. When you select a XLS database file, Excel is applied by PrintShop Mail,
making a plain text copy of the Excel file. Next, PrintShop Mail converts this plain text file to DBF. The DBF file will be
used.
1. From the Database menu select Open.
2. Browse to the folder where the database file is located.
3. Select the xls database file and click Open.
To Sort the data ba s e
You can define a large number of sort keys, which are applied to the opened database. Defining the sort keys and their
precedence is done independently of switching on or off, as explained below.
1. Open the Database floater and click the Edit button next to Sort checkbox.
28
Page 30
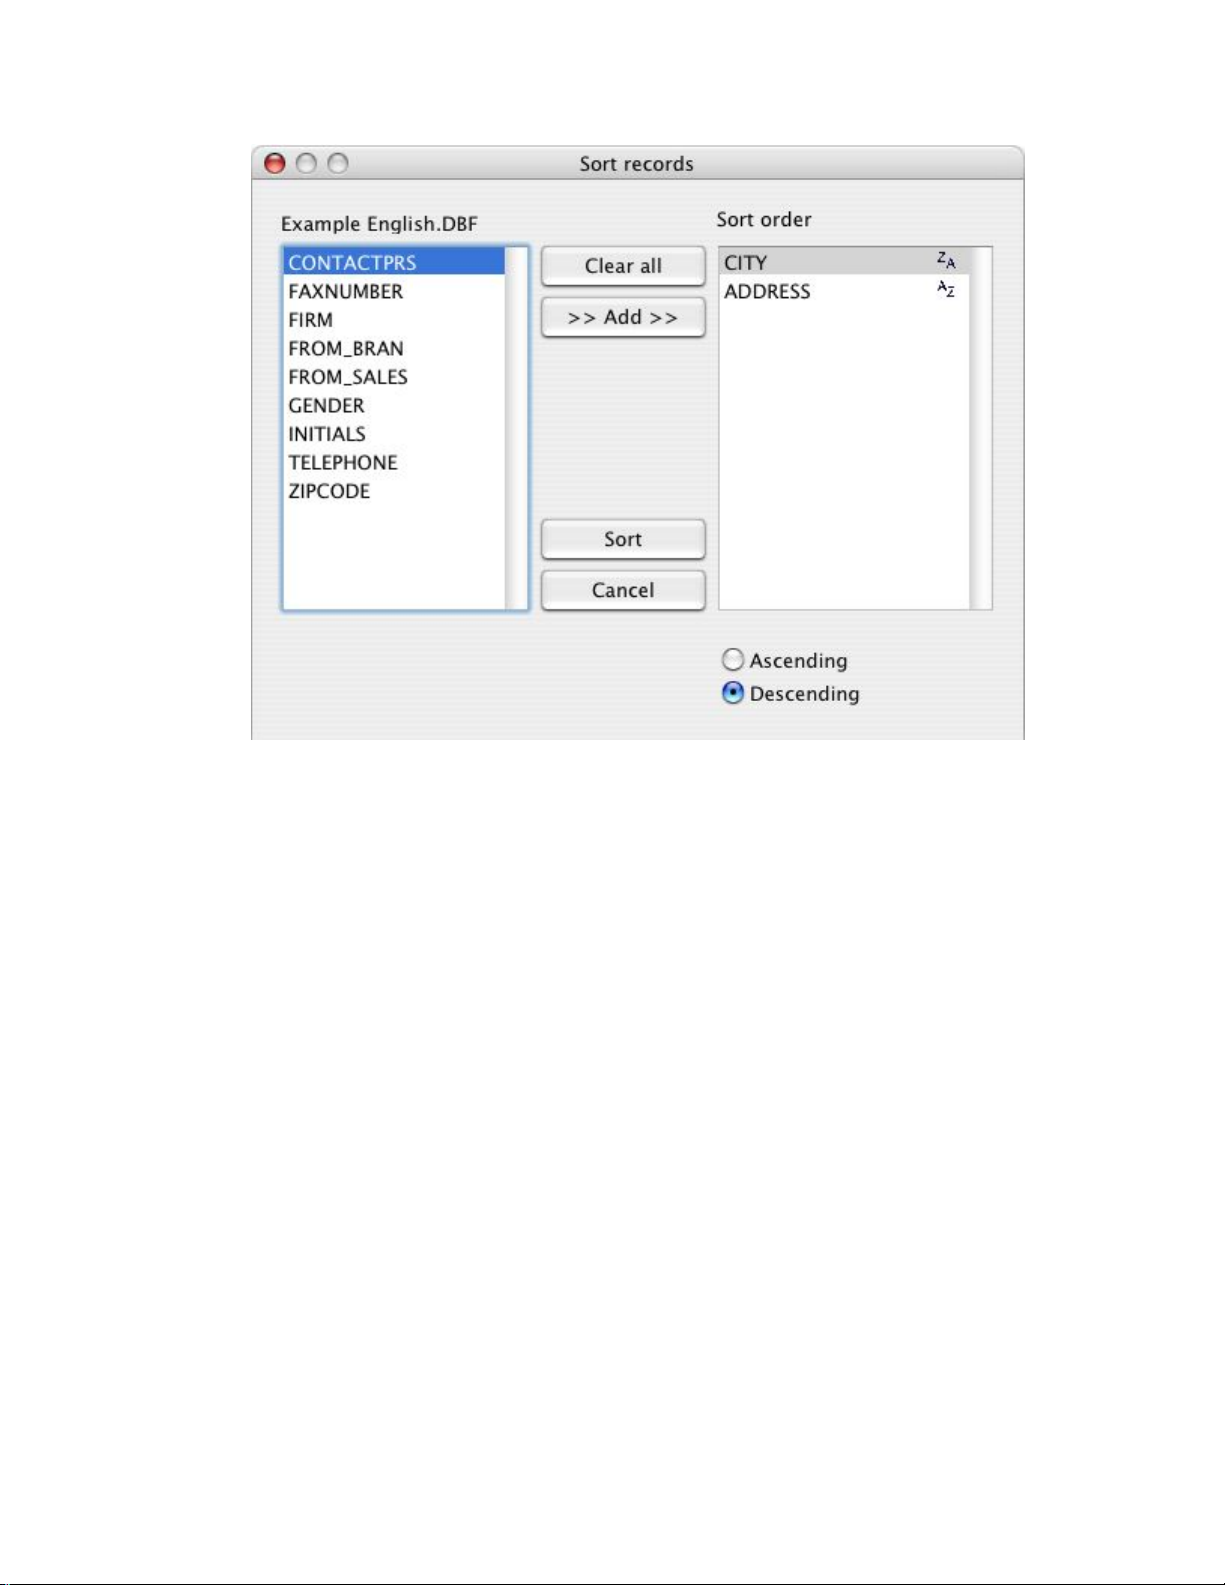
2. Select a database field in the list to the left and press Add button to copy it to the Sort Order list to the right.
Double clicking the field name has the same effect. Repeat the steps with all the fields that you want to use as
further sort keys.
3. It is possible to specify the Sort Order per selected field, which is either Ascending or Descending by
selecting a sort key in the list to the right and dragging it up or down, or remove a sort key by selecting it and
clicking Clear, or double click the sort key.
4. Press Sort to sort the database and Ready to close the dialog.
To Filter the databa se
PrintShop Mail allows you to filter the database to which you wish to link a document. This implies that only a selection of
the database is going to be used.
1. Open the Database window and click Edit button next to the Filter checkbox.
29
Page 31

2. Enter an expression of which the result can only be true or false.
3. Select Filter from the Database menu or click the Filter checkbox in the database window to apply your filter
settings. Selecting or deselecting the filter option, toggles between using the entire database or using only the
filtered records. The filter option is enabled only when the database is currently open.
30
Page 32

Connect to SQL Server
How to...
Before you can connect to an SQL Server, you need to setup an SQL Server ODBC Data Source, as follows.
1. In the Windows Control Panel , select ODBC Data Source Administrator. (In Windows 2000, XP and
2003 this panel is located under Administrative Tools).
The ODBC Data Source Administrator window appears.
2. On the User DSN tab, click Add.
The Create New Data Source window appears.
You are prompted to specify which driver to use for the data source.
31
Page 33

3. Double click SQL Server.
4. Type the data source name and description.
5. Specify the SQL server name or IP address.
6. Click Next.
32
Page 34

7. Select With SQL Server authentication using a login ID and password entered by the user.
8. Specify the logon ID and the password.
9. Click Client Configuration.
10. On the Add Network Library Configuration window, under Network Libraries, select TCP/IP.
Note: Do not change the server name or port number unless otherwise specified by your system administrator.
11. Click OK.
33
Page 35

12. Select Change the default database to: and choose SQL Test (or the name you gave the data source).
13. Click Next.
14. Click Finish.
34
Page 36

15. On the Microsoft SQL Server Setup window, review the options and click Test Data Source... to test the
connection.
16. To begin to use the data source in PrintShop Mail, click OK.
35
Page 37

Add Text
Add Variable Text
How to...
About variable text
Text objects in PrintShop Mail can contain both static and variable text, separated by delimiters. By default, the @
character delimits variables. Each variable is associated with an expression. An expression is a calculation that is usually
based on the contents of your database.
To add variable text
Note: As an alternative to the steps outlined below, you can also drag and drop directly from your database onto your
layout. This automatically creates a text box and a variable name.
Variables you have defined automatically appear in the Variables Panel (Windows), or in the Variables floater (Mac
OS).
1. In the Tools toolbar click the Place Variable Text button, or from the Insert menu select
Variable Text.
(Windows): From the Window menu, select Data Fields (Ctrl+3), or select Data Fields Panel
in the Properties Window.
(Mac OS): From the Window menu, select Show Variables.
2. Begin typing. Whenever you want to include variable information, type a meaningful name
between two delimiting characters. By default, the @ character delimits variables. It is possible to
change the delimiting characters in the Preferences.
3. When you are finish click outside the text box.
To assign database fields to the variables
The next step is to connect the variables to fields in the database. To do this,
1. (Windows): Double click on a variable in the Variables Panel to display the Expression Editor, or right
click on the text object and select the variable in the Edit Expression submenu.
(Mac OS): Double click on a variable in the Variables floater.
Use the Expression Editor to assign an expression to the variable.
36
Page 38

2. Double click on the database field to which to associate the variable.
3. Click OK to close the window.
Note: You can check the result of this expression in the Variables Panel, or in the Variables floater (Mac OS).
To preview the variables
In Preview mode, you can view the result in the text box itself.
To toggle between Preview and Design modes, click this button in the View toolbar or from the View
menu, select Preview (Windows).
From the View menu, select Preview or press Command + Y (Mac OS).
You can change the text style (for example, font name, size, color and style properties) of any part of the text object
from the Text Formatting toolbar, or from the Text menu.
37
Page 39

Mac OS
The "Remove Empty Lines" feature can be switched on using a checkbox in the Expression Editor
Window.
38
Page 40

Formatting Variables
(Windows Only)
How to...
About formatting variables
Formatting the variables allows you to set how numbers, currencies and dates are displayed and printed. You can set this
for each variable text object in the document, according to regional preferences.
To format variables
Choose the Variables Panel and select a variable to specify its format settings. You can select the following format
categories:
• Number
• Currency
• Date
• Text
• E-mail
Number
The Number category has all number formatting options available on the system.
39
Page 41

Set this option... To de this...
Decimal Symbol Select the symbol used as the decimal separator
Number of decimals Select the number of digits shown after decimal symbol
Digit Grouping Symbol Select the symbol to group digits in long numbers (for example: 1,000,000).
Digit Grouping Select the number of digits in the group.
Negative Symbol Select the symbol to denote a negative number.
Negative Format Select the format to display negative numbers.
Leading Zeroes Display fractions with or without leading zeroes (for example, 0.7 or .7)
Currency
The Currency category allows you to format a numeric value to be represented in currency format.
Set this option... To do this...
Locale Select a region
Currency Symbol Select the currency symbol
Positive Format Select the positive currency format
Negative Format Select the negative currency format
Decimal Symbol Select the symbol used as decimal separator
Decimal Places Select the number of digits shown after the decimal symbol.
Digit Grouping Symbol Select the symbol to group currency in long numbers.
Digit Grouping Select the number of digits in the group.
Date
The Date category lets you format a date when it is in the expected input format. The expected input format is
"YYYYMMDD"
40
Page 42

Set this option... To do this...
Locale Select a region
Date Format Select date format
Sample MM/dd/yyyy
Text
The Text category is the default option a variable is set to. Setting the format to this category will have PrintShop Mail
treat variable numeric content as a text string.
E-mail
Setting the format to this category will have PrintShop Mail to check if there is something missing in the format like "@ "
and "."
41
Page 43

Creating Serial Numbers
How to...
About serial numbers
Serial numbers are linked to the COUNTER function.
To create a serial number
1. Insert a variable in the text where you want the number to appear.
(Windows): In the Variables Panel in the Properties Window, double click the variable you just created,
or right click on the variable text box and select Edit Expression to open the Expre ssion Edit or .
(Mac OS): From the Window menu, select Show Variables.
2. Double click on the COUNTER function to open the Expression Assistant window.
3. Fill in the values you want the counter to generate.
4. Click OK.
For example:
COUNTER(1, 100) creates a counter that starts with 1 and ends with 100.
Note: To create an indefinite COUNTER, simply double click the COUNTER function, when the Expression
Assistant window opens, click OK; the operator COUNTER() creates a counter that starts with 1 and ends with
whatever is set as the maximum number of "Items without Database" as set in the Programs Settings.
To view the results, browse the records using the buttons of the Database toolbar. The counter displays 1,
2, 3, and so on as you scroll through the records.
Note: You do not need to open a database to use this function.
When no database is open, you can change the total number of records, in the Database
toolbar. To do this, enter the desired number of records and press Enter.
42
Page 44

To view an example that uses customized serial numbers, see Custom Serial Numbers.
43
Page 45

Add Images
Add Static and Variable Images
How to...
In PrintShop Mail, image objects can contain either static or variable images. Using variable images with PrintShop Mail
allows you to personalize your documents with pictures.
About static images
Static images are not linked to a variable, which means that they are always associated with the sa me image file. Print
technologies use this fact to optimize print process time by only spooling static images once per job.
To insert a static image
About bounding boxes
The bounding box of a static image reflects the image size. When you resize the object, it retains its original aspect ratio.
The initial size of an image depends on its resolution. PrintShop Mail assumes an image resolution of 96 DPI (Dots Per
Inch), except for EPS (72 DPI) and TIFF files. The resolution of a TIFF image is stored in the file itself.
About variable images
Variable images are linked to variables in the same way as variable text. The result of the expression associated with a
variable image should be an image file name. Print technologies optimize print process time by only spooling recurring
variable images once per job.
Windows
To insert a variable image
For a list of supported image formats, see Support Image Formats.
1. In the Tools toolbar, click the Insert Image File button, or from the Insert menu, select Image
File.
2. In the dialog box, browse to the image to insert.
3. Click Open.
PrintShop Mail for Windows preserves the color space in images format EPS and JPEG. All other
image formats will be converted to RGB color space.
1. In the Tools toolbar, click the Insert Image Box button, or from the Insert menu, select Insert
Image Box.
2. Double click the name of your variable image in the Variables Panel to display the Expression
Editor. Alternatively right click on the variable image and choose Edit Expression.
3. In the Expression Editor, define an expression or select a database file that contains the image
filename.
44
Page 46

PrintShop Mail can use field information from the database to create variable images. This information is used in two
ways:
• "As is" handling, uses field data to tell the Image Box what the image file name is.
• "Trigger" handling, uses field data combined with a logic expression to create the image file name result. Both
are used regularly for generating variable data.
To inse rt variable images "As is"
Database Setup
ZIP CAR CAR PIC
91335 Mustang Mustang.jpg
75038 Explorer Explorer.jpg
60173 Windstar Windstar.jpg
33351 Explorer Explorer.jpg
Expression
The "CAR PIC" field is used to tell the image box what the file name is:
45
Page 47

To inse rt variable images "Trigger"
Data Triggers can be alpha, numeric or symbol characters. The simplest way to setup a Trigger field is to use short 1 to 3
digit character strings.
Database Setup
ZIP CAR CAR TYPE
91335 Mustang A
75038 Explorer B
60173 Windstar C
33351 Explorer B
46
Page 48

Expression
IF([CAR TYPE] = "A", "Mustang.jpg",
IF([CAR TYPE] = "B", "Explorer.jpg',
IF([CAR TYPE] = "C", "Windstar.jpg","")))
The "CAR TYPE" field is used with a conditional logic formula to generate the image file name.
To check and preview the results
You can check the result in the Variables Panel. The image is displayed in Preview mode.
To toggle between Preview and Design modes, click this button in the View toolbar or from the View
menu, select Preview (Windows).
From the View menu, select Preview or press Command + Y (Mac OS).
Note: EPS images display in Preview only when they contain a TIFF-preview. This TIFF-preview may differ in quality from
the printed output.
To view the image objects properties, see Image Properties.
Mac OS
1. In the Tools toolbar, click the Place Variable Image button and drag a rectangle to the desired size on your
layout, or from the Insert menu, select Variable Image.
2. Double click the name of your variable image in the Variables window, to display the Expre ssion Editor.
3. In the Expression Editor, define an expression or select a database field that contains the image filename.
PrintShop Mail for Macintosh converts the color space that is embedded in the image to the color
space of the printer driver. You can check the color space of the printer driver, selecting from
the File menu, Print/ColorSync.
47
Page 49

Layout Conditioning
How to...
About layout conditioning
Use layout conditioning to conditionally skip certain pages of your document or to leave them blank during the printing
process. The PRINT and BLANK commands will not influence the amount of pages printed.
There are three options for applying a condition to a layout:
To specify layout conditioning
Go to the layout for which you want to set the condition:
For example:
Your document consists of two layouts:
You want to create a one page newsletter. PrintShop Mail can use information from your database to determine whether
to print a page, skip it, or leave it blank.
• PRINT: The layout will be printed (default).
• BLANK: A BLANK page will be printed instead of the layout.
• SKIP : The layout will be skipped.
• (Windows): It is possible to specify layout condition in three ways:
1. From the Layout menu, select Edit Condition.
2. Right click on the layout and select Edit Layout Condition.
3. In the Layo uts Panel , select the layout and click on Action to Edit Condition.
• (Mac OS): From the Windows menu, select Show Layout Conditions. Double click on the layout and edit
the condition.
• Male audience target
• Female audience target
48
Page 50

The expression used is:
IF( [GENDER] = "M", Print, Skip)
In other words,
If the GENDER field equals "M", print the page, otherwise skip the page.
Conversely, the expression for the layout that targets the female audience is:
IF( [GENDER] = "F", Print, Skip)
FreeForm does not fully support layout conditioning. In particular, it does not allow you to
conditionally Skip layouts. When SKIP is used, a BLANK page will be printed instead.
FreeForm 2 does not support SKIP in combination with layout repetition, the skipped layout will
be left BLANK.
When using layout condition in combination with layout repetition and SKIP is activated, the next layout will move to the
position where the previous would have been positioned.
To print Through-the-stack, set top priority (1) to Front to back, priority (2) to Top to bottom and priority (3) to Left
to right. This way the first record is printed on the top left corner of the first page, the sec ond record is printed on the
top left corner of the second page, etc. This eliminates the need for collating after the job is printed.
49
Page 51

When Layout Conditions should be applied?
• Output of multiple versioned documents within one PrintShop Mail file.
• Layout Condition is an alternative for setting up text heavy variables (multiple variable paragraphs). Creating an
expression formula within the Variable text box using 1000s characters can be tedious. A simpler way is to
create multiple static pages in native Desktop Publishing or Word process ing programs, convert the documents
into a usable PrintShop Mail file format (EPS or PDF) and from PrintShop M ail setup the conditions for the
output.
• Inserting blank pages
For more information on expressions, see Expre ssion Overview.
50
Page 52

Layout Repetition
How to...
About layout repetition
PrintShop Mail can print multiple layouts on media that has a larger format than the layout. For example, a postcard that
is 5.5" x 4.25" can be printed 2 by 2 on letter-size paper (11" x 8.5").
To achieve this result, you can create a layout that is the size of 1 personalized document in this case, a postcard that is
5.5" x 4.25".
For a document with multiple layouts, you can print different layouts on the same page.
To specify layout repetition
1. (Windows): From the Edit menu (CTRL+K), select Preferences.
(Mac OS): From the PrintShop Mail menu, select Preferences.
2. In the left pane, click on the icon Repetition.
3. Specify the number of repetitions for the layout, as well as the horizontal and vertical spacing between each
layout.
Note: The maximum number of repetitions is displayed between brackets.
51
Page 53

About priorities
Priorities affect the order in which your layouts are printed. You can change priorities for each of the three dimensions:
• Front to back
• Left to right
• Top to bottom
To print Through-the-stack, set top priority (1) to Front to back, priority (2) to Top to bottom and priority (3) to Left
to right. This way the first record is printed on the top left corner of the first page, the sec ond record is printed on the
top left corner of the second page, etc. This eliminates the need for collating after the job is printed.
When using layout repetition in combination with layout condition and SKIP is activated, the next layout will move to the
position where the previous would have been positioned.
52
Page 54

Select Paper Tray s....
How to...
About paper tray selection
If your printer supports different paper trays and your document consists of multiple layouts, you can send different
layouts to different trays.
To associate a layout with a paper tray
Windows
1. From the File menu select Page Setup, or right click on the layout and choose Page Setup.
2. From the Tray box, select the desired paper tray.
3. In the Apply to box select:
Current layout: layout or layouts selected in the Properties Panel.
This point forward: current layout and all layouts below it.
Whole document: all layouts in the document.
4. Click OK.
If your printer supports more trays but they are not available in the Page Setup window, use the following steps to
select a tray in the Advanced properties of the driver:
1. From the File menu select Page Setup, or right click on the layout and choose Page Setup.
2. Click on the Advance tab.
3. In the Printer Document Properties select Advance.
4. In the Printer Advance Options select Printer Features.
Note: The options outline above, must be repeated for each layout, if each layout need a different tray.
Another way to associate a layout with a paper tray is by selecting the layout in the Layouts Panel, then select the
Paper Tray property and choose the desired tray from the pull down menu.
53
Page 55

Mac OS
1. From the Window menu, select Show Document Layouts.
2. Select the desired layout.
3. From the Layout menu, select Paper Tray. Depending on the selected PPD, a list with the available paper
trays will be displayed.
54
Page 56

Number of copies
(Windows only)
How to...
PrintShop Mail allows you to print a number of copies per page. The Expression Editor can be used to generated
multiple copies of each page in the job.
To setup the number of copies
1. Select the Layouts Panel.
2. Select the desired layout and click on Number of Copies, to open the Expression Editor.
Data fields can be used to specify the number of copies per page. Field data not
containing number strings can be used with logic functions such as the IF
statement.
Number Text String
55
Page 57

Once the Expression builder is open:
1. Double click on the VAL function to open the Expression Assistant window.
2. Select the string value of the database field containing the number of copies.
Non-numerical Text String
In this case, the data field does not contain a number string, but it does have a field to be used as "Trigger".
56
Page 58

In the expression "IF([TRIGGER]="A",VAL("12"),IF([TRIGGER]="B",VAL("8"),VAL("1"))) ", the field name "TRIGGER" has
either an "A" or a "B" in it. The number of copies for "A" would be 12, and the number of copies for "B" would be 8. At
the end of the expression, you need to add VAL("1"), because the function must result in a numeric value.
Limitations
•
The output result will be one copy if a single zero ("0") is used in any part of the Expression.
• For multi-page documents, you need to set the number of copies per each individual page.
• Number of copies can not be used in combination with Layout Repetition.
• Number of copies can not be used when FreeForm Print Technology is selected, use FreeForm 2 instead.
57
Page 59

Verify a Document
How to...
About document verification
Before printing your document, you can verify that it is ready to print.
Verify document checks the document at two levels:
PrintShop Mail performs the following checks:
To perform document verification
Warnings
While you are working, PrintShop Mail will dynamically check for any possible errors on the layout and will display any
occurring error in the Warnings Panel, like:
• Layout level: Warnings at layout level will show the layout number in the Warnings Panel.
• Record level: Warnings at record level will show the layout number and record number in the Warnings
Panel.
• Are any images or PDF files missing?
• Are all items placed within the printable area?
• Does a text object contain more text than the text box can hold? For example, the following warning is
displayed: "Text does not fit in its bounding box". You can prevent this warning from appearing again by
resizing the text box or by linking the text box to another text box. For more information about linking text
boxes, see Linking text objects.
Verify Document
When you select from the Layout menu, Verify Document, a progress bar will be displayed, showing the amount of
records being checked. The warnings for the whole document will be listed in the Verificat ion Results Panel.
58
Page 60

Note: Verify document will be stopped when 1000 warnings are found or when you press the cancel button on the
progress bar.
Here is a list of a few possible messages:
Object is placed beyond the printable area
Object is not entirely placed on the layout
Text file not found
Variable X is not linked to an expression
Text does not fit in its bounding box
Image X not found
Error loading image
Page number X is invalid; this PDF only contains Y pages
Variable X: argument Y is invalid
Variable X: barcode input string Y is invalid
Variable X: date format Y is invalid
X contains at least one TrueType font that is not embedded in
the PDF
Variable X: database field Y not found
59
Page 61

Save a Document
How to...
About saving documents
When saving a document, it is recommended to use one folder for both the document file and its supporting files that is,
the image files and the database. The reason for this is because the supporting files for a PrintShop Mail document are
not included in the document file. This file only contains references, stored as paths relative to the document folder.
For example:
If you save your document in...
"C:\My Documents"
and it contains an image...
"C:\My Documents\Images\Car.tif",
the reference to this image is stored as...
"Images\Car.tif"
If you move the Documents folder and its subfolders to another drive, PrintShop Mail will still be able to locate the
image.
Windows
Note:You can import PrintShop Mail 98, 4.x and 5.x documents into new versions of PrintShop Mail, but PrintShop Mail
98, 4.x and 5.x will not be able to interpret documents saved by the new version of PrintShop Mail . If you try to
overwrite an existing PrintShop Mail 98/4.x/5.x document in the new PrintShop Mail format, PrintShop Mail will issue a
warning.
Mac OS
Note: You can open PrintShop Mail documents created in PrintShop Mail 4.3.X or older, but PrintShop Mail 4.3.x will not
be able to interpret documents saved by the new version of PrintShop Mail. If you open an existing PrintShop Mail 4.3.x
document in the new PrintShop Mail format, PrintShop Mail will issue a warning, even if you have not changed anything,
asking you whether you really want to save this document as soon as you close the document.
To save your documents
You can save a PrintShop Mail document in two ways:
To revert to the last saved version of the document, from the File menu, select Revert.
1. As a PrintShop Mail document, with the extension ".PSMD".
From the File menu, select Save as.
2. As a PrintShop Mail template, with the extension ".PSMT".
From the File menu, select Save as Template. For further guidance in saving PrintShop Mail templates, see
Create a New Document.
60
Page 62

Publish to PrintShop Web
Publishing Documents
How to...
PrintShop Web is an easy to use, powerful and open Web to print application that allows for printing over the Web.
PrintShop Mail allows to prepare and add documents to PrintShop Web. PrintShop Mail documents are used as the basis
for print jobs, meaning that it is possible to reuse the documents by uploading new databases. The designer can publish
(upload) an existing or new document and customers will be able to use PrintShop Web to order print jobs based on this
document. Print jobs can be previewed and validated before they are submitted to the printer.
How to create PrintShop Mail documents for publishing
You, "the designer" create documents and templates in PrintShop Mail.
When the document is ready for publishing, you can start the upload process by c licking on Publish to PrintShop Web
selecting the File menu or clicking the Publish to PrintShop Web button in the Standard toolbar.
You can design a document with or without linking it to a database. The variable data in the document preview in
PrintShop Web will be based upon Data Fields that you assign in PrintShop Mail.
Note: Keep in mind that when you design a template, the template does not save the link to the database.
Data Fields are representatives for the variable data that can be provided either directly through a database that you
link to a PrintShop Mail document, or through any other data source, for example a database which is uploaded by a
PrintShop Web client or a web form.
The entries you will find in the Data Fields Panel in PrintShop Mail, represent data fields that occur in the document.
These fields are either referred to in expressions (for variables or layout conditions, without the need to directly being
linked to a database), or they refer to actual database fields (when the document is already linked to a specific database).
When a data field is used in the PrintShop Mail document, it will have a check mark in the Data Fields Panel.
Example
The Type column displays the type of data in the data field. "Default" means that at the moment no data source is
available for this field. Once there is a data source available, the Type column will display the data type for that field, as
specified in the data source, like number, text, etc.
61
Page 63

Example
By selecting a Data Field, you can view and edit its properties:
Name: A unique identifier. You can not modify this value here.
Default Value: You can set a Default Value here, this will be a string value that will be displayed in PrintShop Web,
once the document is published, as a placeholder when no data source is available (yet) for this Data Field. You will find
this string value back in PrintShop Web, after the document has been selected (before the stage where a data source is
provided).
Note: When no database is (yet) available, this Default Value will be displayed as the current value in the Data Fields
Panel and in the text object in the layout, in case the data field is in use in the document:
How to create a Data Field without opening a database?
1. Create a variable: @variable@.
2. Enter the Expression Editor by double clicking on the @variable@ in the Variables Panel.
3. Type: [My data field].
4. Click OK.
Now you will find the data field back in the Data Fields panel.
Remarks: You can define a Remark here, this will be a string value that will be displayed in PrintShop Web once the
document is published. You can use this, for example, to give clients a hint about this variable data field.
Source: The data source can be either "Database", a database uploaded by the PrintShop Web client, or "User input",
data provided by for example a web form.
Note:These Data Fields Properties are only relevant for PrintShop Web, they will not affect the behavior of PrintShop
Mail.
62
Page 64

How to publish documents from PrintShop Mail
Publishing PrintShop Mail documents to PrintShop Web can be done from PrintShop Mail directly.
When publishing documents the first time, you will need to specify the URL and the login account for your company Web
Server.
1. Launch PrintShop Mail.
2. From the Edit menu, select Preferences and click the PrintShop Web icon. To tell PrintShop Mail how to log
on to your company Web Server, specify:
URL: The Web address of your company.
Login : The user name and password assigned by the administrator.
Once you have specify all the necessary information to login to your company Web server, you can start publishing
documents to PrintShop Web. The connection can be tested clicking the Test Connection button. It verifies only if all
three options (URL, Username, Password) are valid. If no PrintShop Web Server address has been defined in the
PrintShop Mail Preferences, the document and its attributes (images and fonts) will be saved in a zip archive (Publish to
zip) for later publishing.
1. From the File menu, select Publish to PrintShop Web or click the Publish to PrintShop Web button in the
Standard toolbar.
Before publishing PrintShop Mail documents, a document designer can add a note containing Operator
Instructions about for example, duplex settings, paper weight etc.
63
Page 65

2. A dialog Publish to PrintShop Web opens.
3. Select the Publication Type where you want to place the document.
In PrintShop Web documents are organized within Publications Types. Publication Types are a way to mark a
document as being in a particular category (such as envelop, business cards, invitation etc). Each Company can
have a range of Publication Types. Within the Company each Publication Type is unique. Each Publication Type
can contain one or multiple documents.
When a customer of a company logs on to the PrintShop Web web site all Publication Types available for that
Company will be shown.
64
Page 66

4. Click Next.
5. On the next dialog click the Show Browser button to display the folder containing the image files.
Note: Adding files is only necessary when variable images and txt/rtf files are used. If the document does not
contain variable images or txt/rft files, the wizard will take you to step 7.
65
Page 67

6. Select the additional files for the document and c lick the Add button.
Note: In this dialog, you can choose to add variable image and .txt/.rtf files that belong to the document. The
PrintShop Mail document, its used fonts and static images are added automatically.
66
Page 68

7. Click Next.
67
Page 69

8. Click Finish to publish the document.
9. Once the message Successfully uploaded the new document appears, click OK.
It is possible to upload documents made in older versions of PrintShop Mail WE to PrintShop
Web through PrintShop Mail 5.2 and higher.
If you have enough access privileges you can create a "New Company" and "Publication Type" from the Publish to
PrintShop Web dialog in PrintShop Mail.
How to create a New Company
To create a New Company, do the following:
1. In the Publish to PrintShop Web dialog click the New Company button. The New Company dialog appears.
2. Enter the name for the company and click OK.
New Company dialog
68
Page 70

How to create a New Publication Type
To create a New Publication Type, do the following:
1. In the Publish to PrintShop Web dialog, select the company.
2. Click the New Publication Type button. The New publication type dialog appears.
3. Enter the name for the Publication Type.
New Publication Type dialog
More information about managing uploaded documents, Companies and Publication Types can be found in PrintShop Web
Help.
69
Page 71

Print a Document
Printing Basics
Printing your document
About printing
Print Preview
While you are working on your document, it is possible to view an on screen representation of the printed output. In this
Print Preview it is possible to browse through pages and view multiple layouts and records at the same time.
You can enter the Print Preview mode in two ways:
In Print Preview mode, three menu items are shown:
Zoom in on or out of a document
You can "zoom in" to get a close up, more detailed view of your document or "zoom out" to see more of the page.
To zoom in:
To zoom out:
Browsing through the pages
Pages will be automatically scaled to fit inside the window area (fit to window mo d e), unless you zoom in on one
specific page (zoom in mode).
In fit to window mode, only the vertical scroll bar will be active, this scroll bar controls which pages are currently
visible. When you drag the thumb track control of the vertical scroll bar, PrintShop Mail will show a tool tip containing the
page number associated with the current position of the thumb track. The scroll responds to PageUp, PageDown, up
arrow, down arrow, Ctrl+Home, Ctrl+End and the mouse wheel.
In zoom in mode, both the horizontal and vertical scroll bars can be active. These scroll bars control which part of the
page is visible. They respond to up arrow, down arrow, Ctrl+Home, Ctrl+End, and the mouse wheel. By pressing PageUp
you will jump to the previous page and by pressing PageDown you will jump to the next page.
After you have verified your document, your document is ready to be printed. PrintShop Mail offers several different ways
to optimize your output, called print technologies.
1. From the File menu, select Print Preview.
2. Click the Print Preview toolbar button on the Standard toolbar.
• Page combo box: Allows you to select the view of a single page or multiple pages at the same time. By
default you will see two pages horizontally and one vertically.
• Print button: When you click this button, PrintShop Mail returns to the design view and the Print dialog will be
opened.
• Close button: When you click this button, PrintShop Mail returns to the design view. Alternatively, you can
close the Print Preview by pressing Esc, or by pressing Alt+F4.
• Left click inside the page, the pointer becomes a magnifying glass with a plus sign in its center.
• Alternatively, press Ctrl++.
• Press Ctrl while left clicking inside the page, the pointer becomes a magnifying glass with a minus sign in its
center.
• Alternatively, press Ctrl+-.
You can also zoom in on or out of a document by holding down the Ctrl key while turning the mouse wheel.
70
Page 72

Print Technologies
Because every print technology uses PostScript Level 2, PrintShop Mail requires the use of a PostScript printer driver and
a PostScript Level 2 compatible RIP.
Some technologies are based on the PostScript standard, which means that they are supported by every type of RIP
available. Other technologies are based on extensions of PostScript, which are only supported by specific RIP types.
Printing Technologies:
Standard PostScript
Optimized PostScript
RIP type and vendor dependent technologies:
AHT
Creo VPS
EVIPP
Fiery FreeForm
Fiery FreeForm 2
PPML
PPML/VDX 7 (Windows only)
PrintStreamer (Mac OS only)
To set up your printer
Note: Print settings are only maintained throughout the current PrintShop Mail document.
Windows
1. From the File menu, select Page Setup.
2. Click on the Change button. Use the appearing dialog box to select a printer.
3. Select the media to be printed on, orientation, and other printer specific job settings. After you have clicked OK
your changes will be saved for the current document.
Mac OS
1. From the File menu, select Page Setup.
2. Use the appearing dialog box to select a printer, click on the Settings button to select the media to be printed
on, orientation, and other printer specific job settings. After you have clicked OK your changes will be saved for
the current document.
To select a print technology
1. (Windows): From the Edit menu (Ctrl+K), select Preferences.
(Mac OS): From the PrintShop Mail menu (Command,), select Preferences.
2. In the left pane, click the Print job icon.
The Print job settings dialog box appears.
3. Check if your RIP supports one of the RIP type and vendor dependent technologies. If so, you can select that
specific technology. If not, it is advisable to select Optimized PostScript.
To specify technology specific options
1. From the File menu, select Print.
2. On the Print dialog box, specify technology specific options .
Print dialog box settings
Use OPI, don't spool images: Most print technologies support OPI (Open Prepress Interface), allowing you to use an
image substitution server to speed up the printing process. OPI only supports the image formats EPS and TIFF.
Store forms on printer's hard disk: Storing PostScript forms (cached reusable content) on hard disk will prevent out
of memory conditions if your document contains large high resolution images. Only use this option if your RIP has access
to a hard disk.
Custom cache size: Increasing the PostScript form cache size can help to improve performance. You may want to
experiment in order to determine the optimum value. Specifying a custom cache size only works if the system settings of
your RIP are not password protected.
Note: If you use the options "Store forms on printer's hard disk" or "Custom cache size", and the RIP is password
protected you might get a printer error. Consult the RIP manual or consult the system administrator to change the
settings on the RIP.
71
Page 73

Print Technologies
Standard PostScript
Print Technologies
Standard PostScript does not use any special optimization mechanism, except that you can use OPI to speed up
spooling.
Use this technology if your system does not support any of the other technologies.
Print dialog box settings
1. Use OPI, don't spool images
72
Page 74

Optimized PostScript
Print Technologies
Optimized PostScript caches image data in reusable PostScript forms. This speeds up the printing process, since each
unique image is only sent once.
Note:Some printer drivers offer the possibility to change the PostScript Output Options: "Optimize for Speed" or "
Optimize for Portability". For a maximum print speed, change the PostScript Output Option to "Optimize for Speed".
You can find this property, in the Printer driver/Advance Options.
Print dialog box settings
1. Store forms on printer's hard disk
2. Custom cache size
3. Use OPI, don't spool images
73
Page 75

AHT
Print Technologies
Select this technology if you have an AHT RIP. AHT uses an optimization mechanism similar to Optimized PostScript.
Print dialog box settings
1. Store forms on printer's hard disk
2. Custom cache size
3. Use OPI, don't spool images
74
Page 76

Creo VPS
Print Technologies
VPS (Variable Print Specifications) is a PostScript language extension, created and maintained by Creo.
It allows PrintShop Mail to classify each element on a page as either reusable (occurring more than once) or inline
(occurring only once). This distinction allows the VPS RIP to decide when image data can be reused. This avoids
unnecessary repeated processing and speeds up the print process.
One of the main differences between Optimized PostScript and VPS is that VPS reuses rasterized data instead of
PostScript.
Print Technology specific settings
1. Generate booklets: Booklets enable the printer to apply finishing (for example, stapling or binding) to every
subset. A subset is a set of pages belonging to the same record. If your document contains three layouts, every
subset will consist of three pages, assuming that you're not using layout conditioning or layout repetition.
2. Use Automatic Picture Replacement: Automatic Picture Replacement (APR) allows you to speed up the
printing process by using the image substitution capabilities of your VPS RIP. The image format support of APR
is limited to EPS, but some RIP versions support other formats like TIFF and JPEG.
75
Page 77

Fiery FreeForm
Print Technologies
FreeForm makes use of the fact that the data in your document is divided in two layers, which contain the text and image
objects in the document.
The master layer in a FreeForm job consists only of "static" objects, but the variable layer can contain a mix of both
variable and static objects, depending on the order of the objects on your layout. This is a consequence of the fact that
FreeForm does not allow data in the master layer to be printed on top of data in the variable layer.
These layers are sent to the FreeForm RIP in two separate jobs, not necessarily at the same time. The master data job is
rasterized first, and stored under a user defined numeric ID. The RIP overlays the rasterized master data with the
rasterized data of any variable data job that references the same ID. In this way, you can reuse the same master data for
different variable data jobs.
How the objects are separated
Static objects have content that remains constant throughout the entire record set. An image object is static when it has
an expression with a constant result. A text object is static when it does not contain any variable markers. A PDF object is
always static. All other objects are considered to be variable. A variable object is reusable when its content is the same
for at least two different records in the record set.
At printing, PrintShop Mail tries to assign as many static objects to the master layer as possible, starting with the object
at the back of your layout, and working towards the front. All static objects up to (but not including) the first variable
object are put in the master layer. All other objects make up the variable layer. Any reusable data in the variable layer will
be cached in PostScript forms.
Note: When using Freeform, try to make sure that static objects are not placed on top of variable objects in the object
order on your layout.
Preference settings
Form number: A numeric ID used to identify the master data job.
Print dialog box settings
Print Technology specific settings
FreeForm does not fully support layout conditioning. In particular, it does not allow you to
conditionally skip layouts. When SKIP is used, a BLANK page will be printed instead.
1. Store forms on printer's hard disk
2. Custom cache size
3. Use OPI, don't spool images
1. Send Master data
2. Send Variable data
3. Send Master and Variable data
76
Page 78

Fiery FreeForm 2
Print Technologies
FreeForm 2 makes use of the fact that the data in your document is divided in two layers, which contain the text and
image objects in the document.
The master layer in a FreeForm 2 job consists only of "static" objects, but the variable layer can contain a mix of both
variable and static objects, depending on the order of the objects on your layout. This is a consequence of the fact that
FreeForm 2 does not allow data in the master layer to be printed on top of data in the variable layer.
These layers are sent to the FreeForm 2 RIP in two separate jobs, not necessarily at the same time. The master data job
is rasterized first, and stored under a user defined numeric ID. The RIP overlays the rasterized master data with the
rasterized data of any variable data job that references the same ID. In this way, you can reuse the same master data for
different variable data jobs.
How the objects are separated
Static objects have content that remains constant throughout the entire record set. An image object is static when it has
an expression with a constant result. A text object is static when it does not contain any variable markers. A PDF object is
always static. All other objects are considered to be variable. A variable object is reusable when its content is the same
for at least two different records in the record set.
At printing, PrintShop Mail tries to assign as many static objects to the master layer as possible, starting with the object
at the back of your layout, and working towards the front. All static objects up to (but not including) the first variable
object are put in the master layer. All other objects make up the variable layer. Any reusable data in the variable layer will
be cached in PostScript forms.
Note: When using Freeform 2, try to make sure that static objects are not placed on top of variable objects in the object
order on your layout.
FreeForm 2 is an extension of FreeForm. The difference are:
Preference settings
Master ID: A name used to identify the master data job.
Print dialog box settings
Print Technology specific settings
1. FreeForm 2 fully supports layout conditioning.
2. The FreeForm 2 master ID consist of a name instead of a number.
1. Store forms on printer's hard disk
2. Custom cache size
3. Use OPI, don't spool images
1. Send Master data
2. Send Variable data
3. Send Master and Variable data
77
Page 79

PPML
Print Technologies
PPML is short for Personalized Printing Markup Language . A PPML file describes the entire personalized printing job and
contains all necessary elements to print the contents (layout and variable data).
The technology PPML in PrintShop Mail is very similar to PPML/VDX. The difference is that the content (PDF) and page
layout description (PPML) are sent separately.
Windows
Print Technology specific settings
Note: The settings "Environment" and "Send" should not be changed when you are not familiar with PPML terms!
For more information about PPML, visit the Website of PODi (Print On Demand Initiative), http://www.podi.org.
PrintShop Mail offers an option to define if an image should have a "Global Scope". If the Global Scope of an image is
set to "Yes" in the Properties Panel, the image will have a "Global Scope". For recurring print projects, a central benefit
of PPML is its ability to reference Reusable Objects using Global Scope. This feature allows for transmitting smaller
datasets and eliminates repetitive proces sing of the reusable content.
Note: Please make sure that your RIP supports at least PPML 1.5, including the "application/pdf" source format.
Printing speed can be improved by using a "Global Scope" for one or more images, or possibly (depending on your RIP)
by unchecking the "Embed images in PDF’" checkbox in the Print dialog.
Using a "Global Scope" or unchecking "Embed images in PDF" requires that your RIP supports the image formats used in
your document. Please consult the following table and your RIP documentation, or contact the RIP manufacturer. If you
are not sure, send a small test job before submitting a larger job.
Image Source Format
PDF an EPS application/postscript
TIFF image/tiff
JPEG image/jpeg
GIF image.gif
1. Create ZIP archive: When checked, the PDF and PPML files will be zipped before being sent to the printer.
This option is used for specific printers, which expect a PPML-ZIP file. The ZIP file contains the PPML and the
PDF file.
2. Embed images in PDF: When checked, only the following images formats are supported: pdf, eps, tiff, jpeg
and gif.
3. Environment: The path specified in the Environment setting will place the images with a "Global Scope" in the
Environment. The Consumer (RIP) stores and/or caches the images for later use.
4. Send.
4.1- Send "All Images": A PDF file will be created containing images that have a "Global Scope" or a "Local
Scope". This option also creates a PPML job, using this PDF, with instructions to use the Local and the G lobal
images. Images with a "Global Scope" are stored in the specified Environment. After this job the "Glob al
images" can be reused for recurring print projects, for example with the option "Send Local Images".
4.2- Send "Global Images": A PDF file will be created containing images that have a "Global Scope". This
option also creates a PPML job, using this PDF, with instructions for storing these images into the specified
Environment.
4.3- Send "Local Images": A PDF file will be created containing images that have a "Local Scope". This option
also creates a PPML job, using this PDF, with instructions to use these Local images and the Global Images that
are stored in the specified Environment. For that reason, images that have a "Global Scope" should be present
in the specified Environment. Images with a "Global Scope" will only be referenced in the PPML job.
78
Page 80

Mac OS
For Macintosh there is an option "PPML.zip" in the print dialog (File > Print > PrintShop Mail). This option will include all
images. It will make a copy of all the images used in the PrintShop Mail job. If the option "P PM.zip" is unchecked you will
output a PPML file that has a reference to the images that are used in the job.
79
Page 81

PPML/VDX 7
(Windows only)
Print Technologies
PPML/VDX is an abbreviation for Personalized Print Markup Language/Variable Data Exchange. The output consists of an
optimized PDF in which reusable content elements occur only once. The PDF also contains a block of PPML data that
describes the page layout.
Note: PPML/VDX 7 requires both Adobe Acrobat(r) and Distiller(r) to be installed on your system.
To help ensure correct output there are "PSMail joboptions" files for the Acrobat Distiller versions 5, 6, or 7 in the
Printshop Mail installation folder.
These settings will tell Acrobat Distiller how to handle fonts, color, images, etc., when it creates the optimized PDF.
If so desired, you can change these output options for PPML and VDX by changing the Distiller joboptions. Double click on
the "joboptions" file you want to modify, change and save it.
Note: PSMailx.joboptions files should be saved in the PrintShop Mail installation folder, next to the executable. The "x"
specifies the Acrobat Distiller version that the file corresponds to.
More information about the Acrobat Distiller joboptions can be found in the online Help of the Acrobat Distiller.
Print Technology specific settings
1. Environment: The path specified in the Environment setting will place the images with a "Global Scope" in the
Environment. The Consumer (RIP) stores and/or caches the images for later use.
2. Send
2.1- Send "All Images": A PDF file will be created containing images that have a "Global Scope" or a "Local
Scope". This option also creates a PPML job, using this PDF, with instructions to use the Local and the G lobal
images. Images with a "Global Scope" are stored in the specified "Environment". After this job the "Global
images" can be re-used for recurring print projects, for example with the option "Send Local Images".
2.2- Send "Global Images: A PDF file will be created containing images that have a "Global Scope". This
option also creates a PPML job, using this PDF, with instructions for storing these images into the specified
Environment.
2.3- Send "Local Images": A PDF file will be created containing images that have a "Local Scope". This
option also creates a PPML job, using this PDF, with instructions to use these Local images and the Global
Images that are stored in the specified Environment. For that reason, images that have a "Global Scope" should
be present in the specified Environment. Images with a "Global Scope" will only be referenced in the PPML job.
80
Page 82

PrintStreamer
(Mac OS only)
Print Technologies
This printing technology sends two separate files to the RIP, one master file and one with variable data.
Print dialog box settings
Print Technology specific settings
1. Use OPI, don't spool images
1. Send Master and variable data
2. Send Master data
3. Send Variable data
81
Page 83

VIPP
Print Technologies
VIPP is an acronym for Variable data Intelligent PostScript Printware. The output of this technology consists of a
PostScript stream in which reusable images occur only once.
The main difference between VIPP and Optimized PostScript is that images are cached using a proprietary VIPP specific
mechanism instead of PostScript forms. The cached images are stored in print ready format.
Print Technology specific settings
Encapsulated VIPP supports the following image formats: JPEG, TIFF, EPS and PDF.
Note: This technology requires a RIP that has been enabled for Encapsulated VIPP, and a hardware key that has been
upgraded to enable VIPP. For more information on how to upgrade the hardware key, see Upgrading PrintShop Mail.
1. Don't spool images (EPS, TIFF, JPEG): This option allows you not to send the recurring images twice to the
RIP. The output will only contain references (by filename) to images stored in the project folder.
2. Project Folder:This option allows you to store recurring images on the fly, and before printing the job, to a
"project folder" on the (VIPP enabled) RIP. The folder name can be specified in the Print Dialog.
82
Page 84

Page Setup
Printing your document
The Page Setup of your document, allows you to specify which printer to print to, the paper size, source, and other
characteristics of your print media.
The settings in the Print dialog are applied to the current print job only, but the settings in the Page Setup dialog will
be stored in your document file.
You can specify a different Page Setup for each layout, but you can only send layouts to one printer. This allows you to
mix paper sizes (Windows Only), orientations, media types, and finishing options throughout your document, provided
that this is supported by your printer.
Windows
There are different ways of changing the Page Setup:
Use the Page Setup dialog box to specify printer options, as well as the media your job will be printed on.
Mac OS
To change the Page Setup:
Use this dialog box to specify printer options, as well as the media your job will be printed on.
1. From the File menu, select Page Setup, and choose either:
Current layout: layout or layouts selected in the Properties Panel.
This point forward: current layout and all layouts below it.
Whole document: all layouts in the document.
2. Select the Layouts tab in the Properties Panel, select one or more layouts, select Page Size, and click on
the [...] button.
3. Right click on the layout and select Page Setup to open the dialog.
1. From the File menu, select Page Setup.
2. In the dialog box, you can change:
• Settings
• Format
• Orientation
• Scale
83
Page 85

Subset Finishing
Printing your document
About subset finishing
PrintShop Mail defines a subset as a set of pages belonging to the same record. If you are not using layout repetition or
layout conditioning, the number of pages in each subset will equal the number of layouts in your document.
Subset finishing is the process of applying a finishing option (such as stapling or binding) to each subset in a print job.
To use subset finishing
You can specify a finishing option in the printer driver, using the Properties button in the Print dialog or using the
Advanced button in the Print Setup dialog box.
PrintShop Mail can embed certain PostScript instructions in the output to signal that the finishing option should be
applied.
You can specify which instructions to embed in the Embed PostScript dialog box.
It is possible to write your own PostScript set and save them. If you go to New you can give the PostScript set a name.
The given instructions at the "Start of Page", "Start of Job" and "Between Sets" will be saved. You can also turn it to the
default setting by selecting the button "Set Default".
Locating this dialog box
File > Embed PostScript
There are 4 options:
1. General: This option can be used to give the PostScript set a "Name" and write a "Description".
2. Start of Page: These instructions will be injected at the start of each page.
3. Start of Job: Instructions given there will be injected in the header of the job.
4. Between Sets: Instructions given in this field will be injected between the sets.
For stapling or binding, the default setting (Generic Subset Finishing) should suffice.
84
Page 86

Automated Printing
Automated Printing Overview
Printing a Document
About automated printing
PrintShop Mail allows you to automate certain tasks, such as opening and printing documents.
Windows
When you right click on a PrintShop Mail document file in a Windows Explorer window, you will notice that the menu
contains the submenu Print. You can print the document without starting PrintShop Mail, and you can drag a PrintShop
Mail document to a specific printer.
More advanced ways of automate the printing process is to use one of the next available features:
Note: When using automated printing, any errors will be logged in the Autoprint.log file, which usually is located in:
C:\Documents and Settings\User\Application Data\PrintShop Mail.
If you have installed .NET Framework 2.0, the errors will be logged in the Event Viewer.
To open the Even Viewer:
Mac OS
PrintShop Mail allows you to automate the printing process to a high extend. Instead of opening a document in PrintShop
Mail and selecting the "Print" submenu, the program can be told to monitor a HotFolder and execute print jobs as soon as
the necessary files (a PrintShop Mail document and/or a database file) are found there.
• Automated Printing using Command-line Arguments
• Automated Printing using Extended Scripting
• Automated Printing using DDE
To be able to use this feature, you need to activate the automated printing option. See
Upgrading PrintShop Mail to learn how to add this feature to your license.
• Start/Run/eventvwr.msc, or
• Start/Control Panel/Administrator tools/Event View er
Automated printing allows you to print PrintShop Mail documents and PrintShop Mail templates
automatically through the Command line or script file . Make sure to use the appropriate
extension (<document name>.psmd or <document name>.psmt) in the Command line or in the
script file.
• Automated Printing using the HotFolder
85
Page 87

Command Line Arguments
(Windows only)
Automated Printing
You can order PrintShop Mail to perform certain actions by specifying them on the command line.
Supported command line arguments
Argument Description
<document name> Filename of a PrintShop Mail document.
-p Prints the specified document to the default print e r.
-pt Prints the specified document to a specific printer, enclosed in quotes.
-db <database> Links the specified document to a certain database.
How to use command line arguments
A simple example using command line arguments can be created by following the next steps:
If you double click on the shortcut you've just created, PrintShop Mail will be started and the specified document will be
opened. You are now ready to use any of the other supported command line arguments by adding them to the target.
A few examples
"C:\Program Files\PrintShop Mail6\PSMail6x.exe" Sample.psmd -db "Database.mdb"
"C:\Program Files\PrintShop Mail6\PSMail6x.exe" Sample.psmd -p
Dropping a database on a shortcut
You can create a shortcut that will make PrintShop Mail open any supported database you drop on it, by specifying the
next text in the target field of the Shortcut's properties:
"C:\Program Files\PrintShop Mail6\PSMail6x.exe" Sample.psmd -db
If you drop a database on the shortcut, PrintShop Mail will be started, opening the document "Sample.psmd" with the
database you just dropped.
Example: Mailing November.psmd
Example: Mailing November.psmd -p
Example: Mailing Novembert.psmd -pt "Laserwriter 16/600"
Example: Mailing November.psmd -db "Database.mdb"
1. Create a PrintShop Mail document, for example "Sample.psmd"
2. Create a database you wish to use with this document, or copy an existing database to the folder where you
saved the PrintShop Mail document.
3. Create a shortcut to the PrintShop Mail executable usually located at "C:\Program Files\PrintShop Mail6
\PSMail6x.exe". Copy this shortcut to the same folder as you saved the document you c r eated in step 1.
4. Right click on the shortcut and choose Properties. In the field Target, specify the document name by adding
it to the target. It should look something like "C:\Program Files\PrintShop Mail6\PSMail6x.exe" Sample.psmd".
Automated printing allows you to print PrintShop Mail documents and PrintShop Mail templates
automatically through the Command line or script file . Make sure to use the appropriate
extension (<document name>.psmd or <document name>.psmt) in the Command line or in the
script file.
86
Page 88

Extended Scripting
(Windows only)
Automated Printing
Extended Scripting is a fast and flexible way of automating your print jobs. This feature allows you to print any PrintShop
Mail document, combined with any database to any printer. You can even schedule an Extended Scripting job on a certain
date and/or time where your printer is usually idle.
You specify a certain action, or a range of actions, in a plain text file and tell PrintShop Mail to use that file by adding it to
a shortcut:
Note: When the script file has a name with spaces ("My<space>Script.txt") be sure to enclose this file name with quote
marks ("") in the Target line of the PrintShop Mail shortcut: "C:\Program Files\PrintShop Mail 6\PSMail6x.exe” -script “My
Script.txt”. Include the quote marks if you copy this line.
In the script you can specify a set of predefined commands to perform certain actions.
Supported Commands
Command Description
FileOpen
FileClose Closes the currently opened document.
FilePrint Prints the currently opened document to the default printer.
FilePrintTo
SetPrintTech
FilePrintRange
FileExit Quits PrintShop Mail. No other scripting commands followed by this command are
DatabaseOpen
DatabaseOpenODBC
source
DatabaseFilter
DatabaseClose Closes the currently opened database.
1. Create a shortcut to the PrintShop Mail executable usually located at "C:\Program Files\PrintShop
Mail6\PSMail6x.exe".
2. Add "-script scriptfile.txt" to the Target in the properties of the shortcut.
name
Opens the specified document. If another document is opened, it will be closed by
printername
technology
start stop
file
Opens the specified database. If any other database is opened, it will be closed by
filter
Filters the database according to the specified filter.
PrintShop Mail. Example:
Opens the PrintShop Mail document MassMailing.psmd from the folder C:\Documents.
Example:
Example:
Prints the currently opened document to the specified printer.
The name of the printer should equal the name specified in the Printer's properties.
Example:
Prints the currently opened document to the Adobe PDF printer.
Will change the current print technology.
Example:
If the document was saved using
Standard will print the document using
Prints the specified record range to the default printer.
Note: It is not possible to print a record range to a non-default printer.
Example:
Prints record 5 to 10 from the currently opened document.
executed.
Example:
PrintShop Mail.
Example:
Opens the Microsoft Access database "Example" from the folder C:\Documents.
Opens the specified data source. If any other database is opened, it will be closed by
PrintShop Mail.
Example:
Opens the data source called "MyDSN"
Example:
Filters the database, only records where the value of field "CITY" equals "New York" will
be used.
Example:
FileClose
FilePrint
FilePrint Adobe PDF
SetPrintTech Standard
FilePrintRange 5 10
FileExit
DatabaseOpen C:\Documents\Example.mdb
DatabaseOpenODBC MyDSN
DatabaseFilter [CITY] = 'New York'
DatabaseClose
FileOpen C:\Documents\MassMailing.psmd
Optimized PostScript
Standard PostScript
as PrintTechnology, SetPrintTech
as Print Technology.
87
Page 89

The argument <technology> must have one of the following predefined values.
Print Technology Script Value
Standard PostScript SetPrintTech Standard
Optimized PostScript SetPrintTech Optimized
AHT SetPrintTech AHT
Creo VPS SetPrintTech VPS
FreeForm SetPrintTech FreeForm
FreeForm2 SetPrintTech FreeForm2
PPML SetPrintTech PPML
PPML/VDX SetPrintTech PPMLVDX
VIPP SetPrintTech VIPP
How do I create an Extended Scripting job?
You create an extended scripting job by following the next steps:
1. Create a PrintShop Mail document and save it, for example "ScriptTes t.psmd".
2. Create a textfile containing all commands you want to perform.
3. Create a shortcut to PrintShop Mail.
4. Add the argument "-script scriptfile.txt" to the command line (where "scriptfile.txt" is the textfile containing the
Note: It is advised to save your script file as "UNICODE" encoding.
In the script file, you specify all commands you want to perform:
This simple scriptfile opens the document "ScriptTest.psmd", prints it to the default printer and quits PrintShop Mail.
You can create a batch process by telling PrintShop Mail to use another document:
PrintShop Mail first opens the document, "ScriptTest.psmd" and prints it to the default printer. When this is done,
PrintShop Mail opens the second document, "AnotherDocument.psmd" and prints it to the same default printer. Of
course, you can choose to specify a different printer by using the command "FilePrintTo". Finally, PrintShop Mail exits.
It's possible to use the same document with different databases:
This opens the document "ScriptTest.psmd" and prints it to the default printer. When this is d one, PrintShop Mail opens
the database "AnotherDatabase.MDB" and prints it to another printer, called "Printer2". Finally, PrintShop Mail exits.
A combination of the commands is also possible:
commands)
Automated printing allows you to print PrintShop Mail documents and PrintShop Mail templates
automatically through the Command line or script file . Make sure to use the appropriate
extension (<document name>.psmd or <document name>.psmt) in the Command line or in the
script file.
FileOpen ScriptTest.psmd
FilePrint
FileExit
FileOpen ScriptTest.psmd
FilePrint
FileOpen AnotherDocument.psmd
FilePrint
FileExit
FileOpen ScriptTest.psmd
FilePrint
DatabaseOpen AnotherDatabase.MDB
FilePrintTo Printer2
FileExit
FileOpen ScriptTest.psmd
FilePrintRange 5 10
88
Page 90

DatabaseOpen AnotherDatabase.MDB
FilePrintRange 10 15
DatabaseOpen ThirdDatabase.XLS
FilePrintTo Printer2
FileOpen Document2.psmd
FilePrint
FileExit
This opens the PrintShop Mail document "ScriptTest.p smd" and prints records 5 to 10 to the default printer. When this is
finished, it opens the database "AnotherDatabase.MDB" and records 10 to 15 are printed to the default printer. Then, the
database "ThirdDatabase.XLS" is opened and all records are printed to printer "Printer2". Eventually, the PrintShop Mail
document "Document2.psmd" is opened, printed to the default printer and PrintShop Mail exits.
It's possible to change the Print Technology used when the document was created, or print the same document using
different Print Technologies:
FileOpen ScriptTest.psmd
SetPrintTech Optimized
FilePrint
FileOpen ScriptTest.psmd
SetPrintTech Standard
FilePrint
Database Filters
A database filter consists of a field name, an operator and a condition. Suppose you have the following database:
NAME CITY GENDER
Eddy New York M
Pamela Los Angeles F
Tim Washington M
Robert New Jersey M
The available field names in this database are "Name", "City" and "Gender". The database has 4 records.
An operator should be one of the ANSI SQL operators listed in the table below.
Operators Definition
= Equal
<> Not equal
< Less than
> Greater than
<= Less than or equal
>= Greater than or equal
A filter is used to construct the WHERE clause of an SQL statement. It does not include the reserved word WHERE to
filter the record set.
Except for "Distinct", "Like" and "Between", all SQL commands are supported. For more information about the SQL
commands, please visit www.sql.org.
If you want to select and print the records where the field name "City" equals "New York", the following line should be
added to the script file:
DatabaseFilter [CITY] = 'New York'
Result: One record will be printed.
Note: Please notice that we have used single quotes around the conditional values 'New York'. SQL uses single quotes
around text values. Numeric values should not be enclosed in quotes.
Suppose you want to send a mailing to all persons in the database where [GENDER] does not equal 'F'. The filter should
look like:
89
Page 91

DatabaseFilter [GENDER] <> 'F'
Result: Three records will be printed.
Or, you want to print all records where the [GENDER] equals 'F' OR where [CITY] does not equal 'Washington':
DatabaseFilter [GENDER] = 'F' OR [CITY] <> 'Washington'
Result: Three records will be printed
These are just three examples of a database filter. You can create very advanced and powerful database filters. Please
refer to your SQL manual or an online resource for advanced examples.
If you need to have data from more than one table in the database, you can make a query in SQL or MS Access and
export the result of this query into Excel, Access or a text file. This file can be used as a database in PrintShop Mail.
Scheduling a job
It is possible to schedule a certain job on a certain date and time. This can be achieved by using the Windows Scheduler.
For more information about the Windows Scheduler and how to create a scheduled task, please refer to your Microsoft
Windows® manual.
90
Page 92

DDE
(Windows only)
Automated Printing
DDE Dynamic Data Exchange is a more flexible way to automate printing than using command line arguments, but it
requires knowledge of a programming language that supports DDE, such as Visual Basic or C++. Please refer to the
Win32 API documentation to learn how to establish a DDE connection.
To connect to the PrintShop Mail DDE Server, make sure PrintShop Mail is running and open a DDE-connection to server
"PrintShopMail6".
Visual C++ 6.0
// include "ddeml.h"
UINT iReturn = DdeInitialize(&idInst, (PFNCALLBACK)DdeCallback,
APPCLASS_STANDARD | APPCMD_CLIENTONLY, 0 );
HSZ hszApp = ::DdeCreateStringHandle(idInst, "PrintShopMail6", 0);
HSZ hszTopic = ::DdeCreateStringHandle(idInst, "C:\\untitled.psmd", 0);
HCONV hConv = ::DdeConnect(idInst, hszApp, hszTopic, NULL);
::DDEExecute(idInst, hConv, "[FileExit]");
Visual Basic 6.0
TextBox.LinkTopic = "PrintShopMail6|Connect" ' Set link topic.
TextBox.LinkMode = vbLinkManual ' Set link mode.
On Error Resume Next 'TextBox thinks DDE is not executed,
'when actually it is.
TextBox.LinkExecute "[FileExit]"
On Error GoTo 0
PrintShop Mail accepts the following DDE commands:
Command Description
[FileNew] Closes the current document (if any) and creates a new
[FileOpen "filename"] Opens the specified document.
[FileClose] Closes the current document.
[FilePrint] Prints the current document to the default printer.
[FilePrintRange "start", "end"] Prints a range or records to the default printer.
[FileExit] Closes PrintShop Mail.
[DatabaseOpen "filename"] Opens the specified database.
[DatabaseClose] Closes the current database.
[DatabaseOpenODBC
"source"]
Note: This only applies to PrintShop Mail 6.x or later. PrintShop Mail 4.x and 5.x are slightly different. If desired, the text
can be adapted for 4.x and 5.x by changing the word “PrintShopMail6” to “PrintShopMail4.x” or PrintShopMail5.x (all 3
occurrences).
document.
Opens the specified ODBC data source.
91
Page 93

HotFolder
(Mac OS only)
Automated Printing
This feature allows more than one user to "drop" their database files and/or documents into the "HotFolder", causing a
print job to start without further interaction (and without even needing access to the PrintShop Mail program from their
computers).
Initializing the HotFolder
Using the HotFolder
1. From the PrintShop Mail menu, select Preferences and click on the options group "HotFolder".
2. Click on the Edit button to locate the "HotFolder" with the desire documents.
3. With all PrintShop Mail documents closed, from the File menu, select Monitor HotFolder.
4. To stop monitoring and automatic printing of the document, click on the Cancel button.
1. Create a PrintShop Mail document and store it in the "HotFolder".
Since there will not be any user interaction with the program when the document is automatically printed, users
should verify the document before saving it.
2. Drop the document or/and the database file into the HotFolder.
Within 30 seconds, PrintShop Mail combines the database with the available PrintShop Mail document and
starts the print job. In addition to the "HotFolder" itself, three levels of subfolders can be used to drop database
files in. This may be useful if multiple users want to produce mailings with different database files.
3. After PrintShop Mail has printed the document, the database file is moved to a folder "PSM Printed", which is
created next to the HotFolder. The PrintShop Mail doc ument remains in the same location and can be used
again.
4. PrintShop Mail writes a log of its actions into a log file. Since the timestamp of the log file is automatically
adjusted every time when PrintShop Mail becomes active, this timestamp can be used to check whether
PrintShop Mail is still running or not. If no PrintShop Mail document and/or database file was found, the log file
is still updated. The log file is located in the folder, in which the HotFolder is also placed.
92
Page 94

Document Fundamentals
Properties Window
Document Fundamentals
The Properties Window
The Properties Window is the part of the PrintShop Mail screen that shows the properties of the currently selected object.
You can hide the Properties Window to see more of the layout, by double clicking on "Properties", "Layouts", "Variables",
Data Fields", "Warnings", or "Verification Results" panel.
The Properties Panel is a docked window that can be dragged from the properties area to become a floating window.
There is a Properties Panel for the following categories:
Layouts Panel
The Layouts Panel contains the layout(s) and their object(s). The objects are listed as a part of the layout in a tree
view. Selecting an object will show the object properties in the Properties Panel.
When you select a layout in the Layouts Panel, the following properties will be displayed.
• Layouts
• Variables
• Data Fields
• Warnings
• Verification Results
93
Page 95

Option Description
Layout Name Name of the selected layout.
Layout Size Size of the selected layout.
Description Select a standard size: Fit to Page (Default), Fit to Objects,
Width Enter custom width. This setting is editable if you select
Height Enter custom height. This setting is editable if you select
Paper Size Size of paper for the current layout.
Description Select the paper siz e for the selected layout. The paper size
Width The width of the page.
Height The height of the page.
Paper Tray If your printer supports different paper trays and your
Action The action to be performed for this layout, PRINT, BLANK or
Number of copies Number of copies for the selected layout. Only used when
More information about this topic , can be found in Specify the
Layout Size.
Custom Size, A3, A4, A5, B5, US Letter, US Legal.
"Custom Size".
"Custom Size".
More information about this topic can be found in Page Setup.
depends on the printer driver selected in the Page Setup
dialog.
document consists of multiple layouts, you can send different
layouts to different trays.
More information about this topic can be found in Select Paper
Trays
SKIP.
More information about this topic can be found in Use Layout
Condition.
printing, must be at least one.
More information about this topic can be found in Number of
Copies.
Variables Panel
The Variables Panel shows the list of variables, the Name, Expression and calculated Result. Double clicking on a
variable will open the Expression Editor.
94
Page 96

Selecting a variable will show the format category in the Properties Panel, this can be:
• Text
• Number
• Date
• Currency
• E-mail
Detailed information about how to format variables, can be found in Formatting Variables.
Data Fields Panel
The Data Fields Panel will show the field names , database name of the opened database and the number of records it
contains.
The entries you will find in the Data Fields Panel in PrintShop Mail, represent data fields that occur in the document.
These fields are either referred to in expressions (for variables or layout conditions, without the need to directly being
linked to a database), or they refer to actual database fields (when the document is already linked to a specific database).
When a data field is used in the PrintShop Mail document, it will have a check mark in the Data Fields Panel.
You can browse the records in the database by clicking the browse buttons in the Database toolbar, or by making the
following selections from the Database menu:
• First Record (ALT+Up)
• Previous Record (ALT+Left)
• Next Record (ALT+Right)
• Last Record (ALT+Down)
95
Page 97

Warnings Panel
While you are working, PrintShop Mail will dynamically check for any possible errors on the layout and will display any
occurring errors in the Warnings Panel.
Verification Result
When you select from the Layout menu, Verify Document, a progress bar will be displayed, showing the amount of
records being checked. The warnings for the whole document will be listed in the Verification Result Panel.
96
Page 98

Properties Panel
Document Fundamentals
You can change the properties for any object in the Properties Panel
These properties are grouped as follows:
Content
These items describe the properties of the object.
Option Description
Alignment Specify horizontal and vertical alignment:
Image Filename
(images only)
Image Folder
(images only)
Image Scale
(Windows)
Clipping
(Mac OS)
Search Subfolders
(images only)
Vertical Layout
(text box only)
Two Color
(images only)
Copy fitting
(text box only)
Remove Empty Lines
(text box only)
Vertical Layout
(text box only)
The following limitations apply to "Two Color" option for images:
-Images
Horizontally: Left, Centered, Right
Vertically: Top, Centered, Bottom
-Text
Horizontally: Left, Centered, Right, Justified
Vertically: Top, Centered, Bottom
Displays the image filename, including the full path. The contents can only be
changed through the expression builder.
This points to the path where the variable images are stored. Clicking on the icon
allows you to browse to a different search folder.
Here you can specify options on how the image is resized relative to the bounding
box.
Original size: The image is always shown in its original size, regardless of the size
of the frame. If the frame is smaller the image will be cropped. Does not scale the
images.
Fit in Frame: The image will be resized to fill the frame, maintaining the image
aspect ratio. Images are not clipped.
Crop to Frame: Proportionally scales the images so that they fill the entire frame.
Images may be clipped.
Specify whether PrintShop Mail should only look in the current folder (set to "No"), or
if it should look in subfolders as well (set to "Yes").
This setting is specifically designed for vertical text with Asian characters which need
to be printed vertically, other characters will simply be rotated 90°.
This feature is supported under Windows XP and Windows 2003.
Control for Two Color support
Convert to Two Colors: When set to "No" images will shown it's original color.
Setting this option to "Yes" will convert the image to two colors.
Background Color: Convert background color to specified color.
Foreground Color: Convert foreground color to specified color.
Copy fitting is a feature that will automatically shrink text by reducing the font size,
when there is more text than the text box can hold. The font size will be reduced to
the font size needed to fit the text in the text box. Howe ver, text will not be shrunk
beyond the specified minimum size.
When set to "No", empty lines will be shown in the text box. Setting this option to
"Yes", will remove all those empty lines. The option "Only in variables" removes
empty lines that appear in variables, but not empty lines in between variables.
This setting is specifically designed for vertical text with Asian characters which need
to be printed vertically, other characters will simply be rotated 90°.
This feature is supported under Windows XP and Windows 2003.
• The Two Color option does not support the images format EPS and GIF.
• Two Color option will be disabled when using the Print Technology specific options, OPI, APR and Do no send
images (VIPP).
• The Print Technology PPML does not support the Two Color option.
97
Page 99

Frame
These items apply to the bounding box, which is the boundary around the item.
Option Description
Border Size Change the border size. You can choose from hairline width, or a pixel width (1-
Border Color You can choose one of the standard colors, or create your own custom RGB or CMYK
Border Style
(Windows Only)
Bounding Box Displays the dimensions of the bounding box using the location of the top left corner,
Fill Color Specify a custom opaque color to fill the box, or set to transparent (no fill).
Lock Position Locks the position, size and rotation attributes of this object.
Rotation Shows the current rotation applied to the item.
Snap Frame to Content
(Windows Only)
12px). You can also create a Custom Size.
border color.
Choose the border style. The following options are available:
Solid ——————
Square dot ......
Dash — — — — —
Dash Dot — - — - — Long Dash —— —— ——
Long Dash Dot —— - —— Long Dash Dot Dot —— - - —— - -
and the height and width. These values can also be entered manually.
Snaps the frame to the proportions of the content.
When this option is set to "Yes", the object’s bounding box (frame) will automatically
resize to the dimensions of the image or resize vertically to accommodate larger
amounts of variable text that would otherwise not fit in the text box. When set to
"No", a verification warning will be shown at print time, when variables do not fit in
the box.
Object
This item apply to the name of the selected object
Option Description
Object Name The unique name that identifies an object.
The following limitations apply to "objects name":
• No white spaces leading or trailing
• Maximum 255 characters.
• Not editable when multiple objects are selected.
Printing
Option Description
Global Scope for PPML
(images only)
Color space
(text only)
Specifies whether an image should get Global Scope. Images with a Global Scope
can be reused on the printer across multiple PPML or PPML/VDX jobs. When set to
"Yes" images will be stored in a specified Environment and can be reused in
others print jobs. This property will be ignored for other technologies.
CMYK requires the color of the text to be uniform throughout the object.
Mac OS
Note that the "Remove Empty Lines" feature can be switched on using a checkbox in the Expression Editor windo w.
98
Page 100

PDF Page Properties
Document Fundamentals
To specify PDF page properties
Windows
1. Click on the object representing the PDF.
2. In the Properties Panel specify the properties.
Mac OS
1. Double click on the object representing the PDF, or from the Item menu select Show Object Properties.
2. Specify the Properties.
3. Click OK.
99
 Loading...