


PlanetPress Workflow - 8.8
Table of contents
 Loading...
User Guide
Version:8.8

User Guide
Version 8.8
Last Revision:4/9/2018
Objectif Lune, Inc.
2030 Pie-IX, Suite 500
Montréal, QC, Canada, H1V 2C8
+1 (514) 875-5863
www.objectiflune.com
All trademarks displayed are the property of their respective owners.
© Objectif Lune, Inc. 1994-2018. All rights reserved. No part of this documentation may be
reproduced, transmitted or distributed outside of Objectif Lune Inc. by any means whatsoever
without the express written permission of Objectif Lune Inc. Inc. Objectif Lune Inc. Inc. disclaims
responsibility for any errors and omissions in this documentation and accepts no responsibility
for damages arising from such inconsistencies or their further consequences of any kind.
Objectif Lune Inc. Inc reserves the right to alter the information contained in this documentation
without notice.

Table of Contents
Table of Contents 4
Welcome to PlanetPress Workflow 8.8 10
Icons used in this guide 10
System Requirements 12
Operating System (64-bit only) 12
Minimum Hardware Requirements 12
Known Issues 12
Basics 16
Setting Up the Working Environment 16
Setting Up Preferences 16
Create a New Process 16
Considerations 17
Send your Configuration 17
Features 20
The Nature of PlanetPress Workflow 20
About Branches and Conditions 20
Branches 21
Conditions 21
Configuration Components 21
Connect Resources 21
Available Resources 22
Resource Save Location 22
Resource Archives 23
About Data 23
Data File and Job File 24
Job File Names and Output File Names 25
Data selections 26
AboutData Emulation 35
Using the File Viewer 36
Sample Data 36
Metadata 38
Data Repository 51
Structure 52
Page 4

Accessing the Data Repository 53
Where to find the Data Repository 54
About Documents 54
Import Documents 54
Import PrintShop Mail Documents 55
Debugging and Error Handling 55
About Error Handling 55
Using the On Error tab 56
Creating and Using Error Processes 57
Accessing the Logs 58
Resubmit Backed Up Input Files to a Process 60
Knowing What to Resubmit 62
Debugging your PlanetPress Workflow Process 63
The Plug-in Bar 66
Categories 66
Settings & Customization 67
About Printing 68
PlanetPress Workflow Printer Queues 69
Shared Printer Queue Properties 70
Windows Output Printer Queue 72
LPR Output Printer Queue 73
FTP Output Printer Queue 74
Send to Folder Printer Queue 76
Triggers 77
Load Balancing 77
Objectif Lune Printer Driver (PS) 78
About Processes and Subprocesses 81
Processes 81
Subprocesses 81
Process Properties 82
Activate or Deactivate a Process 87
Convert a Branch to a Subprocess 87
Import Processes from Another Configuration File 88
Toggle the Run on Desktop Property 89
Using Scripts 91
The Script Editor and XSLT Editor 92
SOAP Server API Reference 98
Page 5

The Watch Object 105
Data Repository API 121
Stopping Execution 141
Special Workflow Types 142
Special Workflows 142
PlanetPress Capture Workflow 143
Database Considerations (ODBC) 150
HTTP Server Workflow 179
PDF Workflow 186
Workflow processes in a Connect Send solution 189
The basic processes involved in the Capture OnTheGo Workflow 191
About Tasks 196
Task Properties 197
Variable Properties 197
Input Tasks 203
Action Tasks 268
Data Splitters 368
Process Logic Tasks 396
Connector Tasks 426
PlanetPress Capture 475
Metadata Tasks 509
OL Connect Send 538
OL Connect tasks 555
Output Tasks 619
Working With Variables 644
Types of Variables 644
Job Info Variables 645
Standard Variables 646
Manipulate Local Variables 650
Manipulate Global Variables 652
About Configurations 654
Create a New Configuration 654
Open a PlanetPress Workflow Configuration File 655
Saving and Sending 656
Exit PlanetPress Workflow Configuration Program 658
About related programs and services 658
Available Input services 659
Page 6

Available Output services 660
Start and Stop PlanetPress Workflow Service 660
The Interface 663
Customizing the Workspace 664
Dock and Undock Areas of the Program Window 664
Show or Hide Areas of the Program Window 666
Combine and Attach Areas 666
Resize the Program Window Areas 671
Change the Interface Language 671
PlanetPress Workflow Button 672
Options 672
The Configuration Components Pane 674
Components Area Sections 674
Processes and Subprocesses 677
Manipulate Global Variables 685
Connect Resources 687
PPS/PSM Documents 689
Associate Documents and PlanetPress Printer Queues 694
Using the Clipboard and Drag & Drop 695
Rename Objects in the Configuration Components Pane 698
Reorder Objects in the Configuration Components Pane 698
Grouping Configuration Components 699
Expand and Collapse Categories and Groups in the Configuration Components Pane 700
Delete Objects and Groups from the Configuration Components Pane 701
Other Dialogs 701
Activate Your Printers 701
Workflow Services 702
Process Properties 704
Advanced SQL Statement Dialog 709
Access Manager 709
PDF Viewer 717
The PlanetPress Workflow Service Console 719
Update document 721
Data Repository Manager 721
Virtual Drive Manager 724
The Debug Information Pane 725
The Message Area Pane 726
Page 7

The Object Inspector Pane 727
The Plug-in Bar 728
Categories 729
Settings & Customization 729
Preferences 730
Other Preferences and Settings 732
General appearance preferences 732
Object Inspector appearance preferences 733
Configuration Components Pane appearance preferences 733
Default Configuration behavior preferences 734
Notification Messages behavior preferences 735
Sample Data behavior preferences 737
Network behavior preferences 738
PlanetPress Capture preferences 739
OL Connect preferences 748
PDF Text Extraction Tolerance Factors 749
General and logging preferences 751
Messenger plugin preferences 752
HTTP Server Input 1 plugin preferences 753
HTTPServer Input 2 plugin preferences 756
LPD Input plugin preferences 757
Serial Input plugin preferences 758
Telnet Input plugin preferences 759
PlanetPress Fax plugin preferences 759
FTP Output Service preferences 763
PlanetPress Image preferences 764
LPR Output preferences 767
PrintShop Web Connect Service preferences 768
Editor Options 769
The Process Area 773
Zoom In or Out within Process Area 774
Adding Tasks 774
Adding Branches 775
Edit a Task 775
Replacing Tasks, Conditions or Branches 776
Remove Tasks or Branches 776
Task Properties Dialog 777
Page 8

Cutting, Copying and Pasting Tasks and Branches 778
Moving a Task or Branch Using Drag-and-Drop 781
Ignoring Tasks and Branches 782
Resize Rows and Columns of the Process Area 782
Selecting Documents in Tasks Links 783
Highlight a Task or Branch 784
Undo a Command 784
Redo a Command 784
The Quick Access Toolbar 785
The PlanetPress Workflow Ribbon 786
The Task Comments Pane 788
Additional Information 789
Copyright Information 790
Legal Notices and Acknowledgements 791
Page 9

Welcome to PlanetPress Workflow
Note
Complementary information that is not critical, but may help you better use PlanetPress Workflow.
Tip
Information that is useful or suggests an easier method.
8.8
This PDF documentation covers version 8.8. To view the documentation of previous versions
please refer to the PDF files available in the Downloads section of our website:
http://www.objectiflune.com/OL/Download/DownloadCenter.
Workflow is the heart of all of our solutions. Working in conjunction with PlanetPress Connect,
PlanetPress Capture, CaptureOnTheGO, PlanetPress Imaging, PlanetPress Fax, and a variety
of plugins, it helps improve your communications processes. Processes such as
communication creation, interaction, distribution and even maintenance.
Workflow is the "super dispatcher". It caters for inputs from a huge variety of sources, such as
email, web pages, databases, individual files (PDF, csv, XML, etc), print streams, FTP, Telnet
and even ERP systems! This data can then be analysed, modified, stored, verified, routed and
used as triggers for other processes from entirely within Workflow. Finally it is passed to one of
our other products (or not) to be outputted in multiple ways (printed, emailed, posted, archived,
sent to third party solutions, etc..).
Consider Workflow as a set of buildings blocks that enable you to build your own customised
automated processes which will fit your environment and not the other way around. Create
processes that will save you time and money!
Icons used in this guide
Icons are used throughout this guide to point your attention to certain information.
Page 10

Technical
Information that may require specific knowledge to understand.
Warning
Information that is potentially critical to using PlanetPress Workflow. Pay close attention.
Page 11

System Requirements
Note
Windows XP, Windows 2003 and older versions of Windows are not supported by PlanetPress
Workflow.
These are the system requirements for PlanetPress Workflow 8.8.
Operating System (64-bit only)
l Microsoft Windows 2008/2008 R2 Server
l Microsoft Windows 2012/2012 R2 Server
l Microsoft Windows Vista
l Microsoft Windows 7
l Microsoft Windows 8.1
l Microsoft Windows 10 (Pro and Enterprise versions only)
Minimum Hardware Requirements
l NTFS Filesystem (FAT32 is not supported)
l CPU Intel Core i7-4770 Haswell (4 Core)
l 8GB RAM (16GB Recommended)
l Disk Space: At least 10GB (20GB recommended)
Known Issues
l Anoto Pen Director 2.8 is not supported on Windows Server 2012 and Windows 10.
l 22356: Using the PT-PT setting to perform ICR on AlphaNumeric fields may not work
properly. If you encounter the issue, use the PT-BR setting instead, or use another
PlanetPess Field in your document design.
Page 12

l 21962: Barcode scanner task may have issues reading 2-D barcodes printed/scanned
with low resolution. Make sure the scans and the original printed output are at least
300DPI (600 or better recommended)
l 21405: When printing through a Windows printer driver on Windows Server 2008 or
Windows Server 2008 R2, the Job Owner setting is ignored. This is caused by a
documented issue in those two Operating Systems. Microsoft has provided no reason nor
workaround for the problem, therefore PlanetPress Workflow cannot circumvent the issue.
l Under Windows 2000, the SharePoint output task does not work with SharePoint 2010.
Under the same OS, the PlanetPress Capture ICR does not work due to the .NET 3.5
requirement.
l 21465: The SharePoint Output task does not validate the field contents. That's
Sharepoint's responsibility.
l 20143: The Metadata to PDI task encodes the XML using the default system encoding,
not the document's. In addition, it does not discriminate between index names written in
different cases (e.g. Name vs. name).
l Printing PDF files in passthrough mode using a Windows Printer Driver task causes jobs
to be processed sequentially rather than in parallel. This is caused by a 3rd party library
used in the printing process. Possible workarounds are to use a PlanetPress document to
call the PDF files as dynamic images, or to use the PDF file as the Data File for a
PlanetPress Document
l JobInfo #4 in the Windows Input Queue task (the original document name set by the
printing application) replaces any non-alphanumeric character with underscores in order
to filter out any invalid characters. Consequently, if the path contains slashes or colons,
those will be replaced with underscores.
l When the PlanetPress Capture database is set to MS Access, it is considered good
practice to have a single process generate Patterns for documents because the Access
engine may lock the other process out of the database as the first process updates it.
l After the initial installation, the PlanetPress Workflow Configuration tool may display an
error message the first time you launch it if you had already sent a PlanetPress Workflow
Document to it. You can safely ignore this message, you will simply have to manually
start the PlanetPress Messenger service from the Workflow console for this one time only.
To avoid getting the error altogether, make sure you launch the PlanetPress Workflow
tool once before sending any document to it.
Page 13

l 13554: In the LaserFiche connector, when selecting a different template after filling up the
fields and then going back to the first template, the values entered in the fields are lost.
They have to be entered again.
l When loading a workflow configuration that includes references to Windows printers, the
output task may fail to recognize the printer if the printer driver has changed between the
moment the config was set up and the moment it was loaded. This is unlikely to occur, but
it could, for instance, happen when importing a Version 7 configuration file into Version 8.
To circumvent the issue, open the output task's properties, make sure you reselect the
proper printer, close the task and send the configuration again.
l The HTTP/SOAP service may fail when both it and the Workflow service are logged on
using 2 non-local users or 2 local users with different privileges. To resolve the issue,
make sure both services use the same logon credentials.
l 13559: The WordToPDF task, when run under the LocalSystem account, may seem to
hang if the installation of MS-Word wasn't properly completed for the LocalSystem
account. If the task seems to take longer than it does when run in Debug mode, this may
be the case. You can confirm this behavior by opening up the Windows Task Manager
and checking whether the MSIExec application is running. In order to complete the
installation of MS-Word for the LocalSystem account, follow these steps:
1. Open a command-line window (CMD.exe)
2. Type "AT 10:56 /INTERACTIVE CMD.EXE" (replace 10:56 with the next upcoming
minute on your system)
3. At the specified time, a new command-line window opens. In it, navigate to Word
Installation folder, then type Winword Follow the instructions to complete the
installation
4. Re-start PlanetPress Workflow and test your process.
l The WordToPDF task relies on MS-Word to perform its functions. However, MS-Word
sometimes displays confirmation dialogs when it encounters a situation requiring user
input. Such dialog windows cannot be displayed when PlanetPress Workflow runs as a
service. As a result, the process may seem to hang because it is awaiting user input on a
window that isn't displayed. The only way to resolve this situation is to kill the
PlanetPress Workflow service. To avoid these types of issues from occurring, it is
imperative that the configuration for the WordToPDF task be tested thoroughly in Debug
mode prior to sending it into production. In particular, the connection to the database must
be validated.
l The WordToPDF task requires the default system printer to be set to a queue that uses
the PlanetPress printer driver. If you change the default system printer or if you import a
Page 14

PlanetPress Workflow configuration file from another PC that includes an instance of the
WordToPDF task, you must review the properties of each instance of the task and click
OK to validate its contents. A new printer queue will be created if required and the default
printer will be reset properly. If you do not perform these steps, running the configuration
will result in several error messages being logged and the task failing.
l The preferences for the PrintShop Mail Web connector may not be saved properly if you
set them and close the PlanetPress Workflow Configuration tool without first sending the
configuration to the service. Make sure you send the configuration before exiting from the
Configuration tool.
l 13009: With Outlook 2010, the Send Email functionality requires that the service be run
with administrative credentials in the domain. In addition, both Outlook and the
PlanetPress Workflow Configuration tool must *not* be running while the service is.
l The Microsoft Office 2010/2013/2016 and 365 line of products has not been certified for
use with PlanetPress Workflow. Some of its products may not be compatible with the
connectors included.
l Barcodes produced in printer-centric mode may have a slightly different aspect from those
produced in Optimized PostScript mode. This is due to the different types of 3rd party
libraries being used to generate the barcodes. However, all barcodes scan correctly.
Page 15

Basics
PlanetPress Workflow is a tool for the automation of the processing, the distribution and the
printing of your business documents. Once installed on the server, it can be set up to automate
all tasks related to document processing.
Setting Up the Working Environment
Setting up the working environment has to be done the first time you start PlanetPress
Workflow.
1. Defining the printer (see Activate Your Printers).
2. Configure PlanetPress Workflow Services (see Workflow Services).
Setting Up Preferences
PlanetPress Workflow Configuration program lets you configure a variety of options, from how
the application itself looks or behaves, to plugin specific options. For more information about
preferences accessible through the Preferences button in the PlanetPress Workflow Button,
please refer to Preferences.
Create a New Process
You can create a new process in a two different ways:
l
In the Ribbon, go to the Home tab and click the Process button in the Processes group.
l
In the Configuration Components pane, right-click on any process or the Processes
folder and select Insert Process.
Regardless of the method, a new process is created with a default name (Process1, Process2,
etc), Input Task and Output Task. The defaults are configurable in the "Default Configuration
behavior preferences" on page734 screen. The same methods can be used to create a new
Startup process.
Page 16

To add a PlanetPress Workflow startup process:
Note
You can only have one Startup Process in any given configuration and cannot add more.
l
In the Ribbon, go to the Home tab and click the Startup Process button in the
Processes group.
l
In the Configuration Components pane, right-click on any process or the Processes
folder and select Insert Startup Process.
Considerations
l While your configuration is limited to a maximum of 512 processes, any given process
can have as many tasks as necessary.
l A given process may include output tasks that generate files used by input tasks from
other processes.
l When you send a configuration to your PlanetPress Workflow service, all its active
processes are applied.
l Each process’ schedule determines when its initial input task can be performed.
l Other tasks included in the process are performed regardless of schedule, granted that
the previous task was performed.
Send your Configuration
PlanetPress Workflow Configuration saves entire configurations in the form of a single file. Like
any other file, configuration files may be saved and reopened, as well as rename as desired.
Simply saving a configuration has no effect on the configuration actually used by the
PlanetPress Workflow when it is started. To change any currently active configuration, you
must use the Send Configuration command.
When you use the Send command, the PlanetPress Workflow Configuration program uses the
currently opened configuration (Any_name.OL-workflow) to overwrite PlanetPress Workflow
service's current configuration (ppwatch.cfg).
Page 17

Note
OL-workflow files are equivalent to .pp7 files made with older versions of PlanetPress Workflow.
They contain the processes and such used by Workflow.
If PlanetPress Workflow service is running when you send a new configuration, it stops and
Note
If PlanetPress Workflow service is paused when you send a new configuration, it will not
stop and restart. Since PlanetPress Workflow service reads its configuration file when it
starts up, when you resume processing, PlanetPress Workflow service will continue
restarts automatically with the new configuration. If the service is stopped, it will not start
automatically.
To send a Configuration to the local server:
1. Open the configuration you want to use as a new configuration.
2. Edit the configuration, if required.
3.
When the configuration is ready to be used, from the PlanetPress Workflow button,
choose Send Configuration, then Send Local.
To send a Configuration to a remote server:
1. Open the configuration you want to use as a new configuration.
2. Edit the configuration, if required.
3.
When the configuration is ready to be used, from the PlanetPress Workflow button,
choose Send Configuration, then Send Remote.
Alist of available servers on the local network appears.
4. Put a checkmark next to each server where the configuration should be sent.
5. Click OK.
If a server is grayed out, this may mean you do not have access to send a configuration
remotely to it. For more information, please see "Access Manager" on page709.
Page 18

using the old configuration.
Page 19

Features
PlanetPress Workflow are input driven applications designed to output data in a variety of ways
through diverse means to various applications and devices. PlanetPress Workflowcan be used
as simple go between, passing along input data to output devices, but it can also perform
various types of data processing. You can combine the various PlanetPress Workflow services
to set up versatile automated processes to print jobs as well as generate other types of output.
The Nature of PlanetPress Workflow
PlanetPress Workflow act as sorts of dispatchers. On the one hand, they retrieves data and
controls plugins that retrieve data from watched locations, and on the other hand they send data
and controls plugins that send data to various devices, for printing or to generate documents
that can then be emailed or faxed. PlanetPress Workflow can also perform a variety of
operations on the data using its action plugins.
In fact, the PlanetPress Workflow plugin based architecture enables almost limitless
customization. You can create or purchase compatible plugins, drop them in any of
PlanetPress Workflow plugin folder and use them to perform other operations. You can even
find free unsupported plugins on the Objectif Lune Web site.
PlanetPress Workflow are service applications, or if you will, applications that continuously run
on a given computer and that perform actions automatically. Those actions are defined in a
PlanetPress Workflow configuration. A given computer can only run one PlanetPress Workflow
configuration at a time. The PlanetPress Workflow Service Console may be used to monitor the
services running on a given computer.
About Branches and Conditions
While some processes can simply start with an input task, manipulate the data with a few action
tasks and finish with an output task, in some cases you may want to have more control over the
flow of your process. For example, you may want multiple outputs, such as printing to multiple
printers as well as generating a PDFand emailing it. To do this, you will need branches. You
may also want to detect certain criteria in your data and act differently depending on that data,
such as sending a fax only when a fax number is found, or printing to a different printer
depending on who send you a print job. To do this, conditions are used.
Page 20
Branches
A branch is effectively a doubling of your job file. As your job file goes down the process, when
it encounters a branch it will go in that branch, process all tasks up to the output, and return to
the main trunk to continue processes. You can have branches within branches, and all
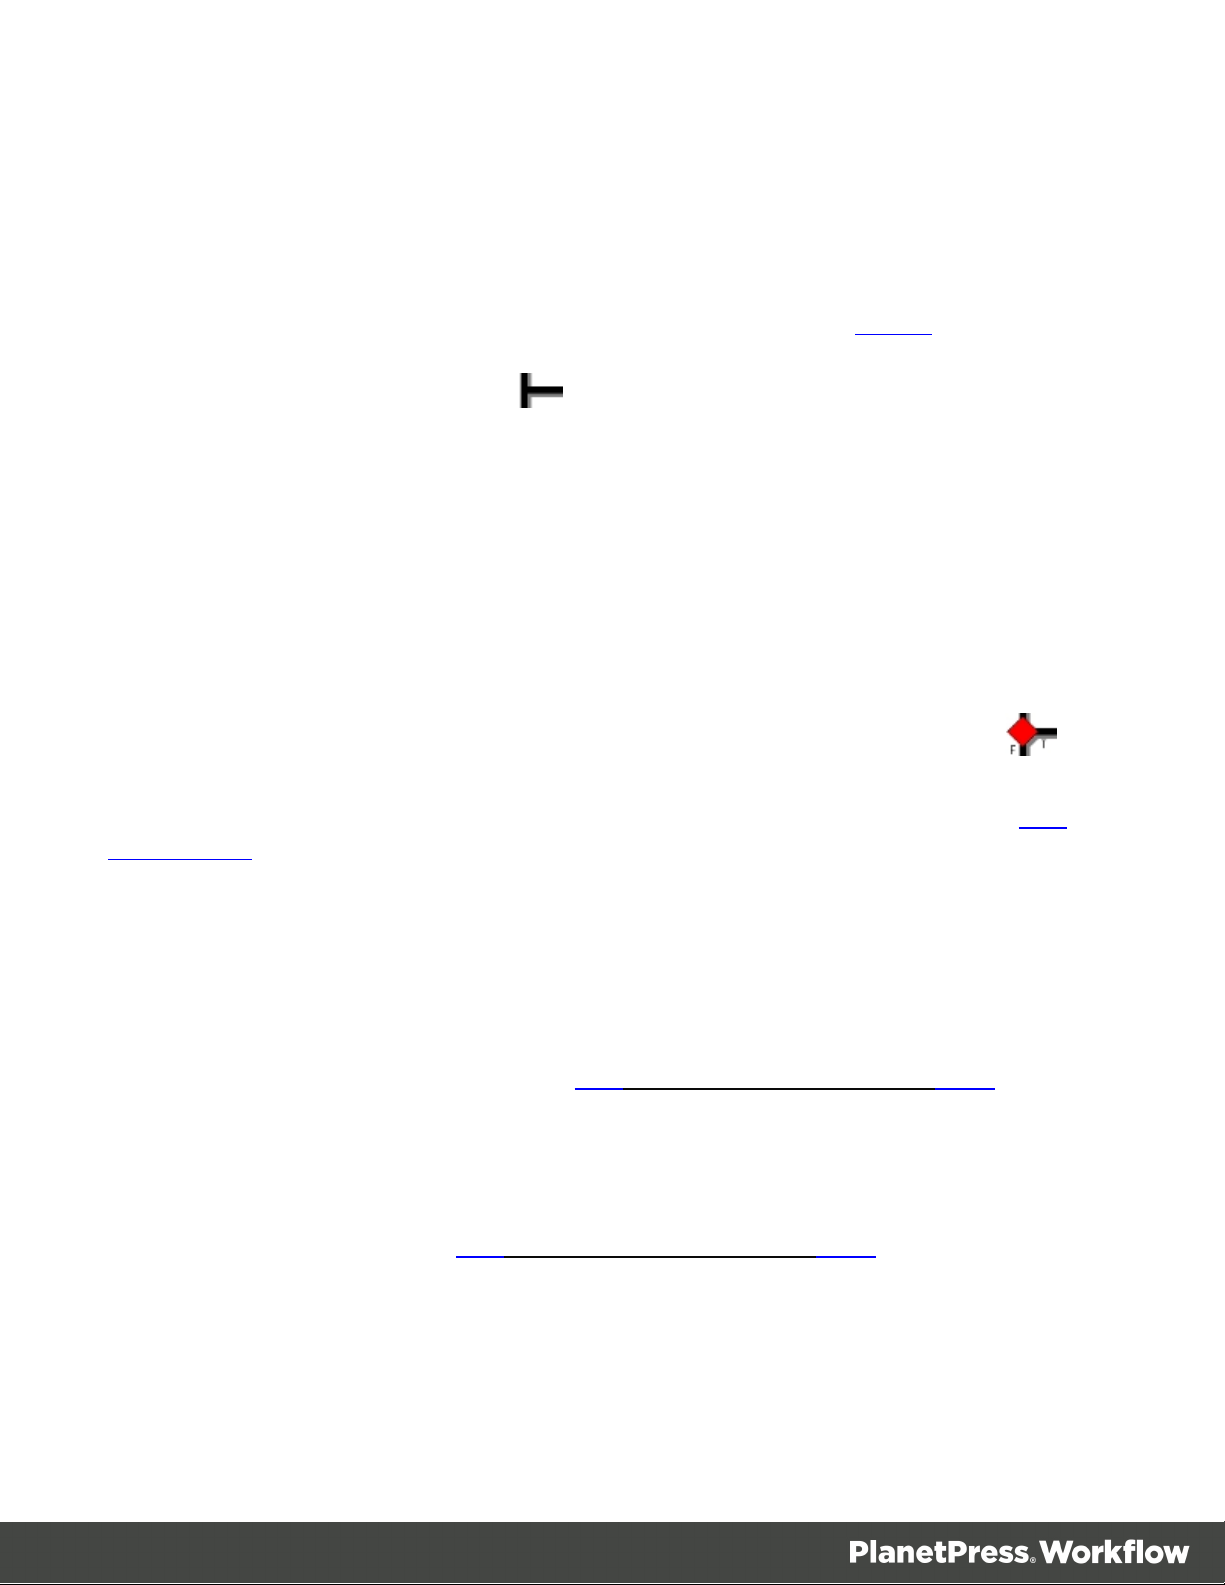
branches must have an output. For more information on branches, see Branch.
A branch is represented as a crossing .
Conditions
Acondition will either execute the branch it creates or the main trunk, but never both. As your
job file goes down the process, when it encounters a condition it will verify whether that
condition results in a "true"or "false"value. If the result is true, it goes in the branch, processes
all tasks up to the output, and the process finishes. If the result is false, it goes down the main
trunk and continues processing until the process finishes.
A conditional branch (or condition) is shown as a crossing with a red diamond over it .
For the list of operations you can perform on Branches and Conditions, please refer to The
Process Area.
Configuration Components
The Configuration Components items displayed in the pane are processes, subprocesses,
variables, documents and printer queues. For more information on operations that you can
perform on each component, please refer to The Configuration Components pane.
Connect Resources
Connect resources are visible in The Configuration Components pane and are added by
using the Send to Workflow option from the PlanetPress 's File menu.
Page 21

Available Resources
l Data Mapping Configurations:Displays a list of data mapping configurations used with
the Execute Data Mapping task. Each of the templates have been sent from PlanetPress
Connect using the Send to Workflow tool. For each template in the list, the following two
items appear within them:
l Data Model:Displays the data model used in the data mapping configuration.
Double-click on the data model to view it in your default XMLviewer (generally,
Internet Explorer).
l Sample Data File(s):Displays a list of sample files that are included in the data
mapping configuration. Double-click on a file to use it as a sample data file for the
active process.
l Document Templates:Displays a list of templates that can be used in content creation
tasks:"Create Email Content" on page562, "Create Web Content" on page587 and
"Create Print Content" on page582.
l Job Presets:Displays a list of Job Presets that can be used in the "Create Job" on
page567 task.
l Output Presets:Displays a list of Output Presets that can be used in the "Create Output"
on page570 task.
Resource Save Location
Any resource sent to PlanetPress Workflow from PlanetPress Connect is saved locally at the
following location: %PROGRAMDATA%\Objectif Lune\PlanetPress Workflow 8\PlanetPress
Watch\OLConnect
Resources are saved in their appropriate folder:
l DataMapper contains the data mapping configurations (.OL-datamapper)
l JobCreation contains the Job Presets(.OL-jobpreset)
l OutputCreation contains the Output Presets (.OL-outputpreset)
l Template contains the templates (.OL-template)
Page 22

Note
Package Files are not saved anywhere. The individual resources contained within the
package are extracted and placed in the folders noted above.
Resource Archives
From version 8.2, PlanetPress Workflow maintains an archive of previous versions of
resources, in the following location:%PROGRAMDATA%\Objectif Lune\PlanetPress Workflow
8\PlanetPress Watch\OLConnect\Archive , each in their own folder:
l datamapper contains archives of the data mapping configurations (.OL-datamapper)
l jobcreation contains archives of the Job Presets(.OL-jobpreset)
l outputcreation contains archives of the Output Presets (.OL-outputpreset)
l template contains archives of the templates (.OL-template)
l workflow contains archives of Workflow configurations received by the server.
The archives are saved using the template named followed by a timestamp. A maximum of 30
of each instance of a resource is kept (meaning if you have 10 different templates, a maximum
of 300 files will be present in the archive\template folder). Older archives are deleted
automatically as new archives are created.
About Data
Data is what drives your business, and our software. We define data as anything that is
obtained through an Input Task and used within the process itself. Once the data is obtained, it
becomes the job file that is passed from one task to another and generally used to generate
output.
Data can be manipulated using the tasks in the process, used as comparison for conditions and
loops, complemented with data from other sources, and used to generate your output. It
originates from many different sources (as many as the input tasks support), parts of it can be
stored in variables, and is always accessible by the task that currently handles it.
Data is referred to using Data Selections either from PlanetPress Workflow or a PlanetPress
Design Document that is being merged with the data (for example in a printed output).
Page 23

For more information about Data, please refer to "Sample Data" on page36.
Note
Null characters present in the data may not be displayed properly when using
PlanetPress Workflow Configuration program, and that they may also be printed
differently by different printers. To ensure consistency, you should consider filtering out
such characters.
Data File and Job File
Whichever source it may come from, a serial port, an e-mail message, or an LPR request, for
instance, and whatever its format, data entering a PlanetPress Workflow process via an input
task is always referred to as a data file. Job file is a more general term, that can refer to data
files as well as other types of files traveling through a process. Image files, for example, can be
passed from task to task in order to be downloaded to a printer. So files traveling within a
process are mostly referred to as job files.
By default, job file names are generated using the %f variable. You may change the
wayPlanetPress Workflow names job files by using any combination of static characters,
variables and Job info variables. You could for instance enter Process_%w_Job_%f in the
File name box to add the process name in the name generated by the PlanetPress Workflow
Tools.
A single job file can be the source of multiple job files. This is the case, for example, when a
process includes multiple branches, as each branch is given a duplicate copy of the job file.
This is also the case when a job file is split into multiple smaller files by a Splitter action task,
for instance (See "Data Splitters" on page368).
It is important to note that job files may be used as a helpful debugging resource (See
"Debugging and Error Handling" on page55).
Actual Data and Sample Data
The actual data is the dynamic data captured by PlanetPress Workflow at run-time. The sample
data file is a static sampling of the run-time data.
Page 24

In the PlanetPress Workflow Configuration program, you use sample data files to create and
edit PlanetPress Workflow configurations.
Job File Names and Output File Names
When an input task sends a new data file down a process, it gives it an internal file name
referred to as the job file name (associated with the %f variable). The new job file typically
keeps the same name until the end of the process.
l If the job file comes to a branch in the process, PlanetPress Workflow makes a copy of the
job file and give the new file a new job file name.
l If the job file is processed by a splitter action task, the task typically creates a number of
new files which are all given new job file names.
Since these files are generated and managed by PlanetPress Workflow, you should not
actually pay too much attention to their names.
Many output tasks, on the other hand, let you determine exactly how you want the files they
generate to be named. In the case of Send to Folder output tasks, for example, output files are
saved under their job file names by default (using the variable %f), but you may use a static
(MyOutput.txt, for example) or variable name (%O_Invoices, for instance) of your choosing.
Variables such as %o (original file name) bring up the issue of file overwriting. If the process
receives two source files with the same name, the second output file may overwrite the first one.
This may be what you want, but otherwise you may consider using another variable, such as in
%u (unique 13-character string).
When choosing naming schemes for output files, consider the following:
l For the benefit of users who must identify files, be it in a folder or on a printer queue,
consider using names that are as meaningful and precise as possible.
l Some devices or applications may use file name extensions to know what to do with
incoming files.
Since variable properties can be entered in the boxes where you specify the folder and file
names, you can use variables, data selections and static text. You could, for example, use the
following: ClientID_@(1,1,1,1,14,KeepCase,Trim)_StatMonth_%m.
Page 25

One last consideration regarding output file names has to do with standard JPEG and TIFF files
Note
You can change the name of a previously named file using a Rename action task (see "Rename"
on page334).
Note
The Get (...) Value options will also open the Data Selector or the Data Repository Manager, but
once selected, the value becomes static and does not change between each datapage and job file.
generated by PlanetPress Image. When an output job contains multiple pages, multiple JPEG
or TIFF files are generated (one image per file), each one identified by a sequence number
appended to its name (this is managed by your PlanetPress Workflow). A three page job to be
called Invoice, for example, will generate three JPEGs or TIFFs called Invoice0, Invoice1 and
Invoice2. Note that this does not apply to multiple TIFFs, which can include multiple images in
a single file.
Data selections
A data selection could be compared to an address. It indicates a location within a data file or
database (the job file, metadata file, or Data Repository).
Data selections are always evaluated at run-time so they are always dynamic and depend on
the job file that is currently being processed.
There are several types of data selections you can use, depending on which emulation you are
using, whether or not Metadata have been created by a previous task in the process, and
whether or not data have been entered in the Data Repository.
Adding a data selection
A data selection can be used in any task property that may contain a variable. These properties
are recognizable by their colored field label (maroon, by default). Right-click the property field
and choose Get Data Location or Get Metadata Location to open the Data Selector (see "The
Data Selector" on page31) or Get Repository Location to open the Data Repository Manager
(see "Data Repository Manager" on page721).
Page 26

After opening a sample of the data and/or metadata, you can easily make a selection.
It is also possible to manually enter a data selection, or to change it after making a selection
with the mouse pointer.
Wild card parameter "?"
Data/metadata selection functions accept a wildcard parameter "?", indicating the function
operates on allnodes (not just one) of a given level.
Examples
l In a PDF emulation, the format of a selected region could be:
region(?,0.59375,2.21875,1.85416,2.51041,KeepCase,NoTrim)
In this case “?” represents the current physical data page processed by the task.
l In the following rule, the Metadata selection function loops through all datapages in a job,
comparing their index in the document to a value:
(GetMeta(SelectedIndexInDocument[0], 11, Job.Group[?].Document
[?].Datapage[?]) Equal 0
l In the following rule, the question mark in the text-based data selection represents the
current page number:
(@(?,1,1,1,9,KeepCase,NoTrim) IS EQUAL TO Page 1 of)
Text-based data selections
Text-based selections are used for text data files such as Line Printer, ASCIIand Channel Skip
emulations. The selection refers to a rectangular selection that may contain multiple lines, rows,
columns on a given page.
Syntax
@(page number, from line, to line, from column, to column, case option, trim
option)
Here is a breakdown of the syntax (all options are mandatory):
l @():Always surrounds a data selection.
l Page Number:The data page number from which you want the data selection to grab the
data. If you want to get data from each page individually, this has to be done after a
splitter.
Page 27

l From Line:The starting line of the data selection.
l To Line:the last line of the data selection.
l From Column:the leftmost character position of the data selection.
l To Column:the rightmost character position of the data selection.
l Case Options:This can be one of three options:
l
KeepCase:Keeps the current uppercase and lowercase letters as they are.
l
UpperCase:Converts all letters to their uppercase equivalent.
l
LowerCase:Converts all letters to their lowercase equivalent.
l Trim Option:Can either be "Trim"if you want to trim empty spaces before and after the
data selection or "NoTrim"if you want to retain the extra spaces.
Database data selections
These selections are used for database-driven data files such as Database and
CSVemulations. The selection refers to a specific field on any given data page.
Syntax
field(record set number, child number, field name, treatment of character case,
treatment of empty trailing cells)
Here is a breakdown of the syntax (all options are mandatory):
l field():Always surrounds database field selections.
l Record Set Number: The data page (or "record") of the data selection.
l Child Number:Line Number in the record (if there are multiple lines returned for one
single record).
l Field Name: The name of the field you want to retrieve.
l Case Option: This can be one of three options:
l KeepCase:Keeps the current uppercase and lowercase letters as they are.
l UpperCase:Converts all letters to their uppercase equivalent.
l LowerCase:Converts all letters to their lowercase equivalent.
l Trim Option:Can either be "Trim"if you want to trim empty spaces before and after the
data selection or "NoTrim"if you want to retain the extra spaces.
Page 28

Data Repository lookups
The Data Repository selections are made through the lookup function. Selections are done
from the data located in the "Data Repository Manager" on page721. The lookup function
returns the value of a single key, which is always a string.
Syntax
lookup(group, return key, lookup key, lookup value)
Here is a breakdown of the syntax (all arguments are mandatory):
l group:The name of the group in which to retrieve the value. Does not need to be
surrounded by quotes.
l return key:The name of the key where the information you want to retrieve is located.
Does not need to be surrounded by quotes.
l lookup key:The name of the key in the group with which to look up the value. The return
key of the KeySet in which the lookup key's value matches the lookup value will be
returned.
l lookup value: A string surrounded by quotes which will be used in the lookup.
PDF data selections
These selections are used for PDF data files. The selection refers to a specific area of any
given page of the PDF by using precise region coordinates (in inches).
Note that when adding a metadata field, if you perform a multi-line data selection on a PDF
region, only the first line of that region will be set to the metadata field.
Syntax
region(page, left, top, right, bottom, case option, trim option)
Here is a breakdown of the syntax (all options are mandatory):
l region():Always surrounds PDFdata selections.
l Page:The page of the PDFfrom which to retrieve the data.
l Left:Exact horizontal position (in inches)that defines the left of the selection region.
l Top:Exact vertical position (in inches)that defines the top of the selection region.
Page 29

l Right:Exact horizontal position (in inches)that defines the right of the selection region.
Tip
To get a sample of the metadata file, debug your process and step through it until the option View
Metadata gets enabled. This happens when metadata have been created by a task in the process.
Open the metadata viewer and save the metadata file to use it as a metadata sample file in the Data
Selector.
l Bottom:Exact vertical position (in inches)that defines the bottom of the selection region.
l Case Option: This can be one of three options:
l KeepCase:Keeps the current uppercase and lowercase letters as they are.
l UpperCase:Converts all letters to their uppercase equivalent.
l LowerCase:Converts all letters to their lowercase equivalent.
l Trim Option:Can either be "Trim"if you want to trim empty spaces before and after the
data selection or "NoTrim"if you want to retain the extra spaces.
Metadata selections
Metadata selections are used with any type of emulation, as long as a metadata file was
created by a previous task in the process.
Syntax
GetMeta(Field Name [, Option Flags, Metadata Path])
Here is a breakdown of the syntax:
l GetMeta():Always surrounds metadata selections.
l Field/Attribute Name:specifies the name of the field (or attribute, if the GetAttribute
option flag is set) to retrieve (see "Metadata" on page38).
l Option Flag (optional):Sets the options for the selection (see table below).
Page 30
Loading...