

Page 1

User Guide
Version:1.6.1
Page 2

Page 3

User Guide
Version 1.6.1
Last Revision:2017-04-18
Objectif Lune, Inc.
2030 Pie-IX, Suite 500
Montréal, QC, Canada, H1V 2C8
+1 (514) 875-5863
www.objectiflune.com
All trademarks displayed are the property of their respective owners.
Page 4

© Objectif Lune, Inc. 1994-2017. All rights reserved. No part of this documentation may be
reproduced, transmitted or distributed outside of Objectif Lune Inc. by any means whatsoever
without the express written permission of Objectif Lune Inc. Objectif Lune Inc. disclaims
responsibility for any errors and omissions in this documentation and accepts no responsibility
for damages arising from such inconsistencies or their further consequences of any kind.
Objectif Lune Inc. reserves the right to alter the information contained in this documentation
without notice.
Page 4
Page 5

Table of Contents
Table of Contents 5
Welcome to PlanetPress Connect 1.6.1 12
Setup And Configuration 14
System and Hardware Considerations 14
System Requirements 14
Environment considerations 15
Database Considerations 17
Network considerations 21
Language and Encoding considerations 21
Performance Considerations 22
Installation and Activation 25
Installation Pre-Requisites 25
User accounts and security 27
The Importance of User Credentials on Installing and Running PlanetPress Connect 27
Installing PlanetPress Connect on Machines without Internet Access 29
Installation Wizard 31
Running Connect Installer in Silent Mode 36
Activating a License 41
Migrating to a new computer 44
Information about PlanetPress Workflow 8 44
Upgrading from PlanetPress Suite 7.6 45
What do I gain by upgrading to PlanetPress Connect? 47
Server Settings 55
Server Security Settings 55
Server Extension Settings 55
Uninstalling 59
Important Note:Stop any Anti-Virus Software before uninstalling Connect. 59
Impacts upon other Applications and Services 59
Uninstallation Wizard 60
The DataMapper Module 61
Basics 61
What's Next? 62
Features 62
Page 5
Page 6

Data Mapping Configuration 63
Creating A New Data Mapping Configuration 63
Opening a Data Mapping Configuration 73
Saving a Data Mapping Configuration 73
Data Mapping Workflow 74
Selecting Data 74
Extracting Data 83
About Promotional and Transactional Data 96
Steps 96
The Data Model 110
How to Use a Data Model? 111
About Records and Fields 112
Data Model File Structure 113
Data Source (Settings) 115
Input Data (Delimiters) 115
Boundaries 115
Data Samples 116
External JS Libraries 116
DataMapper User Interface 117
Menus 118
Panes 121
Example 128
Example 133
Defining Boolean Values 140
Boolean Expressions 141
Defining String Values 141
Building String Values 141
Defining Integer Values 142
Building Integer Values 143
Defining Float Values 143
Building Float Values 144
Defining Currency Values 144
Building Currency Values 144
Extracting dates 145
Defining a date/time format 145
Examples of masks 146
Entering a date using JavaScript 147
Page 6
Page 7

Example 147
Defining Object Values 147
Text File 174
PDF File 175
CSV and Database Files 177
XMLFile 178
Left Operand 201
Condition 202
Operators 203
JavaScript 208
Toolbar 208
Shortcut Keys 210
Welcome Screen 210
DataMapper Scripts API 211
Write Your Own Scripts 218
Setting boundaries using JavaScript 220
Objects 226
Functions 235
Methods 242
The Designer 263
Basic Steps 263
Features 264
Templates 265
Contexts 278
Sections 280
Print 283
Creating a Print template with a Wizard 285
Print context 289
Print sections 292
Pages 300
Master Pages 307
Media 310
Email 315
Designing an Email template 317
Creating an Email template with a Wizard 320
Email context 324
Email templates 326
Page 7
Page 8

Email header settings 329
Email attachments 333
Web 335
Creating a Web template with a Wizard 336
Web Context 340
Web pages 341
Forms 346
Using Form Elements 351
Using JavaScript 355
Capture OnTheGo 357
COTG Forms 358
Creating a COTG Form 358
Filling a COTG template 359
Testing the template 361
Sending the template to the Workflow tool 361
Using COTG data in a template 362
Designing a COTG Template 364
Capture OnTheGo template wizards 368
Using Foundation 372
Using COTG Elements 375
Testing a Capture OnTheGo Template 379
Content elements 385
Element types 386
Editing HTML 387
Attributes 388
Inserting an element 388
Selecting an element 389
Styling and formatting an element 390
Barcode 391
Boxes 432
Business graphics 435
COTG Elements 438
Date 442
Forms 444
Form Elements 449
Hyperlink and mailto link 452
Images 453
Page 8
Page 9

Table 458
Text and special characters 462
Snippets 464
Adding a snippet 464
Creating a snippet 465
JSON Snippets 465
Styling and formatting 465
Local formatting versus style sheets 465
Layout properties 466
Styling templates with CSS files 467
Styling text and paragraphs 474
How to position elements 478
Rotating elements 481
Styling a table 482
Background color and/or image 486
Border 488
Colors 490
Fonts 494
Locale 496
Spacing 497
Personalizing Content 499
Dynamic tables 500
Loading data 501
Variable Data 510
Formatting variable data 516
Showing content conditionally 519
Dynamic Images 521
Dynamic table 523
Personalized URL 527
Writing your own scripts 528
How scripts work 528
Creating a new script 529
Writing a script 530
Managing scripts 532
Testing scripts 535
Optimizing scripts 539
Loading a snippet via a script 543
Page 9
Page 10

Control Scripts 545
Designer User Interface 559
Dialogs 560
Menus 630
Panes 641
Toolbars 656
Welcome Screen 661
Print Options 662
Job Creation Presets 714
Output Creation Settings 723
Designer JavaScript API 741
Designer Scripts API 742
Control Script API 797
Generating output 813
Optimizing a template 814
Scripts 814
Images 815
Generating Print output 816
Saving Printing options in Printing Presets. 817
Connect Printing options that cannot be changed from within the Printer Wizard. 817
Print Using Standard Print Output Settings 818
Print Using Advanced Printer Wizard 819
Adding print output models to the Print Wizard 820
Splitting printing into more than one file 821
Variables available in the Output 821
Generating Fax output 828
Generating Tags for Image Output 829
Generating Email output 830
Email output settings in the Email context and sections 831
Generating Email output from Connect Designer 832
Generating Email output from Workflow 833
Using an ESP with PlanetPress Connect 834
Generating Web output 839
Attaching Web output to an Email template 840
Generating Web output from Workflow 841
Web output settings in the Web context and sections 841
Release Notes 843
Page 10
Page 11

Overview 843
OLConnect Send 845
Connect 1.6.1 General Enhancements and Fixes 847
Connect 1.6.1 Designer Enhancements and Fixes 848
Connect 1.6.1 DataMapping Enhancements and Fixes 850
Connect 1.6.1 Output Enhancements and Fixes 850
Connect Workflow 8.6.1 Enhancements and Fixes 852
Known Issues 854
Copyright Information 860
Legal Notices and Acknowledgments 861
Page 11
Page 12

Welcome to PlanetPress Connect
Note
Since we are always looking for new ways to make your life easier, we welcome your
questions and comments about our products and documentation. Shoot us an email at
doc@ca.objectiflune.com.
1.6.1
PlanetPress Connect is a series of four tools designed to optimize and automate customer
communications management. They work together to improve the creation, distribution,
interaction and maintenance of your communications.
The PlanetPress Connect Datamapper and Designer is designed to create output for print,
email and the web within a single template and from any data type, including formatted print
streams. Output presets applied outside the design phase make printing device independent.
The Designer has an easy-to-use interface that makes it possible for almost anyone to create
multi-channel output. More advanced users may use native HTML, CSS and JavaScript.
PlanetPress Connect also includes a process automation server, called Workflow. It is capable
of servicing response form web pages and email to provide interactive business
communications.
PlanetPress Connect can create documents for tablets and mobile devices that run a free
CaptureOnTheGo App. Users with a CaptureOnTheGo subscription can then download
documents to their own devices, interact with them and send the captured data back to
PlanetPress for conversion into additional documents or workflows.
This online documentation covers PlanetPress Connect version 1.6.1.
Icons used in this guide
Icons are used throughout this guide to point your attention to certain information.
Page 12
Page 13

Note
Information that is important or essential to the completion of a task.
Tip
Complementary information that may help you better use PlanetPress Connect or suggests an easier
method.
Warning
Information that is potentially critical to using PlanetPress Connect. Pay close attention.
Page 13
Page 14

Setup And Configuration
This chapter describes the PlanetPress Connect installation and the different considerations
that are important in regards to the installation and use of PlanetPress Connect.
l "System and Hardware Considerations" below
l "Installation and Activation" on page25
l "Server Settings" on page55
l Uninstalling
System and Hardware Considerations
There are a variety of considerations to be aware of. These are documented in the following
pages:
l "System Requirements" below
l "Environment considerations" on the next page
l "Database Considerations" on page17
l "Network considerations" on page21
l "Language and Encoding considerations" on page21
l "Performance Considerations" on page22
System Requirements
These are the system requirements for PlanetPress Connect 1.6.1
Operating System (64-bit only)
l Microsoft Windows 2008/2008 R2 Server
l Microsoft Windows 2012/2012 R2 Server
l Microsoft Windows Vista
l Microsoft Windows 7
l Microsoft Windows 8.1
l Microsoft Windows 10 (Pro and Enterprise versions only)
Page 14
Page 15

Note
Windows 8.0, Windows XP, Windows 2003 and older versions of Windows are not
supported by PlanetPress Connect.
Minimum Hardware Requirements
Note
For tips and tricks on performance, see "Performance Considerations" on page22.
Warning
Copying (duplicating) a Virtual Machine with Connect installed and using both images
simultaneously constitutes an infringement of our End-User License Agreement.
Note
While some virtual machine environments (from VMWare and Microsoft) are supported,
other virtual environments (such as Parallels, Xen and others) are not supported at this
l NTFS Filesystem (FAT32 is not supported)
l CPU Intel Core i7-4770 Haswell (4 Core)
l 8GB RAM (16GB Recommended)
l Disk Space: At least 10GB (20GB recommended)
Environment considerations
Virtual Machine Support
PlanetPress Connectsupports VMWare Workstation, VMWare Server, VMWare Player,
VMWare ESX (including VMotion), Microsoft Hyper-V and Microsoft Hyper-V/Azure
infrastructure environments as software installed on the Guest operating system.
Page 15
Page 16

time.
Terminal Server/Service
PlanetPress Connect does not support Terminal Server (or Terminal Service) environment as
possible under Windows 2000, 2003 and 2008. This is to say, if Terminal Service is installed
on the server where PlanetPress Connect is located, unexpected behaviours may occur and
will not be supported by Objectif Lune Inc.. Furthermore, using PlanetPress Connect in a
Terminal Service environment is an infringement of our End-User License Agreement.
Remote Desktop
Tests have demonstrated that PlanetPress Connect can be used through Remote Desktop. It is
however possible that certain combination of OS could cause issues. If problems are
encountered, please contact OLSupport and we will investigate.
PlanetPress Connect 1.3 and later have been certified under Remote Desktop.
64-bit Operating Systems
PlanetPress Connect is a 64-bit software and can only be installed on 64-bit operating systems.
Antivirus Considerations
l Antivirus software may slow down processing or cause issues if they are scanning in
temporary folders or those used by PlanetPress Connect. Please see KB-002: Antivirus
Exclusions for more information.
l Antivirus software might interfere with installation scripts, notably a vbs script to install
fonts. McAfee, in particular, should be disabled temporarily during installation in order for
MICR fonts to install and the installation to complete successfully.
Windows Search Indexing Service
Tests have concluded that the Windows Search service, used to provide indexing for Windows
Search, can interfere with Connect when installing on a virtual machine. If the installation
hangs during the last steps, it is necessary to completely disable this service during installation.
l Click on Start, Run.
l
Type in services.msc and click OK.
Page 16
Page 17

l
Locate the Windows Searchservice and double-click on it.
l
Change the Startup Type to Disable, and click Stop to stop the service.
l
Try the installation again.
l
Once completely, you may re-enable the service and start it.
Commandline switches and .ini entries
PlanetPress Connect is intended to work stably and reliably, based on Java and the Eclipse
framework. To ensure this reliability and robustness, many Java and Eclipse parameters have
been tested and tuned, which is reflected in the respective .ini entries and the used command
line switches. A collection of valuable settings has been elaborated and found its entry in
PlanetPress Connect “good switches list” (called the “whitelist”).
The protection of the end user’s system is one of our main goals and therefore we have
implemented a very strict verification mechanism, which ensures, that only these whitelisted ini
entries and commandline switches are accepted, when one of Connect components is started
and run. Please be therefore advised, that any non-whitelisted ini entry or commandline switch
will be accepted and will - if tried to be used - lead to the respective application’s “sudden
death”. If you should encounter such a behaviour then please double-check your Connect log
file/s for respective entries.
Database Considerations
This page describes the different considerations and pre-requisites for the database back-end
used by PlanetPress Connect, whether using the MySQL instance provided by the installer, or
pre-existing instance.
Using the MySQL Instance from the Installer
The MySQL Instance provided in the Installation Wizard is already pre-configured with options
to provide the most stable back-end setup.
These are the specific options that have been changed in our version of "my.ini":
l
max_connections = 200 : PlanetPress Connect uses a lot of database connections. This
number ensures that even in high volume environments, enough connections will be
available.
Page 17
Page 18

l
Note
Since PlanetPress Connect version 1.6 the minimum required version of the MS SQL
Server is SQLServer 2012.
max_allowed_packet = 500M : In some implementations, especially when using Capture
OnTheGo, large packet sizes are required to allow transferring binary files. This
substantial packet size maximum setting ensures that the data received by PlanetPress
Connect will be able to be stored within the database.
l
character-set-server = utf8 , collation-server = utf8_unicode_ci , default-characterset=utf8 : These indicate database support for UTF-8/Unicode.
Using a pre-existing MySQL Instance
If MySQL server is already installed and you wish to use it, the following should be taken into
consideration:
l The MySQL account must have access to all permissions using the GRANT Command,
including creating databases.
l The database configuration must include the options detailed in the "Using the MySQL
Instance from the Installer" on the previous page topic above.
l The SQL instance must be open to access from other computers. This means the bind-
address option should not be set to 127.0.0.1 or localhost.
Using MS SQL Server from the Installer
l
When MS SQL is selected, the default values for root user are sa and 1433 for the port.
l If db settings from a previous installation are found, the pre-exising settings will be
displayed for the matching db type (for MS SQL settings, this will only work if they were
created with Server Config Tool 1.5.0 or later, or the Connect installer 1.6.0 or later). If the
db type is changed in the configuration page, the default values for this db type will be
displayed. If the pre-existing db settings are set to Hsqldb, the default db type selection
will be MySQL.
l Selected db settings are stored in the preferences as usual (C:\ProgramData\Objectif
Lune\Ol
Connect\.settings\ConnectHostScope\com.objectiflune.repository.eclipselink.generic.pref
s)
Page 18
Page 19

Updating With No Local MySQL Product
Note
The MSSQL selection capability will be available only with 1.6 version and upwards.
l When updating a Connect installation from 1.5.0 which contains a Server Product but no
local MySQL Product, the DB Configuration Page will detect which db type was set
before (especially if the db configuration was switched from MySQL to MS SQL using the
Server Configuration Tool), and default to those settings.
l On Update from 1.4.2 or earlier, the DB Configuration Page will always default to MySQL
connection settings, and if the installation was manually tweaked to connect to MS SQL
Server, the user has to switch to "Microsoft SQL Server" type and enter connection details
again.
Installing / Updating Connect Using a Local MySQL
l The Configuration page for the local MySQL is displayed.
l MySQL settings are pre-filled with default values if no existing MySQL db configuration is
found.
l MySQL settings are pre-filled with existing db configuration settings, if they point to a
MySQL db type.
When modifying Connect
l If local MySQL is removed from an installation, the DB Configuration page will offer
additionally the Microsoft SQL Server db type with respective default values.
l If local MySQL is added to an installation, the usual MySQL Configuration page with
default values will be displayed.
If the user has installed the Installer Supplied MySQL and then switches to a foreign MSSQL by
using the Server Configuration Tool, the supplied MySQL cannot be switched off. By design the
installer adds a service dependency between Connect Server and the supplied MySQL
service.
Page 19
Page 20

To remove this dependency the user needs to do the following
Warning
If a Connect 1.5 user wants to use MSSQL instead of MySQL for the Connect Server, there are
several points to be taken care of:
l
IF there should possibly be available some foreign MySQL instance, which could
be used intermediately, then this should be selected during the setup. This ensures,
that no stuff gets installed. Otherwise the supplied MySQL needs to be installed and
the switch to MSSQL needs to be done as outlined above.
l It is not possible to uninstall the supplied MySQL in this case via a Connect 1.5
modify.
1. Have a foreign MSSQL running, ready for use with Connect Server.
2. Use the Server Configuration Tool (SCT) to switch the database to MSSQL.
3. (Re-)start Connect Server Service, so that the modifications will become active.
4. Counter check that everything is working properly with MSSQL.
5. Open a commandline prompt with full administration rights.
6. Enter the command sc config OLConnect_Server depend= /. This removes the
dependency.
Please be aware: The key word depend must be followed immediately by the equal sign,
but between the equal sign and the forward slash there must be a space.
Additional information can be found here: http://serverfault.com/questions/24821/how-
to-add-dependency-on-a-windows-service-after-the-service-is-installed#228326.
7. After the dependency has been removed, it is possible to stop the supplied MySQL
service (OLConnect_MySQL).
Important
If a Server Product and a MySQL Product were selected to be installed on Connect 1.5.0, and
then the Server Configuration Tool is used to switch the database used by the Server to an
external Microsoft SQL, then the Update to 1.6 requires an extra step. The procedure is as
follows:
Page 20
Page 21

1.
Note
If Connect was initially installed not containing the local MySQL product (i.e. on 1.5 installation an
external MySQL was configured as database), then the Update to 1.6 will allow to select either
external MySQL or external Microsoft SQL on the DB Configuration Page.
Run the Update to Connect 1.6. This will assume the local MySQL database needs to
be updated and configured, so the user has to enter a root password on the MySQL
Configuration Page (can be any password matching Connect security rules).
2.
After the update, the Connect 1.6 Setup needs to be run once more to modify Connect.
3.
On the Product Selection page, now the MySQL product can be unselected.
4. When stepping forward in the Wizard, the DB Configuration page will be displayed which
allows to configure the Microsoft SQL Server with appropriate settings.
After this modification, the local MySQL is removed, and also the service dependency from
Server to MySQL is removed.
Network considerations
The following should be taken into consideration in regards to network settings and
communications
l
If a local proxy is configured (in the Internet Explorer Optionsdialog, the option Bypass
proxy server for local addresses must be checked, or some features depending on
local communication will not work.
Language and Encoding considerations
Please note the following considerations:
l
Language:
l PlanetPress Connect is currently offered in several languages. These languages
can be switch between via the Preferences dialog. The current languages include:
Page 21
Page 22

l
Encoding:
l Issues can sometimes be encountered in menus and templates when running
l English
l French
l German
l Spanish
l Italian
l Portuguese
l Chinese (Simplified)
l Chinese (Traditional)
l Japanese.
The default language is English.
The PlanetPress Connect help system (this document) is currently only available in
English.
PlanetPress Connect on a non-English operating system. These are due to
encoding issues and will be addressed in a later release.
Performance Considerations
This page is a comprehensive guide to getting the most performance out of PlanetPress
Connect as well as a rough guideline to indicate when it's best to upgrade.
Performance Analysis Details
In order to get the most out of PlanetPress Connect, it is important to determine how best to
maximize performance. The following guidelines will be helpful in extracting the best
performance from PlanetPress Connect before looking into hardware upgrades or extra
PlanetPress Connect performance packs.
l
Job Sizes and Speed: In terms of pure output speed, it's important to first determine what
job size is expected, and adjust Scheduling Preferences accordingly. The basic rules are:
l If processing a small number of very large records (when each individual record is
composed of a large number of pages), more instances with an equal amount of
speed units is better. For hardware, RAM and Hard Drive speeds are most
important, since the smallest divisible part (the record) cannot be split on multiple
machines or even cores.
Page 22
Page 23

l If creating a very large number of small records (hundreds of thousands of 2-3 page
individual records, for instance), a smaller number of instances with a large number
of speed packs would be better. As for hardware, then the number of cores becomes
critical, whereas RAM and hard drive are secondary. Performance Packs, as well as
the MySQL instance being separate, would be helpful if your most powerful
machine starts struggling.
l Mix and match. For example, one instance prioritized for large jobs and the rest for
smaller, quicker jobs. Or the contrary. Or, whatever you want, really.
l
RAM Configuration: By default, each instance of the Merge Engine and Weaver Engine
is set to use 640MB of RAM. This means that regardless of speed units, if not enough
memory is available, output speed might not be as expected. Assuming that the machine
itself is not running any other software, the rule of thumb is the following: The total number
of used memory in the machine should be pretty much the maximum available (around
95%).
For each engine, it's necessary to modify the .ini file that controls its JAVA arguments.
Edit as follows:
l For the Merge Engine: see C:\Program Files\Objectif Lune\OL
Connect\MergeEngine\Mergeengine.ini
l For the Weaver Engine: see C:\Program Files\Objectif Lune\OL
Connect\weaverengine\Weaverengine.ini
l The parameters are -Xms640m for the minimum RAM size, -Xmx640m for the
maximum RAM size. Explaining Java arguments is beyond the scope of this
document. Please read references here, here and here for more details (fair
warning: these can get pretty technical!).
l
Template and data mapping optimization: Some functionality offered by the
DataMapper and Designer modules are very useful, and sometimes downright awesome,
but can cause the generation of records and of contents items to slow down due to their
nature. Here are some of them:
l
Preprocessor and Postprocessor scripts: manipulating data using a script may
cause delays before and after the data mapping action has actually taken place,
especially file conversion and data enrichment from other sources.
l
Loading external and network resources: In Designer, using images, javascript
or css resources located on a slow network or on a slow internet connection will
obviously lead to a loss of speed. While we do our best for caching, a document
with 100,000 records which queries a page that takes 1 second to return a different
image each time will, naturally, slow output generation down by up to 27 hours.
Page 23
Page 24

l
External JavaScript Libraries: While loading a single JavaScript library from the
web is generally very fast (and only done once for the record set), actually running a
script on each generated page can take some time. Because yes, JavaScript will
run for each record, and often take the same time for each record.
l
Inefficient Selectors: Using very precise ID selectors in script wizards can be much
faster than using a text selector, especially on very large documents. (more details
on this in another upcoming page).
l
Complex Scripts: Custom scripts with large, complex or non-optimized loops can
lead to slowing down content creation. While it is sometimes difficult to troubleshoot,
there are many resources online to help learn about JavaScript performance and
coding mistakes. Here, here, and here are a few. Note that most resources on the
web are about JavaScript in the browser, but the greatest majority of the tips do,
indeed, apply to scripts in general, wherever they are used.
High-Performance Hardware
The following is suggested when processing speed is important. Before looking into a
Performance Packs to enhance performance, ensure that the below requirements are met.
l
A physical, non-virtualized server. VMWare servers are great for reducing the numbers
of physical machines in your IT space, but they must share the hardware between each
other. While you can create a virtual machine that seems as powerful as a physical, it will
still be sharing hardware with any other virtual machines, and this will adversely affect
performance.
l
MySQL Database on a separate machine. MySQL's main possible bottleneck is file I/O,
and as such a high-performance setup will require this server to be on a separate
machine, ideally with a high-performance, low-latency hard drive. A Solid State Drive
(SSD) would be recommended.
l
High-Quality 16+ GB Ram.This is especially true when working with many server
instances ("speed units") running in parallel. The more parallel processing, the more
RAM is recommended.
l
4 or 8 physical cores. We're not talking Hyper-Threading here, but physical cores.
Hyper-Threading is great with small applications, but the overhead of "switching"
between the virtual cores, and the fact that, well, they're virtual, means the performance is
much lesser on high-power applications such as OL Connect. In short, a dual-core
processor with Hyper-Threading enabled is not equivalent to a quad-core processor.
Page 24
Page 25

Installation and Activation
Note
A PDF version of this guide is available for use in offline installations. Click here to
download it.
This topic provides detailed information about the installation and activation of PlanetPress
Connect 1.6.1.
PlanetPress Connect 1.6.1 is comprised of 2 different installers: one for the PlanetPress
Connect software and one for PlanetPress Workflow 8.
Where to Obtain the Installers:
The installers for PlanetPress Connect 1.6.1 and PlanetPress Workflow 8 can be obtained on
DVD or downloaded as follows:
l If you are a Customer, the installers can be downloaded from the Objectif Lune Web
Activations page: http://www.objectiflune.com/activations
l If you are a Reseller, the installers can be downloaded from the Objectif Lune Partner
Portal: http://extranet.objectiflune.com/
For information on licensing, please see Activating your license.
Installation Pre-Requisites
l Make sure your system meets the System requirements.
l PlanetPress Version 1.6.1 can be installed under a regular user account with
Administrator privileges.
l
Connect must be installed on an NTFS file system.
l PlanetPress requires Microsoft .NET Framework 3.5 already be installed on the target
system.
l In order to use the automation feature in Version 1.6.1, PlanetPress Workflow 8 will need
to be installed. This can be installed on the same machine as an existing PlanetPress®
Page 25
Page 26

Suite 7.6 installation or on a new computer. For more information, please see Information
Note
From PlanetPress Connect Version 1.2 onwards, the new version (1.1.8)of the Update
Client is included by default with all setups.
about PlanetPress Workflow 8.
l As with any JAVA application, the more RAM available, the faster the product will
execute.
Users of Connect 1.1
In order for users of PlanetPress Connect 1.1 to upgrade to any later version through the
Update Manager it is necessary to install a later version (1.1.8 or later) of the Objectif Lune
Update Client.
If you do not have such a version installed already, the next time you run your Update Client it
will show that there is an update available of itself to Version 1.1.8 (or later).
Simply click on the download button in the dialog to install the new version of the Update
Client. Note that it is no problem to run the update while the Client is open. It will automatically
update itself.
Once you have done this, PlanetPress Connect 1.6.1 will become available for download.
Users of Connect 1.0
Users of this Connect version 1.0 cannot upgrade directly to Version 1.6.1. This is because
Connect Version 1.0 is a 32 bit version of Connect.
Users must first upgrade to Version 1.1 and from there upgrade to Version 1.6.1
If you are updating manually you must first upgrade to Version 1.1 before installing 1.6.1. If you
attempt go directly from Version 1.0 to Version 1.6.1 the installation will fail.
Also see "Users of Connect 1.1" above for extra information about updating from that version.
Page 26
Page 27

User accounts and security
Permissions for PlanetPress Connect Designer
PlanetPress Connect Designer does not require any special permissions to run besides a
regular program. It does not require administrative rights and only needs permission to
read/write in any folder where Templates or Data Mapping Configurations are located.
If generating Print output, PlanetPress Connect Designer requires permission on the printer or
printer queue to send files.
Permissions for PlanetPress Connect Server
The PlanetPress Connect Server module, used by the Automation module, requires some
special permissions to run. These permissions are set during installation, in the Engine
Configuration portion of the Installation Wizard, but it can also be configured later by modifying
permissions for the service. To do this:
l In Windows, open the Control Panel, Administrative Tools, then Services (this may
depend on your operating system).
l Locate the service called Serverengine_UUID , where UUID is a series of characters that
depend on the machine where the software is installed.
l
Right-click on the service and select Properties.
l
In the Connection tab, define the account name and password that the service should
use. This can be a local account on the computer or an account on a Windows Domain.
The account must have administrative access on the machine. It should also correspond
to the user account set up in PlanetPress Worfklow.
The Importance of User Credentials on Installing and Running PlanetPress Connect
OL Connect and required credentials depends heavily on the Connect component and
respective tasks and what sort of user credentials are needed.
First of all, it is important to distinguish between installation and run-time
Page 27
Page 28

Installation
The Connect installer puts all required files, folders, registry entries and much more to their
correct places and locations. As many of these locations are protected against malicious
accesses, that very user under whose context the Connect installation is started and running,
needs very extensive rights on the respective computer. This user must belong to the Local
Administrators group on that machine. Here are some required capabilities, this user:
l Must be able to write into the "Programs" folder.
l Must be allowed to check for existing certificates and must also be allowed to install new
ones into the global certificate store on that machine.
l Must be able to write into HKLM and any subtree of it in the registry.
l Must be able to INSTALL, START and RUN services and also to MODIFY service
settings.
l Must be known in the network the machine belongs to and must also need to be able to
use shared network resources like shared drives and/or printers etc.
This list may not be complete, but it gives the extent of the requirements. Generally, the local
administrator of the machine will have all these credentials, but there may exist network
restrictions and policies, which will block one or more of these capabilities. In such cases, the
respective network administrator should provide a valid user account for the installation.
User Account
The user account shall be used to later RUN one of the Connect Server flavors (Server or
Server Extension). This dedicated user account has to be entered on the respective installer
dialog page and must be allowed to START, STOP and RUN services on this machine. This is
different from the credentials of the installation user account, which additionally requires the
right to INSTALL services. Please be aware of this fact!
Additionally, the Server user must be able to access any network resources that are required for
OL Connect to function properly. This includes e.g. additional drives, printers, scanners, other
computers and, where appropriate, internet resources, URLs, mail servers, FTP servers,
database servers and everything else planned to be used for the intended operation of
Connect. The Server user is the run-time user.
Connect Components
Usually, a standard end user will only be facing Connect Designer and maybe the License
Activation Tool. Designer this does not require administrator rights. Either everything required
Page 28
Page 29

to create documents or also to run some tasks will be already available (installed by the
installer) or be accessible in a way, where no specific credentials are required. However some
tasks like starting an email campaign will possibly require a respective account at a mail server.
But this has generally nothing to do with the credentials of the Designer user.
Activation Tool
To run the Software Activation Tool, administrator rights are required because this tool needs to
write the license file in one of the protected folders of Windows. The tool will however allow to
restart it with respective credentials if required.
MySQL
MySQL database service is installed by the install user (thus again the requirement of
installing, starting, running and modifying services). Once running it will just work.
Merge and Weaver Engines
These components do run under the Designer (if only Designer is installed) or the Server /
Extension service(s) and inherit the rights of their parent application.
Server (Extension) Configuration Tool
This component needs to access the settings of the Server. As these are stored and read by the
Server, it should be clear that the user used to run the Configuration tool should be the same as
the Server Service user as explained above.
Installing PlanetPress Connect on Machines without Internet Access
Installing PlanetPress Connect1.6.1 in offline mode requires some extra steps. These are listed
below.
GoDaddy Root Certificate Authority needs to be installed.
In order to install PlanetPress Connect it is necessary for the GoDaddy Root Certificate
Authority to be installed (G2 Certificate) on the host machine and for this to be verified online.
When a machine hosting the installation does not have access to the Internet, the installation
will fail because the verification cannot be performed. To solve this problem one must first
ensure that all Windows updates have been installed on the host machine. Once the Windows
Page 29
Page 30

updates are confirmed as being up to date, then complete the following steps:
1. Go to https://certs.godaddy.com/repository and download the following two certificates to
copy to the offline machine:
l GoDaddy Class 2 Certification Authority Root Certificate - G2 - the file is gdroot-
g2.crt
l GoDaddy Secure Server Certificate (Intermediate Certificate) - G2 - the file is
gdig2.crt
2. Install the certificates: Right mouse click -> Install Certificate, and follow the steps through
the subsequent wizard.
3. Now copy the PlanetPress Connect installer to the offline machine and start the
installation as normal
Windows certificate validation - Certificate Revocation List retrieval should be switched
off
For your security Objectif Lune digitally signs all relevant files with our own name and
certificate. The integrity of these files is checked at various times by different, context related,
methods. One of these checks, done during the installation process, uses the Windows
certificate validation check. .
The Windows certificate validation process not only checks the integrity of a file against its
signature, but also usually checks if the certificate itself is still valid. That check is done against
the current Certificate Revocation List (CRL), which needs to be retrieved from the internet.
However, if the machine in question does not have internet access, the retrieval of the CRL
must fail, which will lead to subsequent validation issues.
To circumvent such issues it is highly recommended to switch off the CRL retrieval prior to
installing Connect on machines without internet access. There is no security risk associated
with this, as the CRLs would never be retrievable without internet access, anyway. Advantage
of the switch will not only be found during the installation and operation of Connect, but also in
some speed improvements for any application which use signed binaries.
To switch off CRL retrieval on the computer, complete the following steps:
1. Open the “Internet Options” via the Control Panel
2. Select the “Advanced” tab and scroll down to “Security” node.
3. Uncheck the entry “Check for publisher’s certificate revocation” under that node.
Page 30
Page 31

4. Click the OKbutton to close the dialog.
Note
PlanetPress Connect requires prior installation of Microsoft .NET Framework 3.5 (please refer to
https://www.microsoft.com/en-us/download/details.aspx?id=21 for more details).
5. Re-start the computer.
Installation Wizard
Starting the PlanetPress Connect installer
The PlanetPress Connect installer may be supplied as an ISO image or on a DVD:
l If an ISO image, either burn the ISO onto a DVD or unzip the contents to a folder (keeping
the folder structure)
l If on a DVD, either insert the DVD and initiate the installation from there or copy the
contents to a folder (keeping the folder structure)
Navigate to the PlanetPress_Connect_Setup_x64.exe or and double-click on it. After a short
while the Setup Wizard will appear as a guide through the installation steps.
Selecting the required components
After clicking the Next button, the component selection page appears, where the different
components of PlanetPress Connect can be selected for installation. Currently, the following
are available:
l
PlanetPress Connect Designer: The Designer module. It may be used as a standalone
with no other installed modules, but it will not have certain capabilities such as
automation and commingling.
l
PlanetPress Connect Server: The Server back-end giving capabilities such as
automation, commingling, picking. It saves all entities generated from the Automation
module into a database for future use.
l
MySQL Product: The database used by the PlanetPress Connect Engine to save its
items. This item is optional if an existing MySQL server, either on the same computer or a
separate server, is to be used.
l
Installation Path: This is the location where modules are to be installed.
Page 31
Page 32

The installer can also calculate how much disk space is required for installing the selected
components as well as how much space is available:
l
Disk space required: Displays the amount of space required on the disk by the selected
components.
l
Disk space available on drive: Displays the amount of space available for installation on
the drive currently in the Installation Path.
l
Recalculate disk space: Click to re-check available disk space. This is useful if space
has been made available for the installation while the installer was open.
l
Source repository location: Displays the path where the installation files are located.
This can be a local drive, installation media, or a network path.
Selection Confirmation
The next page confirms the installation selections made. Click Next to start the installation
itself.
End User License Agreement
The next page displays the End User License Agreement, which needs to be read and
accepted before clicking Next.
MySQL Configuration
The Default Database Configuration page only appears if the MySQL Product module was
selected in the Product Selection screen. It defines the administrative password for the MySQL
server as well as which port it uses for communication. Note that the installer will automatically
configure the Server to use the supplied password and port.
l
MySQL user 'root' Password: Enter the password for the 'root', or administration
account, for the MySQL server. The password must be at least 8 characters long and
contain at least one of each of the following:
l a lower case character (a, b, c ... )
l an upper case character (A, B, C ...)
l a numeric digit (1, 2, 3 ...)
l a punctuation character (@, $, ~ ...)
Page 32
Page 33

For example:"Th1sIs@K"
Note
When updating from an earlier Connect version, the appropriate MySQL password
must be entered or the update will fail.
If the password is subsequently forgotten, then the MySQL product must be
uninstalled and its database deleted from disk before attempting to reinstall.
Note
The MySQL Product controlled by the OLConnect_MySQL service communicates
through port 3306 by default.
Note
This option is required if MySQL Server will need to be accessed from any other
machine.
It is also required if the MySQL database is on a separate machine to PlanetPress
Connect.
l
Confirm 'root' Password: Re-enter to confirm the password. Both passwords must
match for installation to continue.
l
TCP/IP Port Number: The port on which MySQL will expect, and respond to, requests. A
check is run to confirm whether the specified TCP\IP Port Number is available on the
local machine. If it is already being used by another service (generally, an existing
MySQL installation), the number is highlighted in red and a warning message is
displayed at the top of the dialog.
l
Allow MySQL Server to accept non-local TCP connections: Click to enable external
access to the MySQL server.
Page 33
Page 34

Tip
This option may represent a security risk if the machine is open to the internet.
It is heavily recommended that your firewall is set to block access to port 3306 from
external requests.
The Database Connection page appears if the MySQL Product module was not selected. It
Note
This test does not check whether the remote user has READ and WRITE
permissions to the tables under the objectiflune schema. It is solely a test of
database connectivity.
defines the necessary information required to connect to an existing database.
l
Database Configuration: Select the database type to use for the PlanetPress Connect
Engine. Currently only MySQL is supported.
l
Administrator Username: Enter the username for a user with administrative rights on the
database. Administrative rights are required since tables need to be created in the
database.
If accessing a database on a different machine, the server must also be able to accept
non-local TCPconnections, and the username must also be configured to accept remote
connection. For example, the "root"MySQLuser entered as root@localhost is not allowed
to connect from any other machine than the one where MySQLis installed.
l
Administrator Password: Enter the password for the above user. The appropriate
MySQL password must be entered or the Connect installation will fail.
l
TCP/IP Port Number: Enter the port on which the database server expects connections.
For MySQL, this is 3306 by default.
l
Database Host Name: Enter the existing database server's IP or host name.
l
Server Schema/Table: Enter the name of the MySQL database into which the tables will
be created. The Connect standard name is "objectiflune".
l
Test Connection button: Click to verify that the information provide into previous fields is
valid by connecting to the database.
Page 34
Page 35

PlanetPress Connect Server Configuration
Note
The "Server Security Settings" on page55 dialog can only ever be executed from
the user specified here.
The Server Configuration page is where the Connect Server component is configured.
The Connect Server settings are as follows:.
l
Run Server as: Defines the machine username and password that thePlanetPress
Connect Server module's service uses.
l
Username: The account that the service uses to login. If the machine is on a
domain, use the format domain\username.
This account must be an existing Windows profile with local administrator rights.
l
Password: The password associated with the selected user.
l
Validate user button: Click to verify that the entered username and password
combination is correct and that the service is able to login.
This button must be clicked and the user validated before the Next button becomes
available.
Click Next to start the actual installation process. This process can take several minutes.
Completing the installation
This screen describes a summary of the components that have been installed.
l
Configure Update Check checkbox: This option is enabled by default. It causes the
Product Update Manager to run after the installation is complete. This allows
configuring PlanetPress Connect to regularly check for entitled updates.
Note: this checkbox may not be available in the event that an issue was encountered
during the installation.
l
Show Log... : If an issue was encountered during the installation, click this button to
obtain details. This information can then be provided to Objectif Lune for troubleshooting.
Page 35
Page 36

l When ready, click the Finish button to close the installation wizard, and initialize the
Technical
Before activating the software, please wait 5 minutes for the database to initialize. If the
software is activated and the services rebooted too quickly, the database can become
corrupted and require a re-installation.
Product Update Manager, if it was selected.
The Product Update Manager
If the Configure Update Check option has been selected, the following message will be
displayed after clicking “Finish” in the setup:
Click “Yes” to install or open the Product Update Manager where the frequency with which the
updates can be checked and a proxy server (if required) can be specified.
Note: if the Product Update Manager was already installed by another Objectif Lune
application, it will be updated to the latest version and will retain the settings previously
specified.
Select the desired options and then click OK to query the server and obtain a list of any
updates that are available for your software.
l Note that the Product Update Manager can also be called from the “Objectif Lune Update
Client” option in the Start menu.
l It can be uninstalled via Control Panel | Programs | Programs and Features.
Product Activation
After installation, it is necessary to activate the software. See Activating your license for more
information.
Running Connect Installer in Silent Mode
PlanetPress Connect can be installed in a so called "silent mode" to allow an automated setup
during a company wide roll-out or comparable situations. The trigger for the Connect Installer to
run in silent mode is a text file with the fixed name install.properties, which is located either in
Page 36
Page 37

the same folder as the PlanetPress_Connect_Setup_x86_64.exe or in the unpacked folder of
Note
Only the installation can be run silently. Silent Mode does not apply to uninstalling, modifying, or
updating Connect. Any previous version of Connect must be uninstalled before using the Silent
Installer.
Note
install.properties file notation must follow commons configuration rules. Please refer to
Properties files for more details.
the installer.exe.
The required properties file has the following attributes:
l Comment Lines, starting with # (e.g. # The options to configure an external database)
l Key = Value pairs (e.g. install.product.0 = Connect Designer)
For supported keys, please refer to the next paragraph.
Required and Optional Properties
Required properties depend on the specified product. Only fields related to that specified
product must be entered. If no product is mentioned, properties must be specified for all valid
Connect products.
Here is an example of an install.properties file.
# Verbose logging
logging.verbose = true
# Product selection
install.product.0 = Connect Designer
install.product.1 = Connect Server
# Server settings
server.runas.username = Localadmin
server.runas.password = admin
Page 37
Page 38

# Database configuration
Note
The values of install.product properties must contain the exact product names.
database.type = mysql
database.host = 192.168.116.10
database.port = 3308
database.username = root
database.password = admin
database.schema = my_ol
Verbose Logging (Optional)
By default, the Silent Installer will log the same way as the GUI installer. That means logging
of error and warnings, and certain information during database configuration. A more verbose
logging can be switched on by using logging.verbose = true.
Product Selection (Optional)
By default, if nothing is entered for the products to be installed (install.product.X), Silent
Installer will install all products which are visible to the user for the respective brand (except for
the Server Extension, because only Server or Server Extension can be installed at the same
time).
PlanetPress Defaults
install.product.0 = Connect Designer
install.product.1 = Connect Server
install.product.2 = MySQL Product
Server Configuration (required if Server is selected for install)
For Server, the following properties need to be provided:
server.runas.username = <username>
server.runas.password = <password>
Server Extension Configuration (required if Server Extension is selected for install)
For Server Extension, the following properties need to be provided:
Page 38
Page 39

server.runas.username = <username>
Note
The unlocked option should only be used when the database requires an external access.
If the Silent Installer runs with the default product selection, MySQL Product is included, and
hence the database.unlocked = true property may be optionally set if MySQL on this machine
is intended to serve as the central database also for remote machines.
If the Silent Installer runs with the explicit installation of a stand-alone (install.product.0 =
Connect Server), the database.unlocked property is irrelevant.
Note
The port will be defined automatically for the MySQL installation. All connect products selected in
the Silent Installer will automatically be configured to use the MySQL running under the port
defined by the database.port property, regardless of the default port 3306 or any other user
server.runas.password = <password>
server.master.host = <IP or name>
server.master.port = <port>
server.master.authenticate = true or false
server.master.username = <username for the Connect Server>
server.master.password = <password>
Database Configuration
Case 1: MySQL is among the selected Connect products to be installed (new MySQL
installation)
If MySQL is selected and there is no previous MySQL configuration on the machine, the
following properties should be defined:
database.password = <password> (required and must meet the rules)
database.port = <port> (3306 is the default port value)
database.unlocked = true or false (the default value is false,
optional)
Page 39
Page 40

defined port.
A different port is required if 3306 is already taken on that machine by another application.
Case 2: The Connect Server is selected and an external database needs to be
Note
Since PlanetPress Connect version 1.6 the minimum required version of the MS SQL
Server is SQLServer 2012.
configured
In this case, an external database must be configured for the Server (and other Connect
products included in the Silent installation) to be used.
2a: Configuring an external MySQL database
To configure an external MySQL database, the following properties should be defined:
database.type = mysql (required)
database.host = <host> (default value is localhost, otherwise
required)
database.port = <port> (default value is 3306, otherwise required)
database.username = <username> (default value is root, otherwise
required)
database.password = <password> (required)
database.schema = <schema name> (default value is objectiflune,
optional)
2b: Configuring an external Microsoft SQL Server database
To configure an external Microsoft SQL Server database, the following properties should be
defined:
database.type = Microsoft SQL Server (required)
database.host = <host> (default value is localhost, otherwise
required)
database.port = <port> (default value is 1433, otherwise required)
database.username = <username> (default value is sa, otherwise
Page 40
Page 41

required)
database.password = <password> (required)
database.schema = <schema name> (default value is objectiflune,
optional)
Activating a License
PlanetPress Connect and PlanetPress Workflow 8 includes separate 30 day trial periods
during which it is not necessary to have a license for reviewing basic functionality. If a
modification to the license if required, such as to allow an extension to the trial period, or for
extra functionality or plugins (e.g., the PReS Plugin for Workflow 8), then a new activation code
will need to be requested.
Obtaining the PlanetPress Connect Magic Number
To obtain an activation file the OL™ Magic Number must first be retrieved. The Magic Number
is a machine-specific code that is generated based on the computer's hardware and software
using a top-secret Objectif Lune family recipe. Each physical computer or virtual computer
should have a different Magic Number, thus require a separate license file to be functional.
To get the PlanetPress Connect Magic Number, open the PlanetPress Connect Designer
application:
l
Open the Start Menu
l
Click on All Programs, then Objectif Lune, then PlanetPress Connect
l
Open the PlanetPress Connect Designer [version] shortcut.
l When the application opens, if it has never been activated or the activation has expired,
the Software Activation dialog appears:
l
License Information subsection:
l
Magic Number: Displays the PlanetPress Connect Magic Number.
l
Copy to Clipboard: Click to copy the Magic Number to the clipboard. It can
then be pasted in the activation request email using the CTRL+V keyboard
shortcut.
l
Licensed Products subsection:
Page 41
Page 42

l
Note
The Software Activation dialog can also be reached through a shortcut located in All
Programs, then Objectif Lune, then PlanetPress Connect and is named Software
Activation. Since it does not load the software, it is faster to access for the initial activation.
Name: Displays the name of the application or module relevant to this
activation.
l
Serial Number: Displays the activation serial number if the product has been
activated in the past.
l
Expiration Date: Displays the date when the activation will expire (or the
current date if the product is not activated)
l
Web Activations: Click to be taken to the online activation page (not yet
functional).
l
End-User License Agreement (Appears only when loading a license file):
l
License: This box displays the EULA. Please note that this agreement is
legally binding.
l
I agree: Select to accept the EULA. This option must be selected to install the
license.
l
I don't agree: Select if you do not accept the EULA. You cannot install the
license if this option is selected.
l
Load License File: Click to browse to the .olconnectlicense file, once it has been
received.
l
Install License: Click to install the license and activate the software (only available
when a license file is loaded).
l
Close: Click to cancel this dialog. If a license file has been loaded, it will not
automatically be installed.
Requesting a license
After getting the Magic Number, a license request must be done for bothPlanetPress Connect
and Workflow 8:
Page 42
Page 43

l
Customersmust submit their Magic Number and serial number to Objectif Lune via the
Web Activations page: http://www.objectiflune.com/activations. The OL Customer Care
team will then send the PlanetPress Connect license file via email.
l
Resellerscan create an evaluation license via the Objectif Lune Partner Portal by
following the instructions there: http://extranet.objectiflune.com/
Note that if you do not have a serial number, one will be issued to you by the OL Activations
team.
Accepting the license will activate it, after which the PlanetPress Connect services will need to
be restarted. Note that in some case the service may not restart on its own. To resolve this
issue, restart the computer, or start the service manually from the computer's Control Panel.
Activating PlanetPress Workflow 8
PlanetPress Workflow 8 uses the same licensing scheme as PlanetPress Connect. There are
two ways of activating the license for Workflow 8 after saving it to a suitable location:
l If only PlanetPress Workflow 8 is installed, double-click on the license for the PlanetPress
Workflow 8 License Activation dialog to open. Applying the license here activates all of
the Workflow 8 components.
l
If you have both PlanetPress Workflow 8 and PlanetPress Connect installed, it will not be
possible to double-click on the license file as this will always open the PlanetPress
Connect Activations Tool. Instead, open PlanetPress Workflow 8 manually and apply the
license through the activations dialog within.
Activating PlanetPress Connect
To activate PlanetPress Connect, simply save the license file somewhere on your computer
where you can easily find it, such as on your desktop. You can then load the license by doubleclicking on it, or through the start menu:
l
Open the Start Menu
l
Click on All Programs, then Objectif Lune, then PlanetPress Connect
l
Open the PlanetPress Connect Designer [version] shortcut. The “PlanetPress Connect
Software Activation” tool displays information about the license and the End-User License
Agreement (EULA).
l
Click the Load License File button.
Page 43
Page 44

l Read the EULA and click I agree option to accept it.
Warning
After installation message will appear warning that the Server services will need to be restarted. Just
click OK to proceed.
l
Click Install License to activate the license. The license will then be registered on the
computer and you will be able to start using the software.
Migrating to a new computer
Currently there are no special migration tools to move data from one PlanetPress Connect
installation to another.
Instructions for migration will be available for later versions of the software when those tools
become available.
Information about PlanetPress Workflow 8
If you wish to use PlanetPress Workflow (automation) in conjunction with PlanetPress Connect,
you will need to install PlanetPress Workflow 8 onto the same machine. Workflow 8 is provided
through a separate installer which is available on CD or for download as follows:
l If you are a Customer, the installer can be downloaded from the Objectif Lune Web
Activations page: http://www.objectiflune.com/activations
l If you are a Reseller, the installer can be downloaded from the Objectif Lune Partner
Portal: http://extranet.objectiflune.com/
PlanetPress Workflow 8 can be installed in parallel on the same machine as an existing
PlanetPress® Suite 7.x installation. Note however:
l If both versions need to be hosted on the same machine, PlanetPress Workflow 8 should
always be installed after the legacy PlanetPress® Suite 7.x installation.
l When uninstalling PlanetPress Workflow 8, you may be prompted to repair your legacy
PlanetPress® Suite 7.x installation.
l If PlanetPress Workflow 8 has been installed alongside PlanetPress® Suite 7, Capture
can no longer be used with Workflow 7. The plugins are now registered uniquely to
Page 44
Page 45

Workflow 8 and the messenger for Workflow 7 is taken offline. It is only then possible to
Note
This document is intended for people who already received their upgrade to PlanetPress Connect.
They should already have their new serial number(s) in hand and the PlanetPress Connect installers.
Note
PlanetPress Connect Print-Only is available for existing users of PlanetPress version 7 or 6 with a
valid OL Care agreement. If you are using a previous version or are not covered by OL Care,
use Capture from PlanetPress Workflow 8.
l PlanetPress Workflow 8 and PlanetPress® Workflow 7 cannot run simultaneously, since
only one version of the Messenger service can run at a time. In fact, no 2 versions of
PlanetPress Workflow can on the same machine simultaneously, whatever version is
installed.
l It is possible to switch between different versions running by shutting down one version's
services and then starting the other. However, this is not recommended. There are no
technical limitations that prevent processes from previous PlanetPress Workflow versions
(as far back as Version 4) to run on PlanetPress Workflow 8, removing the need to run
both versions.
For more information on the licensing of Workflow 8, please see Activating your license.
Upgrading from PlanetPress Suite 7.6
With the release of PlanetPress Connect, Objectif Lune’s innovative new technology, existing
users of PlanetPress Suite version 7 and 6 have the possibility to migrate to an introductory
version of PlanetPress Connect called “PlanetPress Connect Print-Only”.
This migration benefits existing users in many ways and has limited impact on their current
processes and how they use PlanetPress Suite version 7 and 6.
This document provides information on the migration process and the requirements and
considerations for existing PlanetPress Suite users to upgrade to the latest generation of our
products.
Page 45
Page 46

please contact your reseller or your Objectif Lune Account Manager for more information.
What does PlanetPress Connect Contain?
PlanetPress Connect is comprised of the following modules:
l PlanetPress Workflow 8. This is the natural evolution of PlanetPress® Workflow 7
(Watch, Office or Production).PlanetPress Workflow 8 is very similar to PlanetPress®
Workflow 7 version but contains new features and has the ability to run PlanetPress
Connect, PlanetPress Suite, PrintShop Mail and PReS Documents.
o
Imaging for PlanetPress Connect is available as an option. It contains:
l PlanetPress Fax
l PlanetPress Image
l PlanetPress Search
o
PlanetPress Capture is still supported in PlanetPress Workflow 8 but only with
documents created with the PlanetPress Design 7.
l PlanetPress Connect Designer. This is the design tool based on completely new
technology. It is not backwards compatible and therefore cannot open PlanetPress
Design 7 documents. If you need to continue editing those documents you can keep
doing so in PlanetPress Design 7.
l PlanetPress Connect Server. This is the core of the Connect technology. This new
module automates the merging of data with your new templates and generates the output.
It is required for PlanetPress Workflow 8 to handle templates created with the
PlanetPress Connect Designer. It can be installed on the same or a different machine as
PlanetPress Workflow 8.
IMPORTANT: PlanetPress Connect does not contain the PlanetPress Design 7.
GOOD NEWS: PlanetPress Connect does not need any printer licenses to print from
PlanetPress Connect or PlanetPress Suite. It can also print PrintShop Mail 7 and PReS 6
documents if these programs are licensed.
You can keep everything you have
The first thing to know is that you can keep your current PlanetPress Workflow 7 configuration
and your PlanetPress Design documents. When upgrading to PlanetPress Connect, they will
Page 46
Page 47

remain functional.
Please note that PlanetPress Workflow 7 and PlanetPress Workflow 8 cannot run at the same
time. See Information about PlanetPress Workflow 8 for information about these limitations. The
only exception is the PlanetPress Suite Design tool that you can continue to use as it is not part
of PlanetPress Connect.
For customers upgrading to the free “Print only” version, if you wish you to continue your OL
Care engagement, the next year will be priced at the same price as your current price.
For customer upgrading to the full version of PlanetPress Connect, with or without new options,
the next year of OL Care will be priced at the value of the new software you upgraded to.
Before going into any further details, please read the following section carefully.
PlanetPress Connect installation considerations
PlanetPress Suite could run by default on a computer with a minimum of 1GB of RAM
available. The PlanetPress Connect Server with PlanetPress Workflow 8, by default, requires 8
GB of RAM but if you intend on using the new PlanetPress Connect Designer on the same
computer, you should consider having at least 12 GB of RAM available. See System
requirements.
Distributed installation or not
You can decide to install PlanetPress Connect modules all on the same computer or have each
module on a different computer. Reasons for this could be:
l There is insufficient memory in the computer currently running PlanetPress Workflow 8 to
also run PlanetPress Connect Server.
l You want to use a more powerful computer with more RAM and more cores to run the
Server to achieve maximum performance.
What do I gain by upgrading to PlanetPress Connect?
PlanetPress Watch users
When upgrading to PlanetPress Connect, you receive key features of PlanetPress Office such
as the following:
Page 47
Page 48

l Ability to input data from PDF
l Ability to print your PlanetPress Suite documents on any Windows printer (no need for
printer licenses)
l Ability to create standard PDF output from your PlanetPress Suite documents
l Even if you don’t recreate your existing PlanetPress Suite documents, you can easily
change your workflow to convert your output to PDF, then output them in PCL to any
device supporting it.
NOTE: If you were a PlanetPress Production user, you retain all functionalities within
PlanetPress Workflow 8. These are automatically imported during the activation (see below).
Re-purpose your existing documents
IMPORTANT: PlanetPress Suite users covered by a valid OL Care contract receive a “Print
only” version of PlanetPress Connect which can produce printed output. If you also own
PlanetPress Imaging, which can produce PDF, Tiff and other archive formats, you will also
receive a new version.
The full version of PlanetPress Connect can open your company to the digital world by
enabling you to send HTML responsive emails as well as creating dynamic responses and
interactive web pages. All that for a minimal fee. For more information on the full version of
PlanetPress Connect, contact your reseller or your Objectif Lune Account Manager.
Upgrade to the full multi-channel version and expand onto the Web
If you choose to take the optional “multi-channel” upgrade, you can start right away to reuse the
content of your existing documents and map it onto responsive documents that can be sent by
email in full HTML glory and/or make them available as native HTML web pages using the
latest CSS/JavaScript features.
IMPORTANT: If you owned them, you must also upgrade your Imaging modules to use the new
PReS version.
Create new documents and integrate them into your workflow at your own pace
You can start benefiting from the innovative technology of the new PlanetPress Connect
Designer right away by designing new documents, or re-doing existing ones at your own pace.
With PlanetPress Connect Print-Only, you can now:
Page 48
Page 49

l Use the new Data Mapper to easily map any input data into a clean data model that any
designer person can use
l Easily create documents with tables that spread over multiple print pages, respecting
widow and orphan rules, displaying sub-totals and totals properly
l Have text that wrap around images
Upgrade steps
1. To upgrade to PlanetPress Connect, the first step is to stop your PlanetPress Workflow
services. You can do so from the PlanetPress Workflow configuration tool or from the
Windows Service Management console.
2. Then, using the PlanetPress Connect setup, install the Designer and/or Server on the
appropriate computers. Then, using the PlanetPress Workflow 8 setup, install
PlanetPress Workflow and/or PlanetPress Image on the appropriate computers. (See the
installation and activation document for more details)
3. If you installed PlanetPress Workflow 8 on the same computer where you had
PlanetPress Suite Workflow 6 or 7, you can use the Upgrade Wizard to import your:
l PlanetPress Workflow:
l Processes configuration
l PlanetPress Suite compiled documents
l Service configuration
l Access manager configuration
l Custom plug-ins
l PlanetPress Fax settings
l PlanetPress Image settings
l PlanetPress Search profiles
l Printer activation codes
l PlanetPress Capture database
l PlanetPress Capture pen licenses
l Custom scripts
l Content of your virtual drive
l PlanetPress Messenger configuration
If you installed PlanetPress Workflow 8 on a different computer, contact support for
Page 49
Page 50

help importing all those settings, if you wish to import them.
4. To launch the Upgrade wizard, open the PlanetPress Workflow 8 configuration tool and,
from the Tools menu, launch the Upgrade Wizard.
IMPORTANT: Before you start this process, make sure you have a backup of your current
installation/computer.
Page 50
Page 51

5. Then select your upgrade type:
Page 51
Page 52

6. Then select the product from which you wish to upgrade:
7. If you selected to do a Custom upgrade, select the required options:
Page 52
Page 53

8. Then finally review the log in the final dialog for details on how it went:
Page 53
Page 54

9. After that you will need to get the activation file for your product.
To obtain your activation, download the PlanetPress Connect installer from the Web
Activation Manager, follow the instructions for the installation using the serial number
provided to you. You can activate your license through the Web Activation Manager.
10. From now on, if you need to modify your PlanetPress Design documents, simply open
PlanetPress Design 6 or 7, edit your document and send the updated version to
PlanetPress Workflow 8. In order to do that:
l If you have the PlanetPress Design on the same computer as the PlanetPress
Workflow 8, you need to save the documents to PTK by using the “Send to” menu,
then "PlanetPress Workflow”, and there use the “Save to file” button. Then, from the
PlanetPress Workflow 8 configuration tool, in the “Import” menu, select “Import a
PlanetPress Document” and select the previously saved file.
l If you have the PlanetPress Design on a computer and the PlanetPress Workflow 8
on another, you can simply use the “Send to” menu in the Designer and select the
PlanetPress Workflow 8 to which you want to send the PlanetPress Design
document.
Page 54
Page 55

Server Settings
Warning
It is highly recommended to keep security enabled and change the password on any server that
accessible from the web. If these precautions are not taken, data saved in the server may be
accessible from the outside!
This chapter describes the different considerations that are important in regards to the use of
PlanetPress Connect Server.
l "Server Security Settings" below
l "Server Extension Settings" below
Server Security Settings
This dialog controls the security settings for external applications connecting to the PlanetPress
Connect Server, such as PlanetPress Workflow or scripts communicating through the REST
API.
l
Enable server security: Enable to add authentication to the REST server. When
disabled, a username and password is not required to make REST request, and tasks in
PlanetPress Workflow does not require them in the Proxy tab.
l
Administrator's username: Enter the username for the server security. The default
username is ol-admin.
l
Administrator's password: Enter a password for the server security. The default
password is secret.
l
Confirm password: Re-enter the password for the server security.
l
Default session length (min): Enter a session time (in minutes) that the authentication
stays valid for the requested process. This can reduce the number of requests to the
server since an authentication request is not necessary during the session.
Server Extension Settings
This dialog controls the different settings for the PlanetPress Connect Server Extension.
Page 55
Page 56

The Preferences dialog is separated into individual pages, where each page controls certain
aspects of the software.
The following Preferences pages are available:
l "Cleanup Service preferences" on page588
l "Server Extension Scheduling Preferences" on page58 (these are different in the Server
Extension preferences)
l Merge Engine Scheduling
l Weaver Engine Scheduling
l "Server Security Settings" on the previous page
Server Clustering
Server Clustering, available in PlanetPress Connect, enhances the processing capabilities of
PlanetPress Connect Server by load-balancing jobs between the main Server module (master)
and one or more Server Extension installations.
Setting up Server Clustering requires two or more installations of PlanetPress Connect on
separate machines. The Master server is setup by installing the PlanetPress Connect Server
module during the Installation Wizard, while the Slave Server is setup by installing the
PlanetPress Connect Server Extension module instead.
Quick Howto
1. Install the Master server (PlanetPress Connect Server module), making sure to select the
MySQL module.
2. Set the appropriate bindings in MySQL's my.ini file on the Master server.
3. Grant access to the MySQL root user for the appropriate IP range on the Master server.
4. Restart the MySQL Service on the Master server.
5. Install Slave servers (PlanetPress Connect Server Extension module).
6. Install the license on the Master server (a Performance Pack license is required).
7. Set the preferences for the engines (see Scheduling Preferences) on both the Master and
Slaves
8. Install the license on the Slave servers
9. Restart the Master server then, once restarted, restart the Slave servers.
Page 56
Page 57

What if MySQL is not on the Master server?
It is possible to setup clustering with a MySQL instance that is on a Slave server instead of on
the master. In this case, the Slave server must be installed with the Server Extension and
MySQL modules, the MySQL instance configured (steps 2-4 above) then the master and other
slaves can be installed. The remainder of the instructions remain the same.
It is also possible to setup clustering with MySQL being installed completely separately from
PlanetPress Connect, such as using an existing MySQL instance. In this case, the instructions
for the bind address must be followed, but the user does not have to be root. A user for MySQL
must, however, be created and have full access (GRANT ALL PRIVILEGES) to a database
called "objectiflune" that can be created before Connect is installed.
Binding and Root access on the Master server
l The MySQL server's binding must be set to accept connections from the slave servers. To
do this, open C:\Program Files\Objectif Lune\OL Connect\MySQL Product\MySQL\my.ini
in a text editor and change the line bind-address= 127.0.0.1 to bind-
address=0.0.0.0.
l
Once the changes have been made and saved you need to restart the MySQL
services.
l Access must be granted to the root user on the IPs from which the Slave server will
connect:
l Open a Command Prompt in the following folder: C:\Program Files\Objectif Lune\OL
Connect\MySQL Product\MySQL\bin (tip: navigate to the folder, SHIFT+Right-click
and select "Open a command prompt here!).
l Type in the following command to connect to the database, where <password> is
your MySQL password (by default it is admin):
mysql --user=root --password=<password> objectiflune
l You should see the prompt become mysql>. Here, type the command to allow the
"root" user to be accessed from a specific IP subnet range. For example, to accept
communication on 192.168.*.*, use: GRANT ALL PRIVILEGES ON
objectiflune.* TO 'root'@'192.168.0.0/255.255.0.0'
IDENTIFIED BY 'password'; , where password is the one provided during
installation. (ref: http://dev.mysql.com/doc/mysql-security-excerpt/5.5/en/adding-
users.html)
Page 57
Page 58

Technical
IP Subnets understanding is beyond the scope of this documentation. If you want to learn more,
please see the Subnetwork article on Wikipedia.
Clustering Preferences and Setup
When server extensions are installed and connected to a Master, the following options and
settings change in availability or behavior:
l In the Scheduling Preferences of the Slave, both "Maximum Records" are ignored.
Scheduling is handled by the Master.
l The "Expected Remote Merge Engine" and "Expected Remote Weaver Engine" in Merge
Engine Scheduling and Weaver Engine Scheduling respectively, on the Master, should
each equal the total number of engines in all the slaves combined.
l For example, the Expected Remote Merge Engine on the Master should equal the
total of "Local Engines Launched" for each slave.
l
If the number of expected remote engines is lower than the actual number,
performance will not be optimal.
l
If the number of expected remote engines is higher than the actual number, jobs
may fail and not complete.
l Cleanup Service requires special configuration on Clustering setups:
l Cleanup service should not run simultaneously on all machines (staggered
cleanup). Doing so may cause jobs not to be processed since all servers are busy.
l Only the machine where the MySQL Server product is installed should attempt to
cleanup database items. Essentially server that do not have MySQL should only run
Orphan File Cleanup.
Server Extension Scheduling Preferences
The Server Extension Scheduling Preferences define the PlanetPress Connect Server
connection settings.
l
Location of the master server: Enter the location and port of the main PlanetPress
Connect Server module in the hostname:port format. For example, 192.168.100.123:9340
or connect-master:9340.
Page 58
Page 59

l
Note
The PlanetPress Connect Setup Wizard might take some seconds to appear.
Username: Enter the username expected by the PlanetPress Connect Server.
l
Password: Enter the password expected by the PlanetPress Connect Server for the
selected username.
l
Note that Maximum records in a small job and Minimum records in a large job are not
used in Server Extensions. All server scheduling is handled by the Master.
Uninstalling
This topic provides some important information about uninstalling (removing) PlanetPress
Connect1.6.1.
To uninstall PlanetPress Connect select the application from within the Add/Remove programs
option under the Control Panel. This will start the PlanetPress Connect Setup Wizard in
uninstall mode.
Important Note:Stop any Anti-Virus Software before
uninstalling Connect.
Some anti-virus systems are known to block the uninstallation of MySQL datafiles, as well as
blocking the uninstallation of the MySQLdatabase application itself. Therefore it is highly
recommended that any anti-virus application be stopped prior to uninstalling PlanetPress
Connect, as otherwise the Connect uninstallation might not work correctly.
Impacts upon other Applications and Services
l The Uninstall will terminate the installed Server / MySQL service(s)
l The following applications / services should be stopped in a controlled fashion, before
running the PlanetPress Connect Uninstall:
Page 59
Page 60

1. PlanetPress Connect
2. Any Connect Workflow using PlanetPress Connectplugins which connect to this
server.
3. PlanetPress Connect Server Extensions on remote systems which connect to this
machine as the Master Server.
4. Connect products on remote systems which refer to this MySQL database.
Uninstallation Wizard
The uninstallation is done by running the PlanetPress Connect Setup Wizard in uninstall mode.
The Wizard consists of the following pages:
1.
PlanetPress Connect SetupAn information page, listing what will be uninstalled, and
also warning about impacts upon running Applications and Services.
2.
Data Management: A page that provides options for backing up or deleting Connect
data. Selections are as follows:
l
Delete Connect Workspace Data: Check this box to delete the Workspace data for
the current user, or for selected users (as determined by the "Select Users" button)
l Backup Connect Workspace Data for all specified Users: Check this box
to backup the Workspace data for the specified users (as previously
determined) into a compressed ZIP file (whose location can be customized),
before deletion of the full Workspace data.
l
Delete MySQL objectlune Data: Check this box to delete the MySQL database
installed with PlanetPress Connect.
l
Backup MySQL Date: If the deletion check box is selected, this option
appears to allow backing up the MySQL database to a customizable location,
prior to uninstallation.
Page 60
Page 61

The DataMapper Module
The DataMapper is the tool to extract your data and transpose it into a format (a Unified Data
Model or UDM) that will allow it to be shared amongst different layouts and outputs created with
the Connect Designer. This UDM is a generic format with an emphasis on content, free from
any restrictions imposed by the file types or the origin of the data. This UDM also allows a same
layout or output to be populated with data from different sources and formats without the need to
modify it.
The original data, located outside of Connect, whether it’s a file or a database is called a Data
Source. The DataMapper doesn’t use the Data Source directly, rather it uses a copy of that data
called the Data Sample. Although the Data Sample is a copy, it is updated each time the data
mapping configuration is opened or whenever the Data Sample is selected.
The first step in the data extraction process is setting Boundaries for each record inside the
data sample. As an example, “Page 1 of…” in a PDF could be used as a “signal” to indicate the
beginning of a new record. When you define the boundaries, you are actually defining a series
of records inside your data sample file. You can then start working on the logic to extract data
from each of those records (see Configuring the settings for more information). Once you know
where each record begins and ends, you need to identify and extract data from each record. To
achieve this, you will create a process consisting of multiple steps (extraction, loops and
conditions) (see Extracting Data for more information). When this process is complete, the
result is a Data Model.
This Data Model contains all the necessary information to add variable data to Connect
Designer templates. (see Data Model for more information).
Basics
Connect’s DataMapper lets you extract data from a variety of files and creating Data Mapping
Configuration file. The Data Mapping Configuration can then be used to add variable data to
Connect Designer templates.
1.
Create a new Data Mapping configuration.
Start creating a Data Mapping configuration by selecting the Data Source. You can do
this manually or using one of the wizards. See Creating a new Data Mapping
configuration.
Page 61
Page 62

2.
Configure settings for the data source.
Configure how the Data Sample is read by the DataMapper so it can delimit each record
in the file (using Delimiters). See Data Source.
3.
Configure the data extraction workflow.
Configure the workflow steps that will be required to extract the data from the Data source
to the Data Model. This way, data will be converted and prepared to be used by the
Designer module. To learn more, see Data Extraction.
4.
Editing the Data Model.
In this step you can change the data type of fields, add fields, use JavaScript to change
the value of a field and much more. To learn more, see The Data Model Interface.
What's Next?
Use the Designer module to create templates for personalized customer communications. To
learn more, see The Designer Module.
Features
The DataMapper Module is a tool that extract data and prepares it for use in the Designer
module. The tool does this through the use of a Data Mapping Workflow consisting of multiple
Steps which process and extract data from each Source Record of a Data Source and stores it
in a Record Set.
Data Mapping Configuration
A Data Mapping Configuration file can refer to either the current active configuration in the
DataMapper, or a file on disk containing the information necessary for data mapping. It contains
the extraction workflow (steps), Delimiter and Boundary Settings, and any imported Data
Samples.
Data Mapping Workflow
The data mapping workflow is a series of Steps inside of a data mapping configuration that
extract the appropriate data from the Source Record and places it into the Record (see Data
Model).
Page 62
Page 63

The data mapping workflow always starts with the Preprocessor step and ends with the
Postprocessor step and can contain as many of the different steps available in the
DataMapper.
Data Model
A Data Model is the format into which Records are saved.It is also a file format that can be
exchanged between different parts of the PlanetPress Connect solution.
Data Source (Settings)
A data source is simply the source of the data. It can be a file (CSV, PDF, TXT, XML) or a
particular database. The data might be located on the same computer as the program, or on
another computer somewhere on a network.
Data Mapping Configuration
A Data Mapping Configuration file can refer to either the current active configuration in the
DataMapper, or a file on disk containing the information necessary for data mapping. It contains
the extraction workflow (steps), Delimiter and Boundary Settings, and any imported Data
Samples.
Creating A New Data Mapping Configuration
You can create a new Data Mapping configuration from a data file by using a wizard or
manually.
From a File
When creating a data mapping configuration from a file, you first select the file you want to
extract the data from. As opposed to using a wizard, you will later need to configure the settings
to extract the data. Please refer to Configuring Settings For The Data Source for more
information.
To create a Data Mapping from a file, use the following steps:
Page 63
Page 64

From the Welcome screen
Note
PCL and PostScript (PS) files are automatically converted to PDF format before showing that PDF
in the Data Viewer. This happens once when opening the file, but in the Workflow it happens for
every file. Depending on the processing power available, this may influence the processing speed.
1.
Click Create a New Configuration.
2.
From the From a file pane, select the file type (CSV, MS-Access, PDF/VT, Text or XML).
3.
Click the Browse button and open the file you want to work with (for a database, you may
have to enter a password).
4.
Click Finish.
From the File menu
1.
Click the File menu and select New.
2.
Click the Data mapping Configuration drop-down and select Files and then the file
(CSV, MS-Access, PDF/VT, Text or XML)..
3.
Click Next.
4.
Click the Browse button and open the file you want to work with.
5.
Click Finish.
Using a Wizard
The DataMapper module wizards are basically shortcuts to help get started and quickly create
a data mapping configuration. The data mapping wizards are only available for CSV and
database tabular files as well as PDF/VT, because these files contain metadata that can be
used to automatically set boundaries.
When using a wizard to create a new data mapping configuration, you select the file you want
to extract the data from, and the wizard automatically selects the appropriate settings for
extracting the data. All fields are automatically extracted.
Page 64
Page 65

For A CSV File
Note
These settings are generally detected automatically.
The DataMapper Wizard will guide you through setting the data mapping configuration in three
steps. The first step, is to select the data file. The Data Mapper will allow you to verify that the
right data file is being used by giving you a preview of the raw data inside the file. The second
will then display the different settings it has detected and allow you to change them. A preview
window of the extracted data helps you with choosing the settings. For the third step, click
Finish to extract all the fields inside your file.
To create a Data Mapping from a CSV file using the wizard, use the following steps:
From the Welcome screen
1.
Open the PlanetPress ConnectWelcome page by clicking the icon at the top right or
select the Help menu and then Welcome.
2.
Click Create a New Configuration.
3.
From the Using a wizard pane, select CSV.
4.
Click the Browse button and open the CSV file you want to work with.
l
Take a look at the Preview box content to ensure that the file is the right one and the
encoding correctly reads the data.
l
Click Next.
5.
From the Select a CSV Configuration dialog, choose the proper settings:
l
Encoding: Choose the correct encoding to read the file.
l
Separator: Defines what character separates each fields in the file.
l
Comment Delimiter: Defines what character starts a comment line.
l
Text Delimiter: Defines what character surrounds text fields in the file, preventing
the Field Delimiter from being interpreted within those text delimiters.
Page 65
Page 66

l
Note
These settings are generally detected automatically.
Ignore unparseable lines: Ignores any line that does not correspond to the settings
above.
l
First row contains field names: Uses the first line of the CSV as headers, which
automatically names all extracted fields.
6.
Verify that the data is read properly and click Finish.
From the File menu
1.
Click the File menu and select New.Click the Data mapping Data mapping Wizards
drop-down and select From CSV File.
2.
Click Next.
3.
Click the Browse button and open the CSV file you want to work with.
l
Take a look at the Preview box content to ensure that the file is the right one and the
encoding correctly reads the data.
l
Click Next.
4.
From the Select a CSV Configuration dialog, choose the proper settings:
l
Encoding: Choose the correct encoding to read the file.
l
Separator: Defines what character separates each fields in the file.
l
Comment Delimiter: Defines what character starts a comment line.
l
Text Delimiter: Defines what character surrounds text fields in the file, preventing
the Field Delimiter from being interpreted within those text delimiters.
l
Ignore unparseable lines: Ignores any line that does not correspond to the settings
above.
l
First row contains field names: Uses the first line of the CSV as headers, which
automatically names all extracted fields.
5.
Verify that the data is read properly and click Finish.
Page 66
Page 67

For a Database File
To create a Data Mapping from a Database file using the wizard, use the following steps:
From the Welcome screen
1.
Open the PlanetPress ConnectWelcome page by clicking the icon at the top right or
select the Help menu and then Welcome.
2.
Click Create a New Configuration.
3.
From the Using a wizard pane, select Database.
4. Use the drop-down to select the Database type.
5.
Click Next.
From the File menu
1.
Click the File menu and select New.Click the Data mapping Data mapping Wizards
drop-down and select From databases.
2.
Click Next.
3. Use the drop-down to select the Database type.
4.
Click Next.
Now set the following properties according to the selected database:
MySQL
l
Server: Enter the server address for the MySQL database.
l
Port: Enter the port to communicate with the MySQL server. The default port is 3306.
l
Database name: Enter the exact name of the database from where the data should be
extracted.
l
User name: Enter a user name that has access to the MySQL server and specified
database. The user only requires Readaccess to the database.
l
Password: Enter the password that matches the user name above.
l
Table name: The selected database is a set of related tables composed of rows and
columns corresponding respectively to source records and fields. Select a table from
which you want to extract data.
Page 67
Page 68

l
Encoding: Choose the correct encoding to read the file.
l
Click Finish to close the dialog and open the actual Data Mapping configuration.
Microsoft Access
l
Click the Browse button and open the database file you want to work with.
l
Password: Enter a password if one is required.
l
Click Next.
l
Table name: The selected database is a set of related tables composed of rows and
columns corresponding respectively to source records and fields. Select a table from
which you want to extract data.
l
Encoding: Choose the correct encoding to read the file.
l
Click Finish to close the dialog and open the actual Data Mapping configuration.
SQL Server
l
Server: Enter the server address for the SQL Server database.
l
Port: Enter the port to communicate with the SQL Server server. The default port is 3306.
l
Database name: Enter the exact name of the database from where the data should be
extracted.
l
User name: Enter a user name that has access to the SQL Server server and specified
database. The user only requires Readaccess to the database.
l
Password: Enter the password that matches the user name above.
l
Table name: The selected database is a set of related tables composed of rows and
columns corresponding respectively to source records and fields. Select a table from
which you want to extract data.
l
Encoding: Choose the correct encoding to read the file.
l
Click Finish to close the dialog and open the actual Data Mapping configuration.
ODBC DataSource
l
ODBC Source: Use the drop-down to select an ODBC System Data Source. This must
be a data source that has been configured in the 64-bit ODBC Data Source Administrator,
as PlanetPress Connect is a 64-bit application and thus cannot access 32-bit data
Page 68
Page 69

l
Note
Since JDBC can connect to multiple types of databases, a specific database driver and path to
this driver's JAR file must be specified.
JDBC
sources.
This ODBC source is MSSQL: Check this option if the ODBC source is MSSQL (SQL
Server). The options below appear under MSSQL-ODBCadvanced configuration:
l
Windows authentication: Select to use the Windows User name and Password
that are used by the Connect Service.
l
SQL Server authentication: Select to use the User name and Password set below
to connect to the SQL Server:
l
User name: Enter the SQL Server user name.
l
Password: Enter the password for the above user name.
l
Click Next.
l
Click Finish to close the dialog and open the actual Data Mapping configuration.
l
JDBC Driver: Use the drop-down to select which JDBC Driver to use for the database
connection.
l
JAR file path: Enter a path to the JAR file that contains the appropriate driver for the
database below.
l
Server: Enter the server address for the database server.
l
Database name: Enter the exact name of the database from where the data should be
extracted.
l
User name: Enter a user name that has access to the server and specified database. The
user only requires Readaccess to the database.
l
Password: Enter the password that matches the user name above.
l
Advanced mode: Check to enable the Connection String field to manually enter the
database connection string.
l
Connection string: Type or copy in your connection string.
Page 69
Page 70

l
l
Oracle
l
l
l
l
l
l
l
Click Next
Click Finish to close the dialog and open the actual Data Mapping configuration.
Server: Enter the server address for the Oracle database.
Port: Enter the port to communicate with the Oracle server. The default port is 3306.
Database name: Enter the exact name of the database from where the data should be
extracted.
User name: Enter a user name that has access to the Oracle server and specified
database. The user only requires Readaccess to the database.
Password: Enter the password that matches the user name above.
Table name: The selected database is a set of related tables composed of rows and
columns corresponding respectively to source records and fields. Select a table from
which you want to extract data.
Encoding: Choose the correct encoding to read the file.
l
Click Finish to close the dialog and open the actual Data Mapping configuration.
For a PDF File
When you open a PDF/VT within the Wizard, it actually gives you the options to set the
boundaries directly. Then you need to select the record or the level at which you have a new
Source Record. We also need to select what we want to extract. What the PDF Wizard will do
is extract the fields that were selected and set the boundaries automatically On metadata as
we can see in the boundary settings. Of course as with any PDF data file, you do have the
ability to extract more information afterwards.
To create a PDF/VT file data mapping configuration using the wizard, use the following steps:
From the Welcome screen
1.
Open the PlanetPress ConnectWelcome page by clicking the icon at the top right or
select the Help menu and then Welcome.
2.
Click Create a New Configuration.
3.
From the Using a wizard pane, select PDF/VT.
4.
Click the Browse button and open the PDF/VT file you want to work with. Click Next.
Page 70
Page 71

5.
In the Metadata page, select the following options:
l
Metadata record levels: Use the drop-down to select what level in the metadata
defines a Source Record.
l
Field List: This list displays all fields in all levels of the PDF/VT metadata.
l
Checkmark: Check any field to add it to the extraction.
l
Record Level: Displays the level on which the field is located.
l
Property name: Displays the field names to extract.
6.
Click Finish to close the dialog and open the actual Data Mapping configuration).
From the File menu
1.
Click the File menu and select New.
2.
Click the Data mapping Wizards drop-down and select From PDF/VT or AFP.
3.
Click Next.
4.
Click the Browse button and open the PDF/VT file you want to work with. Click Next.
5.
In the Metadata page, select the following options:
l
Metadata record levels: Use the drop-down to select what level in the metadata
defines a Source Record.
l
Field List: This list displays all fields in all levels of the PDF/VT metadata.
l
Checkmark: Check any field to add it to the extraction.
l
Record Level: Displays the level on which the field is located.
l
Property name: Displays the field names to extract.
6.
Click Finish to close the dialog and open the actual Data Mapping configuration).
From a XMLFile
To create a XML file data mapping configuration, use the following steps:
From the Welcome screen
1.
Open the PlanetPress ConnectWelcome page by clicking the icon at the top right or
select the Help menu and then Welcome.
Page 71
Page 72

2.
Click Create a New Configuration.
3.
From the Using a wizard pane, select XML.
4.
Click the Browse button and open the XML file you want to work with. Click Next.
5.
In the Select split level and trigger type page, select the following options:
l
XML Elements: A list of node elements that have children nodes. Select the level in
the data that will define the Source Record (for example Invoice, Customer ID,
Item...etc as opposed to Last name, Due date...etc).
l
Trigger: According to the node element path selected in the XML Elements field,
select On element to create a record in the Data mapping for each occurrence of
the element. Or you can select On change to create a record each time the element
is different.
6.
Click Finish to close the dialog and open the Data Mapping configuration.
From the File menu
1.
Click the File menu and select New.Click the Data mapping Wizards drop-down and
select From XML File.
2.
Click Next.
3.
Click the Browse button and open the XML file you want to work with. Click Next.
4.
In the Select split level and trigger type page, select the following options:
l
XML Elements: A list of node elements that have children nodes. Select the level in
the data that will define the Source Record (for example Invoice, Customer ID,
Item...etc as opposed to Last name, Due date...etc).
l
Trigger: According to the node element path selected in the XML Elements field,
select On element to create a record in the Data mapping for each occurrence of
the element. Or you can select On change to create a record each time the element
is different.
5.
Click Finish to close the dialog and open the Data Mapping configuration.
To Generate Counter
Generate counters is basically a way to create a series of sequential numbers. If, for instance,
you need to create sequential tickets or anything that has an ID that changes on each record,
Page 72
Page 73

you can set all the parameters here. Enter the starting number, how it should be incremented,
Note
You can’t join this configuration to another data file. It is just a counter to be applied on a static
template.
the amount required, a suffix, a prefix or if padding is needed.
l
Starting Value: The starting number for the counter. Defaults to 1.
l
Increment Value: The value by which to increment the counter for each record. For
example, an increment value of 3 and starting value of 1 would give the counter values of
1, 4, 7, 10, [...]
l
Number of records: The total number of counter records to generate. This is not the end
value but rather the total number of actual records to generate.
l
Padding character: Which character to add if the counter's value is smaller than the
width.
l
Width: The number of digits the counter will have. If the width is larger than the current
counter value, the padding character will be used on the left of the counter value, until the
width is equal to the set value. For example for a counter value of "15", a width of "4" and
padding character of "0", the value will become "0015".
l
Prefix: String to add before the counter, for example, adding # to get #00001. The prefix
length is not counted in the width.
l
Suffix: String to add after the counter. The suffix length is not counted in the width.
Opening a Data Mapping Configuration
There are two ways you can open a data mapping configuration:
l
In the Menus, click on File, Open, ensure that the file type is either DataMapper files or
Connect files. Browse to the configuration file to open, select it and click Open.
l
In the Menus, click onFile, Open Recent, and select one of the recently opened
configuration files.
Saving a Data Mapping Configuration
To save a data mapping configuration:
Page 73
Page 74

1.
In the Menus, click on File, thenSave, orclick theSave button in theToolbars.
2. If the data mapping configuration has never been saved, browse to the location where the
data mapping configuration should be saved and type a name, then click Save.
To save a copy of a data mapping configuration under a different name:
1.
In the Menus, click on File, thenSave As.
2. Browse to the location where the data mapping configuration should be saved and type a
name, then click Save.
Data Mapping Workflow
A data mapping workflow is a series of steps used to process and extract the data from Source
Records and store them into Records (see Data Model). Together with the data model, it is
what makes a data mapping configuration (See Data Mapping Configuration).
A data mapping workflow always starts with the Preprocessor step and ends with the
Postprocessor step. It can contains as many steps as needed for extracting the required data.
When working with a data mapping workflow, you need to consider the following:
l
Promotional versus transactional data: Depending on the type of data, whether it is
promotional or transactional, you will use different extraction workflows. See About
Promotional and Transactional Data for more information.
l
Steps: To extract data from the data sample, different steps are used that make up the
extraction process. See Steps for more information.
Selecting Data
In order to extract the data, it is necessary to first define the data to be extracted by selecting it.
The following topics contain information about how to create and manipulate a data selection,
and also how to create steps from it.
From a Text File
The Text data viewer displays the text-based contents of the Data Sample that is currently
active within the data mapping configuration in a grid-like fashion, with each character in the file
Page 74
Page 75

being in a separate grid position.
To select data, click on a starting character within the grid, keeping the mouse button down,
dragging to the end character and releasing the button. This creates a data selection that can
contain multiple lines.
From a PDF File
The PDF data viewer displays the PDF file contents of the Data Sample that is currently active
within the data mapping configuration as pages.
To select data, click on a starting point, keeping the mouse button down, dragging to the end
location and releasing the button. This creates a data selection that can contain multiple lines.
Page 75
Page 76

From a CSV or a Database File
The CSV/Database data viewer displays the field-based contents of the Data Sample that is
currently active within the data mapping configuration in a grid-like fashion, with each field
being in a separate grid position.
To select data, click on a starting point, keeping the mouse button down, dragging to the end
location and releasing the button. This creates a data selection that can contain multiple lines.
Page 76
Page 77

From a XML File
The XML data viewer displays the XML-based contents of the Data Sample that is currently
active within the data mapping configuration in a tree view, with XML fields displayed at each
level of the Sample Record.
To select data, click on a starting point, keeping the mouse button down, dragging to the end
location and releasing the button. This creates a data selection that can contain multiple lines.
Page 77
Page 78

Manipulating a Data Selection
From a Text File
The Text data viewer displays the text-based contents of the Data Sample that is currently
active within the data mapping configuration in a grid-like fashion, with each character in the file
being in a separate grid position.
Once created, data selections can be modified and moved in order to change or extend the
data included in the selection. You can also modify a data selection that is attached to a field
extraction in an Extract step by double-clicking on the data selection in the Data Viewer and
then modifying the data selection.
Moving a Data Selection
To move a data selection, click and hold anywhere on the data selection, move it to its new
desired location and release the mouses.
Page 78
Page 79

Resizing a Data Selection
To resize a data selection, click and hold on one of the resize handles on the borders or
corners, move them to the new size and release the mouse.
Page 79
Page 80

From a PDF File
The PDF data viewer displays the PDF file contents of the Data Sample that is currently active
within the data mapping configuration as pages.
Once created, data selections can be modified and moved in order to change or extend the
data included in the extraction. Moving a new data selection can be done directly if the data
selection is new. Data selections that are attached to a field extraction in an Extract step can
also be modified by double-clicking on the data selection in the Data Viewer and then
modifying the data selection.
Moving a Data Selection
To move a data selection, click and hold anywhere on the data selection, move it to its new
desired location and release the mouse.
Resizing a Data Selection
To resize a data selection, click and hold on one of the resize handles on the borders or
corners, move them to the new size and release the mouse.
Page 80
Page 81

From a CSV or a Database File
The CSV/Database data viewer displays the field-based contents of the Data Sample that is
currently active within the data mapping configuration in a grid-like fashion, with each field
being in a separate grid position.
Once created, data selections can be modified. Modifying a new data selection can be done
directly if the data selection is new.
Modifying a Data Selection
To modify a data selection, press and hold the CTRLkey click, and click on a field to add it or
remove it from the selection (the blue color indicates that the field is part of the current
selection).
Page 81
Page 82

From a XML File
The XML data viewer displays the XML-based contents of the Data Sample that is currently
active within the data mapping configuration in a tree view, with XML fields displayed at each
level of the Sample Record.
Once created, data selections can be modified. Modifying a new data selection can be done
directly if the data selection is new.
Modifying a Data Selection
To modify a data selection, press and hold the CTRLkey click, and click on a field to add it or
remove it from the selection (the blue color indicates that the field is part of the current
selection).
Page 82
Page 83

Extracting Data
The following example explains in detail how to perform a data extraction for each different data
source file types and the Steps used to achieve it. Delimiters and Boundaries must be properly
configured beforehand (see Configuring Settings for more information).
The Preprocessor and the Postprocessor
Data processors allow the application to perform actions on the data file itself before it is
handed over to the Data Mapping workflow (preprocessors) and after the Data Mapping
workflow has completed (Postprocessors).
For more information about the Preprocessor step, see Preprocessor Step Properties.
For more information about the Postprocessor step, see Postprocessor Step Properties.
The Extraction Step
The Extract step is the heart of the DataMapper software. It takes information from the Data
Sample and places it in the Extracted Record within the Record Set.
Page 83
Page 84

To configure the settings for the extraction step such as the list of fields included in the
Note
Alternatively, you can simply right click on the selected fields and select Add
Extraction. Please refer to Menus, Toolbar and Shortcut Keys for more information
about the available toolbar buttons, menus and keyboard shortcuts.
extraction, how to change a field name, the data format of each field or if the information is
extracted from a position on the page or to using a script, see Extract Step Properties.
From a CSV file or a Database
Extracting Promotional Data
For more information about Promotional and Transactional data, please refer to About
Promotional and Transactional Data.
1. From the Viewer pane, select the fields that contain the customer and invoice information.
For more information about how to select data in a CSVfile, please refer to Data
Selection/From a CSV File.
2. Drag & drop the selected fields into the Data Model pane.
Extracting Transactional Data
The Transactional Data (line items information) appears on multiple lines. You must create a
loop on these lines to extract the items information. The line items are extracted in a detail
table.
Page 84
Page 85

1. Select the fields that contain the first line item information.
2.
Right click on this data selection and select Add Repeat . For more information about
what a Repeat step is and why it should be used, please refer to Step_types.htm.
3.
Right click again on this data selection and select Add Extraction. A new extraction step
will be placed between the Repeat and the Goto steps.
Page 85
Page 86
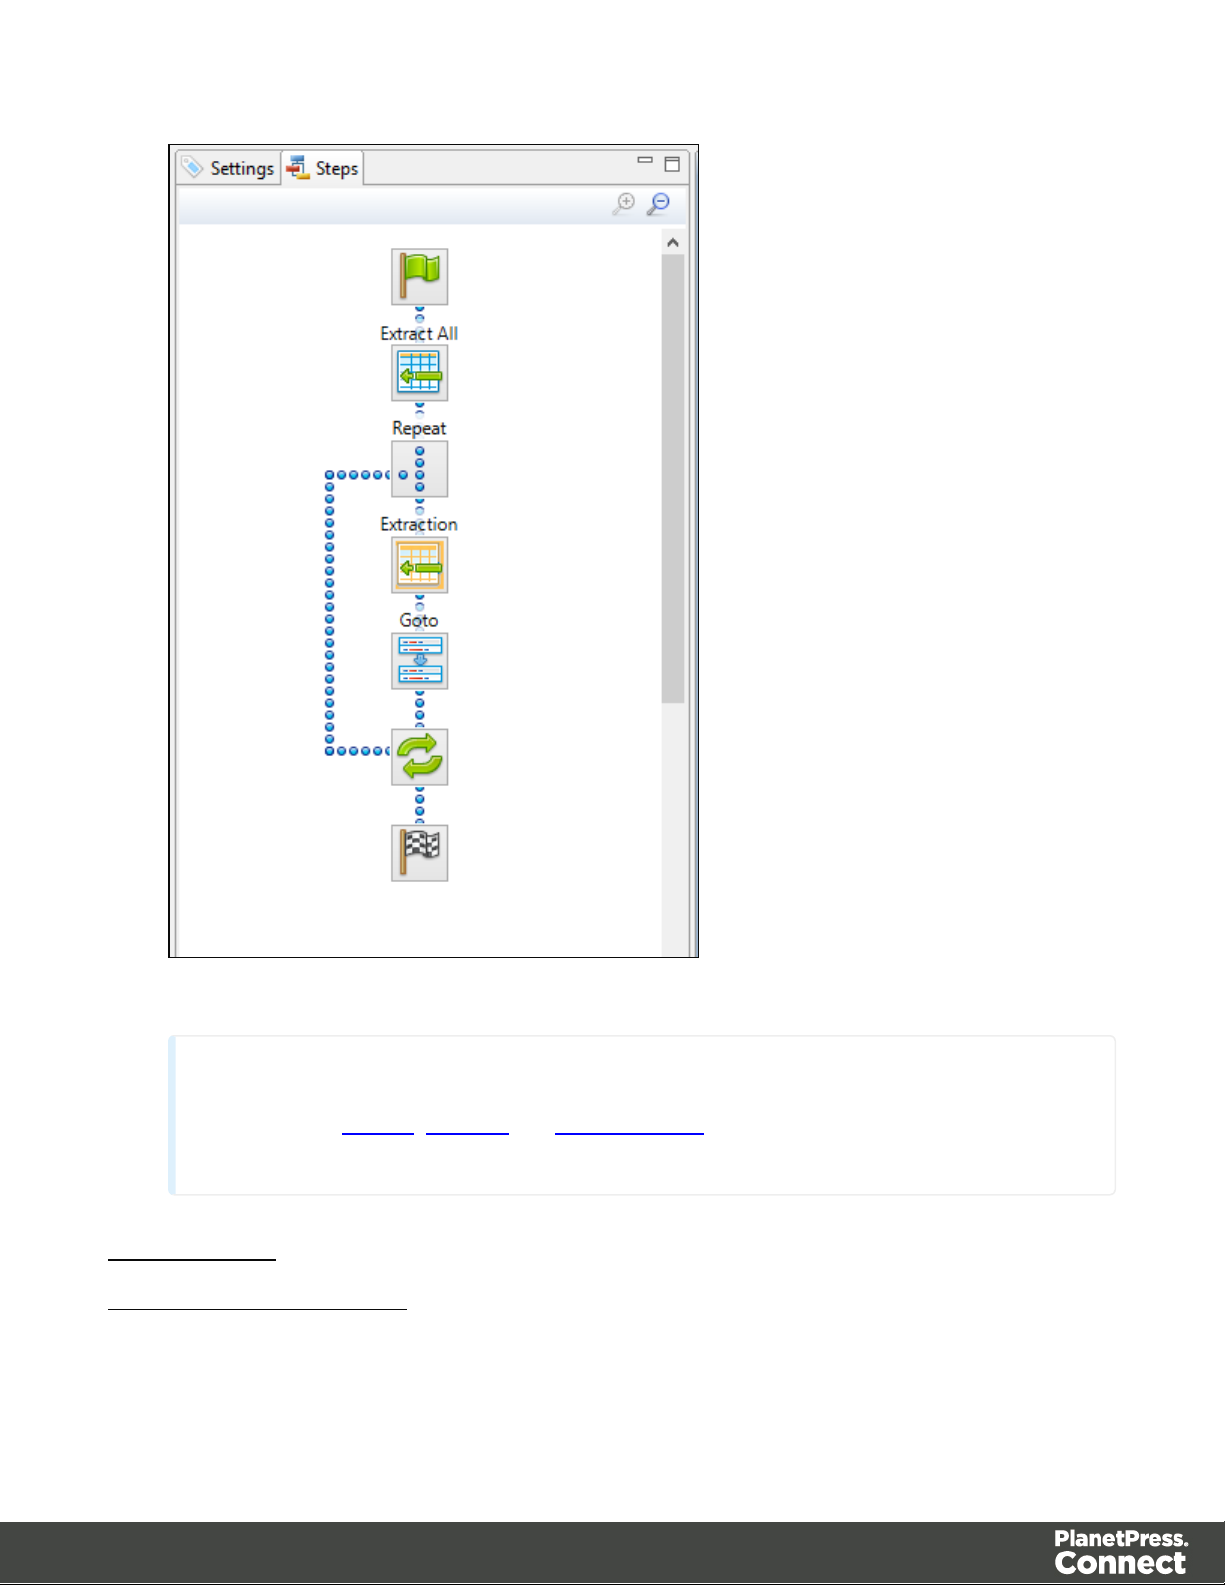
Note
Please refer to Menus, Toolbar and Shortcut Keys for more information about the
available toolbar buttons, menus and keyboard shortcuts.
From a XML file
Extracting Promotional Data
Page 86
Page 87

The Promotional Data (the customer and invoice information) is normally located at the top of
Note
Alternatively, you can simply drag & drop the selected elements into the Data Model
pane.
the Source Record, before the ITEM information. It generally includes the name, the address,
reference numbers, invoice information, etc.
1. Select the child leaf elements of the CUSTOMER() node.
2.
Right click on the selected elements and select Add Extraction.
Page 87
Page 88

3. In this case, the invoice information is also part of the promotional data. Select the child
leaf elements of the INVOICE() node.
4.
Right click on the selected nodes and select Add Extraction.
Extracting Transactional Data
The Transactional Data (line items information) appears in repeated elements. In the example
below, this information appears under the parent node ITEM(). Each ITEM() node gives
information about one item. Create a loop on the ITEM() nodes to extract the items information.
Page 88
Page 89

1. Select the ITEM() node.
Note
By default, when you click on the Repeat step in the Steps pane, the For Each option is
selected in the Repeat type option as shown in theStep Properties pane. The loop will
include each ITEM() node. In the Collection field, you will find the corresponding ITEM()
node path. Please refer to Repeat Step Properties.
2.
Right click on the selected node and select Add Repeat.
3. Select the children leaf nodes of the ITEM() node.
Page 89
Page 90

4.
Note
Please refer to Menus, Toolbar and Shortcut Keys for more information about the
available toolbar buttons, menus and keyboard shortcuts.
Right click on the selected nodes and select Add Extraction.
From a Text or a PDF file
Extracting Promotional Data
The Promotional Data (customer and the invoice information) is repeated for each item and
normally located at the top of the Source Record. It generally includes the name, the address,
reference numbers, invoice information, etc.
1. From the Viewer pane, select the customer and invoice information. Note that you can
select multiple lines. For more information on how to select text, please refer to Selecting
Data.
2.
Right click on the selection data and select Add Extraction .
Page 90
Page 91

Note
Alternatively, you can simply drag & drop the selected fields into the Data Model pane.
Extracting Transactional Data
The Transactional Data (line items in an invoice) appears on multiple lines and pages. A loop
has to be created on these lines to extract the item's information. The line items are extracted in
a detail table as described below:
1. Select a simple data in the first line item. For example the product number.
2.
Right-click on the selection and select Add Goto. That moves the cursor to the beginning
of the first line item.
Page 91
Page 92

3. Add a loop to extract each item until the end of the line items. To stop the loop at the right
place, you can use a text located at the end each record. For example, it can be a text
string like SUBTOTALS, TOTAL or AMOUNT. Now you can use that text as a condition to
stop the loop at the end of the line items list. In that case:
1. Select the text (SUBTOTALSfor example) in the Viewer.
2.
Right click on the selection and select Add Repeat.
The Repeat step loops on all lines until the selected text is found. Since a record can
extend on more than one page, lines that are not item lines must be excluded form the
extraction. You can use any exclusive information like a "." or "," in prices or totals for
example.
4. Select the "." or the "," in the total or in the price of the first line item.
5.
Right click on the selected dot and select Add Conditional. In the Viewer pane, you will
see a green check mark besides each included line or X for other lines.
Page 92
Page 93

6. From the Viewer pane, select the first field on the left for the first line item.
7.
Right click on the selection and select Add Extraction.
8. Select the second field.
Page 93
Page 94

9.
Note
The Add Extract Field step allows to add a field to an existing extract step while the Add
Extract Step creates a new step in the Steps pane. For optimization purposes, it is better to
use Add Extract Field than to have a succession of extraction steps.
Note
Please refer to Menus, Toolbar and Shortcut Keys for more information about the
available toolbar buttons, menus and keyboard shortcuts.
Right click on the selection and select Add Extract Field.
10. Do the same for the rest of the fields along that same line item.
Totals Information
After the loop step, the cursor position is at the end of line items. If the record contains sums or
totals at the end of the line items list:
Page 94
Page 95

1. Select the amounts.
Note
l Dragging a data selection or fields into a specific level of the Data Model (record or
detail tables) will add the fields to that level.
l
When dragging data into a detail table (in the Data Model pane), the Extract step
must be located within the appropriate Repeat step, otherwise the extract will not
function properly.
l Data can be extracted conditionally. Please refer to Condition step
l If a Data Model is loaded into the Data Model pane and if a field of the same name
already exists in that level, dragging a named field into it (CSV, XML, Database) will
extract the data to that field. Otherwise a new one with will be created.
l Action steps could be added to the process described above in order to set the
value for a Source Record property or execute a JavaScript code.
2.
Click the Repeat step in the Steps panel.
3.
Right click on the selection and select Add a Step/Add Extraction.
Also Note That...
Page 95
Page 96

Note
To add an Extract step, you can also use JavaScript (select JavaScript from the Mode drop-down
in the Step Properties pane). Please refer to DataMapper API for more information.
About Promotional and Transactional Data
Note
For more details about operations that can be performed on steps, please refer to "The
Steps Pane Interface" on page164.
Promotional data, like its name suggests it, is used for promotional communications. It usually
contains personal information like addresses, names and phone numbers used to identify the
recipient of these communications. Each recipient represents one record and records for
promotional data are fixed length. These communications are aimed to promote a product or
service, create a bond or establish a relationship with the customer.
Transactional data is used in the communication of transactions between a company and their
customers or suppliers. Examples of such communications are invoices, statements or
purchase orders. Because of the nature of transactions, records lengths vary from record to
record.
Steps
l Steps are executed sequentially, from top to bottom in a workflow.
l Inside conditions, some steps may be skipped altogether when they are on a particular
branch, whereas in loops several steps may be repeated a number of times.
l The Preprocessor and Postprocessor steps are special in that the former can be used to
modify the incoming data prior to executing the rest of the workflow while the latter can be
used to further process the Data Set after the entire workflow has been executed.
You will find below a list of different steps that can be added to a Data Mapping Workflow.
Page 96
Page 97

Preprocessor and Postprocessor
Preprocessors
Data preprocessors allow the application to perform actions on the data file itself before it is
handed over to the Data Mapping workflow.
Using a JavaScript a Preprocessor step could be used add a new field in each record set. A
unique ID could be created to be added to the output for integrity checks latter on. A time stamp
could be added to create reports. A tag could be added to process certain records differently. Or
Certain records could be removed altogether.
Any number of preprocessing tasks can be added to a workflow and run in sequence before the
data is sent to the Data Mapping workflow. Click the button to add a Preprocessor to the list.
Page 97
Page 98

Postprocessors
Data postprocessors allow the application to extract data that was stored in the data model
once the workflow is completed. For example, the postprocessor can export all or parts of the
data to a CSV file which can then used to generate daily reports of the Workflow processes.
Page 98
Page 99

Any number of postprocessing tasks can be added to a workflow and be executed after the
Data Mapping workflow is complete. Click the button to add a Postprocessor to the list.
Page 99
Page 100

Extract
Note
To add an Extract step, you can also use JavaScript (select JavaScript from the Mode drop-down
in the Step Properties pane). Please refer to DataMapper API for more information.
The Extract step is the heart of the DataMapper software. It takes information from the Data
Sample and places it in the Extracted Record within the Record Set.
Please refer to Data Extraction for an animated example.
For more information on how to add a step, please refer to Toolbar, Menus or "Shortcut Keys"
on page210 under the Interface area.
Properties
You can also further customize the step properties. Please refer to The Step Properties
Interface for more information.
Page 100
 Loading...