


TN-100
gyM
sy...
Instruction Manual
TN-100/T-100
Portable Turbidimeter
Technolo
adeEa
68X357701 Rev. 4 Apr 06


Preface
This manual functions in two ways: first as a step by step guide to help you operate
the waterproof TN-100/ T-100 turbidimeter; second, it serves as a handy reference
guide.
It contains basic instructions that you must follow during the operation, care and
maintenance of the instrument. The safety protection provided by this equipment
may be impaired if it is used in a manner not described in this manual. It is
recommended that all operators should read this manual prior to working with this
instrument.
Eutech Instruments/ Oakton Instruments cannot accept any responsibility for
damage or malfunction to the meter caused by improper use of the instrument.
The information presented in this manual is subject to change without notice as
improvements are made, and does not represent a commitment on the part of
Eutech Instruments Pte Ltd/ Oakton Instruments.
Note: Eutech Instruments Pte Ltd/ Oakton Instruments reserves the right to
make improvements in design, construction, and appearance of products
without notice.
Copyright © 2006 All rights reserved.
Eutech Instruments Pte Ltd
Oakton Instruments

Table of Contents
1. Overview .............................................................................................. 1
1.1 Unpacking TN-100/ T-100 Meter and Accessories .............................................. 1
1.2 Display .................................................................................................................. 2
1.3 Keys and Functions .............................................................................................. 3
1.4 Battery Installation ................................................................................................ 4
2. Turbidity Calibration ........................................................................... 5
2.1 Calibration Standards ........................................................................................... 5
2.2 Indexing ................................................................................................................ 5
2.3 Calibration Procedure........................................................................................... 6
2.4 Restoring Factory Calibration............................................................................... 8
3. Turbidity Measurement ..................................................................... 10
3.1 General Information............................................................................................ 10
3.2 Turbidity Measurement Procedure ..................................................................... 10
3.3 Single-Shot or Continuous Measurement .......................................................... 13
4. Troubleshooting Guide ..................................................................... 15
5. Routine Maintenance ........................................................................ 16
5.1 Vials – Handling, Cleaning and Care ................................................................. 16
6. Accessories ....................................................................................... 17
7. Specifications .................................................................................... 18
8. Addendum 1: Turbidity ..................................................................... 19
8.1 Definition............................................................................................................. 19
8.2 Why Is It Important? ........................................................................................... 19
8.3 Measurement Principle....................................................................................... 19
8.4 Nephelometric Turbidity Units (NTU) ................................................................. 20
8.5 Indexing a Vial .................................................................................................... 20
9. Addendum 2: Guide to Good Measurement Technique................ 21
9.1 Maintain sample vials in good condition............................................................. 21
9.2 Match Sample Vials............................................................................................ 21
9.3 Degassing........................................................................................................... 22
9.4 Timeliness of Sample ......................................................................................... 22
9.5 Other Important Sampling Techniques............................................................... 22
9.6 Calibration........................................................................................................... 23
9.7 Dilution................................................................................................................ 23
10. Warranty ........................................................................................ 24
11. Return of Items.............................................................................. 24
Instruction Manual TN-100/ T-100
1. Overview
Thank you for selecting the waterproof portable TN-100/ T-100 turbidimeter. The
TN-100/ T-100 allows you to measure turbidity of an aqueous sample in the field.
This instrument operates on the nephelometric principle of turbidity measurement
and is designed to meet the criteria specified in ISO 7027 and DIN 27027 standards
(see Measurement Principle on page 19).
1.1 Unpacking TN-100/ T-100 Meter and Accessories
The table below indicates the items that you should find in your turbidimeter
shipment.
Item Quantity
1. Portable TN-100/ T-100 Turbidimeter with 4 “AAA” batteries 1
2. Instruction Manual 1
3. Instrument Carrying Case 1
4. Light Shield Cap 1
5. Calibration Set (0.02, 20.0,100, 800 NTU Standards) 1
6. Empty Vials 3
7. Plastic bottle (empty – for collecting sample) 1
8. Silicone Oil 1
9. Lint free cloth 1
Remove TN-100/ T-100 turbidimeter from the packing carton. Carefully inspect all
items to ensure that no visible damage has occurred during shipment. If the items
you received do not match your order, please contact your nearest distributor
immediately.
WARNING: Extra care should be taken when unpacking, opening, and
handling the calibration standards and sample vials. Surface scratches or
finger smudges on the vial surface may cause measurement errors. Handle
these items by their caps only.
Batteries provided with the meter package are to be installed prior to use. See
Section 1.4 - Battery Installation on page 4.
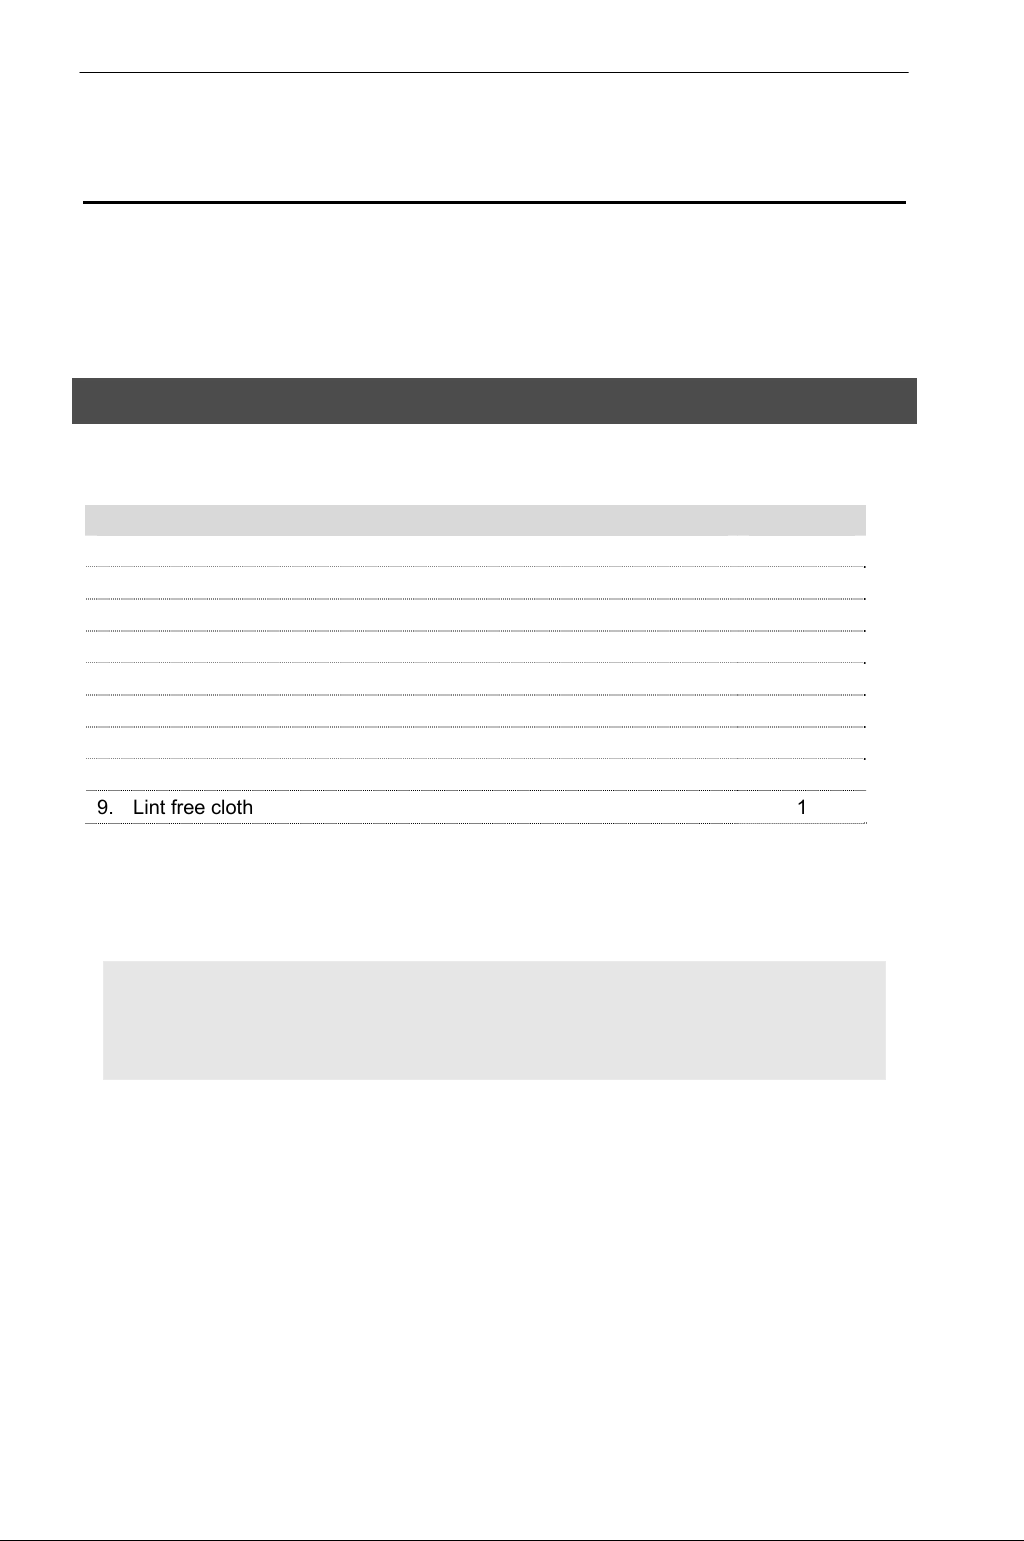
Figure 1 depicts the meter. The three main components of the instrument are the
sample well, the display, and the keypad. The following sections describe the
functionality of the display and the keypad. The proper use of the instrument and
the sample well are discussed in later sections.
1
Instruction Manual TN-100/ T-100
Sample Vial
Sample Well
Index Mark
Liquid Crystal Display
Keypad
Figure 1: Parts of TN-100/T-100 Turbidimeter
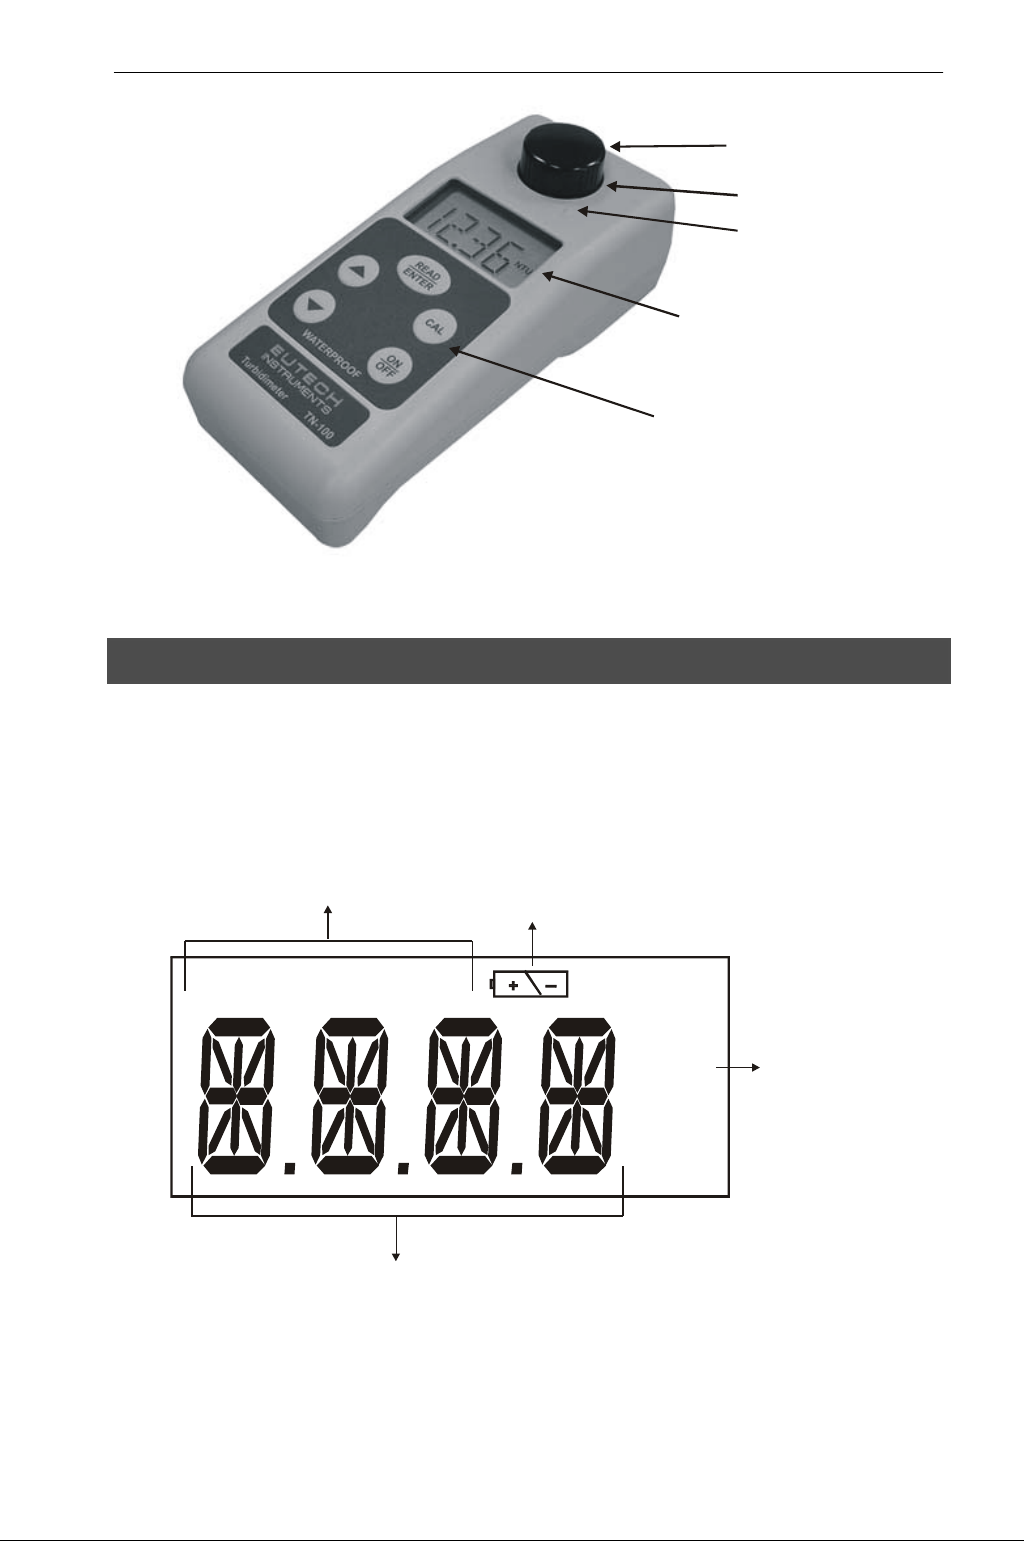
1.2 Display
All the LCD segments and annunciators that can appear on the display are shown
in Figure 2. The display is used for reporting the turbidity reading and to provide
guidance for the operation of the instrument. In addition, the display has several
other annunciators that are used to communicate error messages and provide user
guidance.
Calibration
Standards
Battery Indicator
CAL 13 CAL 24
TAvg
mg/l
NTU
Units of
Measurement
ppm
%pH
14-segment Liquid Crystal Display
Figure 2: Customized LCD with all annunciators
2
Instruction Manual TN-100/ T-100
1.3 Keys and Functions
The keypad has five keys: ON/OFF, CAL, ▲, ▼, and READ/ENTER.
Key Functions
ON
OFF
CAL
READ
ENTER
Powers on and shuts off the meter. With the auto switch-off feature the
meter automatically shuts off 20 minutes after last key press.
Initiates the calibration mode of the meter. When pressed, the meter is set
to accept the first calibration standard.
It is also used to exit the calibration mode if the user does not want to
follow the complete calibration procedure.
When in measurement mode, the READ/ENTER key is used to perform a
measurement.
Single-shot measurements
immediately (a quick key stroke of less than 0.3 seconds), the display will
blink [-Rd-] for 10 times and then display the measured value.
Continuous measurements
the instrument will perform a continuous measurement during which the
display is updated every 2 seconds. This can be used for indexing vials.
(This function is not available in calibration mode).
After the READ/ENTER key is released, the instrument will automatically
perform a single-shot measurement.
Active only during calibration mode. These keys are used to select the
calibration point in an incremental/ decremental manner.
NOTE: This meter is fitted with an auto incrementing feature, i.e. after
the successful calibration of one point it auto selects the next calibration
point, or automatically exits the calibration mode after the fourth
calibration point.
: When the key is pressed and released
: If the READ/ENTER key is pressed and held,
READ
ENTER
CAL
ON
OFF
WATERPROOF
Figure 3: Keypad
3
Instruction Manual TN-100/ T-100
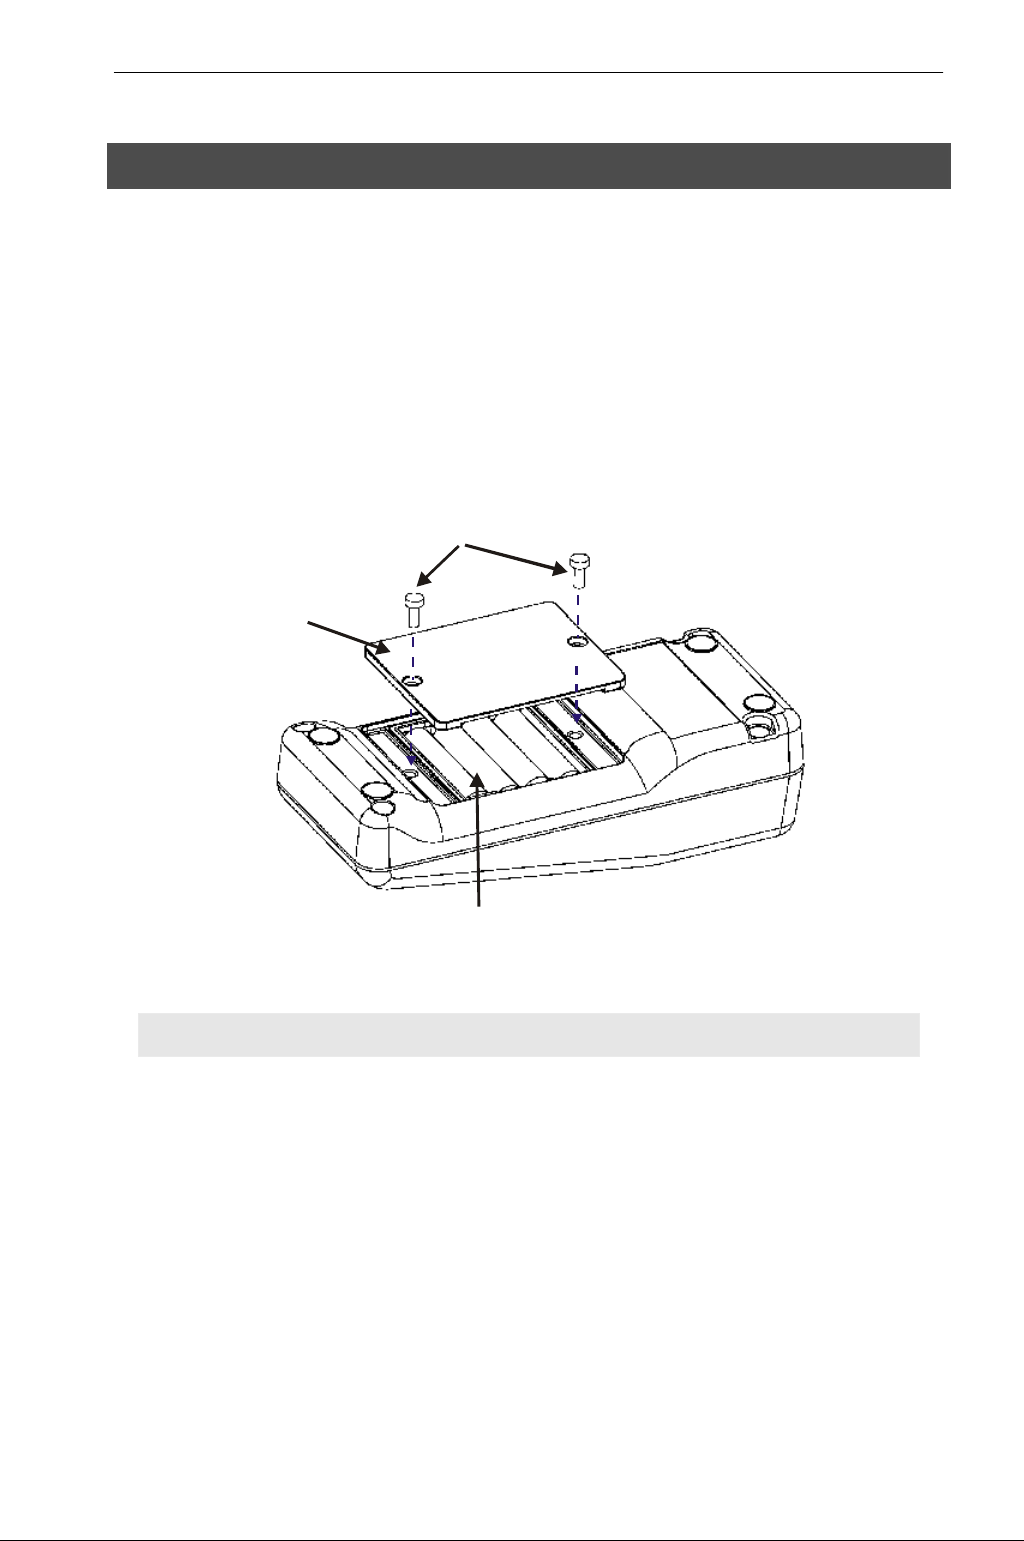
1.4 Battery Installation
Four AAA-sized batteries are included in the packaging:
1. Use a Philips screwdriver to remove the two screws holding the battery
cover. See Figure 4.
2. Remove the battery cover.
3. Insert the batteries. Follow the diagram inside the cover for correct polarity.
4. Replace the battery cover onto its original position using the two screws
removed earlier.
5. The meter is now ready to operate.
Philips Screws
Battery cover
Four 'AAA'-sized batteries
Figure 4: Battery Installation
NOTE: Dispose used batteries in accordance with your local regulations.
4
 Loading...