

Page 1
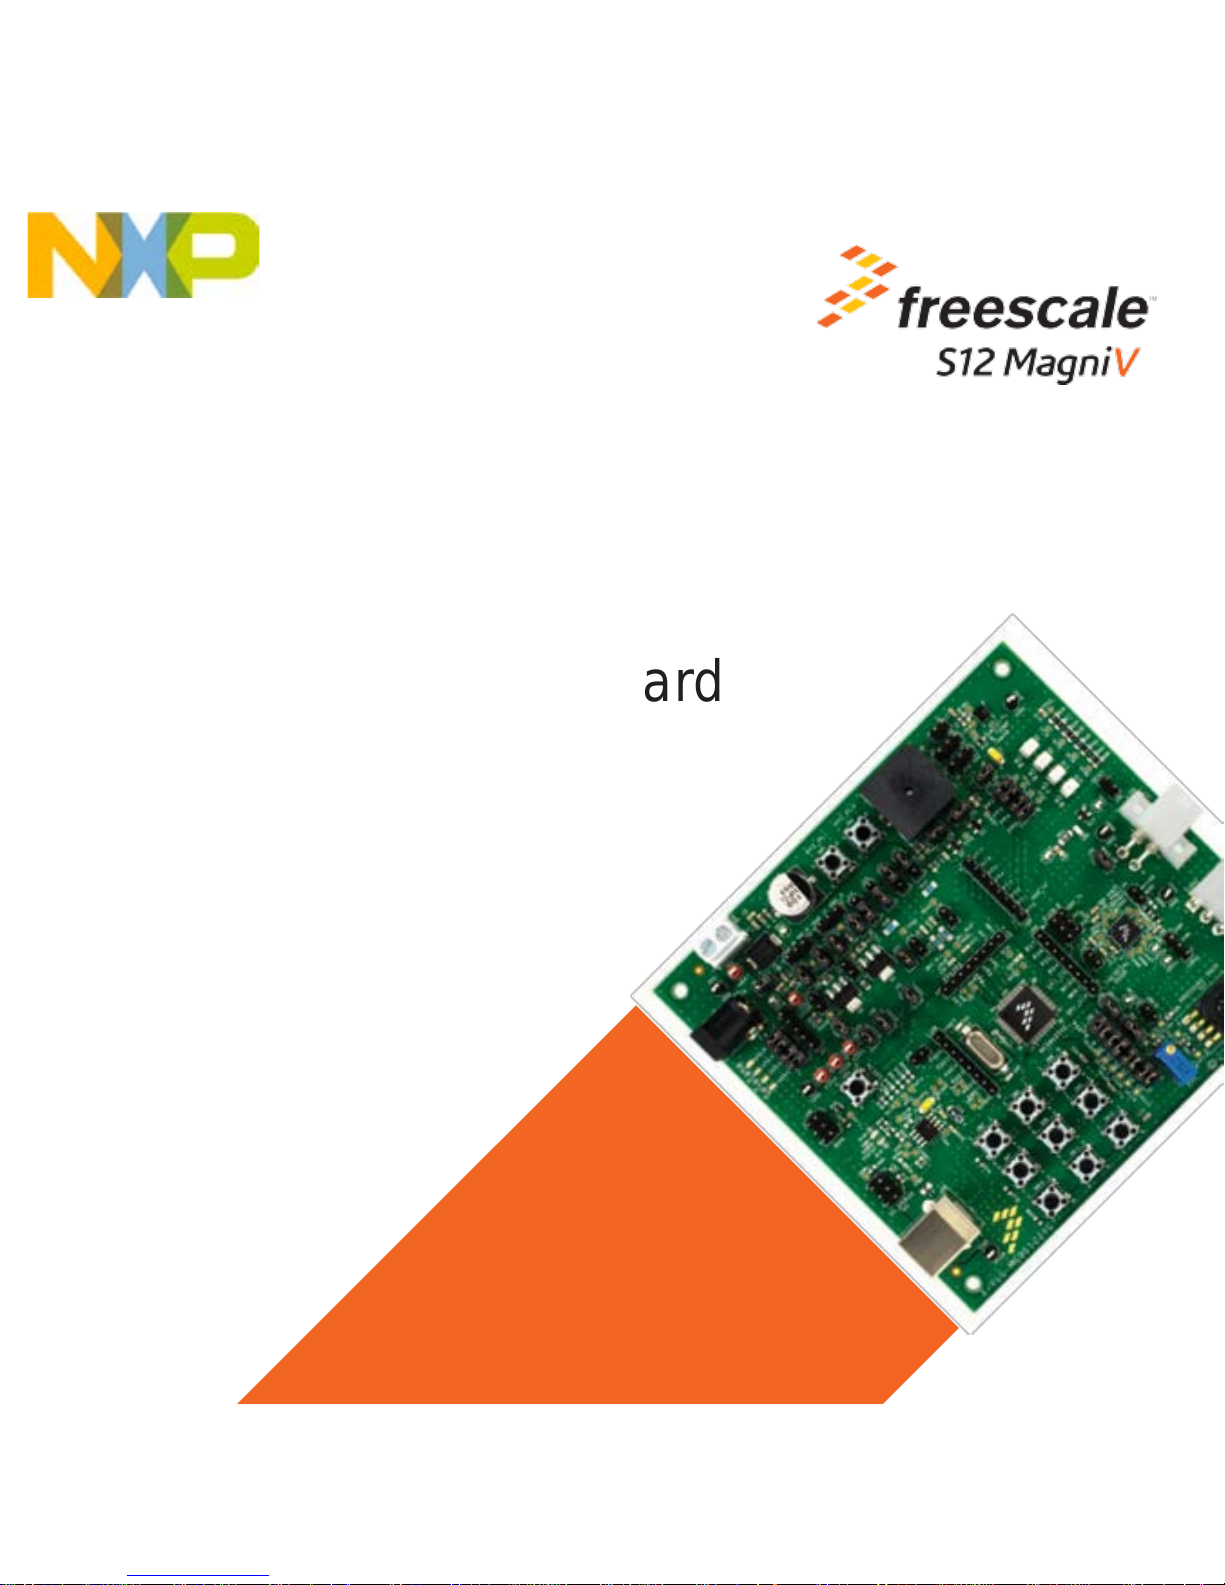
Quick Start Guide
S12 MagniV Mixed-signal MCUs
S12ZVC Evaluation Board
Page 2

Introduction and default settings
Quick Start
2
This guide shows how to quickly connect the board to a host PC and
execute a demonstration application preloaded in to the flash memory.
The S12ZVC MCUintegrates:
• S12Z CPU
• Power supply
PNP external ballast transistor for
VDDX, VDDA, and VDDC
LED powerindicators
• Reset
• LEDs
• Buzzer
• ADC potentiometer
• Keyboard matrix
• High-voltage input
• Sensors
Temperature and humidity
Pressure sensor
Inertial sensor SPI X-Yaxis
• SENT
• CAN
• LIN
Default jumper positions of the
VLG-S12ZVC board are shown in the
following section.
Page 3

Device overview S12ZVC family
The MC9S12ZVC family is a new member of the S12 MagniV product line integrating a
battery level (12 V) voltage regulator, supply voltage monitoring, high voltage inputs,and
a CAN physical interface. It’s primarily targeting at CAN nodes like sensors, switch panels,
or small actuators. It offers various low-power modes and wake-up management to
address sta te of the art pow er consu mptio nrequirements.
Some members of the MC9S12ZVC family are also offered for high temperature applications
requiring AEC-Q100 Grade 0 (-40°C to +150°C ambient operating temperature range) The
MC9S12ZVC family is based on the enhanced performance, linear address space S12Z
core and delivers an optimized solution with the integration of several key system components
into a single device, optimizing system architecture and achieving significant space savings.
3
nxp.com/S12MagniV
Page 4
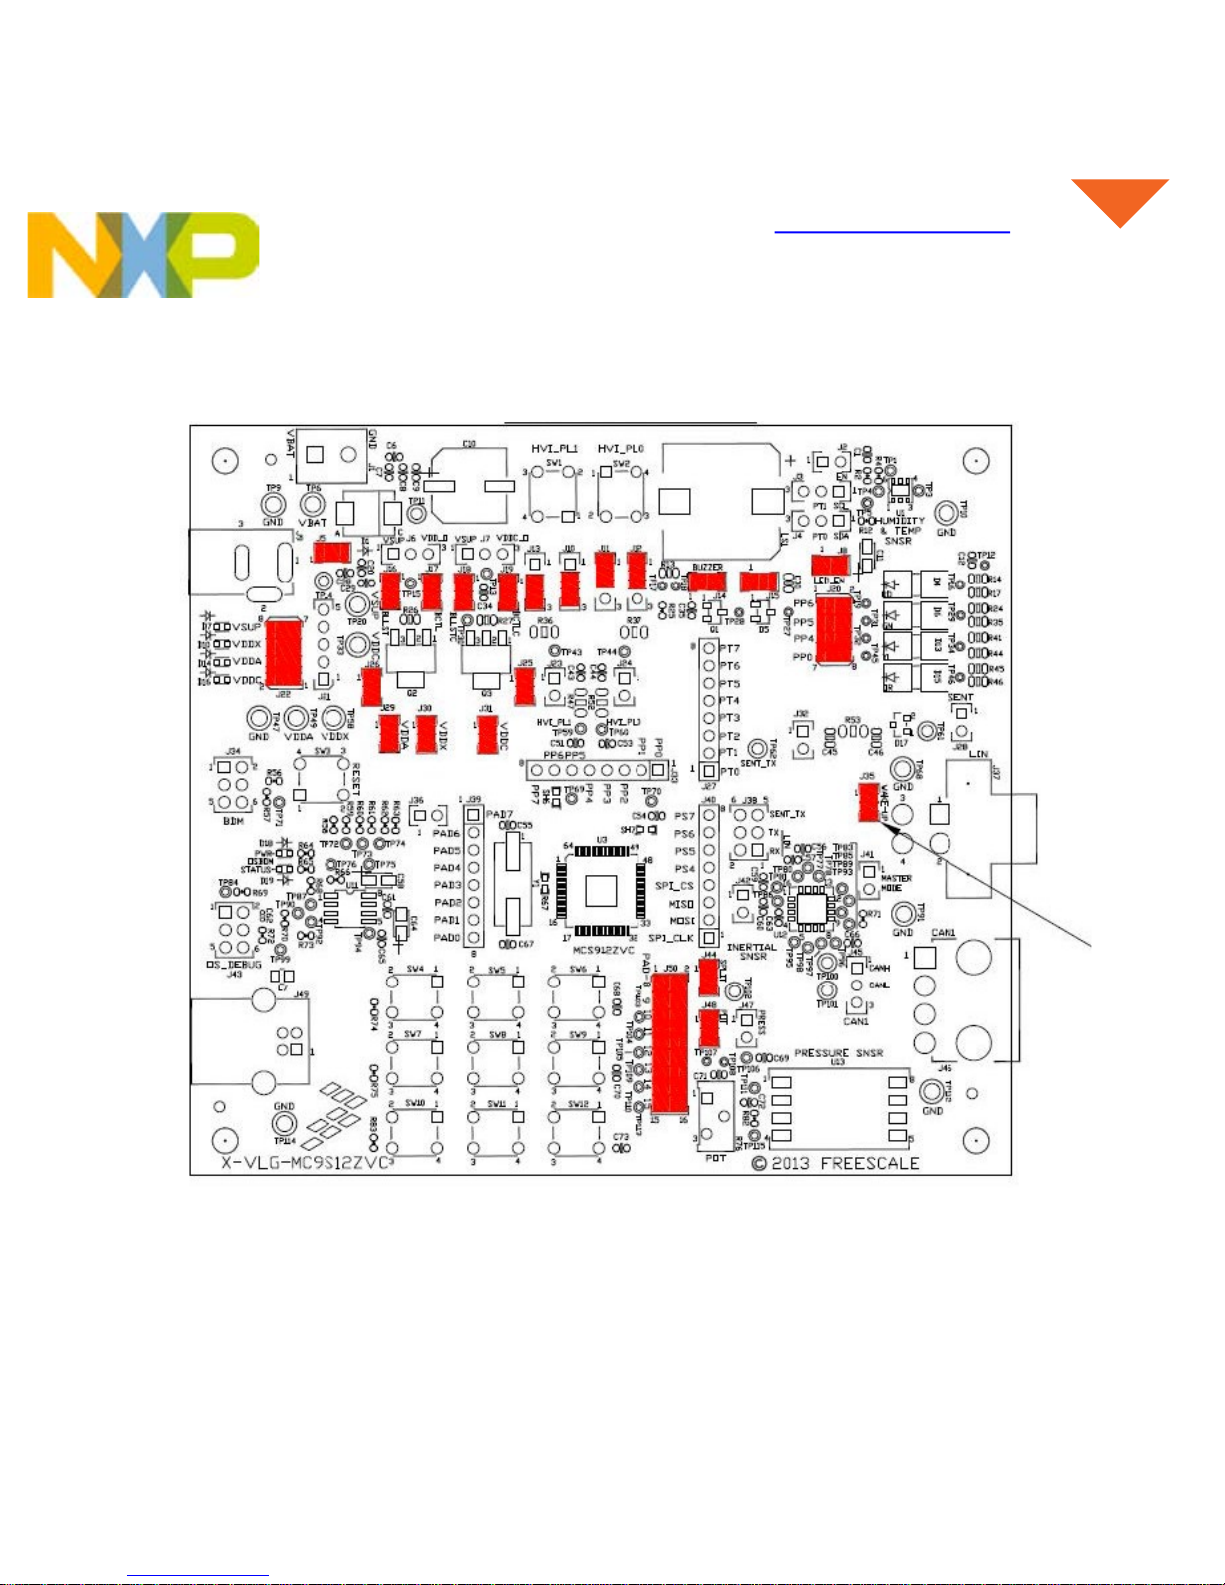
Jumper default configuration
This section describes about the jumper configuration.
Quick Start
Block Diagram shows the maximum configuration.
Not all pins or all peripherals are availableon all devicesand packages. Reroutingoptionsare not shown.
4
CAN-PHY
Pierce Oscillator
Temp
Sense
12-bit
Analog-Digital
Converter
MS-CAN
InternalRC
Oscillator,
+/-1.3%
PLL
with Frequency
Modulationoption
8-Bit
DAC
Analog
Comparator
2 x SCI
2 SPI
S12ZCPU 32 MHzBus
(25 MHZ @ >150°CTj)
Hi-Res-PWM 4ch 16-bit
Hi-Res-Timer 4ch16-bit
1 L1C
Up to 192KB
Flash (ECC)
PWM 4ch 16-bit
SENT TIMER 4ch 16-bit
EEPROM
with ECC up to
2 K bytes)
RAM with ECC
up to8 K bytes
Real TimeInterrupt
4 ch LSD(+25mA)
open drain
BDM/BDC
1ch HSD(+20mA)
open drain
2-HVI
V-SUP
VoltageSupply
Monitor
Vreg for CAN PHY
with ext. ballast (BCTLC)
Figure 1. S12ZVC architecture diagram1
Page 5
5
Figure 2. Jumper configurationdiagram
PRIMARY SIDE
nxp.com/S12MagniV
Page 6
6
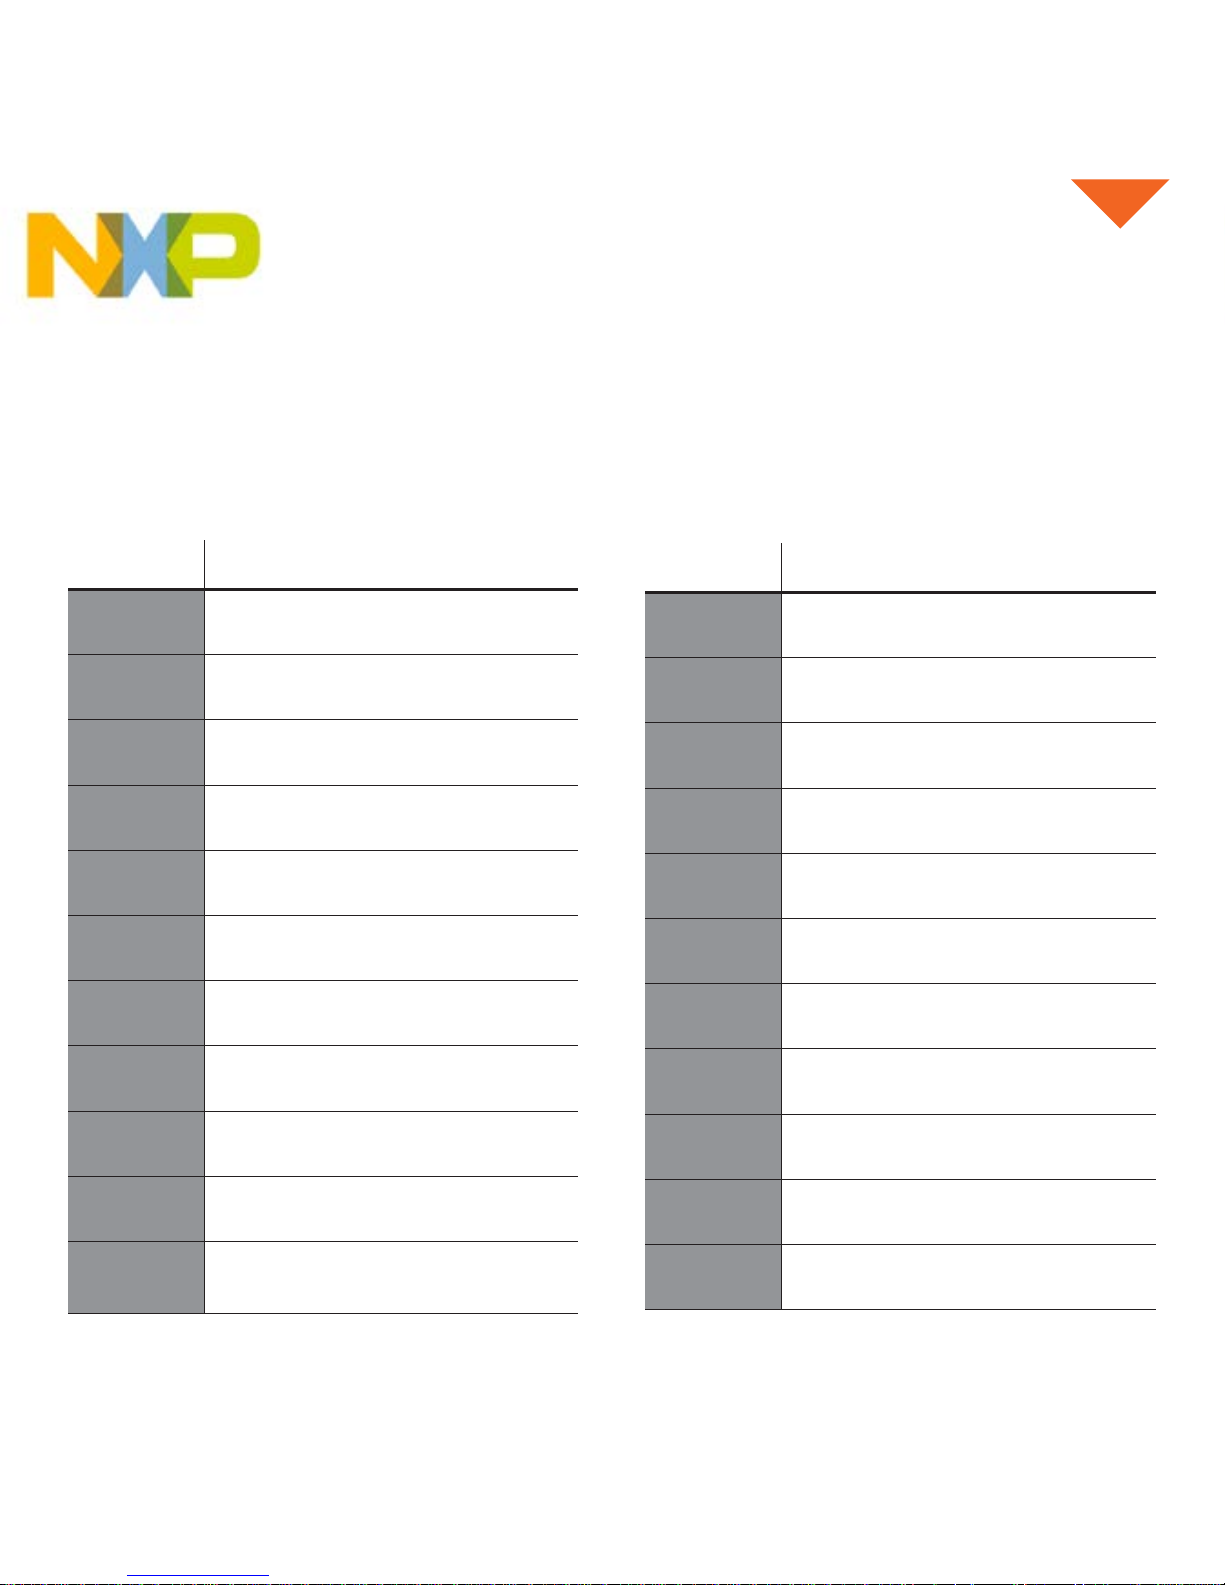
Header Reference position
J5 1-2
J8 1-2
J10 2-3
J11 1-2
J12 1-2
J13 2-3
J15 1-2
J14 1-2
J20 1-2, 3-4, 5-6, 7-8
J48 1,2
J50
1-2, 3-4, 5-6, 7-8, 9-10,
11-12, 13-14, 15-16
Header Reference position
J16 1, 2
J17 1, 2
J18 1, 2
J19 1, 2
J22 1-2, 3-4, 5-6, 7-8
J25 1, 2
J26 1- 2
J29 1- 2
J30 1- 2
J31 1- 2
J35 1- 2
Quick Start
Jumper default configuration
The following table lists the jumper default configuration.
Page 7

7
Software tools installation
This section describes how to get started w ith the S12ZVC board by installing
CodeWarrior development studio and testing the demo program that come s
programmed with the board.
Install CodeWarrior development studio
NXP’s CodeWarrior for MCUs integrates the development tools for several
architectures, including the S12Z architecture, into a single product
based on the Eclipse open development platform. Eclipse offers an excellent
framework for building software development environments and is a standard
framework used by many embedded software vendors.
The latest version of CodeWarrior for
MCUs (Eclipse IDE) can be downloadedfrom
nxp.com/codewarrior
1
nxp.com/S12MagniV
Page 8

8
Software tools installation (cont.)
Quick Start
2
Launch the
demo program
The S12ZVC EVB board comes
preprogrammed with a small
demonstration application that
exercises the different modules
of the S12ZVC MCU family,
including the ADC, SCI, I2C,
and GPIO modules.
To see this demonstration:
• Connect a 12 V power source
to the EVB.
• Connect a USB cable to the
USB type B connector.
• Press the keys on the keypad
to hear tones on the buzzer.
• Tilt the EVB to observe changes
on the red and green LEDs.
• Rotate the potentiometer to
observe changes on the orangeLED.
• Notice that the pressure sensor controls
the yellow LED.
The software for this application is
available on
nxp.com.
Page 9

9
Jumper list and description
Jumper Description
J10
HVI Circuit –Reference Voltage Selector
Pin1-2
Closed
SW1 is connected to VBAT level. This provides a HIGH voltage
level when switch SW1 is pressed.
Pin2-3
Closed
SW1 is connected to GND level. This provides a LOW voltage
level whenswitch SW1 is pressed.
J11
HVI Circuit –Reference Voltage Selector
Pin1-2
Closed
SW2 is connected to VBAT level. This provides a HIGH voltage
level when switch SW2 is pressed.
Pin2-3
Closed
SW2 is connected to GND level. This provides a LOW voltage
level when switch SW2 is pressed.
J12
HVI Circuit –Reference Voltage Selector
Pin1-2
Closed
Enable VBAT level to pullup resistor. This provides a HIGH
voltage level when switch SW2 is open.
Pin2-3
Closed
Enable GND level to pullup resistor. This provides a LOW voltage
level when switch SW2 is open.
J13
Buzzer Control
Pin1-2
Closed
Enable VBAT level to pullup resistor. This provides a HIGH
voltage level when switch SW2 is open.
Pin2-3
Closed
Enable GND level to pullup resistor. This provide a LOW voltage
level when switch SW2 is open.
J14
Buzzer Power
Closing this jumper enables the Buzzer control by PP7 port.
J15
HVI Circuit –Reference Voltage Selector
Closing this jumper powers the Buzzer circuit.
nxp.com/S12MagniV
Page 10

10
Jumper list and description (cont.)
Jumper Description
J16
VDDX External Ballast Transistor
With this jumper closed, the VSUP Voltage is connected to PNP external transistor
collector for the VDDX voltage regulation.
J17
VDDX External Ballast Transistor
This jumper enables the signal control of the PNP external transistor collector for
the VDDX voltage regulation.
J18
VDDC External Ballast Transistor
With this jumper closed, the VSUP Voltage is connected to PNP external transistor
J19
VDDC External Ballast Transistor
This jumper enables the signal control of the PNP external transistor collector for
the VDDC voltage regulation.
J2
Humidit y a nd temperature sensor power
This jumper powers the humidity and temperature sensor.*
J20
LEDs
Pin1-2
Closed
Red LED is connected to PP6 port
Pin3-4
Closed
Green LED is connected to PP5 port
Pin5-6
Closed
Yellow LED is connected to PP4 port
Pin7-8
Closed
Orange LED is connected to PP0 port
Quick Start
• Do not close J2 jumper to power up the sensor. The sensor must be supplied with a voltage
range of 2.1V to 3.6V.
Page 11

11
Jumper list and description (cont.)
Jumper Description
J22
Power Supply Voltages –LEDs Indicators
Pin1-2
Closed
Enable VDDC - LED indicator
Pin3-4
Closed
Enable VDDA - LED indicator
Pin5-6
Closed
Enable VDDX - LED indicator
Pin7-8
Closed
Enable VSUP - LED indicator
J25
VDDX External Ballast Transistor - Output
Closing this jumper connects the external PNP ballast transistor output to
VDD_OUT line.
J26
VDDX External Ballast Transistor - Output
Closing this jumper connects the external PNP ballast transistor output to
VDD_OUT line.
J29
VDDA Power
Closing this header connects VDDA to VDD_OUT line.
J3
Humidit y T e mpe ra ture Sensor - Communication
Closing this jumper connects the SCL-line of the Humidity Temperature Sensor to PT1.
J30
VDDX
Closing this jumper connects VDDX to VDD_OUT line.
J31
VDDC
Closing this jumper connects VDDC to VDDC_OUT line.
nxp.com/S12MagniV
Page 12

12
Jumper list and description (cont.)
Jumper Description
J32
SENT Transmitter Interface
Closing this header connects the SENT_TX line to SENT transmitter interface circuit.
J35
LIN Mode
With this jumper, the user can configure the local and remote wake-up mode of
MC33662 - LIN transceiver.
J38
LIN and SENT Communication
Pin1-2
Closed
PS4 is connected to LIN_RX
Pin3-4
Closed
PS5 is connected to LIN_TX
Pin5-6
Closed
PS7 is connected to SENT_TX
J4
Humidit y T e mpe ra ture Sensor - Communication
Closing this jumper connects the SDA line of the humidity temperature sensor to PT0.
J41
LIN – Master/SlaveMode
With this jumper, the user can configure as master or slave mode.
J42
INERTIAL Sensor Power
Closing this jumper powers the INERTIAL sensor circuit.
J44
CAN
Closing this jumper connects the SPLIT pin to the resistors termination of CAN.
J47
Press Sensor Power
Closing this jumper powers the press s ensor circuit.
J48
Potentiometer Reference
Closing this jumper connects the potentiometer to VDDA.
Quick Start
Page 13

13
Jumper list and description (cont.)
Jumper Description
J5
VBAT
Closing this jumper connects VBAT to all system.
J50
LIN and SENT Communication
Pin1-2
Closed
Closing this jumper connects PAD8 port to the potentiometer.
Pin3-4
Closed
Closing this jumper connects PAD9 port to Press Sensor –
Output.
Pin5-6
Closed
Closing this jumper connects PAD10 port to the keyword matrix.
Pin7-8
Closed
Closing this jumper connects PAD11 port to the keyword matrix..
Pin9-10
Closed
Closing this jumper connects PAD12 port to the keyword matrix.
Pin 11-12
Closed
Closing this jumper connects PAD13 port to the keyword matrix.
Pin 13-14
Closed
Closing this jumper connects PAD14 port to the keyword matrix.
Pin 15-16
Closed
Closing this jumper connects PAD15 port to the keyword matrix.
J51
VDDX shunt resistor
Closing this jumper enables a shunt resistor on VDDX that can aid on current
measurements for the VDDX ballast transistor.
J52
VDDC shunt resistor
Closing this jumper enables a shunt resistor on VDDC that can aid on current
measurements for the VDDC ballast transistor.
J8
LEDs Power
Closing this jumper connects VDDX to D4, D6, D13, and D15.
nxp.com/S12MagniV
Page 14

14
Headers and connectors list
Quick Start
The following table lists all of the connectors available in the S12ZVC evaluation board
and their corresponding signals.
Header /
Connector
Reference position
J1 Main power connector (up to 18 V)
J21 VBAT, VSUP, VDDX, VDDC, and VDDA are connected to this header.
J23
HVI Header –External HVI signal
This jumper allows a monitoring/measurem ent of the High voltage signal. If J13
and J10 are disabled, the user can apply an external signal. This jumper (pin 1-2)
should always be OPEN.
J24
HVI Header –External HVI signal
This jumper allows a monitoring/measurem ent of the High voltage signal. If J11
and J12 are disabled, the user can apply an external signal. This jumper (pin 1-2)
should always be OPEN.
J27 GPIO Header - PortT
J28 SENT transmitter header with GND
J33 GPIO Header - PortP
J34 BDM Connector
Page 15

15
Headers and connectors list (cont.)
Header /
Connector
Reference position
J37 LIN Connector
J39 GPIO Header - PortAD
J40 GPIO Header - PortS
J45 CAN main connector
J46 CAN main connector
J49 OSBDM USB port for programming and debugging the main MCU.
J6
VDDX - PNP Ballast Transistor Terminals
The header could be used for measurements/monitoring of all signals of the external
PNP ballast transistor: Base, Collector, and Emitter. Opening J16, J17, and J27 connects
the user to an additional transistor forvalidation.
J7
VDDC –PNP Ballast Transistor Terminals
The header could be used for measurements/monitoring of all signals of the external
PNP ballast transistor: Base, Collector, and Emitter. Opening J18, J19, and J25 connects
the user to an additional transistor forvalidation.
J9 Main power connector (up to 18 V)
nxp.com/S12MagniV
Page 16

16
Peripheral list
Quick Start
The following table lists all the peripherals available in the S12ZVCevaluation board.
Peripheral ID MCU PORT Description
Potentiometer R76 PAD8
Potentiometer connected to
ADC channel 8
LED –Voltage Indicator
D7 – VSUP LED indicator
D10 – VDDX LEDindicator
D14 – VDDA LED indicator
D16 – VDDC LEDindicator
Switch Panel
SW4 –
Matrix keyboard switch
SW5 –
SW6 –
SW7 –
SW8 –
SW9 –
SW10 –
SW11 –
SW12 –
Page 17

17
Peripheral list (cont.)
Peripheral ID MCU PORT Description
High Voltage Switch
SW1 PL1
Switch connected to PL1
(with 10 kΩ resistor)
SW2 PL0
Switch connected to PL0
(with 10 kΩ resistor)
Buzzer LS1 PP7 Buzzer controlled by PP7
LED –General purpose
D4 PP6 Red LED connected to portPP6
D6 PP5 Green LED connected to portPP5
D13 PP4 Yellow LED connected to port PP4
D15 PP0 Orange LED connected to portPP0
Reset SW3 – Reset switch
nxp.com/S12MagniV
Page 18

References
For further reference, the following documents are available at nxp.com
• AN4851: Using the High Resolution Timer and PWM in the S12ZVC (AN4851)
• AN4852: Using the SENT Transmitter Module in S12ZVC Devices (AN4852)
Revision history
Revision number Date Substantial changes
0 01/2014 Initial release
1 08/2018 Slide 10 updated
Page 19

Information in this document is provided
solely to enable system and software
implementers to use NXP products. There
are no express or implied copyright licenses
granted hereunder to design or fabricate
any integrated circuits based on the
information in this document. NXP reserves
the right to make changes without further
notice to any products herein.
NXP makes no w arranty, representation, or
guarantee regarding the suitability of its
products for any particular purpose, nor
does NXP assume any liability arising out of
the application or use of any product or
circuit, and specifically disclaims any
and all liability, including without limitation
consequential or incidental damages.
“Typical” parameters that may be provided
in NXP data sheets and/or specifications can
and do vary in different applications,
and actual performance may vary over time.
All operating parameters, including “typicals,”
must be validated for each customer
application by customer’s technical experts.
NXP does not convey any license under
its patent rights nor the rights of others.
NXP sells products pursuant to standard
terms and conditions of sale,
which can be found at the following address:
nxp.com/SalesTermsandConditions
Page 20

For more information, visitnxp.com
NXP, the NXP logo, and CodeWarrior are trademar ks of NXP Semiconductor,
Inc., R eg. U.S. Pat. & Tm. Off. M agniV i s a trademark of NXP Semiconductor,
Inc. All other product or service names are the property of their respective
owners. © 2015 NXP Semiconductor, Inc.
Doc Num ber: S12ZVCEBQSGREV 0 Agile Number: 926-28038 Rev A
G
et Started
Download installation software and documentation under
“Jump Start Your Design” at nxp.com/VLG-MC9S12ZVC.
Support
Visit nxp.com/support for a list of phone
numbers within your region.
Warranty
Visit nxp.com/warranty for complete
warranty information.
 Loading...