

Page 1

CONTENUTO DELLA CONFEZIONE
SCHACHTELINHAL
T
CONTENU DE LA BOÎTE
CONTENIDO DE LA CAJA
BOX CONTENTS
M20
Quick Start Owner’s Manual
PROFESSIONAL DJ MONITORS
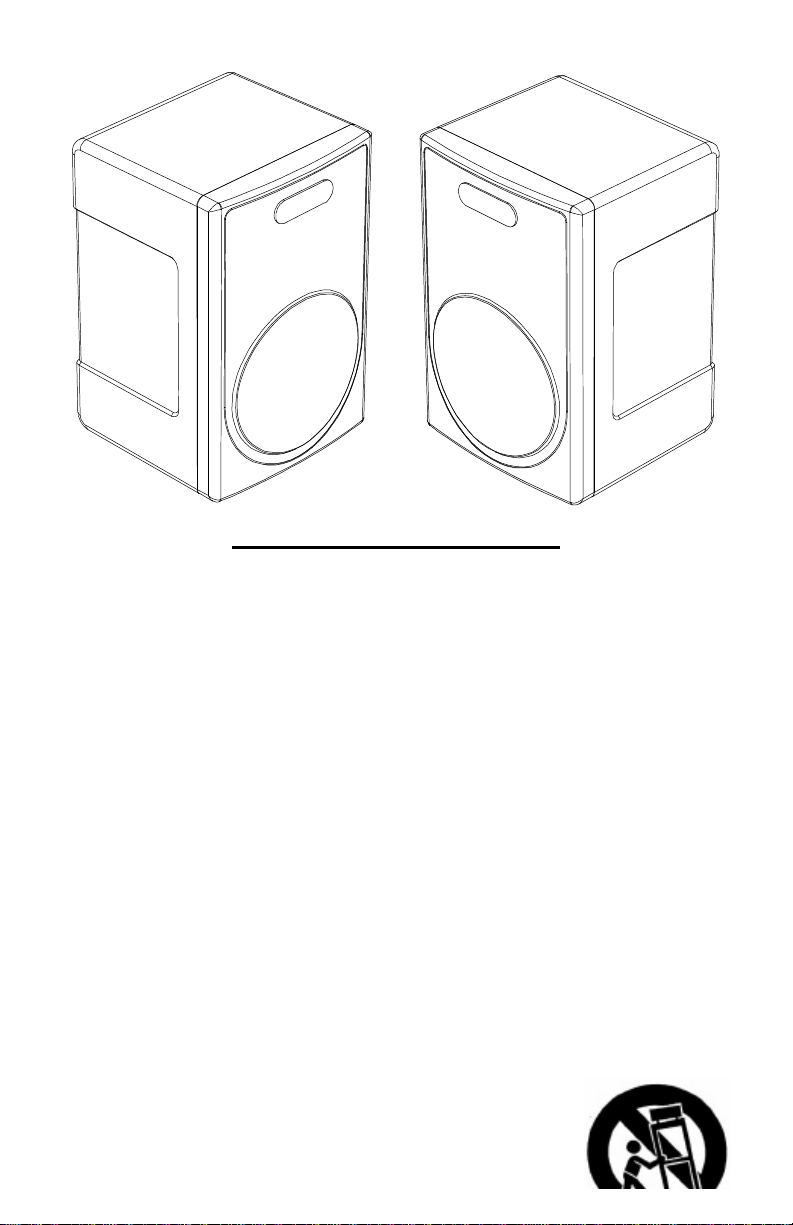
• 2 M20 DJ MONITORS
• 1 CONNECTING WIRE
MONITORES PARA DJ PROFESIONAL
• 2 MONITORES M20 PARA DJ
• 1 CABLE CONECTOR
MONITEURS PROFESSIONNELS POUR DJ
• 2 M20 MONITEURS POUR DJ
• 1 CÂBLE DE CONNEXION
PROFESSIONELLE DJ MONITORE
• 2 DJ MONITORE M20
• 1 CABLE CONNECTOR
DJ MONITOR PROFESSIONALI
• 2 DJ MONITOR M20
• 1 CAVO DI CONNESSIONE
Page 2
SAFETY INSTRUCTIONS
a) Read Instructions - All the safety and operating instructions should be read before this product is
connected and used.
b) Retain Instructions - The safety and operating instructions should be kept for future reference.
c) Heed Warnings - All warnings on this product and in these operating instructions should be
followed.
d) Follow Instructions - All operating and other instructions should be followed.
e) Placement – place the unit in a clean dry location.
f) Water and Moisture - This product should be kept away from direct contact with liquids. The
apparatus shall not be exposed to dripping or splashing and that no objects filled with liquids, such
as vases, shall be placed on the apparatus.
g) Temperature- Avoid placing this product to close to any high heat sources such as radiators. Do
not use this unit at temperatures below 41°F/5°C or higher than 95°F/35°C.
h) Ventilation - The appliance should be situated so that it’s location or position does not interfere
with it’s proper ventilation. For example, the appliance should not be situated on a bed, sofa, rug,
or similar surface that may block the ventilation opening; or, placed in a built-installation, such as
bookcase or cabinet that may impede the flow of air through the ventilation openings.
i) Power Sources - This product should be connected to a power supply only of the type described in
these operating instructions, or as marked on the unit.
j) Power Cord Protection - Power supply cords should be routed so that they are not likely to be
walked upon or pinched by items placed on or against them. When removing the cord from a
power outlet be sure to remove it by holding the plug attachment and not by pulling on the cord.
k) Object and Liquid Entry - Take care that objects do not fall into and that liquids are not spilled into
the inside of the mixer.
l) Cleaning – The appliance should be cleaned only as recommended by the manufacturer. Do not
use chemical solvents to clean the unit.
m) Non-use Periods – The power cord of the appliance should be unplugged from the outlet when left
unused for long periods of time.
n) Damage Requiring Service - Only qualified personnel should service this product. If you have any
questions about service please contact Numark at the number(s) shown on the back cover of this
manual.
o) Grounding or Polarization - Precautions should be taken so that the grounding or polarization
means built into the speaker system is not defeated.
p) Internal/External Voltage Selectors - Internal or external voltage selector
switches, if any, should only be reset and re-equipped with a proper plug
for alternative voltage by a qualified service technician. Do not attempt to
alter this yourself.
Page 3
q) Carts and Stands - The appliance should be used only with a cart or stand that is recommended
insulated “dangerous voltage”
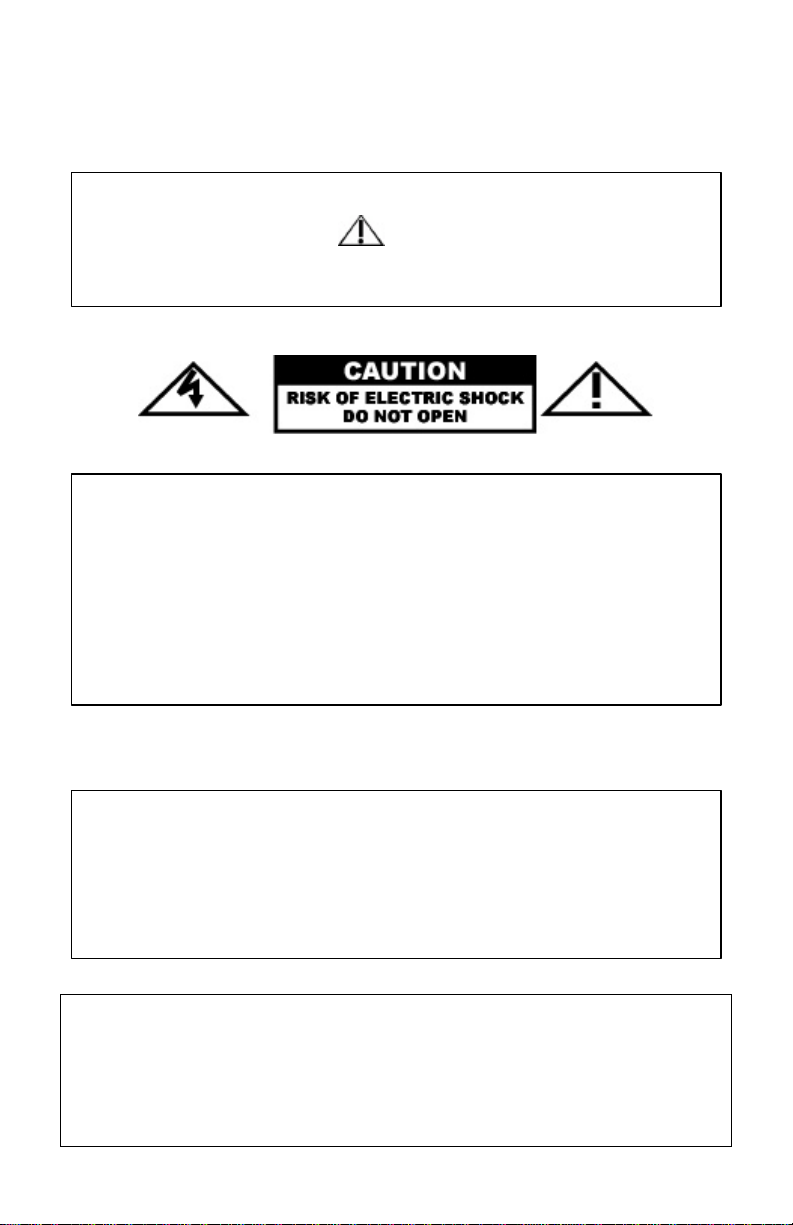
CAUTION
by the manufacturer of the cart or stand. An appliance and cart combination should be moved
with care. Quick stops, excessive force, and uneven surfaces may cause the appliance and cart
combination to overturn.
• Disconnect power cord before servicing
• Replace critical components only with factory parts or
• recommended equivalents
• For AC line powered units - Before returning repaired unit to user, use an ohmmeter to
measure from both AC plug blades to all exposed
SERVICE INSTRUCTIONS
CAUTION: TO REDUCE THE RISK OF ELECTRIC SHOCK DO NOT
REMOVE ANY COVER. NO USER- SERVICEABLE PARTS INSIDE.
REFER SERVICING TO QUALIFIED SERVICE PERSONNEL ONLY.
The lightning flash with arrowhead symbol within the equilateral triangle is
intended to alert the user to the presence of un-
within the product’s enclosure that may be of sufficient magnitude to
constitute a risk of electric shock.
The exclamation point within the equilateral triangle is intended to alert
the user to the presence of important operating and maintenance
WARNING: To reduce the risk of fire or electrical shock, do not expose this appliance to
rain or moisture. Electrical equipment should NEVER be kept or stored in damp
environments.
FOR USA & CANADIAN MODELS ONLY
TO PREVENT ELECTRIC SHOCK DO NOT USE THIS (POLARIZED) PLUG
WITH AN EXTENSION CORD, RECEPTACLE OR OTHER OUTLET UNLESS
THE BLADES CAN BE FULLY INSERTED TO PREVENT BLADE EXPOSURE
NOTICE CONCERNING FCC REGULATIONS
This equipment generates and uses radio frequency energy and may cause interference to radio and
television reception if you do not operate it in strict accordance with the procedures detailed in this
OPERATING MANUAL.
This unit complies with Class B computing device rules in accordance with the specifications in
Sub-part J or Part 15 of the FCC Rules, which are designed to provide reasonable protection against
such interference in a residential installation. There is no guarantee, however, that interference will
not occur in a particular installation. If the unit does cause interference to any radio or television
reception, try to reduce it by one or more of the following means:
Page 4

a) Reposition the other unit and/or its antennae
b) Move this unit
c) Move this unit and the other unit(s) further apart
d) Plug this unit into a different AC outlet so that it is on a different circuit from the other
equipment.
This note is in accordance with Section 15.838 of the FCC Rules.
This unit does not exceed the Class B limits for radio noise emission from digital apparatus set out
in the radio interference regulations of the Canadian Department of Communications.
For 220-volt use in USA, use NEMA style 220-volt plug. For other countries
use proper plug for local outlet.
DOUBLE INSULATED - When servicing use only identical replacement parts
VERY IMPORTANT
Please read this section before connecting these monitors to your
For optimum performance:
• Always make sure that AC power is OFF while making any connections.
• Never use spray cleaners on the control knobs. Residues cause excessive
dirt build-up and this will void your warranty. In normal use, control knobs
can last for many years. If they malfunction (usually because of a dirty or
dusty environment) consult a professional technician.
• Use appropriate cables throughout your system. Do not use excessively
long cables (i.e. over 50ft/14m) Be sure plugs and jacks are tightly mated.
Loose connections can cause hum, noise or intermittents that could easily
damage your speakers. Make the input and output connections with readily
available low-capacitance stereo cables. Quality cable makes a big
difference in audio fidelity and punch. See your ION dealer or an
electronics or audio specialist store if you are not sure which cables to use.
• Never attempt to make any adjustments other than those described in this
manual, or repairs. Take the unit to your dealer or to an authorized ION
Service Center.
• Always remember: “TURN AMPS ON LAST AND OFF FIRST”. Begin with
master faders or volume controls on minimum and the amplifier gain/input
control(s) down. Wait 8 to 10 seconds before turning up the volume. This
prevents transients which may cause severe speaker damage.
• Use restraint when operating controls. Try to move them slowly. Rapid
adjustments could damage equipment due to amplifier clipping.
• Avoid amplifier “clipping” at all costs: this occurs when the red LEDs
(usually on the front panel of most professional power amplifiers) start
flashing. “Clipping” is when the power amplifier is distorting and working
beyond it's limits. Amplifier distortion is THE major cause of speaker
failure.
• To prevent fire or shock hazard, do not expose the unit to rain or moisture.
Never place cans of beer, soda, glasses of water or anything wet near or
on top of the unit!
system
Page 5
• Headphone outputs can be set to levels which can cause damage to your
ears. Use caution
1. Make sure all items listed on the front of this guide are included in the box.
2. READ SAFETY INSTRUCTIONS BEFORE USING THE PRODUCT
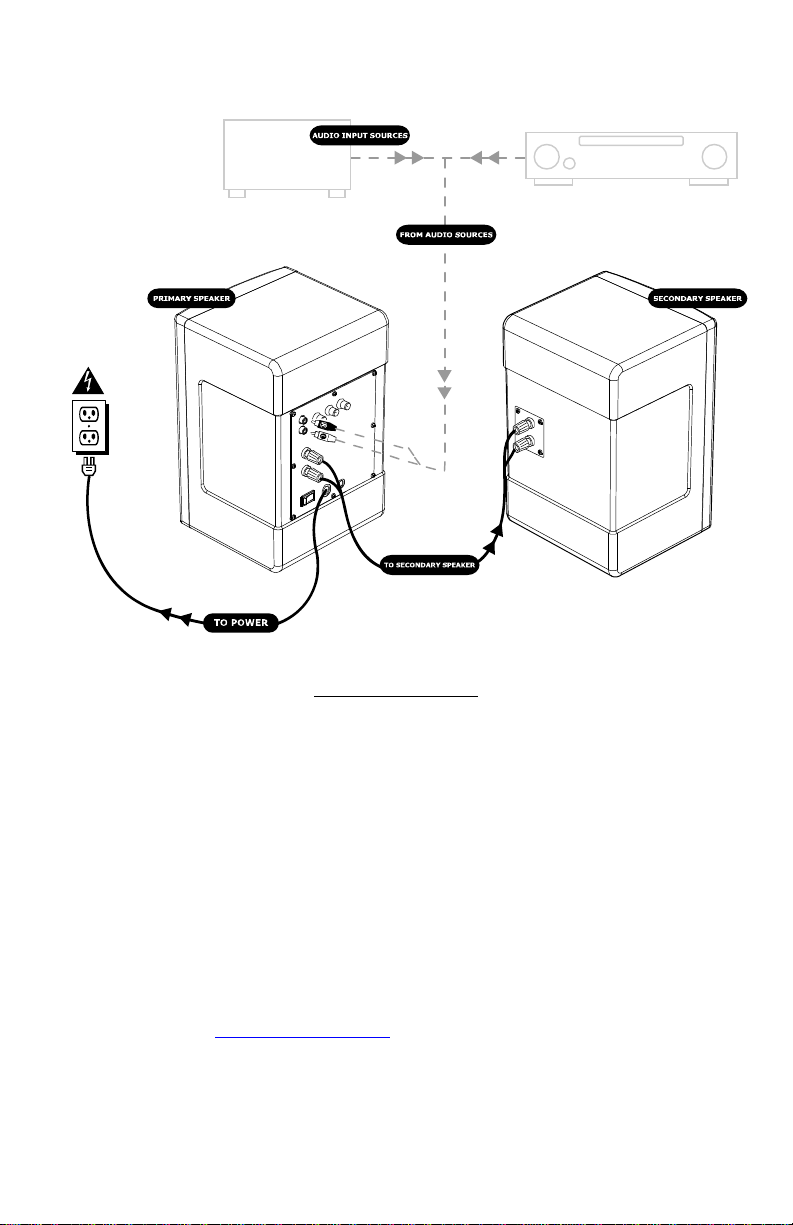
3. Study this setup diagram.
4. Place the speakers in an appropriate position for operation.
5. Make sure all devices are turned off and all volume/gain knobs are set to
“0”.
6. Connect all stereo input sources before turning on the power.
7. Connect the speakers to the power amplifier(s), tape decks, and/or audio
sources.
8. Plug the primary speaker and other powered units into AC power.
9. Switch everything on in the following order.
• audio sources (i.e. CD Players, Turntables or other audio sources)
• any amplifier/output sources
• last, speakers
10. When turning off, always reverse this operation by,
• turning off speakers
• any amplifier/output sources
• last, any audio sources
11. Go to http://www.numark.com for product registration.
QUICK SETUP GUIDE
Page 6

M20 FEATURES
1. Protective Speaker Grill: Protects the speaker and speaker cone from the outside
elements and abuse.
2. 3-Prong Power Cord: Use only in a grounded outlet.
3. On/Off Switch: Turns the speaker power on and off. NOTE: Read the Quick Setup
Guide before and turning on/off this equipment.
4. Fuse Cover: Houses the circuit fuse, which protects this speaker system from power
surges and overloads.
5. Speaker Out Terminals: Output terminals for the secondary speaker.
6. Main Input: RCA jacks for audio input from the main audio source (Amplifier or
other audio source).
7. Gain: This rotary control adjusts the input/volume level.
8. Treble/Bass Controls: These rotary controls adjust the treble (high frequencies)
and the bass (low frequencies) levels.
Page 7

INSTALACIÓN RÁPIDA DEL M20 (ESPAÑOL)
1. Asegúrese de que todos los artículos incluidos al inicio de este manual están incluidos
en la caja.
2. LEA EL FOLLETO DE INSTRUCCIONES DE SEGURIDAD ANTES DE UTILIZAR EL
PRODUCTO.
3. Estudie este diagrama de instalación.
4. Coloque la estación de mezclas en una posición adecuada para su funcionamiento.
5. Asegúrese de que todos los dispositivos están apagados y de que todos los faders y
potenciómetros de ganancia están en posición “cero”.
6. Conecte todas las fuentes de entrada al estéreo como se indica en el diagrama.
7. Conecte los altavoces a los amplificadores de alimentación, unidades de cinta
magnética y/o fuentes de audio
8. Conecte el altavoz principal y otras unidades eléctricas a la fuente de corriente
alterna.
9. Prenda todo en el siguiente orden:
• fuentes de entrada de audio (por ej. giradiscos o reproductores de CD)
• M20
• por último, cualquier amplificador o dispositivo de salida
10. Al apagar, realice siempre esta operación al contrario:
• apague los amplificadores
• M20
• por último, cualquier dispositivo de entrada
11. Visite http://www.numark.com para registrar el producto.
Page 8

CARACTERÍSTICAS DEL M20
1. Parrilla protectora del altavoz: Protege el altavoz y el cono del altavoz contra los
elementos de la intemperie y el mal uso.
2. Cable de alimentación de 3 conectores (dientes): Úselo solamente en un
enchufe conectado a tierra.
3. Interruptor On/Off (Encendido/Apagado): Enciende y apaga el altavoz. NOTA:
Lea la Guía de inicio rápido antes de encender/apagar el equipo.
4. Tapa de fusibles: Cubre el fusible del circuito, el cual protege a este sistema de
altavoces contra la sobretensión y sobrecarga.
5. Terminales de salida de altavoces: Terminales de salida para el altavoz
secundario.
6. Entrada principal: Conectores (jacks) de RCA para la entrada de audio de la fuente
de audio principal (Amplificador u otra fuente de audio).
7. Ganancia: Este control giratorio ajusta el nivel de entrada/volumen.
8. Controles de agudos/graves: Estos mandos giratorios ajustan los niveles de los
agudos (altas frecuencias) y graves (bajas frecuencias).
Page 9

GUIDE D’INSTALLATION SIMPLIFIÉE (FRANÇAIS)
1. Assurez-vous que tous les articles énumérés sur la page couverture de ce guide sont
inclus dans la boîte.
2. LIRE LE LIVRET DES CONSIGNES DE SÉCURITÉ AVANT D’UTILISER LE PRODUIT.
3. Examinez bien le schéma d’installation.
4. Placer la station de mixage M20 dans une position appropriée pour l’utilisation.
5. Assurez-vous que tous les appareils sont hors tension et que tous les atténuateurs et le
gain sont réglés à « zéro ».
6. Connecter toutes les sources d’entrée tel qu’indiqué sur le schéma.
7. Branchez les haut-parleurs à l'amplificateur(s) de puissance, aux lecteurs de cassette
et/ou aux sources audio.
8. Branchez le haut-parleur principal et les autres appareils électriques à une prise de
courant alternatif.
9. Mettre tous les appareils sous tension dans l’ordre suivant :
• sources d’entrée audio (i.e. tourne-disque ou lecteurs de disques compacts)
• M20
• en dernier, tous amplificateurs ou appareils de sortie
10. Pour mettre hors tension, toujours inverser l’opération :
• Éteindre les amplificateurs
• M20
• En dernier, tous les appareils d’entrée
11. Allez à http://www.numark.com pour enregistrer le produit.
Page 10

Caractérisques du M20
1. Grilles de protection : Protège le haut-parleur et le cône diffuseur des éléments
extérieurs et des coups.
2. Câble d’alimentation avec fiche à trois broches : Branchez ce câble uniquement à
une prise avec mise à la terre.
3. Intérrupteur marche-arrêt : La mise sous et hors tension du haut-parleur. NOTE :
Lisez le Guide d’installation rapide avant de mettre ce matériel sous et hors tension.
4. Couvercle de fusible : Abrite le circuit à fusible qui protège le système haut-parleur
des surtensions et des surcharges.
5. Bornes de sortie haut-parleurs : Les bornes de sortie pour les haut-parleurs
secondaires.
6. Entrée principale : Prise RCA pour entrée audio provenant de la source audio
principale (amplificateur ou une autre source audio).
7. Gain : Ce contrôle rotatif ajuste le volume d’entrée.
8. Contrôles Treble/Bass : Ces contrôles rotatifs ajustent le niveau des fréquences
aiguës et graves.
Page 11

M20 SCHNELLAUFBAU (DEUTSCH)
1. Versichern Sie sich, daß alle auf der Vorderseite dieser Anleitung aufgeführten
Gegenstände in der Schachtel enthalten sind.
2. LESEN SIE DIE SICHERHEITSHINWEISE, BEVOR SIE DAS PRODUKT IN BETRIEB
NEHMEN.
3. Sehen Sie sich dieses Aufbaudiagramm genau an.
4. Stellen Sie das M20- Bedienpult an eine für den Betrieb geeignete Stelle.
5. Stellen Sie sicher, daß alle Geräte ausgeschaltet sind und alle Blendregler und Drehknöpfe
auf "null” stehen
6. Schließen Sie alle Stereo-Eingabequellen wie im Diagramm gezeigt an.
7. Verbinden Sie die Lautsprecher mit dem/den Verstärker/n, Kassetten-Decks und/oder
Tonquellen.
8. Schliessen Sie den primären Lautsprecher und andere stromgespeiste Geräte an den
Wechselstromkreis an.
9. Schalten Sie alles in der folgenden Reihenfolge ein:
• Toneingabequellen (z.B. Plattenspieler oder CD-Spieler)
• M20
• zuletzt jegliche Verstärker oder Ausgabegeräte
10. Beim Ausschalten, drehen Sie diese Reihenfolge jeweils um, indem Sie:
• die Verstärker ausschalten
• dann den M20
• zuletzt alle Eingabequellen
11. Besuchen Sie die Webseite http://www.numark.com, um Ihr Produkt zu registrieren.
Page 12

M20 BEDIENELEMENTE
1. Lautsprecherschutzgitter: Schützt den Lautsprecher und den Lautspecherkonus vor
Außeneinwirkungen und Mißbrauch.
2. 3-Stift-Stromkabel: Nur mit geerdeten Anschlüssen zu verwenden.
3. Ein/Aus-Schalter: Schaltet den Lautsprecher ein und aus. HINWEIS: Lesen Sie sich
die Schnellaufbauanleitung vor Ein- und Ausschalten des Gerätes durch.
4. Sicherungsabdeckung: Beinhaltet die elektrische Sicherung, welche das
Lautsprechersystem vor Stromstößen und Überspannungen schützt.
5. Lautsprecherausgabe-Anschlüsse: Ausgabeanschlüsse für den sekundären
Lautsprecher.
6. Hauptanschluß: RCA-Buchsen für Toneingabe der Haupttonquelle (Verstärker oder
andere Tonquelle).
7. Gain: Dieser Drehregler dient zur Einstellung des Eingabe-/Lautstärkepegels.
8. Höhen/Bässe Steuerungen: Diese Drehknöpfe dienen zur Pegeleinstellung der
Höhen (Höhenfrequenzen) und der Bässe (Tiefenfrequenzen).
Page 13

MONTAGGIO RAPIDO M20 (ITALIANO)
1. Verificare che tutti gli elementi elencati sul frontespizio di questo manuale siano
inclusi nella confezione.
2. PRIMA DI UTILIZZARE IL PRODOTTO LEGGERE IL LIBRETTO DELLE
ISTRUZIONI DI SICUREZZA.
3. Esaminare attentamente lo schema di montaggio.
4. Posizionare la console M20 in modo adeguato all’operazione.
4. Assicurarsi che tutti i dispositivi siano spenti e che tutti i fader e le manopole di
guadagno siano a “zero”.
5. Collegare tutti gli ingressi stereo come indicato nello schema.
6. Collegare gli altoparlanti all’amplificatore(i), piatti, e/o sorgenti audio.
7. Inserire l’altoparlante principale e gli altri apparecchi ad alimentazione alla
corrente
CA.
8. Accendere tutto nel seguente ordine:
• sorgenti di ingresso audio (cioè le piastre o i lettori CD)
• il M20
• per ultimi, tutti gli amplificatori o i dispositivi di uscita
9. Al momento dello spegnimento, invertire sempre questa operazione,
• spegnendo gli amplificatori
• il M20
• per ultimi, tutti i dispositivi di ingresso
10. Andare sul sito http://www.numark.com per la registrazione del prodotto.
Page 14

CARATTERISTICHE M20
1. Griglia di Protezione dell’Altoparlante: Protegge l’altoparlante e il cono
dell’altoparlante da elementi estranei e da un eventuale abuso.
2. Cavo di Alimentazione a stella: Utilizzare unicamente con prese dotate di
messa a terra.
3. Interruttore On/Off: Accende e spegne l’alimentazione dell’altoparlante.
NOTA: Leggere la Guida di Utilizzazione Rapida prima di accendere o spegnere
(on/off) l’apparecchio.
4. Coperchio dei Fusibili: Alloggia il fusibile del circuito, che protegge
l’altoparlante da improvvisi sbalzi di tensione e sovraccarichi.
5. Terminali Speaker Out: Terminali di uscita per l’altoparlante secondario.
6. Ingresso Principale: Jack RCA per ingressi audio provenienti dalla sorgente
audio principale (Amplificatore o altra sorgente audio).
7. Gain: Questo comando regola il livello di ingressi/volume.
8. Comandi Treble/Bass: Questi comandi regolano i livelli degli acuti (alte
frequenze) e dei bassi (basse frequenze).
 Loading...