

Page 1
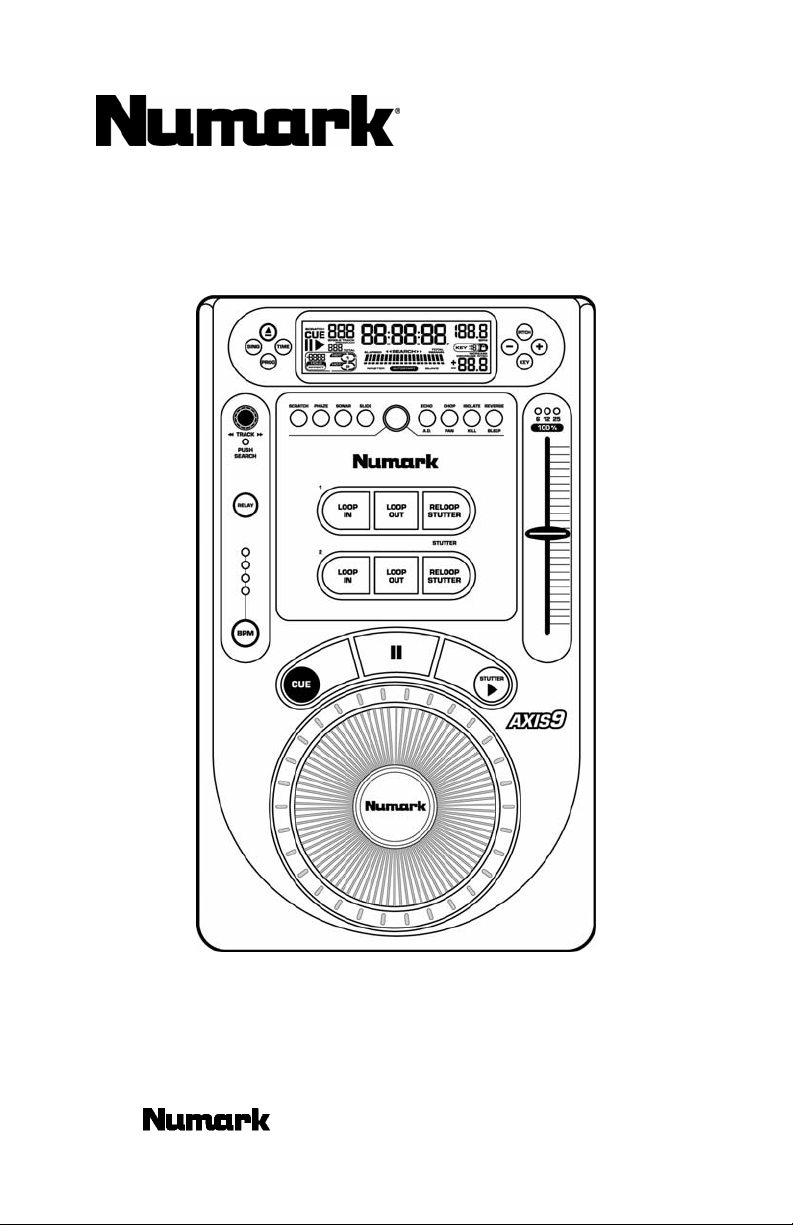
AXIS 8/9
Tabletop CD Players
Reference Guide
©2002 Industries http://www.numark.com
Page 2

TABLE OF CONTENTS
Table of Contents 2
Basic Operation
Play, Pause, Cue, Pitch, General CD control 3
Advanced Operations
Setting Cue Points 5
Saving Cue Points 6
Beatkeeper Operation 7
Adjusting Pitch/ Aligning Beats 8
Looping 9
Stuttering (Hot Starts) 11
Key Lock / Key Change 12
Effects 13
Program Functions (A MUST READ!!!) 17
Relay 18
Fader Start 19
Remote Start 19
Updating your Software 20
-2-
Page 3
BASIC OPERATIONS
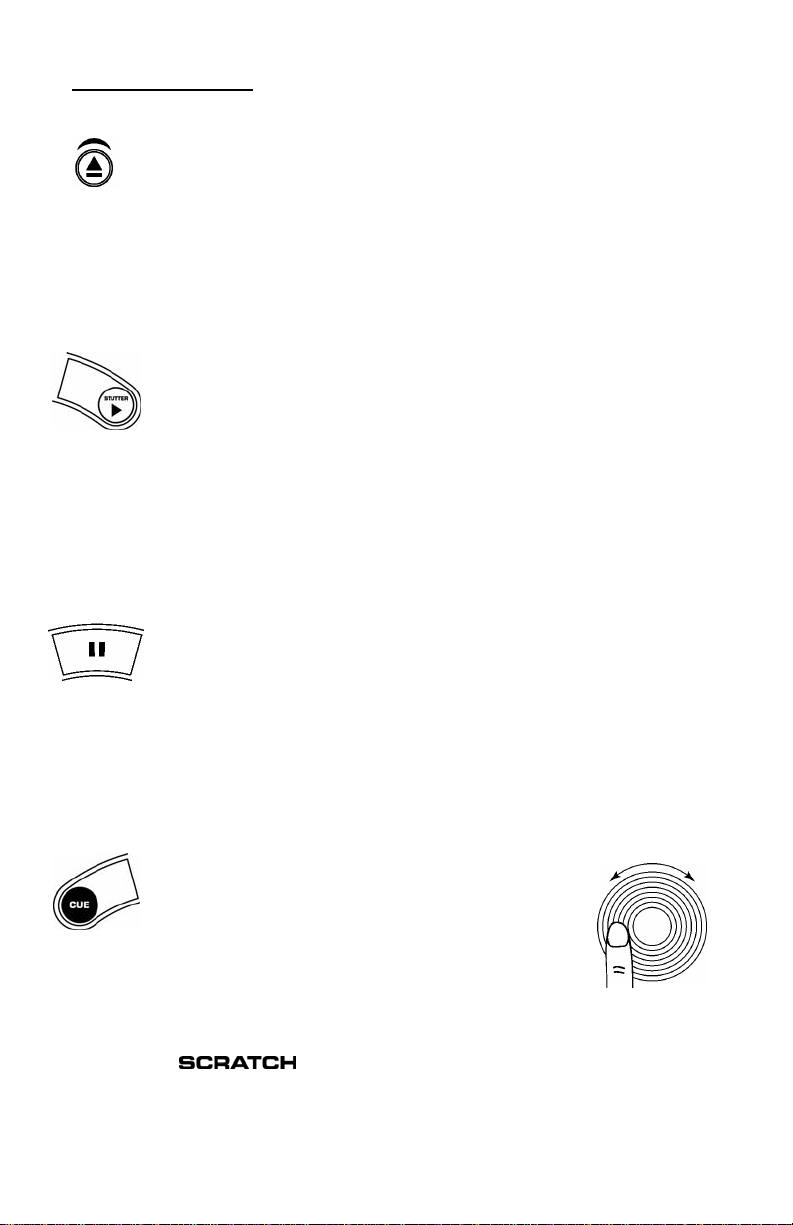
Open/Close: Press to load or eject the disc. The drawer will
automatically close to protect the tray from accidental damage
while open. NOTE: Tray will not open if the disc is in play.
In order to program the automatic close tim e press and hold
“PROG” followed by “OPEN/CLOSE”. The display will indicate
options of 30 seconds, 60 seconds, 120 seconds, and (no) for no
auto close. This setting will be remembered at power down.
Play/Stutter: Starts the music from either the first set cue point or
the last point of pause. By starting from the last pause point
while the unit is paused a new cue point is set. Pressing this
button while the unit is in play restarts the unit from the last cue
point, creating a “stutter” effect.
Startup speed of initial play can be adjusted by pressing “PROG”
followed by “PLAY/STUTTER” and then rotating the wheel until
the desired seconds of startup are shown. Pressing “PROG”
followed by “PLAY/STUTTER” twice will toggle startup between
0 to the desired seconds. This setting will be remembered at
power down.
Pause: Stops the music while in play. Pressing play following this sets
a new cue point. Holding down the button while scratching or
stuttering the music will stop the music at the current position,
allowing you to capture a loop in or cue po int.
Pause speed (BRAKING) can be adjusted, by pressing “PROG”
followed by “PAUSE” and then rotating the wheel until the
desired seconds of startup are shown. Pressing “PROG” followed
by “PAUSE” twice will toggle startup from 0 to the desired
seconds. This setting will be remembered at power down.
Cue: Returns and pauses the music at the last set cue point. The cue
point is the last place in which the un it was paused and then play
was pressed. Pressing a second time allows for
temporary play of this point. You can easily edit
the cue point by turning the wheel. As you
rotate the wheel the music will sound. By
stopping the wheel and pressing play a new
point is set.
The sound during wheel rotation can be adjusted from a smooth
“scratch” sound to the traditional “stutter” sound. To alternate
modes hold “PROG” followed by “CUE”. The display will indicate
will go away when the style of cue is stutter. This setting will be
remembered at power down.
when the scratch sound is active. This indication
-3-
Page 4
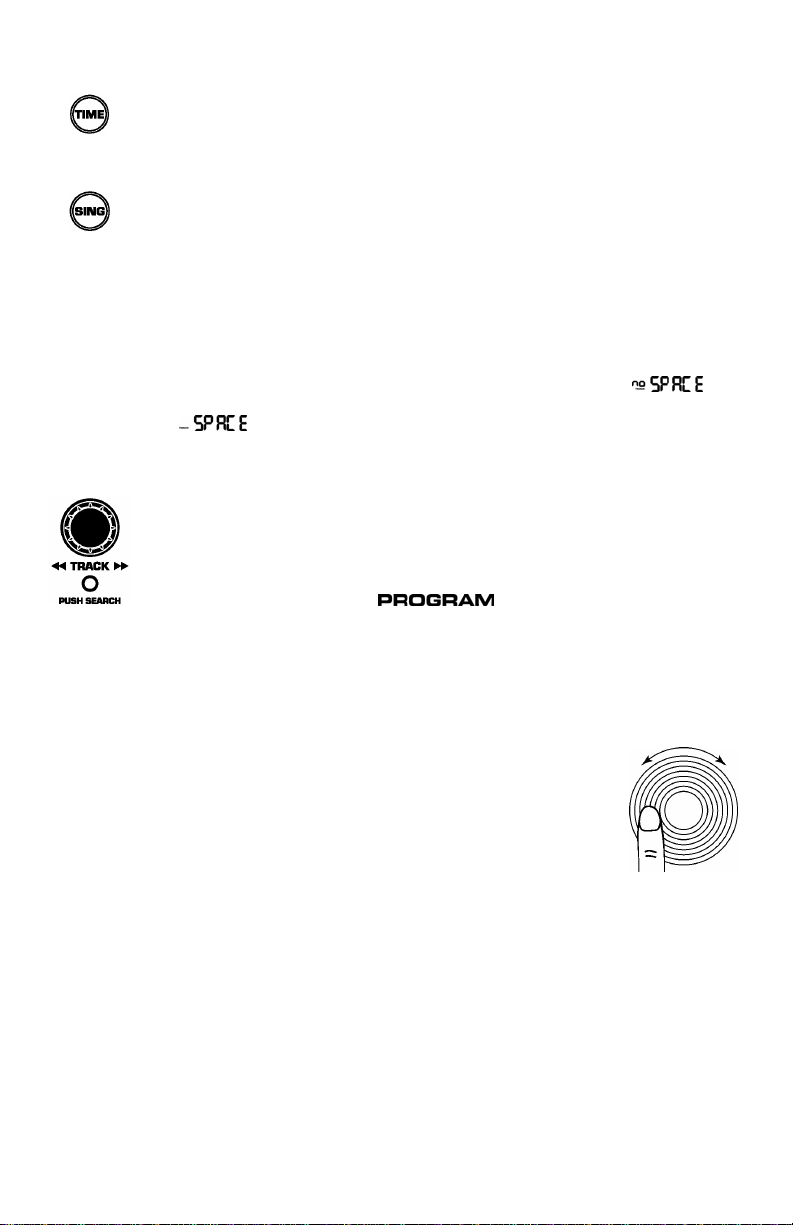
Time: switches the time modes on the display betwe en elapsed
playing time, remaining time on the track and remaining time on
the entire CD. This setting will be remembered at power down.
Single: toggles the unit to play back just one track at a time (single)
or play continuously through all tracks and then start over
repeating the CD infinitely (continuous). This setting will be
remembered at power down.
You have an option for eliminating the dead space at the end of
tracks during continuous mode. The unit already automatically
removes dead space at the beginning of tracks. End of track dead
space elimination is useful if you are playing a CD continuously
and want to eliminate all the gaps between songs. Press
“PROG” followed by “SGL”. The display will indicate “
when the function is set to eliminate space and indicates “
tracks. This setting will be remembered at power down.
Track Selection: Rotate the dial to quickly find the desired track. To
advance by +10, press the knob while rotating.
You can also pre program the desired sequence of songs Track
sequence programming can be done by pressing “PROG” while
the unit is stopped and “
track to be programmed then press “PROG” between selections.
Press “PLAY/STUTTER” to start the track sequence program
playing. To exit and erase program hold “PROG” for more than 2
seconds while the unit is stopped, open the disc tray, or turn off
the power.
Search: Pressing the “TRACK” selector changes the
mode of the jog wheel to a search mode. Search
will remain active while the wheel is being moved
and for 8 seconds after. Moving the wheel clockwise
rapidly moves forward through the music.
Counterclockwise moves backwards through the
music. There are 2 search speeds depending upon
wheel rotation speed.
“ when the unit is left to leave the natural space between
” will light. Select each
”
-4-
Page 5
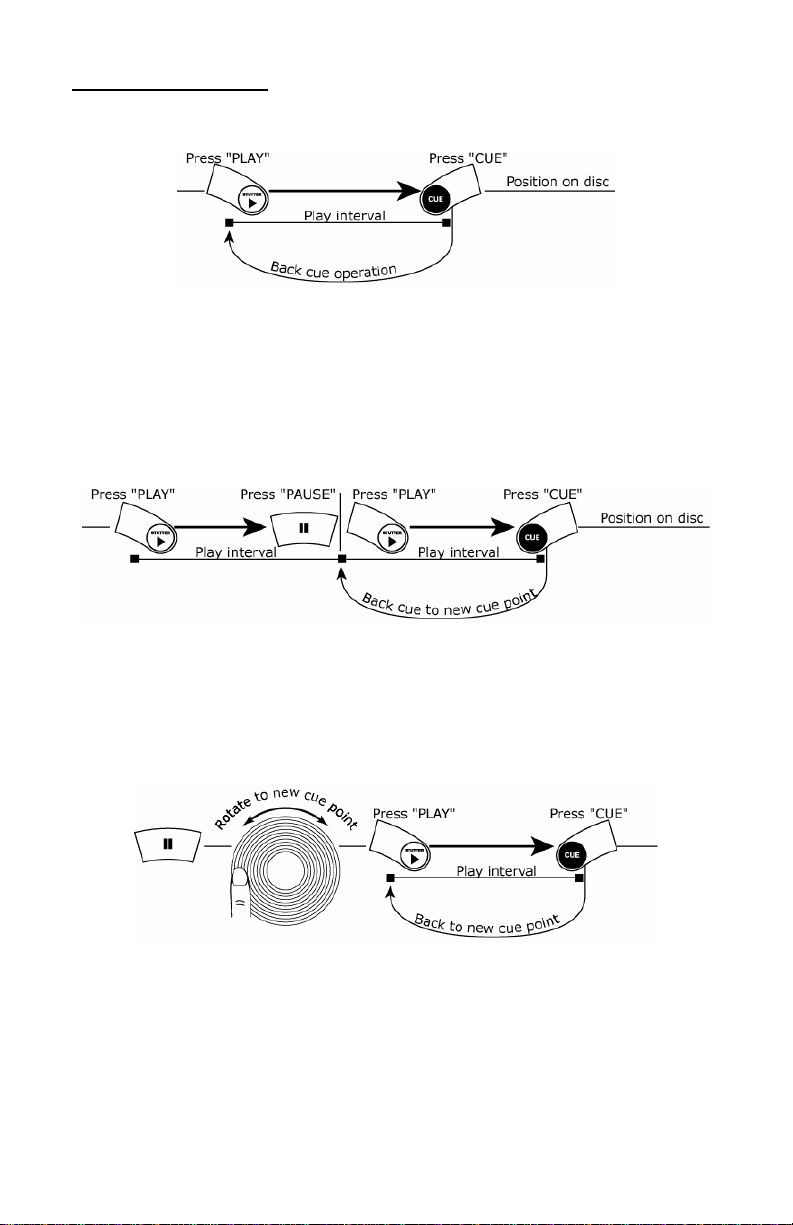
SETTING CUE POINTS
PLAY and CUE
Pressing the “PLAY” button starts the disc. Pressing the “CUE” button will
reset the disc to the last place where the disc was started. This is called the
cue point. By alternately pressing the “PLAY” button and the “CUE” button,
the disc may be returned and played from the cue point any number of times.
This function is called back cue.
PLAY, PAUSE and CUE
When pressing “PLAY” to start then pressing “PAUSE” and then “PLAY”
again, a new cue point will be set. Pressing “CUE” will return to the last pause
position and will be the new cue point.
EDITING CUE POINT
When the jog wheel is turned while paused, a new cue point ca n be located.
By pressing “PLAY” while paused that point will be set. By pressing “PLAY”
again (STUTTER) the point can be checked as desirable.
-5-
Page 6

CUE/LOOP POINT STORAGE AND RECALL
To SAVE Cue and Loop points on the current CD:
• CD should still be in the drawer with cue and loop points set.
• Press “PROG” +
• Cue points are stored and LCD shows "CUE STORE" for 1 second.
To RECALL Cue points on the current CD:
• Press “PROG” +
• If CD player is open, it will automatically close and LCD will show "CUE
FETCH" to indicate cue point loading.
• If CD is already in the player, it will stop the current function and show
"CUE FETCH" to indicate cue point loading ".
• All cue, loop in, and loop out points are restored along with the BPM
and downbeat for immediate access to beatkeeper functions.
• If the CD doesn't have cue points stored on the CD player, then the
LCD will show "NO FETCH.
.
.
-6-
Page 7

THE BEATKEEPER™ III
The AXIS 9 includes the latest Numark patented Beatkeeper™ technology. The
Beatkeeper™ automatically tracks beats based upon a combination of
frequencies and rhythm patterns in the music. It shows BPM in the display and
outputs 4-count (a.k.a. measure) information about the music in a marching
bar graph.
The Bar Graph: Most dance music and rock is set up in 4 beat
increments called measures. Many of the features within the
AXIS-8 use this information for incredible results. It’s important
to understand the basics of how the Beatkeeper works to
effectively take advantage of other advanced features in the unit.
The bottom LED is for the 1
st
beat or “Down Beat”. Typically,
most music starts on the downbeat so the un it sets the first beat
to where the music begins. Occasionally this may not be correct or
you may wish to reset it. To reset the downbeat simply tap the
“BPM” button at the new downbeat location as the music is
playing or while in pause.
BPM: This button is used for resetting the downbeat and also re-
calibrating the BPM. The Beatkeeper is considered by ma ny to be
the most accurate automatic beat counter on the market today,
however, it occasionally may have trouble determining the correct
BPM. This can happen when the music contains complex rhythms,
or if it starts without a beat at all. If you know the BPM showing
in the display is incorrect, or if the beat LEDs are not flashing with
the beat, you have 2 options to reset the Beatkeeper.
1. Tap “BPM” on the downbeat and hold for a second. This will
tell the unit to search and display the nex t BPM it finds.
2. If holding the “BPM” button doesn’t work you can manually
tap “BPM” on the beat and the display will indica te the new
BPM. The BPM will be based upon the average of your last 8
taps. The Beatkeeper will then know which beats in the
music it should be using to determine the co rrect BPM and it
will track them through the song.
Occasionally the unit will be tracking the wrong beat but have the
correct BPM. To reset the downbeat, simply tap the “BPM”
button once on the downbeat.
-7-
Page 8

ADJUSTING PITCH/ALIGNING BEATS
Pitch Button: Activates the pitch slider and adjusts the amount of
control the pitch slider has on the overall speed of mus ic.
Pressing “PITCH” will toggle the slider on and off. Range
adjustments of 6, 12, 25, and 100% can be achieved by
holding down “PITCH” and then pressing
through the range options. This setting will be remembered
at power down.
Pitch Slider: By moving the slider toward “+” the speed of the
music speeds up. By moving toward “-” the speed slows
down. With 100% control the music can be stopped or played
at 2 times original speed. To match the speeds of two units
you can either monitor the music of both units by ear or use
the automatic BPM readout and adjust the pitch to match.
When the tempo of the music of the CD you wish to matc h is
slow compared to the tempo of the other music, move the
slider to the (+) end and match the BPM.
When faster, move the pitch slider to the (-) end. By making
this adjustment the speeds will be matched though the beats
may not yet be aligned.
Pitch Bend: Buttons and Jog Wheel: Allows the user to
temporarily change the speed of the music to align beats.
to cycle
or
When the beats of the music of the CD you wish to match are
fast compared to the tempo of the other music press the
button or rotate the jog wheel counter clockwise (to the left).
or
When PLAYER 2 is behind press the button or rotate the
jog wheel clockwise (to the right). The pitch changes
temporarily while the
the jog wheel is rotated.
The faster you rotate the wheel or the longer you hold the
buttons the more you change the speed. Releasi ng the button
or wheel results in a return to the original pitch.
or buttons are being pressed or
-8-
Page 9

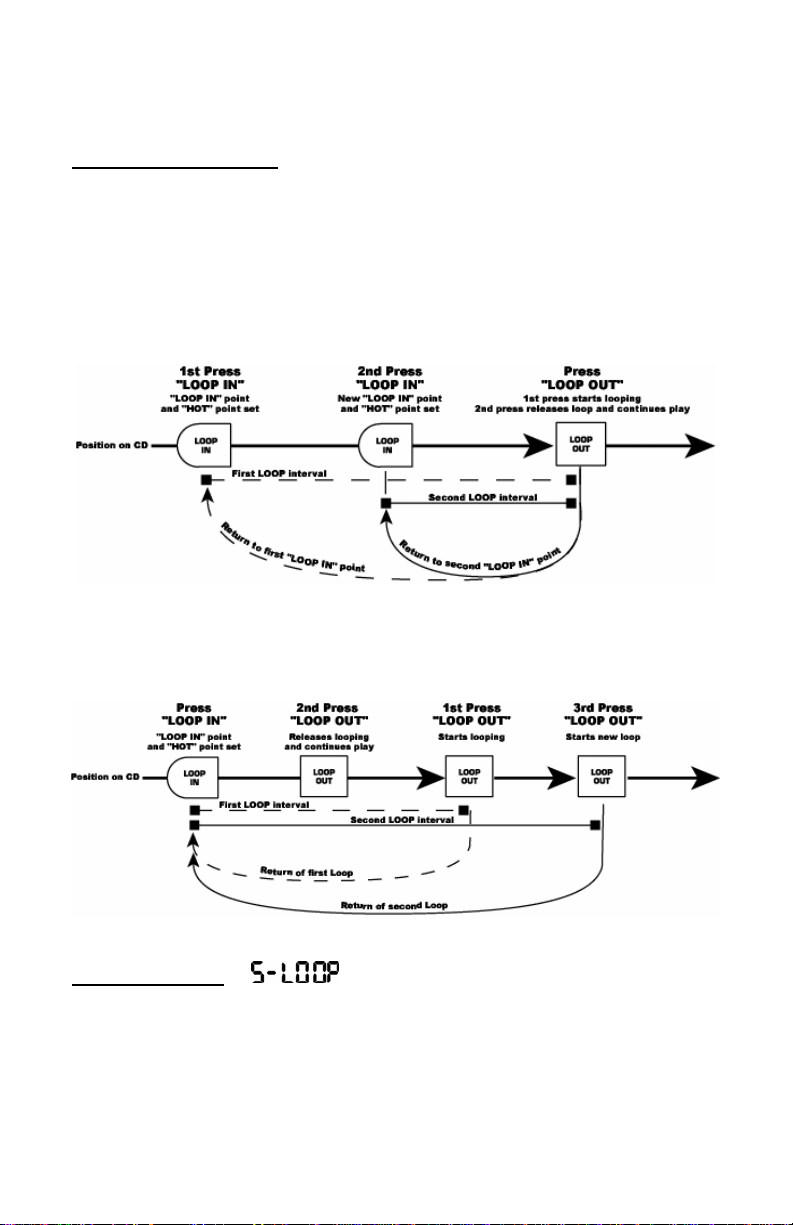
LOOPING OPERATIONS
A loop is any area of a CD that you choose to repeat seamlessly. On the AXIS
8/9 two seamless loops are possible.
LOOP IN: is the point where you wish for the loop to start. The initial
“CUE” or “PLAY” point of the CD is also the default “LOOP IN” point for
both loops or “Hot Start” point. If you wish to set a new “L OOP IN”
point, just press “LOOP IN” while the CD is playing when it reaches
the desired point. The “LOOP IN” button will light indicating a new
loop is set. The “RELOOP/STUTTER” button and
display will also illuminate indicating a point has been set and is
accessible for “STUTTER”. By default the “LOOP IN” also becomes the
“STUTTER” or “HOT START” point.
in the
The CD Player will always remember a new set point as the “LOOP IN”
or “HOT START” point until you actually set a new “LOOP IN” point or
put in a new CD. The new point will be accessible until you remove the
CD from the unit. If you change tracks and you previously set a “Loop
In” on another track, pressing “RELOOP/STUTTER” will jump to that
point.
LOOP OUT: is the end point for a loop. The first time you press “LOOP
OUT” while a CD is in play mode, the “LOOP OUT” LED will turn on
and flash while the song automatically returns to the “LOOP IN” point
with no breaks and continues to play. When the song reaches the
“LOOP OUT” point again it returns to the “LOOP IN” point and
continues to repeat this action. You will notice the “LOOP IN” LED will
also be flashing during loop action. To release or end the LOOP press
“LOOP OUT” a second time and play will continue forward when the
song passes the previously set “LOOP OUT” point. The “LOOP OUT”
LED will be lit solid indicating that the LOOP is now in memory for
“RELOOP” purposes.
-9-
Page 10
Note: The “LOOP OUT” point will be erased if “LOOP IN” is pressed or
a new “CUE” point is set after the “LOOP OUT” point. This is important
because without this point, “RELOOP” will not be possible.
MOVING LOOP POINTS
The “LOOP IN” point can be moved while the music is playing just by
pressing “LOOP IN” at the new desired point. The next time “LOOP OUT”
is reached the CD will return to this new “LOOP IN” point. If “LOOP IN”
is press after the “LOOP OUT” point it will clear the “LOOP OUT” point.
The “LOOP IN” point can also be edited while paused. First hold down “CUE”
then press “LOOP IN” to move to the loop in point. Next rotate the wheel
to search for a new cue point and then press “LOOP IN” again to set the
new point. Check your point by pressing “RELOOP/STUTTER”.
The “LOOP OUT” point can also be moved while a lo op is playing. Press
“LOOP OUT” to release the old “LOOP OUT” point and pressing it again at
the new desired point.
SMART LOOPING
The Beatkeeper and Looping can work together to set perfect loops every
time. In order to work correctly first properly align the Beatkeeper™ on
the beat. To activate smart looping hold down “PROG” followed by
“RELOOP/STUTTER” at the same time. After this has been done all
loop points and stuttering will play perfectly to the beat of the music.
-10-
Page 11

RELOOP/STUTTER:
“RELOOP” is only possible if “LOOP” po ints have been previously set.
The “RELOOP” function automatically re turns the music to the “LOOP
IN” point and will play the loop until it is released with the “LOOP OUT”
button.
2 functions depending on loop setting.
“STUTTER” starts instant play from previously set “Hot” points. Simply
set your stutter (Hot Start) point by follow the directions for setting
loop in because the points are the same. Remember the button
serves also for the reloop function so if a loop out has been set
the unit will also loop until released. This function lets you set 3
Hot Start points. The first is based on the “PLAY” cue point and the
second two are based upon “LOOP IN”. Since the default “LOOP IN”
points are also the initial start point your unit can be “stutter” started
from up to 3 buttons.
Note: The CD Player will always rememb er a new set “Hot” points until you
actually set a new “LOOP IN” point or put in a new CD. The new point will be
accessible until you remove the CD from the unit. If you change tracks and you
previously set a “Loop In” on another track, pressing “RELOOP/STUTTER” will
jump to that point.
-11-
Page 12
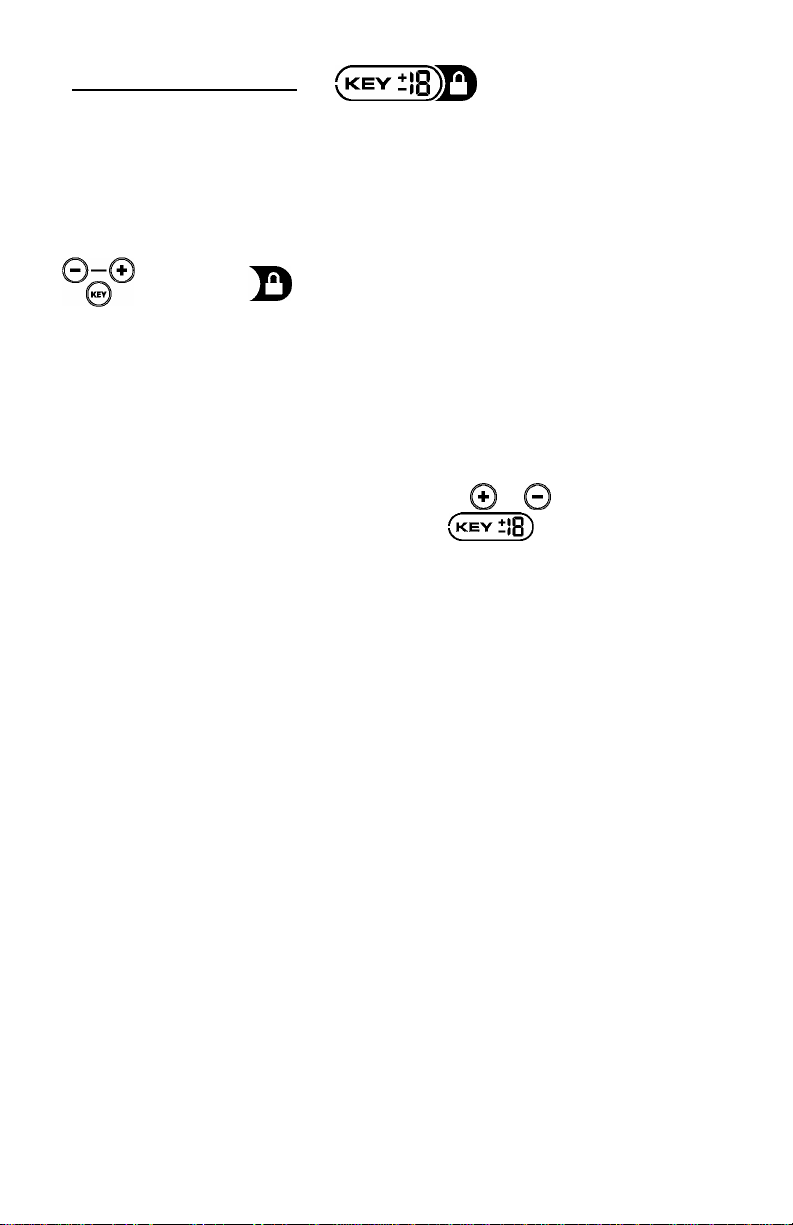
KEY LOCK / KEY CHANGE
The AXIS 9 uses Numark exclusive technology to lock the key of the music
in place at the current pitch position or change it from the current position.
This is different than “master tempo” often found on many modern units
because the key lock to the current pitch position and not automatically set
to the “0” pitch position. By doing this we have allo wed you to activate
this function while playing without changing the key.
Key Lock: Pressing “KEY” holds the key in place. The display will
indicate
(tempo) is changed the current key will continue to play. By
putting the pitch at 100% you can actually slow the music to a
complete stop while playing the last heard tones of the music.
This works very well on vocals and can be a very cool effect. If
the unit has Key Lock active after the track has been changed
and before play is hit, the unit will lock to 0. If Key is
deactivated during pause the unit will reset to match the current
pitch position.
Key Change: Pressing “KEY” and then
key. The display will indicate the
The key can increase to 1 octave above normal key or up to 2
octaves above normal key when the Slide effect is used. The key
can decrease up to 5 octaves below normal key. The display will
limit to 19 half steps above or below no rmal key. If the key is
higher, the display will show "H". If it is lower, the display will
show "L".
to show the current key is locked. If pitch
or will change the
and the new key .
-12-
Page 13

SPECIAL EFFECTS
EFFECT SELECTION (Single Mode): To select and activate an effect tap on
it’s button, it will light to indicate activation and effect will indicate in the
display. To put the effect into hold mode or active alternate effects press the
center button. The button will light indicating the hold has been activated and
hold will show in the display. To release any button, tap it once again.
EFFECT SELECTION (Multiple Effect Mode) (AXIS 9 ONLY
activate/deactivate this mode press PROG + HOLD. The display will indicate
“MULTI” or “NO MULTI”. Press an effect and move the wheel to the desired
parameter. Then press a second effect. The first effect will flash while the
current effect will be solid. To change effects, select the effect you want. To
release, press the “current/solid” effect a second time.
You can use a combined effect value of 4 effect values at the same time.
These values are:
SCRATCH : 0
PHAZE : 2
SONAR : 2
SLIDE : 2
ECHO/A.D. : 1
CHOP/PAN : 1
ISO/KILL : 1
REVERSE/BLEEP : 0
Scratch and Reverse are always possible. If more than the allowed values are
attempted, they will not activate.
EFFECT PARAMETER SELECTION: Once an
effect is active, rotate the wheel (AXIS 8) or inner
touch wheel (AXIS 9) to the desired paramet er
value. The parameter value for most effects will
show in the display above the effect indication.
Note: For all effects except reverse, you will need to
activate pitch bend via the pitch bend buttons. On
the AXIS 9 you can also use the outer non-touch
section of the jog wheel.
EFFECT PARAMETER PRESET: Press on the desired effect and rotate the
wheel (AXIS 8) or inner touch wheel (AXIS 9 ) without releasing the button.
When the desired parameter is reached in the display, release the button. If an
effect is already playing, the new parameter will be heard upon button release.
If the effect is not active, then the next time the effect is activated it will be set
to play from this parameter in “hold” mode
effect such as SLIDE, PAN, or KILL press the hold button first, then hold down
the effect button and spin the wheel as described above.
For example:
• You can have Echo, ISO, Scratch and Sonar
• Phaze and Slide with Reverse
• You can not have Phaze, Sonar, and Echo
. If you wish to preset an alternate
): In order to
-13-
Page 14

EFFECTS:
SCRATCH – This effect makes it possible for the wheel to scratch the music
while it is playing. If you move the wheel back and forth the music will stop
and play slowly as the wheel is moved similar to scratching a record. There are
several modes of operation for this effect. By pressing “PROG” followed by the
scratch button you can toggle between Scratch 1,2,3, and 4. In “Scratch 1” the
unit automatically returns to play when t he wheel is released. In “Scratch 2”,
when the wheel is brought to a stop the music will stop and when you push the
wheel forward the unit will automatically play. In “Scratch 3” the unit
scratches from the current buffer until the unit is released. When released, the
unit jumps ahead to the point where the music would have been, if not
interrupted. This essentially allows a bleep of dirty lyrics through scratch. In
“Scratch 4” the unit scratches from the last set cue point until released. This
allows you to scratch from a set “sample”.
SCRATCH HOLD – This effect works like the above except the music will not
release when the wheel is pushed forward or let go. It is basically the same as
scratching on a powered off turntable. Scratch is similar to working with a
playing turntable, while the Scratch hold is similar to scratching a turntable with
the power off.
PHAZE – Creates an effect on the music similar to the sound of an airplane
taking off. As the wheel is moved the effect is created. If the wheel stops
moving the effect will return to the beginning on it’s own. If the effect is in
“Hold” the effect will stay at the current sound until the effect is released by the
button or hold removed.
SONAR – Creates a metallic hollow effect to create a slightly different sound.
The wheel works a similar way as Phaze.
SLIDE – Smoothly changes the key of the music. In the
key display you will see the key change as the wheel is
moved.
-14-
Page 15

ECHO – this effect adds echo to the music also based upon the Beatkeeper™.
The start parameter is no echo “0”. If you move the wheel to the right the
numbers will go 1-64, 1-32, 1-16, 1-8, 1-4, 1-2, and 1-1 indicating the amount
of echo added to the unit. If you move the wheel to the left you will create
negative or preceding echo. This essentially plays the music before you get to
it. At 1-1 the music will echo 1 full measure or
4 beats of music. If you turn off the effect then
back on again it remembers the last set
parameter.
(Note: a preceding echo requires the unit to play
from buffer memory. If the buffer becomes
unavailable the effect will stop until buffer is
regained.)
A.D. (Artificial-Disseminati on ) – Reduces the bit rate of the music creating
increasing distortion with intensity.
CHOP – This effect works best when the Beatkeeper™ is properly aligned.
Chop breaks up the music by turning the volume on and off based upon the
BPM of the Beatkeeper™. First activation of the effect plays 1/8th note or half
of every beat. In the BPM display will indicate an 1-8 which means one
measure (4 beats) of music has been broken into 8 parts. Rotation of the
wheel to the left decreases the parts to 1-4, 1-2, and 1-1. At 1-1 the music
plays for 4 beats then is silent. Rotating to the right breaks up the music into
1-16, 1-32, 1-64, then smaller increments making for another interesting
effect. When the effect is first activated the
music will play the section then turn off for a
section. This is important because you can
reverse the sections that are off and on by
activating the effect in the other section. If you
deactivate the effect then turn it on again it
remembers the last set parameter.
PAN - This effect also works best when the Beatkeeper™ is properly aligned.
Auto-pan alternates playing right and left audio based upon the BPM of the
Beatkeeper™. First activation of the effect plays alternates on 1/8th notes or
half of every beat. In the BPM display will indicate an 1-8 which means one
measure (4 beats) of music has been broken
into 8 parts. Rotation of the wheel to the left
decreases the parts to 1-4, 1-2, and 1-1.
Rotating to the right makes faster changes of
1-16, 1-32, 1-64, then smaller increments
making for another interesting effect. If you
deactivate the effect then turn it on again it
remembers the last set parameter.
-15-
Page 16

Isolate - This isolation filter lets you play only a specific frequency of the
music. Rotation of the wheel moves the frequency played through the audio
spectrum. If you turn off the
effect then on again it
remembers the last set
parameter.
KILL- This elimination filter lets you play all but a specified frequency. Rotation
of the wheel moves the frequency not played through the audio spectrum. If
you turn off the effect then
on again it remembers the
last set parameter.
Reverse- Plays the music backwards. When the effe ct is activated the music
will play backwards until it is released. There is no limit to the amount of time
you can reverse.
Bleep- The effect activates as soon as the button is pressed. It is a temporary
(forward) reverse function for “bleeping” dirty lyrics or creating interesting
effects. By pressing the button the music plays backwards from buffer until
released or until the buffer runs out
runs out, the audio plays forward form the point where the music would have
been if the button was never
pressed. For example, is the
effect is activated for 5
seconds at 10 seconds into a
song, forward play will
resume at 15 seconds. The
buffer time for this operation
is variable depending upon
the number of loops set and
anti-shock buffer available.
. When the button is release, or the buffer
-16-
Page 17

PROGRAM FUNCTIONS
This button provides several programmable functions depending upon the
combination of buttons used.
Track Sequence Programming - Depress “PROG” while the unit is
stopped and “
programmed then press “PROG” between selections. Press
“PLAY/STUTTER” to start the track sequence program play ing.
To exit and erase program hold “PROG” for more than 2 seconds
while the unit is stopped, open the disc tray, or turn off the
power.
The following functions will work by pressing “PROG” followed by appropriate
function while still holding the program button:
Effect Options - pressing program with an effect button will offer
alternative options to that effect. In the case of the “SCRATCH”
effect the display will toggle between Scratch 1,2,3, and 4. Not all
effects offer options. More information on these options is
available in the effects section o f this manual.
End of track dead space elimination – this will give and option for
eliminating the dead space at the end of tracks. The unit already
automatically removes dead space at the beginning of tracks. End
of track dead space elimination is useful if you are playing a CD
continuously and want to eliminate all the gaps between songs.
The display will indicate “
eliminate space and indicates “
leave the natural space between tracks. This setting will be
remembered at power down.
Cueing Style Selection – this will alternate the jog wheel cue
function from a smooth “scratch” sound to the tradition “stutter”
sound modes during cue operations. The display w ill i ndicate “
will go away when the style of cue is stutter. This setting will be
remembered at power down.
Brake Speed – this allows you to adjust the speed of “PAUSE”, or
braking. Press “PAUSE” then rotate the wheel until the desired
seconds of startup are shown. Pressing “PAUSE” twice will toggle
startup from “
Startup Speed – this allows you to adjust t he startup speed of initial
play. Press “PLAY/STUTTER” then rotate the wheel unt il the
desired seconds of startup are shown. The “STUTTER” funct ion
will not be affected. Pressing “PLAY/STUTTER” twice will toggle
startup between “
PLEASE READ!!!!
” will light. Select each track to be
” when the function is set to
“ when the unit is left to
” when the “scratch” style is active. This indication
” to the desired seconds.
” and the desired seconds.
-17-
Page 18
Relay time – this gives options for the amount of time used for
relaying between tracks on two connected units. Options will
appear to relay immediately after the track (0), with time added
of 1, 2, or 3 seconds (1,2,3), or a reduction of 1,2, or 3 seconds (1,-2,-3). By reducing time the attached CD player will start
playing before the end of a track, creating an automatic segue.
This feature will also work in track sequence program mode;
however, if the units are also in SINGLE mode the same number
of tracks programmed should be the same. Play will stop at the
end of the last track. This setting will be remembered at power
down.
Remote Start – The sets the mode for the “remote” jack on the rear
of the unit. Details can be found in the relay and remote start
sections of this manual.
Automatic door close protection – this option automatically c lo ses
the door at the specified time. The display will indicate 30
seconds, 60 seconds, 120 seconds, and (no) for no auto close.
This setting will be remembered at power down.
Smart Looping – When active the display will indicate “
and all looping and stuttering will follow the beat of the music
based upon the Beatkeeper information.
Sleep Mode – The unit will automatically enter sleep mode after 15
minutes of inactivity. In this mode the unit will still start instantly
from buffer, however, the laser will turn off to extend it’s life. If
this feature is undesirable, then it can be turned off. This setting
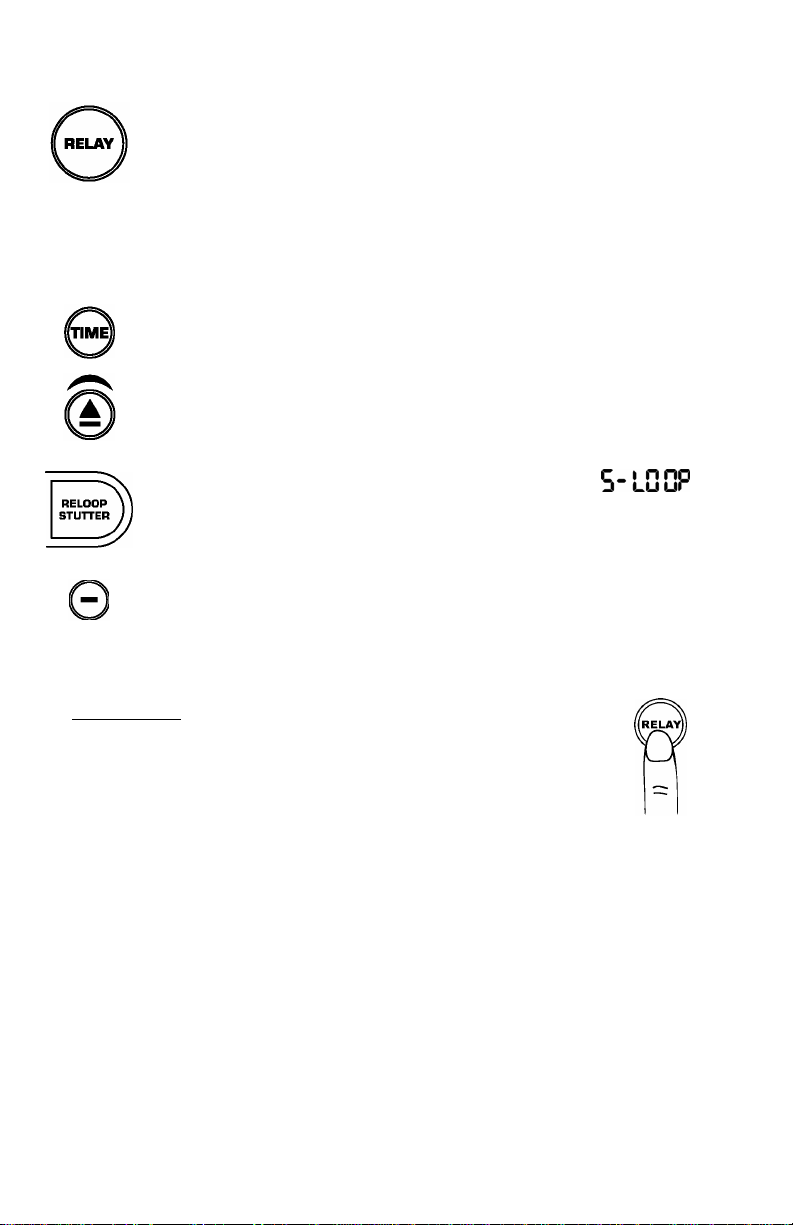
RELAY PLAY
This mode will be operational only when 2 units are connected via
a relay cable.
1. Insert CDs into both of the units.
2. We recommend putting both sides in SINGLE play mode while learning this
function.
3. Press the “RELAY” button on one unit to activate.
4. Press play on the first unit. When that unit has finished play it will send a
signal to the second unit to start play. You wil l see the second unit start
play and the first unit pause and cue to the beginning of the next track.
When unit 2 has completed play unit 1 will start.
Note: The play signal is sent at the end of specified play. If the u nit is in
SINGLE mode the play signal will start the second unit at the end of the track.
If the unit is in CONTINUOUS mode the play signal will be sent at the end of the
full CD. Two CDs will play continuous ly , alternating from unit to unit.
will be remembered at power down.
”
-18-
Page 19

FADER START
Fader Start is achievable by attaching your CD player to a
similarly equipped DJ mixer and setting the rear panel
selection switch to “mixer” m ode.
1. Connect cables between the CD player and your DJ mixer.
2. Press the button or switch on your mixer into fader start mode to activate
the fader start capability.
3. Set the CD player to fader start by hold down “PROG” followed by tapping
“TIME” until the display says
4. Typically if you move the crossfader toward the active channel, the
attached CD player will activate. When it is moved away the unit will cue
or pause depending upon CD player setting.
To select start/stop mode hold the time button for 2 seconds.
• If the display shows
crossfader is moved away.
• If the display shows
crossfader is moved away.
REMOTE SWITCH START
Remote switch start is achievable by attachi ng your CD player to a switch like a
foot switch found in most music shops. Foot switch connector plugs are often
¼” and an adapter to 1/8” will be needed for connection.
1. Connect the remote switch to your CD player.
2. Select the type of foot switch you will use. There are two types of
footswitches that will work with this connector. The first is a typical, ONOFF pushbutton switch and are generally used for switching channels on
guitar amps. Set the CD player to a ON-OFF switch by hold down “PROG”
followed by tapping “TIME” until the display says
switch is a momentary footswitch and is usually used for keyboard sustain
pedals. Set the CD player to a ON-ON switch by hold down “PROG”
followed by tapping “TIME” until the display says
unsure of the style of switch you have, try each position until it works as
desired.
3. Typically if you press the switch once, the attached CD player will activate.
When it is pressed again the unit will cue or pause depending upon CD
player setting.
Note: You can also use a momentary switch in the ON-OFF switch position. In
this case the unit will only play while the switch is depressed. When the button
is release it will either cue or pause depending upon mode.
then the CD will pause when the
then the CD will CUE when the
.
. The second
. If you are
-19-
Page 20

UPGRADING YOUR UNIT
This unit contains the latest software available a t the time of manufacturing.
Our engineering staff will be working hard to constantly improve and offer
additional features in the future. The unit software has been designed to be
easily updateable by you through supplied CD updates from Numark. To
obtain the latest software version contact your local Numark Dealer or visit
us on the web at http://www.numark.com.
In order to check your unit’s software version press “PROG” followed by the
“+” button. Three sets of numbers will appear. 000 00 00 00. Your units
function software will be in the “seconds” set of numbers
For example if R1 05 34 09 appears in the display you have version 34,
revision 1 of the unit code
Audio CD Programming Procedure
Downloading
1. Go to www.numark.com
software.
2. Load update wave file onto a computer with CD Drive capable of
burning Audio CDs.
3. If zipped, using an unzip program on your computer, unzip the file.
Burning
4. Open up your CD burning software to burn an AUDIO CD.
5. Add the software wave file to the audio program contents. It is
advisable to burn the CD at the slowest speed possible to ensure an
accurate burn. If you have a disc-at-once option it should be used.
6. You should set the program to finalize the CD.
7. Burn the disc.
Programming
8. Power up your CD player with no CD inside.
9. Place in the CD in the tray and close the drawer with the O PEN /CLOSE
button. Do not close the drawer by pressing PLAY.
10. Wait until the display indicates time remaining.
11. Press the Play button. In the effect parameter display you will see the
word “test” as the time counts down. The unit will then go through the
cycle again and indicate “busy” while the unit is programmed.
12. At completion of the procedure the CD should eject automatically and
the display will indicate “good”.
Completion
13. Remove the CD and power the unit off for 3 seconds and then on
again.
14. Recalibrate the unit following the “calibration procedure” included with
the software update.
Note: CD burning is dependant upon both the recording equipment and the CD
players ability to read the burned information. On rare occasions the unit may
have difficulty reading the burned CD. If the CD is ejected during the test
procedure, remove the CD and try again. If it fails again try re-burning the CD.
If this doesn’t work, contact Numark service at 401-658-3131 or
techsupport@numark.com for a free upgrade CD.
and download the latest version of the unit
-20-
 Loading...