

NorthStar NS15781520 Quick Start Manual
PART NO. NS15781520
NorthStar 4000PSI Cold Water
Petrol Pressure Washer
THESE INSTRUCTIONS ARE TO BE USED AS A GUIDE ONLY AND ARE NOT INTENDED TO REPLACE THE FULL INSTRUCTION MANUAL PROVIDED WITH YOUR PRODUCT.
ALWAYS READ THE INSTRUCTION MANUAL FOR FULL DETAILS RELATING TO SAFETY INSTRUCTIONS, ASSEMBLY, OPERATION AND MAINTENANCE OF YOUR PRODUCT.
ALWAYS MAKE SURE YOUR PRESSURE WASHER IS ON STABLE LEVEL GROUND BEFORE CHECKING OIL LEVELS.
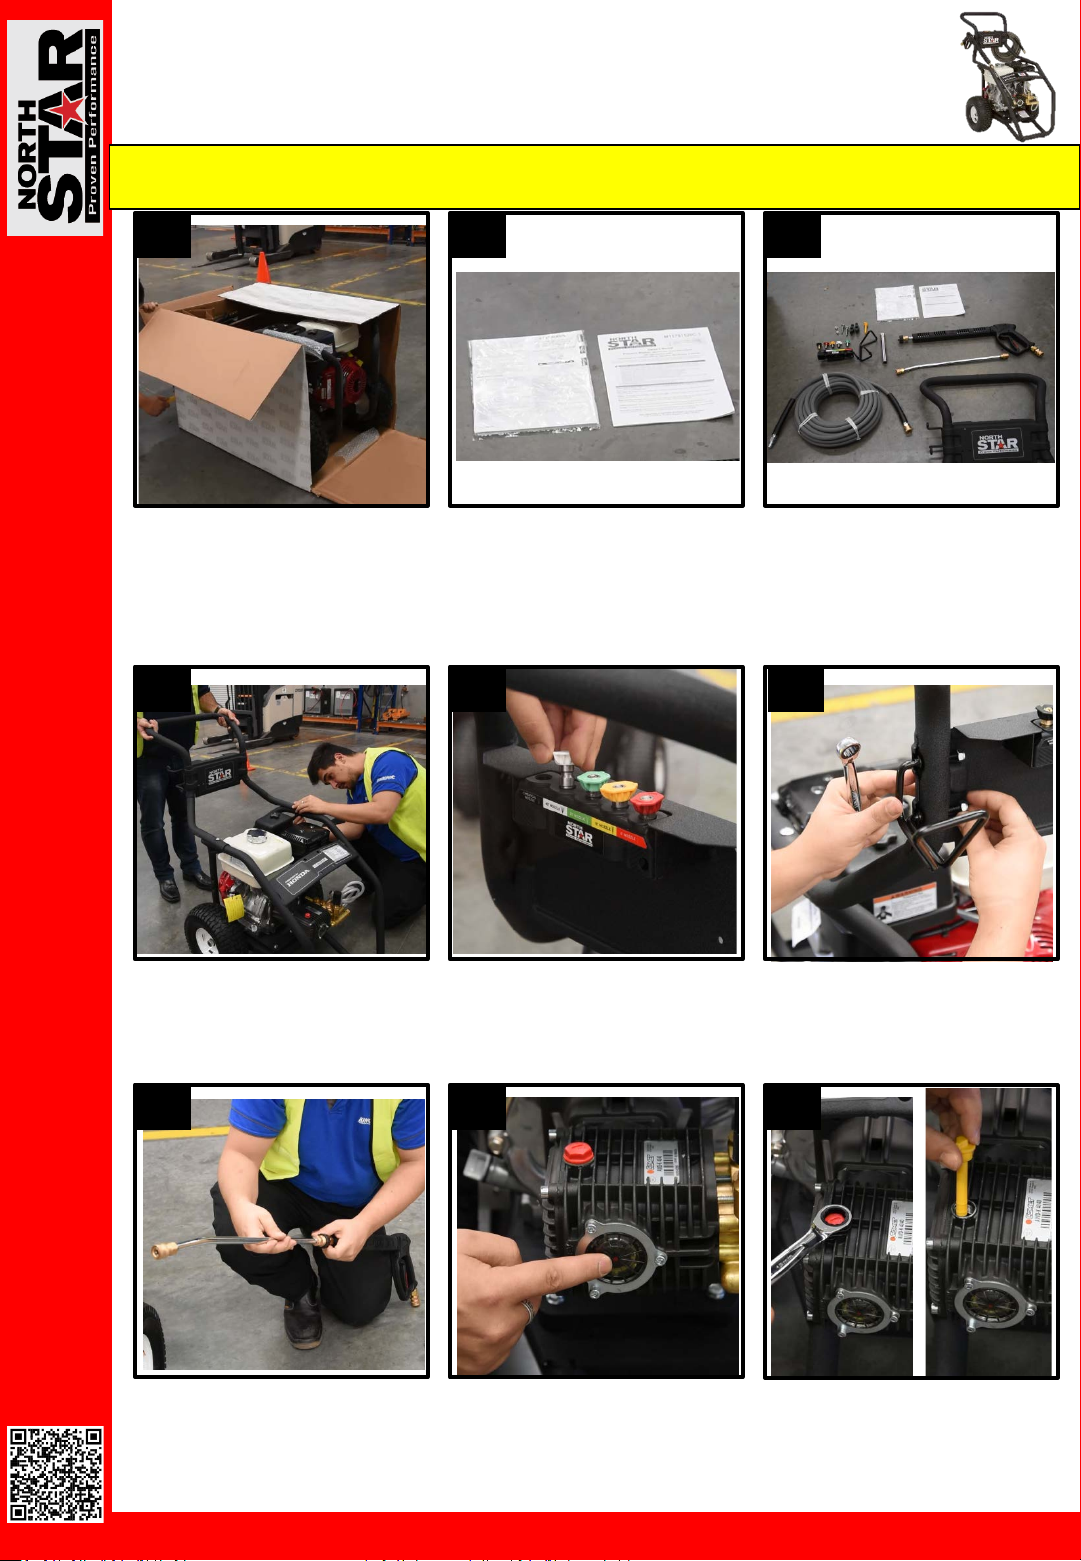
1 2 3
Fully unpack the contents of the
pressure washer and lay out all
accessories .
4
Assemble the handle using the bolts
and wing nuts supplied. Tighten as
required.
Remove the instruction manuals and
read all safety & user instructions
carefully.
Note: There are two separate
instruction manuals. One for the
motor & one for the pressure washer.
5
Slide the nozzle holder belt clip
holder into the rear of the handle
frame, and then insert all of the
supplied nozzles into the rubber
retaining rings.
Remove all product components &
review the instruction manual to
confirm all components have been
supplied with the product.
6
Insert the hose holder bracket through
the allocated holes in the handle, then
tighten the supplied nuts with a 13mm
spanner.
7
8
9
QUICK START GUIDE
SCAN THE QR CODE WITH YOUR MOBILE
DEVICE TO VIEW THE FULL SET UP &
Attach the quick connect lance to the
OPERATION VIDEO FOR THIS ITEM.
gun assembly & ensure you tighten
the connection.
Have questions relating to assembly or operation of your product, call KINCROME on 1300 657 528 Page 1/2
Check and verify the pressure pumps oil
level by visually inspecting the pumps oil
level sight glass. Verify that the oil level
is at least ½ way up the sight glass. If
low, top up with SAE 30 oil (not
supplied)
Using an 18mm spanner, undo &
remove the RED pressure pump travel
plug from the top of the pressure
washers pump. Replace the RED travel
plug with the YELLOW breather/oil
dipstick plug
PART NO. NS15781520
NorthStar 4000PSI Cold Water
Petrol Pressure Washer
THESE INSTRUCTIONS ARE TO BE USED AS A GUIDE ONLY AND ARE NOT INTENDED TO REPLACE THE FULL INSTRUCTION MANUAL PROVIDED WITH YOUR PRODUCT.
ALWAYS READ THE INSTRUCTION MANUAL FOR FULL DETAILS RELATING TO SAFETY INSTRUCTIONS, ASSEMBLY, OPERATION AND MAINTENANCE OF YOUR PRODUCT.
ALWAYS MAKE SURE YOUR PRESSURE WASHER IS ON STABLE LEVEL GROUND BEFORE CHECKING OIL LEVELS.
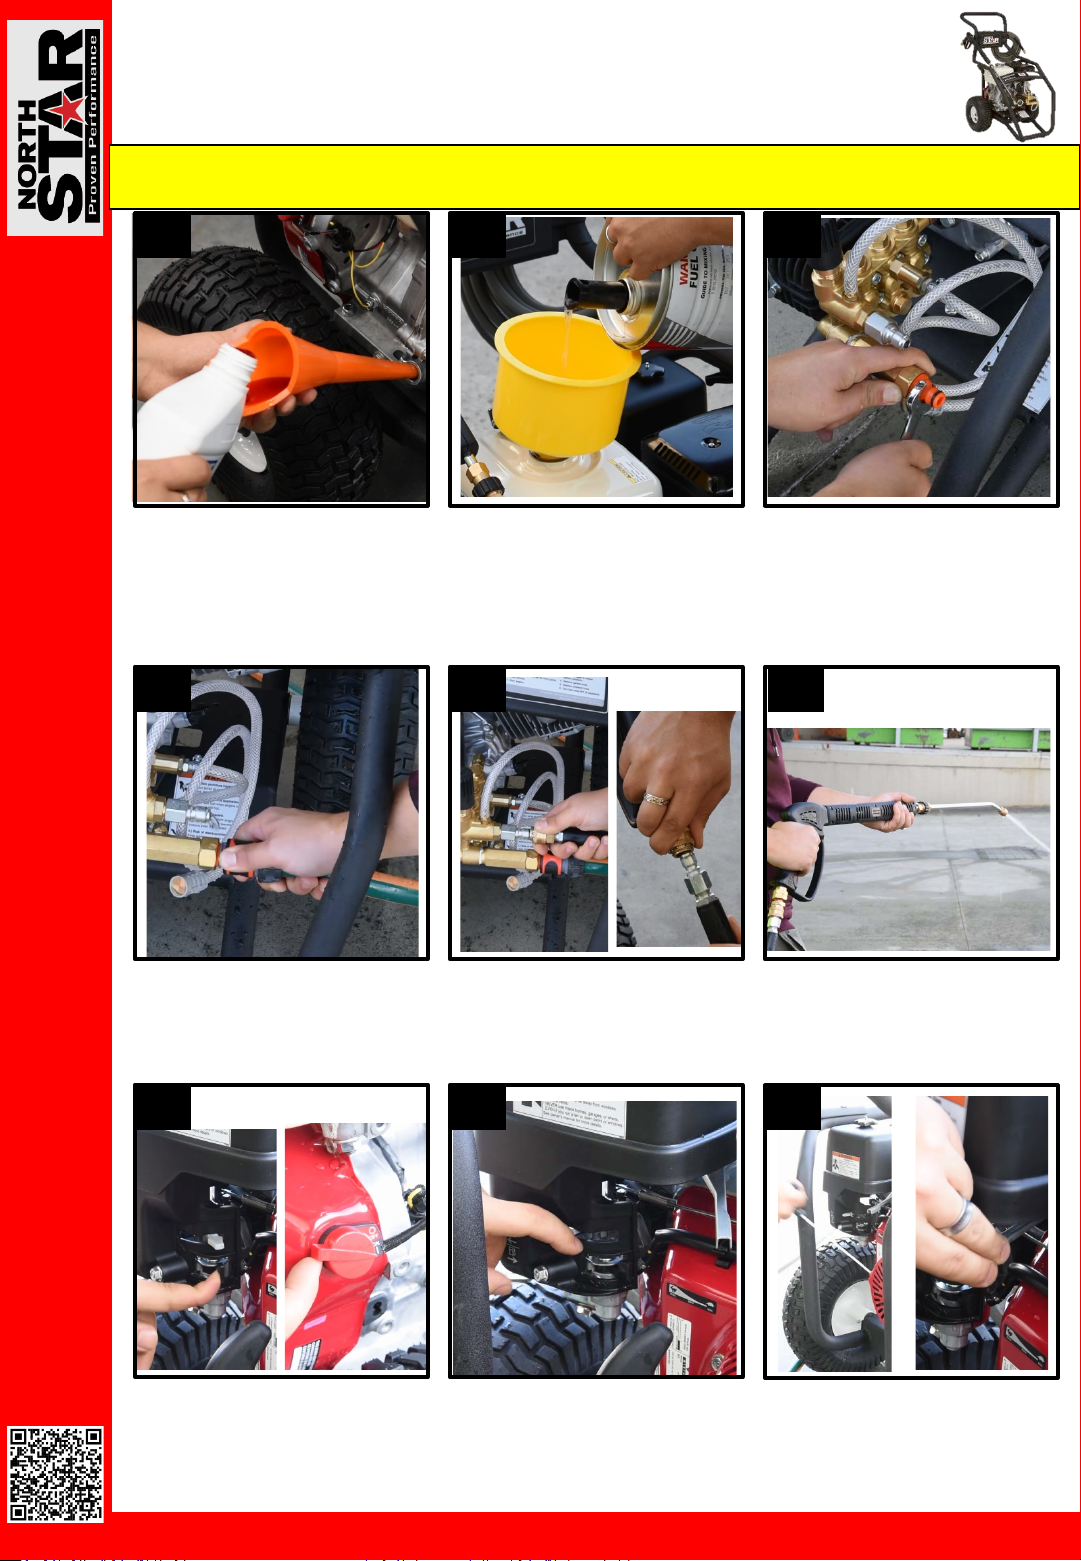
11 12 13
Using a funnel, empty the entire
contents of the 2 bottles of engine oil
supplied with the product into the
motor crankcase, through the
dipstick hole. Check the oil level
before use.
14
Connect your 18mm water supply
hose onto the Orange tap adaptor
fitting.
Fill the petrol tank located on the top
of the pressure washer with Unleaded
Petrol.
15
Attach the high pressure hose onto the
pressure washers outlet connector,
then connect the other end of the high
pressure hose onto the pressure gun
connector. Turn ON your water supply.
Install the supplied Orange 18mm
American BSP tap adaptor into the
water inlet.
DO NOT overtighten the tap adaptor
as this could cause damage to the
water inlet fittings .
16
Squeeze the trigger of the pressure gun to
purge all air from within the pressure
washers pump, hoses & fittings. Continue
until a constant stream of water is visible,
insert nozzle suitable for your application.
17
18
19
QUICK START GUIDE
SCAN THE QR CODE WITH YOUR MOBILE
DEVICE TO VIEW THE FULL SET UP &
Turn fuel valve to the ON position,
OPERATION VIDEO FOR THIS ITEM.
rotate start switch located on the
side of the motor body to the ON
position
Have questions relating to assembly or operation of your product, call KINCROME on 1300 657 528 Page 2/2
If the engine is cold, slide the choke
lever fully to the left (closed choke) if
the engine has already been run or is
warm then you may not need to move
the choke lever prior to starting.
Starting the motor can be achieved by
pulling the recoil starter handle repetitively
until the engine has started. Once started
move the choke lever to the open position.
Slide the metal throttle lever to the Left to
increase the motors power.
 Loading...