

Page 1

C3050 REV2 Portable Telephone (PCI)
User Guide
c
Page 2

CC
CC
ontents
Getting started 1
Using your personal directory 8
Using your headset 12
Customizing your portable 14
Extra features 19
Making your portable secure 26
All about batteries and recharging 28
Accessories 31
Safety information 32
Technical specifications 35
Caring for your portable 37
i
Page 3

ii
Page 4
GG
GG
etting started
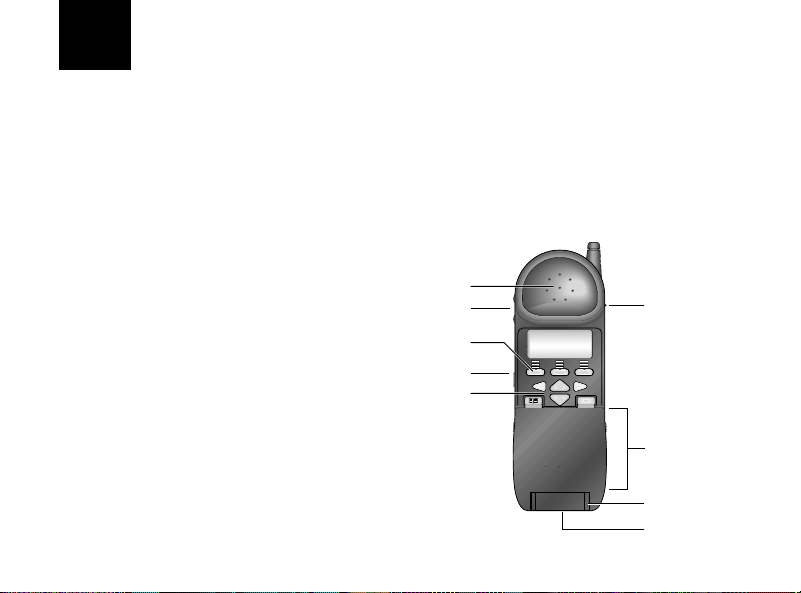
The parts of your
portable
Before you use your portable for the first time, see “Safety
information” on page 32. Y ou should also charge its battery
pack overnight in the rear charger slot (see “All about
batteries and recharging” on page 28).
speaker
volume switch
softkeys
mute
navigation
keys
Menu
COMPANION
ringer
control
switch
keypad
under
flap
hinge
headset jack
1
Page 5
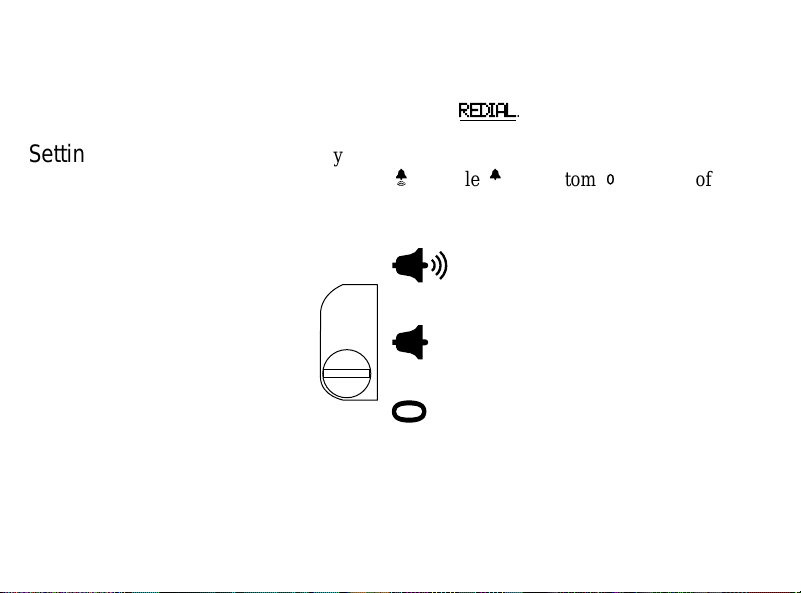
Note:
The three buttons directly below your portable’s display are
called softkeys. Their labels appear on the display with an underline
above the button to which they are assigned. A softkey label is shown
like this in this user guide:
REDIAL
.
Setting your portable
to ring
2
To set your portable to one of the three ringing options,
select the top (
»
), middle («), or bottom (‚) position of the
control switch.
top: portable on, rings normally
middle: portable on, rings once or
not at all, (see "Discrete Ring" on
page 13)
bottom: no incoming calls, but
outgoing calls can be made if the
flap is open
Page 6
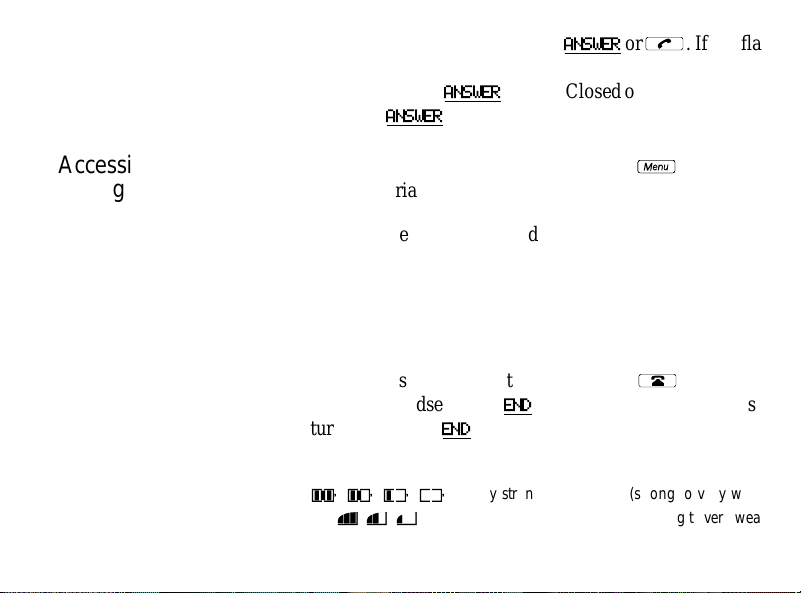
Answering a call
If the flap is already open, press
is closed, open it. If the flap is closed and the headset is
connected, press
on, press
ANSWER
or open the flap.
ANSWER
. If Flap Closed operation is turned
ANSWER
or
Ò
. If the flap
Accessing features
during a call
Making a call
Ending a call
Portable Icons
To access the menu while on a call, press
the appropriate softkey.
Dial the telephone number directly or:
• dial from your directory (see “Using your personal
directory” on page 8)
• predial (see “Customizing your portable” on page 14)
• press a customized softkey (see “Customizing softkeys”
on page 23)
If the flap is open, close the flap or press
using the headset, press
turned on, press
/, ?, ÷, ¿
π, Ú, ∏
END
END
. If Flap Closed operation is
.
Battery strength indicators (strong to very weak)
Radio signal strength indicator (strong to very weak)
Ï
, then select
´
. If you are
3
Page 7
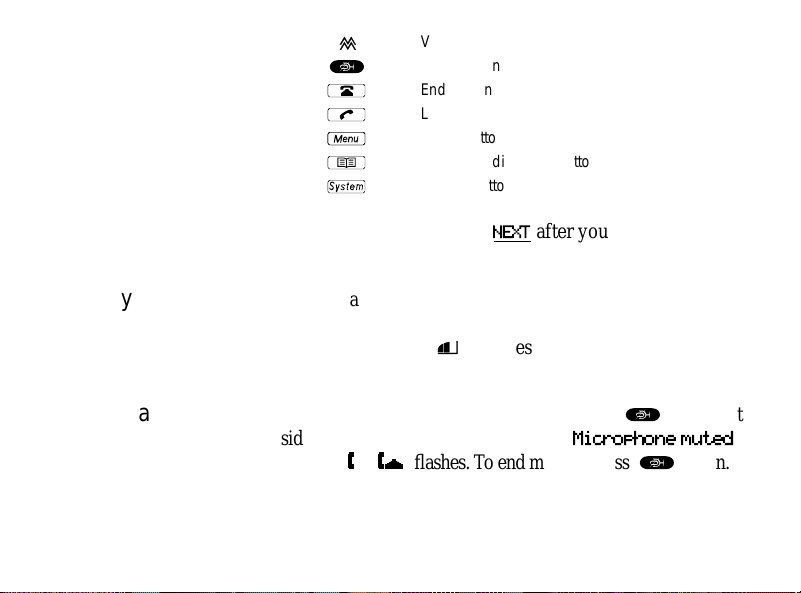
◊
µ
´
Ò
Ï
Î
Í
Vibrator indicator
Mute button
End button
Line button
Menu button
Telephone directory button
System button
Making two calls in a
row
Keeping your
connection
Muting a call
4
Leave the flap open, press
NEXT
after your first call. The
portable maintains its radio connection for another call.
To maintain your call, stay in the radio coverage area. If you
have problems with your connection, retrace your steps. The
signal strength icon
Ú
indicates if the signal is becoming
stronger or weaker.
To prevent your caller from hearing you, press
side of the portable. The display shows
and then ] in [ flashes. To end muting, press
µ
on the left
Microphone muted
µ
again.
Page 8
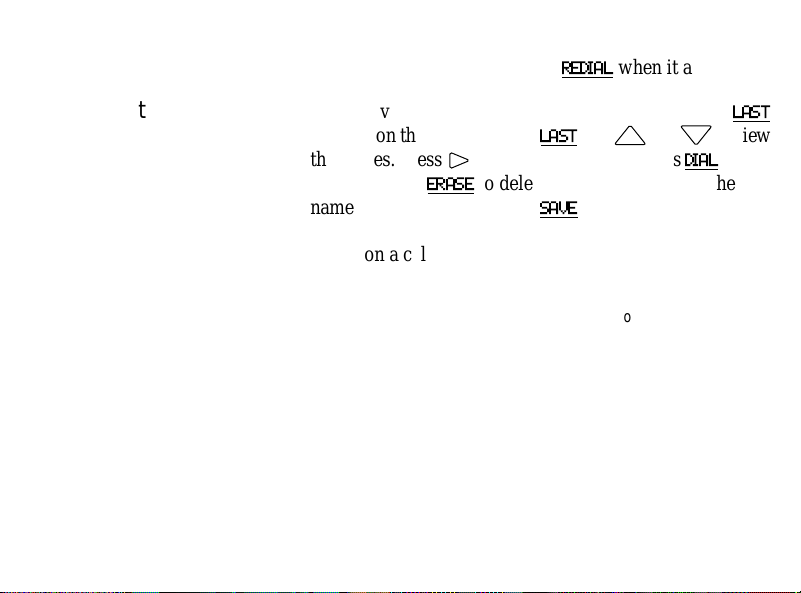
Redialing last
number
Your portable is set up so that you can redial the last
number you dialed by pressing
REDIAL
when it appears.
Dialing the last caller
Adjusting the
speaker volume
You can view the names of the last two callers when
appears on the display. Press
the names. Press ˘to view the number . Press
the number or
to delete the number. To add the
ERASE
name to the Directory, press
LAST
SAVE
and
’ or ”
.
to view
DIAL
While on a call, use the volume control to adjust the
volume of the other party’s voice.
Note:
In a noisy environment, it’ s a good idea to use the portable with
a headset (see “Using your headset” on page 12).
LAST
to call
5
Page 9
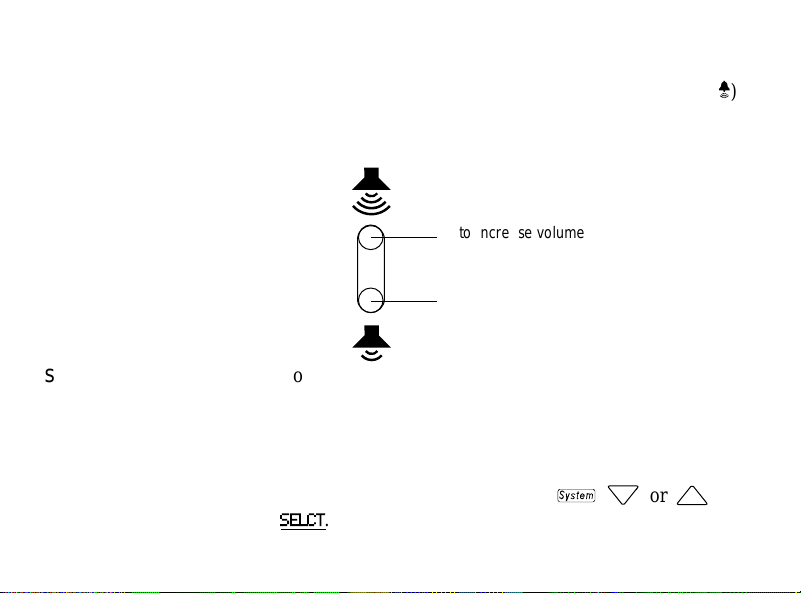
Adjusting the ringing
volume
When the phone is ringing you can adjust the ringing
volume with the volume switch. The ringing volume can
only be adjusted when the control switch is in the top (
position. When the phone is not ringing, use the Menu to
access the volume adjustment levels.
to increase volume, press here
to reduce volume, press here
»
)
Using more than one
system
6
Y ou can use your portable with up to six Companion
systems. For example, if you work at two locations, it’s
possible to register your C3050 at both locations, even
though they use separate systems. When you open the flap,
the display shows the name of the currently selected
system. To change systems, press
.
SELCT
Í, ” or ’,
Page 10
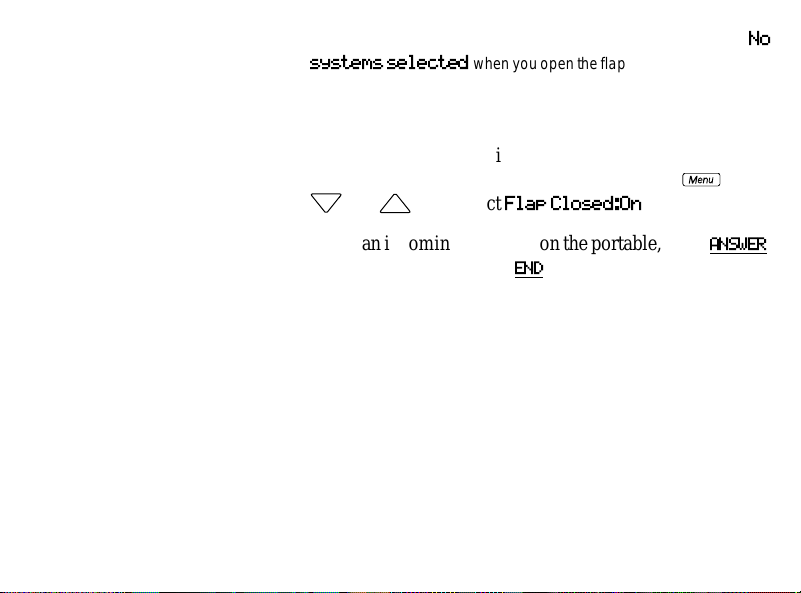
Note:
If your portable has not been registered, the display shows
systems selected
to more systems or are having trouble with your registration, call the
contact for your system.
when you open the flap. If you wish to register
No
Flap closed
operation
You can make and receive calls with the portable’s flap
closed. To enable Flap closed operation, press
” or ’
, and select
Flap Closed:On
When an incoming call rings on the portable, press
T o terminate a call, press
END
.
Ï
, then
.
ANSWER
.
7
Page 11
UU
UU
sing your personal directory
Your portable has an alphabetical directory that allows you
to store up to 50 entries for telephone numbers, feature
codes, or both.
Moving through the
directory
Storing directory
entries
8
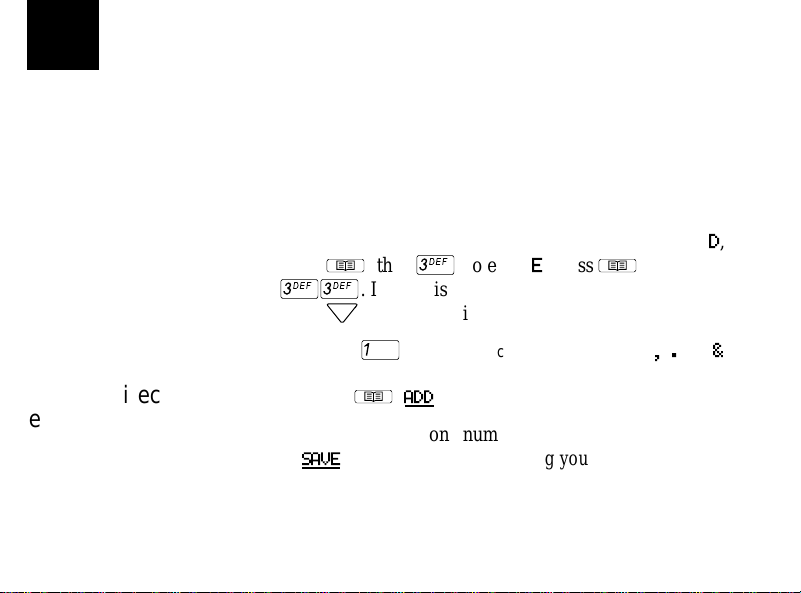
Once you have stored directory entries, you can move
through them quickly by pressing the first letter of the
entry you want. For example to look at listings under
press
Î
, then
£
; to enter E, press
££
press ” to keep looking.
Note: Use
1. Press
2. Enter the telephone number or feature code, then press
. If there is more than one entry under a letter,
¡
to choose special characters such as ,, . and &.
Î, ADD
SAVE
. (See the applicable Using your C3050 Portable
feature reference card for more information about
feature codes.)
.
Î
, then
D
,
Page 12
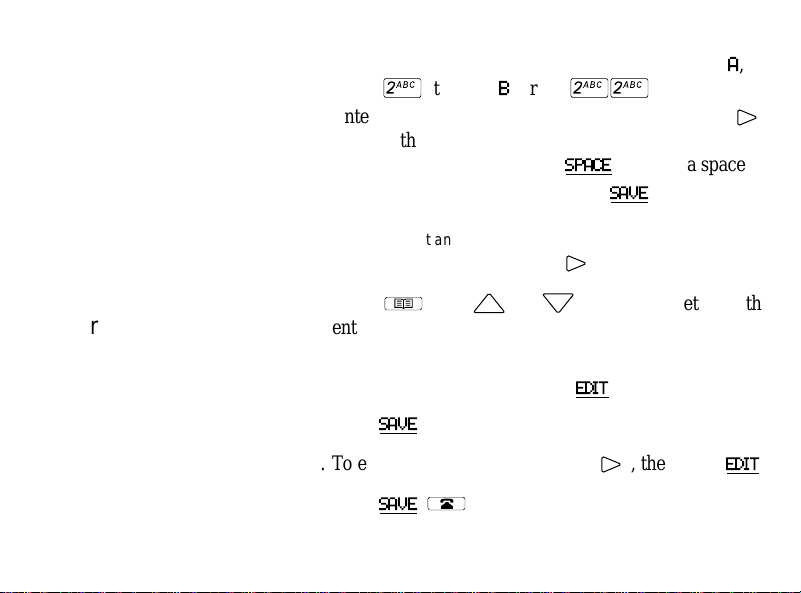
3. Enter the first letter of the name by pressing the button
that has the letter you want. For example to enter A,
press
™
; to enter B, press
4. Enter the rest of the letters as shown in step 3. Use
™™
.
˘
to move the cursor forward if the next letter you want is
on the same button, or select
5. When the name is complete, press
Hint: If you want an entry to appear at the start of your directory,
make its first character a space using ˘.
SPACE
to insert a space.
SAVE
.
Editing directory
entries
1. Press
Î
, then
’ or ”
(or the first letter of the
entry you want) until you reach the entry you want to
change. Directory entries are in alphabetical order.
2. To edit the entry’s name press
3. Press
SAVE
.
4. To edit the entry’s number press
5. Press
SAVE, ´
.
EDIT
, then edit the name.
˘
, then press
EDIT
.
9
Page 13
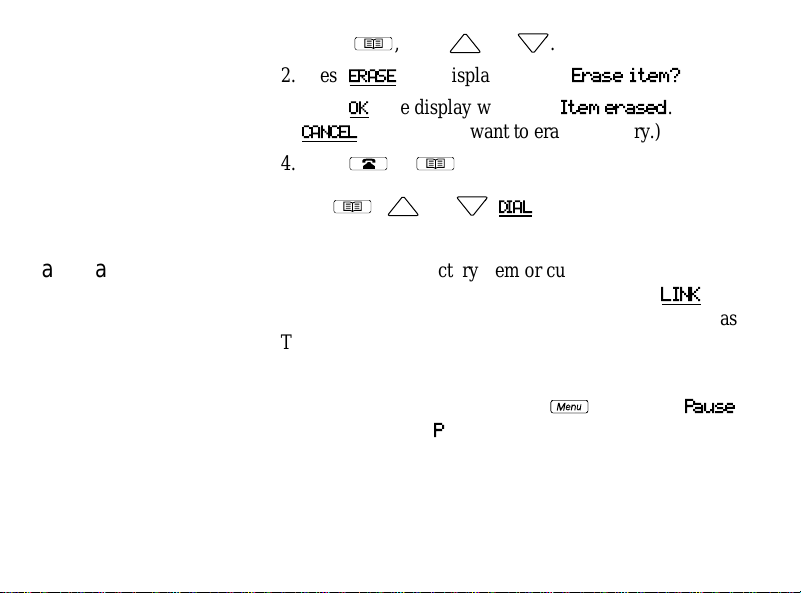
Deleting an entry 1. Press
2. Press
3. Press OK. The display will show
CANCEL
4. Press
Î
, then
’ or ”
ERASE
. The display will ask
if you do not want to erase the entry.)
´
or
Î
.
.
Erase item?
Item erased
. (Select
Dialing from the
Press
Î, ’ or ”, DIAL
.
directory
Pause and link signal When adding a directory item or customizing a softkey,
10
you may need to insert a pause or a link signal.
appears when you are on a call to enable features such as
Transfer and Conference.
To insert a pause when you are predialing a number or
storing it in your directory , press
The display shows P.
Ï
LINK
and select
Pause
.
Page 14

To insert a link signal, press
Ï
and select
Link signal
The display shows L. (Refer to Using your C3050 Portable
feature reference card for information on using this
feature).
11
.
Page 15

UU
UU
sing your headset
Connecting and
disconnecting the
headset
12
Using one of the optional headsets frees both hands for other
tasks. W ith the handset flap closed and the ringer control switch
at the
» or «
from your directory or by using your customized softkeys.
Hint: Using the portable with the C3050 holster protects it from falls.
Using the holster with the headset also allows you complete freedom
of movement while you are on a call.
Note: If you disconnect the headset from the portable during a
conversation, you have five seconds until you lose the connection. To
continue the conversation, either open the flap or plug in the headset.
position, you can answer calls and make calls
Page 16

Using your portable
with the headset
To answer a call, press
Note: If you wear a hearing aid, you should use the C3002 headset.
Note: In particularly noisy environments you should use the C3002
headset.
ANSWER
. To end a call, press
END
.
13
Page 17

CC
CC
ustomizing your portable
Hint: Whenever you are searching through a list, you can press the
first letter of the feature, directory, or system entry you want. If there is
more than one entry under a letter, press ” to keep looking.
Moving through the
Menu
14
To customize your portable, use the
a number of features in alphabetical order.
To search through the available options on the
Ï, ’ or ”
while you are on a call.
Note: The portable displays options in several different ways.
Whenever the display shows a heading followed by a colon, as in
Vibrator: On
case, to switch to the other option.
Whenever the display shows a heading followed by >, as in
Language>
then move through by pressing ” or ’.
, press ˘ to enter a menu of options which you can
. Some of these features are available
, you can select the underlined softkey,
Menu
, which contains
Menu
OFF
press
in this
Page 18

Discrete Ring If you want your portable to ring once, press
”, Discrt ring: ON, ´
to the middle («) position.
To prevent your portable from ringing, set the ringer
control switch to the middle («) position and press
’ or ”, Discrt ring: OFF, ´
Hint: T o stop the ringing or vibrating during an incoming call press µ.
. Set the ringer control switch
.
Ï,
’ or
Ï,
Key Click With
Key click
you press a button.
turned on, you hear a short beep each time
Keypad Light Your portable’s keypad and display have a light that is
helpful in low-light conditions. You can extend the life of
your batteries by leaving the keypad light off when you
don’t need it.
Press
Ï, ’ or ”,
ON
or
OFF
as needed.
select
Keypad l ight
, and select
15
Page 19

Key protect Press
ON
or
to activate softkeys or buttons on the portable.
Hint: If you are using a headset or flap closed operation is turned on,
you may want to turn Key-protect on.
Ï, ’ or ”,
OFF
. When
Key-protect
select
Key-protect
is turned on, press
, and select
START
Language Press
Ï
, select
Language
to move between the
selections. Press
SELCT
, press ˘, then
In English
or
SÉL
, to select your choice.
and
En français
’ or ”
Predialing To check that a number is correct before you dial, set up
16
your portable for predialing. Press
choose
Line selct
and select
Enter the telephone number, which may be edited using
BKSP
, then press
Ò
to dial your call or
your directory.
Note: You can insert a pause or a link into a predial sequence (see
“Pause and link signal” on page 10).
Ï, ’ or ”
MANUAL, ´
SAVE
,
.
to store it in
Page 20

Choosing distinctive
ringing
1. Press
2. Select
3. Press ˘,
4. Press
Ï, ’ or ”
Ring types
SELCT
.
.
’ or ” (to hear samples).
to choose a new ring type,
´
.
Setting the ringing
volume
Setting the portable
to vibrate and ring
1. Press
2. Select
3. Press ˘,
4. Press
1. Press
2. Select
3. Set the ringer control switch to the top (») position, or
Ï, ’ or ”
Ringer volume
’ or ”,
SELCT
to choose a new ring volume,
Ï,
’ or ”
Vibrator: ON
portable vibrates briefly.)
to the middle («) position with
.
.
(to hear samples).
.
. (The display shows ◊, and the
´
Discrt ring
.
turned on.
17
Page 21

Setting the portable
to vibrate only
18
1. Press
2. Select
And to keep your portable from ringing:
3. Press
4. Set the ringer control switch to the middle («) position.
Ï,
portable vibrates briefly.)
’ or ”,
´
.
’ or ”
Vibrator: ON
. (The display shows ◊, and the
select
.
Discrt ring: OFF
, press
Page 22

EE
EE
xtra features
System features If your system supports features such as Call Forward or
Call Transfer, you can customize your directory to include
them (see “Storing directory entries” on page 8,
“Customizing softkeys” on page 23, and Using Your
C3050 Portable feature reference card, or you can call
your contact).
Long tones To select long tones press
Long tones: ON, ´
You may need long tones to respond to electronic banking
services and telephone answering machines. This way you
can send a tone that lasts until you take your finger off the
button (up to 3 seconds).
Note: Not all systems support this feature. Call your contact.
.
Ï, ’
or ”,
19
Page 23

Message waiting Some systems allow your portable to display
waiting
if you have a voice mail message.
Message
Even if your system does not support Message Waiting
indication, you can set up your portable to dial directly into
your voice mailbox. See “Message Service”.
Message Service By first storing a message service code, you can access the voice
mail system by pressing
message and
NEXT
to move on to the next message. Press
to listen to the previous message. Press
Press
DEL
to delete the message. Press
service.
MAIL
. Press
END
PLAY
to listen to the
CALL
to dial the number.
to exit your message
PREV
20
Note: If you press
press
EXIT
.
CALL
, and you want to use your active softkeys,
Page 24

Depending on your voice mail system, you may be required to
change the dial codes. Dial codes are the numbers used to access
voice mail system features. For example, the default dial code 76
deletes a message. If your voice mail system is Meridian Mail,
you do not have to change the dial codes. If you change your
message service code, you will have to change the dial codes as
required.
To store your message service code
1. Press
2. Select
Ï, ’
or ”.
Msg service #, CODE
.
3. Enter ___________ (your voice mail service access
number) and insert one or more pauses as required (see
“Pause and link signal” on page 10).
4. Enter __________ (your voice mailbox number and
password) and press
SAVE
.
Note: Your voice mail system may require you to press
you enter your mailbox number or password.
‹
after
21
Page 25

5. The display shows
Note:
Dialcodes?
message service code. If you erase your message service code, you
will have to go through dial codes again and change as required.
Dialcodes?
is only displayed after you first store the
22
Hint: For most Meridian Voice Mail systems, select
Norstar Companion systems that support integrated voice mail, select
NO
. On some Norstar Companion systems, message service may work
differently, see your system contact for assistance.
6. Press
DEFAULT
EDIT
to change the default dial codes. Press
when you do not want to change the dial codes.
DEFAULT
. For
Press NO when you are not using dial codes.
7. Go through the dial codes and change the values for
your voice mail system, if required.
Page 26

Customizing softkeys For direct, one-touch access to frequently used features or
frequently called numbers, use your softkeys.
Your customized idle softkeys are available when the
portable is not in use. You can also customize an active
softkey that is available while you are on a call.
The default idle softkeys are
Message Service must be programmed for the
The default active softke y is
REDIAL, MAIL
NEXT
. The active softk ey is on
and
LAST
MAIL
.
softkey .
the left of the display.
To assign a feature, a directory number, or a system
selection to a softkey
1. Press
2. Press ˘, then
3. If you select
Ï, ’ or ”
softkeys
or
.
Active softkey
, and select
’ or ”
, then press
Idle softkeys
Program
and select
SELCT
.
Idle softkeys
, press 1, 2, or 3.
4. Select the list item you want as your softkey.
23
Page 27

5. If you want to add a feature to your softkey , press
If you want to add an entry from your directory, press
Î
. If you would like to add a system selection, press
Í
.
6. Press
’ or ”
press
SELCT
to move to the desired entry, then
.
7. Label your softkey with up to four characters by
pressing the button that has the letter you want. For
example to enter A, press
™™
.
™
; to enter B, press
Ï
.
24
8. Press
Note: Only entries from the menu, a directory list, or a system list can
be added to a softkey (see “Using your personal directory” on
page 8,“Using more than one system” on page 6, and “Customizing
your portable” on page 14).
Note: If a directory entry is changed, you will have to re-assign your
softkey to reflect the new directory entry.
SAVE, ´
.
Page 28

Administration
features
Features such as Feature request and Portable Info are only
useful for your system contact.
25
Page 29

MM
MM
aking your portable secure
When your portable is not in use, you can lock its dialpad
with your personal identification number (PIN). When the
portable is locked, the display shows q.
Entering a PIN for
the first time
1. Press
6-digit PIN).
2. Press
Changing a PIN 1. Press
PIN).
2. Press
3. Press
Locking your
portable
26
Press
Ï, ’ or ”
PIN),
DONE
Ï, ’ or ”, Security: PIN
DONE
, (enter new PIN again),
Ï, ’ or ”, Security: PIN
DONE
, (enter a 1- to 6-digit PIN).
DONE
, (enter new PIN again),
, select
. (The display shows q.)
DONE
.
DONE, ´
Security: ON
, (enter a 1- to
, (enter old
.
, (enter
Page 30

Unlocking your
portable
Press
Ï, ’ or ”,
PIN),
DONE
.
Note: If you lose or forget your PIN and your portable is locked, enter
the master PIN supplied with your portable. Be careful when you enter
the master PIN. The display asks if you want to
everything
PIN previously stored will be cleared.
. If you want to keep all of your settings, select
select
Security: OFF
Clear
, (enter
NO
. The
Warning: If you select
registrations, and customized softkeys are cleared.
YES
, all of your directory entries, your system
Put your master PIN label here or store it in a safe place.
27
Page 31

AA
AA
ll about batteries and recharging
Important battery
information
28
Before using your rechargeable battery pack for the first
time, it must be charged in the rear charger slot for at least
8 hours. This is necessary to ensure full battery life.
Your portable needs a rechargeable battery pack. Battery
level is shown by the / symbol on the top right of the
display. If the batteries are v ery low , the display flashes ¿
and you hear warning beeps. Y our programming will not be
lost if you replace your batteries.
Charge rechargeable battery packs in the C3050 Charger or
the C3050 HiCapacity Charger. The C3050 Charger will
quick charge your portable in the front slot in 2.5 hours, or slow
charge a battery pack in the rear slot in 8 hours.
The C3050 HiCapacity Charger charges your portable
battery pack in 2.5 hours or less, or a battery pack in the
rear slot in about 8 hours.
Page 32

Installing battery
packs
Hook the hinges of the battery pack into the slots at the
bottom of your portable, and push the pack and the
portable together until the pack clicks shut.
Preparing the
charger
Recharging the
portable and spare
pack
Connect the ac adaptor plug of the power cable to the rear
of the charger, then attach the ac adaptor to a po wer source.
Note: When charging your portable overnight, slide the ringer
control switch to the bottom (‚) position to extend the life of the
batteries.
1. Place your portable (containing a rechargeable battery
pack) on the charger . The right-hand light indicator turns
red while charging and green when the portable pack is
recharged.
2. Insert a spare rechargeable battery pack into the smaller
rear charger slot. The left-hand light indicator turns red
when charging and green when the spare pack is
recharged.
Note: The spare rechargeable battery pack and the portable can be
recharged at the same time.
29
Page 33

Hint: In high usage environments it is a good idea to have a spare
battery pack. Alternating the spare battery pack between charges will
prolong battery life.
AAA batteries You can also use an optional AAA battery holder with your
portable. Insert the batteries into the battery holder.
Note: Commercially available AAA NiCd batteries cannot be
charged in the C3050 HiCapacity Charger.
30
Page 34

AA
AA
ccessories for your portable
There are a number of C3050 accessories available from
your Nortel distributor.
• C3001 Ear Bud Headset
a small and lightweight ear-bud type headset
• C3002 Over-the-head Headset
a full over-the-head band for extra stability and hold with a single
earpiece.
• C3050 Clip-on Holster
a custom-designed holster with an adjustable belt clip.
• C3050 Leather Glove
a leather glove that holds the portable with a plastic panel covering
the keypad and display
• C3050 Rugged Protector
a rubber protective case with a built-in rigid black plastic belt clip.
For more information, visit the Companion homepage at
http://www.nortel.com/companion
31
Page 35

SS
SS
afety information
Electromagnetic
energy safety
Hazardous conditions may arise if the portable telephone is
operated near construction blasting caps or near
emergency service radio receivers.
Do not use this portable telephone in locations bearing
warning signs that caution against radio transmission.
For hospital use, the manufacturer recommends that
standard acceptance procedures are followed before this
equipment is used in the proximity of life-support systems.
Battery safety Do not replace batteries in a hazardous environment
(where sparks are considered dangerous, or where there are
flammable gases, flammable liquids, dust, or flammable
fumes).
Do not attempt to charge alkaline batteries.
Do not discard batteries in a fire. Batteries may explode
when subjected to extremely high temperatures.
32
Page 36

Charge the battery pack provided with the portable only in
accordance with the instructions specified in this manual.
Do not short circuit batteries. Batteries may explode when
short circuited.
Antenna safety The C3050 portable telephone emits low levels of radio
energy. Although any risk associated with this energy is
minimal, you can further minimize your exposure by not
touching the antenna to the face or eyes while the portable
telephone is turned on.
Charger safety The C3050 charger adaptor is an electrical device
containing hazardous voltages. Do not open the adaptor or
the charger.
Care when using
earpiece
Do not place the earpiece next to your ear if a foreign
object has become attached to it.
33
Page 37

Note for pacemaker
users
Although the risk of interference is minimal, pacemaker
users should not store the C3050 portable in a pocket next
to the pacemaker.
Note for hearing aid
users
34
Use of the portable telephone may produce an audible tone
within a hearing aid. The C3002 headset can be used with
hearing aids and will prevent the occurrence of the audible
tone.
Page 38

TT
TT
Voltage 3.6 V rechargeable batteries
Frequency band 1.920 to 1.930 GHz
echnical specifications
4.5 V (total voltage rating), three AAA alkaline batteries
Total channel
capacity
Operating
temperature
RF output power 32 mW ERP maximum
99
14°F to 104°F
35
Page 39

Regulatory
PCI CAI:FCC Etiquette
compliance
This device complies with Part 15 of the FCC rules.
Operation is subject to the following two conditions:
1). This device may not cause harmful interference, and
2). This device must accept any interference received,
including interference that may cause undesired operation.
Any changes or modifications applied to the portable
telephone not expressly approved by Nortel could void the
user’s authority to operate the equipment.
Privacy This portable telephone uses digital encoding to protect the
speech transmission.
36
Page 40

CC
CC
aring for your portable
Temperature
extremes
Care and
maintenance
Avoid subjecting the portable telephone to extremes in
temperature.
Clean the portable telephone by wiping it with a damp
cloth. Do not use solvents or polishes. If your portable
telephone does not work, check all charging contacts on
the portable and the charger for dirt, grease, or other
material. If necessary, clean them with a soft dry cloth.
37
Page 41

38
Page 42

Printed on recycled paper
E
© 1997 Northern Telecom
All rights reserved.
Companion is a trademark of Northern Telecom.
P0872513
Issue 04
Printed in Canada
n
 Loading...