

Page 1
Enterprise Edge 2.0 Unified Messaging
Quick Reference Guide
www.nortelnetworks.com
© 2000 Nortel Networks
P0911955 Issue 02
Page 2

Page 3

Welcome to Enterprise Edge Unified Messaging
About unified messaging
Unified messaging gives you access to voice messages from your personal computer. You
can manage all your voice,fax and e-mail messages from one graphical interface. You can
also access your mailbox from your telephone at any time.
With unified messaging you can send and receive messages that include any combination
of voice, fax and text. You can use unified messaging to:
• Listen to voice messages
• View and print fax messages
• Record and send voice messages
• Create and send fax messages
• Forward and reply to voice and fax messages
• Add message options such as urgent and private
• Add voice, fax or text files to messages
• Create personal distribution lists
• Change your password
Refer to the Help available with unified messaging for detailed information not covered in
this Quick Reference Guide.
This guide shows e xamples in Microsoft Outlook. The way your screen looks can vary in
Microsoft Exchange.
System requirements
To record and play unified messaging voice messages from your computer, your computer
must have:
• a sound card
• a microphone
• speakers
To use any of the fax options, your system must have a fax card and the voicemail FAX
option installed. Ask your System Administrator to install this option.
P0911955 Issue 02 Enterprise Edge 2.0 Unified Messaging Quick Reference Guide
Page 4
4 Logging on
Logging on
Use your voicemail password to log on to unified messaging.
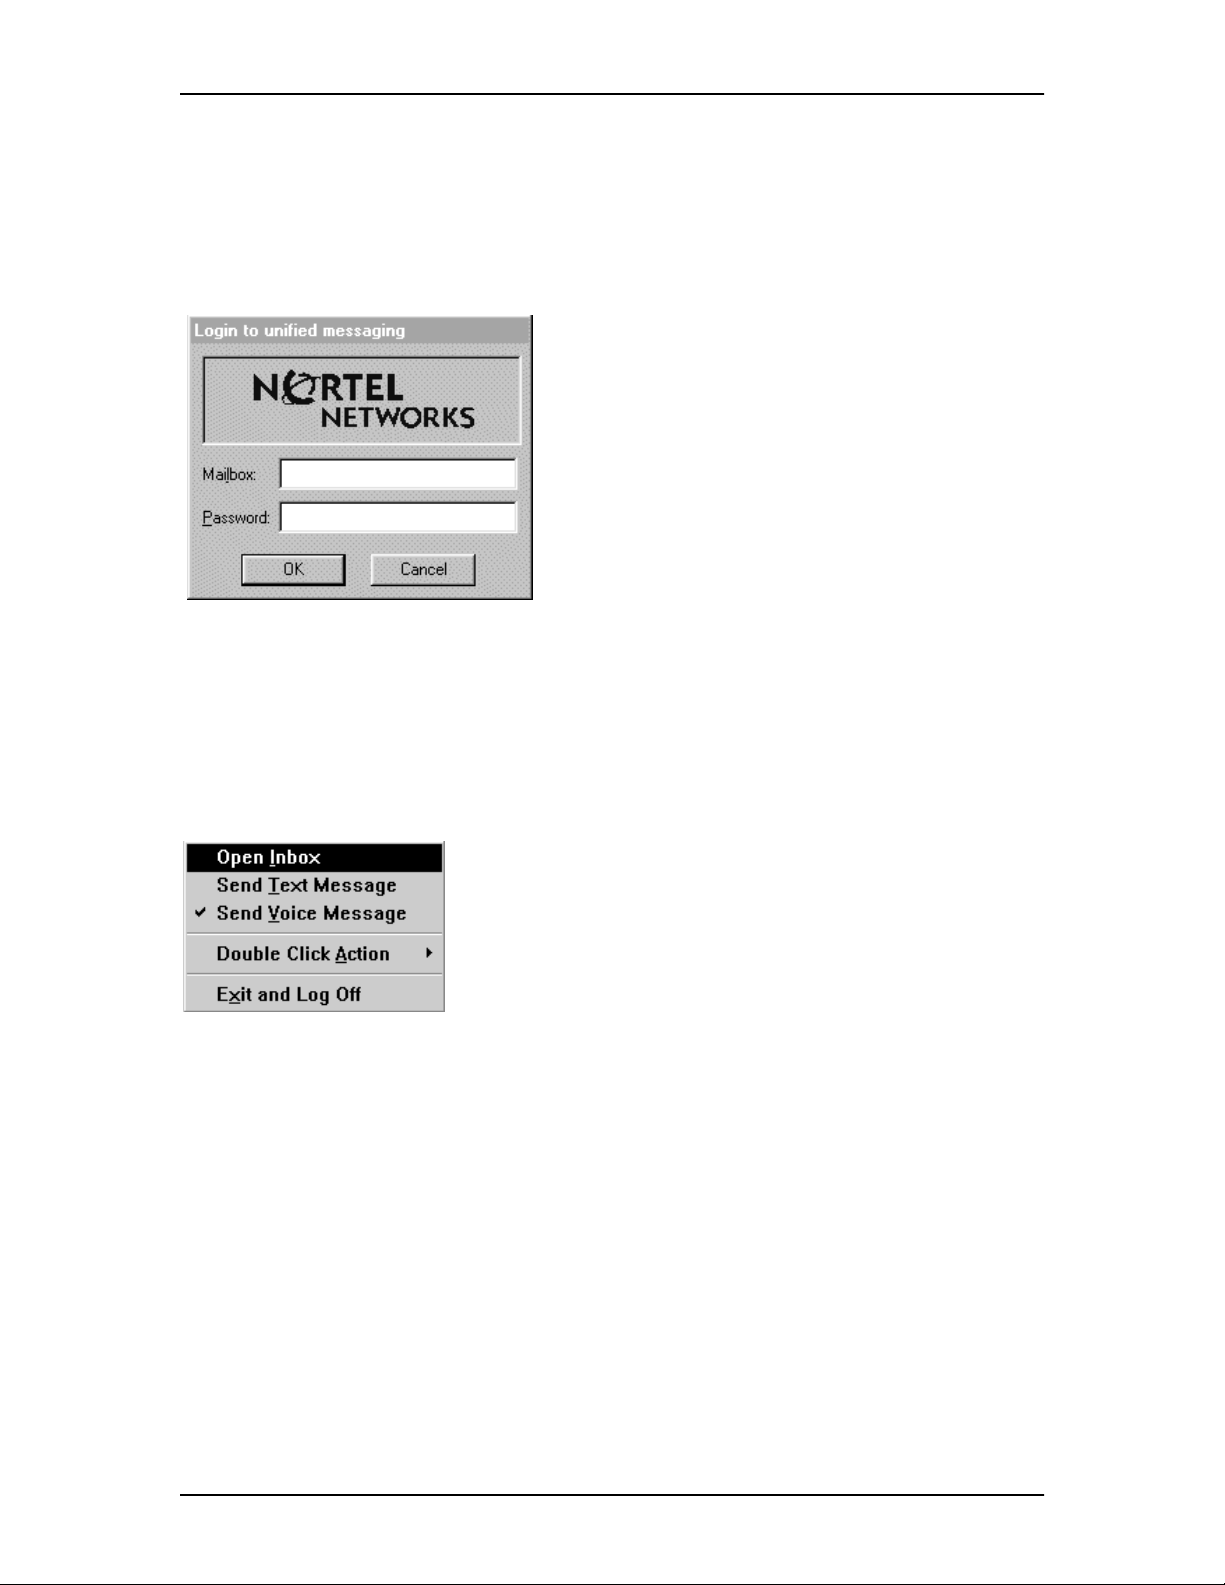
To log on from your PC
1. On your desktop, double-click the
Microsoft Outlook icon.
The Login to unified messaging
dialog box appears.
2. In the Mailbox box, type your
mailbox or extension number.
3. In the Password box, type your
password.
4. Click the OK button.
The Microsoft Outlook window
appears.
Shortcut log on
1. Right-click the mailbox icon on the
Windows taskbar and then click
Open Inbox.
The Login to unified messaging
dialog box appears.
2. In the Mailbox box, type your
mailbox or extension number.
3. In the Password box, type your
password.
4. Click the OK button.
The Microsoft Outlook window
appears.
Remote log on
You can log on to unified messaging from another computer, such as a laptop computer, if
the laptop computer has unified messaging installed and configured in the same way as
your office computer. You can work offline and use a dial-up connection to reach the
server.
Enterprise Edge 2.0 Unified Messaging Quick Reference Guide P0911955 Issue 02
Page 5
Changing your Enterprise Edge password 5
Changing your Enterprise Edge password
You can change your voicemail password from unified messaging.
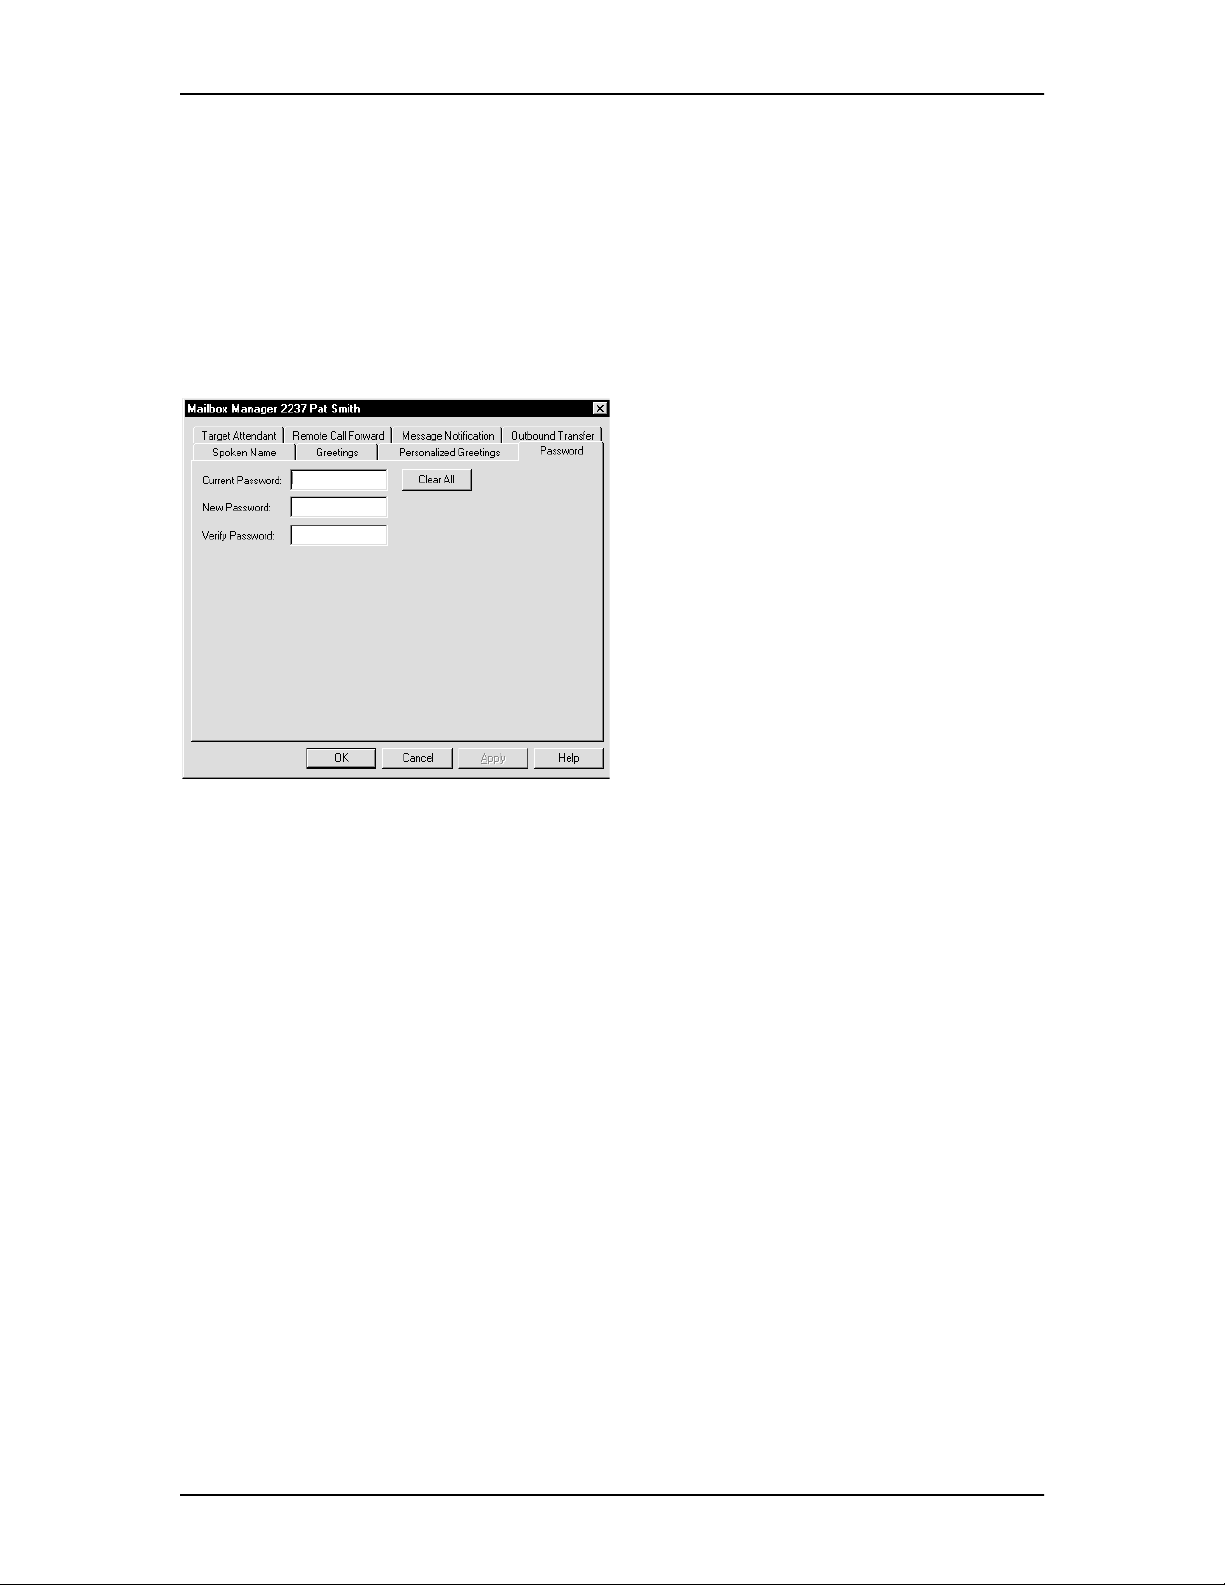
To change your voicemail
password from Microsoft Exchange
or Microsoft Outlook
1. On the Outlook window, click Tools
and then click mailbox manager.
The Mailbox Manager dialog box
appears.
2. Click the Password tab.
3. In the Current Password box, type
your current password.
4. In the New Password box, type your
new password.
5. In the Verify Password box, type
your new password.
6. Click the OK button.
P0911955 Issue 02 Enterprise Edge 2.0 Unified Messaging Quick Reference Guide
Page 6
6 Unified Messaging for Microsoft Exchange and Outlook
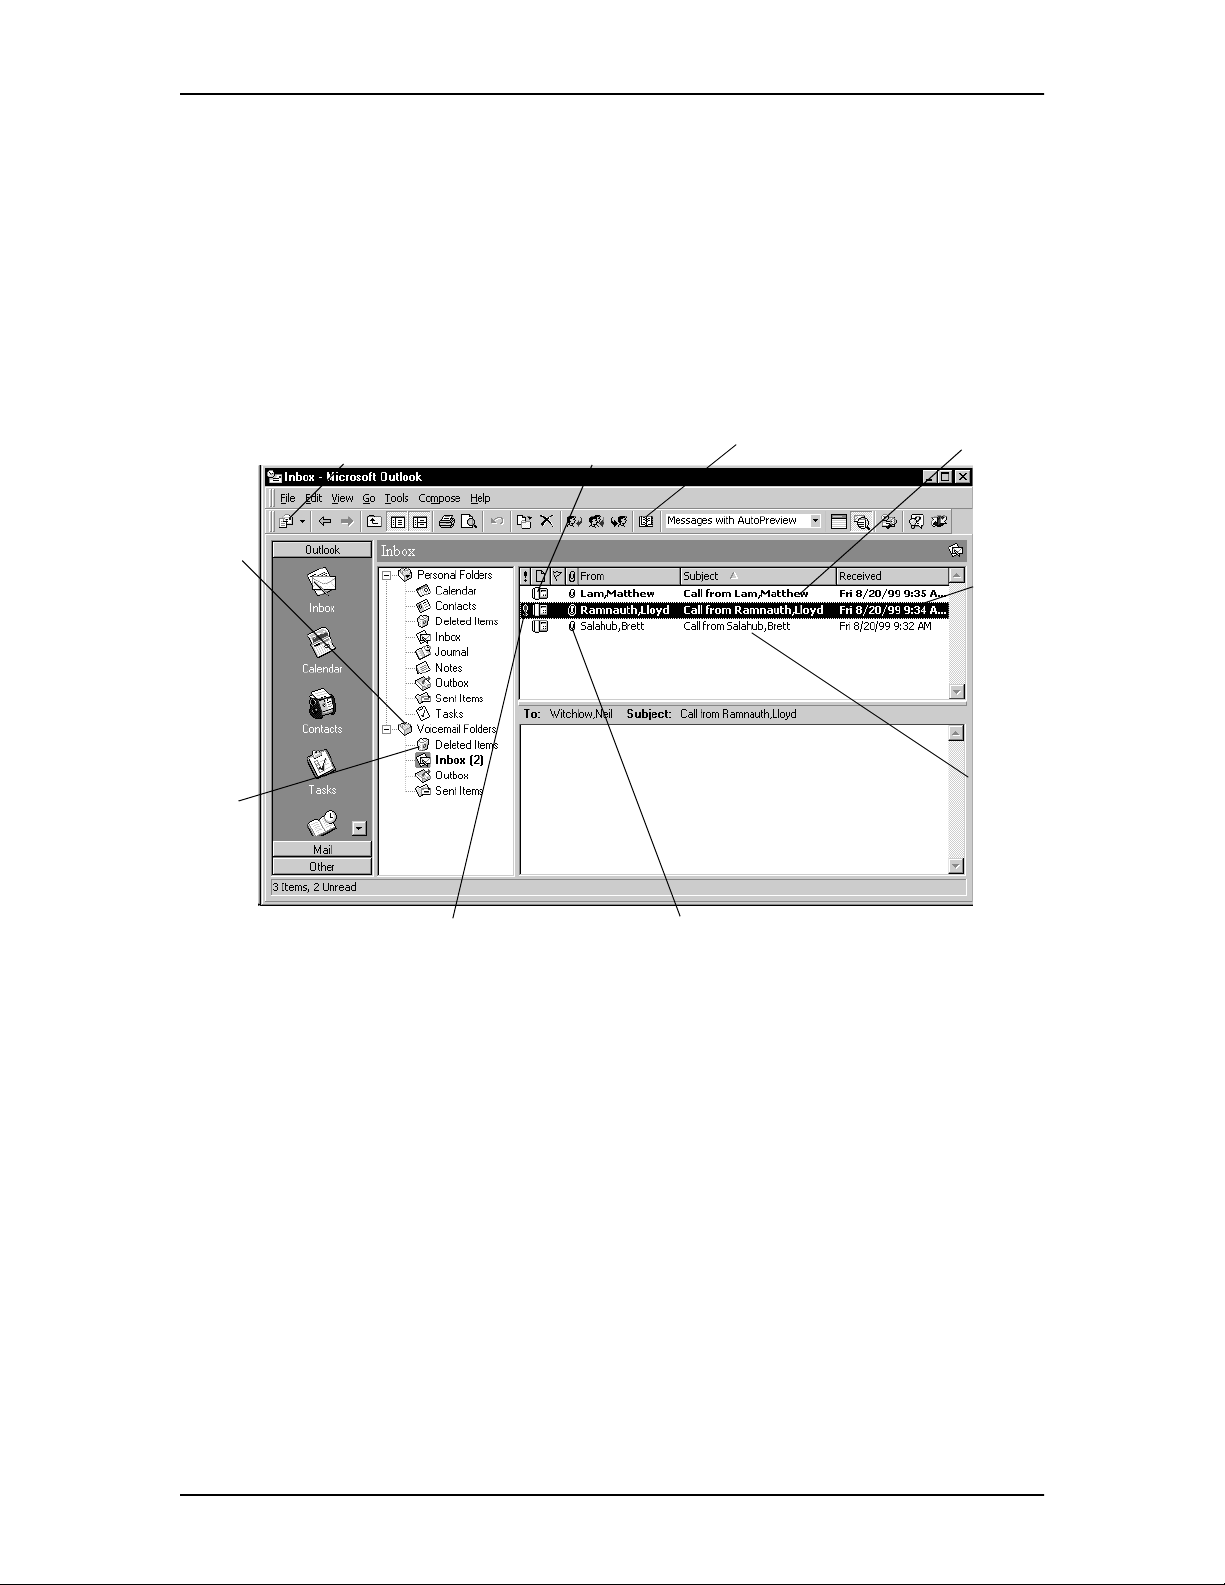
Unified Messaging for Microsoft Exchange and Outlook
When you open Microsoft Exchange or Microsoft Outlook, displayyour unified messaging
messages by clicking the Inbox icon under the Voicemail Folders icon. From the Inbox you
can move, copy and delete messages, and create new messages.
Voic em ai l
Folders
contain
your
received,
sent and
deleted
voicemail
messages
After you
delete a
message,
it is moved
to Deleted
Items. To
delete
messages
completely
empty the
Deleted
Items
folder.
k
c
i
l
C
e
M
n
a
e
w
N
e
h
t
a
g
e
s
s
m
w
e
An exclamation mark means that
the message is urgent
a
i
M
l
o
t
n
o
c
i
e
s
a
g
s
e
e
a
t
r
c
e
To o p e n a m e ss a g e ,
double-click the
message icon
A paperclip means that
the message has an
attached file
Click the Address
Book icon to access
the address books
New messages
appear in bold
Date and
time
received
Subject
shows the
sender
and if the
message
is voice,
fax or
text.
Enterprise Edge 2.0 Unified Messaging Quick Reference Guide P0911955 Issue 02
Page 7
Reviewing your messages 7
Reviewing your messages
To play unified messaging voice messages from your computer, your computer must have
a sound card and speakers.
Message notification
When you have a new message the mailbox icon on your Windows taskbar displays an
exclamation mark.
After you play your message, the exclamation mark disappears.
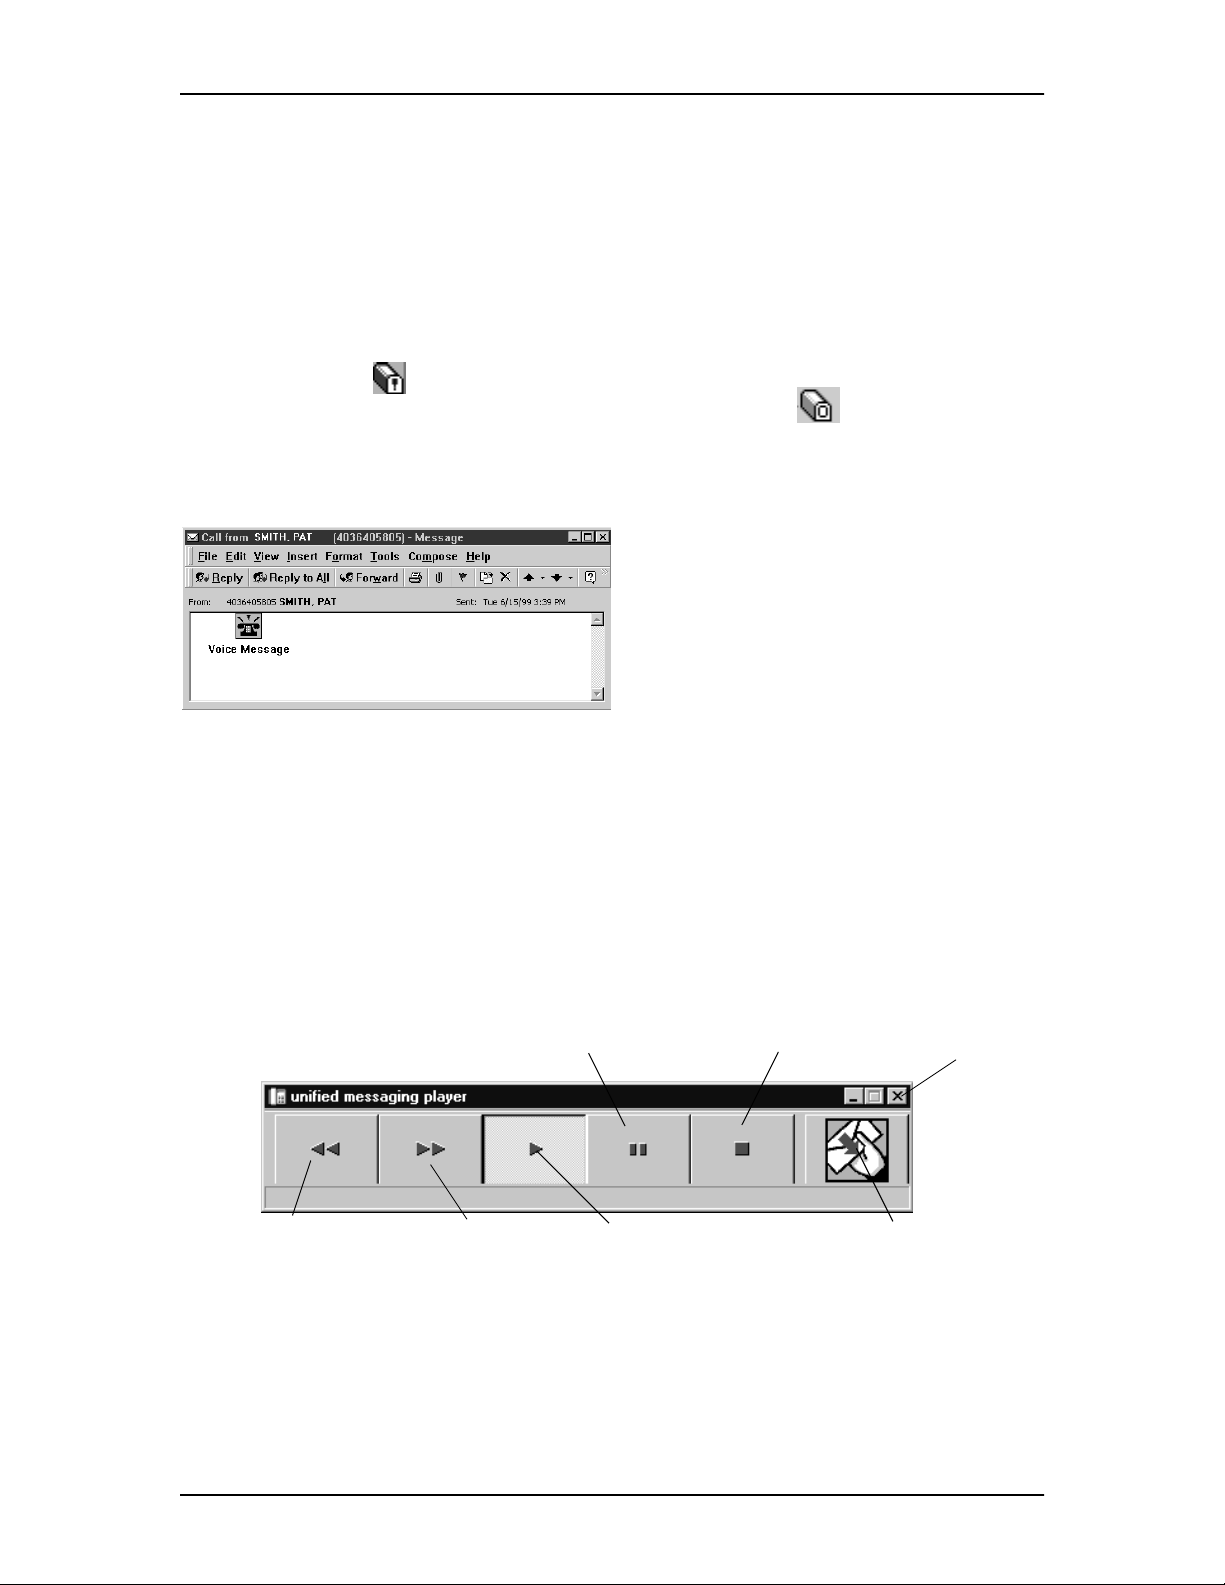
To play a voice message
1. Double-click the voice message icon
in the unified messaging Inbox.
The message appears in a separate
window.
The unified messaging player
Rewinds the
message
Fast forwards
the message
Pauses the
message
Plays the message
2. Double-click the Voice Message icon
to play the voice message.
The unified messaging player
appears.
Stops playing the
message
Closes the unified
messaging player
Downloads and
plays the voice
message
P0911955 Issue 02 Enterprise Edge 2.0 Unified Messaging Quick Reference Guide
Page 8

8 Reviewing your messages
To view a fax message
To view faxes in unified messaging, you must have Imaging for Windows installed on your
PC. Your system must have the voicemail FAX option installed for you to use any of the
fax options. Ask your System Administrator to install this option.
While you view a fax, you can enlarge or reduce the image, rotate it, move it, copy it or
print it.
To view a fax message
1. Double-click the fax message icon in
the unified messaging Inbox
The message appears in a separate
window.
2. Double-click the Fax Message icon to
view the fax message.
Save
Print
Drag/
scroll
Annotate
Magnification
3. Save the fax message to the desired
location.
4. Double-click the fax message icon to
open it. The fax message is displayed
in Imaging for Windows.
Zoom in
Zoom out
Rotate left
Rotate right
Previous page
Current page
Next page
One page view
Thumbnail view
Page & thumbnail view
Enterprise Edge 2.0 Unified Messaging Quick Reference Guide P0911955 Issue 02
Page 9

Creating messages 9
Creating messages
You can create a message that is any combination of voice, fax or text. Your message can
be a new message, a reply to a received message or an introduction to a forwarded message.
Before you send your message, you can add attachments and options.
Create a voice message by opening a unified messaging new mail message and recording
a message from your microphone. You can send the message or save it to send later.
To record and send a voice message
1. On the Microsoft Exchange or
Microsoft Outlook toolbar, click the
New Mail Message icon.
A new message window appears.
2. Click inside the body of the message.
3. Click the Insert menu and then click
Object.
The Insert Object dialog box appears.
4. In the Object Type list, click Wave
Sound.
5. Select the Create New option.
6. Click the OK button.
The Sound Object dialog box opens.
7. Record your voice message and click
the Close button to return to your
message.
8. Click the To button to open the
address books and address your
message.
9. Add the attachments and options you
require. See Adding attachments to
messages on page 13 and Setting
message options on page 16.
10. Click the Send icon to send your
voice message.
P0911955 Issue 02 Enterprise Edge 2.0 Unified Messaging Quick Reference Guide
Page 10

10 Creating messages
To save a voice message
You can record a voice message and save it as a file to use later.
1. In an unified messaging message, record a message.
2. On the File menu, click Save As.
The Save As dialog box appears.
3. In the File name box type a name for the file and in the Save as type list box
select .rtf.
4. Select a folder to keep the file in and then click the Save button.
Enterprise Edge 2.0 Unified Messaging Quick Reference Guide P0911955 Issue 02
Page 11

Creating messages 11
To create and send a fax message
To send a fax, you must have a fax card installed on your PC and your system administrator
must have installed voicemail FAX capability for your mailbox. The recipients of your fax
must also have fax capability enabled to view the fax on their computer. If your recipients
access their messages from their telephone, they must print the fax to view it. You can send
your fax to a fax machine by entering the fax number as the address.
To send a fax message
1. Open the document that you want to
fax. It must be 8.5 inches wide or
less.
2. On the File menu, click Print.
3. From the list of printers, select
voicemail Fax.
4. Click the OK button.
The Compose Fax dialog box
appears. From here you can view the
fax, add more documents to the fax or
save the fax as a file.
5. Click the Send button.
The Optional Voice Annotation
dialog box appears.
6. If you want to add a voice
introduction to the fax, click the Yes
button and record the voice message
or
if you want to send just the fax
message, click the No button
or
if you want to cancel the fax, click the
Cancel button.
7. On the Fax Message window, click
the To button to select a recipient
from your Personal Address book, or
type the recipients’s e-mail address in
the To box.
8. Click the Send icon to send the fax.
P0911955 Issue 02 Enterprise Edge 2.0 Unified Messaging Quick Reference Guide
Page 12

12 Creating messages
To create and send a text message
1. Open a unified messaging new mail message.
2. Type or paste text into the message and then click the Send button.
To save a text message
1. On the File menu, click Save As.
The Save As dialog box appears.
2. In the File name box type a name for the file and in the Save as type list box
select .rtf.
3. Select a folder to keep the file in and then click the Save button.
Enterprise Edge 2.0 Unified Messaging Quick Reference Guide P0911955 Issue 02
Page 13

Forwarding and replying to messages 13
Forwarding and replying to messages
You can forward a message and create an introduction to send with it. You can create a
reply to the sender of a message, or to the sender and all recipients of a message.
To forward or reply to a message
1. Open the message you want to forward or reply to.
2. If you want to forward the message, click the Forward icon and address the message
or
if you want to reply to the sender of the message, click the Reply icon
or
if you want to reply to the sender and all the recipients of the message, click the
Replytoallicon.
3. Click the Send button.
Adding attachments to messages
Before you send a message, you can attach a voice , fax or text file to it. Text files must be
.txt files and fax files must be .tif-f files.
To attach a file to a message
1. In an open message, click the Insert
File icon.
The Insert File dialog box appears.
2. Type the name of the file that you
want to attach in the File name box
andclicktheOK button, or doubleclick the file’s icon to attach it.
3. At the Insert as option, select how
the file is attached:
• if you are attaching a .txt file,
select Text only
• if you are attaching a .tif-f file,
select Attachment.
4. Click the Send icon.
P0911955 Issue 02 Enterprise Edge 2.0 Unified Messaging Quick Reference Guide
Page 14

14 Addressing messages
Addressing messages
With unified messaging you can address a message by selecting a name from the voicemail
address book or your Personal Address Book. Your Personal Address Book can include
distribution lists and names.
To add a voicemail address book
address to your Personal Address
Book
1. On the Microsoft Outlook or the
Microsoft Exchange toolbar, click the
Address Book icon.
The Address Book window appears.
2. From the Show Names from t he list
box select voicemail address book.
3. Click the name you want and click
the Add to Personal Address Book
button.
The name you select is added to your
Personal Address Book.
Enterprise Edge 2.0 Unified Messaging Quick Reference Guide P0911955 Issue 02
Page 15

Addressing messages 15
To address a message from the
voicemail address book or your
Personal Address Book
1. On the Microsoft Outlook or
Microsoft Exchange toolbar, click the
Address Book icon.
The Address Book dialog box
appears.
2. In the Show Names from the list
box, select voicemail address book
or Personal Address Book.
3. Select the name of the recipient or a
distribution list.
4. Click the To button.
5. Click the OK buttontoreturntothe
message window.
P0911955 Issue 02 Enterprise Edge 2.0 Unified Messaging Quick Reference Guide
Page 16

16 Setting message options
Setting message options
From a unified messaging message window you can set priority, sensitivity and delivery
options.
On the open message window click File andthenclickProperties.
The Properties dialog box appears.
Sets the value of the
message to Low,
Normal or High
Notifies you when
the message has
been read
Sets the sensitivity of
the message to
Normal, Personal,
Private or
Confidential
Notifies you of
delivery
Saves a copy of the
message to your Sent
Message folder
Enterprise Edge 2.0 Unified Messaging Quick Reference Guide P0911955 Issue 02
Page 17

Creating personal distribution lists 17
Creating personal distribution lists
You can create a personal distribution list for a group of persons that you frequently send
messages to. After you create a list, it appears in your Personal Address Book. When you
want to address a message to the group, select the list.
To create a personal distribution list
1. On the Microsoft Outlook or
Microsoft Exchange toolbar, click the
Address Book icon.
The Address Book dialog box
appears.
2. Click the New Entry icon.
The New Entry dialog box appears.
3. In the list of entry types, select
Personal Distribution List and click
the OK button.
The New Personal Distribution List
Properties dialog box appears.
4. In the Name box type the name of the
distribution list.
5. Click the Add/Remove Members
button and type or select members
from the list to add to your new
personal distribution list.
6. Click the OK button in the current
and the next dialog boxes to create
your new personal distribution list.
P0911955 Issue 02 Enterprise Edge 2.0 Unified Messaging Quick Reference Guide
Page 18

18 Creating personal distribution lists
Enterprise Edge 2.0 Unified Messaging Quick Reference Guide P0911955 Issue 02
 Loading...