


Nokia G60 5G
Kullanıcı kılavuzu
Basım 2022-10-28 tr-TR

Nokia G60 5G Kullanıcı kılavuzu
İçindekiler
1 Bu kullanıcı kılavuzu hakkında 5
2 Başlarken 6
Telefonunuzu güncel tutma . . . . . . . . . . . . . . . . . . . . . . . . . . . . . . . . . . 6
Keys and parts . . . . . . . . . . . . . . . . . . . . . . . . . . . . . . . . . . . . . . . . . . 6
Insert the SIM and memory cards . . . . . . . . . . . . . . . . . . . . . . . . . . . . . . . 7
Telefonunuzu şarj etme . . . . . . . . . . . . . . . . . . . . . . . . . . . . . . . . . . . . . 8
Switch on and set up your phone . . . . . . . . . . . . . . . . . . . . . . . . . . . . . . . . 8
Use the touch screen . . . . . . . . . . . . . . . . . . . . . . . . . . . . . . . . . . . . . . 9
Use your eSIM . . . . . . . . . . . . . . . . . . . . . . . . . . . . . . . . . . . . . . . . . . 12
3 Telefonunuzu koruma 14
Telefonunuzu kilitleme veya telefonunuzun kilidini açma . . . . . . . . . . . . . . . . . . 14
Ekran kilidiyle telefonunuzu koruma . . . . . . . . . . . . . . . . . . . . . . . . . . . . . . 14
Protect your phone with your fingerprint . . . . . . . . . . . . . . . . . . . . . . . . . . . 14
Protect your phone with your face . . . . . . . . . . . . . . . . . . . . . . . . . . . . . . . 15
Find your lost phone . . . . . . . . . . . . . . . . . . . . . . . . . . . . . . . . . . . . . . . 15
4 Temel Adımlar 17
Personalize your phone . . . . . . . . . . . . . . . . . . . . . . . . . . . . . . . . . . . . . 17
Notifications . . . . . . . . . . . . . . . . . . . . . . . . . . . . . . . . . . . . . . . . . . . 17
Control volume . . . . . . . . . . . . . . . . . . . . . . . . . . . . . . . . . . . . . . . . . . 18
Automatic text correction . . . . . . . . . . . . . . . . . . . . . . . . . . . . . . . . . . . . 19
Battery life . . . . . . . . . . . . . . . . . . . . . . . . . . . . . . . . . . . . . . . . . . . . 19
Accessibility . . . . . . . . . . . . . . . . . . . . . . . . . . . . . . . . . . . . . . . . . . . 20
5 Arkadaşlarınızla ve ailenizle bağlantı kurma 21
Calls . . . . . . . . . . . . . . . . . . . . . . . . . . . . . . . . . . . . . . . . . . . . . . . . 21
Contacts . . . . . . . . . . . . . . . . . . . . . . . . . . . . . . . . . . . . . . . . . . . . . 21
Send messages . . . . . . . . . . . . . . . . . . . . . . . . . . . . . . . . . . . . . . . . . 21
Posta . . . . . . . . . . . . . . . . . . . . . . . . . . . . . . . . . . . . . . . . . . . . . . . 22
© 2022 HMD Global Oy. Tüm hakları saklıdır. 2

Nokia G60 5G Kullanıcı kılavuzu
6 Kamera 23
Camera basics . . . . . . . . . . . . . . . . . . . . . . . . . . . . . . . . . . . . . . . . . . 23
Your photos and videos . . . . . . . . . . . . . . . . . . . . . . . . . . . . . . . . . . . . . 23
7 İnternet ve bağlantılar 24
Activate Wi-Fi . . . . . . . . . . . . . . . . . . . . . . . . . . . . . . . . . . . . . . . . . . . 24
Browse the web . . . . . . . . . . . . . . . . . . . . . . . . . . . . . . . . . . . . . . . . . 24
Bluetooth® . . . . . . . . . . . . . . . . . . . . . . . . . . . . . . . . . . . . . . . . . . . . 25
NFC . . . . . . . . . . . . . . . . . . . . . . . . . . . . . . . . . . . . . . . . . . . . . . . . 26
VPN . . . . . . . . . . . . . . . . . . . . . . . . . . . . . . . . . . . . . . . . . . . . . . . . 27
8 Gününüzü düzenleme 28
Date and time . . . . . . . . . . . . . . . . . . . . . . . . . . . . . . . . . . . . . . . . . . 28
Alarm clock . . . . . . . . . . . . . . . . . . . . . . . . . . . . . . . . . . . . . . . . . . . . 28
Calendar . . . . . . . . . . . . . . . . . . . . . . . . . . . . . . . . . . . . . . . . . . . . . 29
9 Haritalar 30
Find places and get directions . . . . . . . . . . . . . . . . . . . . . . . . . . . . . . . . . 30
10 Uygulamalar, güncellemeler ve yedeklemeler 31
Get apps from Google Play . . . . . . . . . . . . . . . . . . . . . . . . . . . . . . . . . . . 31
Update your phone software . . . . . . . . . . . . . . . . . . . . . . . . . . . . . . . . . . 31
Verilerinizi yedekleme . . . . . . . . . . . . . . . . . . . . . . . . . . . . . . . . . . . . . . 31
Restore original settings and remove private content from your phone . . . . . . . . . . 32
11 Ürün ve güvenlik bilgileri 33
Güvenliğiniz için . . . . . . . . . . . . . . . . . . . . . . . . . . . . . . . . . . . . . . . . . 33
Network services and costs . . . . . . . . . . . . . . . . . . . . . . . . . . . . . . . . . . . 35
Emergency calls . . . . . . . . . . . . . . . . . . . . . . . . . . . . . . . . . . . . . . . . . 36
Cihazınızın bakımı . . . . . . . . . . . . . . . . . . . . . . . . . . . . . . . . . . . . . . . . 36
Geri Dönüşüm . . . . . . . . . . . . . . . . . . . . . . . . . . . . . . . . . . . . . . . . . . 37
Üstünde çarpı işareti olan tekerlekli çöp kutusu simgesi . . . . . . . . . . . . . . . . . . 38
© 2022 HMD Global Oy. Tüm hakları saklıdır. 3

Nokia G60 5G Kullanıcı kılavuzu
Pil ve şarj cihazı bilgileri . . . . . . . . . . . . . . . . . . . . . . . . . . . . . . . . . . . . . 38
Küçük çocuklar . . . . . . . . . . . . . . . . . . . . . . . . . . . . . . . . . . . . . . . . . . 39
Tıbbi cihazlar . . . . . . . . . . . . . . . . . . . . . . . . . . . . . . . . . . . . . . . . . . . 39
İmplante tıbbi cihazlar . . . . . . . . . . . . . . . . . . . . . . . . . . . . . . . . . . . . . . 40
İşitme . . . . . . . . . . . . . . . . . . . . . . . . . . . . . . . . . . . . . . . . . . . . . . . 40
Cihazınızı zararlı içerikten koruma . . . . . . . . . . . . . . . . . . . . . . . . . . . . . . . 40
Araçlar . . . . . . . . . . . . . . . . . . . . . . . . . . . . . . . . . . . . . . . . . . . . . . 41
Potansiyel patlama tehlikesi olan ortamlar . . . . . . . . . . . . . . . . . . . . . . . . . . 41
Sertifika bilgileri (SAR) . . . . . . . . . . . . . . . . . . . . . . . . . . . . . . . . . . . . . 41
Dijital Hak Yönetimi Hakkında . . . . . . . . . . . . . . . . . . . . . . . . . . . . . . . . . 42
Copyrights and other notices . . . . . . . . . . . . . . . . . . . . . . . . . . . . . . . . . . 42
© 2022 HMD Global Oy. Tüm hakları saklıdır. 4

Nokia G60 5G Kullanıcı kılavuzu
1 Bu kullanıcı kılavuzu hakkında
Önemli: Cihazınızın ve pilinizin güvenli kullanımı ile ilgili önemli bilgiler için, cihazınızı
kullanmaya başlamadan önce, basılı kullanım kılavuzunda veya www.nokia.com/support
adresinde yer alan ”Güvenliğiniz için” ve ”Ürün Güvenliği” bilgilerini okuyun. Yeni cihazınızı
nasıl kullanmaya başlayacağınıza ilişkin bilgiler için basılı kullanıcı kılavuzunu okuyun.
© 2022 HMD Global Oy. Tüm hakları saklıdır. 5

Nokia G60 5G Kullanıcı kılavuzu
2 Başlarken
TELEFONUNUZU GÜNCEL TUTMA
Telefon yazılımınız
Telefonunuza yönelik yeni ve geliştirilmiş özellikleri almak için telefonunuzu güncel tutun
ve mevcut yazılım güncellemelerini kabul edin. Yazılımın güncellenmesi telefonunuzun
performansını da artırabilir.
KEYS AND PARTS
Your phone
This user guide applies to the following models: TA-1479, TA-1490, TA-1481, TA-1475.
1. Headset connector
2. Microphone
3. Loudspeaker
4. Camera
5. Flash
6. SIM and memory card slot
© 2022 HMD Global Oy. Tüm hakları saklıdır. 6
7. Front camera
8. Earpiece
9. Microphone
10. Volume keys
11. Power/Lock key, Fingerprint sensor
12. USB connector
Nokia G60 5G Kullanıcı kılavuzu
Some of the accessories mentioned in this user guide, such as charger, headset, or data cable,
may be sold separately.
Parçala ve konnektörler, manyetik çekim
Cihazınıza zarar verebileceğinden, çıkış sinyali üreten ürünleri cihazınıza bağlamayın. Ses
konektörüne herhangi bir voltaj kaynağı bağlamayın. Bu cihazla kullanım için onaylananlar
dışında herhangi bir harici cihaz veya kulaklıklı mikrofon setini ses konektörüne bağlarsanız ses
düzeylerine özellikle dikkat edin.
Cihazın parçaları manyetiktir. Cihaz metal maddeleri çekebilir. Kartlar zarar görebileceğinden,
kredi kartlarını veya başka manyetik şeritli kartları cihazın yanında uzun süreyle bulundurmayın.
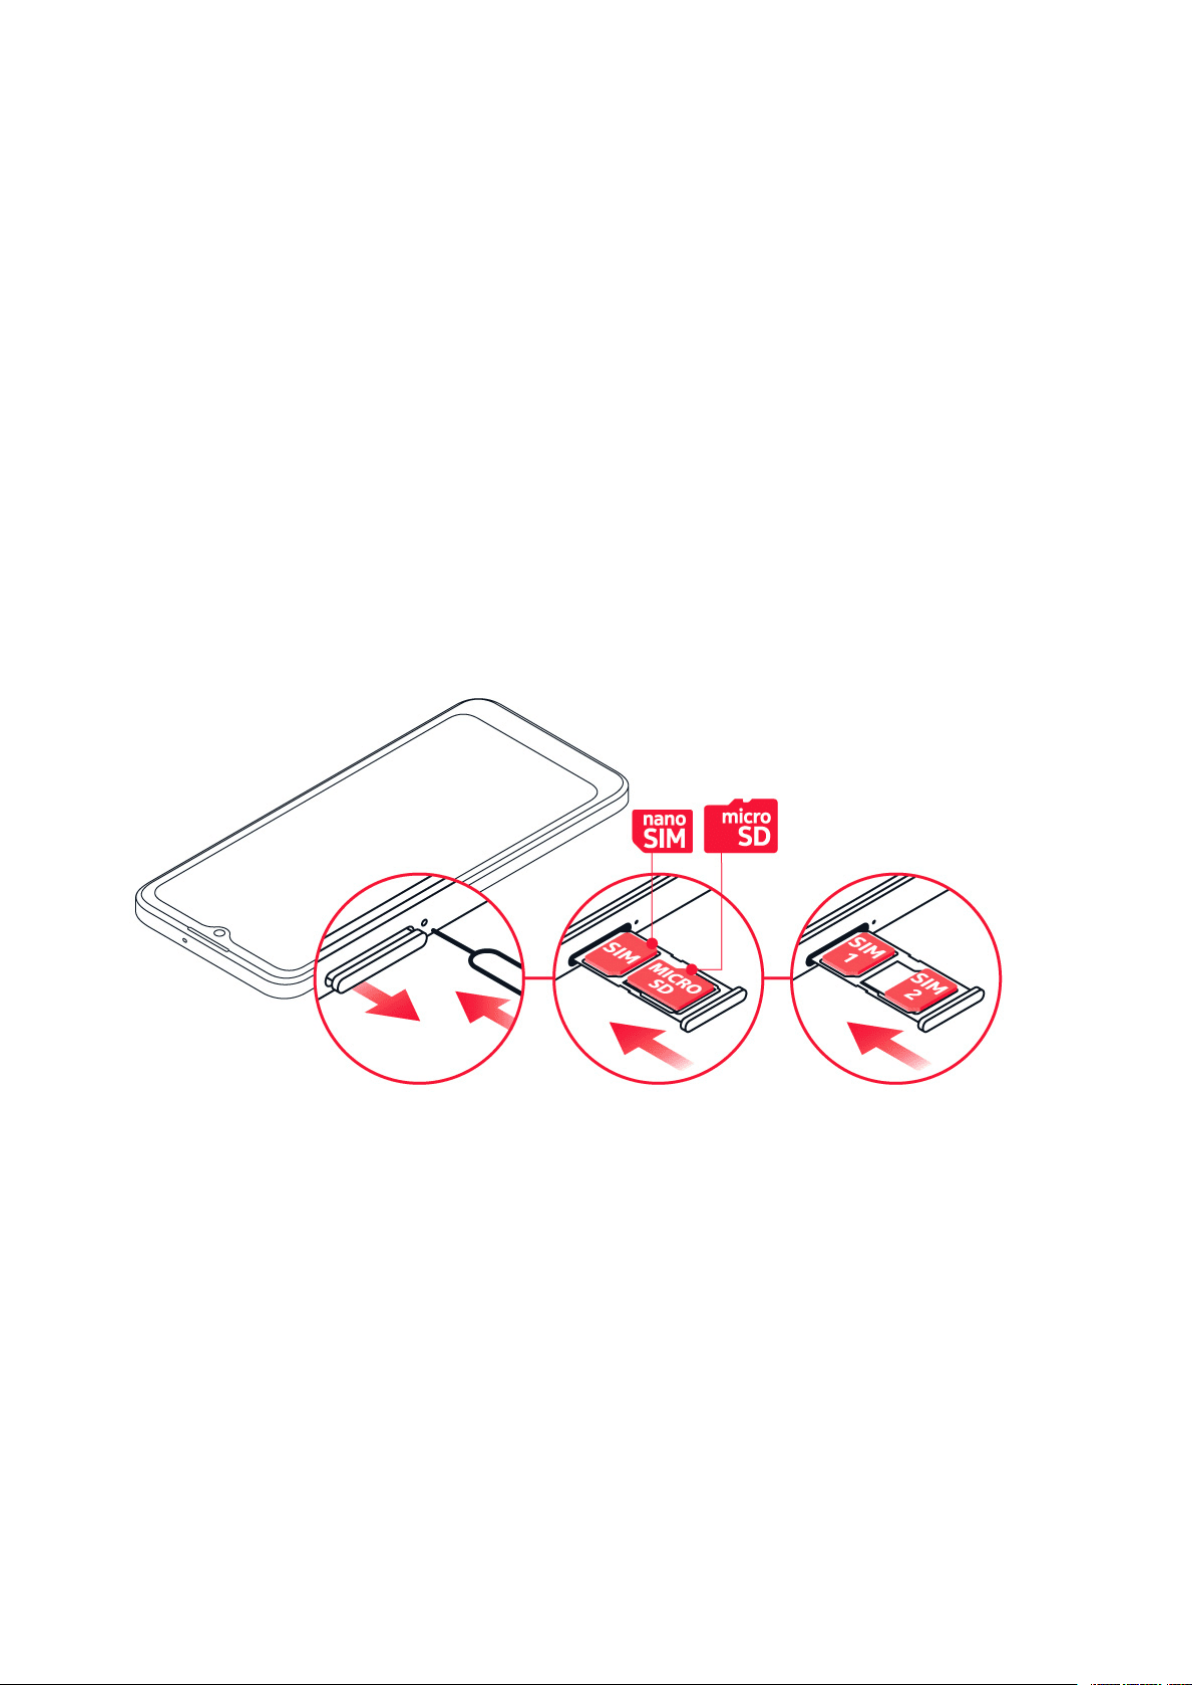
INSERT THE SIM AND MEMORY CARDS
Insert the cards
1. Open the SIM card tray: push the tray opener pin in the tray hole and slide the tray out.
2. If you have a single-SIM phone, put a nano-SIM card in slot 1 and a memory card in slot 2
on the tray with the contact areas face down. If you have a dual-SIM phone, put a nano-SIM
card in slot 1 and either a second SIM or a memory card in slot 2 with the contact areas face
down.
3. Slide the tray back in.
If you have an eSIM card
If you have an eSIM card instead of a physical SIM card, switch on your phone and follow the
instructions on the phone. To be able to activate your eSIM, you need a Wi-Fi connection. To
© 2022 HMD Global Oy. Tüm hakları saklıdır. 7
Nokia G60 5G Kullanıcı kılavuzu
purchase an eSIM card, contact your network operator. Note that if you have a single-SIM
phone, you can only have one SIM card, physical or eSIM, active at a time. If you have a dualSIM phone, you can have two physical SIM cards or a physical SIM and an eSIM active at a time.
For information on eSIM cards, contact your network operator.
__İpucu:__Telefonunuzun 2 SIM kart destekleyip desteklemediğini öğrenmek için kutu
etiketine bakın. Etikette 2 ayrı IMEI kodu varsa, telefonunuz çift SIM kart destekler.
Önemli: Uygulama tarafından kullanıldığı sırada hafıza kartını çıkarmayın. Kartın çıkarılması,
hafıza kartının ve cihazın zarar görmesine ve kartta depolanan verilerin bozulmasına neden
olabilir.
Tip: Use a fast, up to 1 TB microSD memory card from a well-known manufacturer.
TELEFONUNUZU ŞARJ ETME
Pili şarj etme
1. Uyumlu bir şarj cihazını duvar prizine takın.
2. Kabloyu telefonunuza bağlayın.
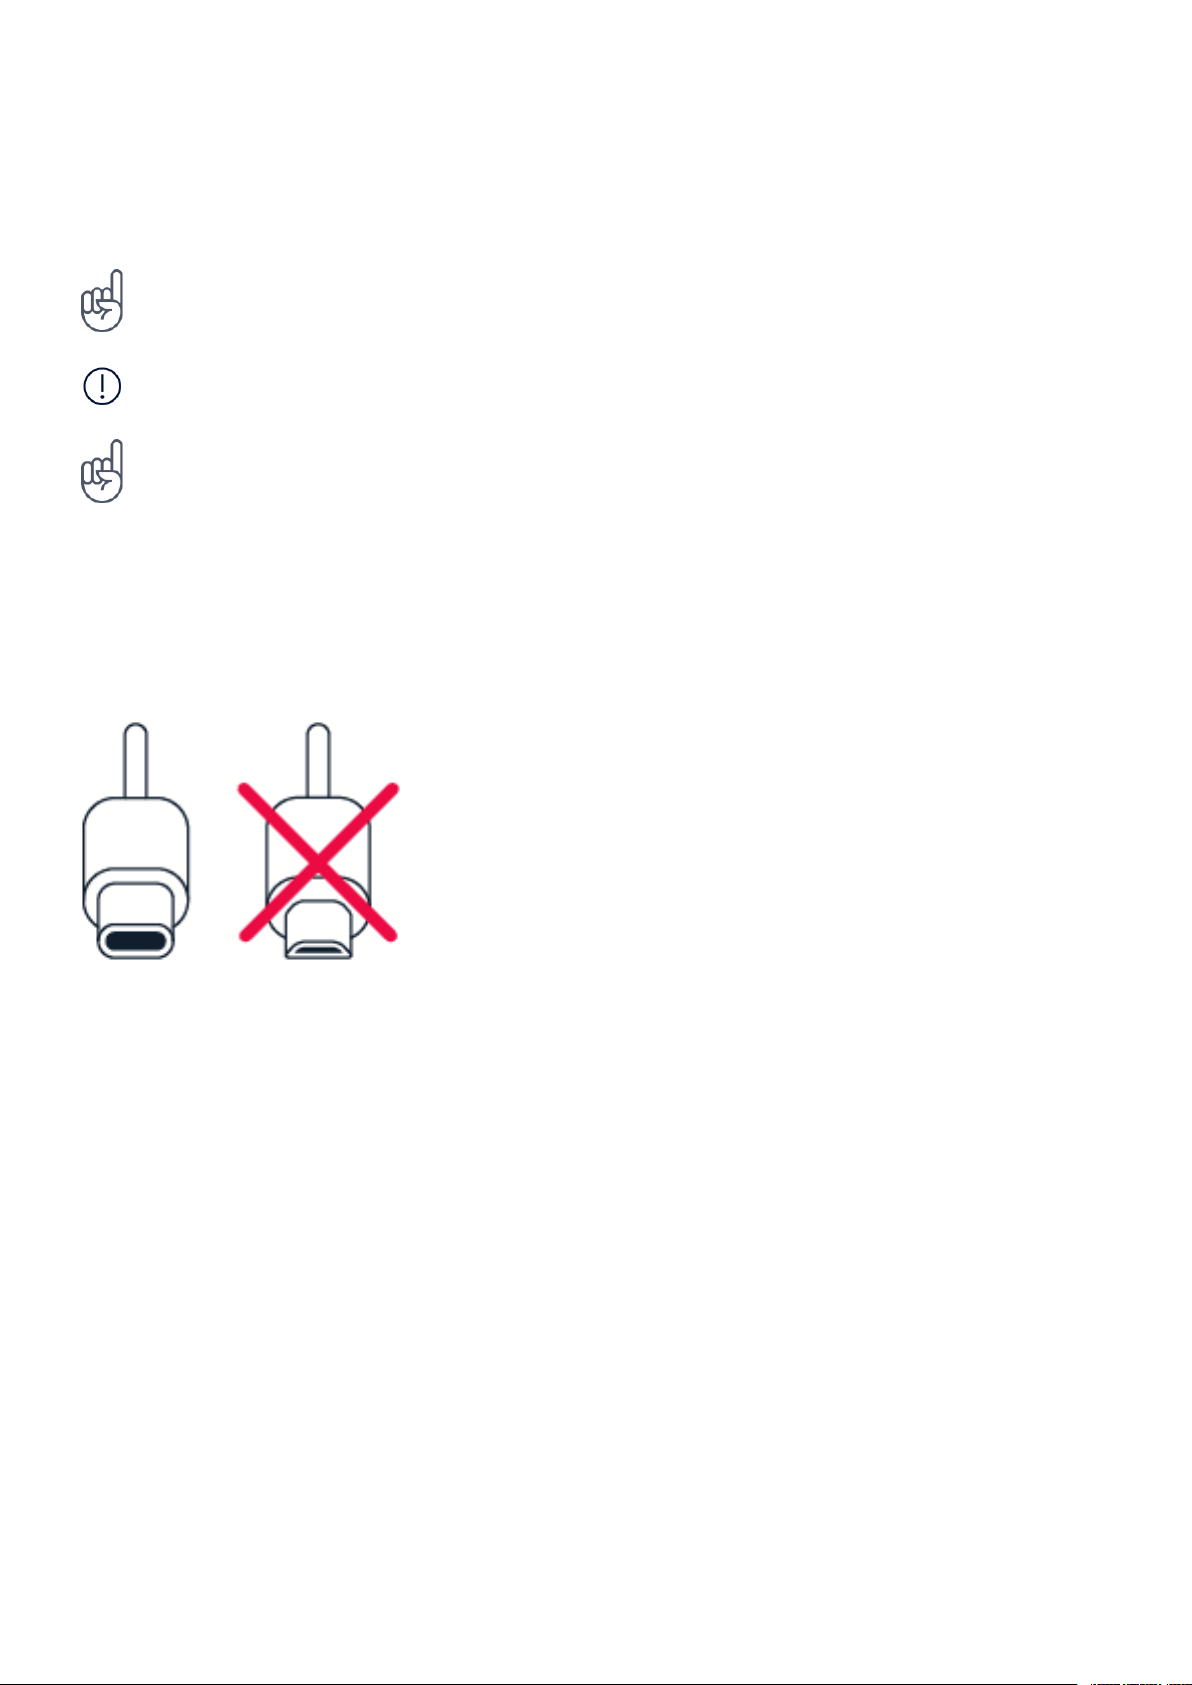
Telefonunuz, USB-C kablosu destekler. Telefonunuzu USB kablosu ile bilgisayardan da şarj
edebilirsiniz, ancak bu daha uzun sürebilir.
Pil tamamen boşalmışsa, şarj göstergesinin görüntülenmesi birkaç dakika sürebilir.
SWITCH ON AND SET UP YOUR PHONE
Switch on your phone
When you switch your phone on for the first time, your phone guides you to set up your
network connections and phone settings.
1. Press and hold the power key.
© 2022 HMD Global Oy. Tüm hakları saklıdır. 8

Nokia G60 5G Kullanıcı kılavuzu
2. Choose your language and region.
3. Follow the instructions shown on your phone.
Transfer data from your previous phone
You can transfer data from an old phone to your new phone using your Google account.
To back up data on your old phone to your Google account, refer to your old phone’s user
guide.
Restore app settings from your previous Android™ phone
If your previous phone was an Android, and you had set it to back up data to your Google
account, you can restore your app settings and passwords.
1. Tap Settings > Passwords & accounts > Add account > Google .
2. Select which data you want to restore on your new phone. The sync starts automatically
once your phone is connected to the internet.
Switch off your phone
To switch off your phone, press the power key and the volume up key at the same time, and
select Power off .
Tip: If you want to switch off your phone by pressing and holding the power key, tap Settings
> System > Gestures > Press and hold power button and switch off Hold for Assistant .
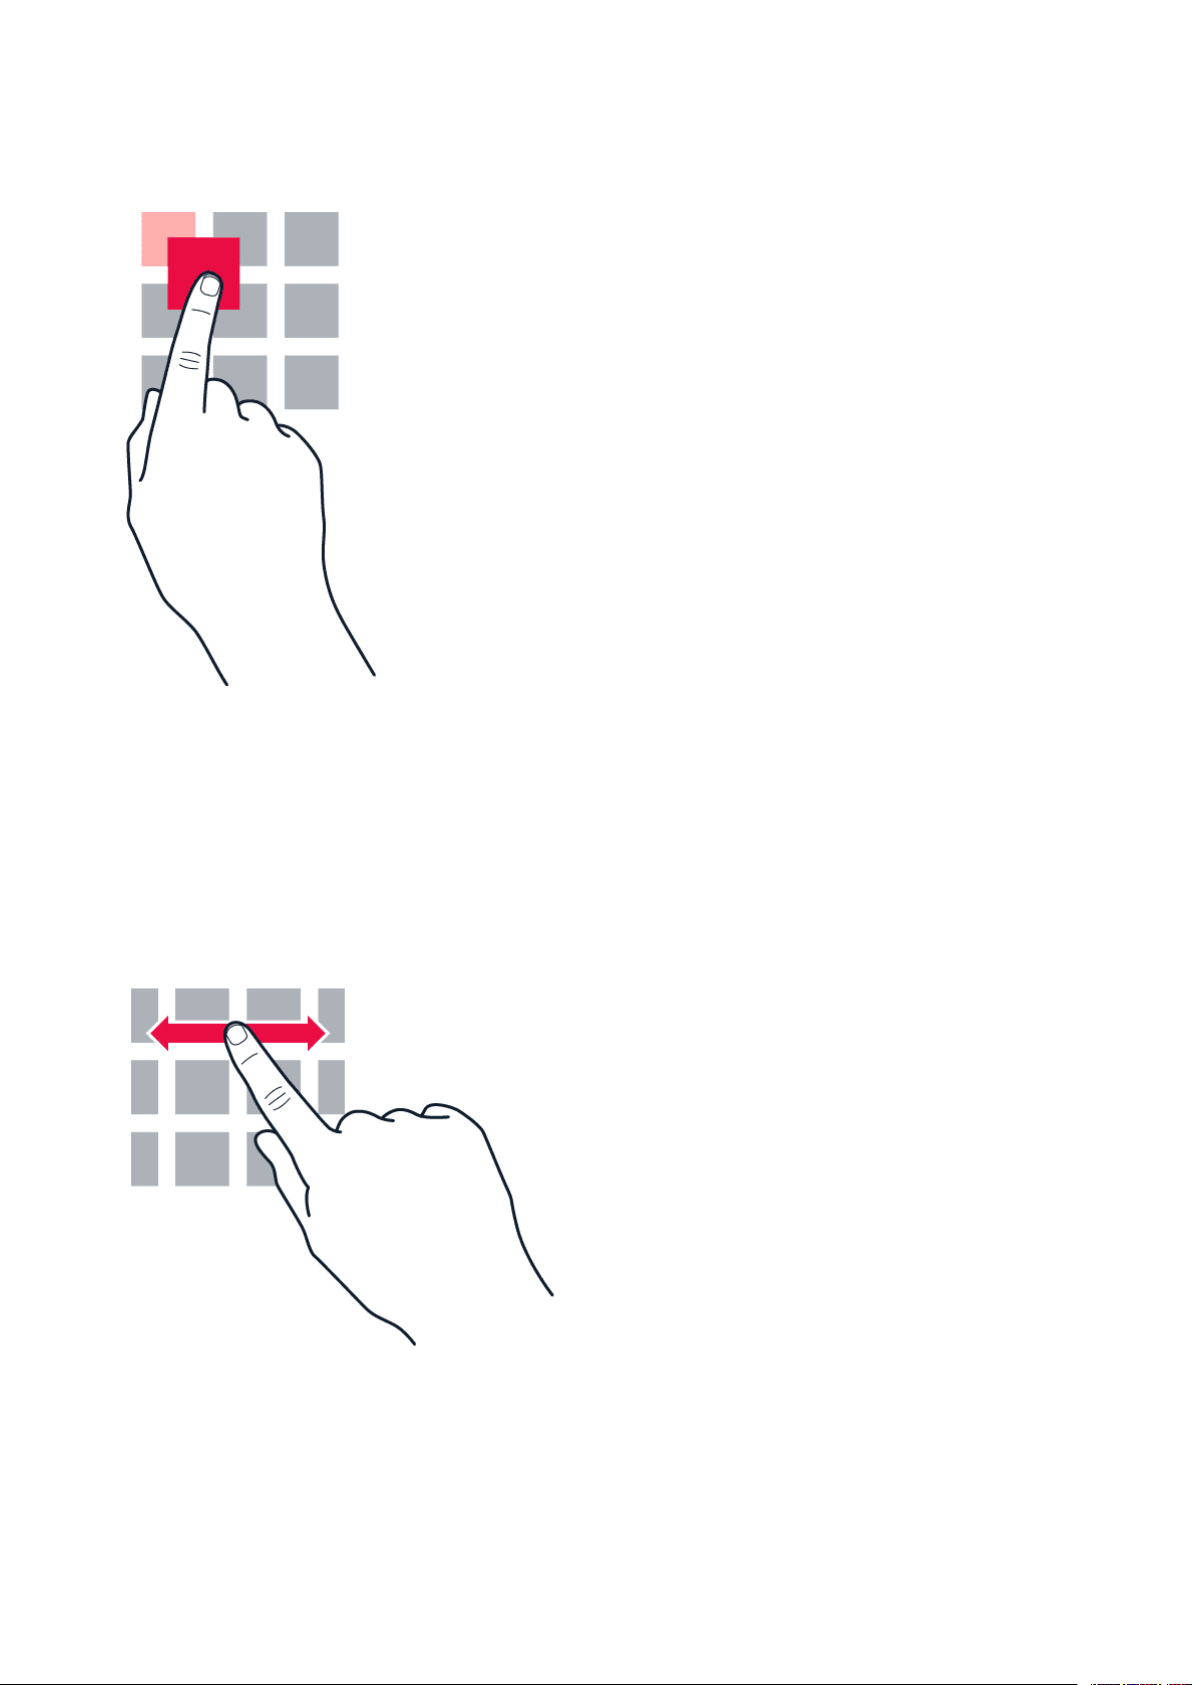
USE THE TOUCH SCREEN
Important: Avoid scratching the touch screen. Never use an actual pen, pencil, or other sharp
object on the touch screen.
© 2022 HMD Global Oy. Tüm hakları saklıdır. 9
Nokia G60 5G Kullanıcı kılavuzu
Öğeyi sürüklemek için dokunup tutma
Parmağınızı birkaç saniye boyunca öğenin üstüne yerleştirin ve ekranda kaydırın.
Hızlıca Çekme
Parmağınızı ekrana yerleştirin ve istediğiniz yöne kaydırın.
© 2022 HMD Global Oy. Tüm hakları saklıdır. 10

Nokia G60 5G Kullanıcı kılavuzu
Uzun bir listede veya menüde ilerleme
Hızlıca kaydırma hareketinde parmağınızı ekranda yukarıya veya aşağıya hızlıca kaydırın ve
parmağınızı çekin. İlerlemeyi durdurmak için ekrana dokunun.
Yakınlaştırma ya da uzaklaştırma
2 parmağınızı harita, fotoğraf veya web sayfası gibi bir öğe üzerine yerleştirin ve parmaklarınızı
ayrı ayrı ya da birlikte kaydırın.
© 2022 HMD Global Oy. Tüm hakları saklıdır. 11

Nokia G60 5G Kullanıcı kılavuzu
Lock the screen orientation
The screen rotates automatically when you turn the phone 90 degrees.
To lock the screen in portrait mode, swipe down from the top of the screen, and tap
Auto-rotate > Off .
Navigate with gestures
To switch on using gesture navigation, tap Settings > System > Gestures >
System navigation > Gesture navigation .
• To see all your apps, on the home screen, swipe up on the screen.
• To go to the home screen, swipe up from the bottom of the screen. The app you were in
stays open in the background.
• To see which apps you have open, swipe up from the bottom of the screen without releasing
your finger until you see the apps, and then release your finger. To switch to another
open app, tap the app. To close all the open apps, swipe right through all the apps and tap
CLEAR ALL .
• To go back to the previous screen you were in, swipe from the right or left edge of the
screen. Your phone remembers all the apps and websites you’ve visited since the last time
your screen was locked.
Navigate with keys
To switch on the navigation keys, tap Settings > System > Gestures > System navigation >
3-button navigation .
• To see all your apps, on the home screen, swipe up from the bottom of the screen.
• To go to the home screen, tap . The app you were in stays open in the background.
• To see which apps you have open, tap . To switch to another open app, swipe right and
tap the app. To close all the open apps, swipe right through all the apps and tap CLEAR ALL .
• To go back to the previous screen you were in, tap . Your phone remembers all the apps
and websites you’ve visited since the last time your screen was locked.
USE YOUR ESIM
Activate your eSIM
If you didn’t activate your eSIM card when you switched on the phone for the first time, you can
activate it in the settings. If you do not have a physical SIM card inserted in your phone, you
need a Wi-Fi connection to be able to activate your eSIM: tap Settings > Network & internet ,
and switch Wi-Fi on.
© 2022 HMD Global Oy. Tüm hakları saklıdır. 12

Nokia G60 5G Kullanıcı kılavuzu
1. Tap Settings > Network & internet >
SIMs .
Need help? > Enter it manually , and
enter the code you received from your
network operator.
2. If you do not have a physical SIM
card inserted in your phone, tap
Download eSIM instead? . If you already
have a physical SIM card inserted, tap
4. Tap Continue > Download , and wait until
the eSIM has been downloaded onto your
phone.
Add eSIM .
5. Tap Settings and the eSIM, and switch
3. If you got a QR code from your network
Use eSIM on.
operator, scan it with your phone or tap
You may have up to 10 eSIM cards on this phone, depending on the size of your eSIMs. If you
don’t have enough space for your eSIMs, remove an eSIM in Settings .
Switch between eSIMs
If you have several eSIM cards and want to switch to using another eSIM, tap Settings >
Network & internet > SIMs , tap the eSIM you want to use, and switch on Use eSIM .
Switch to a physical SIM card
1. Insert a SIM card in your phone.
2. The phone disconnects from the eSIM network. Tap OK to continue.
3. Once the phone has read the SIM card, tap the SIM card and switch on Use SIM .
Remove an eSIM from your phone
To remove an eSIM card from your phone, tap Settings > Network & internet > SIMs , tap the
eSIM you want to remove and tap Erase eSIM . Note, however, that this does not cancel your
subscription from your network operator. If you want to use the removed eSIM in your phone
later, contact your network operator.
© 2022 HMD Global Oy. Tüm hakları saklıdır. 13

Nokia G60 5G Kullanıcı kılavuzu
3 Telefonunuzu koruma
TELEFONUNUZU KILITLEME VEYA TELEFONUNUZUN KILIDINI AÇMA
Telefonunuzu kilitleme
Telefonunuz cebinizde veya çantanızdayken yanlışlıkla bir çağrı yapmaktan kaçınmak
istiyorsanız, telefonunuzun tuşlarını ve ekranını kilitleyebilirsiniz.
Telefonunuzun tuşlarını ve ekranını kilitlemek için açma/kapatma düğmesine basın.
Tuşların ve ekranın kilidini açma
Açma/kapama düğmesine basın ve ekranı yukarıya kaydırın. Sorulursa diğer kimlik bilgilerini
girin.
EKRAN KILIDIYLE TELEFONUNUZU KORUMA
Telefonunuzu, ekranın kilidi açılırken kimlik doğrulaması gerektirecek şekilde ayarlayabilirsiniz.
Ekran kilidi ayarlama
1. Ayarlar > Emniyet > Ekran kilidi seçeneğine dokunun.
2. Kilit türünü seçin ve telefonunuzdaki yönergeleri izleyin.
PROTECT YOUR PHONE WITH YOUR FINGERPRINT
Add a fingerprint
1. Tap Settings > Security > Fingerprint .
2. Select what backup unlocking method you want to use for the lock screen and follow the
instructions shown on your phone.
Unlock your phone with your finger
Place your registered finger on the power key.
If there is a fingerprint sensor error, and you cannot use alternative sign-in methods to
recover or reset the phone in any way, your phone will require service by authorized personnel.
Additional charges may apply, and all the personal data on your phone may be deleted. For
more info, contact the nearest care point for your phone, or your phone dealer.
© 2022 HMD Global Oy. Tüm hakları saklıdır. 14

Nokia G60 5G Kullanıcı kılavuzu
PROTECT YOUR PHONE WITH YOUR FACE
Set up face authentication
1. Tap Settings > Security > Face unlock .
2. Select what backup unlocking methods you want to use for the lock screen and follow the
instructions shown on your phone.
Keep your eyes open and make sure your face is fully visible and not covered by any object,
such as a hat or sunglasses.
Not: Telefonunuzun kilidini açmak için yüzünüzü kullanmak, bir parmak izi, desen veya
parola kullanmaktan daha az güvenlidir. Telefonunuzun kilidi benzer görünümlü bir kişi
tarafından veya bir nesne ile açılabilir. Yüzle kilit açma ters ışıklı veya çok karanlık ya da
aydınlık ortamlarda düzgün şekilde çalışmayabilir.
Unlock your phone with your face
To unlock your phone, just turn your screen on and look at the front camera.
If there is a facial recognition error, and you cannot use alternative sign-in methods to recover
or reset the phone in any way, your phone will require service. Additional charges may apply,
and all the personal data on your phone may be deleted. For more info, contact the nearest
authorized service facility for your phone, or your phone dealer.
FIND YOUR LOST PHONE
Telefonunuzun konumunu belirleme veya telefonunuzu kilitleme
Telefonunuzu kaybederseniz; bir Google Hesabı ile oturum açmış olmanız durumunda
© 2022 HMD Global Oy. Tüm hakları saklıdır. 15

Nokia G60 5G Kullanıcı kılavuzu
telefonunuzu bulabilir, kilitleyebilir veya telefonunuzdaki verileri uzaktan silebilirsiniz. Cihazımı
Bul özelliği telefonlar için varsayılan olarak bir Google Hesabı ile ilişkilendirilmiştir.
Cihazımı Bul özelliğini kullanmak için, kaybolan telefonunuz şu koşulları karşılamalıdır:
• Açık olmalıdır
• Bir Google Hesabında oturum açmış
• Google Play’de görünür olmalıdır
• Konum özelliği açık olmalıdır
olmalıdır
• Cihazımı Bul özelliği açık olmalıdır
• Mobil veri ya da Wi-Fi ağına bağlı olmalıdır
Cihazımı Bul özelliği telefonunuza bağlandığında telefonunuzun konumunu görürsünüz ve
telefonunuza bir bildirim gönderilir.
1. İnternete bağlı bir bilgisayar, tablet veya telefonda android.com/find bağlantısını açın ve
Google Hesabınızda oturum açın.
2. Birden fazla telefonunuz varsa, ekranın üst kısmında kaybolan telefona tıklayın.
3. Haritada, telefonunuzun nerede olduğunu görün. Bu konum, yaklaşık konumu gösterir ve
doğru olmayabilir.
Cihazınız bulunamazsa, Cihazımı Bul, mevcutsa cihazın son bilinen konumunu gösterir.
Telefonunuzu kilitlemek veya kayıtlı verileri silmek için, web sitesindeki yönergeleri izleyin.
© 2022 HMD Global Oy. Tüm hakları saklıdır. 16

Nokia G60 5G Kullanıcı kılavuzu
4 Temel Adımlar
PERSONALIZE YOUR PHONE
Change your wallpaper
Tap Settings > Wallpaper & style .
Change your phone ringtone
Tap Settings > Sound > Phone ringtone (SIM1) or Phone ringtone (SIM2) , and select the
tone.
Change your message notification sound
Tap Settings > Sound > Default notification sound .
NOTIFICATIONS
Use the notification panel
When you receive new notifications, such as messages or missed calls, icons appear at the top
of the screen.
To see more information about the notifications, swipe down from the top of the screen. To
close the view, swipe up on the screen.
To change the notification settings of an app, tap Settings > Notifications > App settings >
Most recent > All apps , and switch the app’s notifications on or off.
© 2022 HMD Global Oy. Tüm hakları saklıdır. 17

Nokia G60 5G Kullanıcı kılavuzu
Use the quick access items
To activate features, tap the corresponding quick access item on the notification panel. To see
more items, drag the menu down. To rearrange or add new items, tap , tap and hold an item,
and then drag it to another location.
CONTROL VOLUME
Ses düzeyini değiştirme
Gürültülü ortamlarda telefonunuzun çaldığını duymakta sorun yaşıyorsanız ya da aramaların
sesi çok yüksekse, telefonunuzun yan tarafındaki ses düzeyi tuşlarını kullanarak ses düzeyini
istediğiniz gibi değiştirebilirsiniz.
Cihazınıza zarar verebileceğinden, çıkış sinyali üreten ürünleri cihazınıza bağlamayın. Ses
konnektörüne herhangi bir gerilim kaynağı bağlamayın. Bu cihazla kullanım için onaylananların
dışında herhangi bir harici cihaz veya mikrofonlu kulaklığı ses konnektörüne bağlarsanız,
özellikle ses düzeylerine dikkat edin.
Change the volume for media and apps
1. Press a volume key to see the volume level bar.
2. Tap .
3. Drag the slider on the volume level bars left or right.
4. Tap DONE .
© 2022 HMD Global Oy. Tüm hakları saklıdır. 18

Nokia G60 5G Kullanıcı kılavuzu
Set the phone to silent
1. Press a volume key.
2. Tap .
3. Tap to set your phone to vibrate only, or tap to set it to silent.
AUTOMATIC TEXT CORRECTION
Klavye sözcük önerilerini kullanma
Hızlı ve daha doğru yazmanıza yardımcı olmak için siz yazdıkça telefonunuz sözcük önerilerinde
bulunur. Sözcük önerileri tüm dillerde sunulmayabilir.
Bir sözcük yazmaya başladığınızda, telefonunuz olası sözcükleri önerir. İstediğiniz sözcük öneri
çubuğunda görüntülendiğinde, sözcüğü seçin. Daha fazla öneri görüntülemek için öneriye
dokunun ve basılı tutun.
Tip: If the suggested word is marked in bold, your phone automatically uses it to replace the
word you wrote. If the word is wrong, tap and hold it to see a few other suggestions.
If you do not want the keyboard to suggest words while typing, turn off the text corrections.
Tap Settings > System > Languages & input > On-screen keyboard . Select the keyboard
you normally use. Tap Text correction and switch off the text correction methods you do not
want to use.
Sözcüğü düzeltme
Bir sözcüğü yanlış yazdığınızı fark ettiğinizde, sözcüğe dokunarak düzeltme önerilerini
görüntüleyebilirsiniz.
Switch spell checker off
Tap Settings > System > Languages & input > Spell checker , and switch Use spell checker
off.
BATTERY LIFE
Extend battery life
To save power:
1. Always charge the battery fully.
2. Mute unnecessary sounds, such as touch
© 2022 HMD Global Oy. Tüm hakları saklıdır. 19
sounds. Tap Settings > Sound , and
select which sounds to keep.

Nokia G60 5G Kullanıcı kılavuzu
3. Use wired headphones, rather than the
loudspeaker.
4. Set the phone screen to switch off after
a short time. Tap Settings > Display >
Advanced > Screen timeout and select
the time.
5. Tap Settings > Display >
Brightness level . To adjust the
brightness, drag the brightness
level slider. Make sure that
Adaptive brightness is switched off.
6. Stop apps from running in the background.
7. Use location services selectively: switch
location services off when you don’t need
them. Tap Settings > Location , and
switch off Use location .
8. Use network connections selectively:
Switch Bluetooth on only when needed.
Use a Wi-Fi connection to connect to
the internet, rather than a mobile data
connection. Stop your phone scanning for
available wireless networks. Tap Settings
> Network & internet , and switch off
Wi-Fi . If you’re listening to music or
otherwise using your phone, but don’t
want to make or receive calls, switch
the airplane mode on. Tap Settings
> Network & internet , and switch on
Airplane mode . Airplane mode closes
connections to the mobile network and
switches your device’s wireless features
off.
ACCESSIBILITY
Make the text on the screen larger
1. Tap Settings > Accessibility > Text and display .
2. Tap Font size , and tap the the font size slider until the text size is to your liking.
Make the items on the screen larger
1. Tap Settings > Accessibility > Text and display .
2. Tap Display size , and tap the display size slider until the size is to your liking.
© 2022 HMD Global Oy. Tüm hakları saklıdır. 20

Nokia G60 5G Kullanıcı kılavuzu
5 Arkadaşlarınızla ve ailenizle bağlantı kurma
CALLS
Make a call
1. Tap .
2. Tap and type in a number, or tap and select a contact you want to call.
3. Tap .
Arama cevaplama
Telefon çaldığında cevaplamak için CEVAPLA seçeneğine dokunun.
Bir aramayı reddetme
Gelen aramayı reddetmek için, REDDET seçeneğine dokunun.
CONTACTS
Add a contact
1. Tap Contacts > + .
2. Fill out the information.
3. Tap Save .
Arama geçmişinden bir kişi kaydetme
1. Arama geçmişinizi görmek için > öğesine dokunun.
2. Kaydetmek istediğiniz numaraya dokunun.
3. Kişi Ekle öğesine dokunun. Yeni bir kişi ekleyecekseniz kartvizit bilgilerini girin ve Kaydet
öğesine dokunun. Bu kişi zaten kişiler listenizde yer alıyorsa Var olana ekle öğesine
dokunun, kişiyi seçip Kaydet öğesine dokunun.
SEND MESSAGES
Send a message
© 2022 HMD Global Oy. Tüm hakları saklıdır. 21

Nokia G60 5G Kullanıcı kılavuzu
1. Tap Messages .
2. Tap Start chat .
3. To add a recipient, tap , type in their
number, and tap . To add a recipient
from your contacts list, start typing their
name and tap the contact.
4. To add more recipients, tap . After
choosing all the recipients, tap Next .
5. Write your message in the text box.
6. Tap .
POSTA
Hareket halindeyken telefonunuzla posta gönderebilirsiniz.
E-posta hesabı ekleme
Gmail uygulamasını ilk defa kullandığınızda e-posta hesabınızı kurmanız istenir.
1. Gmail öğesine dokunun.
2. Google hesabınızla bağlantılı adresi seçebilir veya E-posta adresi ekle öğesine
dokunabilirsiniz.
3. Tüm hesapları ekledikten sonra, BENİ GMAIL’E GÖTÜR öğesine dokunun.
E-posta gönderme
1. Gmail öğesine dokunun.
2. öğesine dokunun.
3. Alıcı kutusuna adres girin
veya> Kişilerden ekle öğesine
dokunun.
4. İleti konusunu ve e-postayı yazın.
5. öğesine dokunun.
© 2022 HMD Global Oy. Tüm hakları saklıdır. 22

Nokia G60 5G Kullanıcı kılavuzu
6 Kamera
CAMERA BASICS
Fotoğraf çekme
Net ve canlı fotoğraflar çekerek fotoğraf albümünüzdeki en iyi pozları yakalayın.
1. Kamera öğesine dokunun.
2. Objektifi, çekeceğiniz nesneye doğrultun ve odaklayın.
3. öğesine dokunun.
Take a selfie
1. Tap Camera > to switch to the front camera.
2. Tap .
Record a video
1. Tap Camera .
2. To switch to the video recording mode, tap
Video .
3. Tap to start recording.
4. To stop recording, tap .
5. To go back to camera mode, tap Photo .
YOUR PHOTOS AND VIDEOS
Fotoğraf ve videolarınızı telefonunuzda görüntüleme
Fotoğraflar öğesine dokunun.
Fotoğraf ve videolarınızı paylaşma
1. Fotoğraflar menüsüne ve ardından paylaşmak istediğiniz fotoğrafa dokunun ve öğesine
dokunun.
2. Fotoğraf veya videoyu paylaşma yönteminizi seçin.
Copy your photos and videos to your computer
Connect your phone to your computer with a compatible USB cable. Use your computer’s file
manager to copy or move your photos and videos to the computer.
© 2022 HMD Global Oy. Tüm hakları saklıdır. 23

Nokia G60 5G Kullanıcı kılavuzu
7 İnternet ve bağlantılar
ACTIVATE WI-FI
Switch on Wi-Fi
1. Tap Settings > Network & internet .
2. Switch Wi-Fi on.
3. Select the network you want to use.
Your Wi-Fi connection is active when is shown at the top of the screen. If both Wi-Fi and
mobile data connections are available, your phone uses the Wi-Fi connection.
Important: Use encryption to increase the security of your Wi-Fi connection. Using encryption
reduces the risk of others accessing your data.
BROWSE THE WEB
Search the web
1. Tap Chrome .
2. Write a search word or a web address to the search field.
3. Tap , or select from the proposed matches.
İpucu:Şebeke servis sağlayıcınız veri aktarımı için sabit bir ücret uygulamıyorsa, veri
maliyetlerinden tasarruf etmek için internete Wi-Fi ağını kullanarak bağlanın.
Use your phone to connect your computer to the web
Use your mobile data connection to access the internet with your laptop or other device.
1. Tap Settings > Network & internet > Hotspot & tethering .
2. Switch on Wi-Fi hotspot to share your mobile data connection over Wi-Fi, USB tethering to
use a USB connection, Bluetooth tethering to use Bluetooth, or Ethernet tethering to use
a USB Ethernet cable connection.
The other device uses data from your data plan, which may result in data traffic costs. For info
on availability and costs, contact your network service provider.
© 2022 HMD Global Oy. Tüm hakları saklıdır. 24

Nokia G60 5G Kullanıcı kılavuzu
BLUETOOTH®
Connect to a Bluetooth device
1. Tap Settings > Connected devices >
Connection preferences > Bluetooth .
2. Switch Use Bluetooth on.
3. Make sure the other device is switched on.
You may need to start the pairing process
from the other device. For details, see the
user guide for the other device.
Since devices with Bluetooth wireless technology communicate using radio waves, they do not
need to be in direct line-of-sight. Bluetooth devices must, however, be within 10 meters (33
feet) of each other, although the connection may be subject to interference from obstructions
such as walls or from other electronic devices.
Paired devices can connect to your phone when Bluetooth is switched on. Other devices can
detect your phone only if the Bluetooth settings view is open.
Do not pair with or accept connection requests from an unknown device. This helps to protect
your phone from harmful content.
4. Tap Pair new device and tap the device
you want to pair with from the list of
discovered Bluetooth devices.
5. You may need to type in a passcode. For
details, see the user guide for the other
device.
İçeriğinizi Bluetooth kullanarak paylaşma
Fotoğraflarınızı veya diğer içeriklerinizi bir arkadaşınızla paylaşmak istediğinizde, bunları
Bluetooth kullanarak arkadaşınızın telefonuna gönderin.
Aynı anda birden fazla Bluetooth bağlantısı kullanabilirsiniz. Örneğin, Bluetooth kulaklık
kullanırken, başka bir telefona bir şeyler göndermeye devam edebilirsiniz.
1. Ayarlar > Bağlı cihazlar >
Bağlantı tercihleri > Bluetooth öğesine
dokunun.
2. Her iki telefonda da Bluetooth’un açık
olduğundan ve telefonların birbirine
görünür olduğundan emin olun.
3. Göndermek istediğiniz içeriğe gidip >
Parola yalnızca yeni bir cihaza ilk kez bağlanırken kullanılır.
Bluetooth öğesine dokunun.
4. Bulunan Bluetooth cihazları listesinde
arkadaşınızın telefonuna dokunun.
5. Diğer telefon için parola gerekiyorsa,
parolayı yazın veya kabul edin ve Eşleştir
öğesine dokunun.
Remove a pairing
If you no longer have the device with which you paired your phone, you can remove the pairing.
© 2022 HMD Global Oy. Tüm hakları saklıdır. 25

Nokia G60 5G Kullanıcı kılavuzu
1. Tap Settings > Connected devices > Previously connected devices .
2. Tap next to a device name.
3. Tap FORGET .
NFC
If your phone supports Near Field Communication (NFC), you can tap accessories to connect
to them, and tap tags to call someone or open a website. The NFC functionality can be used
with some specific services and technologies like tap to pay with your device. These services
might not be available in your region. For additional info about the availability of these services,
contact your network service provider.
Switch on NFC
1. Tap Settings > Connected devices > Connection preferences > NFC .
2. Switch on Use NFC .
Before using NFC, make sure the screen and keys are unlocked.
Use NFC
The NFC area is at the back of your phone.
To connect your phone to another phone or an accessory, or to read NFC tags, just tap the
other device or tag with the NFC area of your phone.
Not: Ödeme ve biletleme uygulamaları ile hizmetleri, üçüncü taraflarca sağlanır. HMD Global,
cihazınızla birlikte gelen; destek, işlevsellik, işlemler veya herhangi bir maddi kayıp dahil olmak
üzere, üçüncü taraf uygulamalar ya da hizmetler ile ilgili hiçbir garanti vermemekte veya
sorumluluk kabul etmemektedir. Cihazınızın onarılmasından sonra, ödeme veya biletleme
uygulamasını yeniden yüklemeniz ve önceden eklemiş olduğunuz kartları etkinleştirmeniz
gerekebilir.
Bağlı aksesuarın bağlantısını kesme
Telefonunuzun aksesuara bağlı olması gerekmiyorsa, aksesuarın bağlantısını kesebilirsiniz.
Telefonunuzu aksesuarın NFC alanına tekrar dokundurun.
Daha fazla bilgi için, aksesuarın kullanıcı kılavuzuna bakın.
© 2022 HMD Global Oy. Tüm hakları saklıdır. 26

Nokia G60 5G Kullanıcı kılavuzu
VPN
You may need a virtual private network (VPN) connection to access your company resources,
such as intranet or corporate mail, or you may use a VPN service for personal purposes.
Contact your company IT administrator for details of your VPN configuration, or check your
VPN service’s website for additional info.
Use a secure VPN connection
1. Tap Settings > Network & internet > VPN .
2. To add a VPN profile, tap .
3. Type in the profile info as instructed by your company IT administrator or VPN service.
VPN profilini düzenleme
1. Profil adının yanındakiöğesine dokunun.
2. Bilgileri gerektiği gibi değiştirin.
Delete a VPN profile
1. Tap next to a profile name.
2. Tap FORGET .
© 2022 HMD Global Oy. Tüm hakları saklıdır. 27

Nokia G60 5G Kullanıcı kılavuzu
8 Gününüzü düzenleme
DATE AND TIME
Tarih ve saat ayarlama
Ayarlar > Sistem tarih ve saat öğesine dokunun.
Update the time and date automatically
You can set your phone to update the time, date, and time zone automatically. Automatic
update is a network service and may not be available depending on your region or network
service provider.
1. Tap Settings > System > Date & time .
2. Switch on Set time automatically .
3. Switch on Set time zone automatically .
Saat biçimini 24 olarak değiştirme
Ayarlar > Sistem > Tarih ve saat öğesine dokunun ve 24 saat biçimini kullan seçeneğini açık
olarak değiştirin.
ALARM CLOCK
Set an alarm
1. Tap Clock > Alarm .
2. To add an alarm, tap .
3. Select the hour and the minutes, and tap OK .
4. To set the alarm to repeat on specific days, tap the corresponding weekdays.
Alarmı kapatma
Alarm çaldığında, alarmısağa çekin.
© 2022 HMD Global Oy. Tüm hakları saklıdır. 28

Nokia G60 5G Kullanıcı kılavuzu
CALENDAR
Select the calendar type
Tap Calendar > , and select what type of calendar you want to see.
If you have signed into an account, such as your Google account, your calendar is shown on the
phone.
Add an event
1. Tap Calendar > .
2. Add the needed details.
3. To make the event repeat on certain days,
tap Does not repeat , and select how
İpucu:Etkinliği düzenlemek için etkinliğe ve öğesine dokunup ayrıntıları düzenleyin.
Randevu silme
1. Etkinliğe dokunun
2. > Sil öğesine dokunun.
often the event should repeat.
4. To set a reminder, tap Add notification
and set the time.
5. Tap Save .
© 2022 HMD Global Oy. Tüm hakları saklıdır. 29

Nokia G60 5G Kullanıcı kılavuzu
9 Haritalar
FIND PLACES AND GET DIRECTIONS
Bir yeri bulma
Google Maps belirli konumları ve iş yerlerini bulmanızda yardımcı olur.
1. Haritalar öğesine dokunun.
2. Arama çubuğuna sokak veya yer adı gibi arama sözcükleri yazın.
3. Yazarken önerilen eşleşmeler listesinden bir öğe seçin veya arama yapmak için öğesine
dokunun.
Konum haritada gösterilir. Hiçbir arama sonucu bulunamazsa, arama sözcüklerinizi doğru
yazdığınızdan emin olun.
Mevcut konumunuza göz atma
Haritalar > öğesine dokunun.
Get directions to a place
1. Tap Maps and enter your destination in the search bar.
2. Tap Directions . The highlighted icon shows the mode of transportation, for example . To
change the mode, select the new mode under the search bar.
3. If you don’t want the starting point to be your current location, tap Your location , and
search for a new starting point.
4. Tap Start to start the navigation.
The route is shown on the map, along with an estimate of how long it takes to get there. To see
detailed directions, tap Steps .
© 2022 HMD Global Oy. Tüm hakları saklıdır. 30

Nokia G60 5G Kullanıcı kılavuzu
10 Uygulamalar, güncellemeler ve yedeklemeler
GET APPS FROM GOOGLE PLAY
Add a payment method
To use Google Play services, you need to have a Google account added to your phone. Charges
may apply to some of the content available in Google Play. To add a payment method, tap
Play Store , tap your Google logo in the search field, and then tap Payments & subscriptions .
Always be sure to have a permission from the payment method owner when buying content
from Google Play.
Uygulama yükleme
1. Play Store öğesine dokunun.
2. Uygulamaları aramak için, arama çubuğuna dokunun veya önerilenler arasından uygulama
seçin.
3. Uygulama açıklamasında Yükle öğesine dokunarak uygulamayı indirin ve yükleyin.
Uygulamalarınızı görmek için, ana ekrana gidin ve ekranın altından yukarıya kaydırın.
UPDATE YOUR PHONE SOFTWARE
Install available updates
Tap Settings > System > System update > Check for update to check if updates are
available.
When your phone notifies you that an update is available, just follow the instructions shown
on your phone. If your phone is low on memory, you may need to move your photos and other
stuff to the memory card.
Before starting the update, connect a charger or make sure the device battery has enough
power, and connect to Wi-Fi, as the update packages may use up a lot of mobile data.
VERILERINIZI YEDEKLEME
Verilerinizin güvende olmasını sağlamak için telefonunuzdaki yedekleme özelliğini kullanın.
Cihaz verileriniz (Wi-Fi şifreleri ve arama geçmişi gibi) ve uygulama verileri (ayarlar ve
uygulamalar tarafından saklanan dosyalar gibi) uzaktan yedeklenir.
© 2022 HMD Global Oy. Tüm hakları saklıdır. 31

Nokia G60 5G Kullanıcı kılavuzu
Otomatik yedeklemeyi açma
Ayarlar > Sistem > Yedekle öğesine dokunun veaçık olarak değiştirin.
RESTORE ORIGINAL SETTINGS AND REMOVE PRIVATE CONTENT FROM YOUR PHONE
Reset your phone
1. Tap Settings > System > Reset options > Erase all data (factory reset) .
2. Follow the instructions shown on your phone.
© 2022 HMD Global Oy. Tüm hakları saklıdır. 32

Nokia G60 5G Kullanıcı kılavuzu
11 Ürün ve güvenlik bilgileri
GÜVENLIĞINIZ IÇIN
Burada yer verilen basit talimatları okuyun. Bu talimatlara uyulmaması tehlikeli olabileceği gibi,
yerel yasa ve düzenlemelere aykırı olabilir. Daha fazla bilgi için kullanım kılavuzunun tamamını
okuyun.
YASAKLANAN ALANLARDA KAPATIN
Cep telefonu kullanımına izin verilmediğinde veya uçakta, hastanelerde ya da tıbbi ekipmanlar,
yakıt, kimyasal madde veya patlama alanlarının yakınında olduğu gibi parazite ya da tehlikeye
neden olabileceği zamanlarda cihazı kapatın. İzin verilmeyen yerlerde tüm talimatlara uyun.
YOL GÜVENLİĞİ ÖNCE GELİR
Yerel yasalara uyun. Sürüş sırasında, aracı kullanabilmek için ellerinizin her zaman serbest
olmasını sağlayın. Sürüş sırasında önceliğiniz yol güvenliği olmalıdır.
PARAZİT
© 2022 HMD Global Oy. Tüm hakları saklıdır. 33

Nokia G60 5G Kullanıcı kılavuzu
Tüm kablosuz cihazlar parazite duyarlı olabilir ve bu durum performansını etkileyebilir.
YETKİLİ SERVİS
Bu ürünü yalnızca yetkili personel monte edebilir veya onarabilir.
PİLLER, ȘARJ CİHAZLARI VE DİĞER AKSESUARLAR
Yalnızca, bu cihazla birlikte kullanımı HMD Global tarafından onaylanmış olan pilleri, şarj
cihazlarını ve diğer aksesuarları kullanın. Uyumsuz ürünleri bağlamayın.
CİHAZINIZI KURU TUTUN
Cihazınız suya dayanıklıysa daha ayrıntılı bilgi için, lütfen cihazınızın IP sınıflandırmasına
başvurun.
© 2022 HMD Global Oy. Tüm hakları saklıdır. 34

Nokia G60 5G Kullanıcı kılavuzu
CAM PARÇALAR
Cihaz ve/veya ekranı camdan yapılmıştır. Cihaz sert bir yüzeye düşürülürse veya ağır bir
darbeye maruz kalırsa bu cam kırılabilir. Cam kırılırsa cihazın cam parçalarına dokunmayın veya
kırılan camı cihazdan çıkarmaya çalışmayın. Cam, yetkili servis personeli tarafından değiştirilene
kadar cihazı kullanmayın.
İȘİTME DUYUNUZU KORUYUN
İşitme sistemine hasar gelme olasılığını önlemek için yüksek ses düzeylerinde uzun süre
dinlemeyin. Hoparlör kullanımdayken cihazınızı kulağınızın yakınına getirmemeye dikkat edin.
NETWORK SERVICES AND COSTS
Ücretsiz öğeler dahil, bazı özellikler ile servisleri kullanmak veya içerik indirmek için bir şebeke
bağlantısı gerekir. Bu, büyük miktarda veri aktarımı gerektirebilir ve bunun sonucunda, veri
ücreti ödemeniz gerekebilir. Ayrıca bazı özelliklere abone olmanız da gerekebilir.
Important: 5G might not be supported by your network service provider or by the service
provider you are using when traveling. Ask your network service provider for details. If 5G
is not supported by your network service provider, it is recommended that you change the
highest connection speed from 5G to 4G. To do this, on the home screen, tap Settings >
Network & internet > SIMs , and switch Preferred network type to LTE .
Not: Wi-Fi kullanımı bazı ülkelerde kısıtlanmış olabilir. Örneğin, AB’de 5150 - 5350 MHz Wi-Fi
ve ABD ile Kanada’da 5,15 - 5,25 GHz Wi-Fi, yalnızca iç mekanlarda kullanılabilir. Daha fazla
bilgi için yerel yetkililere danışın.
Daha fazla bilgi için şebeke servis sağlayıcınıza danışın.
© 2022 HMD Global Oy. Tüm hakları saklıdır. 35

Nokia G60 5G Kullanıcı kılavuzu
EMERGENCY CALLS
Önemli:Bağlantıların her koşulda kullanılabilir olacağı garanti edilemez. Tıbbi acil durumlar gibi
çok önemli iletişim ihtiyaçları için, hiçbir zaman yalnızca kablosuz telefonlara güvenmeyin.
Before making the call:
• Switch the phone on.
• If the phone screen and keys are locked, unlock them.
• Move to a place with adequate signal strength.
On the home screen, tap .
1. Type in the official emergency number for your present location. Emergency call numbers
vary by location.
2. Tap .
3. Give the necessary info as accurately as possible. Do not end the call until given permission
to do so.
You may also need to do the following:
• Put a SIM card in the phone. If you don’t have a SIM card, on the lock screen, tap
Emergency call .
• If your phone asks for a PIN code, tap Emergency call .
• Switch the call restrictions off in your phone, such as call barring, fixed dialling, or closed
user group.
• If the mobile network is not available, you may also try making an internet call, if you can
access the internet.
CIHAZINIZIN BAKIMI
Cihazınızı; cihazınızın pilini, şarj cihazını ve aksesuarlarını dikkatli kullanın. Aşağıdaki öneriler
cihazınızı çalışır durumda tutmanıza yardımcı olur.
• Cihazı kuru tutun. Yağmur damlaları, nem
ve her türlü sıvı ya da su buharı, elektronik
devrelere zarar verebilecek mineraller
içerebilir.
• Cihazı tozlu veya kirli yerlerde kullanmayın
© 2022 HMD Global Oy. Tüm hakları saklıdır. 36
ya da saklamayın.
• Cihazı sıcaklığın yüksek olduğu ortamlarda
saklamayın. Yüksek sıcaklıklar cihaza veya
pile zarar verebilir.

Nokia G60 5G Kullanıcı kılavuzu
• Cihazı soğuk yerlerde saklamayın. Cihaz
tekrar normal sıcaklığına döndüğünde,
cihazın içinde nem oluşarak cihaza zarar
verebilir.
• Cihazı, kullanım kılavuzunda belirtilenden
farklı bir yöntemle açmayın.
• Yetkisiz değişiklikler, cihaza zarar verebilir
ve radyo cihazlarına ilişkin düzenlemeleri
ihlal edebilir.
• Cihazı ya da pili düşürmeyin, çarpmayın ya
da sallamayın. Sert kullanım cihaza zarar
verebilir.
Cihaz, uzun bir işlem sırasında ısınabilir. Bu, çoğu zaman normaldir. Fazla ısınmayı önlemek
amacıyla cihaz otomatik olarak yavaşlayabilir, görüntülü arama sırasında ekran parlaklığını
azaltabilir, uygulamaları kapatabilir, şarj işlemini durdurabilir ve gerekirse kapanabilir. Cihaz
olması gerektiği gibi çalışmıyorsa, cihazı en yakın yetkili servise götürün.
• Bu cihazın yüzeyini temizlemek için,
yalnızca yumuşak, temiz ve kuru bir bez
kullanın.
• Cihazı boyamayın. Boya, düzgün çalışmayı
engelleyebilir.
• Cihazı mıknatıslardan veya manyetik
alanlardan uzak tutun.
• Önemli verilerinizin güvenliği için, bu
verileri cihazınız, hafıza kartı veya
bilgisayarınız gibi en az iki farklı yerde
saklayın ya da uygun bir yere yazın.
Tüketicinin Yapabileceği Bakım ve Onarım
Cihaz ile ilgili tüketicinin yapabileceği bir bakım veya onarım bulunmamaktadır. Bakım ve onarım
ihtiyacınız olması durumunda Yetkili Servis listesinde bulunan noktalardan destek alabilirsiniz.
VERİMLİ ENERJİ KULLANIMI
• Kullanmadığınızda Bluetooth ve kablosuz ağlar gibi veri bağlantılarını kapatın.
• Ekran parlaklığını azaltın ve ekranı daha kısa bir süre sonra kapanacak şekilde ayarlayın.
• Tuş sesleri vb. gereksiz sesleri kapatın.
GERI DÖNÜŞÜM
© 2022 HMD Global Oy. Tüm hakları saklıdır. 37

Nokia G60 5G Kullanıcı kılavuzu
Bu ürün AEEE Yönetmeliğine uygundur.
Kullanılmış elektronik ürünlerinizi, pil ve ambalaj malzemelerini her zaman tahsis edilmiş
toplama noktalarına bırakın. Böylece denetimsiz atıkların yok edilmesine ve malzemelerin geri
dönüştürülmesine yardımcı olabilirsiniz. Elektrikli ve elektronik ürünler çok miktarda değerli
madde içerir. Bunlara metaller (bakır, alüminyum, çelik ve magnezyum gibi) ve değerli metaller
(altın, gümüş ve paladyum gibi) dahildir. Cihazdaki malzemelerin tümü malzeme ve enerji olarak
geri kazanılabilir.
ÜSTÜNDE ÇARPI IŞARETI OLAN TEKERLEKLI ÇÖP KUTUSU SIMGESI
Üstünde çarpı işareti olan tekerlekli çöp kutusu simgesi
Ürününüzde, pilde, basılı materyallerde veya ambalajlarda yer alan, üstünde çarpı işareti olan
tekerlekli çöp kutusu simgesi; kullanım ömürleri sona erdiğinde tüm elektrikli ve elektronik
ürünlerin ve pillerin ayrı atık toplama ünitelerinde toplanması gerektiğini belirtir. Bu ürünleri
ayrımı yapılmamış diğer belediye atıklarıyla birlikte atmayın: geri dönüştürülmek üzere ayırın.
Size en yakın geri dönüşüm noktası ile ilgili bilgi için yerel atık toplama yetkilinize danışın.
PIL VE ŞARJ CIHAZI BILGILERI
Pil ve şarj cihazı bilgileri
Telefonunuzun pilinin çıkarılabilir olup olmadığını kontrol etmek için Başlarken kılavuzuna bakın.
Pilleri çıkarılabilen cihazlar Cihazınızı yalnızca orijinal, şarj edilebilir piliyle kullanın. Pil yüzlerce
kez şarj edilip kullanılabilir olsa da sonunda yıpranacaktır. Konuşma ve bekleme süreleri, normal
sürelere göre belirgin ölçüde kısaldığında pili değiştirin.
Pilleri çıkarılabilir olmayan cihazlar Pili çıkarmaya çalışmayın, aksi takdirde cihaza zarar
verebilirsiniz. Pil yüzlerce kez şarj edilip kullanılabilir olsa da sonunda yıpranacaktır. Konuşma
ve bekleme süreleri normal sürelere göre belirgin ölçüde kısaldığında pili değiştirmek için, cihazı
en yakın yetkili servise götürün.
Cihazınızı, cihazla birlikte verilen şarj cihazı ile şarj edin. Şarj cihazının fiş tipi farklı olabilir. Şarj
süresi, cihaz özelliğine göre değişiklik gösterebilir.
© 2022 HMD Global Oy. Tüm hakları saklıdır. 38

Nokia G60 5G Kullanıcı kılavuzu
Pil ve şarj cihazı güvenliği bilgileri
Telefonunuzun şarj işlemi tamamlandığında, şarj cihazını telefondan ve elektrik prizinden
çıkarın. Kesintisiz şarj süresinin 12 saati geçmemesi gerektiğini lütfen unutmayın. Tam olarak
şarj edilmiş bir pil kullanılmadan bırakıldığında zaman içinde boşalır.
Yüksek sıcaklık, pilin kapasitesini azaltır ve ömrünü kısaltır. En iyi performans için pili her
zaman 15 °C ile 25 °C (59 °F ve 77 °F) arası sıcaklıktaki ortamlarda bulundurun. Pili sıcak veya
soğuk olan bir cihaz bir süre çalışmayabilir. Düşük sıcaklıkta pilin çabuk bitebileceğini ve güç
kaybederek telefonu dakikalar içerisinde kapatabileceğini unutmayın. Sıcaklığın düşük olduğu
dış ortamlarda, telefonunuzu sıcak tutun.
Patlama olasılığı olduğundan pilleri ateşe atmayın. Yerel yönetmeliklere uyun. Geri dönüşüm
olanaklarını değerlendirin. Evsel atıklarla birlikte atmayın.
Pili sökmeyin, kesmeyin, ezmeyin, bükmeyin, delmeyin veya zarar verecek başka herhangi bir
girişimde bulunmayın. Pil sızdırıyorsa sıvının derinize veya gözlerinize temas etmesine izin
vermeyin. Böyle bir durum olursa, etkilenen bölgeleri hemen suyla yıkayın veya tıbbi yardım
alın. Pilde değişiklik yapmayın, içine yabancı madde sokmaya çalışmayın ya da suya veya diğer
sıvılara daldırmayın ya da maruz bırakmayın. Piller zarar gördüklerinde patlayabilir.
Pili ve şarj cihazını yalnızca amaçları doğrultusunda kullanın. Pillerin veya şarj cihazlarının
uygunsuz şekilde kullanılması veya onaylı ya da uyumsuz pillerin veya şarj cihazlarının
kullanılması yangın, patlama v.b. tehlike riski oluşturabilir ve onay ya da garantileri geçersiz
kılabilir. Pilin veya şarj cihazının hasarlı olduğunu düşünüyorsanız pili veya cihazı kullanmaya
devam etmeden önce incelenmesi için servis merkezine veya telefonu aldığınız yere götürün.
Hasarlı pilleri veya şarj cihazlarını asla kullanmayın. Şarj cihazını yalnızca kapalı alanlarda
kullanın. Cihazınızı gök gürültülü havalarda şarj etmeyin.
Bir şarj cihazının veya aksesuarın bağlantısını kesmek için kablodan değil, fişten tutarak çekin.
Cihazınızda çıkarılabilir pil mevcut olması durumunda aşağıdakiler de geçerlidir:
• Pili çıkarmadan önce, cihazı kapatın ve şarj cihazının bağlantısını kesin.
• Pilin metal şeritlerine bir metal cismin temas etmesi kısa devreye neden olabilir. Bu, pile
veya başka cisimlere zarar verebilir.
KÜÇÜK ÇOCUKLAR
Cihazınız ve aksesuarları oyuncak değildir. Küçük parçalar içerebilir. Bunları küçük çocukların
erişiminden uzak tutun.
TIBBI CIHAZLAR
Kablosuz telefonlar da dahil olmak üzere, telsiz sinyali yayan bir cihaz, yeterli ölçüde
korunmayan tıbbi cihazların işlevine engel olabilir. Harici radyo enerjisine karşı yeterli koruması
olup olmadığını öğrenmek için bir doktora veya tıbbi cihazın üreticisine danışın.
© 2022 HMD Global Oy. Tüm hakları saklıdır. 39

Nokia G60 5G Kullanıcı kılavuzu
İMPLANTE TIBBI CIHAZLAR
Olası parazitleri önlemek amacıyla, tıbbi implant cihaz (kalp pili, insülin pompası, nörosimülatör
vb.) üreticileri tıbbi cihaz ile kablosuz cihaz arasında en az 15,3 santimetre (6 inç) mesafe
bulundurulmasını önermektedir. Bu tür cihazlar taşıyan kişiler:
• Kablosuz cihazı her zaman tıbbi
cihazlardan en az 15,3 santimetre (6 inç)
uzakta tutun.
• Kablosuz cihazı göğüs cebinde
taşımamalıdır.
• Kablosuz cihazı, tıbbi cihazın aksi
Kablosuz cihazı, implante edilmiş tıbbi cihaz ile birlikte kullanmayla ilgili sorularınızın olması
durumunda, sağlık kuruluşunuza danışın.
tarafındaki kulağına tutmalıdır.
• Parazitlenme olduğundan şüphelenilecek
bir neden olması durumunda, kablosuz
cihazı kapatmalıdır.
• İmplante edilmiş tıbbi cihaz konusunda,
üreticinin talimatlarını izlemelidir.
İŞITME
Uyarı: Kulaklıklı mikrofon setini kullandığınızda, dış sesleri duyma yeteneğiniz etkilenebilir.
Güvenliğinizin tehlikeye girebileceği durumlarda kulaklık kullanmayın.
Bazı kablosuz cihazlar bazı işitme cihazlarının çalışmasına engel olabilir.
CIHAZINIZI ZARARLI IÇERIKTEN KORUMA
Cihazınız virüslere ve diğer zararlı içeriğe maruz kalabilir. Aşağıdaki önlemleri alın:
• Mesajları açarken dikkatli olun. Mesajlar
kötü amaçlı yazılım içerebilir ya da
cihazınıza veya bilgisayarınıza başka
şekilde zarar verebilir.
• Bağlantı isteklerini kabul ederken,
internette gezinirken ya da içerik
indirirken dikkatli olun. Güvenmediğiniz
kaynaklardan gelen Bluetooth
bağlantılarını kabul etmeyin.
• Yalnızca, güvendiğiniz ve yeterli güvenliği
ve korumayı sunan kaynaklardaki servisleri
ve yazılımları yükleyip kullanın.
• Cihazınıza ve cihazı bağladığınız
bilgisayarlara virüsten koruma ve diğer
güvenlik yazılımlarını yükleyin. Aynı anda
birden fazla virüsten koruma uygulaması
kullanmayın. Birden fazla virüsten koruma
uygulama kullanmak cihazın ve/veya
bilgisayarın performansını ve çalışmasını
olumsuz etkileyebilir.
• Önceden yüklenmiş yer işaretlerini ve
üçüncü taraflara ait internet sitelerinin
bağlantılarını kullanacak olursanız, gerekli
önlemleri alın. HMD Global bu tür siteler
için herhangi bir onay vermemekte veya
sorumluluk kabul etmemektedir.
© 2022 HMD Global Oy. Tüm hakları saklıdır. 40

Nokia G60 5G Kullanıcı kılavuzu
ARAÇLAR
Telsiz sinyalleri, araçlara doğru bir şekilde monte edilmemiş veya yeterli ölçüde korunmayan
elektronik sistemleri etkileyebilir. Ayrıntılı bilgi için aracınızın veya ekipmanının üreticisiyle
görüşün. Cihazın bir araca montajı yalnızca yetkili personel tarafından yapılmalıdır. Hatalı
montaj tehlikeli olabilir ve garantiyi geçersiz kılar. Aracınızdaki her türlü kablosuz cihaz
ekipmanının doğru bir biçimde monte edilip edilmediğini ve sorunsuz çalışıp çalışmadığını
düzenli olarak kontrol edin. Yanıcı veya patlayıcı maddeleri cihazla, cihazın parçaları veya
donanımlarıyla aynı yerde bulundurmayın. Cihazınızı veya aksesuarları hava yastığı bölgesine
koymayın.
POTANSIYEL PATLAMA TEHLIKESI OLAN ORTAMLAR
Benzin pompalarının yakını gibi patlamaya elverişli ortamlarda cihazınızı kapatın. Kıvılcımlar
yaralanma ve hatta ölüme yol açan patlamaya veya yangına neden olabilir. Benzin bulunan
alanlarda; kimyasal tesislerde veya patlama işlemlerinin yapıldığı yerlerdeki kısıtlamalara
dikkat edin. Patlayıcı madde içeren bölgeler açık şekilde belirtilmeyebilir. Bunlar genellikle araç
motorunuzu kapatmanızın önerildiği, gemilerde güverte altı, kimyasal aktarım veya depolama
tesisleri ve ortamında tanecik, toz, metal tozu gibi partiküller veya kimyasal maddeler içeren
yerlerdir. Bu cihazın sıvı petrol gazı (örneğin, propan ve bütan) kullanan araçların yakınlarında
güvenle kullanılıp kullanılamayacağını araç üreticilerinden öğrenin.
SERTIFIKA BILGILERI (SAR)
Bu mobil cihaz radyo dalgalarına maruz kalmayla ilgili kurallara uygundur.
Mobil cihazınız bir radyo vericisi ve alıcısıdır. Bu cihaz, bağımsız bir bilimsel kuruluș olan
ICNIRP’nin yayınladığı uluslararası kuralların önerdiği radyo dalgalarına maruz kalma sınırlarını
(radyo frekansı elektromanyetik alanları) așmayacak şekilde tasarlanmıștır. Söz konusu
kurallar, tüm kișilere yaș ya da sağlık durumlarından bağımsız olarak koruma sağlayacak şekilde
tasarlanmıș önemli güvenlik sınırları içermektedir. Maruz kalma ile ilgili kurallar, cihaz iletim
yaparken bașa veya vücuda bıraktığı radyo frekansı (RF) gücü miktarını yansıtan Özel Massetme
Oranı’na (SAR) göre olușturulmuștur. ICNIRP’nin mobil cihazlar için SAR sınırı ortalama olarak on
gramlık doku üzerinde 2,0 watt/kilogram (W/kg) olarak hesaplanmıștır.
SAR testleri, cihaz tüm frekans bantlarında onaylı en yüksek güç düzeyinde sinyal iletirken,
standart çalıșma konumlarında gerçekleștirilmiștir.
Cihazın maksimum SAR değeri için lütfen www.nokia.com/phones/sar web sayfasına başvurun.
Bu cihaz başa dayalı kullanıldığında veya vücuttan en az 1,5 santimetre (5/8 inç) uzakta
tutulduğunda RF’ye maruz kalma koşullarına uygundur. Tașıma kılıfları, kemer klipsleri veya
vücut üzerinde tașımak için kullanılan diğer biçimdeki tutucular kullanıldığında, bu tutucular
metal içermemelidir ve cihazı vücudunuzdan yukarıda belirtilen mesafe kadar uzak tutmalıdır.
Veri veya mesaj göndermek için iyi bir șebeke bağlantısı gerekir. Gönderme işlemi bağlantı
olana kadar gecikebilir. Gönderme ișlemi bitene kadar uzaklık talimatlarına uyun.
© 2022 HMD Global Oy. Tüm hakları saklıdır. 41

Nokia G60 5G Kullanıcı kılavuzu
Genel kullanım sırasında, SAR değerleri genellikle yukarıda belirtilen değerlerin oldukça
altındadır. Bunun nedeni, sistem verimliliği ve şebekedeki girişimleri en aza indirmek amacıyla,
arama yapmak için tam güç gerekli olmadığında cep telefonunuzun çalışma gücünün otomatik
olarak azaltılmasıdır. Daha düșük güç çıkıșı, daha düșük SAR değeri demektir.
Cihaz modelleri farklı sürümlere ve bir değerden fazlasına sahip olabilir. Zaman içinde bileșen
ve tasarım değișiklikleri yapılabilir ve bazı değișiklikler SAR değerlerini etkileyebilir.
Daha fazla bilgi için www.sar-tick.com adresini ziyaret edin. Sesli arama yapmasanız da mobil
cihazlar sinyal iletebilir.
Dünya Sağlık Örgütü (WHO), mevcut bilimsel bilgilerin mobil cihazlar kullanılırken herhangi
bir özel önlem alınması gerektiği yönünde bir bulgu yoktur. Bu sinyallere daha az maruz
kalmak istiyorsanız Dünya Sağlık Örgütü size kullanımını sınırlamanızı ve cihazı başınız ve
vücudunuzdan uzak tutmak için ahizesiz bir kit kullanmanızı önermektedir. Radyo frekansına
maruz kalma konusunda daha fazla bilgi ve açıklama almak ve bu konuyla ilgili tartışmalara
ulaşmak için www.who.int/peh-emf/en adresinden ulaşabileceğiniz WHO web sitesini ziyaret
edin.
DIJITAL HAK YÖNETIMI HAKKINDA
Bu cihazı kullanırken telif hakları da dahil olmak üzere tüm yasalara uyun, yerel örf ve adet
kurallarına ve başkalarının gizlilik hakkı ile yasal haklarına riayet edin. Telif hakkı koruması,
fotoğrafları, müzik parçalarını ve diğer içerikleri kopyalamanızı, aktarmanızı veya bunlar
üzerinde değişiklik yapmanızı engelleyebilir.
COPYRIGHTS AND OTHER NOTICES
Copyrights and other notices
The availability of some products, features, applications and services described in this guide
may vary by region and require activation, sign up, network and/or internet connectivity and
an appropriate service plan. For more info, contact your dealer or your service provider.
This device may contain commodities, technology or software subject to export laws and
regulations from the US and other countries. Diversion contrary to law is prohibited.
The contents of this document are provided ”as is”. Except as required by applicable law, no
warranties of any kind, either express or implied, including, but not limited to, the implied
warranties of merchantability and fitness for a particular purpose, are made in relation to the
accuracy, reliability or contents of this document. HMD Global reserves the right to revise this
document or withdraw it at any time without prior notice.
To the maximum extent permitted by applicable law, under no circumstances shall HMD Global
or any of its licensors be responsible for any loss of data or income or any special, incidental,
consequential or indirect damages howsoever caused.
Reproduction, transfer or distribution of part or all of the contents in this document in any
form without the prior written permission of HMD Global is prohibited. HMD Global operates
© 2022 HMD Global Oy. Tüm hakları saklıdır. 42

Nokia G60 5G Kullanıcı kılavuzu
a policy of continuous development. HMD Global reserves the right to make changes and
improvements to any of the products described in this document without prior notice.
HMD Global does not make any representations, provide a warranty, or take any responsibility
for the functionality, content, or end-user support of third-party apps provided with your
device. By using an app, you acknowledge that the app is provided as is.
Downloading of maps, games, music and videos and uploading of images and videos may
involve transferring large amounts of data. Your service provider may charge for the data
transmission. The availability of particular products, services and features may vary by region.
Please check with your local dealer for further details and availability of language options.
Certain features, functionality and product specifications may be network dependent and
subject to additional terms, conditions, and charges.
All specifications, features and other product information provided are subject to change
without notice.
HMD Global Privacy Policy, available at http://www.nokia.com/phones/privacy, applies to your
use of the device.
HMD Global Oy is the exclusive licensee of the Nokia brand for phones & tablets. Nokia is a
registered trademark of Nokia Corporation.
Android, Google and other related marks and logos are trademarks of Google LLC.
Snapdragon is a product of Qualcomm Technologies, Inc. and/or its subsidiaries. Snapdragon
is a trademark or registered trademark of Qualcomm Incorporated.
The Bluetooth word mark and logos are owned by the Bluetooth SIG, Inc. and any use of such
marks by HMD Global is under license.
OZO
OZO, Nokia Technologies Oy’nin ticari markasıdır.
© 2022 HMD Global Oy. Tüm hakları saklıdır. 43
 Loading...