


User Guide Manual del Usuario
Nokia 6255, Nokia 6255i, Nokia 6256,
and Nokia 6256i User
Guide
Note: Spanish translation of this guide begins on page 121.
1 Copyright © 2004 Nokia
Part No. 9231200, Issue No. 1
Copyright ©2004 Nokia. All rights reserved.
Nokia, Nokia Connecting People, Nokia 6255, Nokia 6255i, Nokia 6256, Nokia 6256i, Pop-Port,
and the Nokia Original Enhancements logos are trademarks or registered trademarks of Nokia
Corporation. Other company and product names mentioned herein may be trademarks or trade
names of their respective owners.
Printed in Canada 10/2004
US Patent No 5818437 and other pending patents. T9 text input software Copyright ©1999-2004.
Tegic Communications, Inc. All rights reserved.
Includes RSA BSAFE cryptographic or security protocol software from
RSA Security.
Java is a trademark of Sun Microsystems, Inc.
The information contained in this user guide was written for the Nokia 6255, Nokia 6255i,
Nokia 6256, and Nokia 6256i products. Nokia operates a policy of ongoing development.
Nokia reserves the right to make changes to any of the products described in this document
without prior notice.
UNDER NO CIRCUMSTANCES SHALL NOKIA BE RESPONSIBLE FOR ANY LOSS OF DATA OR
INCOME OR ANY SPECIAL, INCIDENTAL, AND CONSEQUENTIAL OR INDIRECT DAMAGES
HOWSOEVER CAUSED.
THE CONTENTS OF THIS DOCUMENT ARE PROVIDED “AS IS.” EXCEPT AS REQUIRED BY APPLICABLE
LAW, NO WARRANTIES OF ANY KIND, EITHER EXPRESS OR IMPLIED, INCLUDING, BUT NOT
LIMITED TO, THE IMPLIED WARRANTIES OF MERCHANTABILITY AND FITNESS FOR A PARTICULAR
PURPOSE, ARE MADE IN RELATION TO THE ACCURACY AND RELIABILITY OR CONTENTS OF THIS
DOCUMENT. NOKIA RESERVES THE RIG HT TO REVISE THIS DOCUMENT OR WITHDRAW IT AT ANY
TIME WITHOUT PRIOR NOTICE.
EXPORT CONTROLS
This device may contain commodities, technology or software subject to export laws and
regulations from the US and other countries. Diversion contrary to law is prohibited.
FCC/INDUSTRY CANADA NOTICE
Your phone may cause TV or radio interference (for example, when using a telephone in close
proximity to receiving equipment). The FCC or Industry Canada can require you to stop using
your telephone if such interference cannot be eliminated. If you require assistance, contact your
local service facility. This device complies with part 15 of the FCC rules. Operation is subject to
the condition that this device does not cause harmful interference.
2 Copyright © 2004 Nokia

Contents
Contents
For your safety . . . . . . . . . . . . . . . . . . . . . . . . . . . . . . . . . . . . . . . . 5
Welcome . . . . . . . . . . . . . . . . . . . . . . . . . . . . . . . . . . . . . . . . . . . . . 7
1 Phone at a glance . . . . . . . . . . . . . . . . . . . . . . . . . . . . . . . . . . 10
2 Set up your phone . . . . . . . . . . . . . . . . . . . . . . . . . . . . . . . . . . 15
3 Text entry . . . . . . . . . . . . . . . . . . . . . . . . . . . . . . . . . . . . . . . . 22
4 Messages (Menu 1) . . . . . . . . . . . . . . . . . . . . . . . . . . . . . . . . . 25
5 Call log (Menu 2). . . . . . . . . . . . . . . . . . . . . . . . . . . . . . . . . . . 41
6 Contacts (Menu 3). . . . . . . . . . . . . . . . . . . . . . . . . . . . . . . . . . 45
7 Camera (Menu 4). . . . . . . . . . . . . . . . . . . . . . . . . . . . . . . . . . . 51
8 Gallery (Menu 5) . . . . . . . . . . . . . . . . . . . . . . . . . . . . . . . . . . . 54
9 Media (Menu 6). . . . . . . . . . . . . . . . . . . . . . . . . . . . . . . . . . . . 56
10 Settings (Menu 7) . . . . . . . . . . . . . . . . . . . . . . . . . . . . . . . . . . 61
11 Organizer (Menu 8) . . . . . . . . . . . . . . . . . . . . . . . . . . . . . . . . . 78
12 Mobile Web (Menu 9) . . . . . . . . . . . . . . . . . . . . . . . . . . . . . . . 83
13 Connectivity (Menu 10) . . . . . . . . . . . . . . . . . . . . . . . . . . . . . . 85
14 Extras (Menu 11). . . . . . . . . . . . . . . . . . . . . . . . . . . . . . . . . . . 91
15 Enhancements . . . . . . . . . . . . . . . . . . . . . . . . . . . . . . . . . . . . . 93
16 Reference information . . . . . . . . . . . . . . . . . . . . . . . . . . . . . . . 94
Care and maintenance . . . . . . . . . . . . . . . . . . . . . . . . . . . . . . . . . . 95
Additional safety information . . . . . . . . . . . . . . . . . . . . . . . . . . . . 96
Appendix A Message from the CTIA. . . . . . . . . . . . . . . . . . . . . . . 105
Appendix B Message from the FDA . . . . . . . . . . . . . . . . . . . . . . . 109
Index . . . . . . . . . . . . . . . . . . . . . . . . . . . . . . . . . . . . . . . . . . . . . . 117
3 Copyright © 2004 Nokia

NOTES
4 Copyright © 2004 Nokia
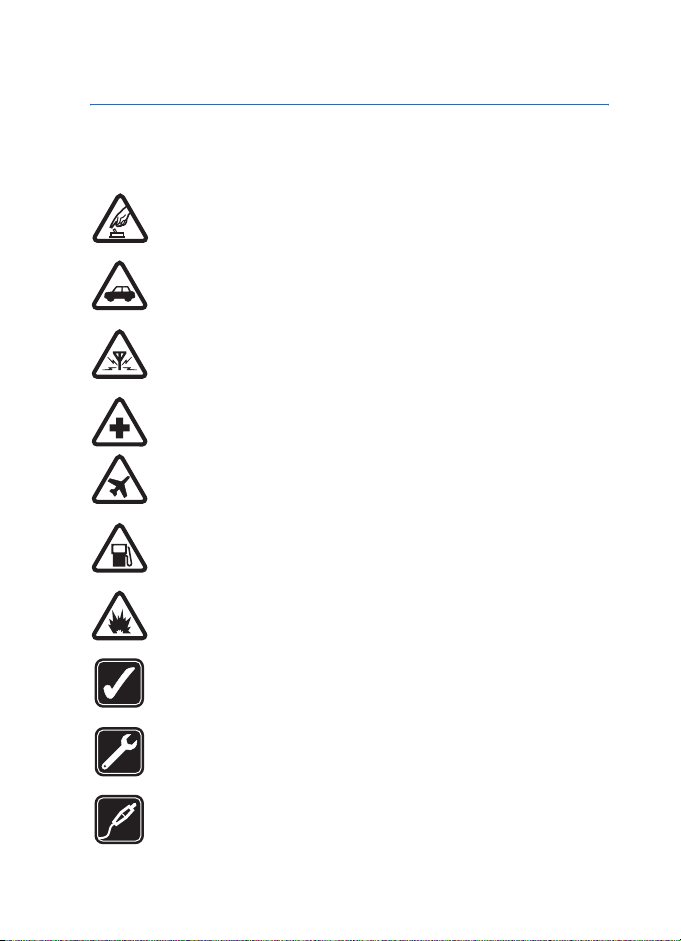
For your safety
Read these simple guidelines. Not following them may be dangerous or illegal.
Read the complete user guide for further information.
SWITCH ON SAFELY
Do not switch the phone on when wireless phone use is prohibited or
when it may cause interference or danger.
ROAD SAFETY COMES FIRST
Obey all local laws. Always keep your hands free to operate the vehicle
while driving. Your first consideration while driving should be road safety.
INTERFERENCE
All wireless phones may be susceptible to interference, which could
affect performance.
SWITCH OFF IN HOSPITALS
Follow any restrictions. Switch the phone off near medical equipment.
SWITCH OFF IN AIRCRAFT
Follow any restrictions. Wireless devices can cause interference in
aircraft.
SWITCH OFF WHEN REFUELING
Don't use the phone at a refuelling point. Don't use near fuel or chemicals.
SWITCH OFF NEAR BLASTING
Follow any restrictions. Don’t use the phone where blasting is in progress.
USE SENSIBLY
Use only in the normal position as explained in the product
documentation. Don't touch the antenna unnecessarily.
QUALIFIED SERVICE
Only qualified personnel may install or repair this product.
ENHANCEMENTS AND BATTERIES
Use only approved enhancements and batteries. Do not connect
incompatible products.
5 Copyright © 2004 Nokia
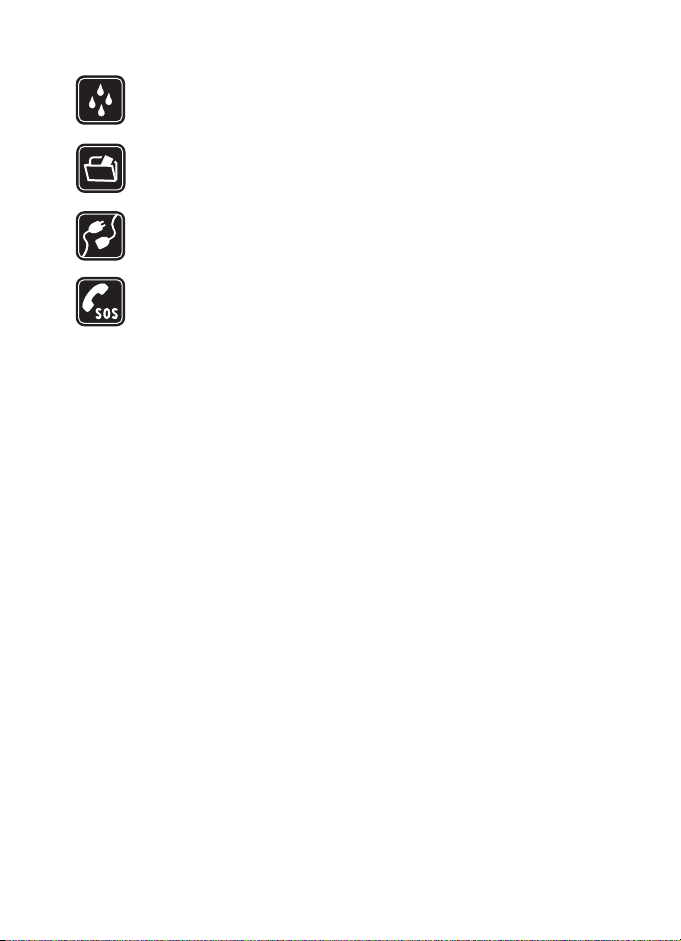
WATER-RESISTANCE
Your phone is not water-resistant. Keep it dry.
BACKUP COPIES
Remember to make back-up copies or keep a written record of all
important information stored in your phone.
CONNECTING TO OTHER DEVICES
When connecting to any other device, read its user guide for detailed
safety instructions. Do not connect incompatible products.
EMERGENCY CALLS
Ensure the phone is switched on and in service. Press the End key as many
times as needed to clear the display and return to the main screen. Enter
the emergency number, then press the Call key. Give your location. Do not
end the call until given permission to do so.
6 Copyright © 2004 Nokia

Welcome
Congratulations on your purchase of the Nokia 6255, Nokia 6255i, Nokia 6256, or
Nokia 6256i mobile phone. Your phone provides many functions which are practical
for daily use, such as a hands-free loudspeaker, alarm clock, calculator, calendar,
and more. Your phone can also connect to a PC, laptop, or other device using a data
cable, Bluetooth, or Infrared. To personalize your phone, you can set your favorite
ring tones.
■ About your device
The Nokia 6255, Nokia 6255i, Nokia 6256, or Nokia 6256i wireless phone described
in this guide is approved for use on the CDMA 800, 1900 and AMPS networks.
Contact your service provider for more information about networks.
When using the features in this device, obey all laws and respect privacy and
legitimate rights of others.
Warning: To use any features in this device, other than the alarm clock, the
phone must be switched on. Do not switch the device on when wireless
phone use may cause interference or danger.
■ Network Services
To use the phone you must have service from a wireless service provider. Many of
the features in this device depend on features in the wireless network to function.
These Network Services may not be available on all networks or you may have to
make specific arrangements with your service provider before you can utilize
Network Services. Your service provider may need to give you additional instructions
for their use and explain what charges will apply. Some networks may have
limitations that affect how you can use network services. For instance, some
networks may not support all language-dependent characters and services.
Your service provider may have requested that certain features be disabled or not
activated in your device. If so, they will not appear in your device menu. Contact
your service provider for more information.
7 Copyright © 2004 Nokia
■ Shared memory
The following features in this device may share memory: contacts, text messages,
photos, images, and tones in gallery, calendar notes, games, and applications. Use of
one or more of these features may reduce the memory available for the remaining
features sharing memory. Your phone may display a message that the memory is
full when you try to u se a shared memory feature. In this case, delete some of th e
information or entries stored in the shared memory features before continuing.
Some of the features, such as photos, images, tones in gallery, text messages, and
applications may have a certain memory specially allotted to them in addition to the
memory shared with other features.
■ Register your phone
Make sure to register your phone at www.warranty.nokiausa.com or call
1-888-NOKIA-2U (1-888-665-4228) so that we can serve your needs better
if you should need to call a customer center or to have your phone repaired.
■ Getting help
Find your phone label
If you need help, Nokia Customer Care is
available for assistance. Before calling,
we recommend that you write down
the following information and have
it available:
• Electronic serial number (ESN)
• Your zip code (only in the US)
The ESN is found on the type label, which is located beneath the battery on the
back of the phone. See “Remove the back cover”, page 16 and “Remove the battery”,
page 16 for more information.
8 Copyright © 2004 Nokia

Contact Nokia
Please have your product with you when contacting either of theses numbers:
Nokia Customer Care Center, USA
Nokia Inc.
7725 Woodland Center Boulevard, Suite #150
Tampa, Florida 33614
Tel: 1-888-NOKIA-2U (1-888-665-4228)
Fax: 1-813-249-9619
TTY/TDD users: 1-800-24-NOKIA (1-800-246-6542)
Customer Care, Canada
Nokia Products Ltd.
601 Westney Road South
Ajax, Ontario L1S 4N7
Tel: 1-905-427-1373 or 1-888-22-NOKIA (1-888-226-6542)
Fax: 1-905-619-4360
Updates
From time to time, Nokia updates this guide to reflect changes. The latest version
may be available at www.nokia.com
be available at the Web site www.nokiahowto.com
. An interactive tutorial for this product may
.
Accessibility solutions
Nokia is committed to making mobile phones easy to use for all individuals,
including those with disabilities. For more information visit the Web site at
www.nokiaaccessibility.com
.
9 Copyright © 2004 Nokia
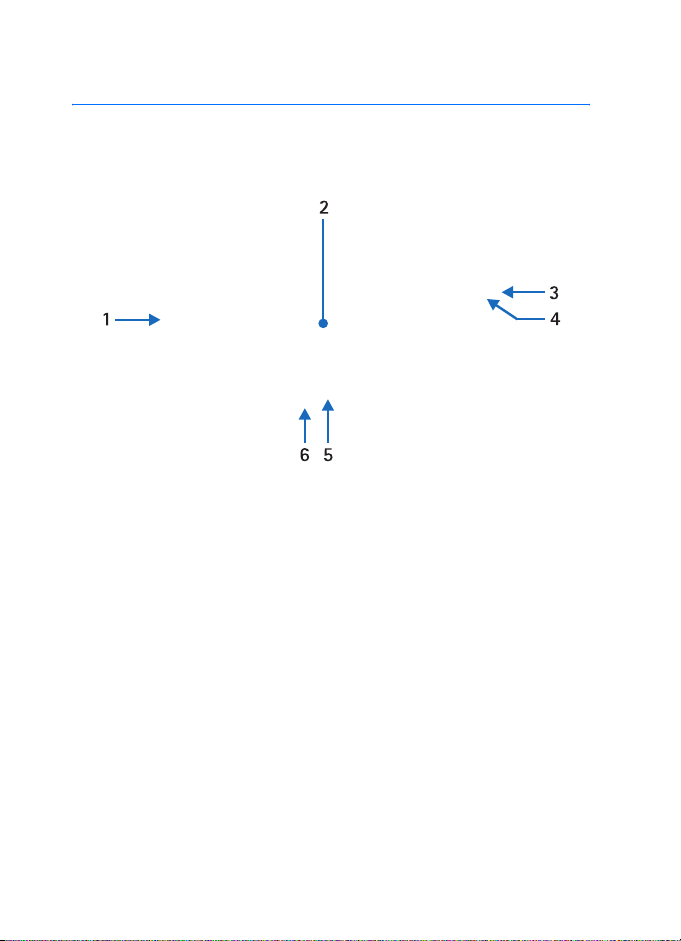
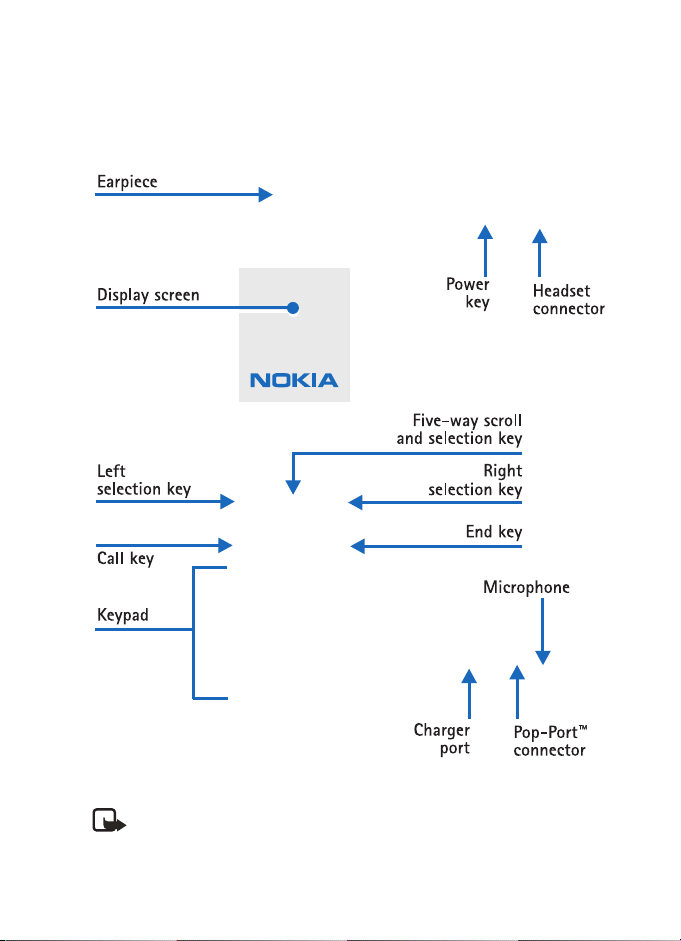
1. Phone at a glance
■ Keys and parts
1 Volume key
2 Front display/viewfinder
3Infrared
4 Voice/shutter key
5Flash
6 Camera lens
Voice/shutter key
• Short press—Starts and stops voice memo recorder.
• Long press—Answer or make a call using the loudspeaker when the fold is closed.
• Capture a picture when the camera is active.
10 Copyright © 2004 Nokia

Phone at a glance
■ The start screen
Note: Depending on your wireless service provider and the model number of
your phone, some or all of the following selection keys may appear on the
start screen.
The start screen is home base and indicates your
phone is in idle mode.
Signal strength (1)—A higher bar indicates a stronger
network signal.
Menu (2)—Press the Center selection key to select
this option.
Go to (3)—Press the Left selection key to select this option.
Names or network operator menu (4)—Press the Right selection key to select
this option.
Battery level (5)—A higher bar indicates more power in the battery.
■ Quick keys
Note: Depending on your wireless service provider and the model number
of your phone, some or all of the following Quick keys may appear on the
start screen.
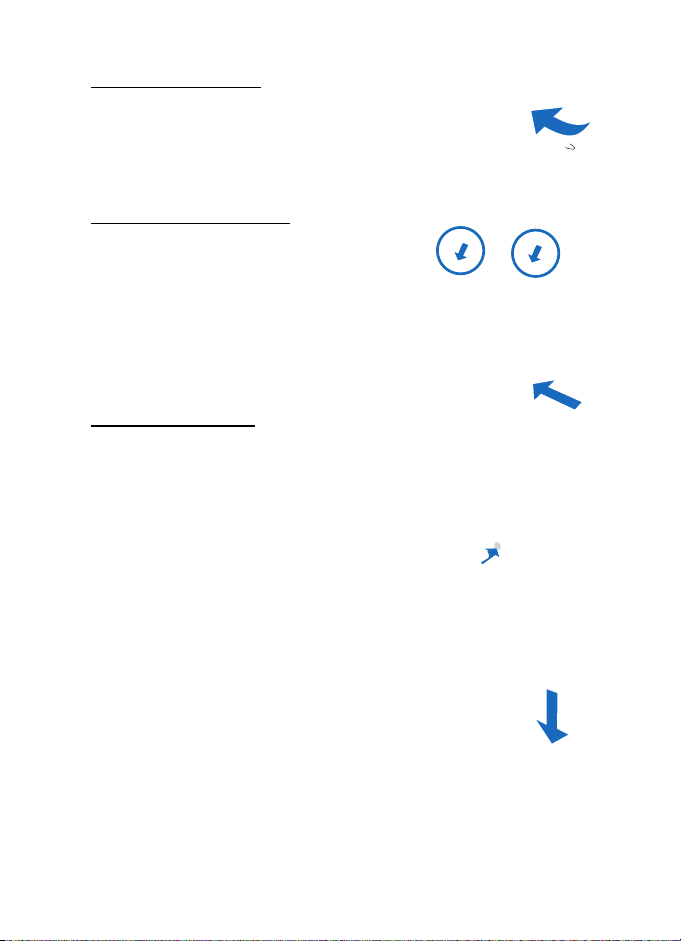
At the start screen, the Five-way scroll key instantly takes you to frequently-
accessed menus:
Scroll up key—Go to the contacts list or network operator menu.
Scroll right key—View the calendar.
Scroll down key—Go to the contacts list.
Scroll left key—Quickly create a text message.
Center selection key—Selects highlighted menus and submenus.
Camera key—Quickly activates the viewfinder.
11 Copyright © 2004 Nokia
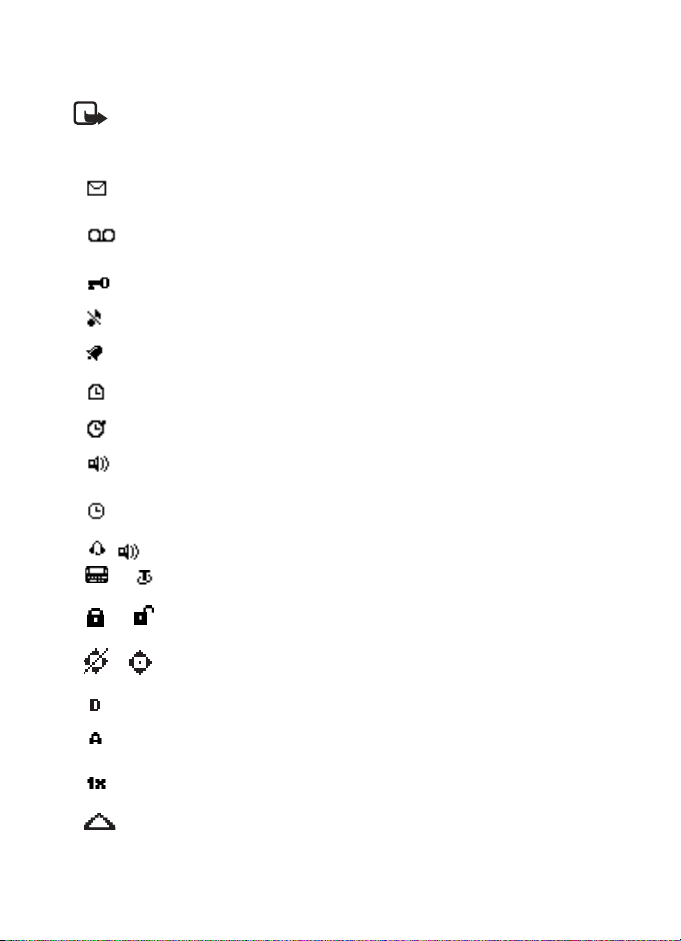
■ Indicators and icons
Note: Depending on your wireless service provider and the model number of
your phone, some or all of the following indicators and icons may appear on
the start screen.
You have new text or picture messages. See “Text messages”,
page 25.
You have new voice messages. See “Voice messages”,
page 34.
Your phone keypad is locked. See “Keyguard”, page 21.
Your phone is set to the silent profile. See “Profiles”, page 61.
The alarm clock is set to on. See “Alarm clock”, page 78.
The countdown timer is running.
The stopwatch timer is running in the background.
Integrated hands-free is active. See “Using the loudspeaker”,
page 20.
The timed profile is selected. See “Profiles”, page 61.
or
or
or
An enhancement is connected to the phone.
See “Enhancement settings”, page 71.
Voice privacy encryption is active (or is not active) in the
network.
Location info sharing is set to Emergency or On. See “Location
info sharing”, page 65.
You are in a digital network. See “Network Services”, page 7.
You are in an analog network. See “Network Services”,
page 7.
You are in a 1XRTT network. See “Network Services”, page 7.
You are roaming outside your home network. See “Roaming
options”, page 75.
12 Copyright © 2004 Nokia

Phone at a glance
■ Get the most out of this guide
The following sections illustrate the various components of your phone. Familiarize
yourself with these sections to help you understand the instructions that follow.
This guide uses certain terms for the steps that you are asked to perform.
• Press means to press and release a key quickly (short press). For example, Press 7
means press the key on the keypad that is labeled with the number 7 and the
letters “pqrs”.
•Press and hold means to press and hold a key for 2–3 seconds; then release the
key (long press).
• Selection keys are used to select a menu option. To select an option, press the
selection key below the menu item on the phone screen.
• Scroll keys are used to move up, down, left, or right in the menus.
•Call and End keys: Press the Call key to place a call or to answer an incoming
call. Press the End key to end a call or press and hold to return to the idle screen.
■ Phone menus
Phone features are grouped according to function and are accessed through the
main menus. Each main menu contains submenus and lists from which you can
select or view items and customize your phone features. You can access these
menus and submenus by using the scroll method or by using a shortcut.
Note: Some features may not be available, depending on your network. For
more information, contact your wireless provider.
The scroll method
1. At the start screen, select Menu and scroll through the main
menus using the up and down Five-way scroll key.
As you scroll through the menus, the menu number appears in
the upper right corner of the display. Below the number is a
scroll bar with a tab that moves up or down on the right side of the display
screen as you scroll through the menus, providing a visual representation of
your current position in the menu structure.
2. When you arrive at a menu, press Select (the Center selection key) to
enter submenus.
•Press Back (the Right selection key) to return to the previous menu.
•Press the End key to return to the start screen from any menu or submenu.
13 Copyright © 2004 Nokia

In-phone help
Many features have brief descriptions (help text) which can be viewed on the
display. To view these descriptions, scroll to a feature and wait for about 10 seconds.
Use the Scroll down key to view all of the description, or press Back to exit.
In order to view the descriptions, you must first activate help text.
At the start screen, select Menu > Settings > Phone settings > Help text activation >
On or Off.
■ ’Go to’ functions
The Go to menu allows you to change the function of the Left selection key on your
phone so that your most frequently used functions can be quickly accessed from the
Go to menu on the start screen.
Choose ’Go to’ functions
1. At the start screen, select Go to > Options > Se lect options.
2. Use the Scroll up key and the Scroll down key to highlight the desired functions
from the list of available functions.
3. Press Mark to add a function. Use Unmark to remove a function.
4. Select Done when you have added all desired functions.
5. Select Yes to save the changes.
6. At the start screen, press Menu > Go to to display a list of the functions that you
selected in step 3.
Organize functions
1. At the start screen, select Go to > Options > Organize.
2. Use the Scroll up key or the Scroll down key to highlight the function you wish
to rearrange, and select Move.
3. Select Move up, Move down, Move to top, or Move to bottom.
4. Press Done > Yes to save the changes.
14 Copyright © 2004 Nokia
2. Set up your phone
■ Antenna
Your device has two antennas:
• The fixed antenna is active unless the extendable
antenna is fully extended.
In the Nokia 6255i and 6256i phone, the GPS antenna is
also internal and is activated when placing emergency
calls or when On is selected from the Location info sharing
menu. For more information on location info sharing, see
“Location info sharing”, page 65.
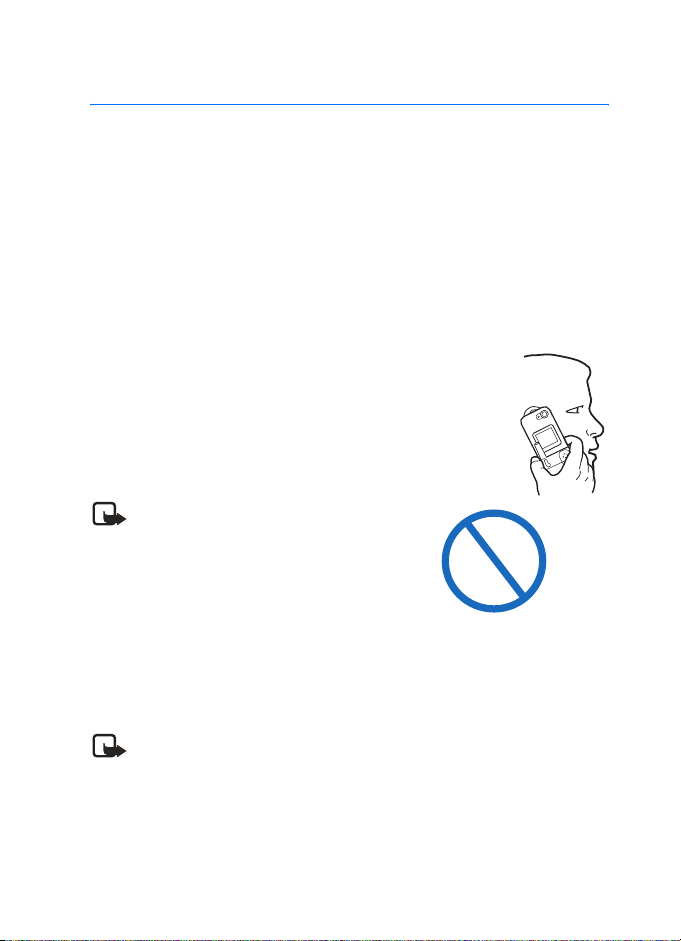
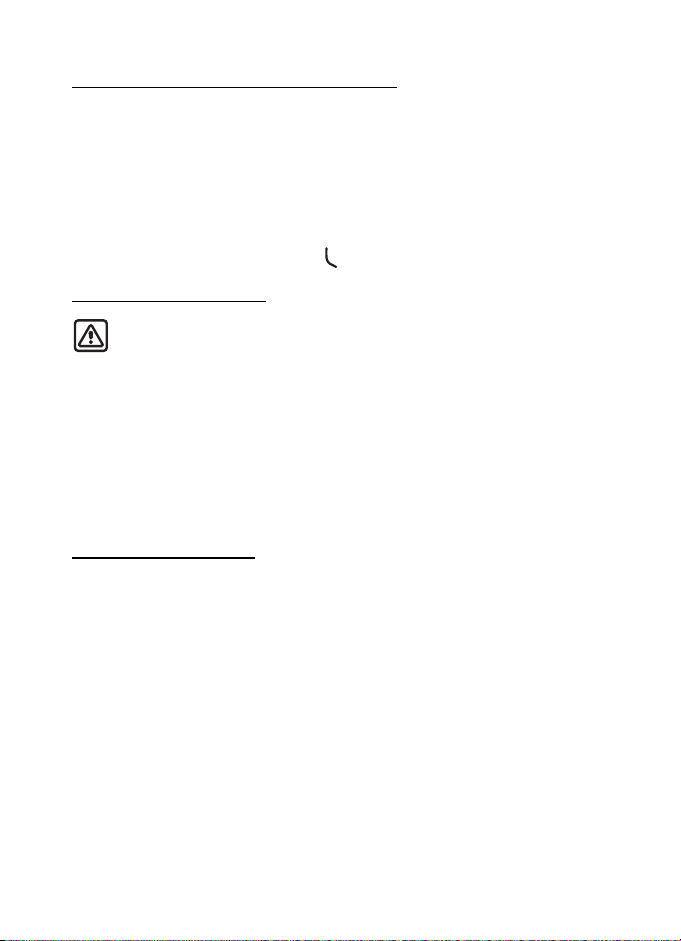
Your device has a fixed and extendable antenna located
towards the top of the phone when the fold is closed.
Hold the phone as you would any other telephone with
the antenna area pointed up and over your shoulder.
Note: As with any other radio transmitting
device, do not touch the antenna unnecessarily
when the device is switched on. Contact with
the antenna affects call quality and may
cause the phone to operate at a higher power
level than otherwise needed. Not touching the
antenna area during a phone call optimizes
the antenna performance and the talktime of
your device.
Set up your phone
■ Battery
Note: Before removing the cover, always switch off the power and disconnect
the charger and any other device.
Avoid touching electronic components while changing the covers.
Always store and use the device with the covers attached.
15 Copyright © 2004 Nokia

Remove the back cover
1. With the back of the phone facing you,
push down on the back cover.
2. Slide the back cover towa rd the bottom
of the phone and remove.
Remove the battery
After you have removed the back cover,
insert your finger into the finger grip, and
lift the battery from its compartment.
UIM (CDMA SIM) card slot
Your phone has a UIM card slot built into
the mechanics. However, the UIM is not functional in this phone model. Avoid
placing anything into the UIM card slot.
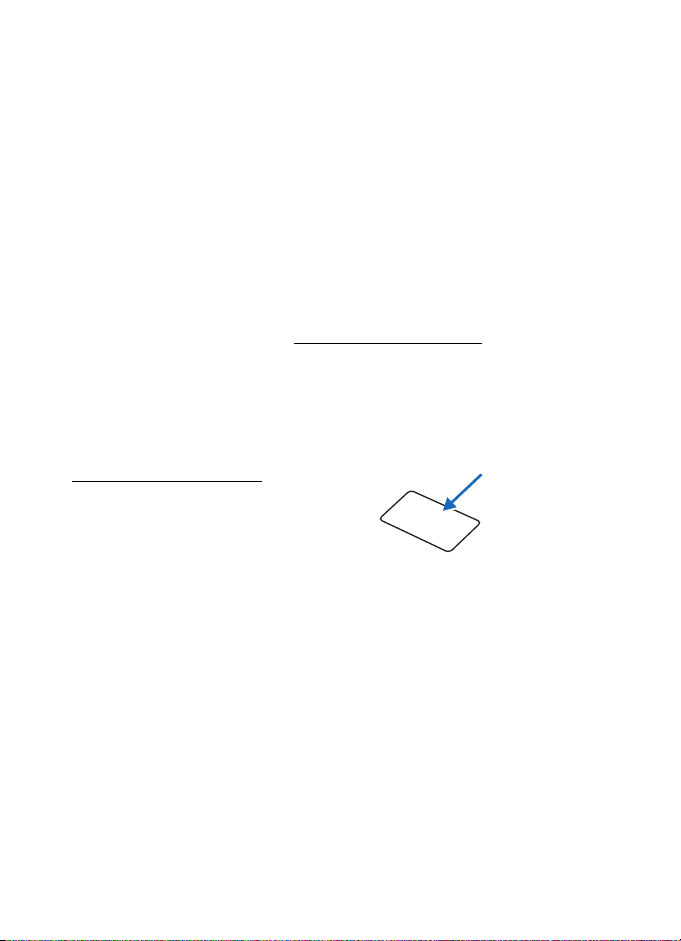
Install the MMC card
Before installing the MMC card, always
make sure that the phone is switched off
and that you have removed the cover
and battery.
Open the MMC holder by lifting the
latch(1) and lifting the holder up (2).
Insert the MMC card into the holder
with the gold-colored contacts facing
down, matching up with the goldcolored contacts on the phone. The
beveled corner of the card fits into the
beveled corner of the slot.
Close the UIM/MMC holder and
replace the battery.
16 Copyright © 2004 Nokia
Replace the battery
1. Insert the battery, gold-colored contact end
first, into the battery slot.
2. Push down on the other end of the battery to
snap the battery into place.
Replace the back cover
Set the back cover on the phone with
the cover tabs aligned with the slots in
the phone.
Slide the back cover toward the top of
the phone until the back cover is securely
in place.
Charge the battery
1. Plug the charger transformer into a
standard ac outlet.
2. Insert the charger output plug into the
round jack at the bottom end of the phone.
After a few seconds, the battery indicator
in the display starts to scroll from bottom
to top. If the battery is completely
discharged, it may take a few minutes
before the charging indicator appears
on the display or before any calls can
be made.
Set up your phone
■ Turn your phone on or off
1. To turn your phone on or off, press and hold
the Power key on top of the phone for at least
3 seconds.
2. Enter the security code, lock code, or PIN code, if
necessary, and press OK.
17 Copyright © 2004 Nokia
■ Connect the headset
A compatible headset, such as HS-5, may be purchased with your phone or separately
as an enhancement. See “Enhancement settings”, page 71 for information.
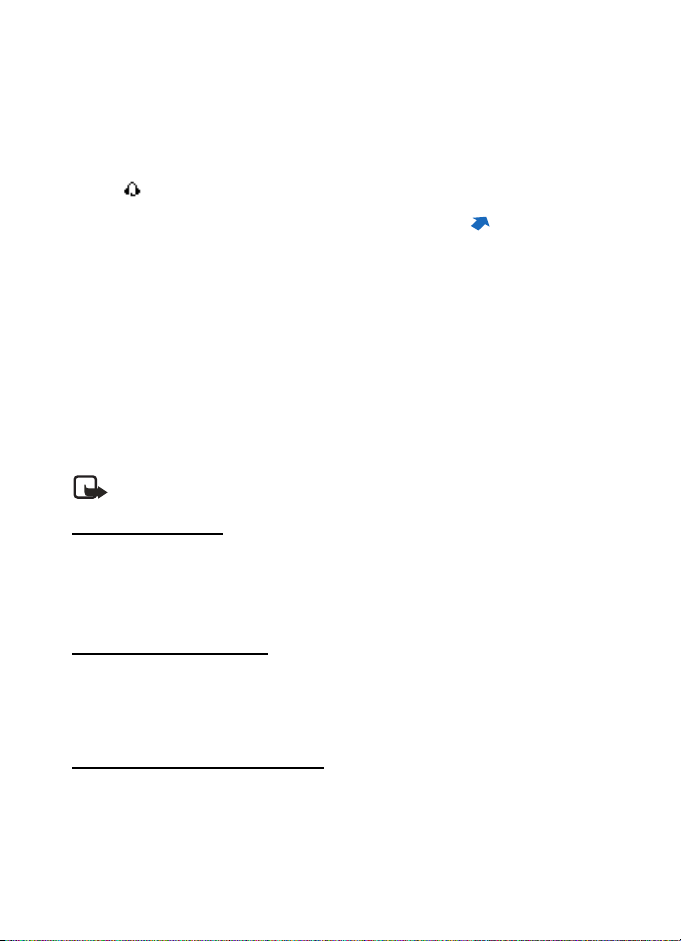
1. Plug the headset connector into the Pop-Port™
connector at the bottom end of your phone.
The icon appears on the start screen.
2. Position the headset on your ear.
With the headset connected, you can make,
answer, and end calls as usual.
• Use the keypad to enter numbers.
• Press the Call key to place a call.
• Press the End key to end a call.
You can also plug a compatible headset, such as the HS-9 Universal Headset, into
the 2.5mm headset jack on the top of your phone to allow hands-free operation.
See “Enhancement settings”, page 71.
■ Make a call
Note: Before making or receiving a call, fully extend the whip antenna.
Using the keypad
1. Enter the phone number (including the area code), and press the Call key.
(To delete a character to the left of the cursor, press Clear.)
2. Press the End key or to end the call or End call to cancel the call attempt.
Using the contacts list
At the start screen, use the Scroll up key or Scroll down key to scroll to the entry
you wish to view. Press the Call key to make the call, or press Details to view details
of the entry.
Using the last dialed number
At the start screen, press the Call key to display the last 30 numbers dialed. Scroll to
the number (or name) you wish to redial, and press the Call key.
18 Copyright © 2004 Nokia

Set up your phone
Conference calling
Conference calling is a network service that allows you to take part in a conference
call with two other participants.
1. Make a call to the first participant.
2. With the first participant on the line, select Options > New call.
3. Enter the phone number of the second participant, or press Search to retrieve a
number from the contacts list. Press OK. The first participant is put on hold.
4. When the second participant picks up, press the Call key to connect the calls.
5. To end the conference call, press Options > End all calls or press the End key.
■ Answer calls
Answer or silence an incoming call
1. Press the Call key or Answer to answer the call.
2. With the fold open:
Press the End key to reject the call.
Press Silence to mute the ringing tone, then press Dismiss, or do nothing, and the
call is eventually diverted to voicemail.
If your phone is set to Silent in the Profiles menu, press Dismiss, and the call is
diverted to voicemail.
3. With the fold closed:
Press the Volume key to mute the ringing tone.
A long press of the Voice/shutter key answers an incoming call with the
loudspeaker.
Your phone answers an incoming call when you open the fold. This is the default setting,
but you can change the setting to Phone will not answer calls when fold is opened.
From the start screen, select Menu > Settings > Call settings > Answer when fold is
opened > On or Off.
Adjust the earpiece volume
While in a call, press the Up arrow or Down arrow on the volume key located on the
left side of your phone to adjust the volume of the earpiece.
When adjusting the volume, a bar chart appears in the display indicating the
volume level.
19 Copyright © 2004 Nokia
Answer a call with the keypad locked
To answer a call with the keypad locked, simply press the Call key with fold open.
To answer a call with the fold closed and with the keypad locked, press and hold the
Voice/shutter key to answer with the loudspeaker. During the call, all features
function as normal. When you end or reject the call, the keypad automatically re-locks.
See “Keyguard”, page 21 for details.
When the keypad lock is on, calls still may be possible to the official emergency
number programmed into your device.
Key in the emergency number and press .
Using the loudspeaker
Warning: Do not hold the device near your ear when the loudspeaker is in
use, because the volume may be extremely loud.
You can use your phone as a loudspeaker during a call. While in a call:
• To activate the loudspeaker while in a call with the fold open, press Loudspeaker.
• To activate the loudspeaker when answering a call with the fold closed, press the
Voice/shutter key.
• To deactivate the loudspeaker during a call, press Handset.
The loudspeaker is deactivated automatically when a call (or a call attempt) ends or
when certain enhancements are connected.
Options during a call
Many of the options that you can use during a call, are network services. Check with
your wireless service provider for more information.
1. Press Options during a call to display the following options:
Loudspeaker/Handset—Activate or deactivate the loudspeaker while in a call.
New call—Initiate a conference call. See “Conference calling”, page 19
for information.
Save—Save a number entered during a call.
Add to contact—Add a number entered during a call to a contact in your list.
End all calls—Disconnect from all active calls.
Touch tones—Enter the number(s), and press Tones to send the number(s) as tones.
Contacts—View the contacts list.
Menu—View the phone menu.
2. Scroll to an option, and press Select to activate the option or enter its submenu.
20 Copyright © 2004 Nokia

Set up your phone
■ Keyguard
With keyguard, you can lock the keypad to prevent keys from being pressed accide ntally.
If the keypad is locked, it unlocks when you receive a call. After the call, the lock
automatically reactivates.
When the keyguard is on, calls still may be possible to the official emergency number
programmed into your phone. Key in the emergency number, and press the Call key.
Lock the keypad
Select Menu with the Center selection key; then press the * key within two seconds.
Unlock the keypad
Select Unlock with the Center selection key; then press the * key within two seconds.
21 Copyright © 2004 Nokia
3. Text entry
You can use two methods for entering text and numbers:
• Standard mode is the only way to enter text into the contacts list and to rename
caller groups.
• Predictive text input is a quick and easy method for writing messages or creating
a calendar note.
■ Standard mode
Text (Abc)
• Press a key once to insert the first letter on the key, twice for the second letter,
etc. If you pause briefly, the last letter in the display is accepted and your phone
awaits the next entry.
•Press Clear to backspace the cursor and delete a character.
• Press and hold Clear to backspace continuously and delete characters.
•Press the 0 key to enter a space, thereby accepting a completed word.
•Press the 1 key as many times as necessary to scroll through a list of commonly
used characters.
•Press the * key to display a complete list of special characters.
•Press and hold the # key to bring up the Editor settings (Number mode,
Predictive text on/Predictive text off, Writing language).
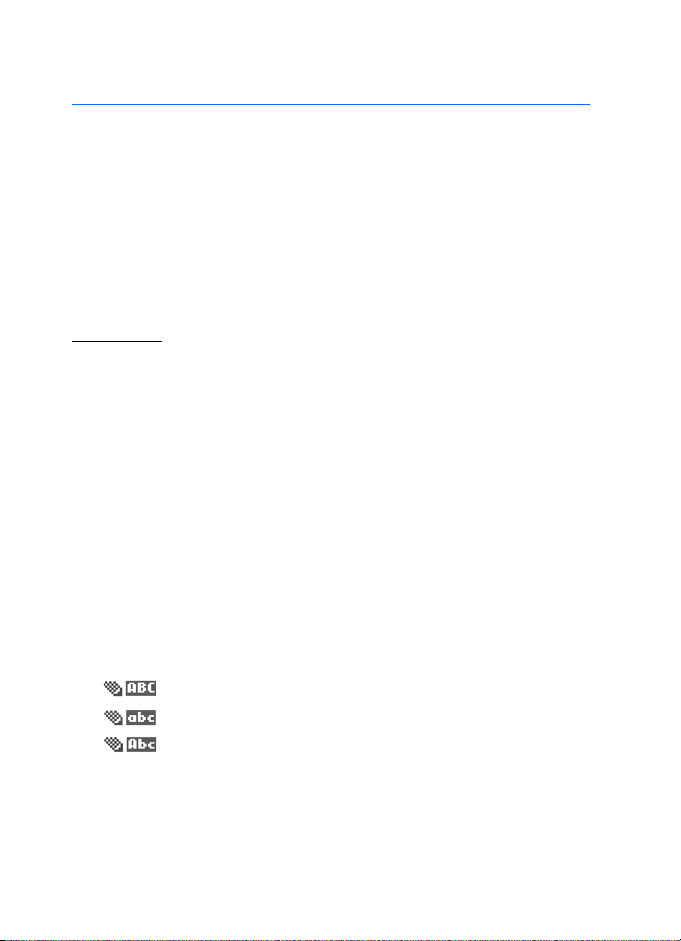
•Press the # key to switch between uppercase, lowercase, and sentence case text.
As you press the # key, the following icons (not the descriptions) appear in the
upper left of the display screen:
Uppercase text: standard mode is on
Lowercase text: standard mode is on
Sentence case text: standard mode is on
22 Copyright © 2004 Nokia

Text entry
Numbers (123)
To switch to 123 mode from Abc mode, press and hold the # key at any message
entry screen to bring up the Editor settings menu list of Number mode, Predictive
text, and Writing language. Select Number mode, and the phone will return to the
message entry screen and switch the ABC icon in the upper left corner of the display
to the 123 icon.
Punctuation and special characters
While at any text entry screen, press the * key to display special characters (press
and hold the * key if predictive text is on). Press the * key again to cycle through all
available characters. You can navigate through the list of special characters by
using the Five-way scroll key. Once a character is highlighted, press Insert to insert
the character into your message.
■ Predictive text input
Predictive text input allows you to write messages quickly using your keypad and
the built-in dictionary. It is much faster than the standard mode method, because
for each letter, you only press the corresponding key on your keypad once.
When you use Predictive text , as you press the # key, the following icons (not the
descriptions) appear in the upper left of the display screen:
Uppercase text: predictive text is on
Sentence case text: predictive text is on
Lowercase text: predictive text is on
Activate/deactivate
At any text entry screen, press and hold Options. Predictive text is turned on and off,
depending on its previous mode.
OR
1. At any text entry screen, select Options > Predictive text.
2. Scroll to the language of your choice, and press Select.
23 Copyright © 2004 Nokia

Text entry
The illustration below simulates your display each time a key is pressed. For example,
to write Nokia with predictive text on and with the English dictionary selected, press
each of the following keys once:
the 6 key the 6 key the 5 ke y the 4 key the 2 key
•Press the 0 key to enter a space, and begin writing the next word.
• If a displayed word is not correct, press the * key to see other matches. To return
to the previous word in the list of matches, press Previous.
•If ? appears after a word, press Spell to add the word to the dictionary.
•Press the 1 key to insert a period into your message.
•Press and hold the * key to display special characters. Press the * key again to
cycle through all available characters.
24 Copyright © 2004 Nokia
Messages (Menu 1)
4. Messages (Menu 1)
If you have subscribed to a message network service, you can send and receive
messages to compatible phones that are also subscribed to a message service.
You can also send and receive picture messages, multimedia messages, and e-mail
if supported by your service provider. Also, you can make distribution lists that
contain phone numbers and names from your contact list. See “Text entry”, page 24
for more information.
When composing text messages, picture messages, or multimedia messages, check the
number of characters allowed in the top right corner of the message. Using special
(Unicode) characters takes up more space. If there are special characters in your
message, the indicator may not show the message length correctly. Before the message
is sent, the phone will tell you if the message exceeds the maximum length allowed
for one message.
Note: When sending messages, your device may display Message sent.
This is an indication that the message has been sent by your device to the
message center number programmed into your device. This is not an
indication that the message has been received at the intended destination.
For more details about messaging services, check with your service provider.
Important: E-mail messages or multimedia message objects may contain
viruses or otherwise be harmful to your device or PC. Do not open any
attachment if you are not sure of the trustworthiness of the sender.
■ Text messages
Write and send
1. At the start screen, select Menu > Messages > Text messages > Create message.
To go quickly to the Create message display, press the Scroll left key from the
start screen.
2. Compose or reply to a message using the keypad, and select Send.
For other options while composing the message, select Options and one of
the following:
Preview—Preview the message when sending a picture message.
Sending options—Mark/Unmark options Urgent, Delivery note, Callback no.,
and Signature.
25 Copyright © 2004 Nokia

Clear text—Erase the text from the message editor.
Insert picture—Insert a picture from a Templates folder into your message.
Change picture—Change the picture in a picture message.
Delete picture—Delete the picture in a picture message.
Insert contact—Insert a name from your contacts list into your message.
Insert number—Insert a phone number or find a phone number in the contacts list.
Save message—Select Drafts to save the message in the Drafts folder; select
Templates to save the message as one of your predefined templates in the
Templates folder. If you have defined any folders under My folders, they also
appear in the list and you can save the message to one of them.
Exit editor—Exits the message editor.
Use template—Insert a predefined template into your message.
Insert smiley—Insert a smiley into your message.
Writing language—Choose the language you want to use.
Predictive text—Turn predictive text on or off.
Insert word—Enter a word and insert it into your message. This option is
available if predictive text is on.
Insert symbol—Insert a special character into your message. This option is
available if predictive text is on.
Matches—View matches found in the dictionary for the word you want to use.
3. To send the message, select Send > Send to number, Send to e-mail, or Send to
many. Enter the recipient’s phone number or e-mail address or select Search to
retrieve a number or e-mail address from Contacts, and select OK.
Templates
Templates are short, prewritten messages which can be recalled and inserted into
new text messages when you are short on time.
1. At the start screen, select Menu > Messages > Text messages > Create message.
2. Select Options > Use template.
3. Scroll to one of the available templates, and press Select.
4. Select Send > Send to number , Send to e-mail , Send to many , or Send to distrib.
list ( only when a distribution list has been created) and press Select.
5. Enter the recipient’s phone number or e-mail address, or select Search to
retrieve a number or e-mail address from your contacts list, and select Send.
26 Copyright © 2004 Nokia

Messages (Menu 1)
Read and reply
When you receive a message, a notification message and the unopened letter icon
( ) appear in the display.
1. Press Show to read the message, or Exit to move it to your inbox.
When you have unopened messages in your inbox, is shown in the upper
left corner of the start screen as a reminder.
Use the Scroll down key to view the whole message if necessary.
2. Select Reply > Empty screen, Original text, T emplate, or one of the predefined
answers, then compose your reply using the keypad.
3. Press Send.
Options
When you read a text message, some or all of the following options are available:
Delete—Discard the message.
Use number—Choose Add to contact, Send message, or Call.
Save—Save the message to Sent items, Archive, Templ ates, or a folder you have created.
Forward—Forward the message to another phone number or e-mail address.
Rename—Edit the title of the message.
Reply—Reply to the message. Create the message, and select Options > Send.
The sender’s phone number or e-mail is used as the default.
Resend—Send the message again.
Change sending options
1. At the start screen, select Menu > Messages > Text messages > Message settings >
Sending options to change sending options for all text messages.
2. To change sending options for one message, at the start screen, select Menu >
Messages > Text messages > Create message > Options > Sending options.
3. Select the setting you wish to change:
Priority—Set the priority of the note as Normal or Urgent.
Delivery note—A note is sent to you confirming delivery of the message.
Select On or Off.
Send callback number—A callback number is sent to the recipient. Select Off or
your phone number.
Signature:—Write a Signature to send with text messages, or select Off.
27 Copyright © 2004 Nokia
Change message settings
1. At the start screen, select Menu > Messages > Text messages > Message settings >
Other settings.
2. Select the setting you wish to change:
Message font size—Select Small font or Large font.
Message overwriting—Select Sent items only, Inbox only, S. items & Inbox, or Off.
Note: When the message memory is full, your phone cannot send or
receive any new messages. However, you can set your phone to
automatically replace old messages in the Inbox and Outbox folders
when new ones arrive.
Save sent messages—Select Always save, Always prompt, or Off.
Queue msgs.when digital unavailable—Select On, On prompt, or Off. Messages
are stored in the Outbox until they can be sent with digital service.
■ Picture messages
Your phone comes with 5 preloaded pictures. You can save more pictures. If necessary,
you can overwrite any of the preloaded pictures. Pictures can be attached to a message
and sent using a text message to compatible phones. Picture messages behave the
same as text messages, but pictures take up more space than text. Pictures are stored
in the Templates folder under Messages > Text messages > Templates.
You cannot send a picture message using e-mail.
Download pictures
Note: This function can be used only if it is supported by your service provider.
Only phones that offer compatible picture message features can receive and
display picture messages. Contact your service provider for details.
Receive and save a picture message
When you receive a picture message, your phone beeps and Message received appears
in the display as well the message icon .
When you have unopened picture messages in your inbox, is shown in the
upper left corner of the start screen as a reminder.
Select Show to view the picture message. If you have more than one picture message,
scroll and select the message you want to view. Use the scroll keys to view the whole
picture if necessary.
28 Copyright © 2004 Nokia

Messages (Menu 1)
You can save a received picture in your templates folder by selecting Options > Save
picture Enter a title and select OK. If your templates folder is full of pictures, you can
scroll to the picture you want to replace and select Select.
Compose and send a picture message
One picture message is equivalent in size to three text messages. When you insert a
picture into a message, you will have enough remaining space for about 121 characters
in the message. If you try to insert a picture into a message that is almost full of
text, a beep sounds, and you are prompted to delete some text before proceeding.
1. From the start screen, select Menu > Messages > Text messages > Create
message.
2. Write the message, and select Options > Insert picture.
3. Scroll to a picture, and select View > Insert.
To view another picture, select Back, scroll to another picture, and select
View > Insert.
4. Select Send and enter the phone number of the recipient, or select Find to retrieve
a number from contacts, and select OK.
After a picture has been inserted into your message, you can select Options > Preview,
Change picture, or Delete picture.
■ Multimedia messages
A multimedia message can contain text, sound, and a picture. Or a multimedia
message can contain a video clip. Your phone supports multimedia messages that
are up to 300 KB. If the maximum size is exceeded, the phone may not be able to
receive the message. Depending upon your network, you may receive a message that
includes an Internet address where you can go to view the multimedia message.
Pictures are scaled to fit the display area of the phone. Your phone has a multimedia
message viewer for playing messages and a multimedia inbox for storing saved
messages. Once you save the multimedia message, you can use the image as a
screen saver or the sound as a ringing tone.
Important: Multimedia message objects may contain viruses or otherwise
be harmful to your device or PC. Do not open any attachment if you are not
sure of the trustworthiness of the sender.
Copyright protections may prevent some images, ringing tones, and other content
from being copied, modified, transferred, or forwarded.
29 Copyright © 2004 Nokia
 Loading...