


INT
GB70
User Guide
 DANGER
PRIOR TO USE, READ AND UNDERSTAND PRODUCT SAFETY INFORMATION.
Failure to follow the instructions may result in ELECTRICAL SHOCK, EXPLOSION,
or FIRE, which may result in SERIOUS INJURY, DEATH, DAMAGE TO DEVICE or PROPERTY. Do not discard this information.
Welcome. Thank you for buying the NOCO Genius® Boost™ GB70. Read and understand the User Guide before operating the product. For questions regarding our jump starter, view our comprehensive support information at www.no.co/support. To contact NOCO for personalized support (not available in all areas), visit www.no.co/connect.
What’s In The Box.
•GB70 Lithium Jump Starter w/HD Battery Clamps
•Micro USB Cable
•12V Female Plug (OUT)
•12V Male Plug (IN)
•12V XGC Cable
•User Guide & Information Guide and Warranty
Contacting NOCO.
Phone: 1.800.456.6626 Email: support@no.co
Mailing Address: 30339 Diamond Parkway, #102 Glenwillow, OH 44139
United States of America
About GB70. The NOCO Genius® Boost™ GB70 is an ultra-compact and portable lithium-ion jump starter for highdisplacement gas and diesel engines in cars, trucks, boats and more. Safe to use on engines of any size. It’s extremely safe for anyone to use. It features spark proof technology and reverse polarity protection. The GB70 can instantly jump start most single-battery applications, up to 40 times on a single charge. The GB70 is also equipped with a USB battery pack, 12V OUT port and LED flashlight, making it the ultimate emergency tool.
Getting Started. The GB70 comes partially charged out of the box and needs to be fully charged prior to use. Carefully read and understand the vehicle owner’s manual on specific precautions and recommended methods for jump starting the vehicle. Make sure to determine the voltage and chemistry of the battery by referring to your battery owner’s manual prior to using this product. The GB70 is for jump starting 12-volt lead-acid batteries only.
Connecting to the Battery.
Before connecting to the battery, verify that you have a 12volt lead-acid battery. The GB70 is not suitable for any other type of battery. Identify the correct polarity of the battery terminals on the battery. The positive battery terminal is typically marked by these letters or symbol (POS,P,+).
The negative battery terminal is typically marked by these letters or symbol (NEG,N,-). Do not make any connections to the carburetor, fuel lines, or thin, sheet metal parts. The below instructions are for a negative ground system (most common). If your vehicle is a positive ground system (very uncommon), follow the below instructions in reverse order.
1.) Connect the positive (red) HD battery clamp to the positive (POS,P,+) battery terminal.

2.) Connect the negative (black) HD battery clamp to the negative (NEG,N,-) battery terminal or vehicle chassis.
3.) When disconnecting, disconnect in the reverse sequence, removing the negative first (or positive first for positive ground systems).
Jump Starting.
1.) Verify the voltage and chemistry of the battery.
2.) Confirm the HD battery clamps are connected to the correct polarity battery terminals.
3.) Make sure all of the vehicle’s power loads (headlights, radio, air conditioning, etc.) are turned off before attempting to jump start the vehicle.
4.) Press the Power Button to begin jump starting. All LEDs will flash, indicating that all LEDs are properly functioning. If you are properly connected to the battery, the White Boost LED will illuminate and the charge level LEDs will chase. If the battery clamps are connected in reverse, the Red Error LED will illuminate. Reverse the connections to clear this error and then the White Boost LED will illuminate. The White Boost LED is illuminated, when the GB70 is ready to jump start your vehicle.
5.) Try starting the vehicle. Most vehicles will immediately start. Some vehicles may require the GB70 to be connected for up to 30 seconds before starting. If the vehicle does not start right away, wait 20-30 seconds and try again. Do not attempt more than five (5) consecutive jump starts within a fifteen (15) minute period. Allow the GB70 to rest for fifteen (15) minutes before attempting to jump start the vehicle again.
6.) Once you have started your vehicle, disconnect the battery clamps, and remove the GB70.
Low Voltage Batteries & Manual Override
The GB70 is designed to jump start 12-volt lead-acid batteries down to 2-volts. If your battery is below 2-volts, the Boost LED will be “Off”. This is an indication that the GB70 can not detect a battery.
If you need to jump start a battery below 2-volts there is a Manual Override feature, which allows you to force “On” the jump start function.
CAUTION. USE THIS MODE WITH EXTREME CARE. THIS MODE IS FOR 12-VOLT LEAD-ACID BATTERIES ONLY. BOTH THE SPARK PROOF AND REVERSE POLARITY PROTECTION FEATURES ARE DISABLED. PAY VERY CLOSE ATTENTION TO THE POLARITY OF THE BATTERY BEFORE USING THIS MODE. DO NOT ALLOW THE POSITIVE AND NEGATIVE BATTERY CLAMPS TO TOUCH OR CONNECT TO EACH OTHER AS THE PRODUCT WILL GENERATE SPARKS. THIS MODE USES VERY HIGH CURRENT (UP TO 2000 AMPS) THAT CAN CAUSE SPARKS AND HIGH HEAT IF NOT USED PROPERLY. IF YOU ARE UNSURE ABOUT USING THIS MODE, DO NOT ATTEMPT AND SEEK PROFESSIONAL HELP.
Before using the Manual Override feature, make sure the HD battery clamps are connected to the correct polarity battery terminals. To use the Manual Override feature, press and hold the Manual Override Button (a red exclamation point icon inside a red circle) for three (3) seconds. The White Boost LED will flash “On” and “Off” indicating you have successfully entered into Manual Override and it is ready to jump start your vehicle. If connected in reverse polarity, the Red Error LED will illuminate and the unit will not operate.
CAUTION: POWER THE GB70 “OFF” BEFORE DISCONNECTING THE BATTERY CLAMPS. THIS WILL ENSURE YOUR SAFETY. REMEMBER BOTH THE SPARK PROOF AND REVERSE POLARITY PROTECTION FEATURES ARE DISABLED.
Most vehicles will immediately start. Some vehicles may require the GB70 to be connected for up to 30 seconds
before starting. If the vehicle does not start right away, wait 20-30 seconds and try again. Do not attempt more than five (5) consecutive jump starts within a fifteen (15) minute period. Allow the GB70 to rest for fifteen (15) minutes before attempting to jump start the vehicle again.
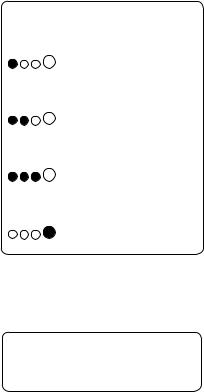
Understanding Charge LEDs.
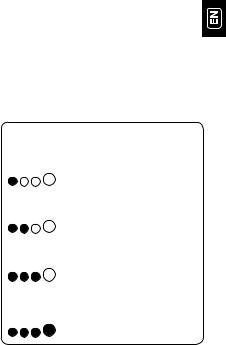
The GB70 has four (4) Charge LEDs - 25%, 50%, 75% and 100%. These Charge LEDs indicate the internal battery’s state-of-charge (SOC). See below:
LED |
Explanation |
|
|
|
|
25% |
The 25% Charge LED will be solid |
|
Red LED |
||
when the internal battery is 25% or |
||
25% 50% 75% 100% |
less charged. |
|
|
|
|
50% |
The 50% and 25% Charge LEDs will |
|
Red LED |
||
be solid when the internal battery is |
||
25% 50% 75% 100% |
more than 25% but less than 50% |
|
|
charged. |
|
|
|
|
75% |
The 75%, 50%, and 25% Charge |
|
Yellow LED |
||
LEDs will be solid when the internal |
||
25% 50% 75% 100% |
||
battery is more than 50% but less |
||
|
||
|
than 75% charged. |
|
|
|
|
100% |
All four (100%, 75%, 50%, and 25%) |
|
Green LED |
||
Charge LEDs will be solid when the |
||
25% 50% 75% 100% |
||
internal battery is more than 75% up |
||
|
||
|
to 100% charged. |
|
|
|
The above charge states apply when the GB70 is NOT connected to a power supply and recharging.
When Recharging the GB70.
LED |
Explanation |
|
|
|
|
25% |
The 25% Charge LED will slowly |
|
Red LED |
||
pulse “On” and “Off”, when the |
||
25% 50% 75% 100% |
battery is less than 25% charged. |
|
|
When the battery is 25% charged, |
|
|
the Red Charge LED will be solid. |
|
|
|
|
50% |
The 50% Charge LED will slowly |
|
Red LED |
pulse “On” and “Off”, when the |
|
25% 50% 75% 100% |
battery is less than 50% charged. |
|
|
When the battery is 50% charged, |
|
|
the Red Charge LED will be solid. |
|
|
|
|
75% |
The 75% Charge LED will slowly |
|
Yellow LED |
pulse “On” and “Off”, when the |
|
25% 50% 75% 100% |
battery is less than 75% charged. |
|
|
When the battery is 75% charged, |
|
|
the Yellow Charge LED will be solid. |
|
|
|
|
100% |
The 100% Charge LED will slowly |
|
Green LED |
pulse “On” and “Off”, when the battery |
|
25% 50% 75% 100% |
is less than 100% charged. When the |
|
battery is fully charged, the Green LED |
||
|
||
|
will be solid, and the 25%, 50% and |
|
|
75% Charge LEDs will turn “Off”. |
|
|
|
Understanding Error Conditions.
The GB70 shall display an Error Condition when a reverse polarity condition is present, a battery below two (2) volts, or the internal battery overheating. When one of these Error Conditions are present, the following will happen:
Error |
Reason/Solution |
|
|
Error LED |
Reverse polarity/ |
Solid Red |
Reverse the battery |
connections. |
|
|
|

Error |
|
Reason/Solution |
|
|
|
||
|
|
|
|
Error LED |
|
The internal battery is too |
|
Blinking Red |
|
hot/ |
|
|
Allow the unit to cool. |
|
|
w/Cables Connected |
|
Bring the unit into cooler |
|
Properly |
|
environment. |
|
|
|
|
|
Boost Light Does |
|
Connected battery is below |
|
Not Come On |
|
2-volts/ |
|
|
Remove all loads, and |
|
|
w/Cables Connected |
|
try again, or use Manual |
|
Properly |
|
Override Mode. |
|
|
|
|
|
Charging the GB70.
12V Fast Charge (36W):
Connect the 12V Cable to the “12V IN” port on the GB70, and the other end to the Male 12 Plug. Plug into a powered 12V AUX Plug (Cigarette Lighter Port.)
USB Charging (Up to 10W):
Connect the GB70 using the included USB Charge Cable to the USB IN port and a powered USB port, like an AC adapter, car charger, laptop and more. The USB IN port is rated at 2.1 Amps to ensure safe and efficient charging of the internal lithium battery.
Due to FCC regulations, we do not recommend charging and discharging the unit at the same time.
Charging Times.
The time to recharge a GB70 will differ based on the discharge level and the power source used. Actual results may vary due to battery conditions.
USB Charger Rating 12V Fast Charge
|
.5A |
1A |
2A |
3A @ 12V (36W) |
|
|
|
|
|
Time |
28hr |
14hr |
7hr |
2-3hr |
|
|
|
|
|
Charging Your USB Devices.
You can recharge virtually any USB device, like a smartphone. Connect the included USB Charge Cable to the USB OUT port and connect to your USB device.
The number of times you can recharge a USB device will vary between devices. For recharge times, contact your device manufacturer.
Powering Your 12V Devices.
Connect the 12V Cable to the “12V OUT” port on the GB70, and the other end to the Female 12V Plug (12V AUX/ Cigarette Lighter Port.) Plug-in any standard 12V device (Up to 15A) with a 12V plug and turn the GB70 “On” to start powering your device.
LED Flashlight.
The GB70 has an integrated ultra-bright LED flashlight. It has seven (7) light modes that effect its performance and longevity: 100%, 50%, 10%, SOS, Blink, Strobe, and Off.
To turn the flashlight “On” and “Off”, use the Power button with the light bulb icon. Press once to turn the flashlight “On” at 100% luminosity, again for 50% luminosity (within 3 seconds), again for 10% luminosity (within 3 seconds), again for SOS (within 3 seconds), again for Blink (within 3 seconds), again for Strobe (within 3 seconds) and again for “Off”. If a light mode is not selected within 3 seconds, it will remain “On” in the current light mode, and the next selection will turn the flashlight “Off”.
Depending on the mode selection, the GB70 will have various levels of output and runtime. Selecting a lower power level when using the GB70 for extended periods of time will prolong battery life.
Modes:
100% > 50% > 10% > SOS > Blink > Strobe > Off

Technical Specifications.
|
Internal Battery: |
Lithium Ion |
|
|
|
|
Peak Current Rating: |
2000A |
|
|
|
|
joules3S: |
15700+ |
|
Operating Temperature: |
-30°C to +50°C |
|
|
|
|
Charging Temperature: |
0ºC to +40ºC |
|
|
|
|
Storage Temperature: |
-20ºC to +50ºC (Avg Temp.) |
|
|
|
|
Micro USB (Input): |
5V, 2.1A |
|
|
|
|
USB (Output): |
5V, 2.1A |
|
|
|
|
12V (Input) |
12V, 3A |
|
|
|
|
12V (Output) |
12V, 15A |
|
|
|
|
Housing Protection: |
IP65 (w/Ports Closed) |
|
|
|
|
Cooling: |
Natural Convection |
|
|
|
|
Dimensions (L x W x H): |
8.6 x 6 x 2.5 Inches |
|
|
|
|
Weight: |
5 Pounds |
|
|
|
Energy Saving Auto Shut Off.
The GB70 has a built in energy saving feature that will automatically turn the unit off after seven (7) hours. To continue using, simply power on the unit again.

|
7 |
|
5 |
1 |
6 |
|
2
3
4
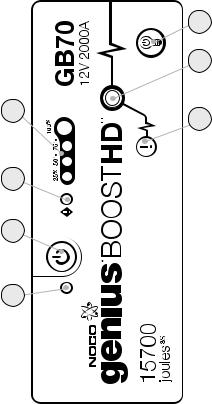
User Interface.
1. Internal Battery Level
Indicates the charge level of the internal battery.
2. Error LED
Illuminates Red if reverse polarity is detected, or blinks “On” and “Off” when the internal battery temperature is too high.
3. Power Button
Push to turn unit “On” & “Off”.
4. Power LED
Illunimates White when unit is “On”.
5. Boost LED
Illuminates White when Boost is active. If the unit is connected properly to a battery, the GB70 will automatically detect a battery and go into Boost mode (LED flashes White when Manual Overide feature is active).
6. Manual Override Button
To enable, push and hold for three (3) seconds.
WARNING: Disables safety protection and manually forces Boost “On”. Only for use when a battery is too low to be detected.
7. Light Mode Button
Toggles the ultra-bright LED light through 7 light modes: 100% > 50% > 10% > SOS > Blink > Strobe > Off

GB70
Guide de l’utilisateur
 DANGER
AVANT TOUTE UTILISATION, LISEZ ET COMPRENEZ LES INFORMATIONS SÉCURITÉ DU PRODUIT. Ne pas suivre les instructions peut provoquer des CHOCS ÉLECTRIQUES, EXPLOSIONS, FEUX pouvant résulter en de graves BLESSURES, la MORT ou ENDOMMAGER DES APPAREILS ou DES BIENS. Ne négligez pas ces informations.
Bienvenue. Merci d’avoir acheté le NOCO Genius® Boost™ GB70. Lisez et comprenez le mode d’emploi avant d’utiliser le produit. Pour les questions concernant notre démarreur rapide, veuillez consulter la documentation et le support à l’adresse www.no.co/support. Pour contacter NOCO pour un soutien personnalisé (dans certains régions uniquement), consultez www.no.co/connect.
Le contenu de la boîte.
•GB70 démarreur rapide au lithium avec pinces pour batteries HD
•Câble micro USB
•connecteur 12V femelle (OUT)
•connecteur mâle 12V (IN)
•Câble 12V XGC
• Guide d’utilisateur, informations et garantie |
12 |
|
Contacter NOCO.
Téléphone : 1.800.456.6626 E-mail : support@no.co
Adresse postale : 30339 Diamond Parkway, #102 Glenwillow, OH 44139
United States of America
À propos du GB70. Le NOCO Genius Boost HD GB70 est un démarreur lithium portable ultra-compact pour des moteurs haute puissance au gaz et diesel de voitures, bateaux entre autres. Utilisation sûre pour moteurs de toute taille et pour toute personne. Il dispose d’une technologie anti-étincelles et d’une protection contre l’inversion des polarités. Le GB70 peut démarrer instantanément la plupart des applications à batterie unique, jusqu’à 40 fois sur une recharge unique. Le GB70 est également équipé d’un pack batterie USB, d’une sortie 12 V OUT et d’une lampe torche LED, qui en font l’outil pour urgences par excellence.
Premiers pas. Le GB70 est livré en partie déchargé et doit être complètement rechargé avec al première utilisation. Veuillez lire attentivement et comprendre le guide du véhicule pour prendre les précautions nécessaires et suivre les méthodes recommandées pour un démarrage rapide. Soyezsûrs de déterminer le voltage et la composition chimique
de la batterie en consultant le manuel du propriétaire de la batterie avant d’utiliser ce produit. Le GB70 est adapté uniquement aux batteries acide-plomb de 12 volts.
Connecter la batterie. Avant de connecter la batterie, vérifiez que vous avez bien une batterie acide-plomb de 12 volts. Le GB70 n’est pas adapté à un autre type de batterie. Identifier correctement la polarité de la batterie. La
borne positive est toujours marquée des lettres ou symboles suivants : POS, P, +. La borne négative est toujours marquée des lettres ou symboles suivants : NEG, N, +. Ne relier pas l’appareil au carburateur, aux arrivées d’essence ou à des parties métalliques minces. Les instructions plus bas sont destinés à une terre négative (ce qui est le plus courant). Si votre véhicule a une terre positive (ce qui est très rare), suivez les instructions dans l’ordre inverse.
1.) Connectez la pince positive (rouge) HD à la borne positive (POS, P, +) de la batterie.

2.) Connectez la pince négative (noire) HD à la borne négative (NEG, N, -) de la batterie ou au châssis du véhicule.
3.) Au moment de la déconnexion, déconnectez dans l’ordre inverse, en enlevant d’abord la borne négative (ou bien positive pour si le système terre est positif).
Démarrage rapide.
1.) Vérifiez le voltage et la composition chimique de la batterie.
2.) Vérifiez que les pinces HD de la batterie sont connectées aux polarités correctes des bornes de la batterie.
3.) Assurez-vous que tous les charges électriques du véhicule (phares, radio, climatisation etc...) sont éteintes avant de tenter un démarrage rapide du véhicule.
4.) Appuyez sur le bouton marche/arrêt pour commencer le démarrage rapide. Si tous les LEDs clignotent, cela indique que les LEDs fonctionnent correctement. Si vous avez connecté correctement la batterie, le “White Boost” LED s’allumera. Si les pinces des batteries sont connectées dans le mauvais ordre, le LED d’erreur rouge s’allumera. Inversez les connecteurs pour résoudre cette erreur, le LED “White Boost” s’allumera. Si le LED “White Boost” est allumé, alors le GB70 est prêt pour le démarrage rapide de votre véhicule.
5.) Essayer de démarrer le véhicule. La plupart des véhicules démarreront immédiatement. Avec certains véhicules, le GB70 soit être connecté jusqu’à 30 secondes avant de pouvoir le démarrer. Si votre véhicule ne démarre pas tout de suite, attendez 20 à 30 secondes et essayez à nouveau. Ne tentez pas plus de (5) démarrages rapides dans une période de (15) minutes. Permettez au GB70 d’attendre (15) minutes avant de tenter à nouveau le démarrage rapide de votre véhicule.
6.) Une fois que vous aurez démarré votre véhicule, |
|
déconnectez les pinces et enlevez le GB70. |
14 |
Basse tension et commande manuelle
Le GB70 est conçu pour un démarrage rapide de batteries plomb-acide 12 volts jusqu’à 2 volts. Si votre batterie a une puissance inférieure à 2 volts, le LED “Boost” sera sur “Off”.
Ceci est une indication que le GB70 ne peut pas détecter une batterie.
Pour démarrer une batterie en-dessous de 2 volts il existe une procédure de commande manuelle vous permettant de basculer la fonction démarrage sur “On”.
ATTENTION. UTILISEZ CE MODE AVEC UNE PRÉCAUTION EXTRÊME. CE MODE EST POUR LES BATTERIES PLOMB-ACIDE 12 VOLTS SEULEMENT. LES PROTECTION CONTRES LES ÉTINCELLES ET CONTRE L’INVERSION DES POLARITÉS SONT DÉSACTIVÉES FAITES TRÈS ATTENTION À LA POLARITÉ DE LA BATTERIE AVANT D’UTILISER
CE MODE. VEILLEZ À CE QUE LES PINCES POSITIF ET NÉGATIF DE LA BATTERIE NE SE TOUCHENT OU SE CONNECTENT PAS COMME CELA PROVOQUERAIT DES ÉTINCELLES. CE MODE UTILISE UN COURANT HAUTE INTENSITÉ (JUSQU’À 2000 AMPÈRES) POUVANT CAUSER DES ÉTINCELLES ET UNE forte chaleur S’IL N’EST PAS UTILISÉ CORRECTEMENT. SI VOUS N’ÊTES PAS FAMILIER DE CE MODE, NE L’UTILISEZ PAS ET CONSULTEZ UN PROFESSIONNEL.
Avant d’utiliser la fonction commande manuelle, assurez-vous que les pinces batterie HD sont connectées aux bornes de la batteries correspondantes en polarité et que le HD X Connect est connecté au GB70. Pour utiliser la fonction commande manuelle, maintenez le bouton commande manuelle
enfoncé (une icone en forme de point d’exclamation rouge dans un cercle rouge) pendant 3 secondes. Le LED “White Boost” clignotera “On” et “Off” montrant que vous le mode commande manuelle est actif et que la batterie est prête à démarrer votre véhicule. Si les polarités ne correspondent pas, le LED d’erreur rouge s’allumera et l’unité ne fonctionnera pas.
ATTENTION: METTEZ LE GB70 SUR “OFF”AVANT DE DÉCONNECTER LES PINCES DE LA BATTERIE. CELA GARANTIRA VOTRE SÉCURITÉ. LES PROTECTIONS CONTRES LES ÉTINCELLES ET CONTRE L’INVERSION DES POLARITÉS SONT DÉSACTIVÉES.

La plupart des véhicules démarreront immédiatement. Avec certains véhicules, le GB70 soit être connecté jusqu’à 30 secondes avant de pouvoir le démarrer. Si votre véhicule ne démarre pas tout de suite, attendez 20 à 30 secondes et essayez à nouveau. Ne tentez pas plus de (5) démarrages rapides dans une période de (15) minutes. Permettez au GB70 d’attendre (15) minutes avant de tenter à nouveau le démarrage rapide de votre véhicule.
Comprendre les LEDs de chargement.
Le GB70 dispose de quatre (4) LEDs de chargement - 25%, 50%, 75% et 100%. Ces LEDs de charge indiquent l’état de chargement de la batterie interne (SOC). Voir plus bas :
Lors du rechargement du GB70.
LED |
Explication |
|
|
|
|
25% |
Le LED de charge de 25% sera |
|
Rouge LED |
||
stable si la batterie interne est |
||
25% 50% 75% 100% |
chargée à 25% ou moins. |
|
|
|
|
50% |
Les LEDs de charge de 25 et de |
|
Rouge LED |
||
50% seront stables si la batterie |
||
25% 50% 75% 100% |
interne est chargée à plus de 25% |
|
|
mais à moins de 50%. |
|
|
|
|
75% |
Les LEDs de charge de 75%, 50% |
|
Jaune LED |
||
et 25% seront stables si la batterie |
||
25% 50% 75% 100% |
||
interne est chargée à plus de 50% |
||
|
mais à moins de 75%. |
|
|
|
|
100% |
Tous les LEDs de charge (100%, |
|
Vert LED |
75%, 50% et 25%) seront stables si |
|
25% 50% 75% 100% |
la batterie interne est chargée entre |
|
|
75% et 100%. |
|
|
|
Les états de chargement cités plus haut s’appliquent quand le GB70 n’est PAS connecté à une source d’alimentation et n’est pas en recharge.
16

|
7 |
|
5 |
1 |
6 |
|
2
3
4

Interface utilisateur.
1. Niveau interne de la batterie
Indique le niveau de chargement interne de la batterie.
2. LED d’erreur
S’allume en rouge si une inversion de polarités est détectée, ou bien clignote entre “On” et “Off” si la température de la batterie interne est trop élevée.
3. Bouton marche
Appuyez pour mettre l’unité sur “On” et “Off”.
4.LED de marche
S’allume quand l’unité est “On”.
5.LED “Boost”
S’allume quand le Boost est actif. Si l’unité est connectée à la batterie, le GB70 détectera automatiquement une batterie et basculera en mode “Boost” (le LED clignote quand la fonction commande manuelle est active).
6. Bouton de commande manuelle
Pour l’activer, maintenez le bouton enfoncé pendant trois (3)
secondes. ATTENTION: Désactive la protection de sécurité et allume de force le mode “Boost” qui passe en “On”. À n’utiliser que si une
batterie est trop basse pour être détectée.
7. Bouton mode “Light”
Passe entre les 7 modes lumineux du LED haute intensité : 100% > 50% > 10% > SOS > Clignotement > Stroboscope > Off
18
LED |
Explication |
|
|
|
|
25% |
Le LED de charge 25% passera |
|
Rouge LED |
lentement de “On” à “Off” si le |
|
chargement de la batterie est |
||
25% 50% 75% 100% |
||
inférieur à 25 %. Si la batterie est |
||
|
||
|
chargée à 25%, le LED de charge |
|
|
rouge restera stable. |
|
|
|
|
50% |
Le LED de charge 50% passera |
|
Rouge LED |
lentement de “On” à “Off” si le |
|
25% 50% 75% 100% |
chargement de la batterie est inférieur |
|
à 50 %. Si la batterie est chargée à |
||
|
||
|
50%, le LED de charge rouge restera |
|
|
stable. |
|
|
|
|
75% |
Le LED de charge 75% passera |
|
Jaune LED |
lentement de “On” à “Off” si le |
|
25% 50% 75% 100% |
chargement de la batterie est inférieur |
|
à 75%. Si la batterie est chargée à |
||
|
||
|
75%, le LED de charge rouge restera |
|
|
stable. |
|
|
|
|
100% |
Le LED de charge 100% passera |
|
lentement de “On” à “Off” si le |
||
Vert LED |
||
chargement de la batterie est inférieur |
||
25% 50% 75% 100% |
à 100 %. Si la batterie est entièrement |
|
|
chargée, le LED vert sera stable, et les |
|
|
LEDs de charge 25%, 50% et 75% |
|
|
passeront sur “Off”. |
|
|
|
Comprendre les conditions d’erreur.
Le GB70 affichera une condition d’erreur si une inversion de polarité est présente et dispose également d’une technologie de détection de batteries qui peut empêcher le mode “Boost” de s’enclencher si une batterie à bas chargement est présente. Si une de ces conditions d’erreur sont données, la conséquence sera :
Erreur |
Raison/Solution |
|
|
LED d’erreur |
Polarité inversée/ |
Rouge stable |
Inversez les connections de |
|
la batterie. |
|
|
Erreur |
Raison/Solution |
|
|
|
|
LED d’erreur |
La batterie interne est trop |
|
Clignotement rouge |
chaude/Laissez l’unité |
|
refroidir. Mettez l’unité dans |
|
|
w/Câbles connectés |
|
|
un environnement moins |
|
|
Correctement |
chaud. |
|
|
|
|
|
La batterie connectée est |
|
L’indicateur “Boost” ne |
inférieure à 2 volts/ |
|
Enlevez toutes les charges |
|
|
s’allume pas |
|
|
électriques, essayez à |
|
|
w/Câbles connectés |
|
|
nouveau, ou bien utilisez |
|
|
Correctement |
le mode de commande |
|
|
manuelle |
|
|
|
|
Chargement du GB70.
12V chargement rapide (36W):
Connectez le câble 12V à l’entrée 12V IN du GB70 et l’autre bout au connecteur mâle 12. Connectez-le à une prise 12V AUX (allume-cigarette)
USB (10W):
Connectez le GB70 en utilisant le câble de chargement USB au port USB IN. Il peut être rechargé depuis n’importe quel port USB, comme un adaptateur AC, un chargeur de voiture, un ordinateur portable et bien plus encore. Le port USB IN est classé 2,1 ampères pour garantir un chargement sûr et efficient de la batterie interne au lithium.
Temps de chargement.
Le temps de recharge d’un GB70 sera différent selon le niveau de déchargement et la source d’alimentation choisie. Les durées réelles peuvent varier selon l’état de la batterie.
Classement du chargeur USB |
12V chargement rapide |
|||
|
.5A |
1A |
2A |
3A @ 12V (36W) |
|
|
|
|
|
Temps |
28hr |
14hr |
7hr |
2-3hr |
|
|
|
|
|
20
Chargement de vos appareils USB.
Vous pouvez rechargez quasiment tout appareil USB comme un smartphone par exemple. Connectez le câble de chargement USB au port USB OUT et connectez votre appareil USB.
Le nombre de cycles de chargements d’un appareil USB peut varier d’un appareil à l’autre. Pour les temps de recharge, contactez le fabricant de l’appareil.
Alimentation d’appareils 12 V.
Connectez le câble 12V à la sortie 12V OUT du GB70, et l’autre bout au connecteur femelle 12V (12V AUX/allumecigarettes). Raccordez n’importe quel appareil 12V (jusqu’à 15A) avec un connecteur 12V et allumez le GB70 pour commencer à charger votre appareil.
Lampe-torche LED.
Le GB70 dispose d’une lampe-torche haute intensité intégrée. Il dispose de sept (7) modes qui affectent sa performance et longévité. 100%, 50%, 10%, SOS, clignotement, stroboscope et Off. Pour basculer la lampe torche entre “On” et “Off”, utilisez le bouton “Power” avec l’icone de l’ampoule électrique. Appuyez une fois pour allumer la lampe-torche (“On”) à 100% de luminosité, une nouvelle fois pour une luminosité de 50% (en moins de 3 secondes), une nouvelle fois pour 10% de luminosité (en moins de 3 secondes), une nouvelle fois pour SOS (en moins de 3 secondes), une nouvelle fois pour Clignotement (Blink) (en moins de 3 secondes), une nouvelle fois pour stroboscope (en moins de 3 secondes) et encore une fois pour “Off”. Si un nouveau mode lumineux n’est pas choisi en moins de 3 secondes, il restera “On” dans le mode lumineux actuel, et la prochaine sélection fera passer la lampe-torche sur “Off”. Selon la sélection de mode, le GB70 aura différentes intensités et durées. Sélectionner un niveau d’intensité plus bas lors d’une utilisation prolongée du GB70 prolongera la durée de vie de la batterie.
Modes :
100% > 50% > 10% > SOS > Clignotement >
Stroboscope > Off

Spécifications techniques.
|
Batterie interne: |
Lithium Ion |
|
|
|||
|
|
|
|
|
Classement des pics courants: |
2000A |
|
|
|
|
|
|
joules3S: |
15700+ |
|
|
|||
|
Température de fonctionnement: |
-30°C to +50°C |
|
|
|
|
|
|
Température de chargement: |
0ºC to +40ºC |
|
|
|
|
|
|
Température de stockage: |
-20ºC to+50ºC (Temp moyenne.) |
|
|
|
|
|
|
Micro USB (entrée): |
5V, 2.1A |
|
|
|
|
|
|
USB (sortie): |
5V, 2.1A |
|
|
|
|
|
|
12V (entrée): |
12V, 3A |
|
|
|
|
|
|
12V (sortie): |
12V, 15A |
|
|
|
|
|
|
Protection du boîtier: |
IP65 (w/ports fermés) |
|
|
|
|
|
|
Refroidissement: |
Convection naturelle |
|
|
|
|
|
|
Dimensions (Lo x La x H: |
8.6 x 6 x 2.5 Pouces |
|
|
|
|
|
|
Poids : |
5 Livres |
|
|
|
|
|
Extinction automatique d’économie d’énergie.
Le GB70 dispose d’une fonction d’économie d’énergie qui éteindra automatiquement l’unité après 7 heures. Pour continuer à utiliser, allumez simplement l’unité.
22

GB70
Bruksanvisning
 GEFAHR
LESEN UND VERSTEHEN SIE DIESE HINWEISE ZUR PRODUKTSICHERHEIT VOR GEBRAUCH DES PRODUKTS. Die Nichtbefolgung der Anweisungen kann
STROMSCHLÄGE, EXPLOSIONEN, oder FEUER verursachen, was SCHWERE VERLETZUNGEN, TOD, SCHÄDEN AM GERÄT oder SACHSCHÄDEN zur Folge haben kann. Bitte bewahren Sie diese Hinweise sorgfältig auf.
Willkommen. Vielen Dank, dass Sie sich für den Kauf des NOCO Genius® Boost™ GB70-Starthhilfegeräts entschieden haben. Lesen und verstehen Sie die Betriebsanleitung, bevor Sie das Produkt verwenden. Bei Fragen im Zusammenhang mit unseren Starthilfegeräten finden Sie umfassendes Informationsmaterial unter www. no.co/support. Um das persönliche Betreuungsangebot von NOCO in Anspruch zu nehmen, gehen Sie auf www.no.co/connect.
Lieferumfang.
•GB70 Lithium-Starthilfegerät mit HD-Batterieklemmen
•Mikro-USB-Kabel
•12V-Buchse (OUT)
•12V-Stecker (IN)
•12V XGC-Kabel
• Benutzerhandbuch, Hinweise und Garantie
DE
24
Kontakt zu NOCO:
Telefon: 1.800.456.6626 E-Mail: support@no.co
Postanschrift: 30339 Diamond Parkway, #102 Glenwillow, OH 44139
United States of America
Über das GB70 NOCO Genius® Boost HD™ GB70 ist ein ultra-kompaktes und tragbares Lithium-Starthilfegerät, für hubraumstarke Benzinund Dieselmotoren in Autos, Lkw, Booten und mehr. Sichere Anwendung für Motoren jeder Größe. Es kann gefahrlos von jedem verwendet werden. Das Gerät verfügt über eine funkensichere Technologie sowie Verpolungsschutz. Das GB70 kann die meisten Geräte mit Einzelbatterie sofort fremdstarten, bis zu 40 Mal bei nur einer Ladung. Es ist außerdem mit einem USB-Akkupack, einem 12V OUT-Port und einer LED-Taschenlampe ausgestattet, was es zu einem perfekten Notfallhelfer macht.
Vor der Inbetriebnahme: Das Starthilfegerät GB70 ist bei der Lieferung nur teilweise geladen und muss vor der ersten Inbetriebnahme vollständig aufgeladen werden. Bitte lesen und verstehen Sie die im Fahrzeughandbuch angegebenen Vorsichtsmaßnahmen und Empfehlungen für das Fremdstarten des Fahrzeugs. Bevor Sie das Produkt verwenden, stellen Sie die im Handbuch der Batterie
angegebene Spannung und den Batterietyp fest. GB70 ist nur mit 12V-Bleibatterien kompatibel.
Anschluss an eine Batterie
Bevor Sie das Gerät an eine Batterie anschließen, vergewissern Sie sich, dass es sich um eine 12V-Bleibatterie handelt. Das GB70 ist nicht für andere Batterietypen geeignet. Bestimmen Sie die korrekte Polung der Akkukontakte auf der Batterie. Der positive Akkukontakt ist üblicherweise mit einem der folgenden Buchstaben oder Symbole gekennzeichnet: POS, P, +. Der negative Akkukontakt ist üblicherweise
mit einem der folgenden Buchstaben oder Symbole gekennzeichnet: NEG, N, -. Achten Sie darauf, dass es zu keiner Verbindung mit dem Vergaser, den Kraftstoffleitungen oder dünnen Blechteilen kommt. Die unten aufgeführte Anleitung ist für ein System mit Negativerdung (kommt am häufigsten vor). Sollte Ihr Fahrzeug über ein System mit Positiverdung verfügen (äußerst selten), dann befolgen Sie die

unten aufgeführte Anleitung in umgekehrter Reihenfolge.
1.) Verbinden Sie die positive (rote) HD-Batterieklemme mit dem positiven (POS, P, +) Akkukontakt.
2.) Verbinden Sie die negative (schwarze) HDBatterieklemme mit dem negativen (NEG, N, -) Akkukontakt oder der Fahrzeugkarosserie.
3.) Wenn Sie die Verbindung trennen, tun Sie das bitte in umgekehrter Reihenfolge, d. h. zuerst die negative (oder positive bei Systemen mit Positiverdung) Batterieklemme entfernen.
Fremdstarten
1.) Überprüfen Sie die Spannung und den Batterietyp.
2.) Vergewissern Sie sich, dass die HD-Batterieklemmen an die korrekten Akkukontakte angeschlossen sind.
3.) Bevor Sie versuchen, das Fahrzeug fremdzustarten, stellen Sie sicher, dass alle stromabhängigen Anwendungen (Scheinwerfer, Radio, Klima-Anlage etc.) ausgeschaltet sind.
4.) Drücken Sie den An-Knopf, um das Fremdstarten zu beginnen. Alle LED-Lampen leuchten, um anzuzeigen, dass alle LEDs ordnungsgemäß funktionieren. Wenn alle Anschlüsse korrekt hergestellt wurden, leuchte die weiße Boost-LED auf. Wenn die Batterieklemmen falsch angeschlossen sind, leuchtet die rote Fehler-LED auf. Schließen Sie die Batterieklemmen umgekehrt an, um den Fehler zu beheben. Die weiße Boost-LED sollte jetzt aufleuchten. Die weiße Boost-LED leuchtet auf, sobald
das GB70 einsatzbereit ist - Sie können Ihr Fahrzeug nun fremdstarten.
5.) Versuchen Sie, das Fahrzeug zu starten. Die meisten Fahrzeuge springen sofort an. Bei manchen Fahrzeugen ist es erforderlich, dass das GB70 bis zu 30 Sekunden angeschlossen ist, bevor das Fahrzeug anspringt. Sollte das Fahrzeug nicht sofort anspringen, warten Sie 20-30 Sekunden und versuchen Sie es erneut. Versuchen Sie innerhalb von fünfzehn (15) Minuten nicht mehr als fünf
(5) Mal hintereinander das Fahrzeug fremdzustarten. Lass Sie das GB70 fünfzehn (15) Minuten ruhen, bevor
DE
26
Sie erneut versuchen, das Fahrzeug fremdzustarten.
6.) Nachdem das Fahrzeug angesprungen ist, klemmen Sie die Batterieklemmen ab und entfernen Sie das GB70.
Batterien mit niedriger Spannung und Handbetätigung
Das GB70 ist zum Fremdstarten von 12V-Bleibatterien konzipiert, die bis auf 2V entladen sind. Sollte Ihre Batterie weniger als 2V haben, bleibt die Boost-LED „Aus“. Das deutet darauf hin, dass das GB70 keine Batterie erkennen kann. Wenn Sie eine Batterie mit weniger als 2V fremdstarten müssen, gibt es die Funktion „Handbetätigung“, mit der Sie die Fremdstartfunktion („An“) erzwingen können.
ACHTUNG SEIEN SIE BEI DER VERWENDUNG DIESES MODUS BESONDERS VORSICHTIG. DIESER MODUS EIGNET SICH NUR FÜR 12V-BLEIBATTERIEN. SOWOHL DIE FUNKENSICHERHEIT ALS AUCH DER VERPOLUNGSSCHUTZ SIND DEAKTIVIERT. ACHTEN SIE GANZ BESONDERS AUF DIE POLUNG DER BATTERIE, BEVOR SIE DIESEN MODUS WÄHLEN. ACHTEN SIE DARAUF, DASS DIE POSITIVE UND DIE NEGATIVE BATTERIEKLEMME NICHT MITEINANDER IN BERÜHRUNG KOMMEN, DA DIES ZU FUNKENBILDUNG FÜHREN KANN. DIESER MODUS FUNKTIONIERT MIT HOCHSTROM (BIS ZU 2000 AMPERE) UND KANN BEI FALSCHER HANDHABUNG ZU FUNKENBILDUNG UND starker Hitze FÜHREN. WENN SIE UNSICHER ÜBER DEN UMGANG MIT DIESEM MODUS SIND, LASSEN SIE SICH VOR DER ANWENDUNG VON EINEM FACHMANN BERATEN.
Bevor Sie die Funktion „Handbetätigung“ verwenden, stellen Sie sicher, dass die HD-Batterieklemmen an die korrekten Akkukontakte angeschlossen sind und das HD X Connect mit dem GB70 verbunden ist. Um die Funktion „Handbetätigung“ zu aktivieren, drücken Sie drei (3) Sekunden lang den Handbetätigungsknopf (rotes Ausrufezeichen in einem roten Kreis). Die weiße Boost-LED leuchtet abwechselnd „An“
und „Aus“, was bedeutet, dass Sie erfolgreich die Funktion „Handbetätigung“ aktiviert haben - Sie können Ihr Fahrzeug nun fremdstarten. Wenn die Batterieklemmen falsch angeschlossen sind, leuchtet die rote Fehler-LED auf und das Gerät funktioniert nicht.
ACHTUNG SCHALTEN SIE DAS GB70 „AUS“, BEVOR SIE

DIE BATTERIEKLEMMEN ABKLEMMEN. DIES SORGT FÜR IHRE SICHERHEIT. DENKEN SIE DARAN, DASS SOWOHL DIE FUNKENSICHERHEIT ALS AUCH DER VERPOLUNGSSCHUTZ DEAKTIVIERT SIND. Die meisten Fahrzeuge springen sofort an. Bei manchen Fahrzeugen ist es erforderlich, dass das GB70 bis zu 30 Sekunden angeschlossen ist, bevor das Fahrzeug anspringt. Sollte das Fahrzeug nicht sofort anspringen, warten Sie 20-30 Sekunden und versuchen Sie es erneut. Versuchen Sie innerhalb von fünfzehn (15) Minuten nicht mehr als fünf (5) Mal hintereinander das Fahrzeug fremdzustarten. Lass Sie das GB70 fünfzehn (15) Minuten ruhen, bevor Sie erneut versuchen, das Fahrzeug fremdzustarten.
Die Lade-LED verstehen
Das GB70 verfügt über vier (4) Lade-LED - 25%, 50%, 75% und 100%. Diese Lade-LED zeigen den
Ladezustand (SOC) der internen Batterie an. Erklärung in der Tabelle unten.
DE
LED |
Erklärung |
|
|
|
|
25% |
Die 25% Lade-LED leuchtet |
|
Rote LED |
||
dauerhaft, wenn die interne Batterie |
||
25% 50% 75% 100% |
||
25% oder weniger geladen ist. |
||
|
||
|
|
|
50% |
Die 50% und 25% Lade-LEDs |
|
Rote LED |
||
leuchten dauerhaft, wenn die interne |
||
25% 50% 75% 100% |
||
Batterie mehr als 25%, jedoch |
||
|
||
|
weniger als 50% geladen ist. |
|
|
|
|
75% |
Die 75%, 50% und 25% Lade-LEDs |
|
Gelbe LED |
||
leuchten dauerhaft, wenn die interne |
||
25% 50% 75% 100% |
Batterie mehr als 50%, jedoch |
|
|
||
|
weniger als 75% geladen ist. |
|
|
|
|
100% |
Alle vier (100%, 75%, 50% und 25%) |
|
Grüne LED |
||
Lade-LEDs leuchten dauerhaft, wenn |
||
25% 50% 75% 100% |
die interne Batterie mehr als 75% oder |
|
|
bis zu 100% geladen ist. |
|
|
|
Die oben genannten Ladezustände gelten nur dann, wenn |
|
das GB70 NICHT an eine Steckdose angeschlossen und |
|
gerade wiederaufgeladen wird. |
28 |
|
7 |
|
5 |
1 |
6 |
|
2
3
4
 Loading...