

Page 1

®
2014 NAVIGATION
SYSTEM
OWNER’S MANUAL
For your safety, read carefully and keep in this vehicle.
Page 2

FOREWORD
NISSAN NAVIGATION SYSTEM HELPDESK CONTACT INFORMATION
For assistance or inquiries about the NISSAN Navigation System, or to order updated
map data, contact the NISSAN NAVIGATION
SYSTEM HELPDESK at:
ADDRESS: P.O. Box 1588,
•
Orem, UT 84059-992
E-MAIL: [email protected]
•
WEB SITE: www.navigation.com or
•
www.nissan.ca
PHONE: 1-888-661-9995
•
HOURS: 6:00 AM to 5:00 PM
•
(Pacifi c Time)
NISSAN CONSUMER AFFAIRS DEPARTMENT
For assistance or inquiries about the NISSAN
warranty, service or general questions, contact
the NISSAN Consumer Affairs Department at:
For U.S. customers
Nissan North America, Inc.
Consumer Affairs Department
P.O. Box 685003
Franklin, TN 37068-5003
1-800-NISSAN-1
(1-800-647-7261)
For Canadian customers
Nissan Canada Inc.
5290 Orbitor Drive
Mississauga, Ontario L4W 4Z5
1-800-387-0122
Thank you for purchasing a NISSAN vehicle
This user’s manual is for the navigation system
only. This manual contains operating instructions for the NISSAN Navigation System offered in your NISSAN vehicle.
Please read this manual carefully to ensure safe
operation of the navigation system.
Because of possible specifi cation changes
•
and optional equipment, sections of this
manual may not apply to your vehicle.
All information, specifi cations and illustra-
•
tions in this manual are those in effect
at the time of printing. NISSAN reserves
the right to change specifi cations or
design at any time without notice.
Do not remove this manual from the vehicle
•
when selling this vehicle. The next user of
this navigation system may need the manual.
Page 3

Table of
Introduction
1
Contents
Getting started
Map settings
Navigation
Other settings
General system information
Troubleshooting guide
Index
2
3
4
5
6
7
8
Page 4

Page 5

1 Introduction
How to use this manual ............................1-2
For safe operation ..............................1-2
Reference symbols .............................1-2
Safety information .................................1-2
Laser product .....................................1-3
Page 6
HOW TO USE THIS MANUAL SAFETY INFORMATION
This manual uses special words, symbols and
icons that are organized by function.
Please refer to the following items to understand
how to use this manual properly.
FOR SAFE OPERATION
WARNING
m
Indicates the presence of a hazard that
could cause death or serious personal
injury. To avoid or reduce the risk, the
procedures must be followed precisely.
CAUTION
Indicates the presence of a hazard that
could cause minor or moderate personal injury or damage to your vehicle.
To avoid or reduce the risk, the procedures must be followed carefully.
NOTE:
Indicates items that help you understand
and maximize the performance of your
vehicle. If ignored, they may lead to a malfunction or poor performance.
REFERENCE SYMBOLS
INFO:
Indicates information that is necessary for efficient use of your vehicle or accessories.
Reference page:
Indicates the title and page that you should refer
to.
NAV:
This is an example of how a button on the control
panel will be shown.
“Route”:
This is an example of a key/item displayed on the
screen.
This system is primarily designed to help you
reach your destination, and it also performs other
functions as outlined in this manual. However,
you, the driver, must use the system safely and
properly. Information concerning road
conditions, traffic signs and the availability of
services may not always be up-to-date. The system is not a substitute for safe, proper and legal
driving.
Before using the navigation system, please read
the following safety information. Always use the
system as outlined in this manual.
WARNING
m
● To operate the navigation system,
first park the vehicle in a safe location and set the parking brake. Operating the system while driving can
distract the driver and may result in a
serious accident.
● Do not rely on route guidance alone.
Always be sure that all driving maneuvers are legal and safe in order to
avoid accidents.
● Do not disassemble or modify this
system. If you do, it may result in
accidents, fire or electrical shock.
1-2 Introduction
Page 7

LASER PRODUCT
● If you notice any foreign objects in
the system hardware, spill liquid on
the system or notice smoke or a
smell coming from it, stop using the
system immediately and contact a
NISSAN dealer. Ignoring such conditions may lead to accidents, fire or
electrical shock.
CAUTION
● Do not use this system if you notice
any malfunctions such as a frozen
screen or the lack of sound. Continued use of the system may result in
accidents, fire or electrical shock.
● Some states/provinces may have
laws limiting the use of video
screens while driving. Use this system only where it is legal to do so.
● Extreme temperature conditions [below -4 °F (-20 °C) and above 158 °F
(70 °C)] could affect the performance
of the system.
NOTE:
Do not keep the navigation system running
with the engine stopped. Doing so may
discharge the vehicle battery. When you
use the navigation system, always keep
the engine running.
WARNING
m
● Do not disassemble or modify this
system. There are no user serviceable parts in this navigation system.
● If maintenance, adjustments and operations other than those specified
in this manual are attempted, injury
due to laser radiation and exposure
could occur.
Introduction 1-3
Page 8

SiriusXM services require a subscription after a trial period and are sold separately or as a package. Our satellite
service is available only in the 48 contiguous USA and DC. For more information visit www.siriusxm.com.
“Made for iPod” and “Made for iPhone” mean that an electronic accessory has been designed to connect spe-
cifically to iPod or iPhone, respectively, and has been certified by the developer to meet Apple performance
standards. Apple is not responsible for the operation of this device or its compliance with safety and regulatory standards. Please note that the use of this accessory with iPod or iPhone my affect wireless performance.
The Bluetooth® word mark and logos are registered trademarks owned by Bluetooth SIG, Inc. and any use
of such marks by DENSO CORPORATION is under license. Other trademarks and trade names are those of
their respective owners.
Required SiriusXM Satellite Radio and SiriusXM Traffic monthly subscriptions are sold separately. SiriusXM
Traffic are only available in select markets. For more information, see www.siriusxm.com/siriusxmtraffic
Required SiriusXM Satellite Radio and SiriusXM Travel Link monthly subscriptions are sold separately. SiriusXM Travel Link is only available in select markets. For more information, see
www.siriusxm.com/travellink
App Store
Apple and the Apple logo are trademarks of Apple Inc., registered in the U.S. and other countries. App Store is a service mark of Apple Inc.
Google Play™
Google Play is a trademark of Google Inc.
Google
© 2012 Google Inc. All rights reserved.
1-4 Introduction
Page 9

2 Getting started
Control buttons and functions.......................2-2
Control panel (Type A) ..........................2-2
Control panel (Type B) ..........................2-3
Control panel (Type C) ..........................2-4
Steering wheel switch (Type A) ..................2-5
Steering wheel switch (Type B) ..................2-5
Steering wheel switch (Type C) ..................2-6
Basic operation ...................................2-7
Touch screen operation .........................2-7
Menu screen operation..........................2-8
How to input characters.........................2-9
Page 10

CONTROL BUTTONS AND FUNC-
TIONS
CONTROL PANEL (Type A)
1
VOL (volume) control knob/POWER button:
䊐
Rotate clockwise to increase the volume or
counterclockwise to lower the volume.
Press to turn the audio system on or off.
2
Touch screen display
䊐
3
TUNE-SCROLL dial / ENTER/AUDIO but-
䊐
ton:
Turn to scroll through the items in a list.
Press to select a menu item. When the
screen is not displaying a list or menu, the
knob is used to control the audio system.
Press the ENTER/AUDIO button to select a
highlighted item on the screen.
LNV2446
䊐
䊐
䊐
䊐
䊐
4
5
6
7
8
BACK button:
Press to return to the previous screen or to
delete the last inputted letter if a touch keyboard is displayed on the screen.
MAP button:
Press to display the current location map
screen.
NAV button:
Press to access the functions of the Navigation system.
button:
Press to access the system settings.
button:
Press to change the display brightness between day and night modes. While the
mode is being displayed, the brightness can
be adjusted using the TUNE/SCROLL dial.
Press and hold for more than two seconds
to switch the display to a larger display of
the digital clock.
“DISPLAY SETTINGS”
(page 5-3)
2-2 Getting started
Page 11

CONTROL PANEL (Type B)
1
VOL (volume) control knob/POWER button:
䊐
Rotate clockwise to increase the volume or
counterclockwise to lower the volume.
Press to turn the audio system on or off.
2
Touch screen display
䊐
3
TUNE-SCROLL dial / ENTER/AUDIO but-
䊐
ton:
Turn to scroll through the items in a list.
Press to select a menu item. When the
screen is not displaying a list or menu, the
knob is used to control the audio system.
Press the ENTER/AUDIO button to select a
highlighted item on the screen.
LNV2479
䊐
䊐
䊐
䊐
䊐
4
5
6
7
8
BACK button:
Press to return to the previous screen or to
delete the last inputted letter if a touch keyboard is displayed on the screen.
MAP button:
Press to display the current location map
screen.
NAV button:
Press to access the functions of the Navigation system.
button:
Press to access the system settings.
button:
Press to change the display brightness between day and night modes. While the
mode is being displayed, the brightness can
be adjusted using the TUNE/SCROLL dial.
Press and hold for more than two seconds
to switch the display to a larger display of
the digital clock.
“DISPLAY SETTINGS”
(page 5-3)
Getting started 2-3
Page 12

CONTROL PANEL (Type C)
1
VOL (volume) control knob/POWER button:
䊐
Rotate clockwise to increase the volume or
counterclockwise to lower the volume.
Press to turn the audio system on or off.
2
Touch screen display
䊐
3
TUNE-SCROLL dial / ENTER/AUDIO but-
䊐
ton:
Turn to scroll through the items in a list.
Press to select a menu item. When the
screen is not displaying a list or menu, the
knob is used to control the audio system.
Press the ENTER/AUDIO button to select a
highlighted item on the screen.
LNV2477
䊐
䊐
䊐
䊐
䊐
4
5
6
7
8
BACK button:
Press to return to the previous screen or to
delete the last inputted letter if a touch keyboard is displayed on the screen.
MAP button:
Press to display the current location map
screen.
NAV button:
Press to access the functions of the Navigation system.
button:
Press to access the system settings.
button:
Press to change the display brightness between day and night modes. While the
mode is being displayed, the brightness can
be adjusted using the TUNE/SCROLL dial.
Press and hold for more than two seconds
to switch the display to a larger display of
the digital clock.
“DISPLAY SETTINGS”
(page 5-3)
2-4 Getting started
Page 13

Altima
LNV2499
STEERING WHEEL SWITCH (Type A
1
Volume increase button
䊐
Increases the volume of the voice guidance
given by the Navigation System if pressed
while the voice guidance is speaking. If the
volume increase button is pressed at any
other time, only the volume of the active
screen (phone, SMS playback, Voice Recognition system [if so equipped], audio system) will be increased.
2
Volume decrease button
䊐
Decreases the volume of the voice guidance
given by the Navigation System if pressed
while the voice guidance is speaking. If the
volume decrease button is pressed at any
other time, only the volume of the active
screen (phone, SMS playback, Voice Recognition system [if so equipped], audio system) will be decreased.
For more information about the audio system,
Bluetooth® Hands-Free Phone System and
Voice Recognition system (if so equipped), see
)
the vehicle’s Owner’s Manual.
Sentra
LNV2500
STEERING WHEEL SWITCH (Type B
1
Volume control button
䊐
Increases or decreases the volume of the
voice guidance given by the Navigation System if pressed while the voice guidance is
speaking. If the volume button is pressed at
any other time, only the volume of the active
screen (phone, SMS playback, Voice Recognition system [if so equipped], audio system) will be adjusted.
)
Getting started 2-5
Page 14

Xterra and Frontier
For more information about the audio system,
Bluetooth® Hands-Free Phone System and
Voice Recognition system (if so equipped), see
the vehicle’s Owner’s Manual.
LNV2501
Rogue
LNV2502
STEERING WHEEL SWITCH (Type C
1
Volume increase button
䊐
Increases the volume of the voice guidance
given by the Navigation System if pressed
while the voice guidance is speaking. If the
volume increase button is pressed at any
other time, only the volume of the active
screen (phone, SMS playback, Voice Recognition system [if so equipped], audio system) will be increased.
2
Volume decrease button
䊐
Decreases the volume of the voice guidance
given by the Navigation System if pressed
while the voice guidance is speaking. If the
volume decrease button is pressed at any
other time, only the volume of the active
screen (phone, SMS playback, Voice Recognition system [if so equipped], audio system) will be decreased.
For more information about the audio system,
Bluetooth® Hands-Free Phone System and
Voice Recognition system (if so equipped), see
)
the vehicle’s Owner’s Manual.
2-6 Getting started
Page 15

BASIC OPERATION
TOUCH SCREEN OPERATION
The same operations described for the scrolling
dial are possible using touch screen operation.
LNV2443 LNV2440
Examples of touch screen operation
Selecting an item:
When any item is touched, the next screen is
displayed.
Adjusting:
Touch the “+”, “-”, “>” or “<” key to adjust a
setting.
Getting started 2-7
Page 16

LNV0921
Scrolling through a message or list:
Turn the TUNE-SCROLL dial to scroll through a
message or a list. When scrolling a lengthy list,
you can also touch the screen and slide your finger along the scroll bar where shown to scroll
more quickly. Touching the up or down arrow will
move between pages of the list.
(Type A)
MENU SCREEN OPERATION Menu screens and their purpose
2-8 Getting started
LNV2448
(Type B)
Press one of the application buttons to activate
the corresponding menu screen:
● NAV (Navigation)
●
or MENU
LNV2478
Page 17

(Type C)
LNV2476
How to select a menu item
1. As an alternative to using the touch screen,
turn the scrolling dial clockwise or counterclockwise to scroll through the menu items
until the preferred item is highlighted.
2. To select the preferred item, press the
scrolling dial.
3. Press the BACK or
The previous screen will be displayed and
the changes will be saved.
BACK button.
HOW TO INPUT CHARACTERS
Character (letter and number) input
screen
Alphanumeric characters are used when setting
a destination, searching for an address, editing
stored locations, etc.
LNV2415
1. Touch characters on the touch keyboard
and they will appear in the field at the top of
the screen. When the entry is complete,
touch the “OK” key.
Alternatively, use the scrolling dial to highlight a character and press the dial to select
that character.
NOTE:
● Press the
last inputted character or to return to the previous screen if no characters have been
inputted.
● On every character entry screen, the touch
keyboard will display only the letters that are
possible to enter after the current letter.
● Symbol and number keys are available when
the “123/ABC” key is touched.
BACK button to delete the
● Touch the “123/ABC” key to toggle the display between the touch keyboard for letters
and the touch keyboard for numbers and
symbols.
2. To delete the last entry, touch the “Delete”
key or hold it to delete all entries at once.
3. After finalizing the entries, touch the “OK”
key or touch the “List” key for the completed
list screen.
NOTE:
● If a phrase is being entered that has been previously entered into the system, the matched
text may appear in light gray. Touch “OK” to
search for the matched text. Touch “List” to
search for both the matched text and entered
text.
Getting started 2-9
Page 18

MEMO
2-10 Getting started
Page 19

3 Map settings
Map types ........................................3-2
2-Dimensional (2D) view . . . .....................3-2
2-Dimensional North Up (2DN) view ..............3-2
3-Dimensional (3D) view . . . .....................3-2
Screen information (2D, 2DN or 3D)..............3-3
Moving a map .....................................3-4
Returning to the current vehicle location...........3-5
Map options menu screen ..........................3-5
Changing the map scale............................3-6
Map scale .....................................3-7
Looking at information on the map ...................3-7
Map symbols...................................3-7
Map settings for the map screen ....................3-9
Lane information..................................3-11
Map SD-card ....................................3-11
How to handle the SD-card.....................3-12
SD-card replacement ..........................3-12
How to order map data updates.................3-12
About the map data............................3-13
End-user terms................................3-14
Page 20

MAP TYPES
2D
2-DIMENSIONAL (2D) VIEW
The 2D map is a two-dimensional (flat) representation of the map data, similar to a road map,
focused on the vehicle’s position (vehicle icon).
“SCREEN INFORMATION (2D, 2DN
or 3D)” (page 3-3)
“MAP SETTINGS FOR THE MAP
SCREEN” (page 3-7)
LNV2455
2DN
2-DIMENSIONAL NORTH UP (2DN)
VIEW
The 2DN map is a two-dimensional (flat) representation of the map data, similar to a road map,
focused on the vehicle’s position (vehicle icon)
with the top of the map aligned North.
3-2 Map settings
LNV2454
3D
LNV2456
3-DIMENSIONAL (3D) VIEW
The 3D map displays the map from an elevated
perspective, providing a panoramic view over a
long distance.
The map in 3D view always appears with the current forward direction facing up (heading up).
Page 21

SCREEN INFORMATION (2D, 2DN or
3D)
1
“Voice” key
䊐
Touch to repeat the voice guidance while a
route is active. Touch and hold for two seconds to toggle the voice guidance on or off
(button will be grayed out when voice guidance is turned off). This option is available
only when a route is set.
2
Audio information
䊐
Indicates the radio station, CD track number or other audio information currently
playing.
3
Next maneuver road name
䊐
Indicates the name of the next road in the
route guidance. This is only shown if route
guidance is active.
4
Clock
䊐
Indicates the current time.
LNV2206
5
Direction indicator and distance to next ma-
䊐
neuver on the route
When route guidance is active but you have
deviated from the route, this area displays a
compass icon with an arrow indicating the
destination direction.
When route guidance is active and you are
on the route, this area indicates the distance (in miles or kilometers) to the next
point and the turning direction at that point.
When the “Voice” key is not shown on the
screen (such as when an audio screen is
displayed on the screen), touch the direction indicator to repeat the voice guidance
while a route is active. Touch and hold for
two seconds to toggle the voice guidance
on or off.
6
Estimated time of arrival and distance to
䊐
destination or remaining time of travel and
distance to destination.
Touch this button to switch the indicator between estimated arrival time and remaining
travel time. This indicator only appears once
the destination is set and the route guidance is initiated. The estimated arrival time
may not switch to the estimated arrival time
for the destination’s time zone if a time zone
line is crossed as part of the route.
Map settings 3-3
Page 22

MOVING A MAP
7
Current road indicator
䊐
The location of where the car is positioned.
8
Vehicle icon
䊐
Indicates the current location and direction
of the vehicle.
9
Suggested route
䊐
Appears as a bold blue line during route
guidance.
10
Scale indicator
䊐
Indicates the scale of the map.
11
Compass icon
䊐
Indicates the direction of the map. Touch
this icon to switch the map view between
the North Up, Heading Up (or actual direction) and 3D modes.
12
“Presets” key
䊐
This option toggles on and off with the
“Menu” key and displays a touch menu of
the radio presets on the screen. For more
information about the audio system, see the
vehicle Owner’s Manual.
13
Zoom in and zoom out keys
䊐
Touch to zoom the map in or out.
14
“Options” key
䊐
Touch this key to access the map options
menu screen.
“MAP OPTIONS MENU
SCREEN” (page 3-5)
LNV2463
To scroll the map in either direction:
1. Touch and release the screen anywhere on
the map.
2. Touch the screen again and move your finger along the screen in the direction you
wish to scroll.
After releasing and touching the map again, a
marker will be displayed at the point touched
and, if possible, the position determined.
3-4 Map settings
Page 23

MAP OPTIONS MENU SCREEN
NOTE:
When the current location of the vehicle is
recognized, the street name will be displayed at the bottom of the screen. When
scrolling a map and an area that is not a
road, city or POI is touched, coordinates
corresponding to the marker’s position are
displayed at the bottom of the screen.
RETURNING TO THE CURRENT
VEHICLE LOCATION
The basic map screen displays the current location of the vehicle. The current location can be
displayed again even after the map is moved, or
after the menu screen is displayed.
Press the MAP button or the BACK or
BACK button and the current location will be
displayed on the map.
The Map Options menu allows you to quickly
store the current position, show position information or destination information, and adjust the
map settings.
LNV2457
1. Touch the “Options” key while the route
guidance map is displayed.
2. The following options are available for selection:
● Enter Destination
Select to open the navigation screen for
entering an address.
● Turn List
Select to display all of the turns and waypoints along the route.
● Cancel Route
Select to cancel entire route or waypoints along route.
● POIs Along Route
Select to choose the types of points of
interest to display along the active route.
Available options are gas stations,
restaurants, ATMs, parking, rest areas,
hotels, dealerships and airports.
Map settings 3-5
Page 24

CHANGING THE MAP SCALE
NOTE:
Some places of interest on divided highways may show the equivalent place of interest on the opposite side of the road
(such as a rest area) as being closer than
the place in your traveling direction. Confirm location of the place before following
the route.
● Traffic
Select to display all traffic events on
route and options to avoid roads along
route.
● Show Route On Map
Select to display the entire route on the
screen. The view will zoom to the necessary level in order to show both the starting point and destination on the screen.
● Routing Options
Select to view options available to customize route. Avoiding specific roads, dynamic guidance, route type and minimizing freeways, types of roads and ferries
can all be adjusted.
● Show Position Information
Select to display the latitude, longitude
and altitude for the current position of the
vehicle. Location can also be stored to
the Address Book.
● Show Waypoints
Select to add or show list of waypoints
along route.
● Guidance & Map Settings
Select to toggle guidance information
and map settings options.
“MAP SETTINGS FOR THE
MAP SCREEN” (page 3-7)
3-6 Map settings
LNV2462
When using the “+” or “-” for zooming in or out,
the scale on the bottom left side of the screen
changes to indicate the new scale level.
Page 25

LOOKING AT INFORMATION ON THE
MAP
MAP SCALE
The following scales are available depending on
the map view:
Per approximately 1/2 inch (1 cm)
150 ft (50 m)
300 ft (100 m)
600 ft (200 m)
1/4 mile (500 m)
1/2 mile (1 km)
1 mile (2 km)
2.5 mi (5 km)
5 mi (10 km)
10 mi (20 km)
25 mi (50 km)
50 mi (100 km)
100 mi (200 km)
250 mi (500 km)
Icons of various categories of locations can be
displayed on the map.
MAP SYMBOLS
This navigation system uses symbols to display
various types of facilities. The following icons (if
so equipped) may be used on the map screen.
Map settings 3-7
Page 26

3-8 Map settings
LNV2467
Page 27

MAP SETTINGS FOR THE MAP
SCREEN
LNV2490 LNV2460
Other settings are available for the map screen,
such as switching the map view or changing the
map direction.
1. Press the
or MENU button.
2. Touch the “Settings” key.
Menu Item Options
Voice Guidance Select to toggle on or off the voice guidance on map screen.
Volume Select “+” or “-” to increase or decrease voice guidance volume.
Map View Touch the “Map View” key to toggle between 2D and 3D map view.
2D-North/Heading Up Touch to toggle display between “Head” and “North” for 2D mode. When “Head” is selected, the screen always shows the map
Auto Zoom Touch the “Auto Zoom” key to choose a setting for automatic zooming. Available settings are “Never”, “Always” and “Only with a
Show Points of Interest On Map Select to toggle various map icons on and off including gas stations, restaurants, banks and parking.
in the driving direction. When “North” is selected, the top of the map is always orientated north. This option can only be selected
when the “Map View” is set to 2D.
route”.
3. Touch the “Navigation” key.
4. Touch the “Guidance & Map Settings” key.
When selected, the system will offer the following map setting options:
Map settings 3-9
Page 28

Menu Item Options
My Points of Interest Alert Select to control alert options. Choose “Off” to disable the alert. Choose “Show Only” to have the alert displayed on the screen.
Show Presets On Map Select to toggle on or off the preset radio station buttons on the map screen.
Split Map for Freeway Exit Select to toggle on or off the split view map when approaching a freeway exit.
Show Lane Information Select to toggle on or off lane information when available.
Show Speed Limit Select to toggle on or off the display of speed limit information when available.
Show Estimated Time Select to control display of estimated time of arrival or trip time remaining.
Customize Travel Speed Select to customize travel speeds on local roads and freeways along route.
Speed Limit Warning Select to control the speed limit alert that activates when the vehicle speed is greater than the speed limit information for the cur-
Speed Limit Sensitivity Select the sensitivity level for the speed limit warning. Choose a value between zero and 30
Speed Warning for Curves Select to control the alert that activates depending on vehicle speed and a curve in the road ahead. Choose “Off” to disable the
Distance Units Select to toggle “US” or “Metric” for the distance units on the map screen.
Choose “Show & Beep” to have an audible beep in addition to the alert displayed on the screen.
rent location. Choose “Off” to disable the alert. Choose “Show Only” to have the alert displayed on the screen. Choose “Show &
Beep” to have an audible beep in addition to the alert displayed on the screen.
alert. Choose “Show Only” to have the alert displayed on the screen. Choose “Show & Beep” to have an audible beep in addition
to the alert displayed on the screen.
3-10 Map settings
Page 29

LANE INFORMATION MAP SD-CARD
LNV2464 LNV2465
When the vehicle is approaching a junction or
interchange, the screen switches to a split view.
Lane information is graphically displayed on the
left side of the split screen and icons showing
the proper lanes for upcoming maneuvers are
shown in the upper right corner below the clock.
The highlighted lanes are those from which the
next maneuver on the route will be made. Lanes
displayed in gray are those that do not follow the
route at the upcoming junction or interchange.
The icons in the upper right corner also indicate
direction and may change as the junction or interchange approaches (for example, straight
ahead, to straight and then right).
Once the vehicle passes through the junction or
interchange, the screen returns to the previous
view.
NOTE:
Lane information is not available for all
areas. It will only be displayed in areas
where the necessary map data is available.
NOTE:
The number of lane icons in the upper right
corner may change as the junction or interchange approaches due to a difference in
the number of available lanes.
Type A
LNV2473
The SD-card slot is located on the front of the
unit. When you purchase this system, an SDcard with map data is provided.
Map settings 3-11
Page 30

Type B
NOTE:
● Before inserting the map SD-card confirm
that there is no SD-card already in the slot.
● The SD-card slot can only read the SD-card
with map data provided specifically for use
with the vehicle’s navigation system. The system will not read other SD-cards.
● If an SD-card with something other than map
data (such as music, pictures or movies) is inserted into the slot, the Navigation System will
not function. A message will appear prompting for the map SD-card to be reinserted. This
message will not appear if the SD-card is removed while in audio mode. The audio mode
is not affected by the SD-card.
LNV2474
Type C
LNV2475
HOW TO HANDLE THE SD-CARD
When handling the SD-card, please be careful
and adhere to the following instructions:
CAUTION
● Handle the SD-card with care. Never
touch the metal contacts.
● Do not use any conventional cleaner,
benzine, thinner, or antistatic spray.
● If you need to clean the SD-card use
a soft cloth.
● Never attempt to use an SD-card that
has been cracked, deformed or repaired using adhesive. Doing so may
damage the equipment.
● Do not try to bend the SD-card. Do
not use any SD-card that is bent or
cracked.
● Do not put on any sticker or write
anything on the SD card.
● Handle the SD-card carefully to avoid
contamination or flaws. Otherwise,
the data may not be read properly.
● Do not store the SD-card in locations
exposed to direct sunlight, or in high
temperatures or humidity.
● Always place the SD-card in its storage case when not in use.
SD-CARD REPLACEMENT
For additional SD-cards with map data, contact
the NISSAN Navigation Helpdesk.
HOW TO ORDER MAP DATA UPDATES
To order updated map data and voice
commands, contact the NISSAN Navigation
Helpdesk. See the contact information on the inside front cover of this manual.
3-12 Map settings
Page 31

ABOUT THE MAP DATA
● Bosch has compiled the digitized map data
into a usable format. © 2011 Robert Bosch
GmbH all rights in compilation software
reserved. Due to the production timing of the
map data, some new roads may not be
included, or some names and roads may be
different from those in use at the time this map
data is used.
● Traffic control and regulation data used in this
map data may be different from those in use at
the time this map data is used. When driving,
follow the actual traffic control signs and notices on the roads.
● Reproducing or copying this map software is
strictly prohibited by law.
WARNING
m
● This navigation system should not be
used to replace your own judgement.
No itinerary suggested by this navigation system should ever override
any freeway regulations, your own
judgement, or a knowledge of safe
driving practices. Do not follow the
navigation system’s suggested itinerary if it would cause you to perform
a dangerous or illegal act, place you
in a dangerous situation, or take you
into an area you consider unsafe.
● The advice provided by the navigation system is to be regarded as a
suggestion only. There may be times
when the navigation system displays
the vehicle’s location incorrectly,
fails to suggest the shortest route, or
fails to direct you to your desired
destination. In such instances, rely
on your own judgement taking into
account the driving conditions at the
time.
● Do not use the navigation system to
locate emergency services. The database does not contain a complete
listing of emergency services such as
police stations, fire stations, hospitals and walk-in clinics. Please show
discretion and ask for directions in
such instances.
● As the driver, you alone are responsible for your driving safety.
– In order to avoid a traffic accident,
do not operate the system while
driving.
– In order to avoid a traffic accident,
operate the system only when the
vehicle is stopped at a safe place
and the parking brake is on.
– In order to avoid a traffic accident
or traffic offence, remember that
actual road conditions and traffic
regulations take precedence over
the information contained on the
navigation system.
Map settings
3-13
Page 32

– The software may contain inaccu-
rate or incomplete information
due to the passage of time, changing circumstances, and the
sources of information used.
Please respect current traffic conditions and regulations at all
times while driving.
– Where actual road conditions and
highway regulations differ from
the information contained on the
navigation system, abide by the
highway regulations.
– Keep the amount of time spent
viewing the screen while driving to
a strict minimum.
The navigation system does not provide, nor represent in any way information on: traffic and
highway regulations; technical aspects of the vehicle including weight, height, width, load and
speed limits; road conditions including grade,
percentage of incline and surface conditions;
obstacles such as the height and width of
bridges and tunnels; and other current driving or
road conditions. Always rely on your own judgement when driving a car, taking into account current driving conditions.
The company trademarks used in this product to
identify locations and business offices are the
trademarks of their respective owners. Their use
does not represent sponsorship, approval or
recommendation of this product by these
companies.
END-USER TERMS
The data (“Data”) is provided for your personal,
internal use only and not for resale. It is protected by copyright, and is subject to the following terms and conditions which are agreed to by
you, on the one hand, and NISSAN and its licensors (including their licensors and suppliers) on
the other hand.
© 2011 NAVTEQ. All rights reserved.
The Data for areas of Canada includes information taken with permission from Canadian
authorities, including: © Her Majesty the Queen
in Right of Canada, © Queen’s Printer for
Ontario, © Canada Post Corporation,
GeoBase®, © Department of Natural Resources Canada.
NAVTEQ holds a non-exclusive license from the
United States Postal Service® to publish and
sell ZIP+4® information.
©United States Postal Service® 2009. Prices
are not established, controlled or approved by
the United States Postal Service®. The follow-
3-14 Map settings
ing trademarks and registrations are owned by
the USPS: United States Postal Service, USPS,
and ZIP+4.
The Data may include or reflect data of licensors,
including Her Majesty the Queen in the Right of
Canada (“Her Majesty”), Canada Post
Corporation (“Canada Post”) and the Department of Natural Resources Canada (“NRCan”).
Such data is licensed on an “as is” basis. The
licensors, including Her Majesty, Canada Post
and NRCan, make no guarantees, representations or warranties respecting such data, either
express or implied, arising by law or otherwise,
including but not limited to, effectiveness,
completeness, accuracy or fitness for a particular purpose.
The licensors, including Her Majesty, Canada
Post and NRCan, shall not be liable in respect of
any claim, demand or action, irrespective of the
nature of the cause of the claim, demand or action alleging any loss, injury or damages, direct
or indirect, which may result from the use or possession of the data or the Data. The licensors, including Her Majesty, Canada Post and NRCan,
shall not be liable in any way for loss of revenues
or contracts, or any other consequential loss of
any kind resulting from any defect in the data or
the Data.
Page 33

End User shall indemnify and save harmless the
licensors, including Her Majesty, Canada Post
and NRCan, and their officers, employees and
agents from and against any claim, demand or
action, irrespective of the nature of the cause of
the claim, demand or action, alleging loss, costs,
expenses, damages or injuries (including injuries
resulting in death) arising out of the use or possession of the data or the Data.
Terms and conditions
Personal Use Only:
You agree to use this Data together with
NISSAN Automotive Products for the solely
personal, non-commercial purposes for which
you were licensed, and not for service bureau,
timesharing or other similar purposes.
Accordingly, but subject to the restrictions set
forth in the following paragraphs, you may copy
this Data only as necessary for your personal use
to view it, and save it, provided that you do not
remove any copyright notices that appear and do
not modify the Data in any way. You agree not to
otherwise reproduce, copy, modify, decompile,
disassemble or reverse engineer any portion of
this Data, and may not transfer or distribute it in
any form, for any purpose, except to the extent
such restrictions are expressly prohibited or limited by applicable law.
Restrictions:
Except where you have been specifically licensed to do so by NISSAN and without limiting
the preceding paragraph, you may not:
a. use this Data with any products, systems, or
applications installed or otherwise connected
to or in communication with vehicles, capable
of vehicle navigation positioning, dispatch,
real time route guidance, fleet management
or similar applications;
b. use this Data with or in communication with
any positioning devices or any mobile or
wireless-connected electronic or computer
devices, including without limitation mobile
phones, palmtop and handheld computers,
pagers, and personal digital assistants or
PDAs.
Warnings:
The Data may contain inaccurate or incomplete
information due to the passage of time, changing
circumstances, sources used and the nature of
collecting comprehensive geographic data, any
of which may lead to incorrect results.
No Warranty:
This Data is provided to you “as is,” and you
agree to use it at your own risk. NISSAN and its
licensors (and their licensors and suppliers)
make no guarantees, representations or warranties of any kind, express or implied, arising by law
or otherwise, including but not limited to,
content, quality, accuracy, completeness,
effectiveness, reliability, fitness for a particular
purpose, usefulness, use or results to be obtained from this Data, or that the Data or server
will be uninterrupted or error-free.
Disclaimer of Warranty:
NISSAN AND ITS LICENSORS (INCLUDING
THEIR LICENSORS AND SUPPLIERS) DISCLAIM ANY WARRANTIES, EXPRESS OR
IMPLIED, OF QUALITY, PERFORMANCE,
MERCHANTABILITY FITNESS FOR A PARTICULAR PURPOSE OR
NON-INFRINGEMENT.
Some countries, local laws and territories do not
allow certain warranty exclusions, so to that extent the above exclusion may not apply to you.
Map settings 3-15
Page 34

Disclaimer of Liability:
NISSAN AND ITS LICENSORS (INCLUDING
THEIR LICENSORS AND SUPPLIERS) SHALL
NOT BE LIABLE TO YOU: IN RESPECT OF
ANY CLAIM, DEMAND OR ACTION, IRRESPECTIVE OF THE NATURE OF THE CAUSE
OF THE CLAIM, DEMAND OR ACTION ALLEGING ANY LOSS, INJURY OR DAMAGES,
DIRECT OR INDIRECT, WHICH MAY RESULT
FROM THE USE OR POSSESSION OF THE
INFORMATION; OR FOR ANY LOSS OF
PROFIT, REVENUE, CONTRACTS OR
SAVINGS, OR ANY OTHER DIRECT,
INDIRECT, INCIDENTAL, SPECIAL OR CONSEQUENTIAL DAMAGES ARISING OUT OF
YOUR USE OF OR INABILITY TO USE THIS
INFORMATION, ANY DEFECT IN THE
INFORMATION, OR THE BREACH OF THESE
TERMS OR CONDITIONS, WHETHER IN AN
ACTION IN CONTRACT OR TORT OR BASED
ON A WARRANTY, EVEN IF NISSAN OR ITS
LICENSORS (OR THEIR LICENSORS OR
SUPPLIERS) HAVE BEEN ADVISED OF THE
POSSIBILITY OF SUCH DAMAGES.
Some countries or local laws do not allow certain liability exclusions or damages limitations, so
to that extent the above may not apply to you.
Export control:
You agree not to export from anywhere any part
of the Data provided to you or any direct product
thereof except in compliance with, and with all licenses and approvals required under, applicable
export laws, rules and regulations.
Entire Agreement:
These terms and conditions constitute the entire
agreement between NISSAN (and its licensors,
including their licensors and suppliers) and you
pertaining to the subject matter hereof, and supersedes in their entirety any and all written or
oral agreements previously existing between us
with respect to such subject matter.
3-16 Map settings
Page 35

4 Navigation
About route guidance ..............................4-2
Voice guidance during route guidance ............4-2
Navigation screen . . ...............................4-3
Basic operation ................................4-3
Available setting items ..........................4-3
Setting a destination ...............................4-5
Available destination setting methods .............4-5
Setting a destination from a street address ...........4-5
Setting a destination from points of interest...........4-9
Searching for nearby restaurants or gas
stations .......................................4-9
Searching for places near current location........4-11
Searching for points of interest in another
city ..........................................4-12
Searching for places using Voice
Recognition (if so equipped) ....................4-12
My points of interest/User-defined points of
interest (POIs) ................................4-13
Setting a destination from the address book .........4-17
Setting a new entry to the address book .........4-17
Setting an entry as a destination.................4-18
Setting a destination from the address book
using Voice Recognition (if so equipped) .........4-18
Setting an intersection as a destination .............4-18
Setting a city center as a destination................4-19
Traffic feature ....................................4-20
Displaying traffic events along route .............4-20
Traffic flow feature .............................4-21
Traffic settings ................................4-21
Weather feature ..................................4-22
Displaying weather information on the
screen .......................................4-22
Fuel prices.......................................4-23
Page 36

ABOUT ROUTE GUIDANCE
After setting the destination, select “Start” to begin route guidance.
During route guidance, the system navigates you
through the guide points using visual and voice
guidance.
CAUTION
● The navigation system visual and
voice guidance is for reference purposes only. The contents of the guidance may be inappropriate depending on the situation.
● When driving along the suggested
route, follow all traffic regulations
(for example, one-way traffic).
“Route guidance” (page 6-2)
VOICE GUIDANCE DURING ROUTE
GUIDANCE
When approaching a guide point (intersection or
corner), destination, etc., during route guidance,
voice guidance announces the remaining distance and/or turning direction.
Touch “Voice” on the upper left of the screen to
repeat the voice guidance.
Example of voice guidance:
1
“In about one quarter mile (400 meters), right
䊐
(or left) turn.” “Right (or left) turn ahead.”
4-2 Navigation
2
“In about one quarter mile (400 meters)
䊐
freeway entrance on your right onto (road
number and direction).” “Freeway entrance
on your right onto (road number and
direction).”
3
“In about one mile (1.6 kilometers), exit on
䊐
your right.” “Take the second exit on your
right.”
4
“You have reached your destination. Ending
䊐
route guidance.”
LNV0943
Page 37

NAVIGATION SCREEN
Several methods are available to set your
destination.
LNV2409 LNV2410
BASIC OPERATION
1. Press the NAV button.
2. Select the appropriate destination setting
method by touching the screen or scrolling
with the scrolling dial.
AVAILABLE SETTING ITEMS
● Street Address:
Set a destination address.
Several methods are available to set your
destination.
“SETTING A DESTINATION”
(page 4-5)
● Points of Interest:
The system features a database of places
such as restaurants, hotels, banks and more
to assist you in navigation. These points of
interest can be set as destinations and the
system can then calculate a route.
● Cancel Route:
Touch “Cancel Route” to cancel the route
guidance.
Navigation 4-3
Page 38

Speak the number of an entry on the dis-
NOTE:
If route guidance is not active, “Cancel
Route” cannot be operated.
● Previous Destinations:
Searches for a destination from the previous destinations in the destination memory.
Up to 50 previous destinations will be automatically stored. If the number of previous
destinations exceeds 50, the oldest one will
be removed from the list and the newest
one will be added.
To manually delete a previous destination
entry, select an entry from the list and then
touch the “Delete” key.
Touch the “Save” key to add a previous destination to the address book.
Previous destinations can also be selected
using the NISSAN Voice Recognition System (if so equipped):
1. Press the
steering wheel. The system provides
prompts and waits for voice commands.
2. Say “Navigation”.
3. Say “Previous destinations”.
or button on the
4.
played list to choose that destination or say
“Next Page” to view more entries (if available).
If no route is set, route guidance is calculated automatically. If a route is set, say “Replace Destination” to use the chosen previous destination in Step 4 as the new
destination. Say “Set as Waypoint” to add
the chosen previous destination as a waypoint on the current route. Say “Show on
Map” to show the chosen previous destination on the map.
For more information about the NISSAN
Voice Recognition System, see the vehicle
Owner’s Manual.
NOTE:
It is not possible to retrieve deleted previous destination entries.
● Home:
Your home address can be entered as a
destination.
Home can also be set as a destination using the
NISSAN Voice Recognition System (if so
equipped):
1. Press the
steering wheel. The system provides
prompts and waits for voice commands.
or button on the
4-4 Navigation
2. Say “Navigation”.
3. Say “Home”.
If a home location is set, route guidance to the
home location is calculated automatically.
For more information about the NISSAN Voice
Recognition System, see the vehicle Owner’s
Manual.
● Address Book:
Touch “Address Book” to access stored
addresses.
● Intersection:
Select “Intersection” to designate an intersection of two roads as a destination.
● City Center:
Touch “City Center” to designate a city as a
destination.
● My Points of Interest:
My Points of Interest are locations entered
into the system via the vehicle’s USB port.
“MY POINTS OF
INTEREST/USER-DEFINED
POINTS OF INTEREST (POIs)”
(page 4-13)
Page 39

SETTING A DESTINATION SETTING A DESTINATION FROM A
STREET ADDRESS
Press the NAV button. The methods for setting a
destination are shown.
If route guidance is active, you can choose how
to use the new destination. Select “Add as Waypoint” to keep the current destination and to add
the current destination as a waypoint along the
route. Select “Replace” to cancel the current
route and replace the current destination with
the new destination.
AVAILABLE DESTINATION SETTING
METHODS
● “Street Address”
“SETTING A DESTINATION
FROM A STREET ADDRESS”
(page 4-5)
● “Points of Interest”
“SETTING A DESTINATION
FROM POINTS OF INTEREST”
(page 4-9)
● “My Points of Interest”
“MY POINTS OF
INTEREST/USER-DEFINED MY
POINTS OF INTEREST”
(page 4-13)
● “Address Book”
“SETTING A DESTINATION
FROM THE ADDRESS BOOK”
(page 4-17)
● “Intersection”
“SETTING AN INTERSECTION
AS A DESTINATION”
(page 4-18)
● “City Center”
“SETTING A CITY CENTER AS
A DESTINATION” (page 4-19)
LNV2426
1. Press the NAV button.
2. Touch “Street Address”.
3. If the state or province shown on the screen
is correct, proceed to step 5. If the state or
province shown on the screen is not
correct, touch “Change State/Province”.
Navigation 4-5
Page 40

LNV2415 LNV2406
4. Enter the name of the state or province. The
display shows the touch keyboard.
“HOW TO INPUT CHARACTERS” (page 2-9)
The keyboard has an intelligent spelling
setting, so it excludes non-existing
combinations. On the top right of the
screen, the number of matches is shown. At
any time, touch the “List” key to display a list
of possible names based on the letters currently entered. When the number of
matches is reduced to six or less, a list will
be shown automatically.
5. Touch “City”
NOTE:
It is possible to choose “House Number &
Street” at this step if you want to manually
enter the street name. However, the system can automatically narrow down the
street in most cases when you enter the
city name first. Entering by city can also be
useful if you are unsure of the street’s correct spelling.
6. The display shows a touch keyboard to enter the city of the destination. Enter the
name of the city. At any time, touch the
“List” key to display a list of possible city
names based on the letters currently
entered. When the number of matches is
reduced to six or less, the city list will be
shown automatically.
4-6 Navigation
Page 41

LNV0953 LNV2411 LNV2412
7. Touch the city name on the list. 8. The display shows a touch keyboard to enter the house number of the destination. If
the house number is not known, touch
“Skip” and a default location on the street
will be used.
NOTE:
If you choose “Skip”, a default location is
chosen by the system and you will have a
chance to change the position once the
map is displayed. See step 12 for more instructions on changed the default location.
9. The display shows a touch keyboard to enter the street name. Enter the name of the
street. At any time, touch the “List” key to
display a list of possible street names based
on the letters currently entered. When the
number of matches is reduced to six or less,
the street list will be shown automatically.
Navigation 4-7
Page 42

LNV2413 LNV2438
10. Touch the street name on the list.
11. If the house number entered in step 8 does
not exist on the street in the chosen city,
“The house number is not available” will be
displayed. Select “Show Map” or “Change
Number”.
NOTE:
You will have a chance to change the position from the default location once the
map is displayed. See step 12 for more instructions on changing the default
location.
12. A map of the destination is displayed on the
screen. Touch “Start” to calculate the route.
The map of the destination is always displayed in
2D North Up. Once the “Start” key is touched,
the system returns to the current map settings.
NOTE:
If you did not enter an exact street address
earlier in the process, the system will have
chosen a default location, either along the
street or within a range of addresses on
that street. To move the map from that default position, touch the “Move” key. A
message will be displayed asking if you
want to touch a new location for the
destination. Touch “OK” when complete.
Touch “Store” to store the location in the address book.
“SETTING A NEW ENTRY TO THE
ADDRESS BOOK” (page 4-17)
A destination can also be set from a street address using the NISSAN Voice Recognition System (if so equipped):
1. Press the
steering wheel. The system provides
prompts and waits for voice commands.
2. Say “Navigation”.
3. Say “Enter address in steps”.
4. When prompted, say the name of the state
or province. If the system cannot clearly interpret the name of the state or province, a
list is provided with possible matches.
Speak the number of the state or province
displayed on the screen or say “Spell State”
to spell the name of the state.
5. When prompted, say the name of the city. If
the system cannot clearly interpret the name
of the city, a list is provided with possible
matches. Speak the number of the city displayed on the screen or say “Spell City” to
spell the name of the city.
or button on the
4-8 Navigation
Page 43

SETTING A DESTINATION FROM
POINTS OF INTEREST
6. When prompted, say the name of the street.
If the system cannot clearly interpret the
name of the street, a list is provided with
possible matches. Speak the number of the
street displayed on the screen or say “Spell
Street” to spell the name of the street.
7. When prompted, say the house number or
say “No House Number” to display a default
location on the chosen street within the
chosen city. If the house number spoken is
not on the chosen street, the system will notify you that the number is out of range and
to restate the number or say “No House
Number”.
If a route is active, say “Replace Destination” to
replace the current destination with the new
street address or say “Set as Waypoint” to set
the new street address as a waypoint on the current route.
If a route is not set, say “Set as Destination” to
set the new street address as the destination
and begin route guidance.
Say “Show on Map” to display the new street address on the map.
For more information about the NISSAN Voice
Recognition System, see the vehicle Owner’s
Manual.
The system features a database of points of interest such as restaurants, hotels, banks and
more to assist you in navigation. These points of
interest can be set as destinations and the system can then calculate a route.
“MY POINTS OF
INTEREST/USER-DEFINED POINTS
OF INTEREST (POIs)” (page 4-13)
LNV2409
SEARCHING FOR NEARBY
RESTAURANTS OR GAS STATIONS
While a wide variety of places can be searched
in the system, shortcut buttons are available for
restaurants and gas stations.
1. Press the NAV button.
2. Touch “Points of Interest”.
Navigation 4-9
Page 44

LNV2437 LNV2407 LNV2408
3. Touch “Nearby Restaurants”, “Nearby Gas
Stations”, “Nearby Parking” or “Nearby
ATMs”.
4. The system searches for destinations within
50 miles (80 km) of the current position.
5. Places are shown based on the straight line
distance to the current position. The arrow
on the right shows the direction of the
destination. Touch the desired destination
on the list.
NOTE:
A maximum of 200 destinations will be
listed when searching with this method.
4-10 Navigation
6. A detailed description of the destination is
provided.
● Press the BACK or
back and pick another destination.
● Touch “Call” to call the destination (if a phone
number is available) using the Bluetooth®
Hands-Free Phone System. See the vehicle
Owner’s Manual for more information about
the Bluetooth® Hands-Free Phone System.
● Touch “Map” to show a map of the
destination.
● Touch “Start” to calculate the route to the
destination.
BACK button to go
Page 45

LNV2409 LNV2437
SEARCHING FOR PLACES NEAR
CURRENT LOCATION
1. Press the NAV button.
2. Touch “Points of Interest”.
3. Touch “Search by Category”.
4. Touch “Near Current Location”.
When searching by category, you can browse
destinations from a variety of categories and
subcategories, including:
● Automotive
● Banking & Business
● Emergency
● Hotel/Motel
● Leisure
● Public Places
● Restaurant
● Shopping
● Travel
If you choose “By Name”, you can search for
places using a specific name. The touch keyboard is shown.
“HOW TO INPUT CHARACTERS”
(page 2-9)
NOTE:
● When using “Search By Category”, the system will search for up to 200 matches within
50 miles (80 km) of the current position.
● When using “Search By Name”, the system
will search for up to 30 matches within
50 miles (80 km) of the current position.
● If the destination is not found within the
50 mile (80 km) search radius, you can search
for places around a specific city name.
“SEARCHING FOR POINTS OF INTEREST IN ANOTHER CITY”
(page 4-12)
5. Destinations are shown based on the distance to the selected position. The arrow on
the right shows the direction of the
destination. The distance shown is a
straight line distance.
Navigation 4-11
Page 46

Touch the desired destination from the list.
6. A detailed description of the destination is
provided.
Press the BACK or
go back and pick another destination or
touch “Start” to have the system calculate
the route to the destination.
BACK button to
SEARCHING FOR POINTS OF INTEREST IN ANOTHER CITY
1. Press the NAV button.
2. Touch “Points of Interest”.
3. Touch “Search By Category” or “Search By
Name”.
4. Touch “In Another City”.
5. Touch “Change State/Province” if the state
or province shown is not correct.
6. If necessary, enter the name of the state or
province.
The display shows the touch keyboard.
“HOW TO INPUT CHARACTERS” (page 2-9)
The keyboard has an intelligent spelling
setting, so it excludes non-existing
combinations. On the top right of the
screen, the number of matches is shown.
7. Touch “City”.
8. A touch keyboard is displayed. Enter the
name of the desired city.
Press “List” at any time to display a list of remaining cities. Touch the desired city.
9. If you chose “Search By Category” in
Step 4, you can browse destinations from a
list of categories and subcategories.
If you choose “Search By Name” in Step 4, you
can search for places using a specific name. The
touch keyboard is shown.
NOTE:
● When using “Search By Category”, the system will search for up to 200 matches within
50 miles (80 km) of the chosen city.
● When using “Search By Name”, the system
will search for up to 30 matches within
50 miles (80 km) of the chosen city. If no
matches are found, touch “Change Name” to
search for another name.
10. Destinations are shown based on the dis-
tance from the selected position. The arrow
on the right shows the direction of the
destination. The distance shown is a
straight line distance from the city center.
4-12 Navigation
Touch the desired destination from the list.
11. A detailed description of the destination is
provided.
Press the BACK or
go back and pick another destination or
touch “Start” to have the system calculate
the route to the destination.
BACK button to
SEARCHING FOR PLACES USING
VOICE RECOGNITION (if so
equipped)
Places can be set as destinations using the
NISSAN Voice Recognition System:
1. Press the
steering wheel. The system provides
prompts and waits for voice commands.
2. Say “Navigation”.
3. Say “Points of Interest” followed by a brand
name.
4. Say number of the point of interest from the
available list on the screen.
5. There are up to four options to search for a
point of interest:
● Say “Along Route” to search for the de-
sired places along the current route.
or button on the
Page 47

● Say “Nearby” to search for the desired
places close to the vehicle’s current
location.
● Say “Near Destination” to search for the
desired places near the route’s
destination.
● Say “In another city” so search for the desired places in another city. Selecting
this option will lead to a series of other
steps.
6. The system displays a list of results fitting
the search criteria. Say the number of the
desired entry on the list.
If a route is active, say “Replace Destination” to
replace the current destination with the new
street address or say “Set as Waypoint” to set
the new street address as a waypoint on the current route.
If a route is not set, say “Set as Destination” to
set the new street address as the destination
and begin route guidance.
Say “Show on Map” to display the new street address on the map.
For more information about the NISSAN Voice
Recognition System, see the vehicle Owner’s
Manual.
MY POINTS OF INTEREST/USERDEFINED POINTS OF INTEREST
(POIs)
A point of interest (POI) in the My Points of Interest database is a specific location of interest
such as a gas station or bank. The POI consists
of a longitude value, a latitude value and a name.
Additional POIs can be added to the system using the vehicle’s USB port. For more information
about using the USB port, see your vehicle’s
owner’s manual.
The POIs can be set as a destination or be setup
to activate POI warnings that display a pop-up
message when the vehicle approaches certain
areas such as hazard spot warnings.
NOTE:
● In order to save the user-defined points of interest data, a USB mass storage device is
required. The user-defined points of interest
data cannot be saved on the SD-card which
contains the navigation data.
● User-defined points of interest are not shown
in the map representation.
● The system recognizes the user-defined
points of interest (POI) data and then asks the
user via a pop-up message if the data needs
to be downloaded into the system.
● If you confirm the download, the available user
Points of Interest in the system internal
memory will be deleted and the new ones in
the USB mass storage device will be downloaded into the internal memory of the system.
● The progress of the download is shown by a
progress-bar. When the download is finished,
the user is notified that the USB mass storage
device can be removed.
Navigation 4-13
Page 48
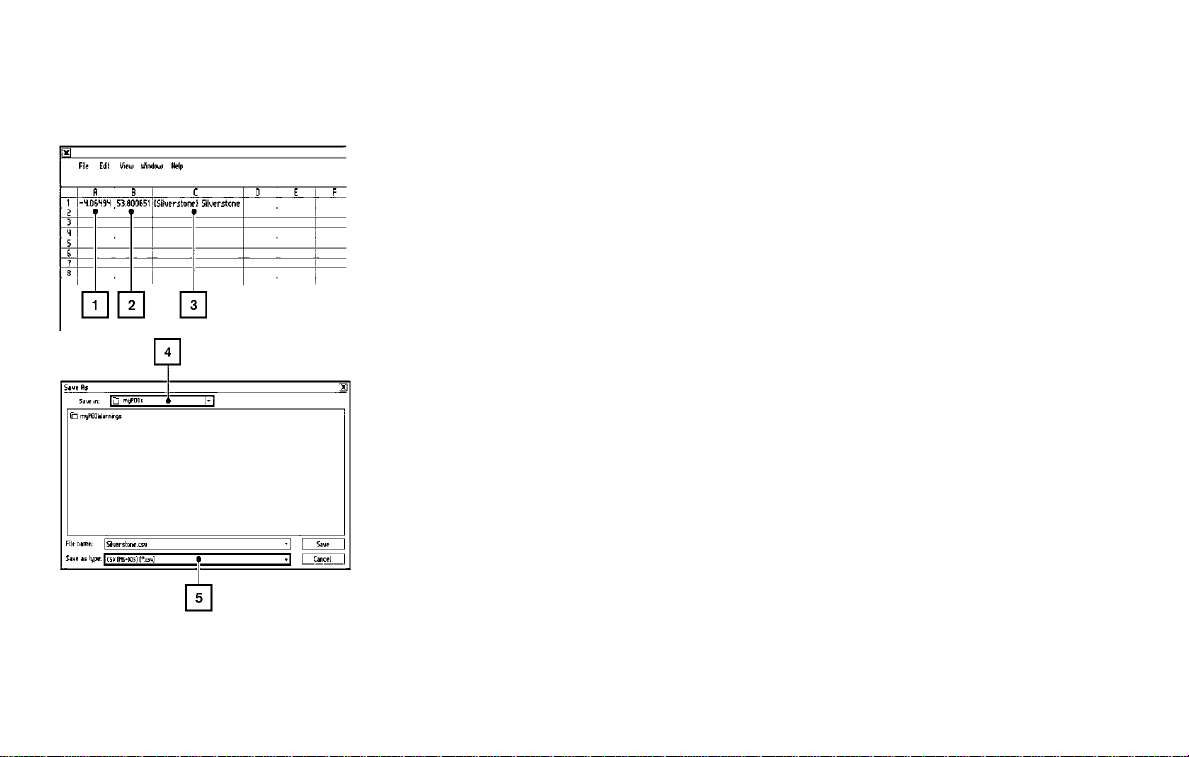
LNV1017
Creating user-defined points of interest (POIs)
1
Longitude
䊐
2
Latitude
䊐
3
Name
䊐
4
Location/Folder to save
䊐
5
File name
䊐
POI data can be downloaded from the Internet
or created in a simple text editor in CSV (Comma
Separated Values) file format.
There are two kinds of POI data supported by
the system:
● User POIs – user-defined points of interest
(POI) that can later be set as a destination
and found using route guidance.
● POI-warnings – user-supplied areas such as
hazard spots that the system displays in a
pop-up window when the vehicle is approaching the designated area.
Perform the following procedure to create your
own User POIs:
1. Connect a USB mass storage device to
your personal computer.
2. Use a standard software program to create
a list of POIs. Make sure the software can
support the CSV file format.
3. In the first column, enter the longitude value
of the position of the POI.
4. In the second column, enter the latitude
value of the position of the POI.
5. In the third column, enter the name of the
POI. Information entered in the fourth
column, such as address or phone number,
will be appended to the name of the POI.
6. Add more rows if necessary.
7. Save the file with the extension .csv (for
example, myplacesfile.csv).
NOTE:
The name of the .CSV file will be used to
create a My Points of Interest category in
the system. Create separate .CSV files with
different names to create other My Points
of Interest categories.
4-14 Navigation
Page 49

8. Make sure to select the USB mass storage
device as the location to save, using the exact folder name “/myPOIs” for User POIs or
“/myPOIs/myPOIwarnings”
for POI-warnings. For example, if the USB
mass storage device’s root folder is represented by f:/, save the file to the folder
“f:/myPOIs” for User POIs or to the folder
“f:/myPOIs/myPOIwarnings”
for POI-warnings.
9. Connect the USB mass storage device to
the vehicle’s USB port. For more information about the USB port, see your vehicle’s
Owner’s Manual.
LNV2410
Adding user-defined points of interest
(POIs)
Perform the following procedure to add your
User POIs to the system:
1. Press the NAV button.
2. Touch “Next Page”.
3. Touch “My Points of Interest”.
4. If a USB mass storage device with the new
POI data is connected, the system will automatically ask if you want to transfer the POI
data. Touch “Download” to begin the transfer or “Cancel” to cancel the procedure.
NOTE:
New POI data will overwrite POI data already in the internal memory.
5. The POI data on the USB mass storage device is transferred to the vehicle.
NOTE:
A maximum of 8 MB of POI data can be
added to the system.
6. Once the download process is complete,
the available POIs are displayed in a list on
the screen.
7. Touch the name of a POI on the list to set it
as the destination.
8. Touch “Start” to calculate the route.
A user-defined POI in the My Points of Interest
database can also be set as the destination by
following the procedure below:
1. Press the NAV button.
2. Touch “Next Page”.
3. Touch “My Points of Interest”
4. Touch the name of the user-defined Point of
Interest to set that entry as a destination.
Navigation 4-15
Page 50

LNV2490 LNV2460
Deleting user-defined points of interest (POIs)
Perform the following procedure to delete the
user-defined POIs stored in the My Points of Interest memory:
1. Press the
2. Touch “Settings”.
or MENU button.
3. Touch “Navigation”.
4. Touch “My Points of Interest Settings”
5. Touch “Remove My Points of Interest From
System”.
6. A pop-up is displayed to confirm that you
want to delete all User POIs (My Points of
Interest) from the system. Touch “Yes” to
delete the User POIs or “No” to cancel.
Other options are available on the “My Points of
Interest Settings” screen:
● My Points of Interest Alert
Select to adjust how alerts are provided when
approaching a destination set by My Points of
Interest. Choose “OFF” to disable the alert.
Choose “Show Only” to display the alert on
the screen. Choose “Show & Beep” to display
the alert on the screen and play an audible
sound.
● Points of Interest Alert Distance
Select to choose from the available list a distance away from the My Points of Interest
destination at which to activate the alert.
4-16 Navigation
Page 51

SETTING A DESTINATION FROM THE
ADDRESS BOOK
This option allows you to set and store the destination in the address book and use the stored
destinations to calculate a route.
LNV2410
SETTING A NEW ENTRY TO THE
ADDRESS BOOK
1. Press the NAV button.
2. Touch “Next Page”.
3. Touch “Address Book”.
4. Touch “Add New Entry”.
There are four possibilities shown:
NOTE:
Up to 50 address book entries can be
stored. If the number of address book entries exceeds 50, one must be deleted before the new one can be added.
“SETTING AN ENTRY AS A DESTINATION” (page 4-18)
● “Street Address”
This option allows you to save a new entry
by selecting the address.
“SETTING A DESTINATION
FROM A STREET ADDRESS”
(page 4-5)
● “Previous Destination”
This option allows you to save a destination
in the address book from a location stored
in the previous destination memory.
Touch the destination you would like to save
into the address book.
The touch keyboard gives the option to change
the name of the selected destination.
Touch “OK”. The system confirms the entry and
adds it to the address book.
● “Current Destination”
This option allows you to store the currently
set destination in the address book when a
route is active. This option is only available
when a route is active.
Touch “Current Destination”.
Navigation 4-17
Page 52

SETTING AN INTERSECTION AS A
DESTINATION
The touch keyboard gives the option to change
the name of the destination.
Touch “OK”. The system confirms the entry and
adds it to the address book.
● “Current Position”
This option allows you to set the current position as a destination in the address book.
Touch “Current Position”.
The touch keyboard gives the option to change
the name of the destination.
Touch “OK”. The system confirms the entry and
adds it to the address book.
SETTING AN ENTRY AS A DESTINATION
Instead of touching “Add New Entry”, you can
touch any previously saved address.
The detailed description of the entry is shown. If
information for the destination is not available,
latitude and longitude coordinates will be shown.
You can rename or delete the entry. Touch “OK”
to set the entry as a destination.
The system will calculate the route to the address chosen.
SETTING A DESTINATION FROM
THE ADDRESS BOOK USING
VOICE RECOGNITION (if so
equipped)
Entries in the address book can be set as destinations using the NISSAN Voice Recognition
System:
1. Press the
steering wheel. The system provides
prompts and waits for voice commands.
2. Say “Navigation”.
3. Say “Address Book”.
4. Say the number of the entry in the address
book displayed on the screen.
If a route is active, say “Replace Destination” to replace the current destination with the address
book entry or say “Set as Waypoint” to set address
book entry as a waypoint on the current route.
If a route is not set, route guidance is calculated
to the address book entry.
Say “Show on Map” to display the location of the
address book entry on the map.
For more information about the NISSAN Voice
Recognition System, see the vehicle Owner’s
Manual.
or button on the
4-18 Navigation
LNV2410
An intersection of two streets can be set as a
destination. To set an intersection as the destination:
1. Press the NAV button.
2. Touch “Next Page”.
3. Touch “Intersection”.
4. Touch “Change State/Province” if the state
or province displayed is not correct.
5. If necessary, enter the name of the state or
province.
The display shows the touch keyboard.
“HOW TO INPUT CHARACTERS”
(page 2-9)
6. Press “List” at any time and a list of remaining cities will be shown. Touch the desired
city.
Page 53

SETTING A CITY CENTER AS A DESTINATION
7. Touch “Street”.
The display shows the touch keyboard.
8. Touch the name of the desired street.
9. A list of intersecting streets will be shown if
six or less exist. Otherwise, the touch keyboard will be displayed again so that the
name of the second street in the intersection can be entered. Enter the second street
name.
10. Select the intersecting street.
11. Touch “Start”.
The route to the intersection will be
calculated.
6. Touch “City”
7. Enter the name of the first street. The display shows the touch keyboard.
8. Touch “Start” to calculate the route to the
city center.
LNV2410
The center of a city can be set as a destination.
To set a city center as a destination:
1. Press the NAV button.
2. Touch “Next Page”.
3. Touch “City Center”.
4. If the state shown is not correct, touch
“Change State or Province”. Otherwise,
proceed to step 7.
5. Enter the name of the state or province. The
display shows the touch keyboard.
“HOW TO INPUT CHARACTERS” (page 2-9)
The keyboard has an intelligent spelling
setting, so it excludes non-existing
combinations. On the top right of the
screen, the number of matches is shown.
Navigation 4-19
Page 54

TRAFFIC FEATURE
The Navigation System receives traffic information from SiriusXM Traffic to inform you of traffic
events and guide you to an alternate route. Traffic events include accidents, road construction,
heavy traffic and other factors that affect the
route ahead.
LNV2490
DISPLAYING TRAFFIC EVENTS
ALONG ROUTE
When a route is active, press the button and then touch “SiriusXM Traffic” to display
the traffic event nearest the current vehicle
location. The location and nature of the traffic
event is displayed on the screen. Three menu
options are available on the screen.
NOTE:
This feature can also be accessed using
the NISSAN Voice Recognition System (if
so equipped) by pressing the
or button on the steering wheel and
when prompted, saying “Information” then
“Traffic”.
● “Avoid Road On Route.”
Touch the “Avoid Road On Route.” key to direct
the navigation system to avoid the area impacted
by the listed traffic event. The next screen lists
multiple options.
Touch the “Detour by Distance” key to avoid the
road listed on the traffic event. You can choose
the distance over which the system avoids the
affected road. Touch the “+” or “-” key to set the
distance and then touch “Recalculate Route” to
calculate the new route.
Touch the “Avoid Segment of Route List” key to
avoid a series of roads on the route list due to
the traffic event. The route list is displayed on the
screen. Touch the names of two streets on the
list to avoid that portion of the route and then
touch “Recalculate Route” to calculate the new
route.
● “List All Traffic Events”
Touch the “List All Traffic Events” key to display a
list of all traffic events in the area, including those
which are not directly along the current route.
Touch the line of a specific event on the screen
to see more details about that item.
4-20 Navigation
Page 55

TRAFFIC FLOW FEATURE
Using information received from SiriusXM Traffic,
the system informs you of traffic levels on certain
highways and roads in the area along the route.
Press the MAP button to display the map of the
current vehicle location. Any roads with traffic
flow information will appear colored as follows:
● Green: traffic is light and moving at normal
speeds. (>45 mph)
● Yellow: traffic is heavy and moving slowly.
(10-45 mph)
● Red: traffic is gridlocked and not moving.
(<10 mph)
LNV2490 LNV2460
TRAFFIC SETTINGS
To access the settings for the traffic feature:
1. Press the
2. Touch the “Settings” key.
or MENU button.
3. Touch the “Traffic Messages” key.
The following settings can be adjusted:
● Dynamic Guidance
● Show Traffic Incidents
● Show Traffic Flow
● Announce Traffic Alerts
Navigation 4-21
Page 56

WEATHER FEATURE
NavWeatherXM information is a subscription
service offered by SiriusXM Satellite Radio.
This service provides real-time information regarding current weather and forecasts where
available. The weather information is broadcast
to the vehicle by the SiriusXM satellites.
WARNING
m
NavWeatherXM information is not a
substitute for attentive driving.
Weather conditions change constantly
and emergency situations can arise
without warning. Relying only on
NavWeatherXM information could result in serious personal injury.
XM NavWeather information is available in limited
markets. To subscribe to or check if this service is
available in the area, call 1-866–635–2349 or
access www.siriusxm.com/navweather.
LNV2461 LNV2441
DISPLAYING WEATHER INFORMATION ON THE SCREEN
1. Press the or MENU button.
2. Touch “SiriusXM Travel Link”.
3. Touch “Weather”.
The weather conditions for the current location
are displayed on the screen.
NOTE:
In some areas, the location name at the
top of the screen may not match the location shown for “Weather Station” due to
differences in where weather information
is collected.
Touch “Forecast” to see the weather forecast for
the selected area for the next five days.
4-22 Navigation
Page 57

LNV2442 LNV2461
Touch “Location” to view weather information for
a different location:
● “Near Current Location”
Select to view weather information for the current location.
● “Near Destination”
Select to view weather information near the
destination of the current route. Route guidance must be active for this option to be
available.
● “In Another City”
Select to view weather information for a different city. Follow the on screen prompts and
character input screens to select the desired
location.
NOTE:
When the weather function is accessed for
the first time of the day, the GPS location
may not be used. If this occurs, touch the
“Location” key to update the location.
NOTE:
This feature can also be accessed using
the NISSAN Voice Recognition System (if
so equipped) by pressing the
or button on the steering wheel and
when prompted, saying “Information” then
“Current Weather” or “Weather Forecast”.
FUEL PRICES
To display fuel prices at gas stations in the surrounding area on the screen:
1. Press the
2. Touch “SiriusXM Travel Link”.
3. Touch “Fuel Prices”.
NOTE:
This feature can also be accessed using
the NISSAN Voice Recognition System (if
so equipped) by pressing the
or
when prompted, saying “Information” then
“Fuel Prices”.
button on the steering wheel and
or MENU button.
Navigation 4-23
Page 58

4. A list of gas stations is displayed with the
distance and direction to each entry. Touch
an entry on the screen to view information
about that gas station.
5. The name, address and phone number of
the gas station are displayed. If available,
the prices for each grade of gasoline are
also displayed. Touch “Store” to store the
location in the address book. Touch “Call”
to call the location using the Bluetooth®
Hands-Free Phone System. Touch “Map” to
view the location on the map. Touch “Start”
to begin route guidance to the location.
4-24 Navigation
Page 59

5 Other settings
System settings ...................................5-2
Touchscreen click ..............................5-3
System beeps. . . ...............................5-3
Return to factory settings........................5-3
Display settings ...................................5-3
Display ........................................5-3
Brightness.....................................5-3
Rear View Camera Settings . . . ..................5-4
Temperature Unit Settings .......................5-4
Clock settings.....................................5-4
Set clock manually..............................5-5
Language settings .................................5-5
Page 60

SYSTEM SETTINGS
LNV2490 LNV2460
The system can be customized according to
your preference.
1. Press the
2. Touch “Settings”.
or MENU button.
3. Touch “System”.
4. Select the preferred setting item on the
screen and the next screen will be shown.
You may need to use the scrolling dial or the
touch screen to scroll if more than one
screen of options is available.
The following settings are available:
● Display
“DISPLAY SETTINGS”
(page 5-3)
● Clock
“CLOCK SETTINGS” (page 5-4)
● Language
“LANGUAGE SETTINGS”
(page 5-5)
● Camera
“CAMERA DISPLAY SETTINGS”
(page 5-4)
● Temperature Unit
“TEMPERATURE UNIT”
(page 5-4)
● Touchscreen Click
“TOUCHSCREEN CLICK”
(page 5-3)
● System Beeps
“SYSTEM BEEPS” (page 5-3)
● “Return to Factory Settings/Clear Memory”
“RETURN TO FACTORY SETTINGS” (page 5-3)
5. Select the button of the preferred item and
adjust the setting. Alternatively, use the
scrolling dial or steering wheel scrolling
switch (if so equipped).
6. Press the BACK or
return to the previous screen or press the
NAV button to return to the current location
map screen.
BACK button to
5-2 Other settings
Page 61
DISPLAY SETTINGS
TOUCHSCREEN CLICK
Use this setting to change the audible confirmation between the on or off position when a
screen button is touched.
Select the “Touchscreen Click” key to toggle between On and Off.
SYSTEM BEEPS
Use this setting to change the audible confirmation when:
● a button on the unit is pressed and held for
about two seconds, such as the
● a pop-up message appears on the screen.
Select the “System Beeps” key to toggle between ON and OFF.
button.
RETURN TO FACTORY SETTINGS
Use this setting to restore the factory default
settings.
Touch the “Return to Factory Settings/Clear
Memory” key and then confirm the message. If
you choose “Yes”, the system will reset the settings to the default settings. If you choose “No”,
the default settings will not be restored and the
display returns to the system settings screen.
DISPLAY
Switching the display on or off
This setting allows you to turn the display on or
off. When the display is turned off, the clock will
still be displayed.
To turn off the display, press and hold the
button.
The display will switch on when:
● the
● any other button is pressed.
● receiving incoming calls or during a phone
call. When the call is ended, the display returns to clock display.
Voice guidance (if active) continues even when
the display is turned off.
Press and hold the
two seconds to switch the display to a larger display of the digital clock.
Changing day-night brightness
Press the
onds to toggle:
● between day and auto (night) when headlights are on.
button is pressed.
button for more than
button for less than two sec-
● between night and auto (day) when headlights are off.
While the display is showing the current brightness mode, turn the TUNE/SCROLL dial to adjust the brightness.
The day or night mode can also be toggled from
the Display Settings menu.
BRIGHTNESS
This menu allows you to adjust the brightness of
the screen.
1. Press the
2. Touch the “Settings” key.
3. Touch the “System” key.
4. Touch the “Display” key.
5. Adjust the brightness using the “+” and “-”
keys.
6. To save the setting, press the BACK
or
vious screen.
BACK button to return to the pre-
or MENU button.
Other settings 5-3
Page 62

CLOCK SETTINGS
REAR VIEW CAMERA SETTINGS
Use this setting to change the display mode
(automatic/day/night) for the rear view camera.
Brightness, contrast and color can also be
adjusted.
1. Press the
2. Touch the “Settings” key.
3. Touch the “System” key.
4. Scroll down and touch the “Camera” key.
Toggle display mode and use the “+” and “–”
keys to adjust brightness, contrast and color for
rear camera display.
or MENU button.
TEMPERATURE UNIT SETTINGS
Use this setting to change the temperature units
(Fahrenheit/Celsius).
1. Press the
2. Touch the “Settings” key.
3. Touch the “System” key.
4. Scroll down and touch the “Temperature
Unit” key.
or MENU button.
This setting allows you to make clock
adjustments.
1. Press the
2. Touch the “Settings” key.
3. Touch the “System” key.
4. Touch the “Clock” key.
5. Select the preferred setting item and make
an adjustment.
● “Time Format”:
Touch the “Time Format” key to change the
clock format between 12-hour and 24-hour.
● “Date Format”:
Touch the “Date Format” key to choose one
of five available date formats.
● “Clock Mode”:
Select “Manual” to manually set the clock
with the “Set Clock Manually” key. Select
“Auto” to have the clock automatically adjusted by the GPS system. Select “Time
Zone” to have the time set to a specific time
zone.
.
● “Set Clock Manually”:
Allows you to set the clock manually. This
feature is only available if “Manual” is selected for “Clock Mode”.
“SET CLOCK MANUALLY”
(page 5-5)
● “Daylight Savings Time”:
Touch the “Daylight Savings Time” key to
toggle daylight savings time on or off. This
feature is unavailable if “Clock Mode” is set
to “Auto”.
● “Time Zone”:
Select and touch an appropriate time zone
of the current vehicle location to bypass the
GPS satellite. This feature is only available if
“Time Zone” is selected for “Clock Mode”.
NOTE:
If “Daylight Savings Time” is set to “ON”
and a time zone is chosen for an area that
does not observe Daylight Savings Time,
the “Daylight Savings Time” setting remains “On” and must be turned off
manually.
5-4 Other settings
Page 63

LANGUAGE SETTINGS
6. After adjusting the desired settings, press
the BACK or
to the previous screen. You can also press
the MAP button to return to the current location map screen or the FM, AM, CD or
AUX button to return to the audio screen.
BACK button to return
SET CLOCK MANUALLY
Adjust the hour, minute, day, month and year using the “+” and “–” keys.
1. Press the
2. Touch the “Settings” key.
3. Touch the “System” key.
4. Touch the “Clock” key.
5. Toggle “Clock Mode” key to “Manual”.
6. Toggle “MODE” to “AM” or “PM”, then use
“+” and “–” keys to adjust hour, minute, day,
month and year.
After adjusting the desired settings, press the
BACK or
previous screen.
BACK button to return to the
button.
This setting allows you to change the language
used by the system.
1. Press the
2. Touch the “Settings” key.
3. Touch the “System” key.
4. Touch the “Language” key.
5. Select the appropriate language. The available languages are:
– English
– Français
– Español
or MENU button.
Other settings 5-5
Page 64

MEMO
5-6 Other settings
Page 65

6 General system information
Safety information .................................6-2
Features of this navigation system ...................6-2
Route guidance ................................6-2
Points of Interest directory .......................6-3
Address book . . . ...............................6-3
SiriusXM Traffic information ......................6-3
Voice guidance. . ...............................6-3
Current vehicle location ............................6-4
Display of current vehicle location ................6-4
What is GPS (Global Positioning System)?........6-4
Detailed map coverage (MCA) for the
navigation system ..............................6-4
When a gray road is displayed on the map ........6-4
Route calculation ..................................6-4
Route guidance ...................................6-6
Basics of voice guidance ........................6-6
Directions provided and the distances to
guide points ...................................6-6
Repeating voice guidance .......................6-6
Notes on voice guidance ........................6-6
How to handle the display ..........................6-7
Characteristics of a liquid crystal display ..........6-7
Maintenance of the display ......................6-8
Page 66

SAFETY INFORMATION FEATURES OF THIS NAVIGATION
SYSTEM
This system is primarily designed to help you
reach your destination, and it performs other
functions as outlined in this manual. However the
driver must use the system safely and properly.
Information concerning road conditions, traffic
signs and the availability of services may not always be up-to-date. The system is not a substitute for safe, proper and legal driving.
Before using the navigation system, please read
the following safety information. Always use the
system as outlined in this manual.
WARNING
m
● When the driver wants to operate the
navigation system, first park the vehicle in a safe location and set the
parking brake. Operating the system
while driving can distract the driver
and may result in a serious accident.
● Do not rely on route guidance alone.
Always be sure that all driving maneuvers are legal and safe in order to
avoid accidents.
● Do not disassemble or modify this
system. If you do, it may result in
accidents, fire or electrical shock.
● Do not use this system if you notice
any malfunctions such as a frozen
screen or lack of sound. Continued
use of the system may result in
accidents, fire or electrical shock.
● If you notice any foreign objects in
the system hardware, spill liquid on
the system or notice smoke or a
smell, stop using the system immediately and contact a NISSAN dealer.
Ignoring such conditions may lead to
accidents, fire or electrical shock.
CAUTION
● Some states or provinces may have
laws limiting the use of video
screens while driving. Use this system only where it is legal to do so.
NOTE:
Do not keep the navigation system running
with the engine stopped. Doing so may
discharge the vehicle battery. When you
use the navigation system, always keep
the engine running.
ROUTE GUIDANCE
The main features of the NISSAN Navigation
System are visual guidance and voice guidance
in selected map coverage areas. Utilizing a network of GPS (Global Positioning System)
satellites, the NISSAN Navigation System tracks
the location on the map and navigates to a preferred location.
Once you set the destination in a map coverage
area, the NISSAN Navigation System will calculate a route from your current location to your
destination. The real-time map display and turnby-turn voice guidance leads the driver along the
route. These features can be especially helpful
when driving to unfamiliar locations.
The system may be unable to set a destination
and/or calculate a route when the destination is
outside the map coverage area. Additionally,
voice guidance may not be available if the destination is outside the map coverage area. For
more information on how to set a destination, refer to Section 4.
6-2 General system information
Page 67

POINTS OF INTEREST DIRECTORY
The NISSAN Navigation System offers an extensive Points of Interest directory in map coverage
areas. This directory includes a wide variety of
destinations. By accessing the Points of Interest
directory, you can search for addresses for a
destination, and just by pushing a button, the
NISSAN Navigation System will calculate a
route to the destination.
The Points of Interest directory has many uses.
For example, the directory can be sorted by the
various types of restaurants near your current
location. If you need a bank or a gas station, the
NISSAN Navigation System can navigate you to
the closest preferred location using the Points of
Interest entered in the system.
“SETTING A DESTINATION FROM
POINTS OF INTEREST” (page 4-9)
ADDRESS BOOK
The address book can store up to 50 locations
from map coverage areas into a personal
directory. This is especially useful for frequently
visited locations, such as clients, relatives and
friends. The address book function allows easy
access to frequently visited locations when setting them as your destination.
“SETTING A DESTINATION FROM
THE ADDRESS BOOK” (page 4-17)
SIRIUSXM TRAFFIC INFORMATION
When available, the SiriusXM Traffic Information
broadcast may help to avoid delays due to traffic
incidents. Traffic jams, roadwork, closed roads
around the current location, etc. are represented
graphically on the map by icons depicting the
nature of the event. Incidents on the route are
automatically displayed when they are
approached.
The SiriusXM Traffic Information feature, via the
guidance mode, may help to detour around traffic
problems. For more information on the SiriusXM
Traffic Information feature, refer to section 4.
LNV2026
VOICE GUIDANCE
Route guidance is provided through voice and
visual instructions. Voice guidance announces
the appropriate directions when approaching an
intersection at which you need to turn. To repeat
the voice guidance, touch the “Voice” key.
The voice guidance can be alternately enabled
or disabled by touching and holding the “Voice”
key on the screen for about two seconds. When
the voice guidance is disabled, the “Voice” key
on the screen will appear grayed out.
General system information 6-3
Page 68

CURRENT VEHICLE LOCATION ROUTE CALCULATION
DISPLAY OF CURRENT VEHICLE
LOCATION
This navigation system combines the data obtained from the vehicle (by gyro sensor) and from
GPS (Global Positioning System) satellites to
calculate the current location of the vehicle. This
position is then displayed throughout route guidance to a destination.
WHAT IS GPS (Global Positioning
System)?
GPS is a position detecting system that uses
satellites deployed by the U.S. government. This
navigation system receives radio signals from
three or more different satellites that orbit
13,049 miles (21,000 km) above the earth in
space, and detects the position of the vehicle by
utilizing the principle of triangulation.
DETAILED MAP COVERAGE (MCA)
FOR THE NAVIGATION SYSTEM
This system is designed to help you reach your
destination, and also performs other functions as
outlined in this manual. However, you, the driver,
must use the system safely and properly. Information concerning road conditions, traffic signs
and the availability of services may not always be
up-to-date. The system is not a substitute for
safe, proper, and legal driving.
Map data is available on the provided SD-card.
For information about the map SD-card, contact
a NISSAN dealer or call the NISSAN NAVIGATION SYSTEM HELPDESK. See the contact information on the inside front cover of this
manual.
Map data includes 2 types of areas: “Detailed
coverage areas” providing all detailed road data
and other areas showing “Main roads only”.
NOTE:
Detailed map data is not available in many
areas and is generally limited to select major metropolitan areas.
WHEN A GRAY ROAD IS DISPLAYED ON THE MAP
● Route calculation may not be possible when a
destination or the current vehicle location is
near a gray road.
● Route guidance (enlarged view and voice
guidance) may not be available at the intersection where the road your vehicle is driving
on and a gray road intersect.
● Places information and street names near
gray roads are not contained in the map data.
6-4 General system information
● The NISSAN Navigation System may not calculate a route if the current vehicle location is
too far away from the destination. In this case,
please divide your trip by selecting one or two
intermediate destinations.
● To reach your destination, refer to the map
screen. Always follow actual roads and regulations and drive safely.
● The suggested route may not be the shortest,
nor are other circumstances such as traffic
jams considered unless the SiriusXM Traffic is
active.
● Because of the inevitable difference in road
conditions and circumstances between the
time you use this system and the time the information was produced for the map data,
there may be discrepancies in roads and
regulations. In such cases, follow the actual
information available.
● During route calculation, the map will not
scroll, however the vehicle icon will move with
the actual vehicle’s movement.
● In some cases, after the calculation is
complete, the calculated route may not be immediately displayed.
● If you scroll the map while the suggested
route is being drawn, it may take more time to
finish drawing.
Page 69

● If waypoints are set, the system calculates
multiple routes between waypoints
simultaneously, and the following may result.
– If one section between waypoints cannot
be calculated, none of the route will be
displayed.
– The route may not connect completely at
some waypoints.
– The route may require a U-turn close to
some waypoints.
● Route calculation may not be completed in
the following cases.
– If there is no main road within a range of
1.5 miles (2.5 km) from the vehicle, a
message will then appear on the screen.
Try recalculating when the vehicle is
closer to a main road.
– If the vehicle is too close to the destina-
tion or if there are no roads to the
destination, a message will then appear
on the screen.
– If it is impossible to reach the destination
or waypoints because of traffic
regulations, etc.
– If the only target route to the destination
or waypoints is extremely complicated.
● The following may occur when the route is
displayed.
– If you calculate a route on a main road,
the starting point of the route may not exactly match the current vehicle location.
– The endpoint of the route may not exactly
match the destination.
– If you calculate a route on a main road,
the system may display a route from another main road. This may be because
the position of the vehicle icon is not
accurate. In this case, park the vehicle in
a safe location and reset the vehicle icon,
or continue driving to see if the position
of the vehicle icon is automatically adjusted before recalculating the route.
“VEHICLE ICON” (page 7-3)
– In some cases, the system shows an in-
direct route to the destination or waypoints if you set them from stored or
places information. In order to correct,
you must be careful about the traffic
direction, especially when lanes with different travel directions are shown
separately, such as interchanges and
service areas.
– Even if the freeway preference is set to
OFF, a route that uses the freeway may
be suggested.
– Even if the preference is set to OFF, a
route that uses a ferry line may be
suggested.
– Ferry lines, excluding those that are only
for pedestrians, bicycles and
motorcycles, are stored in this system.
Take into consideration the travel time required and operational condition before
deciding whether to use the route.
General system information 6-5
Page 70

ROUTE GUIDANCE
BASICS OF VOICE GUIDANCE
The voice guidance announces which direction
to follow when approaching an intersection
where a turn is required.
After setting the route, select “Start” to begin
route guidance.
During route guidance, the system navigates you
through the guide points using visual and voice
guidance.
NOTE:
● The navigation system visual and voice guidance is for reference purposes only. The contents of the guidance may be inappropriate
depending on the situation.
● There may be some cases in which voice
guidance and actual road conditions do not
correspond. This may occur because of discrepancies between the actual road and the
information on the map data, or due to the vehicle’s speed.
● In case voice guidance does not correspond
to the actual road conditions, follow the information obtained from traffic signs or noticed
on the road.
● Route guidance provided by the navigation
system does not take carpool lane driving into
consideration, especially when carpool lanes
are separated from other road lanes.
DIRECTIONS PROVIDED AND THE
DISTANCES TO GUIDE POINTS
Directions will differ, depending on the road
type.
INFO:
Distances may vary, depending on the vehicle
speed.
Notification when approaching the
destination
Ordinary road:
The voice guidance will warn you when approaching your destination. To reach your destination precisely, refer to the map screen.
REPEATING VOICE GUIDANCE
This function is available throughout route
guidance, from the time after the route calculation is completed until the vehicle arrives at the
destination.
Touch the “Voice” key.
Voice guidance will be repeated.
INFO:
● If you touch the “Voice” key when you have
deviated from the suggested route, voice
guidance will announce, “Proceed to the
highlighted route.”
● If you touch the “Voice” key when you are going in the wrong direction, voice guidance will
announce: “Please make a legal U-turn if
possible.”
NOTES ON VOICE GUIDANCE
● Voice guidance in this system should be regarded as a supplementary function. When
driving your vehicle, check the route on the
map and follow the actual roads and traffic
regulations.
● Voice guidance is activated only for intersections with certain conditions.
● There may be cases where the vehicle has to
turn, but voice guidance is not provided.
● Voice guidance contents may vary, depending
on the direction of the turn and the type of
intersection.
● The voice guidance timing will vary depending
on the situation.
6-6 General system information
Page 71

HOW TO HANDLE THE DISPLAY
● When the vehicle has deviated from the suggested route, voice guidance is not available.
The system will not announce this to you. Refer to the map and recalculate the route.
● Voice guidance may not accurately correspond with road numbers and directions at
freeway junctions.
● Voice guidance may not accurately correspond to street names at freeway exits.
● The displayed street names may sometimes
differ from the actual names, or “UNKNOWN
STREET NAME” may be displayed.
● Voice guidance is not available when the feature is disabled in the SETTINGS menu.
● Voice guidance will start when the vehicle enters the suggested route. Refer to the map for
directions to the starting point of the route.
● When approaching a waypoint, voice guidance will announce, “You have reached your
intermediate destination on the (left/right)
side.” Voice guidance will switch to the next
section of the route. When voice guidance is
not available, refer to the map for directions.
● In some cases, voice guidance ends before
arrival at the destination. Refer to the destination icon on the map to reach the destination.
● If the system recognizes on which side the
destination (waypoint) is located, voice guidance will announce “on the right/left” after announcing the arrival at the destination.
● Voice guidance may be partially operational or
inoperative due to the angle of roads at an
intersection.
● Because it is not possible to consider data
concerning roads that are seasonally available
or unavailable, a route may be displayed that
does not match the actual traffic restrictions.
Be sure to follow the actual traffic restrictions
while driving.
● Canada and Alaska contain many roads with
incomplete map data. As a result, when
searching for a route, the route may include
roads with incomplete data. In regions where
road data is not complete, voice guidance
may stop for long periods of time. Be sure to
follow the actual traffic restrictions while
driving.
The display is a liquid crystal display and should
be handled with care.
WARNING
m
Never disassemble the display. Some
parts utilize extremely high voltage.
Touching them may result in serious
personal injury.
CHARACTERISTICS OF A LIQUID
CRYSTAL DISPLAY
● If the temperature inside the vehicle is especially low, the display will stay relatively dim or
the movement of the images may be slow.
These conditions are normal. The display will
function normally when the interior of the vehicle has warmed up.
● Some pixels in the display are darker or
brighter than others. This condition is an inherent characteristic of liquid crystal displays,
and it is not a malfunction.
● A remnant of the previous display image may
remain on the screen. This screen burn is inherent in displays, and it is not a malfunction.
INFO:
The screen may become distorted by strong
magnetic fields.
General system information 6-7
Page 72

MAINTENANCE OF THE DISPLAY
CAUTION
● To clean the display, never use a
rough cloth, alcohol, benzine,
thinner, any kind of solvent, or paper
tissues with chemical cleaning agent.
They would scratch or deteriorate the
panel.
● Do not splash any liquid such as water or car fragrance on the display.
Contact with liquid will cause the
system to malfunction and damage
the hardware.
For cleaning, use a dry soft cloth. If additional
cleaning is necessary, use a small amount of
neutral detergent with a soft cloth. Never spray
the screen with water or detergent. Dampen the
cloth first, then wipe the screen.
6-8 General system information
Page 73

7 Troubleshooting guide
Basic operations . . . ...............................7-2
Vehicle icon.......................................7-3
Map SD-card route calculation and visual guidance . . . 7-5
Voice guidance....................................7-6
Page 74
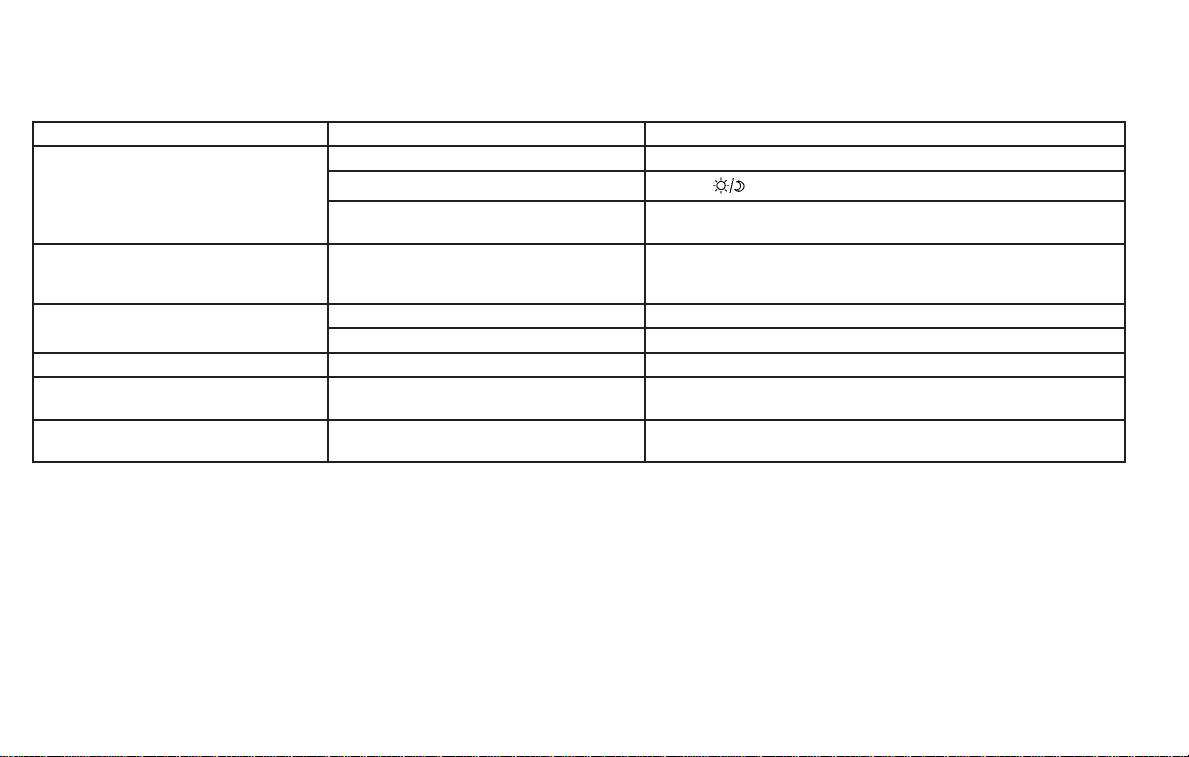
BASIC OPERATIONS
Symptom Possible cause Possible solution
No image is displayed. The brightness is at the lowest setting. Adjust the brightness of the display.
The display is turned off.
The system is in overheat mode due to excessive
high temperature.
No voice guidance is available.
or
The volume is too high or too low.
No map is displayed on the screen. The map SD-card is not inserted. Insert the map SD-card correctly.
The screen is too dim. The movement is slow. The temperature in the interior of the vehicle is low. Wait until the interior of the vehicle has warmed up.
Some pixels in the display are darker or
brighter than others.
Some menu items cannot be selected. Some menu items become unavailable while the
The volume is not set correctly, or it is turned off. Adjust the volume of voice guidance or turn voice guidance on.
A screen other than map screen is displayed. Press MAP.
This condition is an inherent characteristic of liquid
crystal displays.
vehicle is driven.
Press the
Wait until the system cools down.
This is not a malfunction.
Park the vehicle in a safe location, and then operate the navigation system.
NOTE:
Locations stored in the Address Book and other memory functions may be lost if the vehicle’s battery is disconnected or is discharged.
If this occurs, service the vehicle’s battery as necessary and re-enter the information in the Address Book.
button to turn on the display.
7-2 Troubleshooting guide
Page 75
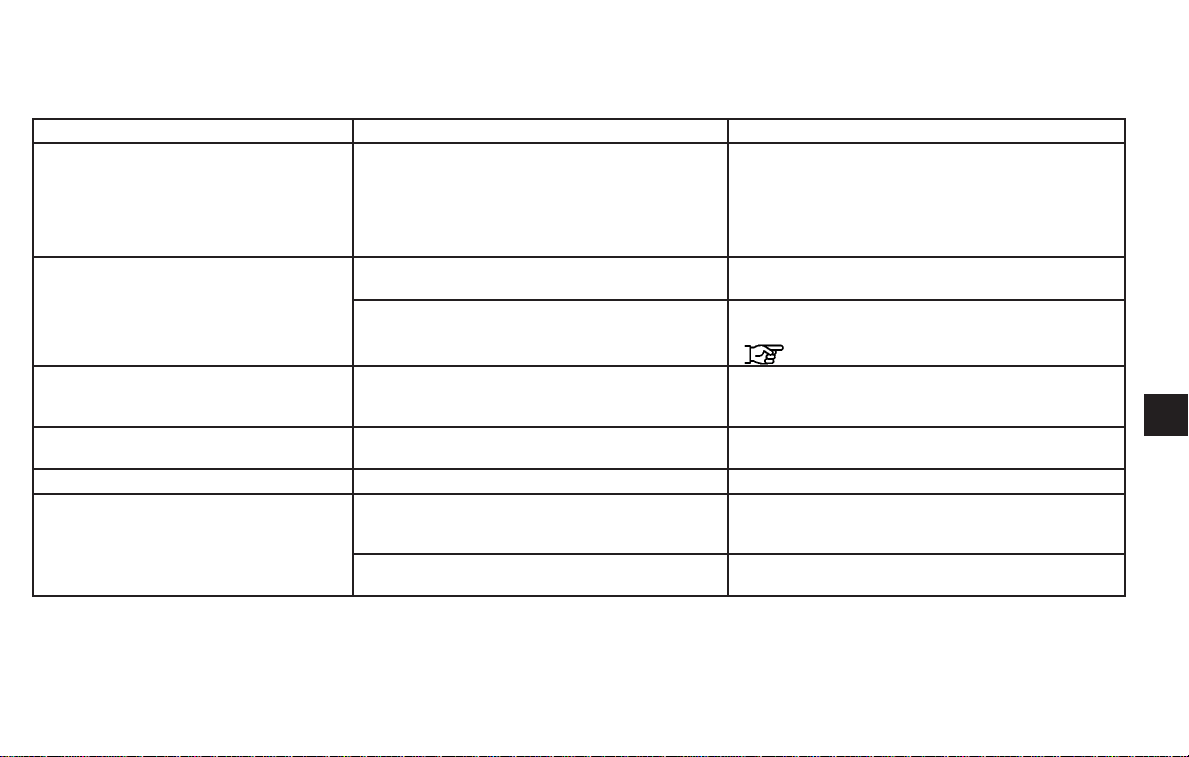
VEHICLE ICON
Symptom Possible cause Possible solution
Names of roads and locations differ between 2D
and 3D mode.
The vehicle icon is not displayed in the correct
position.
When the vehicle is traveling on a new road, the
vehicle icon is located on another road nearby.
The map does not scroll even when the vehicle is
moving.
The vehicle icon is not displayed. The current location map screen is not displayed. Press the MAP button.
The GPS indicator on the screen remains gray. GPS signals cannot be received under certain conditions,
This is because the quantity of the displayed information is
reduced so that the screen does not become difficult to read.
There is also a chance that names of the roads or locations
may be displayed several times, and the names appearing on
the screen may be different because of a processing
procedure.
The vehicle was transported after the ignition switch was
turned off by a ferry or car transporter, for example.
The position and direction of the vehicle icon may be incorrect depending on the driving environments and the levels of
positioning accuracy of the navigation system.
The system automatically places the vehicle icon on the nearest available road, because the new road is not stored in the
map data.
The current location map screen is not displayed. Press the MAP button.
such as in a parking garage, on a road with many tall
buildings, etc.
A sufficient number of GPS satellites is not available. Wait for the satellites to move to locations available for the navi-
This is not a malfunction.
Drive the vehicle for a while on a road where GPS signals can
be received.
This is not a malfunction. Drive the vehicle for a while to automatically correct the position and direction of the vehicle icon.
“CURRENT VEHICLE LOCATION” (page 6-4)
Updated road information will be included in the next version of
the map SD-card.
Drive on an open, straight road for a while.
gation system.
Troubleshooting guide 7-3
Page 76
Symptom Possible cause Possible solution
The location of the vehicle icon is misaligned from
the actual position.
When using tire chains or replacing the tires, speed calculations based on the speed sensor may be incorrect.
The map data has a mistake or is incomplete (the vehicle
icon position is always misaligned in the same area).
Drive the vehicle for a while (at approximately 19 MPH [30 km/h]
for about 30 minutes) to automatically correct the vehicle icon
position. If this does not correct the vehicle icon position, contact a NISSAN dealer.
Updated road information will be included in the next version of
the map data.
7-4 Troubleshooting guide
Page 77
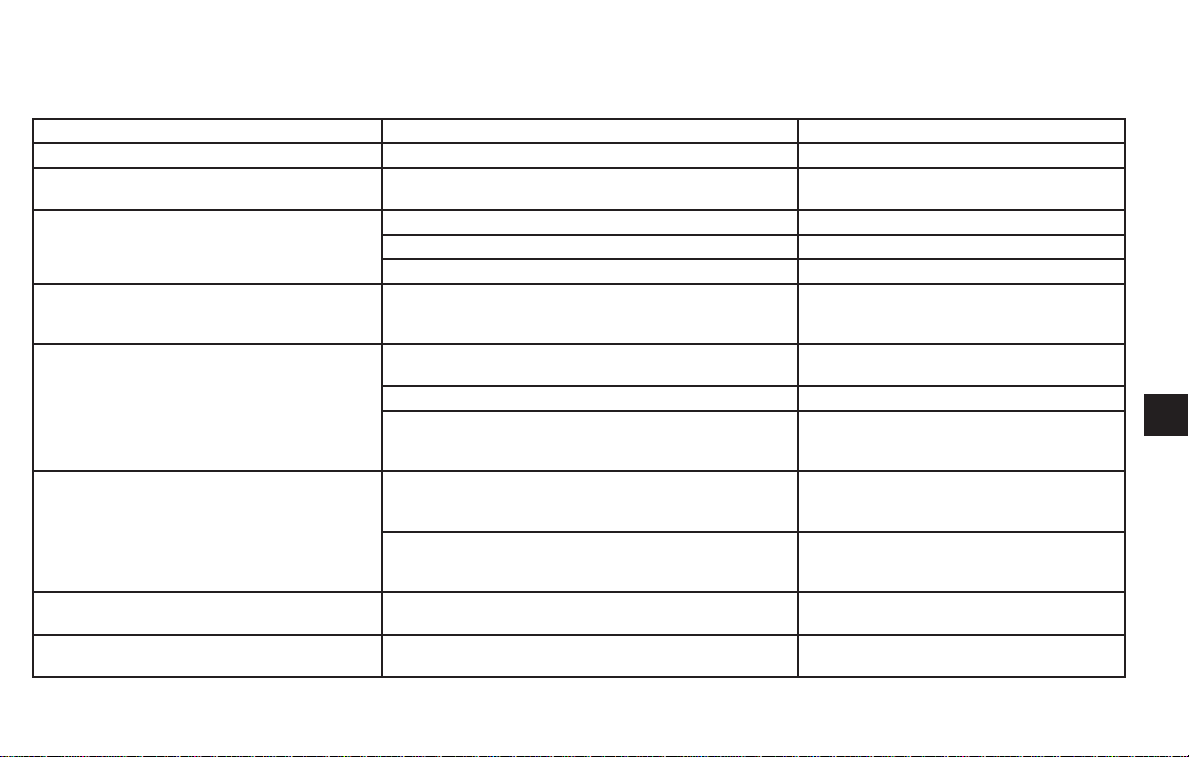
MAP SD-CARD ROUTE CALCULATION
AND VISUAL GUIDANCE
Symptom Possible cause Possible solution
The message “Error” appears. The SD-card is not recognized by the system. Replace the map SD-card if you see any damage.
In the automatic reroute calculation, the waypoint is not
included.
Route information is not displayed. Route calculation has not yet been performed. Set the destination and perform route calculation.
The automatic reroute calculation (or detour calculation)
suggests the same route as the one previously
suggested.
The suggested route is not displayed. Roads near the destination cannot be calculated. Reset the destination to a main or ordinary road, and
An indirect route is suggested. If there are restrictions (such as one-way streets) on roads close to
The landmark information does not correspond to the
actual information.
The suggested route does not exactly connect to the
starting point or destination.
A waypoint that you have already passed is not included in the automatic reroute calculation.
The vehicle is not on the suggested route. Drive on the suggested route.
Route guidance is cancelled. Turn on route guidance.
Route calculations took priority conditions into consideration, but
the same route was calculated.
The starting point and destination are too close. Set a more distant destination.
The starting point and destination are too far away. Divide the trip by selecting one or two intermediate
the starting point or destination, the system may suggest an indirect
route.
The system may suggest an indirect route because route calculation
does not take into consideration some areas such as narrow streets
(gray roads).
This may be caused by insufficient or incorrect data on the map
SD-card.
There is no data for route calculation closer to these locations. Set the starting point and destination on a main road,
If you want to go to that waypoint again, you need to
add it back to the route.
This is not a malfunction.
recalculate the route.
destinations, and perform route calculations multiple
times.
Adjust the location of the starting point or
destination.
Reset the destination to a main or ordinary road, and
recalculate the route.
Updated information will be included in the next version of the map SD-card.
and perform route calculation.
Troubleshooting guide 7-5
Page 78
VOICE GUIDANCE
Symptom Possible cause Possible solution
Voice guidance is not available. In some cases, voice guidance is not available even when the
The guidance content does not correspond to the
actual condition.
vehicle should make a turn.
The vehicle has deviated from the suggested route. Go back to the suggested route or request route calculation
Voice guidance is set to off. Turn on voice guidance.
The content of voice guidance may vary, depending on the
types of intersections at which turns are made.
This is not a malfunction.
again.
Follow all traffic rules and regulations.
7-6 Troubleshooting guide
Page 79

8 Index
A
Address book ...................6-3
B
Basic operations .................7-2
Basicsofvoiceguidance ............6-6
C
Clocksettings ..................5-4
Control buttons and functions ..........2-2
Current vehicle location .............6-4
D
Directions provided and the distances to guide
points .......................6-6
Display of current vehicle location........6-4
Displaysettings..................5-3
F
Features of this navigation system .......6-2
For safe operation ................1-2
H
Howtousethismanual.............1-2
L
Language settings ................5-5
Laser product ...................1-3
M
Movingamap...................3-4
MyPlaces....................4-13
N
Notesonvoiceguidance ............6-6
P
PointsOfInterest(POI)directory........6-3
R
Reference symbols ................1-2
Repeating voice guidance ............6-6
Returning to the current vehicle location ....3-5
Route calculation .................6-4
Route calculation and visual guidance .....7-5
Routeguidance..................6-2
S
Safety information ................1-2
Steering wheel switch .........2-5,2-6,2-5
U
User-defined points of interest (POIs).....4-13
V
Vehicleicon....................7-3
Voiceguidance...............6-3,7-6
Voice recognition . . .4-9, 4-18, 4-21, 4-23, 4-5,
4-12
W
What is GPS (Global Positioning System)? . .6-4
When a gray road is displayed on the map . . .6-4
X
XMNavWeather™............4-22,4-22
Page 80

Printing : August 2013 (02)
Publication No.:
Printed in U.S.A.
N14E L2KUU1
LC2
 Loading...