

Page 1
Nintendo of America Inc.
P.O. Box 957, Redmond, WA 98073-0957 U.S.A.
www.nintendo.com
AGB-BZ6E-USA
®
INSTRUCTION BOOKLET
PRINTED IN JAPAN
Page 2
PLEASE CAREFULLY READ THE SEPARATE HEALTH AND SAFETY PRECAUTIONS
BOOKLET INCLUDED WITH THIS PRODUCT BEFORE USING YOUR NINTENDO®
HARDWARE SYSTEM, GAME PAK OR ACCESSORY. THIS BOOKLET CONTAINS
IMPORTANT HEALTH AND SAFETY INFORMATION.
IMPORTANT SAFETY INFORMATION: READ THE FOLLOWING WARNINGS BEFORE
YOU OR YOUR CHILD PLAY VIDEO GAMES.
WARNING - Seizures
• Some people (about 1 in 4000) may have seizures or blackouts triggered by light flashes or patterns, such as while
watching TV or playing video games, even if they have never had a seizure before.
• Anyone who has had a seizure, loss of awareness, or other symptom linked to an epileptic condition should consult a
doctor before playing a video game.
• Parents should watch when their children play video games. Stop playing and consult a doctor if you or your child
have any of the following symptoms:
Convulsions Eye or muscle twitching
Altered vision Involuntary movements Disorientation
• To reduce the likelihood of a seizure when playing video games:
1. Sit or stand as far from the screen as possible.
2. Play video games on the smallest available television screen.
3. Do not play if you are tired or need sleep.
4. Play in a well-lit room.
5. Take a 10 to 15 minute break every hour.
Loss of awareness
WARNING - Repetitive Motion Injuries and Eyestrain
Playing video games can make your muscles, joints, skin or eyes hurt after a few hours. Follow these instructions
to avoid problems such as tendinitis, carpal tunnel syndrome, skin irritation or eyestrain:
• Avoid excessive play. It is recommended that parents monitor their children for appropriate play.
• Take a 10 to 15 minute break every hour, even if you don't think you need it.
• If your hands, wrists or arms or eyes become tired or sore while playing, stop and rest them for several hours
before playing again.
• If you continue to have sore hands, wrists or arms or eyes during or after play, stop playing and see a doctor.
WARNING - Battery Leakage
Nintendo portable video game systems contain a rechargeable lithium ion battery pack. Leakage of ingredients
contained within the battery pack, or the combustion products of the ingredients, can cause personal injury as well
as damage to your hardware. If battery leakage occurs, avoid contact with skin. If contact occurs, immediately wash
thoroughly with soap and water. If liquid leaking from a battery pack comes into contact with your eyes, immediately
flush thoroughly with water and see a doctor.
To avoid battery leakage:
• Do not expose battery to excessive physical shock, vibration, or liquids.
• Do not disassemble, attempt to repair or deform the battery.
• Do not dispose of battery pack in a fire.
• Do not touch the terminals of the battery, or cause a short between the terminals with a metal object.
• Do not peel or damage the battery label.
Page 3
THIS GAME PAK WILL WORK ONLY WITH THE GAME BOY
The official seal is your assurance
that this product is licensed or
ADVANCE, GAME BOY® MICRO, OR NINTENDO DSTM VIDEO
GAME SYSTEMS.
manufactured by Nintendo. Always
look for this seal when buying
video game systems,
accessories, games
and related
products.
Nintendo does not license the sale or use of products
without the Official Nintendo Seal.
© 1994, 2006, 2007 SQUARE ENIX CO., LTD. All Rights Reserved. Illustration © 1994, 2006 YOSHITAKA AMANO. FINAL FANTASY,
SQUARE ENIX and the SQUARE ENIX logo are trademarks or registered trademarks of SQUARE ENIX CO., LTD.
Advance are trademarks of Nintendo. © 2007 Nintendo.
TM, ® and Game Boy
®
PROLOGUE
The ancient War of the Magi...
When its flames at last receded, only the charred husk of
a world remained. Even the power of magic was lost...
In the thousand years that followed, iron,
gunpowder, and steam engines took the
place of magic, and life slowly
returned to the barren land...
Yet there now stands
one who would reawaken
the magic of ages past, and
use its dread power as a means
by which to conquer all the world...
...Could anyone truly be
foolish enough to repeat
that mistake?
CONTENTS
Prologue 3
Characters 4
Basic Controls 10
Getting Started 12
Game Interface 14
Getting Around 15
Main Menu 20
Menu Commands 22
Battle 30
Battle Commands 32
Special Abilities 36
Status Effects 38
Espers 40
Magicite & Spell Lists 44
Page 4
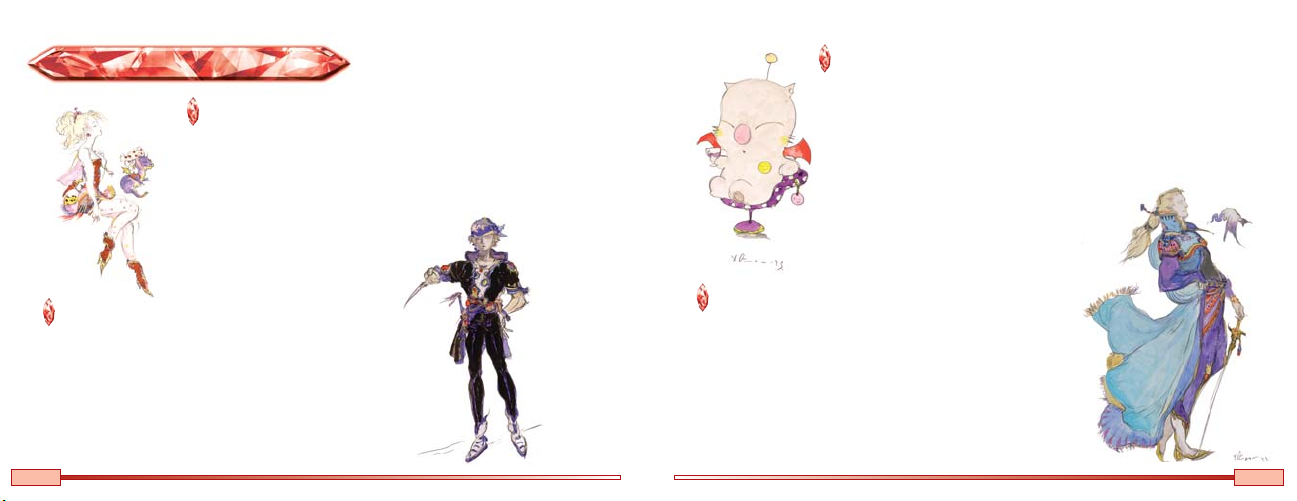
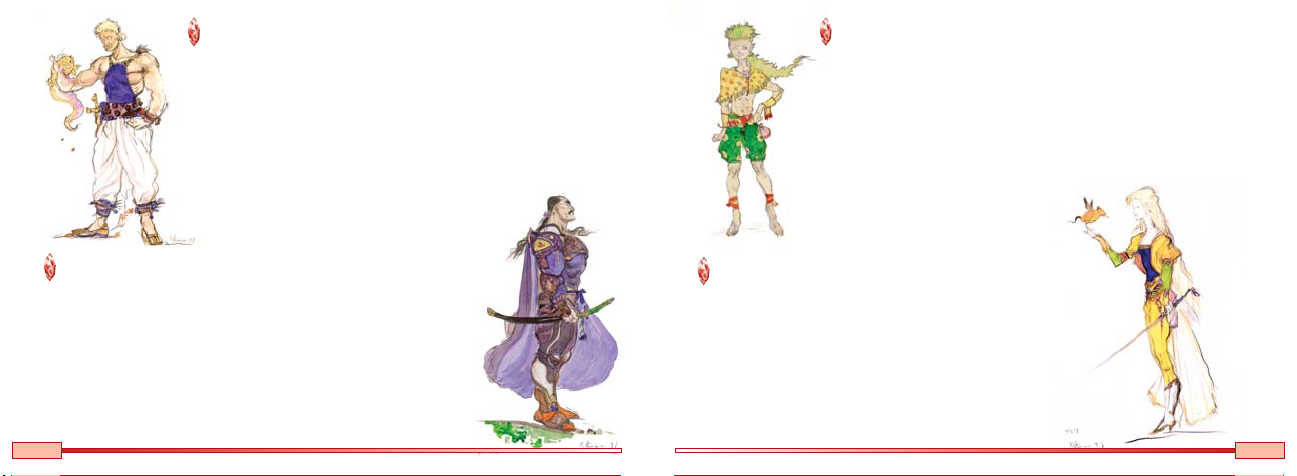
CHARACTERSCHARACTERSCHARACTERS
TERRA BRANFORD
A mysterious girl, born with the power of magic and enslaved by the
Gestahlian Empire. The secrets of her past and the reason for her
unusual abilities remain unknown...even to Terra herself.
SPECIAL ABILITY - MAGIC
Terra can use magic from the beginning
of the game, and learns new spells
as she rises in level.
MOG
A music- and dance-loving moogle who lives deep within the mines
of Narshe. Mog is exceptionally brave for a moogle, and will never
turn his back on those in need of aid.
SPECIAL ABILITY - DANCE
Mog can control the power of nature through his dance. He learns
new dances as he fights in different surroundings.
LOCKE COLE
A treasure hunter searching the world over for valuable relics
of the past. A certain turning point in his life led him to join an
underground Imperial-resistance group known as the
Returners. Locke will go to any length to protect those he loves.
SPECIAL ABILITY - STEAL
Locke can steal items from enemies in battle.
4
EDGAR RONI FIGARO
The young king of the technologically advanced kingdom of
Figaro. Edgar is exceedingly confident, optimistic...and a
notorious ladies' man.
SPECIAL ABILITY - TOOLS
Edgar can use an array of high-tech tools to attack enemies.
The effects of each tool are different.
5
Page 5
SABIN RENE FIGARO
Edgar's twin brother. Sabin left Figaro Castle at a young age to pursue a
life of freedom, choosing to undergo training as a monk. Headstrong
but humble, Sabin is Edgar's polar opposite.
SPECIAL ABILITY - BLITZ
Entering the proper command sequences allows Sabin to perform
powerful martial arts moves. He devises new blitz techniques as he
gains levels.
GAU
A boy abandoned on the Veldt and raised among monsters. He
may have trouble expressing his feelings through words, but that
doesn't stop him from caring about his friends as much as
anyone else.
SPECIAL ABILITIES - LEAP, RAGE
Gau can leap into packs of monsters on the Veldt, studying their
fighting styles and later using them in battle by means of his
Rage command.
CYAN GARAMONDE
A master swordsman hailing from the eastern kingdom of Doma. Cyan is a
man of honor who has sworn undying fealty to his king and country.
Doma's traditional culture has been slow to adopt modern technology,
leaving Cyan unexposed to most things mechanical.
SPECIAL ABILITY - BUSHIDO
When using a katana, Cyan can store up energy to unleash powerful
samurai sword techniques. He masters new techniques as he rises in level.
6
CELES CHERE
A former Imperial general. Celes was raised to be an elite Magitek
knight from a young age, acquiring the ability to use a limited
amount of magic through an experimental Magitek infusion.
SPECIAL ABILITY - RUNIC
Celes can use her sword as a lightning rod for magic,
harmlessly absorbing magic spells as MP.
7
Page 6
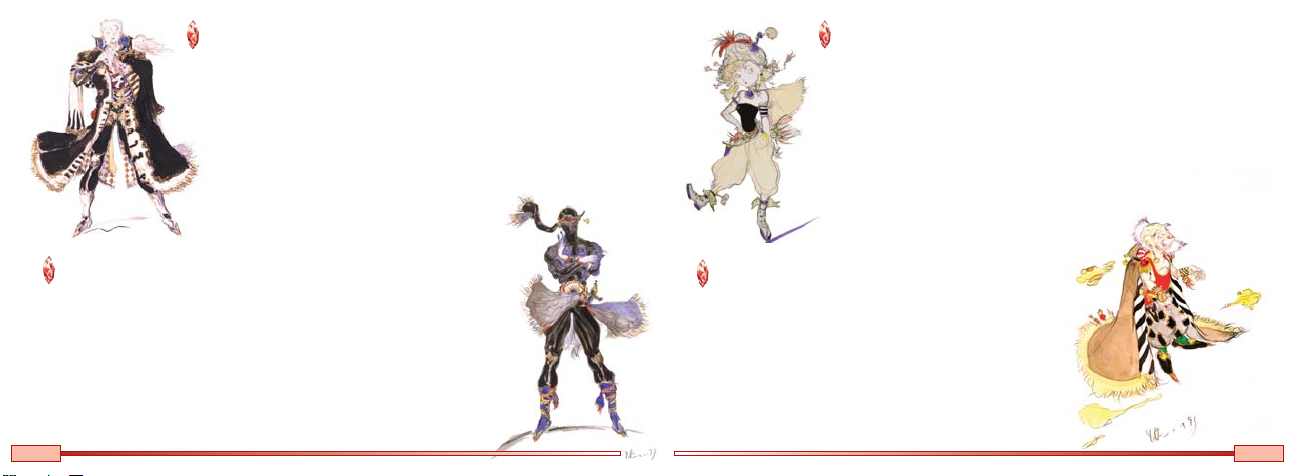
SETZER GABBIANI
The owner of the flying casino known as the Blackjack. A gambler
through and through, Setzer lives for thrills and pays little attention to
anything that is not of personal interest.
SPECIAL ABILITY - SLOT
Setzer can play a slot machine in battle, triggering various effects
depending on the results. Of course, Lady Luck is a fickle mistress, and
there's always a chance that things could go horribly wrong...
RELM ARROWNY
A young girl raised by Strago after her parents left her behind.
She loves to draw and paint, and always puts on a
happy-go-lucky performance to hide the loneliness that she truly
feels inside.
SPECIAL ABILITY - SKETCH
Relm can draw pictures of enemies that come to life and attack
her real foes. She may fail from time to time if the enemy is
particularly difficult to sketch.
SHADOW
An assassin who would as readily kill a man as help him, depending on
who was paying the bill. Cold and calculating, Shadow is a man of few
words. He travels with his dog, Interceptor, at all times.
SPECIAL ABILITY - THROW
Shadow can attack enemies by throwing items at them. The amount and
type of damage depend on the item that is thrown.
8
STRAGO MAGUS
An elderly gentleman who has spent his life pursuing the
secrets of monsters. Despite his age and appearance, he is full
of vitality and hates to be treated like an old man.
SPECIAL ABILITY - LORE
Strago is thoroughly versed in monster lore, and can learn to
cast the special blue magic spells used by monsters.
9
Page 7

BASIC CONTROLSBASIC CONTROLSBASIC CONTROLS
These are the basic controls for the game. For more specific information,
see the other sections of this booklet or follow the on-screen cues.
+CONTROL PAD
Move character
Move cursor
The character or cursor will move in the direction the
+Control Pad is pressed.
A BUTTON + B BUTTON
+ START + SELECT
Return to the title screen.
cursor
SELECT
Show/Hide world map
Skip character's turn in battle
START
Open main menu
Pause/Resume battle
L BUTTON, R BUTTON
Scroll through lists
Cycle through pages
Select multiple targets for a spell
Within menus, these buttons can be used to
cycle through the characters in your party.
B BUTTON
Cancel
Dash
(Press and hold to move faster in
towns and dungeons.)
L BUTTON +
R BUTTON
Press and hold to flee from battle.
A BUTTON
Confirm
Examine
Ta lk
Board airship
This button is the primary button
used for gathering information.
10
11
Page 8
GETTING STARTEDGETTING STARTEDGETTING STARTED
Insert the FINAL FANTASY VI Advance Game Pak into your Game Boy Advance system and turn the power on.
Load Game
This option allows you to continue a previously saved game. Use the +Control Pad to select one of the
three save files.
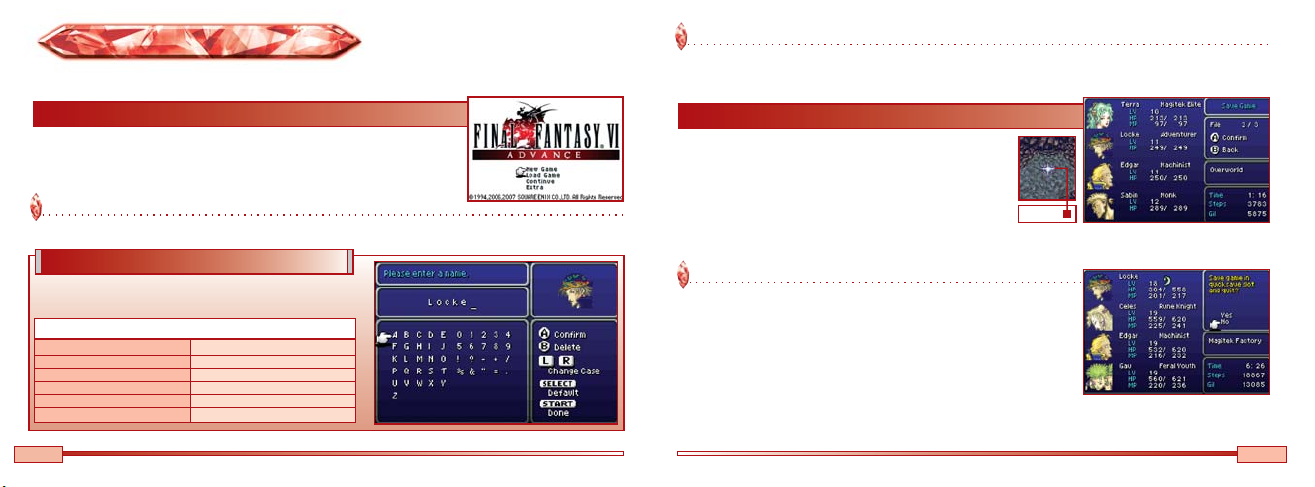
Starting a Game
Once the title screen appears, press any button to open the title menu. Select
the desired option from the menu to begin playing, or select “Extra" to access
extra features such as the Bestiary (see p. 28).
New Game
This option allows you to start playing from the beginning.
Name Entry
As you proceed through the game, you will be prompted to
enter names for certain characters.
Name Entry Screen Controls
+Control Pad Move cursor
A Button Enter selected letter
B Button Backspace
L Button / R Button Toggle uppercase or lowercase
START Confirm name and exit menu
SELECT Revert to default name
12
Saving a Game
You must save your game before quitting if you want to
continue playing later without losing any of the progress
you have made. Select “Save" from the main menu to save
your game (see p. 29). You can save at save points or
anywhere on the overworld map and may maintain up to
Save Point
three different saved games.
Quicksave
Selecting “Quicksave" from the main menu allows you to
temporarily save your game regardless of your location (see p. 29).
You can then select “Continue" at the title screen to resume playing
from the same point. Unlike a normal save file, the quicksave file
will be deleted once it has been loaded. It will also be deleted if you
select “New Game" or load any other saved game.
13
Page 9

GAME INTERFACEGAME INTERFACEGAME INTERFACE GETTING AROUNDGETTING AROUNDGETTING AROUND
FINAL FANTASY VI Advance utilizes three different types of views during the course of the game.
MENUS
Pressing START from any map will
open the main menu, where you
can make any necessary
preparations for your adventure.
EXPLORATION
(OVERWORLD/TOWNS/
DUNGEONS)
Most of the story will unfold
on these maps as you travel
around the world on your
adventure.
14
BATTLE
The battle screen appears if you
encounter enemies while exploring.
Select commands from the menu to
fight.
In the game world's various locations, you will need to talk to other characters, purchase items, and reach
certain destinations.
Map Screens
There are two different types of
Overworld
Town/Dungeon
map screens: the overworld map,
and town and dungeon maps.
World Map
From the overworld map, you can press SELECT to toggle the display of the small
world map in the lower right-hand corner of the screen. Your current location is
indicated by the red dot on this map. When riding a chocobo or flying an airship, a
smaller red dot will also be shown to indicate the direction you are facing.
15
Page 10

Talk/Examine
You can talk to other characters or examine objects by pressing the A
Button. Speaking to others may sometimes yield valuable information.
Parties
During the course of your adventure, you will control a party composed of up to four members.
Changing Party Members
As you proceed through the game, you will eventually be able to
choose which characters to include in your party. Talk to any ally
who is not currently in your party to open the party formation
screen shown on the right. Move the desired characters into the
party window, and then press START to confirm your choice.
Party Window
Controlling Multiple Parties
At certain points during the game, you will control multiple parties at once.
You can press SELECT to switch between them.
Modes of Transportation
Walking is not the only way to move around on the overworld map.
CHOCOBO
You can rent chocobos at chocobo
stables. These swift-moving birds
will allow you to get to your
destination quickly, and without
Chocobo Controls
+Control Pad Up: Move forward, Left/Right: Turn
A Button Move forward
B Button Dismount
L Button and +Control Pad Left Sharp left turn
R Button and +Control Pad Right Sharp right turn
encountering enemies. Chocobos
return to their stables as soon as
you dismount.
AIRSHIP
Airships are large, fast-flying
ships. Stand over an airship and
press the A Button to take off.
Airship Controls
+Control Pad Up: Descend, Down: Ascend,
Left/Right: Turn
A Button Move forward
B Button Land (only over level ground)
L Button and +Control Pad Left Sharp left turn
R Button and +Control Pad Right Sharp right turn
START Go amidships
L Button + R Button Move in any direction
and +Control Pad without turning
16
18
17
19
Page 11

Shops and Services
You will find a variety of helpful shopkeepers in towns that will provide
services in exchange for gil (the currency of the game world).
Shopping
Speak to a shopkeeper to open the shop menu. Select “Buy" if you want to purchase items, or “Sell"
if you want to sell unneeded items in your inventory. Select an item you want to buy or sell from the
list, adjust the quantity with the +Control Pad, then press the A Button to confirm the transaction.
Inn Weapon Shop Armor Shop
Staying at an inn allows party members to recover
HP and MP, and also removes all status effects
(see p. 39).
Chocobo Stable
At chocobo stables, you can rent chocobos to ride
on the overworld map (see p. 17). Chocobos are
especially useful when traveling over great distances.
Item Shop Relic Shop
Adventurer's School
You can receive some very helpful hints at the adventurer's school
in Narshe. It may be worth your while to stop in sometime and see
what you can learn.
18
18
You can buy and sell items and
equipment at these shops.
Inventory will vary from one
merchant to another.
Items and Prices
Equipment Comparison
Characters who can equip the
selected item will raise their
hands, and a white arrow ( )
will appear beneath each character currently in your party. In the case of weapons
or armor, the following icons are shown to the left of characters who can equip the
selected item to indicate how the item compares to the one currently equipped.
Stronger Weaker
No Change Already Equipped
Your G il
Quantity
Owned/Equipped
19
19
Page 12

MAIN MENUMAIN MENUMAIN MENU
Pressing START from the overworld map, or any town or dungeon, will open the main menu.
Menu Screen
The character in the uppermost slot is the one who will appear on the map screen.
Character Information
Menu Commands (see pp.22-29)
Current Location
Time Played
Step Count
Party Funds
Character Information
Basic information is displayed for each character, such as the character's level and HP and MP totals.
2
3
4
1
Status Icon
Icons are shown if there are any status effects on the character (see p. 39).
2
Level
A character's level increases after the character gains enough experience points (EXP) in battle.
3
HP / Max HP
Hit points are lost when a character is hurt in combat or by other means.
4
MP / Max MP
Magic points are used to cast magic spells.
1
Formation
The portraits of characters in the front row are aligned slightly to the
left, and those of characters in the back row are aligned slightly to the
right. You can move characters between the two rows or rearrange
Front Row
Back Row
your party members by selecting “Formation" from the main menu.
20
21
Page 13

MENU COMMANDSMENU COMMANDSMENU COMMANDS
This section provides a detailed explanation of each command displayed in the main menu.
Items
This menu allows you to view and use the items in your inventory. You can use the L and R Buttons to
quickly scroll through the list.
Item Submenu
Press the B Button to move
the cursor to the submenu.
Inventory
Items that can be
used are displayed
in white.
Submenu Commands
Use Allows you to select an item and use it.
Sort Sorts the item list by category.
Rare Shows special items that are
important to your quest.
Using Items
Move the cursor next to the name of an item displayed in white and
press the A Button twice to use it. Depending on the item, you may
be prompted to select a target character.
Selecting a piece of equipment instead of a usable item will show
detailed information about the item, such as the list of characters
who can equip it.
Rearranging Your Inventory
You can rearrange the items in your inventory. First select an item
and press the A Button once, then select another item and press the
A Button again. The positions of the two items will be exchanged.
Item Types
There are numerous item categories in the game, and a different icon is displayed for each one.
Knife Sword Polearm Katana Rod Throwing Weapon /
Flail
Brush Claws Gambling Shuriken Scroll
Equipment
Tool Shield Helm Armor Relic
22
23
Page 14

Abilities
This menu allows you to view information about the abilities a character
has learned. Select a category to view the list of known abilities. You can
also cast magic spells by selecting “Magic" or equip magicite by
selecting “Espers."
Equip
Select “Equip" from the main menu to view or change your characters' currently equipped weapons and
armor. Keep in mind that the set of weapons and armor that each character can equip is different.
Note: To view the entire party's current equipment, select “Equip" from the main menu, press +Control Pad Left or Right to select all party members, and
then press the A Button.
Casting Spells on the Entire Party
Some magic spells can be cast on the entire party. Press either the L or R Button or +Control
Pad Left or Right to select all party members, then press the A Button to cast the spell.
24
18
Equip Submenu
Equippable Items
Current Equipment
Character Attributes
Attributes that will be raised
by equipping the selected item
are shown in yellow, and those
that will be lowered are shown
in gray.
Submenu Commands
Equip Allows you to change the character's
equipment. Select the desired location,
and then choose a piece of equipment
from the list.
Optimize Automatically equips the items that will
raise the character's attributes the most.
Remove Allows you to remove individual pieces
of equipment from the character.
Remove All Removes all weapons and armor from
the character.
25
19
Page 15

Relics
This menu allows you to view and change the relics equipped to each
character. If a relic that affects the rules for equipping weapons or armor
is equipped or removed, you will automatically be sent to the Equip
menu (see p. 25).
Note: To view the entire party's list of equipped relics, select “Relics" from the main menu, then press
+Control Pad Left or Right to select all party members and press the A Button.
Status
The Status screen displays various information about the character, such
as his or her experience point totals, attributes, and current equipment.
About Relics
Relics provide characters with various abilities when equipped. Each character can equip up to two relics.
Some examples of relics and their effects are listed below.
Sprint Shoes Doubles walking speed in towns and dungeons.
Jeweled Ring Prevents petrification (see p. 39).
Muscle Belt Provides a 50% bonus to max HP.
Brigand's Glove Turns Locke's “Steal" command into the more powerful “Mug."
Gauntlet Allows a character to grip a weapon with both hands, doubling its attack power.
Knight's Code Causes a character to automatically cover wounded allies in combat.
26
18
You can press the A Button on this screen to
toggle the information displayed.
Attributes
Each character has the following attributes, which may be higher or lower than those of others
depending on the character's equipment.
Strength Affects the amount of damage dealt by the character ’s physical attacks.
Speed Affects the amount of time between turns in combat.
Stamina Affects HP recovery.
Magic Affects the amount of damage dealt by the character's magical attacks.
Attack The total power behind the character's physical attacks.
27
19
Page 16

Formation
Select a character and press the A
Button twice to move the
character from the front row to
the back row, or vice versa (see p.
34). You can also press the A
Button once to select a character,
then select a different character to make them exchange places.
Quicksave
This command allows you to temporarily save your game and quit
playing at any point in time (see p. 13).
Config
This menu allows you to adjust system settings, such as battle mode
and window/font colors.
Bestiary
Accessible via the Config menu as well as from the title screen menu, the
Bestiary allows you to view detailed information about all of the monsters
you have defeated, such as their various attributes and the items they carry.
28
18
Save
Select this command to save your game to one of the three save files. You
can only save your game from the overworld map or at a save point.
Overworld
Save Point
29
19
Page 17

B ATTLEBATTLEB ATTLE
The battle screen appears whenever you encounter enemies. Choose battle commands for each character
from the menu to defeat the enemies before they defeat you.
Active Time Battle (ATB) System
Time is always flowing during battle. You will be prompted to choose battle commands for each party
member whenever the character's ATB gauge becomes full. Time continues to flow even while you are
selecting commands, so don't expect enemies to
wait around while you decide what to do.
If you set the battle mode to “Wait" in the Config
menu (see p. 28), time will stop while you are
selecting abilities, items, or magic spells from
submenus in battle.
End of Battle
Once you defeat all of the enemies, the battle is over. You will receive
money (gil), experience points, magic acquisition points, and
sometimes items.
Game Over
If all of your party members are KO'd, petrified, or turned into
zombies (see p. 39), the battle is lost and the game will end. You
will then have to restart from the last location where you saved the
game. Any items or gil you had acquired since your last save will
have to be obtained again, but you will retain any experience points
or levels you had earned.
Characters' HP
and ATB Gauges
The higher a character's speed (see p. 27),
Battle Commands (see pp. 32-34)
30
the faster his or her ATB gauge will fill.
Pausing the Battle
You can press START during battle to pause the game. Press START again to unpause it.
31
Page 18

BATTLE COMMANDSBATTLE COMMANDSBATTLE COMMANDS
This section provides a basic explanation of the commands available in battle.
Attack
This command makes a character attack the selected target with his or
her fists or currently equipped weapon.
Special Commands
There are several character-specific battle commands, such as Locke's
“Steal" and Edgar's “Tools." Some of these commands work in unique
ways (see pp. 36-37).
Skipping Turns
You can skip a character's turn without entering a command by pressing SELECT. Control will shift to
the next character with a full ATB gauge.
32
Magic
This command allows a character to use MP to cast spells that he or she
knows. Select a spell from the list, and then choose the target.
Selecting Multiple Targets
Some spells can be cast on your entire party or the entire enemy party. Press the L or R Button to toggle
between single-target and whole-party selection.
Items
This command allows a character to use items from the party's
inventory. Select an item from the list, and then choose the target.
Changing Equipment
Pressing +Control Pad Up when the cursor is at the top row of the
item list will open a window showing the items equipped to each of
the character's hands. You can swap these items for different pieces
of equipment by selecting one with the A Button and then selecting
a different item from the item list.
33
Page 19

Defend
Pressing +Control Pad Right at the battle menu will display the “Defend" command. This command causes
a character to take up a defensive stance, reducing damage from physical attacks.
Note: If you have changed the command settings to "Shortcut" in the Config menu (see p. 28), pressing the R Button will display the command.
Row
Pressing +Control Pad Left at the battle menu will display the “Row" command. This command causes a
character to move from the front row to the back row, or vice versa.
Note: If you have changed the command settings to “Shortcut" in the Config menu (see p. 28), pressing the L Button will display the command.
Battle Conditions
Battles may sometimes take place under the following special conditions.
PREEMPTIVE STRIKE
All of your party members
begin battle with full
ATB gauges.
SIDE ATTACK
Your party members
surround the enemies and
begin battle with full ATB
gauges. Characters deal
additional damage if they
attack enemies whose backs
are turned to them.
Front Row vs. Back Row
Characters in the back row receive less damage
from physical attacks, but also deal less damage
with their own.
Fleeing
You can attempt to flee from battle by pressing and holding both the L
and R Buttons. Some enemies are more difficult to escape from than
others, and there are some enemies from which you cannot run.
34
Front Row
Back Row
SURROUNDED
The enemies surround your
party and gain a preemptive
strike. Enemies deal additional
damage if they attack
characters whose backs are
turned to them.
BACK ATTACK
Characters in the front row
begin battle in the back row,
and those in the back row
begin battle in the front row.
The enemies also gain a
preemptive strike.
35
Page 20

SPECIAL ABILITIESSPECIAL ABILITIESSPECIAL ABILITIES
Many character-specific abilities can be used in battle. Some of these abilities have their own unique rules
and control schemes.
Leap / Rage (Gau)
When Gau uses his “Rage" ability, he will fight as if he were the selected
type of monster. He can add new types of monsters to his repertoire via
his “Leap" command, which appears only when he is on the Veldt.
Blitz (Sabin)
First select the “Blitz" command from the menu, and then enter the
button sequence for the desired technique. Press the A Button when you
are finished to make Sabin perform the technique.
Button Sequences
The list of button sequences for Sabin's blitz techniques can be accessed via the main menu. Select
“Abilities" (see p. 24), then select Sabin. Finally, select “Blitz" to view the list.
Bushido (Cyan)
After selecting Cyan's “Bushido" command in battle, the
gauge shown on the right will appear and begin to fill.
Press the A Button when it reaches the number of the desired technique
to perform that technique.
36
Using "Leap"
Gau's “Leap" command causes him to jump into the pack of
monsters the party is fighting and immediately ends the battle. If
you continue fighting on the Veldt, Gau will eventually reappear
and rejoin your party. When he does, he will have learned the
combat techniques of the monsters you were fighting when he
leaped, as well as those you were fighting when he returned.
Slot (Setzer)
Selecting Setzer's “Slot" ability opens a window containing three
spinning reels. Press the A Button to stop each of them in turn.
Depending on the resulting symbol combination, various effects
can occur.
37
Page 21

STATUS EFFECTSSTATUS EFFECTSSTATUS EFFECTS
Certain enemy attacks and magic spells can inflict characters with status effects.
Stop Character becomes unable
to act.
Sap Character's HP
gradually dwindles.
In-Battle Effects
The following effects disappear automatically at the end of battle. They can also be cured during battle with
items or magic. Sleep and confusion are canceled if the character is physically attacked.
Sleep Character falls asleep and
cannot act.
Confusion Character becomes confused
and attacks allies.
Silence Character becomes unable
to cast magic.
Doom Character is KO'd when
the countdown reaches zero.
Berserk Character performs physical
attacks on every turn.
38
Reflect Magic bounces back at
the caster.
Protect Defense is increased.
Shell Magic defense is increased.
Haste Speed is increased.
Slow Speed is decreased.
Lasting Effects
The following status effects do not go away at the end of battle and must be removed with items or magic or
by staying at an inn.
Note: Icons indicating these status effects are shown next to the names of affected characters in the main menu (see p. 21).
KO Character has 0 HP and
cannot act.
Petrification Character is turned to stone
and cannot act.
Invisibility Character becomes invisible
and cannot be hit by
physical attacks. The effect
is cancelled if the character
is hit by magic.
Poison Character is poisoned
and gradually loses HP
in battle or when walking.
Zombie Character is turned undead
and sometimes attacks allies.
Float Character floats in midair
and cannot be hit by attacks
from the ground.
39
Page 22

ESPERSESPERSES PERS
During the course of the adventure, your characters will acquire what is known as magicite and gain the
ability to use magic and summon creatures known as espers.
Espers and Magicite
Espers possess magical powers. By equipping magicite, the crystallized essence of an esper's power,
characters can learn magic spells and gain the ability to summon the mystic beasts.
Equipping Magicite
To equip a piece of magicite, first select “Abilities" from the main menu, then select “Espers." The list of
magicite in your party's possession will be displayed, with the names of those not currently equipped shown
in white. If you select a piece of magicite and press the A Button, the list of spells that can be learned from it
will be displayed along with their respective acquisition rates (see p. 43) and other information, such as the
magicite's level-up bonus. Press A
again to equip the magicite. To
unequip a piece of magicite, simply
select an empty space where no
esper's name is displayed and press
the A Button.
Summoning Espers
Characters equipped with magicite can summon espers in battle.
Select "Magic"
Select the “Magic" command from the battle menu (see p. 33) and
the list of magic spells known by the active character will appear.
Select the Esper
When the list of magic appears, move the cursor to the top row and
then press +Control Pad Up once more. The name of the esper the
character can summon will be shown, along with the MP cost of
summoning it. Press the A Button to summon the esper.
Level-Up Bonuses
Some magicite provides a permanent increase to a certain attribute whenever the character equipping it
gains a level. For example, Ramuh provides a one-point boost to the character's stamina attribute.
40
41
Page 23

Learning Magic
Characters can learn magic spells from the magicite they equip.
Magic Acquisition Points
If your characters have magicite equipped, they will earn magic
acquisition points (AP) at the end of every battle. These points are
multiplied by a spell's acquisition rate and added to the character's
progress toward learning that spell.
Mastering Spells
Once a character's progress in
learning a spell reaches 100%,
the character masters the spell
and gains the ability to use it
in battle or through the main
menu.
Unequipping magicite does not cause characters to lose progress toward learning spells.
Acquisition Rates
Each spell that can be learned from a piece of magicite has an acquisition rate. For example, Kirin
teaches Cure at a rate of x5. This means that a character's progress toward learning Cure will advance
by 5% for each magic acquisition point earned while equipping this magicite.
Acquisition rates for the same spell vary between magicite.
Kirin teaches Cure at a rate of x5.
Shiva teaches Cure at a rate of x3.
Other Ways to Learn Magic
Equipping certain armor or relics allows characters to learn spells in the
same way as magicite. The spell acquisition rates can be found by viewing
the item details (see p. 23).
42
43
Page 24

MAGICITE & SPELL LISTSMAGICITE & SPELL LISTSMAGICITE & SPELL LISTS
Spell List
The following lists are a sampling of the magicite you will obtain during the course of the game and the
magic that you can learn by equipping it.
Magicite List
The multiplier in parentheses is the acquisition rate for the spell. The level-up bonus (if there is one) is
shown in the upper right.
Ramuh
Bathes all enemies in lightning.
Thunder (x10) Thundara (x2)
Poison (x5)
Kirin
Gradually restores the party's HP.
Cure (x5) Cura (x1) Regen (x3)
Poisona (x4) Libra (x5)
Siren
Silences all enemies.
Sleep (x10) Silence (x8)
Slow (x7) Fire (x6)
44
Stamina +1
HP +10%
Ifrit
Strength +1
Scorches all enemies in a fiery blaze.
Fire (x10) Fira (x5)
Drain (x1)
Shiva
Envelops all enemies in an arctic chill.
Blizzard (x10) Blizzara (x5) Rasp (x4)
Osmose (x4) Cure (x3)
Cure Restores HP (or deals damage to undead).
Cura Restores more HP than Cure.
Raise Revives a KO'd character (or slays undead).
Poisona Cures poison status.
Esuna Cures most status ailments.
Regen Gradually restores HP.
Fire Attacks with fire (light damage).
Blizzard Attacks with ice (light damage).
Thunder Attacks with lightning (light damage).
Poison Inflicts poison.
Drain Absorbs HP from the target.
Fira Attacks with fire (moderate damage).
Blizzara Attacks with ice (moderate damage).
Thundara Attacks with lightning (moderate damage).
Libra Reveals information about an enemy.
Rasp Deals MP damage.
Silence Inflicts silence.
Sleep Inflicts sleep.
Confuse Inflicts confusion.
Imp Turns target into an imp (or reverts an imp target).
Osmose Absorbs MP from the target.
Teleport Teleports the party out of a dungeon or battle.
45
Page 25

NOTE SNOTESNOTE S
46
47
Page 26

Important Legal Information
Copying of any video game for any Nintendo system is illegal and is strictly prohibited
by domestic and international intellectual property laws. “Back-up” or “archival” copies
are not authorized and are not necessary to protect your software. Violators will be
prosecuted.
This Nintendo game is not designed for use with any unauthorized copying device or
any unlicensed accessory. Use of any such device will invalidate your Nintendo product
warranty. Nintendo (and/or any Nintendo licensee or distributor) is not responsible for
any damage or loss caused by the use of any such device. If use of such device
causes your game to stop operating, disconnect the device carefully to avoid damage
and resume normal game play. If your game ceases to operate and you have no
device attached to it, please contact Nintendo Customer Service (see below).
The contents of this notice do not interfere with your statutory rights.
This booklet and other printed materials accompanying this game are protected by
domestic and international intellectual property laws.
For further information or assistance, please contact:
Nintendo Consumer Service
www.nintendo.com
or call 1-800-255-3700
(U.S. and Canada)
48
REV-D
Warranty & Service Information
You may need only simple instructions to correct a problem with your product. Try our website at www.nintendo.com or call our Consumer Assistance
Hotline at 1-800-255-3700, rather than going to your retailer. Hours of operation are 6 a.m. to 7 p.m., Pacific Time, Monday - Sunday (times subject to change). If the
problem cannot be solved with the troubleshooting information available online or over the telephone, you will be offered express factory service through Nintendo.
Please do not send any products to Nintendo without contacting us first.
HARDWARE WARRANTY
Nintendo of America Inc. ("Nintendo") warrants to the original purchaser that the hardware product shall be free from defects in material and workmanship for twelve
(12) months from the date of purchase. If a defect covered by this warranty occurs during this warranty period, Nintendo will repair or replace the defective hardware
product or component, free of charge. The original purchaser is entitled to this warranty only if the date of purchase is registered at point of sale or the consumer can
demonstrate, to Nintendo's satisfaction, that the product was purchased within the last 12 months.
GAME & ACCESSORY WARRANTY
Nintendo warrants to the original purchaser that the product (games and accessories) shall be free from defects in material and workmanship for a period of three (3)
months from the date of purchase. If a defect covered by this warranty occurs during this three (3) month warranty period, Nintendo will repair or replace the defective
product, free of charge.
SERVICE AFTER EXPIRATION OF WARRANTY
Please try our website at www.nintendo.com or call the Consumer Assistance Hotline at 1-800-255-3700 for troubleshooting information and repair or replacement
options and pricing. In some instances, it may be necessary for you to ship the complete product, FREIGHT PREPAID AND INSURED FOR LOSS OR DAMAGE, to
Nintendo. Please do not send any products to Nintendo without contacting us first.
WARRANTY LIMITATIONS
THIS WARRANTY SHALL NOT APPLY IF THIS PRODUCT: (a) IS USED WITH PRODUCTS NOT SOLD OR LICENSED BY NINTENDO (INCLUDING, BUT NOT
LIMITED TO, NON-LICENSED GAME ENHANCEMENT AND COPIER DEVICES, ADAPTERS, AND POWER SUPPLIES); (b) IS USED FOR COMMERCIAL
PURPOSES (INCLUDING RENTAL); (c) IS MODIFIED OR TAMPERED WITH; (d) IS DAMAGED BY NEGLIGENCE, ACCIDENT, UNREASONABLE USE, OR BY
OTHER CAUSES UNRELATED TO DEFECTIVE MATERIALS OR WORKMANSHIP; OR (e) HAS HAD THE SERIAL NUMBER ALTERED, DEFACED OR REMOVED.
ANY APPLICABLE IMPLIED WARRANTIES, INCLUDING WARRANTIES OF MERCHANTABILITY AND FITNESS FOR A PARTICULAR PURPOSE, ARE HEREBY
LIMITED IN DURATION TO THE WARRANTY PERIODS DESCRIBED ABOVE (12 MONTHS OR 3 MONTHS, AS APPLICABLE). IN NO EVENT SHALL NINTENDO
BE LIABLE FOR CONSEQUENTIAL OR INCIDENTAL DAMAGES RESULTING FROM THE BREACH OF ANY IMPLIED OR EXPRESS WARRANTIES. SOME
STATES DO NOT ALLOW LIMITATIONS ON HOW LONG AN IMPLIED WARRANTY LASTS OR EXCLUSION OF CONSEQUENTIAL OR INCIDENTAL DAMAGES,
SO THE ABOVE LIMITATIONS MAY NOT APPLY TO YOU.
This warranty gives you specific legal rights. You may also have other rights which vary from state to state or province to province.
Nintendo's address is: Nintendo of America Inc., P.O. Box 957, Redmond, WA 98073-0957 U.S.A.
This warranty is only valid in the United States and Canada.
REV-P
49
 Loading...