

Page 1
61220A
P.O. Box 957, Redmond, WA 98073-0957 U.S.A.
Nintendo of America Inc.
www.nintendo.com
PRINTED IN USA
INSTRUCTION BOOKLET
Page 2

61220A
PLEAS E CA RE FU LLY REA D TH E SE PARATE HE ALTH AND SA FE TY
PRECA UT IO NS B OO KLET IN CL UD ED W ITH T HI S PR OD UC T BEF OR E
USING Y OU R NI NT ENDO® HARD WA RE SYSTEM , GA ME C ARD OR
ACCES SO RY. T HI S BO OKLET C ON TAI NS IMPORTA NT HEALTH AND
SAFET Y IN FO RM ATIO N.
IMPOR TAN T SAFET Y IN FO RM ATIO N: R EA D THE F OL LO WI NG
WAR NI NG S BEFORE YO U OR Y OUR CHI LD P LAY VIDEO G AM ES .
WARNING - Seizures
• Some people (about 1 in 4000) may have seizures or blackouts triggered by light flashes or patterns,
such as while watching TV or playing video games, even if they have never had a seizure before.
• Anyone who has had a seizure, loss of awareness, or other symptom linked to an epileptic condition
should consult a doctor before playing a video game.
• Parents should watch when their children play video games. Stop playing and consult a doctor if you or
your child have any of the following symptoms:
Convulsions Eye or muscle twitching Loss of awareness
Altered vision Involuntary movements Disorientation
• To reduce the likelihood of a seizure when playing video games:
1. Sit or stand as far from the screen as possible.
2. Play video games on the smallest available television screen.
3. Do not play if you are tired or need sleep.
4. Play in a well-lit room.
5. Take a 10 to 15 minute break every hour.
WARNING - Radio Frequency Interference
The Nintendo DS can emit radio waves that can affect the operation of nearby electronics, including
cardiac pacemakers.
• Do not operate the Nintendo DS within 9 inches of a pacemaker while using the wireless feature.
• If you have a pacemaker or other implanted medical device, do not use the wireless feature of the
Nintendo DS without first consulting your doctor or the manufacturer of your medical device.
• Observe and follow all regulations and rules regarding use of wireless devices in locations such as
hospitals, airports, and on board aircraft. Operation in those locations may interfere with or cause
malfunctions of equipment, with resulting injuries to persons or damage to property.
WARNING - Repetitive Motion Injuries and Eyestrain
Playing video games can make your muscles, joints, skin or eyes hurt after a few hours. Follow these
instructions to avoid problems such as tendinitis, carpal tunnel syndrome, skin irritation or eyestrain:
• Avoid excessive play. It is recommended that parents monitor their children for appropriate play.
• Take a 10 to 15 minute break every hour, even if you don't think you need it.
• When using the stylus, you do not need to grip it tightly or press it hard against the screen. Doing so
may cause fatigue or discomfort.
• If your hands, wrists, arms or eyes become tired or sore while playing, stop and rest them for several
hours before playing again.
•
If you continue to have sore hands, wrists, arms or eyes during or after play, stop playing and see a doctor.
WARNING - Battery Leakage
The Nintendo DS contains a rechargeable lithium ion battery pack. Leakage of ingredients contained within the
battery pack, or the combustion products of the ingredients, can cause personal injury as well as damage to your
Nintendo DS.
If battery leakage occurs, avoid contact with skin. If contact occurs, immediately wash thoroughly with soap and
water. If liquid leaking from a battery pack comes into contact with your eyes, immediately flush thoroughly with
water and see a doctor.
To avoid battery leakage:
• Do not expose battery to excessive physical shock, vibration, or liquids.
• Do not disassemble, attempt to repair or deform the battery.
• Do not dispose of battery pack in a fire.
• Do not touch the terminals of the battery, or cause a short between the terminals with a metal object.
• Do not peel or damage the battery label.
Page 3
61220A
THIS GAME CARD WILL WORK
The official seal is your assurance
that this product is licensed or
manufactured by Nintendo. Always
look for this seal when buying
video game systems,
accessories, games
and related
ONLY WITH THE NINTENDO DS
VIDEO GAME SYST EM.
Wireless DS
Single-Card
Download Play
1-2*
THIS GAME ALLOWS WIRELESS MULTIPLAYER
GAMES WITH EACH DS SYSTEM CONTAINING
A SEPARATE GAME CARD.
*Demo Version
1-2
Wireless DS
Multi-Card
Play
products.
Nintendo does not license the sale or use of products
without the Official Nintendo Seal.
Nintendo's game pages, at www.nintendo.com/games, feature
walkthroughs, frequently-asked questions, and codes for many of our
games. If your answer isn't there, check out our forums where you can
If you don't have access to the web-site, recorded tips for many titles are
available on Nintendo's Power Line at (425) 885-7529. This may be a long-
distance call, so please ask permission from whoever pays the phone bill.
exchange tips with other gamers online.
For more information about our forums, visit
www.nintendo.com/community.
© 2006 Nintendo. Developed by Nintendo Software Technology Corporation. TM, ® and the Nintendo DS logo are trademarks
of Nintendo. © 2006 Nintendo. This product uses the LC Font by Sharp Corporation. LCFONT, LC Font and the LC logo mark are
trademarks of Sharp Corporation. All Rights, including the copyrights of Game, Scenario, Music and Program, reserved by NINTENDO.
TM
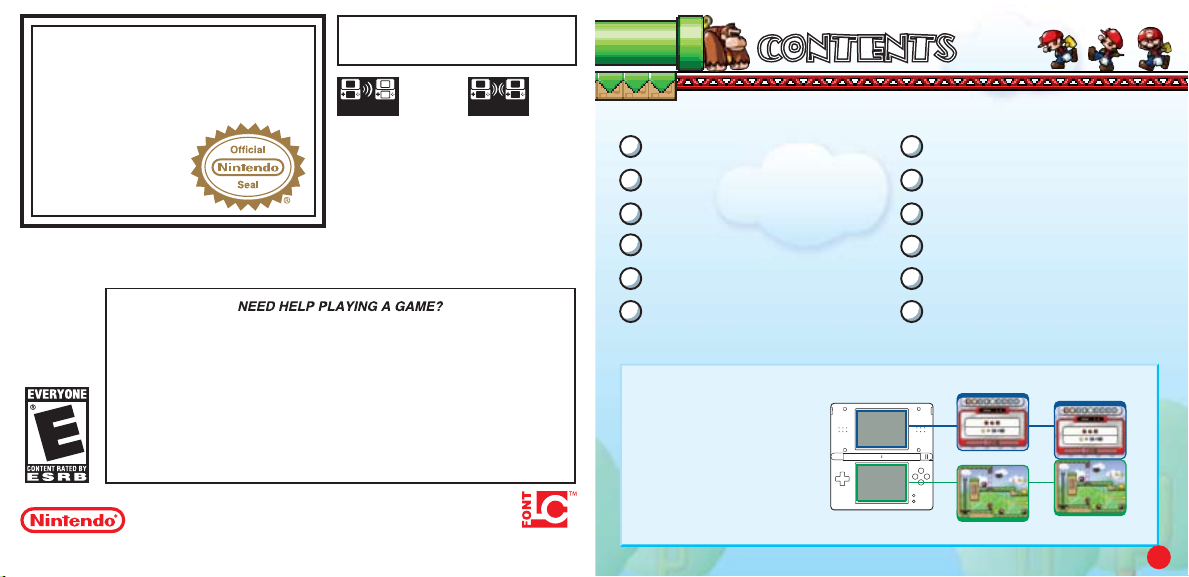
5
CONTE NTS
6
STORY AND CHARACTER S
8
START ING THE GAME
1O
CONTR OLS
14
GAME SCREEN AND RUL ES
16
HOW T O PLAY
In this instruction booklet,
you will see the top screen
and bottom screen
(Touch Screen) displayed
as shown on the right.
CONTENTS
CONTENTS
18
SPECI AL STAGES
2O
ITEMS AND MECHANISM S
22
DS DO WNLOAD PLAY
23
HINTS
24
CONST RUCTION ZONE
28
NINTE NDO Wi-Fi CONN ECTION
Top Screen
Bottom Screen
Both screens
together
5
Page 4
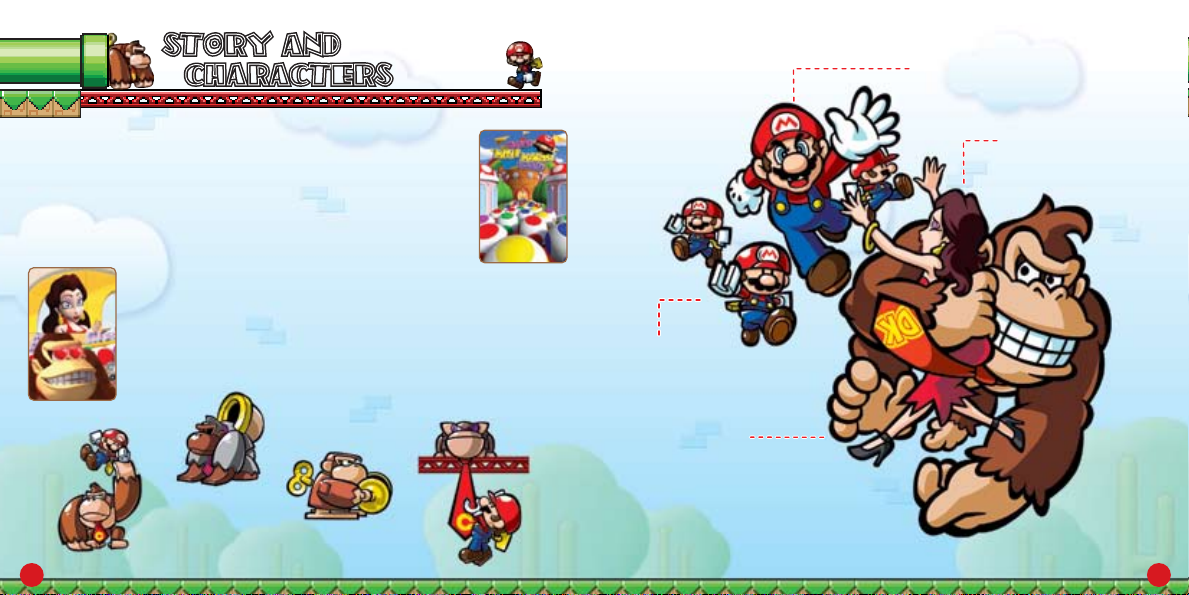
STORY AND
STORY AND
CHARACTERS
CHARACTERS
The Mario Toy Company’s new toy, the Mini Mario, is a smash
hit! The Mini Mario has raked in so much money that the
company’s superstar president, Mario, has decided to open
a toy-filled theme park called Super Mini Mario World.
Today is the grand opening of Super Mini Mario World.
Lots of people have come to watch the festivities.
UNFORTUNATELY…
Donkey Kong has kidnapped the gorgeous guest of honor,
Pauline, and locked himself on the roof of the building
with her!
Can President Mario save Pauline and stop the
marauding ape?
MONKEY ROBOTS
These mechanical monkey robots will
stop at nothing to get in Mario’s way.
MINI MARIOS
The Mario Toy Company’s
best-selling toys.
DONKEY KONG
The Mario Toy Company’s
hairiest employee. He instantly
fell in love with Pauline as soon as
he saw her at the theme park’s opening
ceremony, and now the jealous ape
has run off with her!
MARIO
The Mario Toy Company’s
esteemed president.
PAULINE
Mario’s glamorous
friend.
76
Page 5
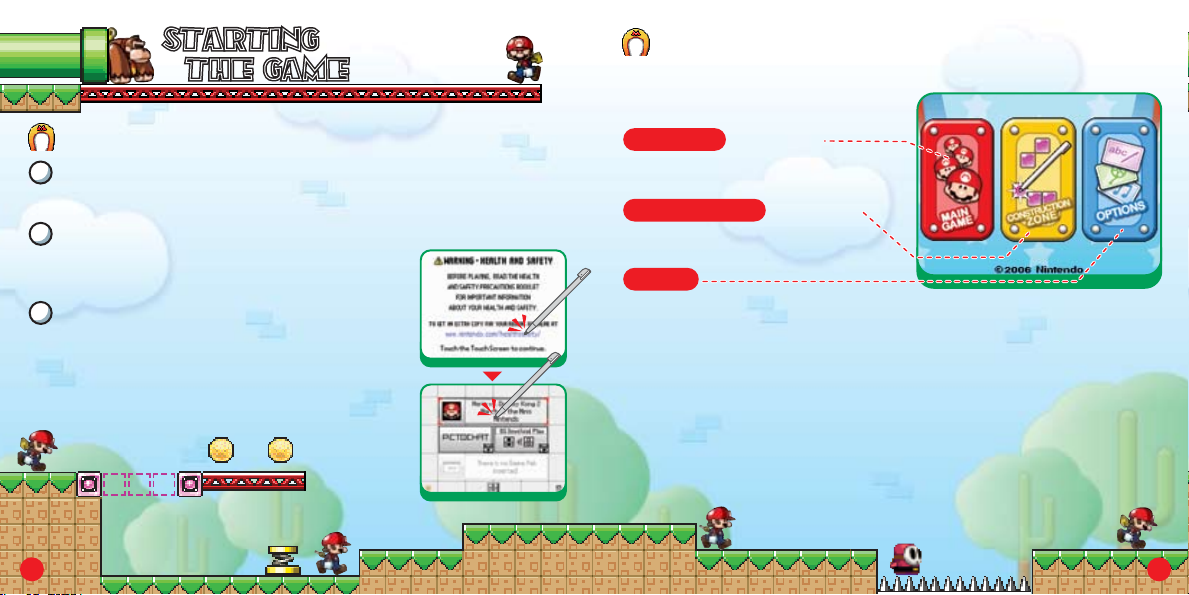
STARTING
STARTING
THE GAME
THE GAME
SELECT A MODE
From the title screen, just tap the panel of the mode you want to play.
Tap again to start playing.
STARTING THE GAME
Make sure your Nintendo DS is shut off before you insert the
1
Mario vs. DK 2 Game Card. Insert the card completely.
Turn on the power and read the displayed information on the screen
2
shown on the right. When you're done, tap the
Touch Screen.
Tap the Mario vs. DK 2 panel to start the game.
3
*You will not need to do this if you have set your
Nintendo DS to start software automatically.
Please see your Nintendo DS instruction booklet
for more information.
8
Main Game (page 16)
In this mode, your goal is to clear
all of the stages to save Pauline.
Construction Zone (page 24)
Design your own levels and trade
them with your friends here.
Options
Choose an item from the options below to change your settings.
Audio Choose output and volume settings for game sound.
Showroom View illustrations, movies, and staff credits here.
Register Change the nickname you will use in the
Construction Zone.
Erase All Erase saved data.
Single Card Send a demo version to another Nintendo DS
NintendoWiFi.com Choose whether or not to upload your levels and
Features gameplay stats to NintendoWiFi.com. Also, your levels
may be selected by Nintendo to be available for play
by other Nintendo WFC players.
(page 22).
9
Page 6
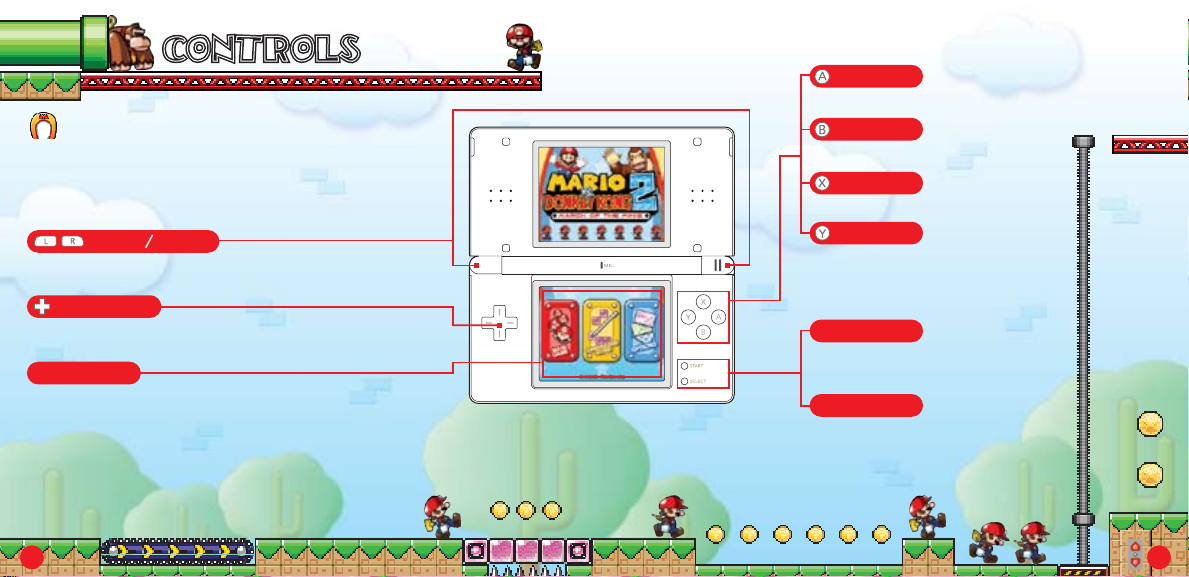
CONTROLSCONTROLS
BASIC CONTROLS
In this game, you can control your Mini Marios simply by
using your stylus on the Touch Screen. See pages 12-13
for more information.
L Button/R Button
(DK stages only) Boss cannon indicator (page 18).
Control Pad
Scroll around the level.
Touch Screen
Control Mini Marios (page 12).
A Button
Scroll view to the right.
B Button
Scroll view down.
X Button
Scroll view up.
Y Button
Scroll view to the left.
START
Go to the pause menu
(page 15).
SELECT
SOFT RESET
Press and hold the L Button, R Button, SELECT, and START simultaneously to
restart the game. If you do this in the middle of a stage, you will lose
your progress, so please be careful.
SLEEP MODE
To put your Nintendo DS into Sleep Mode and conserve battery
power, simply close it during play. Open it to leave Sleep Mode.
111O
Page 7

MOVING MINI MARIO
Mini Mario will stay
put until you tell him
to move.
When Mini Mario sees
danger, he will raise
his foot and hesitate.
Hurry up and help him!
Mini Mario will break
if he falls from big
heights, so be careful.
Tap Mini Mario to make him
move. Slide your stylus in one
direction or another to tell him
where to go.
Mini Mario will jump up
one block automatically.
Blue springs will
make Mini Mario
jump in the direction
he was moving.
Once you start him
going, Mini Mario will
move automatically.
Slide your stylus up
on a stopped Mini
Mario to make him
jump straight up.
You can control more
than one Mini Mario
at the same time.
Tap a moving Mini
Mario to make him stop.
Mini Mario can
ride on the
heads of some
enemies.
Slide the stylus upward on a moving Mini
Mario to make him jump across one block.
When a moving Mini Mario bumps into a
motionless Mini Mario, the motionless
Mini Mario will start moving.
Slide the stylus
straight up to get Mini
Mario to use a spring
to jump extra high.
Mini Mario will change
direction to face the
direction you slide
the stylus.
Mini Mario will change
direction automatically
when he hits a wall.
1312
Page 8

GAME SCREEN
GAME SCREEN
AND RULES
AND RULES
GAME SCREEN
Mini Mario Cards
you have found
(page 20)
Mini Marios who
have reached
the goal
Your Score
Time Remaining
Mini Mario
(page 12)
Current
Room Number
(page 16)
Mini Marios
in the level
Number of Color
Blocks you own
(page 21)
Arrow
Tap here to scroll
the screen.
CLEARING A LEVEL
Use the stylus to move Mini Marios to the goal somewhere
in the level. Direct at least one Mini Mario to the goal within
the allotted time to clear a level. Bring lots of Mini Marios
to the goal in a row for an even better score (page 23).
If all of your Mini Marios break, your game will end.
PAUSE MENU
Press START during the game to pause
the game and access the pause menu.
CONTINUE Return to the game.
RETRY Start the current level over.
EXIT Stop the game and return to the
level-selection screen (page 17).
14
15
Page 9

HOW TO PLAYHOW TO PLAY
SELECT A FILE
Choose Main Game from the title screen to go
to the file-selection screen. To start a new
game, choose NEW. The game will begin after
the opening movie. Tap a file with a level
number displayed to continue a previous game.
Room Number
Erase File
Erase the contents of a save
file. You cannot restore erased
data, so please be careful.
SAVING
While playing, any levels cleared or Mini Marios saved will
be automatically recorded to the save file you chose on the
file-selection screen.
File
Copy
Copy a file to
another slot.
CHOOSE A FLOOR AND LEVEL
Choose a file to advance to the floor-selection screen. Choose the floor
and level you would like to play. You can’t choose floors and levels that are
still dark. Each floor has nine levels. Clear each level to unlock the next in
the sequence. Beat a DK level to open the next floor. You can return to
floors and levels you have already cleared as often as you like.
Mini Marios who
Mini Mario Cards
you have found
(page 20)
Floor
Room
This is a room on your
current floor. Complete
it to earn a star. The
color of star depends
on your score.
Minigame Stages
(page 19)
have reached the
goal/ Mini Marios
in the level
Help
Tap this to view
explanations of
controls and
mechanisms.
DK Stages
(page 18)
1716
Page 10

SPECIAL STAGESSPECIAL STAGES
DK STAGES
Once you have cleared all nine levels on a floor, you can enter the DK level,
where you will launch Mini Marios at DK. Pummel DK with Mini Marios until
his health reaches zero to clear this stage. If time runs out or you lose your
remaining Mini Marios, your game will end.
CLEARING THE DK STAGE
Clear a DK stage to advance to the next floor. Check the score screen to see
your score and which star you earned. The color of your star depends on
your score.
Score
Remaining
Mini Marios
You will start this fight
with the number of Mini
Marios you saved from
each level on this floor
(page 17).
Cannon
Mario will launch
from here.
Attack Button
Tap this to fire a Mini
Mario from the cannon.
DK’s Health
Time Remaining
Boss Cannon
Indicator
Press the L or R Button
to bring up a guide
line for a short time
that will indicate
where your Mini
Mario will fire.
Handle
Slide the stylus here
to angle the cannon
left or right.
MINIGAME STAGES
If you collect all of the Mini Mario Cards on a floor,
you can play a minigame stage. Tap the Shy Guys
that pop out of the pipes! Don’t tap a Bob-omb,
or you’ll lose points. Tap the number of Shy Guys
displayed next to GOAL before time runs out to
clear this stage. Clear it, and something nice might
just happen…
1918
Page 11

ITEMS AND
ITEMS AND
MECHANISMS
MECHANISMS
GOLD MINI MARIO
METAL BARS
COINS AND LARGE COINS
Each level has a certain number
of coins. Large Coins are worth
10 coins. Try to grab them all.
MINI MARIO CARDS
There are nine cards on each
floor. Collect them all to spell
out the words “Mini Mario” and
unlock a minigame (page 19).
2O
HAMMERS
Grab these to make
your Mini Mario
swing hammers around for a
short time. To stop using them,
just slide up on Mini Mario with
your stylus.
FIRE FLOWER
Grab one of these to turn
a Mini Mario into a Fire Mini
Mario, allowing him to attack
with fire for a short time.
Reach the goal with the Gold
Mini Mario last in the chain to
multiply your score (page 23).
COLOR BLOCKS
Touch these blocks to suck
them up. Then, you can put
them anywhere you see similar
block outlines. You can
check the number of blocks you
are carrying by looking at the
top screen (page 14).
If you make Mini Mario jump
toward a metal bar, he will
grab on to it. You can then
rotate the handle on the
side to rotate your Mini
Mario. If you slide up on
Mini Mario with the stylus
while he is rotating, he will
go really high.
ELEVATOR
Mini Mario will
automatically
stop when he
enters an elevator.
You can move the elevator
up or down by tapping the
nearby control panel. Only two
Mini Marios can use an elevator
at a time.
Control
panel
Handle
21
Page 12

DS DOWNLOAD
DS DOWNLOAD
PLAY
PLAY
HINTSHINTS
SENDING A DEMO VERSION
Using Single Card mode, you can send a demo version of this game to your
friends. Please read the info on page 33, then follow the directions below.
Player sending the demo
(requires one Game Card):
Choose Single Card from the options
menu to advance to the confirmation
screen. Choose Yes to send the demo,
and wait until the upload is complete.
Player receiving the demo (no Game Card required):
When the download is complete, you will see this
title screen.
PLAYING THE DEMO VERSION
Once the download is complete, you can play the demo version. Your demo
version will remain on your DS even if you put it into Sleep Mode, but turning
off the power will cause the demo to be removed from your system.
SCOUT OUT THE LEVEL BEFORE YOU START
The timer does not begin until you move Color Blocks or move a Mini Mario.
Be sure to scout out the level by scrolling the screen in any direction that an
arrow is pointing before you get started.
PLAY THROUGH LEVELS AGAIN AND AGAIN
You can return to levels you have already cleared. Keep trying until you
can save all the Mini Marios and find all of the Mini Mario Cards and coins.
YOUR SCORE AND THE COLOR OF YOUR STAR
To get a high score, you need to save as many Mini Marios
as you can in as little time as possible. Finding coins and
saving a Gold Mini Mario (page 21) also adds to your
score, as does getting chains and nonstop victories. A
chain occurs when two or more Mini Marios reach the goal
in quick succession. A nonstop occurs when you lead a Mini Mario to the
goal without stopping him. Being stopped by elevators or other mechanisms
does not count against you. If you beat the score needed for each
level, you can also earn a star (page 17).
Stars come in bronze , silver , and gold .
2322
Page 13

CONSTRUCTION
CONSTRUCTION
ZONE
ZONE
CONSTRUCTION ZONE MENU
Select Construction Zone from the title screen to enter the
Construction Zone. Then, simply choose an item from the menu below.
PLAY LEVEL
1
Choose the level you would like to play. Simply tap a level to choose it.
Your Levels These are levels that you have created.
Received Levels These are levels you have received from your friends.
2
Tap a level to play it.
Play Level
(page 25)
Play a level designed
by you or one of
your friends.
Nintendo WFC
(page 28)
Trade levels with your friends or download
new levels over Nintendo Wi-Fi Connection.
Edit Level
(page 26)
Create your own
original masterpiece.
Multi-Card
(page 25)
Trade levels with
nearby friends over
local wireless.
Switch Screens
Tap the arrows on either side
to change screens.
MULTI-CARD PLAY
Use two Nintendo DS systems and two Mario vs. DK 2 Game Cards to trade
original levels. Just follow the steps below.
Player sending the level: Tap Broadcast and choose up to eight levels to
send. Please wait until the upload is completed.
Player receiving the level: Tap Receive Level and then choose a place to
save this level. When you see the message asking if you want to receive the
level, tap and then choose the level you want to receive. You can only
receive one level at a time. Go to the Construction Zone to play the levels
you have received.
2524
Page 14

EDIT LEVEL
Tap Edit Level to create your own level. Just follow the steps listed below.
1
CHOOSE A PLACE TO SAVE YOUR LEVEL
Tap the file where you want to save the level you
are about to create. To create a new level, tap an
empty file. If you choose a file with a name, you
will edit the level that is saved there. Tap Erase File
to erase a level that has been saved. Just remember,
you can’t recover erased data!
2
CHOOSE A CONSTRUCTION KIT
When you create a new level, you must first choose
a construction kit. Each construction kit contains
features from a different floor and will be available
once you have beaten that floor in the main game.
Tap a construction kit you would like to use on the list.
Select an optional template, and then select to confirm.
26
Kit List
Template
3
EDITING A LEVEL
On the editing screen, you can place features, mechanisms,
and characters. When you are done, tap the red button or press
START to stop editing.
1
Full View
2
Confirmation Menu Choose features, mechanisms,
and characters.
3
Edit Menu You can choose the following
commands when placing features,
mechanisms, and characters:
Delete from level Move within the level
Change character direction Return to starting layout
End Menu You can choose the following
4
commands when ending editing and saving your floor:
Name your level and save.
Play test the current level. You can’t share or play a level unless
you can clear it in play test, so don’t forget to choose this.
End editing without saving the level.
5
Undo Undo the last editing action.
6
Redo Restore the last undone action.
7
Meter This meter will decrease as you place features, mechanisms,
and characters. When the meter runs out, you will not be
able to place any more features, mechanisms, or characters.
Size Slide this to change the size of the level.
8
27
Page 15

NINTENDO Wi-Fi CONNECTION
You can trade your levels with your friends over Nintendo Wi-Fi Connection!
The Nintendo Wi-Fi Connection is an online game play
system provided by Nintendo for people to connect and
play games worldwide. You can use compatible hotspots
all over the world or your own wireless LAN connection.
SETTING UP NINTENDO Wi-Fi CONNECTION
You will need to establish a wireless internet
connection to use Nintendo Wi-Fi Connection.
From the Nintendo WFC menu, select Nintendo
WFC Config to access the Nintendo Wi-Fi Connection
configuration. For more information about the
Nintendo Wi-Fi Connection, please see the
separate Nintendo Wi-Fi Connection booklet.
*If you are unable to connect to Nintendo Wi-Fi
Connection, you will see an error code and message.
If this happens, please refer to the separate Nintendo
Wi-Fi Connection instruction booklet.
NINTENDO WFC MENU
Choose Nintendo WFC from the Construction Zone menu to access the
Nintendo WFC menu. Choose an item from the menu below.
*Once you have connected to Nintendo Wi-Fi Connection with a
Nintendo DS and a Game Card, they will be considered a set. For more
information about the Nintendo Wi-Fi Connection, please see the separate
Nintendo Wi-Fi Connection instruction booklet.
Synchronize
Enter here to prepare
to send a level
to another player.
Nintendo WFC Config
Tap here to adjust
your Nintendo
Wi-Fi Connection configuration.
Receive
Tap here to receive
a level from another
player.
WFC Friends
View your friend code
or enter a new friend
code.
SYNCHRONIZE
Select this option to send a level to Nintendo
Wi-Fi Connection. Tap Synchronize and then the level
you want to send. Tap to confirm your choice and
make your level available to your friends.
To protect your privacy, do not give out personal information such as last
name, phone number, birth date, age, e-mail or home address when
communicating with others.
2928
Page 16

RECEIVE
This option allows you to receive levels created by
another player. Once you choose a place to save the
levels, tap Connect to connect to Nintendo Wi-Fi
Connection. Choose the player’s page you want to
see and then choose a level to download from the
list. You can play the level you have received from the
Construction Zone (page 25). To receive a level from
a friend, you will need to have their friend code registered (page 31).
NINTENDO WFC FRIENDS
From your WFC Friends, you can view your own friend code or register a
friend code you have received. Your friend code is a twelve-digit number
that is automatically generated when you first connect to Nintendo Wi-Fi
Connection. Once you have registered another player’s friend code, you
can download levels they have created on their registered list.
WFC Friends
This is a list of all the friend
codes you have registered.
Once 60 friends are stored,
no additional friends may be
added until one is removed.
REMOVE
If you tap a name after selecting it from your WFC Friends, that friend
code will be erased. Erased data is gone forever, so please be careful.
ADD (page 31)
SYNC
Update your WFC
Friend roster with
those on the server.
REGISTERING A FRIEND CODE
To register a friend code, tap ADD from WFC Friends
and enter the name and friend code of the person
you want to register. You can also view your own
friend code by tapping ADD.
Your friend's status may display the message
"This friend has not yet connected to Nintendo WFC
and received a friend code," when, in fact, they have.
This message will continue to be displayed until there
has been a two-way relationship established. Due to
the nature of Nintendo WFC, each friend may need to
connect to Nintendo WFC several times before this
message is removed. Until then, your friend will not be
able to view your levels from Nintendo WFC, and you
may not be able to view theirs. When the message
switches to "You did not enter a friend code for this player," then your friend
will be able to view your levels on Nintendo WFC.
The Terms of Use Agreement which governs Nintendo Wi-Fi Connection game
play is available in the Nintendo Wi-Fi Connection Instruction Booklet or
online at www.nintendowifi.com/terms.
Your Friend Code
313O
Page 17

*When you connect to the server, the name you have entered with a friend
code will automatically be changed to the nickname that person has
entered on the server.
MAKE FRIENDS
Trading levels over local wireless will automatically add someone
to your WFC Friend roster. Even if you engage in wireless play when
you don’t have a friend code, you will still be able to save your
friend’s information.
Nintendo Wi-Fi Connection allows multiple Mario vs Donkey Kong 2: March of the Minis owners
to play together over the internet—even when separated by long distances.
• To play Nintendo DS games over the internet, you must first set up the Nintendo Wi-Fi
Connection (Nintendo WFC) on your Nintendo DS system. Please see the separate Nintendo
Wi-Fi Connection instruction booklet included with this game for directions on setting up your
Nintendo DS.
• To complete the Nintendo WFC setup, you will also need access to a PC that has a wireless
network device installed (such as a wireless router) and an active broadband or DSL
internet account.
• If you do not have a wireless network device installed on your PC, you can order a Nintendo
Wi-Fi USB Connector (sold separately) directly from Nintendo. See the separate Nintendo WFC
instruction booklet for more information.
• Nintendo Wi-Fi Connection game play uses more battery power than other game play.
You may prefer to use the AC Adapter to prevent running out of power when using the
Nintendo Wi-Fi Connection.
• You can also play Nintendo WFC compatible games at selected internet hotspots without
additional setup.
• The Terms of Use Agreement which governs Nintendo Wi-Fi Connection game play is available
in the Nintendo Wi-Fi Connection instruction booklet or online at www.nintendowifi.com/terms.
For additional information on the Nintendo WFC, setting up your Nintendo DS, or a list of available internet
hotspots, visit www.nintendowifi.com (USA, Canada and Latin America) or call 1-800-895-1672
(USA/Canada only).
32
IMPORTANT WIRELESS COMMUNICATION GUIDELINES
Please read the following for important wireless play information.
The DS Wireless icon indicates compatibility with DS Wireless play. This icon
•
appears on the DS Menu Screen, in-game menus, and other places. Selecting any
menu items that have this icon will turn on the wireless communication system,
so be aware of and comply with rules and regulations regarding the use of wireless
devices in locations such as hospitals, airports, and aircraft, etc.
During wireless game play, an icon appears on-screen showing the strength
•
of the wireless signal. The icon displays four levels of signal strength.
The stronger the signal, the smoother game play will be.
Number of bars 0 1 2 3
Signal Strength Weak Strong
The power light blinks when the wireless function
•
is working.
For optimum wireless communications, please
•
follow these guidelines:
Begin with the distance between systems at about 30 feet
or less and move closer or farther apart as desired, keeping
the signal strength at two or more bars for best results.
The systems should face each other as directly as possible without having
people or other obstructions between them.
Avoid interference from other devices. If communication seems to be affected
by other devices (wireless LAN, microwave ovens, cordless devices, computers),
move to another location or turn off the interfering devices.
(5) 30 feet
(10 m) or less.
33
Page 18

Important Legal Information
REV–D
Copying of any video game for any Nintendo system is illegal and is strictly prohibited by domestic
and international intellectual property laws. “Back-up” or “archival” copies are not authorized and
are not necessary to protect your software. Violators will be prosecuted.
This video game is not designed for use with any unauthorized copying device or any unlicensed
accessory. Use of any such device will invalidate your Nintendo product warranty. Nintendo (and/or
any Nintendo licensee or distributor) is not responsible for any damage or loss caused by the use of
any such device. If use of such device causes your game to stop operating, disconnect the device
carefully to avoid damage and resume normal game play.
If your game ceases to operate and you have no device attached to it, please contact Nintendo
Customer Service (see below).
The contents of this notice do not interfere with your statutory rights.
This booklet and other printed materials accompanying this game are protected by domestic and
international intellectual property laws.
For further information or assistance, please contact:
Nintendo Consumer Service
www.nintendo.com
or call 1-800-255-3700
(U.S. and Canada)
Warranty & Service Information
REV–P
You may need only simple instructions to correct a problem with your product. Try our website at www.nintendo.com or call our
Consumer Assistance Hotline at 1-800-255-3700, rather than going to your retailer. Hours of operation are 6 a.m. to 7 p.m., Pacific
Time, Monday - Sunday (times subject to change). If the problem cannot be solved with the troubleshooting information available online or over the
telephone, you will be offered express factory service through Nintendo. Please do not send any products to Nintendo without contacting
us first.
HARDWARE WARRANTY
Nintendo of America Inc. ("Nintendo") warrants to the original purchaser that the hardware product shall be free from defects in material and
workmanship for twelve (12) months from the date of purchase. If a defect covered by this warranty occurs during this warranty period, Nintendo
will repair or replace the defective hardware product or component, free of charge. The original purchaser is entitled to this warranty only if the date
of purchase is registered at point of sale or the consumer can demonstrate, to Nintendo's satisfaction, that the product was purchased within the last
12 months.
GAME & ACCESSORY WARRANTY
Nintendo warrants to the original purchaser that the product (games and accessories) shall be free from defects in material and workmanship for a
period of three (3) months from the date of purchase. If a defect covered by this warranty occurs during this three (3) month warranty period,
Nintendo will repair or replace the defective product, free of charge.
SERVICE AFTER EXPIRATION OF WARRANTY
Please try our website at www.nintendo.com or call the Consumer Assistance Hotline at 1-800-255-3700 for troubleshooting information and repair or
replacement options and pricing. In some instances, it may be necessary for you to ship the complete product, FREIGHT PREPAID AND INSURED FOR
LOSS OR DAMAGE, to Nintendo. Please do not send any products to Nintendo without contacting us first.
WARRANTY LIMITATIONS
THIS WARRANTY SHALL NOT APPLY IF THIS PRODUCT: (a) IS USED WITH PRODUCTS NOT SOLD OR LICENSED BY NINTENDO (INCLUDING, BUT NOT
LIMITED TO, NON-LICENSED GAME ENHANCEMENT AND COPIER DEVICES, ADAPTERS, AND POWER SUPPLIES); (b) IS USED FOR COMMERCIAL PURPOSES
(INCLUDING RENTAL); (c) IS MODIFIED OR TAMPERED WITH; (d) IS DAMAGED BY NEGLIGENCE, ACCIDENT, UNREASONABLE USE, OR BY OTHER CAUSES
UNRELATED TO DEFECTIVE MATERIALS OR WORKMANSHIP; OR (e) HAS HAD THE SERIAL NUMBER ALTERED, DEFACED OR REMOVED.
ANY APPLICABLE IMPLIED WARRANTIES, INCLUDING WARRANTIES OF MERCHANTABILITY AND FITNESS FOR A PARTICULAR PURPOSE, ARE
HEREBY LIMITED IN DURATION TO THE WARRANTY PERIODS DESCRIBED ABOVE (12 MONTHS OR 3 MONTHS, AS APPLICABLE). IN NO EVENT SHALL
NINTENDO BE LIABLE FOR CONSEQUENTIAL OR INCIDENTAL DAMAGES RESULTING FROM THE BREACH OF ANY IMPLIED OR EXPRESS WARRANTIES.
SOME STATES DO NOT ALLOW LIMITATIONS ON HOW LONG AN IMPLIED WARRANTY LASTS OR EXCLUSION OF CONSEQUENTIAL OR INCIDENTAL
DAMAGES, SO THE ABOVE LIMITATIONS MAY NOT APPLY TO YOU.
This warranty gives you specific legal rights. You may also have other rights which vary from state to state or province to province.
Nintendo's address is: Nintendo of America Inc., P.O. Box 957, Redmond, WA 98073-0957 U.S.A.
This warranty is only valid in the United States and Canada.
 Loading...