

Page 1
Please make sure to read th e enclosed Ninja® Own er’s Guide prior to using your unit.
CT815 SERIES
PITCHER
WARNING: Handle the Pro Ex tractor Bl ades Ass embly and t he pitcher ’s bottom bla des
with care, a s they are sha rp. Contac t with the blades’ edg es can result in lacer ation.
MANUAL MODE
CLEANING
Dishwasher: All attachme nts are dishw asher saf e.
It is recomm ended th at the tamp er, lid, and c ap be
placed on t he top rack of th e dishwashe r. Exercise
care when w ashing Pro -Extr actor Bla des Asse mbly
and pitche r, as the blade as semblie s are sharp .
Hand-washing: Wash pitcher in wa rm, soapy
water using a d ishwashin g utensil with a h andle
to avoid direct c ontact wit h the blade s. Exercis e
care when w ashing Pro -Extr actor Bla des
Assembly and pitcher, as the blade assemblies
are sharp . Thoroug hly rinse an d air-dry al l parts .
OTHER MODES
CLEAN
• Pitcher: To run the self-cleaning program with the pitcher, first add warm water to the MAX CLEAN
line and two drops of dishwashing soap to the pitcher. Secure pitcher lid and lid cap in place. Select
CLEAN mode, then press START/STOP to begin. The unit will shut down when the self-cleaning cycle
is complete. Make sure to thoroughly rinse and air-dry the pitcher.
• Cup: When using CLEAN mode for the blender cup, fill the cup halfway with warm water and add one
drop of dishwashing soap. Secure the Pro Extractor Blades® Assembly to the blender cup, then install
cup onto motor base. Select CLEAN mode, then press START/STOP to begin. The unit will shut down
when the self-cleaning cycle is complete. Make sure to thoroughly rinse and air-dry the cup.
TIMER+
Use TIMER+ mode to set a countdown timer. Select TIMER+ and add blend time in 10-second intervals
by repeatedly pressing the TIMER+ button. Set the speed by rotating the dial to the desired setting.
Press START/STOP to activate the unit. Blending will stop automatically when countdown is complete.
PULSE
Select PULSE and turn dial to desired speed. Press the START/STOP button in short bursts to pulse.
The unit will blend only while button is pressed.
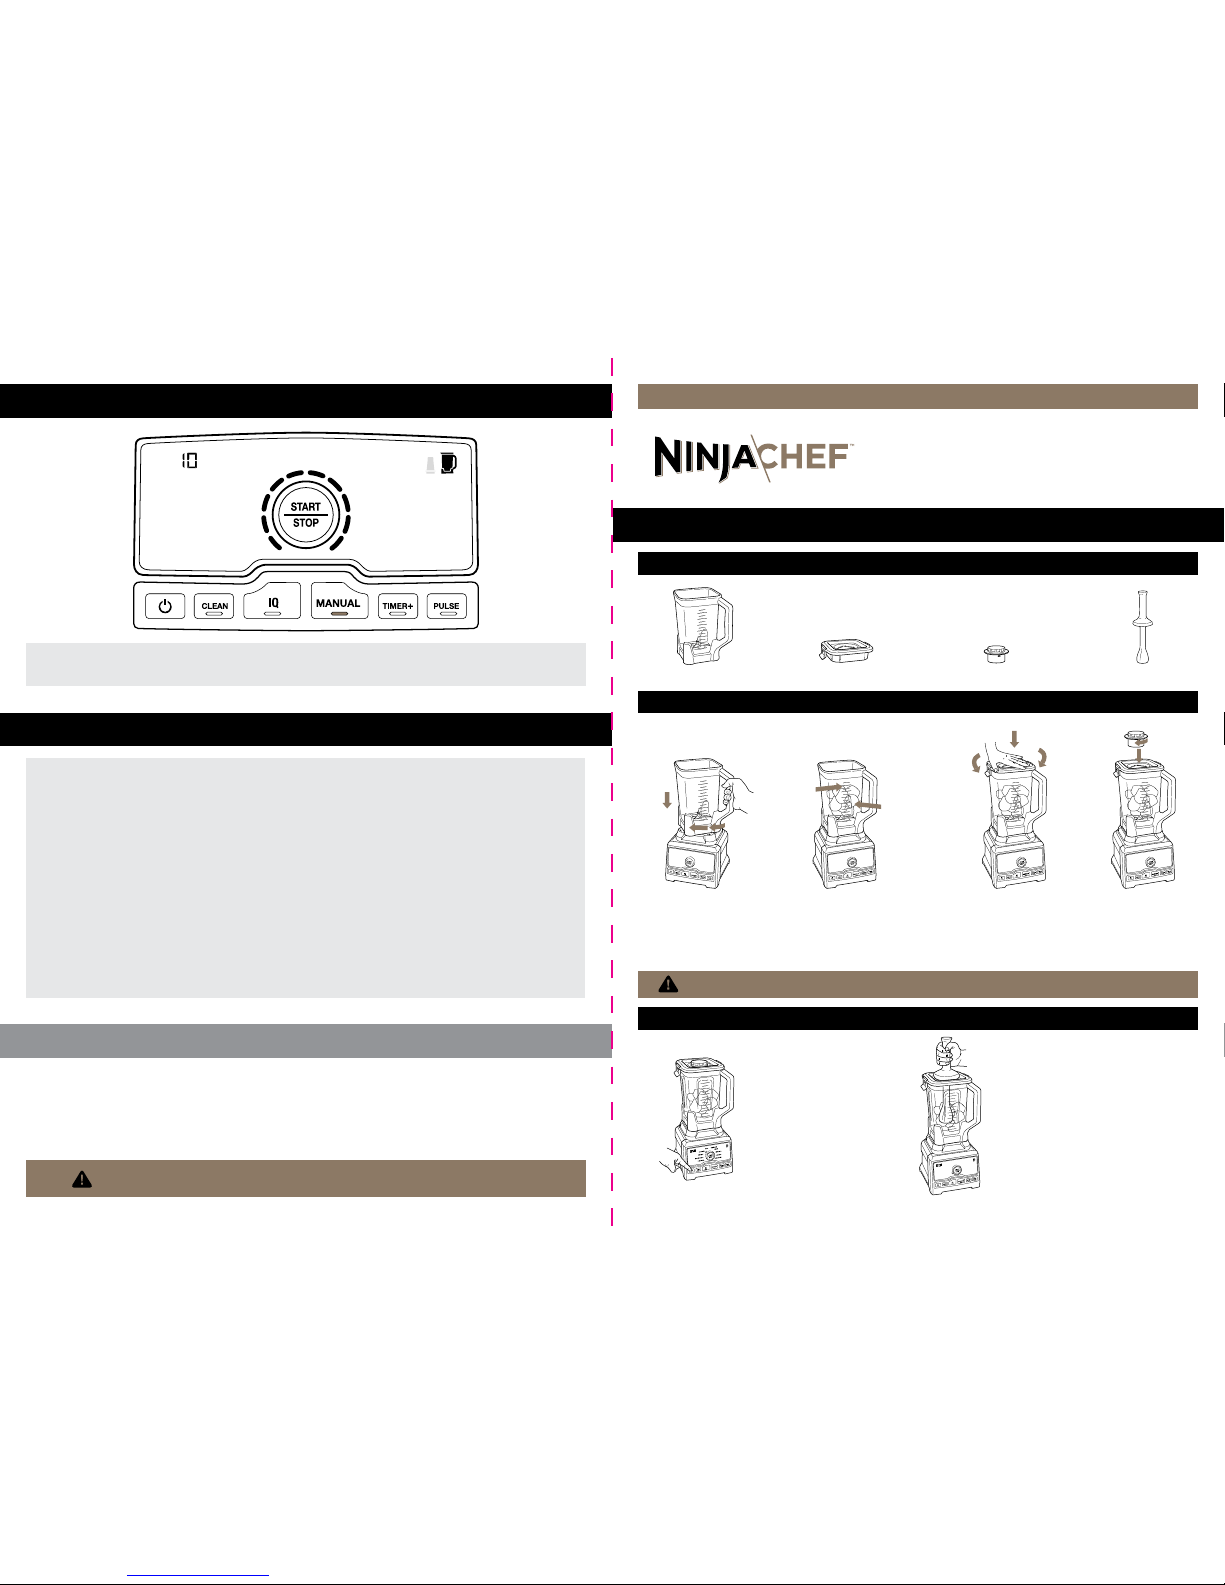
Turn the dial from 1 to 10 for total control of blending speed. Press START/STOP to begin
and end blending.
1.
Lower pitche r
onto motor
base, the n rotate
clockwi se until it
clicks into p lace.
TAM PE R
If unmixed i ngredie nts are stic king
to the pitcher, rem ove lid cap an d
use tamp er to push ing redient s
closer to the b lades.
BLENDING
Press the po wer button .
The base de faults to
Auto-iQ ® Mode. S elect th e
desired p rogram an d press
START/STOP, or press
MANUAL to switch modes
and use the d ial to selec t
blending speed.
2.
Add ingred ients to pitch er,
making su re not to exceed
Max Liquid line. Hot ingredients
cannot exc eed the Ma x Hot
Liquid line.
4.
Insert l id cap
into lid and
turn clock wise
to lock.
PITCHER PITCHE R LID LID CAP TAM PE R
PART S
AS SEM BLY
IN USE
WARNING: Pitcher’s bottom bl ades are sh arp. Cont act with the b lades ca n result in lac eration .
3.
Place lid on to pitcher,
then pres s down firmly,
making su re that both
side clips o n lid fully
snap onto li p of pitcher.
MAX
MAX
HOT
DUO™
QUICK ASSEMBLY
QUESTIONS? We’re here to help. Cal l 1-87 7-646 -5288 or visit ninjakitchen.comQUESTIONS? We’re here to help. Cal l 1-87 7-646 -5288 or visit ninjakitchen.com
Page 2
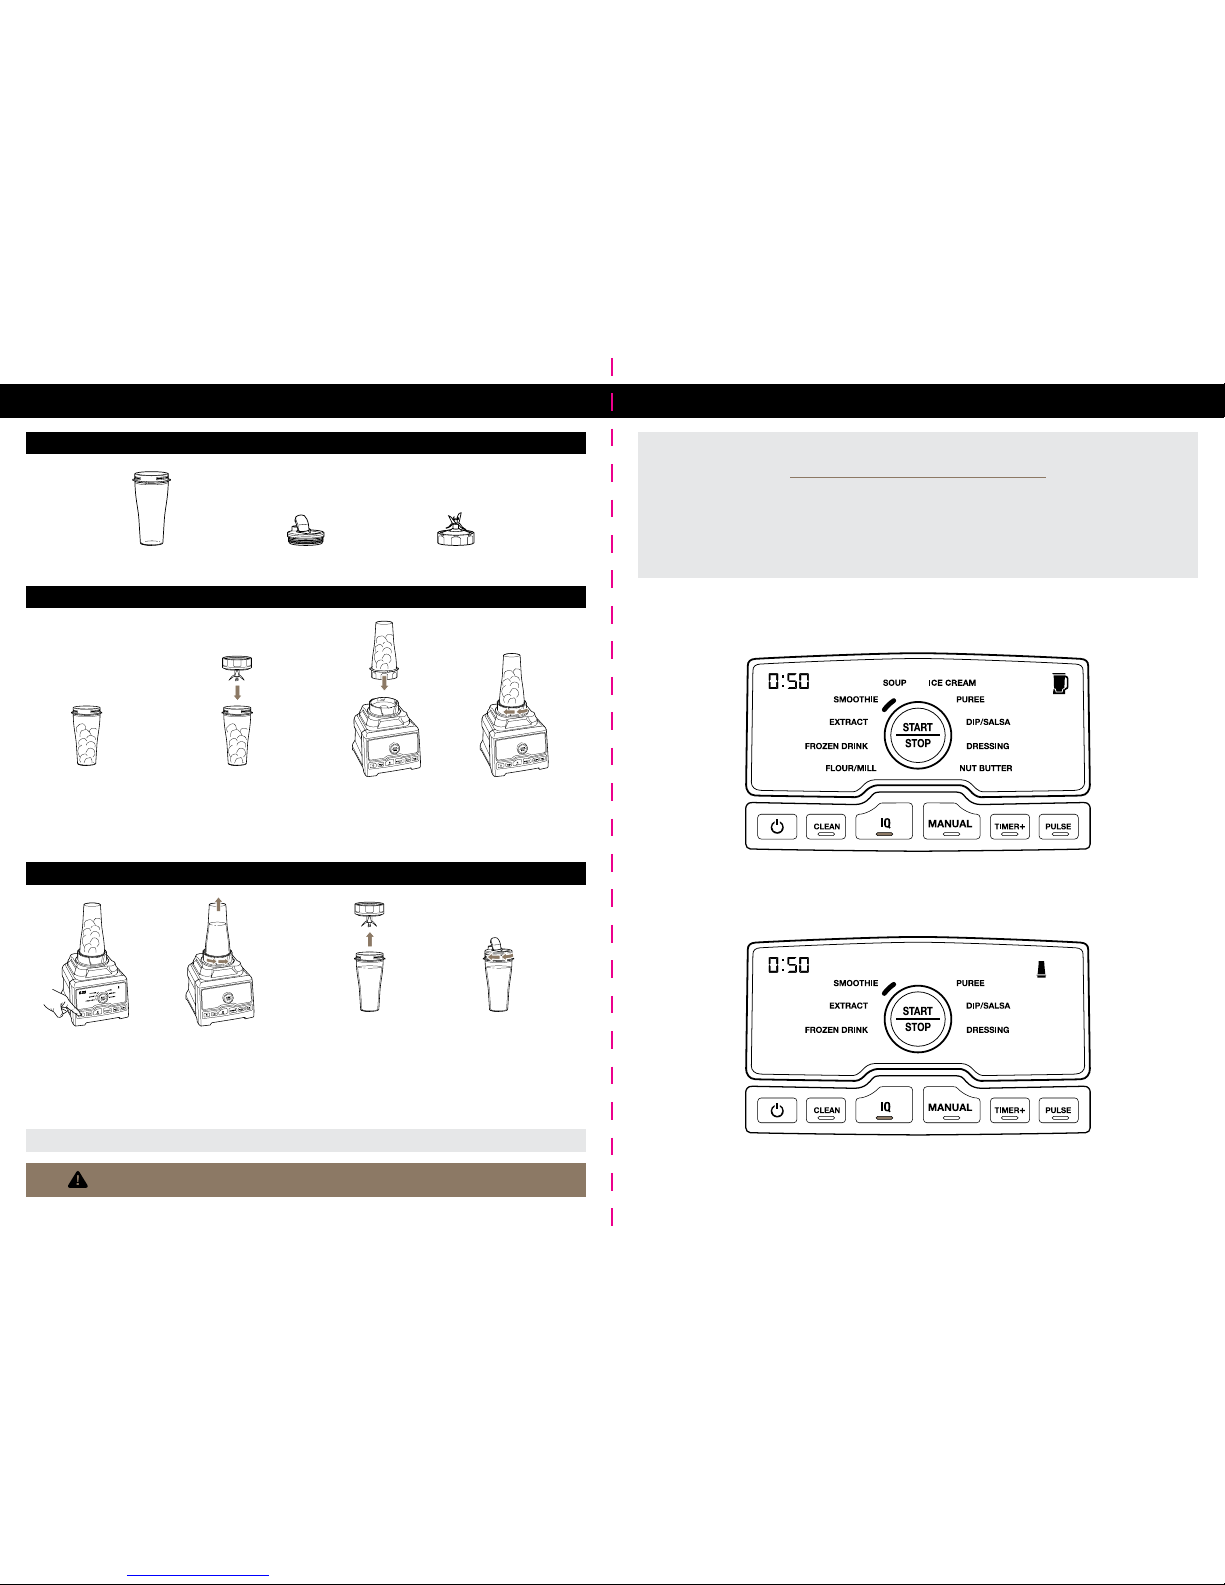
1.
Fill Single-Serve
Cup with des ired
contents.
2.
Place Pro Ex tractor
Blades ® Assem bly on
cup and rota te clockwi se
until sealed tightl y.
1.
Turn dial to selec t
the desire d
program , then
press START/STOP.
3.
Flip cup ups ide
down and lower
it onto base.
2.
When ble nding is
complete , turn cup
counterclockwise and
lift to rem ove.
WARNING: Handle the Pro Ex tractor Bl ades Ass embly with c are, as the b lades are sh arp.
4.
Turn cup clock wise
to lock in pla ce.
3.
Turn blade assembly
countercl ockwis e
to remove.
4.
Place Spo ut Lid on
top of cup and tu rn
clockwi se to lock
in place.
AS SEM BLY
BLEND & E NJOY
SINGLE-SERVE CUP
SINGLE-SERVE
CUP
SPOUT LID
PRO EXTRACTOR
BLADES® ASSEMBLY
Once a cont ainer is lo cked onto base , the progr ams compa tible with tha t containe r will illum inate.
PART S
AUTO-IQ® MODE
AUTO-IQ TECHNOLOGY
Auto-iQ’s unique timed programs are customized to take the guesswork out
of making great drinks and meals.
Turn dial to select the desired program, then press START/STOP to begin.
As the program runs, the timer will count down. When the countdown ends,
blending will stop automatically.
PITCHER
SINGLE-SERVE CUP
QUESTIONS? We’re here to help. Cal l 1-87 7-646 -5288 or visit ninjakitchen.comQUESTIONS? We’re here to help. Cal l 1-87 7-646 -5288 or visit ninjakitchen.com
 Loading...