

Page 1

Software Reference for Scanners
Page 2

Nikon Software License Agreement
NOTICE TO USER
You should carefully read the Nikon License Agreement and Disclaimer of Warranty contained
herein before opening this package or breaking any seals. BY OPENING THIS PACKAGE,
YOU INDICATE YOUR ACCEPTANCE OF THIS AGREEMENT AND ARE AGREEING TO BECOME BOUND BY THE TERMS OF THIS AGREEMENT. If you do not
agree to the terms of this agreement, do not open the package or break any seals. Promptly
return within fifteen (15) days from the date of delivery the unopened package to the authorized Nikon Dealer where you obtained it for a full fee refund.
In consideration of the payment of the license fee, Nikon grants to you a non-exclusive license
to use the enclosed computer program and documentation ("Nikon Device Driver Software")
only under the terms stated in this agreement. This license is not a sale of the Nikon Device
Driver Software and you do not become owner of it. Nikon retains ownership of Nikon
Device Driver Software and all copies of it, and reserves all rights not expressly granted to you
under this agreement. You only own the disk on which the Nikon Device Driver Software is
recorded. This agreement constitutes the complete and exclusive agreement between you and
Nikon and takes the place of any prior agreement, oral or written, between us relating to the
Nikon Device Driver Software.
1. License
This license allows you to:
A Use the Nikon Device Driver Software only on a single Apple or IBM computer. You
must obtain a supplementary license from Nikon before using the Nikon Device Driver
Software in connection with systems, multiple central processing units, computer networks, or
emulations on a mainframe or mini computer.
B Make one copy of the Nikon Device Driver Software in machine-readable form solely
for back-up purposes. The Nikon Device Driver Software is protected by United States copyright law. You must reproduce on each copy the Nikon copyright notice and any other proprietary legends that were on the original copy.
C Transfer the Nikon Device Driver Software and all rights under this license to another
party together with a copy of this Agreement provided you give Nikon written notice of the
transfer and the other party reads and agrees to accept the terms and conditions of the agreement.
D Configure the Nikon Device Driver Software for your own use by adding or removing
fonts, desk accessories, and/or device drivers.
2. Restrictions
Except as otherwise stated in this Agreement, you may not distribute copies of the Nikon
Device Driver Software to others or electronically transfer the Nikon Device Driver Software
Page II Software Reference for Scanners
Page 3

from one computer to another over a network. The Nikon Device Driver Software contains
trade secrets, and in order to protect them, you may not decompile, reverse engineer, disassemble, or otherwise reduce the Nikon Device Driver Software to a human perceivable form.
YOU MAY NOT MODIFY, ADAPT, TRANSLATE, RENT, LEASE, LOAN, RESELL FOR
PROFIT, DISTRIBUTE, NETWORK, OR CREATE DERIVATIVE WORKS BASED
UPON THE NIKON DEVICE DRIVER SOFTWARE OR ANY PART THEREOF.
3. Term
This license is effective until terminated. This license will terminate automatically without
notice from Nikon if you fail to comply with any provisions of this license. Upon termination
you must destroy the Nikon Device Driver Software and all copies thereof. You may terminate
this license at any time by destroying the Nikon Device Driver Software and all copies thereof.
4. Foreign Export
You agree and certify that neither the Nikon Device Driver Software nor any direct product
thereof is being or will be shipped, transferred, or re-exported, directly or indirectly, into any
country prohibited by the United States Export Administration Act and the regulations thereunder or will be used for any purpose prohibited by the same.
5. Limited Warranty and Limitations of Warranty and Liability
A Nikon warrants that the disk on which the Nikon Device Driver Software is recorded is
free from defects in material and workmanship under normal use and conditions for a period of
ninety (90) days from date of delivery to the original licensee as evidenced by the original fee
receipt. During this period, if there is any defect in material or workmanship to the disk,
return it to the Nikon authorized dealer from whom you obtained it, together with your original fee receipt and it will be repaired or replaced free of charge. If you ship the Nikon Device
Driver Software to your Nikon authorized dealer, you must pay all postage, shipping, transportation, insurance and delivery costs.
B This warranty extends to the original licensee only and is not assignable or transferable.
This warranty does not apply to any disk which has been subject to misuse, abuse, negligence
or accident. Any repaired or replaced disk shall be warranted for the remainder of the original
limited warranty or thirty (30) days, whichever is longer. All warranties implied by law on the
disk, including but not limited to merchantability or fitness for a particular purpose, are limited
to the duration of the above warranty. Nikon's entire liability and your exclusive remedy hereunder is limited solely to repair or replacement of the disk on which the Device Driver
Software is recorded, or, at Nikon's option, a refund of the license fee.
C Except for the limited warranty for the disk on which the Nikon Device Driver Software
is recorded as set forth above, Nikon makes no warranties, either expressed or implied. The
Nikon Device Driver Software is sold "as is" without any warranty of any kind and Nikon, its
employees, distributors, dealers and agents specifically disclaim any warranty of any kind, either
expressed or implied, including but not limited to any implied warranty of merchantability or
fitness for a particular purpose. In no event does Nikon, its employees, distributors, dealers, or
Software Reference for Scanners Page III
Page 4

agents warrant the performance of or the results you may obtain from the Nikon Device Driver
Software, or that the Nikon Device Driver Software will meet your requirements, or that the
operation of the Nikon Device Driver Software will be uninterrupted and error-free. If the
Nikon Device Driver Software is defective, you assume all costs of repair or servicing. In no
event shall Nikon, its employees, distributors, dealers or agents be liable to you for any direct,
indirect, consequential or incidental damages, losses or expenses of any kind, including but not
limited to the loss of profits, business information or business interruption, arising out of or
resulting from the Nikon Device Driver Software, however caused, even if Nikon has been
advised of the possibility of such damages, losses or expenses.
D EXCEPT AS OTHERWISE PROVIDED IN THIS AGREEMENT, NIKON SHALL HAVE NO LIABILITY OR RESPONSIBILITY OF ANY KIND (INCLUDING LIABILITY FOR NEGLIGENCE) TO YOU OR
ANY OTHER PERSON OR ENTITY WITH RESPECT TO ANY LIABILITY, LOSS OR DAMAGE CAUSED
OR ALLEGED TO HAVE BEEN CAUSED, DIRECTLY OR INDIRECTLY BY THE NIKON DEVICE DRIVER SOFTWARE SOLD, LICENSED OR FURNISHED BY NIKON UNDER THIS AGREEMENT.
NOTWITHSTANDING THE ABOVE LIMITATION, NIKON'S LIABILITY ON ANY CLAIM OF ANY KIND
(INCLUDING NEGLIGENCE) FROM THE DELIVERY, LICENSE, OR USE OF THE NIKON DEVICE DRIVER SOFTWARE FURNISHED UNDER THIS AGREEMENT SHALL IN NO CASE EXCEED THE FEE
YOU PAID FOR THE NIKON DEVICE DRIVER SOFTWARE.
SOME STATES DO NOT ALLOW (A) LIMITATIONS ON HOW LONG AN IMPLIED WARRANTY LASTS
OR (B) THE EXCLUSION OR LIMITATIONS OF INCIDENTAL OR CONSEQUENTIAL DAMAGES SO
THE ABOVE LIMITATIONS OR EXCLUSIONS MAY NOT APPLY TO YOU. NIKON'S WARRANTY
GIVES YOU SPECIFIC LEGAL RIGHTS AND YOU MAY ALSO HAVE OTHER RIGHTS WHICH VARY
FROM STATE TO STATE.
6. General
This agreement is governed and shall be construed in accordance with the laws of the
State of New York. If any provision of this Agreement shall be determined to be invalid for
any reason, the remaining provisions shall not be invalidated and shall remain in full force and
effect.
Apple Disclaimer
The following disclaimer is required by Apple Computer, Inc. It applies only to Apple software. All other software is covered by Nikon’s limited warranty.
“APPLE COMPUTER, INC. (“APPLE”) MAKES NO WARRANTIES, EXPRESS OR IMPLIED, INCLUDING
WITHOUT LIMITATION THE IMPLIED WARRANTIES OF MERCHANTABILITY AND FITNESS FOR A
PARTICULAR PURPOSE, REGARDING THE APPLE SOFTWARE. APPLE DOES NOT WARRANT, GUARANTEE OR MAKE ANY REPRESENTATIONS REGARDING THE USE OR THE RESULTS OF THE USE OF
THE APPLE SOFTWARE IN TERMS OF ITS CORRECTNESS, ACCURACY, RELIABILITY, CURRENTNESS
OR OTHERWISE. THE ENTIRE RISK AS TO THE RESULTS AND PERFORMANCE OF THE APPLE
SOFTWARE IS ASSUMED BY YOU. THE EXCLUSION OF IMPLIED WARRANTIES IS NOT PERMITTED
BY SOME STATES. THE ABOVE EXCLUSION MAY NOT APPLY TO YOU.”
Page IV Software Reference for Scanners
Page 5

“IN NO EVENT WILL APPLE, ITS DIRECTORS, OFFICERS, EMPLOYEES OR AGENTS BE LIABLE TO
YOU FOR ANY CONSEQUENTIAL, INCIDENTAL OR INDIRECT DAMAGES (INCLUDING DAMAGES
FOR LOSS OF BUSINESS PROFITS, BUSINESS INTERRUPTION, LOSS OF BUSINESS INFORMATION,
AND THE LIKE) ARISING OUT OF THE USE OR INABILITY TO USE THE APPLE SOFTWARE EVEN IF
APPLE HAS BEEN ADVISED OF THE POSSIBILITY OF SUCH DAMAGES. BECAUSE SOME STATES DO
NOT ALLOW THE EXCLUSION OR LIMITATION OF LIABILITY FOR CONSEQUENTIAL OR INCIDENTAL DAMAGES, THE ABOVE LIMITATIONS MAY NOT APPLY TO YOU. APPLE’S LIABILITY TO YOU
FOR ACTUAL DAMAGES FROM ANY CAUSE WHATSOEVER, AND REGARDLESS OF THE FORM OF
THE ACTION (WHETHER IN CONTRACT, TORT (INCLUDING NEGLIGENCE), PRODUCT LIABILITY
OR OTHERWISE), WILL BE LIMITED TO $50.”
The MacApp software is proprietary to Apple Computer, Inc. and is licensed to Nikon Inc. for
distribution only for use in combination with Nikon Control.
Acknowledgments
Nikon acknowledges with gratitude the contributions of the Design, Planning and
Production Sections of the Electronic Image Engineering Division of Nikon Corp. and the
Marketing & Development Group at Nikon Electronic Imaging.
This manual may not, in whole or in part, be copied, photocopied, reproduced, translated,
or converted to any electronic or machine readable form without prior written consent of
Nikon Inc.
The accompanying 35mm slide is for instructional purposes only and may not be copied,
reproduced, translated, or converted to any electronic or machine readable form for any other
usage without prior written consent. The slide is © 1993, John Harcourt.
Trademark Information
Coolscan™, Nikon Control™, Coolscan Control™, and Eject Coolscan Film™are
trademarks of Nikon Inc.
Nikon LS-10™, Nikon LS-10E™, Nikon LS-3510AF™, Nikon LS-3500™, and
Nikon CP-3000™are trademarks of Nikon Corporation.
Macintosh™, PowerBook™, Quadra™, HDI-30™, IIci™, IIfx™,
AppleLink™, ColorSync™and QuickDraw™ are trademarks of Apple Computer, Inc.
ImageAccess™is a trademark of AXS/Optical Technology Resource, Inc.
Photoshop™, Illustrator™ and PostScript™ are trademarks of Adobe Systems Inc.
Fractal ColorStudio™is a trademark of Fractal Design.
Windows™and DOS™are trademarks of Microsoft® Corporation.
PhotoStyler™is a trademark of Aldus Corporation.
Picture Publisher™is a trademark of Micrografx, Inc.
Centronics™is a trademark of Centronics.
Microchannel™is a trademark of IBM.
Software Reference for Scanners Page V
Page 6

IBM-PC™is a trademark of IBM.
T-130™and T-260™are trademarks of Trantor Systems, Ltd.
NB Handler CDEV, NB-GPIB, GPIB-AT, GPIB-PCIIA, and
MC-GPIB are © National Instruments, Inc.
Agfachrome™is a trademark of Agfa Corporation.
Ektachrome™and Kodachrome™are trademarks of Eastman Kodak Co.
Fujichrome™is a trademark of Fuji Corporation.
Color Key™and MatchPrint™are trademarks of 3M Corp.
Chromalin™is a trademark of DuPont Corp.
Pantone™is a trademark of Pantone, Inc.
HP-IB™is a trademark of Hewlett-Packard.
America Online™is a trademark of America Online Inc.
PressLink™is a trademark of Knight-Ridder.
Targa™is a trademark of Truevision, Inc.
All trademarks have been used in an editorial fashion with no intention of infringement.
Nikon Inc.
Electronic Imaging Department
1300 Walt Whitman Road
Melville, NY 11747-3064
516-547-4355
© 1993, Nikon Inc. All rights reserved.
Printed in the United States of America
Page VI Software Reference for Scanners
Page 7

Table of Contents
Chapter 1 – Read This First.........................................................................................1
About this Manual .....................................................................................................1
The Package Contents.........................................................................................1
User Registration.................................................................................................1
Minimum Macintosh Scanning System Requirements........................................1
Minimum IBM PC and Compatibles Scanning System Requirements................2
Suggested Macintosh System Configurations ......................................................2
Suggested IBM PC or Compatibles System Configurations.................................3
Before You Begin .......................................................................................................3
Chapter 2 – Software Installation – Macintosh ...........................................................5
Nikon Software..........................................................................................................5
Nikon Scanner Plug-in Software.........................................................................5
Nikon Control Software......................................................................................5
Utility Software...................................................................................................6
System Requirements..........................................................................................6
About the Nikon Installer...........................................................................................6
The Distribution Diskette...................................................................................6
Before You Begin................................................................................................7
Running the Nikon Installer ......................................................................................7
Chapter 3 – Software Installation – IBM PC or Compatible.....................................11
Nikon Software........................................................................................................11
Nikon Scanner Plug-in Software.......................................................................11
Nikon Control Software....................................................................................11
Utility Software.................................................................................................11
Nikon Installer Software...........................................................................................11
System Requirements...............................................................................................12
The Distribution Diskette.................................................................................12
Running the Nikon Installer ....................................................................................12
The Software Installer Dialog............................................................................13
The Product Selection Dialog ...........................................................................14
The Installation Options Dialog .......................................................................15
The Path Selection for Files Dialog...................................................................16
Installing Third-Party Applications ..........................................................................19
The Path Selection for Installer Dialog..............................................................19
The Installation Method Dialog........................................................................19
Configuring and Testing the GPIB ..........................................................................20
Installing the SCSI Driver Software..........................................................................21
Software Reference for Scanners Page VII
Table of Contents
Page 8

Chapter 4 – Getting Started on the Macintosh..........................................................23
Launching the Nikon Scanner..................................................................................23
Plug-in Initialization.........................................................................................25
The Scan Dialogs .....................................................................................................25
Inserting the Slide ....................................................................................................27
Coolscan...........................................................................................................27
LS-3510AF .......................................................................................................28
Scanning a Preview Image........................................................................................29
Final Scan.................................................................................................................30
Setting the Crop................................................................................................30
Conclusion...............................................................................................................32
Chapter 5 – Getting Started on the IBM PC or Compatible.....................................33
Launching the Software............................................................................................33
Inserting the Slide ....................................................................................................35
Coolscan...........................................................................................................35
LS-3510AF .......................................................................................................36
Scanning a Preview Image........................................................................................37
Final Scan.................................................................................................................38
Setting the Crop................................................................................................38
Conclusion...............................................................................................................40
Chapter 6 – Producing a Scan...................................................................................41
Step 1. Insert the slide into the scanner ...................................................................41
Step 2. Launch the application program..................................................................41
Step 3. Select the film type and orientation .............................................................42
Step 4. Perform a preview scan................................................................................44
Step 5. Select the size of the scan.............................................................................44
Step 6. Select the final resolution of the scan...........................................................45
Lock the file size................................................................................................46
Step 7. Select the area to scan..................................................................................47
Step 8. Perform a final scan.....................................................................................48
Step 9. Name the file...............................................................................................48
Step 10. Eject/Remove the slide ..............................................................................49
Chapter 7 – Introduction to the Nikon Scanner Plug-in...........................................51
Introduction.............................................................................................................51
Launching the Nikon Scanner..................................................................................51
Plug-in Initialization.........................................................................................53
The Scan Dialogs .....................................................................................................54
Using the Nikon Scanner Plug-in.............................................................................57
Message Boxes...................................................................................................57
Page VIII Software Reference for Scanners
Table of Contents
Page 9

Buttons.............................................................................................................58
Value Edit Boxes...............................................................................................58
Pop-up Menus - Macintosh...............................................................................59
Combo Boxes – Windows.................................................................................59
Graphics Windows............................................................................................60
Using the Mouse to Control the Scan Dialog...........................................................61
The Gamma Curve Editor Dialog Box.....................................................................62
The Tools Dialog Box..............................................................................................64
Selecting the Scan Dialog Size...........................................................................67
Selecting the Focus Method – Coolscan only....................................................68
Interface Buttons...............................................................................................68
Calibrating the Lamp (LS-3510AF only)...........................................................70
The Scanner State.....................................................................................................71
Getting Help............................................................................................................71
Chapter 8 – Setting and Restoring the Nikon Plug-in State – Macintosh ................73
The Settings Controls...............................................................................................74
Reset.................................................................................................................74
Set Defaults.......................................................................................................74
Load Settings ....................................................................................................74
Save Settings .....................................................................................................75
The Automatic Method............................................................................................75
Summary...........................................................................................................75
The Set Default Method ..........................................................................................75
Summary...........................................................................................................76
The User-Named Method........................................................................................76
Summary...........................................................................................................77
Chapter 9 – Setting and Restoring the Nikon Plug-in State – Windows ..................79
The Settings Controls...............................................................................................80
Use Defaults......................................................................................................80
Set Defaults.......................................................................................................80
Load Settings ....................................................................................................80
Save Settings .....................................................................................................81
The Automatic Method............................................................................................81
Summary...........................................................................................................81
The Set Default Method ..........................................................................................82
Summary...........................................................................................................82
The User-Named Method........................................................................................82
Summary...........................................................................................................84
Software Reference for Scanners Page IX
Table of Contents
Page 10

Chapter 10 – Performing a Preview or Final Scan.....................................................85
The Scan Controls....................................................................................................85
The Preview Button..........................................................................................85
The Scan Button...............................................................................................85
The Abort Keystroke.........................................................................................85
Autoexposure Cycle..................................................................................................86
Forcing an Autoexposure Cycle.........................................................................87
Autofocus – LS-3510AF only...................................................................................88
Manual Focus – LS-3510AF only.............................................................................88
Performing a Preview Scan.......................................................................................89
Performing a Final Scan...........................................................................................90
Saving the Scan ........................................................................................................90
Ejecting the Film (Coolscan only)............................................................................91
Quitting the Application..........................................................................................92
Chapter 11 – Cropping and Sizing Images................................................................93
The Sizing Controls .................................................................................................93
The Preview Window........................................................................................94
Width...............................................................................................................94
Height...............................................................................................................95
Width and Height Units...................................................................................95
Final Resolution................................................................................................95
Final Resolution Units......................................................................................96
Scan Pitch.........................................................................................................96
Scan Resolution Status......................................................................................97
Locking the Aspect............................................................................................97
Locking the File Size.........................................................................................97
File Size Status..................................................................................................98
The Preview Window...............................................................................................98
Crop Rectangle .................................................................................................99
Coordinate Display.........................................................................................101
The Sizing Controls ...............................................................................................101
Dimensional Units.................................................................................................103
Resolution and Scan Pitch......................................................................................103
Final Resolution..............................................................................................104
Scan Pitch.......................................................................................................106
Locking Proportions and File Size..........................................................................107
Moving the Crop Rectangle ...................................................................................108
Disk Space Status...................................................................................................110
Page X Software Reference for Scanners
Table of Contents
Page 11

Chapter 12 – Film Type and Orientation................................................................113
The Image Orientation Controls............................................................................113
Portrait/Landscape Button in Portrait Mode...................................................113
Portrait/Landscape Button in Landscape Mode...............................................113
Flip Vertical Button........................................................................................114
Flip Horizontal Button ...................................................................................114
Portrait or Landscape......................................................................................114
Film Type ..............................................................................................................115
Color Positive Film.........................................................................................115
Color Negative Film........................................................................................115
Black and White Positive Film........................................................................115
Black and White Negative Film ......................................................................116
Changing the Film Type........................................................................................116
Chapter 13 – Contrast, Brightness and Color Balance............................................119
The Exposure Controls...........................................................................................119
Automatic Exposure...............................................................................................119
Autoexposure Button......................................................................................120
Autoexposure Check Box................................................................................120
Autoexposure Check Mark..............................................................................120
Brightness...............................................................................................................121
Adjusting Brightness .......................................................................................121
Contrast.................................................................................................................122
Adjusting Contrast..........................................................................................123
Color Balance.........................................................................................................124
Red Exposure..................................................................................................124
Green Exposure...............................................................................................125
Blue Exposure.................................................................................................126
Chapter 14 – Focusing with Coolscan.....................................................................127
Focus Controls.......................................................................................................127
Selecting the Focus Method (Macintosh only)........................................................127
Metered Focus Method..........................................................................................128
Focus Level Meter...........................................................................................128
Visual Focus Method .............................................................................................130
Chapter 15 – Gamma Curve Controls.....................................................................133
Gamma Curve Controls.........................................................................................133
Gamma Curve Editor Button..........................................................................133
Custom Check Box.........................................................................................133
Scanner Gamma Curve ..........................................................................................133
Changing Your Mind......................................................................................134
Software Reference for Scanners Page XI
Table of Contents
Page 12

Chapter 16 – The Gamma Curve Editor Dialog......................................................135
The Interactive Help Button (Macintosh only)...............................................136
Gamma Curves ......................................................................................................137
Custom and Default Gamma Curves..............................................................137
Where Gamma Curves Reside (Macintosh only).............................................138
Sending Gamma Tables to the Scanner..................................................................138
Custom Check Box.........................................................................................139
Factory Default Gamma Curves......................................................................139
Default Settings (Macintosh only)...................................................................139
Load Settings and Save Settings.......................................................................140
Loading Curves from Gamma Files........................................................................141
Entering the Gamma Editor............................................................................142
Loading the Factory Default Gamma Curves..................................................142
Loading Custom Gamma Curves (Macintosh only)........................................142
Resetting the Gamma Curves..........................................................................143
Viewing the Gamma Curves...................................................................................144
Red/Cyan, Green/Magenta and Blue/Yellow (RGB) Gamma Curves.............145
Monochrome Gamma Curve..........................................................................145
Master Gamma Curve.....................................................................................146
Red, Green, and Blue (RGB) Gamma Curves.................................................146
Viewing the Histogram ..........................................................................................147
Adjusting the Preview Image..................................................................................148
Setting Control Points on the Gamma Curves................................................148
Setting the Black Point....................................................................................149
Setting the White Point ..................................................................................150
Automatic Contrast Adjustment .....................................................................152
Modifying the Gamma Curves...............................................................................152
Graphically Altering a Gamma Curve .............................................................152
Forcing a Gamma Curve to Linear..................................................................154
Exiting the Gamma Curve Editor Dialog...............................................................154
Exiting Without Saving Results of the Editing Session....................................155
Exiting and Saving Results of the Editing Session............................................155
Chapter 17 – Nikon Control Application Software – Macintosh ............................157
Launching Nikon Control......................................................................................157
Scan Windows........................................................................................................157
Status Bar...............................................................................................................158
The Main Menu.....................................................................................................158
The Apple Menu.............................................................................................158
The File Menu................................................................................................159
New Scan.................................................................................................160
Close........................................................................................................160
Page XII Software Reference for Scanners
Table of Contents
Page 13

Save As... .................................................................................................161
Eject.........................................................................................................161
Quit.........................................................................................................162
The Edit Menu...............................................................................................162
Undo/Redo (Last Command Used).........................................................162
Zoom In..................................................................................................162
Zoom Out...............................................................................................163
Double Zoom..........................................................................................163
Halve Zoom.............................................................................................163
Set Zoom to 1:1.......................................................................................163
Original Scan Zoom ................................................................................163
Chapter 18 – Nikon Control Application Software – Windows..............................165
Launching Nikon Control......................................................................................165
Scan Windows........................................................................................................165
The Main Menu.....................................................................................................166
The File Menu................................................................................................166
New Scan.................................................................................................167
Open .......................................................................................................167
Close........................................................................................................168
Save .........................................................................................................168
Save As... .................................................................................................168
About.......................................................................................................169
Exit..........................................................................................................169
The Edit Menu...............................................................................................169
The Window Menu........................................................................................170
Cascade....................................................................................................170
Tile..........................................................................................................170
Arrange Icons...........................................................................................170
Zoom In..................................................................................................170
Zoom Out...............................................................................................171
Fit In Window.........................................................................................171
Autosize Window.....................................................................................171
Information .............................................................................................172
Selecting the Active Scan Window...........................................................172
Troubleshooting – Macintosh .................................................................................173
Troubleshooting – Windows...................................................................................177
Glossary of Computer Imaging Terms.....................................................................181
Index........................................................................................................................189
Software Reference for Scanners Page XIII
Table of Contents
Page 14

Page XIV Software Reference for Scanners
Table of Contents
Page 15

Read This First
About this Manual
This software reference contains instructions for using Nikon Coolscan (LS-10
and LS-10E), LS-3510AF, and LS-3500 scanners running on either an Apple Macintosh
computer or an IBM PC or compatible computer under Microsoft Windows 3.1 or
later. Use of this manual assumes that the user has a working knowledge of the relevant
operating system. Where possible, Nikon has attempted to make both versions of software as similar as possible in feature set and interface design. There may be occasions,
because of operating system dissimilarities, where the two versions may not match exactly. The explanations in the respective platform sections may also differ for that reason.
Specific references to Coolscan apply to all Coolscan models. Specific references to
model LS-3510AF may apply to model LS-3500 as well.
Commands that are taken from the user interface are shown using HELVETICA
type. Cautions and Notes are printed in boldfaced type with a triangular warning
marker located in the margin.
The Package Contents
Listed below are the components of the Nikon Software Reference for Scanners
package:
• Nikon Software Reference for Scanners
• Nikon Scanning Software for Macintosh
• Nikon Scanning Software for Windows
• Nikon User Registration Card
• Sample 35mm Slide
User Registration
To receive the latest product information and software updates from Nikon,
please complete the enclosed registration card and mail it today!
Minimum Macintosh Scanning System Requirements
• Macintosh family of computers with SCSI interface (for use with Coolscan or
LS-3510AF SCSI models)
• Macintosh System 6.0.5 or later
• 32-bit QuickDraw (when using earlier than System 7.0)
Software Reference for Scanners Page 1
Chapter 1 Read This First
Page 16

• 8 Megabytes of RAM (more recommended)
• 80 Megabyte Hard Disk (300MB or more recommended)
• National Instruments NB-GPIB card with cable (with LS-3510AF GPIB models)
• 8-bit display (24-bit true-color display strongly recommended)
• SCSI II cable adapter (with LS-3510AF SCSI models)
Minimum IBM PC and Compatibles
Scanning System Requirements
• Microsoft Windows version 3.1 or later
• 8 Megabytes of RAM (more recommended)
• 80 Megabyte Hard Disk (300MB or more recommended)
• National Instruments GPIB-AT card (for ISA bus) or MC-GPIB card (for
Microchannel bus) with cable (with LS-3510AF and LS-3500 GPIB models). The
National Instruments GPIB-PCIIA card is not supported under Windows 3.1.
• SCSI controller card with ASPI driver (with LS-3510AF SCSI models)
• 8-bit display (24-bit true-color display strongly recommended)
• SCSI II cable adapter (with LS-3510AF SCSI models)
Suggested Macintosh System Configurations
Following these suggestions will yield the best scanning results:
• Set your disk cache (found in the “Memory” Control Panel in System 7, and in the
General Control Panel in System 6) to the minimum setting, as scan times increase
if the RAM cache is set above the minimum.
• Virtual Memory, also in the “Memory” Control Panel in System 7, should be
switched off. Most imaging applications have their own method for dealing with
images larger then available RAM.
• File Sharing should be switched off. Any extended background operation, such as
copying large files from your system to another over a network, may cause the scanner to abort during a scan.
• Allocate at least 80% of your available memory to the application that is hosting
the Nikon Scanner plug-in. Adding memory to your system is one of the best
investments you can make to increase overall image processing performance.
Page 2 Software Reference for Scanners
Read This First Chapter 1
Page 17

• For the most accurate display, set your “Monitors” Control Panel to the maximum
number of colors available. “Thousands” or “Millions” of colors will provide an
excellent display of your image. If your system only supports a maximum of 256
colors you will see a ‘dithered’ image, which looks ‘soft’, and is difficult to adjust or
edit accurately. The monitor setting has no effect on the actual quality of your
image, which is always captured in 24-bit mode (16.7 million colors).
• Color images can occupy large amounts of disk space. Make sure your hard disk
has sufficient free space to store the images you plan to scan. You should have at
least 60 megabytes of free space available if you plan on maximum resolution scans.
Suggested IBM PC or Compatible
System Configurations
• For the most accurate display, set your monitor to display the maximum number
of colors available. 16-bit or 24-bit graphics adapters will provide an excellent rendition of your image. If your system only supports a maximum of 256 colors (VGA)
you will see a ‘dithered’ image, which looks speckled or grainy. The monitor setting
has no effect on the actual quality of your image, which is always captured in 24-bit
mode (16.7 million colors).
• Color images can occupy large amounts of disk space. Make sure your hard disk
has sufficient free space to store the images you plan to scan. You should have at
least 60 megabytes of free space available if you plan on maximum resolution scans.
Before You Begin
Before proceeding, make a backup copy of your master diskettes! Store the master
diskettes in a safe place. Always work with the backup copies to install the software.
In “Getting Started” you will learn the basics of how to perform a scan, thus getting you up and running within the shortest time possible. “Getting Started” provides
condensed instruction that will lead you through your first scan, using the enclosed sample slide. Don’t worry if you do not understand some of the terminology and concepts
introduced here. The goal is to familiarize yourself with the controls by performing a
routine scan.
You will probably require about one half-hour to complete this trial run. In that
time you will gain a working knowledge of the scanning system. Nikon scanners are
designed to yield a high quality scan requiring little user intervention. You need only
properly insert the film in the scanner, launch the scanning software, and select the
SCAN command. However, if you would like a thorough explanation of the scanner
controls, color imaging techniques, and color separation guidelines, we strongly recommend reading the entire contents of this manual.
Software Reference for Scanners Page 3
Chapter 1 Read This First
Page 18

Before you begin, make sure that you have the minimum system requirements for
a functional scanning system. In particular, if you are using a GPIB model scanner, you
must have a GPIB interface card and software installed in your computer, or have one
ready to install.
For detailed information on the scanning hardware and a full discussion of programming your own scanner interface, refer to the Technical and Programmer’s
References, available from Nikon.
Now, let’s begin by following the instructions in the “Software Installation” chapter for your particular computer.
Page 4 Software Reference for Scanners
Read This First Chapter 1
Page 19

Software Installation – Macintosh
Nikon Software
The enclosed distribution diskette Scanning Software for Macintosh, includes two
scanning software programs, Nikon Scanner plug-in software and Nikon Control . Also
included is a driver for the Nikon CP-3000 printer. Two software utilities, NB Handler
and Eject Coolscan Film are included to assist you in configuring your GPIB computer
interface (if applicable), and ejecting slides from Coolscan scanners, respectively.
Before you can use your scanner, you must install the scanning software on your
computer. Because the scanning software files are compressed, you cannot simply copy
them to your hard disk. Rather, by responding to a few simple prompts and providing a
minimum amount of information, the Nikon Installer, also located on the distribution
diskette, will automatically decompress and install the Nikon Scanner plug-in, Nikon
Control, ColorSync profiles and Eject Coolscan Film (if applicable) onto your hard
drive, as requested.
Commands that are taken from the user interface in this section are shown using
HELVETICA type.
Nikon Scanner Plug-in Software
The Nikon Scanner plug-in software must be used in conjunction with another
software application. It is called a plug-in because it ‘plugs in’ to any software application which is compatible with the Adobe Photoshop plug-in standard. The Nikon
Scanner plug-in software user interface remains the same across most of the popular
imaging applications. This allows you to scan from within different applications as
desired, even crossing over from the Macintosh to the PC, without having to learn a
new scanner software interface. Use of the Nikon Scanner plug-in is explained in detail
later in this manual.
Nikon Control Software
Nikon Control is a stand-alone scanning software application that directly supports the Nikon Scanner plug-in for use with Nikon scanners only. If you would rather
not scan from within another application program, such as Photoshop, Nikon Control
is an easy-to-use application. Use of Nikon Control is explained in detail later in this
manual.
!
Software Reference for Scanners Page 5
Chapter 2 Software Installation – Macintosh
Page 20
Utility Software
The distribution diskette also contains two software utilities. The first,
NB Handler, is used to communicate with the GPIB interface card for use with Nikon
LS-3510AF scanners or CP-3000 printers with a GPIB interface. Eject Coolscan Film
is a simple software application for ejecting the slide inserted in Coolscan scanners only.
This application has no menu. It will locate Coolscan, send the EJECT FILM command,
then quit.
System Requirements
Macintosh System 6.0.5 (System 7.1 is recommended) must be installed on the
computer before attempting to run the Nikon Installer software. The destination disk
drive, the drive on which you will be loading the scanning software, must have enough
disk space to accommodate the Nikon Scanner plug-in and Nikon Control. If you are
planning on using the plug-in with specific third-party applications, make sure that the
application is already installed on the destination drive before installing the plug-in.
About the Nikon Installer
The Distribution Diskette
Insert the backup copy of the distribution diskette into an available floppy disk
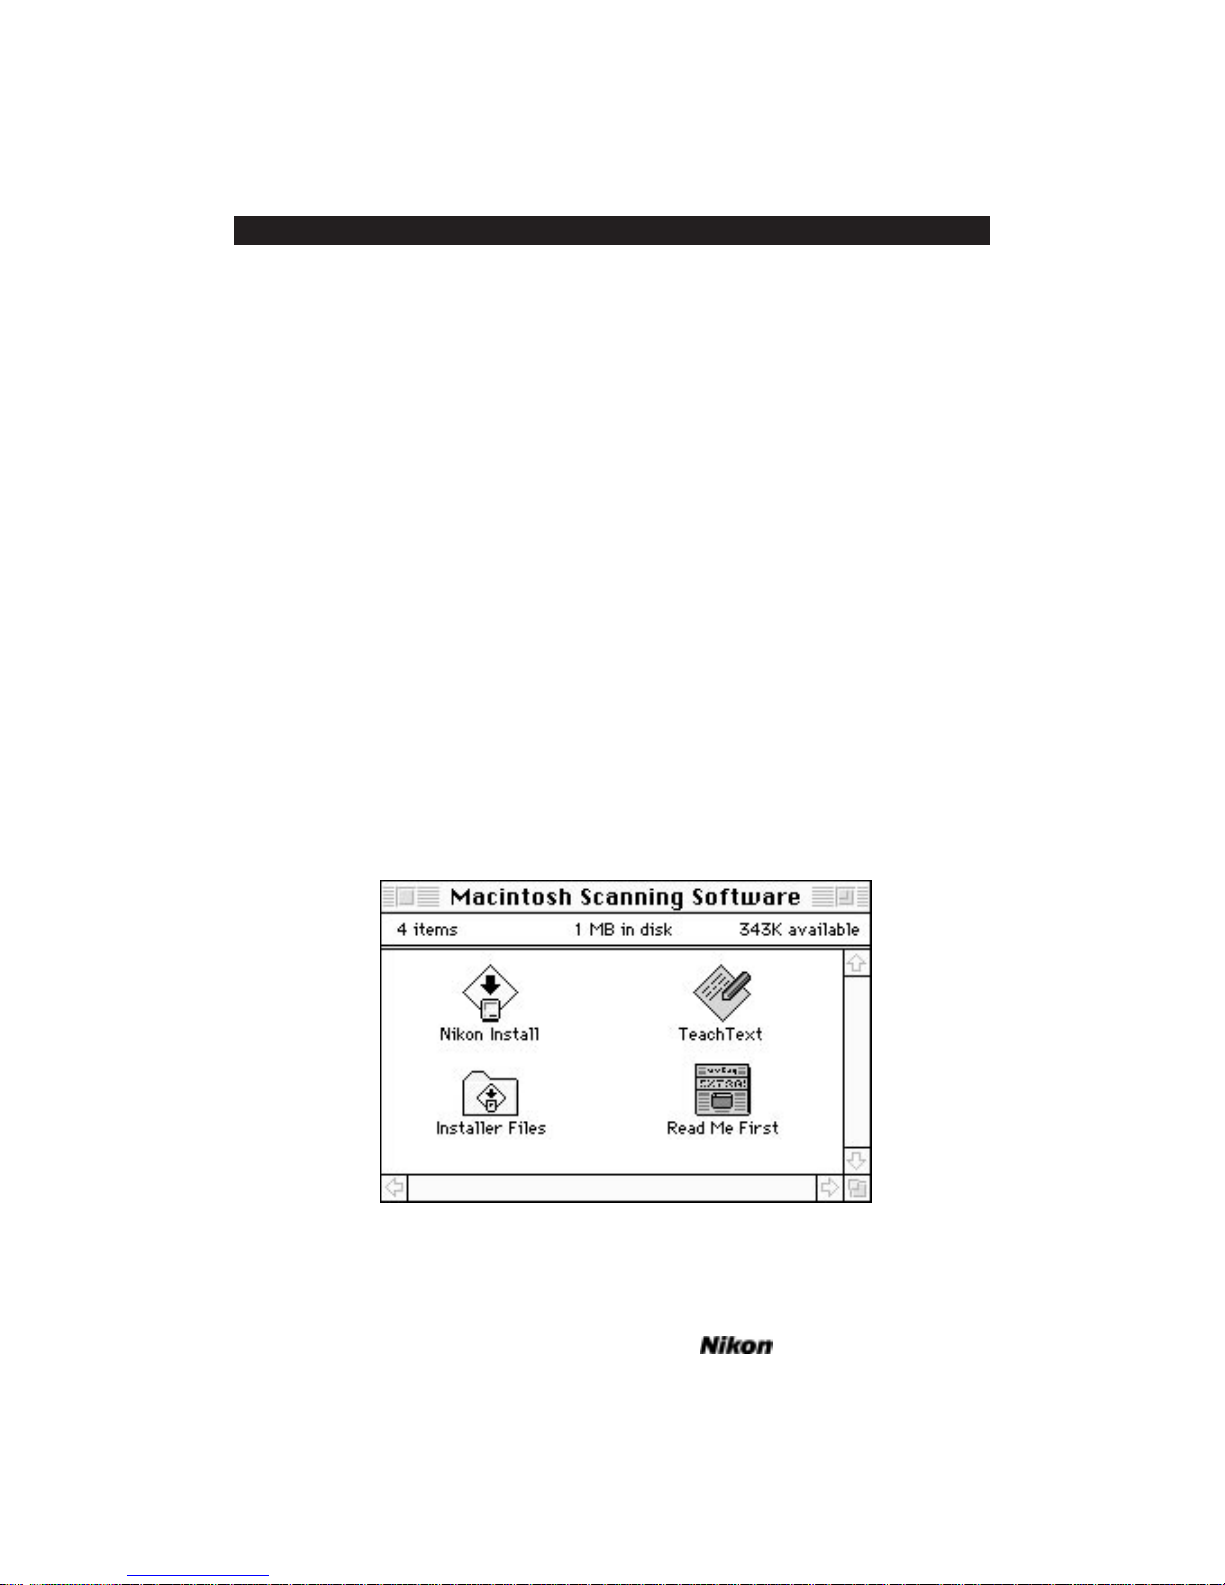
drive. The disk should open automatically to the top-left corner of the screen, revealing
its contents, shown in Figure 2.1.
Figure 2.1 Contents of the distribution diskette.
Page 6 Software Reference for Scanners
Software Installation – Macintosh Chapter 2
Page 21

Make sure to read contents of the Read Me First file for important technical information before proceeding.
Before You Begin
The Nikon Installer program provides two installation options. The first option,
Easy Install, installs all necessary files for your LS-3510AF with GPIB interface. This
can only be installed to a disk with a working System Folder. The second set of options,
Customize, allows you to specify installation of software for other Nikon products. Both
options allow you to quit during the installation if desired.
There are times when you will already have another imaging application loaded
onto your Macintosh and would like to use the Nikon Scanner plug-in in conjunction
with it. For example, you might be using Nikon ImageAccess or Adobe Photoshop. If
you already have one of these applications loaded onto your computer, all that is
required is to run the Nikon Installer, then copy the Nikon Scanner plug-in from the
NIKON CONTROL folder to the desired folder. The Nikon Scanner plug-in can then be
automatically accessed by your existing imaging software.
The LS-3510AF/LS-3500 GPIB software must be installed to a system disk.
The Nikon Installer will not allow installation of the GPIB Drivers to a nonsystem disk.
It is strongly recommended that you disable all virus protection software before
using the Nikon Installer. Some virus protection software may be triggered by the
Nikon Installer.
Running the Nikon Installer
Step 1. Double-click the NIKON INSTALL icon with the mouse button.
The Installer will display an introductory screen.
Step 2. Click the OK button.
Step 3. The following message will appear:
!
!
Software Reference for Scanners Page 7
Chapter 2 Software Installation – Macintosh
Page 22
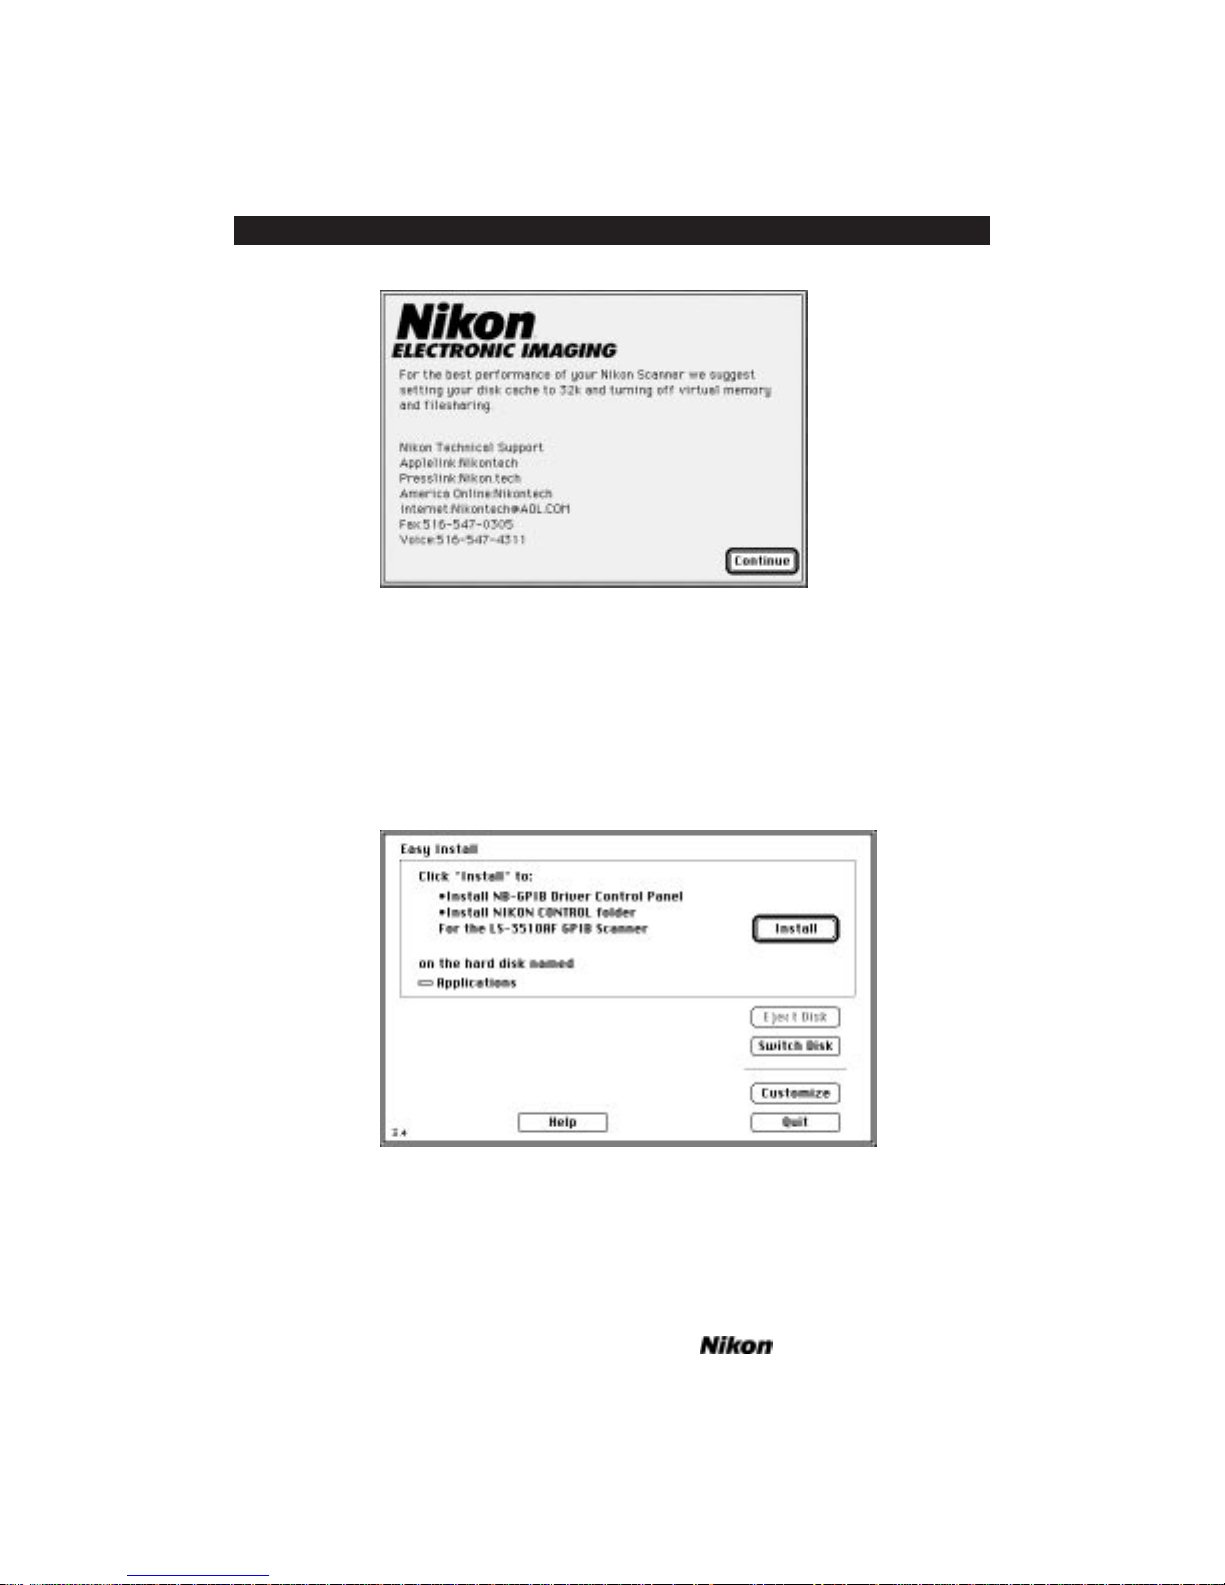
Figure 2.2 The installation message for suggested system configuration.
It is strongly recommended that you adhere to the recommended system configuration to optimize performance of your Nikon scanner.
Click the CONTINUE button.
Step 4. The Nikon Installer dialog box, seen in Figure 2.3, will appear, and your
Startup disk will be selected for the installation.
Figure 2.3 The Nikon Installer dialog for selecting Easy Install of LS-3510AF
GPIB model. Click C
USTOMIZE for installation for other Nikon devices.
Page 8 Software Reference for Scanners
Software Installation – Macintosh Chapter 2
Page 23
If you are installing a Nikon LS-3510AF or LS-3500 GPIB model scanner, click
the INSTALL button and proceed to Step 7.
–or–
If you are installing a Nikon Coolscan scanner, an LS-3510AF SCSI model scanner, or a Nikon CP-3000 Dye Sublimation Printer, click CUSTOMIZE, and proceed to
Step 5.
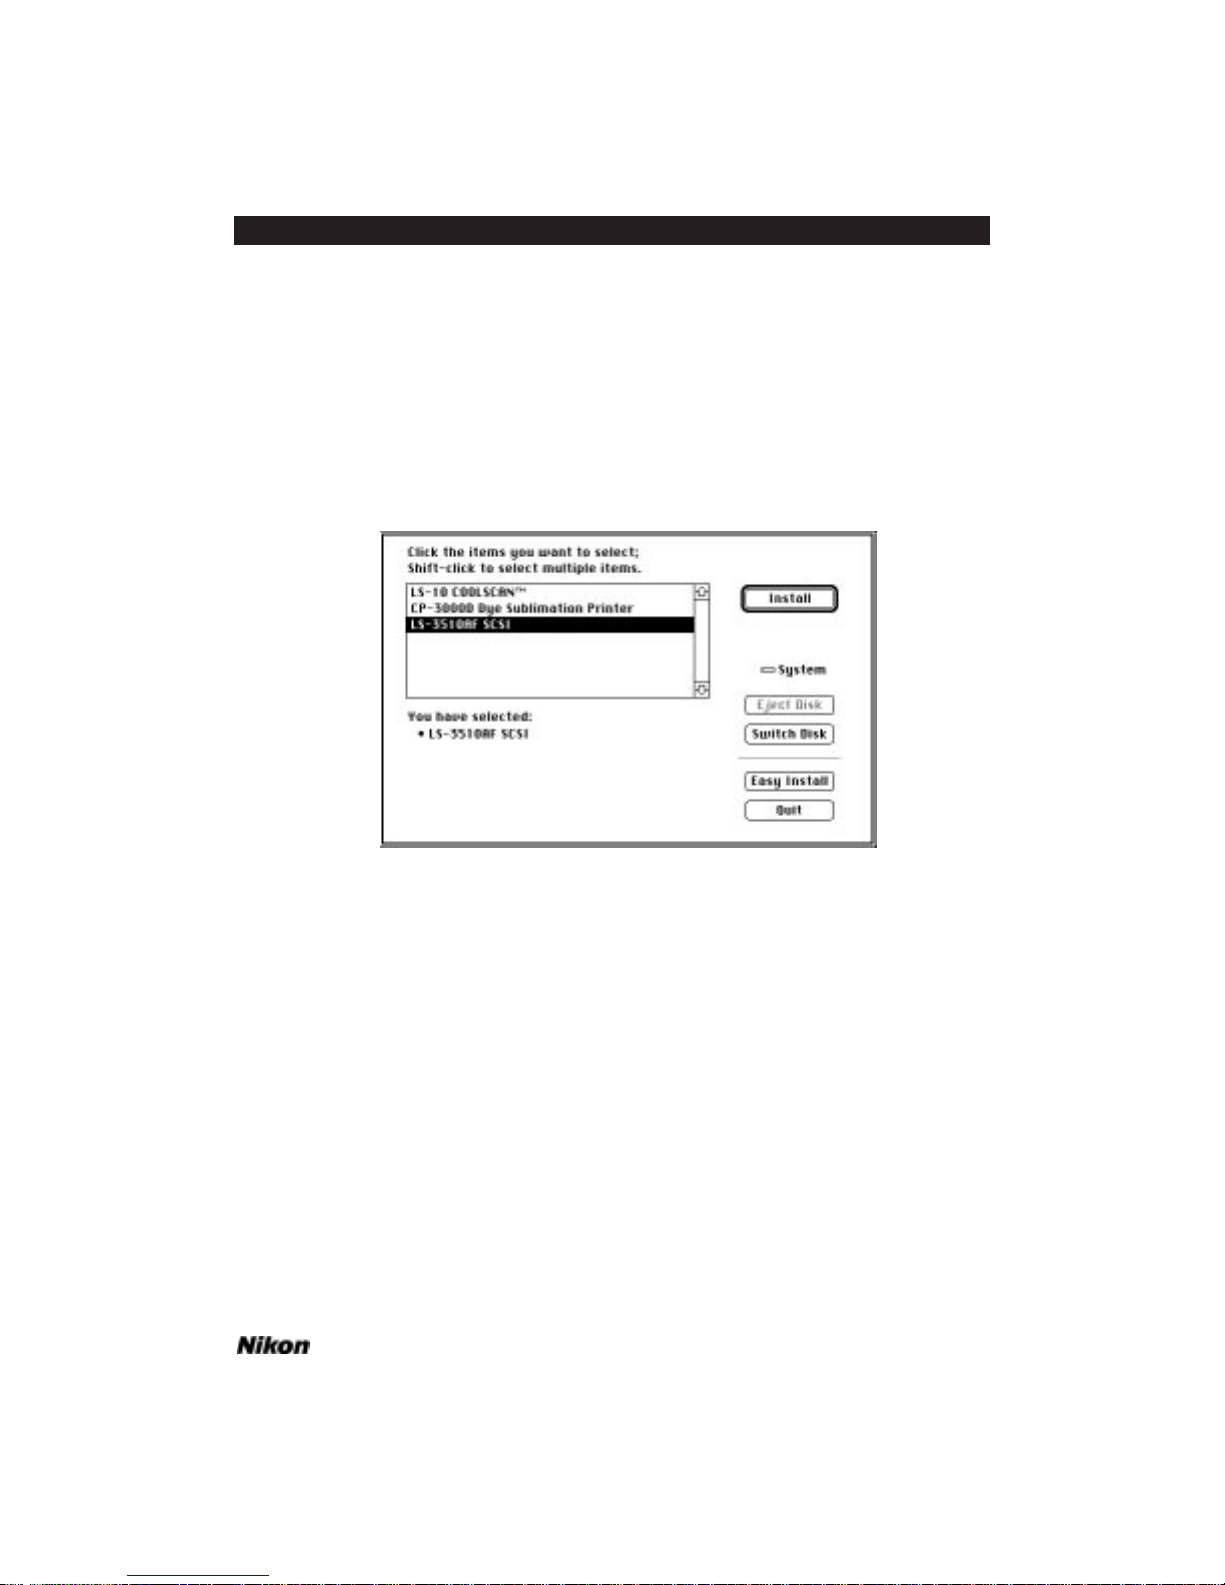
Step 5. A dialog box containing the three installation options will appear, as seen
in Figure 2.4. Select the option you want to install by clicking on it.
Figure 2.4 The Nikon Installer dialog for selecting other Nikon
devices for installation.
Step 6. Once you have selected the device for installation, click the INSTALL but-
ton, not to be confused with the EASY INSTALL, button which returns you to the first
dialog.
–or–
If you want to install the LS-3500/LS-3510AF GPIB model, click the EASY
INSTALL button.
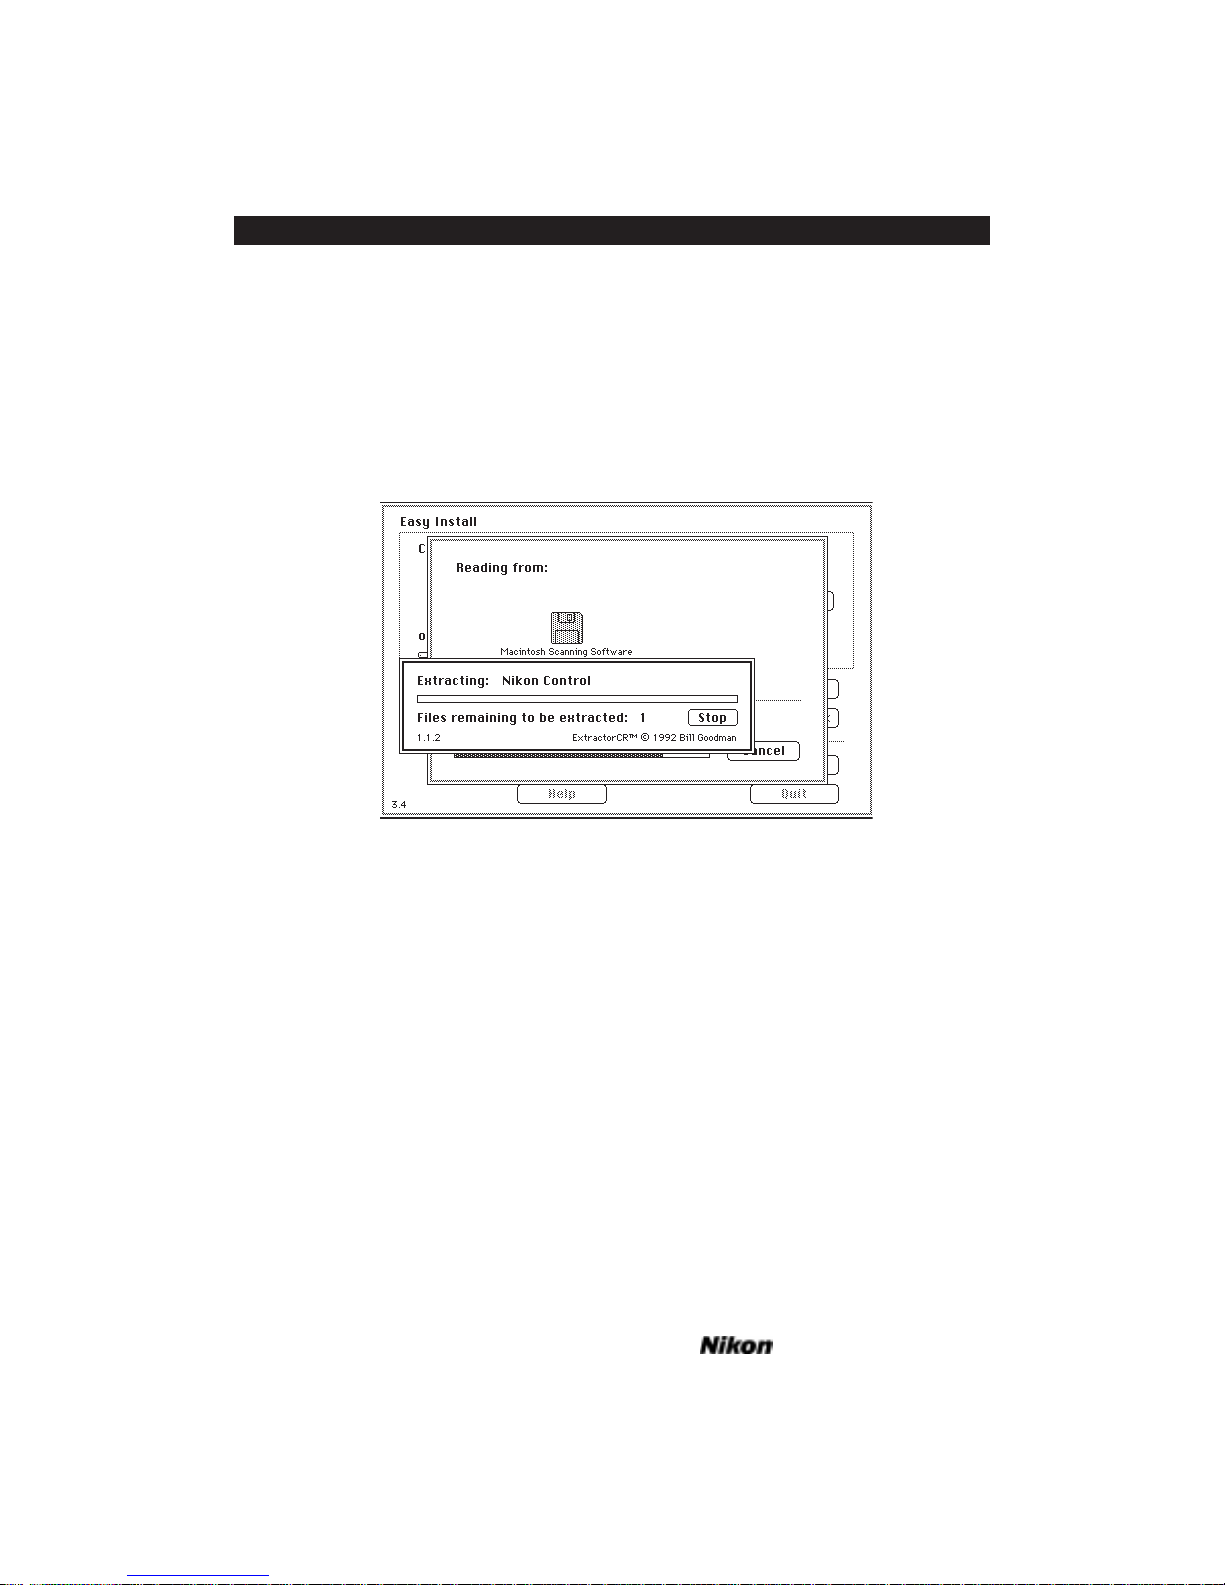
Step 7. The dialog box shown in Figure 2.5 will appear, indicating the progress of
the installation. You will see the names of the files being installed adjacent to
EXTRACTING: as they are first copied then extracted to your hard disk, as well as the
number of FILES REMAINING TO BE EXTRACTED: just below. This extraction process
will take a few minutes to complete. Note that you can quit the installation at any time
by clicking the STOP button. Your system will automatically be restarted at the end of
the installation, so that the necessary driver software will load.
Software Reference for Scanners Page 9
Chapter 2 Software Installation – Macintosh
Page 24
If you selected the Easy Install option in Step 4, all files necessary for operating a
Nikon LS-3510AF GPIB model scanner will be copied and extracted to your hard disk.
A folder named Nikon Control will be created on the hard disk, in this example on the
hard disk “System.” The NB-Handler software will be installed in the Control Panels
folder in your System Folder if you are using System 7. Your system will automatically
be restarted at the end of the installation, so that the GPIB drivers will load.
If you selected a Nikon device other than the LS-3510AF GPIB model for installation, as in Step 5, all relevant files will be copied and extracted to your hard disk.
Figure 2.5 The Nikon Installer progress indicator.
Step 8. In most cases, a message will be displayed informing you that the installation was completed successfully. Be sure to make note of any error messages that
appear, before contacting Nikon Technical Support. Some virus detection software may
be triggered by the Nikon Installer. You should disable them before using the Nikon
Installer.
If you are installing a Nikon LS-3510AF with a SCSI interface, using the built-in
SCSI interface on the Macintosh, connect the DB25 to SCSI II cable adapter to the rear
panel connector on the Macintosh, then to the Mini 50-pin connector on the
LS-3510AF. If this is the only device on the SCSI bus, connect a terminator to the second plug on the Nikon device. Restart your Macintosh and proceed to the chapter
“Getting Started on the Macintosh.”
Page 10 Software Reference for Scanners
Software Installation – Macintosh Chapter 2
Page 25

Software Installation – IBM PC or Compatible
Nikon Software
The enclosed distribution diskette Scanning Software for Windows, includes two
scanning software programs, Nikon Scanner plug-in software and Nikon Control . Also
included is a driver for the Nikon CP-3000 Dye Sublimation Printer. The software
utility Eject Coolscan Film is included to assist you in ejecting a slide from Coolscan
scanners within the Program Manager, Windows’ File Manager, or DOS.
Nikon Scanner Plug-in Software
The Nikon Scanner plug-in software must be used in conjunction with another
software application. It is called a plug-in because it ‘plugs in’ to a number of software
applications such as Nikon ImageAccess, Micrografx Picture Publisher and Adobe
Photoshop/PC. The Nikon Scanner plug-in software user interface remains the same
across these and most other popular imaging applications. This allows you to scan from
within different applications as desired, even crossing over from the PC to the
Macintosh, without having to learn a new scanner software interface. Use of the Nikon
Scanner plug-in is explained in detail later in this manual.
Nikon Control Software
Nikon Control is a stand-alone scanning software application that directly supports the Nikon Scanner plug-in for use with Nikon scanners only. If you would rather
not scan from within another application program, such as Photoshop, Nikon Control
is an easy-to-use application. Use of Nikon Control is explained in detail later in this
manual.
Utility Software
The distribution diskette also contains the software utility Eject Coolscan Film, a
simple software application for ejecting the slide inserted in Coolscan scanners only.
This application has no menu. It will locate Coolscan, send the EJECT FILM command,
then quit.
Nikon Installer Software
By responding to a few simple prompts and providing a minimum amount of
information, the Nikon Installer will automatically install the Nikon Scanner plug-in
and/or the Nikon Control software onto your hard drive, as requested.
Software Reference for Scanners Page 11
Chapter 3 Software Installation – IBM PC or Compatible
Page 26
Commands that are taken from the user interface in this section are shown using
HELVETICA type.
System Requirements
Windows 3.1 or later must be installed on the computer before attempting to run
the Nikon Installer software. The destination disk drive, the drive on which you will be
loading the scanning software, must have enough disk space to accommodate the Nikon
Scanner plug-in and/or Nikon Control, and the SCSI driver. If you are planning on
using the Nikon Scanner plug-in with specific third-party applications, you should have
all the required disks available before continuing.
The Distribution Diskette
The Nikon software distribution diskette contains the Nikon Control application,
the ASPI driver required by the SCSI controller card, and the main installation program
called SETUP.EXE. The SETUP.EXE program will install Nikon Control and/or a number of third-party applications you may already own. Make sure to make a backup copy
of the Nikon distribution diskette before continuing.
Running the Nikon Installer
First, insert the backup copy of the distribution diskette into an available 3-1/2
inch floppy disk drive. Please contact Nikon Technical Support at 516-547-4311 if you
require 5-1/4 inch media.
The Nikon Installer software must be run from Windows. In the Windows
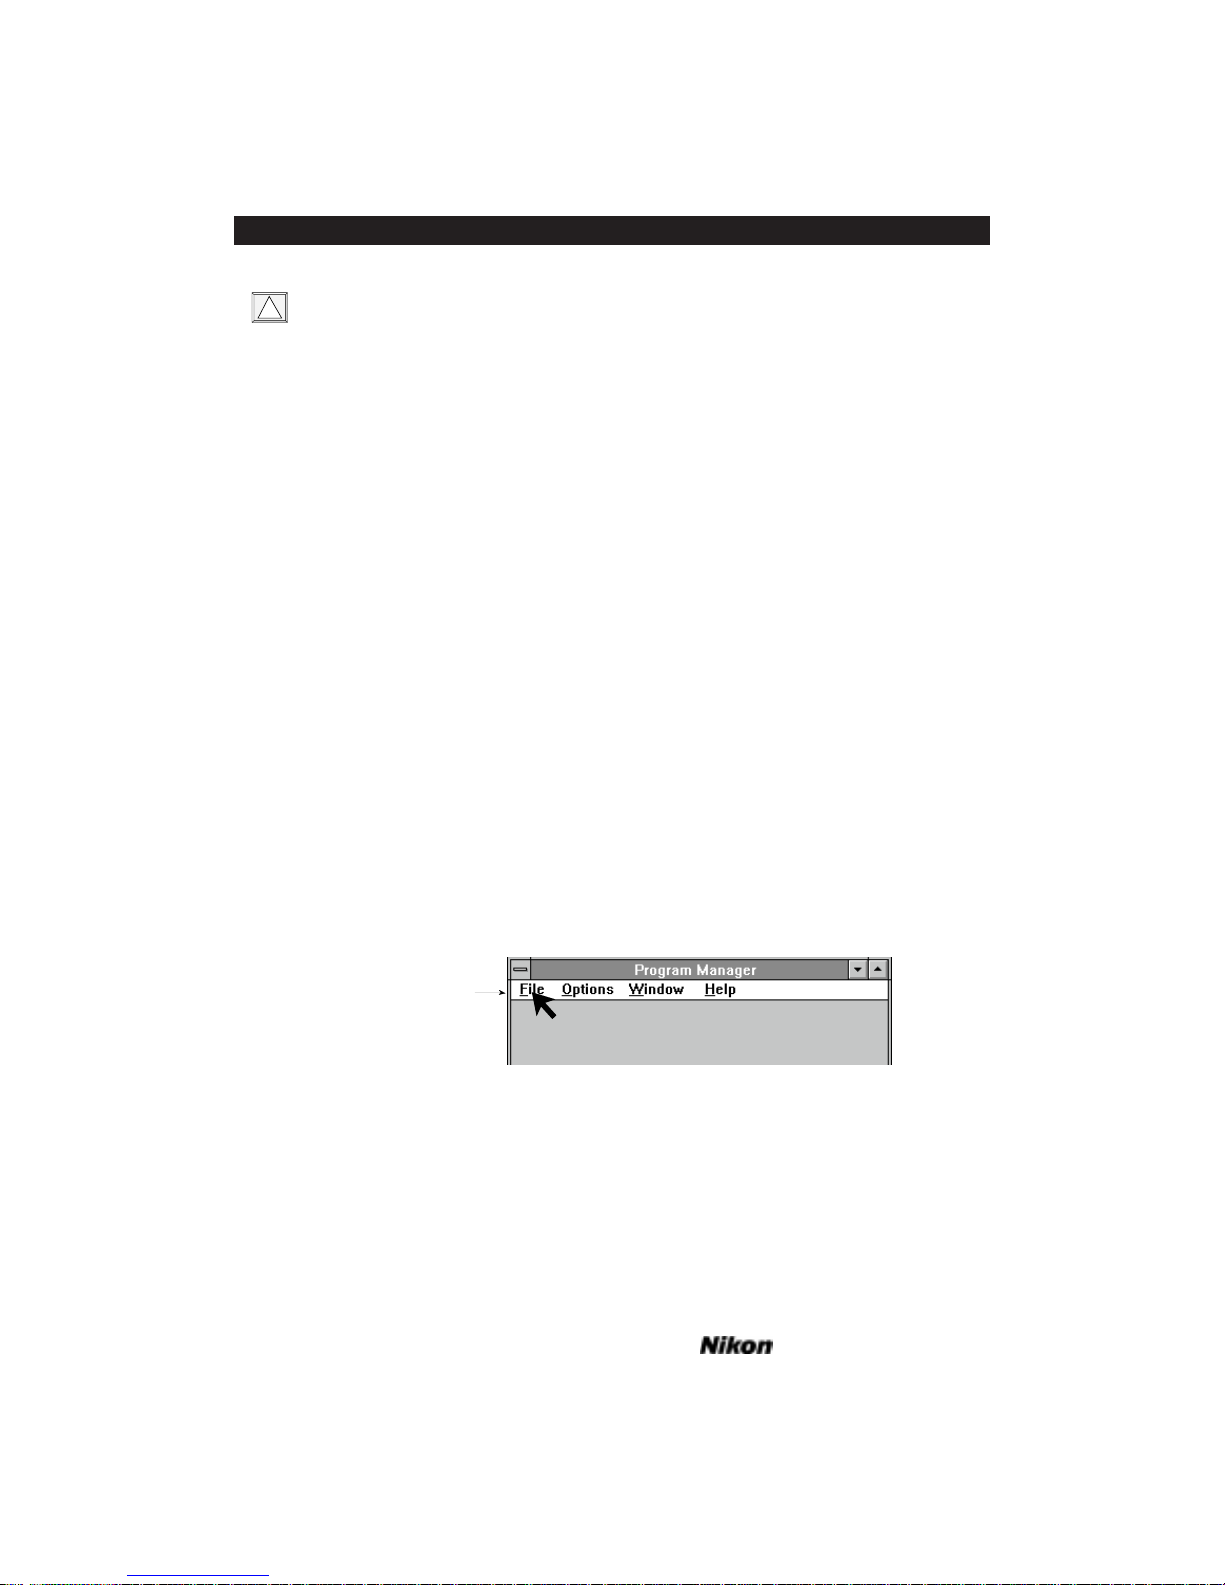
Program Manager click the mouse on the FILE menu item, as shown in Figure 3.1.
Figure 3.1 The Windows Program Manager.
The FILE drop-down menu will appear, as shown in Figure 3.2. Drag the mouse
down to the RUN item and release the mouse button.
Main Menu Bar
Click and pull down
!
Page 12 Software Reference for Scanners
Software Installation – IBM PC or Compatible Chapter 3
Page 27
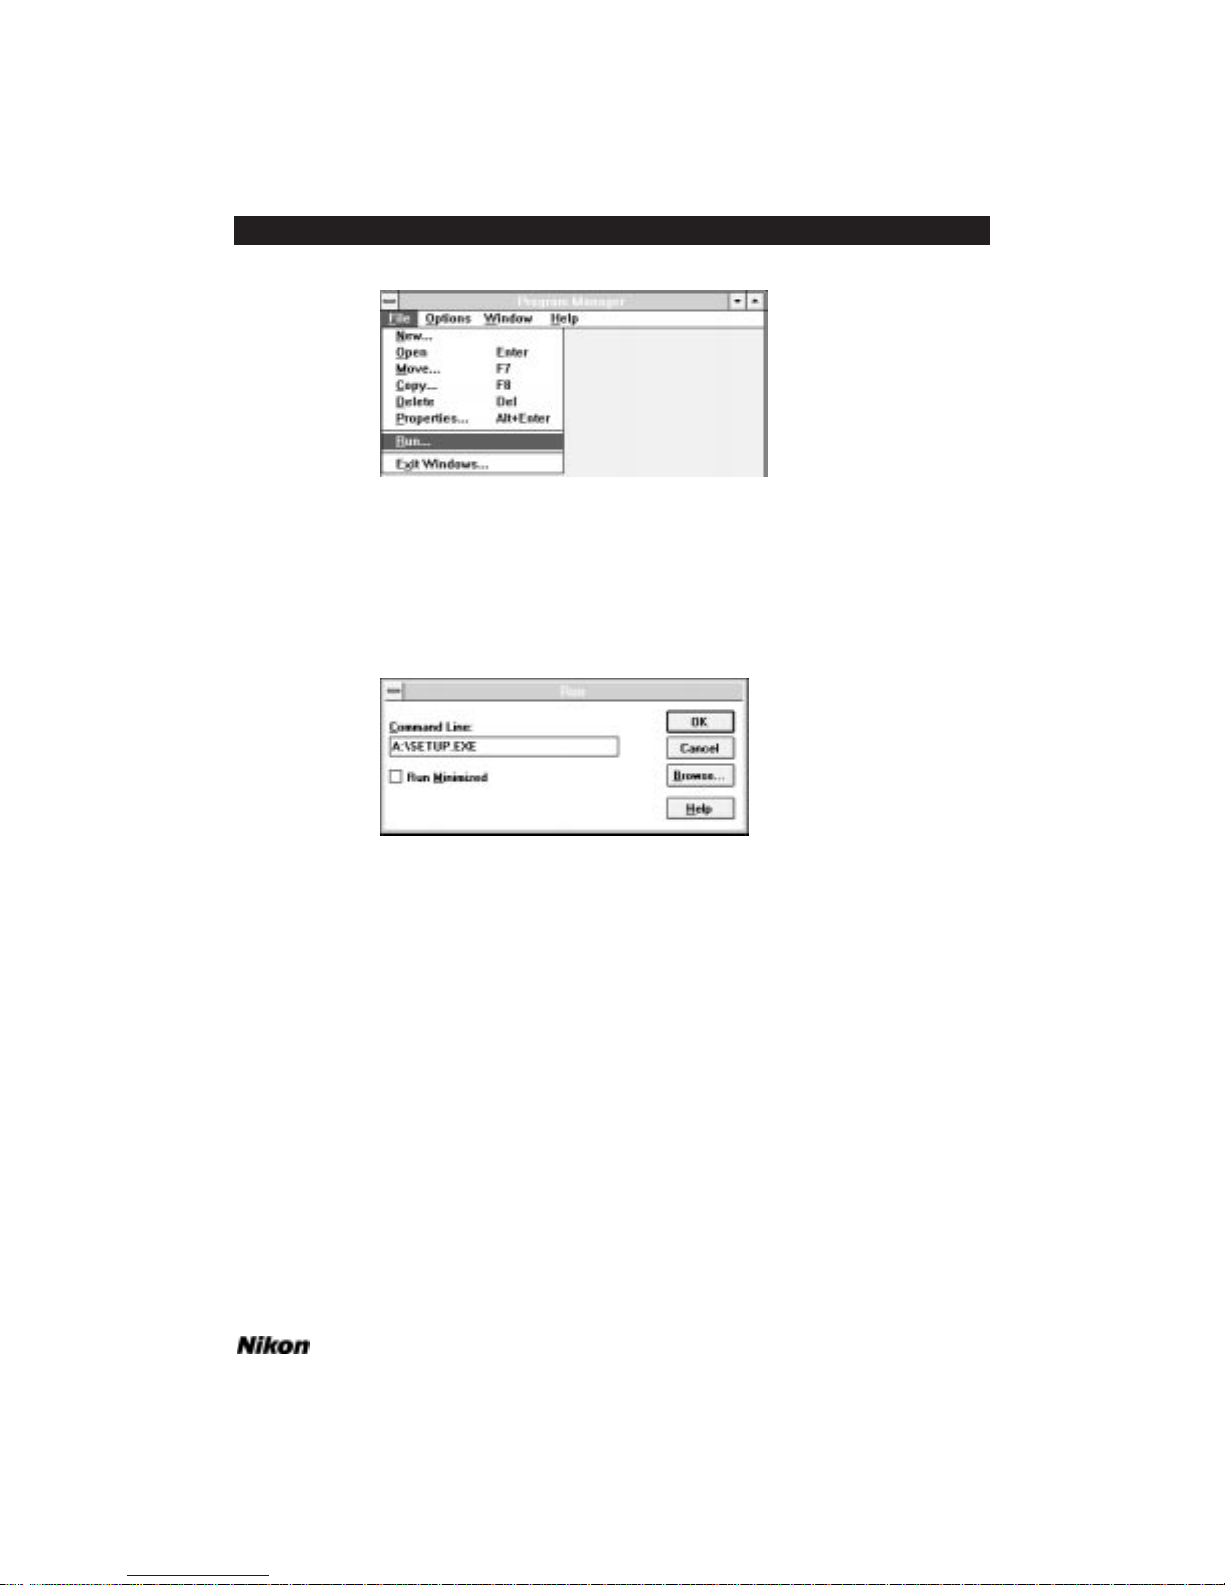
Figure 3.2 The FILE menu.
At this time the RUN dialog will be displayed, prompting you to enter the path to
the Nikon Installer. The Nikon Installer program is named SETUP.EXE. If the Nikon
distribution diskette is in the ‘A’ drive, enter A:\SETUP.EXE into the file name dialog,
then click the OK button. This is illustrated in Figure 3.3.
Figure 3.3 Windows' RUN dialog.
You will be prompted to answer a series of basic questions, after which the Nikon
Installer will automatically install the designated scanning software.
You can access help at any stage of the installation by clicking on the HELP button. Similarly, you can exit the Nikon Installer at any time by clicking on the EXIT
button.
To complete the software installation, simply select from the options available in
each dialog, which are explained fully in the following sections.
The Software Installer Dialog
The first dialog that appears after you launch the SETUP.EXE program is the
NIKON SCANNER SOFTWARE SETUP dialog, seen in Figure 3.4. The Installer is decom-
pressing the scanner software files on the floppy disk and copying them to a temporary
file on your hard disk. This will take a few moments to complete.
Software Reference for Scanners Page 13
Chapter 3 Software Installation – IBM PC or Compatible
Page 28
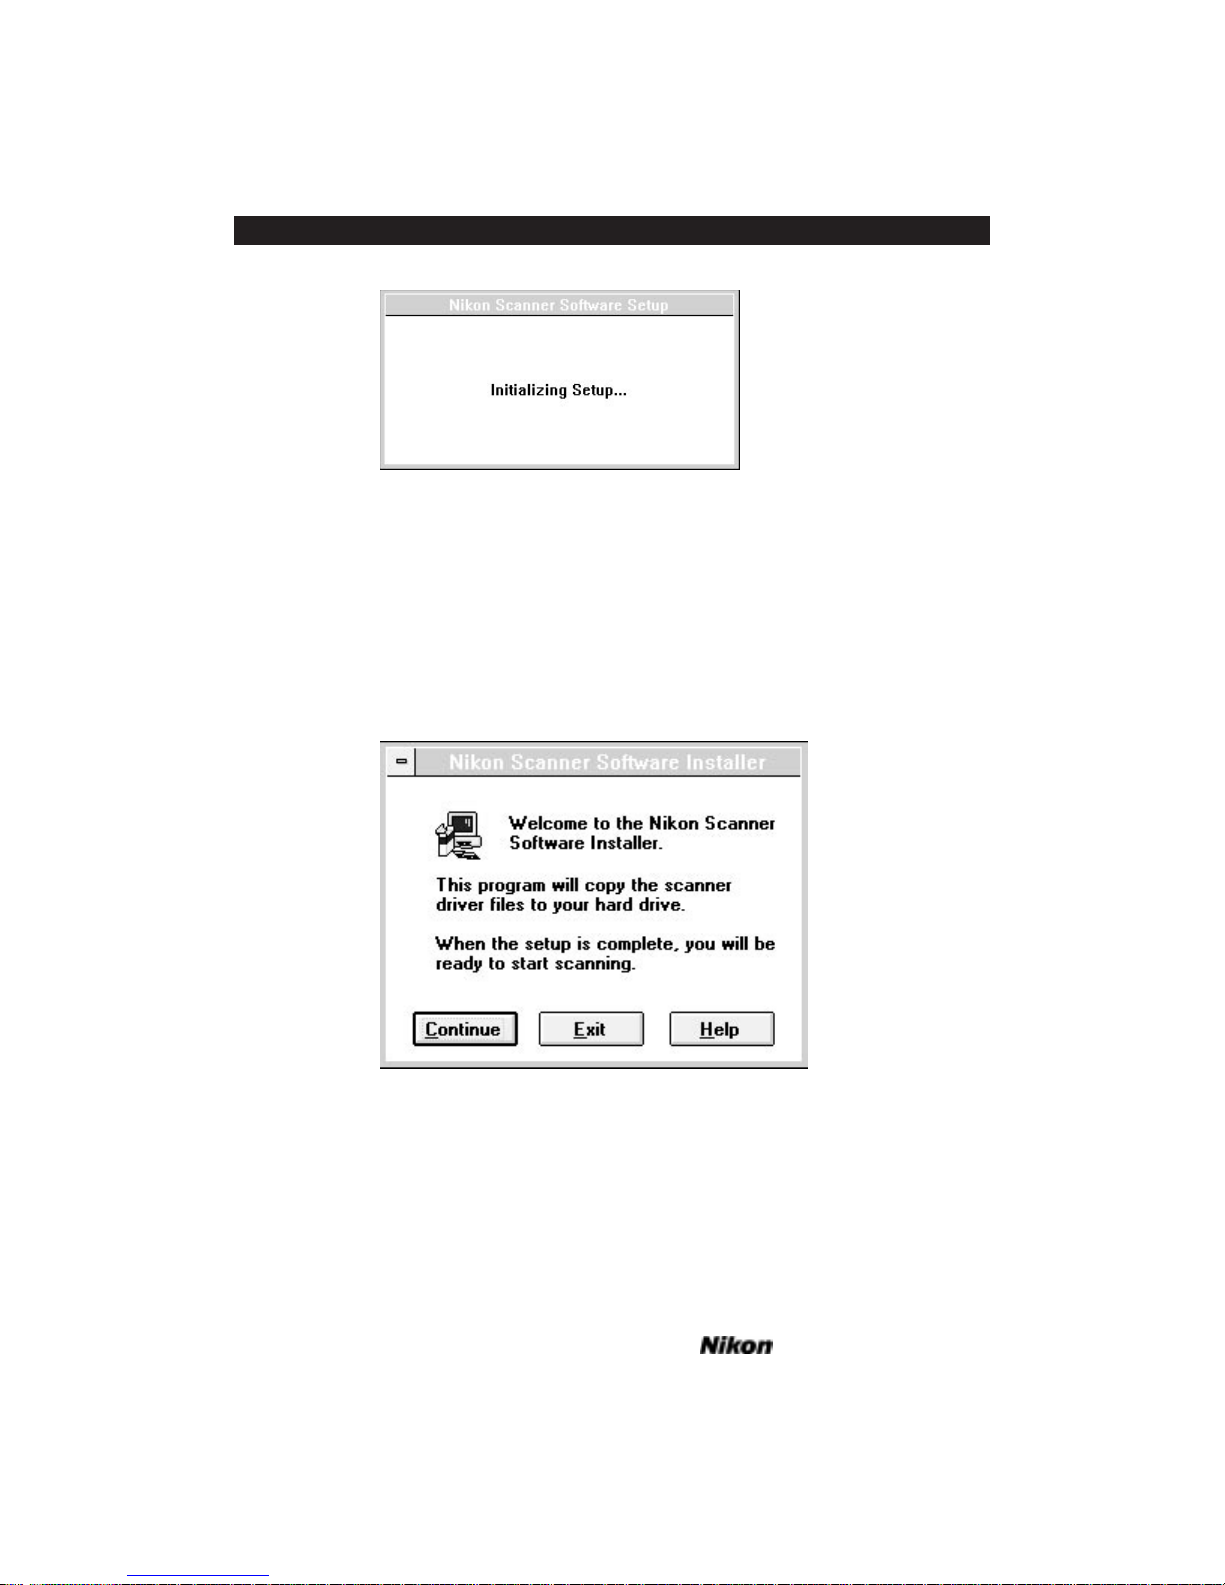
Figure 3.4 The NIKON SCANNER SOFTWARE SETUP dialog.
At the conclusion of the setup operation, the NIKON SCANNER SOFTWARE
INSTALLER dialog will appear, as shown in Figure 3.5.
If you want to continue with the installation, click the CONTINUE button. If you
don’t want to continue with the installation, click the EXIT button. Clicking the HELP
button will provide you with basic information about the current step in the installation
procedure.
Figure 3.5 The NIKON SCANNER SOFTWARE INSTALLER dialog.
The Product Selection Dialog
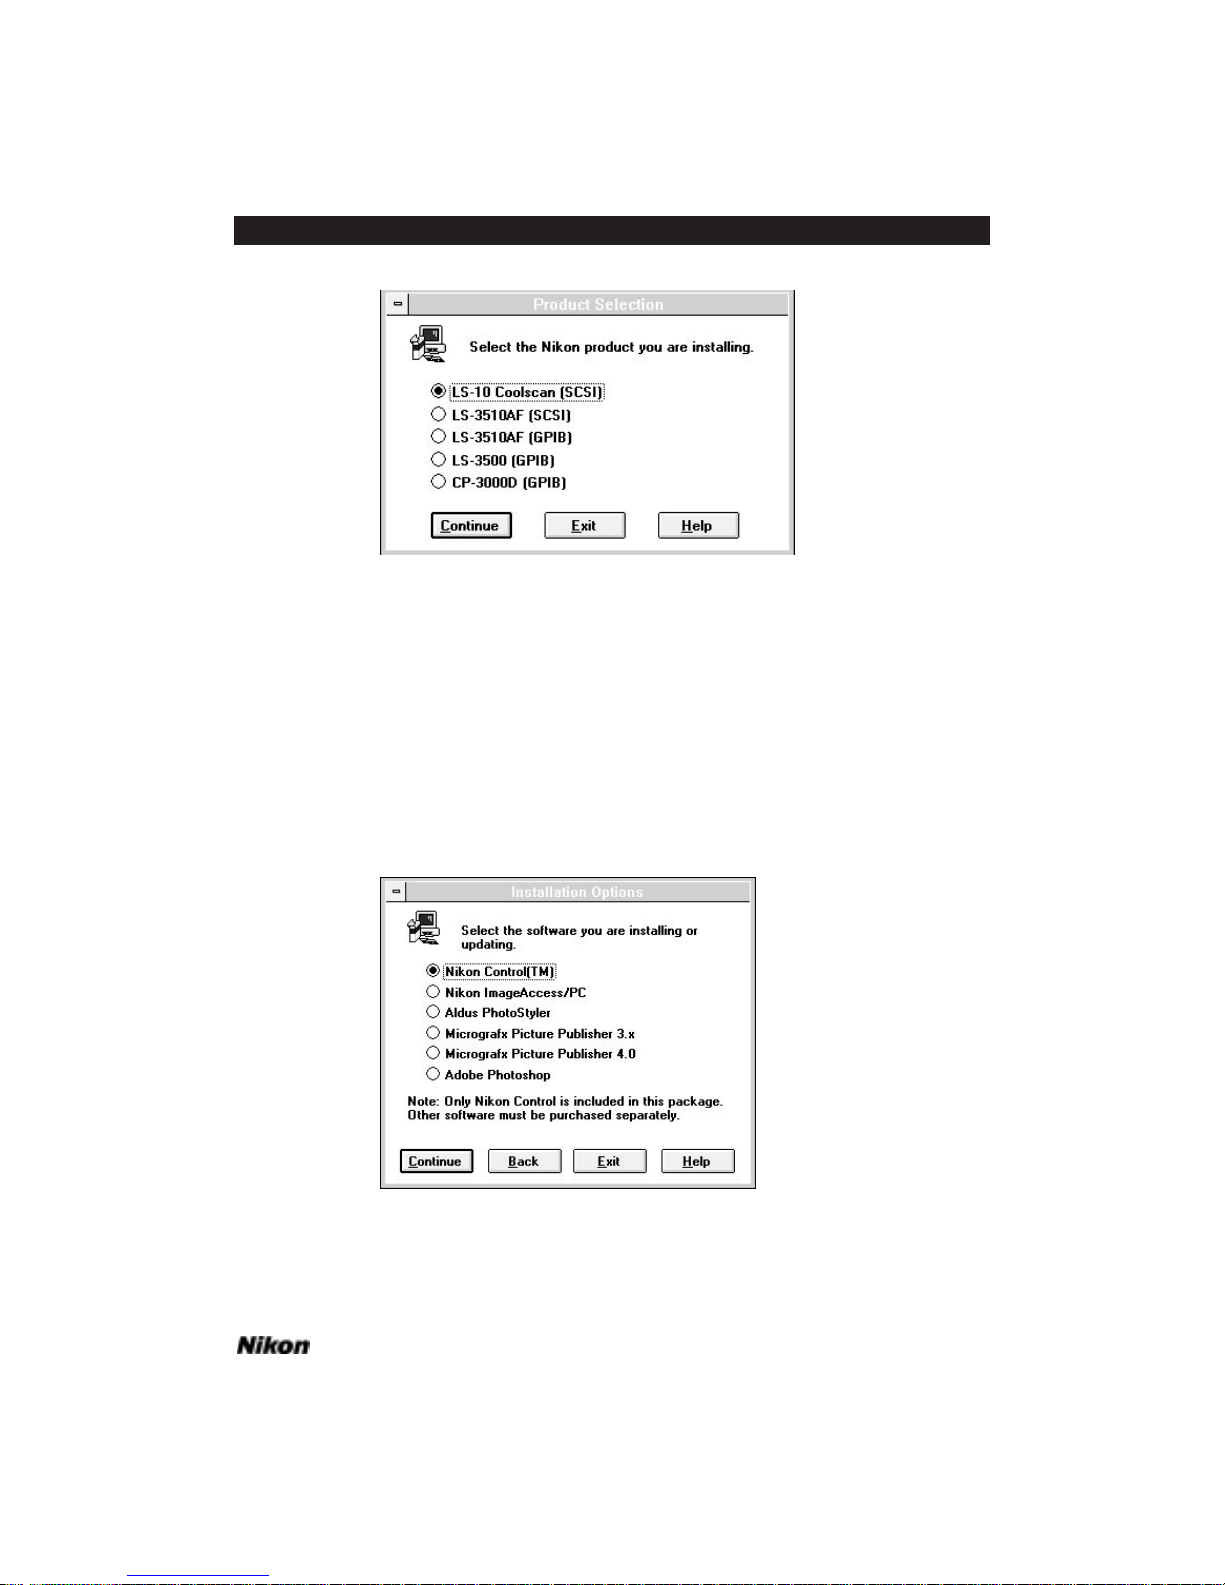
The PRODUCT SELECTION dialog, seen in Figure 3.6, is used to indicate which
Nikon product is being installed. Select the appropriate button, then click on the
CONTINUE button to proceed.
Page 14 Software Reference for Scanners
Software Installation – IBM PC or Compatible Chapter 3
Page 29
Software Reference for Scanners Page 15
Chapter 3 Software Installation – IBM PC or Compatible
Figure 3.6 The PRODUCT SELECTION dialog.
The Installation Options Dialog
The next step entails selecting the application software which you want to ‘host,’
or control the Nikon Scanner plug-in software. Use of the Nikon Scanner plug-in
requires a host application.
Select the host application through the INSTALLATION OPTIONS dialog, shown in
Figure 3.7. The function of this dialog is to tell the Nikon Installer which application
you will be using to access the scanner.
Figure 3.7 The INSTALLATION OPTIONS dialog.
Page 30
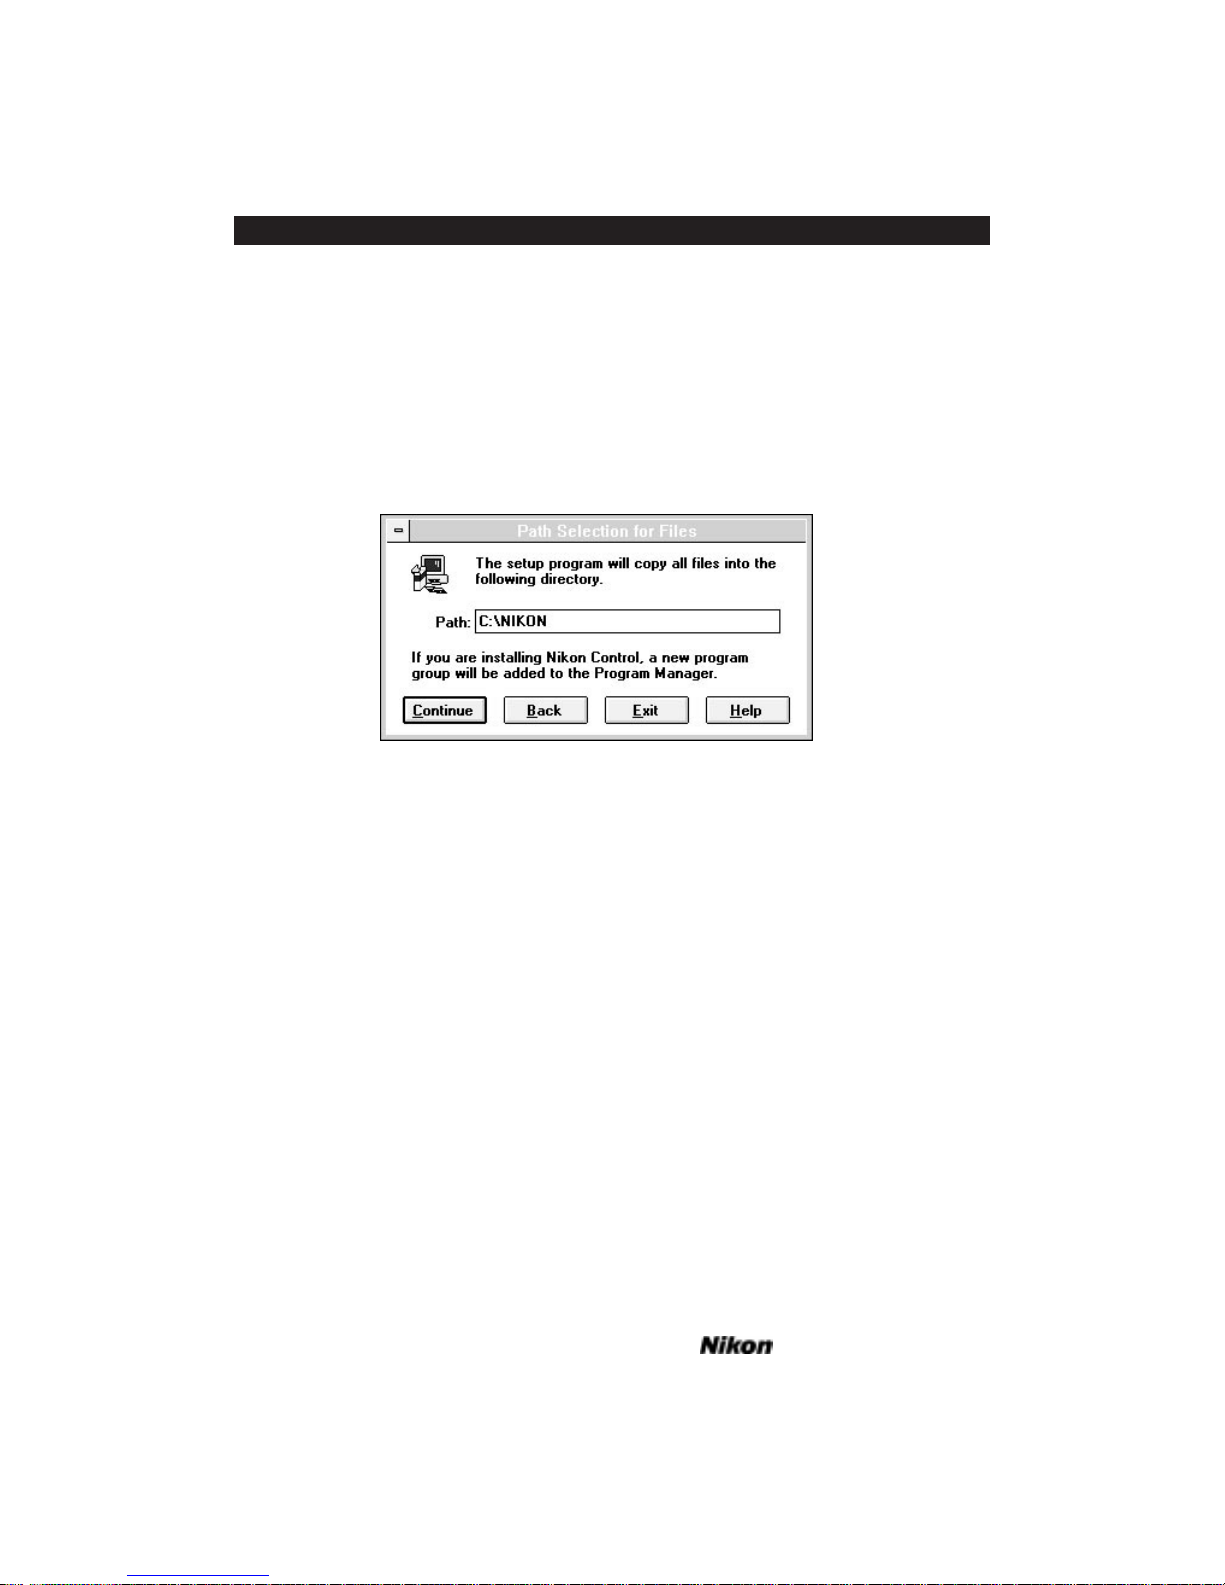
The default selection is Nikon Control. If you select any of the other listed software products, refer to the section “Installing Third-Party Applications” in this chapter.
The Path Selection for Files Dialog
The Installer software must be informed as to where you want the scanning software installed. This is accomplished by entering the ‘logical disk’ and path into the
PATH SELECTION FOR FILES dialog, as shown in Figure 3.8, then clicking CONTINUE.
The default path for Nikon Control is C:\NIKON.
Figure 3.8 The PATH SELECTION FOR FILES dialog.
If you want to install the Nikon Control software as the host application, click
CONTINUE. This will invoke the SCSI DEVICE DRIVER OPTIONS dialog, as seen in
Figure 3.9.
Page 16 Software Reference for Scanners
Software Installation – IBM PC or Compatible Chapter 3
Page 31
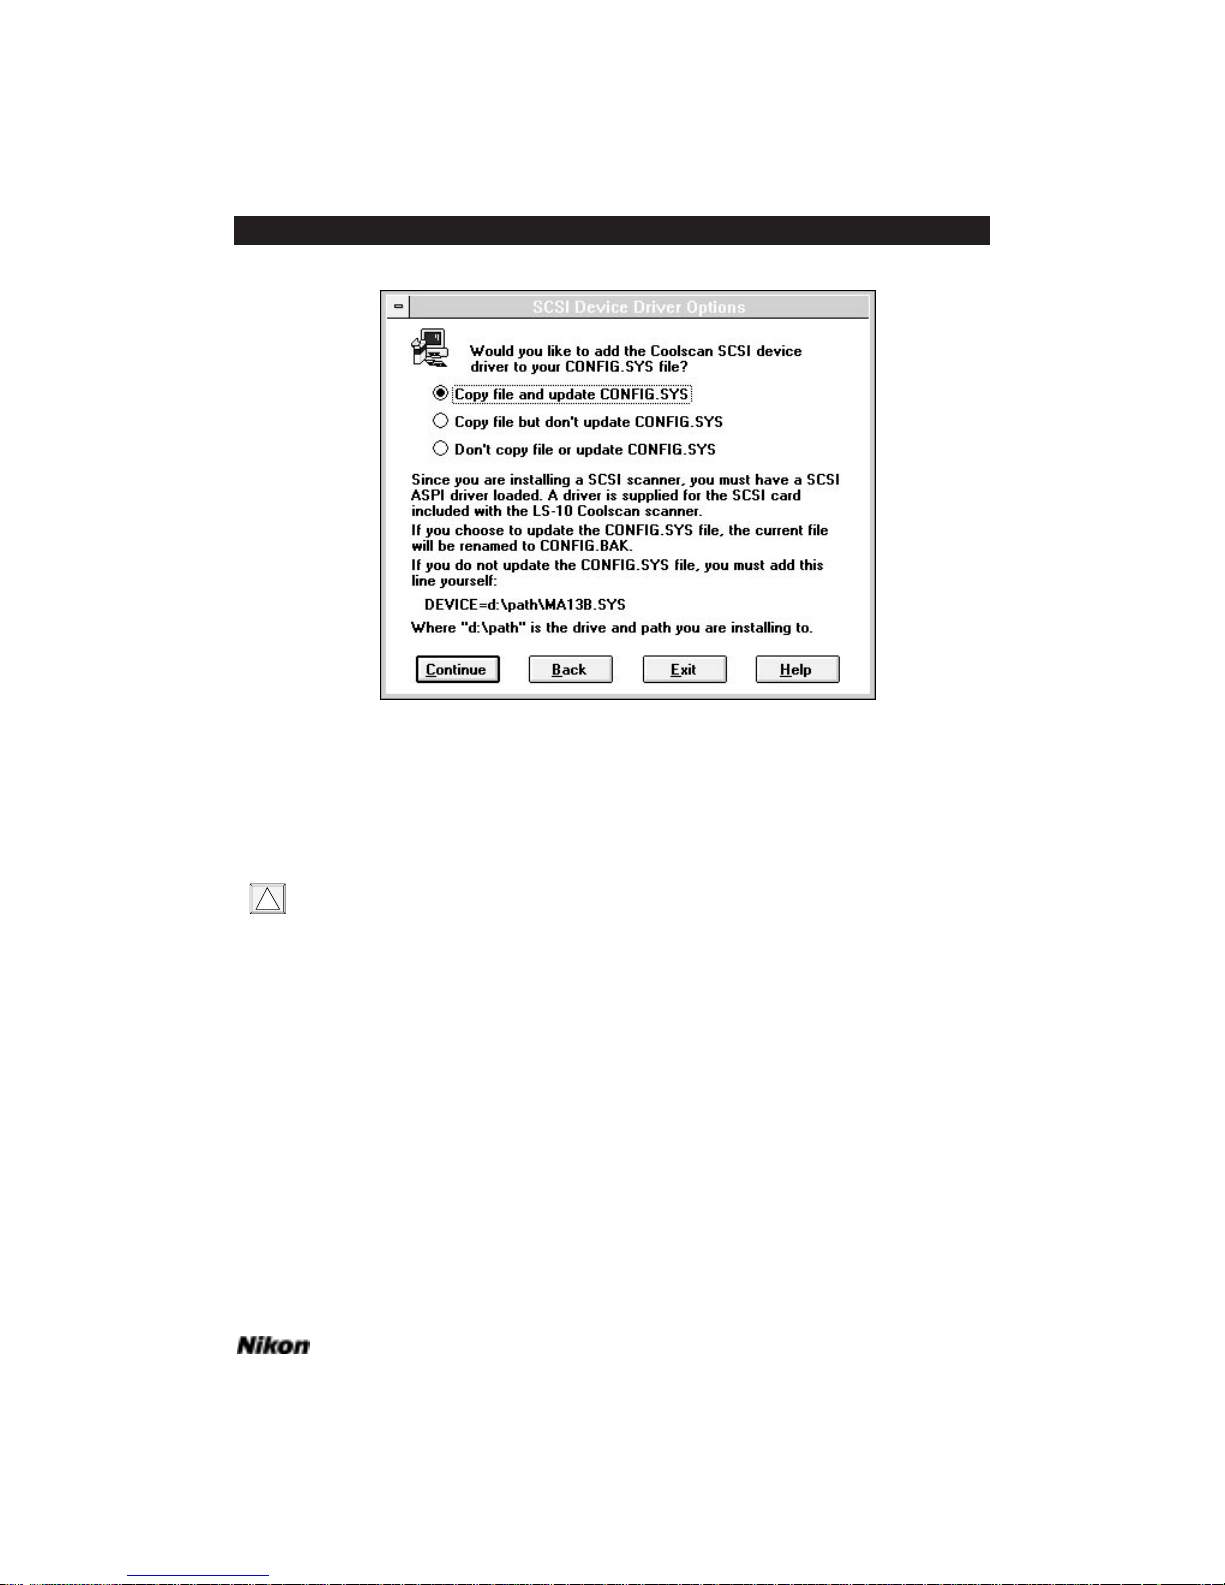
Figure 3.9 The SCSI DEVICE DRIVER OPTIONS dialog.
When using the scanner with the included SCSI controller card, select the COPY
FILE AND UPDATE
CONFIG.SYS selection. Expert level users, who are familiar with
the structure of the Config.SYS file, may choose one of the other options.
Improperly editing the CONFIG.SYS file may cause your system to operate
improperly or fail to boot. Always make a backup copy of the CONFIG.SYS file
before editing it.
After you click on CONTINUE, each file is copied to your hard disk. The NIKON
SETUP Progress Indicator, seen in Figure 3.10, will report the percentage of the installa-
tion completed.
!
Software Reference for Scanners Page 17
Chapter 3 Software Installation – IBM PC or Compatible
Page 32
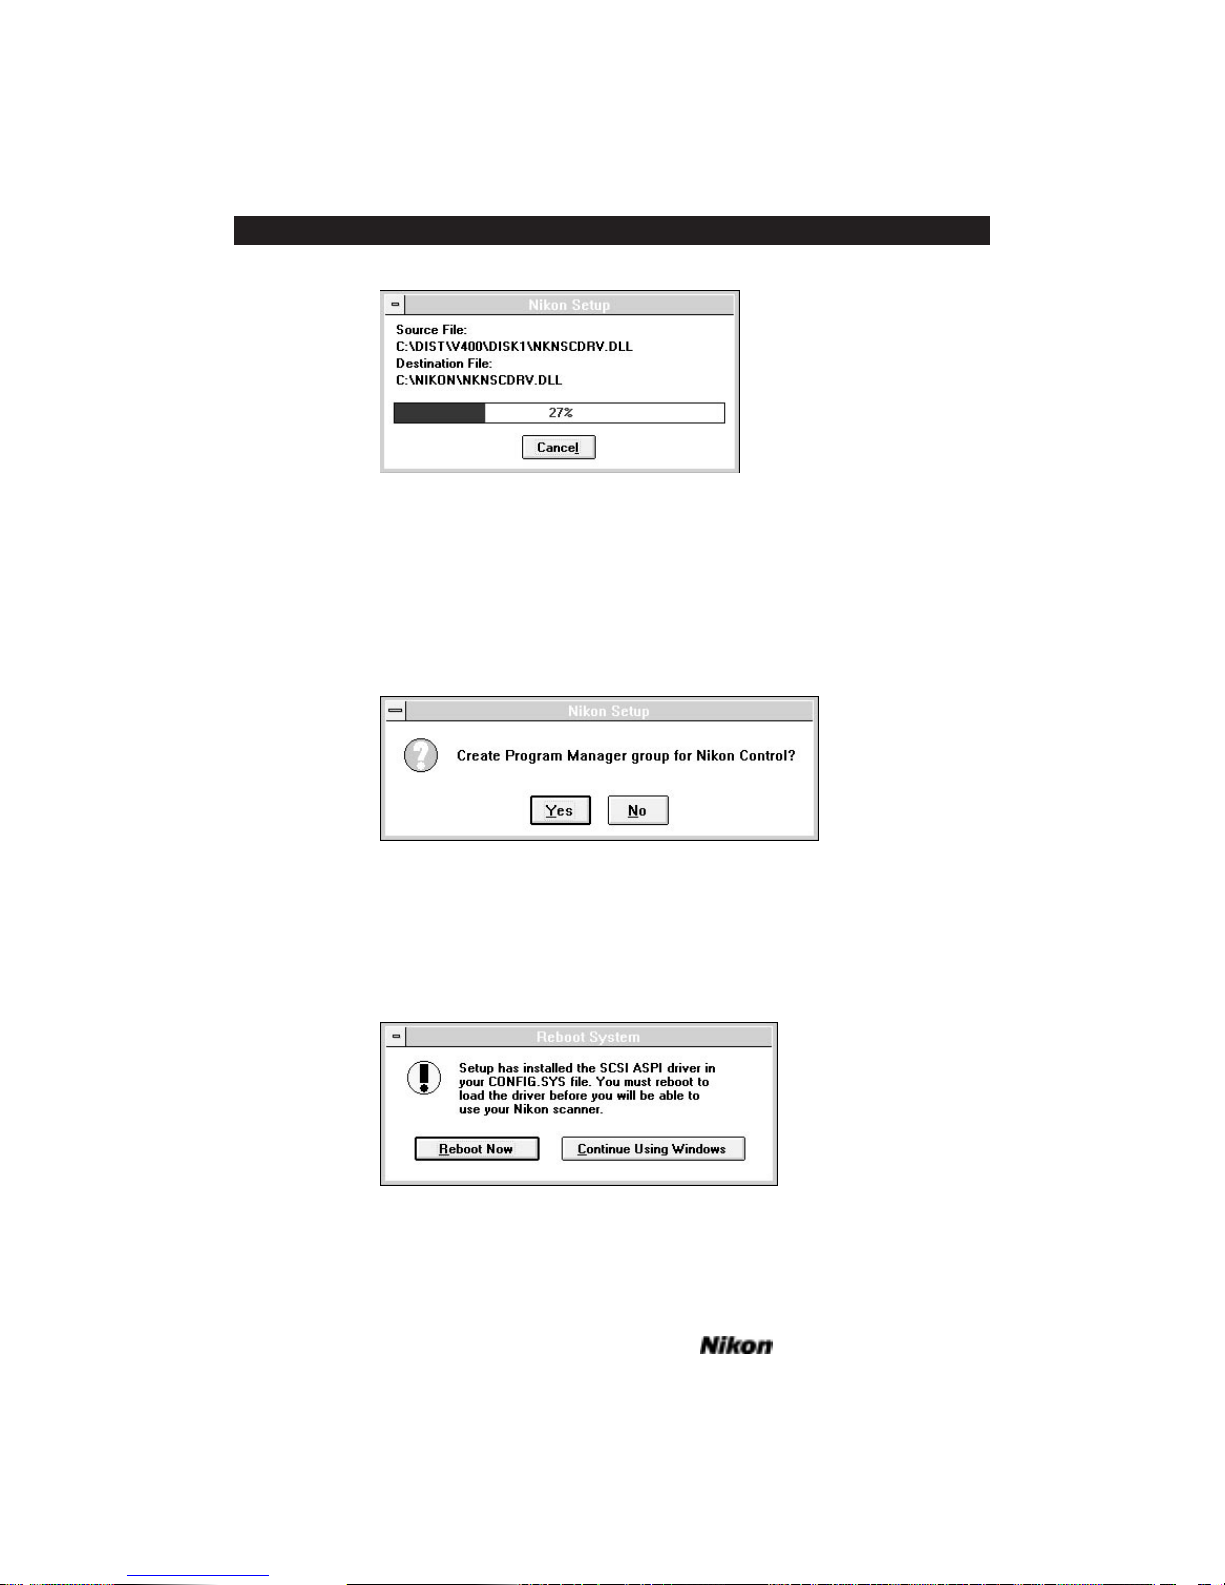
Figure 3.10 The NIKON SETUP Progress Indicator.
At the conclusion of the Nikon Control installation you will be prompted to create a PROGRAM MANAGER GROUP FOR NIKON CONTROL, as seen in Figure 3.11. The
Program Manager group allows you to quickly launch application software by doubleclicking on an icon, instead of typing a path in the RUN dialog in the Program Manager,
or having to locate the program in the Windows File Manager.
Figure 3.11 The NIKON SETUP dialog.
After you create the Program Manager group you will see the REBOOT SYSTEM
dialog. You must reboot your system in order to load the driver software and use your
Nikon scanner.
Figure 3.12 The REBOOT SYSTEM dialog.
Page 18 Software Reference for Scanners
Software Installation – IBM PC or Compatible Chapter 3
Page 33
Congratulations! You have successfully installed the Nikon Control software. If
you wish to install the Nikon Scanner plug-in software for use with a third party application, please proceed to the next section.
Installing Third-Party Applications
The Path Selection for Installer Dialog
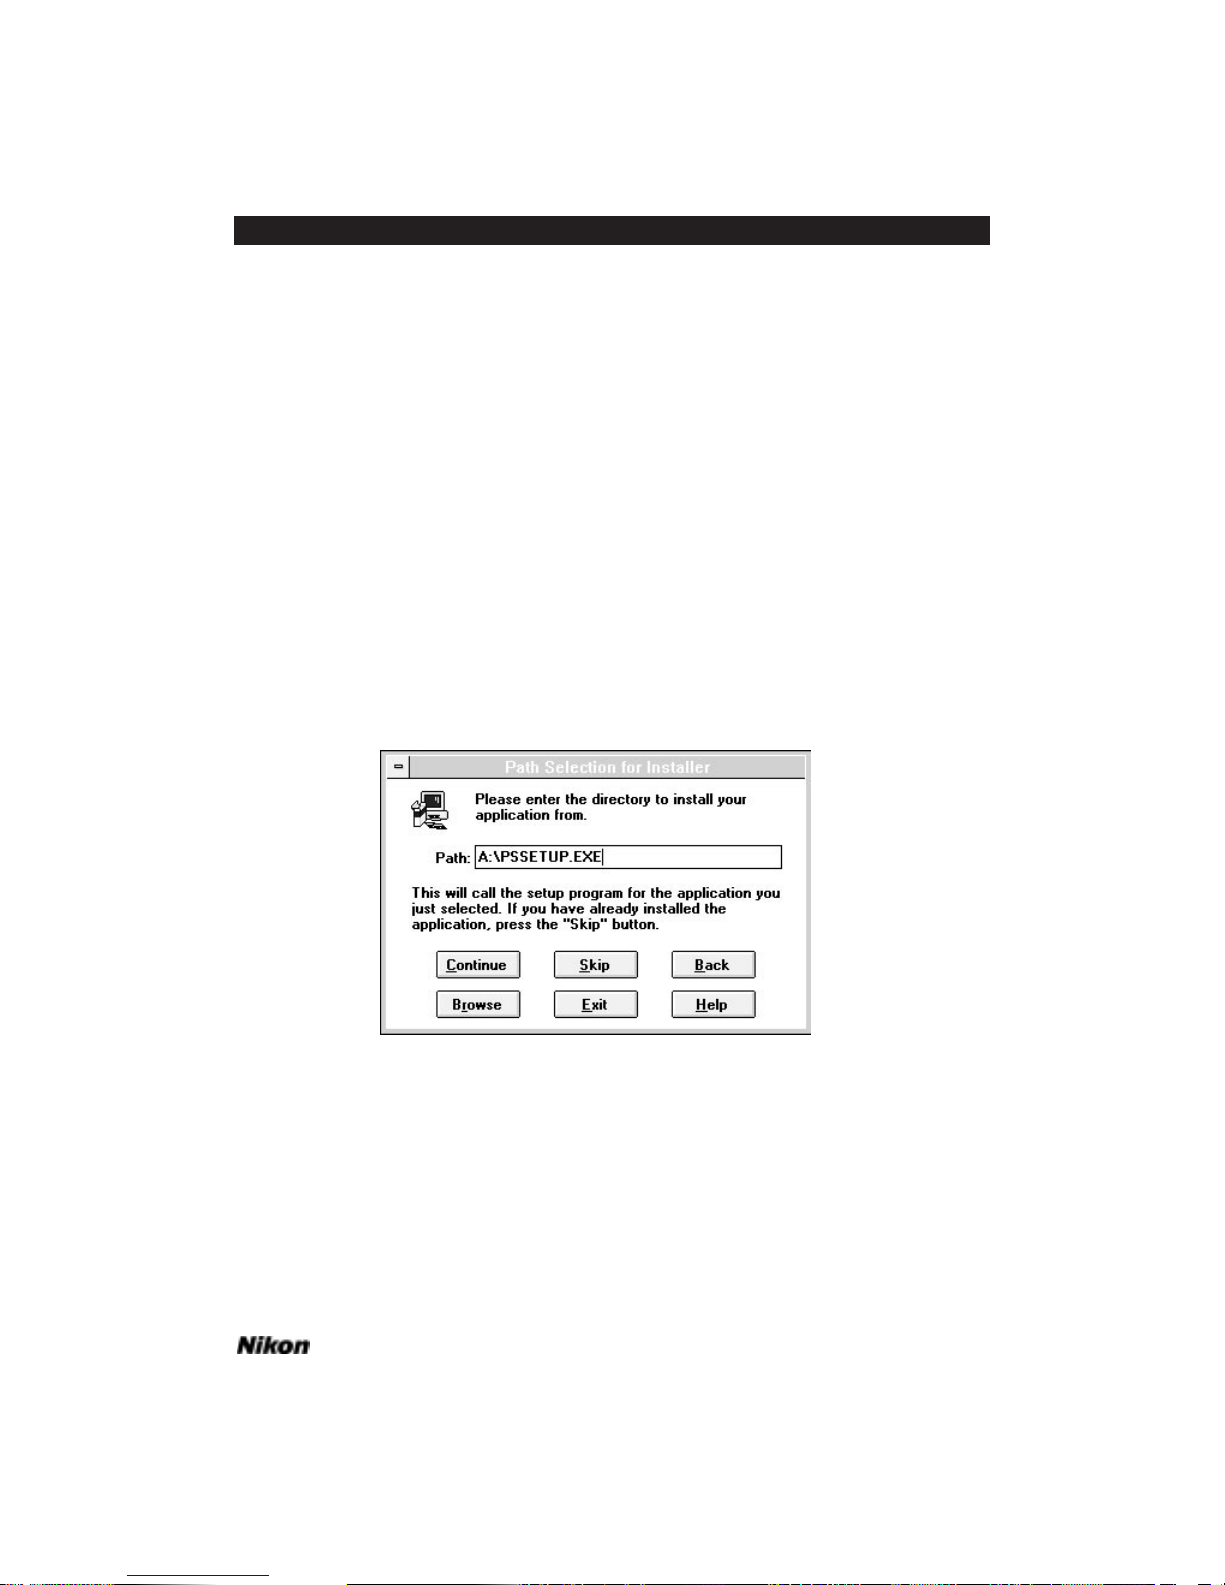
If you are using one of the listed third-party software applications in the
INSTALLER OPTIONS dialog, the Nikon Installer needs to know where you want the
Nikon plug-in software to reside. This is accomplished by entering the destination disk
and path into the PATH SELECTION FOR INSTALLER dialog, shown in Figure 3.13. The
Nikon Installer will do its best to anticipate where you want the files to go, based on
your host application selection. This path information will automatically appear in the
PATH text box. If this path is correct, click on CONTINUE. If it is incorrect, correct the
path entry, then click on CONTINUE.
If necessary, you can revert to the PATH SELECTION FOR INSTALLER dialog by
clicking on BACK.
Figure 3.13 The PATH SELECTION FOR INSTALLER dialog.
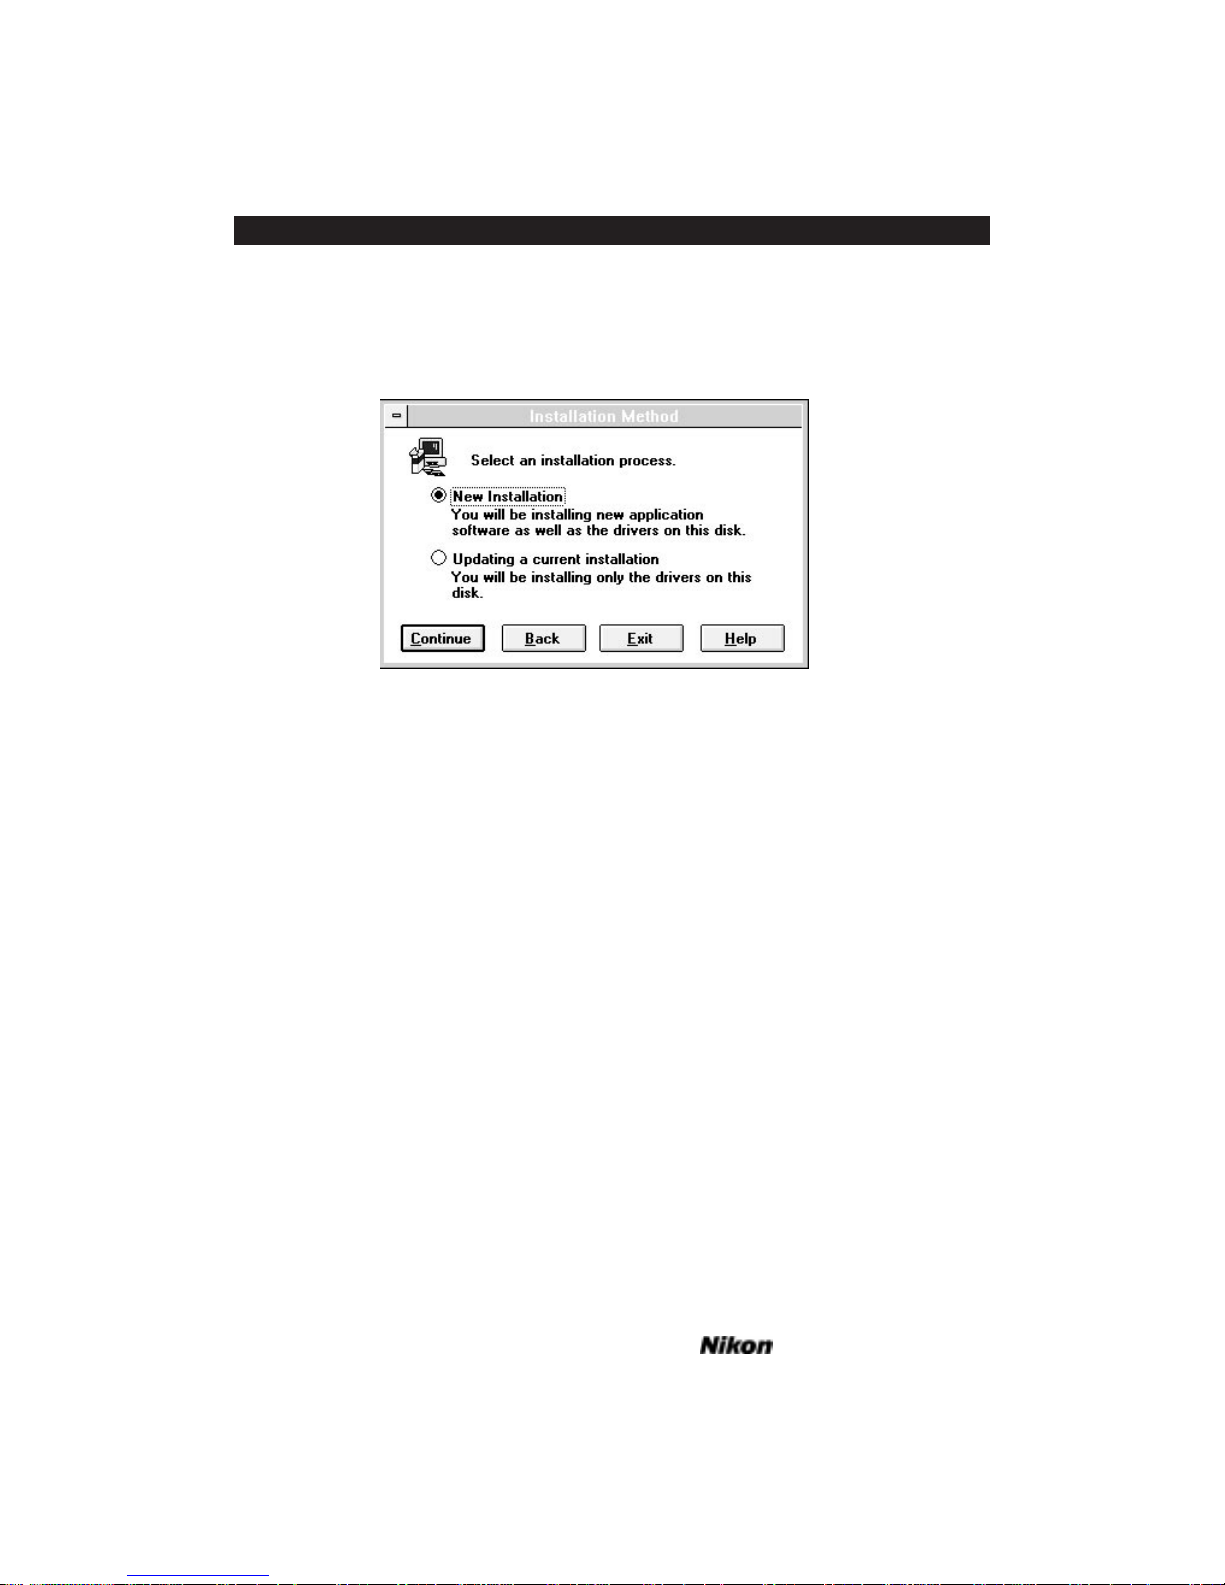
The Installation Method Dialog
At this time, you need to inform the Nikon Installer whether you will be
installing new host application software and the plug-in onto the destination disk, or
updating an already installed host application and only loading the plug-in onto the destination disk. This is accomplished via the INSTALLATION METHOD dialog, shown in
Figure 3.14.
Software Reference for Scanners Page 19
Chapter 3 Software Installation – IBM PC or Compatible
Page 34
Page 20 Software Reference for Scanners
Software Installation – IBM PC or Compatible Chapter 3
If you are installing new host application software, click the NEW INSTALLATION
radio button, then click CONTINUE. If you are updating a previously installed host
application, click the UPDATING A CURRENT INSTALLATION radio button, then click on
CONTINUE.
Figure 3.14 The INSTALLATION METHOD dialog.
If you are installing new host application software, you will be required to supply
the path of its installation software. At this time, you should insert your host application distribution disks, if they aren’t already loaded, into the appropriate floppy drive
and follow the third-party vendor’s installation instructions. The path of the host application installation software is entered through the PATH SELECTION FOR INSTALLER
dialog, shown in Figure 3.13.
Upon completion of the third-party application software installation, you will be
required to enter the destination path for the Nikon Scanner plug-in. This is accomplished by entering the path into the PATH SELECTION FOR FILES dialog, as seen in
Figure 3.8, then clicking CONTINUE.
If you are only updating previously installed application software, the same
requirement applies, i.e. enter the destination path for the Nikon Scanner plug-in.
Again, this is accomplished by entering the path into the PATH SELECTION FOR FILES
dialog, as seen in Figure 3.8, then clicking CONTINUE.
Configuring and Testing the GPIB
If you are installing a Nikon LS-3510AF GPIB model, the National Instruments
AT-GPIB and MC-GPIB are supported. When installing the software drivers for these
boards, be sure to select the installation for Windows. National Instruments can be
reached directly at 1-800-IEEE-488 (1-800-433-3488).
Page 35

Installing the SCSI Driver Software
The Nikon LS-3510AF SCSI model and all Coolscan models are interfaced to the
computer through the SCSI bus. It is necessary to load the SCSI driver software into the
computer’s memory in order to access the scanner. This is typically accomplished by
adding a DEVICE statement in the computer’s CONFIG.SYS file.
The Nikon Installer can automatically update the current CONFIG.SYS file for
you via the SCSI DEVICE DRIVER OPTIONS dialog, seen in Figure 3.9. This is the recommended procedure for novice users.
The dialog contains three options. The first is COPY FILE AND UPDATE
CONFIG.SYS. If you select this option and click CONTINUE, the scanner SCSI device
driver will be added to your current CONFIG.SYS file, which will then be renamed
CONFIG.BAK. The following line will automatically be entered into the CONFIG.SYS
file:
DEVICE=C:\PATH\MA13B.SYS
Alternatively, you can modify the CONFIG.SYS file yourself. In this case, select
the COPY FILE BUT DON’T UPDATE CONFIG.SYS radio button, then click CONTINUE.
If you select this option, you must manually enter the following line into your
CONFIG.SYS file:
DEVICE=C:\PATH\MA13B.SYS
The last option in this dialog, DON’T COPY FILE OR UPDATE CONFIG.SYS
should only be selected when you do not want to complete this operation.
If you are attempting to use the scanner with a third-party SCSI controller card
you should consider the advantages of running your scanner and hard disk from isolated
buses. There are a wide variety of SCSI controller cards on the market, but not every
card can supply the SCSI functionality required to run your scanner. The required
ASPI driver software is often an additional cost. The Trantor T-130 SCSI controller
card and ASPI software have been certified by Nikon for use with your scanner. For
microchannel use, the Trantor T-260 has been certified by Nikon. Only select COPY
FILE AND UPDATE CONFIG.SYS if you are using the Trantor T-130 SCSI controller
card.
Software Reference for Scanners Page 21
Chapter 3 Software Installation – IBM PC or Compatible
Page 36

Page 22 Software Reference for Scanners
Software Installation – IBM PC or Compatible Chapter 3
Page 37
Getting Started on the Macintosh
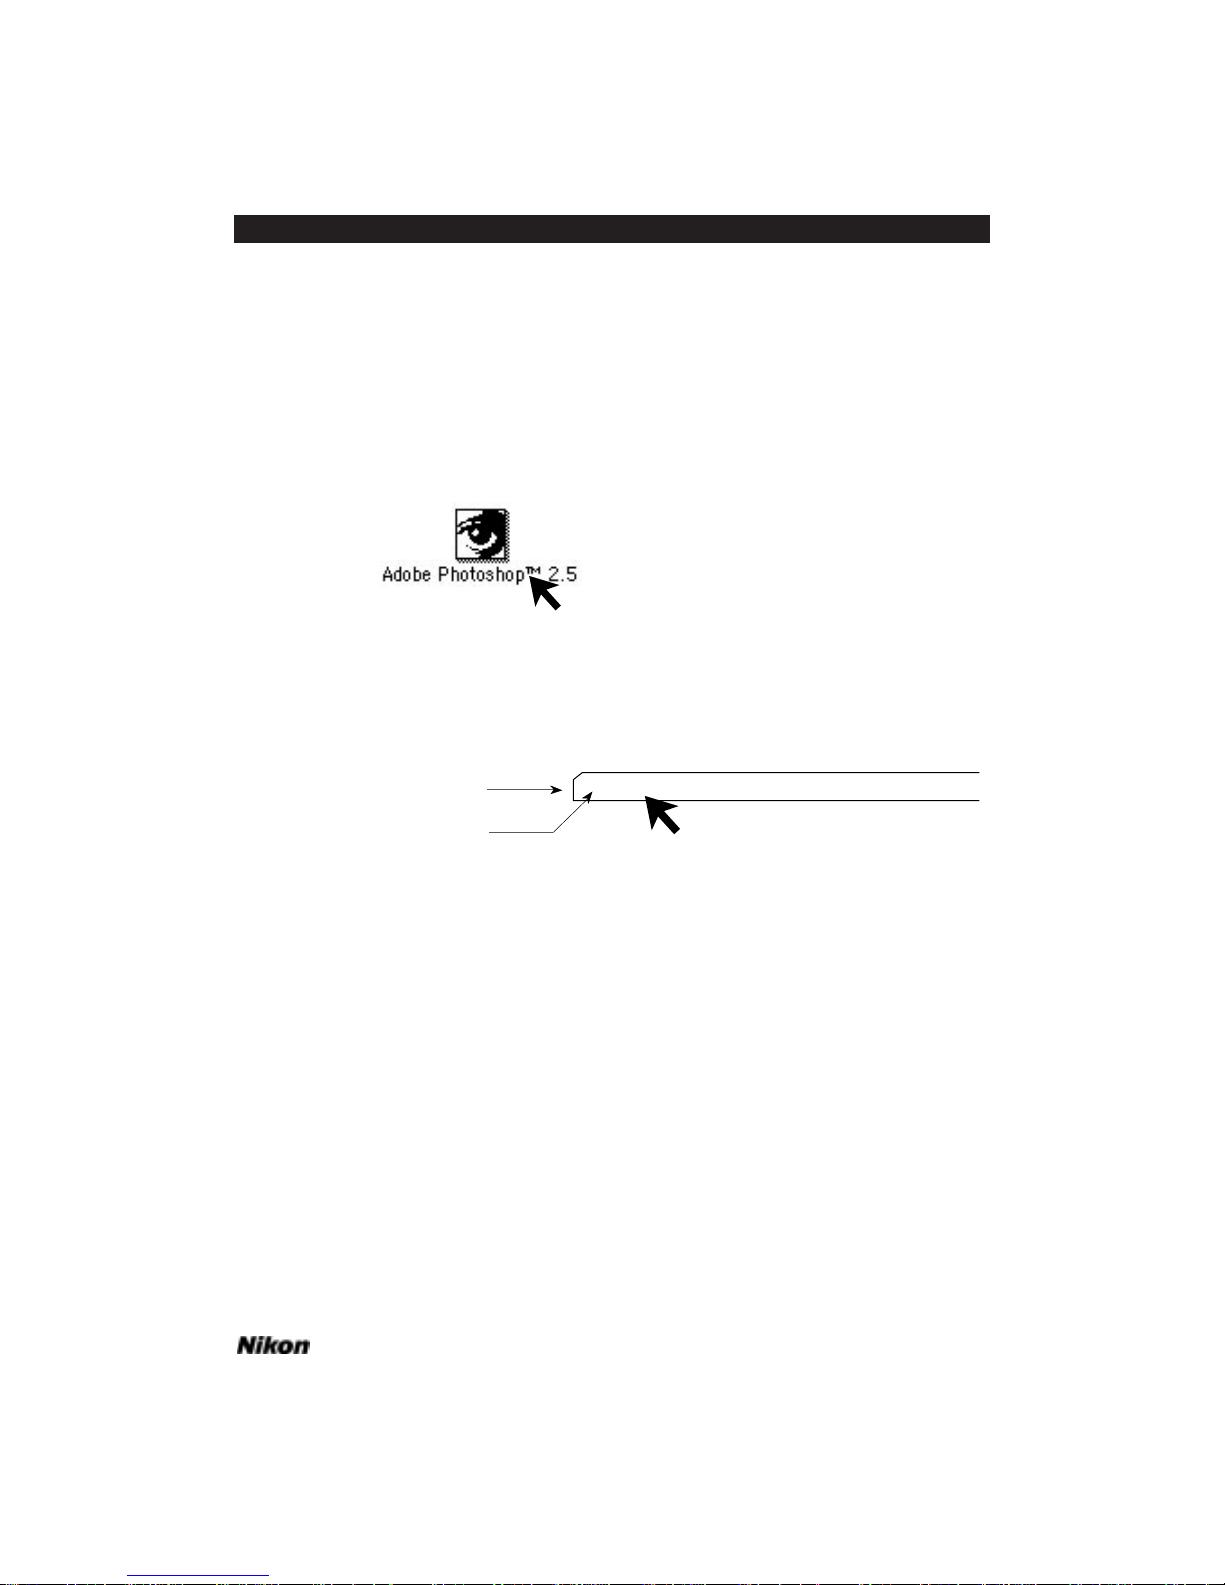
Launching the Nikon Scanner
To access your Nikon Scanner plug-in you must first launch your imaging application, such as Photoshop, shown in Figure 4.1.
Figure 4.1 Launching the imaging application.
A menu bar associated with the Photoshop application will appear at the top of
the screen. It will look similar to the one shown in Figure 4.2.
Figure 4.2 The Photoshop Main menu.
Click on the FILE portion of the Main menu. Notice the file pull-down menu
looks similar to the following illustration. Without releasing the mouse button, pull
down until the ACQUIRE item is highlighted, as shown in Figure 4.3.
File Edit Mode Image Filter Select
Apple Menu
Main Menu Bar
Click and pull down
ð
Double Click
Software Reference for Scanners Page 23
Chapter 4 Getting Started on the Macintosh
Page 38
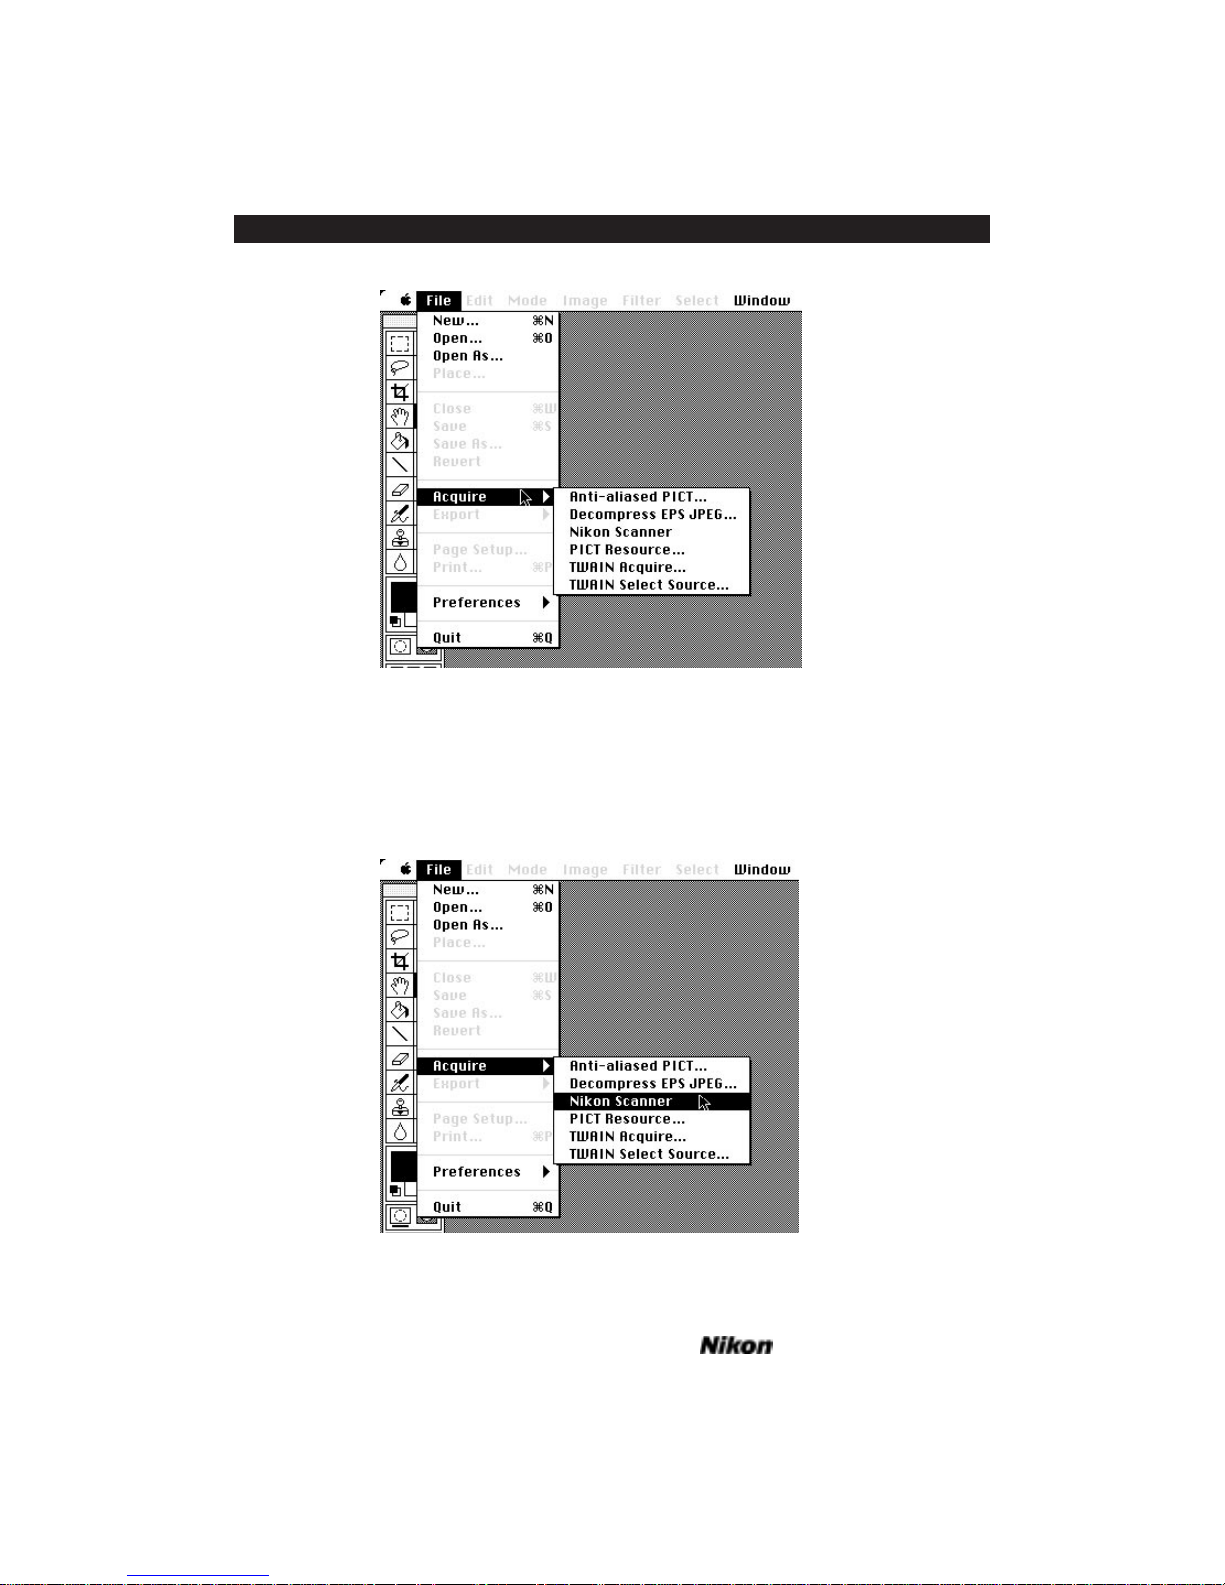
Figure 4.3 Selecting ACQUIRE from the Photoshop FILE pull-down menu.
Next, drag the mouse to the right, following the arrow to the right of the
ACQUIRE item. This will bring up the NIKON SCANNER item, as shown in Figure 4.4.
Highlight this box and release the mouse button. This will initialize the plug-in's Main
Scan dialog box.
Figure 4.4 Selecting the NIKON SCANNER menu item.
Page 24 Software Reference for Scanners
Getting Started on the Macintosh Chapter 4
Page 39
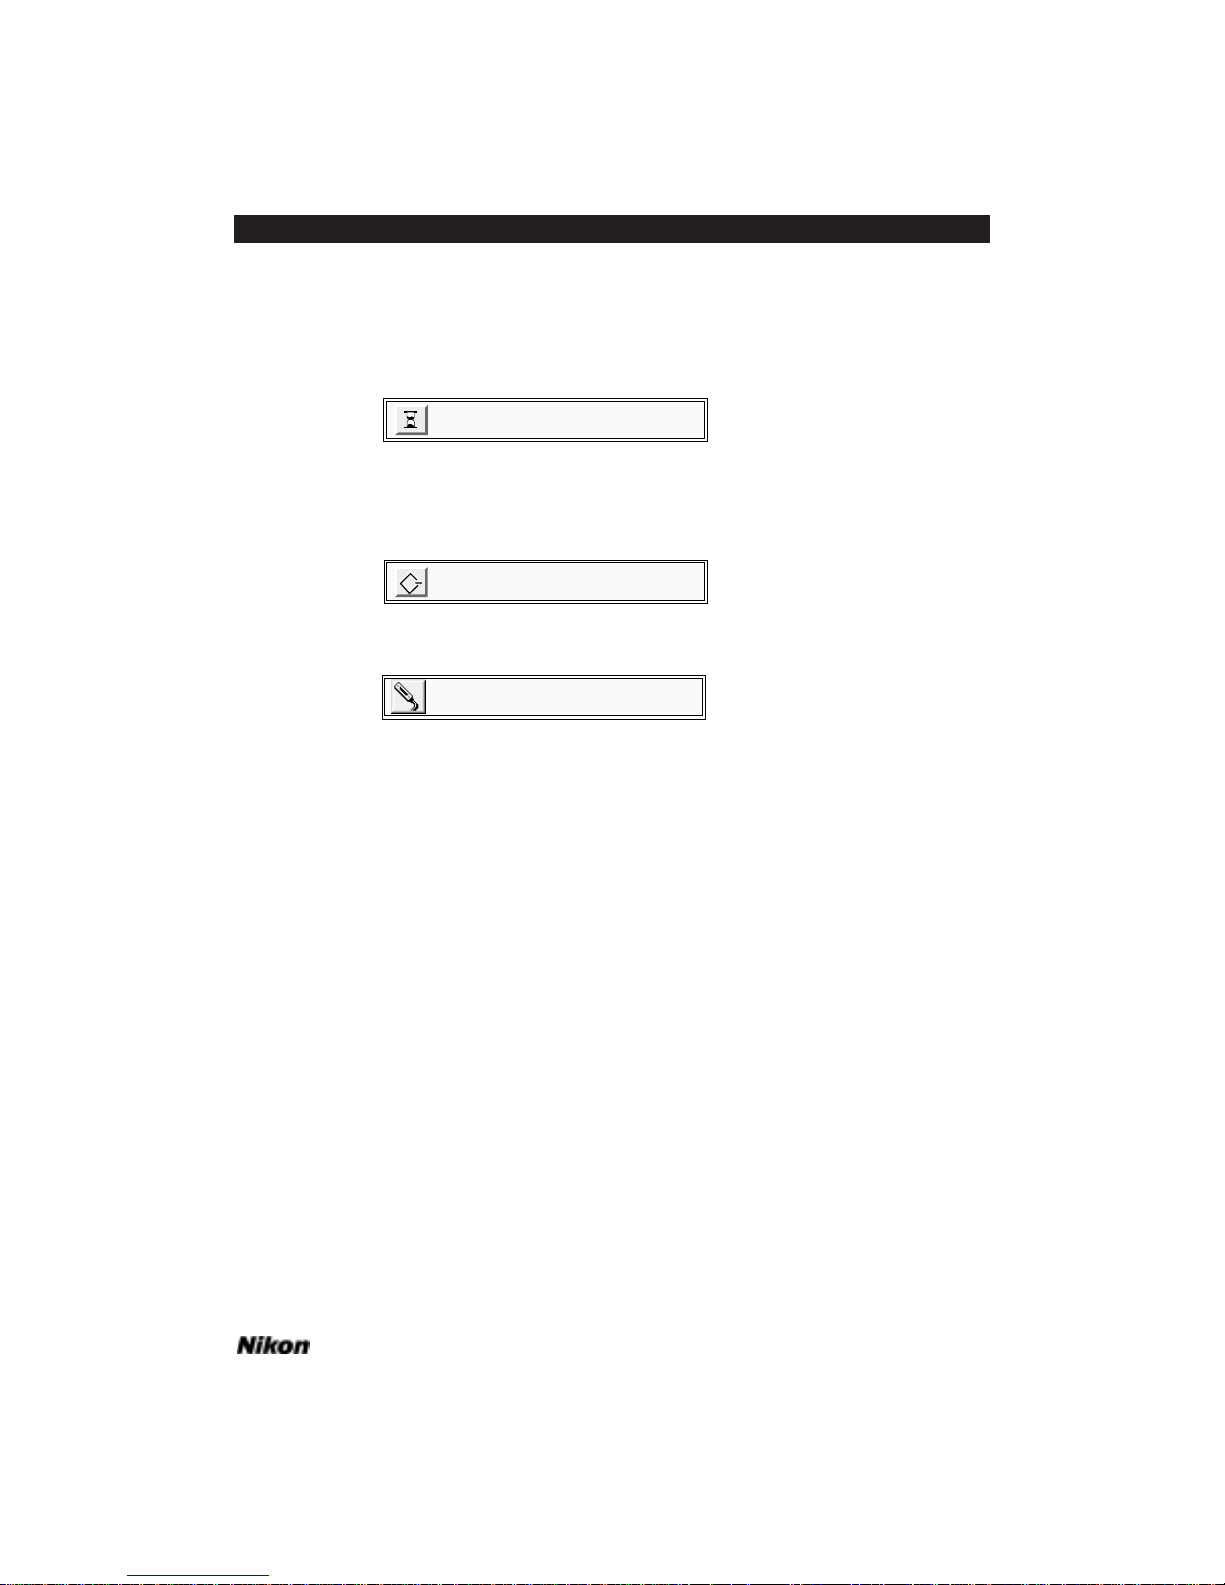
Plug-in Initialization
The plug-in will first set up the software environment and display the following
message.
The plug-in will next search the SCSI for SCSI model scanners, or the GPIB bus
for GPIB model scanners to ensure that your scanner is installed and functional. While
it is searching, the following message will appear for SCSI model scanners:
Or for GPIB model scanners, the following message will appear:
Once the plug-in opens the functional SCSI or GPIB scanner, you will be able to
commence scanning.
The Scan Dialogs
The Nikon Scanner plug-in’s main scanning dialog box is called the Main Scan
dialog. There are three sizes of this scan dialog, designed to best accommodate the wide
variety of available monitor sizes. Macintosh PowerBooks are supported with appropriate artwork, depending on the available display. These three different sized dialog boxes
offer similar functionality, with the dialog box for large screens offering a substantially
larger preview, making such operations as color correction and cropping easier and more
precise.
The scan dialog shown in Figure 4.5 is the dialog used for monitors that have resolutions of 832 x 624 pixels or larger, including 16" through 21" screens.
Opening the GPIB Scanner...
Opening the SCSI Scanner...
Preparing the Nikon Scanner Plugin
Software Reference for Scanners Page 25
Chapter 4 Getting Started on the Macintosh
Page 40
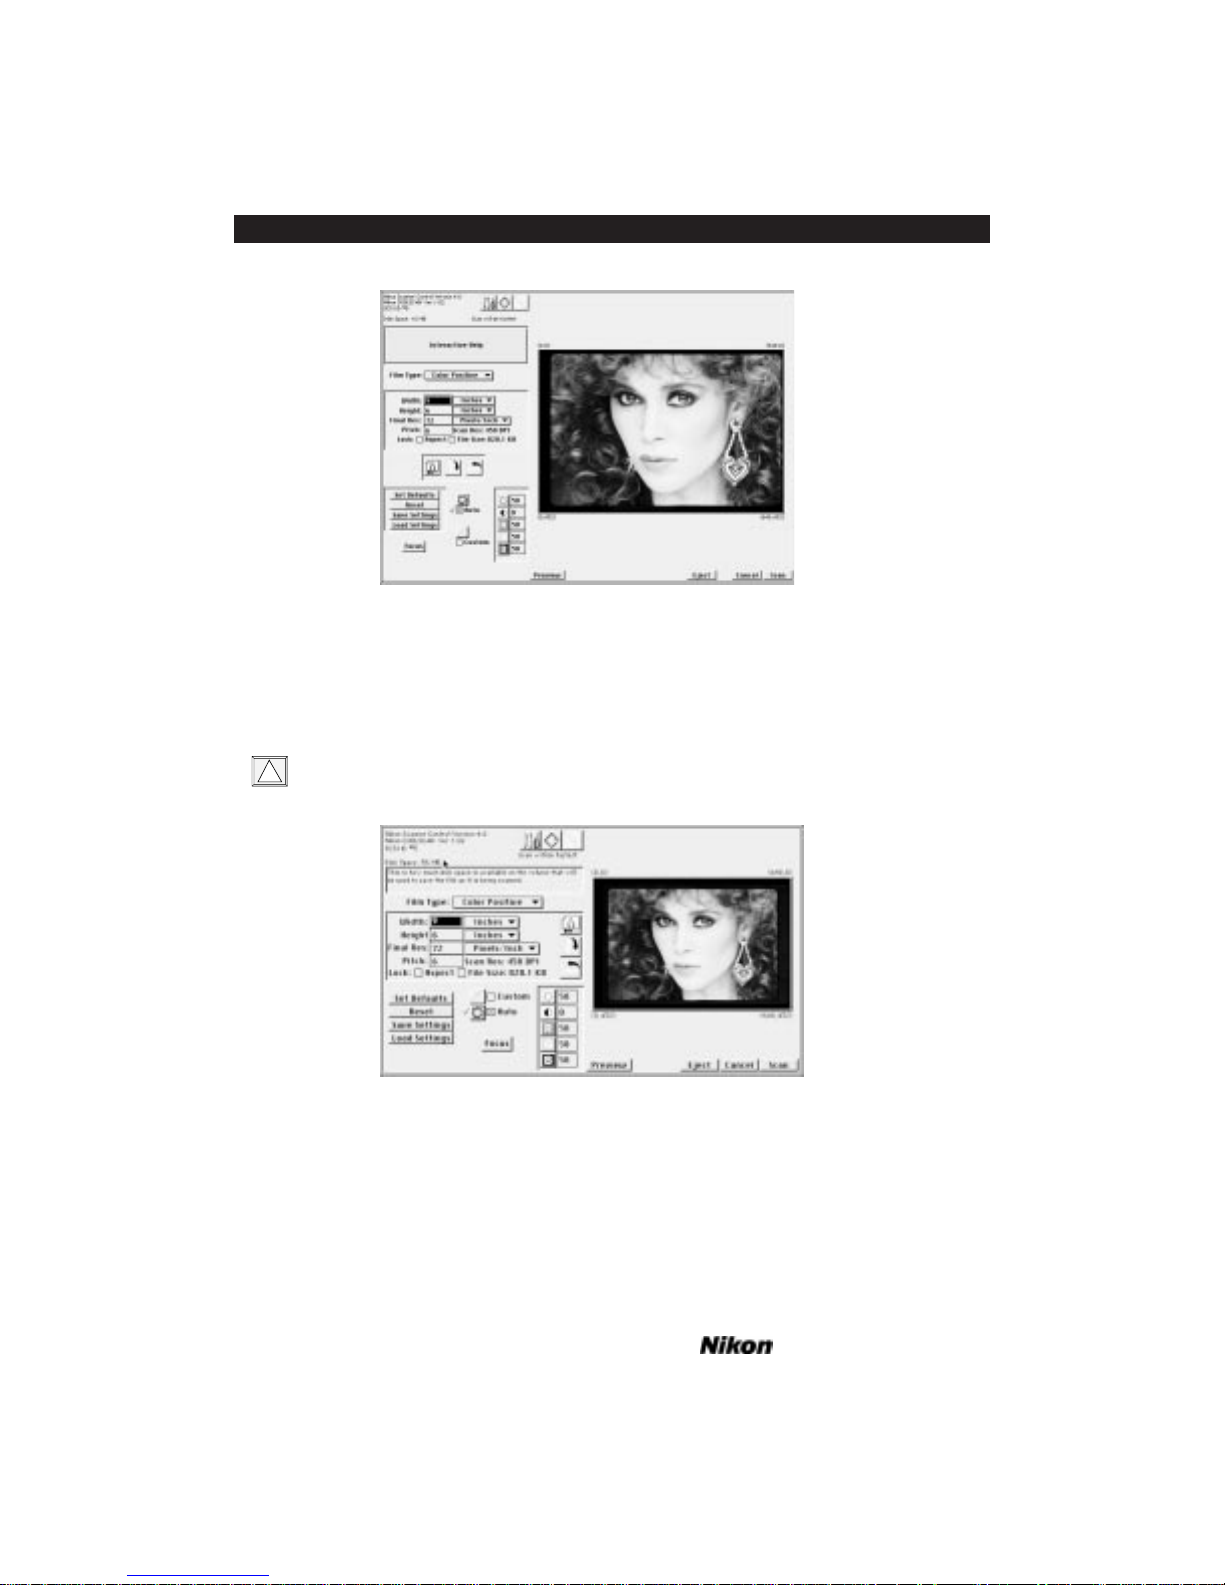
Figure 4.5 The Nikon Scanner plug-in’s Main Scan dialog for monitors
that have resolutions of 832 x 624 pixels or greater (Coolscan connected).
The scan dialog shown in Figure 4.6 is the default dialog size for monitors with
resolutions that are less than 832 x 624 pixels, that include 9" through 14" screens.
Note that using the larger dialog results in longer preview times. This can be
changed in the Tools dialog, explained later in this chapter.
Figure 4.6 The Nikon Scanner plug-in’s Main Scan dialog for
monitors that display less than 832 x 624 pixels (Coolscan connected).
Most scanning operations can be performed from this dialog box, including
selecting the film type, previewing the image, fine focusing, cropping the image, and
performing basic brightness, contrast and color balance tasks.
If the message box in the upper left-hand corner contains NIKON COOLSCAN VER.
!
Page 26 Software Reference for Scanners
Getting Started on the Macintosh Chapter 4
Page 41

Software Reference for Scanners Page 27
Chapter 4 Getting Started on the Macintosh
1.0.2 (for Coolscan users), or NIKON LS-3510AF VER. 1.34 (for LS-3510AF users),
you are ready to perform a preview scan or a final scan. Please note that engineering
changes may mean that your software version, which was the shipping version at the
time of this printing, will not be the same. If no scanner type is indicated, the message
NO SCANNER CONNECTED will appear. In this case, the scanner may not have been in a
ready state (indicated by a steady green LED on the front panel) when you started the
Nikon Scanner plug-in software. You can establish a connection to the scanner by
clicking on the relevant search icon, SCSI or GPIB, which is located at the top of the
Main Scan dialog. You will need to check your installation, particularly the SCSI or
GPIB cabling to confirm proper connections and termination if this attempt fails. For
scanner installations with other SCSI or GPIB external devices, place the scanner in the
SCSI or GPIB chain, remembering to maintain proper termination. If you are unsure
of which SCSI or GPIB address to use, consult the Installation Guide included with
your scanner.
Inserting the Slide
Take out the included sample 35mm slide. You will be using this slide to perform
your first preview scan and final scan.
The two sides of the film in the slide mount are not the same. One side is known
as the emulsion side, and contains the image dye layers. The other side is known as the
base, and consists of the celluloid film support. We will explain the significance of the
emulsion side of the film, and how to identify it in a later chapter. For the purpose of
this introduction we have predetermined the emulsion side for you. The emulsion side
does not have the “Nikon Electronic Imaging” logo printed on the slide mount.
As you have probably already noticed, the slide mount is square, and can be
inserted in the scanner in any orientation. However, the orientation of the slide when it
is inserted into the scanner does affect the scanning process. This will be addressed in
depth in a later chapter.
Coolscan
The slide is inserted into Coolscan in much the same way as a floppy diskette is
inserted into a disk drive, as shown in Figure 4.7. For optimum scanning, the emulsion
side should face the top of the scanner, as shown in Figure 4.7. Insert the slide into the
slot in the front of the scanner, making sure that the “Nikon Electronic Imaging” logo
faces down, and that the side of the slide corresponding to the top of the head of the
person seen in the picture enters the scanner facing the left side of the film slot. Gently
push the slide in as far as it will go, without forcing it. The carriage mechanism inside
the scanner will take care of the rest.
Page 42
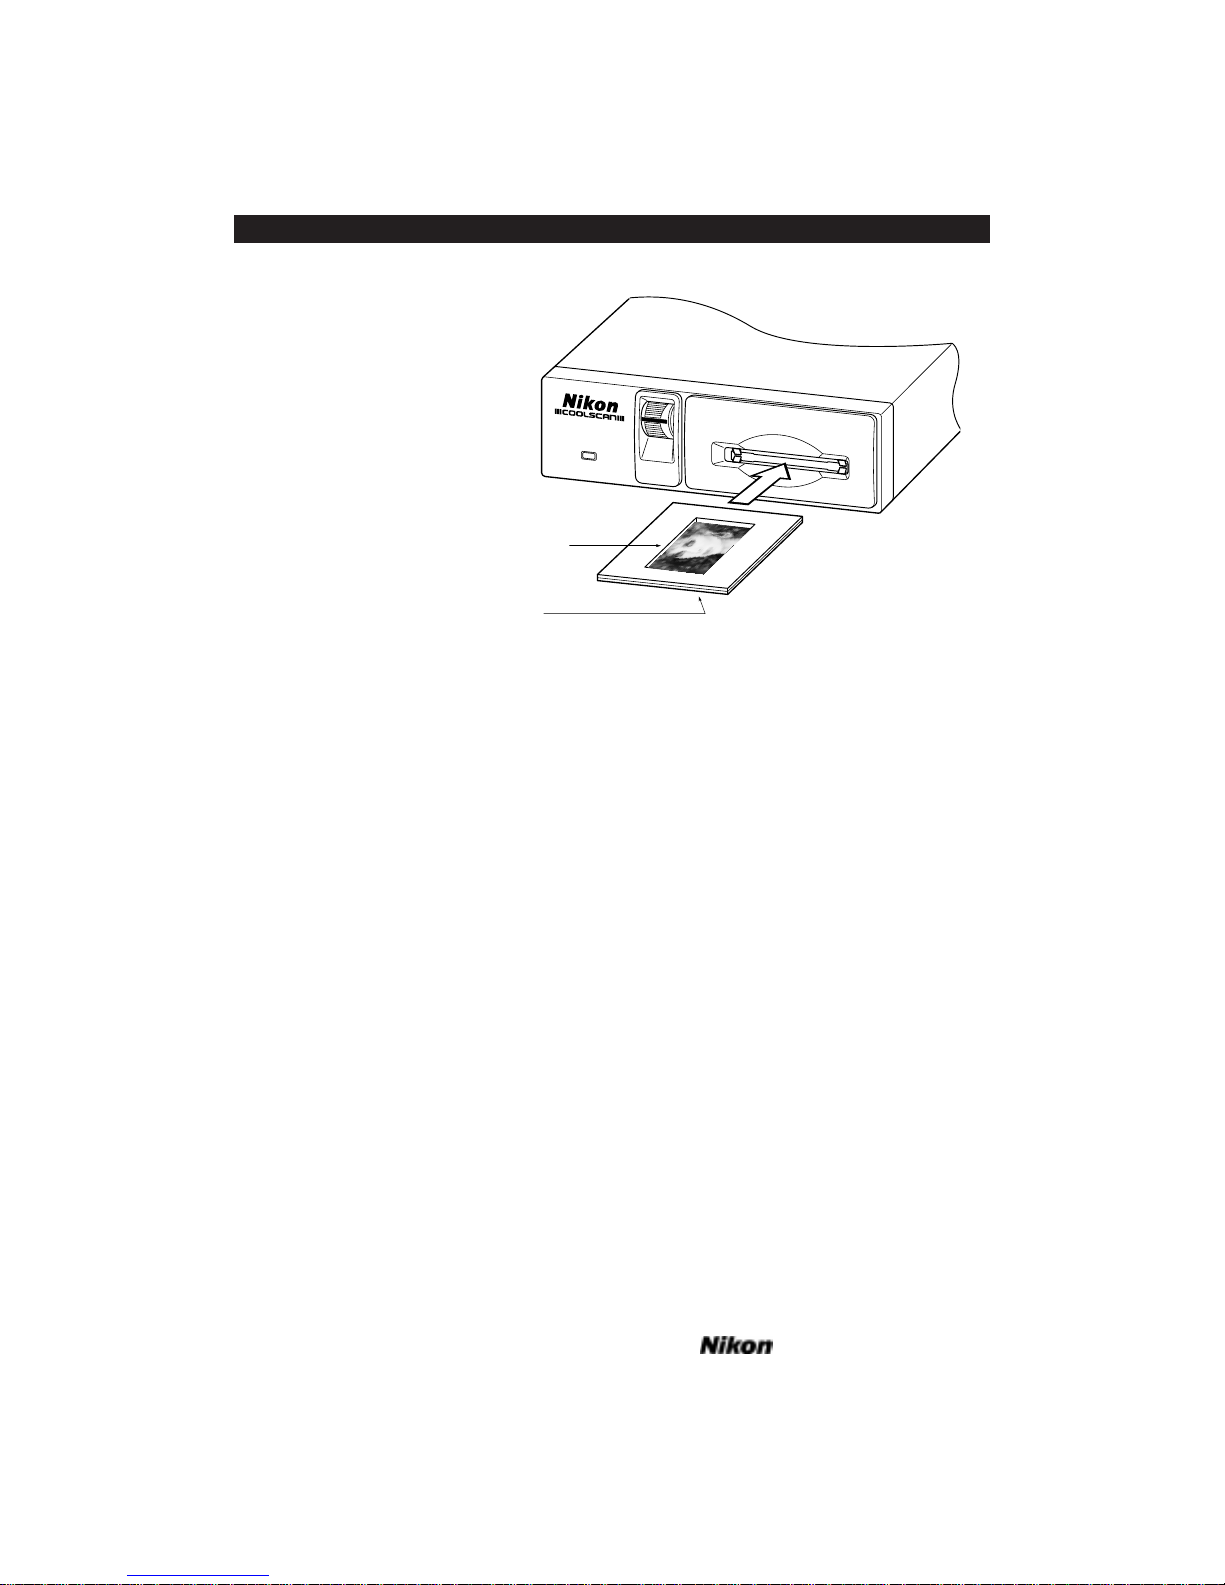
Figure 4.7 Inserting the emulsion side of the film facing the top of Coolscan.
LS-3510AF
You will be using the Standard Slide Holder for this scan. Hold the mount as in
the diagram in Figure 4.8. Insert the slide so that the emulsion side of the film faces the
back of the scanner, and the picture is rightside-up. Since the LS-3510AF is an autofocus scanner, it will not make much difference which way you place the emulsion (other
than image orientation, right-reading or backwards), although sharpest results will be
achieved when the emulsion faces the front of the scanner. This is because the imaging
lens will not be reading the film through the film base, which may reduce definition,
depending on the film type.
Insert the Slide Holder into the scanner so that the slide mount is closest to the
lamp. Close the dustproof cover so that the outside light does not affect the scan.
The sample slide is a landscape, or a horizontal image. Therefore we can leave the
default scanning orientation in the landscape position.
Base side of film
Emulsion side of film
Page 28 Software Reference for Scanners
Getting Started on the Macintosh Chapter 4
Page 43
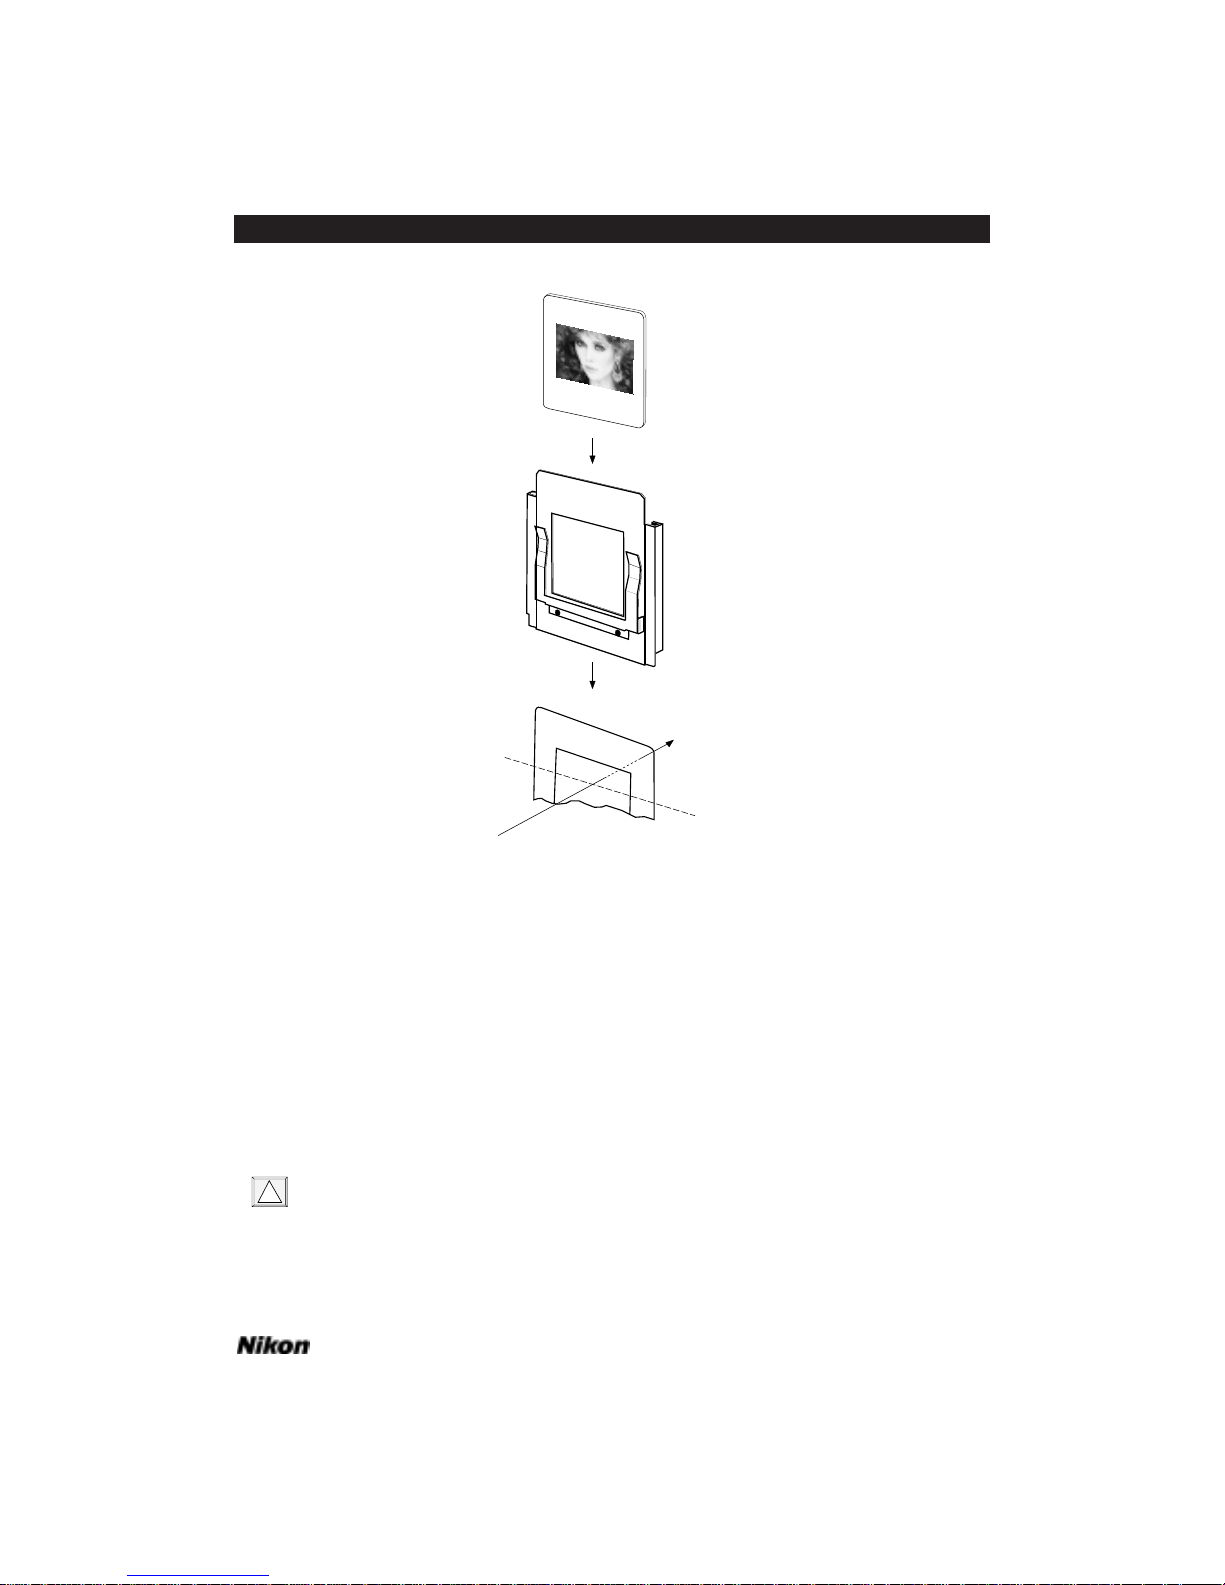
Figure 4.8 Loading the slide into the LS-3510AF.
Scanning a Preview Image
The purpose of the preview scan is to rapidly display the image from the slide on
your computer screen. Once the image is scanned and on the screen, you can then perform more detailed operations which will affect how the image will be captured in the
final high resolution scan. A sampling of such operations might include cropping a particular portion of the image, or adjusting the contrast, brightness and color balance.
The results of these operations will be displayed on the screen. For now, though, we
will scan the sample slide using the plug-in’s default settings.
For Coolscan users: Before proceeding, make sure that the center line of the focus
wheel on the front panel of the scanner is in the centered position. If not, set this
position by rotating the wheel with your thumb.
So, go ahead and click the PREVIEW button.
!
Standard Holder
Sample
35mm film
in slide mount
Scanning Stage
Light source
Software Reference for Scanners Page 29
Chapter 4 Getting Started on the Macintosh
Page 44
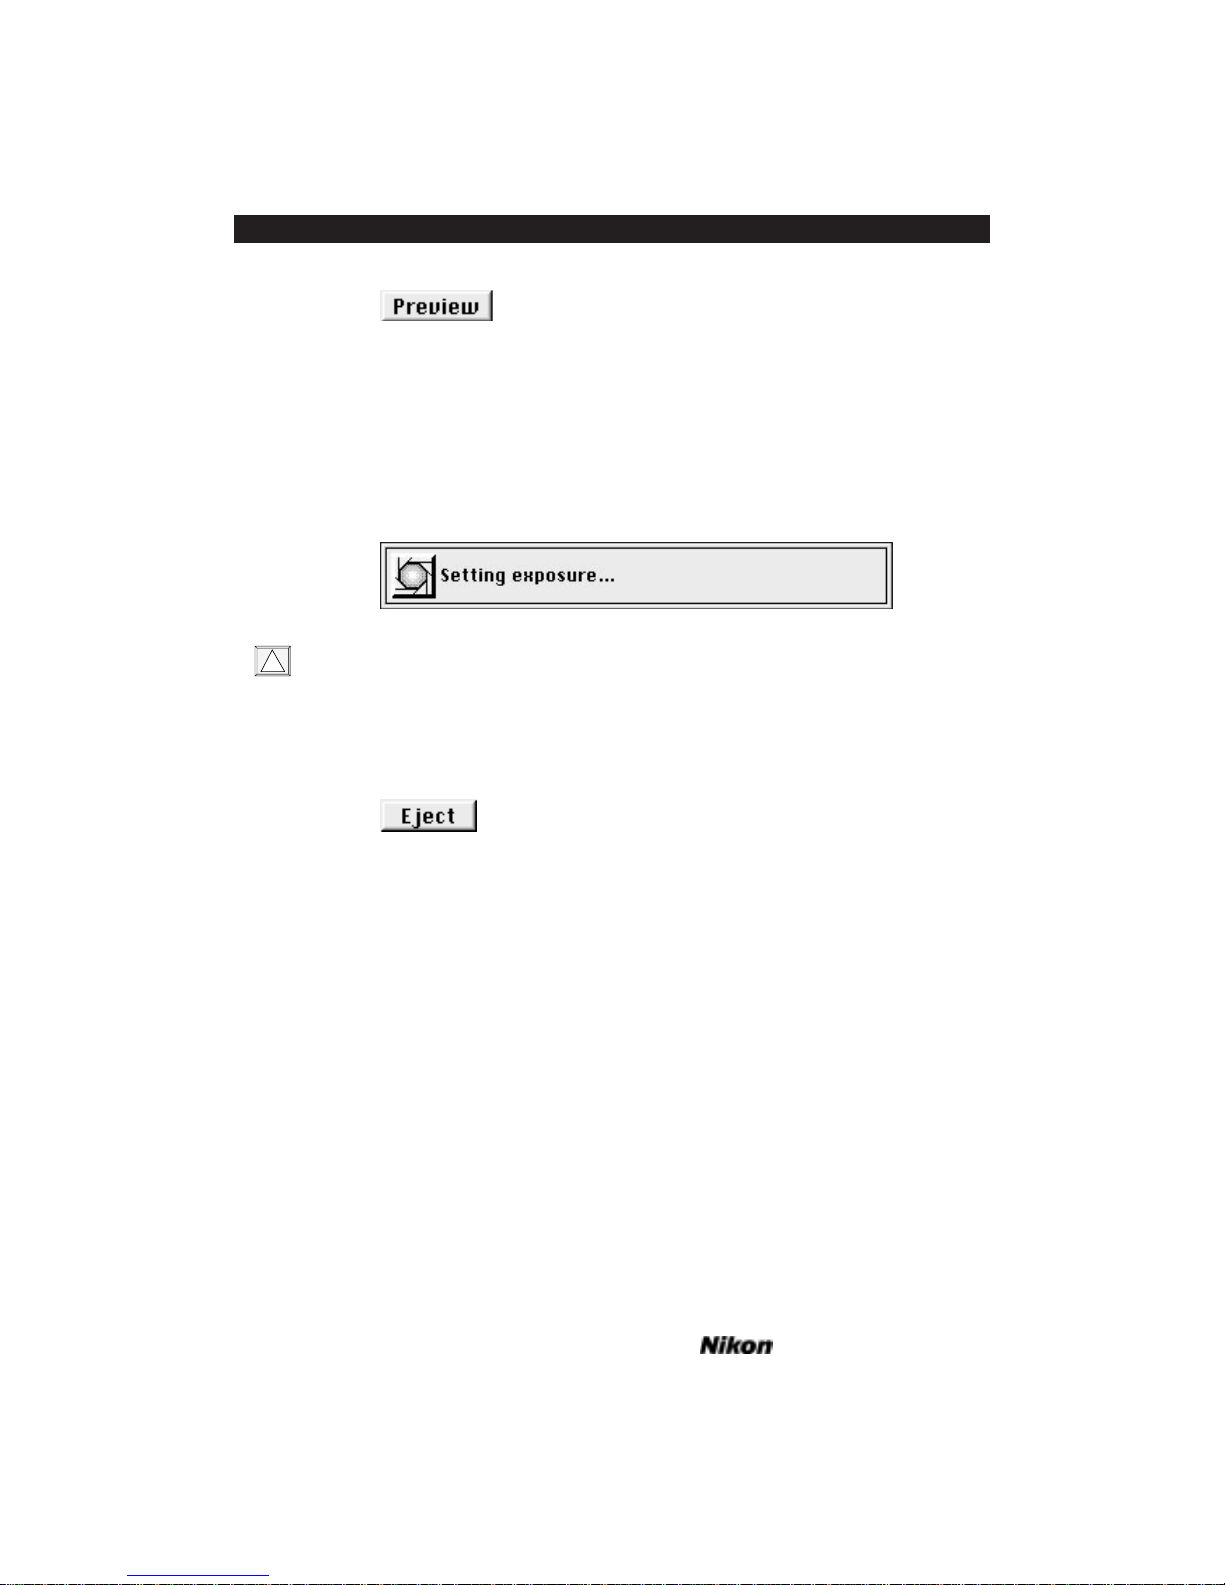
In order to obtain the best scan, Coolscan and the LS-3510AF first perform an
autoexposure sequence to determine certain image characteristics. This will be indicated
on screen by the dialog shown below, and followed by additional messages as required.
The LS-3510AF will also perform an autofocus sequence, accompanied by the message
PERFORMING AUTOFOCUS. Coolscan users should then see the green LED on the scanner’s front panel blink on and off slowly as the scanner is acquiring the image, while
LS-3510AF users should see the green BUSY LED illuminated. We can now see the
image as it is displayed, line by line, in the preview window.
Should you discover that you have inserted the slide in the wrong orientation, you
can abort the scan by pressing the Command “ð” and period “.” keys simultaneously. Coolscan users can then eject the slide by clicking on the EJECT button in
the bottom-right corner of the Scan dialog box. Do not click the EJECT button
during a scan. Always abort the scan first.
The preview scan should take a little less than one minute to complete, with slight
variations in speed depending on the model of your Macintosh and the size of your display. Upon completion, the preview image will stay in the Scan dialog box while you
prepare for the final scan.
Final Scan
The next step is to perform the final scan at a higher resolution, or image quality.
First, we have to crop, or trim the preview image. Notice there is a narrow black border
around it. We want to eliminate this from the scanning area so that it does not appear
in our final scan.
Setting the Crop
Start by placing the cursor anywhere over the preview, clicking and dragging a
crop rectangle to enclose the area of interest. Adjust the crop rectangle by placing the
cursor on any of the small boxes, or ‘hot spots,’ on the crop rectangle. The cursor will
change to an arrow when it is placed over any of these boxes. Now, move the rectangle
inward by clicking and dragging until the border line of the rectangle encloses the area
!
Page 30 Software Reference for Scanners
Getting Started on the Macintosh Chapter 4
Page 45
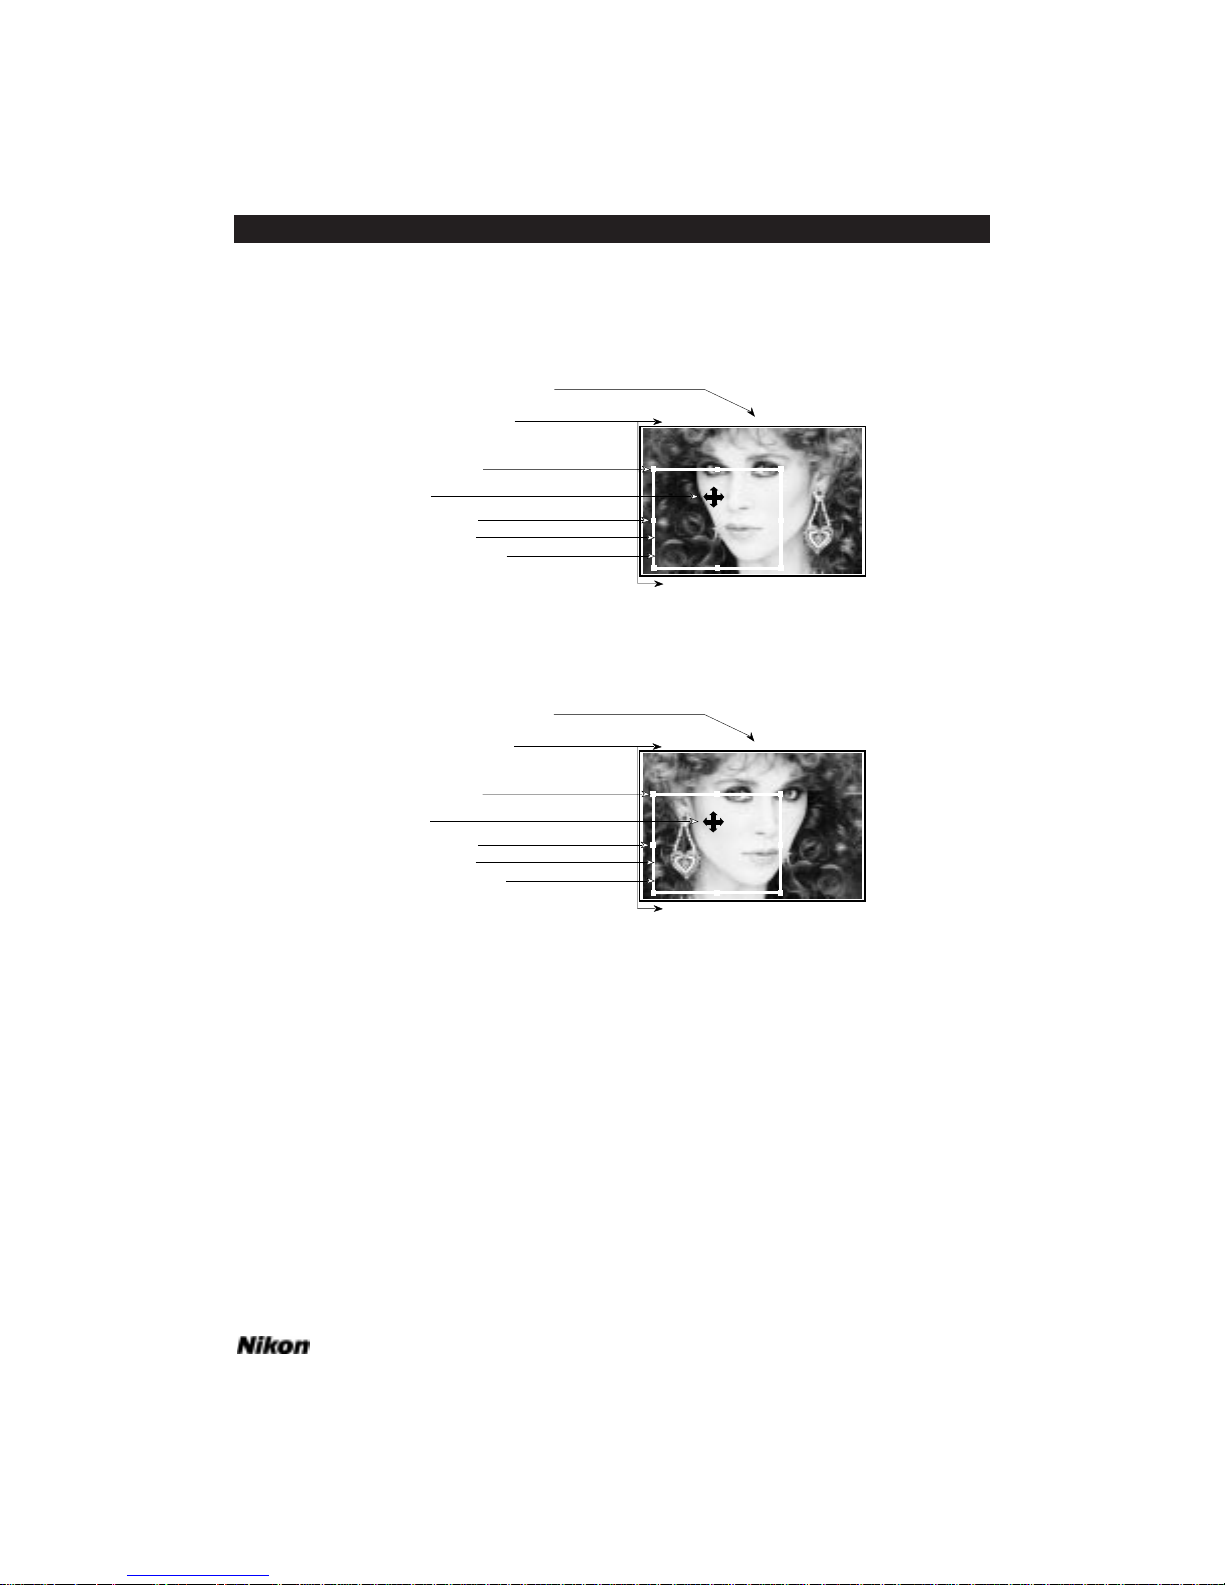
of interest, as in Figure 4.9a for Coolscan, and Figure 4.9b for LS-3510AF. Repeat this
step using the other small boxes, as necessary, until you have cropped the image to its
edges, and the unexposed, or black area is completely outside of the rectangle.
Figure 4.9a Selecting a crop area – Coolscan.
Figure 4.9b Selecting a crop area – LS-3510AF.
The dimensions, resolution, and pitch setting in the preview window can be left
at the default setting of 9 x 6 inches, 72 pixels/inch, and 6, respectively.
You are now ready to make the final scan. Click on the SCAN button, shown in
Figure 4.10, at the lower-right corner of the Main Scan dialog box. The scanner will
begin the scanning cycle. Again, the SETTING UP THE SCANNER dialog will appear on
your screen. This will be followed immediately by the scanning progress indicator, which
shows the approximate duration of the scan and the portion remaining to be completed.
Coolscan users should also see the green LED on the scanner’s front panel blink on and
off as the scan proceeds, while LS-3510AF users should see the green BUSY LED illuminated. The final scan should take approximately two minutes to complete, with
slight variation in speed depending on the model of your Macintosh and the size of your
display.
(229,331) (500,523) (1195,331)
(229,1110) (1195,1110)
Landscape Mode
Pixel coordinates of
crop rectangle corners
Corner hot spot
Pixel coordinates of cursor
Cursor
Crop rectangle
Center hot spot
Crop rectangle edge
(229,331) (500,523) (1195,331)
(229,1110) (1195,1110)
Landscape Mode
Pixel coordinates of
crop rectangle corners
Corner hot spot
Pixel coordinates of cursor
Cursor
Crop rectangle
Center hot spot
Crop rectangle edge
Software Reference for Scanners Page 31
Chapter 4 Getting Started on the Macintosh
Page 46
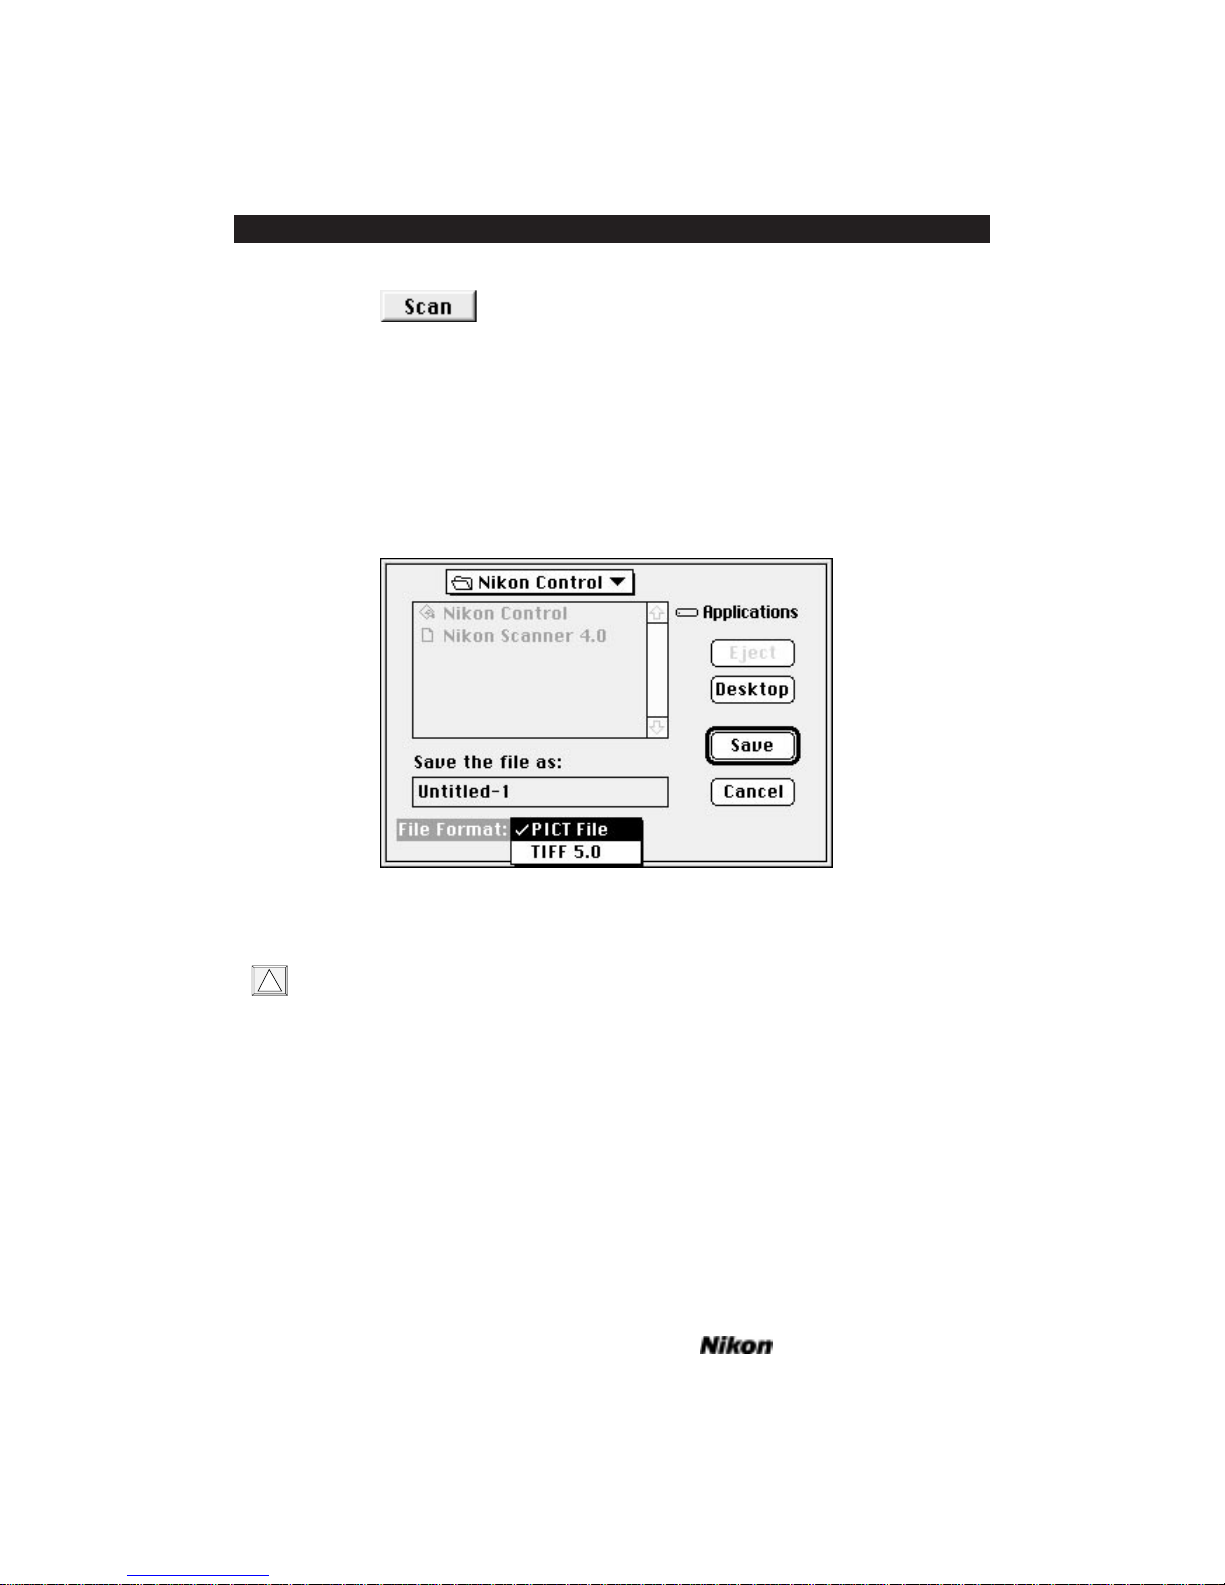
Figure 4.10 Start your final scan by clicking the SCAN button.
Unlike the preview scan, the image will not display on the screen as the scan progresses. Instead, you will see the scanning progress indicator. The final scan will appear
upon completion in a new window labeled “UNTITLED–1.” You will want to save the
file with an appropriate name, so it will be easy to locate later on. You can save the
image in the normal manner, using the SAVE AS... command located under the FILE
pull down menu, as shown in Figure 4.11, or close the window and begin again.
Figure 4.11 The SAVE AS... dialog box.
You will not be able to see the high-quality color produced by the scanner unless
your computer is configured with a 24-bit display card. Using an 8-bit card will
display a dithered, or softened image, comprised of many small dots. Select
“Thousands” or “Millions” of colors from your Monitors control panel for the
best display.
Conclusion
Congratulations! You have completed “Getting Started!” Feel free to continue
exploring on your own. However, to take advantage of the full functionality of the
scanner we strongly recommend reading the following chapters. In them, you will learn
the fundamentals of scanning, managing different film types, adjusting color, contrast,
and brightness, and utilizing the software controls.
!
Page 32 Software Reference for Scanners
Getting Started on the Macintosh Chapter 4
Page 47
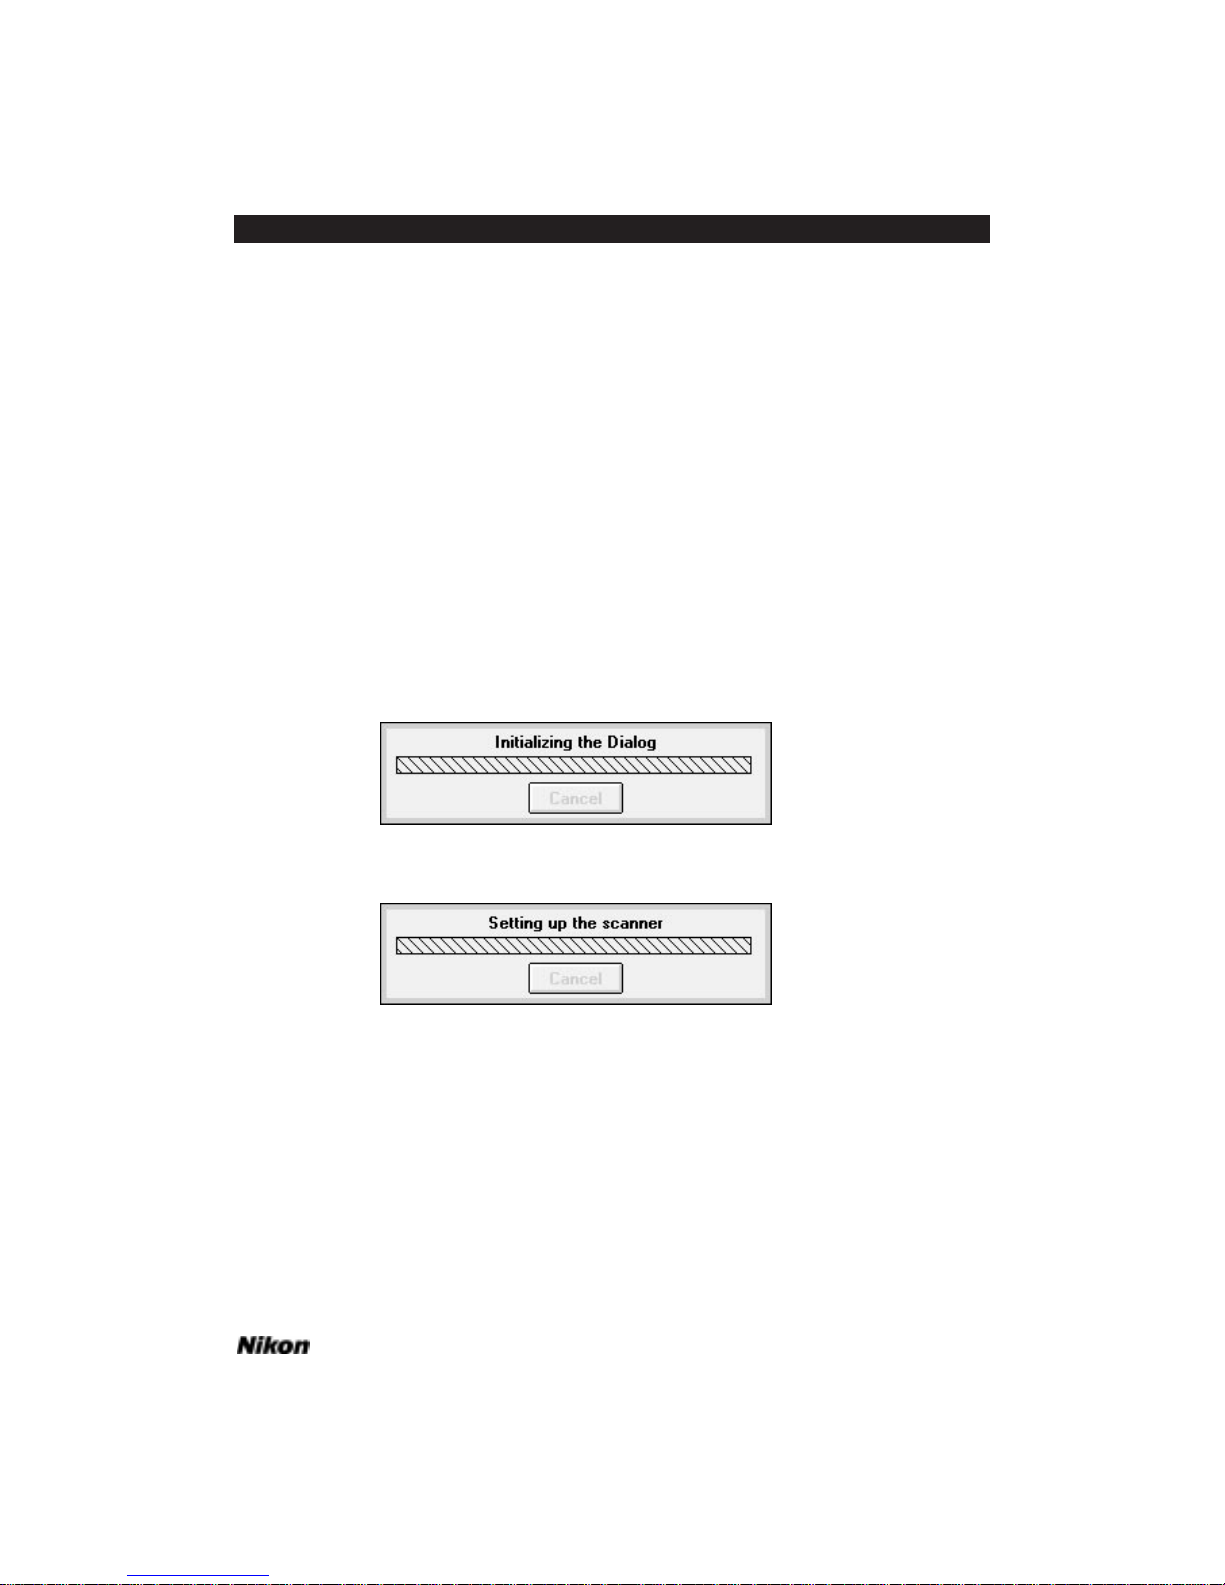
Getting Started on the IBM PC or Compatible
Launching the Software
Before launching the scanning software make sure that your scanner is powered
on. Power on is indicated by a solid green illuminated LED on the scanner’s front
panel.
If you are using a third-party imaging application you will need to access the
Nikon Scanner plug-in from the FILE menu. If you are using the Nikon Control software, the dialog will appear automatically.
If you are using a third-party imaging application, pull down the FILE menu to
access the appropriate menu item used by that application for scanning input. Then,
select NIKON SCANNER... from the submenu. Once launched you should see the following messages appear on your screen.
After a moment, the following message will appear:
The Nikon Scanner plug-in is now attempting to establish connection with the
scanner.
The Main Scan dialog will then appear.
Software Reference for Scanners Page 33
Chapter 5 Getting Started on the IBM PC or Compatible
Page 48
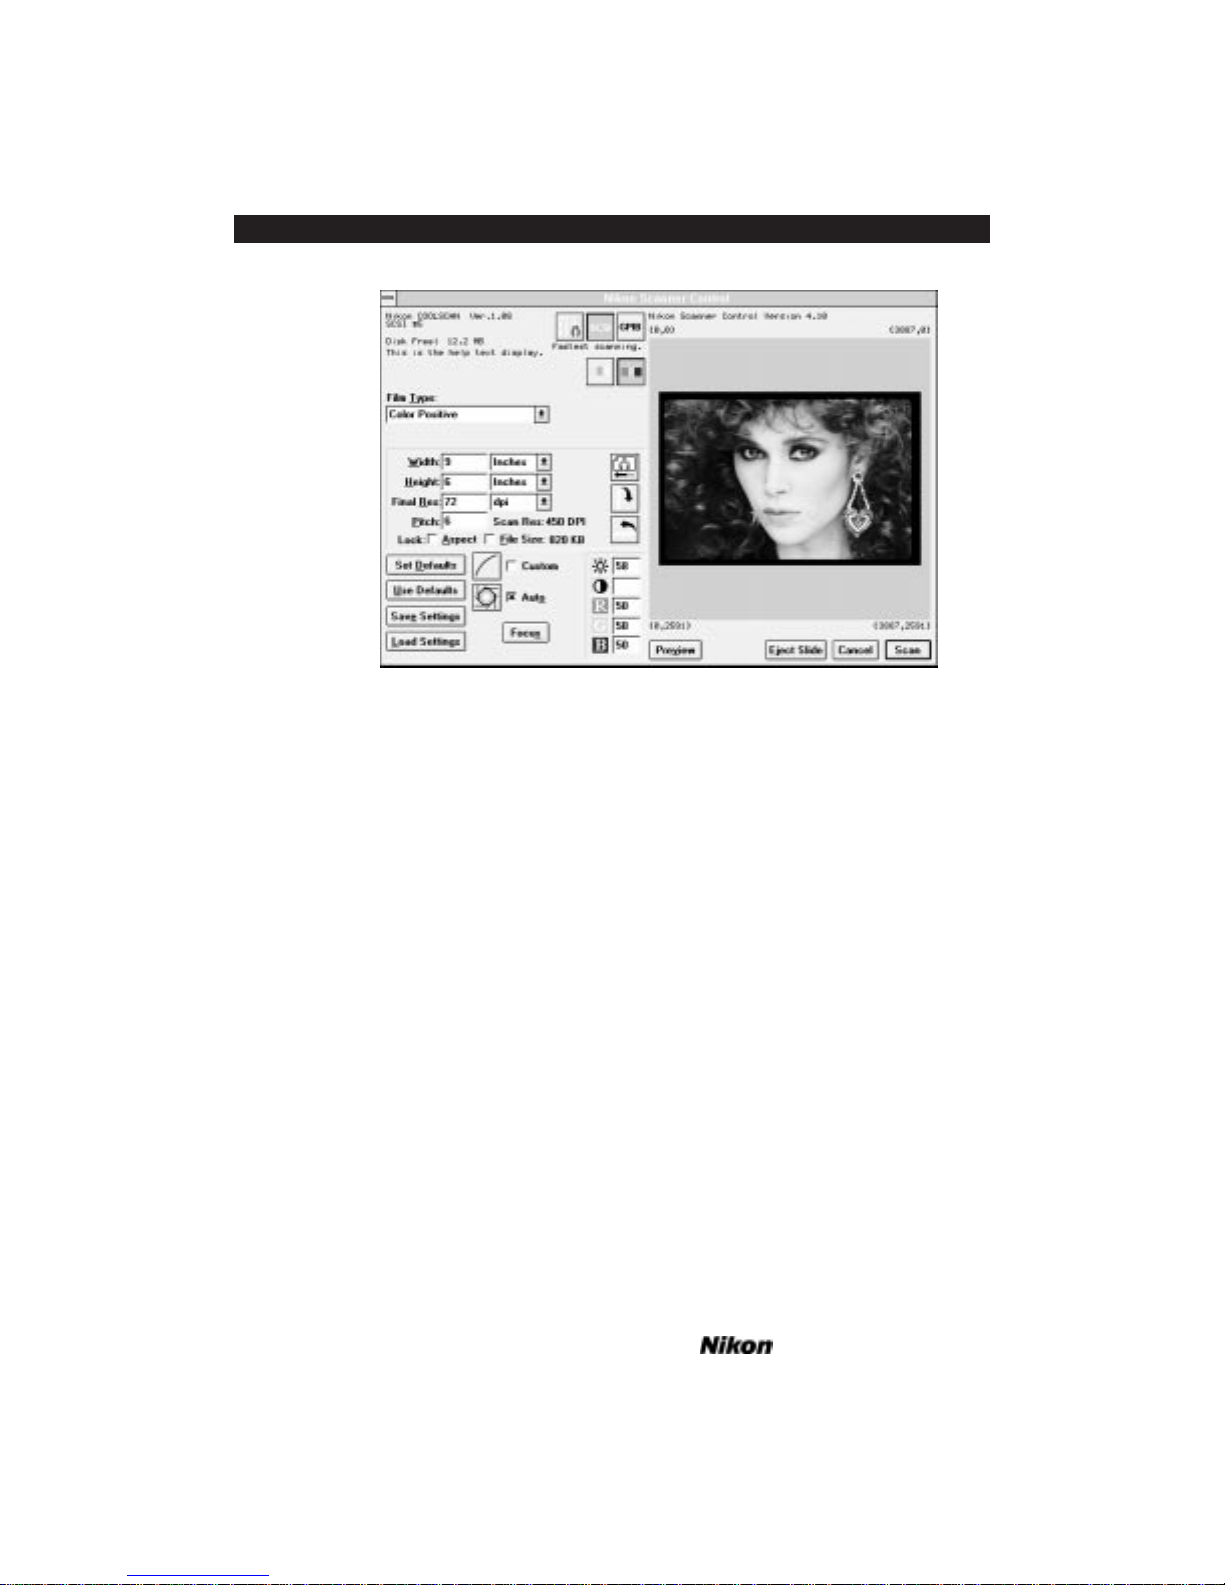
Figure 5.1 The Nikon Scanner plug-in’s Main Scan dialog for monitors with resolutions of 640 x 480 pixels (Coolscan connected).
For Nikon scanners with a SCSI interface, the Nikon Scanner plug-in and the
Nikon Control software assume that the scanner is configured for SCSI ID #5. This is
the factory default condition. If this is not the case, consult the Installation Guide
accompanying your scanner for proper configuration instructions.
Most scanning operations can be performed from this dialog box, including
selecting the film type, previewing the image, fine focusing, cropping the image, and
performing basic brightness, contrast and color balance tasks.
If the message box in the upper left-hand corner contains NIKON COOLSCAN VER.
1.0.2 (for Coolscan users), or NIKON LS-3510AF VER. 1.30 (for LS-3510AF users),
you are ready to perform a preview scan or a final scan. Please note that engineering
changes may mean that your ROM version, which was the shipping version at the time
of this printing, will not be the same. If no scanner type is indicated, the message NO
SCANNER CONNECTED will appear. In this case, the scanner may not have been in a
ready state (indicated by a steady green LED on the front panel) when you started the
Nikon Scanner plug-in software. You can establish a connection to the scanner by
clicking on the relevant search icon, SCSI or GPIB, which is located at the top of the
Main Scan dialog. You will need to check your installation, particularly the SCSI or
GPIB cabling to confirm proper connections and termination if this attempt fails. For
scanner installations with other SCSI or GPIB external devices, place the scanner in the
SCSI or GPIB chain, remembering to maintain proper termination. If you are unsure
of which SCSI or GPIB address to use, consult the Installation Guide included with
your scanner.
Page 34 Software Reference for Scanners
Getting Started on the IBM PC or Compatible Chapter 5
Page 49
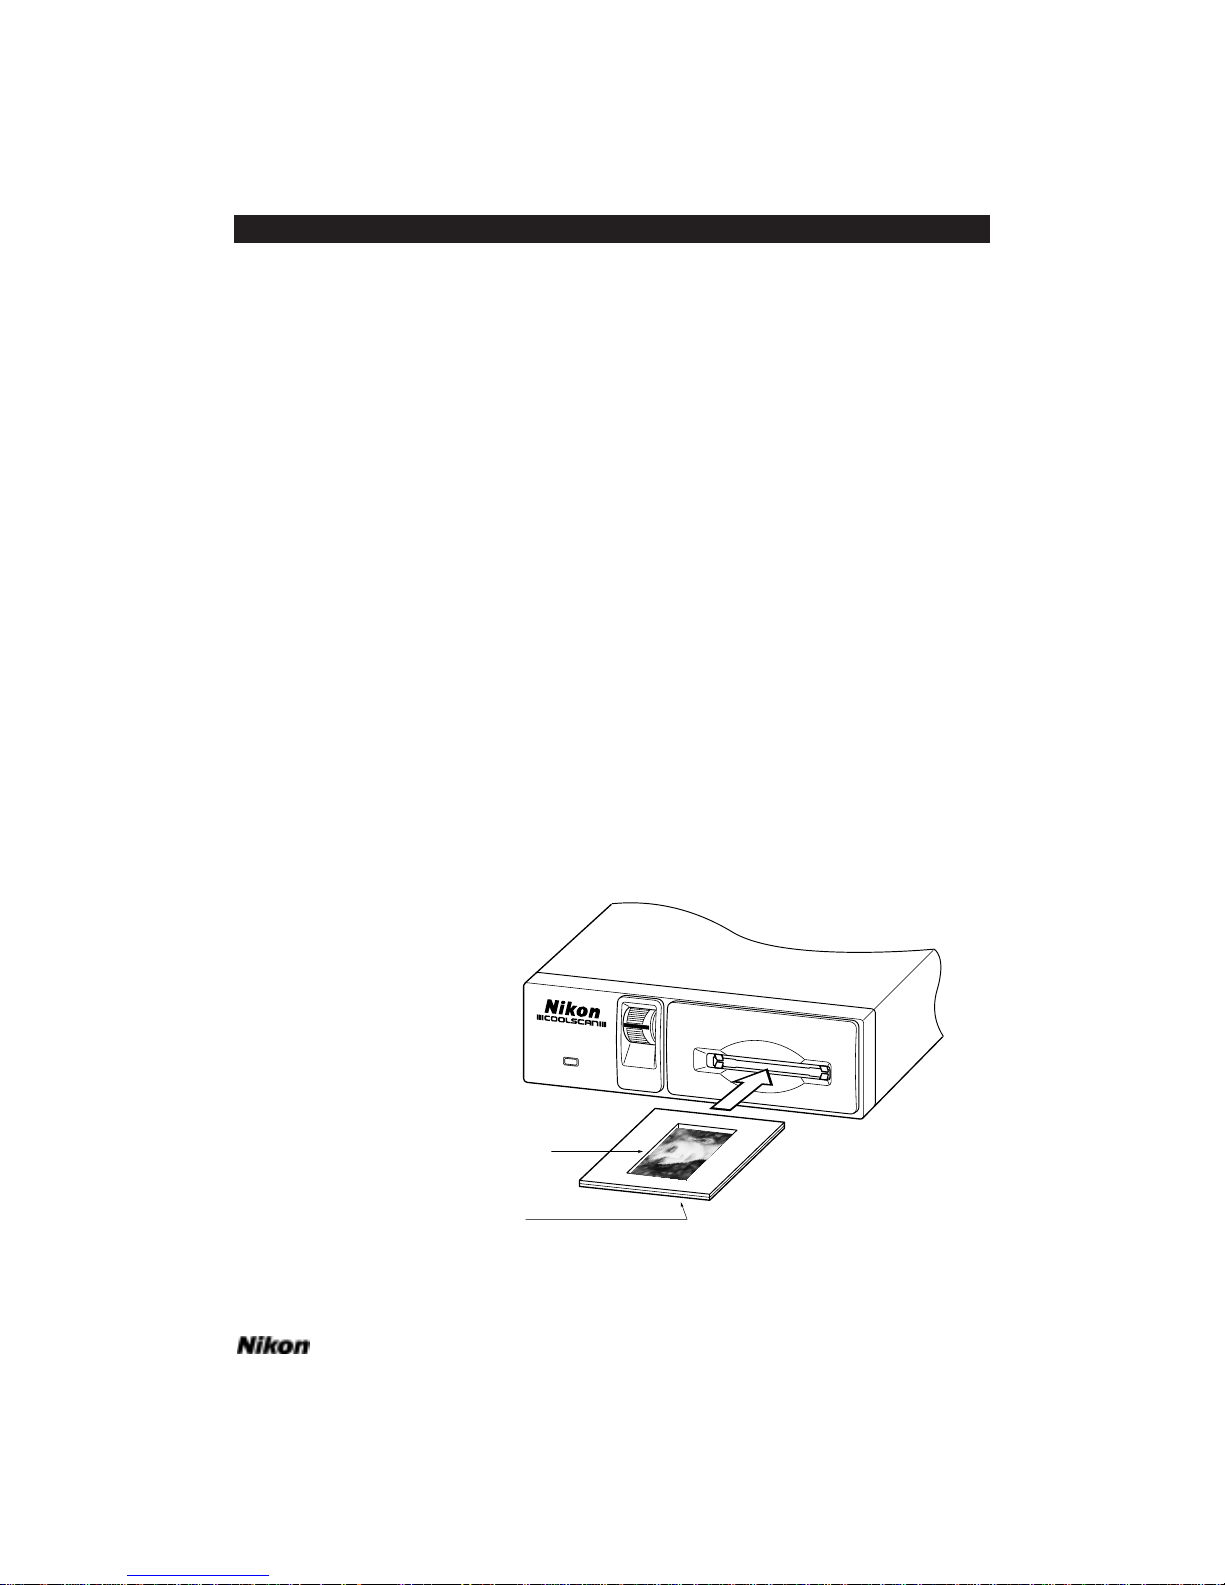
Inserting the Slide
Take out the included sample 35mm slide. You will be using this slide to perform
your first preview scan and final scan.
The two sides of the film in the slide mount are not the same. One side is known
as the emulsion side, and contains the image dye layers. The other side is known as the
base, and consists of the celluloid film support. We will explain the significance of the
emulsion side of the film, and how to identify it in a later chapter. For the purpose of
this introduction we have predetermined the emulsion side for you. The emulsion side
does not have the “Nikon Electronic Imaging” logo printed on the slide mount.
As you have probably already noticed, the slide mount is square, and can be
inserted in the scanner in any orientation. However, the orientation of the slide when it
is inserted into the scanner does affect the scanning process. This will be addressed in
depth in a later chapter.
Coolscan
The slide is inserted into Coolscan in much the same way as a floppy diskette is
inserted into a disk drive, as shown in Figure 5.2. For optimum scanning, the emulsion
side should face the top of the scanner, as shown in Figure 5.2. Insert the slide into the
slot in the front of the scanner, making sure that the “Nikon Electronic Imaging” logo
faces down, and that the side of the slide corresponding to the top of the head of the
person seen in the picture enters the scanner facing the left side of the film slot. Gently
push the slide in as far as it will go, without forcing it. The carriage mechanism inside
the scanner will take care of the rest.
Figure 5.2 Inserting the emulsion side of the film facing the top of Coolscan.
Base side of film
Emulsion side of film
Software Reference for Scanners Page 35
Chapter 5 Getting Started on the IBM PC or Compatible
Page 50
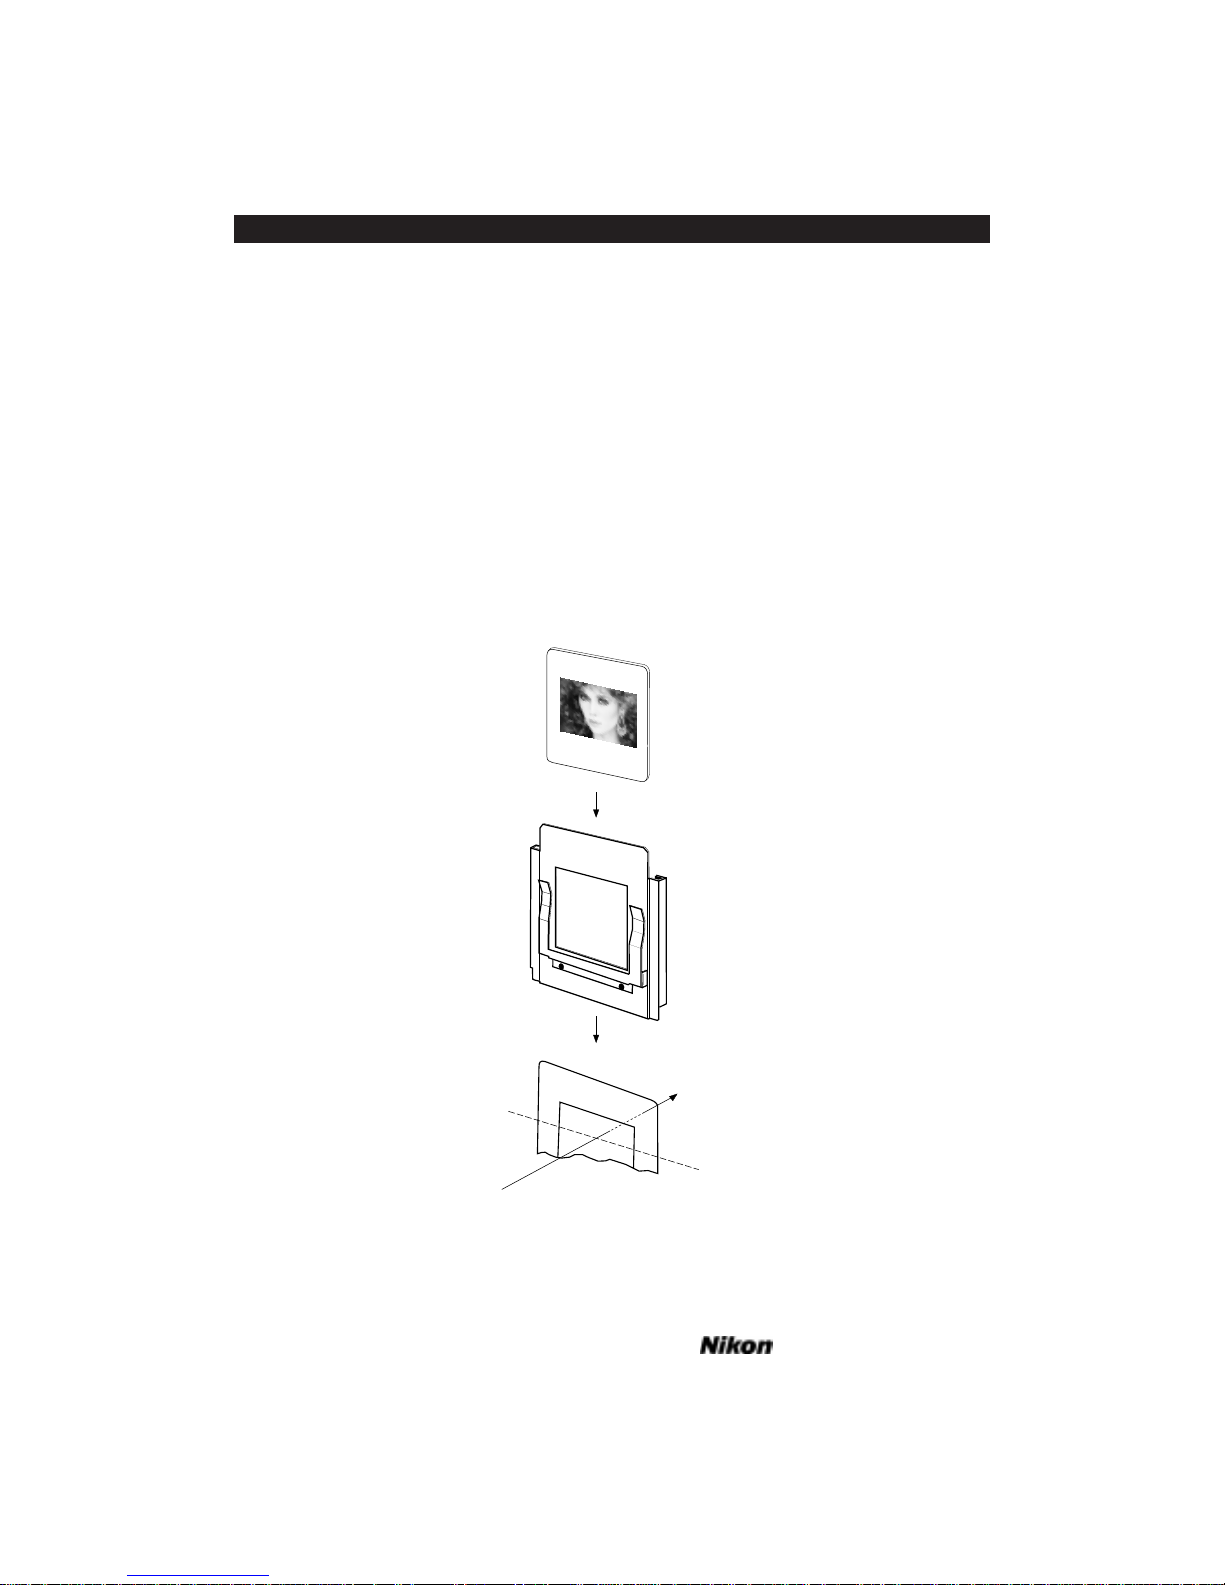
LS-3510AF
You will be using the Standard Slide Holder for this scan. Hold the mount as in
the diagram in Figure 5.3 below. Insert the slide so that the emulsion side of the film
faces the back of the scanner, and the picture is rightside-up. Since the LS-3510AF is an
autofocus scanner, it will not make much difference which way you place the emulsion
(other than image orientation, right-reading or backwards), although sharpest results
will be achieved when the emulsion faces the back of the scanner. This is because the
imaging lens will not be reading the film through the film base, which may reduce definition, depending on the film type.
Insert the Slide Holder into the scanner so that the slide mount is closest to the
lamp. Close the dustproof cover so that the outside light does not affect the scan.
The sample slide is a landscape , or a horizontal image. Therefore we can leave
the default scanning orientation in the landscape position.
Figure 5.3 Loading the slide into the LS-3510AF.
Standard Holder
Sample
35mm film
in slide mount
Scanning Stage
Light source
Page 36 Software Reference for Scanners
Getting Started on the IBM PC or Compatible Chapter 5
Page 51
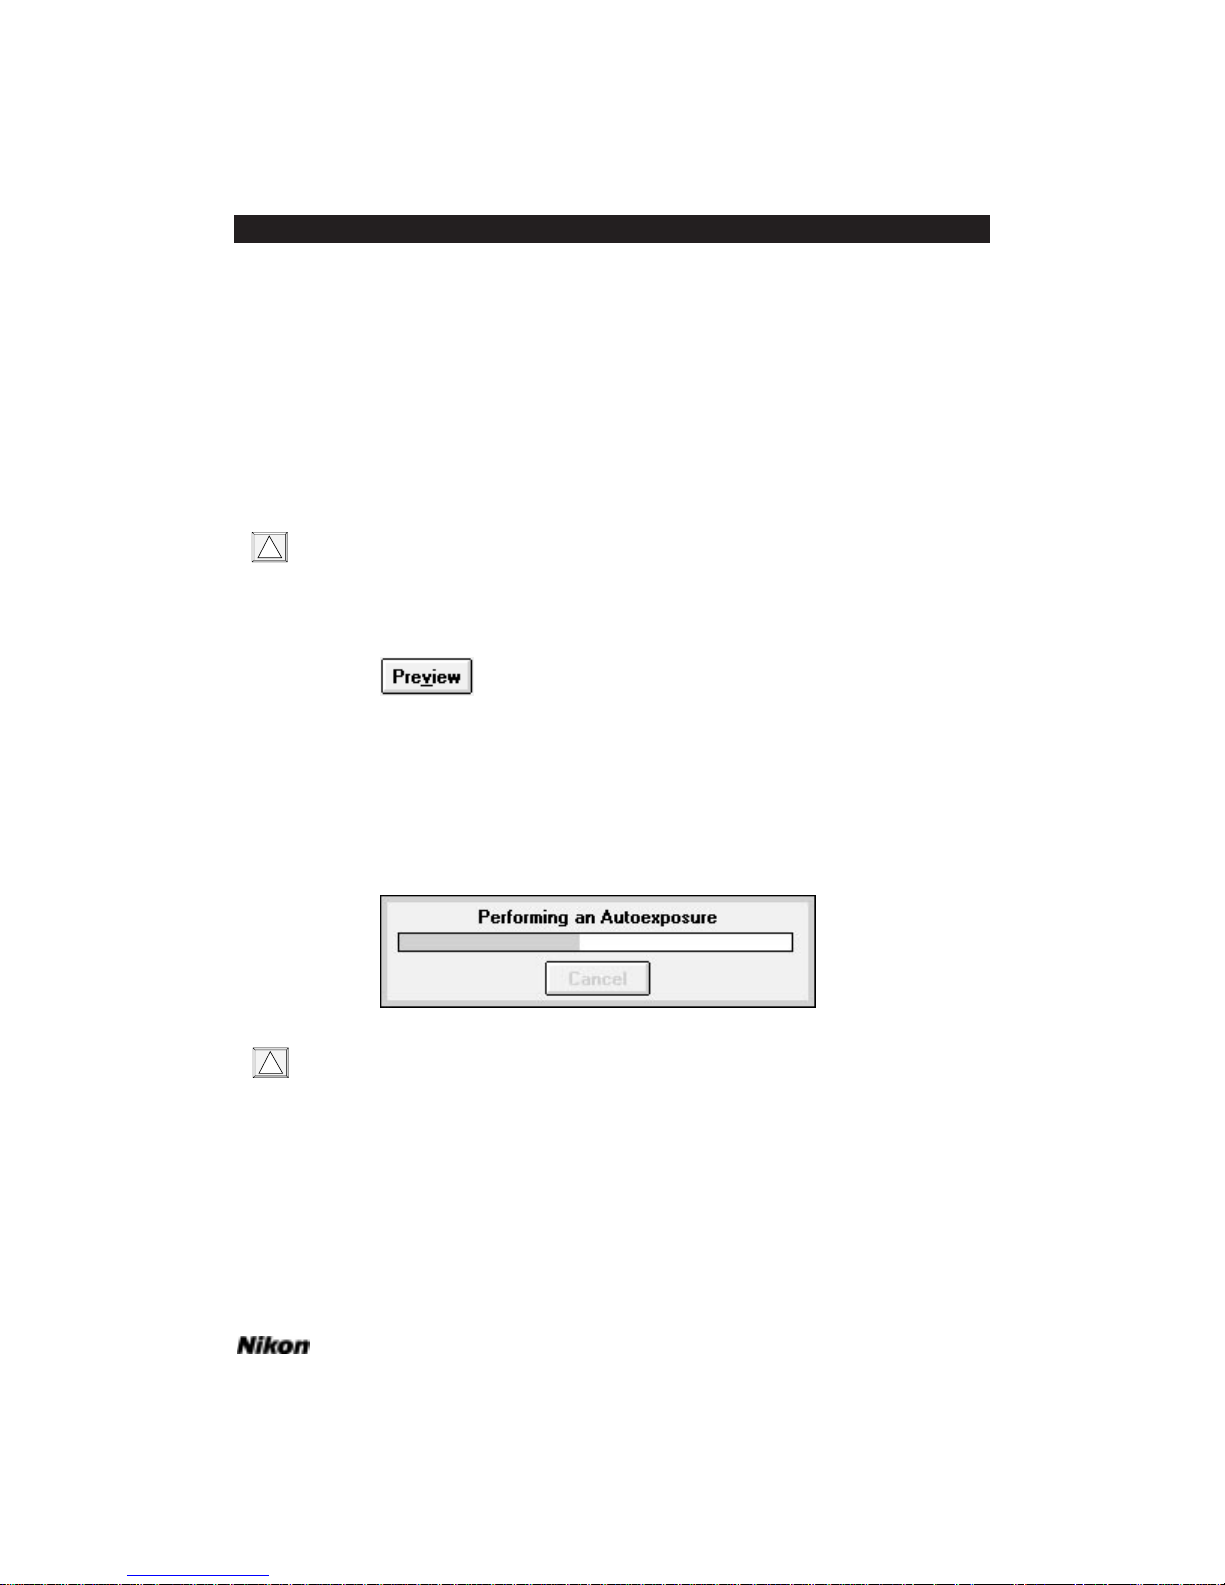
Scanning a Preview Image
The purpose of the preview scan is to rapidly display the image on the slide on
your computer screen. Once the image is scanned and on the screen, you can then perform more detailed operations which will affect how the image will be captured in the
final high resolution scan. A sampling of such operations might include cropping a particular portion of the image, or adjusting the contrast, brightness and color balance.
The results of these operations will be displayed on the screen. For now, though, we
will scan the sample slide using the scanner's default settings.
For Coolscan users: Before proceeding, make sure that the center line of the focus
wheel on the front panel of the scanner is in the centered position. If not, set this
position by rotating the wheel with your thumb.
So, go ahead and click the PREVIEW button.
In order to obtain the best scan, Coolscan and the LS-3510AF first perform an
autoexposure sequence to determine certain image characteristics. This will be indicated
on screen by the dialog shown below, and followed by additional messages as required.
The LS-3510AF will also perform an autofocus sequence, accompanied by the message
PERFORMING AUTOFOCUS. Coolscan users should then see the green LED on the scanner’s front panel blink on and off slowly as the scanner is acquiring the image, while LS3510AF users should see the green BUSY LED illuminated.
Should you discover that you have inserted the slide in the wrong orientation, you
can abort the scan by pressing the Escape key. Coolscan users can then eject the
slide by clicking on the EJECT SLIDE button in the bottom-right corner of the Scan
dialog box. Do not click the EJECT SLIDE button during a scan. Always abort the
scan first.
!
!
Software Reference for Scanners Page 37
Chapter 5 Getting Started on the IBM PC or Compatible
Page 52
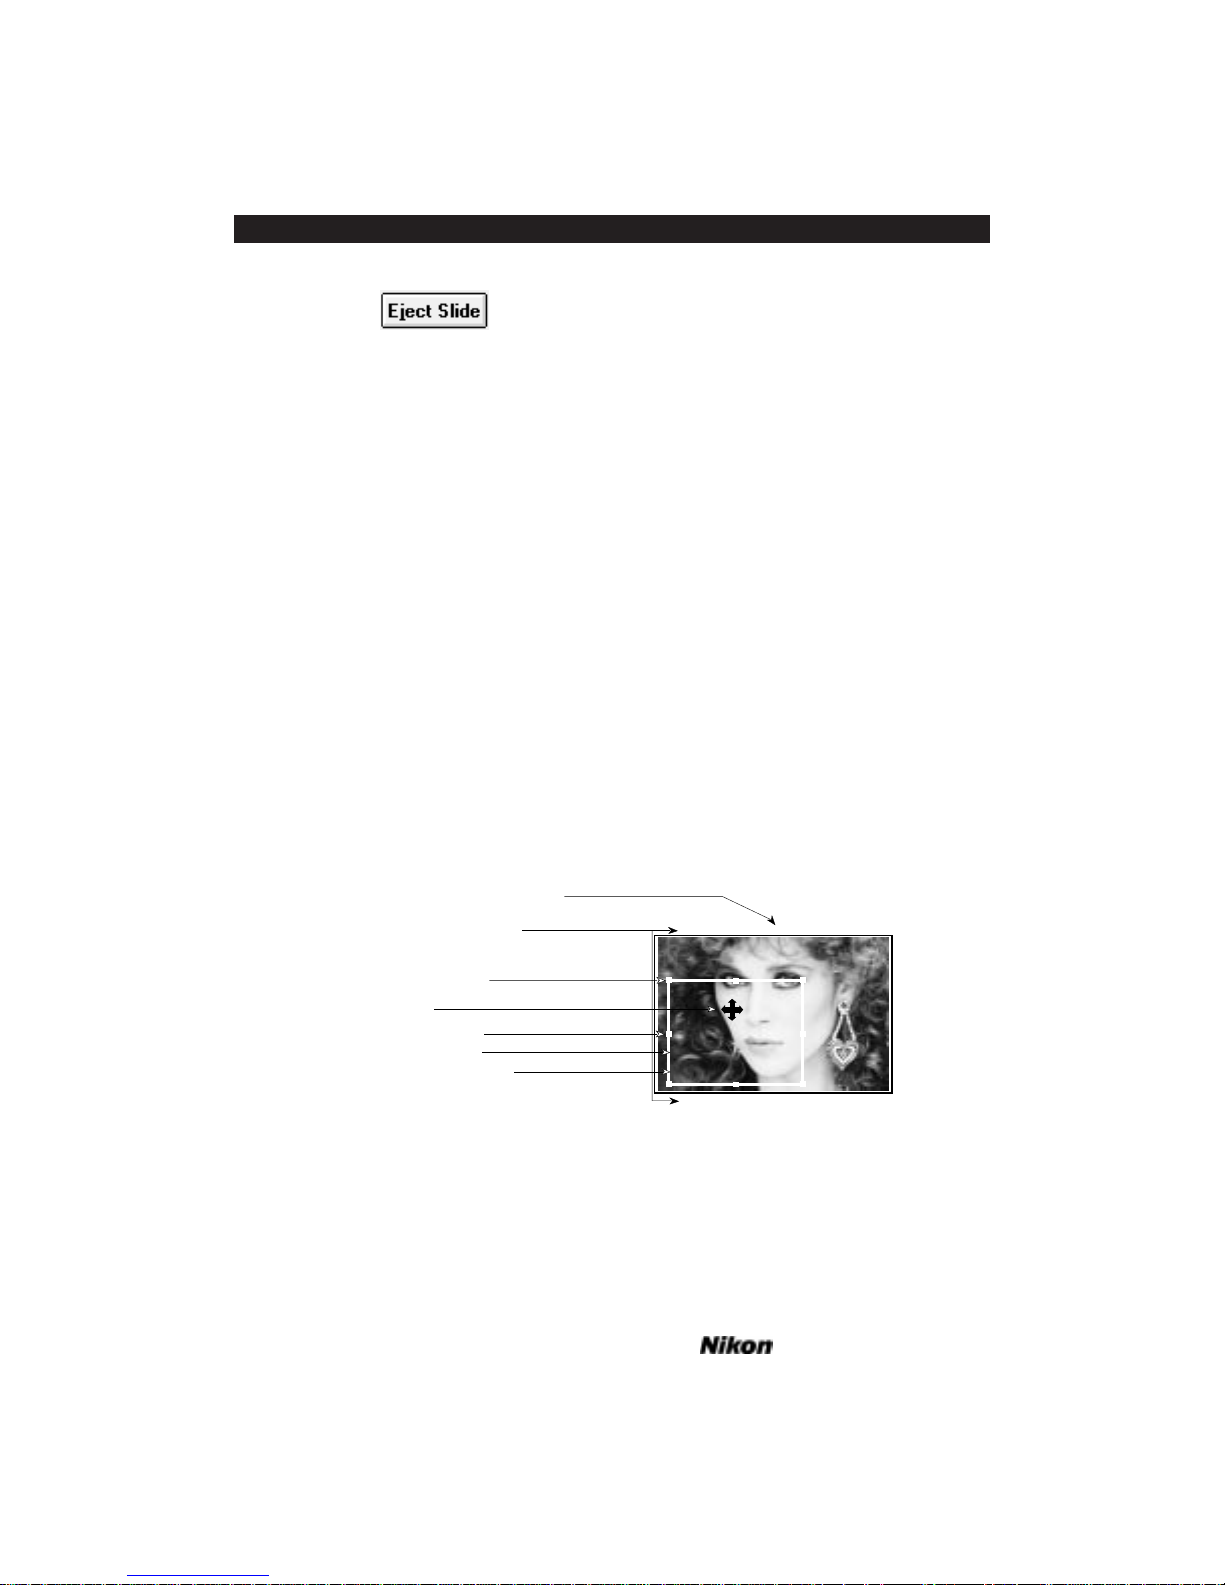
The preview scan should take a little less than one minute to complete, with slight
variations in speed depending on the model of your Macintosh and the size of your display. Upon completion, the preview image will stay in the Scan dialog box while you
prepare for the final scan.
Final Scan
The next step is to perform the final scan at a higher resolution, or image quality.
First, we have to crop, or trim the preview image. Notice there is a narrow black border
around it. We want to eliminate this from the scanning area so that it does not appear
in our final scan.
Setting the Crop
Start by placing the cursor anywhere over the preview, clicking and dragging a
crop rectangle to enclose the area of interest. Adjust the crop rectangle by placing the
cursor on any of the small boxes, or ‘hot spots,’ on the crop rectangle. The cursor will
change to an arrow when it is placed over any of these boxes. Now, move the rectangle
inward by clicking and dragging until the border line of the rectangle encloses the area
of interest, as in Figure 5.4a for Coolscan and Figure 5.4b for LS-3510AF. Repeat this
step using the other small boxes, as necessary, until you have cropped the image to its
edges, and the unexposed, or black area is completely outside of the rectangle. Note
that the crop rectangle does not appear if the full image area is selected.
Figure 5.4a Selecting a crop area – Coolscan.
(229,331) (500,523) (1195,331)
(229,1110) (1195,1110)
Landscape Mode
Pixel coordinates of
crop rectangle corners
Corner hot spot
Pixel coordinates of cursor
Cursor
Crop rectangle
Center hot spot
Crop rectangle edge
Page 38 Software Reference for Scanners
Getting Started on the IBM PC or Compatible Chapter 5
Page 53
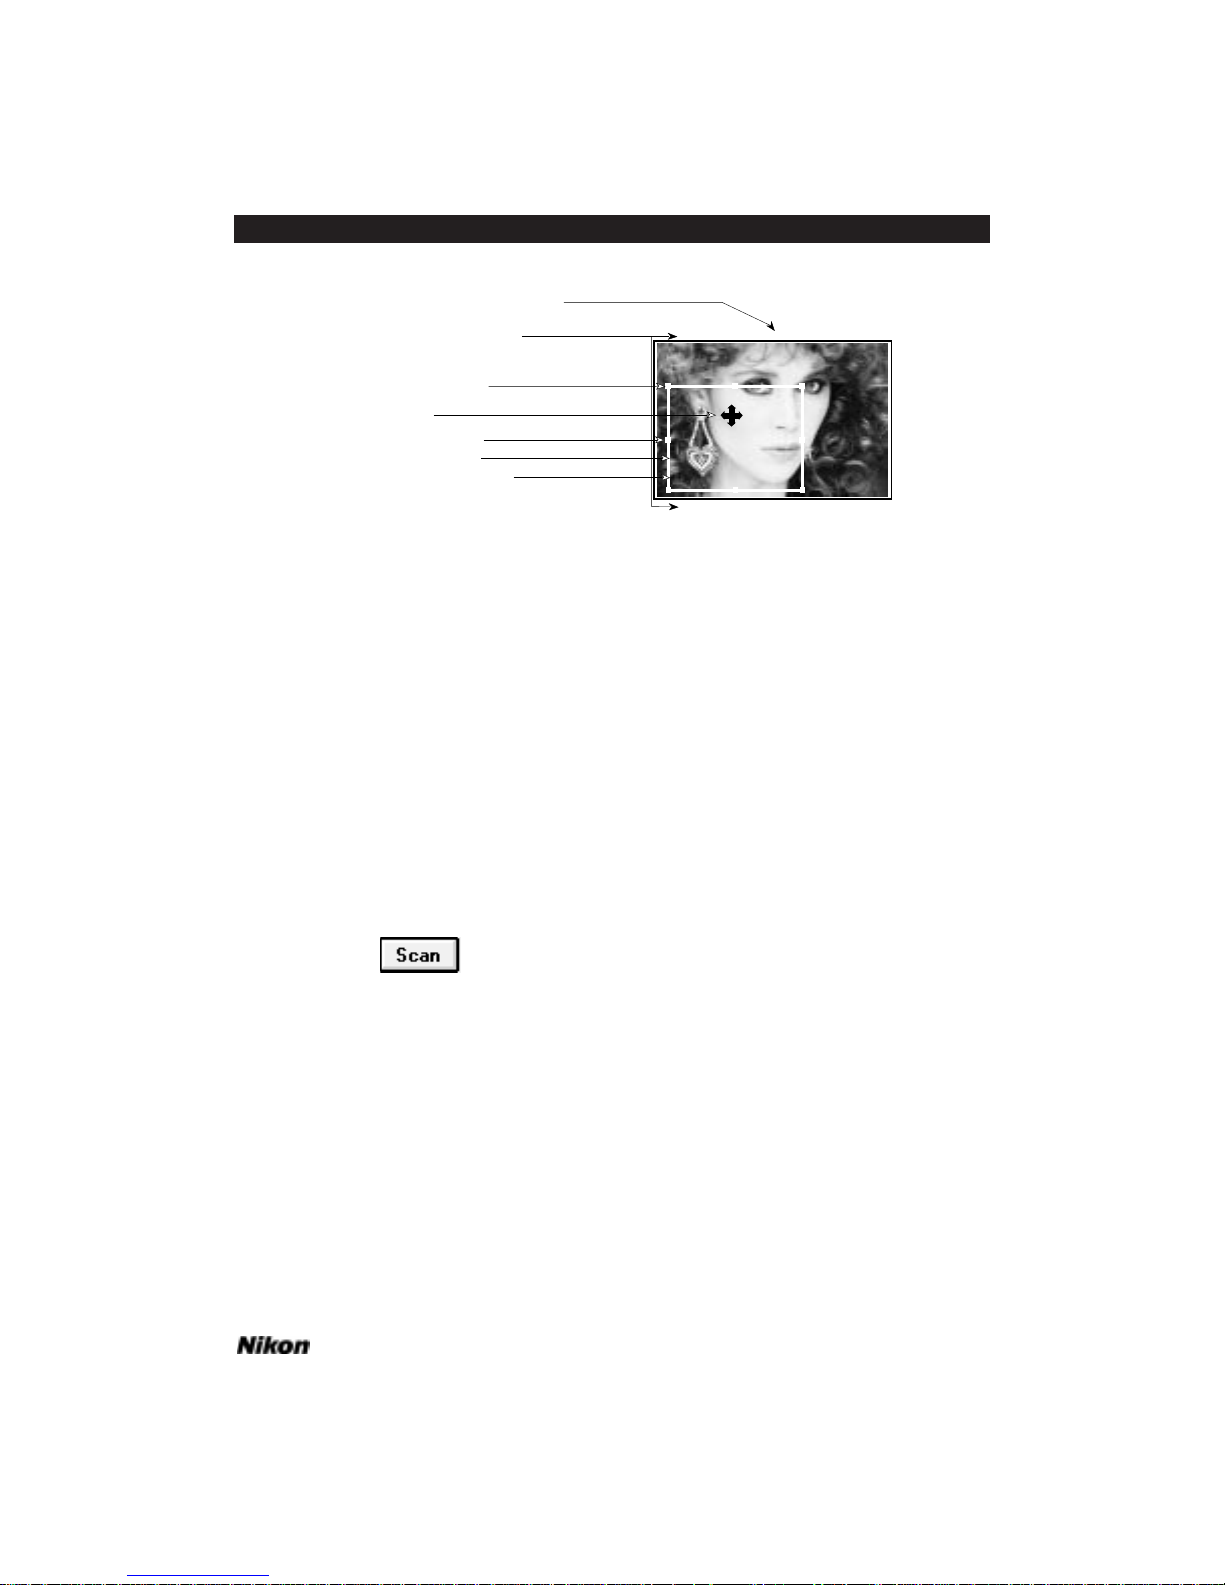
Figure 5.4b Selecting a crop area – LS-3510AF.
The dimensions, resolution, and pitch setting in the preview window can be left
at the default setting of 9 x 6 inches, 72 pixels/inch, and 6, respectively.
You are now ready to make the final scan. Click on the SCAN button, as shown
in Figure 5.5, at the lower-right corner of the Main Scan dialog box. The scanner will
begin the scanning cycle. Again, the SETTING UP THE SCANNER dialog will appear on
your screen. This will be followed immediately by the scanning progress indicator, which
shows the approximate duration of the scan and the portion remaining to be completed.
The scanning progress indicator will appear at the bottom of the window in PhotoStyler
and Photoshop/PC. Coolscan users should also see the green LED on the scanner’s front
panel blink on and off as the scan proceeds, while LS-3510AF users should see the green
BUSY LED illuminated. The final scan should take approximately two minutes to
complete, with slight variation in speed depending on the model of your PC and the size
of your display.
Figure 5.5 Start your final scan by clicking the SCAN button.
Unlike the preview scan, the image will not display on the screen as the scan progresses. Instead, you will see the scanning progress indicator. The final scan will appear
upon completion in a new window labeled “UNTITLED–1.” You will want to save the
file with an appropriate name, so it will be easy to locate later on. You can save the
image in the normal manner, using the SAVE AS... command located under the FILE
pull down menu or close the window and begin again.
(229,331) (500,523) (1195,331)
(229,1110) (1195,1110)
Landscape Mode
Pixel coordinates of
crop rectangle corners
Corner hot spot
Pixel coordinates of cursor
Cursor
Crop rectangle
Center hot spot
Crop rectangle edge
Software Reference for Scanners Page 39
Chapter 5 Getting Started on the IBM PC or Compatible
Page 54
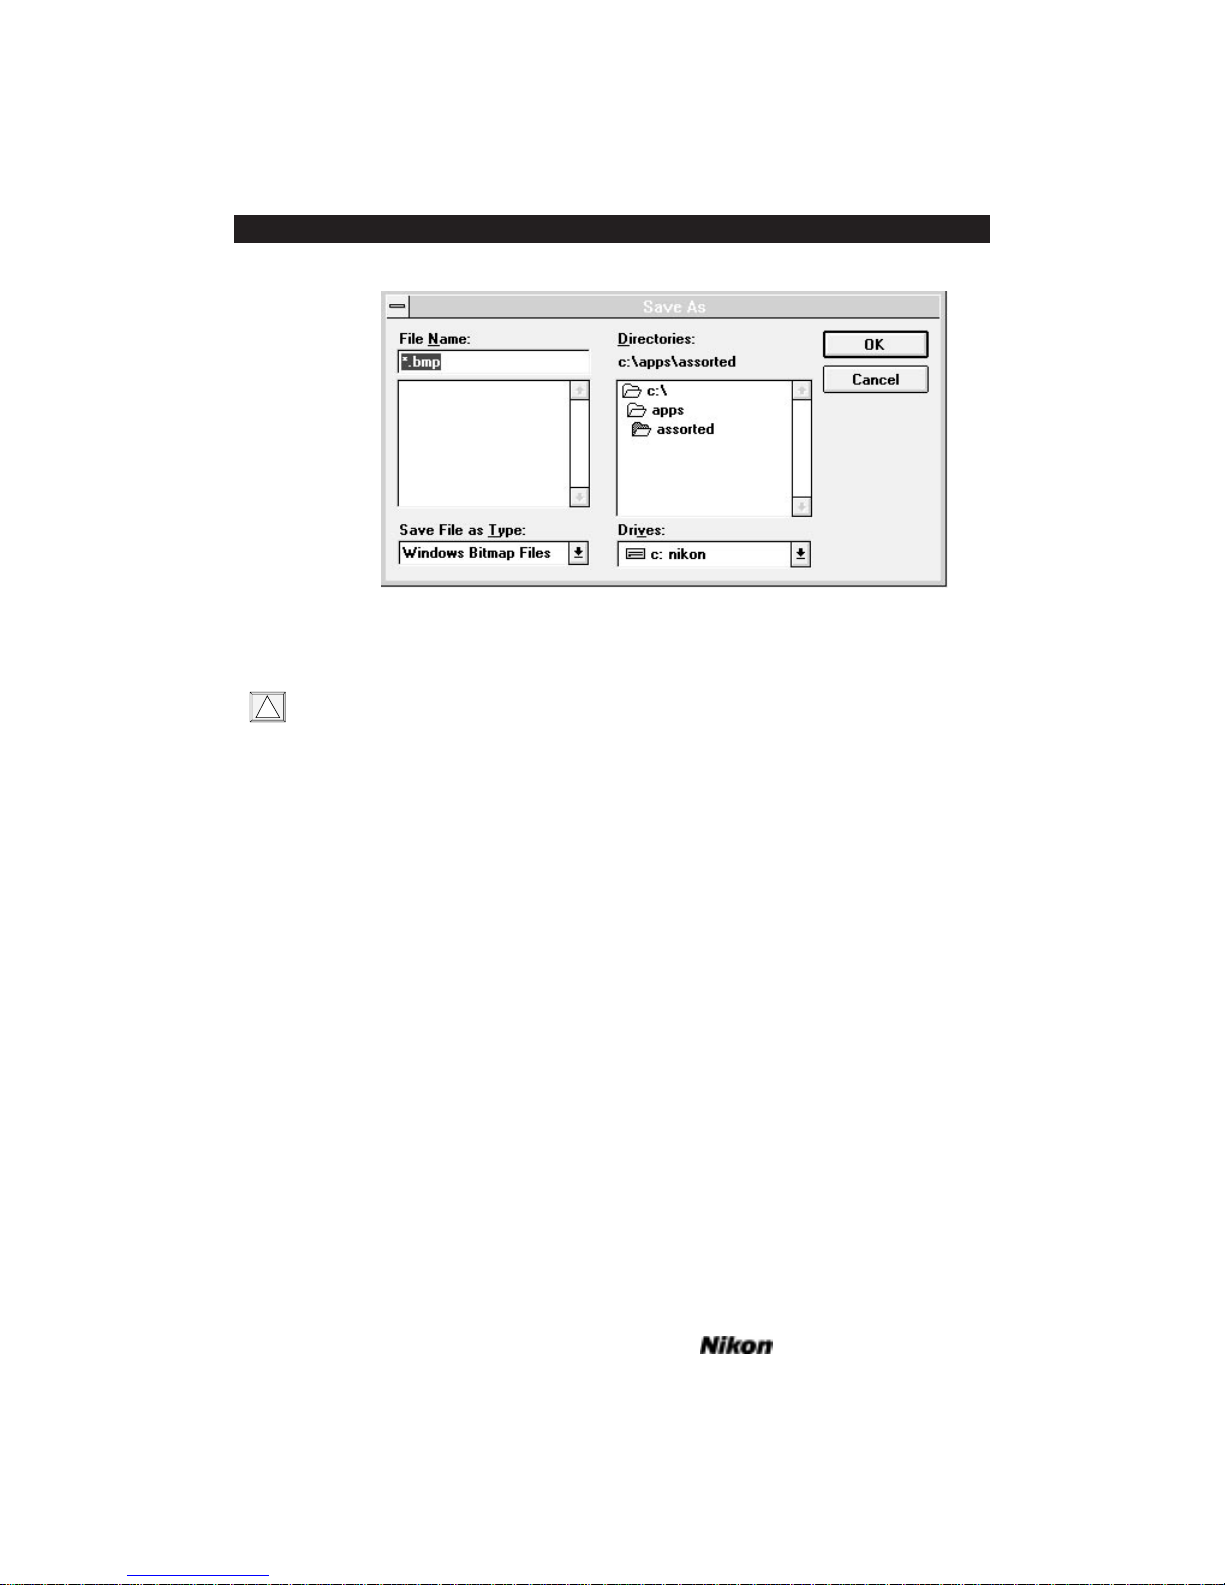
Figure 5.6 The SAVE AS... dialog.
You will not be able to see the high-quality color produced by the scanner unless
your computer is configured with a 16-bit or 24-bit display card. Using an 8-bit
VGA card will display a dithered, or softened image, comprised of many small
dots.
Conclusion
Congratulations! You have completed “Getting Started!” Feel free to continue by
exploring on your own. However, to take advantage of the full functionality of the
scanner we strongly recommend reading the following chapters. In them, you will learn
the fundamentals of scanning, managing different film formats, adjusting color, contrast, and brightness, and utilizing the software controls.
!
Page 40 Software Reference for Scanners
Getting Started on the IBM PC or Compatible Chapter 5
Page 55

Producing a Scan
This chapter will take you through the ten basic steps in performing a scan using
either the Nikon Control or third-party application with the Nikon Scanner plug-in
software. It will introduce you to scanning and the scanner controls in more detail than
in the “Getting Started” chapters. This chapter assumes that the Nikon Control standalone application and/or Nikon Scanner plug-in have been properly installed, and the
Main Scan dialog is open.
The ten steps to a quick scan are as follows:
Step 1. Insert the slide into the scanner
Step 2. Launch the application program
Step 3. Select the film type and orientation
Step 4. Perform a preview scan
Step 5. Select the size (dimensions) of the scan
Step 6. Select the final resolution of the scan
Step 7. Select the area to scan
Step 8. Perform a final scan
Step 9. Name the file
Step 10. Eject/Remove the slide
These ten steps are described here in greater detail.
Step 1. Insert the slide into the scanner
The first step required is, of course, to insert the slide into the scanner. Selecting
and orienting the scanned image is described in detail in Chapter Twelve of this manual.
Step 2. Launch the application program
Macintosh: Launch the Nikon Control software by double-clicking on its icon.
The Nikon Scanner plug-in will then be loaded and the Main Scan dialog displayed.
If you are using the Nikon Scanner plug-in with a third-party application that
supports Photoshop plug-ins, select the NIKON SCANNER item from the ACQUIRE submenu in the FILE pull-down menu, as illustrated in Figure 4.4 in Chapter Four.
Software Reference for Scanners Page 41
Chapter 6 Producing a Scan
Page 56

Windows: Launch the Nikon Control software by double-clicking on its icon.
The Nikon Scanner plug-in will then be loaded and the Main Scan dialog displayed.
If you are using the Nikon Scanner plug-in with a third-party application that is
supported by the Nikon Installer, select the NIKON SCANNER item from the appropriate
menu in the application.
Commands from the user interface can be invoked via a keyboard shortcut, by
holding down the Alt key and striking the letter which is underlined on the command button. For example, the PREVIEW command can be invoked by holding
down the Alt key and striking the “V” key, the letter underlined on the PREVIEW
button. This keyboard shortcut is not available for every command.
Step 3. Select the film type and orientation
Step 3 requires that you make sure that the film type is correctly indicated. There
are four possible film types:
1. Positive color (slide)
2. Negative color (print film)
3. Positive black and white
4. Negative black and white
The scanner will perform image processing based on the film type selected, so it is
critical to indicate the correct film type. The film type should be selected before a preview or final scan is executed.
The film type is selected through the FILM TYPE selection box in the Scan dialog
box, as shown in Figure 6.1a for Macintosh, and Figure 6.1b for Windows. This is
accomplished by holding down the mouse button within the selection box and dragging
until the desired film type is highlighted in black. The mouse button is then released
and the selected film type becomes active.
!
Page 42 Software Reference for Scanners
Producing a Scan Chapter 6
Page 57
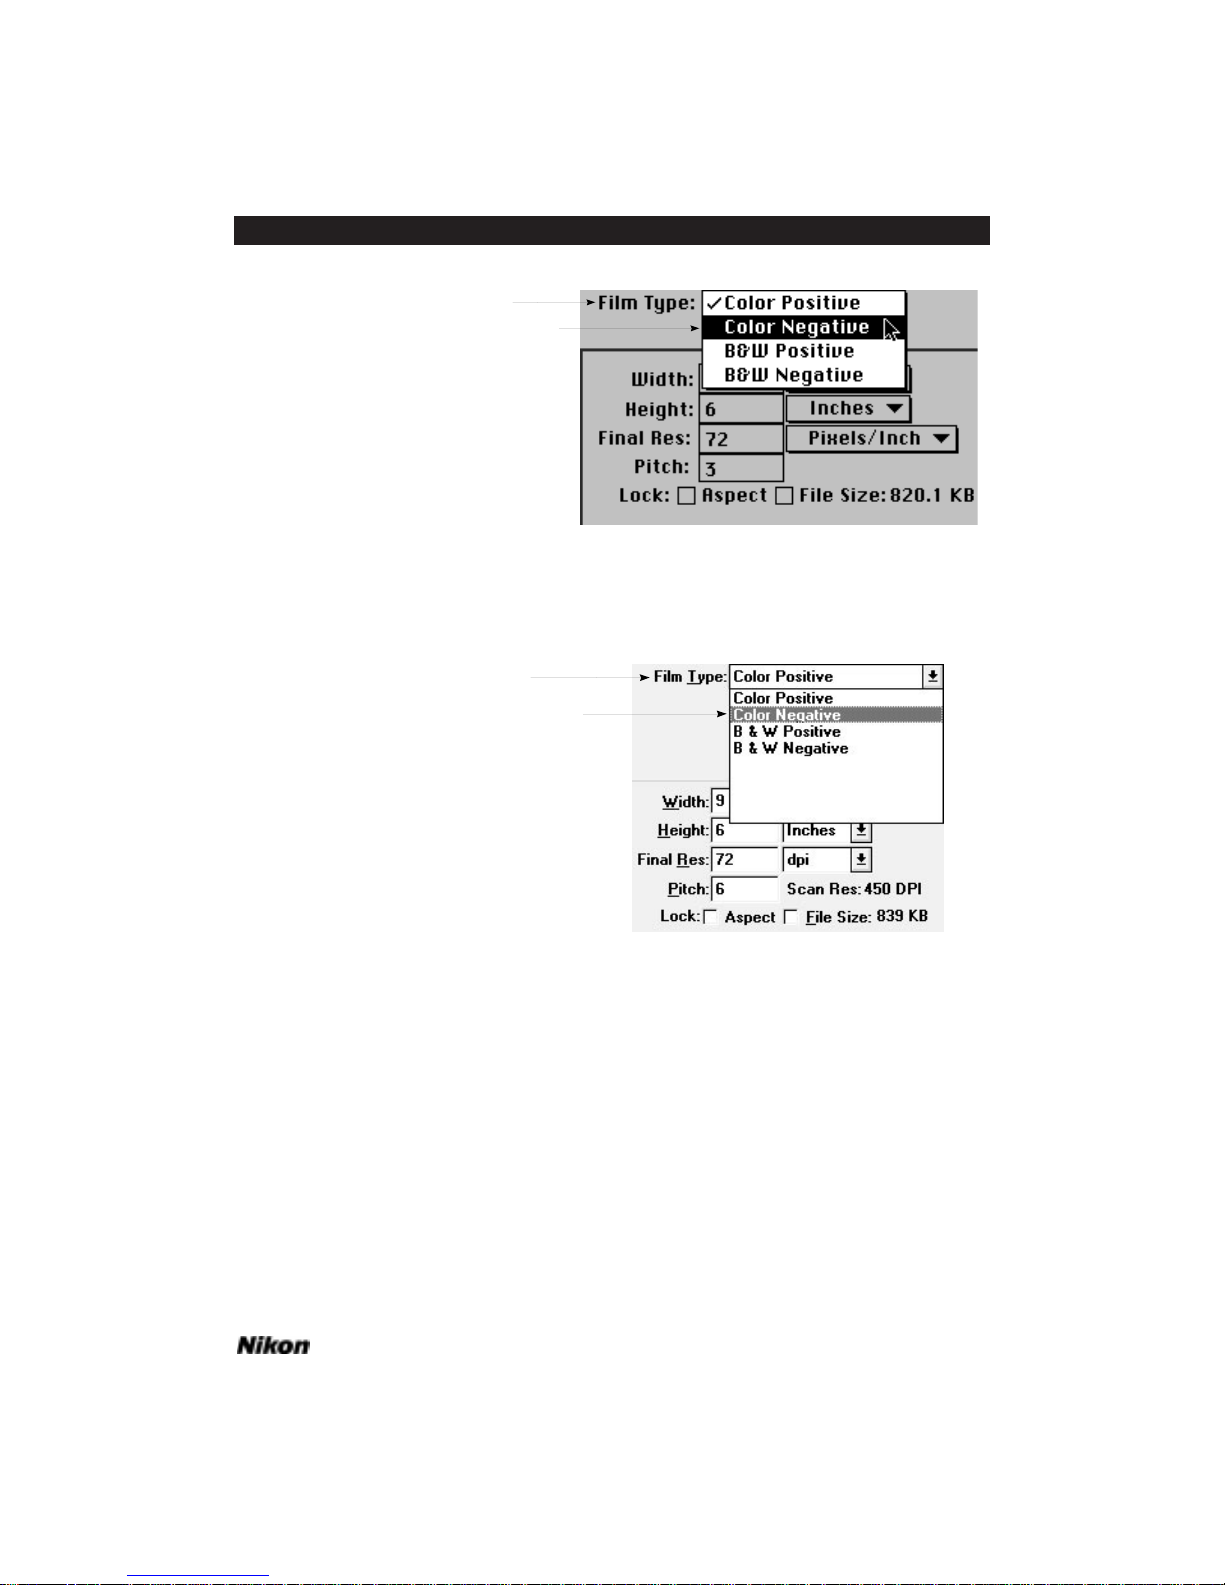
Software Reference for Scanners Page 43
Chapter 6 Producing a Scan
Figure 6.1a Film type selection in the lower left corner of the Scan dialog box –
Macintosh. (a) The F
ILM TYPE selection box showing the currently selected film type.
(b) Changing the film type.
Figure 6.1b Film type selection in the lower left corner of the Scan dialog box –
Windows. (a) The F
ILM TYPE selection box showing the currently selected film type.
(b) Changing the film type.
The film inserted into the scanner is oriented as either portrait or landscape. In
order for the software to correctly display the preview image, it must first know the orientation of the image. The final scan will be properly oriented based on this selection.
The image orientation button is located adjacent to the preview image window.
The symbol on the face of this button changes to reflect which orientation the film is
assumed to be in in the LS-3510AF. In the LS-3500 and Coolscan the film is always
oriented the same way. The buttons are used to re-orient the resulting image. In the
portrait orientation the button looks like this:
(a) Current film type
(b) Selecting a new film type
(a) Current film type
(b) Selecting a new film type
Page 58
Figure 6.2 Image orientation button in portrait mode.
Clicking the mouse on this button will cause the image orientation to toggle
between portrait and landscape mode. In the landscape orientation, the button looks
like this:
Figure 6.3 Image orientation button in landscape mode.
Step 4. Perform a preview scan
The preview scan is a low resolution scan of the entire frame of film. Think of the
preview scan as a ‘snap shot’ of the image. Once the image is on the screen, you can set
the parameters for the final scan, such as resolution, size, cropping the area of interest,
and adjustment of the contrast, brightness and color balance. As you change these parameters you will see the results displayed on the screen, thus enabling you to preview the
effect they would have on the final scan.
Perform a preview scan by clicking on the PREVIEW button.
Figure 6.4 The PREVIEW button – Macintosh and Windows.
Once the PREVIEW button is clicked, the scanner will set its exposure, then make
a preview scan. The image will display on a line-by-line basis as the preview progresses.
The preview image will remain in the Scan dialog box as you prepare for the final
scan. If you cancel the dialog box without making a final scan, and return to it later, the
last preview scan taken will be displayed.
Step 5. Select the size of the scan
The next step is to select the area of the preview scan for final scanning. In some
cases, the entire preview, or film area may be chosen. Other times, only a portion of the
preview may be desired as the image for the final scan.
Page 44 Software Reference for Scanners
Producing a Scan Chapter 6
Page 59
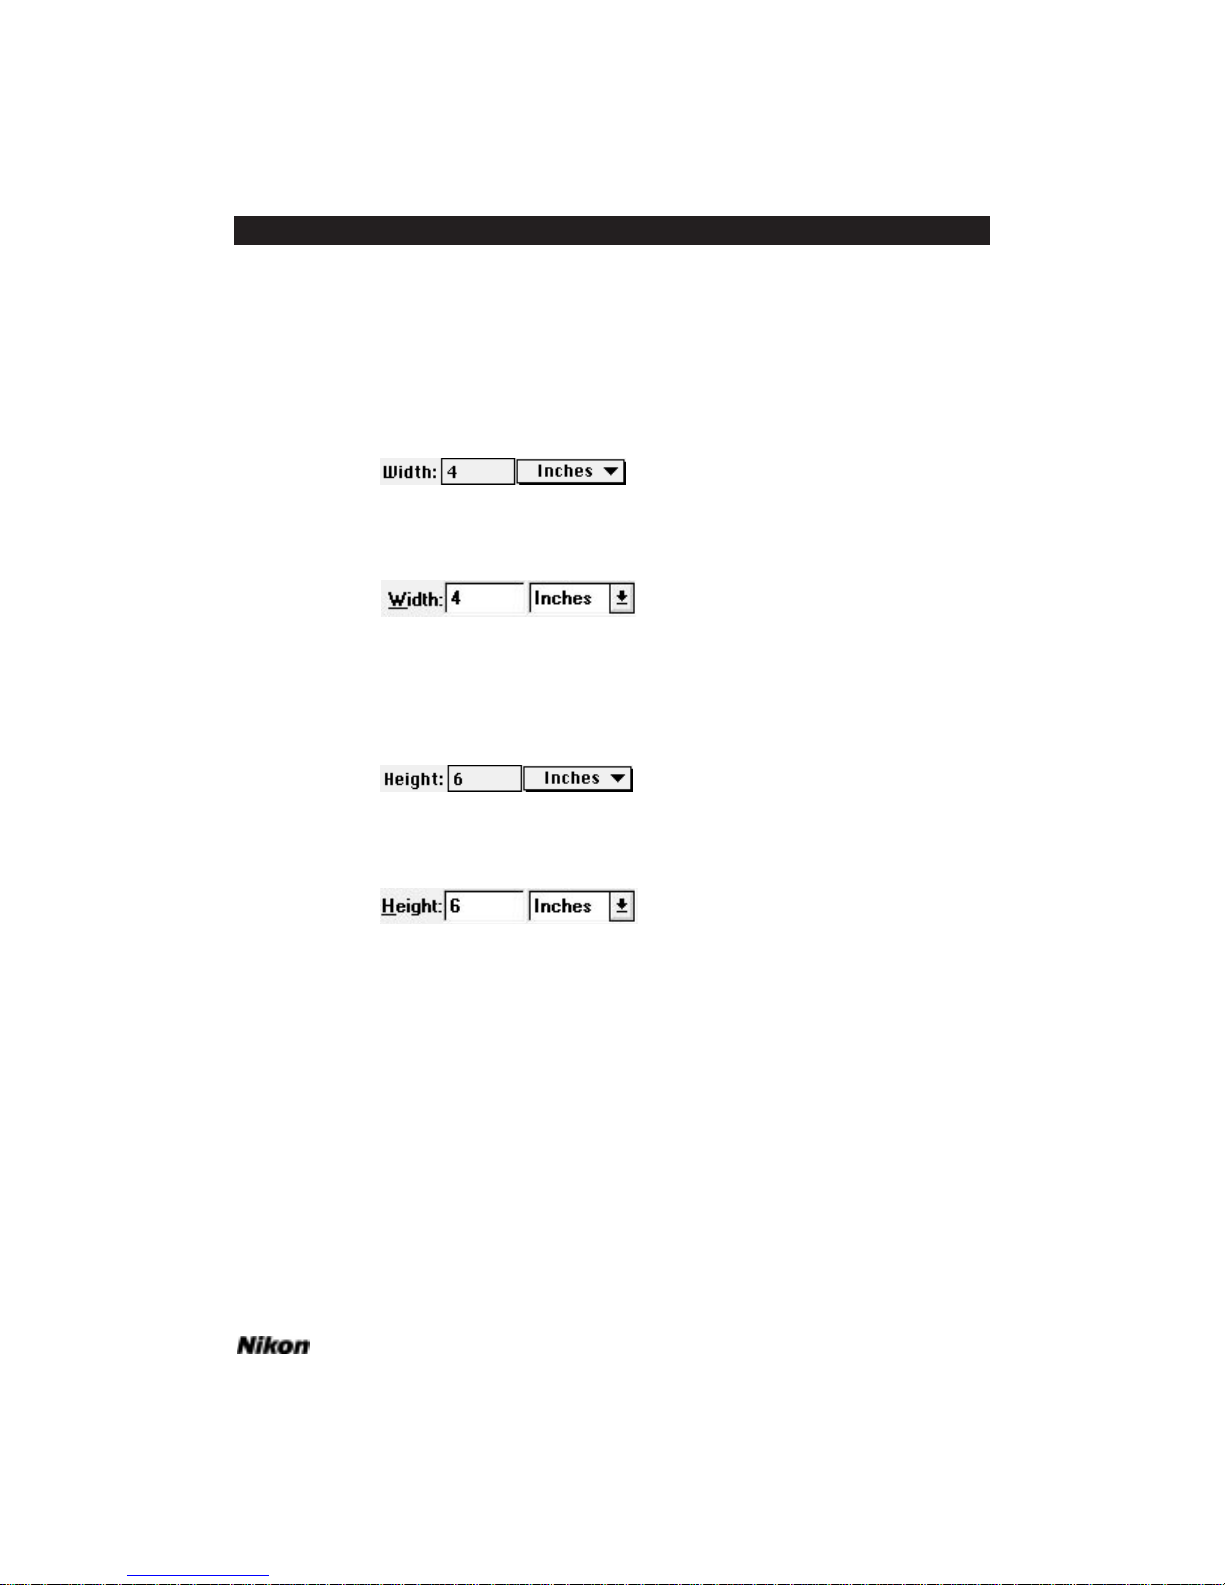
As an example, let’s select a portion of the image that would be used to create a
4" x 6" final scan size.
To accomplish this, you will have to set the width and height fields of the sizing
portion of the Scan dialog box, then position the resulting crop rectangle. First, set the
width to 4 inches by entering “4” into the WIDTH value edit box. Note that the units,
in this case inches, for width and height are set by default.
Figure 6.5a The WIDTH value edit box – Macintosh.
Figure 6.5b The W
IDTH value edit box – Windows.
Similarly, set the height to 6 inches by entering “6” into the HEIGHT value edit
box.
Figure 6.6a The HEIGHT value edit box – Macintosh.
Figure 6.6b The H
EIGHT value edit box – Windows.
Note that the size of the crop rectangle seen in the preview image area has
changed to reflect the new dimensions. Do not be concerned about the selected boundaries yet. You will adjust the crop rectangle in Step 7.
Step 6. Select the final resolution of the scan
The final resolution determines the amount of detail captured in the scan. The
final resolution setting is especially important because it will affect how your scans will
look when reproduced for print applications. Therefore, the final output resolution (the
resolution at which your scan will be reproduced) will require a certain input scan resolution. This will affect the size of the resulting file. The higher the resolution, the
greater the file size. For example, a 4" x 5" scan at an output scan resolution of 72
Software Reference for Scanners Page 45
Chapter 6 Producing a Scan
Page 60
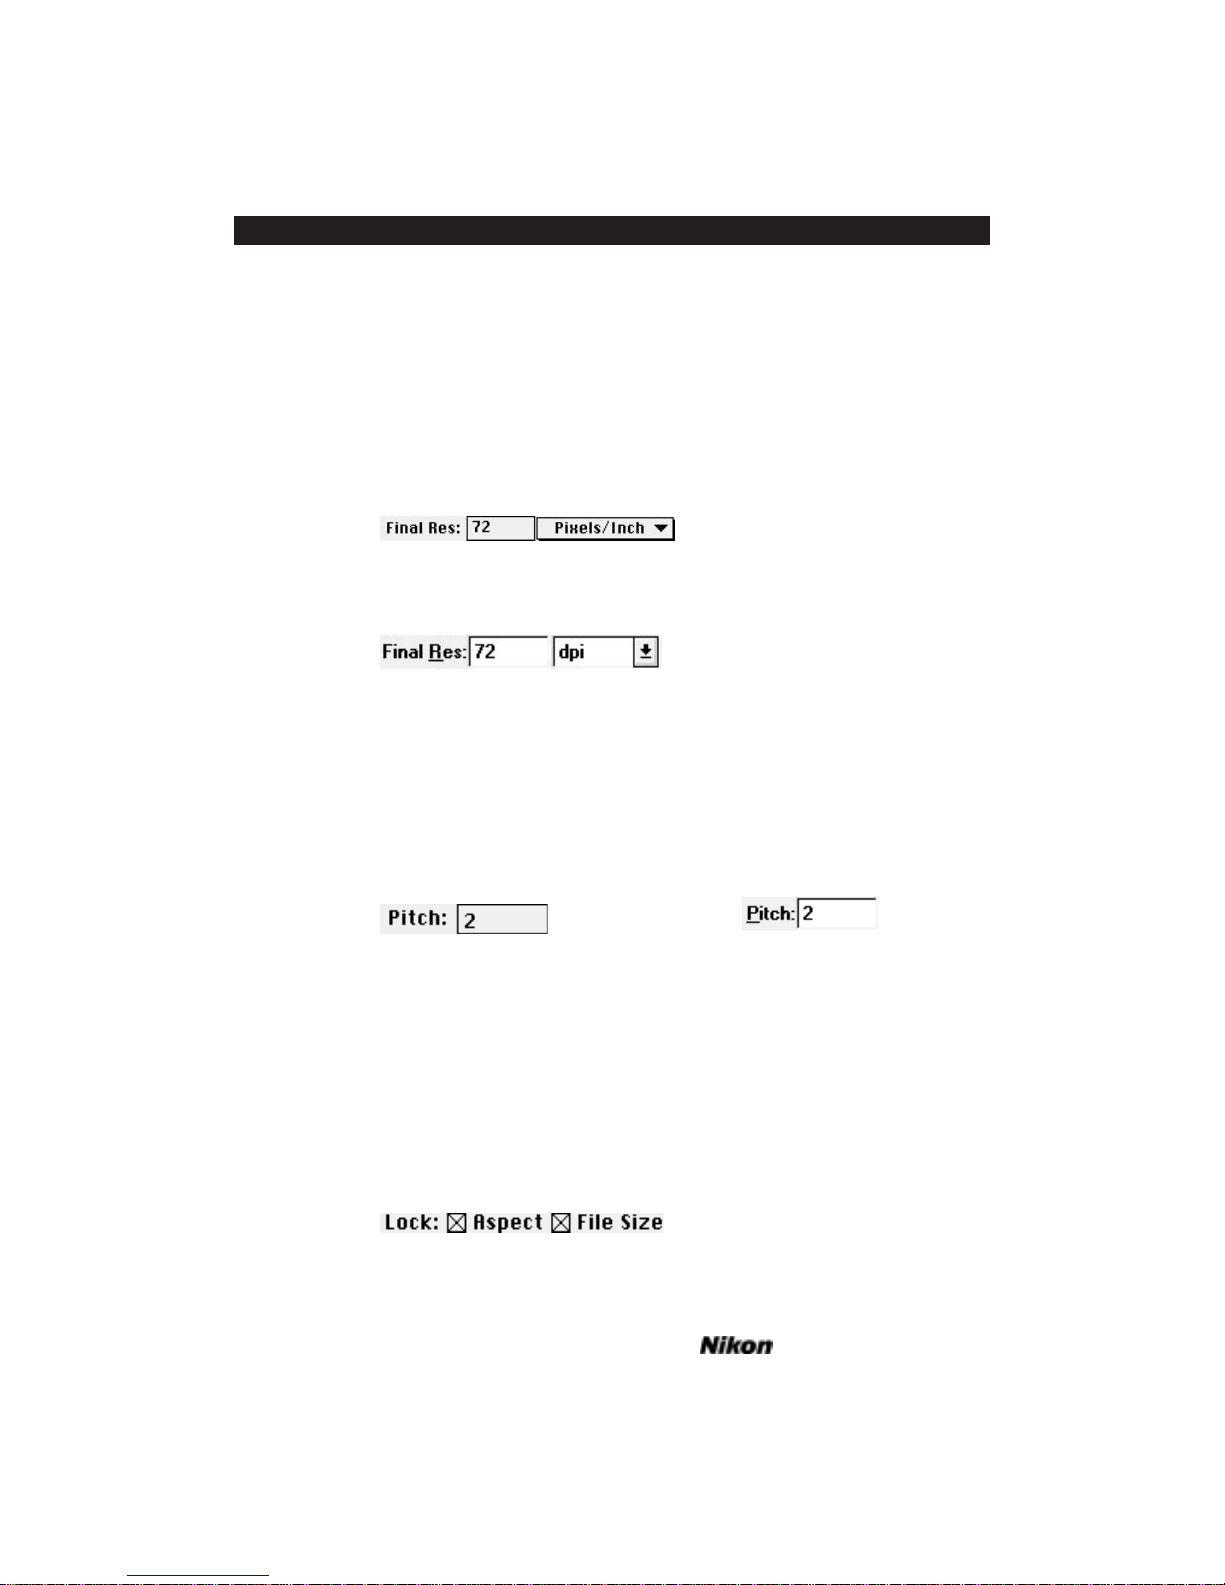
dots/inch would create a 364.5 kilobyte file. A 4" x 5" scan at an output resolution of
288 dots/inch would create a 5.7 megabyte file.
As a starting point for high-quality print reproduction, set the output scan resolution, or final res, to be about twice the printing line screen resolution. For example, if
you know you will be printing an image at 150 lines per inch, your input scan resolution would be approximately 300 pixels or dots per inch.
In this case, let’s set the final resolution to 72 pixels/inch. Note that the crop
rectangle does not change.
Figure 6.7a Setting the FINAL RESOLUTION – Macintosh.
Figure 6.7b Setting the F
INAL RESOLUTION – Windows.
As mentioned, changing the final resolution automatically changes the pitch of the
scanner stage mechanism (scanner resolution). The pitch is automatically set by changing the output resolution. Therefore, all you really need to know is what output resolution, or FINAL RES, you want. See page 96 for an explanation of scanner pitch.
The new values for these fields follow. We won’t modify the pitch at this time.
Figure 6.8 The scan PITCH (input scan resolution) – Macintosh and Windows.
Lock the file size
Since you have entered the width, height and output resolution, let’s make sure
that these parameters cannot be changed when you reposition the crop rectangle in Step
Seven.
There are two ways to lock the scan dimensions. For now, lock the file size by
clicking in the LOCK FILE SIZE box.
Figure 6.9a Locking the FILE SIZE – Macintosh.
Page 46 Software Reference for Scanners
Producing a Scan Chapter 6
Page 61
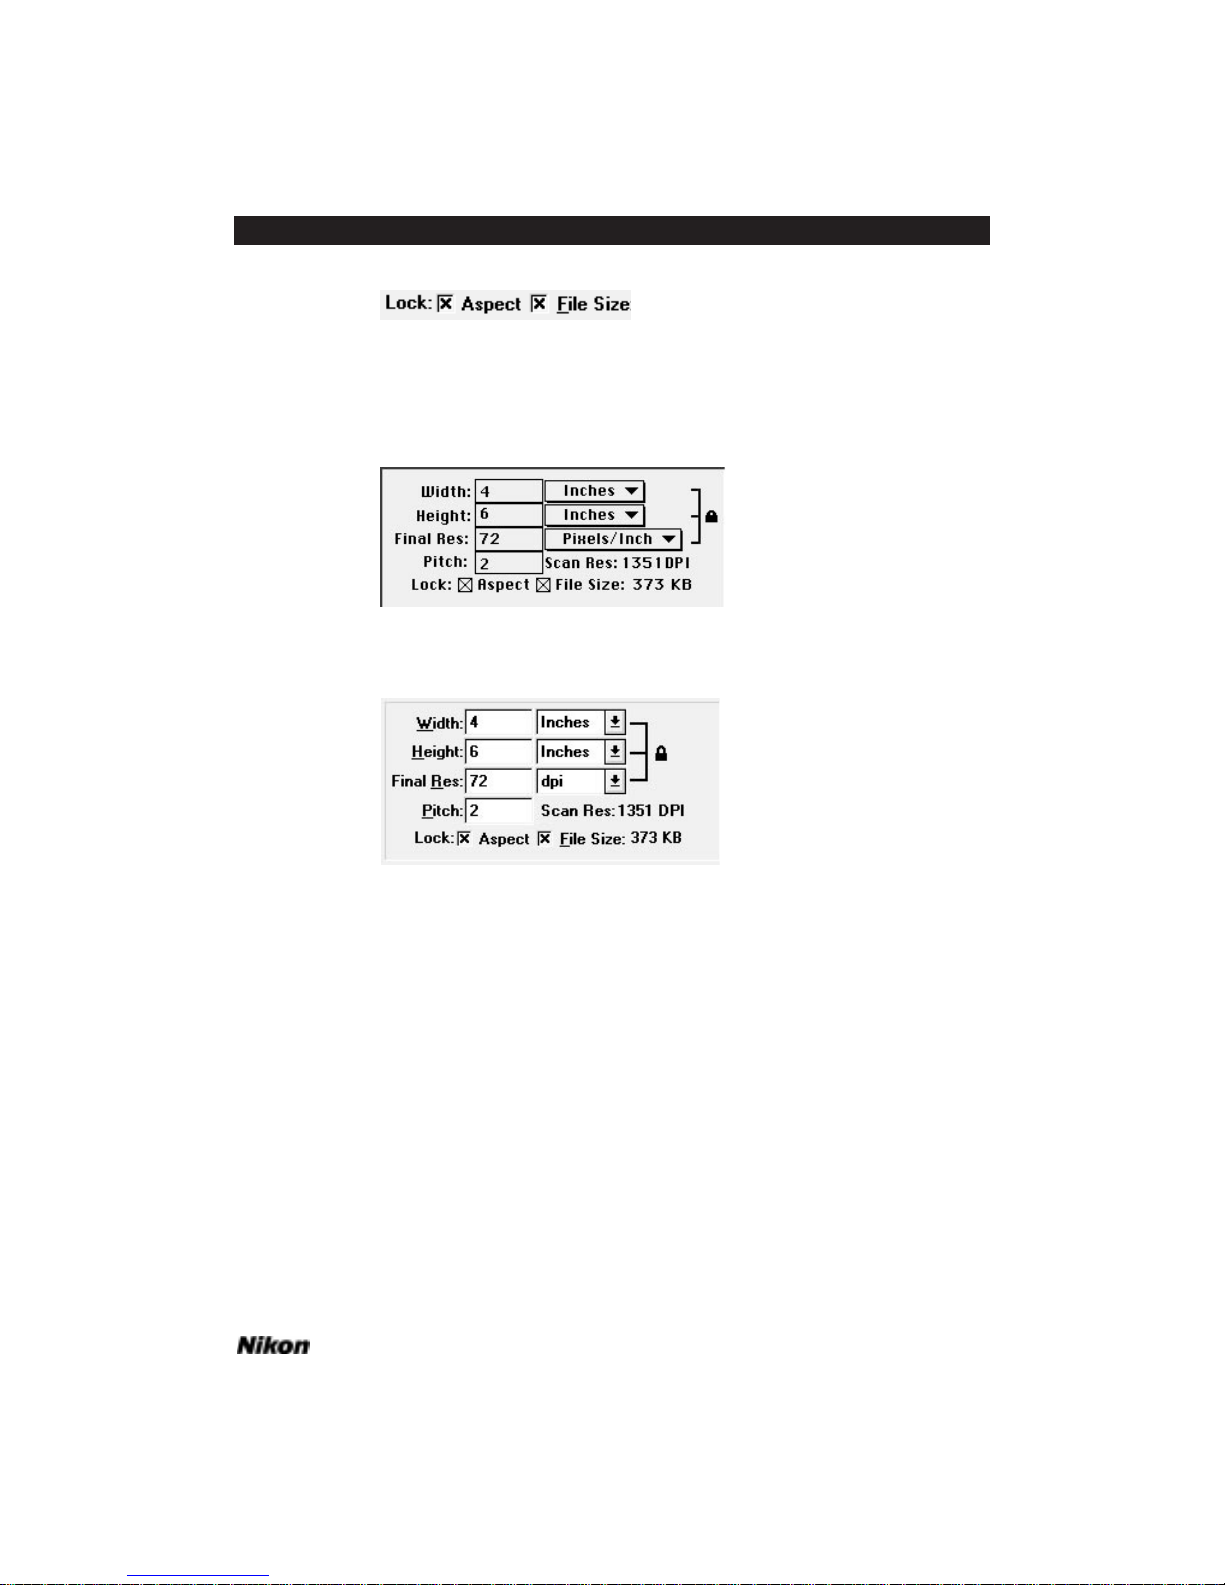
Software Reference for Scanners Page 47
Chapter 6 Producing a Scan
Figure 6.9b Locking the FILE SIZE – Windows.
Locking the file size results in a lock icon appearing in the sizing area. The sizing
cannot be changed unless the file size is unlocked.
Figure 6.10a Results of locking the file size – Macintosh.
Figure 6.10b Results of locking the file size – Windows.
Step 7. Select the area to scan
Now that you have defined the final size of the image contained by the crop rectangle, it is necessary to position the crop rectangle such that only the desired portion of
the film is scanned. This is accomplished graphically, using the mouse.
Position the cursor inside the crop rectangle such that the four-way arrow is visible. Now hold down the mouse button and move the cursor. Note that the entire crop
rectangle moves with the cursor. Position the crop rectangle over the area of the film
you wish to scan and release the mouse button.
Adjust the size of the crop by clicking on the corner or side ‘handles’ of the rectangle, and dragging to a new size. The output dimensions and resolution will not
change. See page 99 for a detailed explanation of the crop rectangle tool.
Page 62
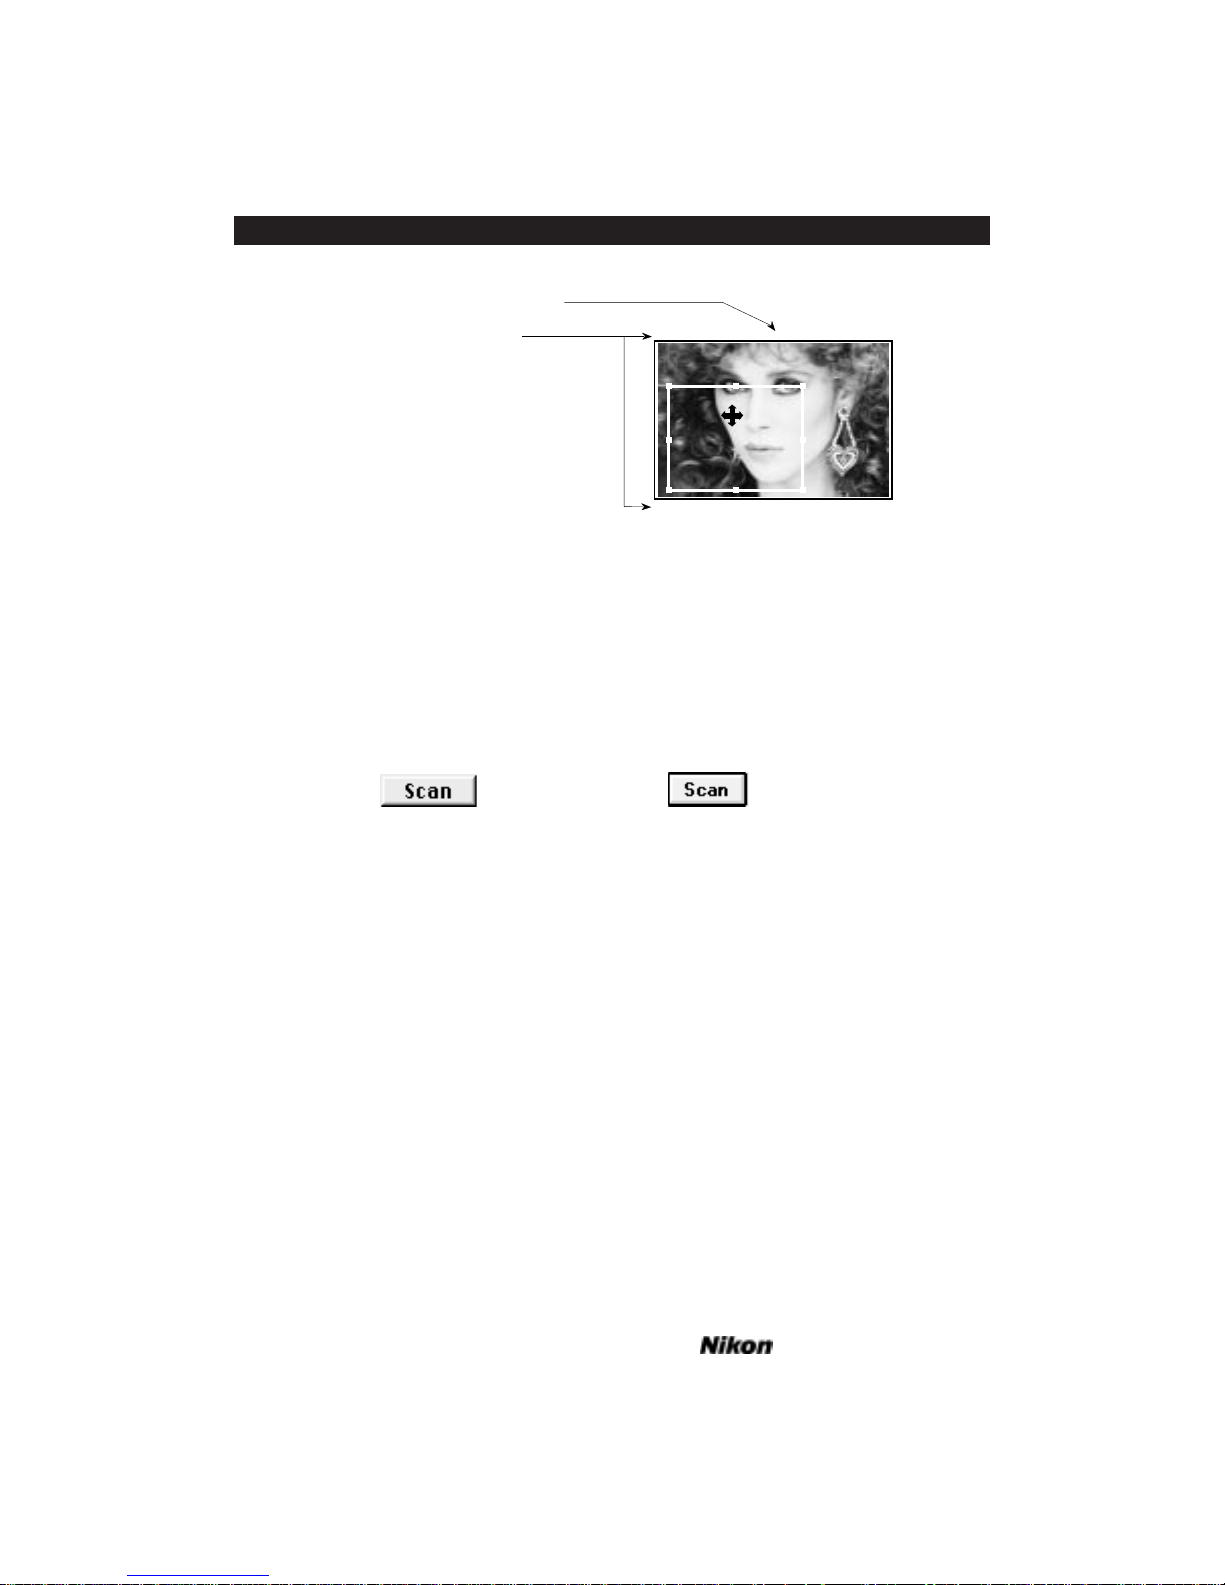
Figure 6.11 Positioning the crop rectangle.
Note that the pixel coordinates at the four corners of the preview window have
changed in accordance with the new crop rectangle location.
Step 8. Perform a final scan
Now that you have set the scanning parameters, simply click on the SCAN button
to execute the final scan.
Figure 6.12 The SCAN button – Macintosh and Windows.
The Nikon Scanner control will keep you informed of the progress of the scan
operation by displaying status messages during the scan.
Step 9. Name the file
Now that the final scan is done, it is necessary to name the scan file in order for it
to be saved. To do so, select the SAVE AS... command from the FILE pull-down menu.
Select the location and file type, enter a file name for the resulting file, then click
on SAVE.
(229,331) (500,523) (1195,331)
(229,1110) (1195,1110)
Pixel coordinates of
crop rectangle corners
Pixel coordinates of cursor
Page 48 Software Reference for Scanners
Producing a Scan Chapter 6
Page 63
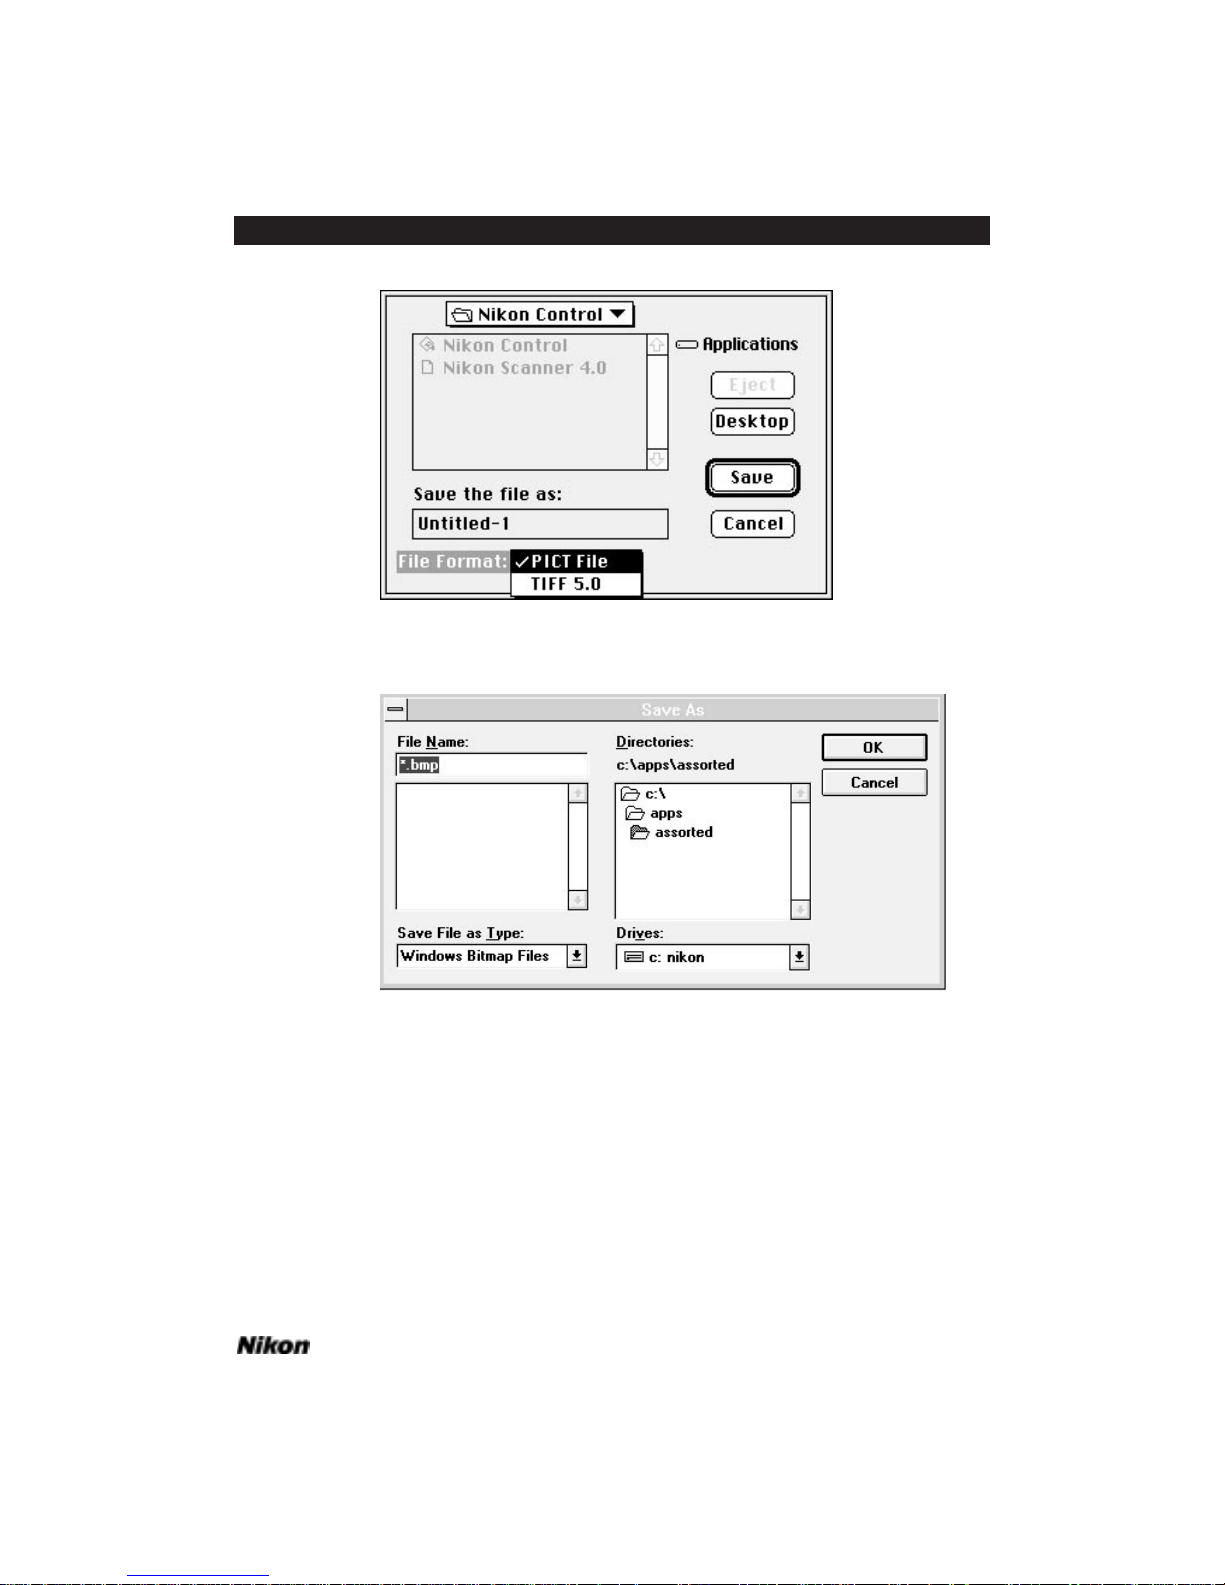
Software Reference for Scanners Page 49
Chapter 6 Producing a Scan
Figure 6.13a Saving an image using the SAVE AS... dialog – Macintosh.
Figure 6.13b Saving an image using the S
AVE AS... dialog – Windows.
Step 10. Eject/Remove the slide
Macintosh: For Coolscan scanners, the slide can be ejected by either clicking on
the EJECT button, or by selecting the EJECT menu item in the FILE pull-down menu.
After a few moments, the slide can be easily removed from Coolscan’s film slot. You
may also run the Eject Coolscan Film application. If you are using System 7, place the
Eject Coolscan Film application in the Apple Menu Items folder, located within your
System Folder.
Page 64

Figure 6.14a The EJECT button – Macintosh.
For LS-3510AF scanners, simply open the dustcover and remove the slide holder
from the scanner.
Windows: The slide can be ejected by clicking on the EJECT SLIDE button. After
a few moments, the slide can be easily removed from Coolscan’s film slot. You may also
run the Eject Coolscan Film application to accomplish this.
Figure 6.14b The EJECT SLIDE button – Windows.
For LS-3510AF scanners, simply open the dustcover and remove the slide holder
from the scanner.
Page 50 Software Reference for Scanners
Producing a Scan Chapter 6
Page 65

Introduction to the Nikon Scanner Plug-in
Introduction
The Nikon Scanner plug-in software provides the novice or expert user with a
simple to use, fast and effective scanning tool for use with Nikon scanners. The Nikon
Scanner plug-in is the core software module of the scanning system, providing a standardized user-interface to control Nikon scanners from within various imaging applications.
As you have seen in the previous chapters of this manual, use of the Nikon
Scanner plug-in requires that a compatible imaging application program be installed on
your system.
For Macintosh computers, the plug-in can be used with any application that can
access a Photoshop plug-in. Nikon cannot guarantee proper operation with applications
not providing full support for Adobe Photoshop plug-ins. Please contact your application vendor to determine the level of Photoshop plug-in compatibility. If, however, you
wish to use an application that does not provide full support for Adobe Photoshop plugins, select the Version 1 plug-in from the Tools dialog box, shown starting on pg. 67 of
this reference. Note that the disk space feature will not provide accurate readings when
using the Version 1 plug-in.
You have seen a simple imaging software application is provided for use with
Nikon scanners called Nikon Control. This application was developed specifically to
use the Nikon Scanner plug-in.
For IBM PC or compatible computers running Windows, the plug-in can be
used with Photoshop/PC, Picture Publisher, Nikon ImageAccess, or PhotoStyler. You
have seen a simple imaging software application is provided with Nikon scanners called
Nikon Control. This application was developed specifically to use the Nikon Scanner
plug-in.
This chapter provides a thorough description of the Nikon Scanner plug-in,
including how to access the plug-in from your application, and a description of how to
interact with the various types of dialogs and controls. Some of the material covered
here has been introduced in previous chapters, so you will already be familiar with
certain parts.
Launching the Nikon Scanner
Macintosh: For Macintosh users, to access your Nikon Scanner plug-in you must
first launch your imaging application, such as Photoshop, shown in Figure 7.1.
Software Reference for Scanners Page 51
Chapter 7 Introduction to the Nikon Scanner Plug-in
Page 66
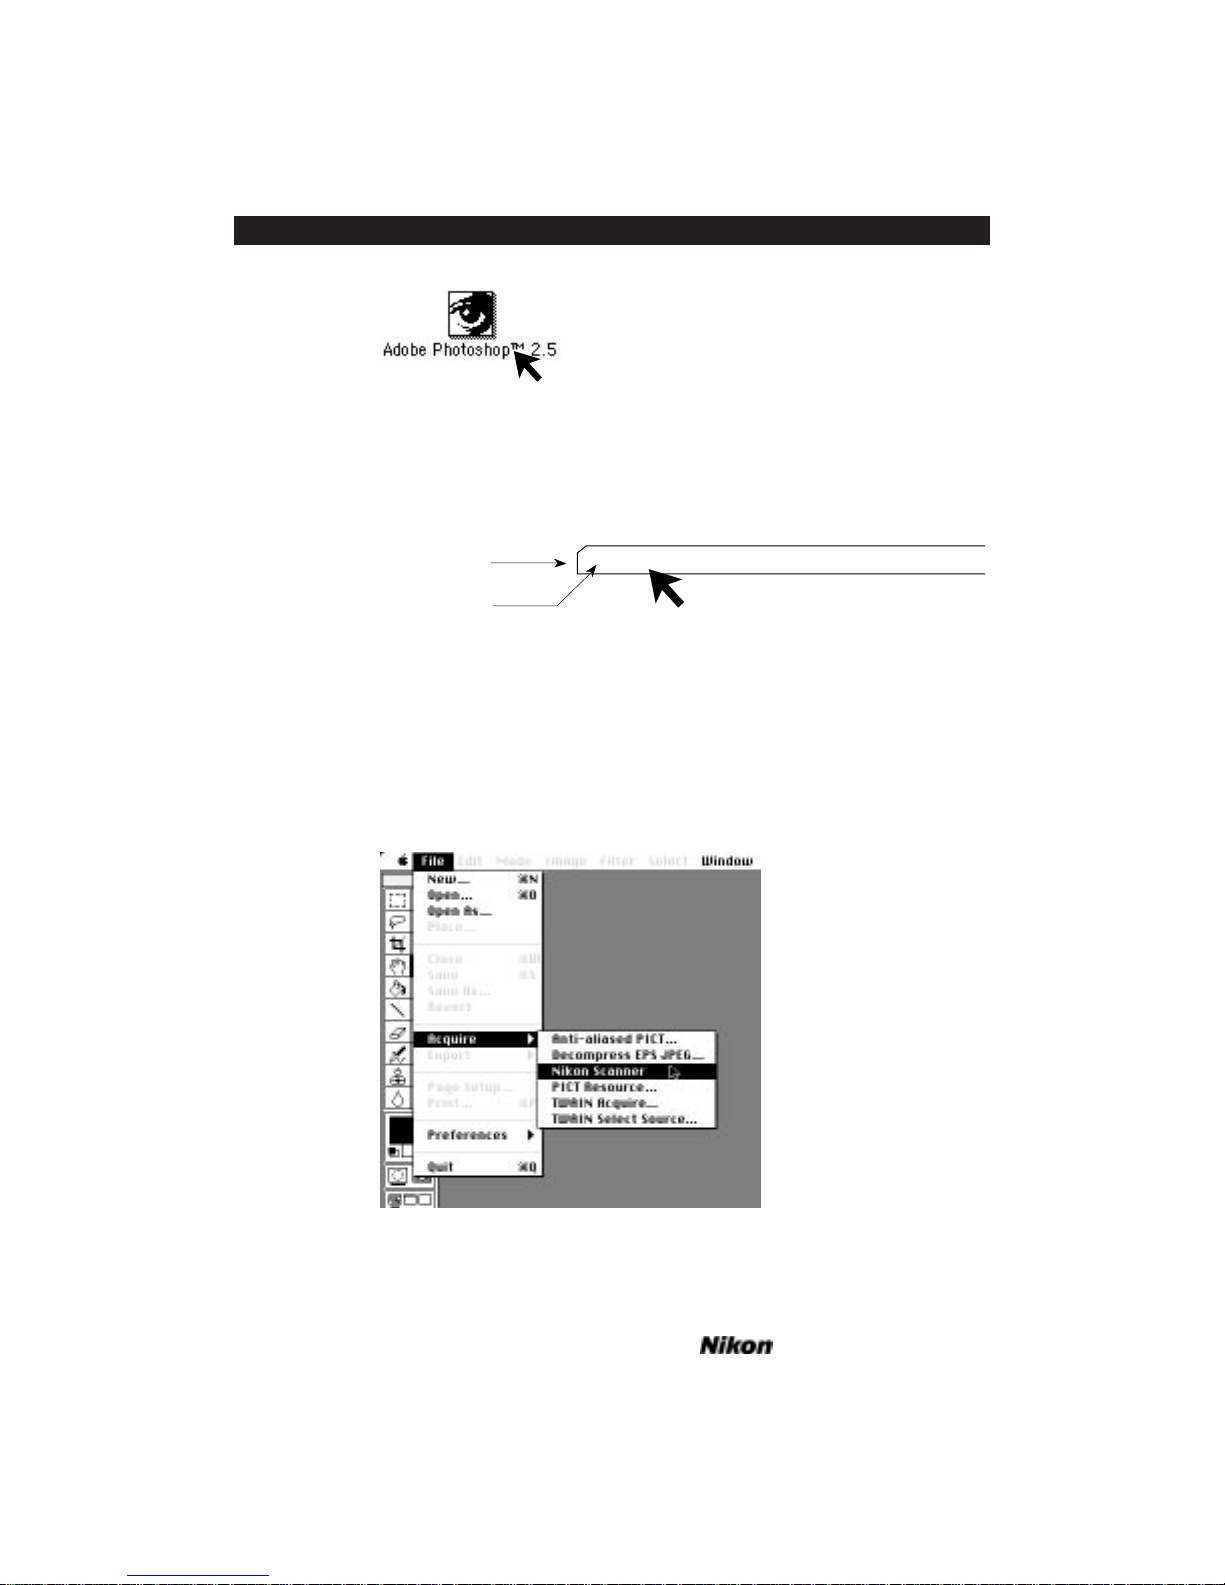
Figure 7.1 Launching the imaging application – Macintosh.
A menu bar associated with the Photoshop application will appear at the top of
the screen. It will look similar to the one shown in Figure 7.2.
Figure 7.2 The Photoshop Main menu.
Click on the FILE portion of the Main menu. Notice the file pull-down menu
looks similar to the following illustration. Without releasing the mouse button, pull
down until the ACQUIRE item is highlighted, as shown in Figure 7.3, and drag the cursor to the right, following the arrow to the right of the ACQUIRE item, and highlighting
NIKON SCANNER. Release the mouse button. This will initialize the plug-in's Main
Scan dialog box.
Figure 7.3 Selecting NIKON SCANNER from the Photoshop
F
ILE pull-down menu – Macintosh.
File Edit Mode Image Filter Select
Apple Menu
Main Menu Bar
Click and pull down
ð
Double Click
Page 52 Software Reference for Scanners
Introduction to the Nikon Scanner Plug-in Chapter 7
Page 67
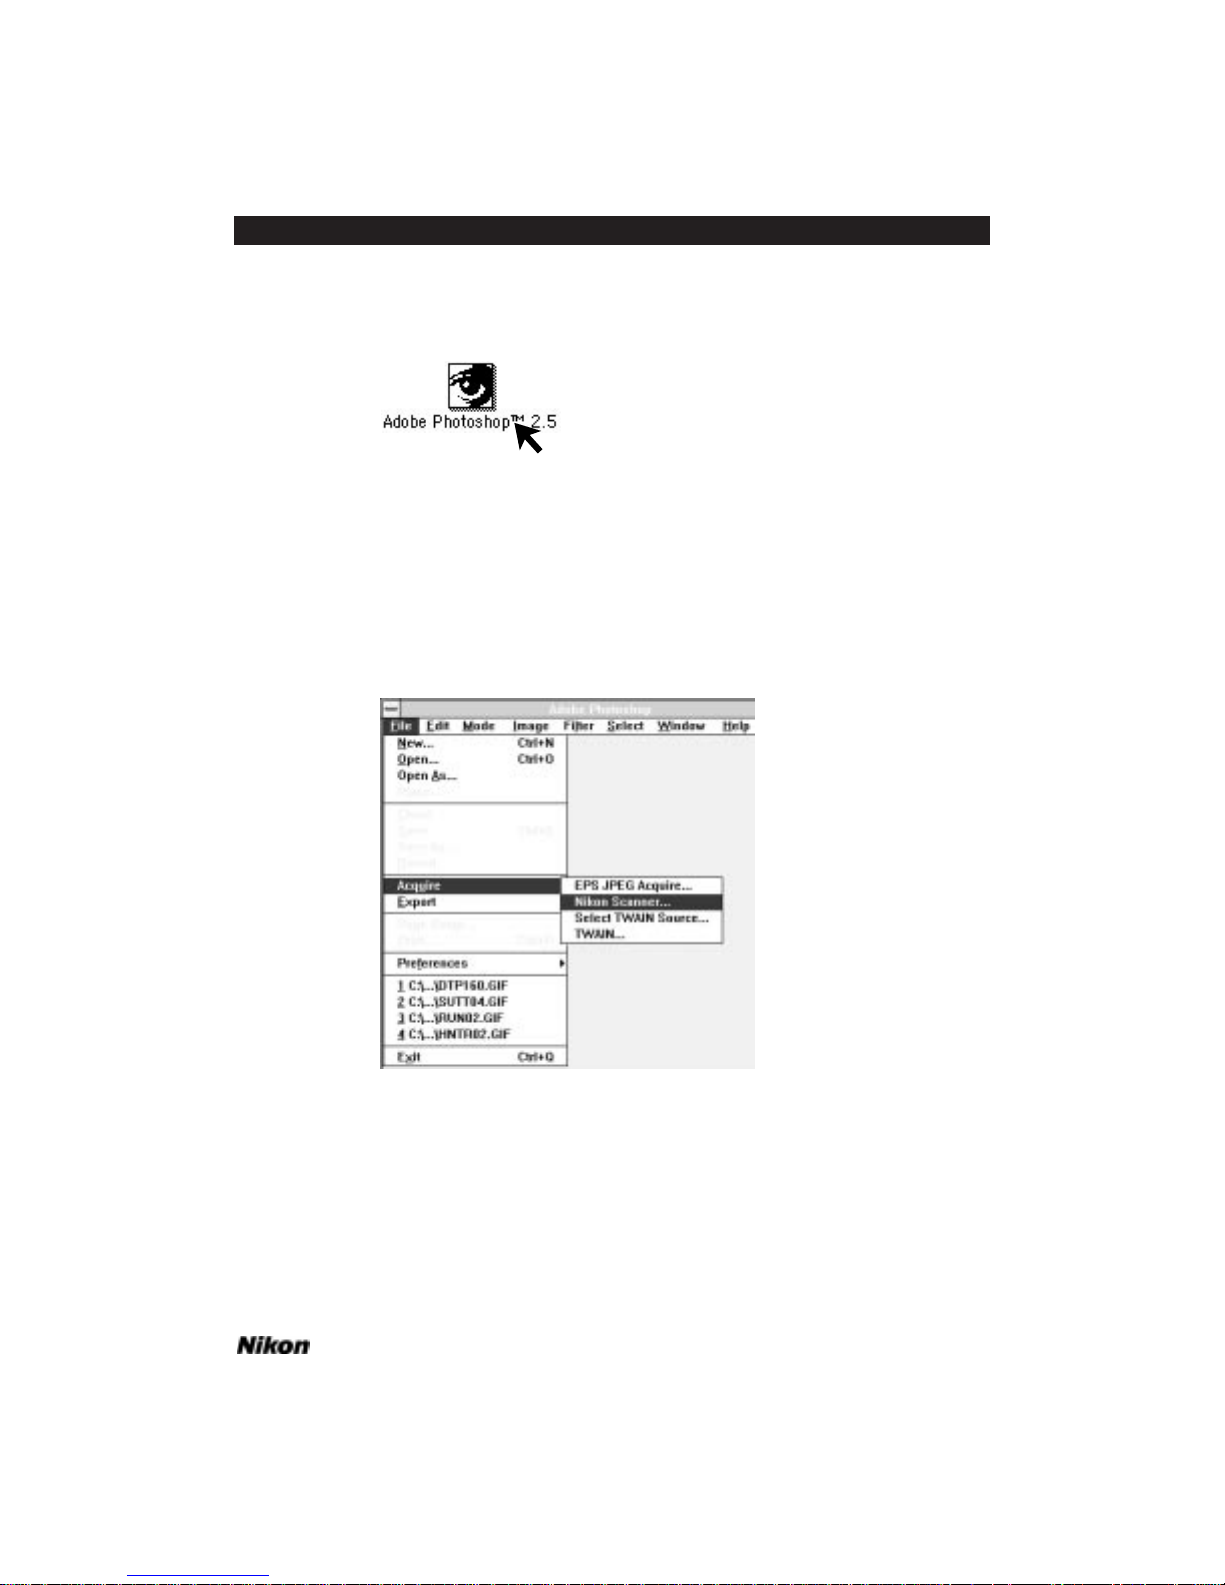
Windows: To access the Nikon Scanner plug-in you must first launch your imaging application, such as Photoshop, shown in Figure 7.4.
Figure 7.4 Launching the imaging application – Windows.
Click on the FILE portion of the Main menu. Notice the file pull-down menu
looks similar to the following illustration. Without releasing the mouse button, pull
down until the ACQUIRE item is highlighted, as shown in Figure 7.5, and drag the cursor to the right, following the arrow to the right of the ACQUIRE item, and highlighting
NIKON SCANNER. Release the mouse button. This will initialize the plug-in's Main
Scan dialog box.
Figure 7.5 Selecting NIKON SCANNER from the Photoshop
F
ILE pull-down menu – Windows.
Plug-in Initialization
Macintosh: The plug-in will first set up the software environment and display the
following message.
Double Click
Software Reference for Scanners Page 53
Chapter 7 Introduction to the Nikon Scanner Plug-in
Page 68
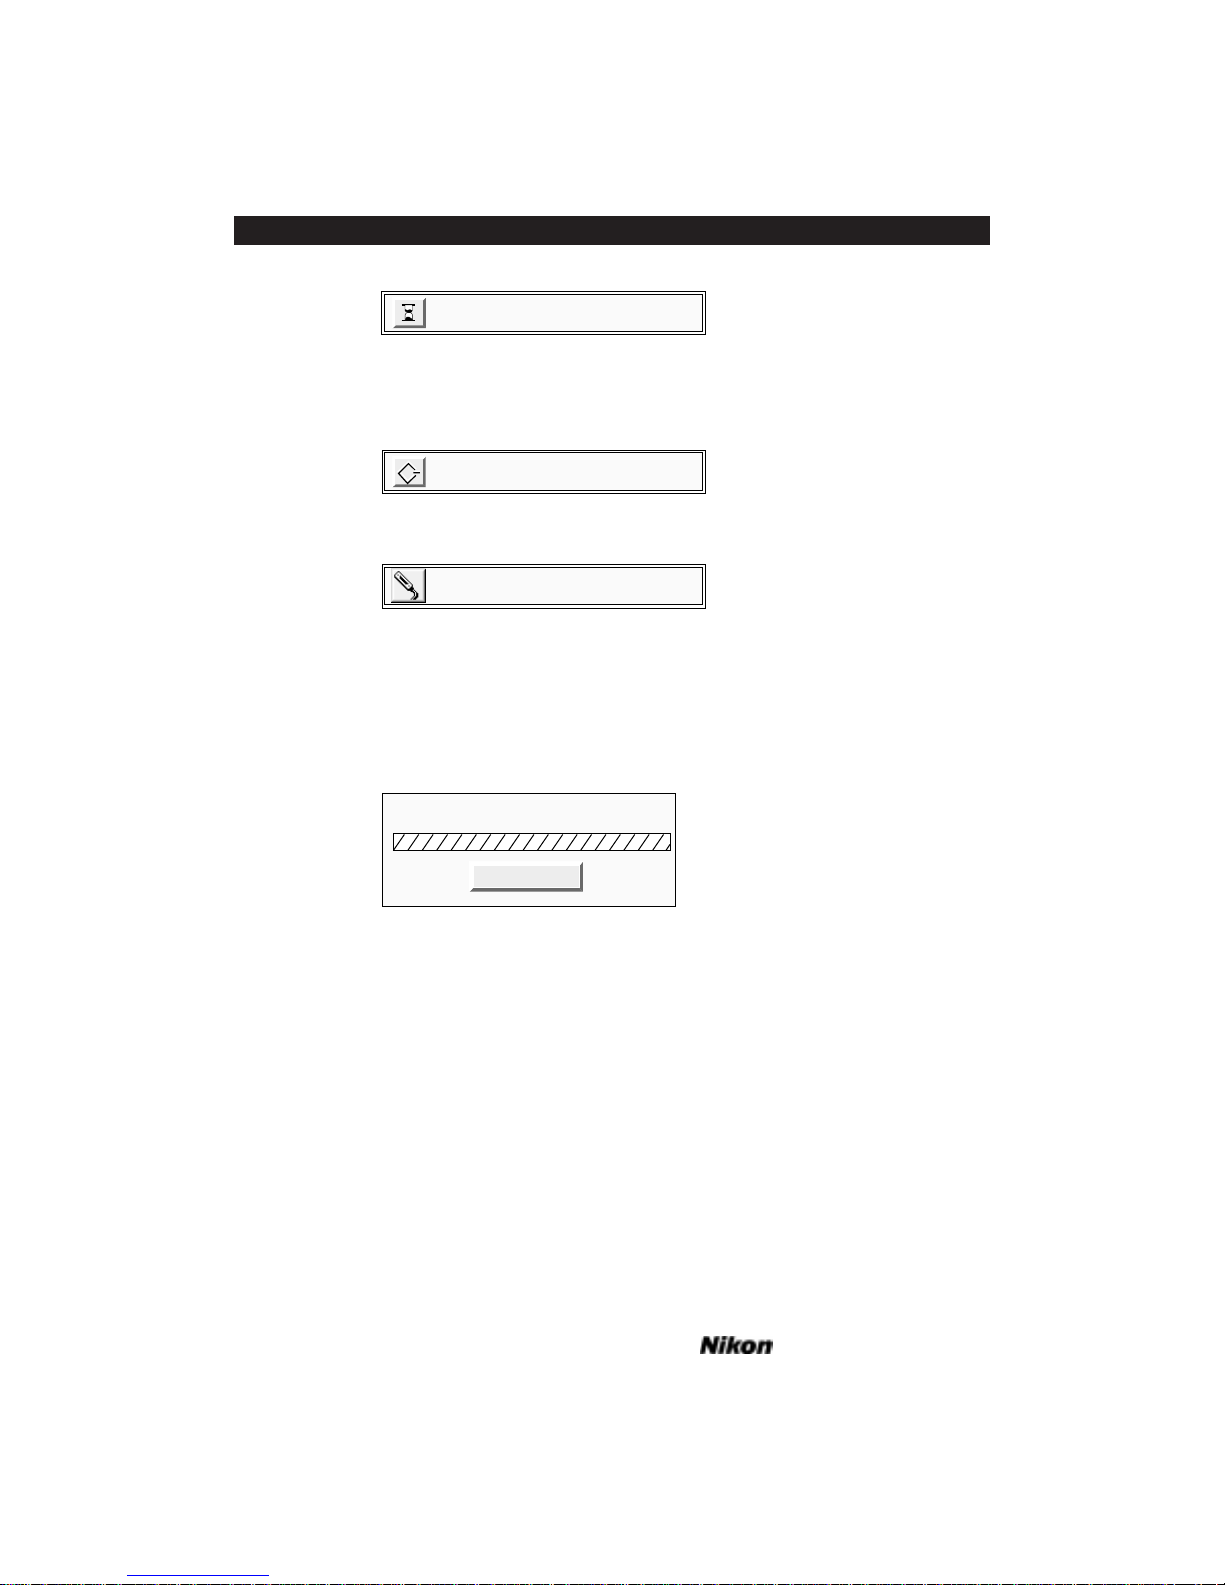
Page 54 Software Reference for Scanners
Introduction to the Nikon Scanner Plug-in Chapter 7
The plug-in will next search the SCSI or GPIB bus, depending on the type of
scanner, to ensure that your scanner is installed and functional. For SCSI-type scanners,
while it is searching, the following message will appear:
Or for GPIB model scanners, the following message will appear:
Once the plug-in opens the functional SCSI or GPIB scanner, you will be able to
commence scanning. In the unlikely event that an error message appears, consult the
“Troubleshooting – Macintosh” chapter in this manual.
Windows: The plug-in will first set up the software environment and display the
following message:
The plug-in will next search the SCSI or GPIB bus, depending on the type of
scanner, to ensure that your scanner is installed and functional.
Once the plug-in opens the functional SCSI or GPIB scanner, you will be able to
commence scanning. In the unlikely event that an error message appears, consult the
“Troubleshooting – Windows” chapter in this manual.
The Scan Dialogs
Macintosh: The Nikon Scanner plug-in’s main scanning dialog box is called the
Main Scan dialog. There are three sizes of this scan dialog, designed to best accommodate the wide variety of available monitor sizes. Macintosh PowerBooks are supported
with appropriate artwork, depending on the available display. These three different
sized dialog boxes offer similar functionality, with the dialog box for large screens offering a substantially larger preview, making such operations as color correction and cropping easier and more precise.
Cancel
Initializing the Dialog
Opening the GPIB Scanner...
Opening the SCSI Scanner...
Preparing the Nikon Scanner Plugin
Page 69
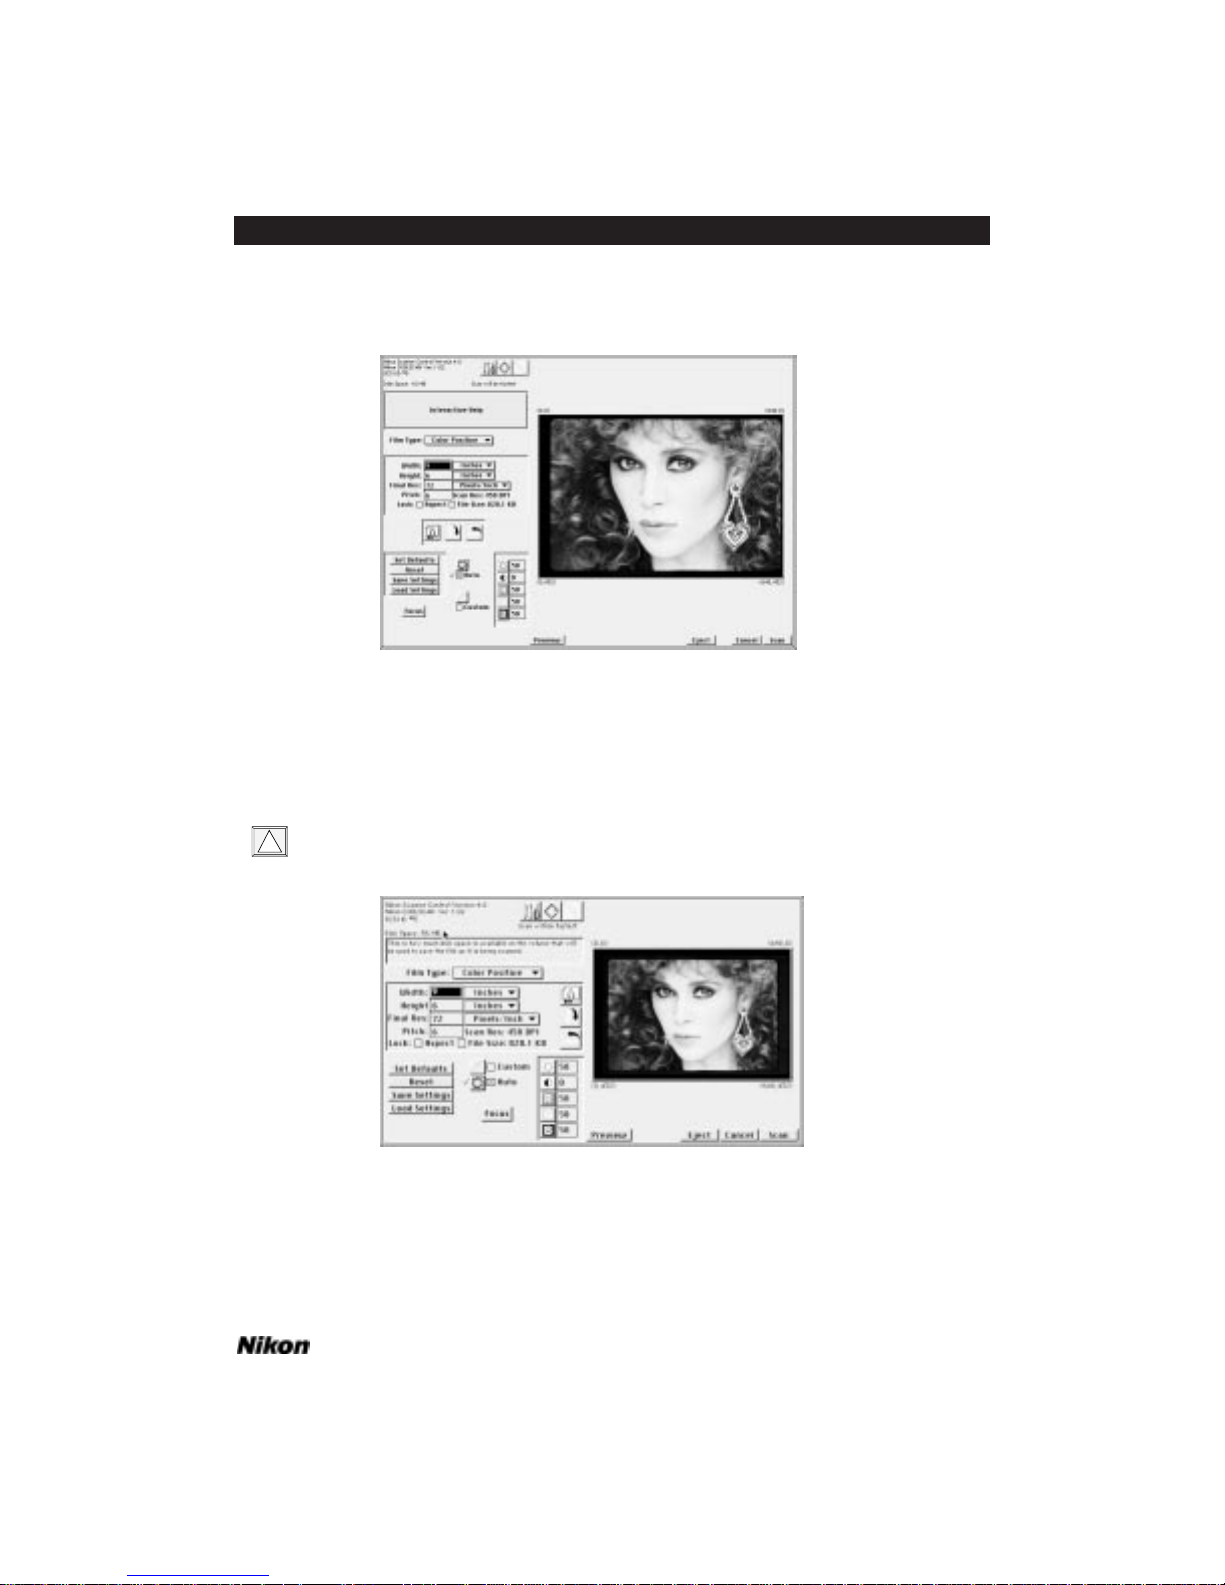
The scan dialog shown in Figure 7.6 is the dialog used for monitors that have resolutions of 832 x 624 pixels or larger, including 16" through 21" screens.
Figure 7.6 The Nikon Scanner plug-in’s Main Scan dialog for monitors
that display more than 832 x 624 pixels – Macintosh (Coolscan connected).
The scan dialog shown in Figure 7.7 is the default dialog size for monitors with
resolutions that are less than 832 x 624 pixels, that include 9" through 14" screens.
Note that using the larger dialog results in longer preview times. The dialog size
can be changed in the Tools dialog, explained later in this chapter.
Figure 7.7 The Nikon Scanner plug-in’s Scan dialog for monitors
that display less than 832 x 624 pixels – Macintosh (Coolscan connected).
!
Software Reference for Scanners Page 55
Chapter 7 Introduction to the Nikon Scanner Plug-in
Page 70
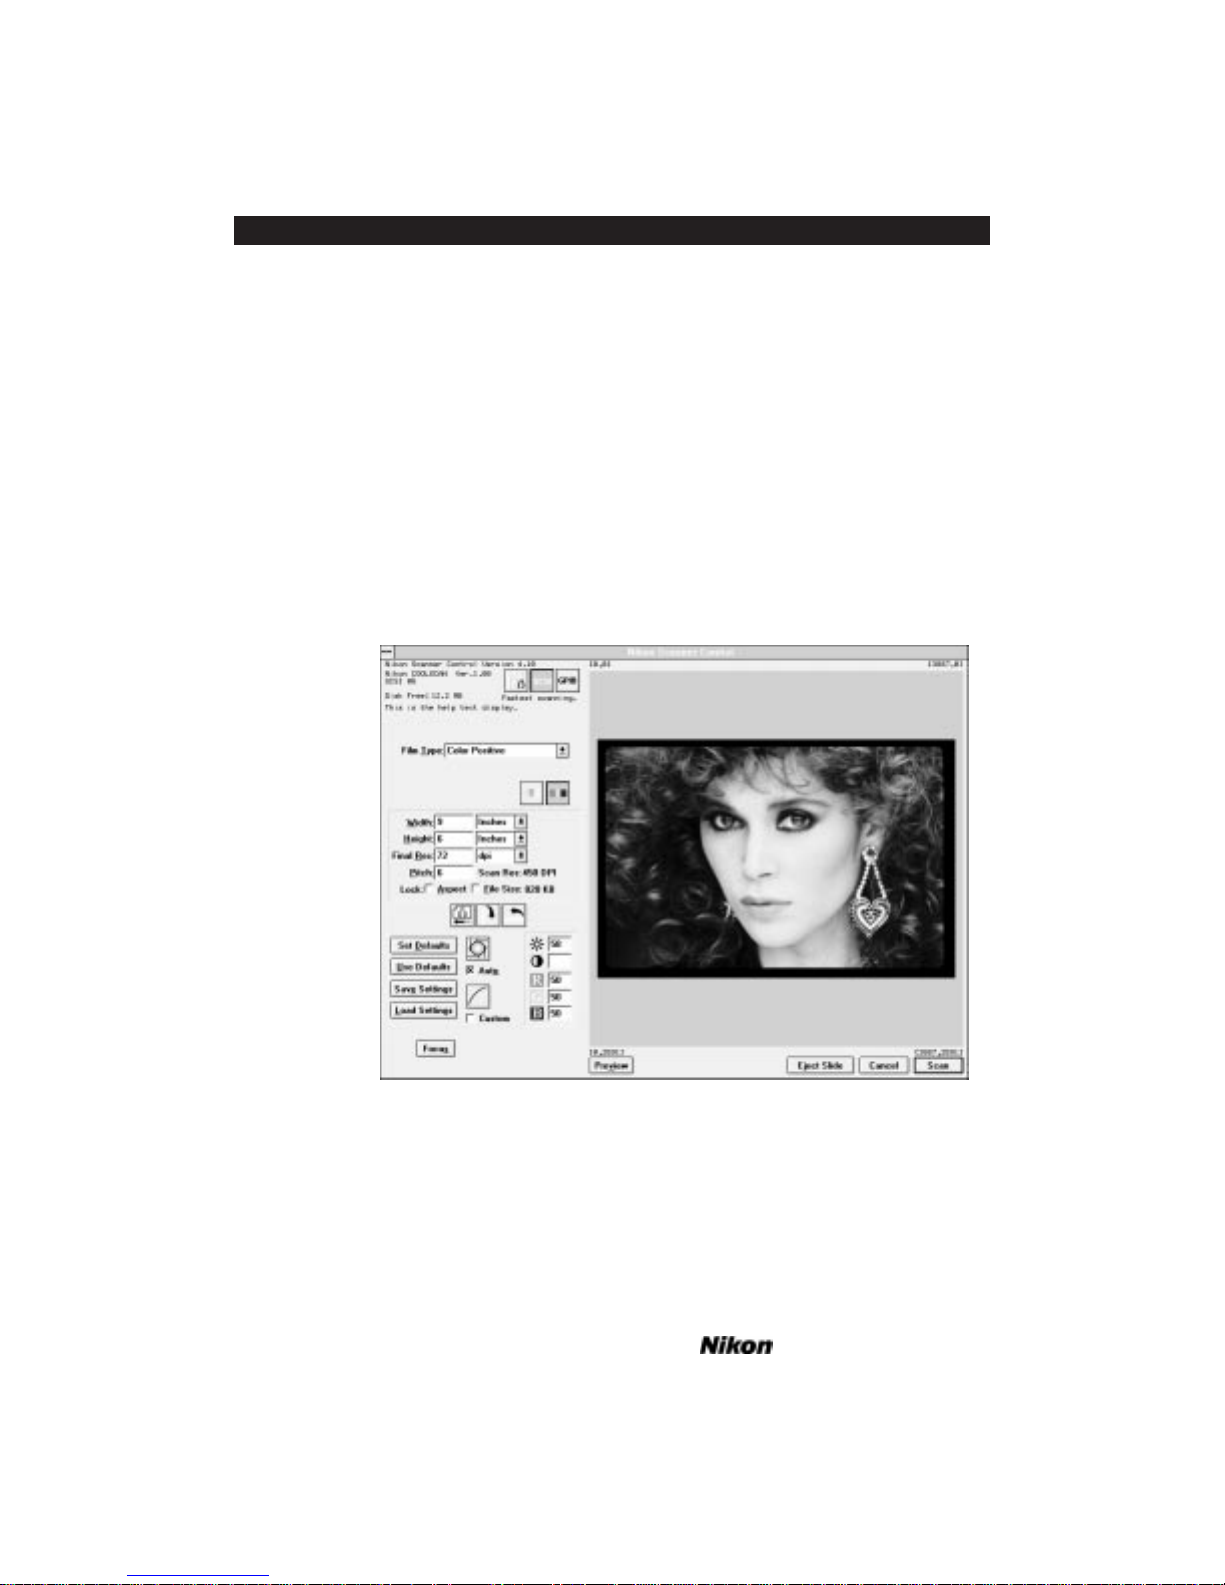
Most scanning operations can be performed from this dialog box, including
selecting the film type, previewing the image, fine focusing, cropping the image, and
performing basic brightness, contrast and color balance tasks.
Windows: The Nikon Scanner plug-in’s main scanning dialog box is called the
Main Scan dialog. There are two versions of this Scan dialog, designed to best accommodate the wide variety of available monitor sizes. These two different sized dialog
boxes offer similar functionality, with the dialog box for large screens offering a substantially larger preview, making such operations as color correction and cropping easier and
more precise. There are only some minor differences involving the position of the controls within the Scan dialog.
The scan dialog shown in Figure 7.8 is the dialog used for monitors that have resolutions of 800 x 600 pixels or larger with small fonts, and 1024 x 768 pixels or larger
with large fonts.
Figure 7.8 The Nikon Scanner plug-in's Main Scan dialog for monitors that have resolutions of 800 x 600 pixels or greater using small fonts, or 1024 x 768 pixels or greater
using large fonts – Windows (Coolscan connected).
The Scan dialog shown in Figure 7.9 is the default dialog size for monitors that
have resolutions of 640 x 480 pixels with small fonts, and 800 x 600 pixels with large
fonts.
Page 56 Software Reference for Scanners
Introduction to the Nikon Scanner Plug-in Chapter 7
Page 71
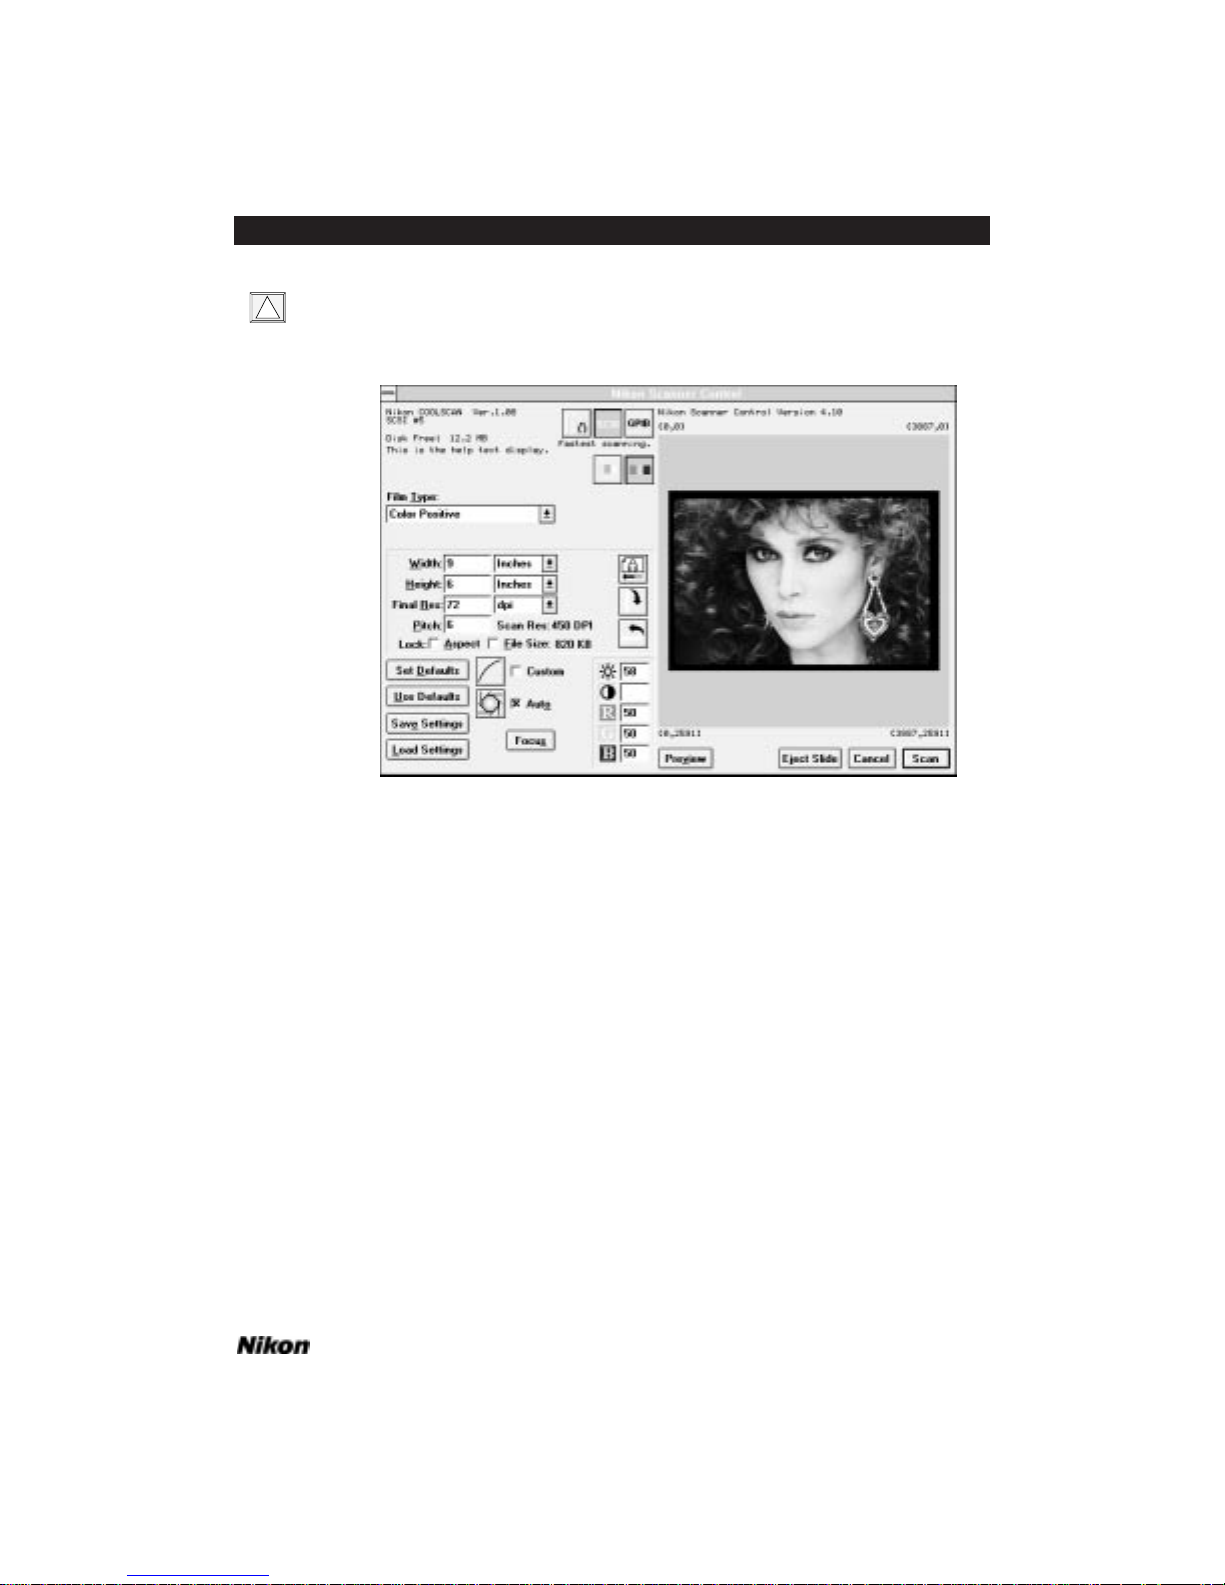
Using the larger dialog results in longer preview times. Appropriate font and
monitor settings for your particular monitor are available in the Windows Setup
Application.
Figure 7.9 The Nikon Scanner plug-in's Main Scan dialog for monitors that have resolutions of 640 x 480 pixels, using small fonts, or 800 x 600 pixels using large fonts –
Windows (Coolscan connected).
Most scanning operations can be performed from this dialog box, including
selecting the film type, previewing the image, fine focusing, cropping the image, and
performing basic brightness, contrast and color balance tasks.
Using the Nikon Scanner Plug-in
You should already be familiar with most of the controls in the Nikon Scanner
plug-in from the previous chapters of this manual.
Following is a brief summary of the dialogs and controls used in the plug-in, with
a description of how to interact with them.
Message Boxes
A message box contains program information. This includes the application name
and version number, the amount of available disk space, and help messages. You cannot
modify the text of these messages.
!
Software Reference for Scanners Page 57
Chapter 7 Introduction to the Nikon Scanner Plug-in
Page 72
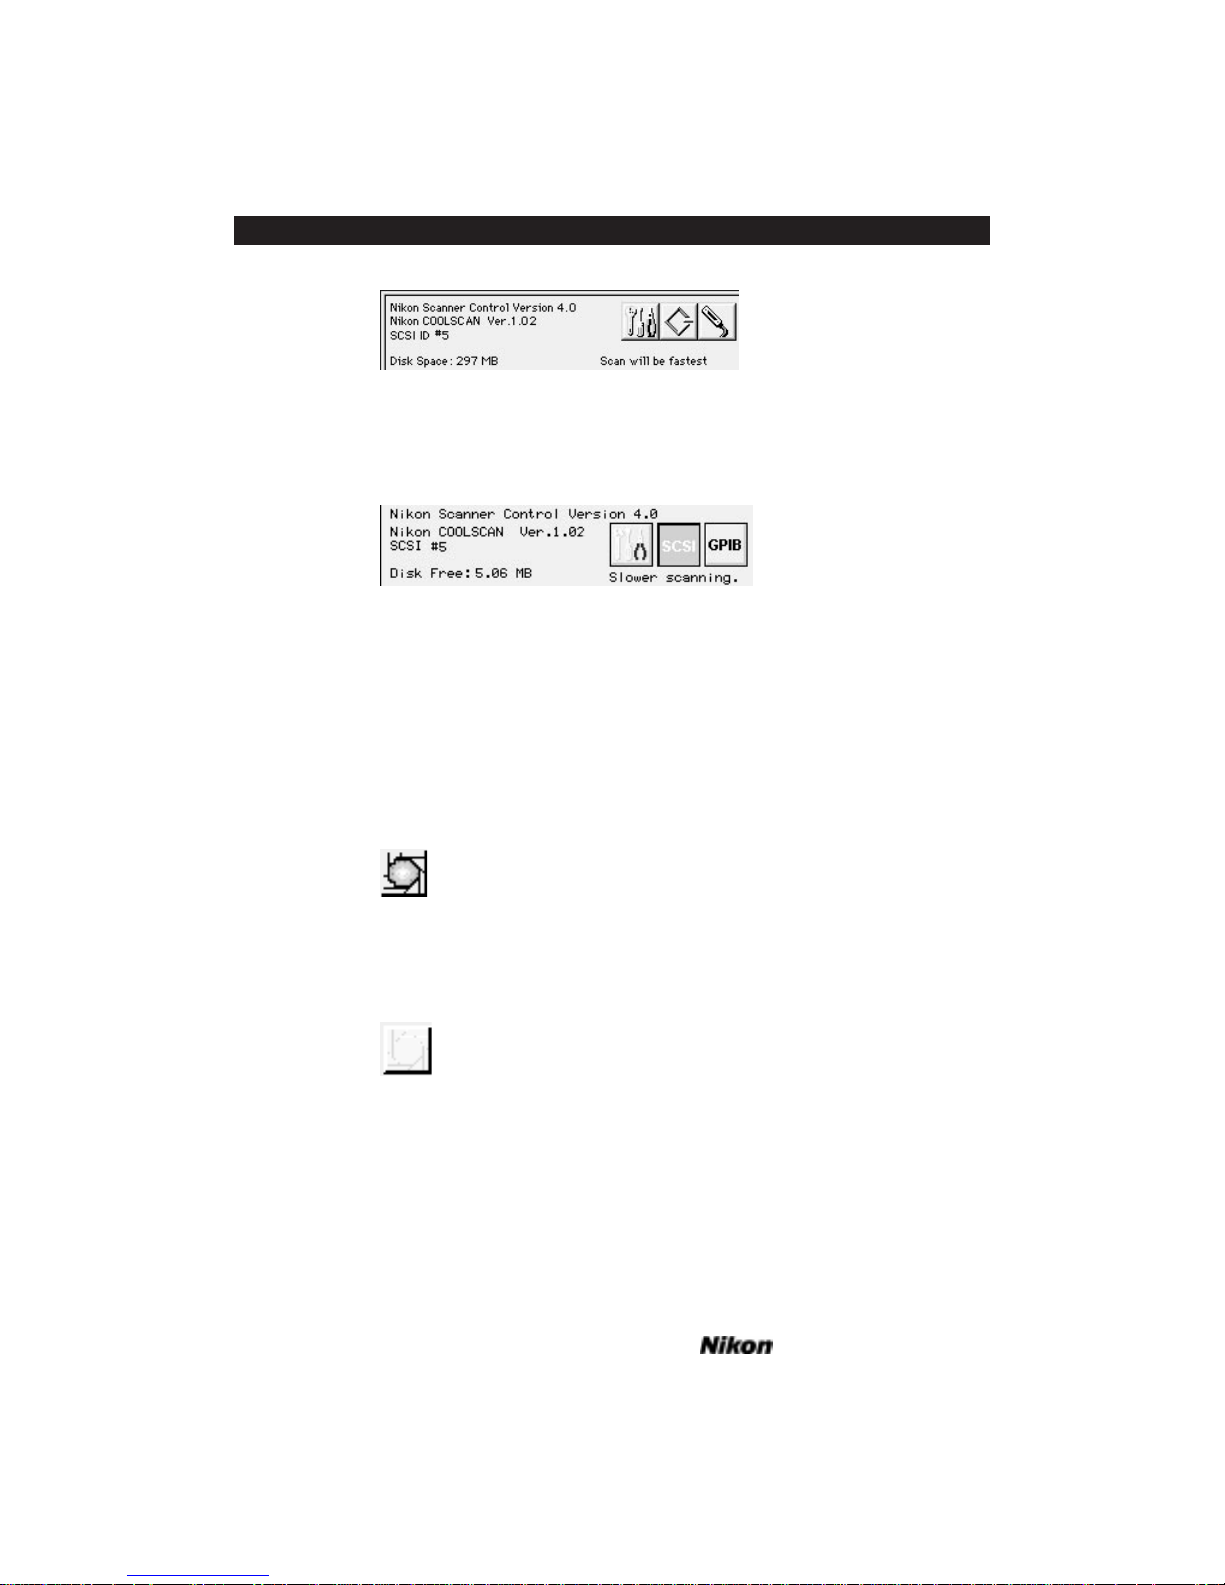
Figure 7.10a The message box (Macintosh) showing software version number, ROM
version, SCSI ID number, and available disk space. The far-right button is used for
GPIB interfaced scanners, such as the Nikon LS-3510AF and LS-3500.
Figure 7.10b The message box (Windows) showing software version number, ROM
version, SCSI ID number, and available disk space. The GPIB button is used for
GPIB interfaced scanners, such as the Nikon LS-3510AF and LS-3500.
Buttons
Buttons, such as the ones below are activated by clicking them once with the
mouse. These three-dimensional buttons are in their active state when they are displayed with contrast, as seen in Figure 7.11.
Figure 7.11 Button in active state.
In their inactive state these buttons appear dimmed, as seen in Figure 7.12.
Figure 7.12 Button in inactive state.
Value Edit Boxes
There are various small boxes within the scanning dialog box called value edit
boxes. The boxes adjacent to the HEIGHT and WIDTH parameters are two examples of
value edit boxes. The contents of these value edit boxes can be changed by using a
number of editing methods.
Page 58 Software Reference for Scanners
Introduction to the Nikon Scanner Plug-in Chapter 7
Page 73
The first method is to double-click the mouse inside the text box. The text box
changes to the current highlight color (depending upon how your system is set up), and
all text inside the box becomes selected. Typing text or a number will replace whatever
text or number that was in the box.
The second and third methods are similar. Clicking once inside the box will
cause a cursor to be present at whatever point you clicked. Text or numbers then keyed
in will be inserted after the cursor. The third method is to click once inside the box,
again causing a cursor to be present at whatever point you clicked, then holding the
mouse button down and dragging in the direction of the portion of text or number you
wish to edit. The portion you dragged over will change to your current highlight color
(depending upon how your system is set up), at which point you can key in any text or
number to replace it. These methods provide selective editing capability, as you can
place the cursor at any point within a text or number string. The fourth method is to
Tab from one box to the next. Shift – Tab will move in reverse order. The Tab key will
highlight the entire value edit box. Values are not set until you leave the value edit box,
using the Tab key or the mouse cursor.
Figure 7.13 Value edit box – Macintosh and Windows.
Pop-up Menus - Macintosh
Combo Boxes – Windows
Pop-up menus, as seen in Figure 7.14a, look like value edit boxes with the exception that they include a downward pointing arrow and a shadow line. The Windows
equivalent, called combo boxes, is seen in Figure 7.14b. When the mouse is clicked with
the cursor positioned inside the pop-up menu or combo box, a list of items will appear
beneath the top-most item. These are the additional options you have to choose from
for this parameter. Only one item can be selected at a time for each of the pop-up
menus or combo boxes used in the Nikon Scanner plug-in. The currently selected
option will be the one displayed in the selection box.
Figure 7.14a Pop-up menu selection box – Macintosh.
Figure 7.14b Combo box – Windows.
Software Reference for Scanners Page 59
Chapter 7 Introduction to the Nikon Scanner Plug-in
Page 74
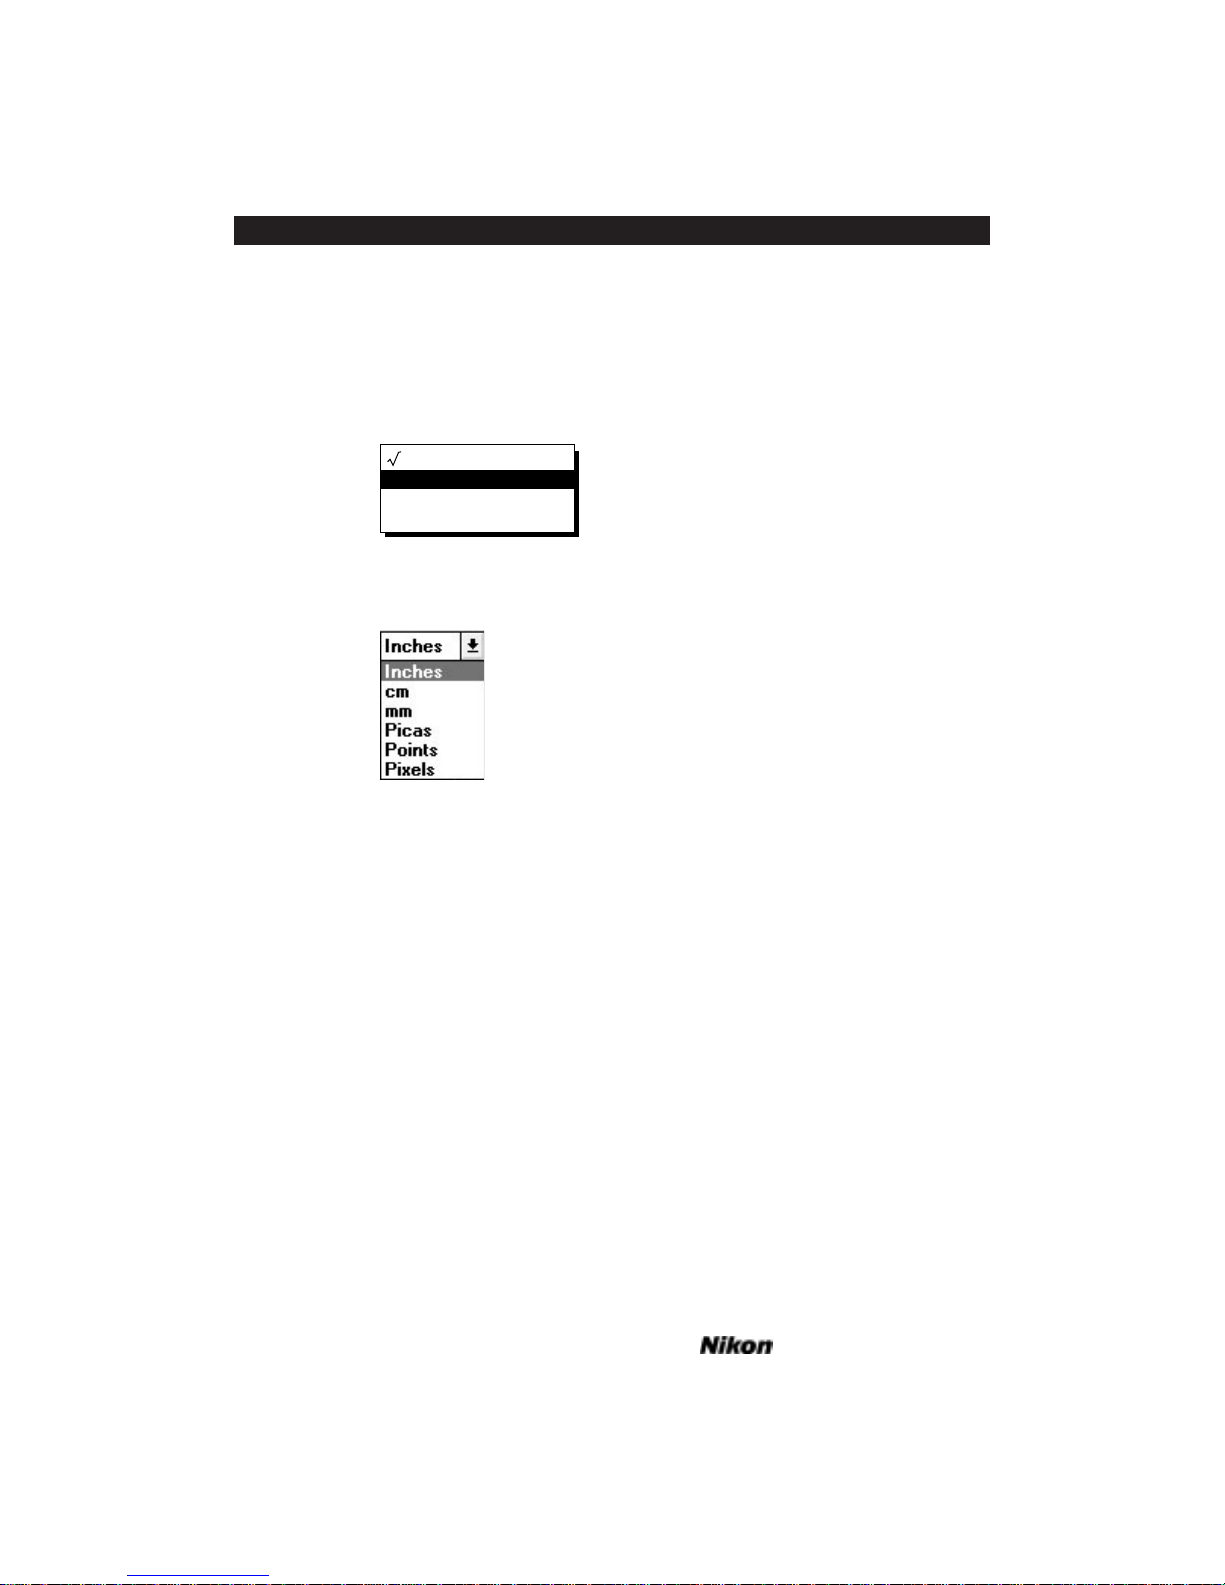
In order to change the selected item, hold the mouse button down and move up
and down the pop-up menu or combo box. This will display all the menu options, the
currently selected option being designated by a check mark next to it. Place the reverse
text box (white text in a black box) over the option you wish to select, as shown in
Figure 7.15a and Figure 7.15b. Release the button and the selection box will display the
new choice.
Figure 7.15a Pop-up menu options – Macintosh.
Figure 7.15b Combo box options – Windows.
Graphics Windows
A graphics window is an area of the Scan dialog box that displays all or part of an
active image. The preview image area in the Scan dialog box and the Gamma Curve
Editor are graphics windows. Special rules apply to the use of these windows and each is
described in detail in the relevant chapters.
Color Positive
Color Negative
B & W Positive
B & W Negative
Page 60 Software Reference for Scanners
Introduction to the Nikon Scanner Plug-in Chapter 7
Page 75
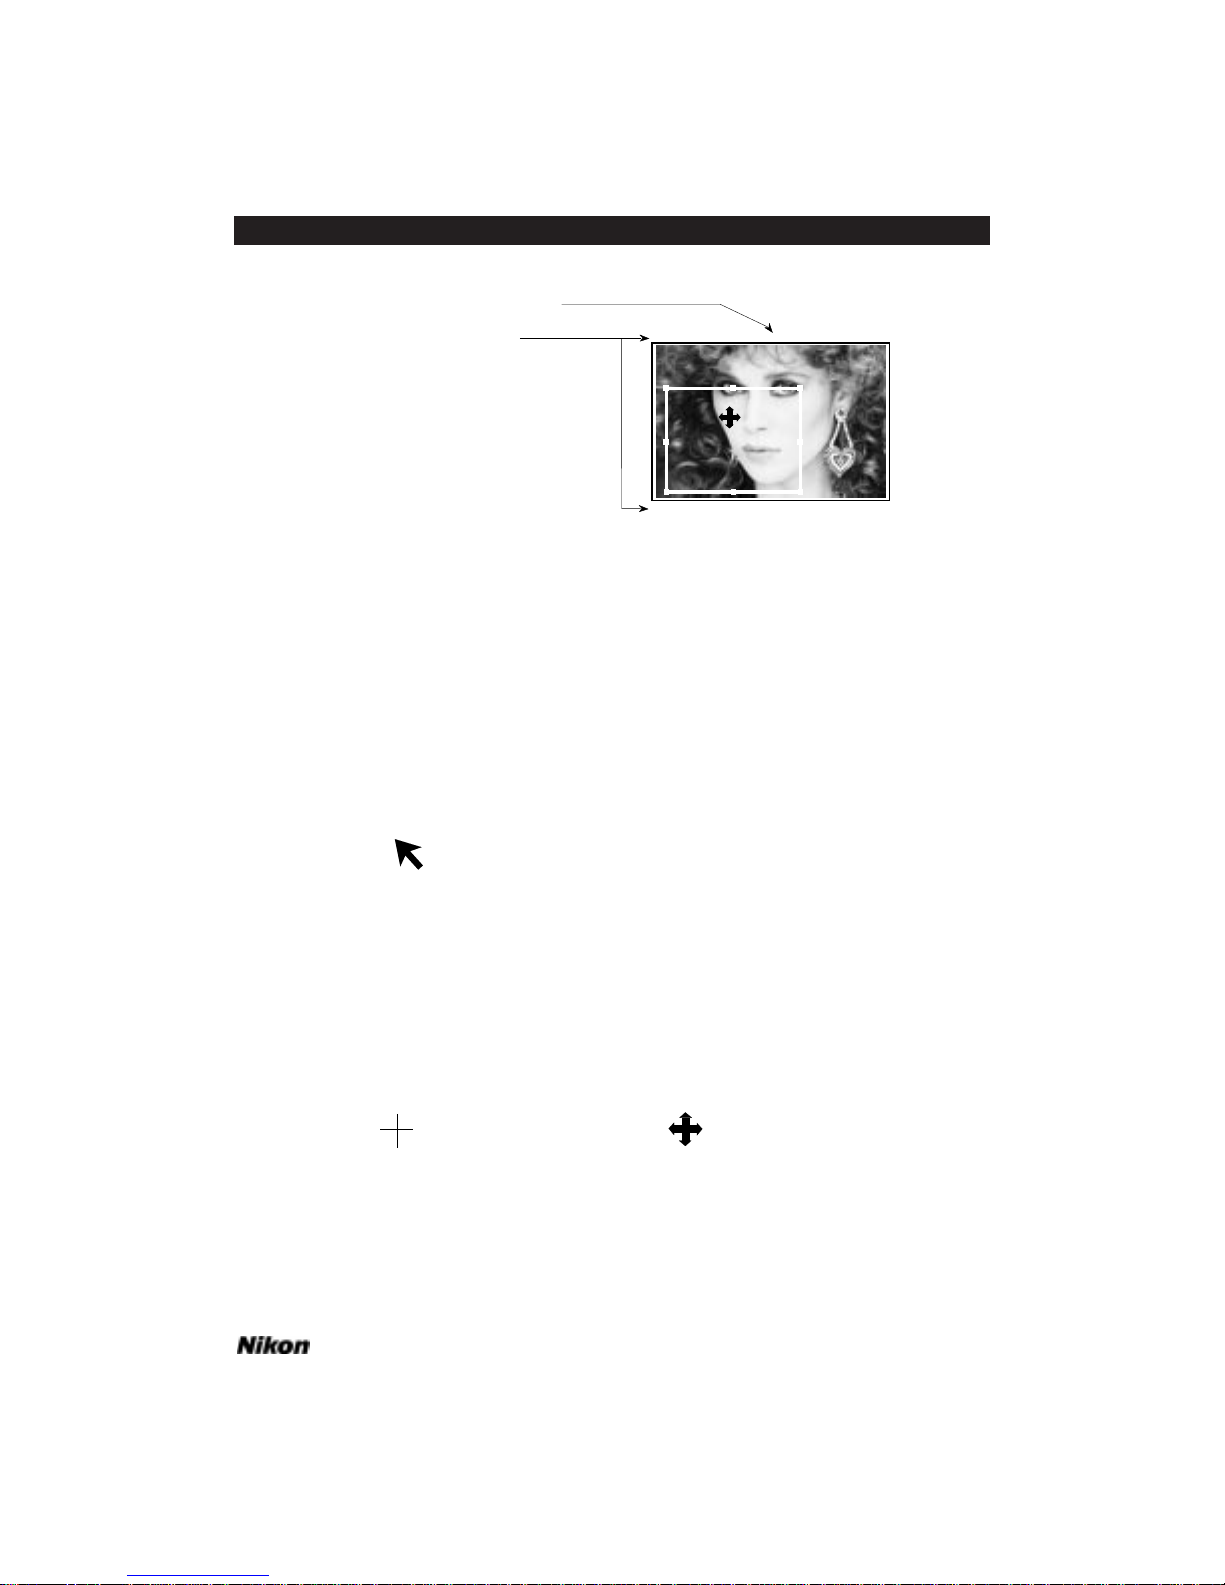
Figure 7.16 Graphics Window showing the crop rectangle.
Using the Mouse to Control the Scan Dialog
The mouse cursor changes shape depending on where the cursor is positioned
within the Scan dialog box.
When the cursor is located over the text portion of the scan dialog box the cursor
assumes the shape of an arrow, as seen in Figure 7.17. The cursor will be in the shape of
an arrow when buttons are clicked, selections are made in a selection box, or when text
or numbers are entered into value edit boxes.
Figure 7.17 Arrow cursor.
When the mouse cursor is located over the image area in the Scan dialog box, but
not within the crop rectangle, it assumes the shape of a crosshair, as shown in Figure
7.18. The color of the crosshair changes to provide contrast with the image. For example, if the cursor is located over a black or dark area the cursor will change to a light
color, and vice versa in white or light areas. The appearance of the crosshair cursor indicates that a new crop rectangle will be drawn if the mouse is clicked and dragged.
Figure 7.18 Crosshair cursor. Figure 7.19 Four-way arrow cursor.
(229,331) (500,523) (1195,331)
(229,1110) (1195,1110)
Pixel coordinates of
crop rectangle corners
Pixel coordinates of cursor
Software Reference for Scanners Page 61
Chapter 7 Introduction to the Nikon Scanner Plug-in
Page 76
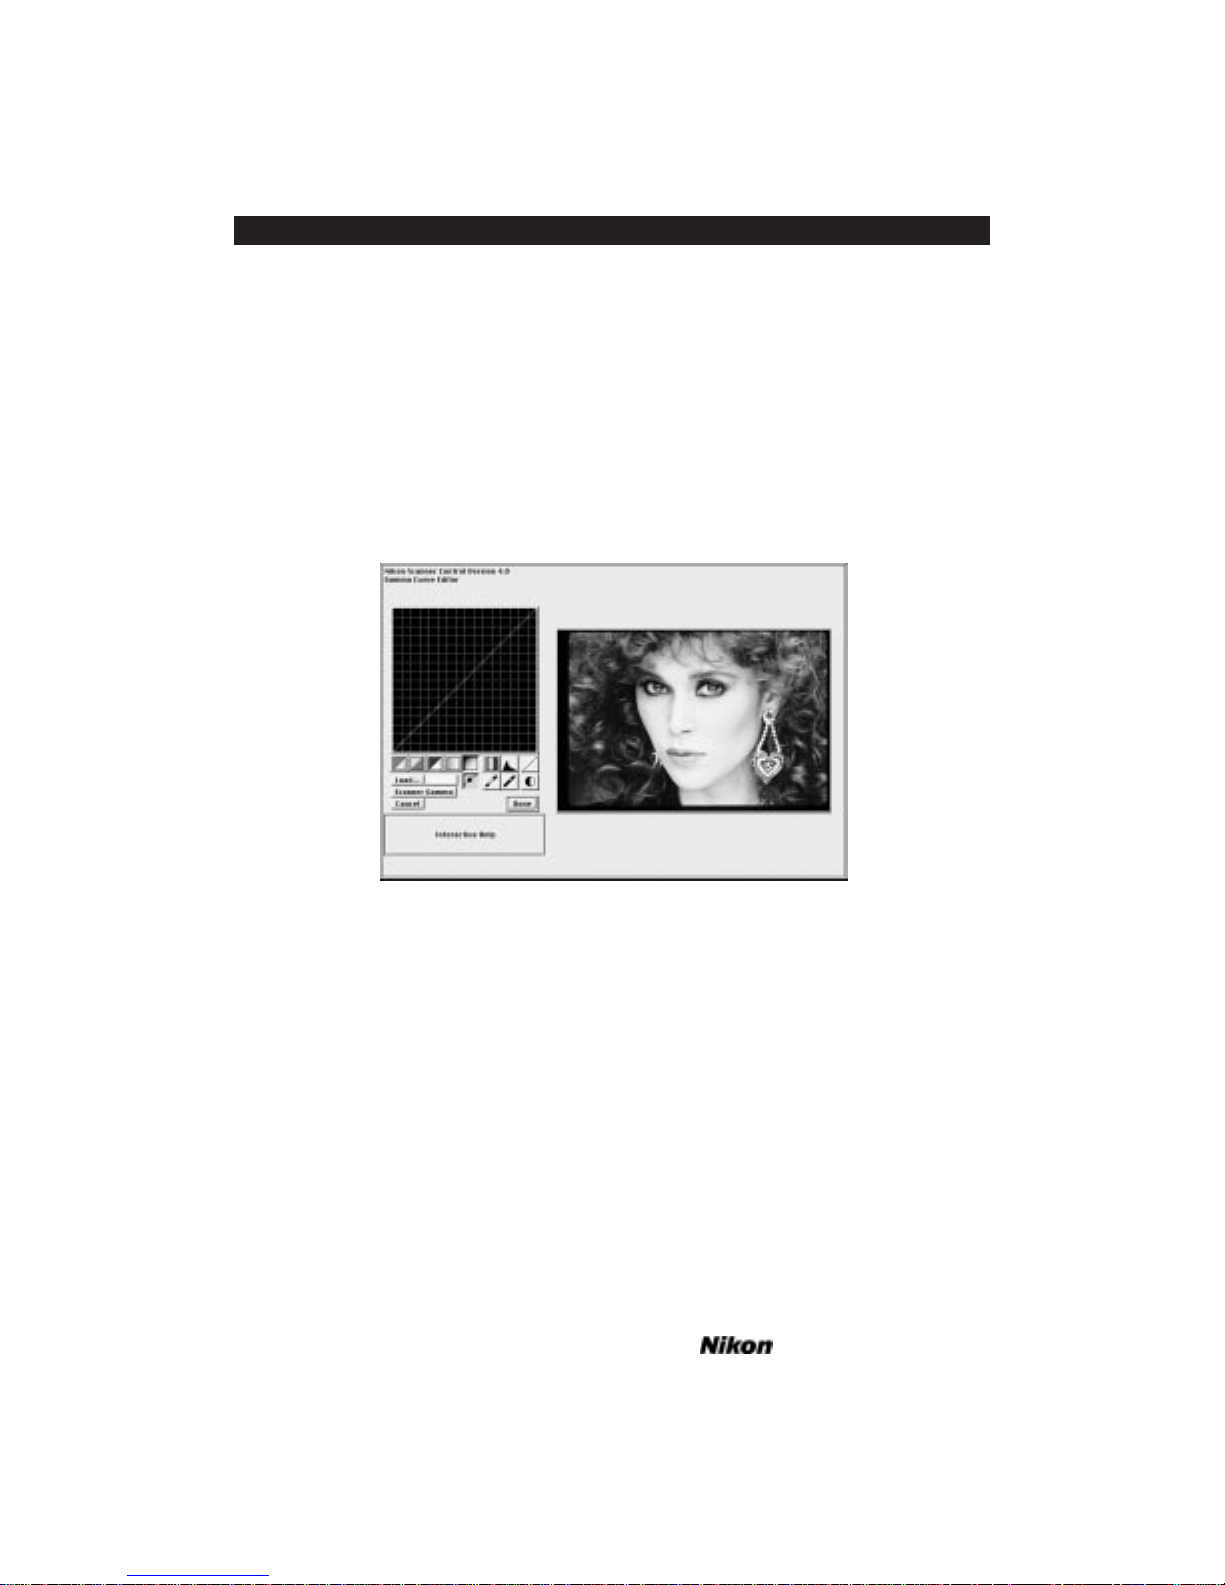
When the mouse cursor is located over the image area of the Scan dialog box and
within the crop rectangle, the cursor takes the shape of a four-way arrow, as seen in
Figure 7.19.
The Gamma Curve Editor Dialog Box
More sophisticated color control operations can be implemented through use of
the Gamma Curve Editor dialog box. Like the Scan dialog, the controls in the Gamma
Curve Editor dialog are positioned differently, depending on the size of your display.
The Gamma Curve Editor dialogs shown in Figure 7.20a and Figure 7.20b are the large
dialogs for Macintosh and Windows, respectively.
Figure 7.20a The large Gamma Curve Editor dialog box – Macintosh.
Page 62 Software Reference for Scanners
Introduction to the Nikon Scanner Plug-in Chapter 7
Page 77
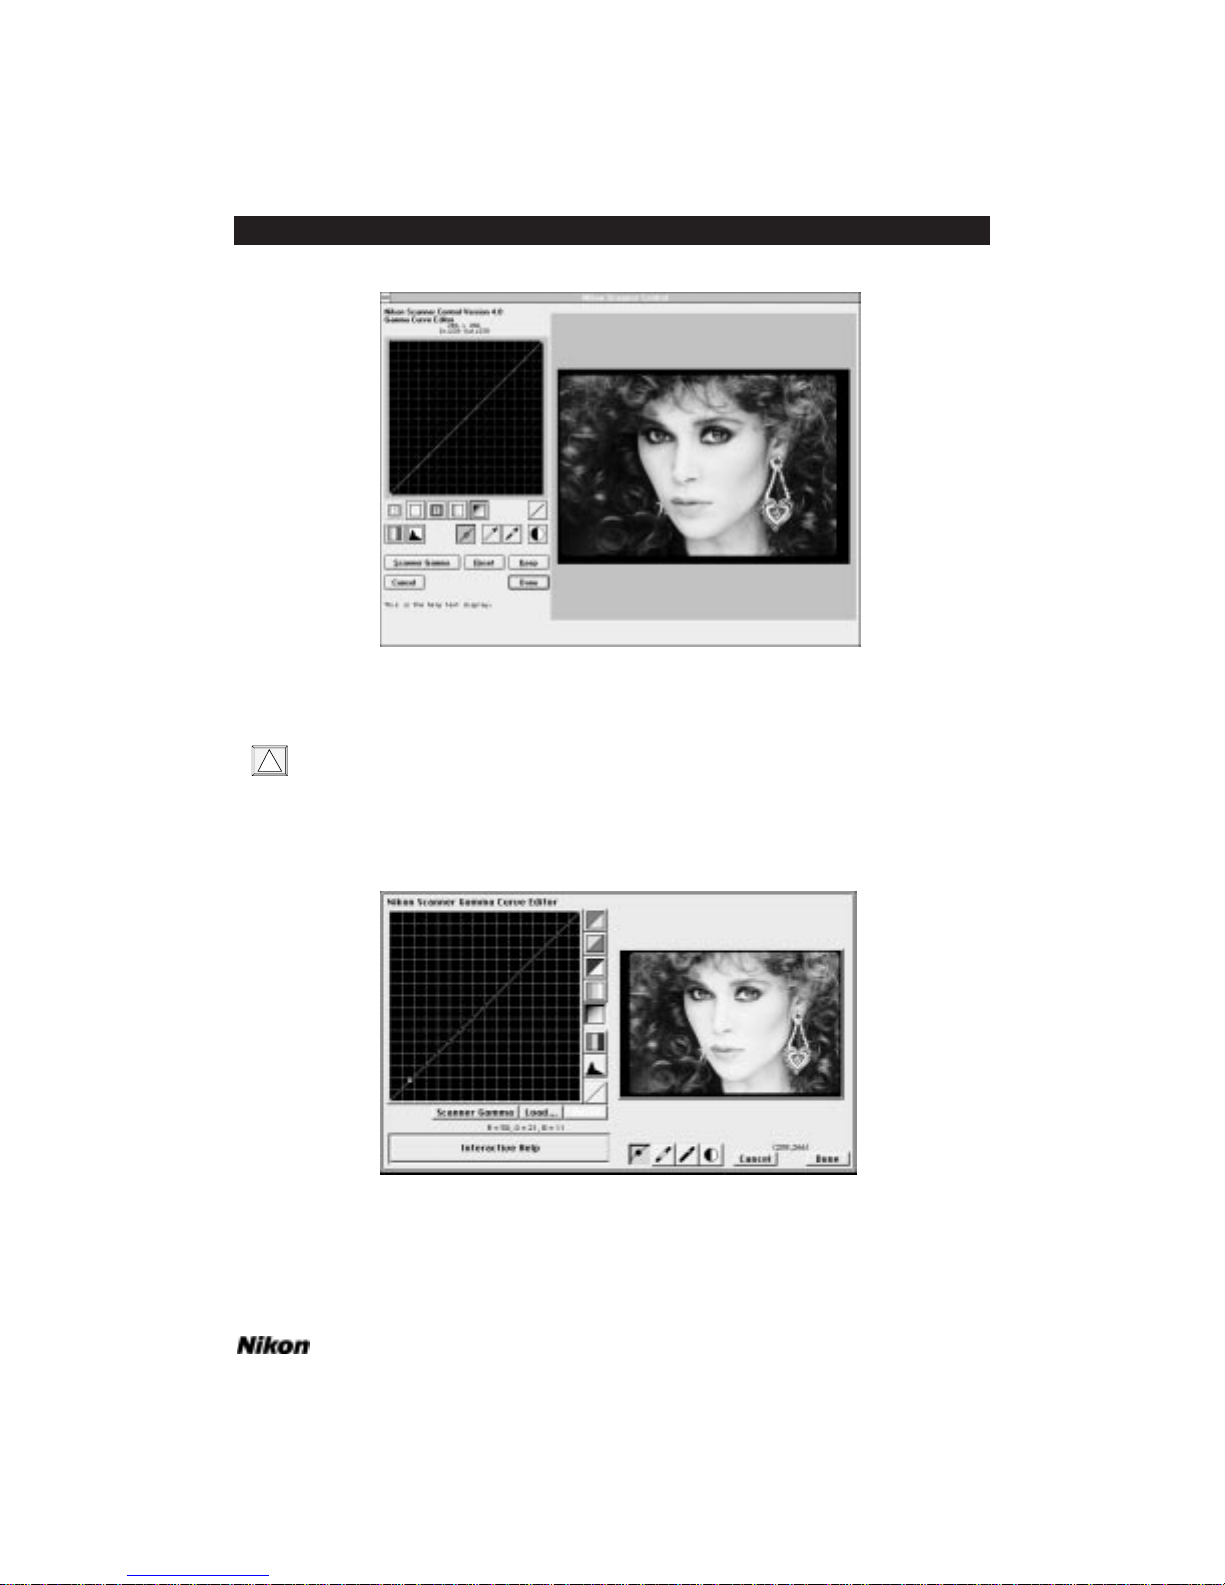
Figure 7.20b The large Gamma Curve Editor dialog box – Windows.
Using the larger dialog results in longer preview times. This can be changed in the
Tools dialog, explained later in this chapter.
The Gamma Curve Editor dialogs, shown in Figure 7.21a and Figure 7.21b, are
the small dialogs for Macintosh and Windows, respectively. Refer to Table 11.1 in
Chapter Eleven for specific information on monitor size, resolution, and preview size.
Figure 7.21a The small Gamma Curve Editor dialog box – Macintosh.
!
Software Reference for Scanners Page 63
Chapter 7 Introduction to the Nikon Scanner Plug-in
Page 78
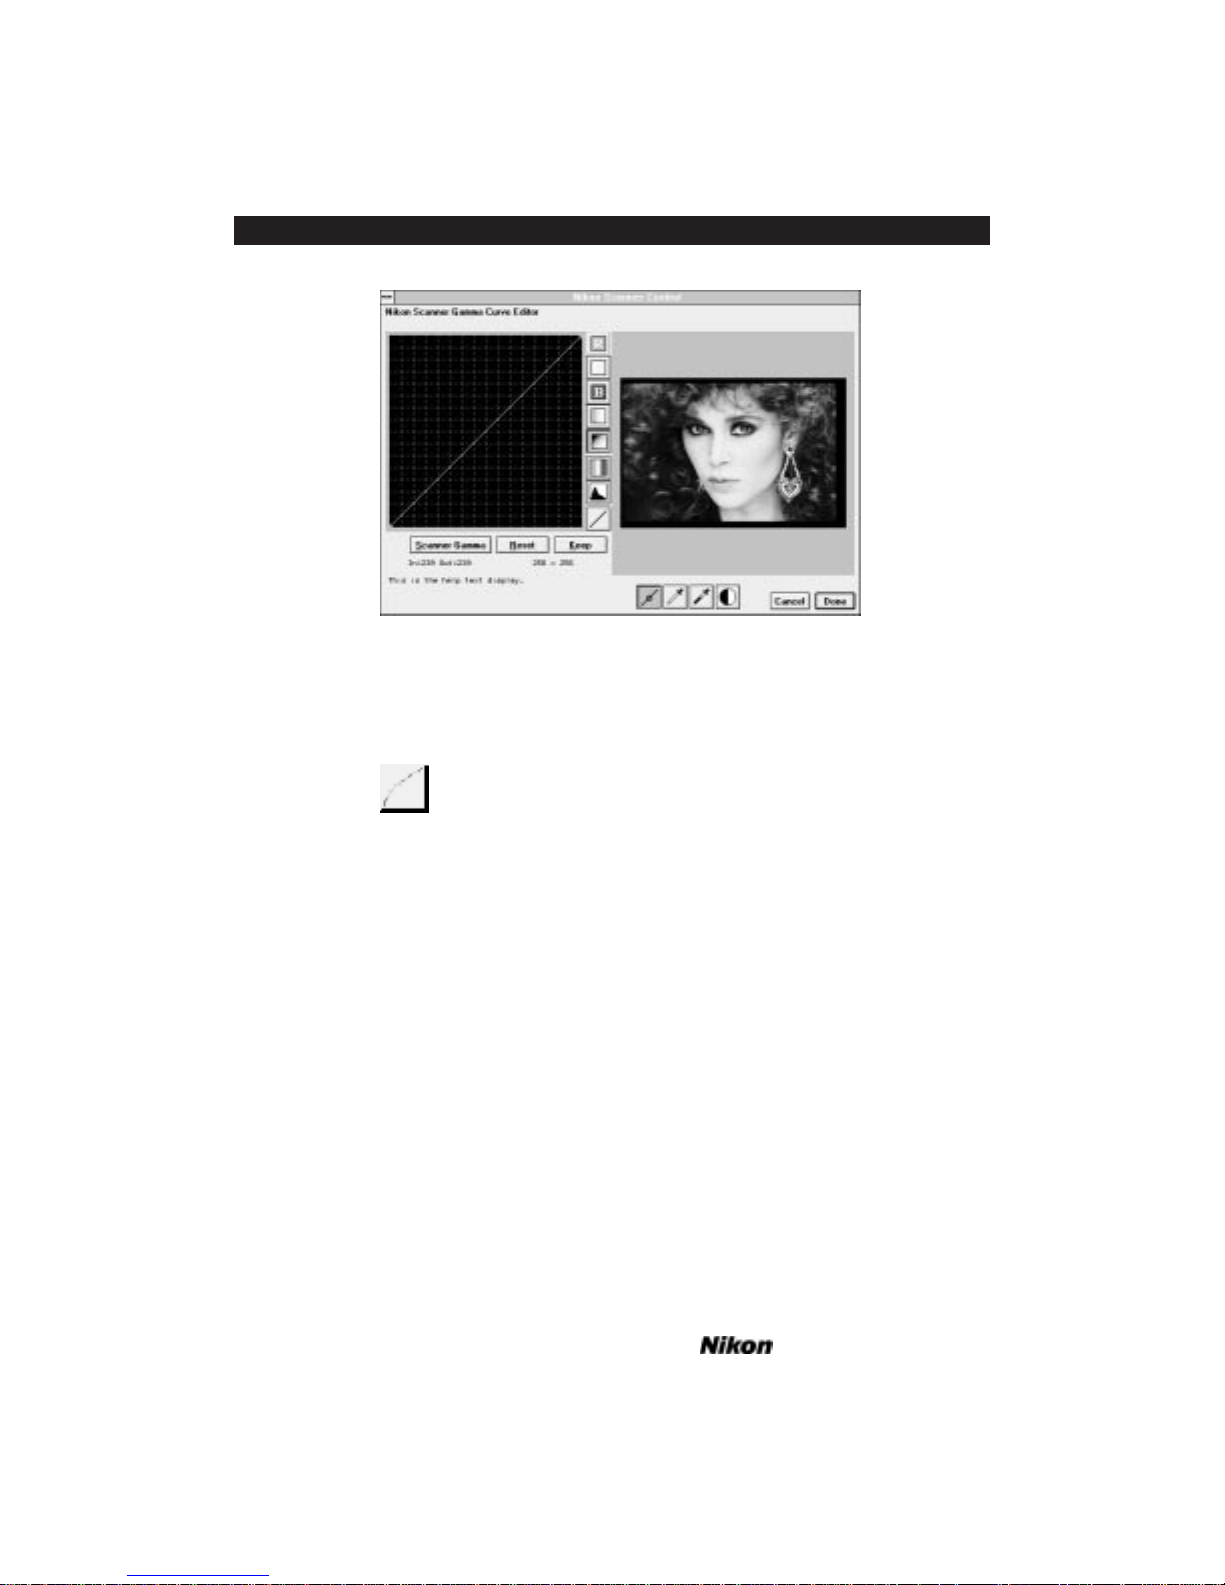
Figure 7.21b The small Gamma Curve Editor dialog box – Windows.
This Gamma Curve Editor dialog box is invoked from the Scan dialog box by
clicking on the Curve button, shown in Figure 7.22.
Figure 7.22 The Gamma Curve Editor button.
The Tools Dialog Box
The Tools dialog box, shown in Figures 7.23a and 7.23b for Coolscan –
Macintosh and Windows, and in Figures 7.24a and 7.24b for LS-3510AF – Macintosh
and Windows, enables you to perform basic diagnostic functions on your scanner. Do
not be put off by the complexity of this dialog. There are three items that you will need
to be concerned with. These are the USE LARGE SCREEN check box, the SCANNING
FOCUS check box, the CALIBRATE LAMP button (LS-3510AF only) and the SCSI and
GPIB selection buttons. The rest of the Tools dialog box can be ignored for now, since
its primary function is service related. INTERACTIVE HELP will provide an explanation of
all the controls, but be aware that large amounts of data are generated by certain service
functions, so it is best to ignore them unless directed to perform an operation by a
Nikon service technician.
Page 64 Software Reference for Scanners
Introduction to the Nikon Scanner Plug-in Chapter 7
Page 79
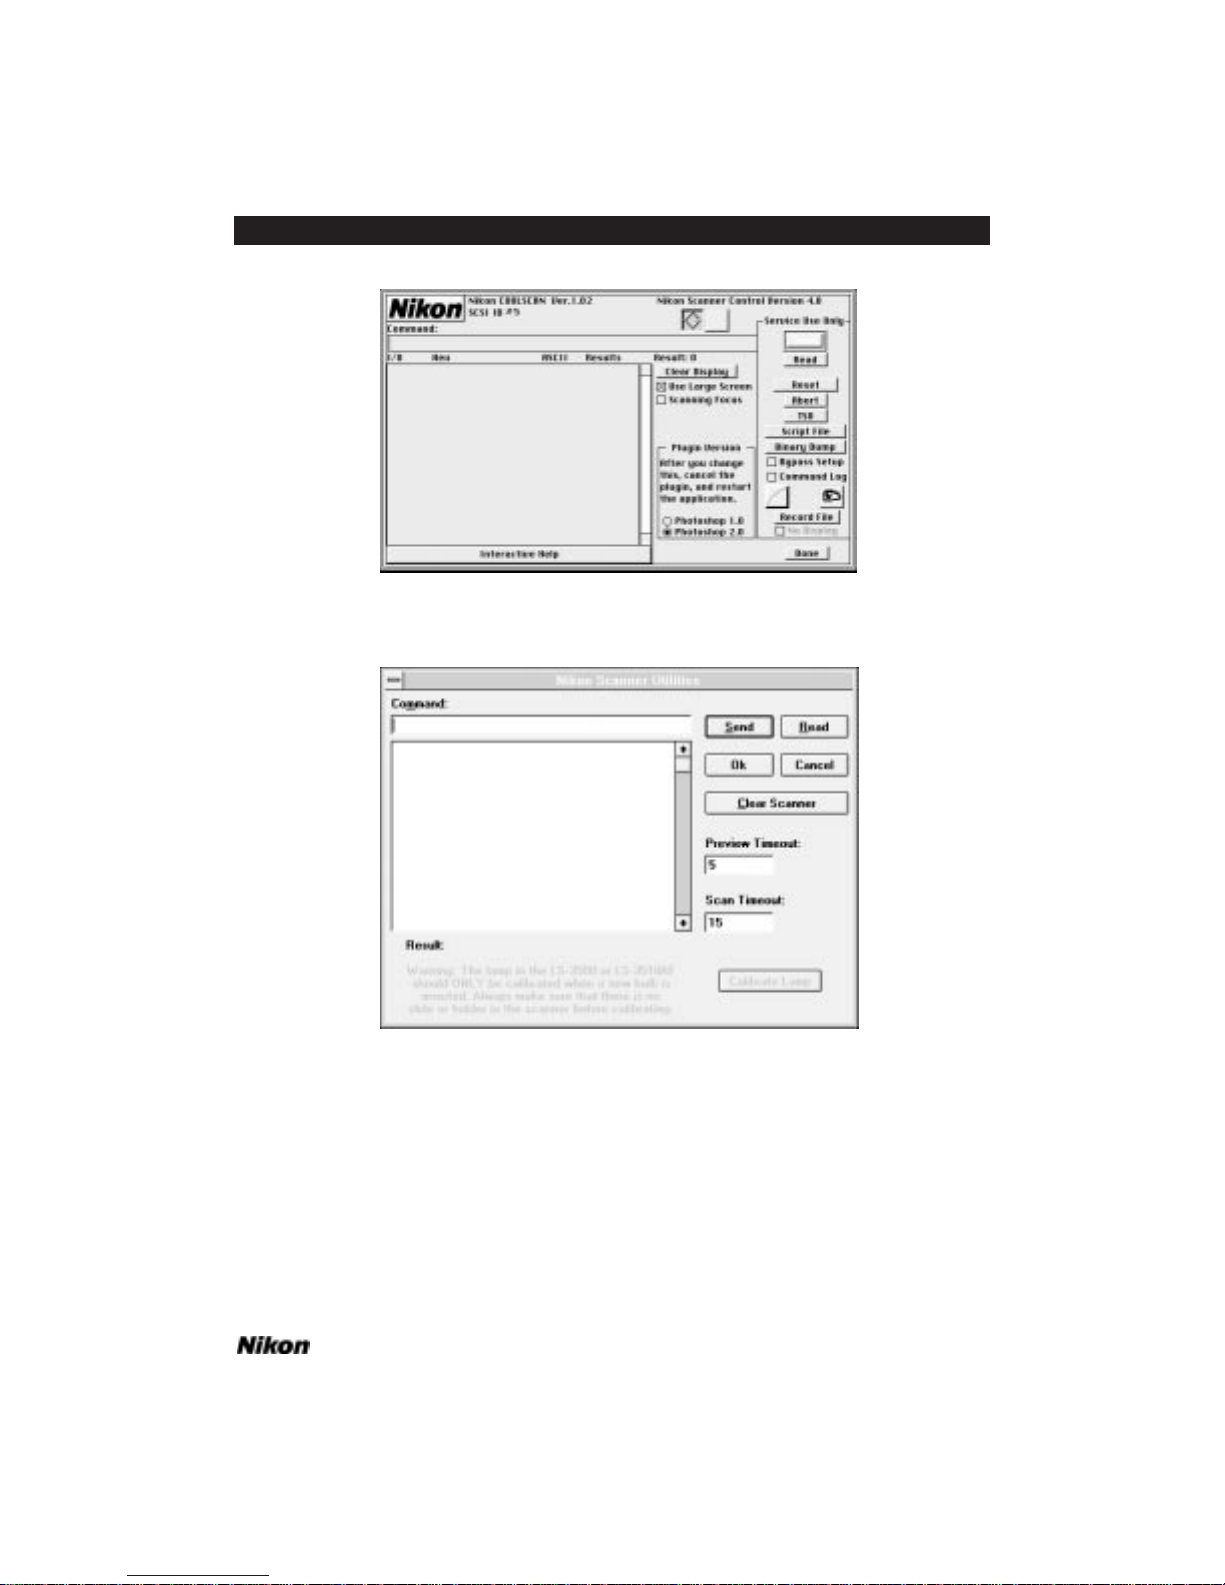
Figure 7.23a The Tools dialog box for Coolscan – Macintosh.
Figure 7.23b The Tools dialog box for Coolscan – Windows.
Software Reference for Scanners Page 65
Chapter 7 Introduction to the Nikon Scanner Plug-in
Page 80
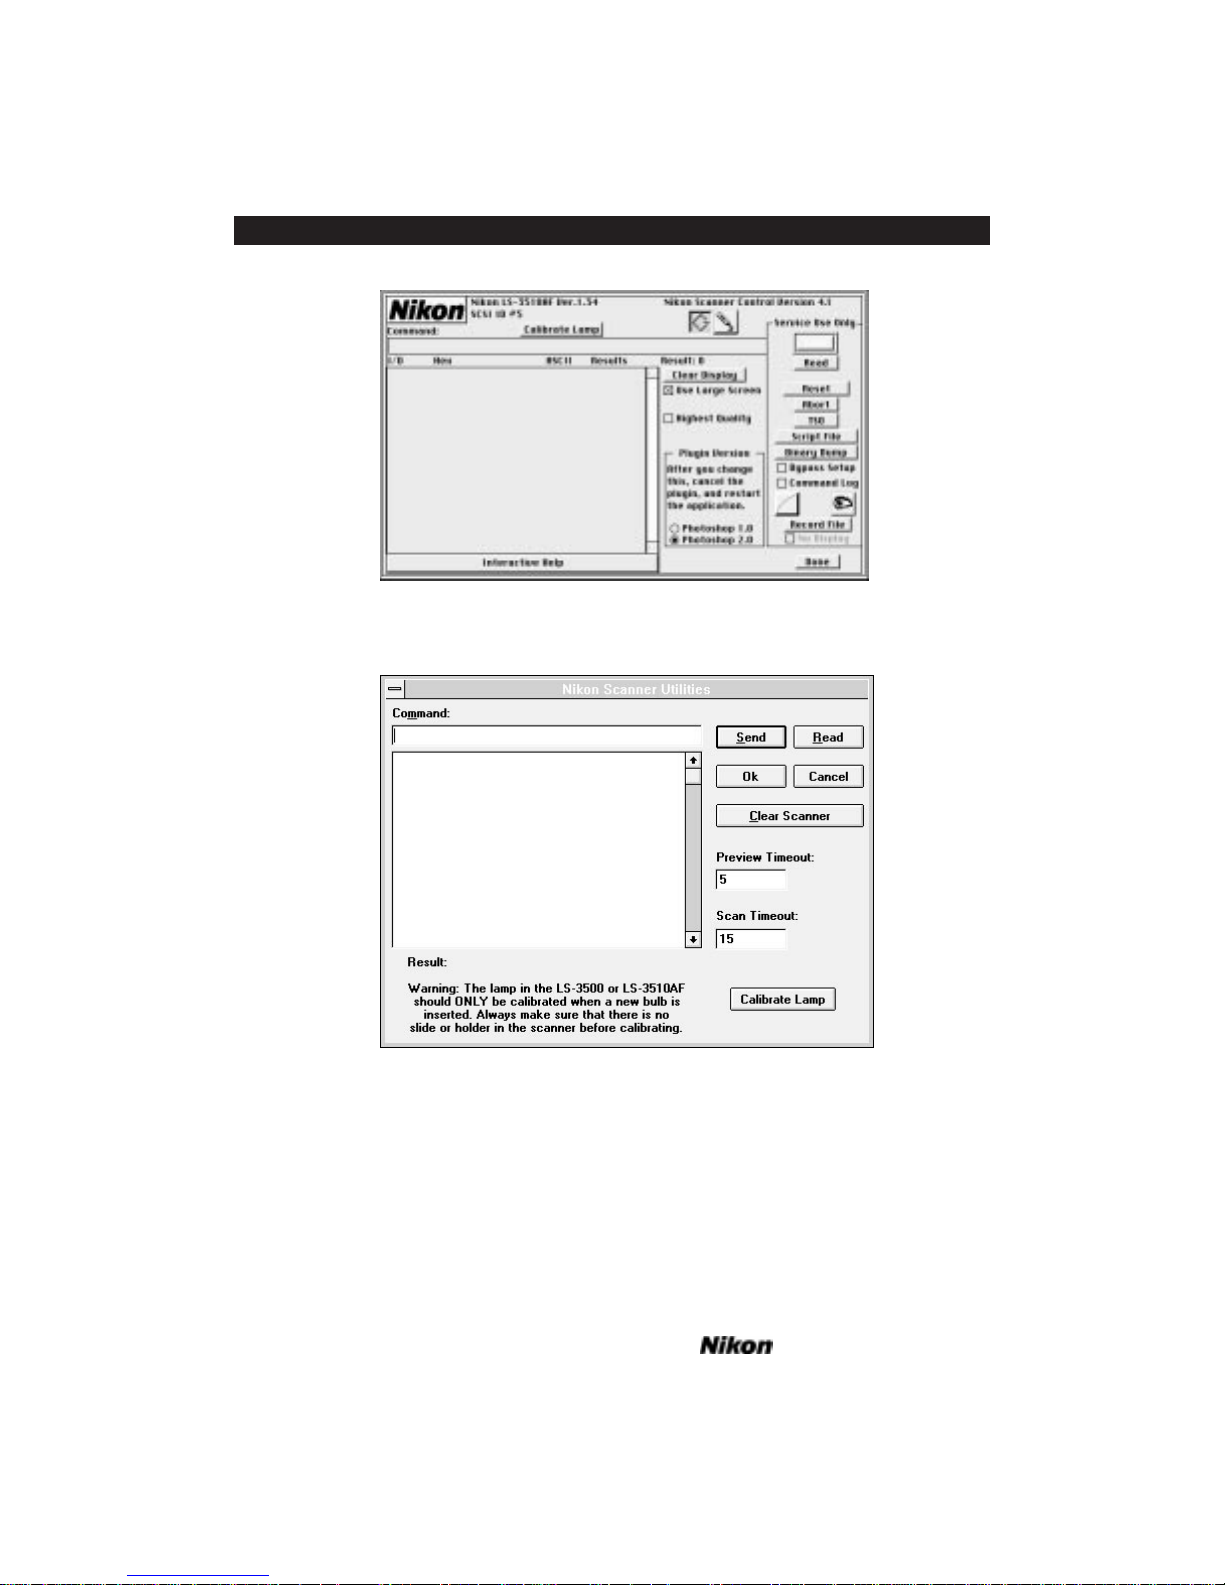
Figure 7.24a The Tools dialog box for LS-3510AF (SCSI) – Macintosh.
Figure 7.24b The Tools dialog box for LS-3510AF – Windows.
The Tools dialog box is invoked by clicking on the Tools button in the Scan dialog, shown in Figure 7.25.
Page 66 Software Reference for Scanners
Introduction to the Nikon Scanner Plug-in Chapter 7
Page 81
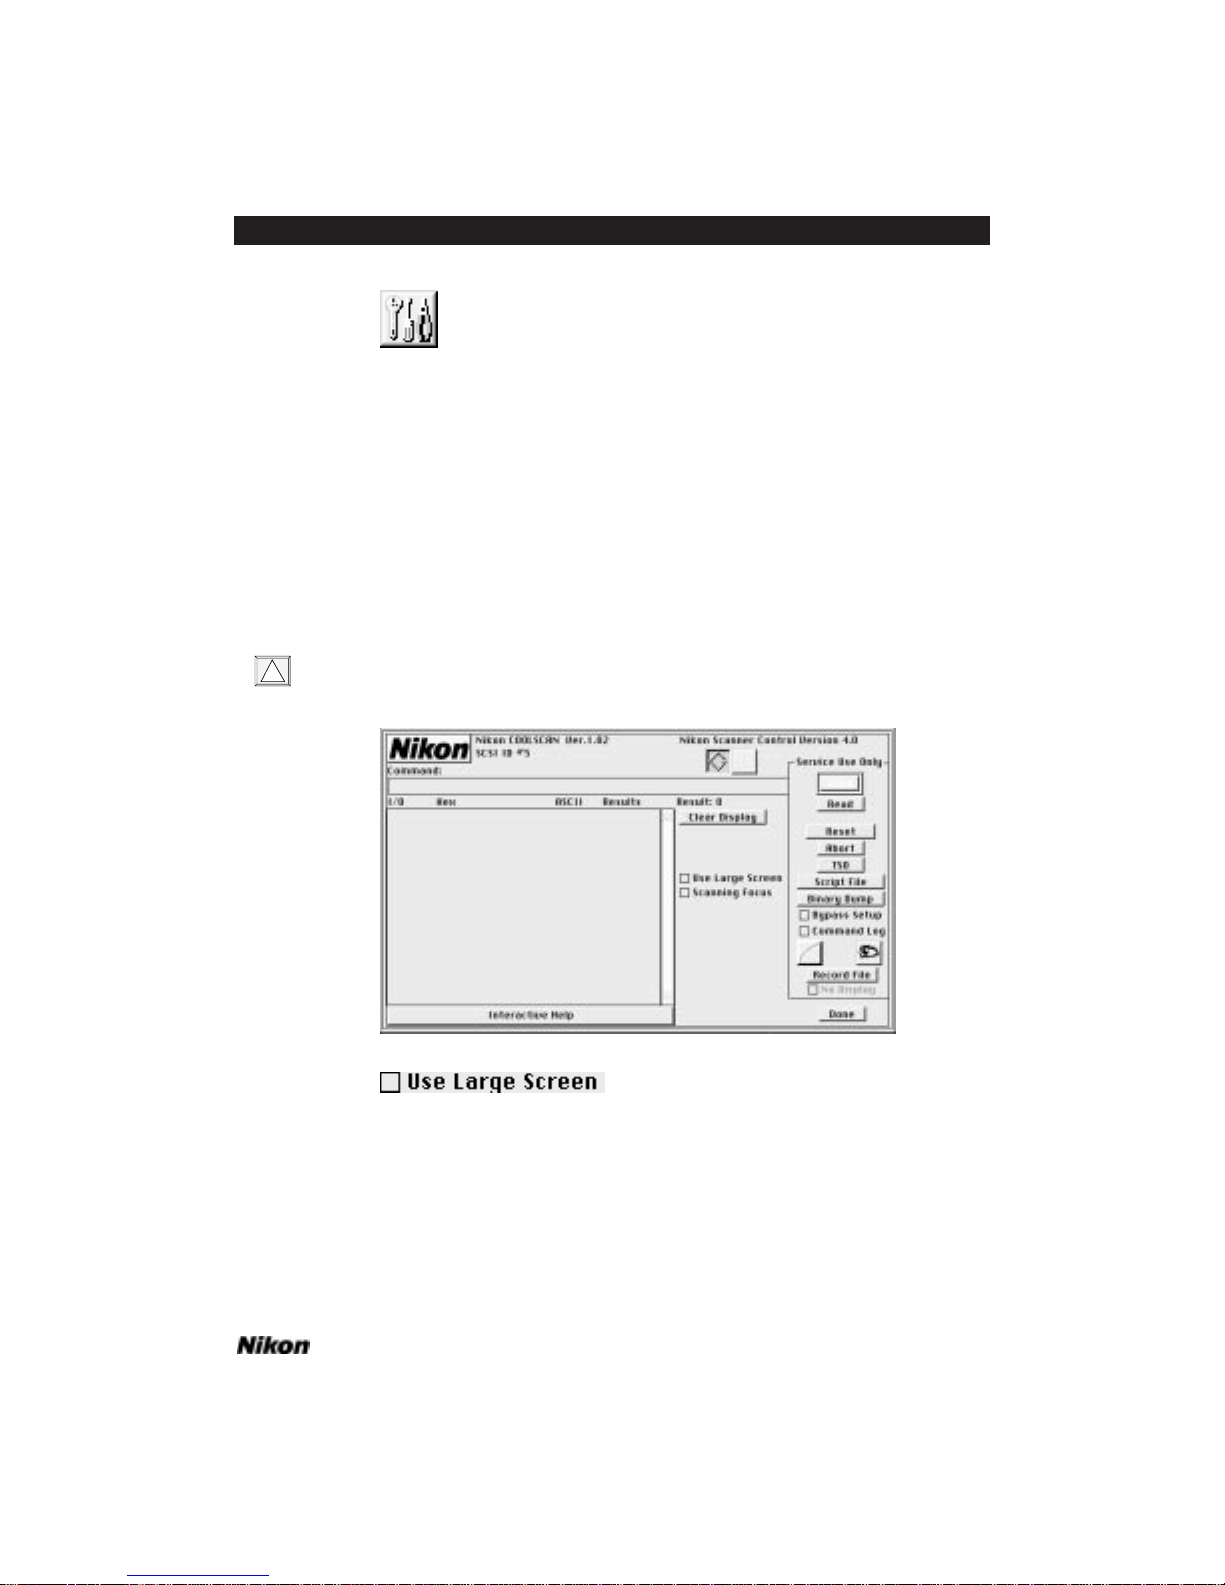
Software Reference for Scanners Page 67
Chapter 7 Introduction to the Nikon Scanner Plug-in
Figure 7.25 The Tools button.
Selecting the Scan Dialog Size
Macintosh: The Nikon Scanner plug-in automatically adjusts the size of the dialog box based on the screen size. At times, you might desire to change the screen size.
You can force a large screen size by checking the USE LARGE SCREEN check box, as
seen in Figure 7.26. Similarly, you can invoke the small screen size by removing the
check mark from this box. If you change the state of the check box, you must exit the
Tools dialog, exit the plug-in, then relaunch the plug-in in order for the new screen size
to take effect. It is not necessary to restart the application software.
Faster previews can be obtained by unchecking the USE LARGE SCREEN check box
and using the smaller screen size.
Figure 7.26 USE LARGE SCREEN check box shown in the Tools dialog
box and close-up – Macintosh.
Windows: The Nikon Scanner plug-in allows you to select the small dialog size
on a large monitor by holding down the Control key while the plug-in is loading, or by
selecting NEW SCAN from the FILE menu.
!
Page 82
Faster previews can be obtained by using the smaller screen size.
Selecting the Focus Method – Coolscan only
Macintosh: The Nikon Scanner plug-in provides two types of focus operations.
These are called Visual Focus and Metered Focus. Both are described in Chapter
Fourteen. The plug-in automatically defaults to the Metered Focus technique. This
can be changed by checking the SCANNING FOCUS check box, seen in Figure 7.26. If
checked, the Visual Focus technique will be employed. If you change the state of the
box, you must exit the Tools dialog. It is not necessary to restart the application software.
Windows: The Nikon Scanner plug-in provides two types of focus operations.
These are called Visual Focus and Metered Focus. Both are described in Chapter
Fourteen. The plug-in automatically defaults to the Metered Focus technique. This
can be changed by holding down the Control key while clicking on the FOCUS button
shown in Figure 7.27.
Figure 7.27 The SCANNING FOCUS keystroke.
Interface Buttons
This toggling pair of buttons, which specifies SCSI or GPIB interface, is available
in the Main Scan dialog and in the Tools dialog. While opening the plug-in, the software will search the GPIB and then the SCSI bus for any scanners. When found, the
device will have its ID displayed in the upper right-hand corner. If no device is found,
and one is known to be connected, then the toolkit buttons provide a means to search
the bus again for a particular address. If you have more than one Nikon scanner connected to your SCSI or GPIB chain, you will have to manually set the SCSI or GPIB
address you wish to use. Do so by clicking the appropriate button, SCSI or GPIB, in
the Tools dialog and set the appropriate address using the relevant pop-up menu, as seen
in Figures 7.29a and 7.30a for Macintosh, and Figures 7.29b and 7.30b for Windows.
Figure 7.28 The SCSI and GPIB addressing button – Macintosh and Windows.
!
Page 68 Software Reference for Scanners
Introduction to the Nikon Scanner Plug-in Chapter 7
Page 83
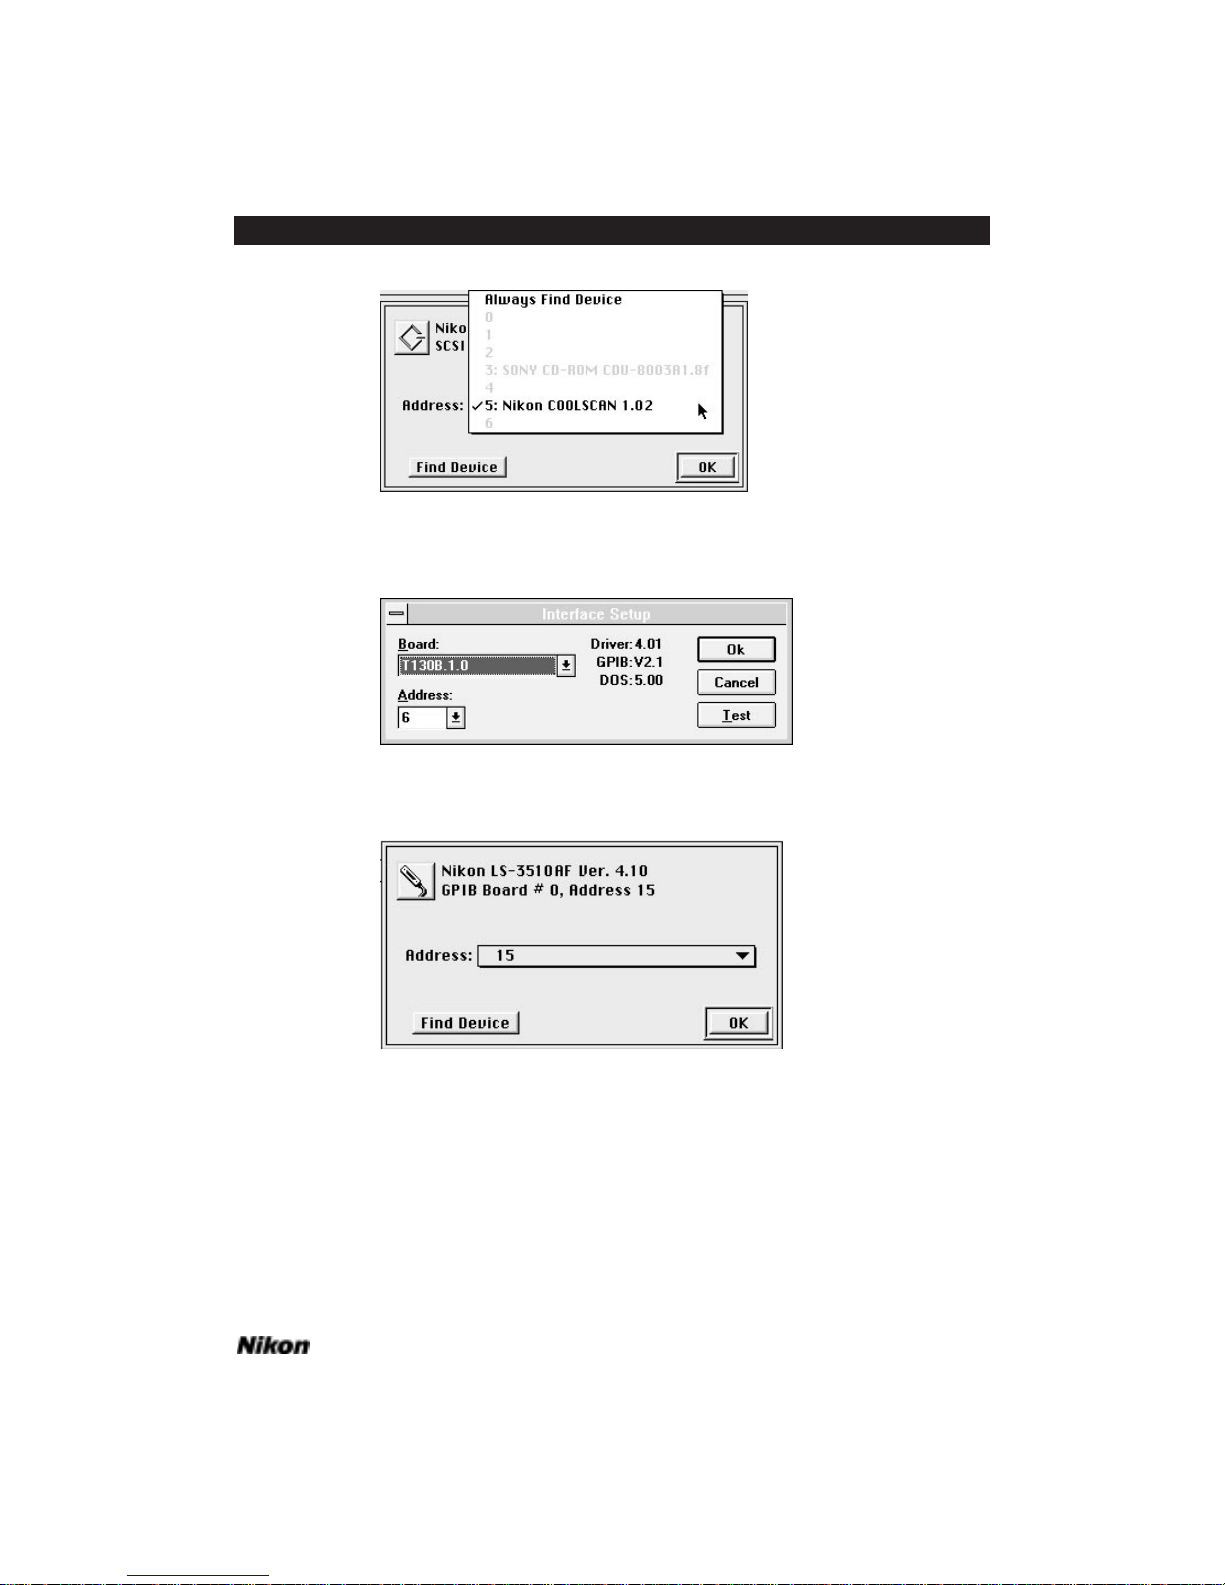
Figure 7.29a The SCSI addressing selection dialog – Macintosh.
Figure 7.29b The SCSI addressing selection dialog – Windows.
Figure 7.30a The GPIB addressing selection dialog – Macintosh.
Software Reference for Scanners Page 69
Chapter 7 Introduction to the Nikon Scanner Plug-in
Page 84
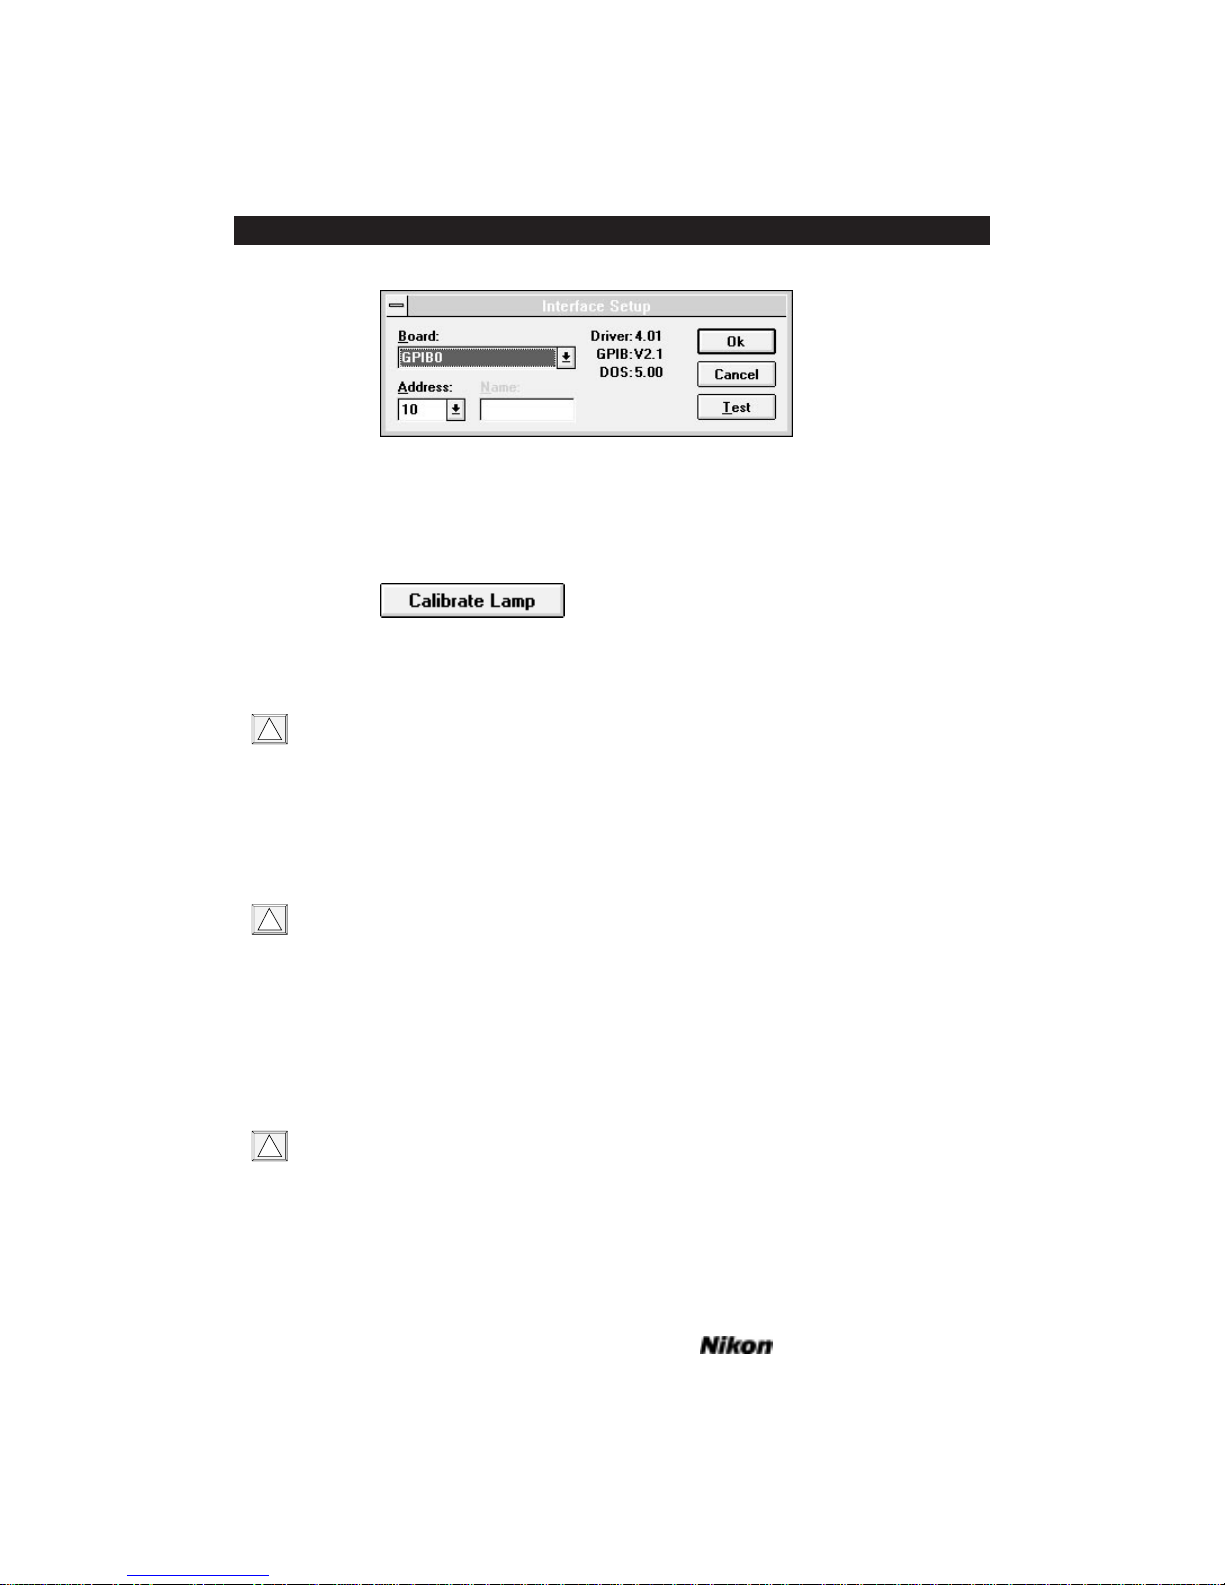
Figure 7.30b The GPIB addressing selection dialog – Windows.
Calibrating the Lamp (LS-3510AF only)
Figure 7.31 Calibrate Lamp button – Macintosh and Windows.
The lamp should be calibrated when the scanner is first unpacked from the
shipping carton.
Thereafter, you can recalibrate whenever you change a lamp, or if you install a 12bit board. If you move the scanner to a new location you may want to recalibrate since
the bulb may change position in transit and the illumination pattern must be recompensated. This calibration is not intended for daily use. It writes color balance and light
distribution shading information to the non-volatile memory in the scanner.
The CALIBRATE LAMP button should be used with caution!
Before calibrating the unit, you must remove any film and film holders from
inside. Otherwise it will misinterpret the light balance and attempt to calibrate to a setting that is outside normal limits. This may leave the scanner in a confused state and
possibly require a call to Nikon Technical Support to remedy.
To execute a calibration, close the dust cover, click the button within the Tools
dialog and wait a couple of minutes while the unit compensates and saves the data.
When the busy light finally goes out you will be returned to the Tools dialog.
Do not disturb the scanner while this is taking place or the routines will not complete and the scanner may not calibrate correctly on the next attempt.
You can exit after completion by clicking the DONE button.
!
!
!
Page 70 Software Reference for Scanners
Introduction to the Nikon Scanner Plug-in Chapter 7
Page 85
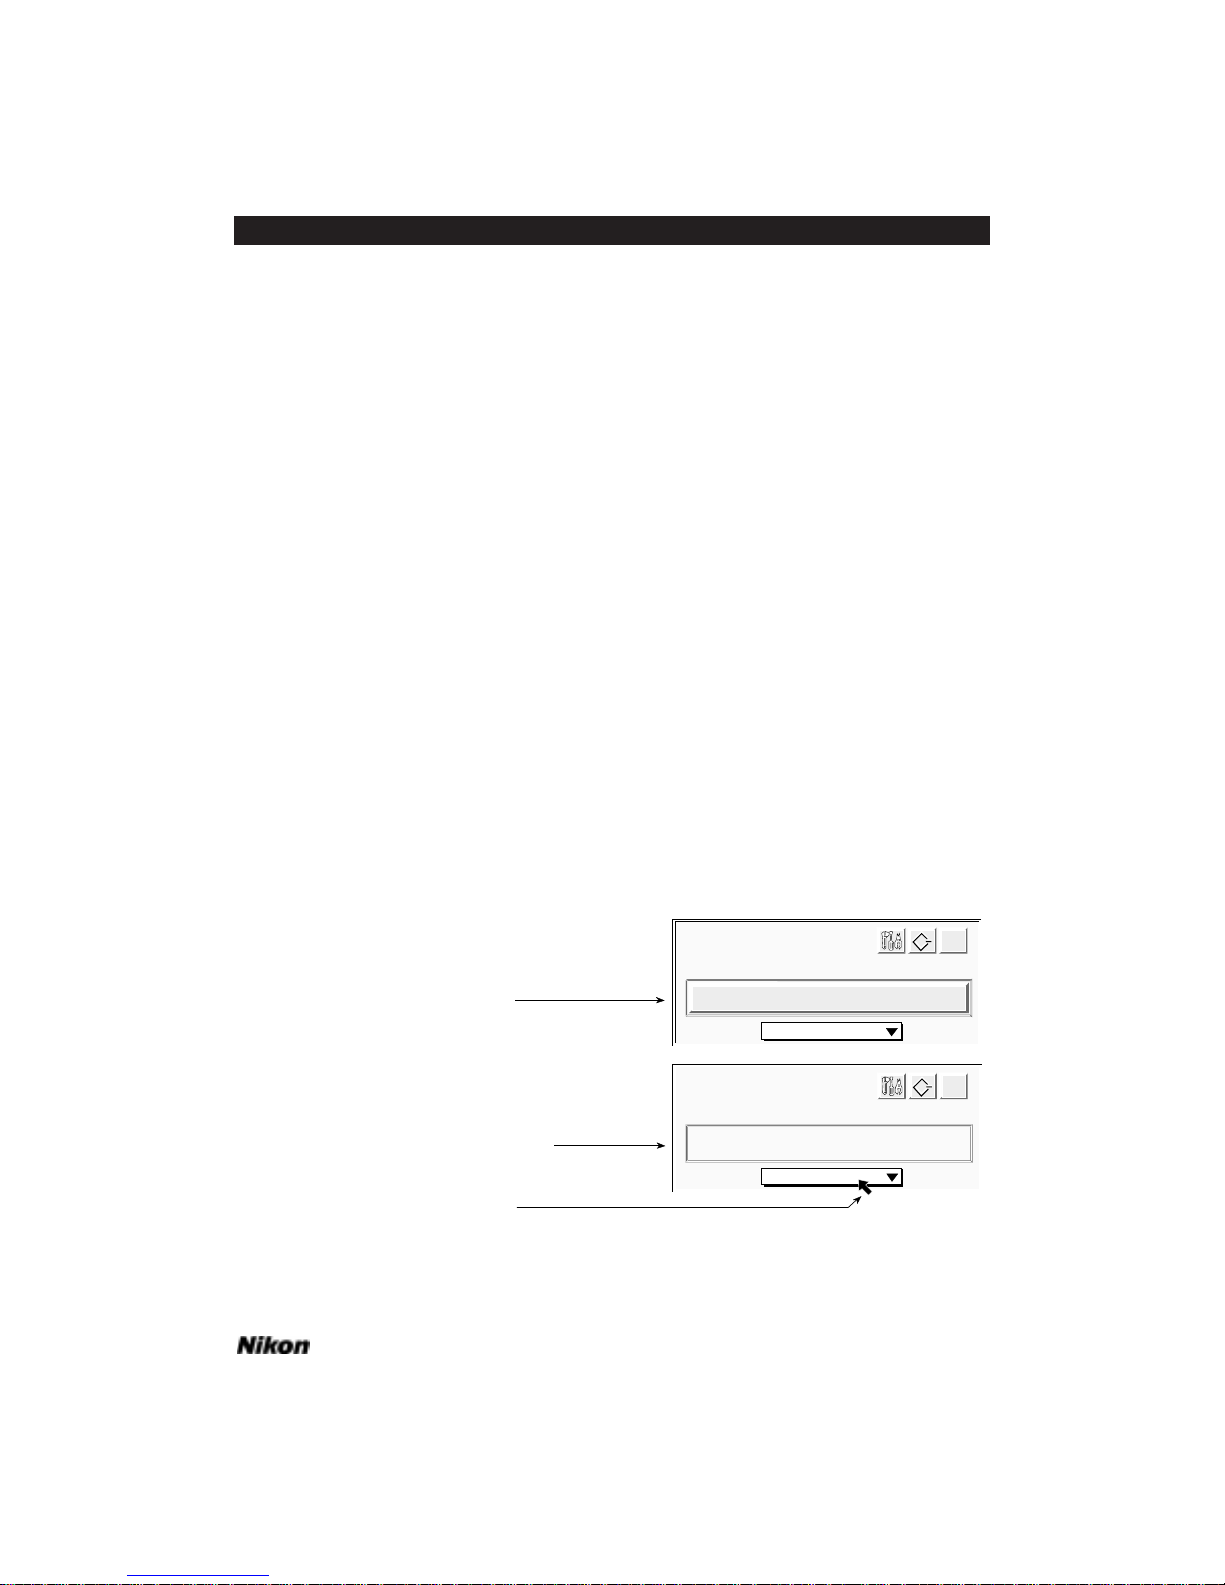
The Scanner State
Macintosh: When you launch the plug-in its settings automatically initialize to
the state that they were in when it was last closed. Also, the last preview image that was
on screen will still be displayed in the preview window.
The plug-in allows you to save and restore settings of the plug-in state through its
preferences file. This will be explained in the next chapter.
Windows: When you launch the plug-in its settings automatically initialize to the
state that they were in when it was last closed.
With Coolscan, the plug-in allows you to save and restore settings of the plug-in
state through its NKNCTRL.INI file. This will be explained in Chapters 8 and 9.
Getting Help
Macintosh: Help can be accessed while in the Scan dialog box or in the Gamma
Curve Editor dialog box by clicking on the INTERACTIVE HELP button. When inactive,
the INTERACTIVE HELP button is displayed, as shown in Figure 7.32(a).
When active, the INTERACTIVE HELP button is replaced by a message box, as
shown in Figure 7.32(b). When the mouse cursor is placed over a control, the appropriate help message for that control appears in this message box. For example, in the Scan
dialog box, suppose that the cursor was placed over the FILM TYPE selection box after
selecting INTERACTIVE HELP. The message box would relay the information shown in
Figure 7.32(b). This function operates identically in the Gamma Curve Editor dialog
box.
Figure 7.32 The INTERACTIVE HELP button is replaced by a help message for
F
ILM TYPE pop-up menu.
Interactive Help
message box
Nikon Scanner Version 4.0
Nikon COOLSCAN Ver.1.02
SCSI ID #5
Disk Space: 66.2 MB Scan will be fastest
Film Type: Color Positive
Click on Interactive Help
message box to make
message area active
Film Type: Color Positive
Interactive Help
Cursor positioned over
Film Type
selection box
(a) Interactive help inactive
(b) Interactive help active
This selects the type of film currently in the scanner.
Nikon Scanner Version 4.0
Nikon COOLSCAN Ver.1.02
SCSI ID #5
Disk Space: 66.2 MB Scan will be fastest
Software Reference for Scanners Page 71
Chapter 7 Introduction to the Nikon Scanner Plug-in
Page 86

Help is disabled by clicking within the message box. Once disabled, the
INTERACTIVE HELP button reappears.
Windows: When the mouse cursor is placed over a control, the appropriate help
message for that control automatically appears in the top left-hand corner of the Scan
dialog.
Page 72 Software Reference for Scanners
Introduction to the Nikon Scanner Plug-in Chapter 7
Page 87
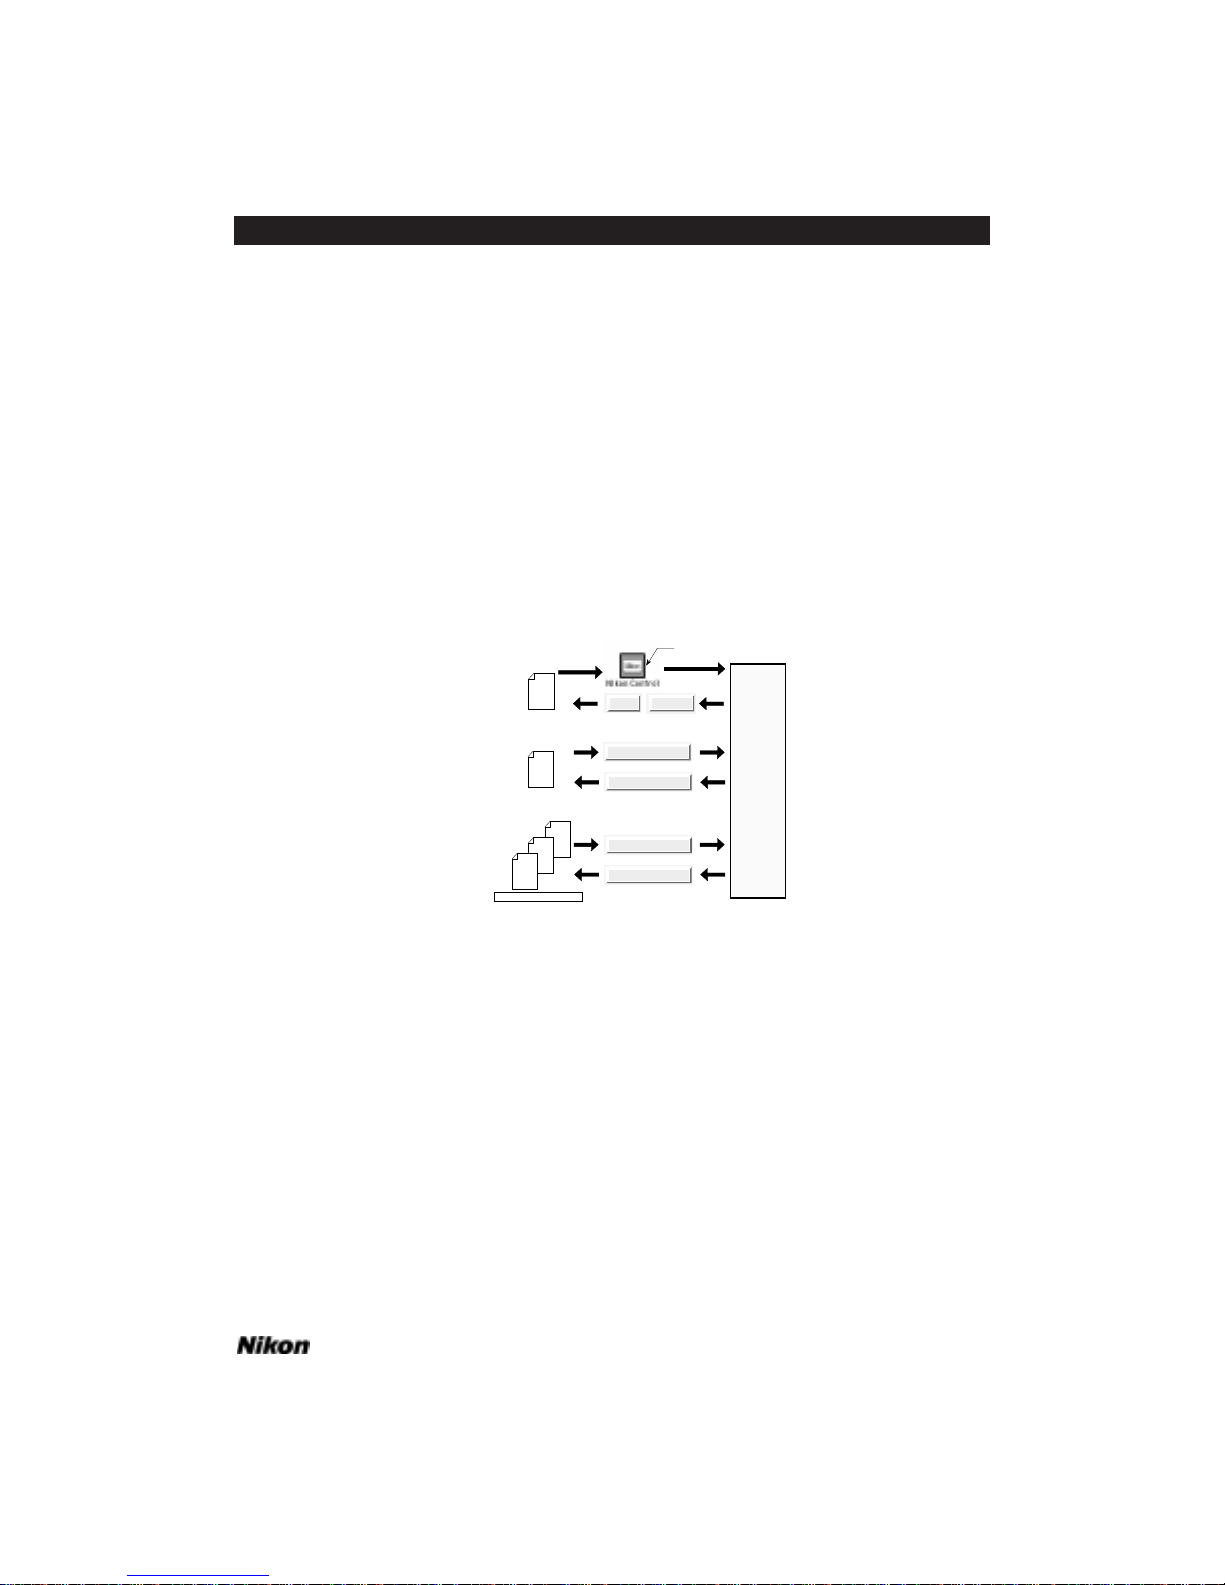
Setting and Restoring the
Nikon Plug-in State – Macintosh
As you have seen, there are many user-controlled settings associated with the
Nikon Scanner plug-in. These user-controlled settings are referred to as the plug-in
state. It is understood that you will not want to fix each setting every time you want to
scan. To avoid this, the Nikon Scanner plug-in includes a simple method of managing
the setting and restoring of the plug-in state.
There are three ways to set and restore the Nikon Scanner plug-in’s initial state as
shown in Figure 8.1. These include the standard startup conditions shown in Figure
8.1a, the default conditions shown in Figure 8.1b, and the user named settings files
shown in Figure 8.1c.
Figure 8.1 Setting the Nikon Scanner plug-in state. (a) This method is used automatically upon starting and exiting the application. (b) The set default method allows you
to save and restore the state through an un-named file. (c) The user-named method
allows you to save and restore the state through named files.
The automatic method of setting and saving the plug-in state involves saving the
state each time the application exits, and then restoring this state the next time the
application is run. In Figure 8.1a, it is seen that clicking on either the CANCEL or SCAN
buttons causes the last state of the plug-in to be stored in the plug-in preferences file.
When the plug-in is run, these saved settings are used as the new startup conditions.
This includes the image present in the preview image window.
The set default method allows you to set aside the current plug-in state for ready
access at a later time by clicking on the SET DEFAULTS button. This is shown in Figure
8.1b. The RESET button can be clicked at any time to restore the plug-in to the default
state in the preferences file.
Save Settings
Load Settings
User Named Files
Preferences
Scan
Cancel
(a) Automatic settings
(c) User-named settings
Preferences
Set Defaults
Reset
(b) Default settings
Nikon
Control
Initial
Settings
Double-click
Software Reference for Scanners Page 73
Chapter 8 Setting and Restoring the Nikon Plug-in State – Macintosh
Page 88

The user-named method is similar to the set default method, but is meant for longterm storage of settings. This is shown in Figure 8.1c. Several different states can be
stored by giving each a unique name. The plug-in saves the current settings to a named
file when the SAVE SETTINGS button is clicked. Similarly, it resets the current settings
to those settings in a named file when the LOAD SETTINGS button is clicked.
The Settings Controls
There are four buttons associated with the saving and restoring of the plug-in
state. These include the RESET, SET DEFAULT,LOAD SETTINGS and SAVE SETTINGS
buttons. All of these are found in the Scan dialog.
Reset
The RESET button, shown in Figure 8.2, provides a means to set the plug-in state
to the default values in the plug-in preferences file. These default values can be changed
by clicking the SET DEFAULTS button.
Figure 8.2 The RESET button.
Set Defaults
The SET DEFAULTS button, seen in Figure 8.3, provides a means to store the current plug-in settings as the default state in the preferences file. After these new default
settings are stored, they can then be recalled by clicking the RESET button.
Figure 8.3 The SET DEFAULTS button.
Load Settings
The LOAD SETTINGS button, shown in Figure 8.4, provides a means to set the
plug-in state to the values in a user-named settings file. These values can be set by clicking the SAVE SETTINGS button.
Figure 8.4 The LOAD SETTINGS button.
Page 74 Software Reference for Scanners
Setting and Restoring the Nikon Plug-in State – Macintosh Chapter 8
Page 89

Save Settings
The SAVE SETTINGS button, shown in Figure 8.5, provides a means to store the
current plug-in state to a user-named file. These settings can then be recalled through
the LOAD SETTINGS button.
Figure 8.5 The SAVE SETTINGS button.
The Automatic Method
Suppose that you have performed a scan of a particular image. The resulting scan
file is imported into a desktop publishing application. Now suppose you want to
change the crop of the image. The Nikon Scanner plug-in is then run again. The same
settings that existed when you exited the plug-in are automatically in place. The preview image of the film is still present, as well. This saves you a great deal of time, as the
only operation required is to change the crop. All other settings are identical. Only
under any of the following conditions would there be the need for a new preview scan to
be performed:
• The film was moved inside the scanner since the last preview scan.
• The film was removed from the scanner manually, or electronically ejected.
• The scanner’s power was turned off.
Summary
To automatically save the state:
• Exit the Nikon Scanner plug-in through the CANCEL or SCAN buttons.
To automatically restore the state:
• Run the application again.
The Set Default Method
One can think of the set default state as a temporary storage location that can be
rapidly accessed. The temporary storage place is in the plug-in preferences file. When
the plug-in is first run, there is no state stored in the preferences file. Rather, the plug-in
uses its factory default state. These factory default settings are resident in the plug-in
itself.
By saving the current state using the SET DEFAULTS button, the next time the
Software Reference for Scanners Page 75
Chapter 8 Setting and Restoring the Nikon Plug-in State – Macintosh
Page 90
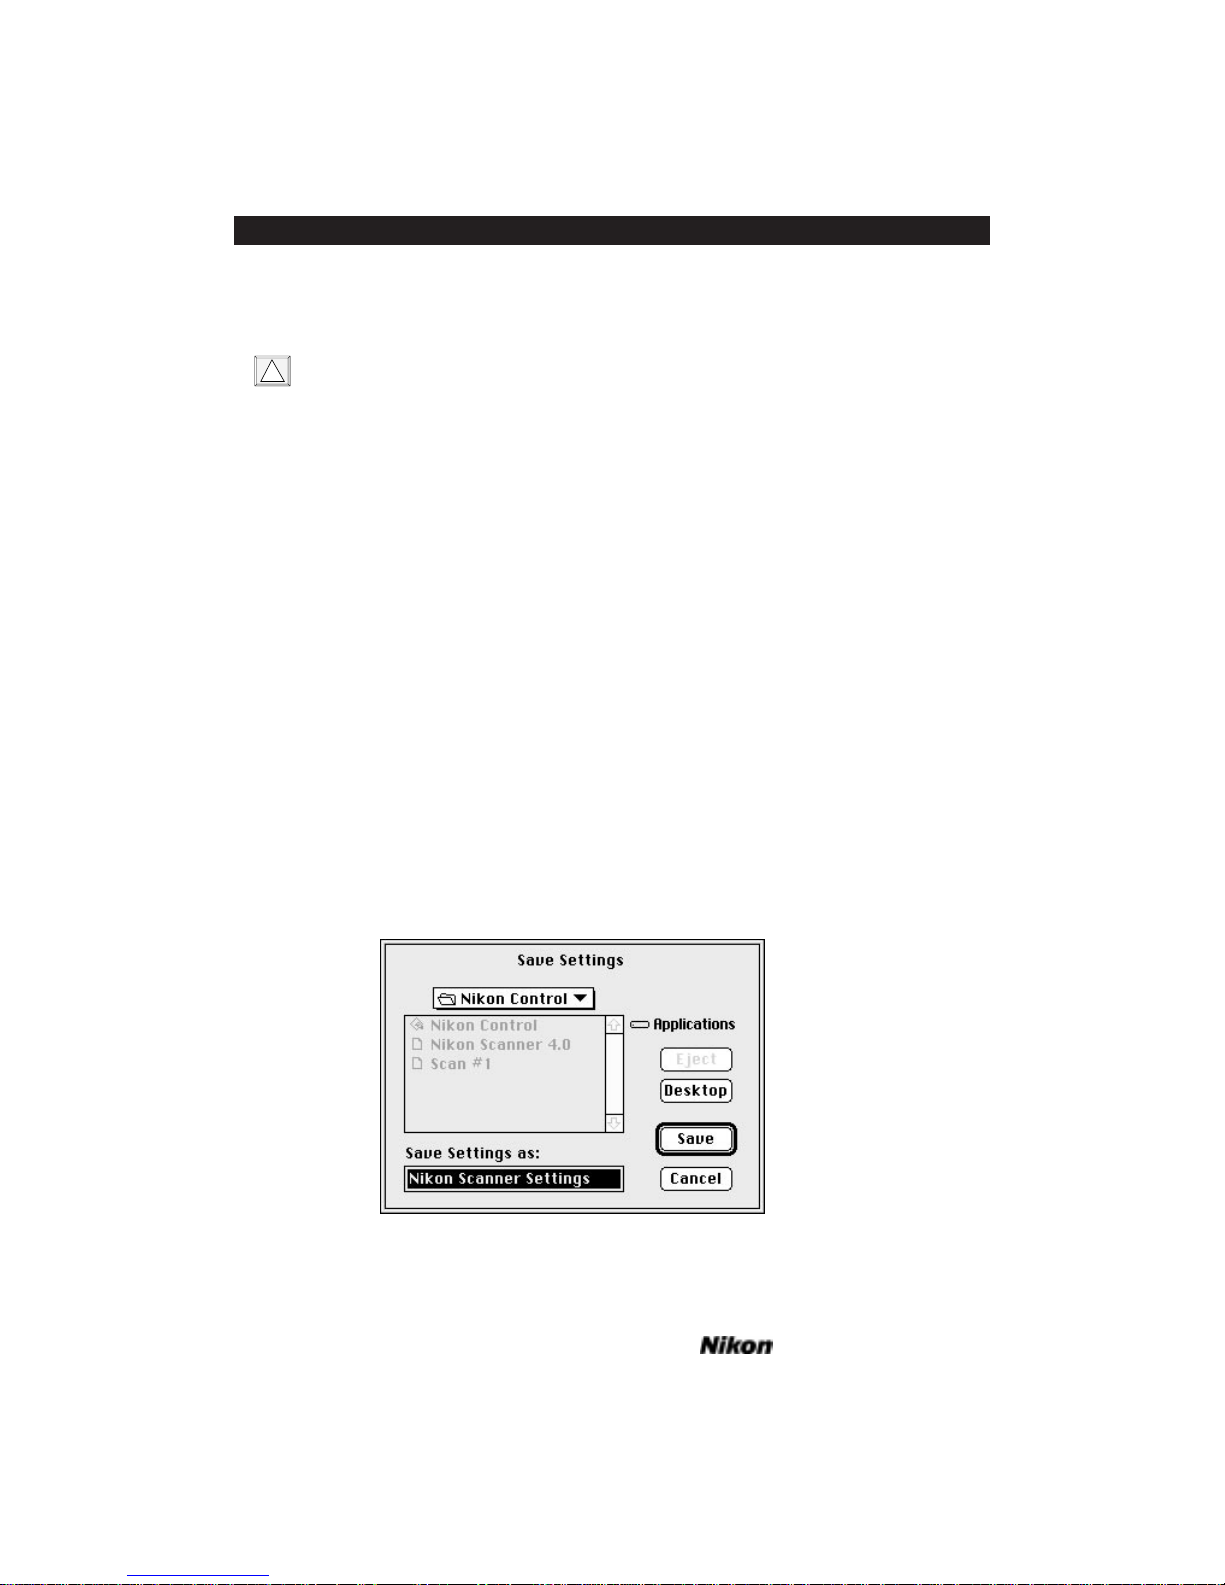
RESET button is clicked, the plug-in state will be set to these settings, not the factory
defaults.
The factory default settings can be recalled at any time by deleting the preferences
file, then restarting the application. If there is no preferences file available, the
plug-in will automatically use the factory defaults settings.
Summary
To save the current state as the default state:
• Click on the SET DEFAULTS button.
To invoke the default state as the current state:
• Click on the RESET button.
To restore the factory defaults as the default state:
• Remove the preferences file from the system folder and restart the application.
The User-Named Method
You may desire to have several different scanner settings readily available. To
accomplish this, you can load and save these settings into user-named settings files.
These files are named by following the standard Macintosh file system conventions.
Clicking on the SAVE SETTINGS button brings up the operating system’s SAVE
SETTINGS dialog, as shown in Figure 8.6. Once the settings file is named, the current
state will be saved. It can be restored at any time through the LOAD SETTINGS button.
Figure 8.6 The SAVE SETTINGS dialog.
!
Page 76 Software Reference for Scanners
Setting and Restoring the Nikon Plug-in State – Macintosh Chapter 8
Page 91
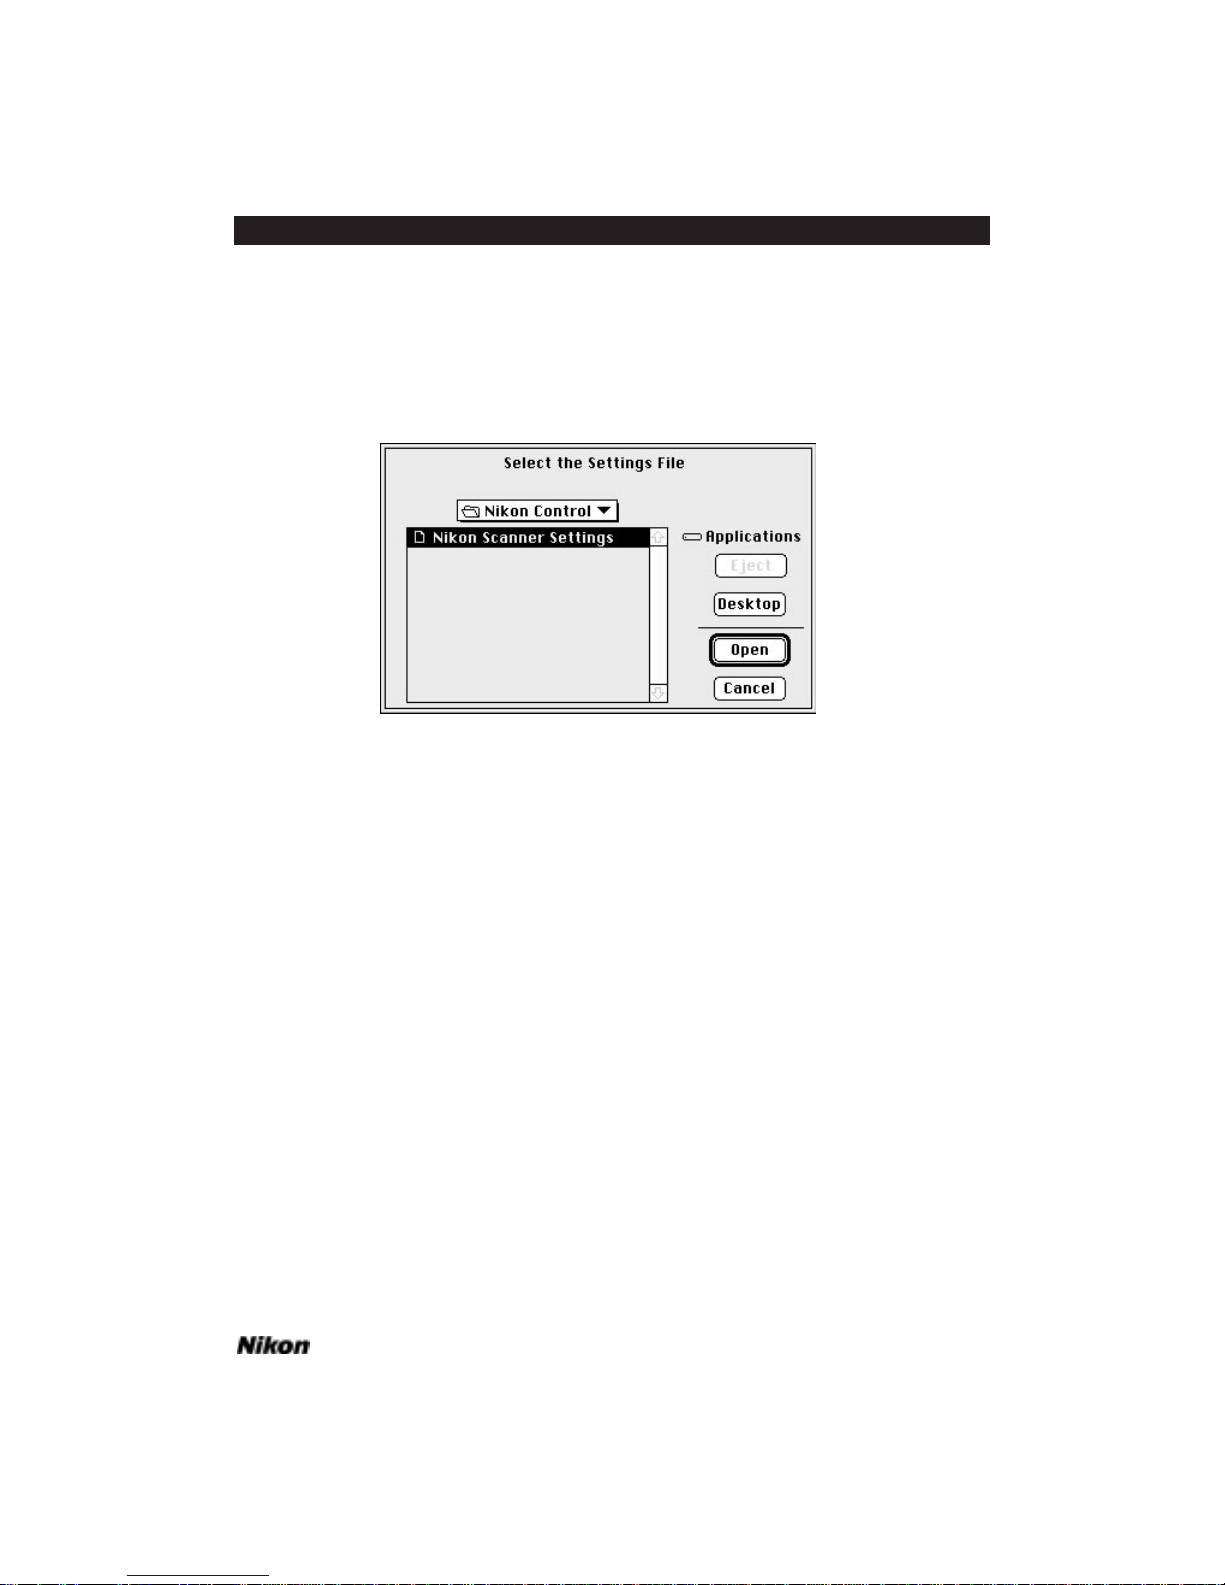
Clicking on the LOAD SETTINGS button prompts the appearance of the SELECT
THE
SETTINGS FILE dialog, as shown in Figure 8.7. Once the settings file is selected and
opened, the state stored in the named file will be loaded in as the current state of the
plug-in. Any changes made to this file can be saved through the SAVE SETTINGS button. Make sure, however to give this state a different name if you also wish to retain the
original settings file.
Figure 8.7 The SELECT THE SETTINGS FILE dialog.
Summary
To save the current state to a named file:
• Click on the SAVE SETTINGS button.
To change the current state to the state in a named file:
• Click on the LOAD SETTINGS button.
Software Reference for Scanners Page 77
Chapter 8 Setting and Restoring the Nikon Plug-in State – Macintosh
Page 92

Page 78 Software Reference for Scanners
Setting and Restoring the Nikon Plug-in State – Macintosh Chapter 8
Page 93
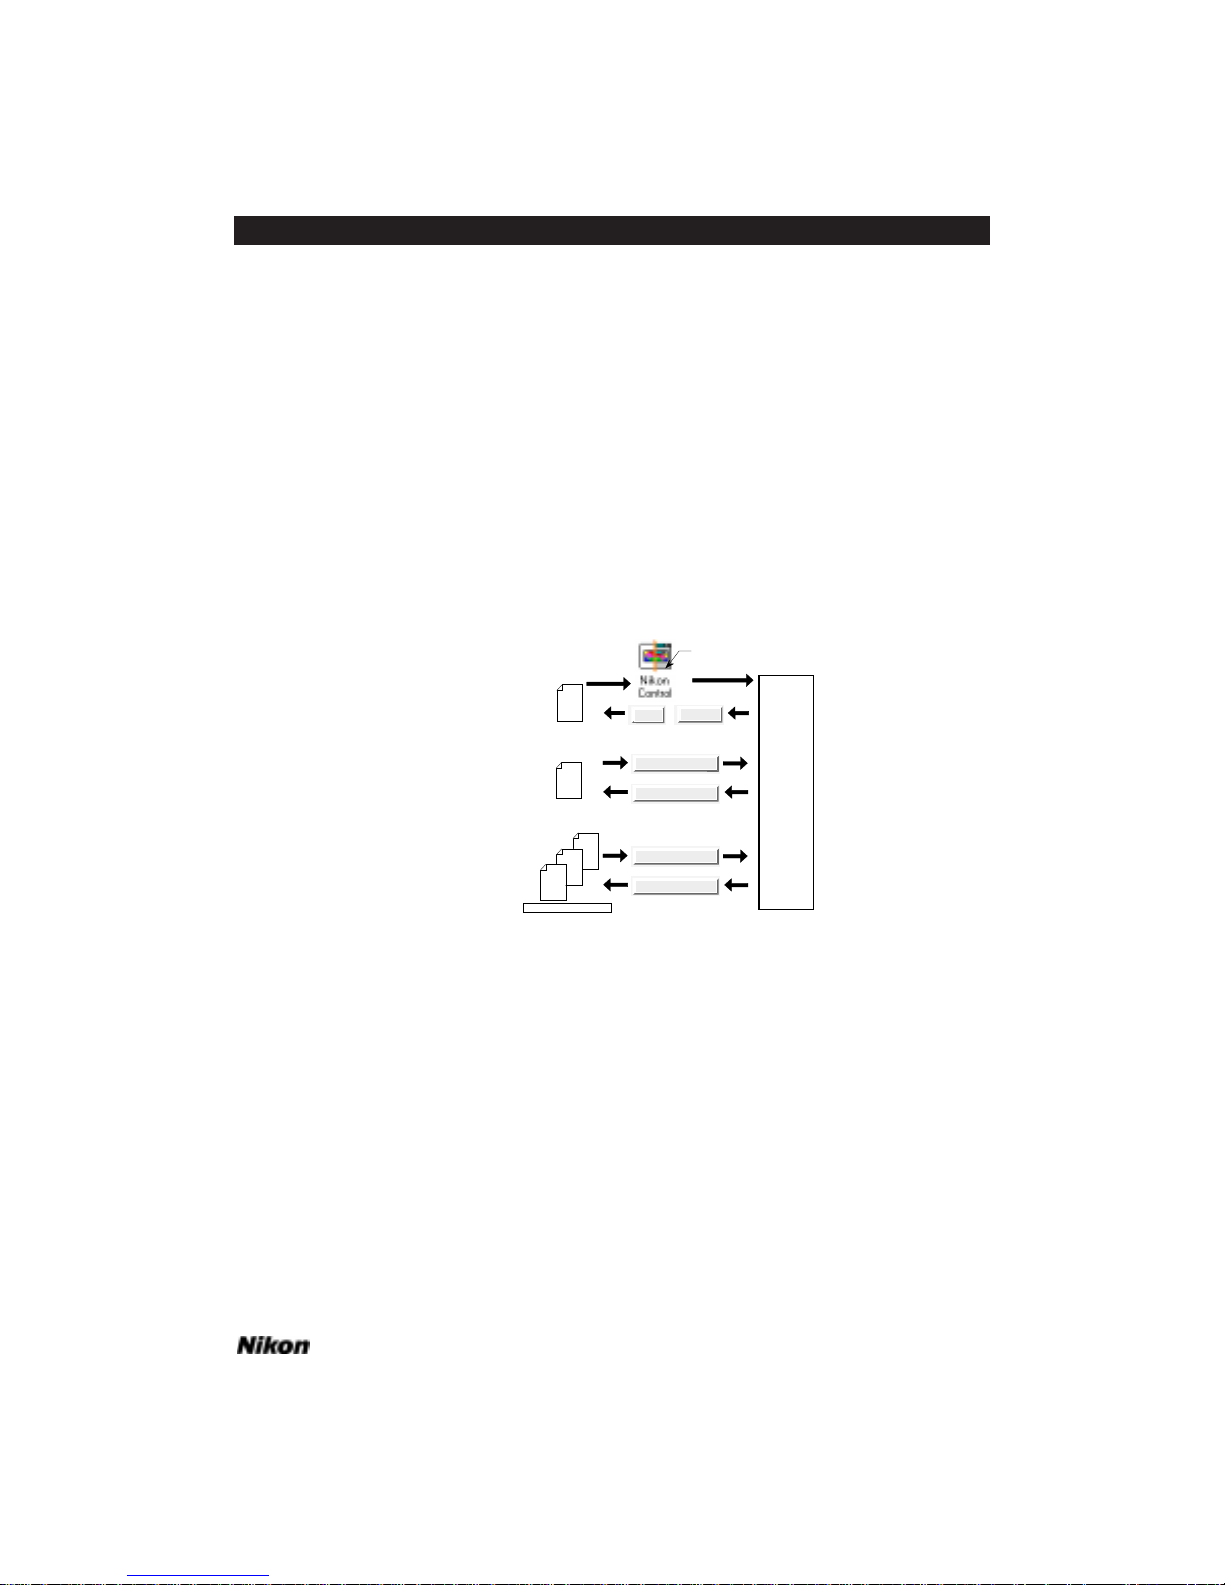
Setting and Restoring the
Nikon Plug-in State – Windows
As you have seen, there are many user-controlled settings associated with the
Nikon Scanner plug-in. These user-controlled settings are referred to as the plug-in
state. It is understood that you will not want to fix each setting every time you want to
scan. To avoid this, the Nikon Scanner plug-in includes a simple method of managing
the setting and restoring of the plug-in state.
There are three ways to set and restore the Nikon Scanner plug-in’s initial state, as
shown in Figure 9.1. These include the standard startup conditions shown in Figure
9.1a, the default conditions shown in Figure 9.1b, and the user named settings files
shown in Figure 9.1c.
Figure 9.1 Setting the Nikon Scanner plug-in state. (a) This method is used automatically upon starting and exiting the application. (b) The set default method allows you
to save and restore the state through an un-named file. (c) The user-named method
allows you to save and restore the state through named files.
The automatic method of saving the plug-in state involves saving the state when
you click the SCAN button, as seen in Figure 9.1a. When the plug-in is run, these saved
settings are used as the new startup conditions. The default settings are used after the
application is terminated. This includes the image present in the preview image window.
The set default method allows you to set aside the current plug-in state for ready
access at a later time by clicking on the SET DEFAULTS button. This is shown in Figure
9.1b. The USE DEFAULTS button can be clicked at any time to restore the plug-in to
the default state in the NKNCTRL.INI file.
The user-named method is similar to the set default method, but is meant for long-term
Save Settings
Load Settings
User Named Files
Preferences
Scan
Cancel
(a) Automatic settings
(c) User-named settings
Preferences
Set Defaults
Use Defaults
(b) Default settings
Nikon
Control
Initial
Settings
Double-click
Software Reference for Scanners Page 79
Chapter 9 Setting and Restoring the Nikon Plug-in State – Windows
Page 94
storage of settings. This is shown in Figure 9.1c. Several different states can be stored
by giving each a unique name. The plug-in saves the current settings to a named file
when the SAVE SETTINGS button is clicked. Similarly, it resets the current settings to
those settings in a named file when the LOAD SETTINGS button is clicked.
The Settings Controls
There are four buttons associated with the saving and restoring of the plug-in
state. These include the USE DEFAULTS, SET DEFAULTS,LOAD SETTINGS and SAVE
SETTINGS buttons. All of these are found in the Scan dialog.
Use Defaults
The USE DEFAULTS button, shown in Figure 9.2, provides a means to set the
plug-in state to the default values in the plug-in’s NKNCTRL.INI file. These default
values can be changed by clicking the SET DEFAULTS button.
Figure 9.2 The USE DEFAULTS button.
Set Defaults
The SET DEFAULTS button, seen in Figure 9.3, provides a means to store the current plug-in settings as the default state in the NKNCTRL.INI file. After these new
default settings are stored, they can then be recalled by clicking the USE DEFAULTS button.
Figure 9.3 The SET DEFAULTS button.
Load Settings
The LOAD SETTINGS button, shown in Figure 9.4, provides a means to set the
plug-in state to the values in a user-named settings file. These values can be set by clicking the SAVE SETTINGS button.
Page 80 Software Reference for Scanners
Setting and Restoring the Nikon Plug-in State – Windows Chapter 9
Page 95

Figure 9.4 The LOAD SETTINGS button.
Save Settings
The SAVE SETTINGS button, shown in Figure 9.5, provides a means to store the
current plug-in state to a user-named file. These settings can then be recalled through
the LOAD SETTINGS button.
Figure 9.5 The SAVE SETTINGS button.
The Automatic Method
Suppose that you have performed a scan of a particular image. The resulting scan
file is imported into a desktop publishing application. Now suppose you want to
change the crop of the image. The Nikon Scanner plug-in is then run again. The same
settings that existed when you exited the plug-in are automatically in place. The preview image of the film is still present, as well. This saves you a great deal of time, as the
only operation required is to change the crop. All other settings are identical. Only
under any of the following conditions would there be the need for a new preview scan to
be performed:
• The film was moved inside the scanner since the last preview scan.
• The film was removed from the scanner manually, or electronically ejected.
• The scanner’s power was turned off.
Summary
To automatically save the state:
• Exit the Nikon Scanner plug-in through the SCAN button.
To automatically restore the state:
• Run the plug-in again.
Software Reference for Scanners Page 81
Chapter 9 Setting and Restoring the Nikon Plug-in State – Windows
Page 96

The Set Default Method
One can think of the set default state as a temporary storage location that can be
rapidly accessed. The temporary storage place is in the plug-in’s NKNCTRL.INI file.
When the plug-in is first run, there is no state stored in the NKNCTRL.INI file.
Rather, the plug-in uses its factory default state. These factory default settings are resident in the plug-in itself.
By saving the current state using the SET DEFAULTS button, the next time the
USE DEFAULTS button is clicked, the plug-in state will be set to these settings, not the
factory defaults.
The factory default settings can be recalled at any time by deleting the
NKNCTRL.INI file, then restarting the application. If there is no NKNCTRL.INI
file available, the plug-in will automatically use the factory default settings.
Summary
To save the current state as the default state:
• Click on the SET DEFAULTS button.
To invoke the default state as the current state:
• Click on the USE DEFAULTS button.
To restore the factory defaults as the default state:
• Remove the NKNCTRL.INI file from the Nikon Control directory and restart
the application.
The User-Named Method
You may desire to have several different scanner settings readily available. To
accomplish this, you can load and save these settings into user-named settings files.
These files are named by following the standard DOS file system conventions.
Clicking on the SAVE SETTINGS button brings up the operating system’s SAVE
SETTINGS dialog, as shown in Figure 9.6. Once the settings file is named, the current
state will be saved. It can be restored at any time through the LOAD SETTINGS button.
!
Page 82 Software Reference for Scanners
Setting and Restoring the Nikon Plug-in State – Windows Chapter 9
Page 97
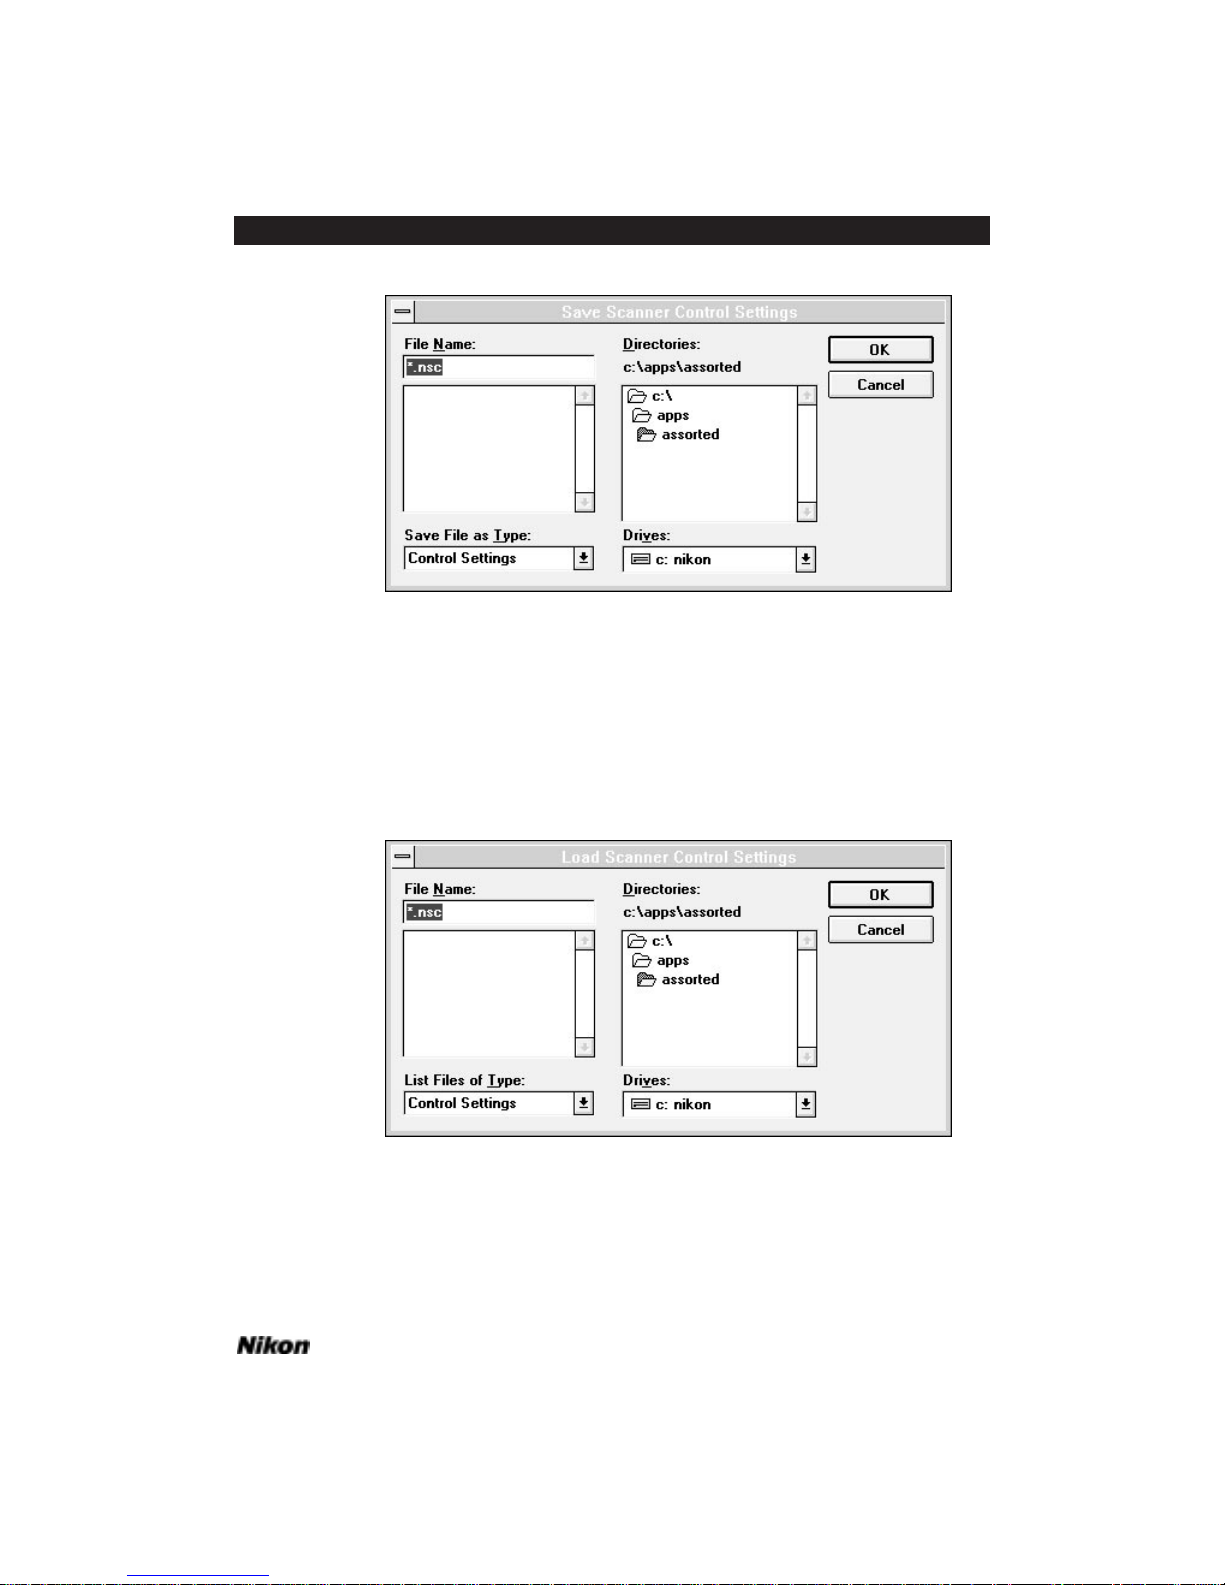
Software Reference for Scanners Page 83
Chapter 9 Setting and Restoring the Nikon Plug-in State – Windows
Figure 9.6 The SAVE SETTINGS dialog.
Clicking on the LOAD SETTINGS button prompts the appearance of the LOAD
SETTINGS dialog, as shown in Figure 9.7. Once the settings file is selected and opened,
the state stored in the named file will be loaded in as the current state of the plug-in.
Any changes made to this file can be saved through the SAVE SETTINGS button. Make
sure, however to give this state a different name if you also wish to retain the original
settings file.
Figure 9.7 The LOAD SETTINGS dialog.
Page 98

Summary
To save the current state to a named file:
• Click on the SAVE SETTINGS button.
To change the current state to the state in a named file:
• Click on the LOAD SETTINGS button.
Page 84 Software Reference for Scanners
Setting and Restoring the Nikon Plug-in State – Windows Chapter 9
Page 99
Performing a Preview or Final Scan
There are two types of scans, the preview scan and the final scan. Note that only
the final scan creates a disk file you can use in other applications.
This chapter will cover the controls for performing a basic preview or final scan.
The chapters following will cover in detail the specific scanner controls affecting the preview and final scans.
The Scan Controls
There are three controls directly related to performing a scan. First, the PREVIEW
button, used to initiate a preview scan. Second, the SCAN button, used to initiate a final
scan. And third, the CANCEL command, which is used to halt a scan that is in progress.
The Preview Button
Clicking the mouse on the PREVIEW button, shown in Figure 10.1, causes the
scanner to perform a preview scan. The preview scan enables you to see the film image
on the screen and carry out any adjustments before the final scan is performed. The
preview scan contains the entire film area.
Figure 10.1 The PREVIEW scan button – Macintosh and Windows.
The Scan Button
Clicking the mouse on the SCAN button, shown in Figure 10.2, causes Coolscan
to perform a final scan.
Figure 10.2 The SCAN button – Macintosh and Windows.
The Abort Keystroke
Macintosh: You can abort a preview or final scan at any time by holding down
the “ð” key and striking the period “.” key, as seen in Figure 10.3.
Software Reference for Scanners Page 85
Chapter 10 Performing a Preview or Final Scan
Page 100

Figure 10.3 The Abort Keystroke: While holding down the “ð” key,
strike the period “.” key.
Windows: You can abort a preview or final scan at any time by pressing and holding down the ESC key for a few moments.
Autoexposure Cycle
Before a preview or final scan is started, the scanner may analyze the entire film
surface in order to set the optimum contrast and brightness for the given image. This is
referred to as setting exposure in an autoexposure cycle. To achieve optimal scanning
results it is recommended that an autoexposure cycle be performed whenever you insert
a new slide. Whether or not an autoexposure cycle is executed depends on the state of
the AUTO check box, as seen in the Scan dialog. There are three possible states:
1) Don’t want autoexposure cycle for this image • If the AUTO check box is
inactive (blank), as shown in Figure 10.4, no autoexposure cycle will be performed.
Figure 10.4 Autoexposure cycle check box in inactive state –
Macintosh and Windows.
2) Want autoexposure cycle for this image • If the AUTO check box is active
(contains an “X”), and there is no check mark next to it, an autoexposure cycle will be
initiated upon the next scan. This state, shown in Figure 10.5, indicates that you desire
an autoexposure cycle because the scanner currently has no available autoexposure data
for this image.
Figure 10.5 Autoexposure cycle check box in active state – Macintosh and Windows.
This is the Nikon Scanner plug-in’s default state for the autoexposure cycle. It
assumes that you will want autoexposure data.
3) Have autoexposure cycle for this image • The third state, seen below in
Figure 10.6, occurs when the AUTO check box is active and there is a check mark adjacent to it. In this case, no autoexposure cycle will be performed upon the next scan.
Page 86 Software Reference for Scanners
Performing a Preview or Final Scan Chapter 10
 Loading...