

Page 1
Nikon Fun>Tbuch
Instruction Manual
Bedienungsanlertung
Manuel d'utilisation
Manual
de
instrucciones
Handledning
English, Deutsch, Franpais
Espanol, Nederlands, Italiano
Svenska, 4" X,
4JJJ*JI
2
i*JLM
Page 2
ENGLISH
DEUTSCH
FRANQAIS
ESPANOL
NEDERLANDS
ITALIANO
SVENSKA
+ £
NT i^io _ \
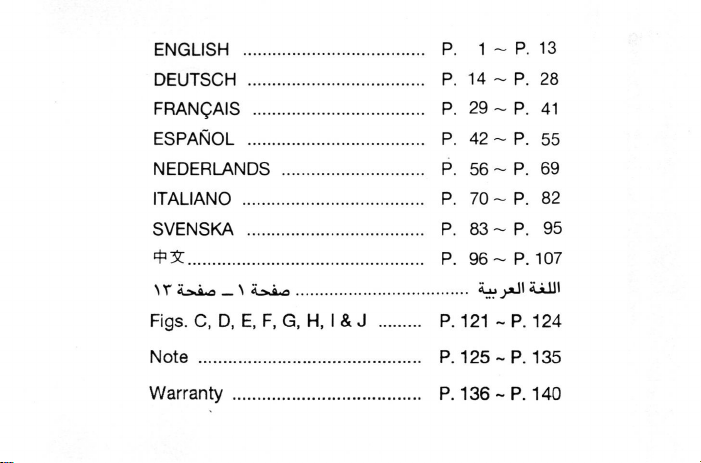
Figs.
A_*io
C, D, E, F, G, H, I & J
P. 1 ~ P. 13
P. 14 ~ P. 28
P. 29 ~ P. 41
P. 42 ~ P. 55
P. 56 ~ P. 69
P. 70 ~ P. 82
P. 83 ~ P. 95
P. 96- P. 107
iiijiJI
SJLIJI
P. 121 ~P. 124
Note
Warranty
P. 125-P. 135
P. 136-P. 140
Page 3

Fig.
A
©@
® © © ©
Page 4
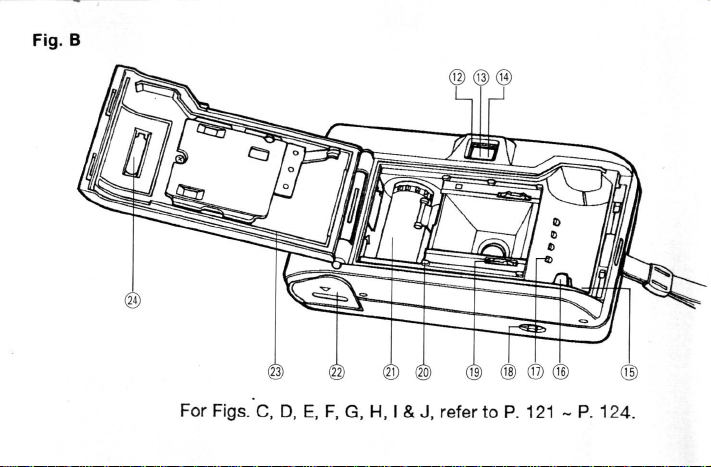
Fig.
B
(23)
@ © ® © © © © ©
For Figs. C, D, E, F, G, H, l& J, refer to P. 121 ~ P. 124.
Page 5
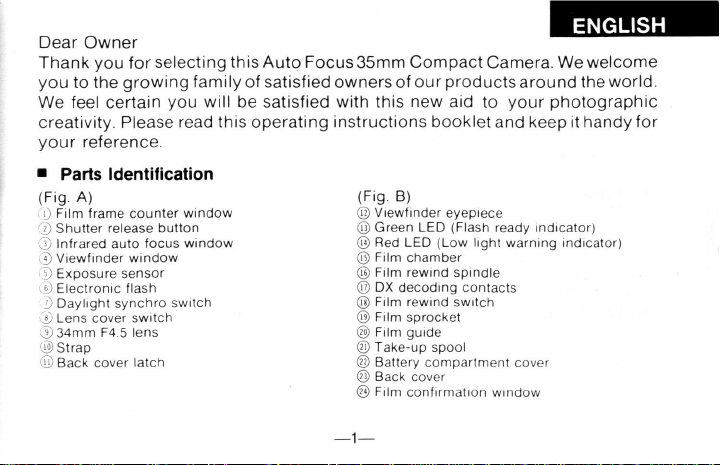
Dear Owner
ENGLISH
Thank you for selecting this Auto Focus 35mm Compact Camera. We welcome
you to the growing family of satisfied owners of our products around the world.
We feel certain you will be satisfied with this new aid to your photographic
creativity. Please read this operating instructions booklet and keep it handy for
your reference.
• Parts Identification
(Fig.
(Fig.
A)
CD
Film frame counter window
CD
Shutter release button
'j) Infrared auto focus window
pViewfinder window
© Exposure sensor
y Electronic flash
D Daylight synchro switch
® Lens cover switch
®34mm F4.5 lens
19)
Strap
© Back cover latch
B)
@ Viewfinder eyepiece
©Green LED (Flash ready indicator)
@ Red LED (Low light warning indicator)
© Film chamber
@ Film rewind spindle
@ DX decoding contacts
@ Film rewind switch
@ Film sprocket
® Film guide
® Take-up spool
© Battery compartment cover
© Back cover
@ Film confirmation window
Page 6
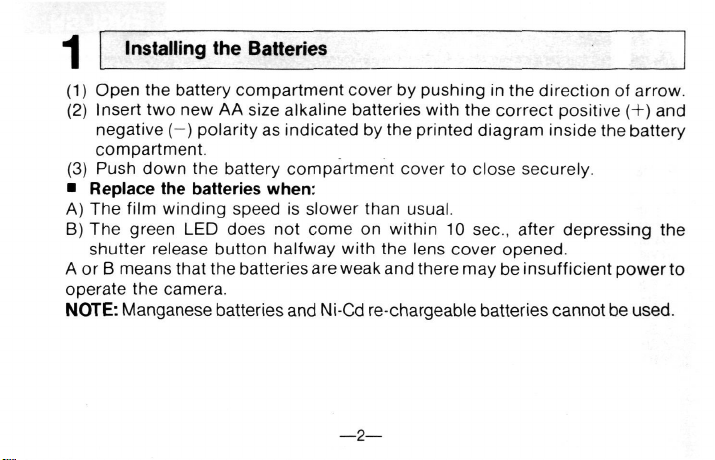
Installing the Batteries
(1) Open the battery compartment cover by pushing in the direction of arrow.
(2) Insert two new AA size alkaline batteries with the correct positive (+) and
negative (—) polarity as indicated by the printed diagram inside the battery
compartment.
(3) Push down the battery compartment cover to close securely.
• Replace the batteries when:
A) The film winding speed is slower than usual.
B) The green LED does not come on within 10 sec, after depressing the
shutter release button halfway with the lens cover opened.
A or B means that the batteries are weak and there may be insufficient power to
operate the camera.
NOTE:
Manganese batteries and Ni-Cd re-chargeable batteries cannot be used.
—2—
Page 7
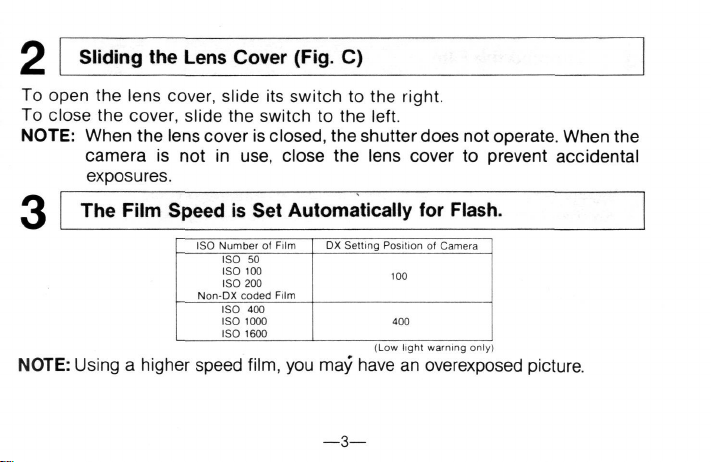
O Sliding the Lens Cover (Fig. C)
To open the lens cover, slide its switch to the right.
To close the cover, slide the switch to the left.
NOTE:
When the lens cover is
closed,
the shutter does not operate. When the
camera is not in use, close the lens cover to prevent accidental
exposures.
The Film Speed is Set Automatically for Flash.
NOTE:
Using a higher speed
ISO Number ol Film
ISO 50
ISO 100
ISO 200
Non-DX coded Film
ISO 400
ISO 1000
ISO 1600
film,
DX Selling Position of Camera
100
400
(Low light warning only)
you may have an overexposed picture
—3—
Page 8
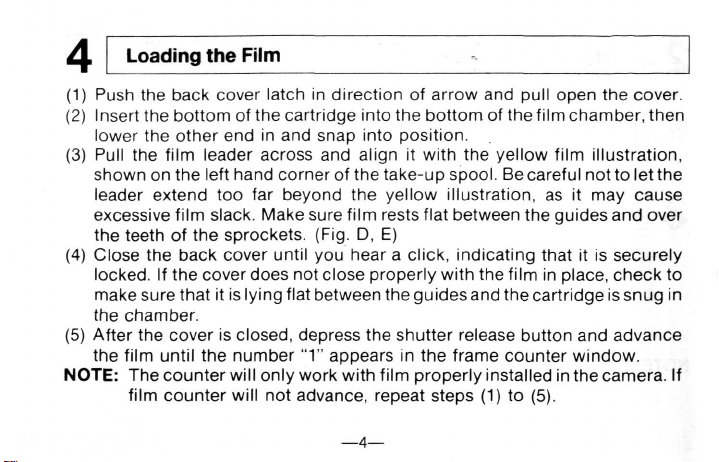
Loading the Film
(1) Push the back cover latch in direction of arrow and pull open the cover.
(2) Insert the bottom of the cartridge into the bottom of the film chamber, then
lower the other end in and snap into position.
(3) Pull the film leader across and align it with the yellow film illustration,
shown on the left hand corner of the take-up spool. Be careful not to let the
leader extend too far beyond the yellow illustration, as it may cause
excessive film slack. Make sure film rests flat between the guides and over
the teeth of the sprockets. (Fig. D, E)
(4) Close the back cover until you hear a click, indicating that it is securely
locked.
If the cover does not close properly with the film in place, check to
make sure that it is lying flat between the guides and the cartridge is snug in
the chamber.
(5) After the cover is closed, depress the shutter release button and advance
the film until the number
NOTE:
The counter will only work with film properly installed in the camera. If
"1"
appears in the frame counter window.
film counter will not advance, repeat steps (1) to (5).
—A—
Page 9
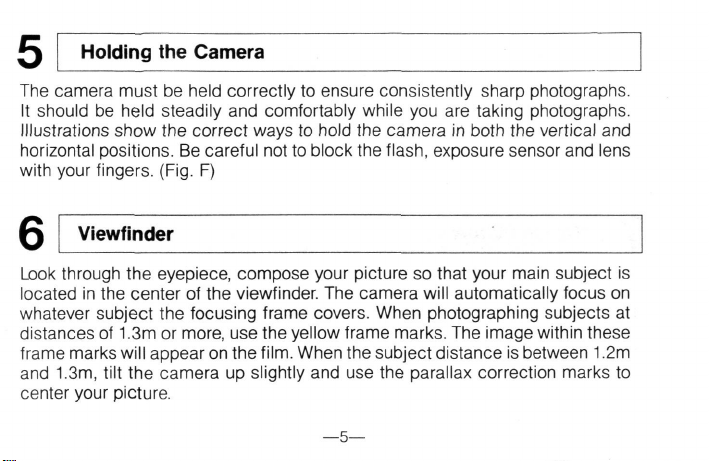
Holding the Camera
The camera must be held correctly to ensure consistently sharp photographs.
It should be held steadily and comfortably while you are taking photographs.
Illustrations show the correct ways to hold the camera in both the vertical and
horizontal positions. Be careful not to block the flash, exposure sensor and lens
with your fingers. (Fig. F)
Viewfinder
Look through the eyepiece, compose your picture so that your main subject is
located in the center of the viewfinder. The camera will automatically focus on
whatever subject the focusing frame covers. When photographing subjects at
distances of 1.3m or more, use the yellow frame marks. The image within these
frame marks will appear on the
and 1.3m, tilt the camera up slightly and use the parallax correction marks to
center your picture.
film.
When the subject distance is between 1.2m
—5—
Page 10
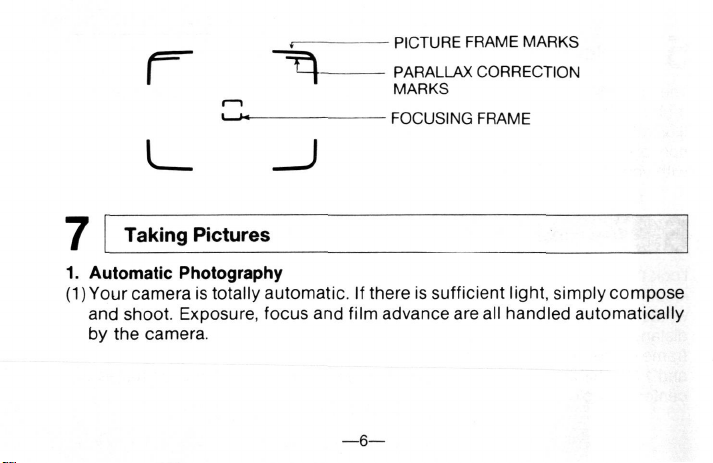
- PICTURE FRAME MARKS
r "^
PARALLAX CORRECTION
MARKS
FOCUSING FRAME
L_ _J
Taking Pictures
1.
Automatic Photography
(1) Your camera is totally automatic. If there is sufficient light, simply compose
and shoot. Exposure, focus and film advance are all handled automatically
by the camera.
-6—
Page 11

(2) Flash Photography
If there is not enough light for a proper exposure (either indoors or
out),
red LED (Low light indicator) in the viewfinder will glow when you depress
the shutter release button halfway. This indicates that the flash should be
used.
Wait for the green LED (Flash ready indicator) to glow, and depress
the shutter release button fully. You can then take a flash picture.
Proper flash exposure depends on the film speed and the camera-tosubject distance.
Photograph range with flash
the
Film Speeds
ISO 100
ISO 400
Flash Range
1.2m -3.5m (3.9-
1.5m-7.0m
—7—
(4.9-22.9 ft)
11.5
ft)
Page 12
2.
Daylight synchro Photography
When photographing a subject in the shade, or against the sun or bright
window, the flash can be used.
After making sure the green LED is lit, push the daylight synchro switch in
the direction of arrow and hold it in place, then release the shutter.(Fig. G)
The daylight synchro switch
after use.
3. Prefocusing
When composing a picture where a principal subject is not in the center of the
viewfinder, it is necessary to prefocus the camera lens. To do so:
(1) Look through the viewfinder and compose the picture so that your subject is
located directly behind the focusing frame. (Fig. H)
(2) Gently press the shutter release button halfway and maintain gentle pressure
to lock in the correct focus.
(3) While maintaining pressure on the shutter release button, recompose the
picture as you desire and then press the shutter release button all the way
down to take the photograph. (Fig. I) (The prefocus can be cancelled simply
by removing pressure from the shutter release button.)
is
automatically returned to its original-position
Page 13
4. Special Auto Focus Situations
The auto focus system will focus accurately on the majority of the subjects
you wish to photograph. However, there are a few situations where the auto
focus mechanism may not function properly. These are:
(1) When the subject has strong reflections, such as polished-metals, exterior of
cars,
bodies of water, or mirrors.
(2) Subjects with little or no reflectance, such as black objects, hair, a flame or
smoke.
(3) Subjects that are very small.
(4) Subjects with an object in front of them, such as a wire net or a cage.
In situations (1)—(4), prefocus on another subject approximately the same
distance away and then recompose the scene and take the picture. (See
Section 3 on Prefocusing.)
(5) Taking pictures through glass windows:
Shoot with camera lens near the glass and at an angle of approximately 20°.
—9—
Page 14
Removing the Film
At the end of the film
film by pushing the film rewind switch in the direction of arrow.(Fig. J) When
rewinding is complete and the motor has stopped, open the back cover and
remove the film cartridge from the chamber. The film rewind switch will return
to its original position automatically.
Trouble Shooting Guide
[Description] [Solution]
Subject out of focus If the subject is not located in the center of the view-
Flash fails to function Replace the battery.
roll,
the frame counter will cease to advance. Rewind the
finder, use prefocusing. See Section 7-3.
Subjects must be 1.2m or more from the camera.
Review Sections 6, 7-3, 7-4.
—10—
Page 15
Flash pictures have dark
area(s)
Flash pictures too dark
overall
Flash pictures too light
Subject's eyes reflect red
Make certain fingers are clear of
flash.
(Have subject watch for this.)
Subject(s) must be within specified flash range.
See Section 7-1.
Place subjects at least 1.2m from flash and make
sure focusing frame covers main subject.
Increase room light if possible. Have subject(s) look
slightly away from flash—towards room light is
beneficial.
—11—
Page 16
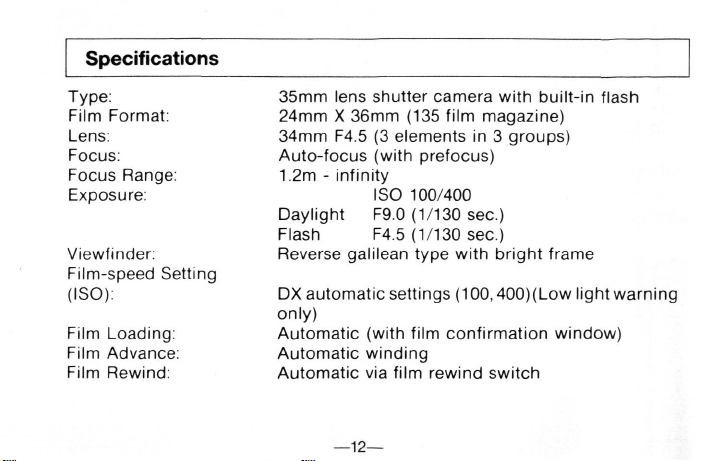
Specifications
Type:
Film Format:
Lens:
Focus:
Focus Range:
Exposure:
Viewfinder:
Film-speed Setting
(ISO):
Film Loading:
Film Advance:
Film Rewind:
35mm lens shutter camera with built-in flash
24mm X 36mm (135 film magazine)
34mm F4.5 (3 elements in 3 groups)
Auto-focus (with prefocus)
1.2m - infinity
ISO 100/400
Daylight F9.0 (1/130 sec.)
Flash F4.5 (1/130 sec.)
Reverse galilean type with bright frame
DX automatic settings (100,400) (Low light warning
only)
Automatic (with film confirmation window)
Automatic winding
Automatic via film rewind switch
—12—
Page 17
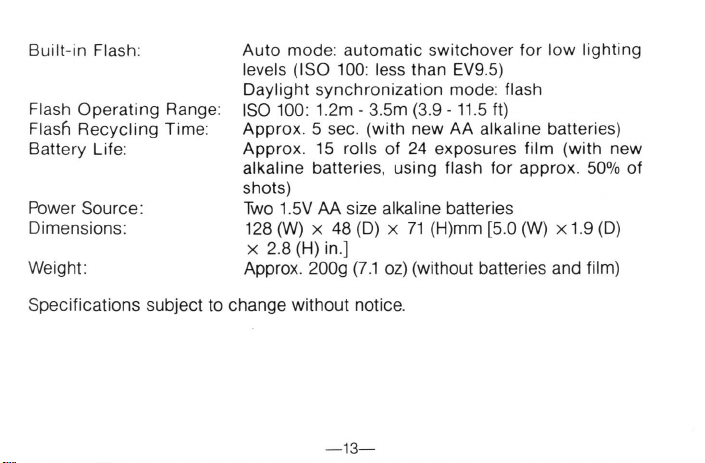
Built-in Flash: Auto mode: automatic switchover for low lighting
levels (ISO 100: less than EV9.5)
Daylight synchronization mode: flash
Flash Operating Range: ISO 100: 1.2m - 3.5m (3.9 -11.5 ft)
Flash Recycling Time: Approx. 5 sec. (with new AA alkaline batteries)
Battery Life: Approx. 15 rolls of 24 exposures film (with new
alkaline batteries, using flash for approx. 50% of
shots)
Power Source: Two 1.5V AA size alkaline batteries
Dimensions: 128 (W) x 48 (D) x 71 (H)mm [5.0 (W) x 1.9 (D)
x 2.8 (H) in.]
Weight: Approx. 200g
(7.1
oz) (without batteries and film)
Specifications subject to change without notice.
—13—
Page 18
Lieber Kamerabesitzer!
Wir danken Ihnen dafur, da(3 Sie sich fur diese Kleinbildsucherkamera mit
automatischer Scharfeinstellung entschieden haben und jetzt auch zur standig
wachsenden Familie zufriedener Kunden unserer Erzeugnisse auf der ganzen
Welt gehoren. Wir sind uberzeugt, da(3 auch Sie mit dieser neuen Kamera fur Ihr
Foto-Hobby voll zufrieden sein werden. Lesen Sie bitte sorgfaltig diese
Bedienungsanleitung, die stets griffbereit aufbewahrt werden sollte.
• Teilebezeichnungen
(Abb.
(Abb.
A)
0 Bildzahlwerk
© Auslbser
© Autofocus-MeBsystem
© Sucherfenster
© Belichtungsmessungssensor
© Elektronenblitz
® Blitzlicht-Programmschalter
© Objektivschulzschalter
© 34mm/1:4,5 Objektiv
©Tragschlaufe
© Ruckwand-Entnegelung
B)
© Suchereinblick
@ Grune LED (Blitz-Bereitschaftsanzeige)
@ Rote LED (Unterbelichtungsanzeige)
© Filmpatronefach
® Ruckspulachse
@ DX-Abtastung der Filmempfindlichkeit
@ Ruckspulschalter
@ Filmtransportrolle
© Filmfuhrung
@ Filmwickelspule
@ Batteriefach-Deckel
@ Ruckwand
@ Filmkontrollfenster
-14-
Page 19
DEUTSCH
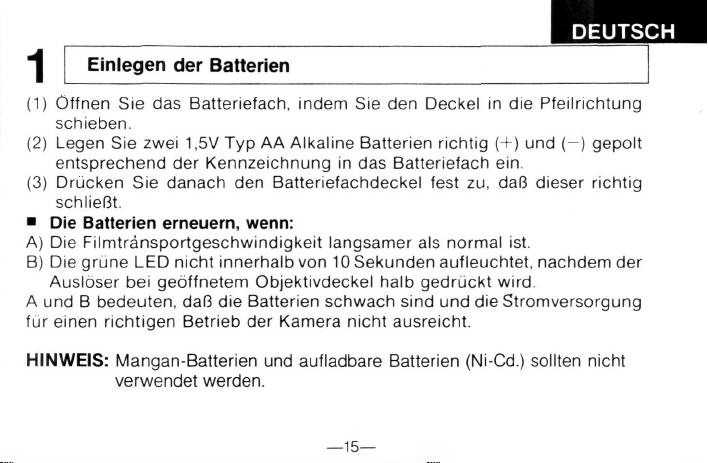
Einlegen der Batterien
1
(1) Offnen Sie das Batteriefach, indem Sie den Deckel in die Pfeilrichtung
schieben.
(2) Legen Sie zwei 1,5V Typ AA Alkaline Batterien richtig (+) und (—) gepolt
entsprechend der Kennzeichnung in das Batteriefach ein.
(3) Drucken Sie danach den Batteriefachdeckel fest zu, dalB dieser richtig
schlieBt.
• Die Batterien erneuern, wenn:
A) Die Filmtransportgeschwindigkeit langsamer als normal ist.
B) Die griine LED nicht innerhalb von 10Sekunden aufleuchtet, nachdem der
Ausloser bei geoffnetem Objektivdeckel halb gedruckt
A und B bedeuten, daB die Batterien schwach sind und dieStromversorgung
fur einen richtigen Betrieb der Kamera nicht ausreicht.
HINWEIS: Mangan-Batterien und aufladbare Batterien (Ni-Cd.) sollten nicht
verwendet werden.
—15—
wird.
Page 20
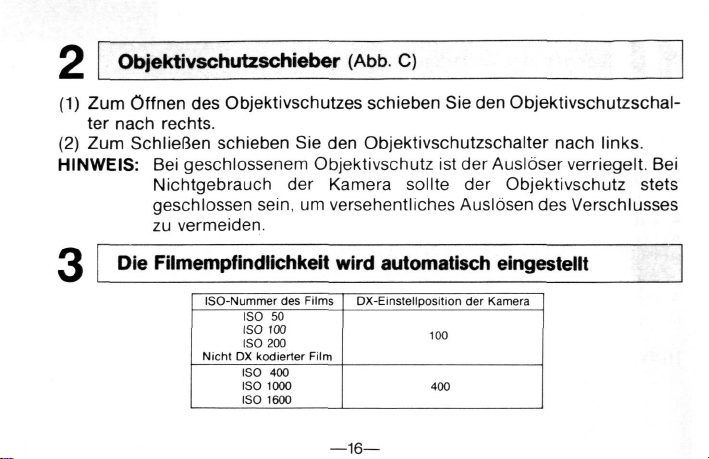
Objektivschutzschieber (Abb. C)
(1) Zum Offnen des Objektivschutzes schieben Sie den Objektivschutzschal-
ter nach rechts.
(2) Zum SchlieGen schieben Sie den Objektivschutzschalter nach links.
HINWEIS: Bei geschlossenem Objektivschutz ist der Ausloser verriegelt. Bei
Nichtgebrauch der Kamera sollte der Objektivschutz stets
geschlossen
sein,
um versehentliches Ausldsen des Verschlusses
zu vermeiden.
Die Filmempfindlichkeit wird automatisch eingestellt
ISO-Nummer des Films
ISO 50
ISO 100
ISO 200
Nicht DX kodierter Film
ISO 400
ISO 1000
ISO 1600
DX-Einstellposition der Kamera
100
400
-16—
Page 21
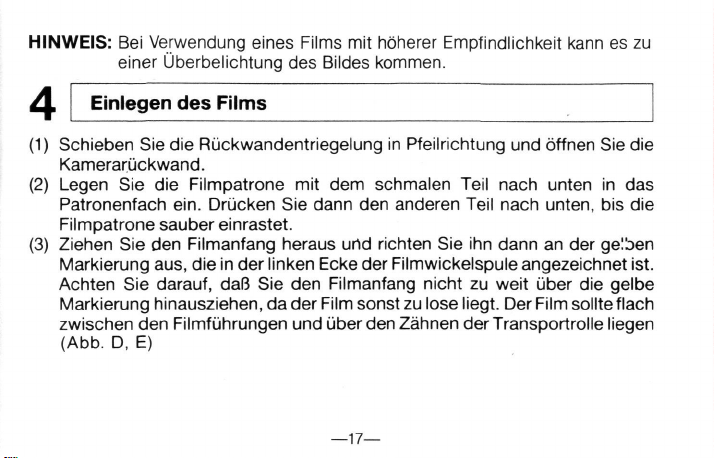
HINWEIS: Bei Verwendung eines Films mit hoherer Empfindlichkeit kann es zu
einer Uberbelichtung des Bildes kommen.
Einlegen des Films
(1) Schieben Sie die Riickwandentriegelung in Pfeilrichtung und offnen Sie die
KamerariJckwand.
(2) Legen Sie die Filmpatrone mit dem schmalen Teil nach unten in das
Patronenfach ein. Driicken Sie dann den anderen Teil nach unten, bis die
Filmpatrone sauber einrastet.
(3) Ziehen Sie den Filmanfang heraus und richten Sie ihn dann an der gelben
Markierung aus, die in der linken Ecke der Filmwickelspule angezeichnet ist.
Achten Sie darauf, daB Sie den Filmanfang nicht zu weit iiber die gelbe
Markierung hinausziehen, da der Film sonst
zu
lose liegt. Der Film sollte flach
zwischen den Filmfuhrungen und iiber den Zahnen derTransportrolle liegen
(Abb.
D, E)
—17—
Page 22
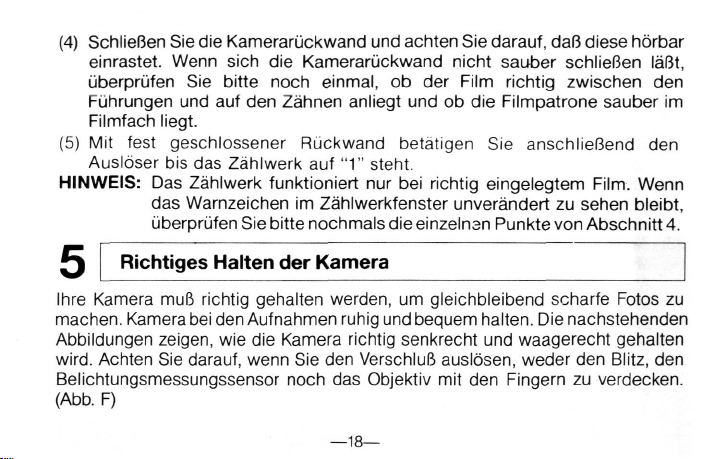
(4) SchlieBen Sie die Kameraruckwand und achten Sie darauf, daB diese horbar
einrastet. Wenn sich die Kameraruckwand nicht sauber schlieBen laBt,
uberprufen Sie bitte noch einmal, ob der Film richtig zwischen den
Fuhrungen und auf den Zahnen anliegt und ob die Filmpatrone sauber im
Filmfach liegt.
(5) Mit fest geschlossener Ruckwand betatigen Sie anschlieBend den
Ausloser bis das Zahlwerk auf
"1"
steht.
HINWEIS: Das Zahlwerk funktioniert nur bei richtig eingelegtem Film. Wenn
das Warnzeichen im Zahlwerkfenster unverandert zu sehen bleibt,
uberprufen Sie bitte nochmals die einzelnen Punkte von Abschnitt 4.
*) Richtiges Halten der Kamera
Ihre Kamera muB richtig gehalten werden, urn gleichbleibend scharfe Fotos zu
machen.
Kamera
bei den
Auf nahmen ruhig
und
bequem halten. Die nachstehenden
Abbildungen zeigen, wie die Kamera richtig senkrecht und waagerecht gehalten
wird.
Achten Sie darauf, wenn Sie den VerschluB auslbsen, weder den Blitz, den
Belichtungsmessungssensor noch das Objektiv mit den Fingern zu verdecken.
(Abb.
F)
—18—
Page 23
h Sucher
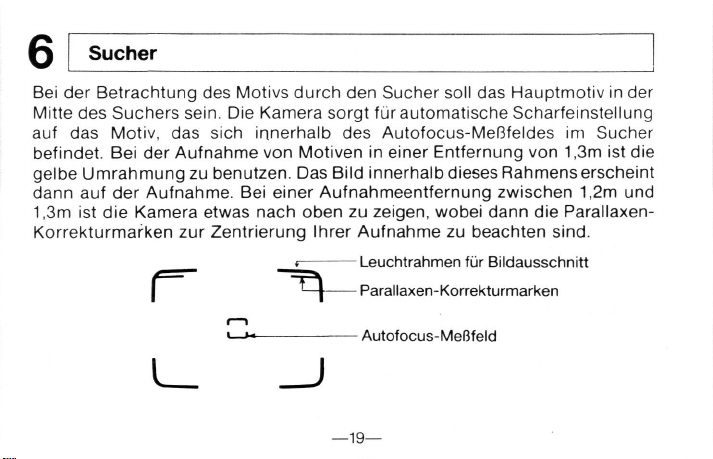
Bei der Betrachtung des Motivs durch den Sucher soil das Hauptmotiv in der
Mitte des Suchers
auf das Motiv, das sich innerhalb des Autofocus-MeBfeldes im Sucher
befindet. Bei der Aufnahme von Motiven in einer Entfernung von 1,3m ist die
gelbe Umrahmungzu benutzen. Das Bild innerhalb dieses Rahmenserscheint
dann auf der Aufnahme. Bei einer Aufnahmeentfernung zwischen 1,2m und
1,3m ist die Kamera etwas nach oben zu zeigen, wobei dann die ParallaxenKorrekturmarken zur Zentrierung Ihrer Aufnahme zu beachten
sein.
Die Kamera sorgt fur automatische Scharfeinstellung
Leuchtrahmen fur Bildausschnitt
r ~^
Parallaxen-Korrekturmarken
sind.
l—X
- Autofocus-MeBfeld
L_ _J
-19—
Page 24

Aufnahmen
1.
Automatische Aufnahmen
Ihre Kamera ist vollstandig automatisch. Wenn die Lichtverhaltnisse
ausreichen, brauchen Sie lediglich den Bildausschnitt zu wahlen und den
Ausloser zu drucken. Belichtung/Blitzzuschaltung, Scharfeinstellung und
Filmtransport erfolgen automatisch durch die Kamera.
2.
Aufnahmen mit eingebautem Blitz
(1) Automatisches Fotografieren mit Blitz
Falls die Beleuchtung (in Raumen Oder im Freien) fur eine richtige
Belichtung nicht ausreicht, leuchtet die rote LED
(Unterbelichtungsanzeige) im Sucher auf, wenn Sie den Ausloser halb
drucken.
Warten Sie bis zum Aufleuchten der grunen LED
(Blitzbereitschaftsanzeige). Danach den Ausloser ganz betatigen. Sie
konnen so eine Blitzlichtaufnahme machen.
Die richtige Blitzbelichtung hangt von der ISO-Empfindlichkeit des Films
und der Entfernung zwischen Kamera und Motiv ab.
Dies weist darauf hin, dalB der Blitz verwendet werden
—20—
soil.
Page 25

Filmempfindlichkeit
ISO 100
ISO 400
Blitzbereich
1,2m - 3,5m
1,5m - 7,0m
(2) Blitzlicht fur Gegenlicht und Aufhellung
Bei Aufnahme eines Im Schatten befindlichen Motivs Oder bei
Gegenlichtaufnahme (Sonne Oder helles Fenster) kannderBlitzzusatzlich
verwendet werden.
Nachdem sichergestellt wurde, da(3 die grune LED aufieuchtet, den
Blitzlicht-Programmschalter in Pfeilrichtung drucken und festhalten, und
danach den VerschluG auslosen. (Abb. G) Der BlitzlichtProgrammschalter kehrt nach der Verwendung automatisch in seine
Ausgangsposition zuriick.
3. Entfernungs-Voreinstellung (Vorfocussierung)
Wenn sich das Hauptmotiv nicht in der Mitte des Suchers befindet, muB eine
Entfernungs-Voreinstellung wie folgt vorgenommen werden:
—21—
Page 26
(1) Durch den Sucher blicken und den Bildausschnitt so wahlen, daB ihr Motiv
sich direkt hinter dem Autofocus-MeBfeld in der Mitte befindet. (Abb. H)
(2) Ausloser vorsichtig halb drticken und vorsichtig halten, um die richtige
Scharfeinsteilung zu speichern.
(3) Wahrend der Ausloser so gehalten
wird,
Bildausschnitt nach Wunsch
wahlen und danach den Ausloser ganz herunterdrucken, um die Aufnahme
zu machen (Abb. I) (die Entfernungs-Voreinstellung kann aufgehoben
werden,
indem man den Ausloser wieder loslaBt.)
4. Besondere Situationen fiir die automatische Scharfeinsteilung
Die automatische Scharfeinsteilung sorgt fur genaue Entfernungseinstellung
bei den meisten Motiven. Es gibt jedoch einige Situationen, bei denen die
automatische Scharfeinsteilung vielleicht nicht richtig funktioniert und zwar
bei:
(1) Starken Reflektionen auf dem Motiv, z.B. polierte Metalle, Autos, Gewasser
Oder Spiegel.
(2) Motiven mit geringer oder keiner Reflektion, wie z.B. schwarze Objekte,
dunkles Haar, eine Flamme oder Rauch.
(3) Sehr kleinen Motiven.
—22—
Page 27
(4) Motiven mit einem davor befindlichen Objekt, wie
Kafig.
Machen Sie in obigen Fallen eine Voreinstellung mit einem anderen Motiv in
etwa der gleichen Entfernung, wahlen Sie den richtigen Bildausschnitt und
machen dann die Aufnahme (siehe Punkt 3 uber Entfernungs-Voreinstellung).
(5) Aufnahmen durch Fenster:
Halten Sie das Objektiv in die Nahe des Fensters und in einem Winkel von
etwa 20° zum Glas.
—23—
z.B.
ein Drahtnetz Oder ein
Page 28
8
Herausnehmen des Films (Abb. J)
Bei Ende des Filmes lauft das Bildzahlwerk nicht mehr weiter. FilmRuckspulschalter in die Pfeilrichtung schieben, um den Film automatisch
zuriickzuspulen. 1st das Ruckspulen beendet und der Motor steht,
Gehausedeckel offnen und Filmpatrone aus dem Fach herausnehmen. Der
Film-Riickspulschaltergeht dann automatisch in seine ursprunglicheStellung
zuruck.
Fehlersuchanleitung
[Fehler] [Abhilfe]
Motiv unscharf Wenn sich das Motiv nicht in der Mitte des Suchers
befindet, Entfernungs-Voreinstellung gemaB Absatz
7-3 vornehmen.
Motive miissen 1,2m von der Kamera entfernt
Abschnitt 6, 7-3, beachten.
—24—
sein.
Page 29
Kein Blitz
Blitzaufnahmen mit
dunklen Flachen
Blitzaufnahmen
insgesamt zu dunkel
Blitzaufnahmen zu hell
Rote Augenref lektion
Batterie wechseln.
Achten Sie
Blitz
Motiv muB sich innerhalb der vorgeschriebenen
Entfernung befinden. Siehe Abschnitt 7-2.
Motiv muG mindestens 1,2m vom Blitz entfernt
sein,
erfaGt werden.
Falls moglich Raumbeleuchtung erhbhen. Motiv
etwas vom Blitz wegsehen lassen — am besten in
Richtung zur Raumbeleuchtung.
darauf,
sind.
(Lassen Sie Ihr Modell darauf achten.)
Hauptmotiv muB vom Autofocus-MeBfeld
—25—
daf3 Ihre Finger nicht vor dem
Page 30
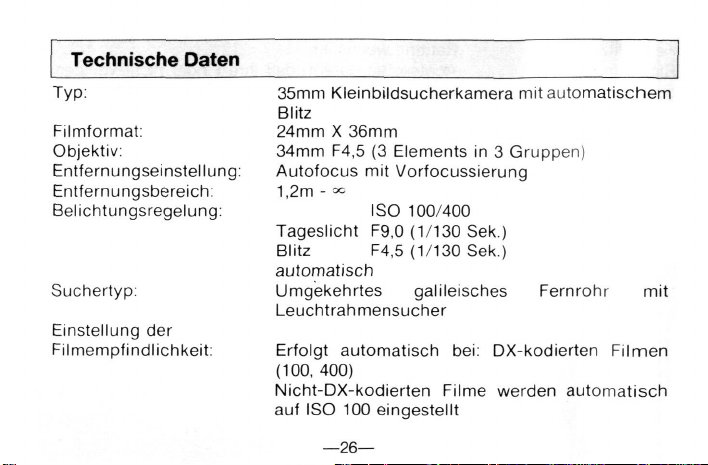
Technische Daten
Typ:
Filmformat:
Objektiv:
Entfernungseinstellung:
Entfernungsbereich:
Belichtungsregelung:
Suchertyp:
Einstellung der
Filmempfindlichkeit:
35mm Kleinbildsucherkamera mit automatischem
Blitz
24mm X 36mm
34mm F4,5 (3 Elements in 3 Gruppen)
Autofocus mit Vorfocussierung
1,2m - «=
Tageslicht F9,0 (1/130 Sek.)
Blitz F4,5 (1/130 Sek.)
automatisch
Umgekehrtes galileisches Femrohr mit
Leuchtrahmensucher
Erfolgt automatisch bei: DX-kodierten Filmen
(100,
Nicht-DX-kodierten Filme werden automatisch
aut ISO 100 eingestellt
ISO 100/400
400)
—26—
Page 31

Filmeinlegen:
Filmtransport:
Filmruckspulen:
Emgebautes Blitzgerat:
Blitzbereich:
Blitzfolgezeit:
Anzahl Filme:
Stromversorgung:
Abmessungen:
Gewicht:
Automatisch (mit Filmkontroll-fenster)
Automatisch mit Motor
Automatisch per Filmruckspulschalter
2 Blitzprogramme:
Automatische Zuschaltung bei nicht
ausreichenden Lichtverhaltnissen (ISO 100: unter
L.W.9,5)
Aufhell/Gegenlicht-Blitz mit Umschaltautomatik
ISO 100: 1,2m -3,5m
etwa 5 Sek. (mit neuen AA Alkaline-Batterien)
etwa 15 Filme (24 Aufnahmen; mit Blitz bei 50%
der Aufnahmen)
Zwei 1,5V AA Alkaline-Batterien
128(B) X48(T) X 71(H)mm
etwa
200gr,
(ohne Batterien und Film)
Technische Anderungen
ohne Anzeige sind vorbehalten.
—27—
Page 32

-28—
Page 33

Madame, Monsieur.
FRANCAIS
Merci d'avoir selectionne cet appareil compact 35mm a mise au point
automatique. Nous sommes heureux de pouvoir vous compter parmi les
detenteurs toujours plus nombreux de materiel NIKON et nous esperons que
ce nouveau produit vous donnera satisfaction.
Nous vous invitons a lire ce mode d'emploi et a le garder a portee de main.
• Description
(Fig.
A)
0 Fenetre du compteur de vues
©Bouton de declenchement
0 Fenetre de mise au point automatique par
infrarouge
0 Fenetre du viseur
0 Voyant de declenchement automatique
© Flash electronique
©Commutateur de synchronisation pour lumiere du
jour
©Bouton d'ouverture/fermeture du protege-objectif
© Objectif 34mm F:4,5
© Dragonne
© Verrou du couvercle arriere
(Fig.
B)
© Oeilleton du viseur
@ Diode electro-luminescente verte (Indicateur de
chargement du Hash)
© Diode electro-luminescente rouge (Indicateur de
lumiere)
@ Logement du film
® Axe de rembobinage
@ Contacts de codage DX
@ Bouton de rembobinage
@ Pignon denroutement du film
® Guide-film
© Bobine d'enroulement
© Couvercle du compartiment piles
© Couvercle arriere
© Fenetre temoin de presence du film
—29—
Page 34

Mise en place des piles
(1) Ouvrir le compartiment piles en poussant dans le sens de la fleche.
(2) Inserer deux piles LR6 alcalines neuves de 1.5V avec les polarites positive
(+) et negative (—) comme il est indiquesurle schema imprime a linterieur
du compartiment piles.
(3) Repousser a fond le couvercle du compartiment piles.
• Remplacer les piles lorsque:
A) La vitesse d'enroulement du film est plus lente que d'habitude.
B) La diode electro-luminescente (DEL) verte ne s'allume pas dans les 10 sec.
apres pression a mi-course sur le declencheur, le protege-objectif etant
ouvert.
NOTA: Ne pas utiliser des piles salines et piles rechargeables au Nickel-
Cadmium.
—30—
Page 35

Couvercle a glissiere de lobjectif (Fig. C)
(1) Pousser le bouton de commande du protege-objectif vers la droite pour
I'ouvrir.
(2) Pousser le bouton de commande du protege-objectif vers la gauche pour
le termer.
NOTA: L'obturateur ne fonctionne pas quand le protege-objectif est ferme.
Lorsque vous n'utilisez pas I'appareil, fermez le protege-objectif afin
de prevenir tout declenchement accidentel de l'obturateur.
La sensibilite du film est reglee automatiquement
Sensibilite ISO
ISO 50
ISO 100
ISO 200
Film sans codage DX
ISO 400
ISO 1000
ISO 1600
Position de reglage DX de
100
400
—31 —
I'appareil
Page 36

NOTA: En utilisant un film plus sensible, vous risquez d'avoir une image
surexposee.
Chargement du film
(1) Pousser le verrou du couverclearriere dans le sensde lafleche puis
(2) Inserer la partie plate de la bobine du film dans la partie inferieure du
logement, puis mettre
(3) Sortir
I'amorce
dans le coin gauche de la bobine receptrice du
Prendre garde a ne pas laisser
schema jaune, car cela pourrait provoquer un relachement excessif de la
pellicule. S'assurerquecettederniere reste plateentre lesguidesdu filmet
qu'elle soit bien placee sur les dents des pignons d'entrainement (Figs. D,
E).
I'autre
du film et
extremite en position.
I'aligner
ainsi que lillustre le schema jaune situe
I'amorce
—32—
film.
du film depasser la limite du
I'ouvrir.
Page 37

(4) Fermer le couvercle arriere jusqu'au verrouillage. Si vous n'entendez pas
un cliquetis de fermeture, le film etant en place, controler que le film est
bien a plat entre les guides et que la cartouche est bien dans son logement.
(5) Le couvercle arriere etant ferme, appuyer sur le bouton de declenchement
pour faire avancer le film jusqu'a ce que le nombre
fenetre du compteur de vues.
NOTA: Le compteur de vues ne fonctionne correctement que
mis en place. S'il n'avance pas, repeter les operations (4) et (5).
} Tenue de I'appareil
Pour obtenir de photos, votre appareil doit etre tenu correctement. II faut le tenir
fermement pendant que vous le declenchez. Les illustrations indiquent comment
tenir
I'appareil
Lorsque vous tenez votre appareil photo, prendre garde de ne pas obstruer le
flash,
le detecteur de pose et
en position horizontale ou verticale.
I'objectif
avec les doigts. (Fig. F)
—33—
"1"
apparaisse dans la
si
le film est bien
Page 38

Q Viseur
En regardant a travers le viseur, composer votre photo, le sujet principal etant
au centre. L'appareil fera la mise au point automatique sur le sujet se trouvant
dans la zone centrale carree du viseur. Quand vous photographiez des sujets
a 1.3m ou plus, utiliser
jaune sera sur votre
Quand le sujet se situe entre 1.2m et 1.3m, lever un peu l'appareil et utiliser la
marque de correction de parallaxe pour centrer votre image.
r ^
le
cadre jaunedu viseur.
film.
Le
sujet a I'interieurdece cadre
-REPERES
-REPERES DE CORRECTION DE
PARALLAXE
-CADRE DE MISE AU POINT
AUTOMATIQUE
DU
CADRE
DU
VISEUR
L_ _J
-34—
Page 39

Prise de vues
1.
Photographie automatique
(1)Votre appareil est entierement automatique. Si la lumiere est sutfisante,
vous avez simplement a cadrer et a declencher. Le temps de pose, la mise au
point et
(2)Photographie au flash
S'il n'y a pas assezde lumiere pour une bonne exposition (al'exterieuroua
linterieur), la DEL rouge (temoin de manque de lumiere) situee dans le
viseur s'allume lorsque vous appuyez a mi-course sur ledeclencheur. Ceci
mdique que le flash doit etre utilise. Retirer votre doigt du declencheur,
attendre que la DEL verte (temoin de charge du flash) s'allume et
declencher.
Une bonne exposition au flash depend de la sensibilite ISO du film et de la
distance appareil -sujet.
I'avance
du film sont automatiques.
—35—
Page 40

Sensibilites du film
ISO 100
ISO 400
2.
Photographie synchrone a ia lumiere du jour
Le flash peut etre utilise en cas de prise de vue d'un sujet a
Portee de flash
1,2m -3,5m
1,5m - 7,0m
I'ombre
ou a
contre-jour.
Apres avoir verifie que la DEL verte est allumee, appuyez sur le
commutateur de synchronisation pour lumiere du jour dans le sens de la
fleche et maintenez-le en place, puis declenchez. (Fig. G) Le commutateur
de synchronisation pour la lumiere du jour est automatiquement ramene a
sa position d'origne apres utilisation.
3. Mise au point prealable
Lorsque vous composez une photo dans laquelle le sujet principal
n'est
pas
au centre du viseur, il est necessaire de faire une mise au point prealable.
Proceder comme suit:
(1) Regarder dans le viseur et composer ia vue pour que le sujet soit situe au
centre du cadre de mise au point automatique. (Fig. H)
—36—
Page 41

(2) Appuyer a mi-course sur le bouton de declenchement et le maintenir ainsi
pour garder la mise au point correcte.
(3) Toujours dans cette position, cadrer votre image et appuyer a fond pour
faire la photo. (Fig. I) (Vous pouvez annuler la mise au point prealable en
relachant la pression).
4. Situations speciales pour une mise au point automatique
Le dispositif de mise au point automatique donne une mise au point precise
dans la plupart des photos. Cependant, dans quelques situations, le
mecanisme de mise au point automatique ne donne pas un resultat correct.
(1) Quand le sujet est tres reflechissant: metal
d'eau ou miroir, etc...
(2) Sujets peu ou pas reflechissants, tels que objets noirs, chevelure, flamme
ou fumee, etc....
(3) Sujets tres petits.
(4) Sujets ayant un objet devant eux: treillis metalliques, cage, etc....Dans les
situations (1) a (4), faites une mise au point prealable sur un autre objet se
situant approximativement a la meme distance, puis recomposez le sujet a
photographier (voir Section 3 - Mise au point prealable).
—37—
poli,
carrosseriedevoiture, plan
Page 42

(5) Images prises a travers une vitre.
Photographier avec
20°.
Dechargement du film
Losque le film est termine, le compteur de vues n'avance plus. Rembobiner le
film en appuyant sur le bouton de rembobinage dans le sens de la fleche. (Fig.
J) Quand loperation est terminee et que le moteur est arrete, ouvrir le
couvercle arriere et enlever le film de son logement. Le bouton de
rembobinage revient a sa position normale automatiquement.
I'appareil
pres de la vitre et sous un angle d'environ
—38—
Page 43

Guide de depannage
|Description| |Solution|
Sujet flou Si le sujet
n'est
pas situe au centre du viseur, faites
une mise au point prealable. (Voir Section 7-3.)
Les sujets doivent etre a 1,2m ou plus de I'appareil.
Revoir sections 6, 7-3, 7-4.
Le flash ne fonctionne Remplacer la pile,
pas
Les images ont des Nettoyer le reflecteur du flash,
zones noires
Les images sont toutes Les sujets doivent se situer dans la zone de prise
trop sombres de vues avec flash. Voir tableau section 7-1.
Les images sont trop Placez le sujet au moins a 1,2m du flash etassurez-
claires vous que la zone centrale de mise
au
point automa-
tique couvre le sujet principal.
Les yeux du sujets sont Augmenter I'eclairage de la piece. Le sujet ne doit
rouges pas fixer directement le flash.
—39—
Page 44

Donnees techniques
Type:
Appareil photo a obturateur d'objectif de 35mm
Dimension du
Objectif: 34mm F4,5 (3 elements en 3 groupes).
Mise au point: Mise au point automatique (avec blocage de la
Plage de mise au point: 1,2m - infini.
Exposition: Lumiere du jour F9,0 (1/130 sec.)
(ISO 100/400) Flash F4,5 (1/130 sec.)
Viseur: Type galileen inverse avec viseur a cadre eclaire.
Reglage de sensibilite de
la pellicule (ISO): Reglages automatiques DX (100,400).
Chargement du
Avance du
Rembobinage du
film:
24mm X 36mm (bobine de 135).
film:
film:
Enroulement automatique.
film:
avec flash incorpore.
mise au point).
Automatique (avec fenetre de verification du film).
Automatique via le bouton de rembobinage.
—40—
Page 45

Flash incorpore:
Plage de fonctionnement
du flash (ISO 100):
Duree de recyclage:
Nombre de films:
Alimentation:
Dimensions:
Poids:
Donnees techniques pouvant etre modifiees sans preavis.
Mode automatique: commutation automatique
pour des niveaux d'eclairages affaiblis (ISO 100:
inferieur a EV9.5).
Mode de synchronisation a la lumiere du jour :
flash.
1,2m - 3,5m. (Voir tableau section 7-1).
Approx. 5 sec. (avec piles alcalines LR6 neuves)
Approx. 15 films.(24 poses; utilisation du flash pour
approx. 50% des photos).
Deux piles alcalines LR6 de 1.5V
128(L) X 48(P) X 71(H)mm.
Approx. 200g (sans les piles ni le film).
—41—
Page 46

Respetado usuario:
Gracias por adquirir esta camara compacta de 35 mm. Le damos la bienvenida
a la creciente familia de usuarios complacidos de nuestros productos por todo
el mundo. Nos sentimos seguros de que Vd. estara totalmente satisfecho con
esta nueva ayuda a su habilidad fotografica. Le rogamos lea este folleto de
instrucciones de empleo, y lo tenga a mano para consultarlo.
•
Identificacion de las partes
(Fig.
A)
© Ventanilla
© Boton
© Ventanilla
© Ventanilla del visor
© Sensor
© Flash electronico
© Sincroconmutador
© Interruptor
® Objetivo f4.5 de 34mm
© Correa
© Aldabilla
del
del
disparador
de
de
exposicibn
de
de
muneca
de la
contador
enfoque auto
a luz
cubierta
tapa posterior
de
exposiciones
de
natural
del
objetivo
infrarrojos
(Fig.
B)
@ Ocular del visor
@ LED verde (Indicador
@ LED rojo (Indicador
@ Compartimiento
@ Manecilla
@ Contactos
@ Interruptor
@ Rodillo dentado
© Guia
de
@ Carrete arrollador
@ Tapa
del
© Tapa posterior
© Ventanilla
de la
del
rebobinado
de
codigo
de
rebobinado
de
pelicula
compartimiento
de
verificacion
de
flash listo)
de
poca
pelicula
DX
pelicula
de las
de
luz)
de
pelicula
pelicula
pilas
Page 47

Instalacion de las pilas
(1) Abra la tapa del compartimiento de pilas apretando en la direccion de la
flecha.
(2) Insertedos pilas alcalinasde tamano AA de 1,5V con lapolaridadcorrecta,
positiva (+) y negativa (—), como indicado por el diagrama impresodentro
del compartimiento de las pilas.
(3) Oprima hacia abajo sobre la tapa del compartimiento de las pilas para
cerrar firmemente.
• Reemplace las pilas cuando:
A) La velocidad de rebobinado de pelicula es inferior a la ordinaria.
B) El LED verde no se enciende dentro de 10 seg., despues de pulsar el boton
del disparador hasta la mitad con la cubierta del objetivo abierta.
A o B significa que las pilas estan descargadas y que puede haber insuficiente
energia para operar la camara.
NOTA: No se pueden utilizar pilas de manganeso y pilas Ni-Cd.
—43—
Page 48

Deslizamiento de la cubierta del objetivo (Fig. C)
(1) Para abrir la cubierta del objetivo, deslice el interruptor de la cubierta del
objetivo hacia la derecha.
(2) Para cerrar la cubierta del objetivo, deslice el interruptor de la cubierta del
objetivo hacia la izquierda.
NOTA: Cuando la cubierta del objetivo esta cerrada, el disparador no opera.
Cuando la camara no esta en uso, cierre la cubierta del objetivo para
evitar exposiciones accidentales.
La sensibilidad de la pelicula se ajusta automaticamente
Numero ISO de Pelicula | Posicion de Ajuste DX Camera
ISO 50
ISO 100
ISO 200
Pelicula sin codificacion DX
ISO 400
ISO 1000
ISO 1600
—44—
100
400
Page 49

NOTA: Utilizando una pelicula de sensibilidad superior, Vd. puede tener una
fotografia con exceso de exposicion.
Cargado de la pelicula
(1) Empuje la aldabilla de la tapa posterior en la direccion de la flecha y abra
.tirandode la tapa.
(2) Inserte el extremo piano del carrete de pelicula en la parte inferior del com-
partimiento de la pelicula, luego baje el otro extremo y se producira un chas-
quido en el punto de posicion.
(3) Tire de la cola de la pelicula a lo largo y alineela con la marca de pelicula
amarilla mostrada en la esquina a mano izquierda del carrete arrollador de
pelicula. Asegurese de no permitir que la cola de la pelicula se extienda
demasiado mas alia de la marca amarilla, ya que esto podria ser causa de
excesiva flojedad de pelicula. Asegurese de que la pelicula quede plana
entre las guias de pelicula y sobre los rodillos dentados correspondientes.
(Fig.
D, E)
—45—
Page 50

(4) Cierre la tapa posterior hasta que se oiga un chasquido, indicando que la
tapa esta firmemente cerrada. Si la tapa no se cierra debidamente una vez
introducida lapelicula, verifiquesi la pelicula esla plana entre lasguiasysi
el carrete esta piano en el compartimiento.
(5) Una vez cerrada la tapa, pulse el boton del disparador y avance la pelicula
hasta que el numero "1" aparezca en la ventanilla del contador de
exposiciones.
NOTA: El contador solo funcionara con la pelicula debidamente instalada en
el compartimiento. Si el contador de pelicula no avanza, repita los
pasos (1) a (5).
Modo de sostener la camara
La camara debe sostenerse correctamente para conseguir siempre fotograf ias
buenas y
Claras.
Se debe sostener f i rme y confortablemente m ientras
se
toman
fotografias. Las ilustraciones muestran las formas correctas de sostener la
camara tanto en la posicion vertical como en la horizontal. Al sostener la
camara, tenga cuidado de no bloquear
el
flash,
sensor
de
exposicion y objetivo
con los dedos. (Fig. F)
—46—
Page 51

Q Visor
Mire a traves del ocular del visor, componga su fotografia de manera que su
sujeto principal este situado en el centra del visor. La camara se enfocara
automaticamente en cualquier sujeto que quede cubierto por el cuadro de
enfoque. Cuando tome fotografias de sujetos a una distancia de 1.3m o mas,
utilice las referencias amarillas del cuadro. La imagen de dentro de estas
referencias del cuadro apareceran en la pelicula. Cuando la distancia al sujeto
este entre 1.2m y 1.3m, incline ligeramente la camara hacia arriba y utilice la
correccion de paralaje para centrar su sujeto.
, REFERENCIAS DEL CUADRO
r "^
DE LA FOTOGRAFIA
REFERENCIAS DE
CORRECCION DE PARALAJE
CUADRO DE ENFOQUE
L_ _J
—47-
Page 52

f Toma de fotografias
1.
Fotografia Automatica
(1) Su camara es totalmente automatica. Si hay suficiente luz, Vd.
simplemente componga y dispare. La exposicion, enfoque y avance de
pelicula lo hace la camara automaticamente.
(2) Fotografia con Flash
Si no hay suficiente luz para una exposicion apropiada (ya en el interior o
exterior), el LED rojo (Indicador de poca luz) en el visor se encendera
cuando Vd. pulse el boton del disparador hasta la mitad. Esto indica que
debe utilizar el flash. Espere que se encienda el LED verde (Indicador de
flash listo) y presione el boton del disparador completamente. Vd. puede,
entonces, tomar una fotografia con flash.
La exposicion de flash apropiada depende de la sensibilidad ISO de la
pelicula y de la distancia de camara-a-sujeto.
—48—
Page 53

Sensibilidades de Pelicula
ISO 100
ISO 400
2.
Fotografia sincro a luz natural
Gama de Flash
1.2m-3.5m
1.5m-7.0m
(3.9- 11.5 ft)
(4.9-22.9 ft)
Al fotografiar un sujeto a la sombra o contra el sol o una ventana brillante,
puede utilizar el flash.
Despues de asegurarse de que el LED verde esta encendido, pulse el
sincroconmutador a luz natural en ladireccion delaflechay retengaloen su
lugar, luego dispare el obturador.(Fig. G)
El
sincroconmutadora luz natural
retorna automaticamente a su posicion original despues del usarlo.
3. Preenfoque
Al componer una fotografia en la que el sujeto principal no esta en el centra
del visor, es necesario enfocar con antelacion el objetivo de la camara. Para
hacerlo:
(1) Mire por el visor y componga la imagen de manera que su sujeto este situado
directamente detras del cuadro de enfoque. (Fig. H)
—49—
Page 54

(2) Pulse suavemente hasta la mitad el boton del disparador y mantenga una
presion suave para sincronizar la imagen en el enfoque apropiado.
(3) Mientras mantiene la presion sobre el boton del disparador, recomponga la
imagen como desee, y despues pulse hasta
para tomar la fotografia. (Fig. I) (Se puede suprimir el preenfoque
simiplemente con quitar la presion del boton del disparador.)
4. Situaciones Especiales de Enfoque Automatico
El sistema de enfoque automatico enfocara con precision en la mayoria de los
sujetos que Vd. desee fotografiar. Sin embargo, hay algunas situaciones en
que el mecanismo del enfoque automatico puede ser que no funcione. Estas
son:
(1) Cuando el sujeto tiene reflexiones intensas, tales como metales brillantes,
exterior de automoviles, superficies de agua o espejos.
(2) Sujetos con poca o ninguna reflectancia, tales como objetos negros, pelo,
una llama o humo.
(3) Objetos que son muy pequenos.
el
fondo
el
boton del disparador
Page 55

(4) Sujetos con algun objeto delante de ellos, tales como una red de alambre o
unajaula.
En las situaciones (1)—(4), enfoque previamente algun otro sujeto que este
aproximadamente a la misma distancia y, luego, recomponga la escena y
tome la fotografia. (Vea la Seccion 3 sobre Preenfoque.)
(5) Toma de fotografias a traves de ventanas de cristal:
Dispare con el objetivo de la camara cerca del cristal y a un angulo
aproximadamente de 20°.
Cambio de pelicula
Al final del rollo de la pelicula, el contador de exposiciones dejara de avanzar.
Rebobine la pelicula oprimiendo el interruptorde rebobinadode pelicula
direccion de la flecha.(Fig. J) Despues de completarse el rebobinado y el
motor haya parado, abra la tapa posterior y remueva el carrete de pelicula del
compartimiento. El interruptor de rebobinado de pelicula retomara
automaticamente a la posicion original.
—51 —
en
la
Page 56

Guia de Solucion de problemas
[Descripcion] [Solucion]
El sujeto esta desenfoque Si el sujeto no esta situado en el centra del visor,
utilice el preenfoque. Vea la Seccion 7-3. Los
sujetos deben estar 1.2m o mas de la camara.
Examine las Secciones 6, 7-3, 4.
El flash deja de funcionar Sustituya la pila.
Las fotografias con flash Cerciorese de que los dedos no obstruyan el flash,
tienen zonas oscuras (Haga que el sujeto tenga cuidado de esto.)
Las fotografias con flash El sujeto (los sujetos) debe estar dentro del alcance
enconjuntodemasiado especificado del flash. Vea la Seccion 7-1.
oscuras
Las fotografias con flash Coloque los sujetos al menos 1.2m del flash y
demasiadoclaras asegurese de que el cuadro de enfoque cubra el
sujeto principal.
—52—
Page 57

Los ojos del sujeto reflejan Aumente, si es posible, la luminosidad de la
derojo habitacion. Es conveniente hacer que el sujeto
(los sujetos) mire un poco aparte del flash, hacia la
luzde la habitacion.
—53—
Page 58

Especificaciones
Tipo:
Formato de pelicula:
Objetivo:
Enfoque:
Gama de enfoque:
Exposicion:
Visor:
Puesta de sensibilidad
de pelicula (ISO):
Cargado de pelicula:
Avance de pelicula:
Camara con obturador de objetivo de 35mm con
flash incorporado
24mm X 36mm (carrete de pelicula de 135)
34mm F4.5 (3 elementos en 3 grupos)
Enfoque antomatico (con preenfoque)
1.2m - infinito
ISO 100/400
Luz natural F9.0 (1/130 seg.)
Flash F4.5 (1/130 seg.)
Tipo galileo inverso con enfocador de cuadro
brillante
Puestas automaticas DX (100, 400)
Automatico (con ventanilla de verificacion de
pelicula)
Enrollado automatico
—54—
Page 59

Rebobinado de pelicula:
Flash incorporado:
Gama de operacion
de flash:
Tiempo de reciclado:
Numero de rollos
de pelicula:
Fuente de energia:
Dimensiones:
Peso:
Especificaciones sujetas a cambios sin previo aviso.
Automatico via interrupter de rer^obinado de
pelicula
Modalidad automatica: conmutacion automatica
para niveles bajos de iluminacion (ISO 100: menos
de EV9.5)
Modalidad de sincronizacidn de luz natural: flash
ISO 100: 1.2m - 3.5m (3.9 -11.5 ft)
Aprox. 5 seg. (con nuevas pilas alcalinas)
Aprox. 15 rollos (24 exposiciones, utilizando flash
para aprox. 50% de disparos)
Dos pilas alcalinas de tamaho AA de 1.5V.
128 (An.) x 48 (P) x 71 (Al.)mm [5.0 (An.) x1.9(P)
x 2.8 (Al.) pies]
Aprox. 200g (7.1 onzas) (sin pilas y pelicula)
—55—
Page 60

Geachte eigenaar.
Wij zijn u heel erkentelijk, dat u deze kompakt 35mm autofocus camera heeft
uitgekozen. We heten u van harte welkom in de steeds groeiende kring van
tevreden eigenaars van onze produkten overal ter wereld. We zijn ervan overtuigd,
det u volkomen tevreden zult zijn over dit nieuwe hulpmiddel om aan de
vervulling van uw fotografische ambities te voldoen. Leest u daarom alstublieft
eerst deze handleiding goed door en berg deze daama dusdanig op, dat u hem
zonodig telkens weer kunt raadplegen.
(Fig.
• Naam der onderdelen
(Fig.
A)
® Opnameteller
© Ontspanknop
© Infrarood autofocus venster
© Zoekerobjektief
© Belichtingssensor
© Electronenflits
© Daglichtsynchroschakelaar
© Lensdopschakelaar
© 34mm f:4,5 lens
© Polsriem
© Achterdoksel vergrendelpal
B)
©Zoekeroculair
@ Groene LED (Flitsbereid mdicatie)
© Rode LED (Onderbelichtings indicatie)
@ Filmmagazijn
® Terugspoelas
© DX code kontaktpunten
@ Filmterugspoelknop
@ Filmgeleidetanding
@ Filmgeleider
@ Opwikkelspoel
@ Deksel batterijvak
@ Achterdeksel
@ Indicatievenster filmaanwezigheid
-56-
Page 61

"1 Plaatsen van de batterijen
(1) Open net batterijvakdeksel door het in de richting van de pijl te drukken.
(2) Leg twee nieuwe AA formaat alkaline batterijen in het vak, daarbij lettend
op de juiste positieve (+) en negatieve (—) polariteit, zoals is aangegeven
op het in het vak afgebeelde schema.
(3) Druk het deksel van het batterijvak weer dicht en zorg dat het stevig vastzit.
• Vervang de batterijen wanneer:
A) De snelheid van het terugspoelen van de film trager dan gewoonlijk is.
B) De groene LED niet binnen 10 seconden oplicht nadat de ontspanknop
halverwege is ingedrukt met de lensdop geopend.
A en B betekenen dat de batterijen zwakzijn endaternietgenoegvermogenis
om de camera in werking te stellen.
OPMERKING: Mangaanbatterijen zijn ongeschikt voor deze camera en Ni-
Cd batterijen mogen niet worden gebruikt.
—57—
Page 62

Lensdop (Fig. C)
Voor het openen van de lensdop wordt de lensdopschakelaar naar rechts
geschoven.
Voor het sluiten van de lensdop wordt de lensdopschakelaar naar links
geschoven.
OPMERKING: De sluiter werkt met gesloten lensdop niet. Wanneer de
camera niet gebruikt wordt, de lensdop sluiten om toevallige
belichtingen te voorkomen.
Automatisch instellen op de filmsneiheid
ISO nummer van de film
ISO 50
ISO 100
ISO 200
Film zonder DX-code
ISO 400
ISO 1000
ISO 1600
—58—
DX-instellingsstand van de camera
100
400
Page 63

OPMERKING: Bij gebruik van een film met hogere snelheid kunt u een
Filminleg
(1) Schuif de vergrendeling van het achterdeksel in de richting van de pijl en trek
het open.
(2) Breng de cassette met de platte kant naar beneden in het
dan de andere kant zakken en druk het geheel in de juiste stand.
(3) Voer de filmlip langs de geleiding en breng hem op
beelding aan in de linkerhoek van de opwikkelspoel. Zorg dat de filmlip niet
te ver uitsteekt over de gele illustratie, daar anders een lus in de film kan ontstaan.
Zorg ook, dat de film vlak en strak in de geleiding en op de tandjes van
het filmtransport ligt. (Fig. D, E)
overbelicht beeld bekomen.
—59—
film-magazijn,
een
lijn met de gele filmaf-
laat
Page 64

(4) Sluit het achterdeksel totdat u een klik hoort, die aangeeft dat het deksel
stevig is vergrendeld. Wanneer het deksel na het inleggen van de fiim niet
goed sluit, dient u te controleren of de film wel vlak tussen de geleiding ligt
en of de film-cassette wel goed in het magazijn rust.
(5) Nadat het achterdeksel is
en het filmtransport worden doorgedraaid tot het cijfer
ler verschijnt.
OPMERKING: De teller werkt alleen wanneer de film op de juiste wijze is
ingelegd.
t/m 5 herhalen.
gesloten,
Wanneer de teller niet funktioneert, moet u stap 1
moet de ontspanknop worden ingedrukt
"1"
op de opnametel-
—60—
Page 65

Hanteren van de camera
Uw camera moet op de juiste wijze worden vastgehouden om te zorgen voor
onbewogen, scherpe foto's. Hij moet tegelijk stevig en onverkrampt worden
vastgehouden terwijl u opnamen maakt. De afbeeldingen tonen de juiste manier
om uw camera in de horizontal en vertikale stand vast te houden. Zorg tijdens
het vasthouden van de camera dat u de flitser, belichtingssensor en de lens niet
met uw vingers bedekt. (Fig. F)
Zoeker
Terwijl u door het oculair van de zoeker kijkt, kiest u het gewenste beeld
zodanig,
dat het hoofdmotief zich in het midden van het zoekerbeeld bevindt.
De camera stelt zich automatisch scherp op elk willekeurig motief in het
kernvlak (scherpstelkader) in het midden van het zoekerbeeld. Wanneer u
onderwerpen fotografeert op een afstand van 1,3m of meer, dient u de gele
kadermarkeringen te gebruiken. Het beeld binnen deze kadermarkeringen
verschijnt op de film Wanneer de afstand tot het onderwerp tussen de 1,2m en
—61—
Page 66

1,3m bedraagt, kunt u de camera licht optillen en de parallax correctie
markeringen gebruiken om het beeld te centreren.
t— BEELDKADER MARKERINGEN
( ~^4 PARALLAX CORRECTIE
i—i
«—•«
SCHERPSTEL KADER
MARKERINGEN
L_ _J
Fotograferen
1.
Auiomatisch fotograferen
(1) Uw camera werkt volautomatisch. Wanneer er voldoende licht is, kiest u
eenvoudig de gewenste beeldinstelling en drukt af.
-62-
Page 67

(2) Fotograferen met flitser
Indien het licht niet voldoende is vooreenjuistebelichting (hetzij binnenof
buiten), zal de rode LED (Onderbelichtingsindicatie) oplichten in de
zoeker wanneer u de ontspanknop halverwege indrukt. Dit betekentdatde
flits gebruikt moet worden. Wacht tot de groene LED (Flitsbereid indicatie)
oplicht en druk de ontspanknop helemaal in. U kunt dan een flitsopname
maken.
De juiste flitsbelichtingstijd hangt af van de ISO-gevoeligheid en van de
afstand tussen camera en objekt.
Filmgevoeligheid
ISO 100
ISO 400
Flitsdracht
1,2 -3,5m
1,5 - 7,0m
Page 68

2.
Daglichtsynchrofotografie
De flitser kan gebruikt worden wanneer men een objekt fotografeert in de
schaduw, of tegen de zon of een helder raam.
U dient erop te letten dat de groene LED moet oplichten. Schakel dan de
daglichtsynchroschakelaar in de richting van de pijl en houd hem in die
stand terwijl u de sluiter ontspant. (Fig. G)
Na gebruik keert de daglichtsynchroschakelaar automatisch terug in zijn
oorspronkelijk stand.
3. Vooraf scherpstellen
Wanneer u een beeld samenstelt, waarbij zich een hoofdmotief niet in het
midden van de zoeker bevindt, is het nodig om met de lens vooraf scherp te
stellen.
Dat gaat als volgt:
(1)
Kijk door de zoeker en stel het beeld zodanig, dat het hoofdmotief zich direct
achter het scherpstelkader bevindt. (Fig. H)
(2) Druk voorzichtig de ontspanknop halverwege in en houdt deze zo ingedrukt
om de ingestelde scherpte vast te houden.
—64—
Page 69

(3) Terwijl u de ontspanknop halverwege ingedrukt houdt, stelt u via de zoeker
het gewenste beeld naar wens samen; dan drukt u de ontspanknop geheel
inomdefototemaken. (Fig. I) (De scherpstelling vooraf kan ongedaan worden gemaakt, door de ontspanknop los te laten).
4. Speciale autofocus situaties
Het autofocus systeem zal in de meeste gevallen nauwkeurig werken bij de
onderwerpen, die u wilt fotograferen. Er zijn evenwe! een paar situaties,
waarin het autofocus mechanisme niet juist werkt. Zoals:
(1) Wanneer het onderwerp sterke reflekties vertoont, zoals bij hoogglans
metaaloppervlakken, auto carosserieen, water oppervlaktes of spiegels.
(2) Onderwerpen met weinig of geen reflecties, zoals zwarte voorwerpen,
haren,
vlammen of rook.
(3) Heel kleine voorwerpen.
(4) Onderwerpen, die deels schuilgaan achter andere, bijvoorbeeld achter een
net of tr'alies van een
In de gevallen (1)—(4) kan tevoren worden scherpgesteld op een voorwerp,
dat zich ongeveer op dezelfde afstand bevindt; daarna kan het beeld
opnieuw worden gecomponeerd en de foto worden gemaakt. (Zie hoofdstuk
3 over Vooraf scherpstellen).
kooi.
—65—
Page 70

(5) Het maken van foto's door glazen ruiten:
Druk af met de cameralens vlak tegen het glas en onder een hoek van circa
20 graden.
Film uitnemen
Aan het eind van de filmrol telt de opnameteller niet verder door. Spoel de film
terug door de terugspoelknop in de richting van de pijl te zetten. (Fig. J)
Wanneer de film geheel is teruggewikkeld en de motor stilstaat, kan het
achterdeksel worden geopend om de filmcassette uit het magazijn te
film terugspoelknop zal vanzelf in de oorspronkelijke stand terugkeren.
—66—
halen.
De
Page 71

Opheffen van storingen
[Omschrijving] [Oplossing]
Onscherp onderwerp Wanneer het onderwerp zich niet in het midden van
de zoeker bevindt, moet u scherpstelling vooraf
gebruiken (zie gedeelte 7-3).
Onderwerpen moeten 1,2m of meer van de camera
zijn vewijderd. Zie ged. 6, 7-3 en 4.
Flitserwerktniet Vervang de batterij.
Flitsopnamen vertonen Zorg, dat zich tijdens het flitsen geen vingers voor de
donkere gedeelten flitser bevinden (laat de gefotografeerde daarop
letten).
Flitsopnamen zijn als Het te fotograferen onderwerp zich binnen een
fjeheel te donker bepaaldflitsbereik bevinden. Zie
ged.
7-1.
Flitsopnamen zijn telicht Plaats de onderwerpen tenminste 1,2m van de
flitser en zorg, dat het autofocus vierkant het
hoofdmotief afdekt.
—67—
Page 72

De ogen van dete Zorg zo mogelijk voor meer omgevingslicht. Laat de
fotograferen persoon gefotografeerde(n) langs de flitser kijken bij
reflecteren in het rood voorkeur richting kamerlicht.
Specificaties
Type:
Filmformaat:
Lens:
Focus:
Focusrange:
Belichting:
Zoeker:
35mm lens sluiter camera met ingebouwde flitser
24mm X 36mm (135 filmchassis)
34mm F4,5 (3 elementen in 3 groepen)
Autofocus (met focusvergrendeling)
1,2m tot oneindig
ISO 100
Daglicht F9,0 (1/130 sec.)
Flits F4.5 (1/130 sec.)
Reverse galilean type met helder verlichte
beeldkader
-68-
Page 73

Filmgevoeligheidsinstelling (ISO):
Filmlading:
Filmtoevoer:
Terugspoelen Film:
Ingebouwde
Flitsrange:
Laadtijd
Gebruiksduur Batterijen:
Stroomvoorziening:
Afmetingen:
Gewicht:
Wijzigingen in de specificaties voorbehouden, zonder kennisgeving.
Flitser:
Flitser:
DX automatische instelling (100, ,400)
Automatisch (met venstertje voor filmkontrole)
Automatisch vooruitspoelen
Automatisch met behulp van de
terugspoelschakelaar
Auto stand: automatische omschakeling bij
zwakke belichtingsniveaus (ISO 100: minder dan
EV9.5)
Daglicht synchronisatiestand: flitser
ISO 100: 1,2m tot 3,5m
Ong.
5 sec. (met nieuwe alkaline batterijen)
Ong.
15 rollen (24opnamen, waarvanong.50%met
de flitser)
Twee 1,5V AA formaat alkaline batterijen
128(B) X 48(D) X71(H)mm
Ong.
200g (exclusief batterijen en film)
—69—
Page 74

Caro amico
Complimenti per la Sua scelta. In questo modo Lei si aggiunge ad una schiera
di utilizzatori soddisfatti dei prodotti Nikon. Con questo apparecchio otterra
certamente dei risultati di ottima qualita. Le consigliamo di leggere attentarmente.
il libretto di istruzioni prima di usare la fotocamera.
•
Identificazione Delle Parti
(Fig.
(Fig.
A)
© Contafotogrammi
© Pulsante
© Finestrella autofocus a infrarossi
© Finestrella
© Sensore
© Flash elettronico
© Interruttore
© Interruttore copriobiettivo
© Obiettivo 34mm,
© Attacco
© Tasto
di
scatto
del
mirino
di
esposizione
di
sincronizzazione diurna
F/4,5
per la
cinghia
di
copertura posteriore
—70—
B)
@ Mirino
@ LED verde (Indicatore
@ LED rosso (Indicatore
@ Scomparto pellicola
© Albero
di
@ Contatti
@ Interruttore
@ Ruota dentata
© Guida
® Perno
@ Scomparto batterie
@ Sportello posteriore
@ Finestrella
riavvolgimento
di
decifrazione
di
riavvolgimento
per la
pellicola
di
avvolgimento pellicola
di
controllo pellicola
di
flash inserito)
di
bassa luminosita)
DX
Page 75

Inserimento delle batterie
(1) Aprire lo scomparto batterie agendo in direzione della freccia.
(2) Inserire due batterie alcaline del tipo 1.5V AA tenendo conto dell'esatta
polarita negativa (—) e positiva (+) comeindicatodal diagrammastampato
all'interno dello scomparto.
(3) Chiudere lo scomparto.
• Sostituire le batterie quando:
A) La pellicola viene riavvolta piu lentamente del solito.
B) Tolto il copriobiettivo, il Led verde non si illumina entro 10 secondi dalla
pressione a meta del pulsante di scatto.
I punti A o B indicano che le batterie sono scariche e non piu in grado di far
funzionare la fotocamera.
NOTA: Le batterie al manganese e le batterie ricaricabili al nichel cadmio non
possono essere utilizzate.
—71 —
Page 76

2 Scorrimento del copriobiettivo (Fig. C)
Per aprire il copriobiettivo, spostare I'interruttore dello stesso verso destra.
Per chiudere il copriobiettivo, spostare I'interruttore del medesimo verso
sinistra.
NOTA: Quando il copriobiettivo e chiuso, il pulsante di scatto non funziona.
Quando la fotocamera non viene utilizzata, chiudere il copriobiettivo
per evitare esposizioni accidentali.
Regolazione automatica della sensibilita
ISO della pellicola
ISO 50
ISO 100
ISO 200
Pellicola non codificata in DX
ISO 400
ISO 1000
ISO 1600
—72—
Regolazione DX della fotocamera
100
400
Page 77

NOTA: Utilizzando una pellicola piu veloce potreste ottenere immagine
sovraesposte.
Caricamento delta pellicola
(1) Aprire lo sportello situato nella parte posteriore agendo sull'appositotasto.
(2) Estrarre la pellicola ed allinearla con I'illustrazione di colore giallo sull'an-
golo a sinistra del perno di avvolgimento. Assicurarsi che la pellicola non
vada oltre I'illustrazione gialla poiche cio pud causare un eccessivo allenta-
mento. Assicurarsi che la pellicola sia ben fissata tra la guida e la ruota
dentata. (Fig. D, E)
(3) Chiudere lo sportello posteriore facendo attenzione ad udire uno scatto
che assicuri la corretta chiusura.
Se a pellicola inserita lo sportello non si dovesse chiudere appropriata-
mente controllate cheessasia ben tesa tra le guide e che sia correttamente
sistemata nello scomparto.
—73—
Page 78

(4) Premere il pulsante di scatto fino a far apparire il numero 1 sul
contafotogrammi.
NOTA: II contafotogrammi non funziona se la pellicola non e inserita corret-
tamente. In questo caso ripetere le istruzioni dal punto 1 al punto 4
Come impugnare la fotocamera
Per ottenere delle belle fotograf ie
tamente. Le illustrazioni mostrano il modocorretto per impugnare la macchina
nelle due posizioni verticale ed orizzontale. Assicuratevi di non bloccare il
flash,
il sensore d'esposizione e I'obiettivo con le dita. (Fig. F)
la
fotocamera deve esser.e impugnata corret-
Mirino
Comporre I'immagine in modo che il soggetto sia al centra del mirino. La
fotocamera mettera a fuoco automaticamente I'immagine dando la priorita alia
parte centrale. Quando si fotografa un soggetto ad una distanza di
si consideri I'immagine compresa entro i bordi gialli del mirino. Sara questa
—74—
1,3mt.
o piu
Page 79

I'immagine
compresa tra 1,2 e
parallasse come limite superiore della fotografia.
che apparira nella fotografia. Quando il soggetto e a una distanza
r ~%
1,3mt.
inquadrate considerando i segni di correzione di
INQUADRATURA MASSIMA
CORREZIONE DEL PARALLASSE
MARGINI
DI MESSA A
FUOCO
L_ _J
V Come fotografare
1.
Fotografia automatica
(1) Questa fotocamera e completamente automatica. Se la luce e sufficiente
basta inquadrare e scattare. Esposizione, messa a fuoco e avanzamento
della pellicola sono posizionati automaticamente.
—75—
Page 80

(2) Se la luce all'interno che all'esterno e insufficiente per I'esposizione, il Led
rosso (indicatore del livello di illuminazione) si accende quando il pulsante
di scatto viene premuto a meta. Questo significa che si deve usare il flash.
Attendere che il Led verde (indicatore di flash attivato) si illumini, quindi
scattare.
La corretta esposizione per
della pellicola e dalla distanza tra la fotocamera e il soggetto.
I'utilizzo
del flash, dipende dal parametro ISO
Velocita pellicola
ISO 100
ISO 400
2.
Fotografia sincronizzata con luce diurna
II flash puo essere usato quando si fotografa un soggetto all'ombra, in
controsole o da una finestra luminosa.
Dopo aver controllato che il Led verde si sia acceso, premere I'interruttore
sincronizzazione di luce diurna nella direzione indicata dalla freccia, man-
tenendolo in posizione, quindi scattare. (Fig. G)
—76—
Gamma flash
1,2mt-3,5mt
1,5mt-7,0mt
Page 81

Dopo
I'uso
nella sua posizione originale.
3. Messa a fuoco preventiva
Quando il soggetto principale della fotografia non e al centra del mirino e
necessario compiere un'operazione di prefocus in questo modo:
(1) Comporre 1'immagine in modo che il soggetto sia localizzato direttamente
dietro I'inquadratura di pretuoco. (Fig. H)
(2) Premere leggermente a meta il pulsante di scatto e tenerlo premuto.
(3) Mentre si tiene premuto il pulsante ricomporre I'immagine desiderata e
quindi scattare la fotografia. (Fig. I) II prefuoco puo essere cancellato
rilasciando semplicemente il pulsante di scatto.
4. Situazioni particolari per I'autofocus
L'autofocus di questo apparecchio f unziona con precisione in quasi tutte le
situazioni.
correttamente. Esse sono:
(1) Quando il soggetto ha dei forti riflessi, ad esempio: metalli cromati, sole,
acqua o specchi.
I'interruttore sincronizzazione diurna torna automaticamente
Esiste qualche particolare condizione in cui esso non funziona
—77—
Page 82

(2) Soggetti con pochi riflessi ad esempio: oggetti di colore nero, fumo.fiamme
di varia natura.
(3) Soggetti molto piccoli.
(4) Soggetti che abbiano davanti qualcosa tipo fili elettrici o gabbie.
Nelle situazioni (1) — (4), compiere il prefocus su un soggetto
approssimativamente alia stessa distanza e quindi scattare. (Vedere il
punto 4 relativo alia messa a fuoco preventiva)
(5) Fotografie attraverso vetri
Disporsi con la fotocamera vicino al vetro con un'angolazione di circa 20°.
X Come togliere la pellicola
Alia fine della pellicola il contafotogrammi cessa di avarizare.
Riavvolgere la pellicola premendo I'interruttore in direzione della freccia. (Fig.
J) Quando il riavvolgimento e completato e il motore si ferma, aprire lo
sportello posteriore e togliere la pellicola dal suo alloggiamento. L'interruttore
di riavvolgimento tornera automaticamente in posizione.
—78—
Page 83

Eventualita
[Descrizione]
Soggetto fuori fuoco
II flash non funziona
Le foto con il flash
hanno zone scure
Le foto con il flash sono
completamente scure
Le foto con il flash sono
troppo chiare
[Soluzione]
Se il soggetto non e al centra del mirino usare il
prefocus. (Sezione 7-3)
II soggetto deve essere ad almeno 1,2mtdallafotocamera. Vedere sezioni 6, 7-3, 7-4.
Sostituire la batteria.
Non mettere le dita davanti al flash.
II soggetto e oltre la distanza massima consentita
dal flash. (Sez. 7-1)
II soggetto deve essere ad almeno 1,2mt distanza.
—79—
Page 84

Gli occhi del soggetto Se possibile aumentare la luce. II soggetto dovrebbe
hanno le pupille rosse evitare di guardare direttamente nel flash.
—80—
Page 85

Caratteristiche
Tipo:
Formato della Pellicola:
Obiettivo:
Fuoco:
Gamma di Fuoco:
Esposizione:
Mirino:
Sensibilita della Pellicola
(ISO):
Inserimento Pellicola:
Avanzamento Pellicola:
Riavvolgimento Pellicola:
Fotocamera 35mm con flash incorporato
24mm X 36mm
34mm F4,5 (3 elementi in 3 gruppi)
Auto-fuoco (con messa a fuoco preventiva)
1,2mt - all'infinito
ISO 100/400
Luce diurna F9,0 (1/130 sec.)
Flash F4,5 (1/130 sec.)
Di tipo galileiano con mirino luminoso
Regolazione automatica DX (100, 400)
Automatico (con finestrella di controllo pellicola)
Avvolgimento automatico
Automatico per mezzo d'interruttore di riavvolgimento di pellicola
—81—
Page 86

Flash Incorporate):
Gamma del Flash:
Tempo di Ricarica:
Autonomia delle Batterie:
Fonte d'energia:
Dimensioni:
Peso:
Le caratteristiche sono soggette a variazioni senza preavviso.
Modo automatico: commutazione automatica per
basso livello d'illuminazione (ISO 100: sotto di EV
9,5)
Modo di sincronizzazione di luce diurna: flash
ISO 100:1,2mt-3,5mt
Circa 5 sec. (con batterie alcaline nuove)
Circa 15 ruMini (con batterie alcaline nuove, 24
esposizioni, usando il flash circa per il 50% degli
scatti)
Due batterie AA a 1,5V di tipo alcaline
128(L) X 48(P) X 71(A)mm
Circa 200g (senza pellicola e batterie)
—82—
Page 87

Baste kameraagare!
Tack for att Du valde Auto Focus 35mm Compact-kameran. Vi halsar Dig Val-
kommen till den vaxande skaran av nojda agare till vara produkter varlden runt.
Vi ar overtygade om att Du kommer att bli mycket nojd med det hya hjalpmedlet
att visa Din fotografiskatalang. Las den har bruksanvisningen noga och hall den
latt tillganglig for att kunna studera den vid behov.
• De olika delarnas benamningar
(Fig.
A)
© Bildrakneverk
© Avtryckare
® Fonster for autofokusering med infrarott ljus
© Sokarfonster
© Fotocell for exponeringsmatning
© Elektronblixt
© Synkroniseringsomkopptare for dagsljus
© Objektivskyddsomkopplare
© 34mm f/4,5 objektiv
® Handledsrem
© Las for bakstycket
(Fig.
B)
@ Sokarokular
@ Gron lysdiod (Blixtberedskap)
@ Rod lysdiod (Indikator, svagt ljus)
© Filmkammare
@ Aterspolning
@ DX kodkontakter
@ Aterspolningsomkopplare
@ Filmdrivhjul
©.Filmstyrning
@ Upptagningsspole
@ Batterifackslock
@ Bakstycke
@ Filmfonster
—83—
Page 88

Isattning av batterier
(1) Oppna batterifackets lock genom att skjuta det i pllens riktning.
(2) Lagg in tva 1,5 alkalibatterier av AA-typ med de positiva (+) och negativa
(—) polariteterna placerade korrekt enligt bilden inuti batterifacket.
(3) Tryck ned batterifackets lock till laslaget.
• Byt batterierna i foljande
A) Nar filmen aterspolas langsammare an vanligt.
B) Nar den grona lysdioden inte tands inom 10 sekunder efter avtryckaren
tryckts ned halwags med oppet objektivskydd.
Om A eller B intraffar innebar det att batterierna ar svaga och att det inte finns
tillrackligt med batteristyrka for kamerans funktioner.
OBS:
Manganbatterier eller ateruppladdningsbara nickel-kadmiumbatterier kan
ej anvandas.
fall:
—84—
Page 89

2 Skjutbart objektivskydd (Fig. C)
(1) Skjut objektivskyddsomkopplaren at hdger for att oppna objektivskyddet.
(2) Skjut omkopplaren at vanster for att stanga objektivskyddet.
OBS:
Slutaren fungerar inte nar objektivskyddet ar stangt. Stang
objektivskyddet, nar kameran inte anvands for att undvika oavsiktlig
exponering.
Filmkansligheten stalls in automatiskt
Filmens ISO-tal
ISO 50
ISO 100
ISO 200
Icke DX-kodat film
ISO 400
ISO 1000
ISO 1600
Kamerans DX-installnings-lage
100
400
—85—
Page 90

OBS:
Anvandning av snabb film kan leda till overexponering.
£L Laddning av filmen
(1) Skjut tillbaka bakstyckets sparr i pilens riktning och oppna bakstycket.
(2) For in filmpatronens plana ande i botten av filmkammaren, sank sedan ned
den andra anden och lat den snappa in i ratt lage.
(3) Drag fram filmanden mot den gula bilden av filmen i vanstra hornet pa
upptagningsspolen. Drag inte ut filmanden for langt forbi den gula bilden,
eftersom filmen da kan bli daligt spand. Kontrollera att filmen ligger plan
mellan filmstyrningarna och over filmdrevets kuggar (Fig. D och E).
(4) Stang bakstycket sa att det hors ett klickande
gar i las.
Om bakstycket inte gar att stanga helt nar filmen har lagts
ljud,
vilket visar att sparren
in,
maste
du kontrollera att filmen ligger plan mellan styrningarna och att
filmpatronen ligger ratt i filmkammaren.
—86—
Page 91

(5) Tryck ned avtryckaren, sedan du stangt bakstycket, och mata fram filmen
tills nr
"1"
OBS:
syns i filmrakneverkets fonster.
Rakneverket fungerar bara om filmen ar ratt inlagd i kameran. Upprepa
punkterna (1) — (5) om rakneverket inte stegarfram.
Hall kameran sa har
Du maste halla kameran pa ratt satt for att alltid fa bra, skarpa bilder. Den maste
hallas stadigt och bekvamt vid tagningen. Bilderna visar ratta sattet att halla
kameran for bade staende och liggande bilder.
Nar man haller kameran, var forsiktig sa att fingrarna inte blockerar blixten,
fotocellen for exponeringsmataren och objektivet. (Fig. F)
Sokaren
Titta genom sokarens okular och komponera bilden sa att du far motivets
huvuddel mitt i sokaren. Kameran staller in sig automatiskt pa den del av motivet,
som liqqer inom fokuseringsramen. Anvand de gula rammarkena om avstandet
—87—
Page 92

ar 1,3m eller mer. Bilden inom dessa marker) kommer med pa filmen.
Om avstandet till motivet ar mellan 1,2m och 1,3m kan du luta kameran nagot
uppat och anvanda parallaxkorrigeringsmarkena for att centrera bilden.
r— — Bildramsmarken
I *—| Parallaxkorrigeringsmarken
Fokuseringsram
L_ _J
Fotografera
1.
Automatisk fotografering
(1) Kameran ar helt automatisk. Om ljuset ar tillrackligt, behover du bara valja
motiv i sokaren och trycka av. Kameran svarar automatiskt for exponering,
fokusering och filmframmatning.
Page 93

(2) Blixtfotografering
Om det inte finns tillrackligt med ljus for ratt exponering (antingen
utomhus eller inomhus), tands den rdda lysdioden vid nedtryckning av
avtryckaren halvvags. Detta betyder att blixten bor anvandas. Vanta tills
den grona lysdioden (Blixtberedskap) tands och tryck darefter ner
avtryckaren helt. Pa sa satt kan du ta blixtbilder.
Ratt exponering beror pa filmens ISO-hastighet och avstandet mellan
kameran och motivet.
Filmhastighet
ISO 100
ISO 400
Blixtens rackvidd
1.2m - 3.5m
1.5m - 7.0m
—89—
Page 94

2.
Synkroniserad fotografering i dagsljus
Blixten bdr anvandas vid fotografering i skugga, motsols eller mot ett ljust
fonster Efteratt den grdna lysdioden tants skall knappen for synkroniserad
fotografering i dagsljus skjutas i pilens riktning och hallas i detta lage
samtidigt som du tryckerav. (Fig. G) Efteranvandning atergardennaknapp
automatiskt till sitt ursprungliga lage.
3. Forinstallning av avstand
Om en bild komponeras sa att huvudmotivet inte kommer mitt i sokaren,
maste objektivet forinstallas pa ratt avstand.
Gor
sa
har:
(1) Titta genom sokaren och rikta in kameran sa att huvudmotivet befinner sig
direkt bakom fokuseringsramen (Fig. H)
(2) Tryck fbrsiktigt ned avtryckaren halvvags och hall ett I att tryck for att lasa
kameran pa korrekt fokusering.
(3) Hall kvar trycket mot avtryckaren och andra kamerans inriktning sa att du far
den onskade bilden i sokaren. Tryck sedan ned avtryckaren helt for att ta
bilden (Fig. I). (Forinstallningen av avstandet kan slopas genom att du helt
enkelt slapper avtryckaren.)
—90—
Page 95

4. Speciella fokuseringsforhallanden
Autofokuseringssystemet ger exakt ratt installing for de fiesta motiv, som du
vill fotografera. Det finns emellertid nagra tillfallen, da autofokuseringen inte
alltid fungerar korrekt, t.ex.:
(1) Om ett foremal ger kraftiga reflexer, t.ex. polerad metall, bilkarosser, vatten
och speglar.
(2) Foremal med mycket liten reflekterande formaga, t.ex. svarta foremal, hal,
lagor och rok.
(3) Mycket sma foremal.
(4) Foremal med nagot framfor sig. t.ex. ett nat eller en bur.
I situationerna (1) — (4) kan forinstallningen goras pa ett annat foremal pa
ungefar samma avstand fran kameran. Rikta sedan kameran mot det
onskade motivet och tag bilden. Se avsnitt 3 om fbrinstallning.
(5) Fotografering genom glasrutor:
Hall objektivet nara glaset och i ungefar 20° vinkel mot glasytan.
—91—
Page 96

Ta ut filmen
Nar filmen ar slut stegar inte f ilmrakneverket fram langre. Spola tillbaka filmen
genom aft fora aterspolningsomkopplaren i pilens riktning. (Fig. J) Oppna
bakstycket nar hela filmen har spolats tillbaka och motorn har stannat och tag
bort filmpatronen fran filmkammaren. Aterspolningsomkopplaren gar
automatiskt tillbaka till sitt utgangslage.
Felsokningsanvisningar
[Storning] [Atgard]
Motivetinteifokus Anvand forinstallning, om motivet inte befinnersig
mitt i sokaren. Se avsnitt
7,punkt
3.
Motivet maste befinna sig minst 1,2m fran
kameran.
Se avsnitt 6 samt avsnitt 7, punkterna 3
och 4.
—92—
Page 97

Blixtenfungerarinte Byt ut batterierna.
Blixtbildemaharmorkaytor Se till att inte fingrarna ar i vagen for blixten (be
den som blir fotograferad att se efter).
Helablixtbildemaarformorka Motivet maste befinna sig inom det angivna
avstandsomradet. Seavsnitt7, punkt 1.
Blixtbildernaarforljusa Hall kameran minst 1,2m fran motivet och se till
att fokuseringsramen tacker huvudmotivet.
Modellens ogon ser roda ut Oka belysningen i rummet, om detta ar mojligt.
Lat modellen titta bort fran blixten — garna mot
ljuskallan i rummet.
—93—
Page 98

Tekniska data
Typ:
Filmformat:
Objektiv:
Fokusering:
Fokuseringsomrade:
Exponering:
Sdkare:
Filmkanslighetsinstallning (ISO):
Filmladdning:
Filmframmatning:
Filmaterspolning:
35mm kamera med slutare i objektivet och Inbyggd
blixt
24mm X 36mm (filmtyp 135)
34mm F4,5 (3 element i 3 grupper)
Autofokusering med mdjlighet till forinstallning
1,2m - oandlighet
ISO 100/400
dagsljus F9.0 (1/130s.)
med blixt F4,5 (1/130S.)
Omvand Galileo-typ med ljus ramsokare
Automatisk DX-installning (100, 400)
Automatisk (med filmkontroljfonster)
Automatisk
Automatisk med omkopplare
—94—
Page 99

Inbyggd blixt:
Blixtomrade:
Repetitionstid:
Antal filmrullar
per batterisats:
Stromkalla:
Dimensioner:
Vikt:
Ratt till andringar utan foregaende meddelande forbehalls.
Auto-lage: autcmatisk omkoppling till blixt vid
daliga ljusfdrhallanden (ISO 100: mindrean LT9.5)
Daylight-lage: blixt
ISO 100:1,2m -3,5m
Ca 5 s. (med nya alkaliska batterier)
Ca 15 rullar (24 exponeringar med blixt vid ca 50%
av bildtagningarna)
Tva 1,5V alkaliska batterier, storlek AA
128(B) X 48(D) X71(H)mm
Ca 200g (utan batterier och film)
—95—
Page 100

, Dtff1ffifflil^*fffi»ra-tB:W'J^fla««S:il4i*JESflWS*. —5E
aft.
«**«•»****, iu«*«*^«»«ffl*Si«l«
0
(1A)
©
i*n»ffl
© a^stWTts
© 0*H#S)H
© ftaXMH
© 34«*f/4.5§
©
ftK-RA
(MB)
©
m*iss
© HSLEDtl
© JlfeLEDJg
© mms.
© fiit««
—96—
@ DXpSlSSH
© eg#MM
©
£*«**!
© ftX
©
B&mmm
 Loading...