


DIGITAL CAMERA
Quick Start Guide
For Smart Device Users |
ii |
|
Introduction |
iv |
En |
|
|
|
Parts of the Camera |
1 |
|
|
|
|
Getting Started |
2 |
|
|
|
|
Using the Camera |
12 |
|
|
|
|
Using the Menu |
23 |
|
|
|
|
Technical Notes |
24 |
|
|
|
|

For Smart Device Users
Your images. The world. Connected
Welcome to SnapBridge — Nikon’s new family of services to enrich
your image experience. SnapBridge connects your camera and compatible smart device, through a combination of Bluetooth® low
energy (BLE) technology and a dedicated app. The stories you capture with your Nikon camera and lenses are automatically transferred to the device as they are taken. They can even be uploaded effortlessly to cloud storage services, inviting access across all your devices.
* Wireless communication is not available when the camera is underwater.
Download the SnapBridge 360/170 app to get started!
Take advantage of the wide-ranging
convenience by downloading the “SnapBridge 360/170” app onto your smart device now. Through a few simple steps, this app connects your Nikon
cameras with a compatible iPhone®, iPad® and/or iPod touch® or smart devices running on the AndroidTM
operating system. The app is available free from the website (http:// snapbridge.nikon.com), Apple App Store® and Google PlayTM.
For the latest information on SnapBridge, visit the Nikon website for your area (Avi).
KeyMission 170 Model Name: N1531/ML-L6 Remote Control Model Name: N1544
ii |
For Smart Device Users |
|
|
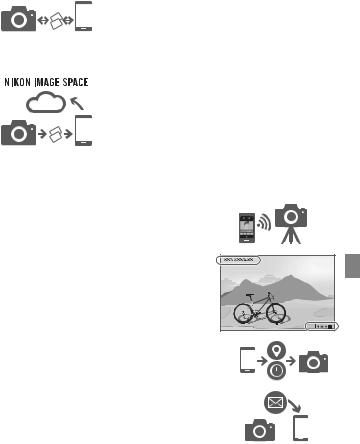
The exciting image experience that SnapBridge offers…
Automatic picture transfer from camera to smart device thanks to the constant connection between the two devices — making online photo sharing easier than ever
* Movies cannot be transferred automatically.
Upload of photos and thumbnail images to the
NIKON IMAGE SPACE cloud service
A range of services that enriches your imaging life, including:
• Camera remote control
• Imprinting up to two pieces of credit information (shooting info, shooting date and time, text, and logos) on pictures
• Automatic update of camera’s date and time info and location info
• Receive camera’s firmware updates
See from page 6 onwards for information on setting or using SnapBridge 360/170.
For Smart Device Users |
iii |
|
|
Introduction
Read This First
Thank you for purchasing the Nikon KeyMission 170 digital camera.
Downloading the “Reference Manual”
The Reference Manual (PDF format) provides more details in various languages on how to use this camera. Use your smart device or computer to refer to it along with this manual. Download the Reference Manual from our Download Center at the URL below.
•The Reference Manual can be viewed using Adobe PDF Reader, iBooks, or other software. Adobe PDF reader can be downloaded from the Adobe website.
Downloading “KeyMission 360/170 Utility”
KeyMission 360/170 Utility is free software that enables you to transfer images and movies to your computer for viewing and editing. Download the software from our Download Center at the URL below.
Visit Our Download Center
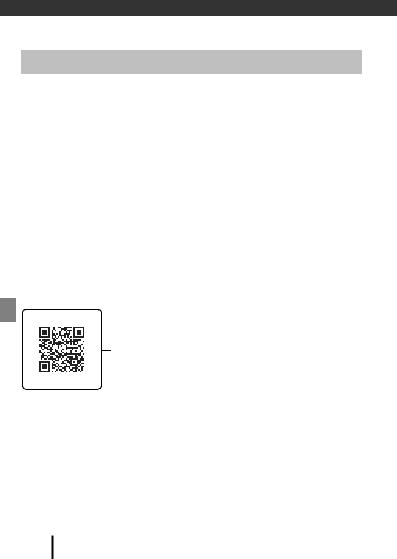
Visit the website below to download the Reference Manual and software for this camera.
http://downloadcenter.nikonimglib.com
Scan this image with your smart device’s QR code reader.
Nikon User Support
If you need any technical assistance with the operation of your Nikon product(s), please contact one of the Nikon representatives. For information on the Nikon representatives in your area, please visit
http://www.nikon-asia.com/support.
iv Introduction
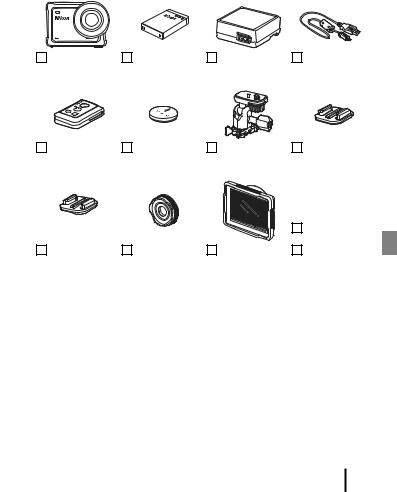
Confirming the Package Contents
In the event that any items are missing, please contact the store where you purchased the camera.
KeyMission 170 |
EN-EL12 |
EH-73P Charging |
UC-E21 USB Cable |
Digital Camera |
Rechargeable |
AC Adapter1, 2 |
|
|
Li-ion Battery |
|
|
ML-L6 Remote |
Remote Control |
AA-1B Base |
AA-2 Base Mount |
Control |
Battery (3V CR2032 |
Adapter |
(Flat) |
|
lithium battery) |
|
|
|
|
|
Quick Start Guide |
|
|
|
(this manual) |
AA-3 Base Mount |
AA-14B Lens |
AA-15B Underwater |
Warranty |
(Curved) |
Protector |
Lens Protector |
|
1A plug adapter is included if the camera was purchased in a country or region that requires a plug adapter. The shape of the plug adapter varies with the country or region
of purchase (A4).
2The EH-73PCH Charging AC Adapter may be included instead of the EH-73P, depending on the country or region where you purchased the camera.
NOTE:
•A memory card is not included with the camera. In this manual, microSD, microSDHC, and microSDXC memory cards are referred to as “memory cards”.
•The lens protector is attached to the camera at the time of purchase.
Introduction v
Information and Precautions
Life-Long Learning
As part of Nikon’s “Life-Long Learning” commitment to ongoing product support and education, continually updated information is available online at the following websites:
•For users in the U.S.A.: http://www.nikonusa.com/
•For users in Europe: http://www.europe-nikon.com/support/
•For users in Asia, Oceania, the Middle East, and Africa: http://www.nikon-asia.com/
Visit these websites to keep up-to-date with the latest product information, tips, answers to frequently asked questions (FAQs), and general advice on digital imaging and photography. Additional information may be available from the Nikon representative in your area. Visit the website below for contact information.
http://imaging.nikon.com/
Use Only Nikon Brand Electronic Accessories
Nikon cameras are designed to the highest standards and include complex electronic circuitry. Only Nikon brand electronic accessories (including battery chargers, batteries, AC adapters, and USB cables) certified by Nikon specifically for use with this Nikon digital camera are engineered and proven to operate within the operational and safety requirements of this electronic circuitry.
THE USE OF NON-NIKON ELECTRONIC ACCESSORIES COULD DAMAGE THE CAMERA AND MAY VOID YOUR NIKON WARRANTY.
The use of third-party rechargeable Li-ion batteries not bearing the Nikon holographic seal could interfere with normal operation of the camera or result in the batteries overheating, igniting, rupturing, or leaking.
Holographic seal: Identifies this device as an authentic Nikon product.
For more information about Nikon brand accessories, contact a local authorized Nikon dealer.
Before Taking Important Pictures
Before taking pictures on important occasions (such as at weddings or before taking the camera on a trip), take a test shot to ensure that the camera is functioning normally. Nikon will not be held liable for damages or lost profits that may result from product malfunction.
vi Introduction

About the Manuals
•No part of the manuals included with this product may be reproduced, transmitted, transcribed, stored in a retrieval system, or translated into any language in any form, by any means, without Nikon’s prior written permission.
•Illustrations and screen content shown in this manual may differ from the actual product.
•Nikon reserves the right to change the specifications of the hardware and software described in these manuals at any time and without prior notice.
•Nikon will not be held liable for any damages resulting from the use of this product.
•While every effort was made to ensure that the information in these manuals is accurate and complete, we would appreciate it were you to bring any errors or omissions to the attention of the Nikon representative in your area (address provided separately).
Comply with Copyright Notices
Under copyright law, photographs or recordings of copyrighted works made with the camera can not be used without the permission of the copyright holder. Exceptions apply to personal use, but note that even personal use may be restricted in the case of photographs or recordings of exhibits or live performances.
Disposing of Data Storage Devices
Please note that deleting images or formatting memory cards does not completely erase the original image data. Deleted files can sometimes be recovered from discarded memory cards using commercially available software, potentially resulting in the malicious use of personal image data. Ensuring the privacy of such data is the user’s responsibility.
Before discarding a memory card or transferring ownership to another person, be sure to perform Reset all in Camera settings in the c(setup) menu (A23) to reset camera settings. After that, erase all data using commercial deletion software or perform Format card in Camera settings in the c(setup) menu to format the memory card, then completely refill it with images containing no private information (for example, images of empty sky).
Care should be taken to avoid injury or damage to property when physically destroying memory cards.
Conformity Marking
Follow the procedure below to display some of the conformity markings that the camera complies with.
Enter shooting mode Mkbutton Mc(setup) icon Mkbutton MCamera settings Mk button MConformity marking Mkbutton
Introduction vii

<Important> Notes About Shockproof,
Waterproof, and Dustproof Performance and
Condensation
•The shockproof, waterproof, and dustproof performance described here do not guarantee that the camera will remain completely waterproof or free from damage and trouble under all conditions.
•Do not subject the camera to excessive shock, vibration or pressure by dropping it, hitting it, or placing a heavy object on it. Failure to observe this precaution could deform the camera, cause water to seep inside, or damage the airtight seals, resulting in camera malfunction.
•Your Nikon warrantee may not cover troubles caused by water seeping inside the camera due to improper handling of the camera.
Notes About Shockproof Performance
This camera has passed Nikon’s in-house test (drop test from a height of 200 cm (6 ft 6 in.) on a 5 cm (2 in.) thick plywood panel) compliant with the MIL-STD 810F Method 516.5-Shock1 standard.2
Changes in appearance, such as paint peeling off and deformation of the camera, are not measured in Nikon’s in-house test.
1U.S. Department of Defense test method standard.
This drop test drops 5 cameras in 26 directions (8 edges, 12 corners, and 6 faces) from a height of 122 cm (4 ft) to make sure that one to five cameras pass the test (if any defect is detected during the test, another five cameras are tested to make sure that the test
criteria are satisfied for one to five cameras).
2 When the lens protectors or underwater lens protectors are attached.
Notes About Waterproof and Dustproof Performance
The camera is rated equivalent to JIS/IEC waterproof class 8 (IPX8) and JIS/IEC dustproof class 6 (IP6X) and can shoot images underwater at a depth of 10 m (33 ft) for up to 60 minutes.*
*This rating indicates that the camera has been designed to withstand the specified water pressure for the specified period of time when the camera is used according to the methods defined by Nikon.
-The waterproof performance of this camera was tested in fresh water (swimming pools, rivers, and lakes) and salt water only.
-The inner portion of this camera is not waterproof. Water seeping inside the camera could cause the components to rust, resulting in high repair costs or irreparable damage.
B Precautions When Cleaning
•Do not puncture the microphone or speaker openings with a sharp implement. If the inside of the camera is damaged, the waterproof performance will deteriorate.
•Do not use soap, neutral detergents, or chemicals such as benzene for cleaning.
viii Introduction
Notes About Shockproof, Waterproof, and Dustproof
Performance
•Do not drop the camera, strike it against a hard object such as a rock, or throw it against a water surface.
•Do not subject the camera to shock when using it underwater.
-Do not subject the camera to water pressure by exposing it to rapids or waterfalls.
-Do not expose to depths greater than 10 m (33 ft) underwater.
-Make sure not to drop the camera underwater. This camera does not float in water.
•Do not continuously use the camera underwater for 60 minutes or more.
•Do not insert a wet memory card or battery in the camera.
-Do not open the battery-chamber/memory card slot cover when the camera or your hands are wet. Doing so may cause water to seep inside the camera or result in camera malfunction.
•Do not open the battery-chamber/memory card slot cover underwater.
• If moisture such as water droplets adheres to the outside of the camera or inside of the battery-chamber/memory card slot cover, immediately wipe it off with a soft dry cloth. - If a foreign substance adheres to the
outside of the camera or inside of the battery-chamber/memory card slot cover, immediately remove it with a blower or a soft cloth.
•Do not leave the camera in cold conditions or in hot conditions of 40°C (104°F) or more for a long period of time.
-Doing so could cause deterioration of the waterproof performance.
-When using the camera underwater, make sure the water temperature is from 0°C to 40°C (32°F to 104°F).
•Do not use the camera at hot springs.
Before Using the Camera Underwater
Check the items below before using the camera underwater.
•Make sure that there are no foreign substances inside the battery-chamber/ memory card slot cover.
•Make sure that the waterproofing packing of the battery-chamber/memory card slot cover is not cracked or deformed.
-Make sure that the waterproofing packing is not detached from the camera.
•Make sure that the battery-chamber/memory card slot cover is firmly closed.
-Make sure that the battery-chamber/memory card slot cover latch release is in the LOCK position (A2).
Introduction ix

Notes About Operating Temperature, Humidity, and
Condensation
The operation of this camera has been tested at temperatures from −10°C to +40°C (14°F to 104°F).
When you use the camera in cold climate regions or at high altitudes, observe the following precautions.
•Battery performance deteriorates temporarily when cold. Keep the camera and batteries warm under your clothing before use.
•Camera performance may deteriorate temporarily if it is exposed to extreme cold for an extended period. For example, the monitor may appear darker than normal immediately after the camera is turned on, or residual images may be produced.
● Environmental conditions that are likely to cause condensation
Fogging (condensation) may occur on the inside of the monitor, lens, or underwater lens protector when there are sharp temperature changes or high humidity, such as in the environmental conditions described below. This is not a malfunction or defect.
•The camera is suddenly immersed in cold water after being in a hot place on land.
•The camera is brought to a warm place such as inside a building after being in the cold outdoors.
•The battery-chamber/memory card slot cover is opened or closed in a highhumidity environment.
•The camera or underwater lens protector is wet when the underwater lens protector is attached.
● Reducing condensation
•Open the battery-chamber/memory card slot cover, put the camera and a commercially-available desiccant in a container such as a plastic bag, and seal the container. Condensation is less likely to occur if the humidity inside the camera is reduced.
•Avoid storing the camera in places where the camera may become hot (such as places exposed to direct sunlight) before using it underwater. Taking the camera underwater while it is hot causes condensation due to sudden changes in temperature.
● Clearing the fogging
•Turn off the camera and open the battery-chamber/memory card slot cover while in a place where the ambient temperature is stable (avoid places with high temperature, high humidity, sand, or dust).
To clear the fogging from the lens or monitor, remove the battery and memory card, and leave the battery-chamber/memory card slot cover open to allow the camera to adjust to the ambient temperature. When the underwater lens protector is fogged, remove it.
•If the underwater lens protector is still fogged, try to clear the fogging by removing the underwater lens protector and using the camera for a while before attaching it again.
xIntroduction
Notes About Waterproof Performance of the Remote
Control
The remote control is rated equivalent to JIS/IEC waterproof class 7 (IPX7), and it is confirmed that water does not seep inside when soaked underwater at a depth of 1 m (3.2 ft) for up to 30 minutes.
- The remote control cannot be used underwater.
Notes About Condensation and Waterproof
Performance of the Remote Control
•Do not drop the remote control, strike it against a hard object such as a rock, or throw it against a water surface.
•Do not take the remote control underwater.
-If the remote control is dropped in water by accident, immediately pick it up and wipe it off with a soft dry cloth.
•Do not insert a wet battery in the remote control.
-Do not open the battery-chamber cover when the remote control or your hands are wet. Doing so may cause water to seep inside the remote control and result in malfunction.
•If moisture such as water droplets or a foreign substance adheres to the outside of the remote control or the inside of the battery-chamber cover, immediately wipe it off with a soft dry cloth.
•Make sure that the battery-chamber cover is firmly closed.
-Make sure that the battery-chamber cover is in the CLOSE position.
-Make sure that no foreign substance such as lint is caught in the batterychamber cover. Failure to observe this precaution could cause water to seep inside the remote control.
•Do not leave the remote control in cold conditions or in hot conditions of 40°C (104°F) or more for a long period of time.
-Doing so could cause deterioration of the waterproof performance.
•Do not suddenly bring the remote control to high-humidity environment if it is exposed to extreme cold for an extended period.
-Condensation may form inside the remote control.
Inspection and Repair
•If the camera is exposed to shock, it is recommended to consult your retailer or Nikon-authorized service representative to confirm the waterproof performance (charged service).
•If the waterproofing packing begins to deteriorate, consult your retailer or Nikonauthorized service representative. The waterproof performance of the waterproofing packing may start to deteriorate after one year.
•If water seeps inside the camera, immediately stop using it and take it to your Nikon-authorized service representative.
Introduction xi

xii Introduction

Parts of the Camera
The Camera Body
1 |
2 |
3 |
4 |
7 |
8 |
9
10
14 13 12 11
|
6 |
5 |
|
|
|
|
|
||
1 |
Status lamp |
9 |
Battery-chamber/memory card slot |
|
2 |
Photo button |
cover latch |
|
|
|
|
|||
|
Battery-chamber/memory card slot |
|
||
3 |
Lens protector |
10 |
|
|
cover latch release |
|
|||
4 |
Movie button |
|
||
11 |
Eyelet for fall prevention cord |
|
||
5 |
Tripod socket |
|
||
12 |
H(xmonitor) button |
|
||
6 |
N-Mark (NFC antenna) |
|
||
13 |
I(cplayback) button |
|
||
7 |
Monitor |
|
||
14 |
k(apply selection) button |
|
||
|
|
|
8Status lamp
Parts of the Camera |
1 |
|
|

Getting Started
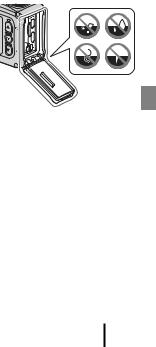
Inserting the Battery and Memory Card
•Unlock the battery-chamber/memory card slot cover latch release (1), slide the battery-chamber/memory card slot cover latch to the yposition (2), and open the battery-chamber/memory card slot cover towards you (3).
•With the battery’s positive and negative terminals oriented correctly, move the orange battery latch (4), and fully insert the battery (5).
•Slide the memory card in until it clicks into place (6).
•Be careful not to insert the battery or memory card upside-down or backward, as this could cause a malfunction or result in damage to the camera or memory card.
•After closing the cover (7), slide the battery-chamber/memory card slot cover latch to the zposition (8), and return the battery-chamber/memory card slot cover latch release to the LOCK position (9). Make sure that the orange marks on both latches are not visible.
B Notes About Waterproof and Dustproof Performance
See “Notes About Shockproof, Waterproof, and Dustproof Performance” (Aix) for more information.
B Formatting a Memory Card
The first time you insert a memory card that has been used in another device into this camera, make sure to format it with this camera.
•Note that formatting a memory card permanently deletes all images and other data on the memory card. Be sure to make copies of any images you wish to keep before formatting the memory card.
•Insert the memory card into the camera, and select Format card in Camera settings (A23) in the c(setup) menu.
2Getting Started
Removing the Battery or Memory Card
Turn the camera off and make sure that the status lamps and screen have turned off, and then open the battery-chamber/memory card slot cover.
•Move the battery latch to eject the battery.
•Gently push the memory card into the camera to partially eject the memory card.
•Be careful when handling the camera, battery, and memory card immediately after using the camera, as they may be hot.
Memory Cards That Can Be Used
The camera supports microSD, microSDHC, and microSDXC memory cards.
•The camera also supports microSDHC and microSDXC cards compliant with UHS-I.
•Use microSDXC memory cards with an SD Speed Class rating of 6 or faster for recording movies.
-Use memory cards with a UHS Speed Class rating of 3 or faster when the image size/frame rate is 2160/30p (4K UHD) or 2160/25p (4K UHD).
-When using a memory card with a lower Speed Class rating, movie recording may stop unexpectedly.
•If you use a card reader, make sure that it is compatible with your memory card.
•Contact the manufacturer for information on features, operation, and limitations on use.
Getting Started |
|
3 |
|
|
|
||
|
|
||
|
|
|
|
 Loading...