

Page 1

DIGITAL CAMERA
Reference Manual
En
• Read this manual thoroughly before using the camera.
• To ensure proper use of the camera, be sure to read
“For Your Safety” (page xli).
• After reading this manual, keep it in a readily accessible
place for future reference.
Page 2
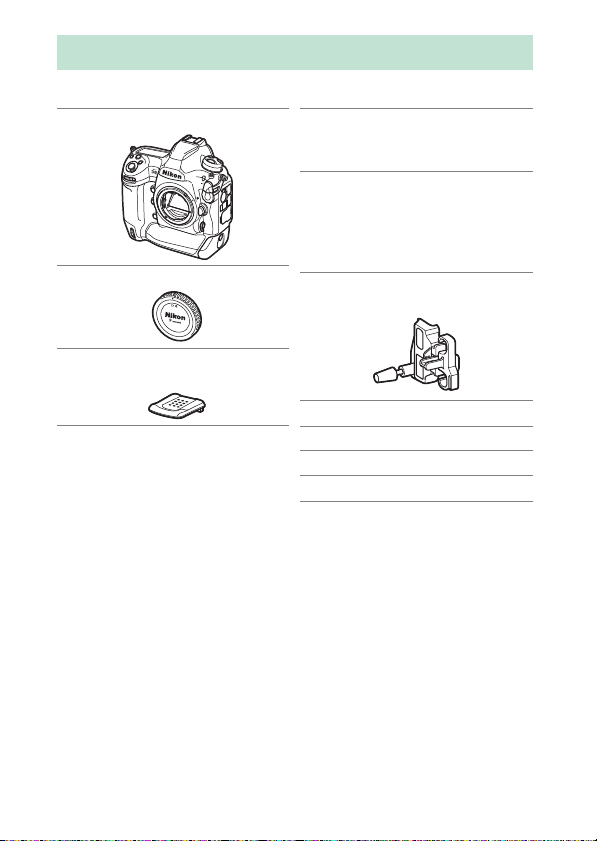
Package Contents
Be sure all items listed here were included with your camera.
Camera
❏
BF-1B body cap
❏
BS-3 accessory shoe cover
❏
(01066)
Memory cards are sold separately.
EN-EL18c rechargeable
❏
Li-ion battery with terminal
cover
MH-26a battery charger
❏
with power cable and two
contact protectors (shape
of power cable depends on
country or region of sale)
HDMI/USB cable clip
❏
(
1068)
0
UC-E24 USB cable
❏
AN-DC22 strap
❏
Warranty
❏
User’s Manual
❏
D6 Model Name: N1823
ii
Package Contents
Page 3

The Nikon Download Center
D
Visit the Nikon download center to download firmware
updates, ViewNX-i and other Nikon software, and manuals
for Nikon products including cameras, NIKKOR lenses, and
flash units.
https://downloadcenter.nikonimglib.com/
Package Contents
iii
Page 4

About This Manual
Symbols
❚❚
The following symbols and conventions are employed in this
manual. Use them to help locate the information you need.
This icon marks notes, information that should be read before
D
using this product.
This icon marks tips, additional information you may find helpful
A
when using this product.
This icon marks references to other sections in this manual.
0
Conventions
❚❚
•
This camera uses CFexpress (Type B) and XQD memory cards.
Throughout this manual, CFexpress and XQD memory cards
are generally referred to as “memory cards”. The terms
“CFexpress cards” and “XQD cards” are however used where
necessary to distinguish between the two types.
•
Throughout this manual, battery chargers are referred to as
“battery chargers” or “chargers”.
•
Throughout this manual, smartphones and tablets are referred
to as “smart devices”.
•
Throughout this manual, the term “default settings” is used to
refer to the settings in effect at shipment. The explanations in
this manual assume that default settings are used.
iv
About This Manual
Page 5

For Your Safety
A
“For Your Safety” contains important safety instructions. Be sure to read
them before using the camera. For more information, see “For Your
Safety” (
xli).
0
About This Manual
v
Page 6

Table of Contents
Package Contents ................................................................................... ii
About This Manual................................................................................. iv
Menu List.............................................................................................. xxxv
For Your Safety....................................................................................... xli
Notices .................................................................................................... xlix
Getting to Know the Camera 1
Parts of the Camera ................................................................................ 1
Camera Body...................................................................... 1
The Power Switch............................................................. 8
The Top Control Panel.................................................... 9
The Rear Control Panel................................................. 11
The Viewfinder ................................................................ 12
The Live View Displays (Photos/Movies)................ 15
Touch Controls................................................................ 18
vi
Table of Contents
Page 7

First Steps 27
Readying the Camera.......................................................................... 27
Attaching the Strap....................................................... 27
Charging the Battery .................................................... 28
Inserting the Battery ..................................................... 32
Attaching a Lens............................................................. 35
Inserting Memory Cards.............................................. 38
Camera Setup.................................................................. 43
The Battery Level and Number of Exposures Remaining....... 47
Battery Level.................................................................... 47
Memory Card Indicators and Number of
Exposures Remaining .............................................. 48
Basic Photography and Playback 50
Taking Photographs ............................................................................ 50
Framing Photographs in the Viewfinder
(Viewfinder Photography)...................................... 50
Framing Photographs in the Monitor
(Live View).................................................................... 55
Recording Movies................................................................................. 63
Taking Photos During Filming .................................. 70
Playback ................................................................................................... 71
Viewing Movies .............................................................. 73
Deleting Unwanted Pictures...................................... 76
Table of Contents
vii
Page 8

Uploading Pictures ............................................................................... 77
Uploading Pictures to Smart Devices ..................... 77
Uploading Pictures to a Computer or
FTP Server..................................................................... 77
Camera Controls 80
The G Button ..................................................................................... 80
Using the Menus............................................................. 81
Button (the i Menu) ................................................................ 88
The
i
The Still Photography i Menu................................... 90
The Movie i Menu ......................................................... 92
The Playback
The R Button ......................................................................................... 94
Viewfinder Photography ............................................. 94
Live View Photography ................................................ 95
The Focus-Mode Selector................................................................... 97
The AF-Mode Button............................................................................ 98
Choosing an AF Mode .................................................. 98
Choosing an AF-Area Mode..................................... 101
The AF-ON Button.............................................................................. 107
The
Button.................................................................................. 108
I
Choosing an Exposure Mode.................................. 108
Menu.................................................... 93
i
viii
Table of Contents
Page 9

The Release Mode Dial and
Choosing a Release Mode......................................... 109
Button....................................................................................... 111
The
Y
Choosing a Metering Option................................... 111
The BKT Button.................................................................................... 113
The
The
The
The
The g (h/Q) Button...................................................................... 125
The
The Pv Button....................................................................................... 134
The Fn1, Fn2, Fn3 (
) Button........................................................................... 114
S (Q
Adjusting ISO Sensitivity........................................... 114
Enabling Auto ISO Sensitivity Control.................. 116
Button........................................................................................ 117
E
Adjusting Exposure Compensation ...................... 117
Button................................................................................ 118
T
Adjusting Image Quality ........................................... 118
Choosing an Image Size ............................................ 120
Button .................................................................................... 121
U
Adjusting White Balance........................................... 121
Choosing a Picture Control ...................................... 125
) Button .............................................................................. 131
W (N
Choosing a Flash Mode ............................................. 131
Adjusting Flash Compensation .............................. 133
), and Fn (Vertical) Buttons..................... 135
C
Button........................................ 109
S
Table of Contents
ix
Page 10

Shooting Settings 136
Image Recording Options (Image Area, Quality,
and Size)............................................................................................ 136
Adjusting Image Area Settings............................... 136
Adjusting Image Quality........................................... 142
Choosing an Image Size............................................ 145
Choosing How the Camera Focuses (Focus)............................ 148
Choosing a Focus Mode............................................ 148
Autofocus Mode .......................................................... 149
AF-Area Mode............................................................... 153
Focus Point Selection................................................. 164
Custom Focus Groups ............................................... 167
Focus Lock ..................................................................... 170
Manual Focus................................................................ 174
Exposure-Related Settings (Metering and Exposure
Compensation)............................................................................... 178
Choosing How the Camera Sets Exposure......... 178
Choosing an Exposure Mode.................................. 182
Long Time-Exposures (Mode M Only) ................. 191
Shutter Speed and Aperture Lock......................... 194
Autoexposure Lock..................................................... 196
Exposure Compensation .......................................... 199
x
Table of Contents
Page 11

Choosing the Operation Performed When the
Shutter Is Released (Release Mode)......................................... 203
Choosing a Release Mode Such as
Single-Frame, Continuous, or
Quiet Shutter-Release............................................ 203
Using the Self-Timer (
Mirror Up Mode (Mup)............................................... 211
Adjusting the Camera’s Sensitivity to Light
(ISO Sensitivity) ............................................................................... 213
ISO Sensitivity................................................................ 213
Auto ISO Sensitivity Control..................................... 216
Achieving Natural Colors with Different Light Sources
(White Balance)............................................................................... 221
White Balance ............................................................... 221
Fine-Tuning White Balance ...................................... 227
Choosing a Color Temperature .............................. 231
Preset Manual................................................................ 234
Varying Exposure or White Balance over a Series of
Photographs (Bracketing)........................................................... 249
Bracketing....................................................................... 250
Exposure and Flash Bracketing............................... 251
White Balance Bracketing......................................... 259
ADL Bracketing ............................................................. 265
)............................................ 209
E
Table of Contents
xi
Page 12

Image Processing (Picture Controls) ........................................... 271
Picture Controls ........................................................... 271
Modifying Picture Controls from the Menus..... 274
Custom Picture Controls........................................... 276
Preserving Detail in Highlights and Shadows
(Active D-Lighting and HDR) ..................................................... 281
Active D-Lighting ........................................................ 281
High Dynamic Range (HDR)..................................... 283
Movie Recording and Editing 292
Image Area: Choosing a Movie Crop........................................... 292
Frame Size/Frame Rate and Movie Quality............................... 294
The Movie Crop............................................................ 296
Points to Note When Recording Movies.................................... 297
Editing Movies..................................................................................... 300
Trimming Movies......................................................... 301
Saving Selected Frames as JPEG Stills.................. 306
Adding Indices to Movies......................................... 307
Other Shooting Options 308
Using Two Memory Cards............................................................... 308
Deleting Copies............................................................ 311
xii
Table of Contents
Page 13

Two-Button Reset: Restoring Default Settings......................... 312
Photo Shooting Menu................................................ 313
Movie Shooting Menu ............................................... 315
Other Settings............................................................... 316
Combining Multiple Exposures in a Single Photo
(Multiple Exposure) ....................................................................... 318
Multiple Exposure Options....................................... 318
Creating a Multiple Exposure .................................. 321
Using the
Ending Multiple Exposures....................................... 330
Taking Photos at a Set Interval (Interval Timer Shooting) ... 331
Interval Timer Shooting Options............................ 331
Interval-Timer Photography .................................... 336
Pausing Interval-Timer Photography ................... 345
Resuming Interval Timer Shooting........................ 346
Ending Interval Timer Shooting ............................. 347
Creating a Movie from Photos (Time-Lapse Movie)............... 348
Time-Lapse Movie Options ...................................... 348
Recording Time-Lapse Movies................................ 350
Varying Focus over a Series of Photos
(Focus Shift Shooting) .................................................................. 360
Focus Shift Shooting Options.................................. 360
Focus Shift Photography........................................... 363
Button ...................................................... 329
i
Table of Contents
xiii
Page 14

The Electronic Shutter (Silent Live View Photography) ....... 374
Customizing the
Using Non-CPU Lenses (Non-CPU Lens Data).......................... 379
Location Data ...................................................................................... 384
Menus: Customize i Menu ..................... 377
i
Entering Lens Data...................................................... 381
Recalling Non-CPU Lens Data................................. 383
Location Data Options............................................... 384
Playback 390
Viewing Pictures ................................................................................. 390
Full-Frame Playback ................................................... 390
Thumbnail Playback................................................... 391
Playback Controls........................................................ 392
Playback Touch Controls .......................................... 395
Button ................................................................. 399
The
i
Photo Information ............................................................................. 405
File Information............................................................ 406
Exposure Data............................................................... 407
Highlights....................................................................... 407
RGB Histogram ............................................................. 408
Shooting Data............................................................... 410
Overview......................................................................... 416
Playback Zoom.................................................................................... 418
Using Playback Zoom ................................................ 419
xiv
Table of Contents
Page 15

Protecting Pictures from Deletion................................................ 421
Rating Pictures..................................................................................... 423
Selecting Pictures for Upload......................................................... 425
Filtered Playback................................................................................. 427
[Filtered Playback Criteria]........................................ 427
Deleting Pictures................................................................................. 429
Using the Delete Button............................................ 429
Deleting Multiple Pictures........................................ 431
Voice Memos 436
Recording Voice Memos .................................................................. 436
During Playback ........................................................... 436
During Shooting........................................................... 438
Playing Voice Memos ........................................................................ 443
Deleting Voice Memos............................................... 444
Connecting to Computers and TVs 445
Connecting to Computers............................................................... 445
Connecting via USB..................................................... 445
Ethernet and Wireless Networks (Wi-Fi) .............. 451
Connecting to HDMI Devices ......................................................... 453
TVs..................................................................................... 454
Recorders........................................................................ 454
Table of Contents
xv
Page 16

Built-in Wireless 457
Camera and Network System Chart ............................................ 457
Connecting to Smart Devices ........................................................ 458
The SnapBridge App .................................................. 458
What SnapBridge Can Do for You ......................... 459
Wireless Connections................................................. 460
Connecting via Wi-Fi (Wi-Fi Mode) ....................... 461
Connecting via Bluetooth ........................................ 469
Connecting to Computers via Wi-Fi ............................................ 485
What Wi-Fi Can Do for You ...................................... 485
The Wireless Transmitter Utility ............................. 485
Infrastructure and Access-Point Modes .............. 486
Connecting in Access-Point Mode........................ 488
Connecting in Infrastructure Mode ...................... 494
Uploading Pictures ..................................................... 503
Disconnecting and Reconnecting......................... 510
Troubleshooting Built-in Wi-Fi ...................................................... 512
xvi
Table of Contents
Page 17

Ethernet/WT-6 514
Ethernet Connections and the WT-6 ........................................... 514
The Wireless Transmitter Utility.............................. 515
What Ethernet and the WT-6 Can Do for You........................... 516
Upload to FTP Servers or Computers ................... 516
Computer-Based Remote Photography
(Camera Control Mode) ........................................ 517
Browser-Based Remote Photography
(HTTP Server Mode)................................................ 517
Camera-Based Remote Photography
(Synchronized Release)......................................... 518
Clock Synchronization (Synchronize Date
and Time) ................................................................... 518
Connecting an Ethernet Cable or WT-6...................................... 520
Connecting an Ethernet Cable................................ 520
Attaching the WT-6..................................................... 521
Creating a Network Profile (Ethernet)......................................... 522
Image Transfer and Camera Control Modes...... 523
HTTP Server Mode ....................................................... 531
FTP Upload Mode ........................................................ 536
Table of Contents
xvii
Page 18

Creating Network Profiles (WT-6)................................................. 544
WT-6 Wireless Connection Options...................... 545
Image Transfer and Camera Control Modes...... 546
HTTP Server Mode....................................................... 560
FTP Upload Mode........................................................ 571
Upload to Computers and FTP Servers ...................................... 585
Connecting to a Computer or FTP Server........... 585
Camera Control................................................................................... 595
The [Wired LAN/WT] Status Display...................... 598
HTTP Server .......................................................................................... 601
The [Wired LAN/WT] Status Display...................... 607
Computer, Android, and iPad Web Browsers.... 610
iPhone Web Browsers................................................ 622
Synchronized Release....................................................................... 628
About Synchronized Release .................................. 628
Using Synchronized Release ................................... 629
Synchronizing Camera Clocks ....................................................... 633
Ethernet/Wireless Transmitter Troubleshooting.................... 636
Problems and Solutions............................................ 636
Error Codes .................................................................... 638
xviii
Table of Contents
Page 19

On-Camera Flash Photography 640
“On-Camera” Versus “Remote” ...................................................... 640
Camera-Mounted Flash Units.................................. 640
Remote Flash Photography ..................................... 640
Using an On-Camera Flash.............................................................. 641
Flash Control Mode............................................................................ 645
Flash Modes.......................................................................................... 648
Choosing a Flash Mode ............................................. 651
Flash Compensation.......................................................................... 653
Adjusting Flash Compensation .............................. 653
FV Lock ................................................................................................... 655
Flash Info for On-Camera Units ..................................................... 659
Flash Control Mode Displays ................................... 660
Remote Flash Photography 663
What Is Remote Flash Photography?........................................... 663
Using Remote Flash Units......................................... 664
Radio AWL ............................................................................................. 665
Establishing a Wireless Connection ...................... 665
Remote Flash Photography ..................................... 670
Adding a Shoe-Mounted Flash Unit...................... 679
Optical AWL .......................................................................................... 680
Using Optical AWL with the SB-5000
or SB-500 .................................................................... 681
Table of Contents
xix
Page 20

Optical/Radio AWL............................................................................. 694
Flash Info for Remote Units ............................................................ 695
Flash Control Mode Displays................................... 695
Menu Guide 698
Defaults.................................................................................................. 698
Playback Menu Defaults ........................................... 698
Photo Shooting Menu Defaults.............................. 700
Movie Shooting Menu Defaults ............................. 707
Custom Settings Menu Defaults ............................ 709
Setup Menu Defaults ................................................. 722
The Playback Menu: Managing Images............................... 730
D
Delete............................................................................................... 731
Playback Folder ............................................................................ 732
Playback Display Options .........................................................733
Delete Images from Both Slots............................................... 734
Dual-Format Recording PB Slot.............................................. 735
Filtered Playback Criteria .......................................................... 735
Image Review................................................................................ 735
After Delete.................................................................................... 736
After Burst, Show .........................................................................737
Rotate Tall....................................................................................... 738
xx
Table of Contents
Page 21

Copy Image(s)................................................................................738
Copying Pictures.......................................................... 739
Hide Image .....................................................................................746
Slide Show ......................................................................................748
Viewing Slide Shows................................................... 748
The Photo Shooting Menu: Shooting Options.................. 750
C
Photo Shooting Menu Bank .....................................................752
Renaming Photo Shooting Menu Banks ............. 753
Restoring Default Settings........................................ 753
Extended Photo Menu Banks ..................................................754
Storage Folder............................................................................... 755
Renaming Folders........................................................ 755
Select Folder by Number .......................................... 756
Select Folder from List ............................................... 758
File Naming ....................................................................................760
Role Played by Card in Slot 2 ...................................................761
Image Area .....................................................................................761
Image Quality ................................................................................761
Image Size.......................................................................................762
NEF (RAW) Recording .................................................................762
NEF (RAW) Compression ........................................... 763
NEF (RAW) Bit Depth................................................... 763
Table of Contents
xxi
Page 22

ISO Sensitivity Settings.............................................................. 764
White Balance ...............................................................................764
Set Picture Control ...................................................................... 764
Manage Picture Control ............................................................765
Color Space.................................................................................... 765
Active D-Lighting......................................................................... 766
Long Exposure NR ....................................................................... 767
High ISO NR ................................................................................... 768
Vignette Control .......................................................................... 769
Diffraction Compensation........................................................ 770
Auto Distortion Control............................................................. 771
Flicker Reduction ......................................................................... 772
Flash Control ................................................................................. 774
Flash Control Mode .................................................... 775
Wireless Flash Options .............................................. 776
Remote Flash Control ................................................ 777
Radio Remote Flash Info........................................... 777
Auto Bracketing ........................................................................... 778
Multiple Exposure ....................................................................... 779
HDR (High Dynamic Range)..................................................... 779
Interval Timer Shooting............................................................. 780
Time-Lapse Movie ....................................................................... 780
Focus Shift Shooting .................................................................. 780
Silent Live View Photography................................................. 781
xxii
Table of Contents
Page 23

The Movie Shooting Menu: Movie Shooting Options ..... 782
1
Reset Movie Shooting Menu....................................................783
File Naming ....................................................................................783
Destination.....................................................................................783
Image Area .....................................................................................784
Auto DX Crop ................................................................ 784
Frame Size/Frame Rate ..............................................................784
Movie Quality ................................................................................785
Movie File Type.............................................................................785
ISO Sensitivity Settings ..............................................................786
White Balance................................................................................787
Set Picture Control.......................................................................788
Manage Picture Control............................................................. 788
Active D-Lighting .........................................................................788
High ISO NR....................................................................................789
Diffraction Compensation ........................................................789
Flicker Reduction..........................................................................790
Electronic VR ..................................................................................791
Microphone Sensitivity ..............................................................792
Attenuator ......................................................................................793
Frequency Response...................................................................793
Wind Noise Reduction................................................................794
Headphone Volume....................................................................794
Timecode ........................................................................................795
Table of Contents
xxiii
Page 24

Custom Settings: Fine-Tuning Camera Settings ............... 797
A
Custom Settings Bank................................................................ 802
Renaming Custom Settings Banks........................ 802
Restoring Default Settings ....................................... 803
a: Autofocus.................................................................................. 804
a1: AF-C Priority Selection................................................. 804
a2: AF-S Priority Selection................................................. 805
a3: Focus Tracking with Lock-On ................................... 805
Blocked Shot AF Response....................................... 806
Subject Motion............................................................. 806
a4: Focus Points Used......................................................... 807
a5: Store Points by Orientation....................................... 808
a6: AF Activation .................................................................. 810
a7: Single-Point AF Watch Area ......................................811
a8: 3D-Tracking Face-Detection .....................................811
a9: Group-Area AF Face Detection ................................812
a10: Custom Groupings (C1/C2) ..................................... 812
a11: Auto-Area AF Face Detection................................. 812
a12: Auto-Area AF Starting Point ...................................813
a13: Focus-Point Persistence ........................................... 813
a14: Limit AF-Area Mode Selection ............................... 814
a15: Autofocus Mode Restrictions ................................. 815
a16: Focus Point Wrap-Around....................................... 815
xxiv
Table of Contents
Page 25

a17: Focus Point Options...................................................815
Manual Focus Mode.................................................... 816
Focus Point Brightness .............................................. 816
Dynamic-Area AF Assist............................................. 816
a18: Manual Focus Ring in AF Mode..............................817
b: Metering/Exposure................................................................ 818
b1: ISO Sensitivity Step Value...........................................818
b2: EV Steps for Exposure Cntrl ....................................... 818
b3: Exp./Flash Comp. Step Value ....................................818
b4: Easy Exposure Compensation ..................................819
b5: Matrix Metering .............................................................820
b6: Center-Weighted Area ................................................820
b7: Fine-Tune Optimal Exposure ....................................821
c: Timers/AE Lock ........................................................................ 822
c1: Shutter-Release Button AE-L .....................................822
c2: Standby Timer................................................................. 822
c3: Self-Timer..........................................................................823
c4: Monitor Off Delay ..........................................................823
d: Shooting/Display.................................................................... 824
d1: Continuous Shooting Speed..................................... 824
d2: Max. Continuous Release ...........................................825
d3: Limit Release Mode Selection...................................826
d4: Sync. Release Mode Options.....................................826
Table of Contents
xxv
Page 26

d5: Exposure Delay Mode ................................................. 827
d6: Electronic Front-Curtain Shutter............................. 827
d7: Extended Shutter Speeds (M)................................... 828
d8: Limit Selectable Image Area..................................... 829
d9: File Number Sequence ............................................... 830
d10: Peaking Highlights..................................................... 832
d11: Framing Grid Display ................................................ 832
d12: Rear Control Panel ..................................................... 833
d13: LCD Illumination......................................................... 833
d14: Live View in Continuous Mode.............................. 835
d15: Optical VR...................................................................... 835
e: Bracketing/Flash..................................................................... 836
e1: Flash Sync Speed........................................................... 836
e2: Flash Shutter Speed .....................................................838
e3: Exposure Comp. for Flash .......................................... 838
e4: Auto
e5: Flash Burst Priority........................................................ 840
e6: Modeling Flash............................................................... 840
e7: Auto Bracketing (Mode M)......................................... 841
e8: Bracketing Order ...........................................................842
e9: Bracketing Burst Options ........................................... 843
ISO Sensitivity Control ................................. 839
N
xxvi
Table of Contents
Page 27

f: Controls....................................................................................... 844
f1: Customize
f2: Customize
Photo Live View Display WB .................................... 848
Split-Screen Display Zoom ....................................... 849
f3: Custom Controls .............................................................850
f4: Multi Selector Center Button......................................863
Viewfinder Photography........................................... 864
Live View ......................................................................... 865
Playback Mode.............................................................. 866
f5: Shutter Spd & Aperture Lock......................................867
f6: Customize Command Dials ........................................867
Reverse Rotation .......................................................... 868
Change Main/Sub........................................................ 868
Aperture Setting........................................................... 869
Menus and Playback................................................... 870
Sub-Dial Frame Advance........................................... 871
f7: Multi Selector...................................................................872
f8: Release Button to Use Dial ..........................................872
f9: Reverse Indicators ..........................................................873
f10: Live View Button Options .........................................874
Switch .........................................................................874
f11:
D
f12: Full-Frame Playback Flicks........................................875
Flick Up/Flick Down .................................................... 875
Flick Advance Direction............................................. 876
Menu.......................................................844
i
Menu (Lv)...............................................846
i
Table of Contents
xxvii
Page 28

g: Movie.......................................................................................... 877
g1: Customize
Multi-Selector Power Aperture............................... 878
Multi Selector Exposure Comp............................... 878
g2: Custom Controls ...........................................................879
g3: Multi Selector Center Button.................................... 884
g4: Highlight Display ..........................................................884
Display Pattern ............................................................. 885
Highlight Display Threshold.................................... 885
The Setup Menu: Camera Setup ............................................... 886
B
Format Memory Card................................................................. 887
Language........................................................................................ 888
Time Zone and Date................................................................... 889
Monitor Brightness ..................................................................... 889
Monitor Color Balance ............................................................... 890
Virtual Horizon.............................................................................. 892
Information Display ....................................................................893
AF Fine-Tuning Options ............................................................ 894
Creating and Saving Fine-Tuning Values ........... 897
Choosing a Default Fine-Tuning Value................ 899
Auto AF Fine-Tuning .................................................. 900
Non-CPU Lens Data..................................................................... 904
Menu .....................................................877
i
xxviii
Table of Contents
Page 29

Clean Image Sensor.....................................................................905
Lock Mirror Up for Cleaning.....................................................906
Image Dust Off Ref Photo .........................................................906
Acquiring Image Dust Off Reference Data ......... 907
Pixel Mapping................................................................................910
Image Comment ..........................................................................911
Input Comment............................................................ 911
Attach Comment.......................................................... 912
Copyright Information ...............................................................912
Artist/Copyright ........................................................... 913
Attach Copyright Information................................. 913
IPTC ...................................................................................................914
Renaming, Editing, and Copying Presets............ 915
Deleting Presets ........................................................... 915
Embedding Presets ..................................................... 916
Copying Presets to a Memory Card....................... 916
Copying Presets to the Camera .............................. 917
Voice Memo Options ..................................................................920
Voice Memo................................................................... 920
Voice Memo Overwrite.............................................. 921
Voice Memo Control................................................... 921
Audio Output ................................................................ 922
Table of Contents
xxix
Page 30

Beep Options................................................................................. 923
Beep On/Off................................................................... 923
Volume............................................................................ 924
Pitch ................................................................................. 924
Touch Controls .............................................................................924
Enable/Disable Touch Controls.............................. 924
Glove Mode ................................................................... 924
HDMI ................................................................................................ 925
Location Data (Built-In).............................................................. 925
Wireless Remote (WR) Options............................................... 925
LED Lamp ....................................................................... 926
Link Mode....................................................................... 926
Assign Remote (WR) Fn Button .............................................. 928
Airplane Mode .............................................................................. 929
Connect to Smart Device.......................................................... 929
Pairing (Bluetooth)...................................................... 930
Select to Send (Bluetooth) ....................................... 930
Wi-Fi Connection......................................................... 931
Send While Off.............................................................. 932
Location Data (Smart Device) ................................. 932
Connect to PC (Built-in Wi-Fi).................................................. 932
Wi-Fi Connection......................................................... 932
Network Settings......................................................... 933
Options............................................................................ 935
MAC Address................................................................. 936
xxx
Table of Contents
Page 31

Wired LAN/WT............................................................................... 937
Wired LAN/WT Functions.......................................... 937
Choose Hardware ........................................................ 937
Network Settings ......................................................... 938
Options............................................................................ 945
Conformity Marking....................................................................949
Battery Info.....................................................................................950
Slot Empty Release Lock............................................................ 951
Save/Load Menu Settings .........................................................952
Save Menu Settings..................................................... 956
Load Menu Settings.................................................... 956
Reset All Settings..........................................................................957
Firmware Version .........................................................................957
The Retouch Menu: Creating Retouched Copies.............. 958
N
Creating Retouched Copies ..................................... 959
NEF (RAW) Processing: Converting NEF (RAW)
to JPEG.........................................................................................962
Trim ...................................................................................................967
Resize................................................................................................ 968
Resizing Multiple Pictures......................................... 968
D-Lighting.......................................................................................973
Red-Eye Correction...................................................................... 974
Straighten .......................................................................................975
Table of Contents
xxxi
Page 32

Distortion Control........................................................................ 976
Perspective Control .................................................................... 978
Monochrome ................................................................................ 979
Image Overlay............................................................................... 980
Add ................................................................................... 980
Lighten and Darken.................................................... 985
Trim Movie ..................................................................................... 989
My Menu/m Recent Settings.................................................... 990
O
My Menu: Creating a Custom Menu ............... 990
O
Recent Settings: Accessing Recently-
m
Used Settings ........................................................... 997
Troubleshooting 998
Before Contacting Customer Support........................................ 998
Problems and Solutions................................................................. 1000
Battery/Display........................................................... 1000
Shooting ....................................................................... 1002
Playback........................................................................ 1009
Bluetooth and Wi-Fi (Wireless Networks)......... 1011
Miscellaneous ............................................................. 1011
Alerts and Error Messages............................................................. 1012
Alerts.............................................................................. 1012
Error Messages ........................................................... 1017
xxxii
Table of Contents
Page 33

Technical Notes 1021
Camera Displays............................................................................... 1021
The Viewfinder........................................................... 1021
The Information Display......................................... 1026
Live View (Still Photography/Movies) ............... 1029
The Top Control Panel ............................................ 1033
The Rear Control Panel ........................................... 1036
Compatible F Mount Lenses........................................................ 1037
CPU lenses ................................................................... 1037
Non-CPU lenses and Other Accessories ........... 1045
The Electronic Rangefinder................................... 1049
Compatible Flash Units ................................................................. 1051
The Nikon Creative Lighting System (CLS) ...... 1051
Other Compatible Accessories ................................................... 1060
Attaching a Power Connector and
AC Adapter ............................................................. 1069
Software.............................................................................................. 1071
Caring for the Camera.................................................................... 1073
Storage ......................................................................... 1073
Cleaning ....................................................................... 1073
The Low-Pass Filter................................................... 1075
Replacing the Clock Battery.................................. 1083
Table of Contents
xxxiii
Page 34

Caring for the Camera and Battery: Cautions ........................ 1085
Camera Care................................................................ 1085
Battery Care................................................................. 1089
Using the Charger ..................................................... 1092
Exposure Program ........................................................................... 1093
Specifications..................................................................................... 1094
Nikon D6 Digital Camera ........................................ 1094
Calibrating Batteries................................................. 1114
Approved Memory Cards.............................................................. 1119
Memory Card Capacity................................................................... 1120
[FX (36 × 24)] Selected for Image Area .............. 1120
[DX (24 × 16)] Selected for Image Area ............. 1122
Battery Endurance ........................................................................... 1125
Location Data (GPS/GLONASS) ................................................... 1128
Trademarks and Licenses .............................................................. 1129
Index ..................................................................................................... 1137
xxxiv
Table of Contents
Page 35

Menu List
The camera offers the following menus. For a more complete
description of individual menu items, refer to the “Menu Guide”
chapter in the Reference Manual. Some items may not be
displayed depending on camera settings or on the type of lens,
flash unit, or other accessory attached.
PLAYBACK MENU
Delete
Playback folder
Playback display options
Delete images from both slots
Dual-format recording PB slot
Filtered playback criteria
Image review
After delete
After burst, show
Rotate tall
Copy image(s)
Hide image
Slide show
PHOTO SHOOTING MENU
Photo shooting menu bank
Extended photo menu banks
Storage folder
File naming
Role played by card in Slot 2
Image area
Image quality
Image size
NEF (RAW) recording
ISO sensitivity settings
White balance
Set Picture Control
Manage Picture Control
Color space
Active D-Lighting
Long exposure NR
High ISO NR
Menu List
xxxv
Page 36

PHOTO SHOOTING MENU MOVIE SHOOTING MENU
Vignette control
Diffraction compensation
Auto distortion control
Flicker reduction
Flash control
Auto bracketing
Multiple exposure
HDR (high dynamic range)
Interval timer shooting
Time-lapse movie
Focus shift shooting
Silent live view photography
Reset movie shooting menu
File naming
Destination
Image area
Frame size/frame rate
Movie quality
Movie file type
ISO sensitivity settings
White balance
Set Picture Control
Manage Picture Control
Active D-Lighting
High ISO NR
Diffraction compensation
Flicker reduction
Electronic VR
Microphone sensitivity
Attenuator
Frequency response
Wind noise reduction
Headphone volume
Timecode
xxxvi
Menu List
Page 37

CUSTOM SETTING MENU
Custom settings bank
a Autofocus
a1 AF-C priority selection
a2 AF-S priority selection
a3 Focus tracking with lock-on
a4 Focus points used
a5 Store points by orientation
a6 AF activation
a7 Single-point AF watch area
a8 3D-tracking face-detection
Group-area AF face
a9
detection
a10 Custom groupings (C1/C2)
Auto-area AF face
a11
detection
a12 Auto-area AF starting point
a13 Focus point persistence
Limit AF-area mode
a14
selection
Autofocus mode
a15
restrictions
a16 Focus point wrap-around
a17 Focus point options
Manual focus ring in AF
a18
mode
CUSTOM SETTING MENU
b Metering/exposure
b1 ISO sensitivity step value
b2 EV steps for exposure cntrl
b3 Exp./flash comp. step value
Easy exposure
b4
compensation
b5 Matrix metering
b6 Center-weighted area
Fine-tune optimal
b7
exposure
c Timers/AE lock
Shutter-release button
c1
AE-L
c2 Standby timer
c3 Self-timer
c4 Monitor off delay
Menu List
xxxvii
Page 38

CUSTOM SETTING MENU
d Shooting/display
Continuous shooting
d1
speed
d2 Max. continuous release
Limit release mode
d3
selection
d4 Sync. release mode options
d5 Exposure delay mode
Electronic front-curtain
d6
shutter
Extended shutter speeds
d7
(M)
d8 Limit selectable image area
d9 File number sequence
d10 Peaking highlights
d11 Framing grid display
d12 Rear control panel
d13 LCD illumination
Live view in continuous
d14
mode
d15 Optical VR
CUSTOM SETTING MENU
e Bracketing/flash
e1 Flash sync speed
e2 Flash shutter speed
e3 Exposure comp. for flash
ISO sensitivity
Auto
e4
e5 Flash burst priority
e6 Modeling flash
e7 Auto bracketing (mode M)
e8 Bracketing order
e9 Bracketing burst options
N
control
xxxviii
Menu List
Page 39

CUSTOM SETTING MENU SETUP MENU
f Controls
f1 Customize
f2 Customize
f3 Custom controls
Multi selector center
f4
button
f5 Shutter spd & aperture lock
f6 Customize command dials
f7 Multi selector
f8 Release button to use dial
f9 Reverse indicators
f10 Live view button options
switch
f11
D
f12 Full-frame playback flicks
g Movie
g1 Customize
g2 Custom controls
Multi selector center
g3
button
g4 Highlight display
menu
i
menu (Lv)
i
menu
i
Format memory card
Language
Time zone and date
Monitor brightness
Monitor color balance
Virtual horizon
Information display
AF fine-tuning options
Non-CPU lens data
Clean image sensor
Lock mirror up for cleaning
Image Dust Off ref photo
Pixel mapping
Image comment
Copyright information
IPTC
Voice memo options
Beep options
Touch controls
HDMI
Location data (built-in)
Menu List
xxxix
Page 40

SETUP MENU RETOUCH MENU
Wireless remote (WR) options
Assign remote (WR) Fn button
Airplane mode
Connect to smart device
Connect to PC (built-in Wi-Fi)
Wired LAN/WT
Conformity marking
Battery info
Slot empty release lock
Save/load menu settings
Reset all settings
Firmware version
NEF (RAW) processing
Trim
Resize
D-Lighting
Red-eye correction
Straighten
Distortion control
Perspective control
Monochrome
Image overlay
Trim movie
MY MENU
Add items
Remove items
Rank items
Choose tab
xl
Menu List
Page 41

For Your Safety
To prevent damage to property or injury to yourself or to others, read “For
Your Safety” in its entirety before using this product.
Keep these safety instructions where all those who use this product will
read them.
DANGER: Failure to observe the precautions marked with this icon
A
carries a high risk of death or severe injury.
WARNING: Failure to observe the precautions marked with this icon
A
could result in death or severe injury.
CAUTION: Failure to observe the precautions marked with this icon
A
could result in injury or property damage.
WARNING
A
Do not use while walking or operating a vehicle.
Failure to observe this precaution could result in accidents or other
injury.
Do not disassemble or modify this product. Do not touch internal
parts that become exposed as the result of a fall or other accident.
Failure to observe these precautions could result in electric shock or
other injury.
Should you notice any abnormalities such as the product producing
smoke, heat, or unusual odors, immediately disconnect the battery
or power source.
Continued operation could result in fire, burns or other injury.
For Your Safety
xli
Page 42

Keep dry. Do not handle with wet hands. Do not handle the plug
with wet hands.
Failure to observe these precautions could result in fire or electric shock.
Do not let your skin remain in prolonged contact with this product
while it is on or plugged in.
Failure to observe this precaution could result in low-temperature burns.
Do not use this product in the presence of flammable dust or gas
such as propane, gasoline or aerosols.
Failure to observe this precaution could result in explosion or fire.
Do not directly view the sun or other bright light source through the
lens or camera.
Failure to observe this precaution could result in visual impairment.
Do not aim the flash or AF-assist illuminator at the operator of a
motor vehicle.
Failure to observe this precaution could result in accidents.
Keep this product out of reach of children.
Failure to observe this precaution could result in injury or product
malfunction. In addition, note that small parts constitute a choking
hazard. Should a child swallow any part of this product, seek immediate
medical attention.
Do not entangle, wrap or twist the straps around your neck.
Failure to observe this precaution could result in accidents.
xlii
For Your Safety
Page 43

Do not use batteries, chargers, or AC adapters not specifically
designated for use with this product. When using batteries,
chargers, and AC adapters designated for use with this product, do
not:
•
Damage, modify, forcibly tug or bend the cords or cables, place
them under heavy objects, or expose them to heat or flame.
•
Use travel converters or adapters designed to convert from one
voltage to another or with DC-to-AC inverters.
Failure to observe these precautions could result in fire or electric shock.
Do not handle the plug when charging the product or using the AC
adapter during thunderstorms.
Failure to observe this precaution could result in electric shock.
Do not handle with bare hands in locations exposed to extremely
high or low temperatures.
Failure to observe this precaution could result in burns, or frostbite.
CAUTION
A
Do not leave the lens pointed at the sun or other strong light
sources.
Light focused by the lens could cause fire or damage to product’s
internal parts. When shooting backlit subjects, keep the sun well out of
the frame. Sunlight focused into the camera when the sun is close to the
frame could cause fire.
For Your Safety
xliii
Page 44

Turn this product off when its use is prohibited. Disable the location
data feature. End location tracking. Disable wireless features when
the use of wireless equipment is prohibited.
The radio-frequency emissions produced by this product could interfere
with equipment onboard aircraft or in hospitals or other medical
facilities.
Remove the battery and disconnect the AC adapter if this product
will not be used for an extended period.
Failure to observe this precaution could result in fire or product
malfunction.
Do not fire the flash in contact with or in close proximity to the skin
or objects.
Failure to observe this precaution could result in burns or fire.
Do not leave the product where it will be exposed to extremely high
temperatures, for an extended period such as in an enclosed
automobile or in direct sunlight.
Failure to observe this precaution could result in fire or product
malfunction.
Do not look directly at the AF-assist illuminator.
Failure to observe this precaution could have adverse effects on vision.
Do not transport cameras or lenses with tripods or similar
accessories attached.
Failure to observe this precaution could result in injury or product
malfunction.
xliv
For Your Safety
Page 45

DANGER (Batteries)
A
Do not mishandle batteries.
Failure to observe the following precautions could result in the batteries
leaking, overheating, rupturing, or catching fire:
•
Use only rechargeable batteries approved for use in this product.
•
Do not expose batteries to flame or excessive heat.
•
Do not disassemble.
•
Do not short-circuit the terminals by touching them to necklaces,
hairpins, or other metal objects.
•
Do not expose batteries or the products in which they are inserted to
powerful physical shocks.
•
Do not step on batteries, pierce them with nails, or strike them with
hammers.
Charge only as indicated.
Failure to observe this precaution could result in the batteries leaking,
overheating, rupturing, or catching fire.
If battery liquid comes into contact with the eyes, rinse with plenty
of clean water and seek immediate medical attention.
Delaying action could result in eye injuries.
For Your Safety
xlv
Page 46

WARNING (Batteries)
A
Keep batteries out of reach of children.
Should a child swallow a battery, seek immediate medical attention.
Keep batteries out of reach of household pets and other animals.
The batteries could leak, overheat, rupture, or catch fire if bitten,
chewed, or otherwise damaged by animals.
Do not immerse batteries in water or expose to rain.
Failure to observe this precaution could result in fire or product
malfunction. Immediately dry the product with a towel or similar object
should it become wet.
Discontinue use immediately should you notice any changes in the
batteries, such as discoloration or deformation. Cease charging
EN-EL18c rechargeable batteries if they do not charge in the
specified period of time.
Failure to observe these precautions could result in the batteries leaking,
overheating, rupturing, or catching fire.
When batteries are no longer needed, insulate the terminals with
tape.
Overheating, rupture, or fire may result should metal objects come into
contact with the terminals.
If battery liquid comes into contact with a person's skin or clothing,
immediately rinse the affected area with plenty of clean water.
Failure to observe this precaution could result in skin irritation.
xlvi
For Your Safety
Page 47

DANGER (CR1616 Lithium Watch Batteries)
A
Do not mishandle batteries.
Failure to observe the following precautions could result in the battery
leaking, overheating, rupturing, or catching fire:
•
Do not attempt to recharge the battery.
•
Do not expose batteries to flame or excessive heat.
•
Do not disassemble.
•
Do not short-circuit the terminals by touching them to necklaces,
hairpins, or other metal objects.
•
Do not expose batteries or the products in which they are inserted to
powerful physical shocks.
If battery liquid comes into contact with the eyes, rinse with plenty
of clean water and seek immediate medical attention.
Delaying action could result in eye injuries.
For Your Safety
xlvii
Page 48

WARNING (CR1616 Lithium Watch Batteries)
A
Keep batteries out of reach of children.
Should a child swallow a battery, seek immediate medical attention.
Do not immerse batteries in water or expose to rain.
Failure to observe this precaution could result in fire or product
malfunction. Immediately dry the product with a towel or similar object
should it become wet.
Discontinue use immediately should you notice any changes in the
battery, such as discoloration or deformation.
Failure to observe this precaution could result in the battery leaking,
overheating, rupturing, or catching fire.
Insert the battery in the correct orientation.
Failure to observe this precaution could result in the battery leaking,
overheating, rupturing, or catching fire.
When batteries are no longer needed, insulate the terminals with
tape.
Overheating, rupture, or fire may result should metal objects come into
contact with the terminals.
If battery liquid comes into contact with a person's skin or clothing,
immediately rinse the affected area with plenty of clean water.
Failure to observe this precaution could result in skin irritation.
xlviii
For Your Safety
Page 49

Notices
•
No part of the manuals included with this product may be reproduced,
transmitted, transcribed, stored in a retrieval system, or translated into
any language in any form, by any means, without Nikon’s prior written
permission.
•
Nikon reserves the right to change the appearance and specifications of
the hardware and software described in these manuals at any time and
without prior notice.
•
Nikon will not be held liable for any damages resulting from the use of
this product.
•
While every effort has been made to ensure that the information in
these manuals is accurate and complete, we would appreciate it were
you to bring any errors or omissions to the attention of the Nikon
representative in your area (address provided separately).
Notices
xlix
Page 50

●
Notice Concerning Prohibition of Copying or Reproduction
Note that simply being in possession of material that has been digitally
copied or reproduced by means of a scanner, digital camera, or other
device may be punishable by law.
•
Items prohibited by law from being copied or reproduced
Do not copy or reproduce paper money, coins, securities, government
bonds, or local government bonds, even if such copies or reproductions
are stamped “Sample.”
The copying or reproduction of paper money, coins, or securities which
are circulated in a foreign country is prohibited.
Unless the prior permission of the government has been obtained, the
copying or reproduction of unused postage stamps or post cards issued
by the government is prohibited.
The copying or reproduction of stamps issued by the government and
of certified documents stipulated by law is prohibited.
•
Cautions on certain copies and reproductions
The government has issued cautions on copies or reproductions of
securities issued by private companies (shares, bills, checks, gift
certificates, etc.), commuter passes, or coupon tickets, except when a
minimum of necessary copies are to be provided for business use by a
company. Also, do not copy or reproduce passports issued by the
government, licenses issued by public agencies and private groups, ID
cards, and tickets, such as passes and meal coupons.
•
Comply with copyright notices
Under copyright law, photographs or recordings of copyrighted works
made with the camera cannot be used without the permission of the
copyright holder. Exceptions apply to personal use, but note that even
personal use may be restricted in the case of photographs or recordings
of exhibits or live performances.
l
Notices
Page 51

●
Use Only Nikon Brand Electronic Accessories
Nikon cameras are designed to the highest standards and include
complex electronic circuitry. Only Nikon brand electronic accessories
(including lenses, chargers, batteries, AC adapters, and flash accessories)
certified by Nikon specifically for use with this Nikon digital camera are
engineered and proven to operate within the operational and safety
requirements of this electronic circuitry.
The use of non-Nikon electronic accessories could damage
the camera and may void your Nikon warranty. The use of
third-party rechargeable Li-ion batteries not bearing the
Nikon holographic seal shown at right could interfere with
normal operation of the camera or result in the batteries overheating,
igniting, rupturing, or leaking.
For more information about Nikon brand accessories, contact a local
authorized Nikon dealer.
Notices
li
Page 52

Before Taking Important Pictures
D
Before taking pictures on important occasions (such as at weddings or
before taking the camera on a trip), take a test shot to ensure that the
camera is functioning normally. Nikon will not be held liable for damages
or lost profits that may result from product malfunction.
Life-Long Learning
D
As part of Nikon’s “Life-Long Learning” commitment to ongoing product
support and education, continually-updated information is available online at the following sites:
•
For users in the U.S.A.: https://www.nikonusa.com/
•
For users in Europe and Africa:
https://www.europe-nikon.com/support/
•
For users in Asia, Oceania, and the Middle East:
https://www.nikon-asia.com/
Visit these sites to keep up-to-date with the latest product information,
tips, answers to frequently-asked questions (FAQs), and general advice on
digital imaging and photography. Additional information may be
available from the Nikon representative in your area. See the following
URL for contact information: https://imaging.nikon.com/
lii
Notices
Page 53

Getting to Know the Camera
2
1
3
4
5
6
7
4
Parts of the Camera
Camera Body
GNSS antenna (0384)
1
button (0108)
I
2
Release mode dial lock release
3
(
109, 203)
0
Eyelet for camera strap (027)
4
BKT button (0113, 251, 259,
5
265)
Release mode dial (0109,
6
203)
button (0111, 178)
Y
7
Parts of the Camera
1
Page 54

2
1
3
4
5
6
7
8
9
10
1
2
3
4
5
6
2
Parts of the Camera
Movie-record button (063)
Power switch (08)
Shutter-release button (050)
button (0117, 199)
E
) button (0114, 213,
S (Q
887)
Top control panel (09, 1033)
(focal plane mark; 0177)
E
7
Diopter adjustment control
8
14)
(
0
Accessory shoe (for optional
9
flash unit;
Accessory shoe cover
10
(
1066)
0
641)
0
Page 55

2
1
3
24
4
5
6
7
8
9
10
11
1415
12
13
16
19
20
21
23
22
18
17
Stereo microphone (for
1
movies;
Meter coupling lever
2
Mirror (063, 1078)
3
Self-timer lamp (0209)
4
Flash sync terminal cover
5
Ten -pin rem ote term inal cov er
6
USB connector cover
7
Peripheral connector cover
8
HDMI connector cover
9
Cover for microphone,
10
headphone, and Ethernet
connectors
Lens release button (037)
11
Battery-chamber cover latch
12
(
0
32)
63)
0
Battery-chamber cover (032)
13
AF-mode button (098, 152,
14
163)
Focus-mode selector (097,
15
148, 174)
Flash sync terminal (0644)
16
Ten-pin remote terminal
17
Peripheral connector (0521)
18
USB connector (0445)
19
HDMI connector (0453)
20
Connector for external
21
microphone (
Headphone connector
22
(
0
Ethernet connector (0520)
23
Body cap (035)
24
0
794)
Parts of the Camera
299)
3
Page 56

1
2
3
4
5
8
7
6
11
10
9
12
13
Pv button (062, 134, 187)
1
Sub-command dial (0867)
2
Fn1 button (0135)
3
Fn2 button (0135)
4
Sub-command dial for vertical
5
shooting (
Shutter-release button for
6
vertical shooting
Fn button (vertical; 0135)
7
867)
0
Security slot (for anti-theft
8
cable;
Lens mounting mark (035)
9
Lens mount (035)
10
CPU contacts
11
Tripod socket
12
Vertical shooting shutter-
13
release button lock (
7)
0
54)
0
4
Parts of the Camera
Page 57

1
2
3
4
5
6
7
8
9
10
1211 15
18
19
17
16
13 14
) button (076, 429, 887)
O (Q
1
button (071, 390)
K
2
Monitor (018, 55, 63, 395)
3
button (080, 698)
G
4
g (h/Q
5
273, 421)
X
6
W (M
7
653)
J
8
Network indicator (0593)
9
Fn3 (C) button (0135, 436)
10
) button (087, 125,
button (061, 418)
) button (061, 131, 651,
(OK) button (081)
Rear control panel (011,
11
1036)
button (0109, 208, 312)
S
12
button (0118, 144,
T
13
147)
button (0121, 221, 312)
U
14
button (094)
R
15
Viewfinder (014)
16
Focus selector lock (0164)
17
Memory card access lamp
18
38)
(
0
button (088, 399)
i
19
Parts of the Camera
5
Page 58

2
1
3
4
87
9
11
12
13
14
16
15
10
65
Viewfinder eyepiece (01067)
1
Eyepiece adapter (01067)
2
Eyepiece shutter lever (013)
3
Eyepiece adapter latch
4
1067)
(
0
button (055, 63, 874)
a
5
Live view selector (055, 63)
6
Sub-selector (0166, 170, 196)
7
AF-ON button (0107, 173)
8
Main command dial (0867)
9
Multi selector (081, 393)
10
Memory card slot cover (038)
11
Card slot cover release button
12
cover (
Card slot cover release button
(under cover; 038)
button (0107)
C
13
Multi selector (vertical; 0166)
14
Main command dial (vertical;
15
0
Speaker
Microphone (for voice memos;
16
0
867)
436)
38)
0
6
Parts of the Camera
Page 59

The GNSS Antenna
D
If possible, stay in the open when using location data services. Keep the
antenna pointed to the sky for best reception.
The Connector Covers
D
Be sure to close the covers when the connectors are not in use. Foreign
matter in the connectors could cause malfunction.
The Speaker
D
Close proximity to the speaker could corrupt data stored on magnetic
stripe cards or other such magnetic storage devices. Keep magnetic
storage devices away from the speaker.
The Security Slot
A
The security slot serves as an attachment point
for third-party anti-theft cables. It is compatible
and intended for use with Kensington security
cable locks. For more information, see the
documentation provided with the security
cable lock.
Parts of the Camera
7
Page 60

The Power Switch
Rotate the power switch to
the “ON” position as shown to
turn the camera on. Returning
the switch to the “OFF”
position turns the camera off.
The LCD Illuminator
D
Rotating the power switch to D
activates the backlights for the
buttons and control panels (LCD
illuminator). The backlights will
remain lit for a few seconds after
the power switch is released. The
backlights turn off when the
switch is rotated to
the button backlight makes the camera easier to use in the dark.
a second time or the shutter is released. Activating
D
8
Parts of the Camera
Page 61

The Top Control Panel
7
1
2
3
5
4
6
13
10
12
11
15
169
8
14
The following indicators appear in the top control panel at
default settings. For a full list of the indicators that may be
displayed, see “Camera Displays” (01033) in “Technical Notes”.
Shutter speed (0185, 188)
1
Exposure mode (0108, 182)
2
AF-area mode indicator
3
101, 163)
(
0
Metering (0111, 178)
4
Photo shooting menu bank
5
752)
(
0
Custom settings bank (0802)
6
Autofocus mode (098, 149)
7
ISO sensitivity indicator
8
(
114, 213)
0
ISO sensitivity (0114, 213)
9
Aperture (f-number; 0186,
10
188)
Exposure indicator
11
Exposure (
Exposure compensation
(0117, 199)
Memory card icon (Slot 2;
12
41, 48)
0
Battery indicator (047)
13
“k” (appears when memory
14
remains for over 1000
exposures; 048)
Number of exposures
15
remaining (
Memory card icon (Slot 1;
16
41, 48)
0
0
0
190)
48, 1120)
Parts of the Camera
9
Page 62

Camera Off Display
D
If the camera is turned off with a battery and
memory card inserted, the memory card icon,
the number of photos in the current folder
q
), and the number of exposures remaining
(
w
(
) will be displayed in the top control panel.
Depending on the memory card, the camera
may in rare cases not display this information
when a card is inserted. This can be addressed by turning the camera on.
10
Parts of the Camera
Page 63

The Rear Control Panel
The following indicators appear in the rear control panel at
default settings. For a full list of the indicators that may be
displayed, see “Camera Displays” (01036) in “Technical Notes”.
312
Release mode (0109, 203)
1
Size (JPEG images; 0120, 145)
2
Image quality (0118, 144)
3
5
4
5
4
White balance (0121, 221)
Role played by memory card
in Slot 2 (
Image quality (
308)
0
0
Parts of the Camera
118, 144)
11
Page 64

The Viewfinder
The following indicators appear in the viewfinder at default
settings. For a full list of the indicators that may be displayed,
see “Camera Displays” (01021) in “Technical Notes”.
1
2
3
1
2
3
4
5
6
7
8
12
Parts of the Camera
4 5 6 7 8 9 10 12 13
12-mm reference circle for
center-weighted metering
(0111, 178)
Focus points (0164)
AF-area brackets (050, 164)
Focus indicator (050, 176)
Metering (0111, 178)
Exposure mode (0108, 182)
Shutter speed (0185, 188)
Autofocus mode (
Aperture (f-number; 0186,
188)
0
98, 149)
ISO sensitivity indicator
9
(
ISO sensitivity (0114, 213)
10
AF-area mode (
Battery indicator (047)
11
Number of exposures
12
remaining (
Number of shots remaining
before memory buffer fills
(
“k” (appears when memory
13
remains for over 1000
exposures; 048)
114, 213)
0
207, 1120)
0
11
0
101, 157)
0
48, 1120)
Page 65

The Viewfinder
D
When the battery is exhausted or no battery is inserted, the display in the
viewfinder will dim. The display will return to normal when a charged
battery is inserted.
Temperature Extremes
D
The brightness of the control panel and viewfinder displays varies with
temperature, and response times may drop when the temperature is low;
the displays will return to normal at room temperature.
The Viewfinder Eyepiece Shutter
D
To prevent light entering via the viewfinder
interfering with photographs or exposure, raise
the viewfinder eyepiece shutter lever to close
the viewfinder eyepiece shutter when taking
photos without your eye to the viewfinder.
Parts of the Camera
13
Page 66

The Diopter Adjustment Control
A
The viewfinder can be focused by lifting and
rotating the diopter adjustment control. With
your eye to the viewfinder, rotate the diopter
control until display in the viewfinder is in
sharp focus.
•
Corrective lenses (available separately) can
be used to further adjust viewfinder diopter.
•
After adjusting diopter, push the diopter adjustment control back into
its original position.
Viewfinder not in focus Viewfinder in focus
14
Parts of the Camera
Page 67

The Live View Displays (Photos/Movies)
Press the a button to display the view through the lens in the
monitor. Rotate the live view selector to
to record movies.
or to
1
Live View Photography
❚❚
The following indicators appear in the monitor at default
settings. For a full list of the indicators that may be displayed,
see “Camera Displays” (01029) in “Technical Notes”.
1 2 843 56 7
to take photographs
C
Exposure mode (0108, 151)
1
Focus point (0164)
2
Autofocus mode (098, 151)
3
AF-area mode (0101, 160)
4
Active D-Lighting (0281)
5
Picture Control (0125, 271)
6
White balance (0121, 221)
7
Image area (0136)
8
Parts of the Camera
15
Page 68

10
1
2
368 7945
Touch shooting (018)
1
icon (088)
i
2
“k” (appears when memory
3
remains for over 1000
exposures; 048)
Number of exposures
4
remaining (
0
48, 1120)
ISO sensitivity (0114, 213)
5
ISO sensitivity indicator
6
(
114, 213)
0
Aperture (0186, 188)
7
Shutter speed (0185, 188)
8
Metering (0111, 178)
9
Battery indicator (047)
10
16
Parts of the Camera
Page 69

❚❚
12
3
4
5
6
7
Movies
Recording indicator (063)
1
“No movie” indicator (
Frame size and rate/image
2
quality (
Time remaining (063)
3
294)
0
297)
0
Release mode (still
4
photography;
Sound level (066)
5
Microphone sensitivity
6
792)
(
0
Frequency response (0793)
7
70)
0
Parts of the Camera
17
Page 70

Touch Controls
•
The touch-sensitive monitor offers a
variety of controls that can be operated
by touching the display with your
fingers.
•
Touch controls can be used to:
- Focus and release the shutter (019)
- Adjust settings (
-View pictures (021)
- View movies (023)
- Access the i menu (023)
-Enter text (024)
- Navigate the menus (
0
20)
0
25)
18
Parts of the Camera
Page 71

Focusing and Releasing the Shutter
❚❚
•
Touch the monitor during live view to
focus on the selected point (touch AF).
•
During still photography, the shutter
will be released when you lift your
finger from the display (touch shutter).
•
Touch AF settings can be adjusted by
tapping the
W
icon.
Parts of the Camera
19
Page 72

Adjusting Settings
❚❚
•
Tap highlighted settings in the display.
•
You can then choose the desired
option by tapping icons or sliders.
•
Tap Z or press J to select the chosen
option and return to the previous
display.
20
Parts of the Camera
Page 73

Playback
❚❚
•
Flick left or right to view other pictures
during full-frame playback.
•
In full-frame playback, touching the
bottom of the display brings up a
frame-advance bar. Slide your finger
left or right over the bar to scroll rapidly
to other pictures.
Parts of the Camera
21
Page 74

•
To zoom in on a picture displayed in
full-frame playback, use a stretch
gesture or give the display two quick
taps. After zooming in, you can adjust
the zoom ratio using stretch gestures
to zoom in and pinch gestures to zoom
out.
•
Use slide gestures to view other parts of the image during
zoom.
•
Giving the display two quick taps while zoom is in effect
cancels zoom.
•
To “zoom out” to a thumbnail view, use
a pinch gesture in full-frame playback.
Use pinch and stretch to choose the
number of images displayed from 4, 9,
and 72 frames.
22
Parts of the Camera
Page 75

Viewing Movies
❚❚
•
Movies are indicated by a 1 icon; to
start playback, tap the on-screen guide.
•
Tap the display to pause. Tap again to
resume.
•
Tap Z to exit to full-frame playback.
The i Menu
❚❚
When the i menu (088) is displayed,
you can tap items to view options.
Parts of the Camera
23
Page 76

Text Entry
❚❚
•
When a keyboard is displayed, you can enter text by tapping
the keys.
1
2
Keyboard area
2
Keyboard selection
3
Text display area
1
3
•
To position the cursor, tap e or f or tap directly in the text
display area.
•
To cycle through the upper- and lower-case and symbol
keyboards, tap the keyboard selection button.
24
Parts of the Camera
Page 77

Navigating the Menus
❚❚
•
After pressing the G button to
display the menus, you can slide up or
down to scroll.
•
Tap a menu icon to choose a menu.
•
Tap menu items to display options.
You can then choose the desired
option by tapping icons or sliders.
•
To exit without changing settings, tap
.
Z
Parts of the Camera
25
Page 78

The Touch Screen
D
•
The touch screen responds to static electricity. It may not respond when
touched with fingernails or gloved hands. For improved response when
using the touch screen with gloves, select [Enabled] for [Touch
controls] > [Glove mode] in the setup menu.
•
Do not touch the screen with sharp objects.
•
Do not use excessive force.
•
The screen may not respond when covered with third-party protective
films.
•
The screen may not respond when touched simultaneously in multiple
locations.
Enabling or Disabling Touch Controls
A
Touch controls can be enabled or disabled using the [Touch controls]
item in the setup menu.
26
Parts of the Camera
Page 79

First Steps
Readying the Camera
Attaching the Strap
To attach a strap (whether the supplied strap or one that has
been purchased separately):
Readying the Camera
27
Page 80

Charging the Battery
Charge the supplied EN-EL18c battery in the supplied MH-26a
battery charger before use. An exhausted battery will fully
charge in about two hours and 35 minutes.
The Battery and Charger
D
Read and follow the warnings and cautions in “For Your Safety” (0xli)
and “Caring for the Camera and Battery: Cautions” (
1
Connect the power cable to the
charger.
2
Plug the charger in.
3
Remove the battery terminal
cover.
0
1085).
28
Readying the Camera
Page 81

4
Remove the contact protector.
Slide the contact protector from the
charger as shown.
5
Charge the battery.
Contacts
1
Guide
2
Chamber lamps
3
Charge lamps (green)
4
Readying the Camera
29
Page 82

•
Insert the battery (terminals first), aligning the end of the
battery with the guide and then sliding the battery in the
direction indicated until it clicks into place.
•
The lamp for the chamber containing the battery (“L” or
“R”) will start to flash as charging begins.
•
Charging is complete when the chamber lamp stops
flashing and the charge lamps turn off.
•
Battery status is shown by the chamber and charge lamps:
Charge state
<50% ≥50%, <80% ≥80%, <100% 100%
Chamber lamp
lamps
100%
80%
50%
Charge
(flashes)H (flashes)
H
(off)
I
(off)
I
(flashes)
H
I
(flashes)
H
K
(off)
(on)
(flashes)
H
(flashes)
H
(on)
K
(on)
K
K
I
I
I
(on)
(off)
(off)
(off)
30
Readying the Camera
Page 83

6
Remove the battery and unplug the charger when
charging is complete.
Calibration
D
For information on calibrating batteries to ensure the accuracy of the
battery level displays, see “Calibrating Batteries” (
Warning Indicators
D
If the MH-26a chamber and charge lamps flash on and off in sequence,
take the steps described below.
•
If no battery inserted: There is a problem with the charger. Unplug the
charger and consult a Nikon-authorized service representative.
•
If a battery is inserted: A problem has occurred with the battery or
charger during charging. Remove the battery, unplug the charger, and
consult a Nikon-authorized service representative.
1114).
0
Readying the Camera
31
Page 84

Inserting the Battery
Turn the camera off before inserting or removing the battery.
1
Remove the BL-6 batterychamber cover.
Lift the battery-chamber cover latch,
turn it to the open (
and remove the battery-chamber
cover (w).
2
Attach the cover to the battery.
•
If the battery release is positioned
so that the arrow (
the battery release to cover the
arrow (H).
•
Insert the two projections on the
battery into the matching slots in
the cover as shown. The battery
release will slide aside to
completely reveal the arrow (H).
) position (q)
A
) is visible, slide
H
32
Readying the Camera
Page 85

3
Insert the battery.
Insert the battery fully and securely
as shown.
4
Latch the cover.
•
Rotate the latch to the closed position (q) and fold it down
as shown (
•
Be sure the cover is securely latched to prevent the battery
from becoming dislodged during operation.
w
).
Readying the Camera
33
Page 86

Removing the Battery
❚❚
Before removing the battery, turn the
camera off, lift the battery-chamber
cover latch, and turn it to the open (A)
position.
Removing the Battery-Chamber Cover
D
To unlatch the battery-chamber cover so that it can be removed from the
battery, slide the battery release in the direction indicated by the arrow
(H) until it stops.
The Battery-Chamber Cover
D
•
Use BL-6 battery-chamber covers only; other battery-chamber covers
cannot be used with this camera.
•
The battery can be charged with the cover attached.
•
To prevent dust accumulating inside the battery chamber, replace the
battery-chamber cover on the camera when the battery is not inserted.
34
Readying the Camera
Page 87

Attaching a Lens
•
The lens generally used in this manual for illustrative purposes
is an AF-S NIKKOR 50mm f/1.4G.
•
Be careful to prevent dust entering the camera.
•
Confirm that the camera is off before attaching the lens.
- Remove the camera body cap (q, w) and rear lens cap (e, r).
t
- Align the mounting marks on the camera (
) and lens (y).
Readying the Camera
35
Page 88

u, i
- Rotate the lens as shown until it clicks into place (
•
Remove the lens cap before taking pictures.
CPU Lenses with Aperture Rings
D
When using a CPU lens equipped with an aperture ring (01044), lock
aperture at the minimum setting (highest f-number).
Lens Focus Mode
D
If the lens is equipped with a focus mode
switch, select autofocus mode (A, M/A, or A/
M).
Image Area
D
The DX format image area is automatically
selected when a DX lens is attached.
).
36
Readying the Camera
Page 89

Detaching Lenses
❚❚
•
After turning the camera off, press and
q
hold the lens release button (
) while
turning the lens in the direction shown
(w).
•
After removing the lens, replace the
lens caps and camera body cap.
Readying the Camera
37
Page 90

Inserting Memory Cards
The camera is equipped with two
memory card slots: Slot 1 (
w
), allowing simultaneous use of two
(
memory cards.
•
Turn the camera off before inserting or removing memory
cards.
•
Do not push on the memory card while pressing the eject
button. Failure to observe this precaution could damage the
camera or memory card.
1
Open the card slot cover.
Open the door protecting the cardslot cover release button (
press the release button (
the card slot (
e
q
) and Slot 2
q
) and
w
) to open
).
38
Readying the Camera
Page 91

2
Insert the memory card.
Inserting a card upside down or backwards could damage the
camera or the card. Check to be sure that the card is in the
correct orientation.
Holding the card with the rear label
toward the monitor, slide it all the
way into the slot. When the memory
card is fully inserted, the eject button
(q) will pop up and the green
memory card access lamp (
light briefly.
3
Close the card slot cover.
If this is the first time the memory
card will be used after being used or
formatted in another device, format
the card in the camera before
proceeding.
w
) will
Readying the Camera
39
Page 92

Two Memory Cards
A
When two memory cards are inserted (one in each of Slots 1 and 2), the
role played by the card in Slot 2 can be selected using [Role played by
card in Slot 2] in the photo shooting menu.
•
[Overflow]: Pictures will be recorded to the card in Slot 2 only when the
card in Slot 1 is full.
•
[Backup]: Two identical copies are recorded, one to each memory card
and each with the same image quality and size.
•
[RAW Slot 1 - JPEG Slot 2]: The NEF (RAW) copies of photos taken at
settings of NEF (RAW) + JPEG are recorded only to the card in Slot 1, the
JPEG copies only to the card in Slot 2.
•
[JPEG Slot 1 - JPEG Slot 2]: Two JPEG copies are recorded, one to each
memory card, but at different sizes.
Removing Memory Cards
❚❚
After confirming that the memory card
access lamp is off, turn the camera off
and open the memory card slot cover.
Press the eject button (
eject the card (
w
q
) to partially
); the memory card can
then be removed by hand.
40
Readying the Camera
Page 93

Memory Cards
D
•
Memory cards may be hot after use. Observe due caution when
removing memory cards from the camera.
•
Do not perform the following operations during formatting or while
data are being recorded, deleted, or copied to a computer or other
device. Failure to observe these precautions could result in loss of data
or in damage to the camera or card.
- Do not remove or insert memory cards
- Do not turn the camera off
- Do not remove the battery
- Do not disconnect AC adapters
•
Do not touch the card terminals with your fingers or metal objects.
•
Do not use excessive force when handling memory cards. Failure to
observe this precaution could damage the card.
•
Do not bend or drop memory cards or subject them to strong physical
shocks.
•
Do not expose memory cards to water, heat, or direct sunlight.
•
Do not format memory cards in a computer.
Memory Card Icons
D
The memory card icons in the top control panel
light when memory cards are inserted (the
example in the illustration shows the display
when two memory cards are inserted).
If the memory card is full or an error has
occurred, the icon for the affected card will
flash.
Readying the Camera
41
Page 94

No Memory Card Inserted
D
If no memory card is inserted, the exposure count displays in the
viewfinder and top control panel will show
off with a battery and no memory card inserted,
the top control panel.
. If the camera is turned
S
will be displayed in
S
42
Readying the Camera
Page 95

Camera Setup
The language option in the setup menu is automatically
highlighted the first time menus are displayed. Choose a
language and set the camera clock.
1
Turn the camera on.
2
Highlight [Language] in the
setup menu and press
•
The [Language] item is
automatically highlighted in the
setup menu the first time the G
button is pressed after purchase.
•
For information on using the
menus, see “Using the Menus”
(081).
2
.
Readying the Camera
43
Page 96

3
Select a language.
Press 1 or 3 to highlight the desired language and press J
(the languages available vary with the country or region in
which the camera was originally purchased).
4
Highlight [Time zone and date]
and press
5
Choose a time zone.
•
Select [Time zone] in the [Time
zone and date] display.
•
Highlight a time zone in the [Time
zone] display and press
•
The display shows a time zone map
listing the selected cities in the chosen zone and the
difference between the time in the chosen zone and UTC.
2
.
.
J
44
Readying the Camera
Page 97

6
Turn daylight saving time on or
off.
•
Select [Daylight saving time] in
the [Time zone and date] display.
•
Highlight [On] (daylight saving time
on) or [Off] (daylight saving time
off) and press J.
•
Selecting [On] advances the clock one hour; to undo the
effect, select [Off].
7
Set the clock.
•
Select [Date and time] in the [Time
zone and date] display.
•
Press J after using the multi
selector to set the clock to the date
and time in the selected time zone
(note that the camera uses a 24-hour clock).
8
Choose a date format.
•
Select [Date format] in the [Time
zone and date] display.
•
Highlight the desired date (year,
month, and day) display order and
press J.
Readying the Camera
45
Page 98

9
Exit the menus.
Lightly press the shutter-release
button halfway to exit to shooting
mode.
The Clock Battery
D
The camera clock is powered by a separate, non-rechargeable CR1616
lithium battery with a life of about two years. When this battery is low, a
icon will be displayed in the top control panel while the standby
B
timer is on, indicating that it is time to purchase a replacement. For
information on replacing the clock battery, see “Replacing the Clock
Battery” (
A
To record your location and the current UTC (Universal Coordinated
Time), select [On] for [Location data (built-in)] > [Record location data].
To set the camera clock to the time supplied by the built-in GNSS receiver,
select [Yes] for [Location data (built-in)] > [Set clock from satellite].
A
Use the SnapBridge app to synchronize the camera clock
with the clock on a smartphone or tablet (smart device). See
SnapBridge online help for details.
1083).
0
Setting the Clock via GNSS
SnapBridge
46
Readying the Camera
Page 99

The Battery Level and Number of Exposures Remaining
Before taking photographs, check the battery level and number
of exposures remaining.
Battery Level
Check the battery level before taking photographs. The battery
level is shown in the top control panel and viewfinder.
Top control
panel
L
K
J
I
H d
H
(flashes)
Viewfinder Description
— Battery fully charged.
—
—
—
d
(flashes)
Battery partially discharged.
Low battery. Charge battery or ready
spare battery.
Shutter release disabled. Charge or
exchange battery.
The Battery Level and Number of Exposures Remaining
47
Page 100

Memory Card Indicators and Number of Exposures Remaining
The top control panel and viewfinder show the number of
additional photographs that can be taken at current settings
(i.e, the number of exposures remaining).
•
The top control panel shows the slot or
slots that currently hold a memory card
(the example shows the icons
displayed when cards are inserted in
both slots).
•
At default settings, [Overflow] is selected for [Role played by
card in Slot 2] in the photo shooting menu. When two
memory cards are inserted, pictures will first be recorded to
the card in Slot 1, switching to Slot 2 when the card in Slot 1 is
full.
48
The Battery Level and Number of Exposures Remaining
 Loading...