


Version 2.0
in little
1
5
Connect your DTD
Install NEXO Dory.
Simply plug a USB cable between your DTD and your computer or mobile terminal
(a USB OTG adapter is needed to connect to an Android device, which should
support OTG).
Launch NEXO Dory.
OTG
USB
USB
steps
2
Choose presets
Press the cabinet icon of a main cabinet to edit the main preset.
Choose a cabinet and the cross-over mode.
Press the sub icon to edit the sub preset.
Choose a cabinet and the cross-over mode.
Select a family, and
scroll to choose a cabinet
Wait for the preset to be uploaded Select a cross-over modePress the cabinet icon
© 2017 NEXO SA. All rights reserved.
Digital is either
Dante or USB
Audio
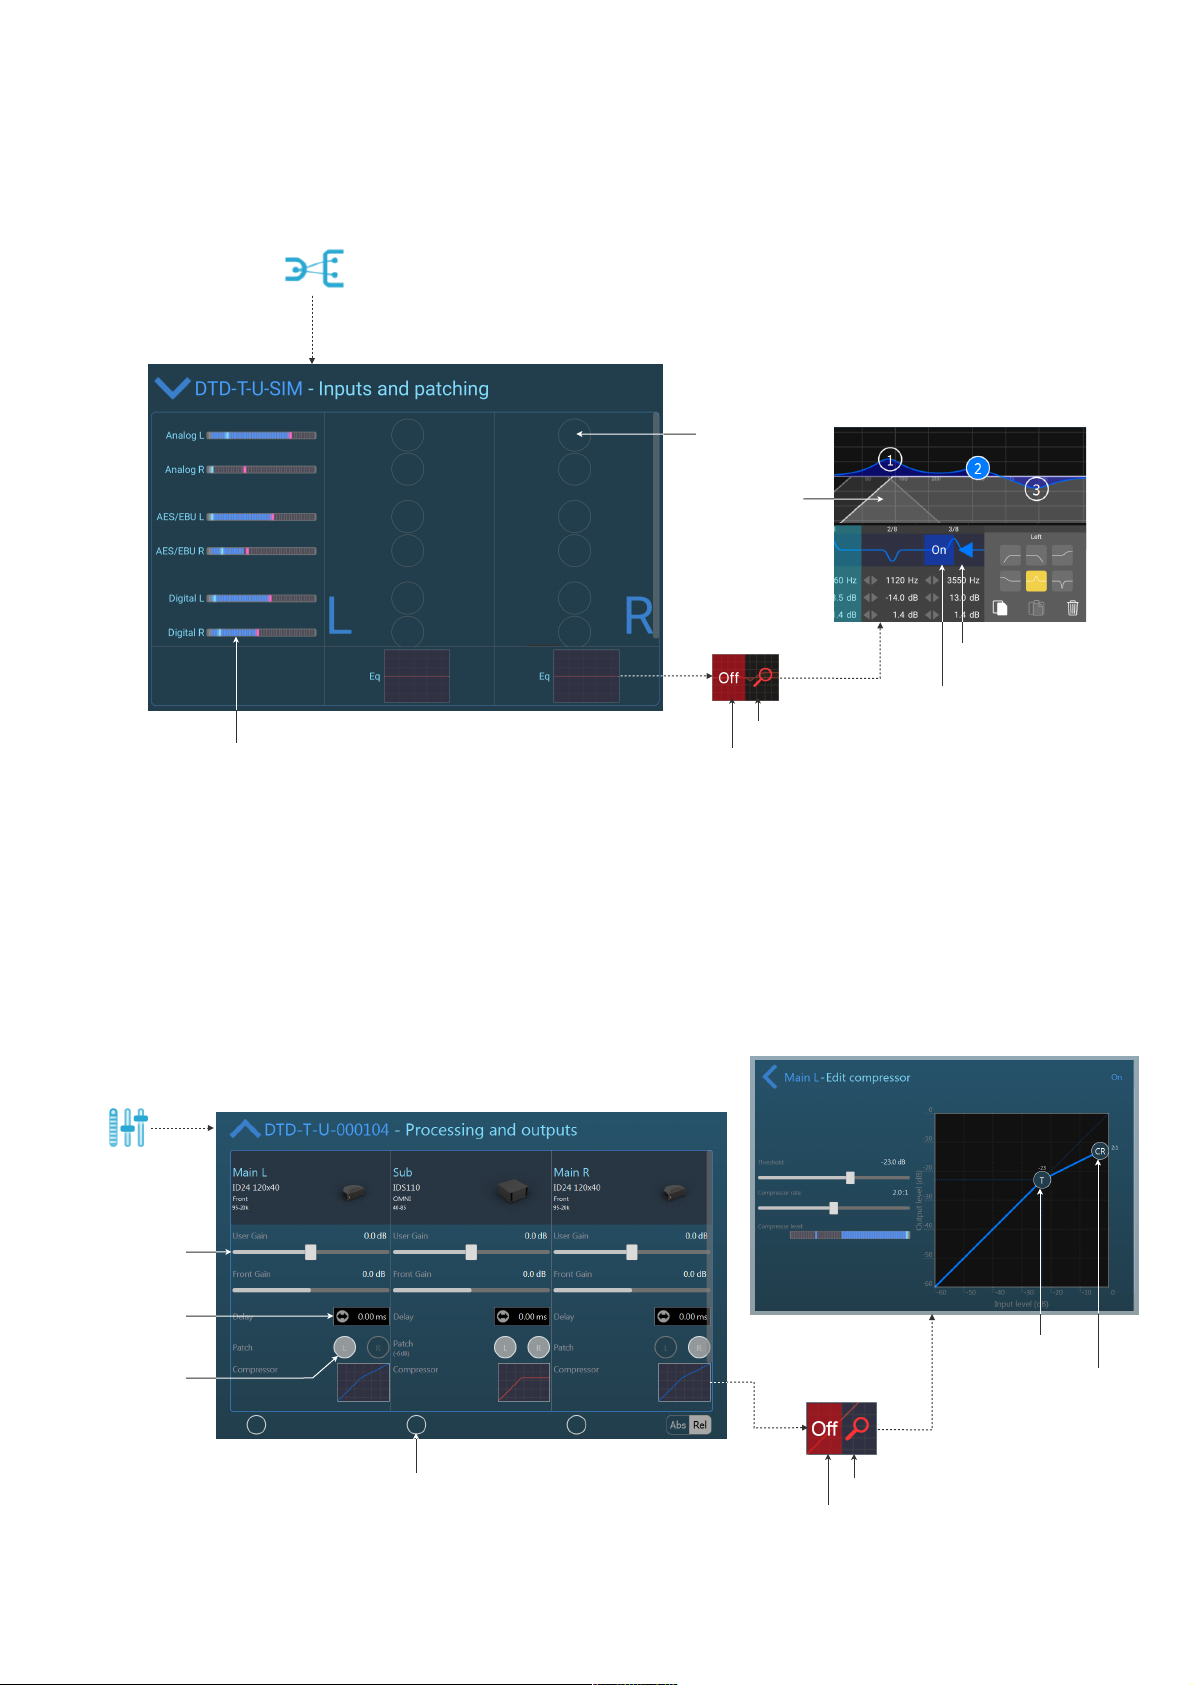
3
Patch the inputs
Go to the Inpatch view.
Patch inputs to the pre-processing channels. The preprocessing channels will later be patched to the output
channels.
Add and edit up to 8 EQ bands per pre-processing channel.
Press to patch
Double tap to
add a band
Edit type, copy/paste
or delete band
Set the band
Edit pre-processing EQ
Set the EQ of the preprocessing channel
ON or OFF
ON or OFF
4
Edit gain.
This gain is
combined with the
front-panel gain
(DTD-T only)
Slide or type to
edit delay
Patch pre-
processing
channels
Prepare Your DTD’s Settings and
Compression
Go to the Output view.
Choose the pre-processing patch for the output channels.
Edit the gains and delays.
Edit the compressor.
Edit the threshold
Edit the
compression ratio
Edit several channel at
once, absolute or
relative
Edit compressor
Set the compressor
of the output channel
ON or OFF
Page 2 of 3

5
Let the show begin
Input music through one of the possible inputs :
analog, AES/EBU, Dante or audio over USB.
Monitor the output levels and the user compression
level.
Optional:
Go to the Settings view.
Choose a password (and don’t forget it ;-)).
Maximum hold
Short-term hold
Current value
Minimum hold
Press to go to the
Settings view
Thanks for downloading and using NEXO Dory! Please refer to the manual for further instructions and tips on
how to use NEXO Dory: https://nexo-sa.com/products/dory/. Your feedback and comments are most
welcome: technical@nexo.fr.
© 2017 NEXO SA. All rights reserved. www.nexo-sa.com. NEXO SA cannot be held responsible for damages caused by improper
use of the devices, this software and its manual. The practices contained herein may not apply to every situation.
Android is a trademark of Google Inc., registered in the U.S. and other countries. Dante and Dante logo are trademarks of Audinate Pty Ltd. Windows is a
registered trademark of Microsoft Corporation. All other trademarks are the property of their owners.
Page 3 of 3
 Loading...