

Page 1

Page 2

Table of Contents
Introduction . . . . . . . . . . . . . . . . . . . . . . . . . . . . . . . . . . . . . . . . . . . . . . . . .1
System Requirements . . . . . . . . . . . . . . . . . . . . . . . . . . . . . . . . . . . . . .1
WGE101 Operating Modes . . . . . . . . . . . . . . . . . . . . . . . . . . . . . . . . . .1
WGE101 Default Wireless Configuration Settings . . . . . . . . . . . . . . . . .2
1: Preparing To Use the Smart Navigator . . . . . . . . . . . . . . . . . . . . . . . . . . . .3
Installing the Software . . . . . . . . . . . . . . . . . . . . . . . . . . . . . . . . . . . . . .3
Connecting a WGE101 Bridge to a Computer . . . . . . . . . . . . . . . . . . . .4
Identifying the Wireless Network Name (SSID), IP Address,
and WEP Security Settings . . . . . . . . . . . . . . . . . . . . . . . . . . . . . . . . . .5
2: Configuring Your WGE101 . . . . . . . . . . . . . . . . . . . . . . . . . . . . . . . . . . . .6
Starting the Smart Navigator . . . . . . . . . . . . . . . . . . . . . . . . . . . . . . . . .6
Getting Status Information . . . . . . . . . . . . . . . . . . . . . . . . . . . . . . . . . .7
Changing the Country/Region Setting . . . . . . . . . . . . . . . . . . . . . . . . . .8
Selecting a Specific Wireless Network . . . . . . . . . . . . . . . . . . . . . . . . . . .9
Enabling WEP Security on the Bridge . . . . . . . . . . . . . . . . . . . . . . . . . .10
Changing the Bridge’s IP Address . . . . . . . . . . . . . . . . . . . . . . . . . . . . . .11
Configuring the Bridge for an Ad-Hoc Network . . . . . . . . . . . . . . . . . . .12
Making Advanced Settings Changes . . . . . . . . . . . . . . . . . . . . . . . . . . . .13
Troubleshooting Tips . . . . . . . . . . . . . . . . . . . . . . . . . . . . . . . . . . . . . . . . . . .14
Page 3

Introduction
Thank you for purchasing a NETGEAR WGE101 54 Mbps Wireless Ethernet Bridge.
If the default settings on the bridge do not work, you will need to configure the bridge. If the
default settings do work, you only need to configure the bridge if the network is in a country
or region other than the United States or if there are multiple WGE101 bridges on the
network.
If you have a Windows®computer you may use the NETGEAR Smart Navigator software to
configure basic connection settings on the bridge. This software is included on the WGE101
54 Mbps Wireless Ethernet Bridge Resource CD. Additionally, to make advanced configuration
changes the Windows computer must have Internet browser software installed. This reference
manual gives you the information you need to use the Smart Navigator to configure a
WGE101 bridge.
System Requirements
Before installing the Smart Navigator, please make sure that these minimum requirements have
been met:
• You have a Windows computer with:
— Windows 98SE, Me, 2000, XP
— CD-ROM drive
— Built-in Ethernet or an Ethernet adapter card
— Microsoft®Internet Explorer 5.0 (or later) or Netscape®6.0 (or later)
WGE101 Operating Modes
The WGE101 Wireless Ethernet Bridge operates in either Infrastructure or Ad-Hoc mode.
• Infrastructure mode is used when you have an access point or wireless router connected to
a wired network. The wireless devices and computers communicate with the wired
network (and other wireless devices) through the wireless router or access point. For
example, with a wireless router multiple computers (both wired and wireless) can share a
single cable or DSL broadband Internet connection.
• You use the bridge in Ad-Hoc mode if you have a small, wireless-only network and all the
devices have wireless transmitters/receivers. In this case, there’s no need for an access point
or a wireless router for the wireless devices communicate directly to one another.
1
Page 4

WGE101 Default Wireless Configuration Settings
The factory default settings for your WGE101 54 Mbps Wireless Ethernet Bridge are:
• Mode (Infrastructure or Ad-Hoc): Infrastructure
• Wireless network name Service Set Identification (SSID): Any
Note: Any means the bridge will connect to the access point or wireless router that has the
strongest signal. This may not be the closest access point or wireless router. For the WGE101
Wireless Ethernet Bridge to communicate with a specific wireless router or access point, both
devices must be configured with the same SSID.
• User ID: admin
• Password: password
• Authentication type: Auto
• WEP security: Disabled
• Country/Region: United States
Warning:
Having the bridge set to the wrong country or region may result in the violation of
local laws.
WGE101-specific default settings:
• IP address:
192.168.0.201
• Protocol: Static
• Device name: netgearxxxx (where xxxx is the last 4 digits of the MAC address)
• Data rate: b/g combo
2
Page 5
Preparing To Use the Smart Navigator
Before you can use the Smart Navigator to configure a WGE101 bridge, you must install the
software on a Windows computer and connect the bridge to that computer.
Installing the Smart Navigator Software
You install the Smart Navigator software from the WGE101 54 Mbps Wireless Ethernet Bridge
Resource CD.
To install from the CD:
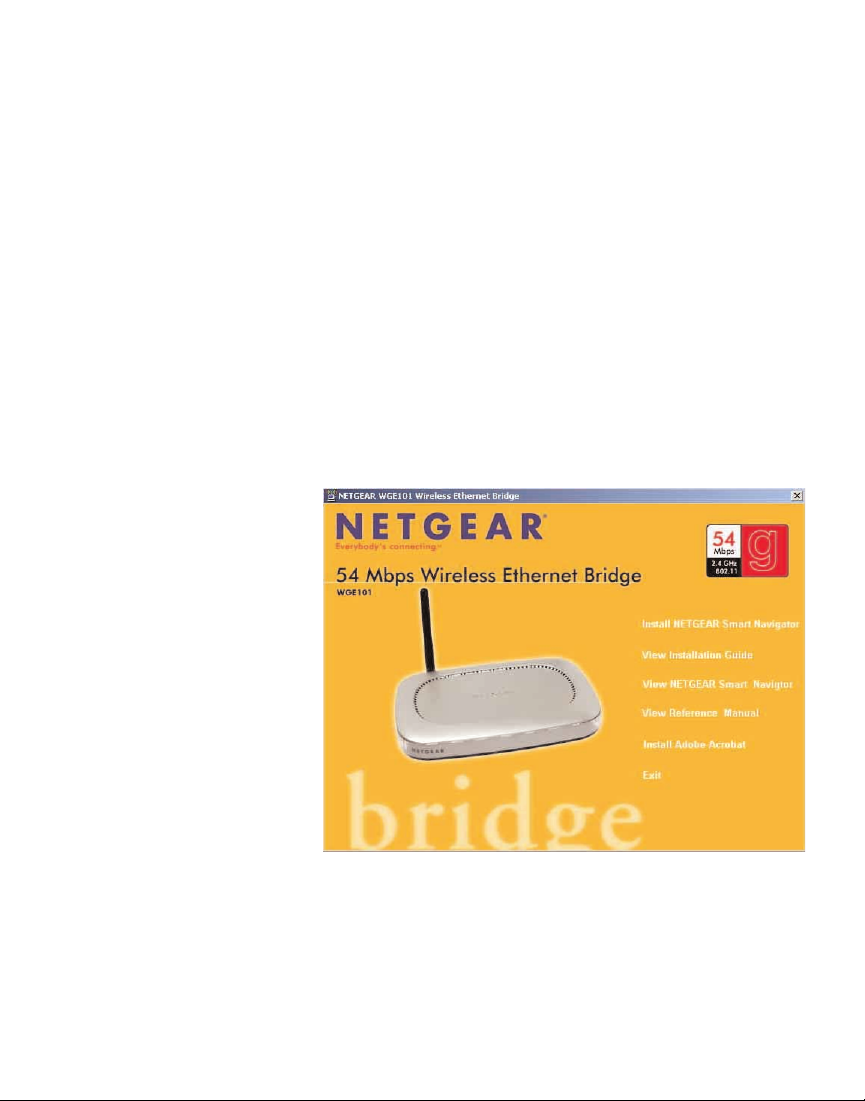
1. Insert the WGE101 54 Mbps Wireless Ethernet Bridge Resource CD in the CD-ROM drive
of a Windows computer.
The CD should start up automatically and show a window of the resources available on
the CD.
If this does not happen, go to My Computer, open the CD-ROM drive, and double-click
Setup.exe.
2. Click Install NETGEAR
Smart Navigator.
3. Follow the instructions
on screen to install the
software.
3
1
1
Page 6

Connecting a WGE101 Bridge to a Computer
To configure the bridge using the Smart Navigator, the bridge must be directly connected or
connected through a switch (or hub) to a Windows computer. For example, if the bridge is
connected to a game box, you’ll have to connect the bridge to a computer to be able to configure
the bridge. To make any advanced settings changes (like changing the bridge’s password or
upgrading the bridge’s firmware), the computer must have an Internet browser installed.
To connect the bridge to a computer:
1. If your network has a wireless router or access point,
make sure it is powered up.
2. Power down the Ethernet-enabled computer.
3. Connect the provided Ethernet cable between the
computer and the bridge.
4. Connect the power adapter to the bridge and plug
the power adapter in to a power outlet.
The Power and Wireless LAN lights should light up.
5. After you see the Wireless LAN light light up, turn on the computer.
If the bridge and the Ethernet-enabled device are successfully connected, the Network
light will light up. This light flashes when there is network activity.
To connect the bridge and computer through a switch (or hub):
1. If your network has a wireless router or access
point, make sure it is powered up.
2. Power down the Ethernet-enabled computer.
3. Connect the provided Ethernet cable between
the bridge and the switch (or hub).
4. Connect the computer to the switch (or hub)
using an Ethernet cable.
5. Connect the switch’s (or hub’s) power adapter
and plug that power adapter in to a power
outlet.
6. Connect the bridge’s power adapter and plug
the power adapter in to a power outlet.
The Power and Wireless LAN lights should light up.
7. After the Wireless LAN light lights up, turn on the computer.
If the bridge, switch, and the computer are successfully connected, the Network light
will light up. This light flashes when there is network activity.
4
WGE101 54 Mbps
Wireless Ethernet Bridge
Ethernet-enabled
Windows computer
WGE101 54 Mpbs
Wireless Ethernet Bridge
Ethernet-enabled
Windows computer
Fast Ethernet
Switch FS605
Page 7

Identifying Your Wireless Network Settings
You may want to print this page separately, fill in the configuration parameters, and put it in a
safe place for possible future reference. For an existing wireless network, the person who set up
the network will be able to provide this information.
Note: For wireless devices and the bridge to communicate with each other, each must be
configured with the same SSID, WEP security settings, and the same IP subset address.
• Wireless Network Name (SSID): The Service Set Identification (SSID) identifies the
wireless local area network. Any is the default WGE101 SSID. If you have named your
wireless network with a different SSID, write your network’s SSID on the line below.
Wireless network name (SSID): ______________________________
• Bridge IP Address: Your Ethernet network has an IP subset address given as a set of three
numbers plus a last set of unique numbers (xxx.xxx.xxx.yyy) to identify each device on the
network. The default IP address for the bridge is 192.168.0.201. To communicate to your
Ethernet network, each bridge must have a unique address consistent with your network’s IP
subset address. If you need to change the bridge’s IP address, write down the new address.
Bridge’s IP address: ______________________________
• WEP Security Encryption key: The default WEP encryption mode of the bridge is
disabled. If you have set up WEP security on your wireless network (through the router or
access point), you’ll need to configure the bridge using the same WEP security parameters.
WEP Encryption Key Length, circle one: 40/64 or 128 bits
WEP Encryption Passphrase, if used: ___________________
A passphrase is used to automatically generate the WEP hexadecimal numbers for the key.
Otherwise, you will have to manually enter up to four hexadecimal numbers.
WEP Hexadecimal Numbers: ______________________________
______________________________
______________________________
______________________________
5
Page 8

Configuring Your WGE101
This section provides instructions for configuring the WGE101 Bridge using the Smart
Navigator. You use the Smart Navigator, itself, to change basic settings:
• Network Name (SSID)
• Country/Region
• Network Type (Infrastructure/Ad-Hoc)
• Security Settings
• IP Address
To change more advanced settings, you use the bridge’s internal configuration software using an
Internet browser. In addition to the basic settings, you can make the following changes using
the browser-based software:
• Changing the password.
• Setting the bridge’s data rate/channel.
• Upgrading the bridge’s firmware.
• Restoring the factory default settings.
For details on using the browser-based configuration software see the WGE101 Reference
Manual on the WGE101 54 Mbps Wireless Ethernet Bridge Resource CD.
Starting the Smart Navigator
1. Choose Programs>NETGEAR WGE101
Bridge>Smart Navigator from the Start menu.
When the Smart Navigator opens, it searches
for any connected WGE101 Bridge. When
located, any bridge appears in the device list at
the top.
2. Select the bridge that you want to configure.
3. To configure basic connection settings, click
Connection Settings.
OR
To configure more advanced settings or the IP
address, click Advanced Settings. Type admin
as the User name and the current password.
(password is the default.) Click OK.
4. To refresh the device list, click
Scan.
6
2
2
Page 9

Getting Status Information
1. Choose Programs>NETGEAR WGE101 Bridge>Smart Navigator from the Start menu.
When the Smart Navigator opens, it searches for any connected WGE101 Bridge. When
located, any bridge appears in the Smart Navigator device list at the top of the window.
2. Select the bridge about which you want status information.
3. Click Status.
The Bridge Status window gives you current information about:
• Network Name (SSID)
• Connection Status
• Country/Region
• Channel
• Security
• Transmitted and received data packets
• Signal Strength
• Bridge IP Settings
• Bridge NetBIOS Name
• MAC Address
• Firmware version number
4. Click
Refresh to update the status
information.
5. Click Close to return to the Smart Navigator device list.
7
Page 10

Changing the Country/Region Setting
Before making any other changes you should make sure that the bridge is configured to operate
where the network is located.
1. Choose Programs>NETGEAR WGE101
Bridge>Smart Navigator from the Start menu.
2. Select the bridge in the device list.
3. Click Connection Settings.
4. To change the Country/Region, select a different
country or region and click OK.
Note: Having the wrong Country/Region setting may
violate local laws.
5. To apply the change, type admin as the User
name and password as the Password.
6. Click OK.
7. Click
Yes.
8
Page 11

Selecting a Specific Wireless Network
By default, the WGE101 connects to the wireless router or access point with the strongest
signal. This may not be the closest or the desired network. To have the bridge connect to a
specific network, you change the Network Name (SSID) setting. If you filled in the Network
Name (SSID) on page 5, you may want to refer to it for this procedure.
1. Choose Programs>NETGEAR WGE101
Bridge>Smart Navigator from the Start menu.
2. Select the bridge in the device list.
3. Click Connection Settings.
4. To connect to a specific network, select its name
in the Network Name (SSID) list.
or
Type the network’s SSID in the Network Name
(SSID) box.
5. Click
OK.
6. To apply the change, type admin as the User
name and the current password.
(password is the default.)
7. Click OK.
9
Page 12

Enabling WEP Security on the Bridge
To prevent others from accessing your wireless network, you may want to enable WEP (Wired
Equivalent Privacy) security in your wireless router or access point. If you do so, you’ll need to
enable WEP security in the bridge, too. If you filled in the parameters on page 5, you may
want to refer to them for this procedure.
Note: The default security setting has WEP security disabled.
1. Choose Programs>NETGEAR WGE101
Bridge>Smart Navigator from the Start menu.
2. Select the bridge in the device list.
3. Click Connection Settings.
4. To enable WEP security click the Use WEP
Encryption check box.
5. If the key is determined through software, select
Create with Passphrase, type the phrase in the
Passphrase box, and select a key length of 64 bits
or 128 bits.
OR
If you entered specific keys for your wireless
router or access point, select Enter Key
Manually, select a Key number, type the
hexadecimal value for that key, and select a key
length of 64 bits or 128 bits.
6. Click OK.
7. To apply the change, type
admin as the User name and the current password.
(password is the default.)
8. Click OK.
10
Page 13

Changing the Bridge’s IP Address
If your wireless network has an IP address other than 192.168.0.yyy, you need to change the IP
address on the bridge or set it to be configured automatically by the router.
Note: All NETGEAR products use 192.168.0.yyy. If you have NETGEAR wireless products
working in your wireless network without configuration changes, you won’t need to change the
bridge’s IP address unless you have more than one WGE101 bridge on the network.
1. Choose Programs>NETGEAR WGE101 Bridge>Smart Navigator from the Start menu.
2. Select the bridge in the device list.
3. Click Advanced Settings.
4. If the warning appears about the IP address not matching
that of the network, click Yes.
Note: If you’re asked for the User name and Password at this point, that means that the
bridge’s IP address matches that of the network. Type admin as the User name and the
current password. (password is the default.) Click OK. See the WGE101 Reference Manual
for details on using the browser-based software for changing the IP address.
5. Click Suggested Settings.
The Smart Navigator suggests an IP address
and subnet mask that match that of your
wireless network.
6. If you don’t like the suggested address,
change the numbers as needed. The first
three sets of numbers (xxx.xxx.xxx.yyy)
should be the same as your access point or
router. The last set of numbers (.yyy) should
be a set of unique numbers on your network.
OR
If your network has a router with a router
table, select Obtain IP Address
automatically.
(By doing this, the bridge’s IP address is
assigned dynamically by the router and you’ll use the router table to find out what the
bridge’s current IP address is.)
7. Click OK.
8. To apply the change, type admin as the User name and the current password.
(password is the default.)
9. Click OK.
11
Page 14

Configuring the Bridge for an Ad-Hoc Network
You may use this bridge in a wireless-only network where the wireless devices are all set to AdHoc mode. By default, the bridge is set to Infrastructure mode; therefore, you’ll need to change
the Network Type.
Note: In an Ad-Hoc network, all devices must have the same SSID, WEP settings, and IP
network subset address with a unique identifying number (xxx.xxx.xxx.yyy).
1. Choose Programs>NETGEAR WGE101 Bridge>Smart Navigator from the Start menu.
2. Select the bridge in the device list.
3. Click Connection Settings.
4. Select
Ad-Hoc as the Network Type.
5. If you are setting up the Ad-Hoc network, type a
SSID for the network in the Network Name
(SSID) box.
OR
If the Ad-Hoc network already exists, select the
correct SSID in the Network Name (SSID) list.
6. Click Initialize.
7. Select the type of 802.11 network.
8. Select the Channel (with frequency) for this
network.
Note: If you’re setting up a new Ad-Hoc
network, select a channel and frequency that
isn’t being used by other nearby wireless devices.
9. Click OK.
10. Click OK.
11. To apply the change, type admin as the User name and the current password. (password is
the default.)
12. Click OK.
12
Page 15

Making Advanced Settings Changes
You can use the bridge’s internal configuration software to make basic settings changes and any
advanced setting changes such as:
• Changing the password.
• Upgrading the bridge’s firmware.
• Restoring the factory default settings.
• Changing the IP address if the default address does work with your network.
You can access the bridge’s internal configuration software either through the Smart Navigator
or through an Internet browser.
To access the internal configuration software through the Smart Navigator:
1. Choose
Programs>NETGEAR WGE101 Bridge>Smart Navigator from the Start menu.
2. Select the bridge in the device list.
3. Click Advanced Settings.
4. Type admin as the User name and the current password. (password is the default.)
Note: If you get a warning that the IP address doesn’t match, see the Changing the Bridge’s
IP Address procedure on page 11.
5. Click OK.
For details on using the browser-based configuration software see the WGE101 Reference
Manual on the WGE101 54 Mbps Wireless Ethernet Bridge Resource CD.
13
Page 16

Troubleshooting Tips
Symptom
The WGE101
doesn’t show up in
the device list.
Cause
There’s a hardware
problem.
Solution
• Check that the bridge’s power light
is on.
• Check that the Ethernet cable is
securely connected to both the
computer and the bridge.
• If operating through a switch (or
hub), check that the bridge’s and
the switch’s (or hub’s) power lights
are on.
• If operating through a switch (or
hub), check the Ethernet cable
connections between the computer
and the switch (or hub) and
between the bridge and switch (or
hub).
If you have problems using the Smart Navigator software, check these tips.
14
Page 17

Technical Support
PLEASE REFER TO THE SUPPORT INFORMATION CARD THAT SHIPPED WITH
YOUR PRODUCT.
By registering your product at www.NETGEAR.com/register, we can provide you with faster
expert technical support and timely notices of product and software upgrades.
NETGEAR, INC.
Support Information
Phone: 1-888-NETGEAR (for US & Canada only), available 24x7.
For other countries see your Support Information card.
E-mail: support@NETGEAR.com (24x7 online support)
www.NETGEAR.com
©2003 by NETGEAR, Inc. NETGEAR, the Netgear logo, Everybody’s Connecting, Auto Uplink and The Gear Guy
are trademarks or registered trademarks of Netgear, Inc. in the United States and/or other countries. Microsoft and
Windows are trademarks or registered trademarks of Microsoft Corporation in the United States and/or other
countries. Other brand or product names are trademarks or registered trademarks of their respective owners.
Information is subject to change without notice. All rights reserved.
July 2003
Attention: When you configure the wireless settings of this device
please make sure to select the correct country settings. Due to EU-law,
the country settings must be identical to the country where the device
is operating (important due to non-harmonized frequencies in the EU).
0560
!
 Loading...