

Netgear PTVU1000 Quick Start Manual

Universal Push2TV HD Adapter
PTVU1000 Installation Guide

© 2011 NETGEAR, Inc. All rights reserved.
No part of this publication may be reproduced, transmitted, transcribed,
stored in a retrieval system, or translated into any language in any form or by
any means without the written permission of NETGEAR, Inc.
DO NOT stack equipment, or place equipment in tight spaces or in drawers.
Be sure your equipment is surrounded by at least 2 inches of air space.
Technical Support
Thank you for choosing NETGEAR. To register your product, get the latest
product updates, or get support online, visit us at http://support.netgear.com.
Phone (US & Canada only): 1-888-NETGEAR
Phone (Other Countries):
See http://support.netgear.com/app/answers/detail/a_id/984.
Trademarks
NETGEAR, the NETGEAR logo, and Connect with Innovation are trademarks
and/or registered trademarks of NETGEAR, Inc. and/or its subsidiaries in the
United States and/or other countries. Other brand and product names are
registered trademarks or trademarks of their respective holders.
Statement of Conditions
In the interest of improving internal design, operational function, and/or
reliability, NETGEAR reserves the right to make changes to the products
described in this document without notice. NETGEAR does not assume any
liability that may occur due to the use or application of the product(s) or circuit
layout(s) described herein.
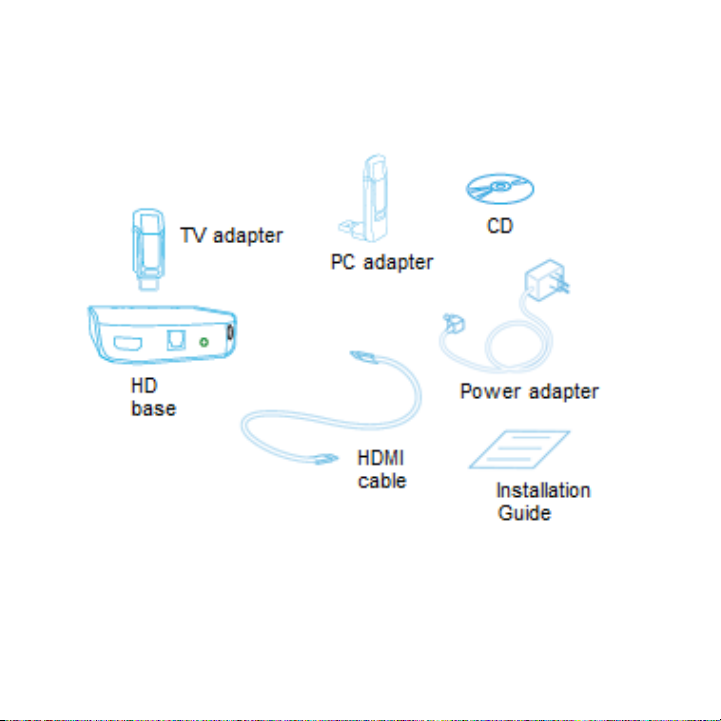
What’s in the Package
3
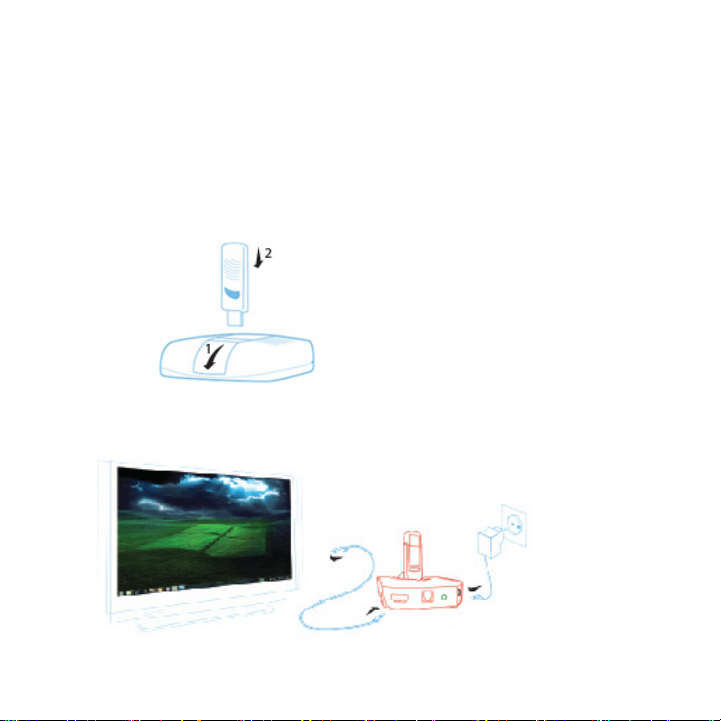
Getting Started
1. Connect the TV Adapter to the HD base.
For table top positioning:
a. Slide the shutter to show the top USB port.
b. Attach the TV Adapter to the HD base.
2. Connect the HD base to your TV using the included HDMI cable.
3. Connect the power cable, as shown below.
4
4. Make sure your TV is on and set to display the correct video input.
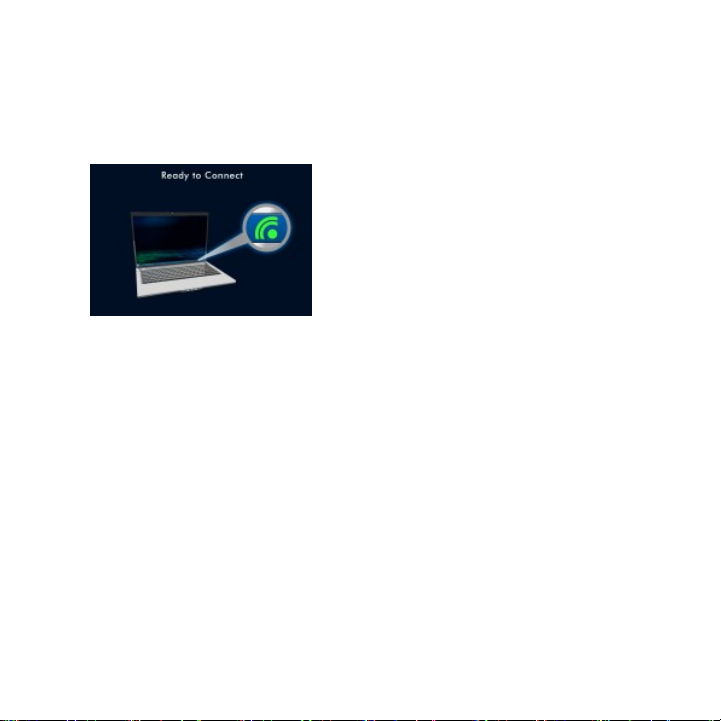
5. Connect to your TV using an HDMI cable.
The Push2TV unit boots up for about 10 seconds, and the Ready to
Connect screen is displayed on your TV.
5
 Loading...