

Netgear PTVU1000 User Guide
Universal Push2TV HD Adapter (PTVU1000)
User Manual
350 East Plumeria Drive
San Jose, CA 95134
USA
August 2011
202-10839-01
v1.0

Universal Push2TV HD Adapter
© 2011 NETGEAR, Inc. All rights reserved
No part of this publication may be reproduced, transmitted, transcribed, stored in a retrieval system, or translated
into any language in any form or by any means without the written permission of NETGEAR, Inc.
Technical Support
Thank you for choosing NETGEAR. To register your product, get the latest product updates, get support online, or
for more information about the topics covered in this manual, visit the Support website at
http://support.netgear.com.
Phone (US & Canada only): 1-888-NETGEAR
Phone (Other Countries): Check the list of phone numbers at
http://support.netgear.com/app/answers/detail/a_id/984.
Trademarks
NETGEAR, the NETGEAR logo, and Connect with Innovation are trademarks and/or registered trademarks of
NETGEAR, Inc. and/or its subsidiaries in the United States and/or other countries. Information is subject to change
without notice. Other brand and product names are registered trademarks or trademarks of their respective
holders. © 2011 NETGEAR, Inc. All rights reserved.
Statement of Conditions
To improve internal design, operational function, and/or reliability, NETGEAR reserves the right to make changes
to the products described in this document without notice. NETGEAR does not assume any liability that may occur
due to the use, or application of, the product(s) or circuit layout(s) described herein.
Revision History
Publication Part Number Version Publish Date Comments
202-10839-01 v1.0 August 2011 First publication
ii

Contents
Chapter 1 Setup and System Initialization
Minimum System Requirements. . . . . . . . . . . . . . . . . . . . . . . . . . . . . . . . . .6
What’s in the Package . . . . . . . . . . . . . . . . . . . . . . . . . . . . . . . . . . . . . . . . .7
Software Installation. . . . . . . . . . . . . . . . . . . . . . . . . . . . . . . . . . . . . . . . . . .8
Before You Install. . . . . . . . . . . . . . . . . . . . . . . . . . . . . . . . . . . . . . . . . . .8
Setting Up the Adapter. . . . . . . . . . . . . . . . . . . . . . . . . . . . . . . . . . . . . . . .11
Connect the HD Base. . . . . . . . . . . . . . . . . . . . . . . . . . . . . . . . . . . . . . .11
Connect the PC Adapter to the PC. . . . . . . . . . . . . . . . . . . . . . . . . . . . .11
Connecting Audio. . . . . . . . . . . . . . . . . . . . . . . . . . . . . . . . . . . . . . . . . .12
Positioning the PC Adapter . . . . . . . . . . . . . . . . . . . . . . . . . . . . . . . . . . . .13
Positioning the HD Base. . . . . . . . . . . . . . . . . . . . . . . . . . . . . . . . . . . . . . .13
Icon Descriptions . . . . . . . . . . . . . . . . . . . . . . . . . . . . . . . . . . . . . . . . . . . .14
Universal Push2TV HD Manager User Interface . . . . . . . . . . . . . . . . . .14
Universal Push2TV HD Manager System Tray Icon . . . . . . . . . . . . . . .14
LED Descriptions . . . . . . . . . . . . . . . . . . . . . . . . . . . . . . . . . . . . . . . . . . . .15
Universal Push2TV HD Manager . . . . . . . . . . . . . . . . . . . . . . . . . . . . . . . .16
Context Menu Options . . . . . . . . . . . . . . . . . . . . . . . . . . . . . . . . . . . . . .16
Universal Push2TV HD Manager Options . . . . . . . . . . . . . . . . . . . . . . .18
PC Adapter Names. . . . . . . . . . . . . . . . . . . . . . . . . . . . . . . . . . . . . . . . .19
Advanced Settings . . . . . . . . . . . . . . . . . . . . . . . . . . . . . . . . . . . . . . . . .20
Blocking or Disassociating . . . . . . . . . . . . . . . . . . . . . . . . . . . . . . . . . . .21
Configuring the Display . . . . . . . . . . . . . . . . . . . . . . . . . . . . . . . . . . . . . . .22
Configuring the Display in Windows 7 . . . . . . . . . . . . . . . . . . . . . . . . . .24
Configuring the Display in Windows XP or Vista . . . . . . . . . . . . . . . . . .26
Configuring the Display through Windows Display Properties in
Windows XP/Vista . . . . . . . . . . . . . . . . . . . . . . . . . . . . . . . . . . . . . . . . .29
Supported Resolutions. . . . . . . . . . . . . . . . . . . . . . . . . . . . . . . . . . . . . . . .31
The Universal Push2TV HD TV Adapter Does Not Turn On . . . . . . . . . . .31
The Universal Push2TV HD TV Adapter Shows a “Ready to Connect”
Message. . . . . . . . . . . . . . . . . . . . . . . . . . . . . . . . . . . . . . . . . . . . . . . . . . .31
Driver Information. . . . . . . . . . . . . . . . . . . . . . . . . . . . . . . . . . . . . . . . . . . .32
Device Manager . . . . . . . . . . . . . . . . . . . . . . . . . . . . . . . . . . . . . . . . . . .32
Verifying WUSB Drivers Installation . . . . . . . . . . . . . . . . . . . . . . . . . . . .34
Uninstalling Drivers. . . . . . . . . . . . . . . . . . . . . . . . . . . . . . . . . . . . . . . . .35
Service Activation. . . . . . . . . . . . . . . . . . . . . . . . . . . . . . . . . . . . . . . . . .35
Viewing the Device’s Vendor ID and Product ID . . . . . . . . . . . . . . . . . .36
iii

Push2TV HD Adapter
Chapter 2 Wireless Connectivity
Wireless Icon Is Gray. . . . . . . . . . . . . . . . . . . . . . . . . . . . . . . . . . . . . . . . .38
Wireless Icon Is Red . . . . . . . . . . . . . . . . . . . . . . . . . . . . . . . . . . . . . . . . .38
Channel Busy. . . . . . . . . . . . . . . . . . . . . . . . . . . . . . . . . . . . . . . . . . . . . . .39
Movie Playing Is Disrupted. . . . . . . . . . . . . . . . . . . . . . . . . . . . . . . . . . . . .40
Link Quality Indication . . . . . . . . . . . . . . . . . . . . . . . . . . . . . . . . . . . . . . . . 40
Universal Push2TV HD Range. . . . . . . . . . . . . . . . . . . . . . . . . . . . . . . . . .41
Pairing . . . . . . . . . . . . . . . . . . . . . . . . . . . . . . . . . . . . . . . . . . . . . . . . . . . . 42
Problems with Pairing . . . . . . . . . . . . . . . . . . . . . . . . . . . . . . . . . . . . . .42
Multiple Hosts . . . . . . . . . . . . . . . . . . . . . . . . . . . . . . . . . . . . . . . . . . . .43
Chapter 3 Video
General Troubleshooting . . . . . . . . . . . . . . . . . . . . . . . . . . . . . . . . . . . . . .45
Media Player . . . . . . . . . . . . . . . . . . . . . . . . . . . . . . . . . . . . . . . . . . . . . . .45
Recommended Media Player Applications . . . . . . . . . . . . . . . . . . . . . .45
QuickTime Player with the Display Adapter . . . . . . . . . . . . . . . . . . . . . .47
WinAmp Application Does Not Return to PC Screen. . . . . . . . . . . . . . .48
VLC Player Does Not Show Properly. . . . . . . . . . . . . . . . . . . . . . . . . . .48
Optimizing Internet Video. . . . . . . . . . . . . . . . . . . . . . . . . . . . . . . . . . . . . .49
Internet Video. . . . . . . . . . . . . . . . . . . . . . . . . . . . . . . . . . . . . . . . . . . . .49
Online Movies Freeze. . . . . . . . . . . . . . . . . . . . . . . . . . . . . . . . . . . . . . .50
Corrupt Picture While Playing Video on the Internet . . . . . . . . . . . . . . .50
Flash Player Is Not Showing in Full Screen . . . . . . . . . . . . . . . . . . . . . .52
Surfing the Internet Using Wi-Fi. . . . . . . . . . . . . . . . . . . . . . . . . . . . . . . . .53
Playing Blu-ray. . . . . . . . . . . . . . . . . . . . . . . . . . . . . . . . . . . . . . . . . . . . . . 53
Playing Video While PC Is Battery Operated. . . . . . . . . . . . . . . . . . . . . . .53
Optimizing Video Performance Tips. . . . . . . . . . . . . . . . . . . . . . . . . . . . . .54
Using Optimize for Video Mode . . . . . . . . . . . . . . . . . . . . . . . . . . . . . . .54
Aero Desktop Theme . . . . . . . . . . . . . . . . . . . . . . . . . . . . . . . . . . . . . . .55
HDMI . . . . . . . . . . . . . . . . . . . . . . . . . . . . . . . . . . . . . . . . . . . . . . . . . . . . . 56
Display Size on TV . . . . . . . . . . . . . . . . . . . . . . . . . . . . . . . . . . . . . . . .56
Picture Is Distorted When the Mouse Is Moving . . . . . . . . . . . . . . . . . . . .57
Using Skype. . . . . . . . . . . . . . . . . . . . . . . . . . . . . . . . . . . . . . . . . . . . . . . . 57
No Display Icon . . . . . . . . . . . . . . . . . . . . . . . . . . . . . . . . . . . . . . . . . . . . . 57
Remote Display Appears Unstable . . . . . . . . . . . . . . . . . . . . . . . . . . . . . .58
External Display Is Not Activated. . . . . . . . . . . . . . . . . . . . . . . . . . . . . . . .59
Video Is Not Playing Smoothly. . . . . . . . . . . . . . . . . . . . . . . . . . . . . . . . . .60
Extend and Mirror Mode. . . . . . . . . . . . . . . . . . . . . . . . . . . . . . . . . . . . . . .60
Using Extend Mode . . . . . . . . . . . . . . . . . . . . . . . . . . . . . . . . . . . . . . . . . .61
Screen Resolution in Mirror Mode . . . . . . . . . . . . . . . . . . . . . . . . . . . . . . .62
Display Issues on TV . . . . . . . . . . . . . . . . . . . . . . . . . . . . . . . . . . . . . . . . .63
Display Is Flipped. . . . . . . . . . . . . . . . . . . . . . . . . . . . . . . . . . . . . . . . . . . .64
Display Turns Black with Windows Media Player. . . . . . . . . . . . . . . . . . . .64
Text Does Not Show Properly While Video is Playing . . . . . . . . . . . . . . . .64
Video and Audio Synchronization . . . . . . . . . . . . . . . . . . . . . . . . . . . . . . .64
Movie Playing Is Disrupted. . . . . . . . . . . . . . . . . . . . . . . . . . . . . . . . . . . . .65
iv

Push2TV HD Adapter
Chapter 4 Audio
No Audio in HDMI Connection . . . . . . . . . . . . . . . . . . . . . . . . . . . . . . . . . .66
Audio Disappears After Link Disconnection . . . . . . . . . . . . . . . . . . . . . . . .67
Audio Does Not Switch to TV or Screen. . . . . . . . . . . . . . . . . . . . . . . . . . .67
Setting Audio Output Device . . . . . . . . . . . . . . . . . . . . . . . . . . . . . . . . . . .67
Video and Audio Synchronization. . . . . . . . . . . . . . . . . . . . . . . . . . . . . . . .70
Audio Control Using the PC Buttons . . . . . . . . . . . . . . . . . . . . . . . . . . . . .71
Chapter 5 Miscellaneous
PowerPoint in Extend Mode. . . . . . . . . . . . . . . . . . . . . . . . . . . . . . . . . . . .72
Power Saving Modes and Screen Saver . . . . . . . . . . . . . . . . . . . . . . . . . .73
Built-In Laptop Screen Remains Black . . . . . . . . . . . . . . . . . . . . . . . . . . .73
PC and TV Adapters Are Warm . . . . . . . . . . . . . . . . . . . . . . . . . . . . . . . . .74
Index
v

1. Setup and System Initialization
This chapter describes the following topics:
• Minimum System Requirements
• What’s in the Package
• Software Installation
• Setting Up the Adapter
• Positioning the PC Adapter
• Positioning the HD Base
• Icon Descriptions
• LED Descriptions
• Universal Push2TV HD Manager
• Configuring the Display
• Supported Resolutions
• The Universal Push2TV HD TV Adapter Does Not Turn On
• The Universal Push2TV HD TV Adapter Shows a “Ready to Connect” Message
• Driver Information
1
Minimum System Requirements
Note: These minimum requirements are for streaming a high-resolution
movie on a high-resolution screen. Movie and screen resolutions
can be lower than 1080p when you do not require as much
resolution.
For best performance, NETGEAR recommends the following minimum system requirements:
• Laptop or PC with USB 2.0 port available.
• Microsoft Windows XP SP3 (32 bit), or Microsoft Windows Vista SP2 (32 or 64 bit), or
Win7 (32 or 64 bit).
• HDTV, display, or projector with HDMI port.
6

Push2TV HD Adapter
• System configurations that include more than one graphic card are currently not
supported.
• Surround audio is supported through HDMI or optical S/PDIF input to home theater or
speaker system.
For Windows XP:
• For office use, web browsing, and so on: 1.6 GHz Atom or Celeron processor and
512 MB memory.
• For 720p / full screen video: 1.8 GHz Core2 Duo processor and 1 GB memory.
• For 1080p / full screen video: 2.4 GHz Core2 Duo processor and 2 GB memory.
For Windows Vista or Windows 7:
• For office use, web browsing, and so on: 1.6 GHz Core Solo processor and 1 GB
memory. Overall WEI score 3.0 or better.
• For 720p full screen video: 1.8 GHz Core2 Duo processor and 1 GB memory.
Overall WEI score 3.5 or better.
• For 1080p full screen video: 2.4 GHz Core2 Duo processor and 2 GB memory.
• Video card: Intel GMA X4500, ATI Radeon HD3xxx, NVidia GeForce 9xxx or better.
Overall WEI score 4.5 or better.
What’s in the Package
The package includes:
7

Push2TV HD Adapter
Software Installation
Before You Install
Before you install the software, be aware of the following:
• If your PC contains a previous Universal Push2TV HD Suite driver installation, be sure to
perform a correct uninstall procedure using the Windows Control Panel.
• The installation software requires .NET Framework version 2.0 (or later) to be installed on
the computer.
If this software is not installed, you can download it from the following location:
http://www.microsoft.com/downloads/details.aspx?FamilyID=
0856EACB-4362-4B0D-8EDD-AAB15C5E04F5&displaylang=en
• Anti-virus software set to very high security might prevent the installer from running. The
user account should be set to lower security settings during installation and restored to
high security settings once the installation is complete. NETGEAR also recommends that
you temporarily disable the anti-virus software during installation.
• The installation checks the PC capabilities and compares them to the minimum system
requirements of the system. For Vista and Windows 7, NETGEAR recommends that you
run WEI (Windows Experience Index) calculation prior to installation.
Installation Steps:
1. Make sure that the PC Adapter is unplugged from the PC.
2. Log in as Administrator, and insert the installation CD in the PC CD ROM drive.
8
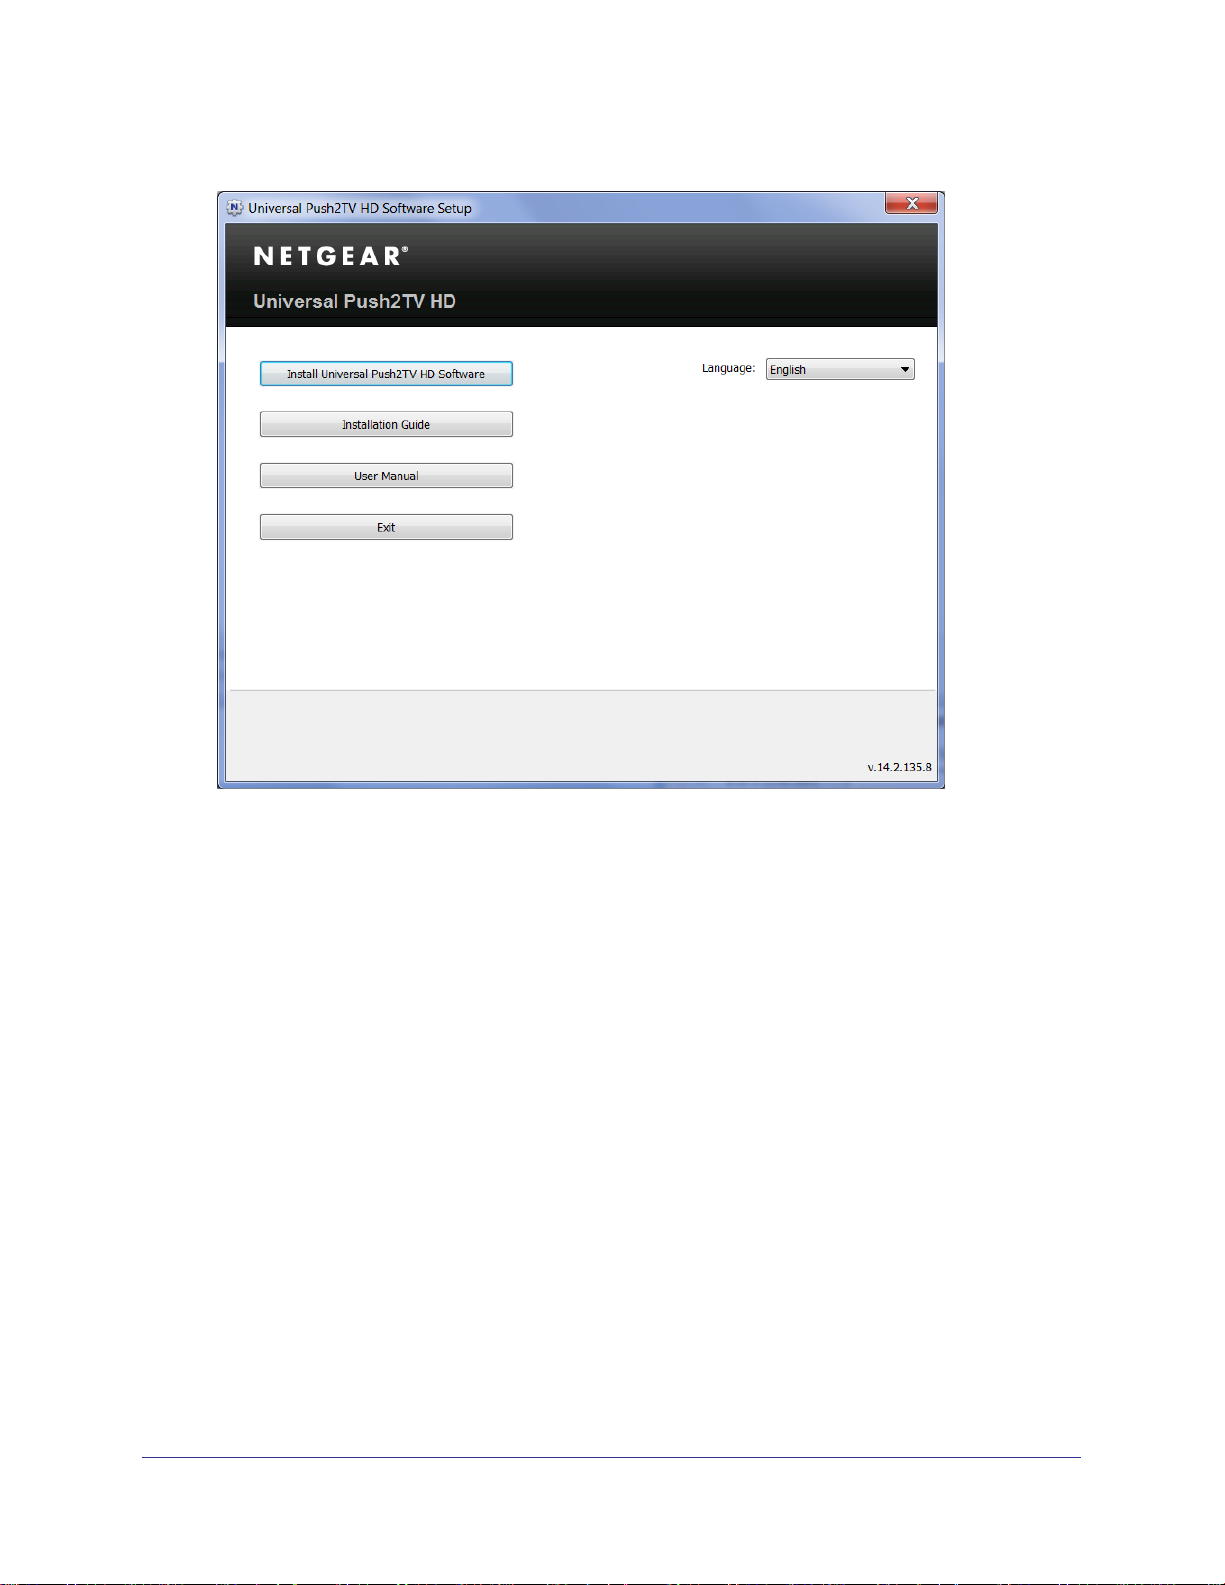
Push2TV HD Adapter
The installation CD Autoplay menu displays.
3. Select Install Universal Push2TV HD Software.
4. The Install Wizard begins installing the Universal Push2TV HD software. The installation
process can include more than one step to accommodate several drivers that are installed.
9
Push2TV HD Adapter
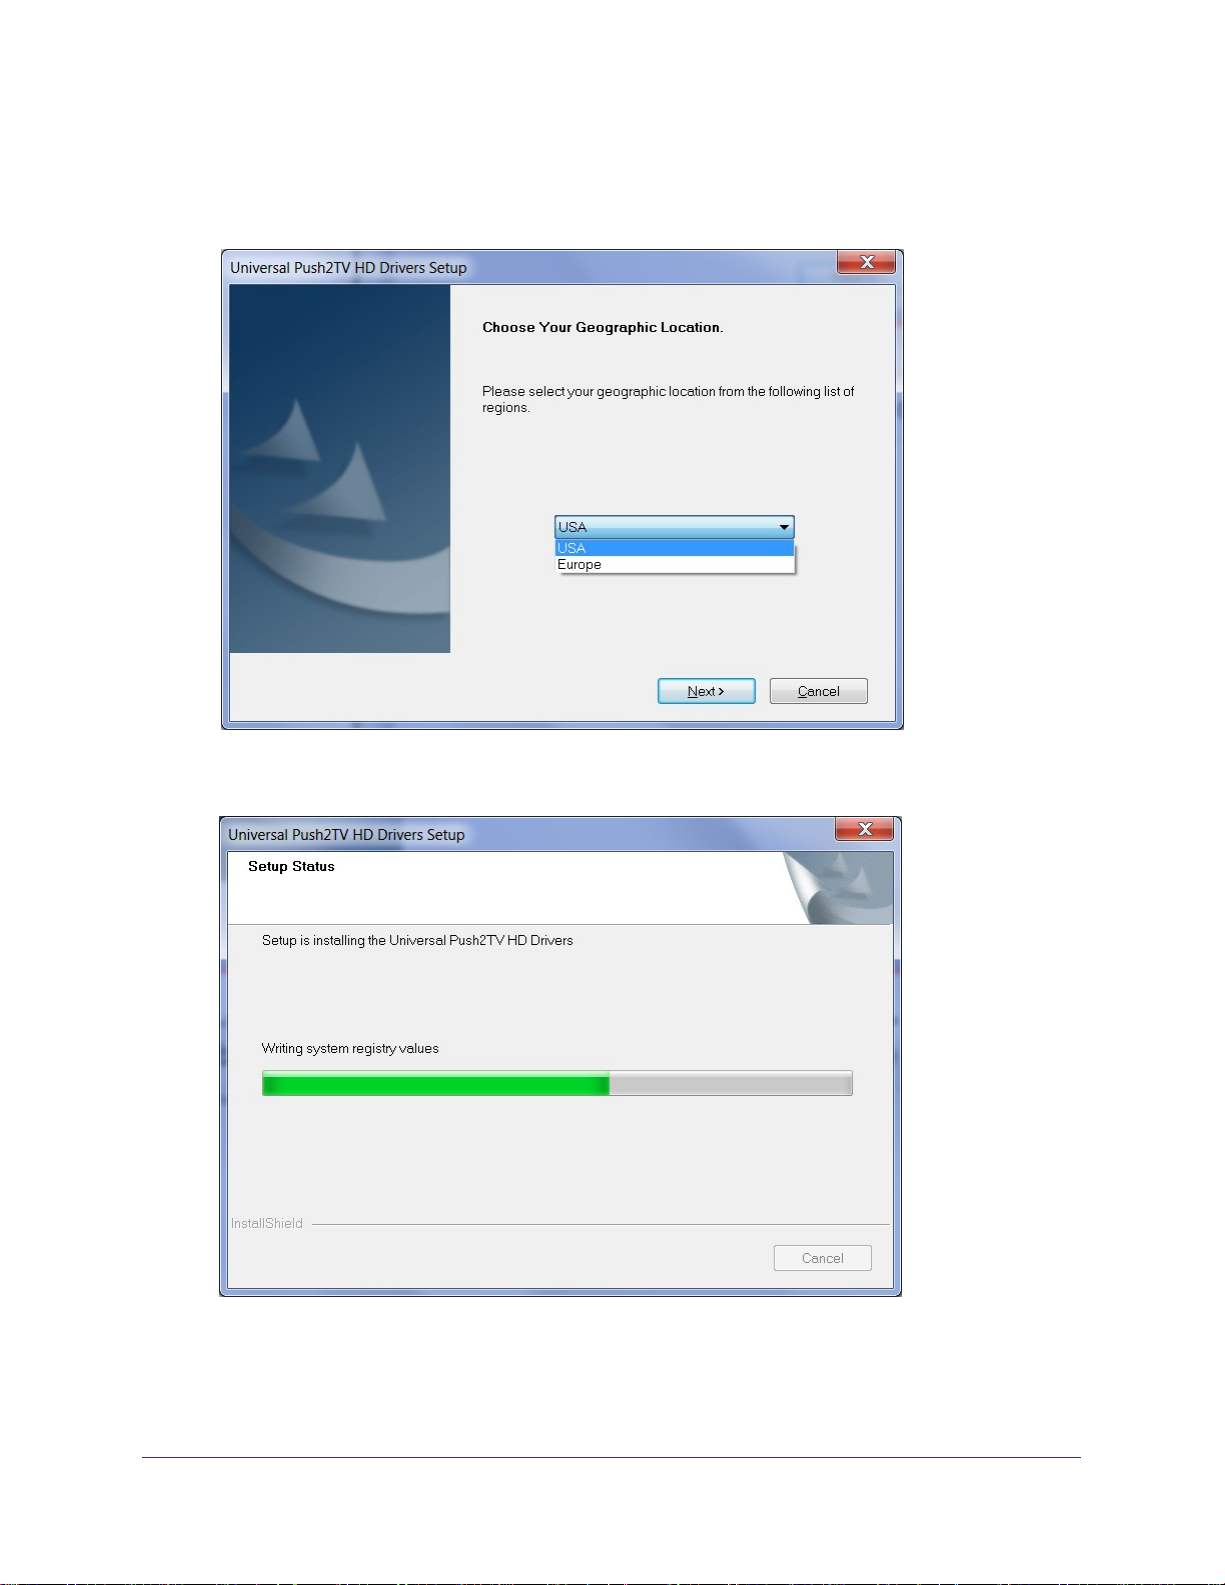
5. Select your geographic region to comply with your local radio regulations.
This setting can be changed, if needed, once the software is installed.
6. Follow the on-screen instructions, and click Next> when prompted, or by approving
authorization requests to continue the installation.
10
Push2TV HD Adapter
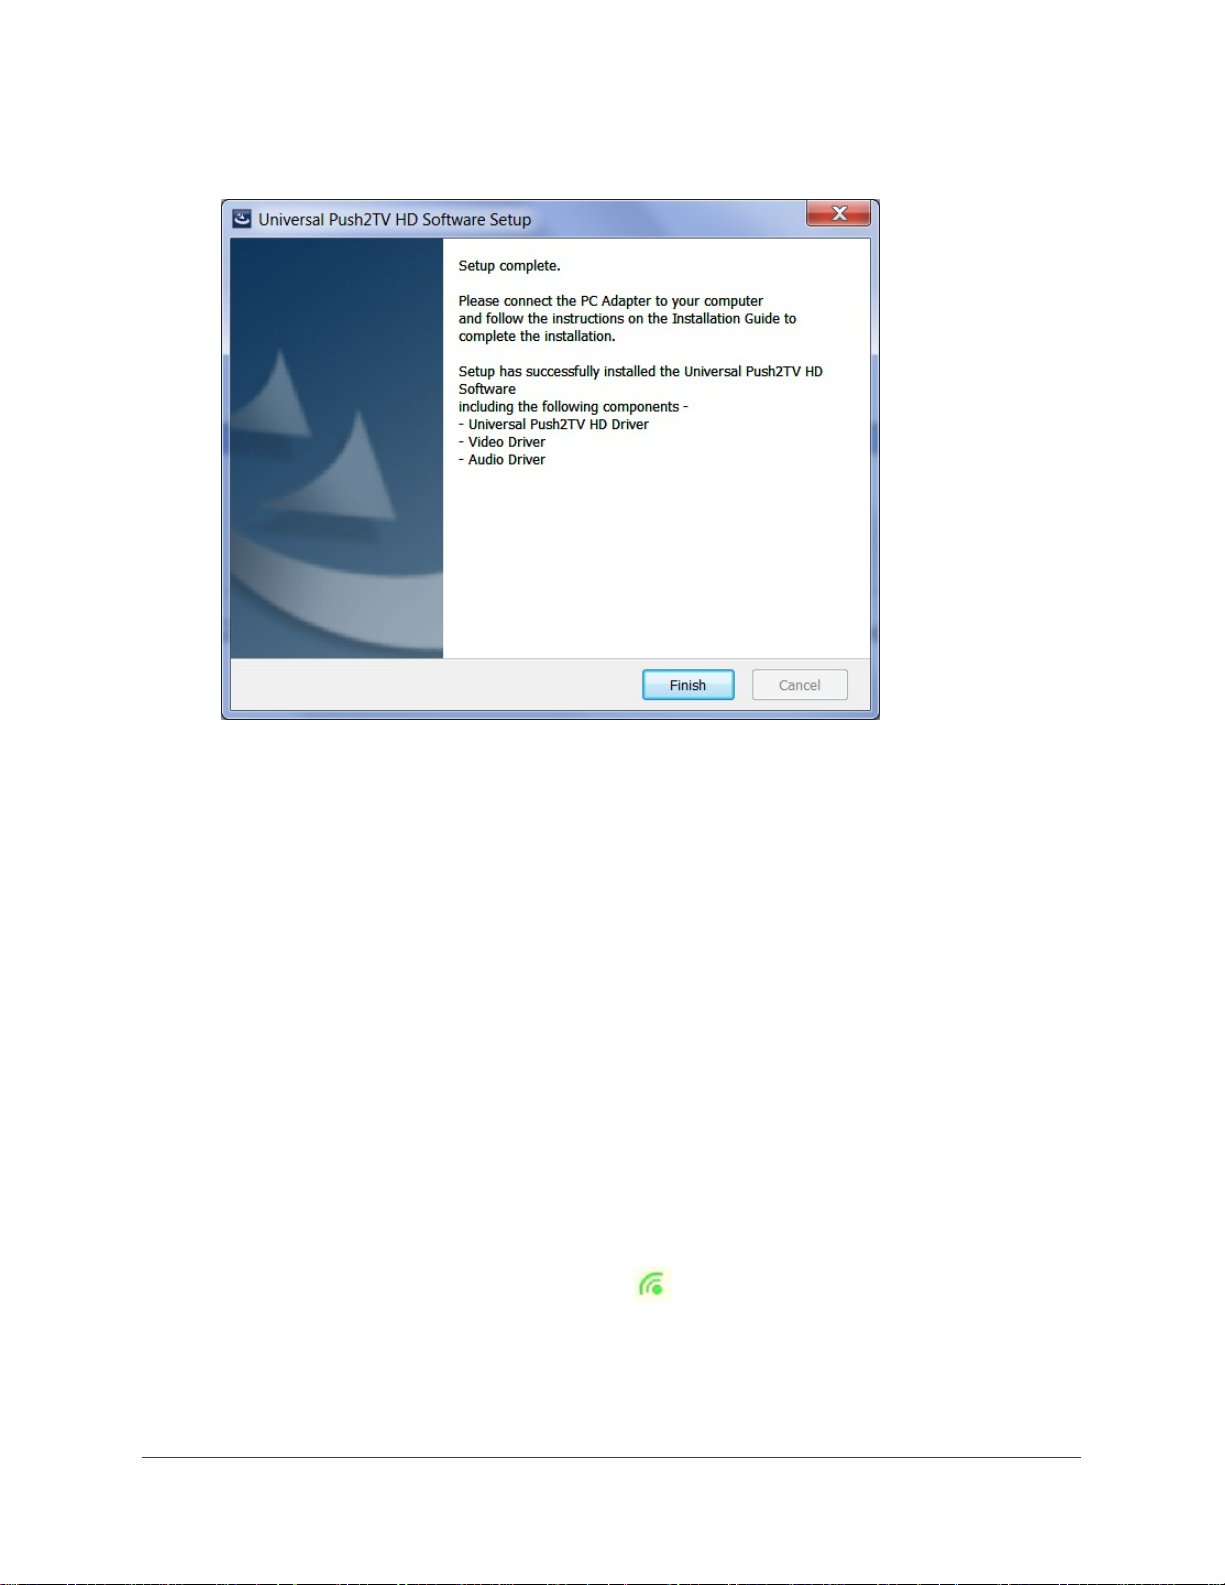
7. Once the audio driver and application driver are installed, the following message displays:
8. When the installation procedure has successfully finished, you are automatically returned to
the opening screen of the AutoRun menu. You might be requested to reboot.
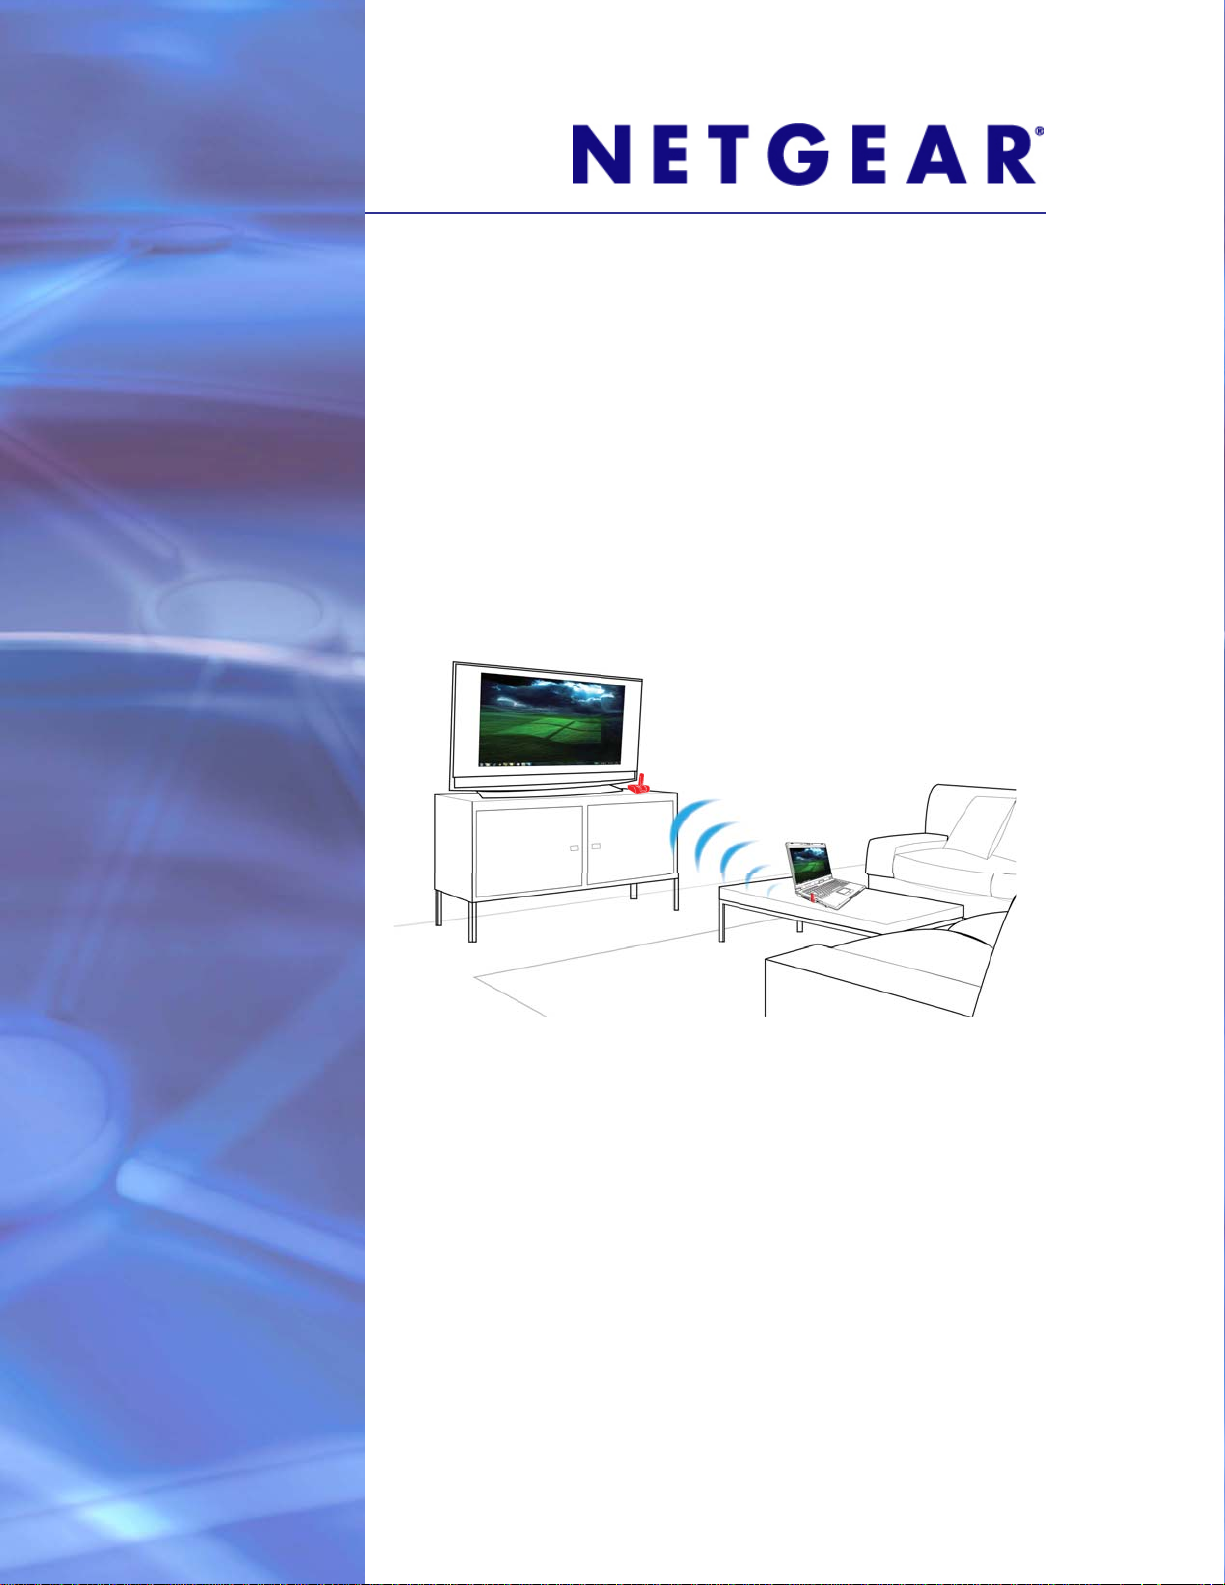
Setting Up the Adapter
Connect the HD Base
1. Attach the HD Base Adapter to the remote display device (TV, projector, or monitor),
using the HDMI cable, and make sure that the PC (with a PC Adapter attached) is within
3 meters (10 feet) distance from the HD Base Adapter for initial connection.
2. Make sure that the two Adapters, PC and Device have a clear line of sight.
3. Connect the provided power supply to the HD Base Adapter power receptacle.
Connect the PC Adapter to the PC
1. Connect the Universal Push2TV HD PC Adapter to a high-speed PC USB port. The
system will automatically detect and install the drivers.
2. Wait for the System Tray icon to turn green
the Universal Push2TV HD adapter has been established.
, indicating that a wireless connection with
11
Push2TV HD Adapter
The Display and Audio icons also display as soon as a connection is established.
Note the following:
• If you do not see the icon changing to green, verify the line of sight between the adapters.
• If you do not see the Display icon, refer to Chapter 3, Video, or try the suggestions in
Service Activation on page 35.
• If you do see the green icon and Display icon, but do not see a picture on your TV, see
The Universal Push2TV HD TV Adapter Does Not Turn On on page 31 or The Universal
Push2TV HD TV Adapter Shows a “Ready to Connect” Message on page 31.
Connecting Audio
The following options can be used to connect an audio output device to the HD Base:
Using the HDMI Connector
Connect the HDMI cable to the HD Base. Both video and audio are supported when you use
the HDMI cable.
Connect the other end of the HDMI cable to the appropriate HDMI port on the TV, projector,
or monitor for stereo audio, or to an available port in a home theater system for surround
sound. For this configuration, the home theater system should support HDMI output to be
connected to the TV, projector, or monitor. Verify that the receiver is configured to the correct
input.
Using the Optical S/PDIF Connector
Connect the S/PDIF cable to an available port in a home theater system for surround sound.
Verify that the audio receiver is configured to the correct input.
Using the Dedicated 3.5 mm Port
Connect an audio cable with a 3.5 mm (mini stereo) plug to the audio jack on the HD Base
(green color). Connect the other end of the audio cable to the appropriate audio input jack on
the TV, projector, or monitor speaker system. This port supports stereo audio only.
12

Push2TV HD Adapter
Note: The audio output is activated automatically. If you need to set the
audio output device manually, see Setting Audio Output Device on
page 67.
Positioning the PC Adapter
To achieve best performance, NETGEAR recommends that you position the PC Adapter in
the upright position.
Positioning the HD Base
The Universal Push2TV HD TV Adapter is designed for two possible mounting options:
Simple table placement: The HD Base is placed on a flat horizontal surface, and the TV
Adapter is connected at 90 degrees relative to the base so that the TV Adapter is in a vertical
position, as shown in this drawing:
13
Push2TV HD Adapter
Vertical mounting: The Base is fastened to a wall or a projector, or behind a display screen,
and the TV Adapter is connected so that it is flat with the mounting surface, with the TV
Adapter pointing upwards.
IMPORTANT:
Leave the top side of the TV Adapter unmasked for best radio
performance:
Note: For best performance, NETGEAR recommends that you always
position the TV Adapter vertically so that it is pointing upwards.
Icon Descriptions
Universal Push2TV HD Manager User Interface
The Universal Push2TV HD Manager allows you to monitor and control the available
Universal Push2TV HD devices and connections that are within the PC’s range.
Universal Push2TV HD Manager System Tray Icon
The Universal Push2TV HD Manager icon is automatically displayed in the Windows System
Tray whenever Windows starts.
In Windows 7, it might be hidden, and you will need to open the System Tray in order to see
it.
14
Push2TV HD Adapter
The color and shape of the icon indicates the current activity state, as shown in the following
table:
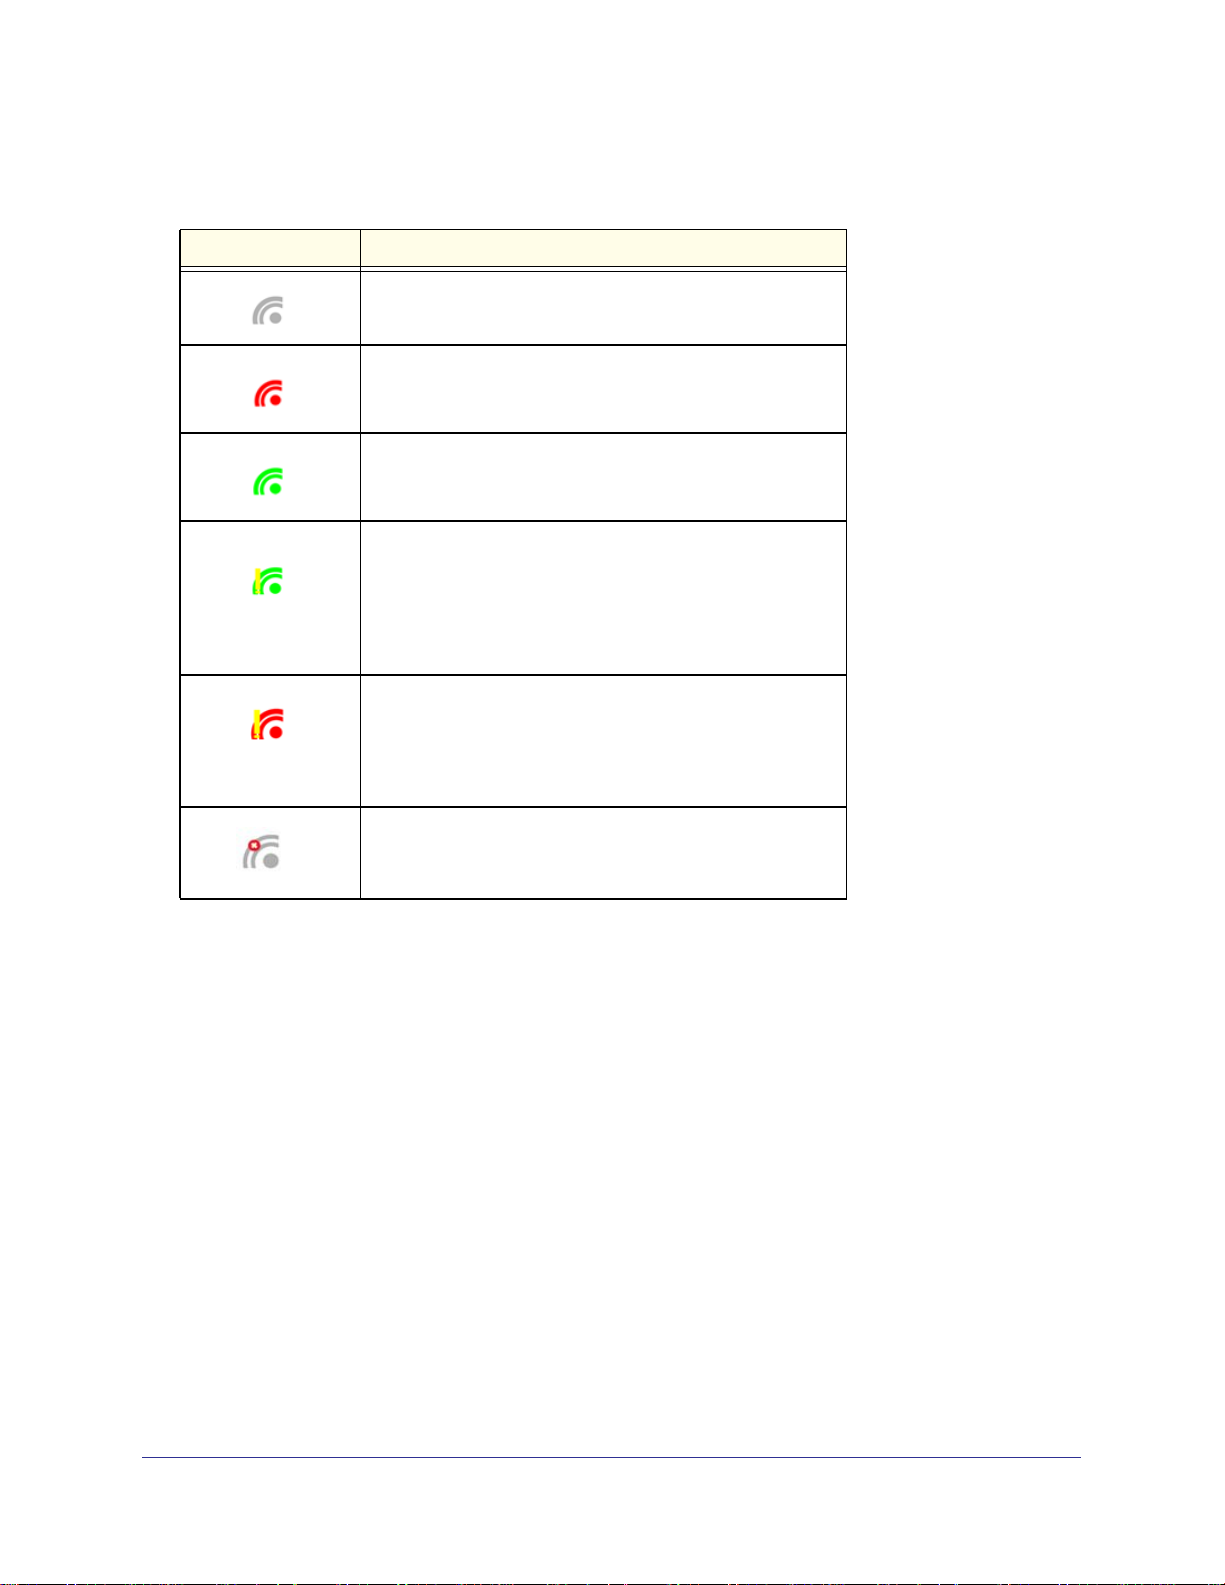
Icon Color Status
Host Hardware Disconnected (gray icon)
Universal Push2TV PC Adapter is not connected.
Host Hardware Enabled (red icon)
Universal Push2TV PC Adapter is connected to the PC (PC
Adapter is enabled), but wireless connection is not active.
Connected (green icon)
A wireless connection is established with a Universal
Push2TV TV Adapter.
Universal Push2TV HD Channel is Busy (green icon with
exclamation)
Low channel quality detected, but at least one Universal
Push2TV HD device is still connected. For information
about how to improve connection quality, see Channel Busy
on page 39.
Universal Push2TV HD Channel is not available (red
icon with exclamation)
No available channel detected. For information about how
to improve connection quality, see Channel Busy on
page 39.
Host Hardware Disabled (gray icon with X)
Universal Push2TV PC Adapter is disabled.
LED Descriptions
The LEDs allow you to see the operational status of the Universal Push2TV adapter.
Power:
• OFF when no power is applied or the adapter is not connected to a USB port.
• ON when power is applied and a wireless connection between the PC Adapter and the
TV Adapter is not established.
15
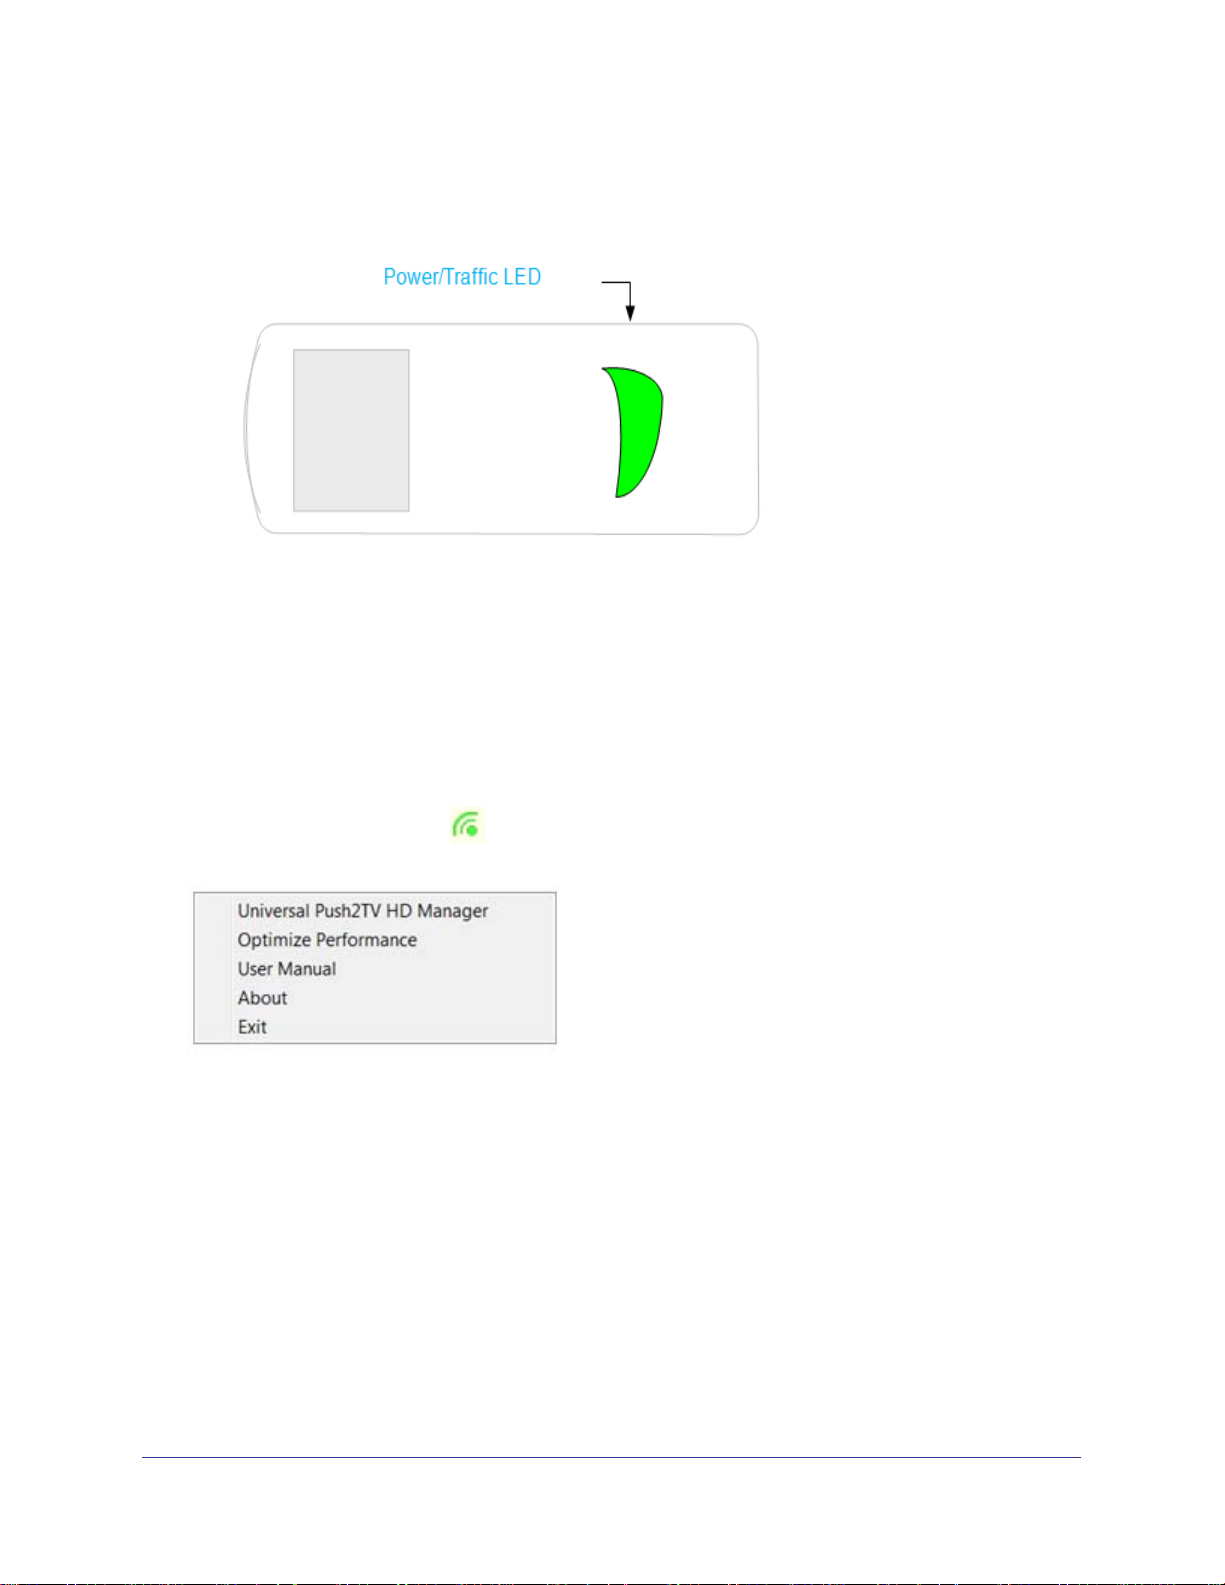
Push2TV HD Adapter
Traffic:
• Rapid flashing when data is received or transmitted.
Universal Push2TV HD Manager
Context Menu Options
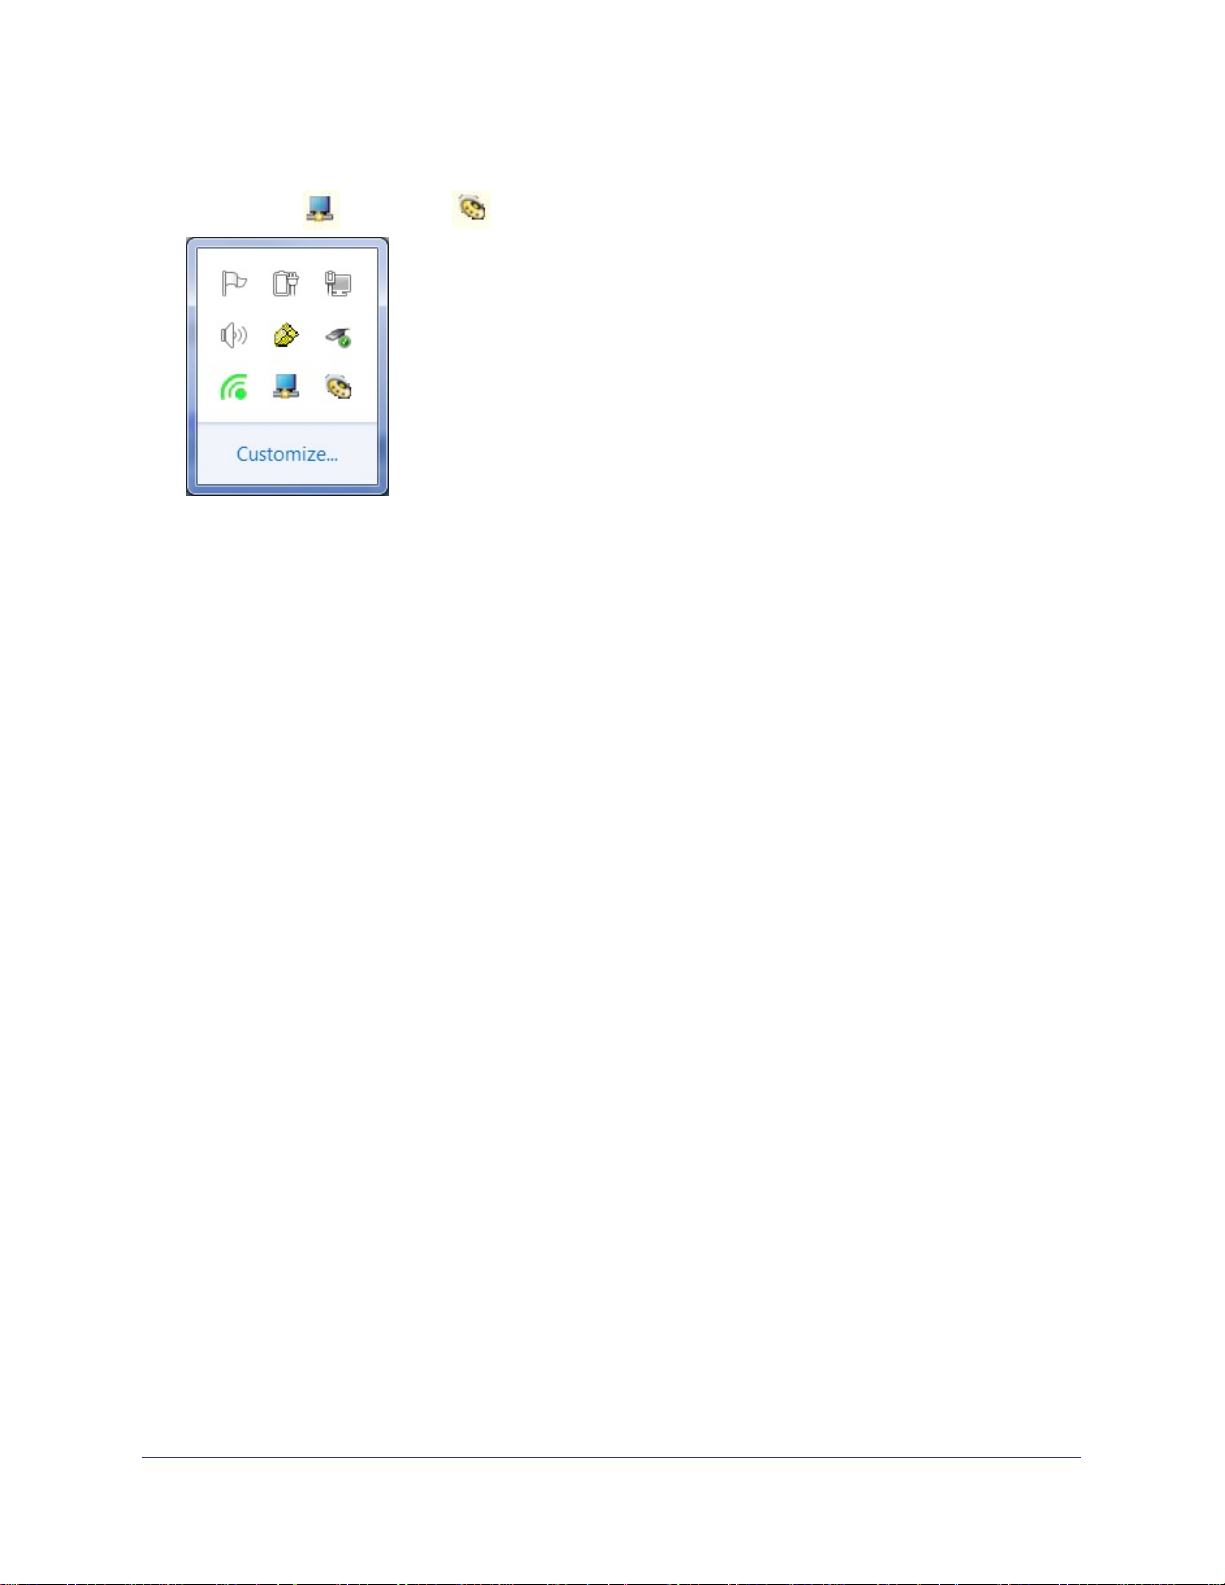
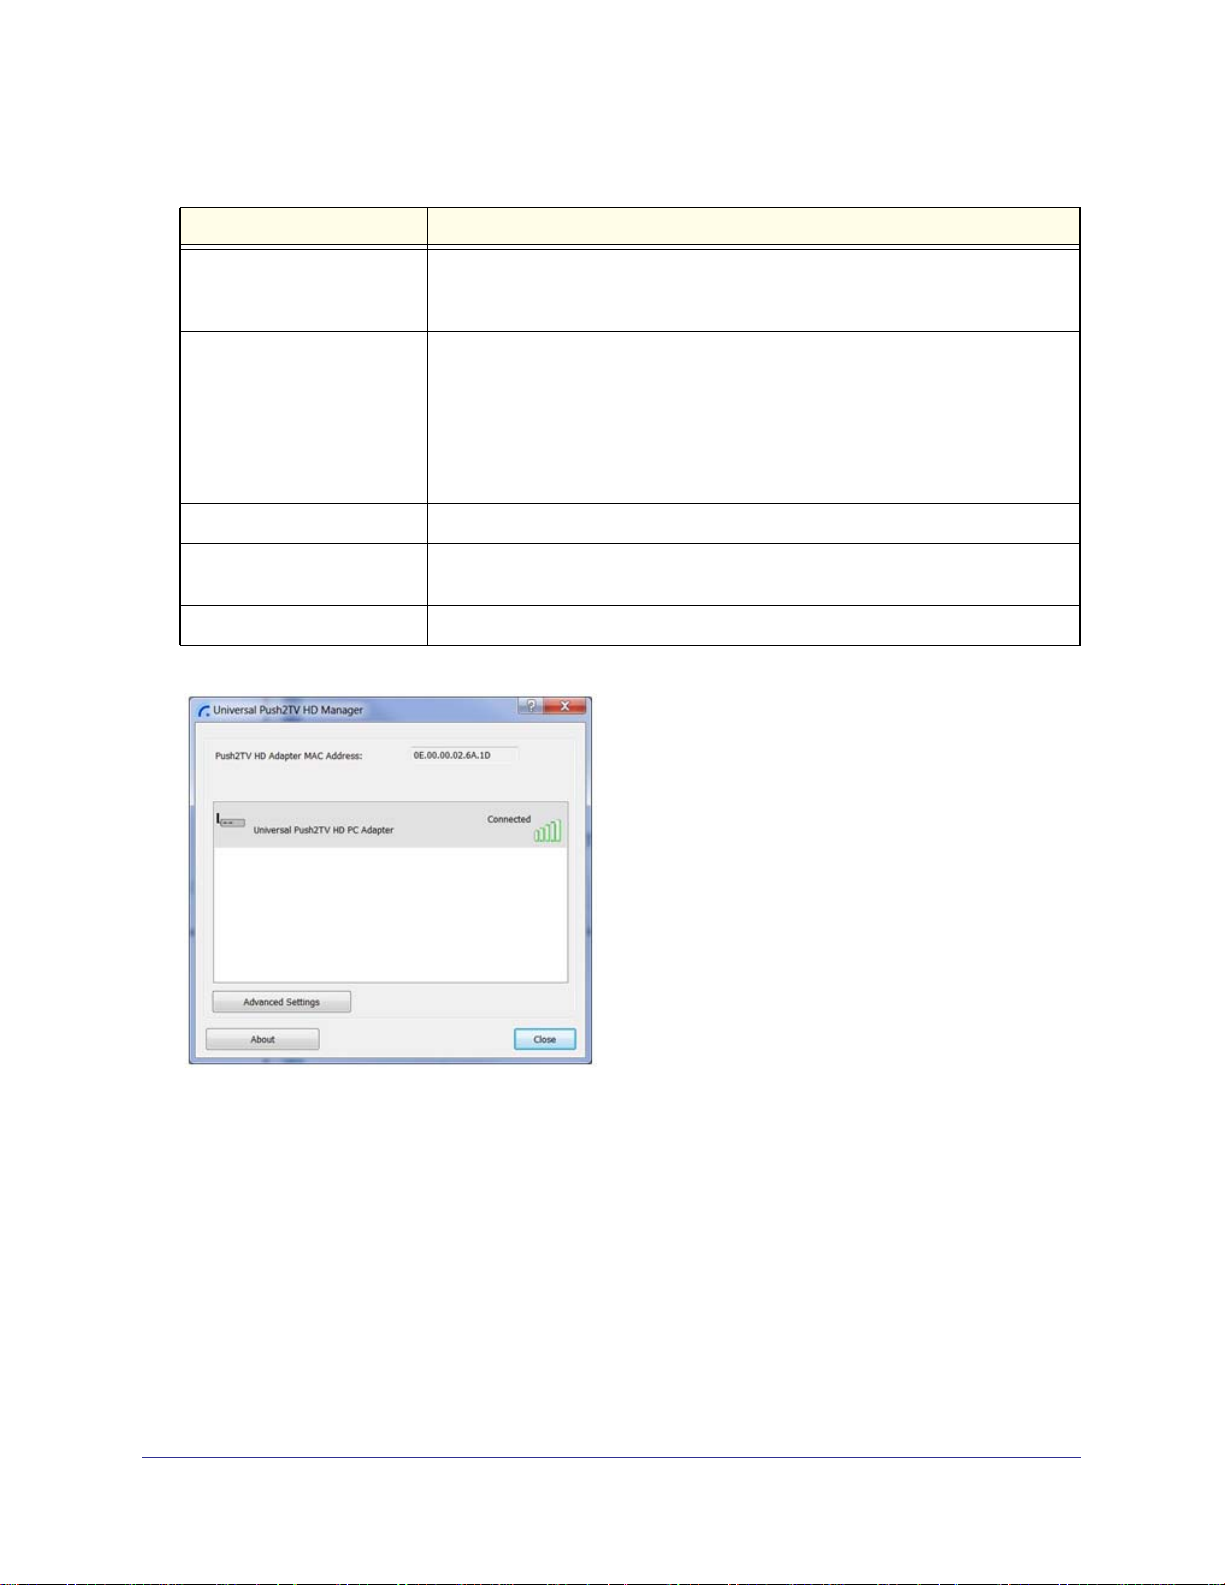
Accessing the Universal Push2TV HD Manager
To access the Universal Push2TV HD Manager, right-click the Universal Push2TV HD
Manager System Tray icon
the Universal Push2TV HD Manager screen.
and select Universal Push2TV HD Connections to display
16
Context menu options
Menu option Description
Push2TV HD Adapter
Universal Push2TV HD
Manager
Optimize Performance Reducing the output resolution has been found to be a good solution for
User Manual Opens the User Manual (in PDF format) in a browser.
About Displays the About screen, containing version information for the drivers and
Exit Closes the Universal Push2TV HD Manager application.
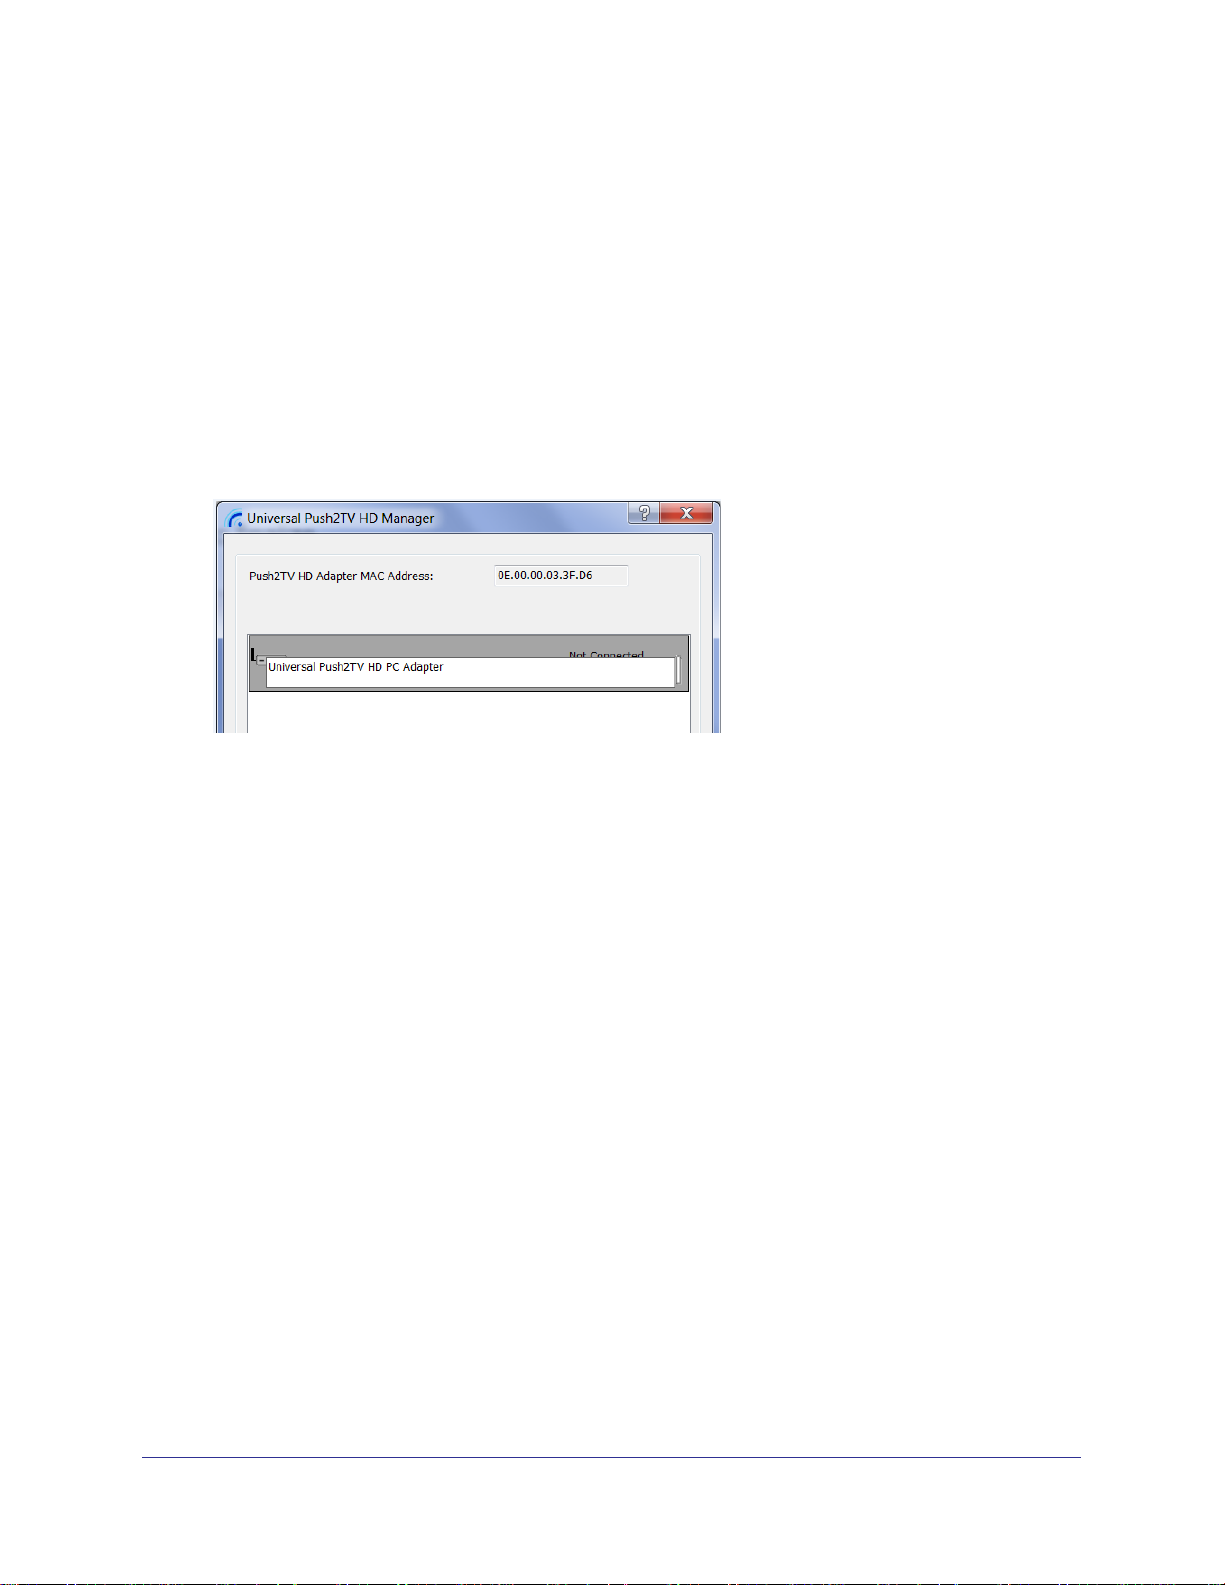
Displays the main user interface, which displays a list of Universal Push2TV HD
devices that are available, and their connection status (Connected, Not
Connected, Blocked)
improving performance on weak platforms as it requires much less processing
power from your platform. Therefore, for platforms that do not meet the
recommended minimal requirements, the output resolution when you first start up
your system is reduced, but the overall video experience has higher FPS and is
less jerky. By default, this option is enabled, and NETGEAR strongly suggests
that you do not change this configuration.
software.
17
Push2TV HD Adapter
Universal Push2TV HD Manager Options
Universal Push2TV HD Manager Options
Menu option Description
Push2TV Adapter
MAC Address
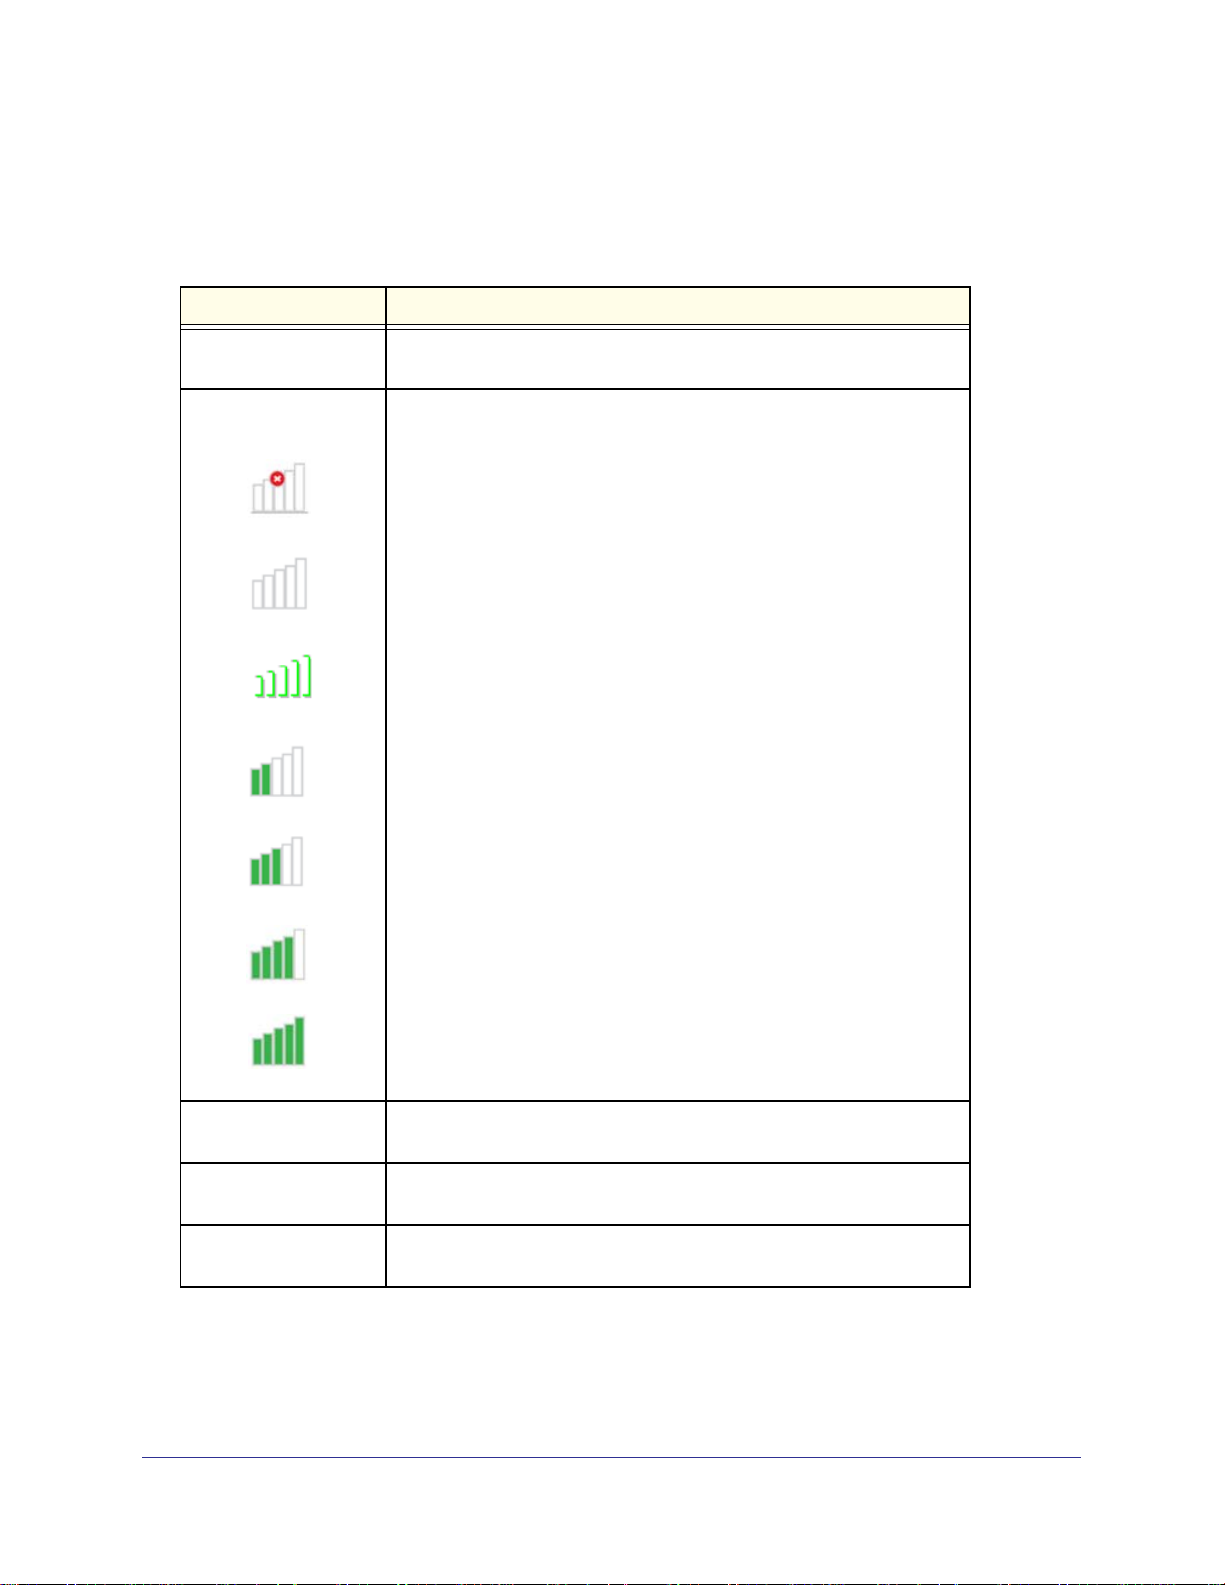
Connection Quality
Displays the currently connected PC Adapter MAC address.
The following are the different states of the connection status icon,
which indicate the connection quality:
Blocked
Not connected
Connected
Medium
Good
Very Good
Excellent
Advanced Settings Displays the Advanced Settings screen, and allows configuration of the
PC Adapter Radio settings.
Close Closes the Universal Push2TV HD Manager screen; does not close the
Universal Push2TV HD Manager application.
About Displays the About screen containing basic information about the
software version and vendor details.
18
Push2TV HD Adapter
PC Adapter Names
Changing PC Adapter Names in the Universal Push2TV HD Manager
The Universal Push2TV HD Manager screen allows you to modify the name of the PC
adapter that displays in the connections list.
To modify the PC adapter name:
1. Double-click the PC adapter name.
2. Enter the text that you want.
3. Click anywhere outside of the device name area to finalize.
19
Push2TV HD Adapter
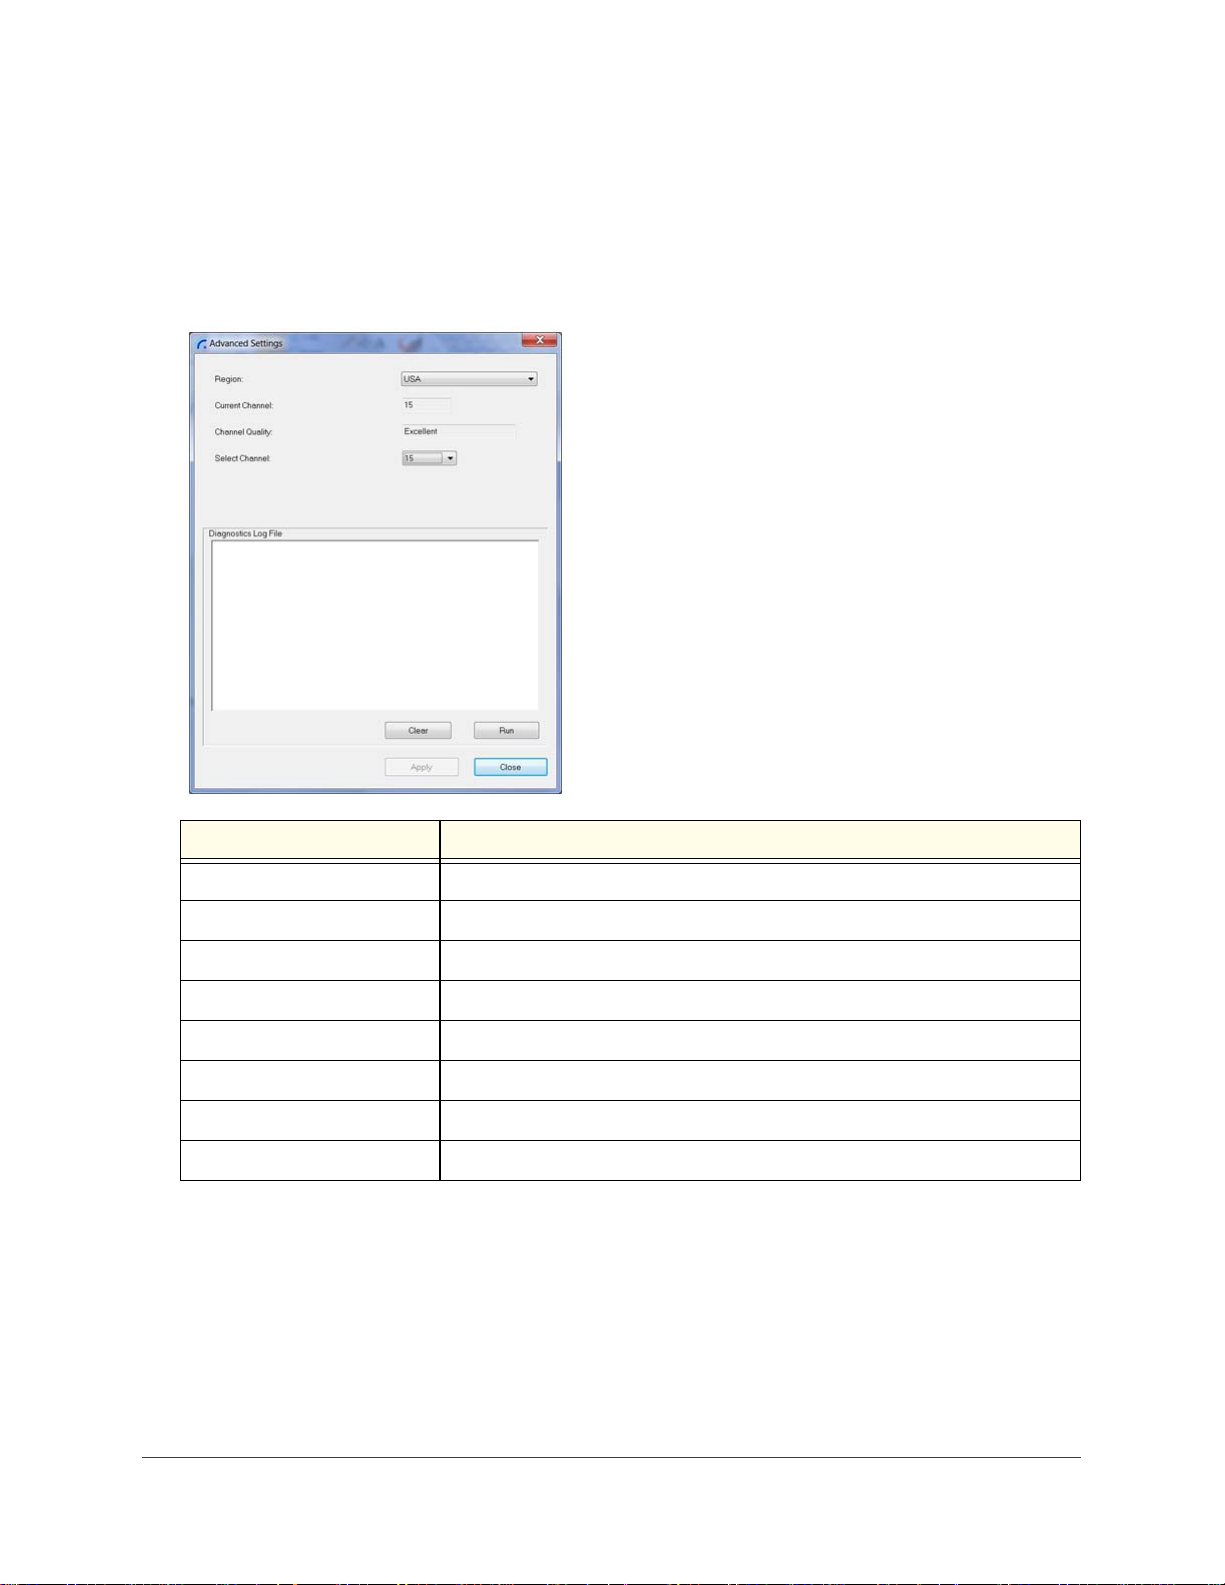
Advanced Settings
The Universal Push2TV HD Manager’s Advanced Settings screen allows the configuration of
the Channel and Region selection in the host. To access the Advanced Settings screen:
In the Universal Push2TV HD Manager screen, click Advanced Settings.
Option Description
Region Allows selecting the regulatory region: USA, Europe.
Current Channel (read only) Displays the current radio channel.
Channel Quality (read only) Displays channel quality: Excellent, Very Good, Good, Low, Not Connected.
Select Channel Allows selecting radio channels: 13, 14, 15
Run Generates diagnostics output.
Clear Clears previously generated diagnostics output.
Apply Applies configuration changes that were made.
Close Closes the Advanced Settings screen.
20
Push2TV HD Adapter
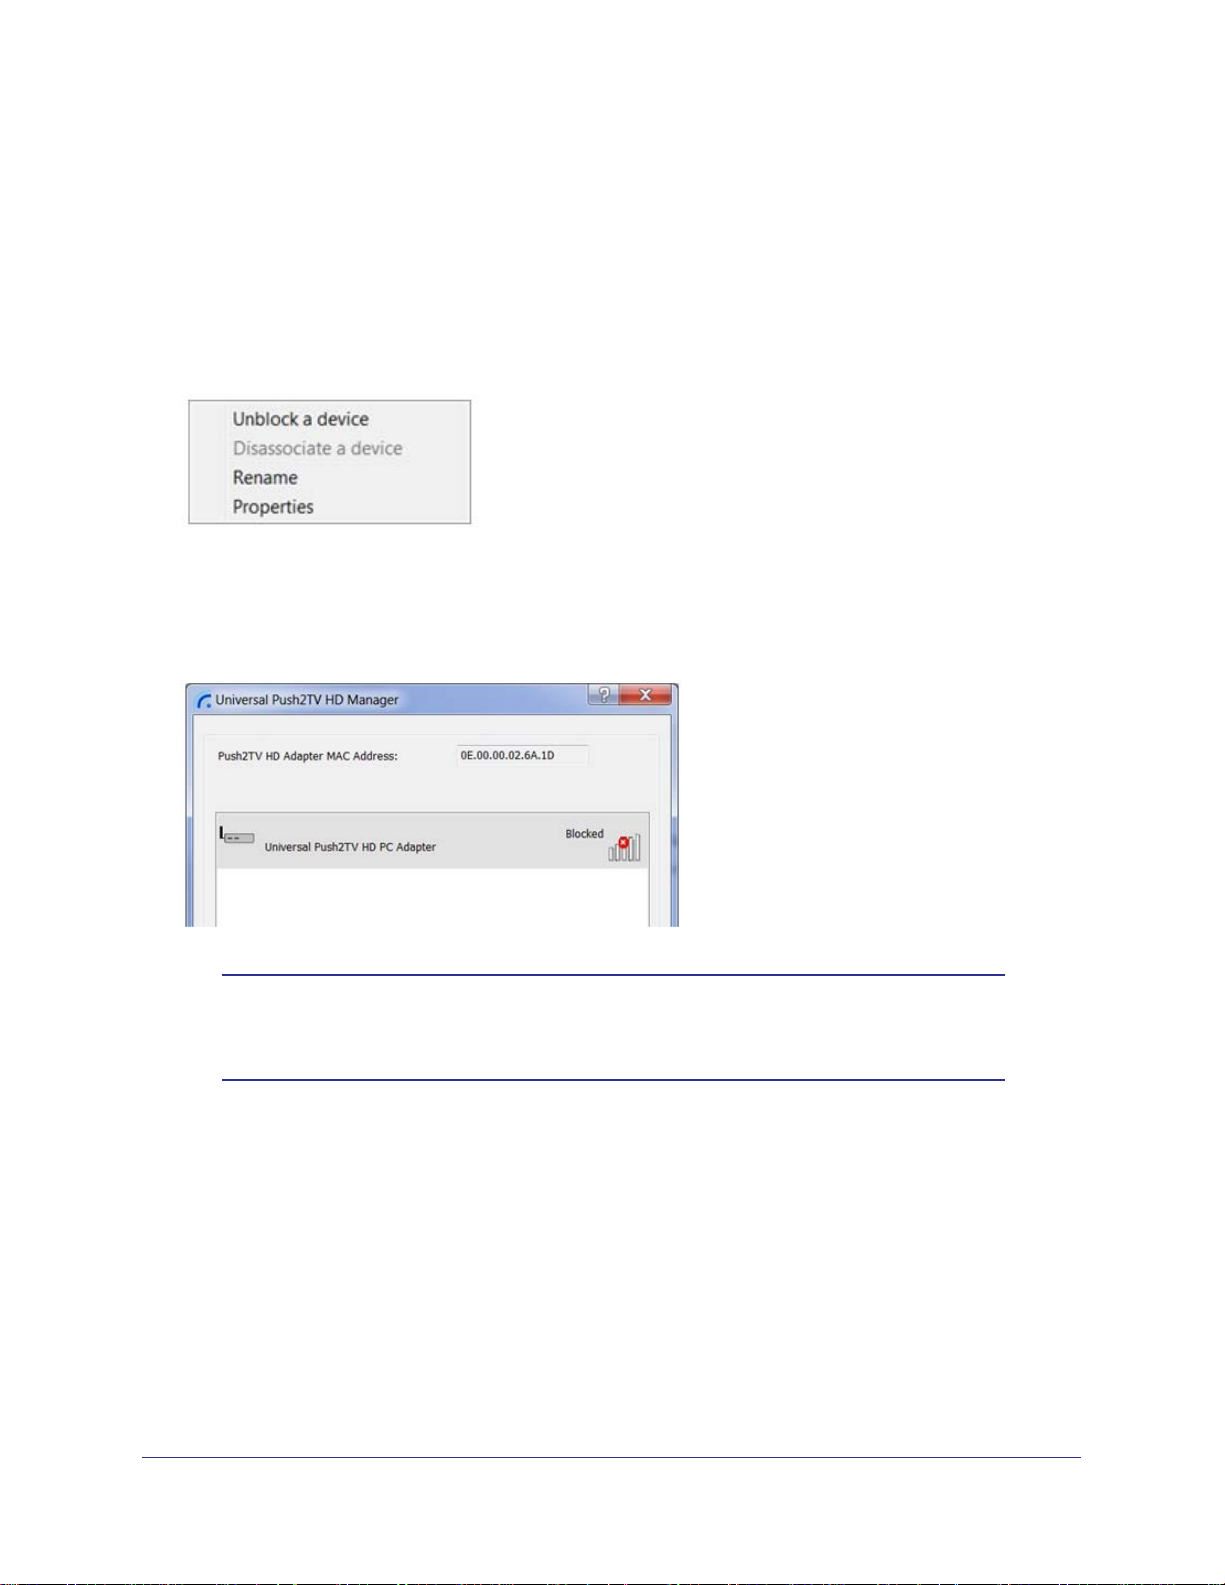
Blocking or Disassociating
Blocking or Disassociating a Device
The Universal Push2TV HD Manager screen allows you to remove devices or to temporarily
disable them from connecting to the PC Adapter. To block a device temporarily, and prevent it
from connecting to the PC Adapter, right-click the device name in the Connection list, and
select Block Device.
Universal Push2TV HD Manager Context Menu
To remove a device from the list of available devices completely, right-click the device name
in the Connection list, and select Disassociate Device.
Note: The Disassociate Device option is available only for TV Adapters
that are purchased separately and not in a set. For information about
pairing an Adapter set, see Problems with Pairing on page 42.
21

Push2TV HD Adapter
Context Menu Options
Menu Option Description
Block/UnBlock Device Allows you to temporarily disable a device from connecting with the PC
Adapter.
Disassociate Device Removes the device from the list. To return the device to the list, pairing must
be performed.
Rename Allows you to change the device name as it appears on the Universal
Push2TV HD Manager.
Properties Displays the properties screen for this device.
Configuring the Display
Setting Options for the Display
The following are the suggested work configurations when you are connecting a display
screen to the TV Adapter:
• Mirror Mode
• Extend Mode
• Laptop with Lid Closed
• External Display Only
Note: On Windows XP/Vista, the display properties for the HD Base can
be configured in two ways: as described in Configuring the Display
via the Display Icon Context Menu on page 26, or as described in
Configuring the Display through Windows Display Properties in
Windows XP/Vista on page 29. On Windows 7, see Configuring the
Display in Windows 7 on page 24.
When you change settings, or during first connection between the
PC Adapter and the Universal Push2TV HD TV adapter, the PC
display might flicker or turn on and off as the screen resolution is
being automatically adjusted.
This section describes the different modes that can be set. Configuring the Display in
Windows XP or Vista on page 26 and Configuring the Display in Windows 7 on page 24,
describe the procedures for configuring these modes.
22
Push2TV HD Adapter
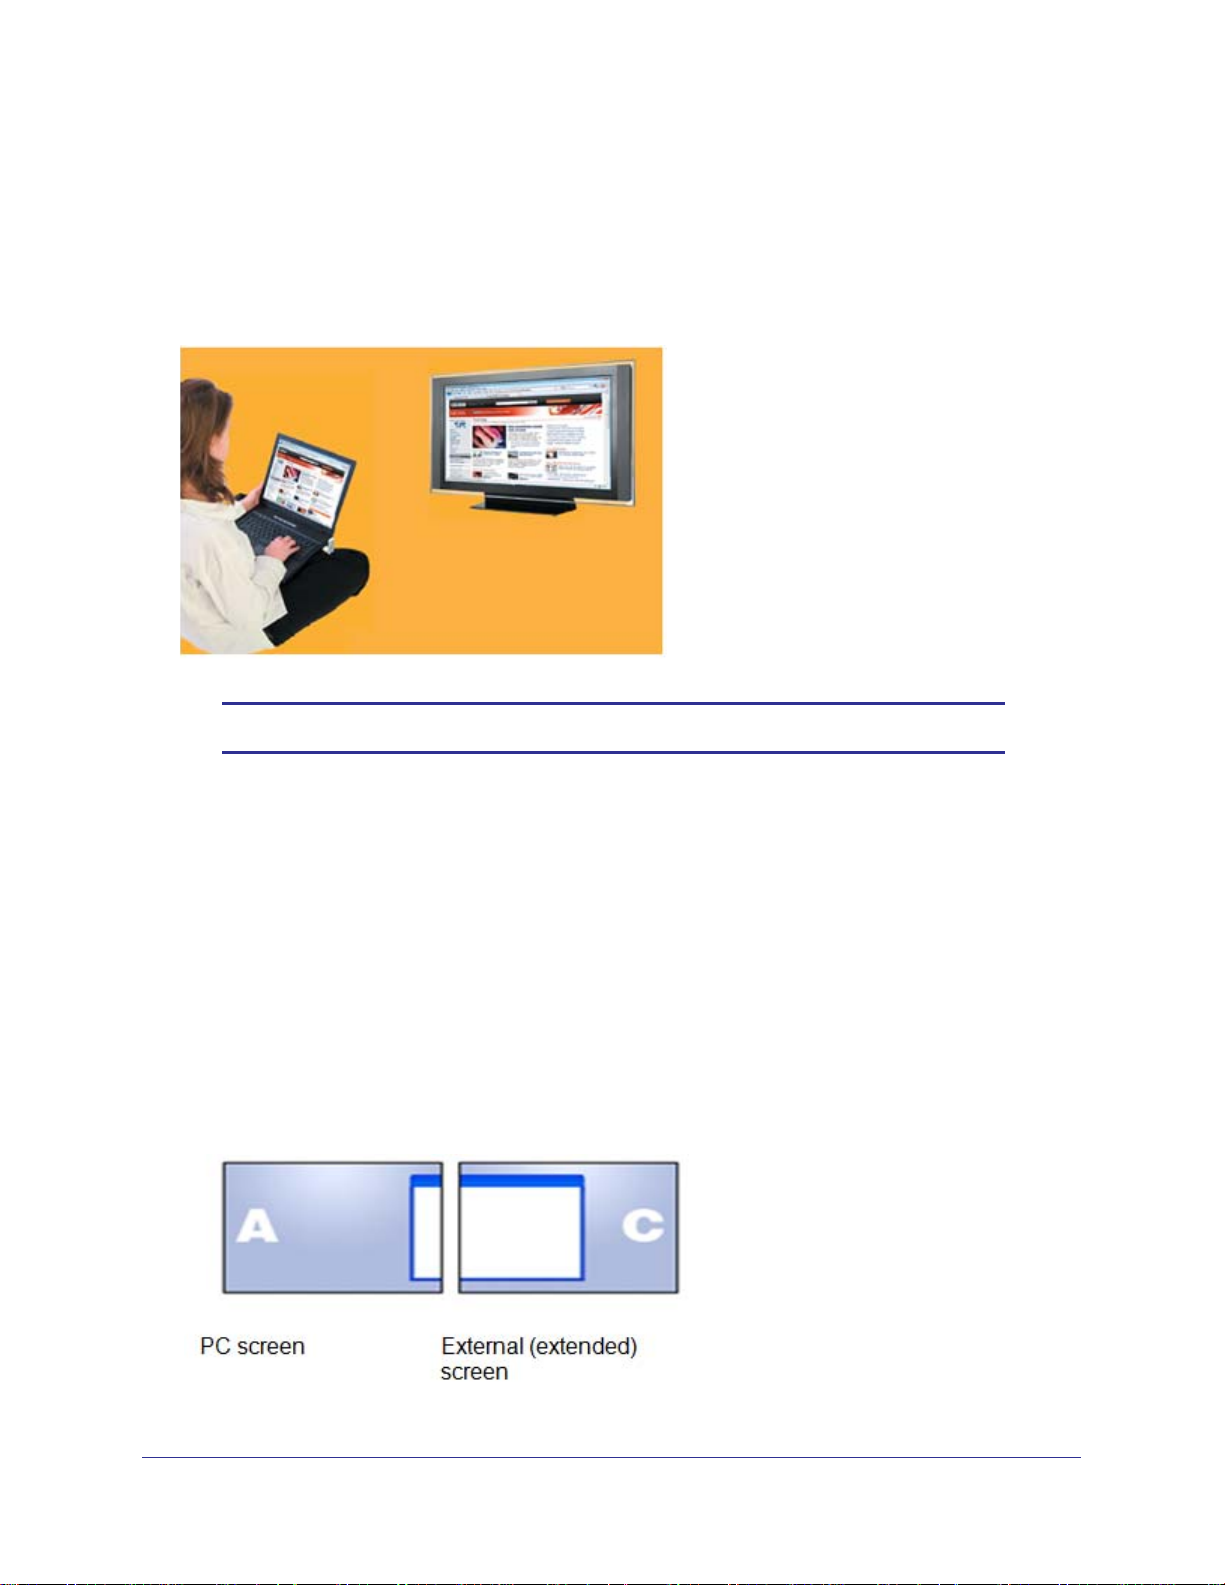
Using Mirror Mode
Mirror mode is used to display the identical content on the additional screen as is shown on
the main PC or laptop screen. Mirror mode is generally used to display the PC contents on a
larger or higher-definition display. In Mirror mode, the default resolution is chosen based on
the common denominator between the PC and the additional screen—therefore, for most
PCs, 1080p is not supported.
Note: Mirror mode is not recommended for playing HD video.
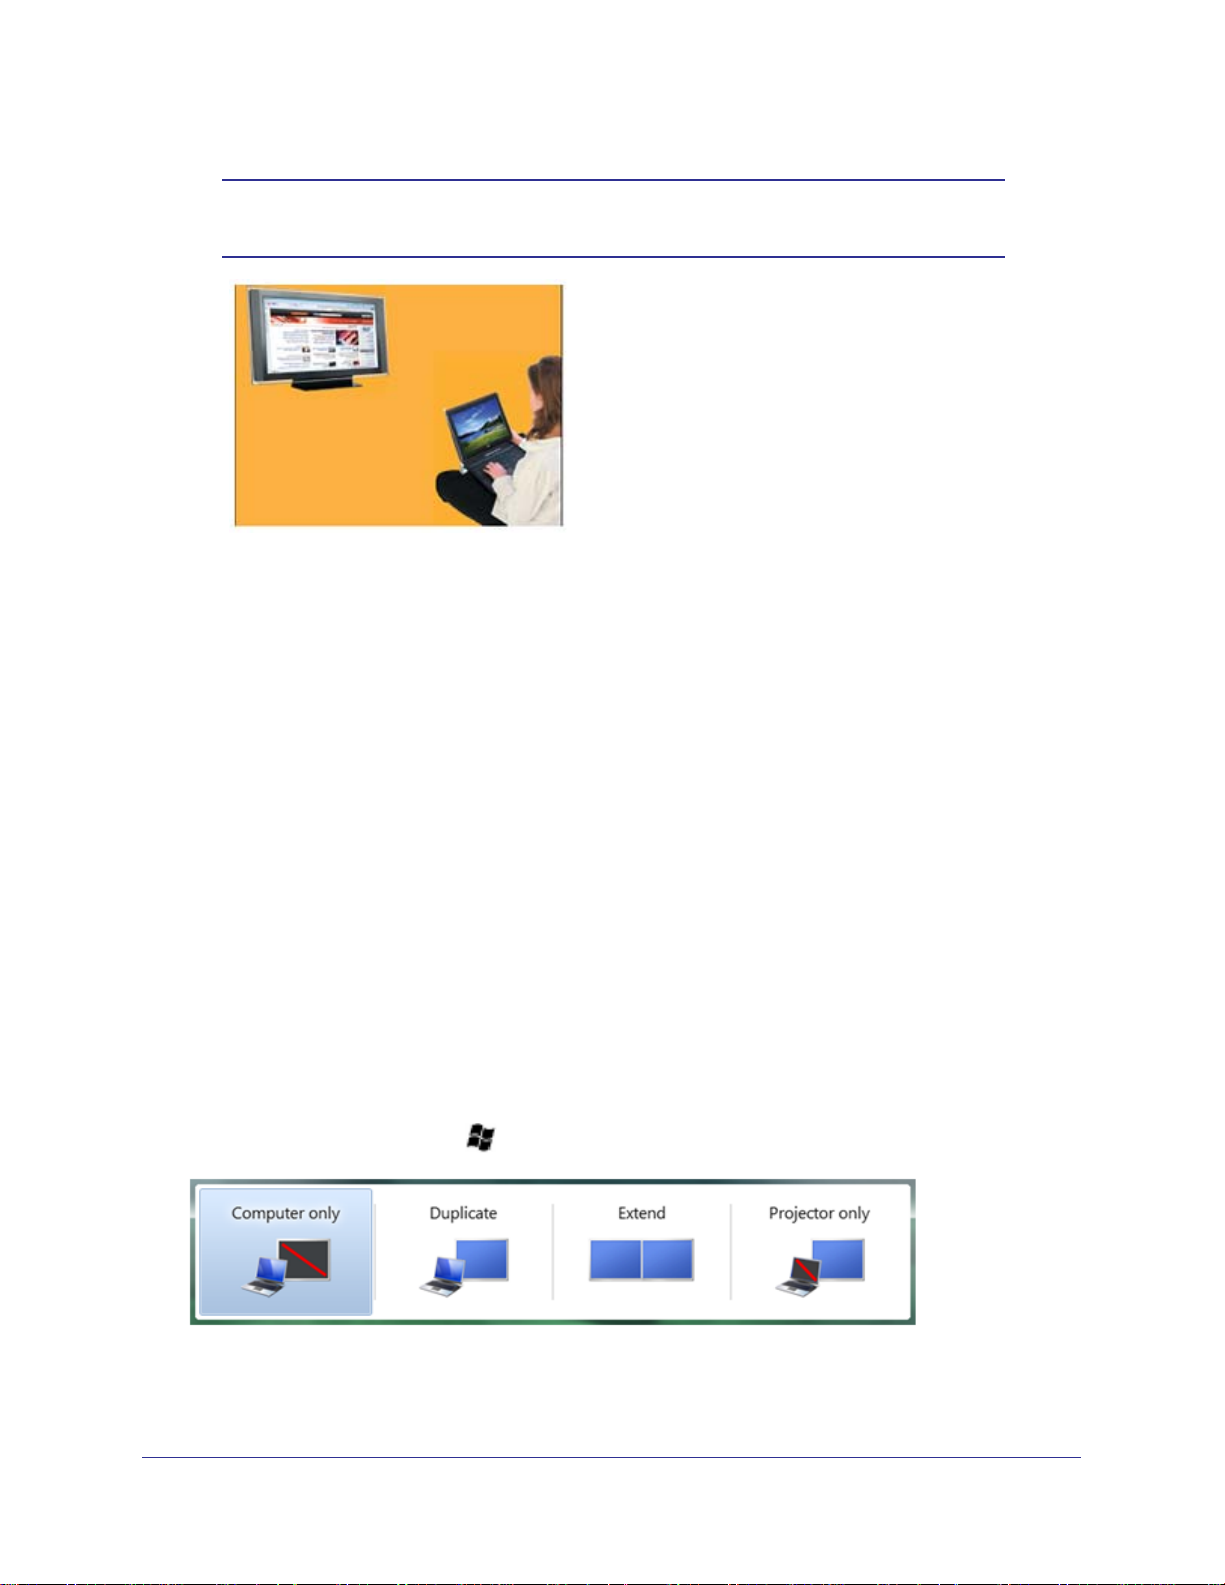
Using Extend Mode
Using the system in Extend mode sets the wireless system to operate as an extension or as
an additional screen to the PC.
Instructions
Use the Extend mode to display different content on each display screen. In Extend mode,
the display attached to the HD Base becomes an extended part of the Windows desktop. The
extra desktop area is a great productivity aid, allowing you to view or work with more
applications or documents at the same time.
You can also use this mode to extend your desktop to fill multiple screens that are positioned
next to each other for a larger continuous work space.
23
Push2TV HD Adapter
Note: Extend mode is recommended for playing HD video as Mirror mode
is limited by the resolutions supported in the PC.
Laptop Operation with the Lid Closed
You can work conveniently with a laptop by setting its default action upon closing the lid to Do
nothing (to prevent the laptop from entering sleep or hibernation mode, select Control
Panel > Power Options, "When I close the lid:" - "Do nothing"), and then set the HD
Base screen as the primary display while disabling the main screen.
The laptop lid can then be closed, and the laptop can be used with the HD Base screen and
an external keyboard and mouse attached to the laptop. This configuration can be used
together with either Mirror mode or Extend mode.
External Display Only
When you want to use the external display only, you can close your main monitor and view
movies on the external display attached to the HD Base.
Configuring the Display in Windows 7
Setting Mirror or Extend Mode in Windows 7
In Windows 7, there is a built in support for an external monitor. To use it, press the Windows
key together with the P key (
+P), and the following menu displays:
For Mirror mode, select Duplicate.
For Extend mode, select Extend.
24
 Loading...