

Page 1
Quick Start
Nighthawk
AC1900 WiFi Cable Modem Router
Model C6900
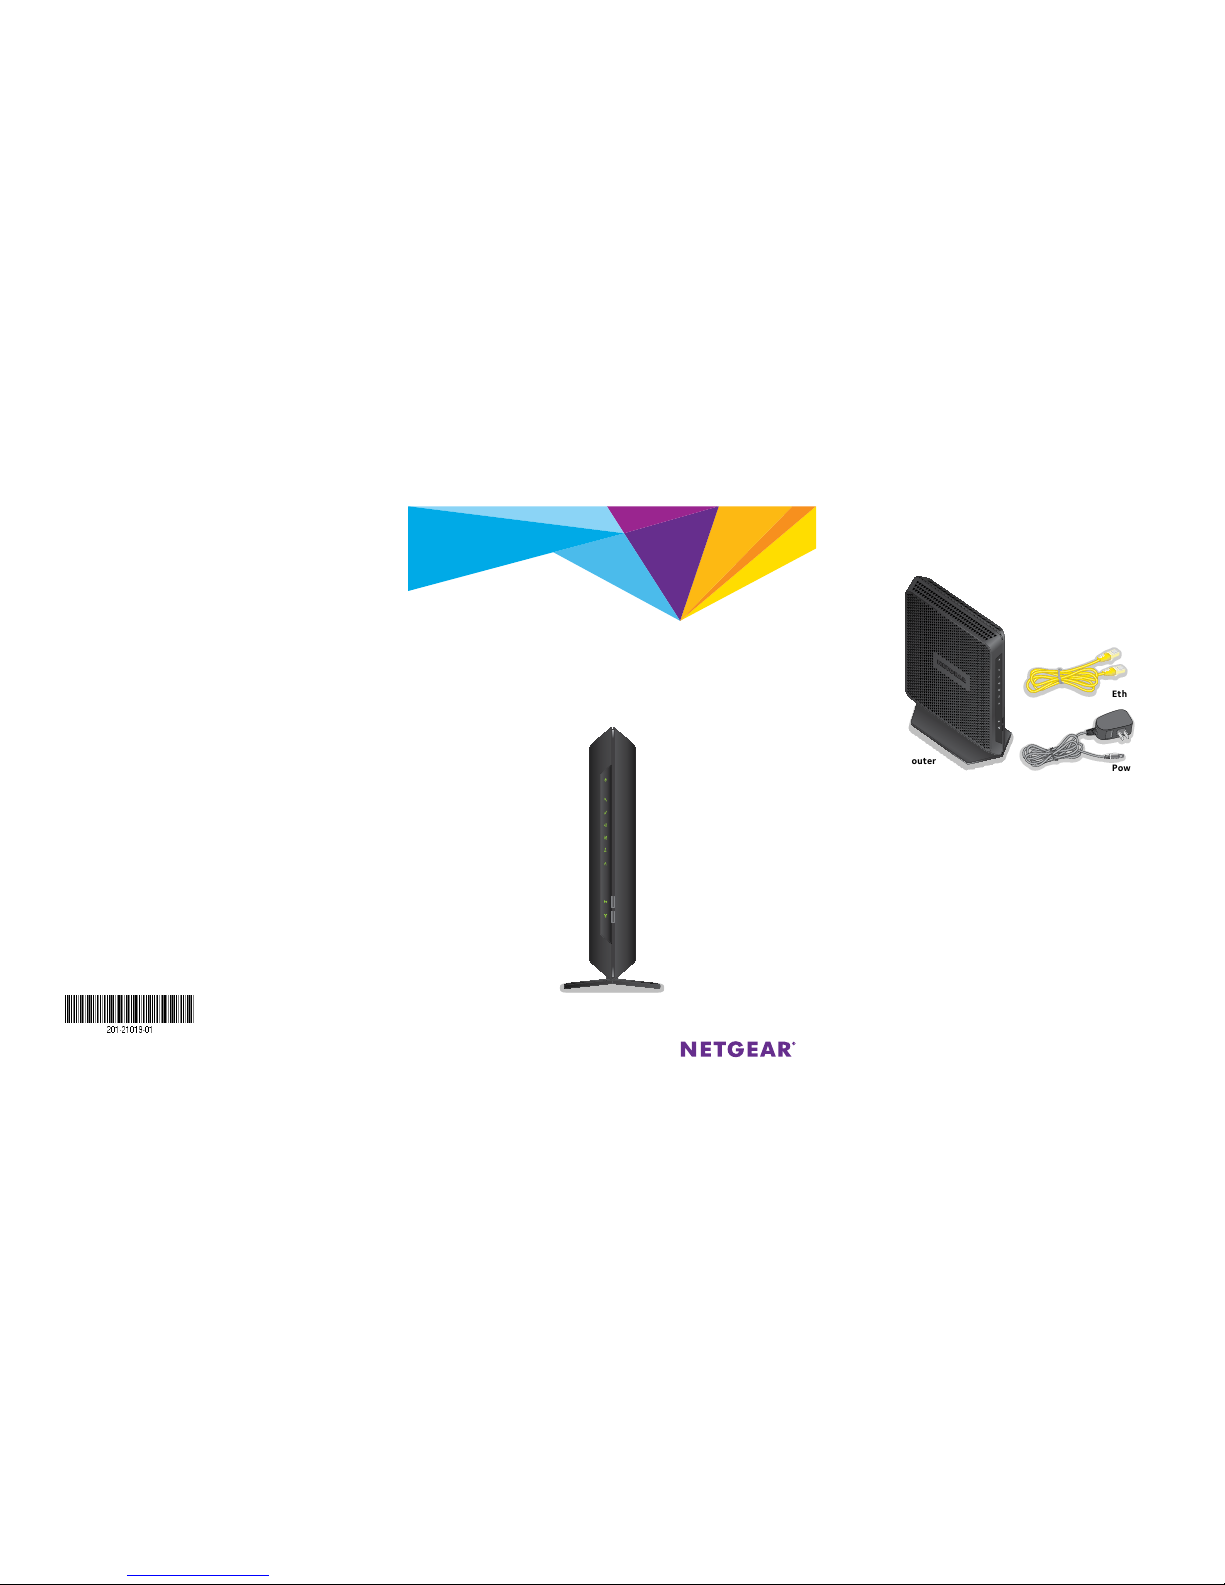
Package Contents
The box contains the following items.
Modem router
Ethernet cable
Power adapter
November 2016
NETGEAR, Inc.
350 East Plumeria Drive
San Jose, CA 95134, USA
Support
Thank you for purchasing this NETGEAR product. You can visit www.netgear.com/support to
register your product, get help, access the latest downloads and user manuals, and join our
community. We recommend that you use only ocial NETGEAR support resources.
If you are experiencing trouble installing your cable modem, contact NETGEAR at
1-866-874-8924.
Customer-owned cable modem router might not be compatible with certain cable networks.
Check with your cable Internet provider to confirm that this NETGEAR cable modem router is
allowed on your cable network.
Trademarks
© NETGEAR, Inc., NETGEAR and the NETGEAR Logo are trademarks of NETGEAR, Inc.
Any non-NETGEAR trademarks are used for reference purposes only.
Compliance
For regulatory compliance information, visit:
http://www.netgear.com/about/regulatory/
.
See the regulatory compliance document before connecting the power supply.
Page 2
Note: For XFINITY cable Internet service, Comcast
XFINITY recommends connecting your modem router to
a cable wall outlet.
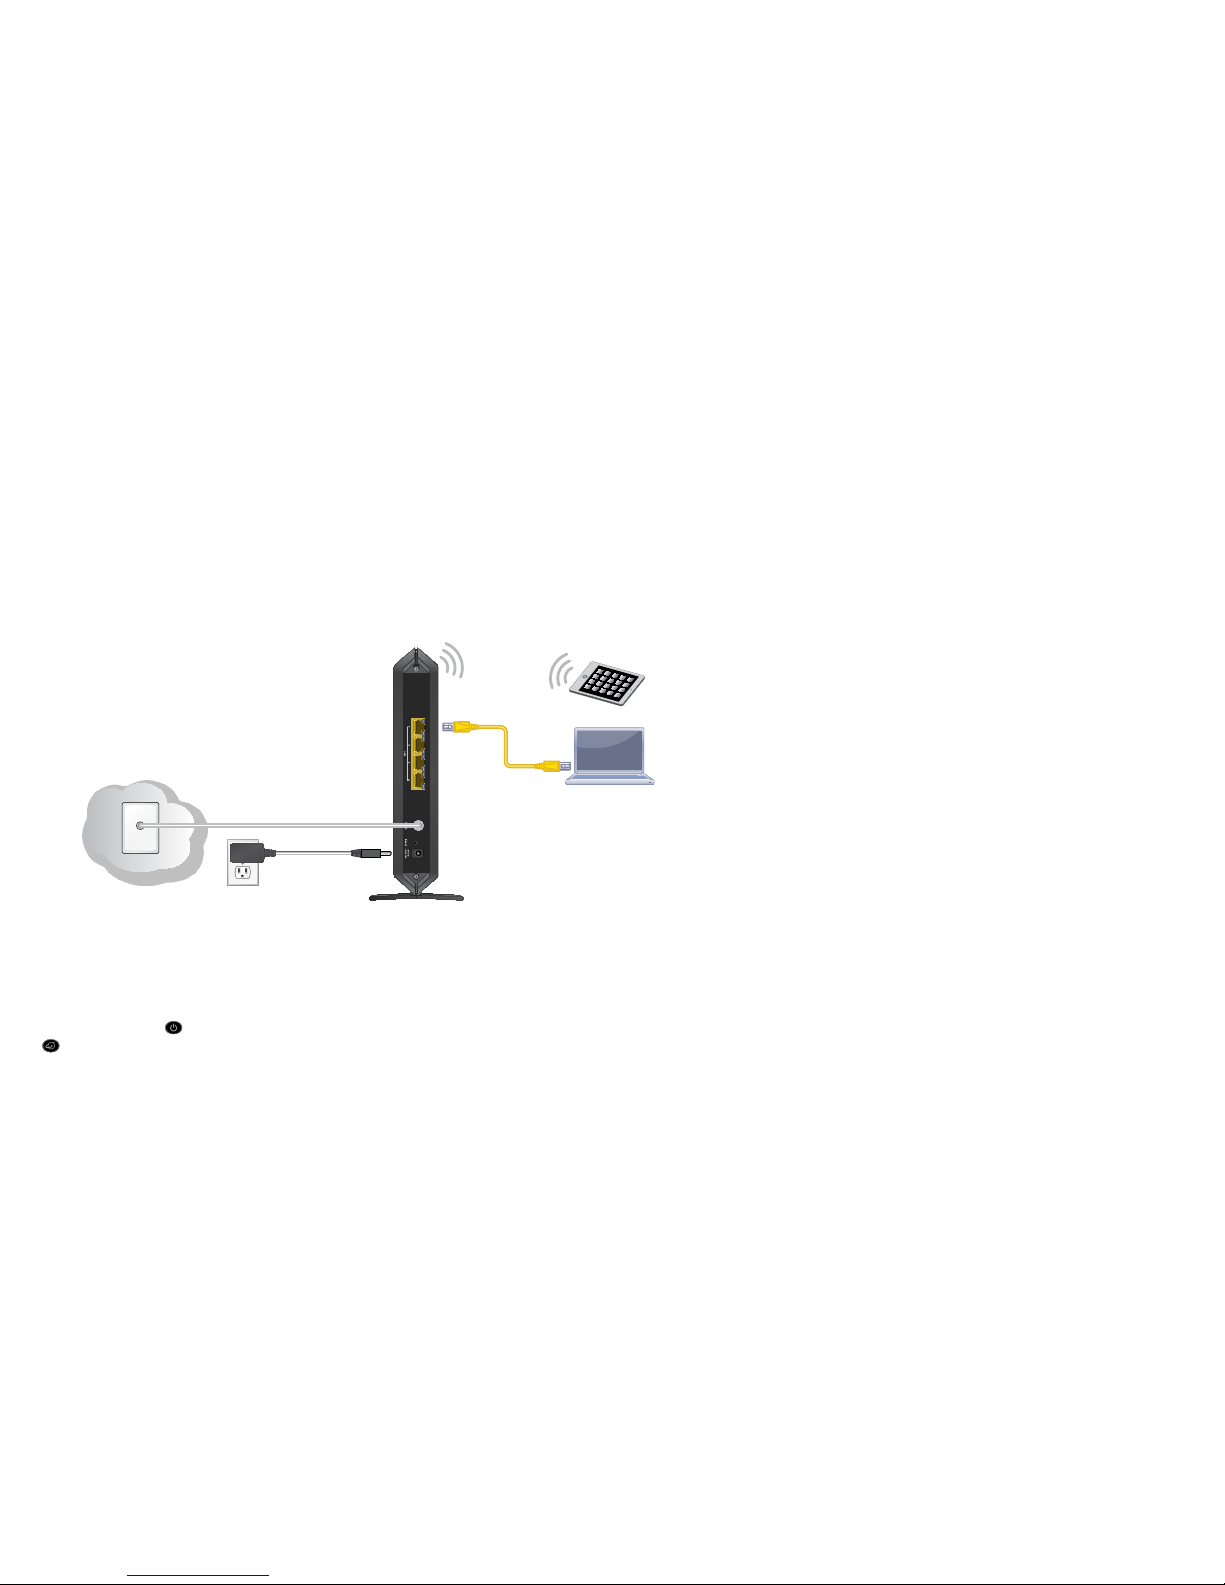
4. Connect the power adapter.
Connect the power adapter to the modem router
and plug the power adapter into an electrical outlet.
Wait for the Power LED
and the Internet LED
to light solid green.
5. Connect a computer or mobile device to the
modem router.
To connect with WiFi, use the WiFi network name and
password on the modem router label.
For a wired connection, use an Ethernet cable to connect a
computer to an Ethernet port on the modem router.
1. Collect your cable Internet provider
information.
Collect your cable account number, account phone
number, and login information (your email address
or user name and password).
2. Turn o existing modems and routers.
If you are replacing a modem that is currently
connected in your home, unplug the modem and
plug the new modem router into the same outlet.
3. Connect a coaxial cable.
Use a coaxial cable that is provided by your
cable company to connect the cable port on the
modem router to a cable wall outlet or a line
splitter.
6. Log in to the modem router.
Launch a web browser.
The modem router menu displays.
If you do not see the modem router menu, enter
http://routerlogin.net or http://192.168.0.1
in the address field of the web browser.
When prompted to log in, do the following:
Enter admin for the user name and password for
the password.
Change the admin password.
Enter security questions and answers.
7. Activate your Internet service.
For information about how to set up your Internet
service, see Activate Your Internet Service on page
6.
Ethernet
cable
Modem router
Internet
Power adapter
You can use this diag ram to connect your modem ro uter or follow the detaile d instructions in th is booklet.
Page 3

1
Contents
LEDs ................................................................................................................................ 2
Install Your Modem Router ....................................................................................... 4
Activate Your Internet Service ................................................................................ 6
Comcast Self-Activation ........................................................................................... 8
WiFi Network Name and Password .......................................................................10
Join the WiFi Network ..............................................................................................11
View or Change the Modem Router Settings ....................................................13
Change the WiFi Network Name and Password ................................................14
Access a USB Device on the Network .................................................................15
Download the NETGEAR genie App ...................................................................... 16
Page 4
2
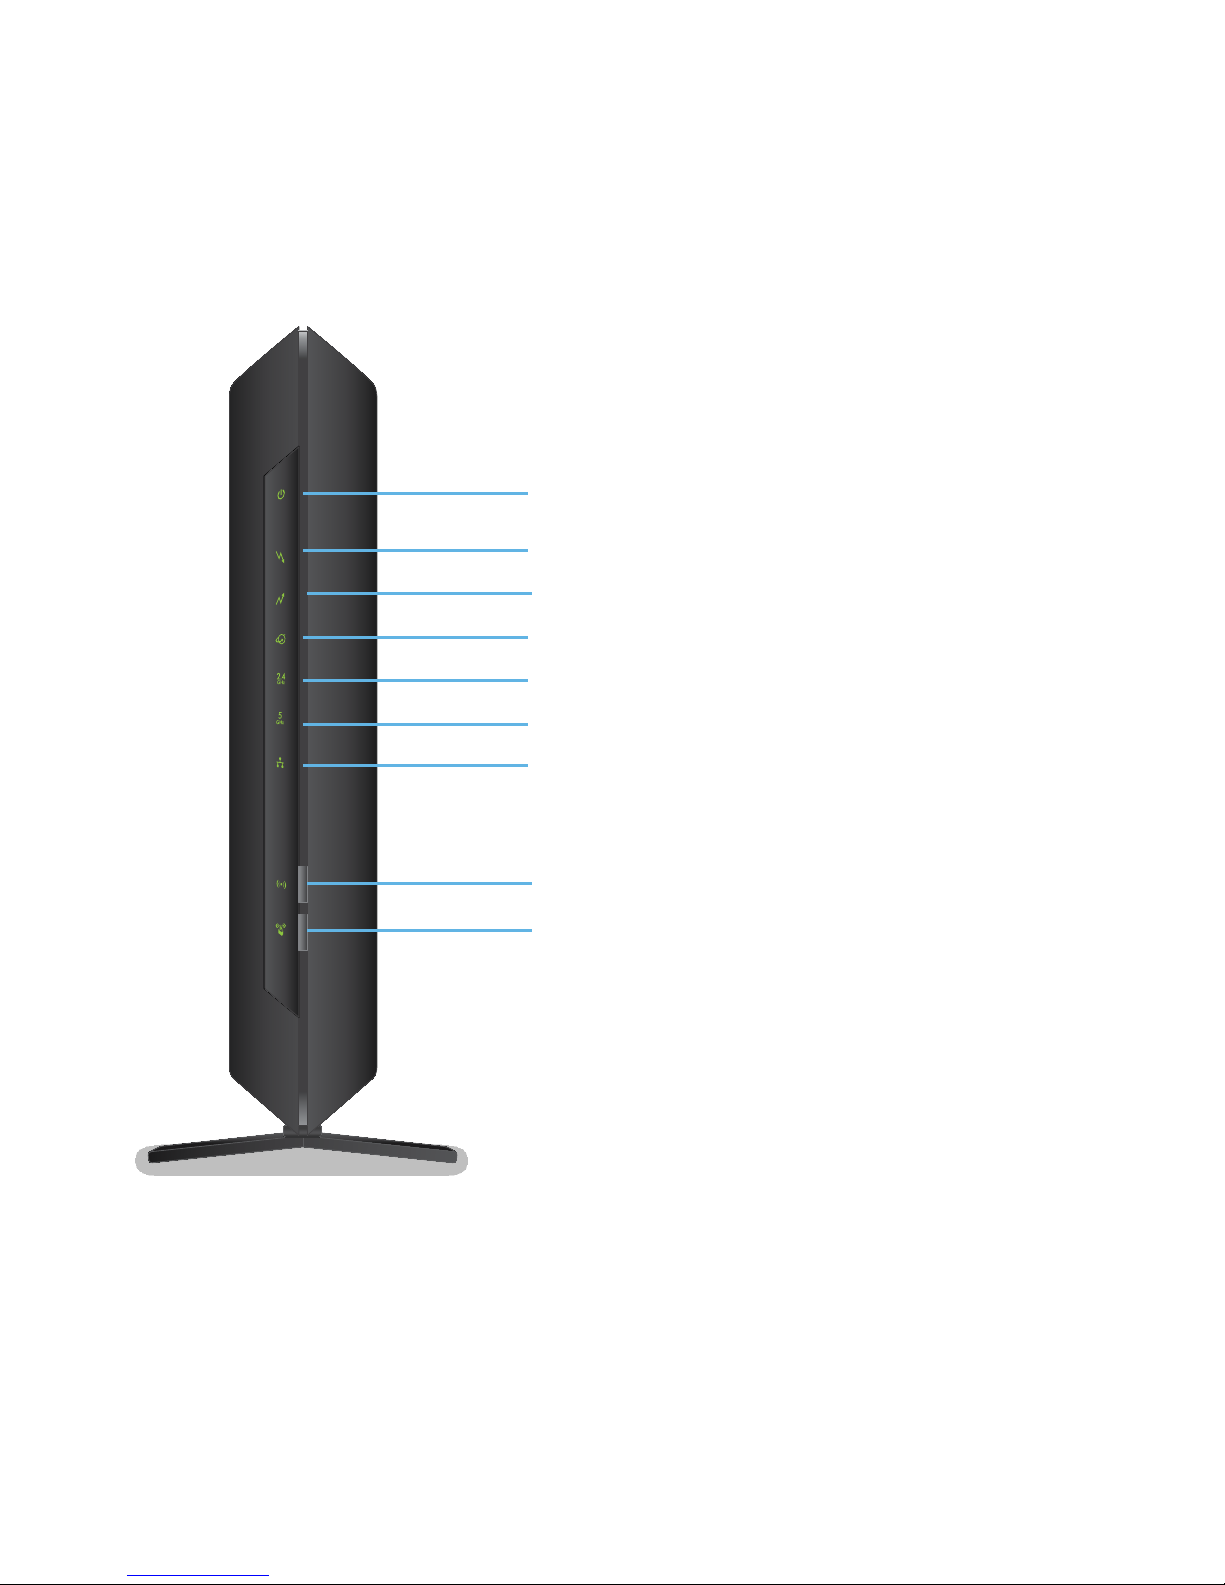
LEDs
The LEDs on the modem router light to indicate modem router
activity:
Internet LED
Downstream LED
Upstream LED
2.4 GHz WiFi LED
5 GHz WiFi LED
Power LED
Ethernet LED
WiFi On/O button and LED
WPS button and LED
Page 5
3
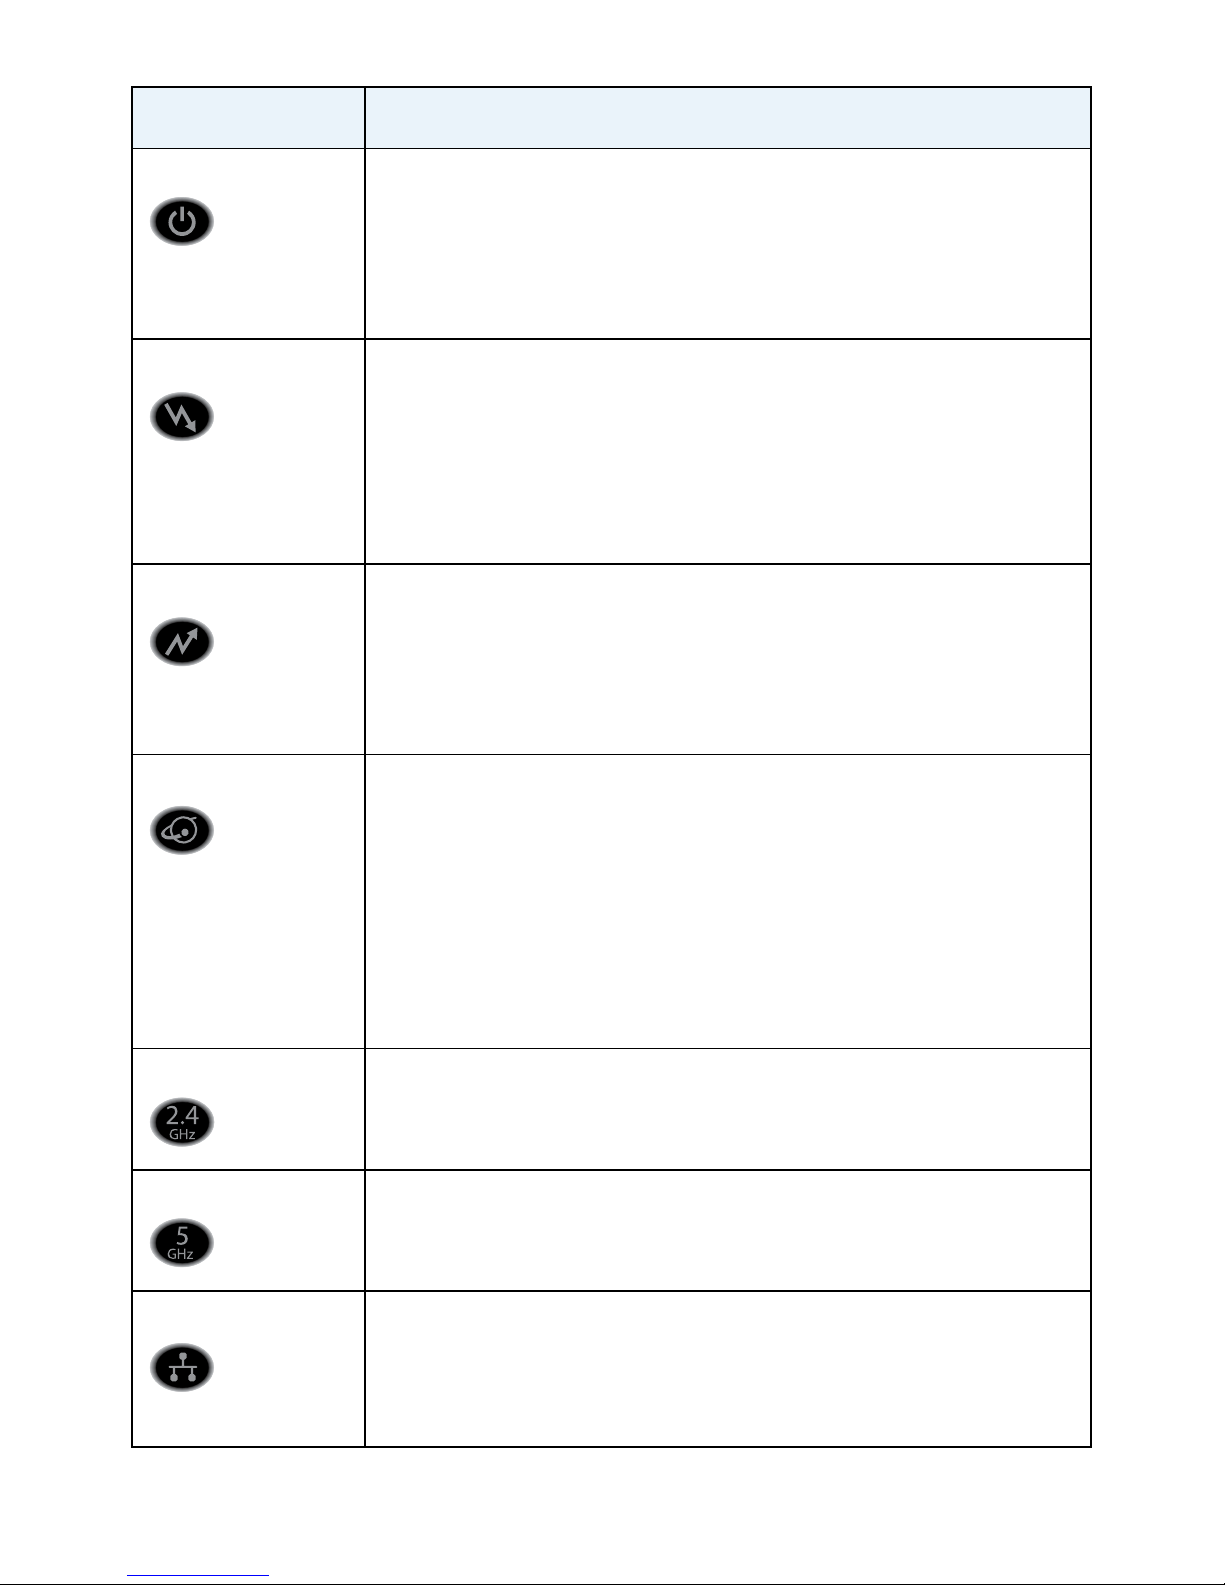
LED Description
Power • Solid green. Power is supplied to the modem router.
• O. No power is supplied to the modem router.
• Solid red. Thermal cuto mode. Power o the unit, let it
cool, and move it away from heat sources (such as a TV,
DVD player, or speakers) and keep it vertical in open air.
Downstream • Solid amber. One downstream channel is locked.
• Solid green. Two or more downstream channels are
locked.
• Blinking green. The modem router is scanning for a
downstream channel.
• O. No downstream channel is locked.
Upstream • Solid amber. One upstream channel is locked.
• Solid green. Two or more upstream channels are locked.
• Blinking green. The modem router is scanning for an
upstream channel.
• O. No upstream channel is locked.
Internet • Solid green. The modem router is online.
• Blinking green. The modem router is synchronizing with
the cable provider’s cable modem termination system
(CMTS).
• Slow blinking amber and green. The modem router
reached the trac meter limit. (For information about the
trac meter, see the modem router’s user manual.)
• O. The modem router is oine.
2.4 GHz WiFi • Solid green. The 2.4 GHz radio is on.
• O. The 2.4 GHz radio is o.
5 GHz WiFi • Solid green. The 5 GHz radio is on.
• O. The 5 GHz radio is o.
Ethernet • Solid green. A device is connected to an Ethernet port
and powered on. Ethernet port LEDs are located on the
rear panel.
• O. No device is connected to an Ethernet port.
Page 6
4
LED Description
WiFi On/O
button with LED
Pressing this button for two seconds turns the WiFi radios
in the modem router on and o. If this LED is lit, the WiFi
radios are on. If this LED is o, the WiFi radios are turned o
and you cannot use WiFi to connect to the modem router.
WPS button with
LED
This button lets you use WPS to join the WiFi network
without typing the WiFi password. The WPS LED blinks
during this process and then lights solid.
Install Your Modem Router
¾ To install your modem router:
1. Collect your cable Internet provider information.
Collect your cable account number, account phone number,
and login information (your email address or user name and
password).
2. Turn o existing modems and routers.
If you are replacing a modem that is currently connected in your
home, unplug the modem and plug the new modem router into
the same outlet.
3. Connect a coaxial cable.
Use a coaxial cable that is provided by your cable company to
connect the cable port on the modem router to a cable wall
outlet or a line splitter.
Note: For XFINITY cable Internet service, Comcast XFINITY
recommends connecting your modem router directly to a cable wall
outlet.
Page 7

5
4. Connect the power adapter to the modem router and plug the
power adapter into an electrical outlet.
Wait for the Power LED
and the Internet LED to light
solid green.
5. Connect a computer or mobile device to the modem router.
To connect with WiFi, use the WiFi network name and password
on the modem router label.
To connect using a wired connection, use an Ethernet cable to
connect a computer to an Ethernet port on the modem router.
Page 8

6
6. To log in to the modem router, launch a web browser.
The modem router menu displays.
If you do not see the modem router menu, enter
http://routerlogin.net or http://192.168.0.1 in the
address field of the web browser.
When prompted to log in, do the following:
a. Enter admin for the user name and password for the
password.
b. Change the admin password.
c. Enter security questions and answers
7. Activate your Internet service.
For more information, see Activate Your Internet Service.
Activate Your Internet Service
¾ To activate your Internet service:
1. Visit your cable Internet provider’s website and follow the
onscreen instructions to activate your Internet service.
Cable Internet
Provider
Contact Information
Bright House
Networks
http://support.brighthouse.com
1-866-898-9101
Cablevision
http://www.cablevision.com
https://install.optimum.com/JointInstall/
Telephone number depends on your region.
Charter
https://install.charter.com/
1-855-757-7328
Page 9

7
Cable Internet
Provider
Contact Information
Comcast
XFINITY
http://www.comcast.com/activate
http://www.xfinity.com/internetsetup
http://www.xfinity.com/internetsupport
1-800-XFINITY (1-800-934-6489)
For information about Comcast self-activation, see
Comcast Self-Activation on page 8.
Cox
https://activation.cox.net/selfactivation/newmodem.
cox
1-888-556-1193
Mediacom
https://maestro.mediacomcc.com/walledgarden/page/
login.jsp
1-844-2SIMPLE (1-844-274-6753)
Time Warner
Cable
https://www.timewarnercable.com/en/support/
internet/step-by-step/modem-activation.html
1-800-892-2253
Note: Your cable Internet provider’s contact information might
change. You can also find the contact number in your monthly Internet
service billing statement.
2. If you are unable to activate your Internet service using the
instructions on your cable Internet provider’s website, call your
cable Internet provider and do the following:
a. When asked, provide your account information and provide
the modem router’s model number, which is C6900, serial
number, and MAC address.
The serial number and MAC address are on the modem
router label.
b. Wait for your cable Internet provider to confirm that your
modem router is active.
Page 10

8
c. If you do not get an Internet connection with the modem
router, ask your cable Internet provider to look for
your modem router online, and do one of the following
depending on what your cable Internet provider tells you
about your modem router:
• If the modem router is not visible, your cable Internet
provider can give you instructions to verify why the modem
router does not connect with your high-speed Internet
service.
• If the modem router is visible to your cable Internet
provider, reboot the modem router. Check your online
status again.
Comcast Self-Activation
If you use Comcast XFINITY, you can set up Internet service by
using Comcast XFINITY’s self-activation process. If you are unable
to self-activate your modem router, call Comcast XFINITY customer
service. Aer you complete the setup, perform a speed test.
Before you start the self-activation process, make sure that your
account number, account phone number, and login information
(your email address or user name and password) are nearby.
¾ To activate your Internet connection with Comcast
XFINITY’s self-activation process:
1. Close all web browsers.
2. Launch a web browser.
You are redirected to the XFINITY self-activation page. If you
are not redirected to the XFINITY self-activation page, visit
www.comcast.com/activate.
Page 11

9
3. Provide your XFINITY credentials and complete the
self-activation process.
This process might take up to 15 minutes, during which the
modem router reboots twice.
4. If you are unable to activate your modem router using the
XFINITY self-activation process, call Comcast XFINITY customer
service at 1-800-XFINITY (1-800-934-6489) and do the
following:
a. When asked, provide your account information and provide
the modem router’s model number and MAC address, which
are on the modem router label.
b. Wait for Comcast XFINITY to confirm that your
modem router is active.
c. If you do not get an Internet connection with the
modem router, ask Comcast XFINITY to look for your
modem router online, and do one of the following
depending on what Comcast XFINITY tells you about your
modem router:
• If the modem router is not visible, Comcast XFINITY can
give you instructions to verify why the modem router
does not connect with your high-speed Internet service.
• If the modem router is visible to Comcast XFINITY,
reboot the modem router. Check your online status
again.
Page 12

10
WiFi Network Name and Password
The preassigned WiFi network name (SSID) and password (network
key) are unique to your modem router, like a serial number. Because
the modem router automatically uses WiFi security, you don’t need
to set it up. The WiFi settings are on the modem router label.
We recommend that you use the preassigned WiFi settings because
you can check the modem router label if you forget them. You can
log in to the router to change these settings.
You can write the WiFi settings from your modem router label in
this space for easy reference.
WiFi network name (SSID):
Network key (password):
If you change the WiFi settings, write the new settings here for
easy reference and store this booklet in a safe place.
WiFi network name (SSID):
Network key (password):
Page 13

11
Join the WiFi Network
You can either use Wi-Fi Protected Setup (WPS) or select your WiFi
network and type its password.
Join the WiFi Network Using WPS
For help with the WPS button on your WPS-enabled device, check
the instructions or online help that came with that device. Some
older equipment cannot use WPS.
¾ To join the network using WPS:
1. Press the WPS button
on the modem router for three to
five seconds.
The WPS LED on the modem router blinks green.
2. Within two minutes, on your WPS-enabled device, press its
WPS button or click its onscreen WPS button.
The WPS LED on the modem router lights solid green when the
computer or WiFi device connects to your modem router.
3. Repeat this process to add other WPS-enabled device devices.
Page 14

12
Join the WiFi Network Using the
Modem Router’s WiFi Settings
Use the modem router’s WiFi network name and password to
connect your WiFi-enabled computer or mobile device to the
modem router’s network through WiFi. If you did not change
the modem router’s WiFi network name and password, use the
modem router’s preassigned WiFi network name and password,
which are on the modem router label.
¾ To select your network and enter its password:
1. On your WiFi-enabled computer or mobile device, open the
WiFi connection manager that manages your WiFi connections.
The WiFi connection manager scans for WiFi networks in your
area.
2. Find and select your modem router’s WiFi network name (SSID).
The SSID is on the modem router label.
3. Enter the modem router’s password (or your custom password
if you changed it) to connect.
The password is on the modem router label.
4. Repeat Step 1 through Step 3 to add other computers or
mobile devices.
Page 15

13
View or Change the Modem Router
Settings
Aer you use genie to set up the modem router, you can log in to
the modem router to view or change its settings.
Log In to the Modem Router
¾ To log in to the modem router:
1. Connect a computer or mobile device to the modem router.
You can connect using an Ethernet connection or a WiFi
connection:
• Ethernet. To connect using an Ethernet connection, use
an Ethernet cable (not included) to connect an Ethernet
port on your computer to an Ethernet port on the
modem router.
• WiFi. To connect using a WiFi connection, look on the
modem router label for the preassigned WiFi network
name and password. Open the WiFi connection manager
on your WiFi-enabled computer or mobile device, find
the modem router’s WiFi network name, and use the
modem router’s password to connect.
2. Launch a web browser and visit www.routerlogin.net.
A login window opens.
3. Enter the modem router admin user name and your admin
password for the password.
The admin user name is admin.
The BASIC Home screen displays.
Page 16

14
Change the WiFi Network Name and
Password
The modem router’s preset WiFi network name (SSID) and
password are on the modem router label. If you want to change
your modem router’s WiFi network name and password, log in to
the modem router.
¾ To change the router’s WiFi network name and password:
1. Launch a web browser from a computer or mobile device that is
connected to the network and visit www.routerlogin.net.
A login window opens.
2. Enter the modem router admin user name and your admin
password for the password.
The admin user name is admin.
The BASIC Home page displays.
3. Select Wireless.
The Wireless Setup page displays.
4. To change the WiFi network name (SSID), enter a new name in
the Name (SSID) field.
5. To change the WiFi password, enter a new password in the
Password (Network Key) field.
6. Click the Apply button.
Your settings are saved.
Page 17

15
Access a USB Device on the Network
ReadySHARE lets you access and share a USB storage device
connected to the modem router’s USB ports. (If your USB device
uses special drivers, it is not compatible.)
¾ To access the USB storage device from a Windows
computer:
1. Connect your USB storage device to a USB port on the modem
router.
It might take up to two minutes before the USB storage device
is ready for sharing.
2. On a Windows computer that is connected to the network,
select Start > Run, enter \\readyshare in the dialog box, and
click the OK button.
A window displays the files and folders on the device.
¾ To access the USB storage device from a Mac:
1. Connect your USB storage device to a USB port on the modem
router.
It might take up to two minutes before the USB storage device
is ready for sharing.
2. On a Mac that is connected to the network, launch Finder and
select Go > Connect to Server.
The Connect to server window opens.
3. Enter the smb://readyshare in the Server Address field and
click the Connect button.
4. When prompted, select the Guest radio button.
Page 18

16
5. If you set up access control on the modem router and you
allowed your Mac to access the network, select the Registered
User radio button and enter admin for the name and your
admin password for the password.
For more information about access control, see the user manual,
which is available online at downloadcenter.netgear.com or
through a link in the modem router’s user interface.
6. Click the Connect button.
A window displays the files and folders on the device.
Download the NETGEAR genie App
The free NETGEAR genie app lets you easily monitor, connect, and
control your home network from a Windows or Mac computer,
tablet, or smartphone. You can share and stream music or videos,
diagnose and repair network issues, set up parental controls, and
more:
• Access your modem router and change its settings or diagnose
and repair network issues.
• Make a printer AirPrint compatible so that you can print from
an iPad or iPhone.
• Use MyMedia to find and play media files in your network.
• Use Turbo Transfer to quickly send files from your computer or
smartphone to another device on the network.
• Set up parental controls.
• Connect your smartphones and tablets to your home WiFi by
scanning the WiFi QR code from genie.
Download the free genie app from www.NETGEAR.com/genie.
 Loading...