

NETGEAR JGS524FNA, JGS524FN V1 Installation Manual
ProSafe 24 Port Gigabit Switch
Installation Guide
Full_IG.book Page 1 Monday, January 9, 2012 6:11 PM

2
© 2011 NETGEAR, Inc. All rights reserved.
No part of this publication may be reproduced, transmitted, transcribed,
stored in a retrieval system, or translated into any language in any form or by
any means without the written permission of NETGEAR, Inc.
Technical Support
Thank you for choosing NETGEAR. To register your product, get the latest
product updates, or get support online, visit us at http://support.netgear.com.
Phone (US only): 1-888-NETGEAR
Phone (Other Countries):
Check the list of phone numbers at:
http://support.netgear.com/app/answers/detail/a_id/984
Trademarks
NETGEAR, the NETGEAR logo, ReadyNAS, ProSafe, Smart Wizard, Auto
NETGEAR, the NETGEAR logo, and Connect with Innovation are trademarks
and/or registered trademarks of NETGEAR, Inc. and/or its subsidiaries in the
United States and/or other countries. Information is subject to change without
notice. Other brand and product names are registered trademarks or
trademarks of their respective holders. © 2011 NETGEAR, Inc. All rights
reserved.
Statement of Conditions
In the interest of improving internal design, operational function, and/or
reliability, NETGEAR reserves the right to make changes to the products
described in this document without notice. NETGEAR does not assume any
liability that may occur due to the use or application of the product(s) or circuit
layout(s) described herein.
Full_IG.book Page 2 Monday, January 9, 2012 6:11 PM
3
Package Contents
Verify that all items are in the box. The package includes:
• ProSafe 24-port Gigabit Switch with 2 Gigabit SFP Combo Ports
JGS524F V1
• Power cord with localized plug
• Adhesive feet
• Rack-mount brackets and hardware
• Installation Guide (this document)
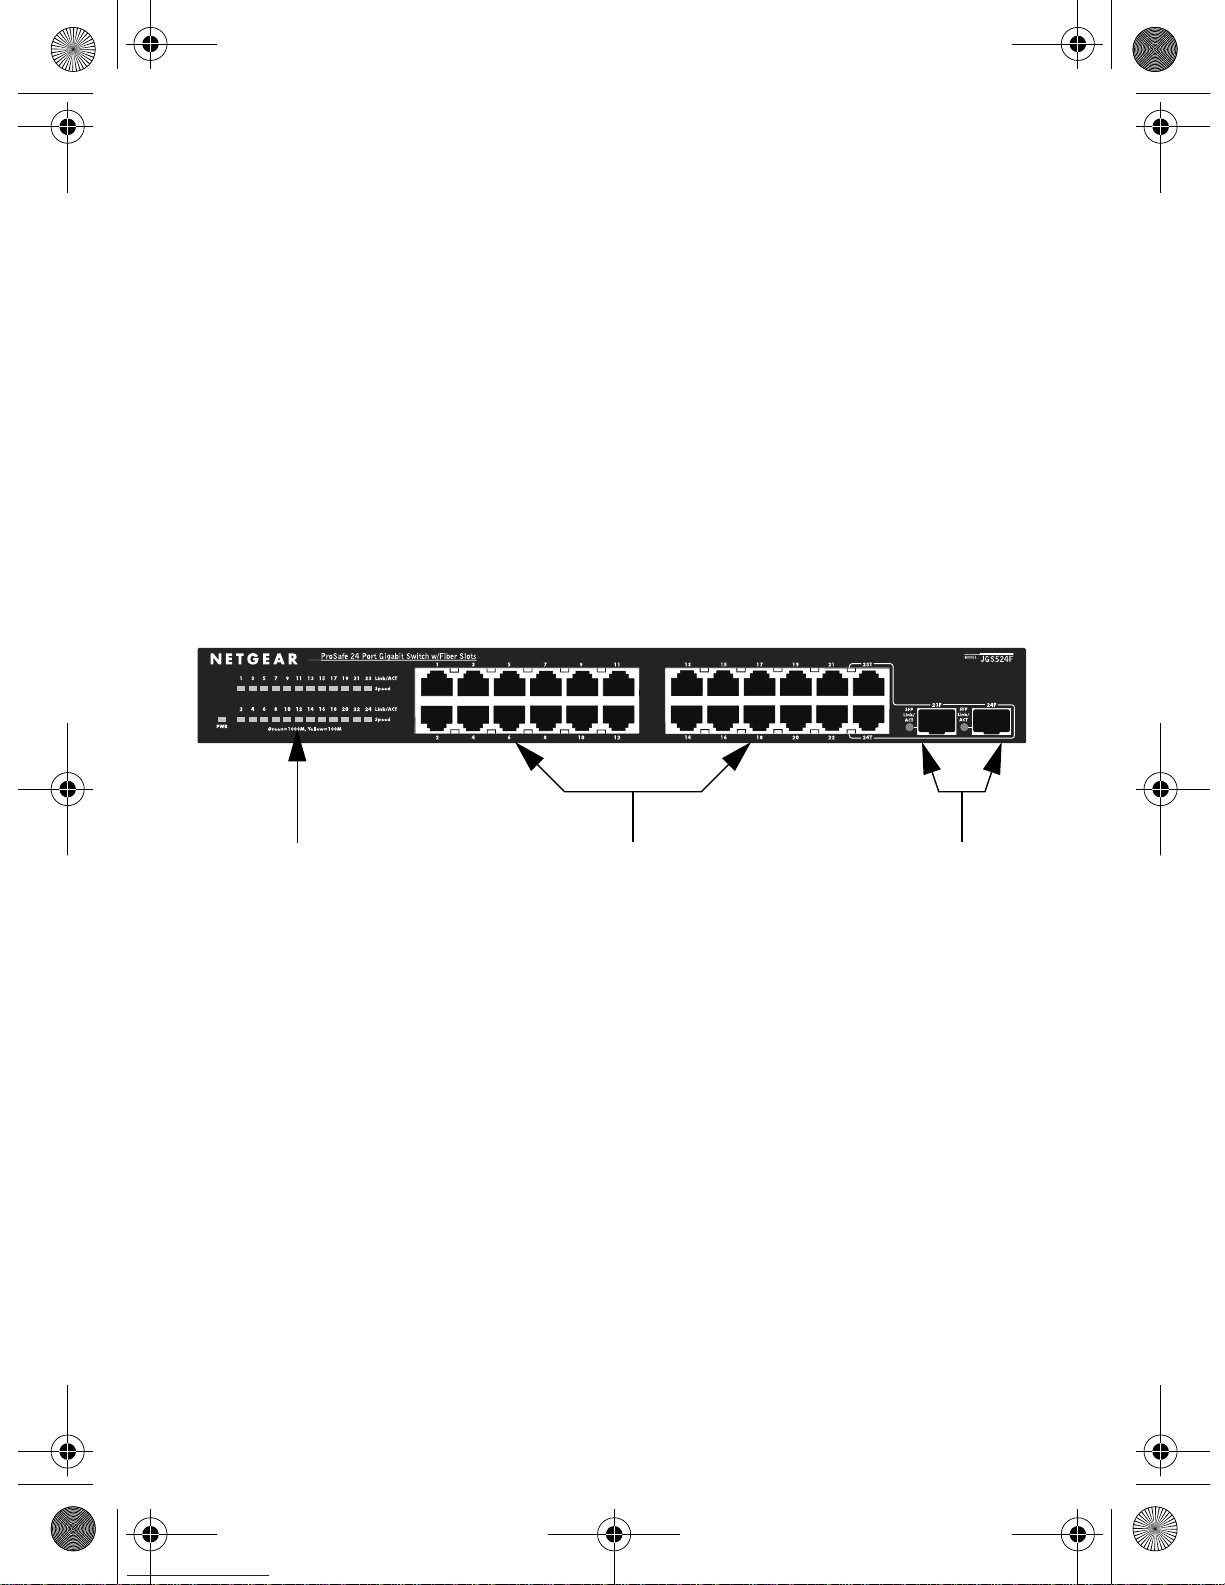
Front View
24 Gigabit ports
LEDs
Gigabit SPF
combo ports
The switch supports 10 Mbps, 100 Mbps, and 1000 Mbps
connections. Using Gigabit Ethernet (1000 Mbps), the switch sends
files across the network at speeds up of to 2000 Mbps due to the fullduplex nature of Gigabit Ethernet connections. You can either
connect 24 Ethernet copper cables or 22 copper cables with 2 optical
fibers.
The switch supports straight-through or crossover Ethernet cables on
24 ports. Each of these ports configures itself based on the cable that
you plug into it. You can use the switch to connect Ethernet devices
such as computers, file servers, printers, routers, switches, or hubs.
Full_IG.book Page 3 Monday, January 9, 2012 6:11 PM

4
Select a Location
Decide where you want to place the switch. Find a flat horizontal
surface or a 19-inch rack.
Make sure that the location is:
• Not in direct sunlight or near a heater or heating vent.
• Not cluttered or crowded. There should be at least 2 inches (5
cm) of clear space on all sides of the switch.
• Well ventilated, especially if it is in a closet.
Install the Switch
1. For each device that you want to connect to the switch, provide
an enhanced Category 5 (Cat 5e) Ethernet cable with RJ-45
connections. Each Ethernet cable has to be less than 328 feet
(100 meters) long.
2. Install the switch on a flat surface or in a standard 19-inch rack.
• Flat surface. The switch comes with four self-adhesive
footpads. Stick one footpad on each of the four concave
spaces on the bottom of the switch. The footpads cushion the
switch against shock and vibrations.
• Rack mounting. Follow the instructions in the 19-Inch Rack
Mounting section.
Verify Cable Connections
Before you apply power, perform the following checks:
1. Inspect the equipment thoroughly.
2. Verify that all cables are installed correctly.
3. Check cable routing to ensure that cables are not damaged and will
not create a safety hazard.
4. Be sure that all equipment is mounted securely.
Full_IG.book Page 4 Monday, January 9, 2012 6:11 PM
 Loading...