

Set Up the Access Point
Ethernet
cable
Nighthawk
AC1900 WiFi Access Point
Model EX7000
Quick Start Guide
Modem router
or router
¾ To set up the access point:
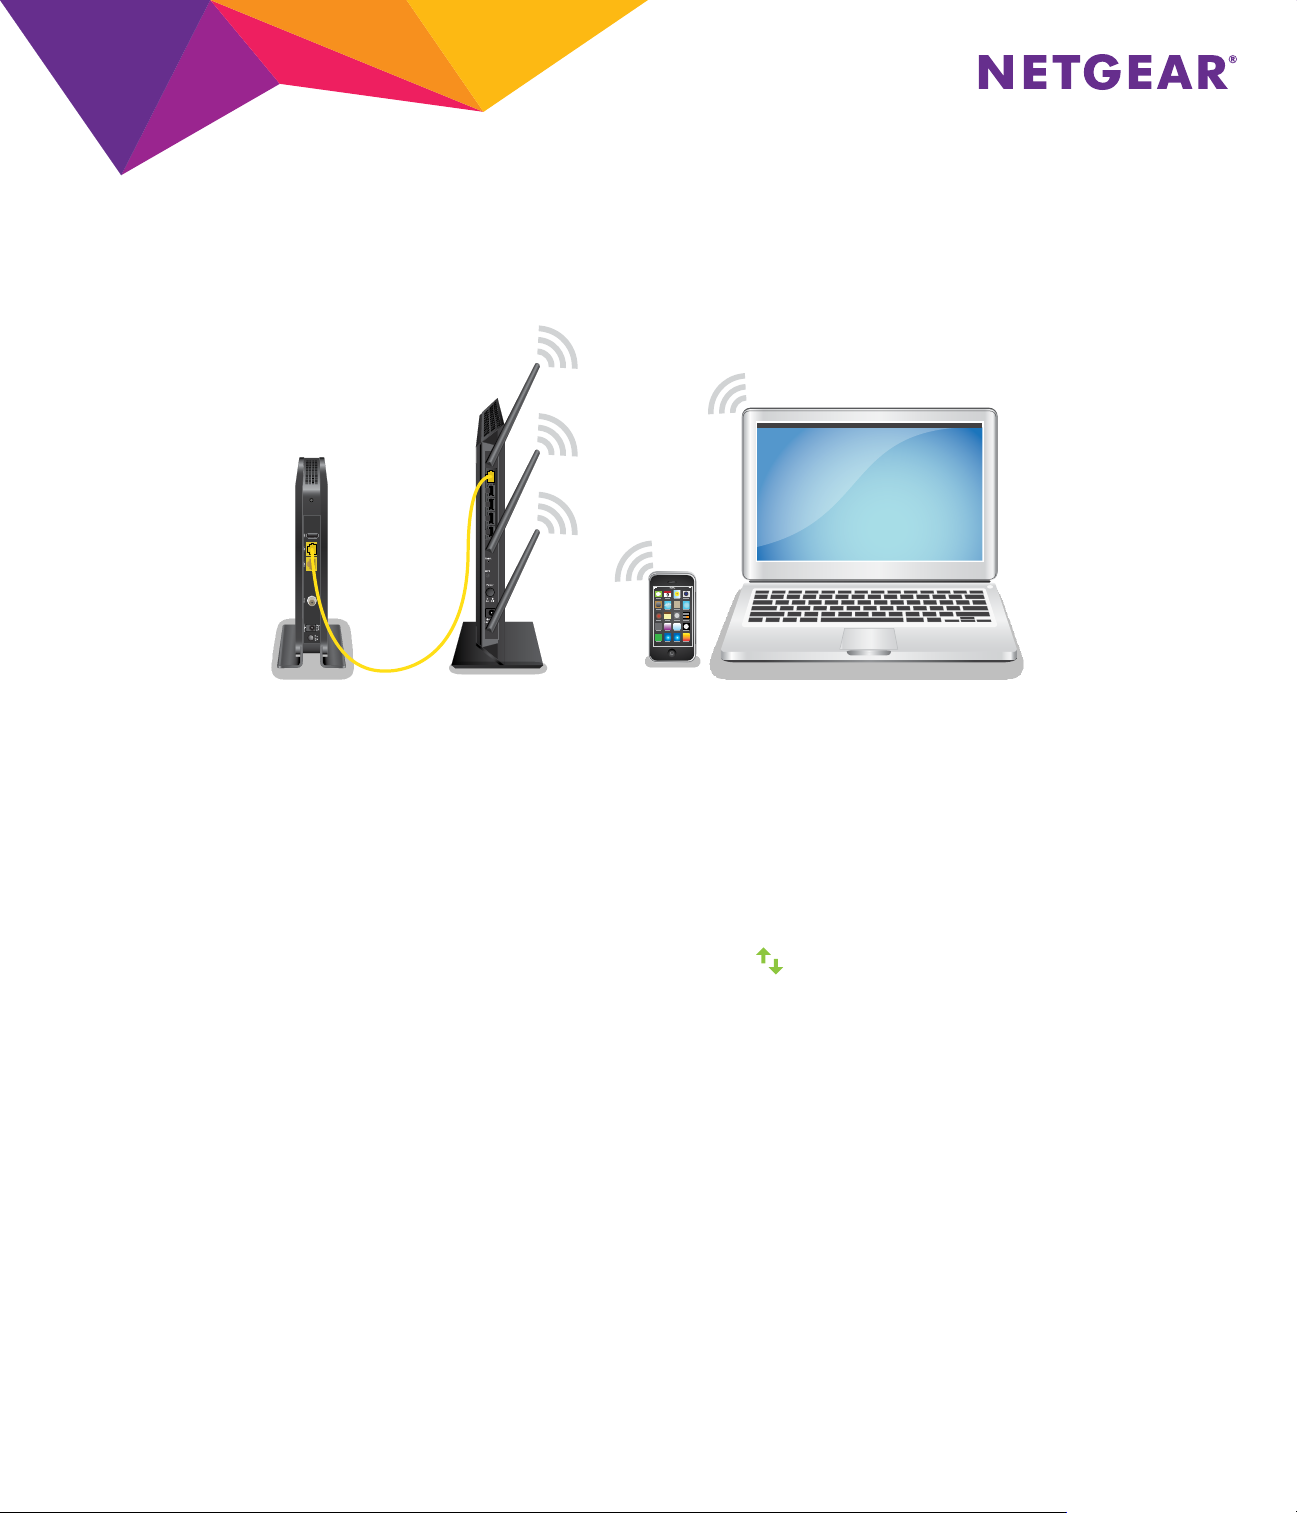
1. Use an Ethernet cable to connect your modem router or router to an Ethernet port on the access point.
Note: Do not connect your access point directly to your DSL or cable modem. The access point does not function as a router.
If your network includes a DHCP server, you can connect the access point to a switch or hub that is connected to the DHCP
server.
2. Open the WiFi network manager on your WiFi-enabled computer or mobile device and find and connect to the access point WiFi
network called NETGEAR_EXT.
When you are connected to the access point, the Device to Extender LED
Note: If you connect your computer to the access point using an Ethernet connection, you cannot set up the access point. You
can connect your computer and other devices to the access point using an Ethernet connection aer the setup.
3. Launch a web browser.
4. Enter www.mywifiext.net in the address field of the browser.
A login page displays.
5. Click the NEW EXTENDER SETUP button.
The Extender Setup page displays.
6. Complete the Extender Setup page and click the NEXT button.
7. Click the ACCESS POINT button.
The access point checks for an Internet connection.
8. Set the network name (SSID), security option, and password for each band, and click the NEXT button.
Your settings are applied.
9. Use a WiFi network manager on your WiFi-enabled computer or mobile device to connect to the new access point WiFi
network.
10. Click the CONTINUE button.
A message displays that you successfully created an access point.
Access point
lights solid green.
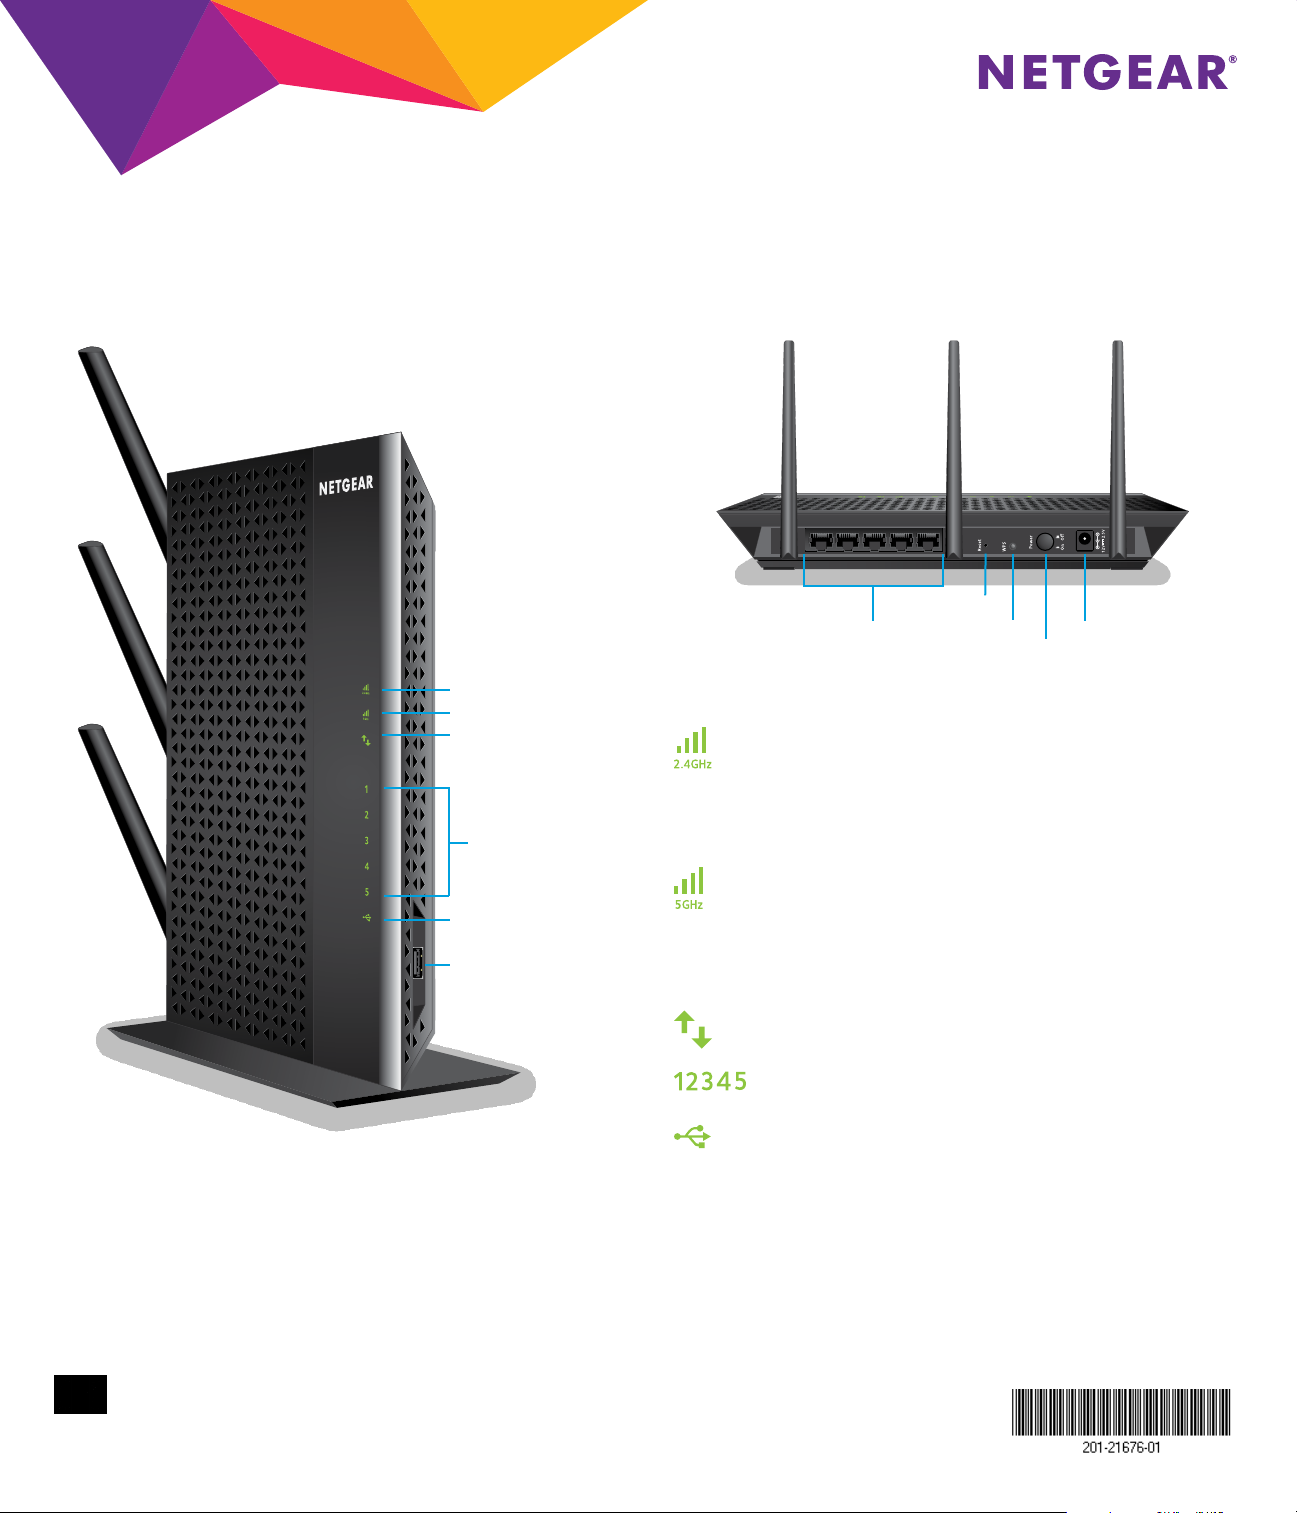
Hardware
Front Panel and Side Panel Rear Panel
Nighthawk
AC1900 WiFi Access Point
Model EX7000
Quick Start Guide
Reset button
Ethernet ports 1–5
WPS button
Power button
Power connector
2.4 GHz Link Rate LED
5 GHz Link Rate LED
Device to Extender LED
Ethernet ports
1–5 LED s
USB LED
USB 3.0 port
Support
Thank you for purchasing this NETGEAR product. You can visit www.netgear.com/support to register your product, get help, access the latest downloads and
user manuals, and join our community. We recommend that you use only ocial NETGEAR support resources.
For the current EU Declaration of Conformity, visit http://support.netgear.com/app/answers/detail/a_id/11621/.
For regulatory compliance information, visit http://www.netgear.com/about/regulatory/.
See the regulatory compliance document before connecting the power supply.
Indicator LEDs
2.4 GHz Link
Rate LED
5 GHz Link Rate
LED
Device to
Extender LED
Solid green. The Ethernet port detected an
Ethernet ports
1–5 LEDs
USB LEDs
This LED indicates the 2.4 GHz WiFi connection
between the access point and the router.
Solid green. Best connection
Solid amber. Good connection
Solid red. Poor connection
Off. No connection
This LED indicates the 5 GHz WiFi connection
between the access point and the router.
Solid green. Best connection
Solid amber. Good connection
Solid red. Poor connection
Off. No connection
Solid green. The access point and device are
connected.
Ethernet link with the access point.
Solid green. A USB device is connected to the
access point.
© NETGEAR, Inc., NETGEAR and the NETGEAR Logo are trademarks of NETGEAR, Inc. Any non-NETGEAR trademarks are used for reference purposes only.
NETGEAR, Inc.
First Floor Building 3 University Technology Centre
Curraheen Road Cork Ireland
Corporate Oce Phone 353 21 2333 200.
NETGEAR, Inc., 350 East Plumeria Drive, San Jose, CA 95134 USA March 2017
 Loading...