

Nec VERSA 2000 user Manual

PROPRIETARY NOTICE AND LIABILITY DISCLAIMER.
The information disclosed in this document, including all designs and
related materials, is the valuable property of NEC Corporation (NEC)
and/or its licensors. NEC and/or its licensors, as appropriate, reserve all
patent, copyright and other proprietary rights to this document, including
all design, manufacturing, reproduction, use and sales rights thereto,
except to the extent said rights are expressly granted to others.
The NEC product(s) discussed in this document are warranted in
accordance with the terms of the Warranty Statement accompanying
each product. However, actual performance of each such product is
dependent upon factors such as system configuration, customer data, and
operator control. Since implementation by customers of each product
may vary, the suitability of specific product configurations and
applications must be determined by the customer and is not warranted by
NEC.
To allow for design and specification improvements, the information in
this document is subject to change at any time, without notice.
Reproduction of this document or portions thereof without prior written
approval of NEC is prohibited.
Versa is a trademark of NEC Corporation
All other product, brand, or trade names used in this publication are trademarks or registered
trademarks of their respective trademark owners.
First Printing — August 1995
Copyright 1995 Copyright 1995
NEC Technologies, Inc. NEC Corporation
1414 Massachusetts Avenue 7-1 Shiba 5-Chome, Minato-Ku
Boxborough, MA 01719 Tokyo 108-01, Japan
All rights reserved All rights reserved
Using This Guide
This Versa™ 2000 Series User’s Guide contains information on using your
notebook computer. Read the following chapters to find out more about the
system.
■ Chapter 1 gives introduces the computer, its features, and how to care for
it.
■ Chapter 2 explains how to use the NEC Versa 2000 hardware.
■ Chapter 3 describes the software that comes with your NEC Versa 2000.
■ Chapter 4 discusses traveling with your NEC Versa 2000.
■ Chapter 5 gives you a checklist to follow if you have problems with the
NEC Versa 2000. Common problems and their solutions are also included.
■ Chapter 6 provides a list of numbers for NEC customer support services.
Text Setup
■ Appendix A, Setting Up a Healthy Work Environment, contains guide-
lines to help you use your computer productively and safely. This appendix also instructs you on how to set up and use your computer to
reduce your risk of developing nerve, muscle, or tendon disorders.
■ Appendix B provides system specifications and environment recommen-
dations.
To make this guide as easy to use as possible, text is set up in the following
ways.
■ Cautions, notes, and tips have the following format:
!
Cautions indicate situations that can damage the system hardware
or software.
CAUTION:
Using This Guide vii

NOTE
Notes give particularly important information about whatever
is being described.
TIP: Tips give helpful hints about getting the most out o f your
system.
■ Names of keys are printed as they appear on the keyboard, for example,
Ctrl, Alt, or Enter.
■ Text that you have to type or keys that you must press are presented in
bold type. For example, type
RELATED DOCUMENTS
In addition to this guide, a number of other documents ship with your Versa
system, including:
DIR and press Enter.
■ The NEC Versa 2000 Series Quick Setup shows you how to set up your
■
viii Using This Guide
system after you unpack it.
The Versa 2000 Series Quick Reference Guide contains brief descriptions of function keys, LEDs, NEC help telephone numbers and troubleshooting tips. Tuck this card inside the notebook when you take it with
you. The card is designed as a quick, portable reference to frequentlyused functions.

Contents
Using This Guide vii
1 Getting to Know Your NEC Versa 2000
Around the System................................................... 1-1
Front................................................................... 1-1
LCD .............................................................. 1-1
Contrast Control............................................. 1-1
Brightness Control.......................................... 1-2
Switches......................................................... 1-2
LEDs............................................................. 1-3
Keyboard....................................................... 1-4
NEC VersaGlide ............................................ 1-5
Rear.................................................................... 1-6
Left Side ............................................................. 1-7
Right Side........................................................... 1-8
Underside............................................................ 1-8
System Care............................................................. 1-9
Precautions ......................................................... 1-9
Storage Requirements.......................................... 1-10
Routine Cleaning................................................. 1-10
2 Learning to Use the Hardware
Powering Your NEC Versa.................................. 2-1
AC Adapter.................................................... 2-1
Battery Pack .................................................. 2-2
Keyboard............................................................ 2-3
The NEC VersaGlide........................................... 2-4
AutoCentering................................................ 2-5
Personalized Modes........................................ 2-5
Pointer Size, Speed......................................... 2-5
Ergonomics.................................................... 2-5
Options and PCMCIA Expansion............................. 2-5
Contents iii

Hard Disk ........................................................... 2-6
Memory Expansion ............................................. 2-6
External Monitor................................................. 2-8
Printer................................................................. 2-9
Parallel Printers.............................................. 2-10
Serial Devices ................................................ 2-11
External Keyboard .............................................. 2-12
Mouse................................................................. 2-13
Internal Modem................................................... 2-15
PCMCIA ............................................................ 2-16
NEC Versa MediaDock 2000.............................. 2-17
NEC Versa MiniDock 2000................................. 2-17
3 About the Software
Windows Introduction .............................................. 3-1
Windows 95........................................................ 3-1
Windows for Workgroups ................................... 3-2
DOS Introduction..................................................... 3-3
Guide to Online Help................................................ 3-3
NEC Versa 2000 InfoCenter................................ 3-3
Additional Topics................................................ 3-4
Guide to NEC Utilities ............................................. 3-5
Distribution Disk Creator.................................... 3-5
Power Center ...................................................... 3-5
Preference Tools Utility....................................... 3-5
Monitor Assistant................................................ 3-5
Function (Fn) Key Utility .................................... 3-5
NEC Battery Gauge ............................................ 3-6
System Backup ................................................... 3-6
Auto Setup Utility............................................... 3-6
4 Traveling with Your NEC Versa
Power Connections................................................... 4-2
Checklists ................................................................ 4-3
What to Take ...................................................... 4-3
Things to Do....................................................... 4-3
iv Contents

5 Solving Problems
Problem Checklist .................................................... 5-1
Start-Up Problems.................................................... 5-3
POST Error Messages......................................... 5-3
If You Need Assistance ............................................ 5-5
Direct Technical Support..................................... 5-6
Remote Technical Support................................... 5-6
Features......................................................... 5-7
6 Getting Help
A Setting Up a Healthy Work Environment
Making Your Computer Work for You..................... A-1
Arrange Your Equipment.......................................... A-3
Adjust Your Chair.................................................... A-3
Adjust Your Input Devices ....................................... A-4
Adjust Your Screen or Monitor................................. A-5
Vary Your Workday................................................. A-6
Pre-Existing Conditions and Psychosocial Factors..... A-7
B Specifications and Environment
Tables
Troubleshooting ....................................................... 5-2
POST Error Messages.............................................. 5-3
Contents v
Getting to Know Your NEC
1
AROUND THE SYSTEM
Front
Versa 2000
Your NEC Versa™ 2000 is ready to go! It’s packed with features to make
your work experience fun and productive. Take the online System Tour or
flip through this guide to familiarize yourself with the NEC Versa.
Let’s first look around the system.
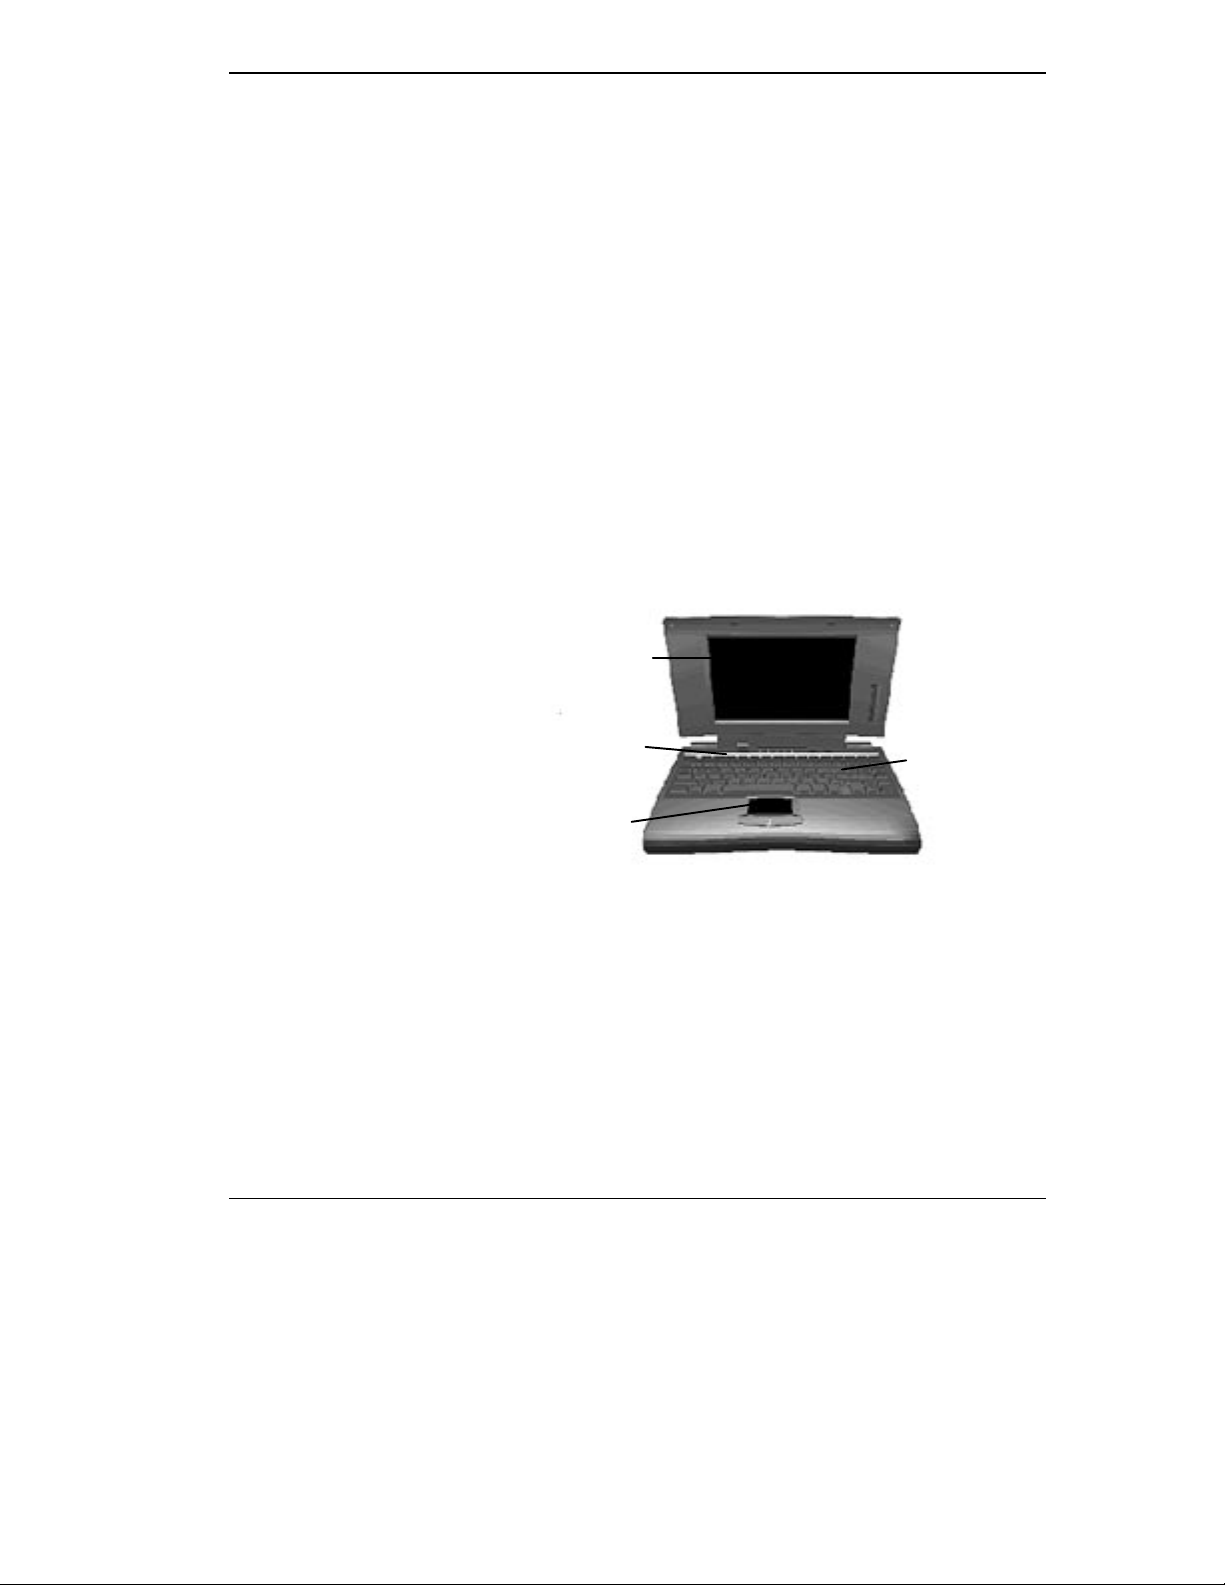
The NEC Versa 2000 is light and compact with features all around it.
Take a look at the front of the NEC Versa 2000.
LCD Display
Switches and
LEDs
Keyboard
LCD
Your NEC Versa 2000 comes with either a 10.4-inch DSTN (Double-Scan
Super-Twisted Nematic) color display or a 9.5-inch color TFT (Thin Film
Transistor) active-matrix display.
Contrast Control
You can adjust the contrast on the LCD with the control slide switch on the
side of the screen (DSTN screen only).
VersaGlide
Front of System
Getting to Know Your NEC Versa 2000 1-1
Brightness Control
You can adjust the screen backlight brightness with the control slide switch
on the side of the screen.
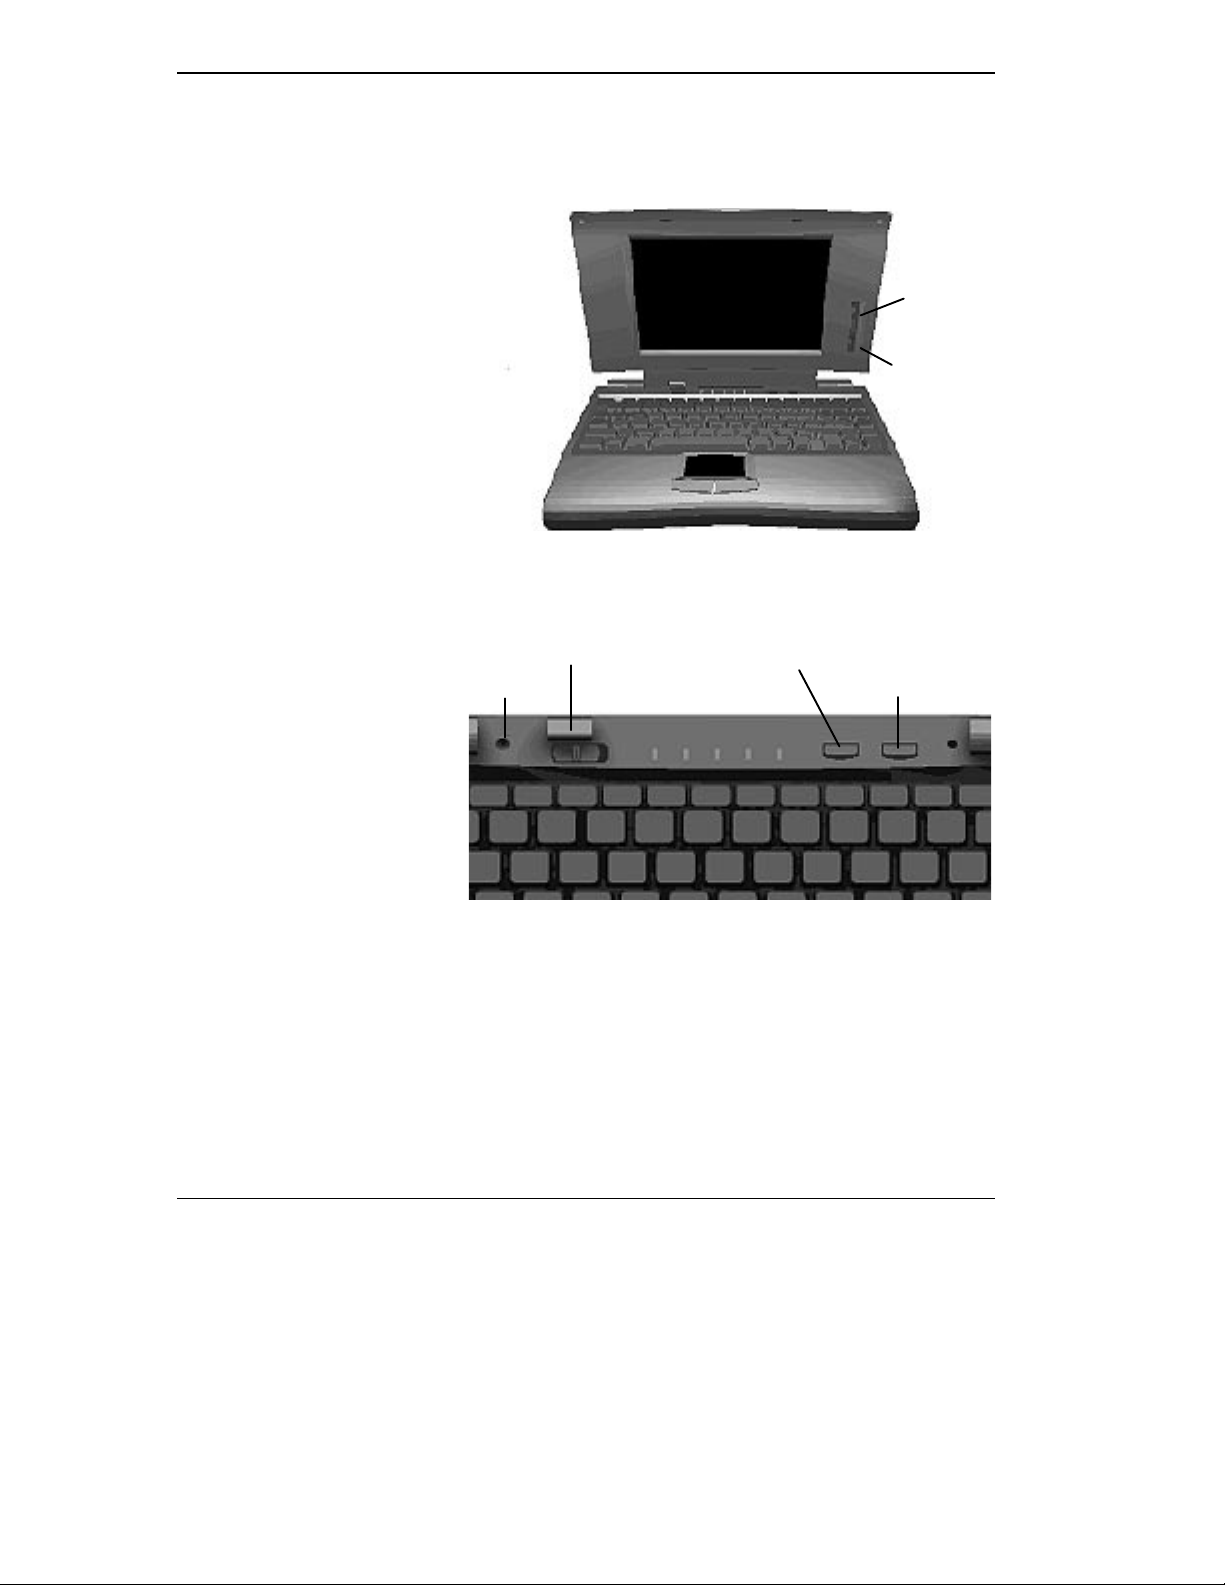
Switches
The NEC Versa 2000 has the following switches:
Reset
Power
Contrast
Control
Brightness
Control
Power
Management
Suspend/Resume
Power — Slide right to turn on; slide right again to turn off.
Power Management — Slide the switch to turn Power Management on;
slide again to turn it off.
Suspend/Resume — Slide the switch for Suspend mode; slide again to re-
sume active mode.
1-2 Getting to Know Your NEC Versa 2000

LEDs
Reset — This recessed switch resets the system if the NEC Versa does not
respond to keyboard input or VersaGlide movement. Use it before powering
down the system and restarting it.
The NEC Versa 2000 has several LED lights to let you know what’s happening on your system.
Power
Management
Battery/AC Power
Status
Diskette
Access
Hard Disk
Access
Num Lock
Caps
Lock
Scroll
Lock
Power Management — Green when on; no color when off. Blinking green
when the system is in Suspend mode.
Battery/AC Power Status — There are several light indicators.
BATTERY
STATUS
AC Powered Green
50% to 100% Green
25% to 49% Yellow
10% to 24% Orange
0% to 9% Blinking Orange
Charging Blinking Green
Power off No color
LED
Hard Disk — Green when the NEC Versa is writing data to or retrieving
from the system’s hard disk.
Getting to Know Your NEC Versa 2000 1-3
Keyboard
Diskette — Green when the NEC Versa 2000 is writing data to or retriev-
ing from the diskette in the A drive.
Num Lock — Green is On; no color is Off.
Caps Lock — Green is On; no color is Off.
Scroll Lock — Green is On; no color is Off.
The NEC Versa 2000 keyboard is equipped with many features, including:
■ Function keys
■ Typewriter keys
■ Cursor control keys
■ Numeric keypad
■ Control keys.
Function keys — The Fn (Function) key activates the functions printed in
blue on keys having dual functions. Press the Fn key and the desired function key simultaneously.
The applications that you run determine how these keys function. See the
user’s guide for the applications.
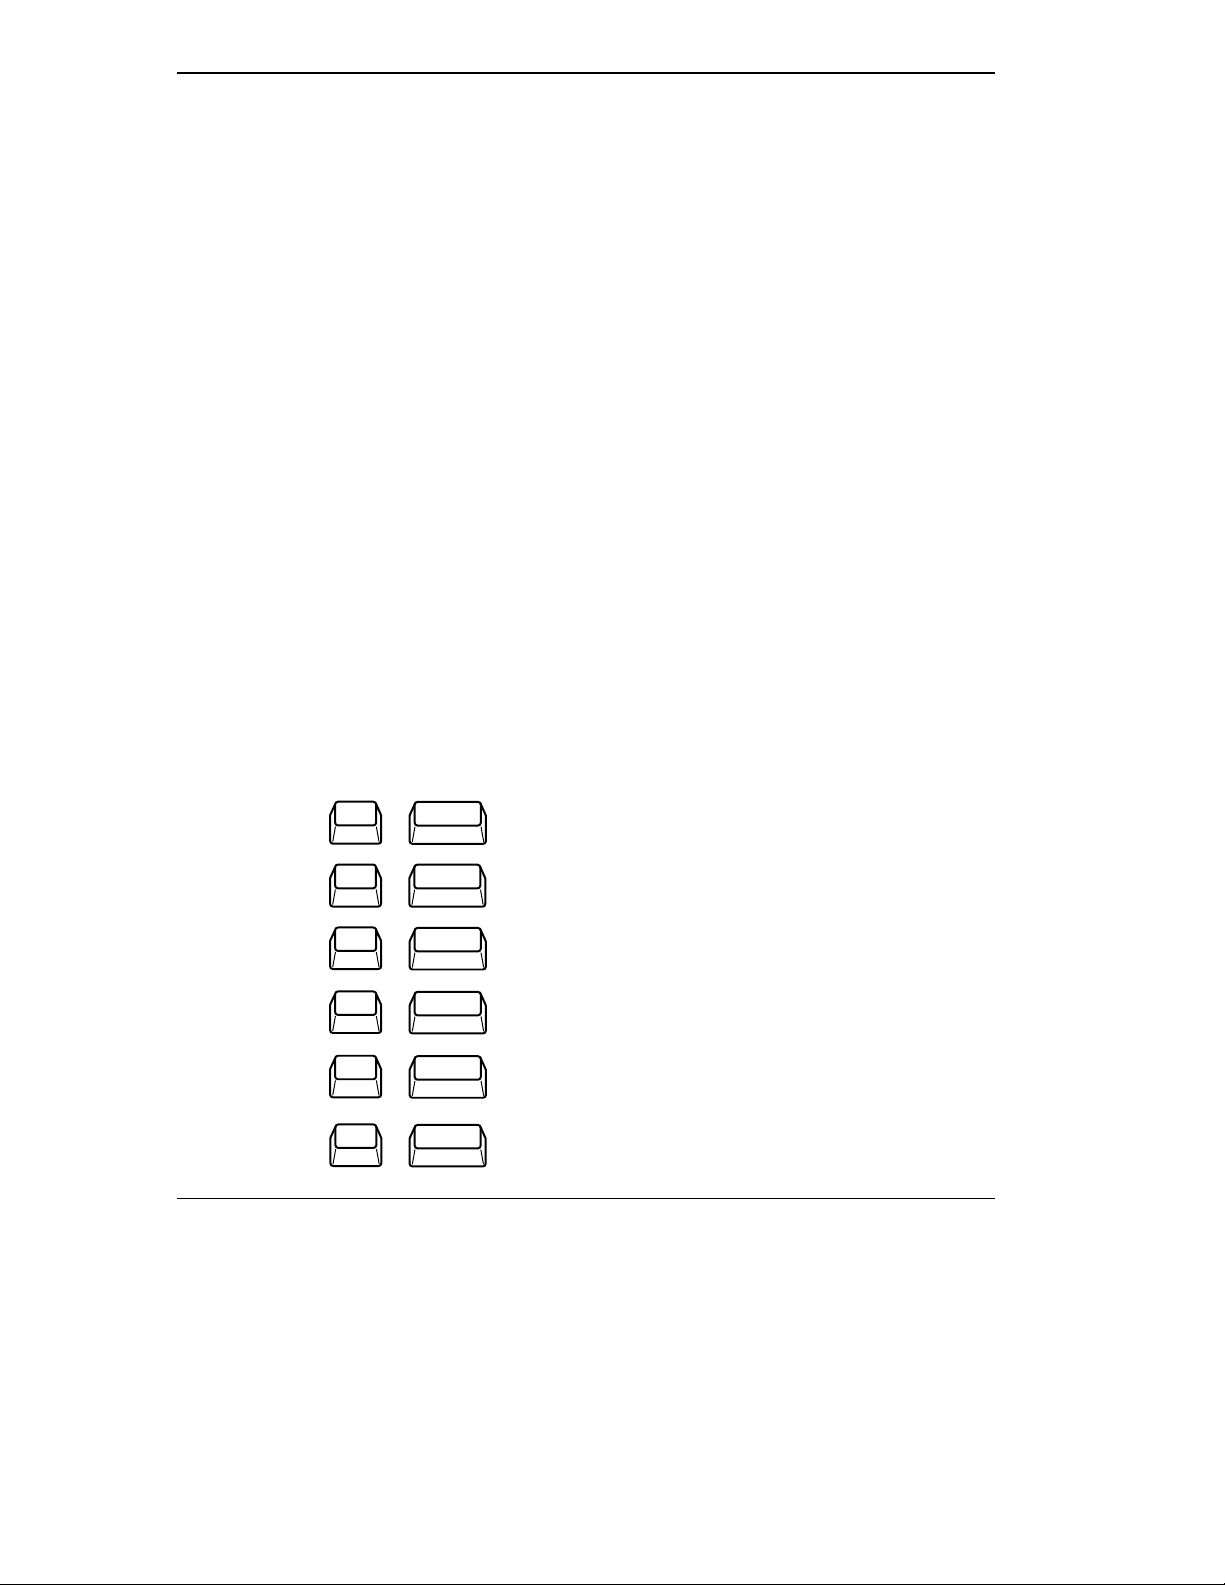
Function key combinations —
Fn
Fn
Fn
Fn
Fn
Fn
1-4 Getting to Know Your NEC Versa 2000
+
+
+
+
+
+
F2
Highlight
F3
LCD/CRT
F5
Backlight
F6
Speaker
F7
P/M Lev
F12
ScrLock
Highlight
LCD/CRT
Backlight
Speaker Volume
Power Management (P/M)
Scroll Lock On/Off

Typewriter keys — The typewriter keys (also called alphanumeric keys)
are used almost exactly as on a typewriter. Those that behave differently do
so when combined with control keys or function keys.
Cursor control keys — Cursor control keys let you position the cursor on
the screen wherever you want. On the screen, the cursor is a blinking underline, block or pointer, depending on the application. It indicates where the
next text type is inserted.
Numeric keypad — Pressing the Num Lock on the keyboard activates the
numeric keypad when an external keyboard is not connected. The numeric
keys are printed in blue. The keypad lets you type numbers and mathematical operands (+, -) as you would on a calculator. The keypad is ideal for
entering long lists of numbers.
Control keys — Cursor control keys include Ctrl, Alt, Fn, and Shift. They
are used in conjunction with other keys to change their functions. To use
these control keys, press and hold the control key while pressing another
key. For example, “
the letter
c. How the key combination works depends on the applications
you are running. Other control keys include
Ins.
press Ctrl C” means to hold down the Ctrl key and type
Num Lock, Scroll Lock, and
NEC VersaGlide
This is the mechanism by which you control the pointer on the screen. It
serves the same function as the mouse or trackball on other systems. For
more information on the VersaGlide, see “Learning to Use the Hardware.”
Getting to Know Your NEC Versa 2000 1-5
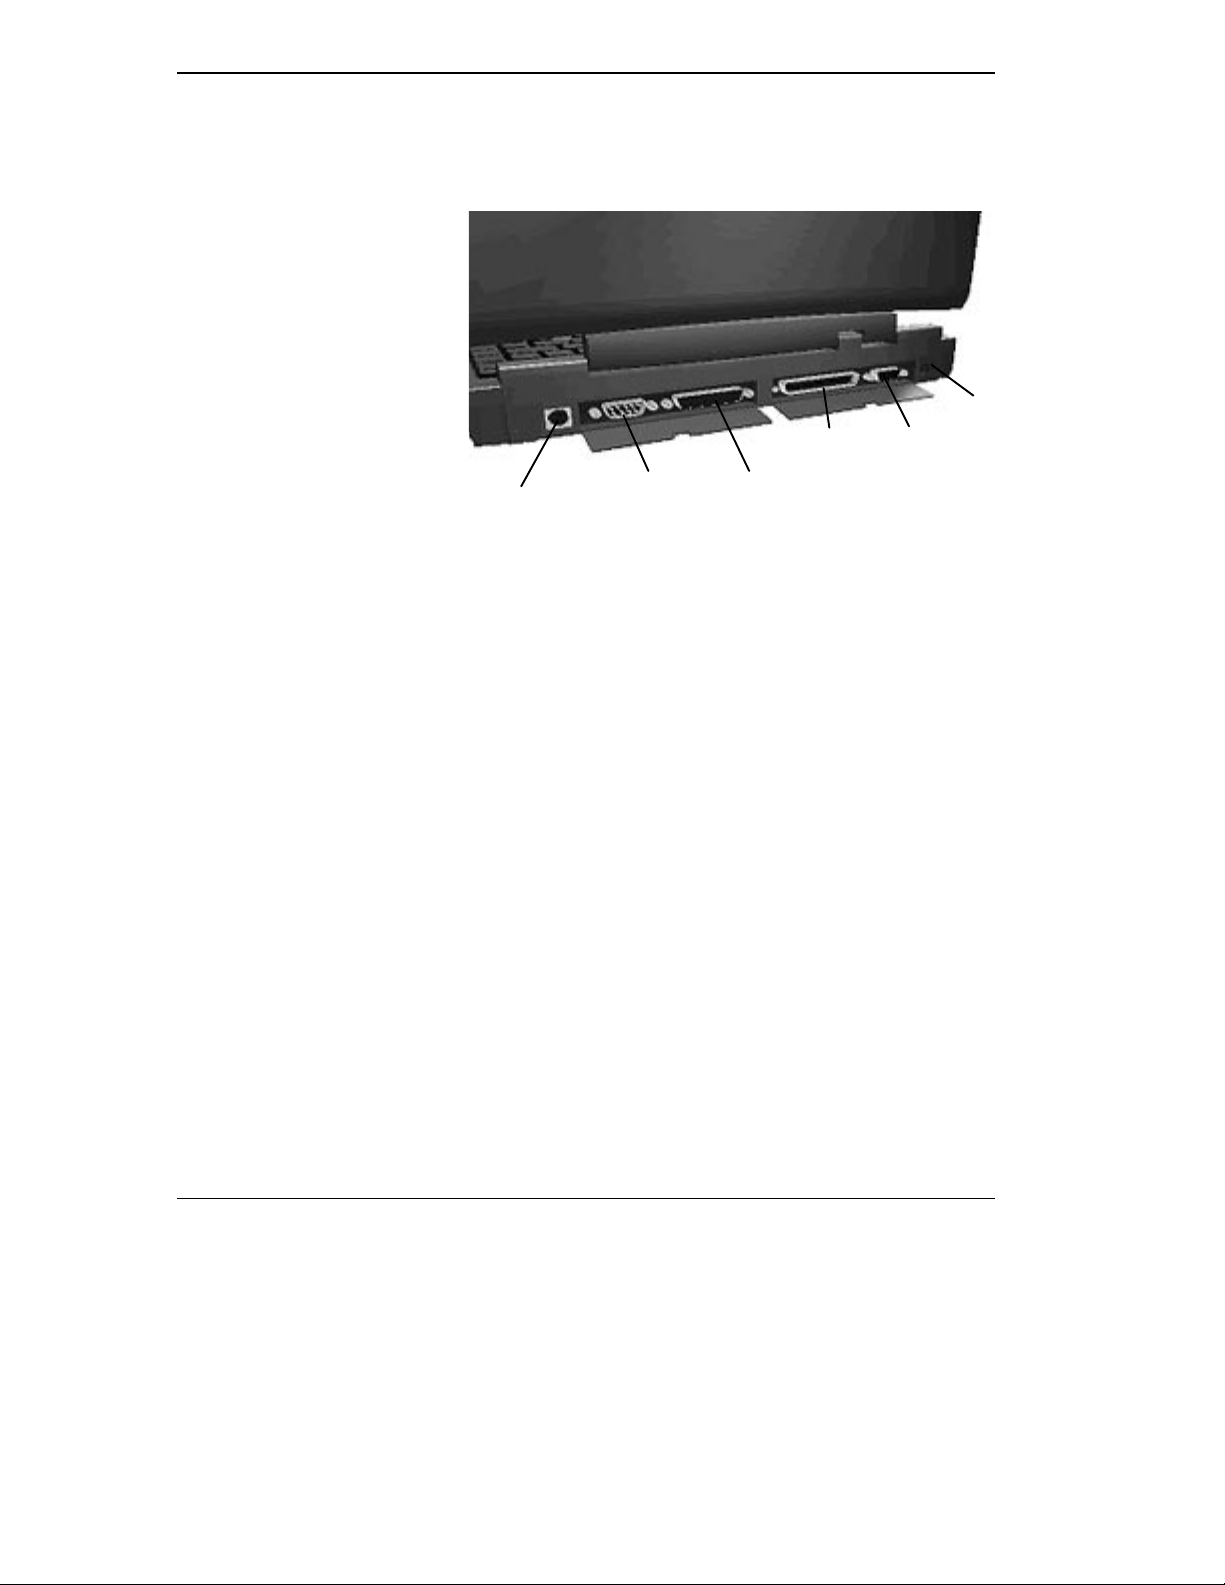
Rear
The rear of the system has ports for connecting your NEC Versa 2000 to
other devices, like a printer or an external mouse, and power sources.
AC Power
Jack
Video
Connector
Keyboard/Mouse
Port
Serial Port
Docking
Connector
Parallel Port
Keyboard and Mouse Port — Use the standard PS/2 port to connect an
external PS/2 mouse or an external PS/2 keyboard. If you want to connect
both, use the optional NEC Versa Y Adapter. (See the online NEC Versa
2000 Options Catalog.)
Serial Port — Use this to connect an external modem or a serial printer.
You can tell that it’s serial by looking at the cable. A serial cable has a 9-pin
connector.
Parallel Port — Use to connect a parallel printer. A parallel device has a
25-pin cable connector.
Docking Connector — Use this bus connector to attach the NEC Versa
2000 to a MiniDock 2000 or MediaDock 2000 to further expand your options.
Video Port — Use this 15-pin connector port to attached an external CRT
monitor to your NEC Versa. You can run both the LCD display and the external monitor simultaneously, or one alone.
AC Power Jack — Use the power jack to attach the NEC Versa 2000 to an
AC power source such as the AC adapter.
1-6 Getting to Know Your NEC Versa 2000
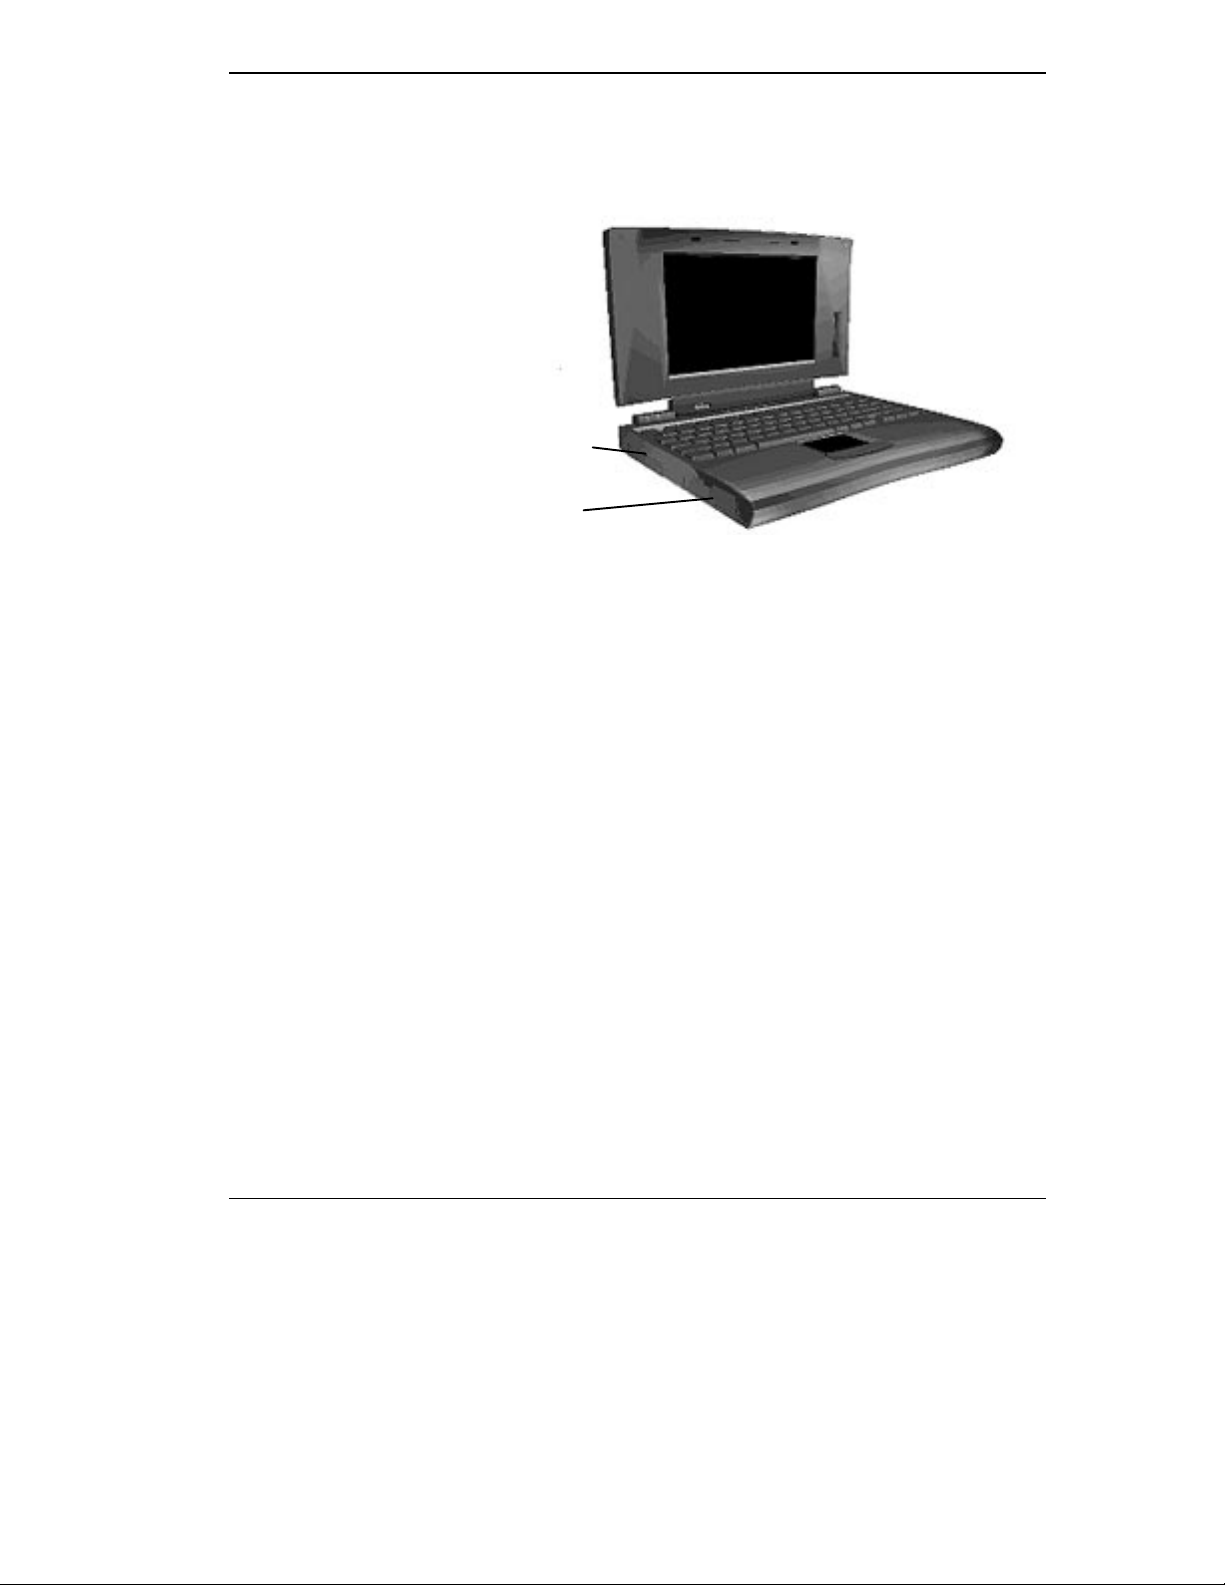
Left Side
The left side of your NEC Versa 2000 has two slots for PCMCIA cards and
a hard disk drive compartment.
PCMCIA
Slots
Hard Disk
Drive
PCMCIA Slots — PCMCIA is a standard interface for peripheral devices
like fax/modems, local area network (LAN) cards, storage cards, and
pagers. A PCMCIA card is about the size and shape of a credit card and inserts into one of the two slots.
Hard Disk Drive — The hard disk drive is removable. Depending on your
NEC Versa 2000’s configuration, it contains either 350MB, 540MB, or
720MB storage space. You can exchange hard disks in the NEC Versa
2000.
Getting to Know Your NEC Versa 2000 1-7
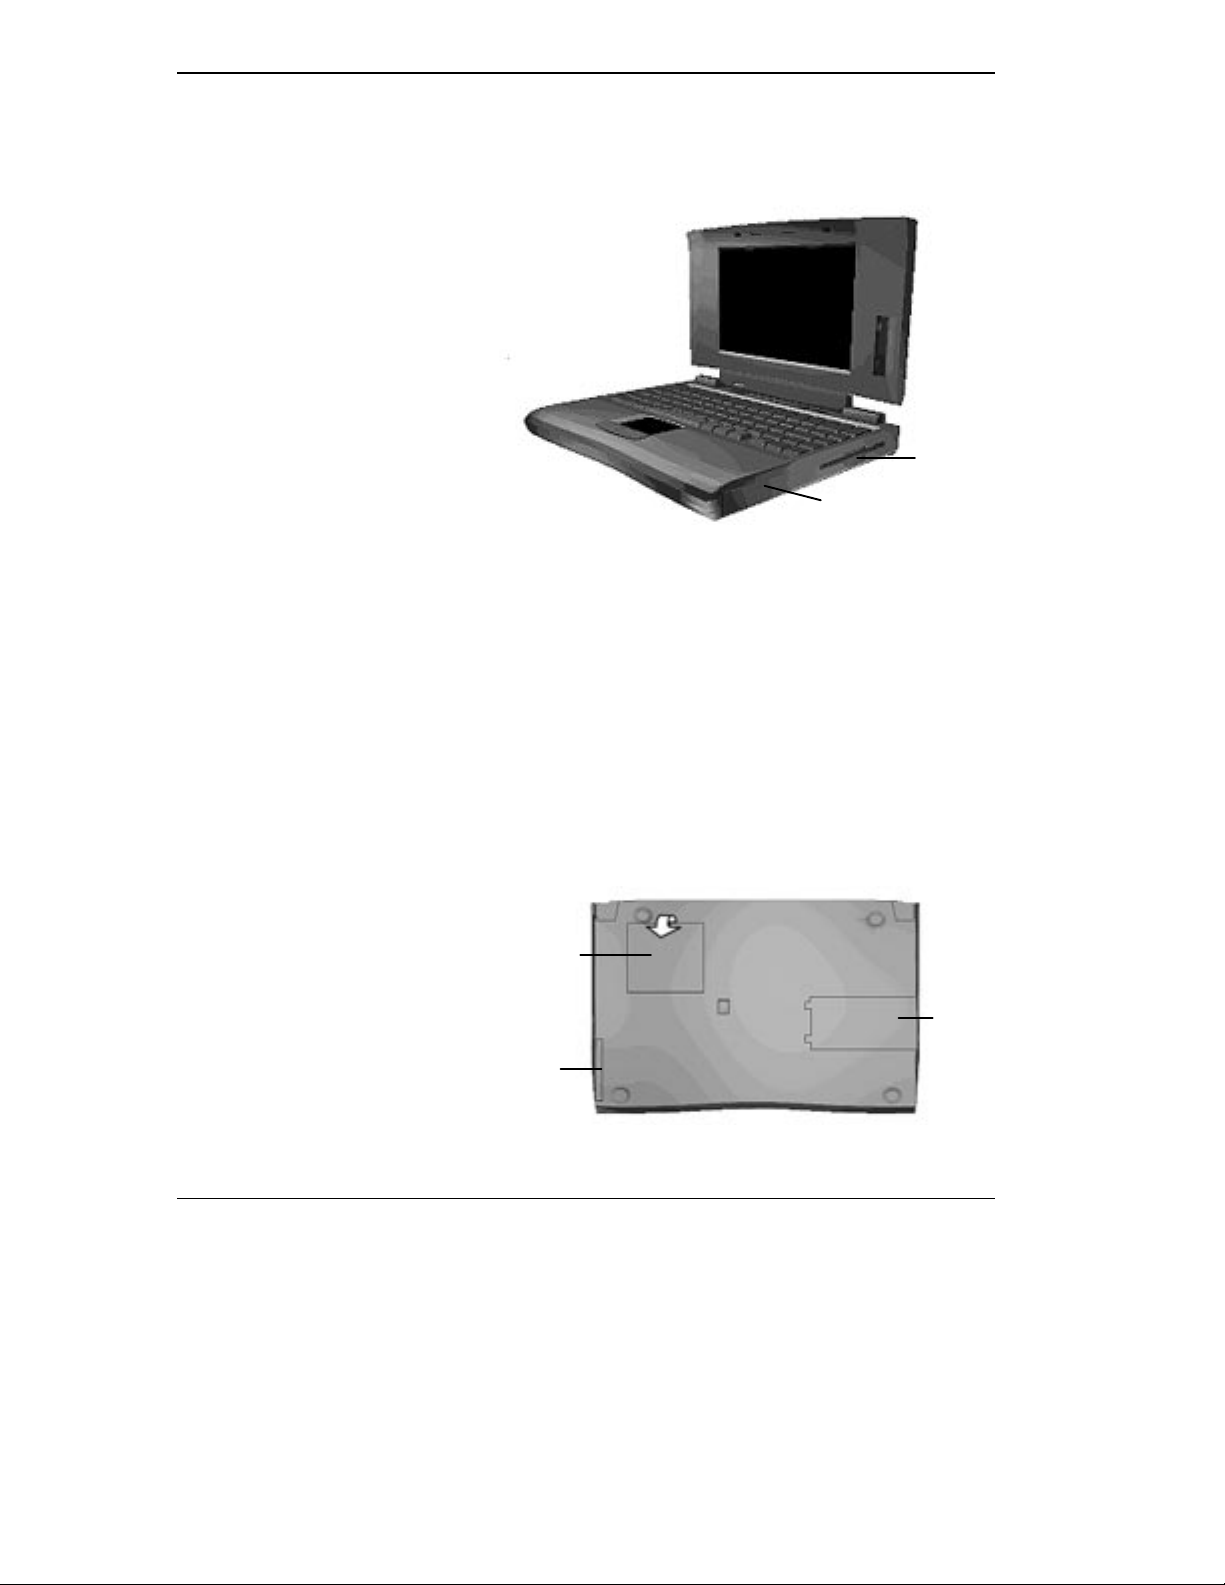
Right Side
On the right side of the NEC Versa 2000 is a diskette drive and a removable
battery.
Diskette
Drive
Underside
Battery
Diskette Drive — You can save your files to diskette and install software
from diskette using the diskette drive, called drive A.
Battery — On the right front is the Lithium Ion (Li-Ion) battery.
Every inch of the NEC Versa 2000 has a purpose — even the underside!
Turn your system upside down. You’ll see three compartments. The small
compartment is for expansion memory modules. Another compartment contains the Lithium Ion (Li-Ion) battery. There is also a compartment for the
built-in modem. You should not try to remove this — call NEC Customer
Support for help with the modem, should you encounter problems.
Memory
Modem
Battery
1-8 Getting to Know Your NEC Versa 2000
SYSTEM CARE
The NEC Versa 2000 is a durable, dependable system built for extensive use
and travel. Follow these guidelines to maintain the condition and performance of your computer.
Precautions
Follow these precautions when using your NEC Versa 2000 and AC
adapter.
■ Avoid dropping or bumping the computer or the AC adapter.
■ Do not stack heavy objects on the computer.
■ Avoid moving the NEC Versa 2000 during system operation, especially
NOTE
There is a small compartment in the center of the underside
that contains the CMOS battery. You should not attempt to remove
this battery.
while the hard disk or diskette drive is being accessed.
■ When using the AC adapter, make sure the power source falls within the
system’s compatible range of 100–120 or 224–240 volts AC. Never use
the AC adapter if the voltage falls outside of this range. (Watch for this
when traveling to foreign countries.)
■ Turn computer power off before attaching or removing non-plug and
play devices.
■ Avoid using the computer or AC adapter for extended periods in direct
sunlight.
■ Do not use the system in humid or dusty environments.
■ Avoid exposing the NEC Versa 2000 or AC adapter to extreme changes
in temperature or humidity. If it is unavoidable, allow your NEC Versa
to adjust to room temperature before using.
■ When cleaning the system, use a soft, clean, dry cloth. Avoid wiping the
display surface with abrasive material, including rough cloth.
Getting to Know Your NEC Versa 2000 1-9

■ The VersaGlide has a sealed surface that resists normal dust and mois-
ture and should require nothing more than an occasional cleaning. To
clean the VersaGlide, simply wipe it off with a clean cloth. For stubborn
grime, use a lightly moistened cloth and a dab of mild dishwashing detergent.
■ If the AC adapter becomes extremely hot, unplug the adapter and let it
cool.
Storage Requirements
Store the computer and AC adapter in an environment that meets the following conditions:
■ Maintain storage temperatures between –4°F and 104°F (–20°C and
40°C).
■ Keep the storage area free from vibration and magnetic fields.
■ Keep the system and its components away from organic solvents or cor-
rosive gases.
■ Avoid leaving the system and its components in direct sunlight or near
heat sources.
Routine Cleaning
Clean or dust your system as follows.
■ LCD screen — Carefully wipe the LCD screen with a soft cloth or a
screen wipe designed for that purpose. Special screen wipes are available
through your local computer dealer.
■ System case — If the NEC Versa 2000 case gets dirty, carefully wipe it
with a slightly damp, almost dry cloth. Be extremely careful not to drip
any moisture onto or into the NEC Versa 2000. Never use harsh solutions or spray chemical cleaning products on the NEC Versa 2000.
■ VersaGlide — Wipe the pad surface with a clean cloth. For stubborn
grime, use a lightly moistened (with water) cloth.
1-10 Getting to Know Your NEC Versa 2000
!
I f the environmental temperature of the NEC Versa suddenly rises
(for example, when you move the system from a warm place to a
cold place), vapor condenses inside the system. Turning on the
system under this condition can cause damage to the internal
components. Wait before turning the system on so that the internal
temperature of the system can equalize with the cooler environment
and any moisture can dry.
CAUTION:
!
Never use household cleaning solvents that contain caustic materi als. The use of these cleaners may cause cracking or discoloration
of the plastic surface.
CAUTION:
Getting to Know Your NEC Versa 2000 1-11

Learning to Use
2
Powering Your NEC Versa
the Hardware
Like any computer, the NEC Versa 2000 is made up of the hardware — the
physical unit and its components — and the software — the programs that
run on the computer. This chapter discusses the hardware. The topics include:
■ Powering the system
■ Keyboard
■ NEC VersaGlide
■ Options and PCMCIA Expansion
Since the NEC Versa 2000 is a truly portable computer, you can use it
practically anywhere using any one of a number of power sources, including:
■ the AC adapter connected to an electrical wall outlet (using AC power)
■ the battery pack
AC Adapter
■ the optional DC adapter connected to a car cigarette lighter.
Use the AC adapter that came with your NEC Versa 2000 to run your computer with AC (alternating current) power, or recharge the battery pack. Use
the AC adapter whenever a wall outlet is nearby.
Keep the adapter connected whenever possible. The AC adapter keeps the
battery charged while you use the system and when the NEC Versa 2000 is
powered off.
Here's how you connect the AC adapter:
1. Connect the AC adapter to your NEC Versa 2000.
Learning to Use the Hardware 2-1
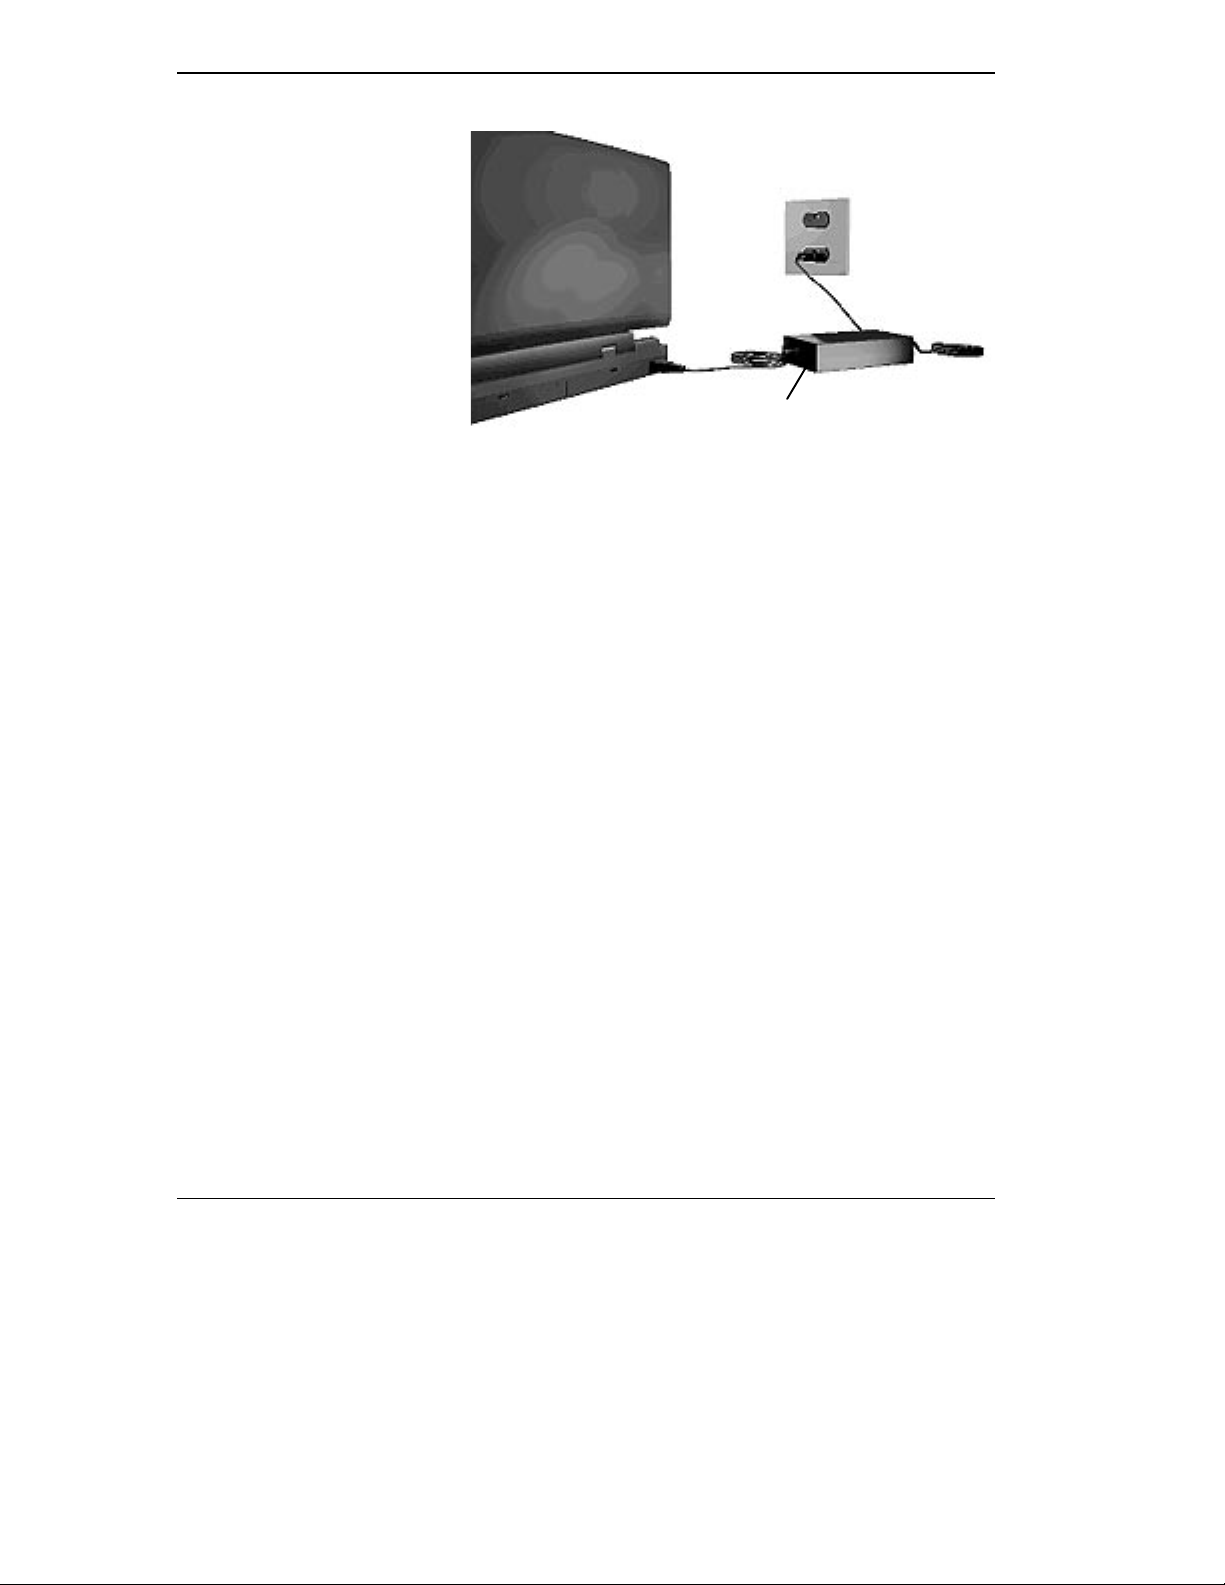
Battery Pack
AC Adapter
Connecting the AC adapter
2. Connect the other end to a 100- or 240-volt wall outlet.
The NEC Versa 2000 comes with a rechargeable Lithium Ion (Li-Ion) battery. With it, you can run your system without a wall outlet for up to four
hours with Power Management or two hours without Power Management.
It's easy to install and remove.
You can keep track of the battery's status through the LEDs on the front of
the system or with the battery gauge in Windows. Both let you know how
much battery power you have left.
When your battery power is getting low, you can remove it and replace it
with a charged Li-Ion battery while your system is off or in Suspend mode
or leave it in the system and simply plug in your NEC Versa 2000 into a
wall outlet. The battery recharges over a period of 1.6 hours while in the
NEC Versa 2000 and the system is powered off. You can recharge the battery in two to three hours while the system is on.
Optionally, you can buy a battery charger to quickly charge your battery.
See the online NEC Versa 2000 Options Catalog.
2-2 Learning to Use the Hardware

Keyboard
!
To prevent accidental battery ignition or explosion, adhere to the
following:
■ Keep the battery away from extreme heat.
■ Keep metal objects away from the battery terminals to prevent
causing a short circuit.
■ Make sure the battery is properly installed in the battery bay.
■ Read the precautions printed on the battery and in the online
Basics
.
WARNING
The NEC Versa 2000 keyboard is equipped with many features. They include the following.
■ Function keys
■ Cursor control keys
■ Typewriter keys
■ Numeric keypad
■ Control keys
Function Keys
Control Keys
Numeric Keypad
Cursor Control
Keys
Keyboard
Learning to Use the Hardware 2-3
 Loading...