

Page 1

Proprietary Notice and Liability Disclaimer
The information disclosed in this document, includin g all designs and related materials, is the
valuable propert y of NEC Computer Systems Divisi on, Packa r d Bell NE C (NE CCSD, PBNEC)
and/or its licensors. NECCSD and/or its licensors, as appropriate, reserve all patent, copyrigh t
and other proprietary rights to this document, including all design, manufacturing,
reproduction, use, and sales rights ther eto, except to the extent said rights are expressly granted
to others.
The NECCSD product(s) discussed in this document are warranted in accordance with the
terms of the Warranty Statement accompanying each pr oduct. However, actual performan ce of
each such product is dependent upon factors such as system configur ation, customer data, and
operator control. Since implementation by customers of each product may vary, the suitability
of specific pr oduct configurations and applications must be determin ed by the customer and is
not warranted by NECCSD.
To allow for design an d specification improvements, the information in this document is subject to change at any time, without notice. Reproduction of this document or portions thereof
without prior written approval of NECCSD is prohibited.
NEC is a registered trademark of NEC Corporation, and NEC CS500 and NEC’s WebWay are trademarks of NEC
Technologies, Inc. These trademarks are used under license by NEC Computer Systems Division, Packard Bell NEC, Inc.
MS-DOS and Windows are registered trademarks of Microsoft Corporation.
X2 and the x2 logo are trademarks of U.S. Robotics Corporation.
All other product, brand, or trade names used in this publication are the trademarks or registered trademarks of their
respective trademark owners.
First Printing — August 1997
Copyright 1997
NEC Computer Systems Division
Packard Bell NEC, Inc.
1414 Massachusetts Avenue
Boxborough, MA 01709
All Rights Reserved
Page 2

Contents
About this guide.........................................................................ix
Who should use this guide?..............................................................ix
How should I use this guide? ...........................................................ix
What about text conventions?........................................................... x
Where else can I find information?...................................................xi
Get acquainted............................................................................. 1
Looking at the Merlin topics.............................................................2
Merlin topics................................................................................3
How to use Merlin .......................................................................4
NEC DirectLinks..............................................................................5
Taking the NEC Ready System Tour ................................................5
Take shortcuts............................................................................. 7
Locating NEC DirectLinks ...............................................................8
Using NEC DirectLinks....................................................................9
Find information quickly!.......................................................... 11
Checking out the NEC Help Library ...............................................12
Using electronic books...............................................................13
Using the NEC Help Center .......................................................13
Keeping help handy.........................................................................16
Getting help on everything..............................................................17
Help in your applications............................................................17
Help on the operating system ..................................................... 17
Contents iii
Page 3

Send a fax — in minutes! ..........................................................19
Checking your fax banner............................................................... 20
Sending the fax .............................................................................. 21
Receiving a fax............................................................................... 22
Viewing faxes ................................................................................ 23
Stay in touch...............................................................................25
Using the phone............................................................................. 26
Dial a call manually.................................................................... 26
Dial using Phone Book.............................................................. 27
Dial using Speed Dial ................................................................ 27
Answering a phone call .................................................................. 28
Checking voicemail answering........................................................ 29
Playing voice messages .................................................................. 30
From the Voice messages tab .................................................... 30
From remote telephones ............................................................ 30
Setting a password for mailboxes ................................................... 31
Hear the difference! ...................................................................33
Introducing your sound system....................................................... 34
Playing a music CD........................................................................ 35
Pumping up the volume.................................................................. 36
From the sound software........................................................... 36
From the speakers ..................................................................... 36
Wander the Web.........................................................................37
Finding NEC’s WebWay................................................................ 37
Checking what’s on NEC’s WebWay.............................................38
Using the navigation buttons .......................................................... 39
iv Contents
Page 4

Calling for WebWay help................................................................39
Using Internet service providers......................................................39
Get customer services ’round the clock!................................ 41
Looking at available services........................................................... 42
Using NECCSD services.................................................................44
NECCSD FaxFlash Service........................................................44
NECCSD Bulletin Board System ............................................... 47
NECCSD on America Online .....................................................49
NECCSD on CompuServe.........................................................50
Email/fax technical support service.............................................51
Internet......................................................................................52
NECCSD Technical Support Center........................................... 53
Find answers to questions....................................................... 55
Mouse............................................................................................56
Monitor..........................................................................................57
Diskette drive .................................................................................58
CD-ROM reader.............................................................................59
Faxing ............................................................................................60
Modem...........................................................................................61
Telephone/answering system...........................................................62
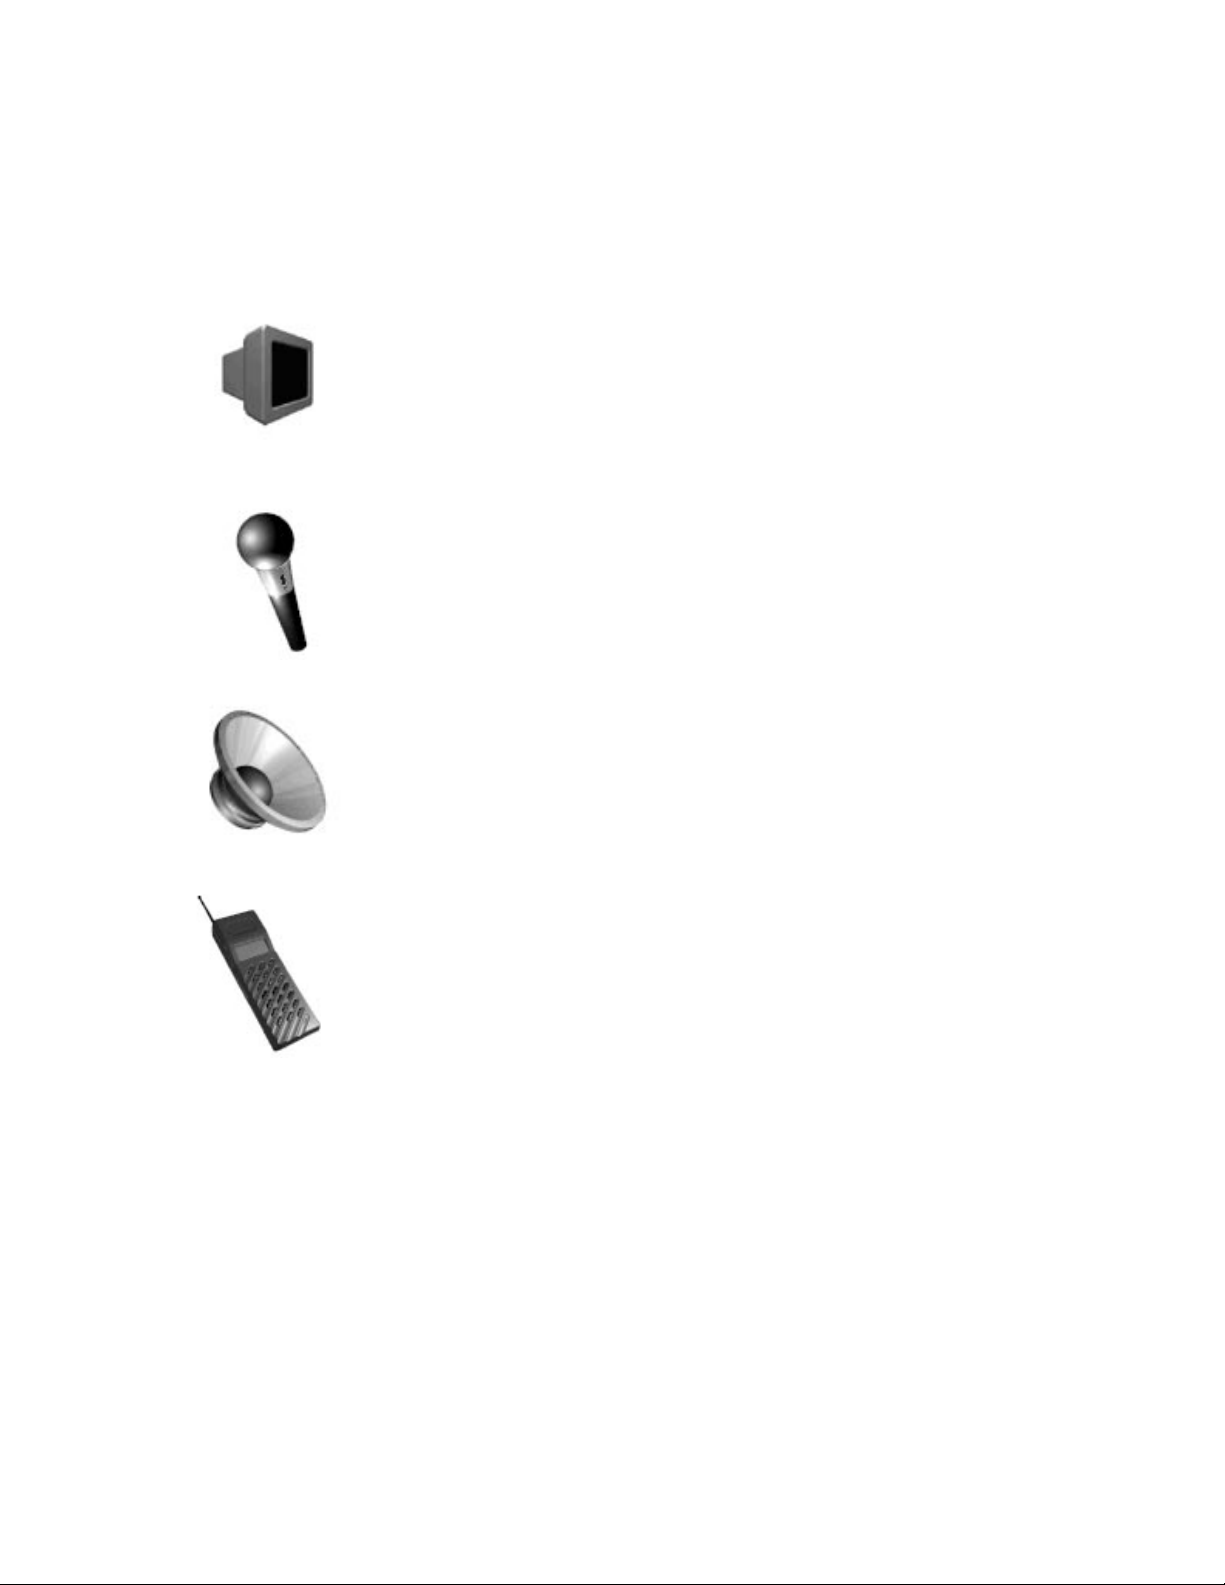
Multimedia .....................................................................................63
Solve problems.......................................................................... 65
Determining the problem.................................................................66
Solving common problems.............................................................. 68
System problems........................................................................68
Diskette drive problems.............................................................. 69
Monitor problems ......................................................................70
Contents v
Page 5

Keyboard/mouse problems ........................................................ 71
CD-ROM reader problems ........................................................ 71
Speaker problems...................................................................... 72
Microphone problems................................................................ 72
Printer problems........................................................................ 73
Clearing your password.................................................................. 73
Cleaning the mouse........................................................................ 74
Getting help ................................................................................... 75
Getting help from your company ............................................... 75
Getting help from your NECCSD retailer/dealer........................ 75
Getting help from NECCSD...................................................... 75
NECCSD warranty repair service................................................... 76
Ready product recovery CD to the rescue!.............................77
Checking out your recovery CD..................................................... 78
Selecting recovery options ............................................................. 78
Test Your System...................................................................... 78
Format and Restore Your Hard Disk ......................................... 79
Testing your system ....................................................................... 80
Restoring your software with the Recovery CD.............................. 82
Setting up a healthy work environment...................................85
Making your computer work for you.............................................. 86
Arrange your equipment................................................................. 87
Adjust your chair ........................................................................... 88
Adjust your input devices............................................................... 90
Adjust your monitor....................................................................... 92
Vary your workday........................................................................ 94
Pre-existing conditions and psychosocial factors............................. 95
vi Contents
Page 6

Index
Checking your comfort: how do you measure up?...........................96
Checking your chair ...................................................................96
Checking your keyboard.............................................................96
Checking your mouse.................................................................96
Checking your monitor...............................................................96
Checking you.............................................................................97
Contents vii
Page 7

About this guide
This guide gives you an introduction to what you can do with your
Ready Multimedia Computer and how to do it.
Who should use this guide?
We’ve written this guide for anyone who wants to learn about using
the Ready Multimedia Computer.
How should I use this guide?
We suggest that you read :
“Get acquainted” for information on how to best start with
your system once you’ve set it up.
“Take shortcuts” to learn about NEC DirectLinks which take
you directly to the software applications that you’ll want to
use often.
“Find information quickly!” for an explanation of all the
electronic help and online books that come with the Ready
Multimedia Computer.
“Send a fax — in minutes!” for quick steps on sending a fax
from Ready fax/modem models.
“Stay in touch” for information on using the phone with
Ready fax/modem models.
“Hear the difference!” to become familiar with the many
sound options on your computer.
“Wander the Web” for an overview of NEC’s WebWay™
Internet home page.
About this guide ix
Page 8

“Get customer services ’round the clock” for information
about the many services NECCSD provides for our products.
“Find answers to questions” for some typical questions about
using the Ready computer and their answers.
“Solve problems” for some ideas on how to handle common
problems with your Ready computer that may come up from
time to time.
“Ready product recovery CD to the rescue!” for some very
important information on what to do if you need to restore the
software that shipped with your Ready computer.
“Setting up a healthy work environment” to learn how to
prepare yourself and your work space for best results with
your computer.
What about text conventions?
This guide uses the following text conventions.
Warnings alert you to situations that could result in serious
personal injury or loss of life.
Cautions indicate situations that can damage the hardware
or software.
x About this guide
Warnings, cautions, and notes have the following meanings:
!
WARNING
!
CAUTION
Page 9
Note:
material being described.
Names of keyboard keys are printed as they appear on the
keyboard, for example,
Text or keystrokes that you enter appear in boldface type. For
example, type
Mouse input is a single click of the left mouse button unless
Notes give important information about the
exit
and press
Ctrl, Alt,
Enter
or
Enter
.
.
indicated otherwise.
Want to know more?
This section appears at the end of some sections in this guide.
See it for other sources of information on the topic just
discussed.
Where else can I find information?
Use the following documentation with this guide for information
about your computer.
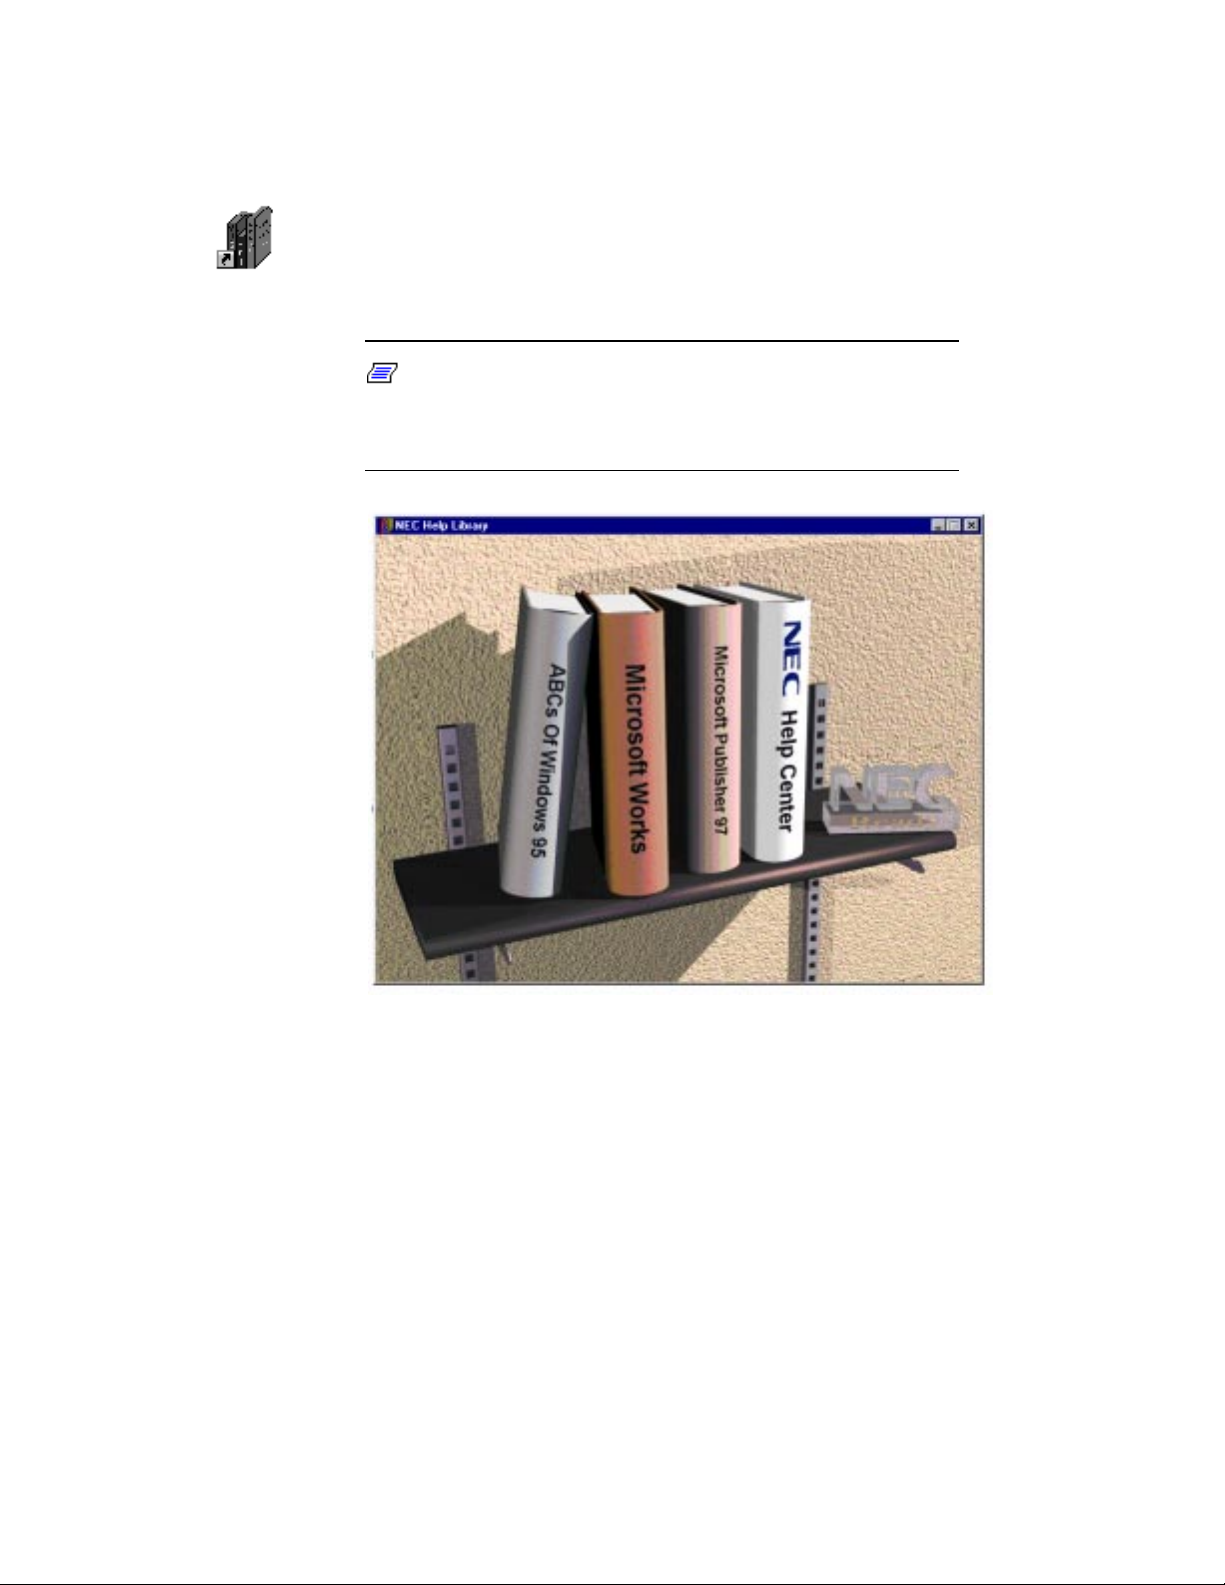
NEC Help Library
The online NEC Help Library provides a shelf of electronic
books describing the software that comes with your Ready
computer. The shelf also contains the NEC Help Center
package described next. You can get to it by double clicking
the NEC Help Library icon on your desktop.
About this guide xi
Page 10

NEC Help Center
The online NEC Help Center is your comprehensive source of
information about your system. Go to the NEC Help Center
for detailed information about your computer.
You can choose topics from categories such as System Tour,
The Basics, Advanced Topics, Questions & Answers, System
Upgrades, and Service & Support.
NEC Ready Series System Upgrade and Reference Guide
This printed guide provides information for adding system
upgrades to your Ready Computer. It includes a description of
your computer’s resources such as communication ports and
interrupts. You can also find jumper settings and hardware
specifications.
xii About this guide
Page 11

Get acquainted
Your new Ready Computer is full of state-of-the-art technologies that
add up to power and performance for you. Take a look at the many
interesting and exciting features. You can learn all about them by
taking the Ready tours.
Continue for directions to the following features:
Merlin topics
DirectLinks
NEC Ready System Tour.
Get acquainted 1
Page 12
Looking at the Merlin topics
Double click the Wizard hat icon on your Windows 95 desktop.
The Merlin Topics List appears. You can select topics that help
you learn the basics, review the NEC DirectLinks, and more!
Merlin and his cast of characters provide an easy and entertaining
way to get acquainted with your computer.
Note:
at the High Color (800 by 600 with 64,000 colors) video
setting.
Merlin appears his best when the system is set
2 Get acquainted
Merlin Topics List
Page 13

When you click “Meet Merlin,” Merlin introduces himself and
explains his role on your Ready computer. He also describes the tours
you can take.
Merlin and his “colleagues” give you a series of quick tours around
your desktop. You’ll see the Start button, the taskbar, My Computer,
the Recycle Bin, and more. By the end of the tours, you should feel
more comfortable with your desktop. And you can also run the tour
or print a reference card anytime for a quick refresher.
Merlin topics
The topics are grouped into four areas.
The Basics
Just as it sounds, the Basics gets you started on your computer. Meet
Merlin, hear how to use the mouse, get around the desktop, start
programs, and understand Windows.
More Basics
More Basics takes you to the next level of concepts you need to
understand to efficiently use Windows. Learn what’s stored on your
computer, how to make and use folders, manage your files, create
shortcuts. Even if you’re not entirely new to computers, you might
pick up a tip or two that you didn’t know before!
DirectLinks
Merlin explains your NEC Ready’s own shortcuts, DirectLinks. He
can get you doing what you want to do with your computer in a jiffy!
Want to play some music? Want to surf the Internet? Merlin can get
you started fast.
Get acquainted 3
Page 14
Tips and Tricks
No matter what your level of experience with computers, it’s
worthwhile going through this topic list. Tips and Tricks addresses
areas that computer users often find confusing. Merlin and company
take some of the mystique out of using your computer and help you
learn to get the most out of your computer.
How to use Merlin
Once you are in the Merlin topics, click the topic title of your choice
and Merlin or one of his “colleagues” appears and talks about the
topic. Hearing how to use the computer can be an easier way to learn
and remember. It’s certainly more fun than just reading about it.
If you like, after listening, you can select and print out a quick
reference card on the topic to refer to as you actually try the task.
Just select View Reference Card. The reference card pops up.
For example, if you find your computer seems stuck, go to Merlin’s
Tips and Tricks topics list. Select “Your computer is stuck?” You can
play the video clip or, just click the button to the right of the topic for
the reference card. Here is the reference card that pops up.
4 Get acquainted
Merlin Reference Card
Page 15

You can also select a link to the relevant Windows Help file for
further information by clicking the highlighted text. In this case, click
“Restarting your computer.”
NEC DirectLinks
Merlin tours the NEC DirectLinks that take you directly to Readyspecific shortcuts. DirectLinks launch software programs that you use
frequently and save you time. More about these later in this guide.
Taking the NEC Ready System Tour
The Ready System Tour takes you around your computer, pointing
out basic system components, your software, and many hardware
attractions. Take the tour to get familiar with your new Ready
computer.
Here’s how to start the system tour:
1.
Double click the NEC Help Library icon on the Windows 95
desktop.
2.
From the shelf, select the NEC Help Center.
3.
From the NEC Help Center screen, click the System Tour
button on the left side of the screen.
Enjoy!
Get acquainted 5
Page 16

Take shortcuts
NEC DirectLinks bring you instantly to the programs that let you get
things done quickly on your computer.
Once you are in DirectLinks, a simple click takes you directly to the
program that lets you
play a video
listen to your favorite music CD
make or pick up phone calls
surf the World Wide Web using NEC’s WebWay™ for
boundless information and fun!
Take shortcuts 7
Page 17
In this section, we’ll show you where you can find your shortcuts and
where they take you.
Locating NEC DirectLinks
You can find the NEC DirectLinks icon on the Windows 95 desktop.
Click the icon and a panel of pictures pops up.
Read on to see where each DirectLink takes you.
8 Take shortcuts
NEC DirectLinks
Page 18
Using NEC DirectLinks
Click the NEC DirectLinks icons to quickly launch your multimedia
and communications programs.
Here’s a description of the NEC DirectLinks:
Video Player
Select Video Player to run video formats such as AVI, MPEG, and
video CDs. Play video clips from the Internet or you can even watch
movies on your computer!
Microphone
Select Microphone to run Voyetra Recording Station. This is where
you go to record voice messages or original musical pieces using
sophisticated-looking recording station software.
Stereo System
Select Stereo System for a suite of programs to perform all of your
personal and professional audio tasks. Use your Stereo System to play
music CDs, adjust your sound system, create custom playlists of
sounds, and more!
Communications
Choose Communications to send and receive faxes (with fax/modem
models), and if you have speakers and a microphone, use your
hands-free speakerphone, use your answering machine, and more!
Take shortcuts 9
Page 19

WebWay
Click the globe to open NEC’s WebWay. Follow the screen
prompts and soon you’ll be on your way, cruising the information
highway!
10 Take shortcuts
Page 20

Find information quickly!
Your system comes with documentation available at your fingertips.
No more hunting for printed manuals. Information about your system
is available right from your Windows 95 desktop.
There are three places you can go for quick information:
NEC Help Library
Merlin’s topics (described earlier in “Get acquainted”)
?
(question mark) or
Help
button in any program you run.
Find information quickly! 11
Page 21
Checking out the NEC Help Library
Double click the NEC Help Library icon on the Windows 95
desktop. A shelf of electronic books and the NEC Help Center are
displayed.
Note: Your NEC Help Library might include other titles.
The following screen and list are representative of the
electronic books in your library.
The NEC Help Center is chock full of comprehensive information
about your Ready computer. See “Using the NEC Help Center” later
in this section for steps on using it.
12 Find information quickly!
NEC Help Library
Page 22

The electronic book titles may include
ABC’s of Windows 95
Microsoft® Works
Microsoft Publisher 97.
Using electronic books
Each volume in the library is an entire guide that you can scroll or
jump through to find the information you need. The books have tabs
and arrows that make them easy to use. You’ll pick it up in no time.
To select an electronic book, click the title you want.
Here’s what to do once you’re inside an electronic book:
1.
Click the tab you want. The first page of the section appears
in a window on your screen.
2.
Click the chapter title you want. The first page of the chapter
appears.
3.
Use the scroll bars on the right side of the page to move
through the information in the window.
Using the NEC Help Center
The NEC Help Center is easy to use. To get there:
1.
Double click the NEC Help Library icon on your Windows 95
desktop.
2.
Click the NEC Help Center volume on the bookshelf. The
NEC Help Center screen welcomes you.
Find information quickly! 13
Page 23
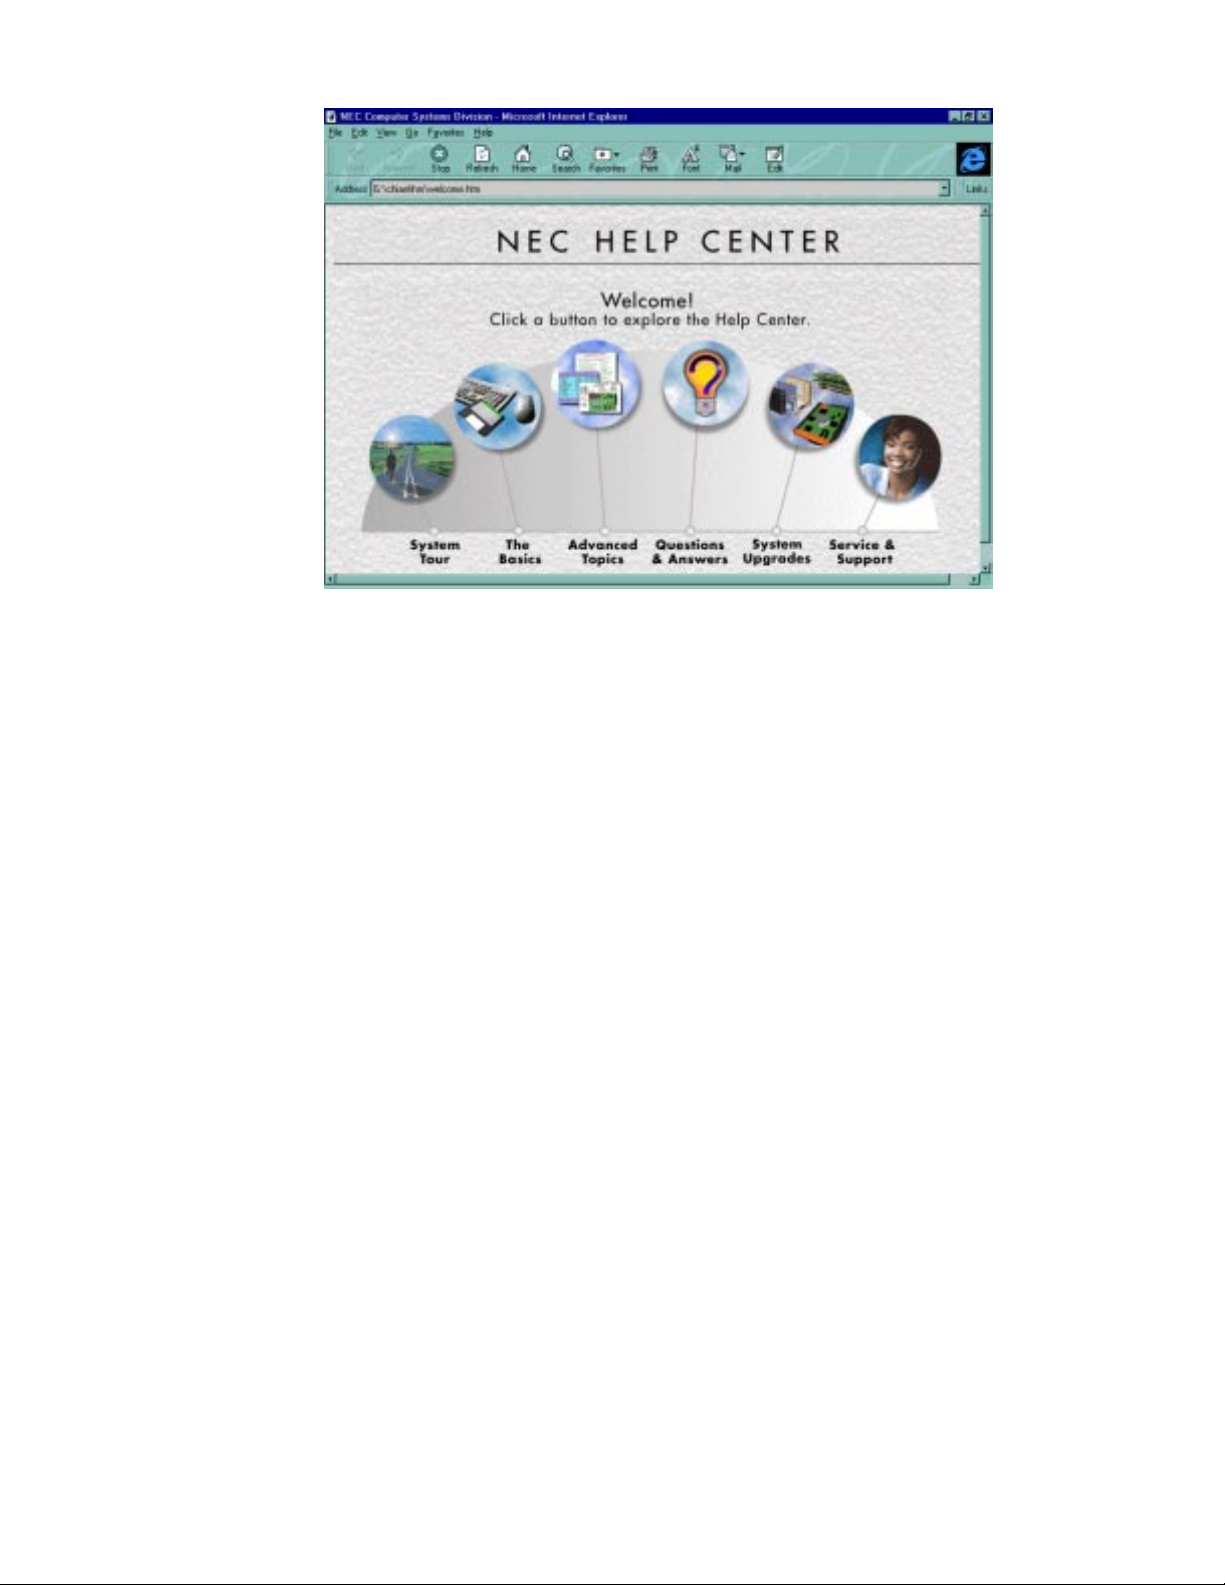
NEC Help Center
3.
Click any topic on the screen and you’ll jump to the contents
for that topic.
Your NEC Help Center supports ActiveX script. If you disabled
ActiveX script, enable it to run the NEC Help Center. In Internet
Explorer, select View from the menu bar, select Options, and select
the Security folder. In the Active control box, check the “Enable
ActiveX scripts” box. Click OK.
14 Find information quickly!
Page 24

To help you find the information you need, the Help Center is
organized by topic and the following categories:
System Tour
The System Tour takes you completely around the computer,
pointing out system features and areas of interest. This brief
introduction should get you familiar with your new Ready
Multimedia Computer.
The Basics
The Basics describes Ready computer features, procedures for
operating your computer, guidelines on system care, and tips
for getting the most out of your Ready computer.
Advanced Topics
Advanced Topics gives you information on controlling system
functions such as power management, system security, and
video drivers. It provides an overview of key features, system
specifications, and system board jumper settings.
Here you can also find NEC utility information including NEC
BIOS Setup utility topics.
Questions & Answers
Questions & Answers lists the most commonly asked
questions about using the Ready Multimedia Computer and
provides their answers. This is a good place to look for
answers to your own questions about the system.
System Upgrades
System Upgrades guides you through choosing and adding
expansion options such as memory, boards, and drives to your
system. It has a quick tour of what’s under the system cover
with plenty of photo-like illustrations.
Find information quickly! 15
Page 25
Service & Support
Go to this category to discover the many 24-hour information
and support services available to you. You can also find
solutions to problems here.
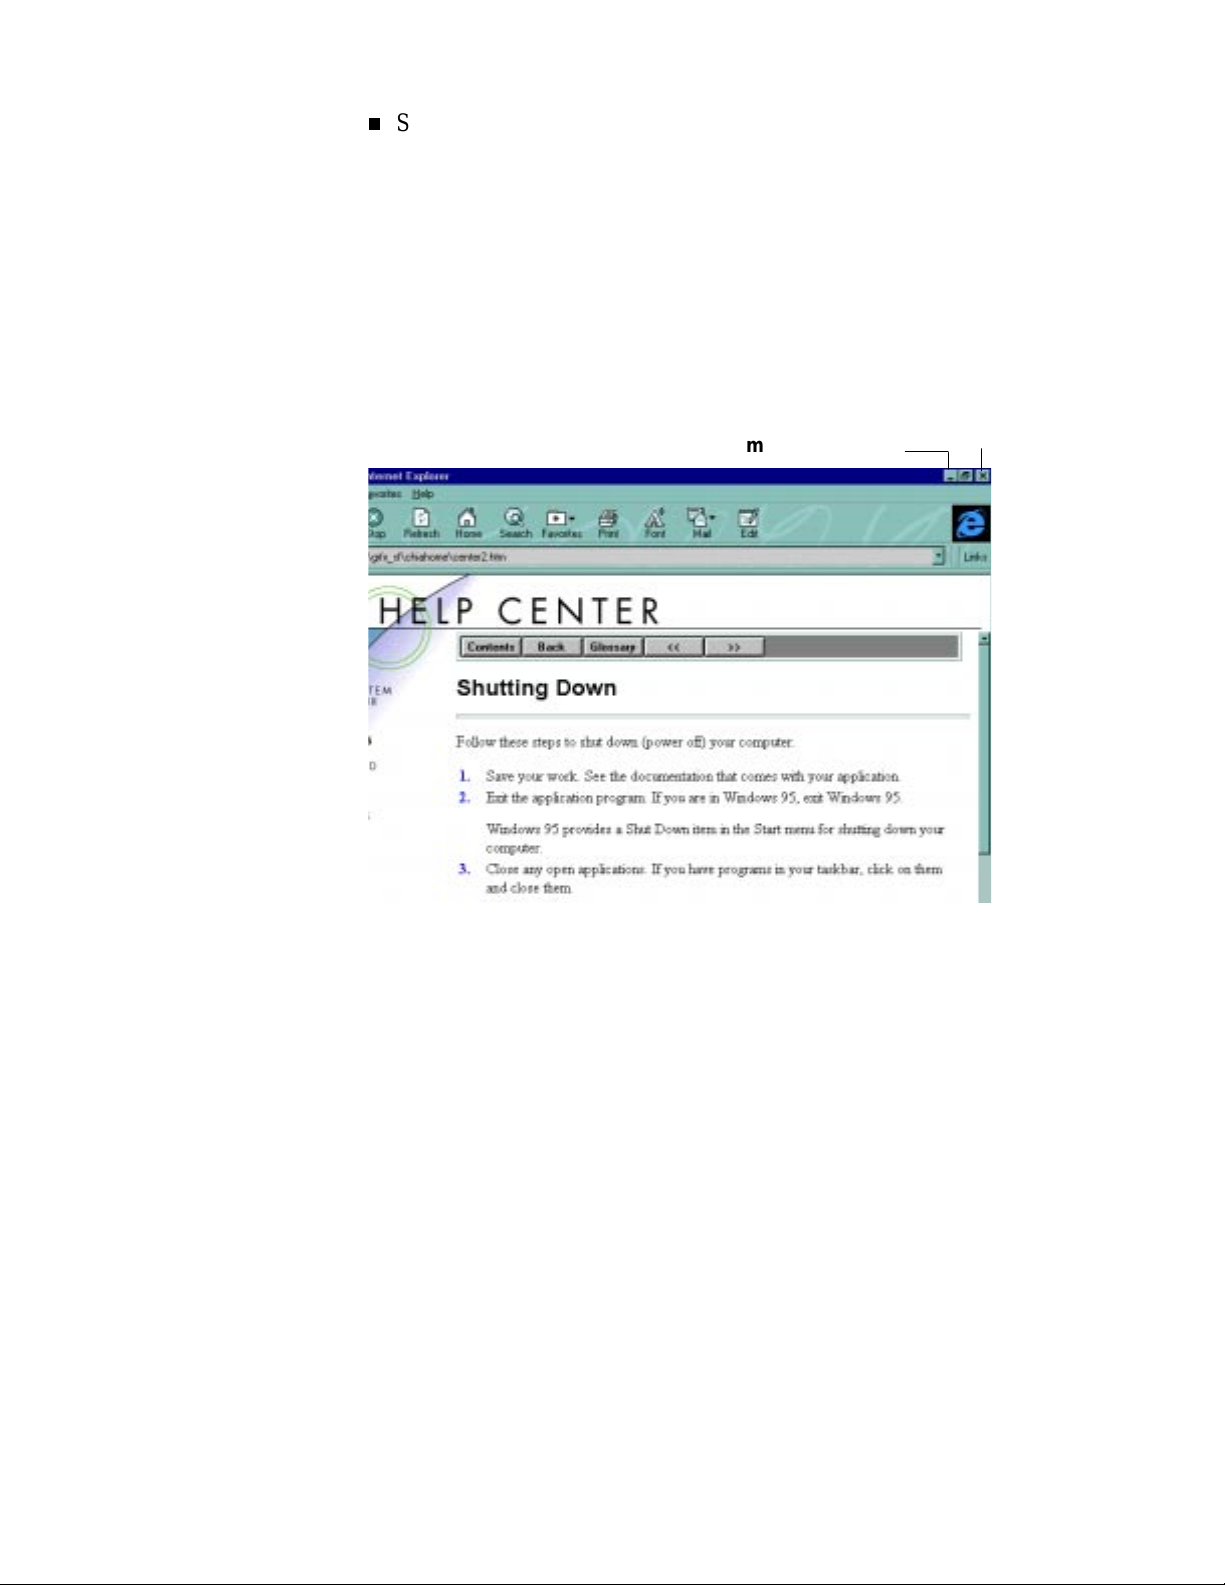
Keeping help handy
To keep your online Help Center handy while you are in other
applications, click the minimize button (-) in the upper right corner of
the window.
minimize button
Minimize button
Clicking the minimize button puts the Help Center in the taskbar.
Anytime you want to switch to it, click the Help Center title in the
taskbar. The Help screen will reopen again.
close
To exit the NEC Help Library, click the Windows close button (x) in
the upper right corner of the screen.
16 Find information quickly!
Page 26

Getting help on everything
The Ready Multimedia Computer provides online help for just about
everything on your system. In addition to Merlin and the NEC Help
Library, you can find help for:
the many application programs that come with your Ready
computer
your Windows 95 operating system.
Help in your applications
Most of your application programs provide extensive online help at
the touch of a button (usually the
Help on the operating system
Windows 95 provides extensive online help and “wizards” to guide
you through procedures. Click the
choose from the several tours and help files listed.
Help
or ? button).
Start
button, select Help, and
Find information quickly! 17
Page 27

Send a fax — in minutes!
If you have a fax/modem model, you can use NEC Connections to
send a fax message. Here’s how to do it. Look at your electronic help
in NEC Connections for more details.
In the following sections, you’ll see quick steps for:
checking your fax banner
sending the fax
receiving a fax.
Send a fax — in minutes! 19
Page 28

Checking your fax banner
By law∗ you must provide identifying information on any fax you
send. This information goes in a fax banner. NEC Connections
provides an easy way to check or create your fax banner.
Note:
the first time you launch NEC Connections. You might have
already entered your fax banner information.
If you haven’t yet provided this information or you want to change
any existing information, use these steps.
1.
Click the NEC DirectLinks Communications icon.
2.
In NEC Connections, select the Fax messages tab on the main
screen.
The Microsoft InBox Setup Wizard appears
3.
Click the
4.
Select the Global tab and then the User tab.
5.
Click the
information you want to appear in the fax banner. (This
information stays in memory until you edit it through the Fax
messages tab.)
∗
The telephone Consumer Protection Act of 1991 makes it unlawful for any
person to use a computer or other electronic device to send any message
via a telephone fax machine unless such message clearly contains in a
margin at the top or bottom of each transmitted page or on the first page
of the transmission, the date and time it is sent and an identification of the
business or other entity, or individual sending the message, and the
telephone number of the sending machine or such business, other entity, or
individual.
20 Send a fax — in minutes!
Settings
Change Fax Settings
button. A series of windows appear.
button. Enter or edit the
Page 29
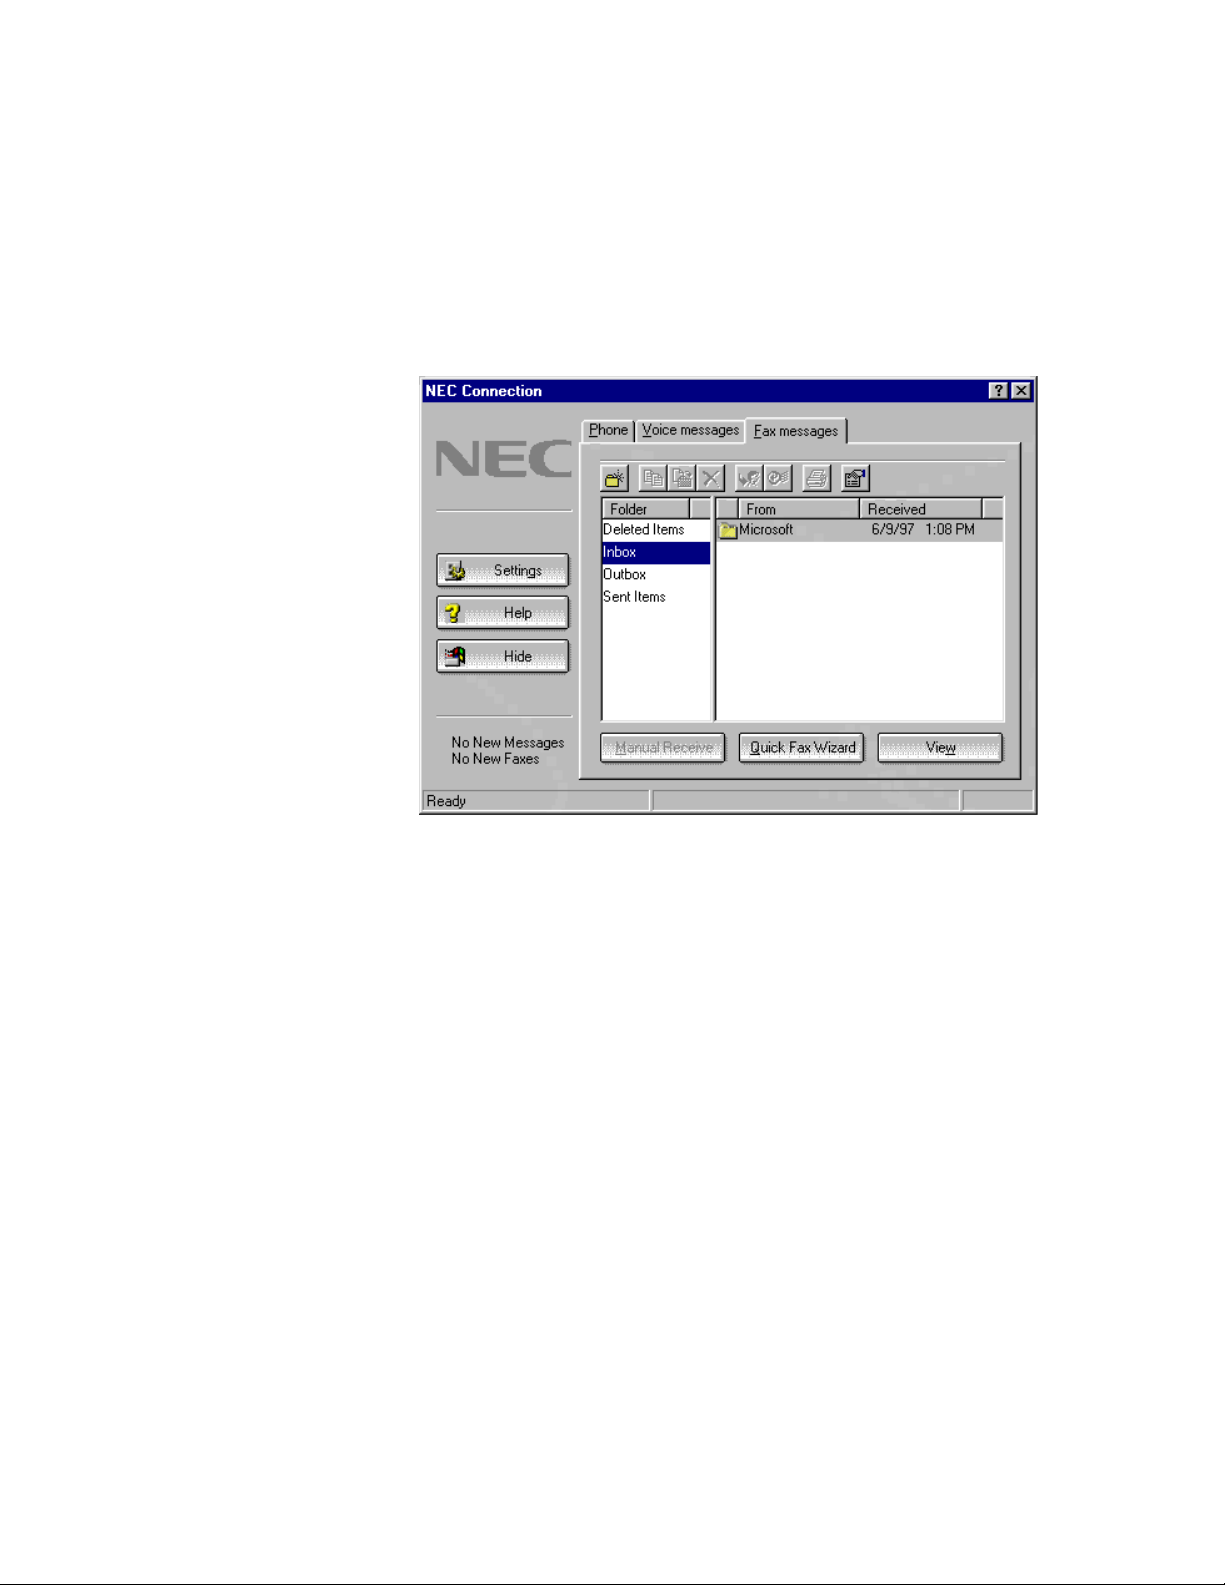
Sending the fax
NEC Connections Quick Fax is a quick and easy way to send a onepage fax. Accessed from the NEC Connections main screen, it is a
standard fax cover page containing the text of your message.
To send a quick fax:
1.
Select the Fax messages tab. The Fax message screen appears.
Fax message screen
2.
Click the
Quick Fax Wizard
button. The Compose New Fax
window appears.
3.
Accept the default location or change the dialog properties
and click the
4.
Enter the name and fax number of the recipient. Click the
Next
button.
5.
Select a cover page type and click
Next
button.
Next
.
Send a fax — in minutes! 21
Page 30
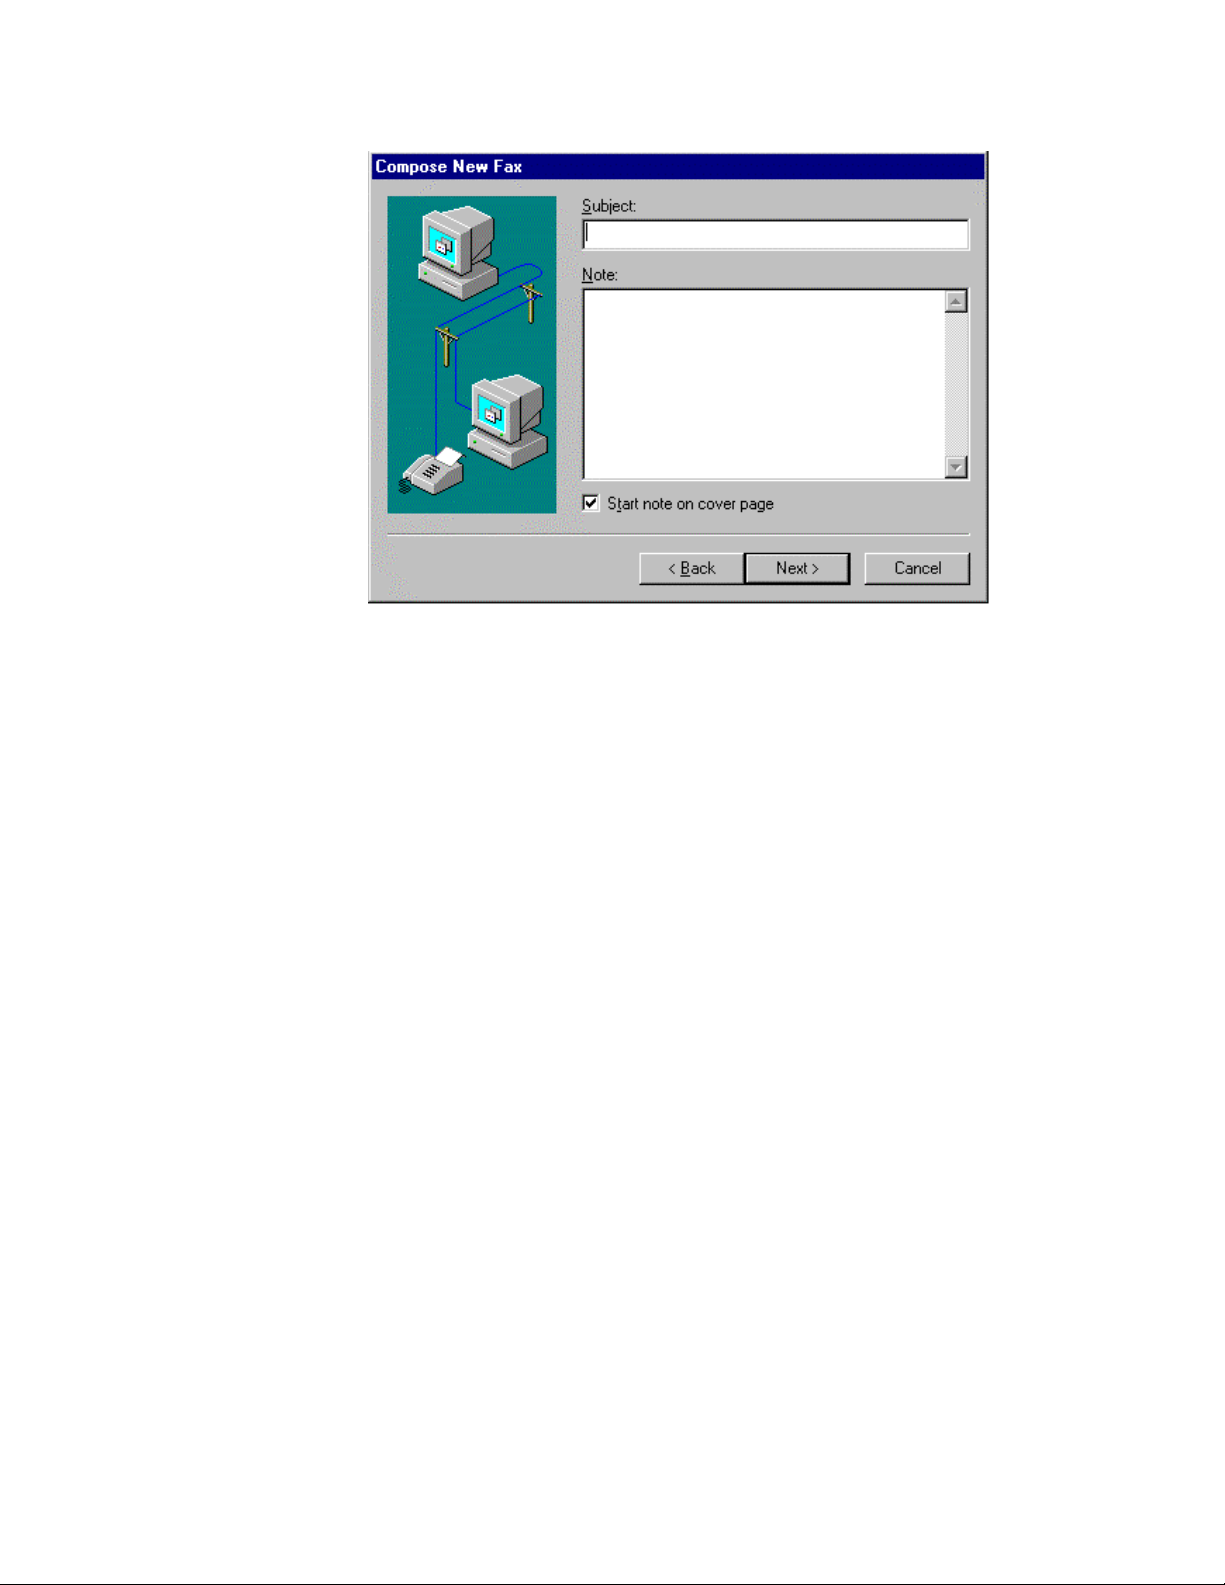
Compose New Fax screen
6.
Enter the title in the Subject field and then click on the large
field and type the text of your message (limited to one page of
text). Click
7.
If you want to attach a document, click
8.
Click
Finish
Monitoring Fax Transmission Progress screen appears.
Receiving a fax
To receive faxes automatically, your Ready Multimedia Computer
must be powered on and NEC Connections must be open. NEC
Connections stores received faxes in the default mailbox. You can
view, print, copy to another mailbox, save to file, or delete the
received fax.
22 Send a fax — in minutes!
Next
.
Next
to attach a file.
when you are ready to send the fax. The
Page 31

Viewing faxes
You can view faxes from the NEC Connections
screen. They’re stored in the
To view a fax from the
message, and click
Fax Viewer then displays the fax message.
Want to know more?
See the NEC Connections help by clicking on ? for additional
information about faxing.
View
Inbox
folder.
Inbox
folder, click
(or double click on the fax message).
New
Fax messages
, select the fax
Send a fax — in minutes! 23
Page 32

Stay in touch
With your Ready Multimedia Computer, staying in touch is easy. If
you have a fax/modem model, use your communications center, NEC
Connections, to make calls, answer calls, take and play voice
messages — all from your computer!
This section provides quick steps for:
using the phone
answering a phone call
checking voicemail answering
playing voice messages.
Stay in touch 25
Page 33

Using the phone
Find your way to NEC Connections by double clicking the NEC
DirectLinks icon and selecting the Communications icon. Or double
click the NEC Connections icon on the desktop. (The first time you
use NEC Connections, you’ll need to enter certain information about
Dial a call manually
yourself. Do this through the Setup Wizard in Settings.)
There are several ways you can use NEC Connections to place a
phone call:
Dial the phone call manually in NEC Connections by clicking
the numbers on the main screen dial pad.
Use Speed Dial to dial a stored number immediately.
Select the phone number from Phone Book and have NEC
Connections dial the call.
You can use one of the following ways to dial the phone number
manually:
No matter what your method, the phone number entered appears in
the digital display in NEC Connections.
Press
Dial/Speaker
To end the connection, click
screen.
26 Stay in touch
Click the dial pad numbers in the NEC Connections main
screen.
Use the keys on your keyboard.
Dial/Speaker
to make the call. After you place the call,
changes to
Hang up
Hang up
.
in the NEC Connections main
Page 34

Dial using Phone Book
Phone Book in
The
you keep in a personal phone book at home or at the office: names,
addresses, company affiliations, phone numbers, fax numbers, etc.
Phone Book automates dialing any of these numbers for you.
You can access Phone Book from the NEC Connections main screen,
search Phone Book, click
the expanded screen. Select the entry to be dialed and click
the main screen.
NEC Connections stores the same information
Phone Book
on the main screen to display
Dial
on
In Phone Book, you can add entries by clicking
dial the number immediately after adding the entry, click
Dial.
click
Dial using Speed Dial
The Speed Dial feature in NEC Connections is a quick and easy way
to place a call to someone you frequently call.
1.
Click a numbered Speed Dial box. A small window appears.
2.
Enter the name and phone number you want to call and store
for later use.
3.
Click OK.
The next time you want to call that person/place, just click the
appropriate
Speed Dial
New
. If you want to
OK
and then
button. NEC Connections dials it for you.
Stay in touch 27
Page 35

Answering a phone call
NEC Connections receives voice, fax, and/or data calls. NEC
Connections receives fax and data messages in their respective
formats and saves them in the Fax messages folder for viewing.
Voice messages, however, can be answered in the following ways:
Click the
Settings
button, select Answer tab, and be sure
“Enable Answering Machine” is checked.
Set NEC Connections to answer the call and to record a voice
message from the caller in the Voice Messages tab.
When NEC Connections answers the call, certain conditions must be
present:
Your NEC Ready Multimedia Computer must be on.
NEC Connections must be open.
Dial/Speaker
The
button turns to
Answer
at the top of the
Phone window. The word “Ready” appears in the lower lefthand corner.
In Settings, click the Notify tab. Select “Incoming Calls
Notification.”
28 Stay in touch
Page 36

Checking voicemail answering
You can use the Voicemail Simulator feature to call the answering
machine without actually placing a call to the computer. This lets you
check that the answering machine is working properly.
To use Voicemail Simulator:
1.
2.
3.
Settings
Click
.
Select the Mailbox tab.
Voicemail Simulator
Click
. A new window with dial buttons
appears on the screen.
4.
Press Simulator Call to initiate a Simulated Call.
5.
Follow the voice instructions as if you were calling from a
remote phone. If you need to enter any numbers, use the
phone keyboard.
6.
7.
Hang up
Press
or # to stop the simulated call.
Close the Simulated Call window.
Stay in touch 29
Page 37

Playing voice messages
You can play voice messages from any of the Voice Messages folders
or from a remote location telephone.
From the Voice messages tab
Here’s how to play a voice message from the Voice Messages folder.
1.
Highlight the message you want to play and click
voice messages through the speakers.
2.
3.
Play All
Click
Click and slide the
the volume.
From remote telephones
You can pick up voice messages from any touch tone telephone.
1.
Dial your phone number and listen to the greeting.
2.
Press the star key (*) at any time during the greeting prior to
the sound of the recording beep.
3.
Follow the recorded instructions to listen to your messages.
Note:
NEC Connections does not require a password to access
messages from a remote telephone. See NEC Connections
help for more information.
Until you establish a password for the mailbox,
Play
to play
to play all the messages in sequence in the log.
Volume
lever in the dialog box to adjust
After accessing your voice messages from a remote telephone, the
number of new messages reverts to
messages. However, messages are not deleted after they have been
played; they are moved to the
30 Stay in touch
Old
0
if there are no new fax or data
folder.
Page 38

Setting a password for mailboxes
Here’s how to set a password for a mailbox within NEC Connections:
1.
Select the Voice messages tab.
2.
3.
4.
Settings
Click
Select the Mailbox tab.
Mailbox Setup
Click
displayed.
5.
6.
Properties
Click
Select “Enable mailbox password” in the “Retrieve Message
Password” section of the dialog box.
7.
Type in a four-digit mailbox password and press
the next field.
8.
Reenter the password and click OK.
Want to know more?
For more information about remote access, see your NEC
Connections help.
For more information about Phone Book, see your NEC
Connections help.
.
. The Mailbox Selections list is
.
tab
to go to
Stay in touch 31
Page 39

Hear the difference!
The sound software on your Ready Multimedia Computer makes it
easy for you to take advantage of your system’s audio functions. With
a speaker set and a microphone, you can play music CDs, adjust the
sound quality to your taste, and, if you’re so inclined, create your
own sounds.
Hear the difference! 33
Page 40

Introducing your sound system
The Ready computer comes with a suite of Voyetra® AudiStation
sound software for creating multimedia programs, listening to your
favorite CD, creating your own music, and more!
AudioStation lets you run your computer like a home stereo
system — its easy-to-use design resembles a home stereo rack. The
rack contains these components: a Power Bar, CD Player, Audio
Mixer, VideoStation, WAV Player, and a MIDI Player.
®
Each component is fully described in AudioStation Help. Just click
To launch AudioStation quickly, double click the NEC DirectLinks
icon on your desktop, then select the Stereo System icon. You can get
to each component from the stereo system rack.
34 Hear the difference!
AudioStation
?.
Page 41

You can also find all of the Voyetra sound software in the Programs folder in the
Windows 95 menu.
Note:
sound software, click the ? in the sound software program.
For detailed information about using your
Playing a music CD
Here’s how to play a music CD:
1.
With the system on, press the open/close button on your
CD-ROM reader.
2.
Place the CD into the CD-ROM reader tray with the print side
up and press the open/close button again. The tray retracts
into the reader.
3.
Press the play button on the CD Player in your sound
software.
Volume slide
controls
Play
Eject
AudioStation CD Player
Hear the difference! 35
Page 42

Pumping up the volume
You can adjust volume from different places, including your:
sound software
speakers, if you have them (integrated on the NEC CS500™
monitor).
From the sound software
With your Stereo System software, AudioStation, you can control
sound right from the Ready screen. You can adjust the volume,
speaker balance, and more with the sound software. Select CD Player
from the stereo rack.
You can bring up the Stereo System software in the following ways:
From NEC DirectLinks — click the speaker icon.
From the Programs menu — point to Voyetra and click
AudioStation.
From the taskbar — double click the speaker icon in the
system tray on your taskbar.
From the speakers
The NEC CS500™ monitor features On-Screen Display (OSD)
controls for adjusting monitor settings, including volume to the builtin stereo speaker set. See the documentation that comes with the
monitor to adjust the volume of the speakers.
If you are using stand-alone speakers, look for a volume knob or
button. See the guide that came with your speakers for information
on how to adjust the volume.
36 Hear the difference!
Page 43

Wander the Web
You can now join the many around the globe who browse, surf, or
cruise the vast Internet World Wide Web. Your Ready computer
provides easy access to the Web through NEC’s WebWay. You’ll
also find comprehensive service, support, tools, and more.
Finding NEC’s WebWay
The first time you open NEC’s WebWay, you’ll be invited to register
on the Internet. Do this by double clicking the WebWay icon on your
Windows 95 desktop. Follow the instructions to register.
Wander the Web 37
Page 44

Thereafter, whenever you want to access WebWay, double click the
DirectLinks icon then select NEC’s WebWay globe icon or just
double click the WebWay icon on the desktop. The NEC home page
opens for you.
If you need help setting up your WebWay account, call
1-800-557-9614
.
Checking what’s on NEC’s WebWay
Here’s what you’ll find on NEC’s WebWay home page:
Daily News
Keep up-to-date on what's going on in the world.
Member Support
Find valuable NEC support and Internet services at your fingertips.
Also click here for online technical support for your Ready computer
as well as for WebWay.
Education
Look here for tours and classes, a library, bookstore, and a virtual
university! Here is all the latest Internet information available.
Software Central
Check out the latest in Internet technology and download free
software.
Neighborhood
Create your own home page on the Internet and meet other WebWay
members.
Web Guide
Discover the best places to go on the Internet for entertainment,
information, and live events.
Search
Start here to find the sites you want on the Internet.
38 Wander the Web
Page 45

Using the navigation buttons
The navigation bar along the left side of the home page contains
buttons with abbreviated names of the options just described. Double
click a button to make selecting an option quick and easy!
Calling for WebWay help
We provide phone support just for the WebWay.
For WebWay account setup
If you need help setting up your WebWay account, call
1-800-557-9614
For WebWay account help
If you need help with WebWay once you’ve set up your account, call
1-206-957-8998
.
.
Using Internet service providers
Fax/modem models come with the latest x2 modem technology,
which means faster transmission speeds. Downloading speeds go as
fast as 56 Kbps (53 Kbps in the U.S.) and uploading at up to
28.8 Kbps. In order to take advantage of this faster technology,
your service provider must be an x2-compatible online Internet
service provider.
See the following list for the major Internet service providers offering
x2 service. Please contact your service provider for x2 support
information and a list of access numbers (surcharges may apply).
Wander the Web 39
Page 46

America Online
America Online (AOL) customers can get the latest
information about downloading at x2 speeds by accessing the
“x2” forum on AOL. In order to download from AOL at x2
speeds, you must be using AOL 3.0 for Windows 95 and must
download new AOL software from the “x2” forum. Call AOL
customer service at 1-800-827-6364.
CompuServe
Call CompuServe customer service at 1-800-336-6823.
Prodigy Internet
Call Prodigy customer service at 1-800-PRODIGY, ext. 3420.
Want to know more?
For the most up-to-date list of x2 Internet service providers,
http://x2.us.com
go to
1-800-5525-URS1 to learn which service providers near you
offer x2 service.
on the Internet. Or call
40 Wander the Web
Page 47

Get customer services ’round
the clock!
NECCSD provides services 24 hours a day. This section guides you
through the variety of services available and their numbers or
addresses.
Get customer services ’round the clock! 41
Page 48

Looking at available services
See the following list of NECCSD services for what they can do for
you. See “Using NECCSD services” later in this section for detailed
information about using these services.
NECCSD FaxFlash™ Service
Automated fax service offers product brochures, installation
procedures, quick reference guides, promotional forms,
troubleshooting information, and more.
U.S. and Canada —
International —
NECCSD Bulletin Board System
1-888-329-0088 (1-888-FAX-0888
1-508-635-6090
.
)
Remote database system containing files that are dedicated to
enhancing the functions of NECCSD products. It also gives you
access to drivers for NECCSD products to be used within various
software applications.
NECCSD on America Online
1-508-635-4706
®
You can find the NECCSD home page if you subscribe to America
Online.
Enter the password,
NECCSD on CompuServe
NEC.
®
You can find the NEC home page if you subscribe to CompuServe
Online.
Enter the password,
42 Get customer services ’round the clock!
Go NECTECH.
Page 49

Email to NECCSD
Send an electronic mail message to the NECCSD Technical Support
Center through a commercial online service or the Internet.
The address is
tech-support@neccsd.com
Fax Service to NECCSD Technical Support
You can fax problems, questions, or other information to NECCSD
Technical Support
The fax number is
NECCSD Technical Support/Customer Service
1-508-635-4100.
NECCSD offers direct technical support through its Technical
Support Center. Direct assistance is available 24 hours a day, 7 days a
week.
1-888-632-8692
Call
.
See “NECCSD Technical Support Center” later in this section for
detailed information about getting toll-free phone support.
NECCSD Warranty Repair Service
The NECCSD repair service is designed to support your warranty
service activity.
Before you call for repair service, see the “Solve problems” section in
this guide to determine if you can solve the problem yourself, within
your company, through your dealer, or with the help of a technician
from NECCSD Technical Support.
If your system requires repair service from NECCSD,
1-888-632-8692.
call
Get customer services ’round the clock! 43
Page 50

Using NECCSD services
The following sections give you detailed information for using:
NECCSD FaxFlash Service
NECCSD Bulletin Board System
NECCSD on America Online
NECCSD on CompuServe
Email/fax services to NECCSD Technical Support
NECCSD Web ftp site
NECCSD Technical Support Center.
NECCSD FaxFlash Service
The NECCSD FaxFlash™ service is a self-help, automated electronic
information service. Use FaxFlash to get up-to-date product
application notes, installation procedures, troubleshooting tips, data
sheets, technical information bulletins, illustrated parts lists, part
numbers, and other information about your system.
Using NEC Connections (in fax/modem models) or a fax machine,
you can obtain information from FaxFlash 24 hours a day, 7 days a
week. Simply call the FaxFlash number in the NEC Connections
program (if you have a fax/modem model) or on your touch-tone
telephone. Order the information you want by following the voice
prompts. FaxFlash automatically faxes the information to you.
44 Get customer services ’round the clock!
Page 51

If you are new to FaxFlash, first order one of the following catalogs.
Each catalog lists the available documents and their document
numbers. Current catalogs include:
Catalog 1, NECCSD Telephone Directory and Online Service
Information
Catalog 3, NECCSD Computer Product Specifications,
Warranty Policy, Ultracare Guidelines, and Sales Information
Catalog 5, NEC ProServa™ and Express Serva Product
Information
Catalog 6, NEC Ready Consumer Desktop Systems
Catalog 7, NEC PowerMate® Commercial Desktop Systems
Catalog 8, NEC Portable Systems (including Versa
®
Notebook and MobilePro™ Handheld computers).
Catalogs 5, 6, 7, and 8 contain technical support information,
including Technical Information Bulletins, Illustrated Parts lists,
Frequently Asked Questions, and other product support documents.
Order information from FaxFlash as follows.
1.
If you have a fax/modem model, be sure that your computer is
on and that NEC Connections is open. If you are using a fax
machine, make sure that it is on. Have the document number
ready for the document you want.
2.
From the NEC Connections phone pad or from your touchtone telephone, enter
508-635-6090
(international).
888-329-0088
(USA and Canada) or
Get customer services ’round the clock! 45
Page 52

3.
Listen to the instructions provided by the voice prompts.
1
Press
if you do not want an introduction to FaxFlash.
Follow the automated instructions for ordering your
document or catalog.
2
Press
if you want an introduction to FaxFlash. Follow the
automated instructions for ordering your catalog or
document.
4.
When prompted, enter your fax number and name.
For international use, first enter the international long distance
access number (
011
), your country code, your area code or
city code, then your fax number.
The information you request will be automatically sent to your fax
machine. Please wait for the ordered document to arrive at your fax
machine before calling to order more documents.
If FaxFlash attempts to send the second order before the first order is
completed, the order may be canceled. After three tries, FaxFlash
assumes that your line is busy and terminates any further processing
of the order.
46 Get customer services ’round the clock!
Page 53

NECCSD Bulletin Board System
If you have access to a modem, you can use the NECCSD Bulletin
Board Service (BBS) to get the latest information on hardware and
software. The BBS allows you to download files (video drivers,
printer drivers, BIOS updates, etc.) for system enhancements and
upgrades.
You can also access the BBS through the CompuServe online service.
Log onto the BBS as follows.
1.
From the Windows desktop, click the
2.
Point to Programs. Point to Accessories and then click
HyperTerminal
3.
Double click the
.
Hypertrm.exe
icon. The HyperTerminal
Start
button.
program appears.
4.
Follow the instructions on the screen to set up your modem.
Click the HyperTerminal help button for information about
dialing the phone number.
If you need to check communications settings, check that the
settings match the following BBS parameters.
Baud rate: select any baud rate that matches your modem
Parity: none
Data bits: 8
Stop bits: 1
Flow control: Xon/Xoff (select Hardware if using 14.4 bps
or higher).
Get customer services ’round the clock! 47
Page 54

5.
Following the HyperTerminal instructions, enter the BBS
phone number
and/or location might require a
Note:
requested to provide information for a new user
questionnaire.
The first time that you use the BBS, you are
508-635-4706
. Your business phone system
9 1
or 1 prefix.
6.
Press
7.
Enter your first name, last name, and password. Press
Enter
twice.
Enter
after each.
8.
Follow the screen prompts until the Main Menu is displayed.
9.
At the Main Menu, select
Conference
10.
From the Main Menu, press
11.
At the File menu, select
1
for the desktop conference.
J
to join a conference. Select
F
and
F
for a list of downloadable files.
Enter
for the File menu.
Follow the prompts to select a file for downloading.
!
Executable files automatically format your diskette when
you download files f rom the BBS. Formatting destroys any
data on the diskette. Before you download files from the
BBS, check that you do not have information on the
diskette that you need.
CAUTION
48 Get customer services ’round the clock!
Page 55

After you complete downloading your file, log off the BBS as
follows:
1.
2.
3.
Press
Press
Press
Enter
G
Enter.
(to continue).
(command for Goodbye/Hangup).
NECCSD on America Online
If you subscribe to America Online, you can use the service to obtain
information about NECCSD and its products. You can use America
Online to email technical questions to NECCSD Technical Support
staff, post technical questions and messages on the Message Board,
and access the NECCSD Software Library to download files.
Use the following steps to access America Online and NECCSD
online information services.
1.
Log onto America Online.
2.
At the opening screen, click
Go
To
in the Main Menu.
3.
At the Go To menu, click
4.
At the prompt, type
5.
At the NEC menu, double-click one of the following topics,
NEC
Keyword
and press
.
Enter
.
then follow the prompts:
About NEC
Terms and Conditions
News
Product Information
Get customer services ’round the clock! 49
Page 56

Questions and Answers
NEC Promotions
Message Board
Software Library.
6.
Exit anytime by double-clicking the rectangle in the upper left
corner of the screen.
NECCSD on CompuServe
If you subscribe to CompuServe, you can use the service to obtain
information about NECCSD and its products. You can use
CompuServe to email technical questions to NECCSD Technical
Support staff, post technical questions and messages on the Bulletin
Board, and access the NECCSD BBS.
Note:
NECCSD Bulletin Board from CompuServe. You must call
the NECCSD Bulletin Board directly using the procedure
described earlier in this section.
You cannot download information from the
Use the following steps to access CompuServe and NECCSD online
information services.
1.
Log onto CompuServe.
2.
At the opening screen, click the Go button, then type
NECTECH
3.
At the NEC menu, double-click one of the following topics,
at the prompt, and click OK.
then follow the prompts:
50 Get customer services ’round the clock!
Page 57

NEC Bulletin Board
Information About This Service
Access NEC BBS
Access CompuServe Information Services
Exit.
4.
Exit anytime by double-clicking on the rectangle in the upper
left corner of the screen.
Email/fax technical support service
The NECCSD Technical Support Center offers technical support by
email over the Internet network if you have a modem. The Internet
address is:
tech-support@neccsd.com
You can also fax technical questions to the NECCSD Technical
Support Center if you have access to a fax machine or fax/modem.
The fax number is:
(508) 635-4100
When using the email or fax support service, you should include the
following words in the subject field for prompt response from the
appropriate technical person:
Desktop
Monitor
CD-ROM
Printer
Notebook.
Get customer services ’round the clock! 51
Page 58

Internet
You should provide as much specific information about your
questions as possible. Also, if you are sending a fax, please include
your voice telephone number and your fax number with the question.
You will receive a response to your questions within one business
day.
If you have a modem, you can access the NECCSD Home Page on
the Internet World Wide Web. You can do this through a commercial
online service or through your Internet account. The NECCSD Home
Page contains general information about NECCSD products.
You can also use the Internet to access the NECCSD ftp (file transfer
protocol) site to download various files (video drivers, printer drivers,
BIOS updates). The files are essentially the same files as on the
NECCSD Bulletin Board Service.
To access the World-Wide-Web NECCSD Home Page, enter the
following Internet Uniform Resource Locator (URL) through your
service:
http://www.nec-computers.com/
To access the NECCSD ftp site, enter the following Internet ftp
address through your service:
ftp.nectech.com
Once in the file menu, follow the prompts to choose and download
the file(s) you want.
52 Get customer services ’round the clock!
Page 59

NECCSD Technical Support Center
NECCSD also offers direct technical support through its Technical
Support Center.
Direct assistance is available 24 hours a day, 7 days a week. Call the
NECCSD Technical Support Center at
following support:
System hardware — toll-free phone support is limited to the
length of the standard Ready warranty.
Preinstalled software — toll-free phone support for
90 days from the time of your first call to the NECCSD
Technical Support Center.
1-888-632-8692
for the
For telephone software support
support
after
the warranty period, support is available for $30.00 per
after
the initial 90 days or hardware
incident. You can charge these fees to either a MasterCard or VISA
credit card.
Please have available your system’s name, model number, serial
number, and as much information as possible about your system’s
problem before calling.
See the many NECCSD electronic services described in this section
for additional ways of getting help and information.
Get customer services ’round the clock! 53
Page 60

Find answers to questions
You may have a question from time to time about using your
computer. Find some typical questions and their answers arranged by
these topics:
Mouse
Monitor
Diskette drive
CD-ROM reader
Faxing
Modem
Find answers to questions 55
Page 61

Mouse
Telephone/answering system
Multimedia.
Why doesn’t anything happen when I double click?
You might not be clicking fast enough. Shorten the interval between
the first and second click.
Or, your mouse might need cleaning. (See the cleaning instructions
later in this section.)
How do I select a word or object?
Place the cursor on the object or the word and double click. The
object is then highlighted.
How do I drag an object?
To drag an object, point to and highlight the object, press and hold
the left mouse button, and move the mouse to the new location. The
object should follow the pointer as you move it and settle in the new
location when you let go of the left mouse button.
How do I change mouse sensitivity and double-click speed?
You can do this in the Windows 95 Control Panel. Point to the
Mouse icon and double click. A Mouse Properties window appears.
Click the Motion tab to adjust the mouse speed. Click the Buttons tab
to adjust the double click speed. You can test your double click
setting by double clicking on the test box. Click
changes.
What do I do if I lose the mouse pointer on the screen?
If your mouse pointer disappears, move your mouse in wide circles to
bring it back into the screen.
56 Find answers to questions
Apply
to accept the
Page 62

Why am I having trouble moving the mouse pointer?
Your mouse ball might need cleaning. To clean the mouse ball, turn
off the computer and unplug the mouse cable. Turn the mouse over
and remove the round disc to release the ball. Rinse off the ball with
water and a
mouse cavity with a dry cotton swab. Replace the mouse ball, secure
the disc, and plug the mouse cable into your computer again.
Or, dirt may have accumulated on your mouse pad. Clean off the
grime and try again.
How can I change my mouse buttons for left-handed use?
You can switch the right and left buttons on your mouse in the
Windows 95 Control Panel. Point to the Mouse icon and double
click. A Mouse Properties window appears. In the Buttons tab, select
Left-handed in the Button Configuration box. Notice the right and left
button configuration change. Click
mild
detergent. Dry it thoroughly. Clean the inside of the
Apply
to accept the changes.
Monitor
Why is my monitor “flickering?”
A low refresh rate or the lighting in your area can cause flickering.
To select the correct refresh rate, or any other video attribute, right
click the Windows 95 desktop and click Properties. The Settings tab
on the Display Properties sheet offers various setup features for your
video display.
You can select the resolution, number of colors, and monitor type.
Selecting the monitor type sets the refresh rate for your monitor.
Select Advanced Topics and “Changing Video Drivers” in your NEC
Help Center for information about changing video attributes.
Find answers to questions 57
Page 63

Why doesn’t anything display on my monitor screen when I
boot my system
?
The problem might be a loose video cable connection. Check that
your video cable from the monitor to the computer is tightly secured.
If the monitor power indicator is not lit, turn on the monitor power.
Check the power cable connection from the monitor to a power
outlet.
Check the controls for contrast and brightness on your monitor.
Why is the image scrolling up on my monitor screen?
A loose video cable connection, a bent video cable pin, or a video
setting can cause a monitor to lose synchronization. Be sure your
system is set correctly for your monitor. Select Advanced Topics and
“Changing Video Drivers” in your NEC Help Center for information
about changing video attributes.
Where can I get video drivers for my monitor?
You can get Windows video drivers by clicking the Windows 95
desktop, clicking Properties, and selecting the Settings tab on the
Display Properties sheet.
Diskette drive
Why can’t I boot from the diskette drive?
To boot the system from the diskette drive, be sure that you have a
diskette containing operating system files in the diskette drive (A).
The system looks for the operating system files first in drive A, then
in the hard disk (drive C).
58 Find answers to questions
Page 64

What happens if I leave a diskette in my diskette drive?
Shutting down your system with a diskette in the diskette drive can
damage the data on the diskette and the diskette drive itself. Always
remove a diskette before powering off.
What type of diskettes do I use in my diskette drive?
Your system ships with a 1.44-megabyte (MB) diskette drive. Use
3 1/2-inch high density (HD) diskettes. These diskettes are also called
double-sided, high-density (DSHD) diskettes. You can store 1.44 MB
of information on these diskettes.
Your diskette drive can also use double-sided, double-density
(DSDD) diskettes. These diskettes hold 720 kilobytes of data —
about half the amount of data that 1.44-MB diskettes hold.
CD-ROM reader
What is the drive designation letter for the CD-ROM reader?
The standard CD-ROM reader is assigned as drive Q. This letter can
change depending upon your configuration. You can find the letter
next to the CD-ROM icon in My Computer or in Windows Explorer.
How do you play a music CD?
Insert the CD into the CD-ROM reader. Open your AudioStation
sound software. Select CD Player and click the Play (¾) button.
What happens if I inadvertently leave a CD in my CD-ROM
reader and power off?
This does no harm to either the CD reader.
What can damage a CD?
Scratching the surface or leaving a CD in the sun or on a hot surface
can damage a CD.
Find answers to questions 59
Page 65

Faxing
Why doesn’t my system see the CD-ROM reader?
Be sure to use the appropriate drive designation. The CD-ROM
reader is assigned as drive Q.
Why doesn’t my CD-ROM reader read my disc?
Make sure the disc is inserted in the CD tray with the label side up.
Also make sure you are not trying to launch a data CD with sound
software, or a music CD with a productivity software application.
The following questions apply to fax/modem models.
How do I send a fax?
You can send a fax through the NEC Connections software on your
system. Access it by clicking the NEC Connections icon on your
Windows 95 desktop. In NEC Connections, click the Fax tab. See
“Send a Fax — in minutes!” earlier in this guide or go to the online
help in NEC Connections.
What do I need to know about my modem?
You should know the speed of your modem. This model of Ready
comes with a 53-Kbps modem (56-Kbps outside the United States).
But the fax message travels between your computer and the
destination fax machine at a transmission speed of 14.4 kilobits per
second.
You also need to know the location of your modem connectors so
you can plug in your phone or data line. See the
Setup
for this information.
See also the “Modem” questions in this section.
60 Find answers to questions
NEC Ready Quick
Page 66

Modem
The following questions apply to fax/modem models.
Where is the modem in my computer?
The modem is a fax/modem/sound board in your computer. Look on
the back of the computer for the fax/modem port to locate the board.
See the
What can I do with my computer's modem?
Your Ready computer’s data/fax modem and NEC Connections
software let you send and receive files (faxes, email, and attachments)
to and from other personal computers. You can get a data download
at 53Kbps (56Kbps outside the U.S.). When you send data, it
transmits at 28.8Kbps.
The modem also makes it possible for you to access online services
worldwide at any time, 24 hours a day. The modem on your Ready
computer uses the latest x2 technology.
NEC Ready Quick Setup
for an illustration
.
How do I find my data communications software?
Click the NEC Connections icon on the Windows 95 desktop or use
the DirectLinks Communications icon. See the online help for detailed
information.
What are the advantages of x2 modem technology
The x2 technology provides high-speed downloads from the Internet
and other online services over regular phone lines, makes streaming
video move more smoothly and audio files sound more realistic, and
it’s supported by many major Internet service providers.
Find answers to questions 61
Page 67

Telephone/answering system
The following questions apply to fax/modem models.
Where is the telephone in my computer?
The telephone is a preinstalled fax/modem/sound board and
communications software in your computer.
How do I find the software for telephone functions?
You can access telephone functions by launching NEC Connections.
When would I need more than one voice mailbox?
A different mailbox is useful if you have other people using your
telephone. You can set up a mailbox for each person using the
telephone. You can set up a greeting that identifies the mailbox for
each user.
What happens to mail messages?
Mail messages are stored on the hard disk and take up hard disk
space, so you need not leave your computer on. You should delete
unwanted messages.
Should I leave my computer on to receive voice mail?
Yes. You should use power management features to conserve energy
and lower costs when the system is not in use. Check that your
system is set for a timeout appropriate for your work. See “Changing
Power Management Settings” in the Advanced Topics category of
your NEC Help Center.
62 Find answers to questions
Page 68

Multimedia
How do I play a music CD?
Insert the CD into the CD-ROM reader, label side up. Double click
the DirectLinks icon and select the Stereo System (speaker) icon to
open AudioStation. Select CD Player and click the Play button (¾).
See the online help for AudioStation.
How do I get to my multimedia sound software?
You can quickly launch AudioStation sound software by double
clicking the NEC DirectLinks icon on the desktop and selecting the
Stereo System (speaker) icon.
Why don’t I get sound from my speakers?
Check the cable connections. See the Quick Setup poster that comes
with your computer.
How do I raise the speaker volume? The volume is too low.
If you have the NEC CS500™ monitor, adjust the speaker volume
control through the On-Screen Display. If you have stand-alone
speakers, adjust the speaker volume control. See the documentation
that comes with your monitor or speakers.
You can quickly change speaker volume in your sound software by
double clicking the speaker icon on the taskbar at the bottom of the
screen.
Or you can change speaker volume and other sound functions in the
AudioStation sound software. You can access AudioStation by
double clicking the NEC DirectLink icon on your desktop and
selecting Stereo System.
Find answers to questions 63
Page 69

How do I get sound from both speakers? I have sound coming
from only one speaker.
Use the Mixer module in your AudioStation sound software to
balance the sound. You can access AudioStation by double clicking
the NEC DirectLink icon on your desktop and selecting Stereo
System.
How do I control sound on my multimedia system?
The Mixer component in your AudioStation sound software lets you
set volume levels for all input and output devices. The Audio Mixer
component has controls for functions such as balance, input levels,
and equalization.
What is SRS 3D Sound?
SRS, also called surround sound, is a Sound Retrieval System
®
that
goes beyond stereo sound. It creates a three-dimensional sound image
with only two conventional speakers. Using prerecorded music, it
retrieves the special information and restores the original threedimensional sound field. The reproduced sound is much closer to a
live performance.
What is MPEG?
MPEG is a compression/decompression standard developed by a
professional video group called the Motion Picture Experts Group.
MPEG produces full-screen, broadcast-quality digital video. This
basically means viewing movies on your computer.
How do I play an MPEG title?
Double click the NEC DirectLinks icon, then select Stereo System.
Click the Video Player module. Select video from the Playlist and
click the Play button (¾). See the online help for information about
using Video Player.
64 Find answers to questions
Page 70

Solve problems
Once in a while you may encounter a problem with your Ready
system. You may be able to solve the problem yourself!
An automatic checking program tests its components when you turn
the system unit power on. If there is a problem, you’ll see an error
message. If this happens, follow any instructions on the screen.
If screen messages don’t help or an error message does not appear,
use the information here to determine and fix the problem.
Look through this section at the first sign of trouble. It’ll help you in:
determining the problem
considering solutions to common problems
Solve problems 65
Page 71

clearing a password
getting help
understanding the NECCSD warranty repair service.
Determining the problem
Review the following problem checklist for possible solutions.
Is the power switch on for the computer and any
connected peripherals (monitor, printer)?
Check that all power switches are on. Also check the power
strip, if you’re using one.
Is the computer and its peripherals connected to a
working AC power outlet or surge protector?
Check the outlet or surge protector by plugging a lamp into
the outlet or surge protector.
66 Solve problems
Are all cables and power cords connected securely?
Check that all cables and power cords are securely connected.
Is the monitor screen blank or is the display hard to
read?
Check that the monitor is on. Adjust the brightness and
contrast controls on the monitor.
Move your mouse or press a key to bring your system out of a
power management mode.
Page 72

Was a Non-System Disk error message displayed when
you started the system?
If you are booting from the hard disk, check to see if you have
a diskette in the diskette drive. Remove the diskette from
drive A and restart the system.
If you are booting from the diskette drive, the diskette may
not be a bootable diskette. Replace the diskette with a
bootable diskette with system files. See your operating system
documentation to create a bootable diskette.
Is your mouse or keyboard not responding?
You may have connected the mouse and keyboard after
turning on your system. Turn the system off, make sure the
mouse and keyboard are connected, and then turn the system
back on.
Also check that the mouse and keyboard cables are attached
to the correct connector.
Does your system fail to recognize the CD-ROM?
Your drive designation may be incorrect. The default setting
for your CD-ROM reader is drive Q. If you have added hard
disks to your system, the drive Q assignment might be
different. Run Windows 95 My Computer to check the drive
assignments.
Solve problems 67
Page 73

Solving common problems
Look here to match your problem area and review the possible causes
and solutions.
When trying to solve problems, remember to note what the system
was doing when the problem occurred and what you tried to do to
correct the problem. This information is useful if you later ask for
help.
System problems
No power and power lamp not lit
Check that the power cable is plugged into the system power
socket. Check that the other end of the cable is plugged into a
live, properly grounded AC power outlet.
System does not boot and error message displayed on
screen
68 Solve problems
Run the Setup Utility. Check that the parameters are set
correctly, particularly if you just installed an option.
System sounds continuous beeps
Turn the system off, wait at least five seconds, and turn the
system on. If the beeps continue, call your NECCSD dealer or
NECCSD Technical Support.
System does not boot from hard disk
The system tries to start from the diskette drive before it starts
from the hard drive. Remove the diskette from the diskette
drive.
Run the Setup Utility and check the Boot parameter settings
to verify that the initial boot parameter is set for hard drive C
and not for a diskette drive.
Page 74

System performance appears sluggish
Check that your system is set for optimal operation. See your
operating system documentation.
Check the memory requirements of your software
applications. If required, install additional memory.
If you added optional memory, check that you correctly
installed the memory modules (see “System memory” in your
System Upgrade and Reference Guide
System password forgotten
Clear the password and reset it. See “Clearing Your
Password” in this guide.
Diskette drive problems
Check the following problems to review the possible cause and
solution.
).
Diskette won’t load
Check that the diskette is being loaded correctly (label side up
with arrow end first).
Check that the system and monitor power lamps are on and
the power-on screen appears.
Check that the diskette is formatted. If not, format it. See
your operating system documentation.
Check that the copy protect tab on your diskette is closed.
If the diskette drive busy lamp does not light when you load
the diskette, try a different diskette. If this loads, the problem
is in the software.
Solve problems 69
Page 75

Non-System Disk or Disk Error message displayed
If you are booting from the diskette drive, insert a diskette
with system files into drive A.
If a bootable diskette does not boot, use the Setup Utility to
verify that the initial boot parameter is set to diskette drive A
and not to a hard disk.
Monitor problems
Monitor screen is dark
Check that the monitor power cable is connected to the
monitor and a power outlet, the monitor signal cable is
connected to the system, and the brightness and contrast
controls are adjusted.
Press the space bar or move the mouse to take the system out
of sleep mode.
70 Solve problems
Distorted image appears on your monitor screen
Adjust the monitor’s video controls. If this does not help, turn
the monitor off for several seconds, then back on.
There is constant movement on the screen
A magnetic field is affecting your monitor. Move any devices
(fan, motor, another monitor) that generate magnetic fields
away from your monitor.
The screen display is fuzzy or flickering; graphics
characters or garbage appears on the screen
.
Check that your monitor is set up correctly and that all
connections have been made.
Page 76

Check that the video refresh rate and video driver are correct.
Go to your NEC Help Center. Choose Advanced Topics and
Changing Video Drivers.
Keyboard/mouse problems
Image appears on screen but nothing happens when
you use the mouse or keyboard
Tighten the keyboard or mouse cable connection.
If this does not help, turn off the system, wait five or more
seconds, and turn on the system.
CD-ROM reader problems
The system does not see the CD-ROM reader
The drive designation is wrong and should be changed. The
default drive designation for the CD-ROM reader is drive Q.
If you added hard disks to your system, the drive designation
might have changed.
The CD-ROM reader is not reading a disc
If you’re using the CD-ROM reader, check that the disc is
inserted in the CD tray with the label printed side up.
Check that the disc is a data disc, not a music disc.
Try a different disc to see if the problem is limited to one disc.
The CD-ROM reader does not play music CDs
Use your AudioStation sound software.
Solve problems 71
Page 77

Speaker problems
No sound from the speakers
Check that the speaker cable is tightly connected to the line
out jack at the rear of the system.
If you have the NEC CS500 monitor, adjust the sound
through the On-Screen Display controls. See the
documentation that comes with the monitor.
If you have stand-alone speakers, adjust the volume control
on the speaker set.
Adjust the volume control through your sound software.
Speaker volume is too low
Adjust the volume control on your speaker set, through sound
software, or if you have the NEC CS500 monitor, through the
On-Screen Display controls.
Sound is only coming from one speaker
Balance the speaker output by adjusting the balance in the
sound software (see the sound software help).
Microphone problems
You get no response from the microphone.
Check that the microphone cable connector is tightly
connected to the microphone jack on your computer.
Microphone response is weak.
Adjust the microphone level through your sound software.
72 Solve problems
Page 78

Printer problems
You set up your printer with your Ready Multimedia
Computer and the printer does not perform as expected
First check the instructions that come with the printer. Be sure
that you’ve installed the necessary printer drivers on your
system.
If printer drivers did not come with the printer, contact the
printer manufacturer for the latest printer driver.
Clearing your password
If you forgot your password, use the following procedure to clear
your current password and to set a new one.
1.
Power off and unplug the system and any peripherals.
!
The system power must be off before removing the side
panel and changing a jumper setting.
WARNING
2.
Remove the system unit cover (see “Taking off the cover” in
the System Upgrade and Reference Guide).
3.
Locate the Password Clear jumper on the system board. (See
“Clearing your password” in the System Upgrade and
Reference Guide).
You might need to remove any installed expansion boards to
access the jumpers (see “Expansion boards” in the System
Upgrade and Reference Guide).
4.
Set a jumper on the Password Clear jumper pins.
Solve problems 73
Page 79

5.
Replace the system unit cover (see “Replacing the cover” in
System Upgrade and Reference Guide
the
6.
Connect system power cables and external devices.
7.
Power on the system. The system boots.
8.
Power off, unplug the system and external devices, and
).
remove the system unit cover.
9.
Move the jumper block to the Password Enabled jumper
pins.
10.
If you removed any expansion boards, replace them (see
“Expansion boards” in the
Guide
).
11.
Replace the system unit cover. Connect the cables and
System Upgrade and Reference
external devices. Power on the system.
12.
Run Setup to set a new password (go to Advanced Topics
in the NEC Help Center and select Setting Security
Features.)
Cleaning the mouse
1.
Power off the computer and unplug the mouse cable.
2.
Turn the mouse over and remove the mouse ball cover to
release the ball.
3.
Rinse off the ball with water and a
thoroughly.
4.
Clean the inside of the mouse cavity with a dry cotton swab.
5.
Replace the mouse ball, secure the cover, and plug the mouse
cable connector into your computer again.
74 Solve problems
mild
detergent. Dry it
Page 80

Getting help
If you tried fixing problems yourself and weren’t successful, you may
want to try getting help within your own company or from the
NECCSD dealer from whom you bought the system.
Getting help from your company
If you are in a company, the best source of help may be internal. Your
company may have designated central support personnel to whom
you can go when you have problems.
Getting help from your NECCSD retailer/dealer
The NECCSD dealer from whom you purchased your system is a
good source of help and should be contacted. The dealer is backed by
complete support resources and programs within NECCSD.
Getting help from NECCSD
If you have a problem that you cannot resolve yourself either within
your company or through your NECCSD dealer, help is available
from NECCSD Technical Support.
Direct assistance is available 24 hours a day, 7 days a week.
Call Technical Support at
Preinstalled applications — toll-free phone support for the
software included with your computer for 90 days from the
date of original purchase.
System hardware — toll-free phone support for hardware is
limited to the length of the standard Ready warranty.
1-888-632-8692
for the following support:
Solve problems 75
Page 81

For telephone software support
support
after
the warranty period, support is available for $30.00 per
after
the first 90 days or hardware
incident. You can charge these fees to either a MasterCard or VISA
credit card.
Before calling, please have ready:
your system name (Ready)
model number
serial number
purchase date.
Also have ready as much information as possible about the problem
you are having, including any error messages that occurred.
Technical Support offers several ways for you to get free help or
information about your computer. Free support from NECCSD
includes Technical Support by email or fax. See “Email/fax technical
support service” in this guide for information about NECCSD
electronic services.
NECCSD warranty repair service
NECCSD repair service is designed to support your warranty service
activity.
Before you call for repair service, see the previous sections in this
section to determine if you can solve the problem yourself, within
your company, through your dealer, or with the help of a technician
from NECCSD Technical Support.
If your system requires repair service from NECCSD, call
1-888-632-8692
76 Solve problems
.
Page 82

Ready product recovery CD to
the rescue!
What do you do if you have system problems and you’ve tried all the
recommendations in “Solve problems?” Reach for your NEC Ready
Series Product Recovery CD and see the following sections for
information about using it. You’ll find information about:
checking out your recovery CD
selecting system recovery options
testing your computer
restoring system software.
Ready product recovery CD to the rescue! 77
Page 83

Checking out your recovery CD
The Product Recovery CD contains the software you need to:
test your system components
completely restore your system to its shipping configuration.
The NEC Ready Series Restore diskette also comes with the Ready
computer to restart your system for recovery procedures.
Selecting recovery options
The following guidelines should help you decide which recovery
option you should use.
Use the R ec o ve ry C D a s a la st re so rt wh e n yo ur syst e m
is malfunctioning.
sure you have tried everything else to solve the problem.
Be sure to see “Solve problems” in this guide for
troubleshooting recommendations.
For additional assistance, contact NECCSD Technical
Support.
Test Your System
The Recovery CD includes a Test Your System option that tests
system components, such as the system board, modem, sound board,
monitor, and printer. The program determines if these components
are working properly. Run this program before choosing other
recovery options.
!
Before you use the Recovery CD, be
CAUTION
78 Ready product recovery CD to the rescue!
Page 84

Format and Restore Your Hard Disk
You might need to choose the
Disk
option. The Format and Restore Your Hard Disk option
Format and Restore Your Hard
removes all of your software and then reloads it, restoring your
software and your computer’s hard disk to their original
configuration.
support before you use this option
We strongly recommend you call for technical
.
The Format and Restore Your Hard Disk option provides a full
system recovery. Use the Format and Restore Your Hard Disk option
last
as a
resort when your preinstalled software becomes unusable or
you can’t reboot from the hard disk. This option requires booting
from the Recovery CD and the Restore diskette.
The Format and Restore Your Hard Disk option
provides a
full
system recovery. This means you’ll be able to
restore your system to its original factory-shipped state.
reformats the standard hard disk C and
erases all information
on the drive.
then restores files on drive C from the Product Recovery CD.
Before
you select Format and Restore Your Hard Disk,
you
need to
back up all your data files to an external storage device
(diskette, tape, or cartridge drive). Format and Restore Your
Hard Disk removes all data.
be prepared with software installation diskettes of any
software application programs that you installed yourself.
Ready product recovery CD to the rescue! 79
Page 85

After
System Recovery,
restore to the hard disk all the data files that you backed up
before System Recovery.
reinstall any software application program that you installed
yourself.
Testing your system
Here’s how to test your system components:
1.
With system power on, insert the NEC Ready Series Product
Recovery CD into the CD-ROM reader.
2.
Insert the NEC Ready Series Restore diskette into the diskette
drive.
3.
Reset your computer by simultaneously pressing the
Delete
and
Your computer takes a few minutes to recognize the
Recovery CD and Restore diskette. Then, the Master CD
System Diagnostics screen appears.
keys on your keyboard.
you
will need to
Ctrl, Alt
,
Note:
does not work, turn off the computer by pressing the pow er
button. Wait approximately 30 seconds, then press the
power button again.
4.
From the Master CD System Diagnostics screen, select the
Test Your System
If your keyboard has frozen up and the reset
option. Another diagnostics screen
appears with test options.
80 Ready product recovery CD to the rescue!
Page 86

5.
Select the Test Your System option to run a series of
hardware tests.
The program asks you to insert a Data CD-ROM disc into the
CD-ROM drive. Since the Product Recovery CD (Master
CD) is already in the drive, just press the space bar on your
keyboard to continue.
Testing takes anywhere from a few minutes to more than an
hour, depending on the size of your hard disk and how much
software is installed on your computer. Testing is complete
when video test patterns stop appearing on the monitor screen
and the disk drive indicator light on the front of your
computer stops flashing.
6.
Select the Advanced Diagnostics option to run specific tests.
Follow the on-screen instructions.
This option is
recommended only for advanced computer users.
7.
After completing the tests, notify an NECCSD Technical
Support representative if your computer fails any tests. When
prompted, select the Print option or write down your test
results. The test results provide a quick reference when you
speak to a representative.
Note:
test results even if you save them on your computer’s hard
disk (typically drive C:/).”
We recommend printing or writing down your
Ready product recovery CD to the rescue! 81
Page 87

MS-DOS®-based program designed for use in the MS-DOS
operating environment (not Windows 95). Depending on
your system configuration, your sound board’s modem
might not be recognized by PC-Doctor.
Please note that there is no cause for concern if your
computer’s sound board works normally when you are in
the Windows 95 environment. Certain modems currently
being produced today are Windows-based modems that
PC-Doctor was not designed to diagnose.
Note:
The PC-Doctor™ test program is an
Restoring your software with the Recovery CD
Format and Restore Your Hard Disk
The
your software
erases
and resets the hard disk
reinstalling the files.
!
If you reformat your hard disk, ALL files on the hard
disk drive will be deleted and replaced by the factory
installed files.
CAUTION
procedure for restoring
completely
before
You
lose all files and customized features you created
and/or saved since you first started up a program
need to reinstall any software you installed yourself.
The Format and Restore Your Hard Disk option should only
be used if the preinstalled software is unusable. If you are
unsure about using this procedure, call NECCSD Technical
Support. Technical Support representatives will help you
determine
services...” in this guide for the technical support telephone
number.
82 Ready product recovery CD to the rescue!
if this is your situation. See “Get customer
Page 88

The Format and Restore Your Hard Disk procedure requires booting
from the NEC Ready Series Product Recovery CD and Restore
diskette. Here is the procedure to start the recovery process. Follow
it carefully.
1.
With system power on, insert the NEC Ready Series Product
Recovery CD into the CD-ROM reader.
2.
Insert the Restore diskette into the diskette drive.
3.
Reset your computer by simultaneously pressing the
Delete
and
keys on your keyboard.
Ctrl, Alt
Your computer takes a few minutes to recognize the
Recovery CD and Restore diskette. Then, the Master CD
System Diagnostics screen appears.
Note:
does not work, turn off the computer by pressing the pow er
button. Wait approximately 30 seconds, then press the
power button again.
4.
From the Master CD System Diagnostics screen, select the
Format and Restore Your Hard Disk
restore Windows 95, click
Windows 95
If your keyboard has frozen up and the reset
. If you only want to
Format and Restore Only
.
The next screen warns you that all of the stored data on your
hard disk will be erased.
5.
At the prompt to proceed with the format procedure, type
(for yes), and then press
Enter
.
,
Y
6.
At the prompt, remove the diskette from the diskette drive.
Enter
Press
.
When the process is complete, you’ll see the startup screen you saw
the first time you started up your computer.
Ready product recovery CD to the rescue! 83
Page 89

Setting up a healthy work
environment
!
Prolonged or improper use of a computer workstation may
pose a risk of serious injury. To reduce your risk of injury,
set up and use your computer in the manner described in
this appendix
Contact a doctor if you experience pain, tenderness,
swelling, burning, cramping, stiffness, throbbing, weakness, soreness, tingling and/or numbness in the hands,
wrists, arms, shoulders, neck, back, and/or legs.
.
Setting up a healthy work environment 85
WARNING
Page 90

Making your computer work for you
Computers are everywhere. More and more people sit at computers
f or longer p eriods of time. Th is appendi x ex pla ins how to set up your
computer to fit your physical needs. This information is based on
ergonomics — the s cience of making the workplace fit the needs of the
worker.
Some nerve, tendon, and muscle disorders (
disorders
environments, and incorrect work habits. Examples of
musculoskeletal disorders that may be associated with certain forms
of repetitive activities include: carpal tunnel syndrome, tendinitis,
tenosynovitis, de Quervain’s tenosynovitis, and trigger finger, as well
as other nerve, tendon, and muscle disorders.
Although some studies have shown an association between increasing
hours of keyboard use and the development of some musculoskeletal
disorders, it is still unclear whether working at a computer causes
such disorders. Some doctors believe that using the keyboard and
mouse may aggravate existing musculoskeletal disorders.
Some people are more susceptible to developing these disorders due
to pre-existing conditions or psychosocial factors (see “Pre-existing
Conditions and Psychosocial Factors” later in the appendix).
To reduce your risk of dev eloping these dis orders, follow the
instructions in this appendix. If you experience discomfort while
working at your computer or afterwards, even at n ight, contact a doctor
as soon as possible. Signs of discomfort might include pain,
tenderness, swelling, burning, cramping, stiffness, throbbing,
weakness, soreness, tingling and/or numbness in the hands, wrists,
arms, shoulders, neck, back, and/or legs.
) may be associated with repetitive activities, improper work
musculoskeletal
86 Setting up a healthy work environment
Page 91

Arrange your equipment
Arrange your equipment so that you can work in a natural and
relaxed position. Place items that you use frequently within easy
reach. Adjust your workstation setup to the proper height (as
described in this appendix) by lowering the table or stand that holds
your computer equipment or raising the seat height of your chair. To
create more desk space, you can put your computer base on the floor.
Adjust
your chair
Adjust
your keyboard
and mouse
Adjust
your monitor
Setting up a healthy work environment 87
Page 92

Adjust your chair
Your chair should be adjustable and stable. Vary your posture
throughout the day.
Check the following:
Keep your body in a relaxed yet upright position. The
backrest of your chair should support the inward curve of
your back.
Use the entire seat and backrest to support your body. Tilt the
backrest slightly backwards. The angle formed by your thighs
and back should be 90° or more.
88 Setting up a healthy work environment
Page 93

Your seat depth should allow your lower back to comfortably
contact the backrest. Make sure that the backs of your lower
legs do not press against the front of the chair.
Extend your lower legs slightly so that the angle between your
thighs and lower legs is 90° or more.
Place your feet flat on the floor. Only use a footrest when
attempts to adjust your chair and workstation fail to keep your
feet flat.
Be sure that you have adequate clearance between the top of
your thighs and the underside of your workstation.
Use armrests or forearm supports to support your forearms. If
adjustable, the armrests or forearm supports should initially be
lowered while all the other adjustments discussed in this
appendix are made. Once all these adjustments are completed,
raise the armrests or adjust the forearm supports until they
touch the forearms and allow the shoulder muscles to relax.
Setting up a healthy work environment 89
Page 94

Adjust your input devices
Follow these points in positioning your keyboard and mouse.
Position your keyboard directly in front of you. Avoid
reaching when using your keyboard or mouse.
If you use a mouse, position it at the same height as the
keyboard and next to the keyboard. Keep your wrists straight
and use your entire arm when moving a mouse. Do not grasp
the mouse tightly. Grasp the mouse lightly and loosely.
Adjust the keyboard height so that your elbows are near your
body and your forearms are parallel to the floor, with your
forearms resting on either armrests or forearm supports, in the
manner described previously. If you do not have armrests or
forearm supports, your upper arms should hang comfortably
at your sides.
Adjust your keyboard slope so that your wrists are straight
while you are typing.
90 Setting up a healthy work environment
Page 95

Type with your hands and wrists floating above the keyboard.
Use a wrist pad only to rest your wrists between typing.
Avoid resting your wrists on sharp edges.
Type with your wrists straight. Instead of twisting your wrists
sideways to press hard-to-reach keys, move your whole arm.
Keep from bending your wrists, hands, or fingers sideways.
Press the keys gently; do not bang them. Keep your shoulders,
arms, hands, and fingers relaxed.
Setting up a healthy work environment 91
Page 96

Adjust your monitor
Correct placement and adjustment of the monitor can reduce eye,
shoulder, and neck fatigue. Check the following when you position
the monitor.
Adjust the monitor height so that the top of the screen is at or
slightly below eye level. Your eyes should look slightly
downward when viewing the middle of the screen.
Position your monitor no closer than 12 inches and no further
away than 28 inches from your eyes. The optimal distance is
between 14 and 18 inches.
92 Setting up a healthy work environment
Page 97

Rest your eyes periodically by focusing on an object at least
20 feet away. Blink often.
Position the monitor at a 90° angle to windows and other light
sources to minimize glare and reflections. Adjust the monitor
tilt so that ceiling lights do not reflect on your screen.
If reflected light makes it hard for you to see your screen, use
an anti-glare filter.
Clean your monitor regularly. Use a lint-free, non-abrasive
cloth and a non-alcohol, neutral, non-abrasive cleaning
solution or glass cleaner to minimize dust.
Adjust the monitor’s brightness and contrast controls to
enhance readability.
Use a document holder placed close to the screen.
Position whatever you are looking at most of the time (the
screen or reference material) directly in front of you to
minimize turning your head while you are typing.
Get regular eye check-ups.
Setting up a healthy work environment 93
Page 98

Vary your workday
If you use your computer for prolonged periods, follow these
instructions.
Vary your tasks throughout the day.
Take frequent short breaks that involve walking, standing, and
stretching. During these breaks, stretch muscles an d joints that
were in one position for an extended period of time. Relax
muscles and joints that were active.
94 Setting up a healthy work environment
Page 99

Use a timer or reminder software to remind you to
take breaks.
To enhance blood circulation, alter your sitting posture
periodically and keep your hands and wrists warm.
Note:
see the American National Standard for Human Factors
Engineering of Visual Display Terminal Workstations.
ANSI/HFS Standard No. 100-1988. The Human Factors
Society, Inc., P.O. Box 1369, Santa Monica, California
90406
For more information on workstation setup,
Pre-existing conditions
and psychosocial factors
Pre-existing conditions that may cause or make some people more
susceptible to musculoskeletal disorders include the following:
hereditary factors, vascular disorders, obesity, nutritional deficiencies
(e.g., Vitamin B deficiency), endocrine disorders (e.g., diabetes),
hormonal imbalances, connective tissue disorders (e.g., arthritis),
prior trauma (to the hands, wrists, arms, shoulders, neck, back, or
legs), prior musculoskeletal disorders, aging, fluid retention due to
pregnancy, poor physical conditioning and dietary habits, and other
conditions.
Psychosocial factors associated with these di sorders inclu de: workplace
stress, poor job satisfaction, lack of support by management, and/or
lack of control over one’s work.
Contact a doctor if you experience pain, tenderness, swelling,
burning, cramping, stiffness, throbbing, weakness, soreness, tingling
and/or numbness in the hands, wrists, arms, shoulders, neck, back,
and/or legs.
Setting up a healthy work environment 95
Page 100

Checking your comfort:
how do you measure up?
Use this checklist to see if you are setting up your work environment
to fit your physical needs.
Checking your chair
Do you sit in an upright position with the backrest supporting
your lower back?
When sitting, are your feet flat on the floor?
Do you periodically adjust your chair and your posture?
Checking your keyboard
Is your keyboard angled so your wrists are straight when you
type?
Is your keyboard directly in front of you?
Do you avoid resting your wrists on sharp edges?
Do you press the keys gently and not bang on them?
Checking your mouse
Is your mouse at the same height as the keyboard and next to
the keyboard?
Are your wrists straight and your touch light when moving the
mouse?
Checking your monitor
Did you adjust your monitor so that the top of the screen is at
or slightly below eye level?
96 Setting up a healthy work environment
 Loading...