

Page 1
Notes:
____________________________________________________________
____________________________________________________________
____________________________________________________________
____________________________________________________________
____________________________________________________________
____________________________________________________________
____________________________________________________________
____________________________________________________________
____________________________________________________________
____________________________________________________________
____________________________________________________________
____________________________________________________________
____________________________________________________________
____________________________________________________________
____________________________________________________________
____________________________________________________________
____________________________________________________________
____________________________________________________________
____________________________________________________________
____________________________________________________________
____________________________________________________________
____________________________________________________________
____________________________________________________________
____________________________________________________________
____________________________________________________________
____________________________________________________________
For Questions or Service Contact:
Certified Alarm Co. of Alabama Inc.
2904 Jackson Hwy
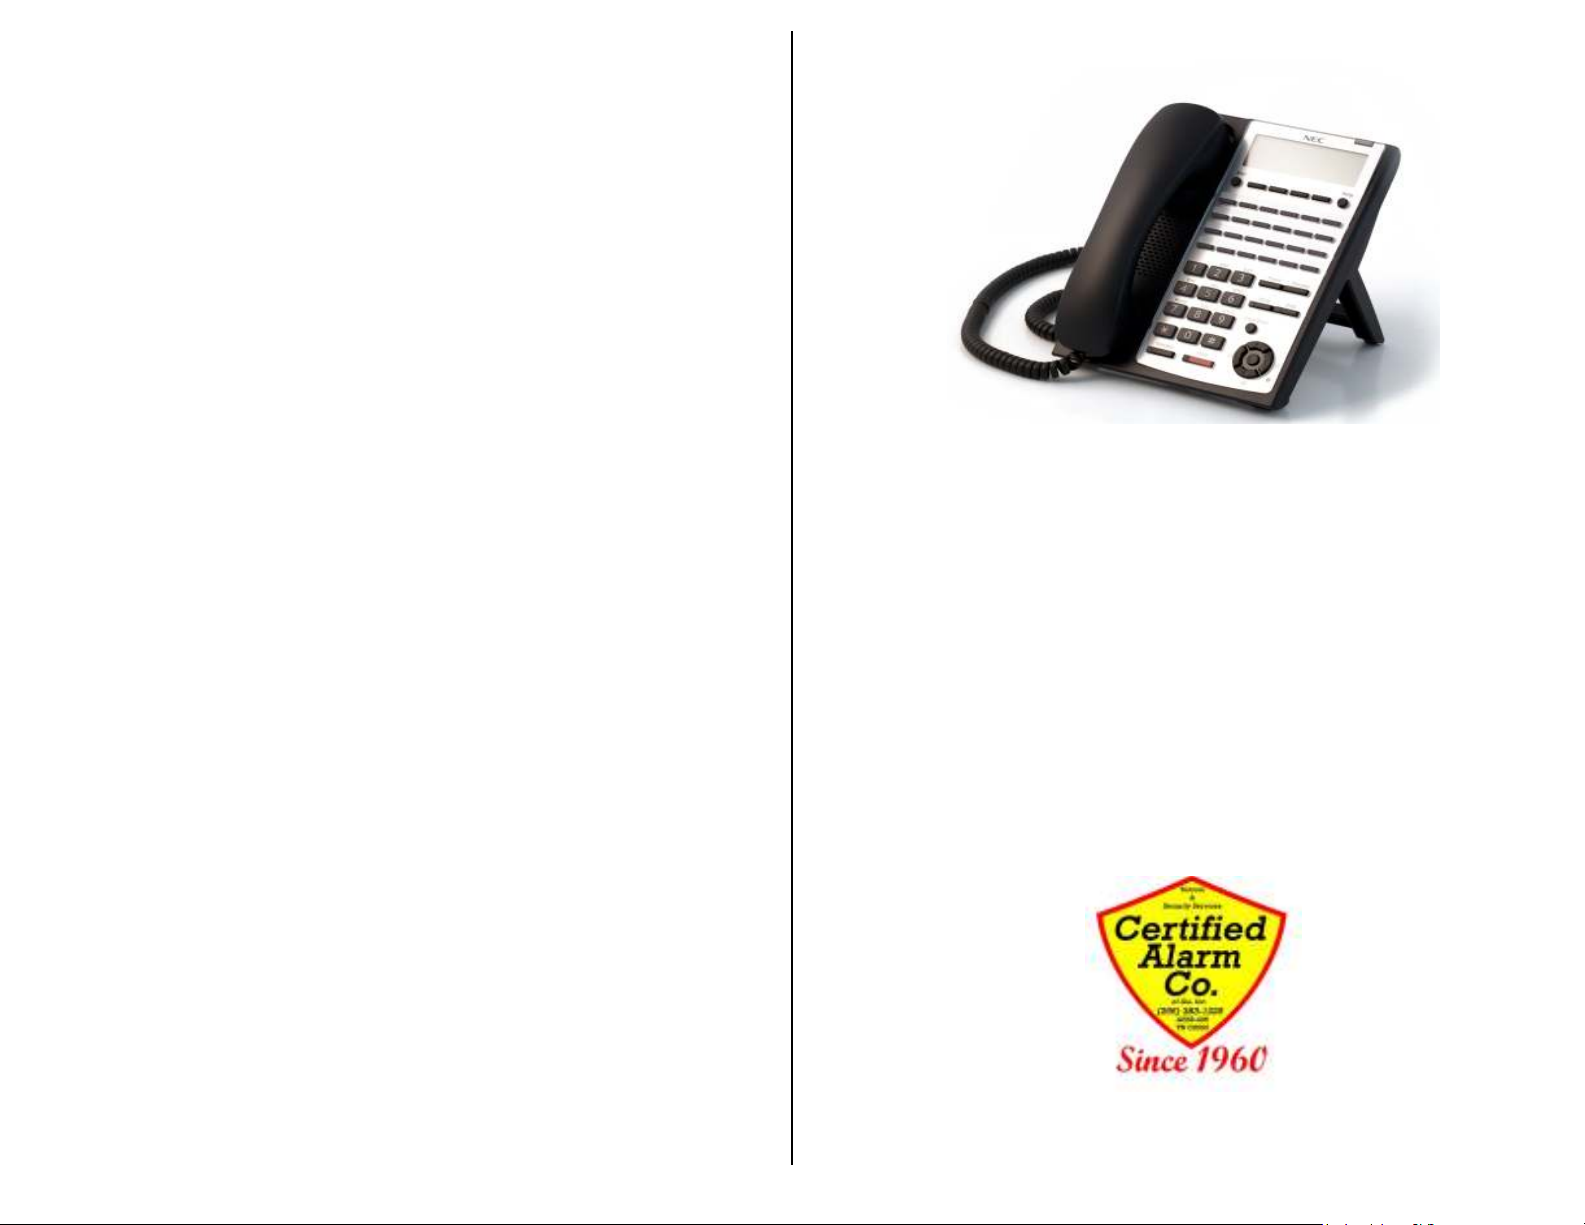
NEC SL1100 Telephone System
IP4WW-12/24 Series Desktop Digital Terminals with Voicemail
Quick Reference Guide
Certified Customers Only !
(We do not sell, install or service phone systems outside of
the North Alabama area; we will not answer any questions on
systems we did not install or service. If you are in our service
area call us, we will service your NEC SL1100 system)
Installed and Serviced by:
For:
Sheffield Al. 35660
(256) 383-1225
www.certified-alarm.com
www.necSL1100.com
Guide By: Jerry W. Sharp
jsharp@certified-alarm.com
© Copyright 2012, Certified Alarm has prepared this document for use by its customers. The information
contained herein is the property of Certified Alarm Company of Alabama Inc. and shall not be reproduced
without prior written approval of Certified Alarm Co.
Certified Alarm Co. (256) 383-1225 by: Jerry W. Sharp © 2012 by Certified Alarm Co. of Ala. Inc. 4/19/2012
(256) 383-1225
www.certified-alarm.com
Page 2
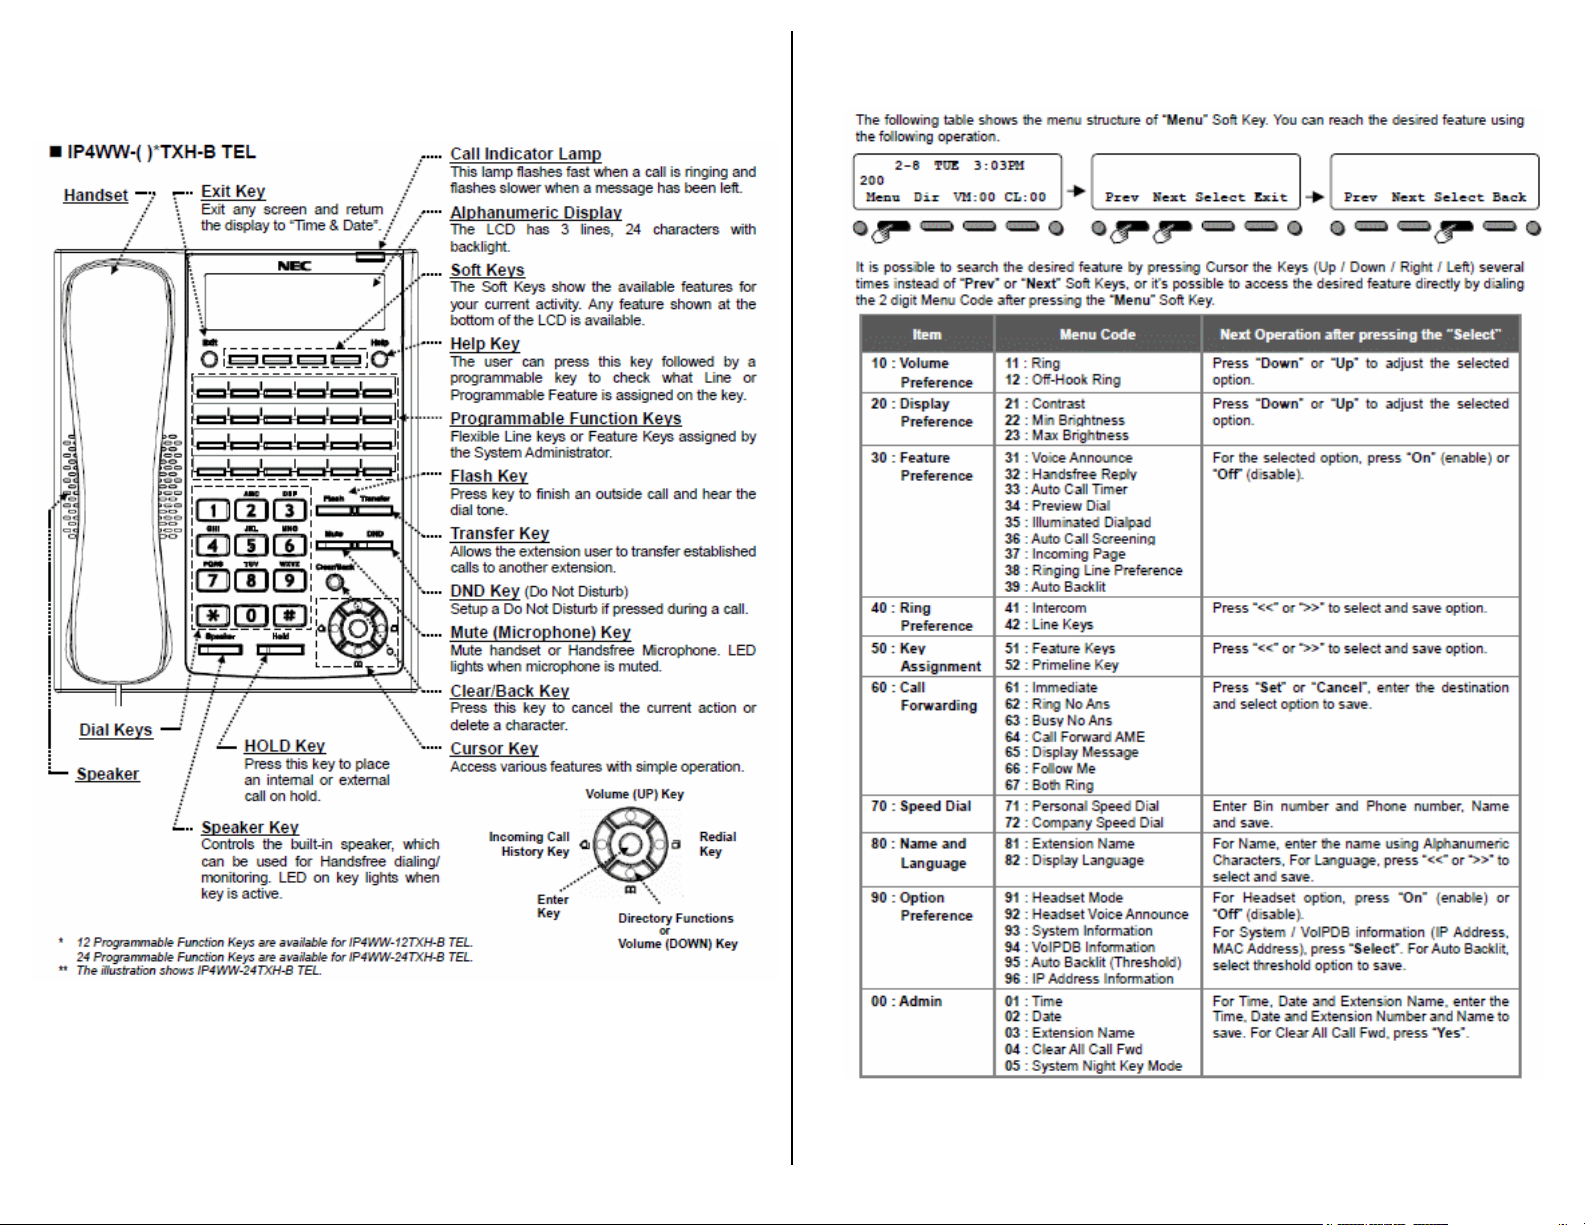
IP4WW-12/24TXH Telephone
Menu Key Operation
(Used to set ringing, display options and features)
Page 2
Certified Alarm Co. (256) 383-1225 by: Jerry W. Sharp © 2012 by Certified Alarm Co. of Ala. Inc. 4/19/2012
Page 15
Page 3

Auto Attendant Greetings
(All recordings or mode changes must be from the System Administrators phone)
Recording the Day/Night/Override Greeting*
• Presses the VMsg Soft Key, when prompted enter your security
code.
• Press 72 (SA) for the System Administrator menu.
• Press the Instr Soft Key, for the Instruction Menu Messages.
• Enter mailbox number for the Day Greeting 001*, Night Greeting
002*, Lunch/Out of Office 003* or the Override Mailbox 004*.
• Follow the prompts to Lstn (Listen), Rec (Record) or Erase the
greeting.
• To record or change the greeting press the Rec. Soft Key.
• Press the Done Soft Key or the # Key when finished recording.
• Press the Lstn Soft Key to review,
• Press Rec Soft Key to re-record, or press the Exit Soft Key to quit
*Default Mailbox Numbers, Note any changes or additions.
Day MB 001 MB 005
Night MB 002 MB 006
Lunch/Out MB 003 MB 007
Override MB 004 MB 008
Activating the Override Greeting
(Used for Holiday Greetings or unexpected Weather Closings)
• Press the VMsg Soft Key, when prompted enter your security code.
• Press 726 (SAO) for the System Administrator, Answering Schedule
Override menu.
• Enter the Table Number 1.
• The Display/Prompts gives the information about the Answering
Schedule Override, you may turn the mailbox On/OFF or change the
Mail box number (MBOX, usually 004).
• To turn On, press the On Soft Key. (be sure the greeting for the
override mailbox is recorded)
• Press the Exit Soft Key and Hang Up.
• This Override greeting will answer until you renter the System
Administrator Override menu and press the Off Soft Key.
*When recording the Day/Night greeting, it will be easier to change the greetings if
you use extension numbers (Press 102 for Sales) instead of menu numbers
(Press 1 for Sales). Any valid extension number, Mailbox number or Group
number can be used, see your installer for a list of numbers.
Having your greetings written down before you start will help. Remember KISS
(Keep it Short and Simple)
Page 14
Soft Keys (button function displayed on bottom line of the display)
• Each display telephone provides interactive Soft Keys for intuitive
feature access. It is no longer necessary to remember feature codes
to access the telephone advanced features because the function of
the Soft Keys change as the user processes calls.
Programmable Function Keys (See page 10 for instructions)
• Usually programmed for your Extension number, CO Lines, Direct
Station Select (DSS*), Park, Page, Record Buttons etc.
*DSS button (Direct Station Select) = one of the programmable button programmed to call
another extension and see busy status
Non Programmable Keys
• Call Indicator Lamp= Blinks with new voice mail message(s).
• Exit = Cancel and returns to main screen
• Help = Press Help then press a programmable key(s) to display
current key programming.
• Flash = Used to disconnect calls and get dial tone for the next call
• Transfer = Transfer to stations without a DSS button (page 5)
• Mute = Turns the phones mic on/off, usually left off (page 5)
• DND = Sets up do not disturb if pressed during a call.
• Clear/Back = Press this key to cancel the current action or delete a
character
• Hold = Place callers on Hold (page 5)
• Speaker = Press to answer or place calls handsfree.
Volume Adjustments
To adjust Ring Volume
• While the phone is ringing. (internal or external)
• Press the up or down Cursor key to adjust ring volume.
• Or press the Menu key. Default is Menu 10 Volume Preference
• Press “Enter”
• Use the Left or Right cursor keys to select “Ring” or “Off Hook Ring”
• Press “Enter”
• Adjust the volume with the Up or Down cursor key.
• Exit/Save by lifting Handset.
To adjust Handset or Speakerphone receive volume
• While on a call using either the Handset or Speakerphone.
• Press the up or down Cursor key to adjust caller’s volume.
(see page 11 to change the ring tone)
Page 3
Certified Alarm Co. (256) 383-1225 by: Jerry W. Sharp © 2012 by Certified Alarm Co. of Ala. Inc. 4/19/2012
Page 4

Making Calls
To place internal calls
• Press the DSS* button of the person you wish to call, talk hands free
after the tone, or lift handset.
• Or, Lift the Handset or Press Speaker and dial the 3-Digit Extension
Number.
• Soft Keys allow options to, Ring/Voice (Toggles from Handsfree to
Ringing) MW (turn callback message waiting lamp on), or Vmsg
(leave Voice mail Message)
To Place External Calls
• Lift the Handset or press Speaker, dial “9” and the Telephone
Number.
•
Or Press the idle CO line key and dial the Telephone Number, lift
the Handset or talk hands free.
*DSS button (Direct Station Select) = one of the programmable button programmed to call
another extension and see busy status
Answering Calls
To answer Internal calls
• When phone beeps, answer hands free or if phone rings lift the
handset or press speaker.
• The Mute lamp must be off for callers to hear you, handset or hands
free. (Press the button to toggle on/off)
To Answer External calls
• When phone rings, lift the handset or press the Speaker button to
answer hands free.
• The Mute lamp must be off for callers to hear you, handset or hands
free. (Press the button to toggle on/off)
Call Park (a parked call may be retrieved from any phone)
To Park or Retrieve Parked callers.
• To place a caller in park, use the Park Keys. Or press the Transfer
key, dial #6XX (XX=00-64)
• To retrieve a parked caller, use the Park Keys or dial *6XX
(XX=number used to park call)
• Example: While talking to a caller, press transfer, dial #601, then
page and instruct the recipient of the call to dial *601 to retrieve the
parked call.
Page 4
To check Voice Mail Messages
From your Phone:
• When the Message Waiting lamp blinks, the display (VM:01) will
indicates the number of messages. Press the VM:XX Soft Key, when
prompted enter your security code.
• Follow prompts to listen to messages, press the Soft Keys to Lstn,
Greet, LvMsg or More. Setup, Mgr, RcNam or More. Page, list,
Exit or More to start over.
• Follow Prompts while listing to message for Next, Pause or Delete.
From outside the System:
• Dial a Line answered by the AutoAttendent or dial the main number
and ask the attendant to transfer you to ext#3999
• When Auto Attendant answers, Dial # + your Mail Box Number (3-
Digit extension number), when prompted enter your security code.
• Follow the prompts to listen to messages. Save, Erase and Exit the
same as if you were in the office.
Voice Mail options (for complete lists see the Voice Mail user’s guide)
While listening to messages dial:
• TI (84) to hear the Time and Date the message was left.
• SA (72) to Save the message.
• MF (63) to have Message Forwarded to another user.
• E (3) to Erase the message
• L (5) to Listen to the next message.
• B (2) to Back up a few seconds
• BB (22) to Backup to the Beginning
• G (4) to Go Ahead a few seconds
• * to Pause/Resume listening.
• # to Exit listen mode
Conversation Recording* (Requires InMail)
Recording your conversation
• Press the “Record” button (recording beeps disabled*)
• “Recording” will be in the display.
• Press the “Record” button to stop or hang-up.
• The recording will be saved as a voicemail message.
*Before recording any conversations, you should seek the advice of a local
attorney to ensure you are complying with State and Federal Law.
Page 13
Certified Alarm Co. (256) 383-1225 by: Jerry W. Sharp © 2012 by Certified Alarm Co. of Ala. Inc. 4/19/2012
Page 5

Voice Mail and Auto Attendant (InMail required for Voice Mail)
Automated Attendant automatically answers the incoming outside caller.
After listening to a customized message (Day, Night or Holiday), an
outside caller can dial directly to an extension or department.
Voice Mail, answers your phone and gives the caller the option to leave
you a message or dial another extension.
Voice Mail Setup (Must complete all 3 steps)
1. Record your Greeting
• Press the VM:XX Soft Key
• Press the Greet Soft Key.
• Press the Gr1 (greeting 1) Soft Key. (you may record the other
greetings later)
• Press the Rec Soft Key.
• Follow the prompts to record your greeting.
• Press LSTN (Listen), REC (Record over) Del (Delete) Back
(Previous Menu) or # to exit.
2. Record Your Name
• Press the VM:XX Soft Key
• Press R N (7 6) to record your name.
• Press the Rec Soft Key.
• Follow the prompts to record your name.
• Press LSTN (Listen), REC (Record over) Del (Delete) Back
(Previous Menu) or # to exit.
3. Enter your Password* (Security Code)
• Press the VM:XX Soft Key
• Press O P (6 7) for Mail Box Options.
• Press the Code Soft Key.
• Follow the prompts; enter your 4 digit Password.
each time you access your mail box, do not forget it!. There is no way to
retrieve it.)
(you must use this
• Press OK to save or Clear to start over.
*
Without a password callers may be able to listen and delete
your voice mail messages.
Page 12
Transferring Calls
To transfer a call to another extension
• With the call in progress, press the DSS button, and hang-up (Blind
transfer) or wait for the user to answer and announce the caller, then
hang-up (announced transfer)
• If no DSS button is available, press the Trf Soft Key or Transfer
button then dial the 3-digit Extension Number, and hang-up (Blind
transfer) or wait for the user to answer and announce the caller, then
hang-up (announced transfer)
• If there is no answer, the caller will go to VoiceMail if transferred or
to cancel and get the caller back press the blinking green outside line
button.
To transfer directly to Voicemail
• With the call in progress, press the DSS button. (you can transfer to a
busy extension) if no DSS button press the Trf Soft Key or Transfer
button then dial the 3-digit Extension Number.
• Dial 8 and Hang-up to complete the transfer to Voicemail.
Placing callers on hold
To Place a caller on Hold (call can be picked up from any phone)
• With the call in progress, press Hold
• To return to the call at your extension, or any other extension. Press
the blinking Green Line button (Hold button on inside ICM callers) on
your phone, Blinking red on all other phones.
• Calls will recall to your extension if not answered within the
programmed recall time limit,
To place caller on Exclusive Hold* (call can only be picked up from this phone)
• With the call in progress, press the Exclusive Hold * button
• To return to the call at your extension only. Press the blinking
Green button on your phone, Steady red on all others.
• Calls will recall to your extension if not answered within the
programmed recall time limit.
Mute (Microphone Key)
• The Mute button will disable the Handset, Headset or Speakerphone
Microphone
Handset, Headset or Speakerphone mic. is disabled (off). Press the
button to toggle on/off. This button is usually left off.
(* Requires a programmable function button programmed as Exclusive Hold. To program
function key. Press speaker, dial 751, press unused function button, and dial 45)
while in use; the Mute button is on to indicate your
Page 5
Certified Alarm Co. (256) 383-1225 by: Jerry W. Sharp © 2012 by Certified Alarm Co. of Ala. Inc. 4/19/2012
Page 6

Paging
Paging to Phones or External Paging Speakers
Lift the handset press the Page Key or:
To page the internal phones (Digital phones only)
Or for External Paging (existing or new overhead paging system)
(* Wait until after the Beeps/Chimes finish before speaking or the first words will be muted)
Conference Calls
To make a conference call
• With the first call in progress (internal or external), press the More
• Press the DSS key or Dial the second party (internal or 9 +external)
• Press the Add Soft Key (after they answer)
• Press the Begin Soft Key to connect all parties together.
• You may add more (internal or external) parties by pressing the
DND
To set DND
• Press the DND Key
• Press the Set Soft Key.
• Select the Ext Soft Key for External calls, Icm for internal calls, or All
• With DND set, the selected calls will be answered by voicemail.
To Cancel DND
• Press the DND Key
• Press the Cncl Soft Key to cancel DND.
(page only, no talk back)
• Lift the Handset, Press the Page Soft key then the InPg Soft Key,
Dial 1 (the Group Number for all phones. ask administrator for
additional zone areas)
• After the Beep-Beep*, Speak into the handset.
• Hang-up the handset.
• Lift the Handset, Press the Page Soft key then the ExPg Soft Key.
Dial 0 (the Zone Number for the all page zone, ask administrator
for additional zone areas)
• After the chimes*, Speak into the handset.
• Hang-up the handset
Soft Key then the Conf Soft Key.
Conf Soft Key again.
for both external and internal calls.
911 Emergency Calls.
Emergency calls requiring outside assistance.
• Lift the handset or press Speaker.
• Dial 911, Describe the nature and location of the emergency. (it
is very important to give the correct address, Building Number etc.,
The phones lines may have a different address listed)
• The Attendant will be notified by an audible alarm, displaying the
extension name/number that placed the emergency call.
To turn Background Music on or off:
To Hear Music from your phone (if equipped)
• Press the Speaker button.
• Dial 725 (toggles On or Off)
• Press the Speaker button to quit.
Changing Station Ring Tones
To change the Internal/External Ring Tone
• Press the Speaker button.
• Dial 720.
• Dial 1 for internal or 2 for external ring tones.
• Dial 1-8 to select the desired tone.
• Press the Speaker button to exit and set.
Headset
To use a headset you need a Headset button* programmed,
• Plug the headset in the bottom of the phone, (the jack with the
headset icon located next to the Handset jack)
• Press the Headset button to use the Headset (you will hear dial tone,
make your call. Or answer your ringing phone)
• To hang-up press the Headset button.
•
To use the Handset, lift the Handset and then press the headset
button.
* To program a Headset key, press speaker, dial 751 press a unused function key, dial 05
Not all headsets are guaranteed to work, most of the latest models of the Plantronics brand are
recommended. Certified can recommend or supply a compatible headset.
Page 6
Page 11
Certified Alarm Co. (256) 383-1225 by: Jerry W. Sharp © 2012 by Certified Alarm Co. of Ala. Inc. 4/19/2012
Page 7

To Program DSS/One Touch Keys
DSS (Direct Station Select) or One Touch Dial Keys
• Press the Speaker button.
• Dial 751.
• Press the Key to be programmed (shows current programming, if
programmed dial 00 to erase, then press Key again)
• Dial 01 plus the 3-Digit Extension number or 9 + the outside
number to dial, press Hold to save (hear beep/beep/beep tone)
• Press another Key or Speaker button to quit.
• DESI lite software (Free) and DESI labels are available from Certified
to re-label your phone.
To Program CO Line Keys
To Program the outside line Keys
• Press the Speaker button .
• Dial 752.
• Press the Key to be programmed (shows current programming, if
programmed dial 000 to erase, then press Key again) .
• Dial
tone).
• Press another Key or Speaker button to quit.
• DESI lite software (Free) and DESI labels are available from Certified
to re-label your phone.
01 plus the CO Line Number 01-99 (hear beep/beep/beep
*
Callback Request notification: *
If you call a busy/unanswered extension and press 0 or the MW Soft Key,
it will turn on (Blinks) the message waiting lamps on both extensions,
requesting a callback. (display shows what extension was called)
To Call back and reset the callback message notification.
• The called extension can press *0 to return the call and turn the
message lamps off.
Or to cancel from either phone
• Lift the Handset
• Dial 773
• Hang up the Handset.
* This usually gets turned on by mistake causing users to think they have a new
voicemail message. If you have no new messages cancel from your phone.
Call Forward
To set Call Forwarding
• Press the Menu Key
• Press the down cursor key, (or dial 60) until you get to Menu 60 Call
Forwarding, press Enter
• Select Menu 61-67 * with the right cursor key, press Enter (or
Select Soft Key)
• Select the Set Soft Key.
• Dial the Extension or 9+off premise number to forward to and
press Next.
• Select All or Line (for all calls or just outside callers)
• Press Save, hear Beep Beep. Press speaker to hang up.
To Cancel Call Forwarding (cancel the code (61-67) that you set)
• Press the Menu Key
• Press the down cursor key, (or dial 60) until you get to Menu 60 Call
Forwarding, press Enter
• Select Menu 61-67 * with the right cursor key, press Enter
• Select the CNCL Soft Key to cancel. Hear Beep Beep. Press
speaker to hang up.
* Call Forward Codes
61 – Immediate (phone does not ring, forwarded phone rings)
62 – Ring No Answer (only forwards if you do not answer)
63 – Busy No Answer (only forwards if you’re on the phone)
64 – Call Forward AME (Answering Machine Emulation, you hear
the caller and can pick up and talk to the caller)
65 – Display Message (displays the inside caller a message)
66 – Follow Me (activate from the destination phone)
67 – Both Ring (both your phone and the forwarded phone rings)
(If you’re a frequent CF user, a feature button can be programmed, ask
your installers to program a specific type button)
Directed Call Pickup
To answer a ringing co-workers phone
• Lift the handset or press Speaker.
• Dial * *.
• Dial the 3-Digit Extension Number of the co-workers phone you
want to answer.
Page 10
Page 7
Certified Alarm Co. (256) 383-1225 by: Jerry W. Sharp © 2012 by Certified Alarm Co. of Ala. Inc. 4/19/2012
Page 8

Call waiting
To answer a second caller (you hear call waiting tone, display shows
Caller ID information)
• Press Hold, (first caller placed on hold) Hang up the handset or turn
off the handsfree speaker. Phone rings, answer the 2nd call
• You can place the 2nd caller on hold and switch between calls. (if you
place an internal caller on hold, press the Hold key to pick up)
• If not answered 2nd caller goes to Voice Mail after time out, usually 3
or 4 rings.
(while on a call)
Redial
Last number(s) redial
• With the handset on-hook
• Press the Redial Cursor key (right side), last number dialed is
displayed. (use the up/down scroll keys to see more)
• Lift the Handset, or press Speaker to dial the number.
Caller ID Buffer
List of Caller ID Numbers that ring to your phone (Phone must ring to
store the caller ID info)
• Press the CL:XX Soft Key
• Select All or Unan
• Use the cursor Up or down key to scroll through the stored
numbers.
• From the CID list, lift the Handset, or press Speaker to dial the
displayed number.
Received Caller ID Buffer
List of Caller ID Numbers answered at your phone (Phone must ring
and be answered to store the caller ID info)
• Press the received call cursor key (left side)
• Use the cursor up or down key to scroll through the stored numbers.
• From the CID list, lift the Handset, or press Speaker to dial the
displayed number.
Page 8
To Store/Dial the Speed Dial Numbers
To Store Personal/Company Speed Dial Numbers
• Press the Menu Soft Key.
• Press the down cursor key, to Menu # 70 Speed Dial, Press Enter
• Select 71 Personal Speed Dial or 72 Company Speed Dial with the
right cursor key.
• Press Enter. Select the Bin # (00-20 Personal or 000-899 Company)
• Press the Select Soft Key,
• Dial the Phone Number (dial 9, Area Code, Number)
• Enter the Name using the keypad.*
• Press the Save Soft Key to save. Press the Speaker button to quit.
To dial the Station Speed Dial Numbers
• Press the Dir Soft Key.
• Use the up or down keys to scroll through the numbers.
• Or enter the first letters of the name and use the up or down arrow
Soft Keys to scroll through the numbers.
• Pick up the Handset or Press the Speaker Key to dial.
Setting the Clock
To set the Clock
• Press the Speaker button
• Dial 728 + Time, (4-Digits in 24hr. format
0830=8:30 AM, 1645=4:45PM)
• Press the Speaker button to quit.
• Call Certified @ 256 383-1225 to change the date.
(for Daylight Saving Time Changes)
(from Administrators Phone only)
Program Station Names
To change the phone users name
• Press the Speaker button.
• Dial 700.
• Dial the 3-digit Extension Number to change.
• Enter the Name using the keypad *.
• Press the Hold button to save.
(hear beep/beep/beep tone)
• Press the Speaker button to quit.
* A-Z, a-z, 0-9, # # = Space, # = Move Cursor, Clear/Back=Delete
Page 9
Certified Alarm Co. (256) 383-1225 by: Jerry W. Sharp © 2012 by Certified Alarm Co. of Ala. Inc. 4/19/2012
 Loading...