How it Works
Log In / Sign Up
Buy Points
How it Works
FAQ
Contact Us
Questions and Suggestions
Users
NEC
Loading...
P
PA1004UL-W
2
PA1004UL-W-41
2
PA1004UL-WH (c объективом NP13ZL)
PA1004UL-WH (c объективом NP41ZL)
PA1004UL-WH (без объектива)
PA1505UL /W/B
2
PA1705UL /W/B
PA1724
PA231W-BK
2
PA231W-BK-SV
11
PA241W
3
PA241W-BK
2
PA241W-BK-SV
PA242W-BK
14
PA242W-BK-SV
9
PA242W-SV2
2
PA243W-BK
3
PA271Q
PA271Q-BK
PA271W
3
PA271W-BK
3
PA271W-BK-SV
PA272W
17
PA272W-BK
15
PA272W-BK-SV
10
PA272W-BK-SV2
PA272W-SV
10
PA301W-BK
3
PA301W-BK-L1
PA301W-BK-L1W
PA301W-BK-SV
PA302W
16
PA302W-BK
16
PA302W-BK-SV
11
PA302W-SV
11
PA311D-BK
2
PA322UHD
PA322UHD-BK
11
PA322UHD-BK-SV
10
PA500U
9
PA500U-13ZL
PA500UG
PA500X
13
PA500X-13ZL
PA521U
4
PA522U
4
PA550W
13
PA550W-13ZL
PA571W
4
PA572W
5
pa600x
11
PA600X-13ZL
PA621U
10
PA621X
4
PA622U
9
PA622U-13ZL
PA622X
4
PA653U
5
PA653U-41ZL
PA653UL
6
PA653UL-41ZL
PA671W
4
PA672W
5
PA672W-13ZL
PA703UL
3
PA703UL (NP41ZL)
PA703UL (без линз)
PA703W
4
PA721X
4
PA722X
5
PA723U
2
PA803U
6
PA803U-41ZL
PA803UL
9
PA803UL-41ZL
PA804UL
3
PA804UL-BK
PA804UL-BK (с объективом NP13ZL)
PA804UL-BK (с объективом NP41ZL)
PA804UL-WH
PA804UL-WH (с объективом NP13ZL)
PA804UL-WH (с объективом NP41ZL)
PA836TF
PA853W
6
PA853W-41ZL
PA903X
7
PA903X-41ZL
Packard Bell EasyNote M5
Packard Bell EasyNote M7
PAGEPRO 1100
PAGEWORKS 8E
PathManager
Patient Monitor
PAV-1
PB100474
PB6100
PB EasyNote M5
PB EasyNote M7
PC Attendant Console
pc cards
Loading...
Loading...
Nothing found
pa600x
Installation Manual
9 pgs
617.5 Kb
0
Installation Manual
13 pgs
2.3 Mb
0
Installation Manual
13 pgs
1.32 Mb
0
Product Sheet
4 pgs
1.85 Mb
0
Quick Setup Manual
6 pgs
2.09 Mb
0
Quick Setup Manual
6 pgs
2.2 Mb
0
Specifications
4 pgs
2.07 Mb
0
User Manual
13 pgs
893.8 Kb
0
User Manual
235 pgs
15.23 Mb
0
User manual
234 pgs
8.81 Mb
0
User Manual
234 pgs
15.66 Mb
0
Table of contents
Loading...
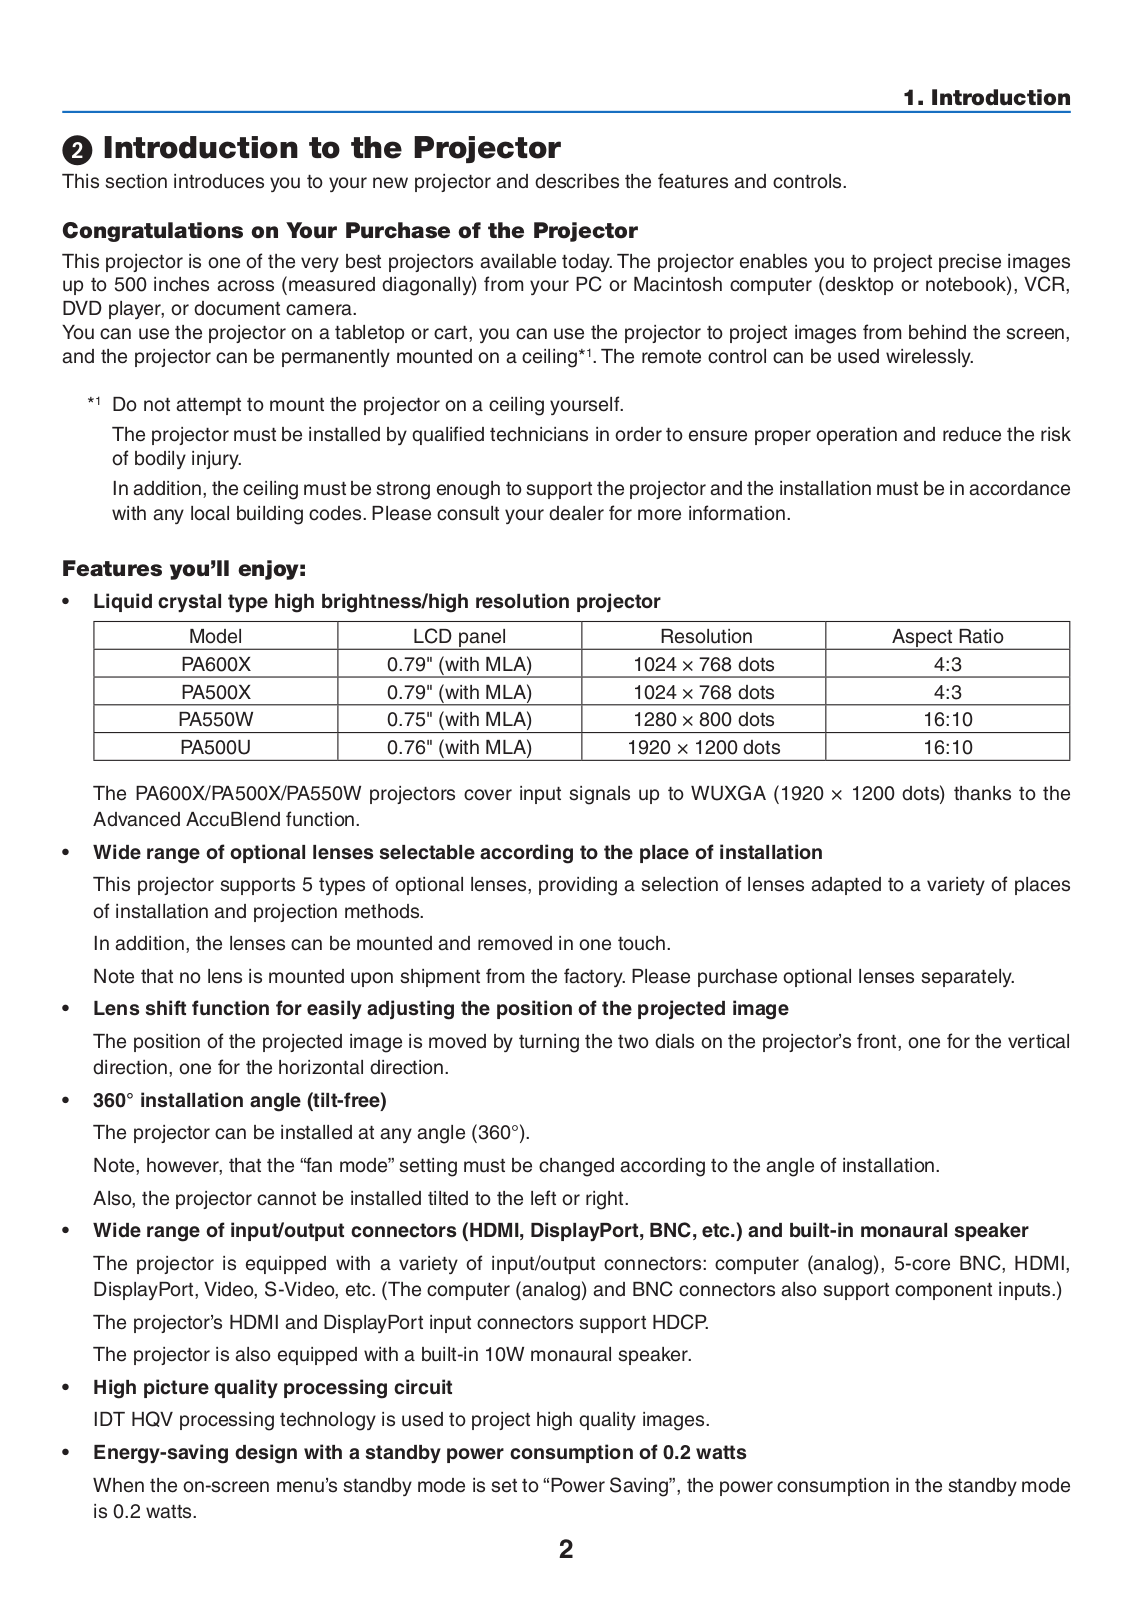
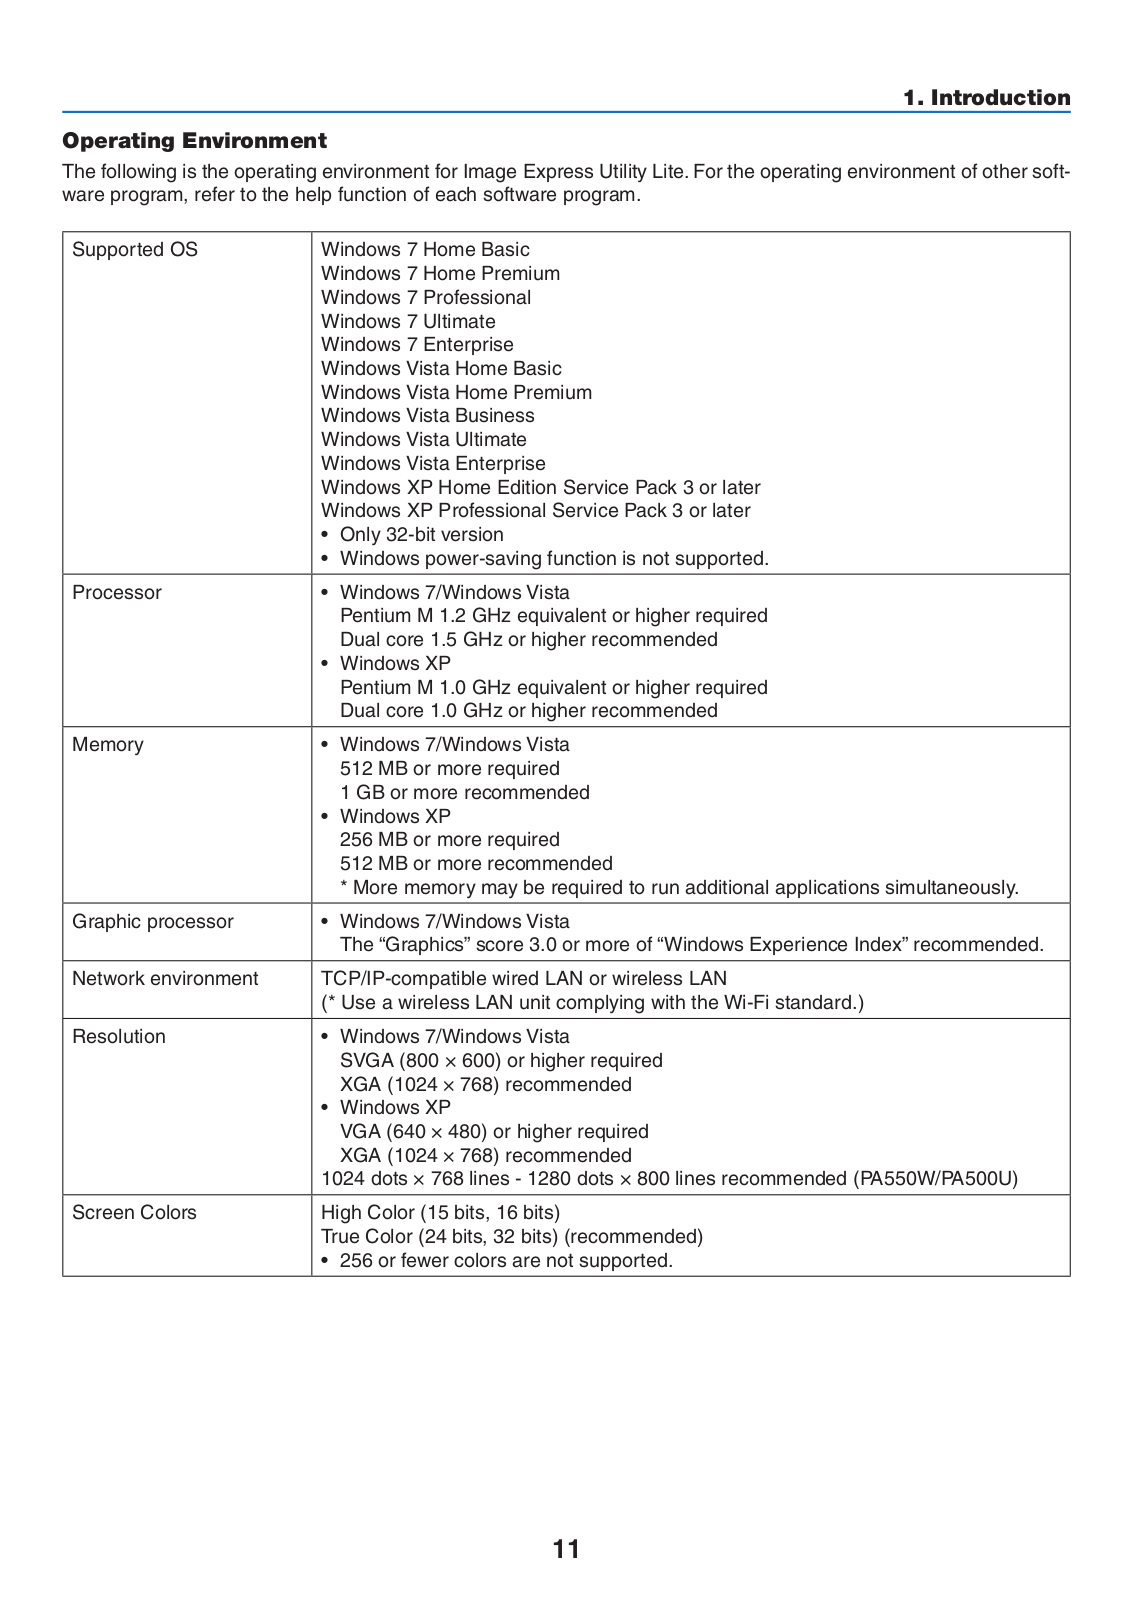
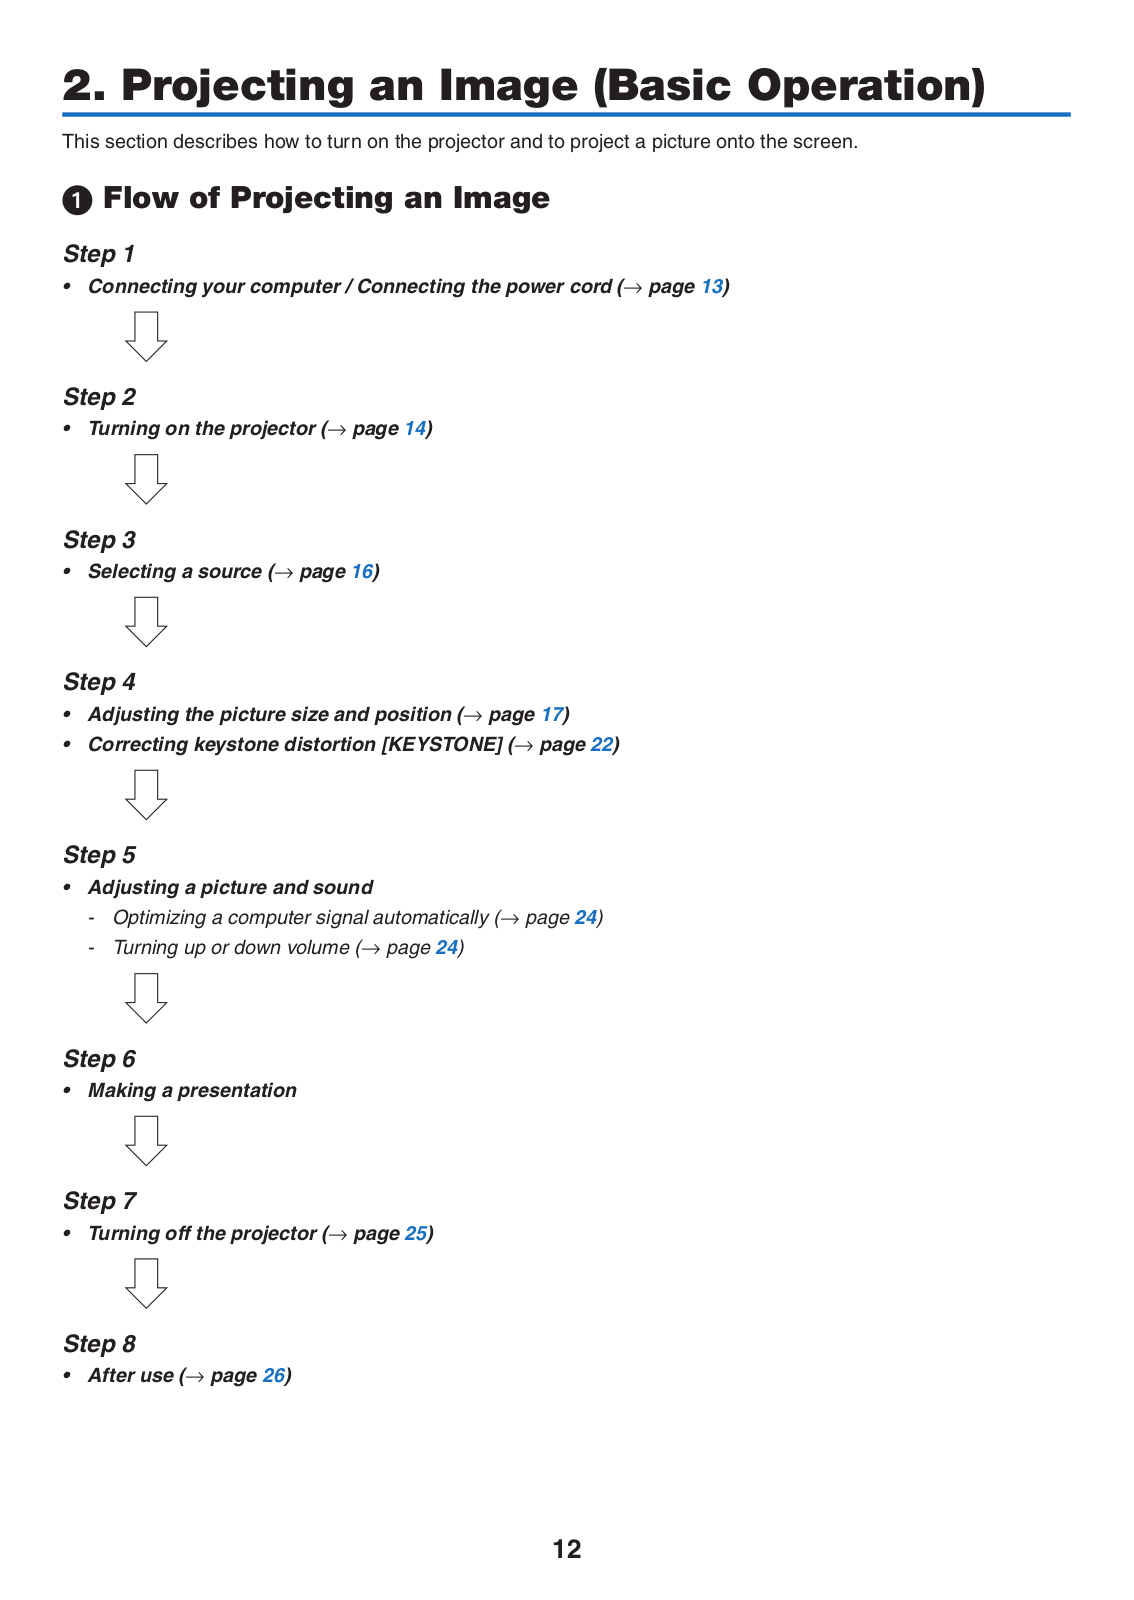
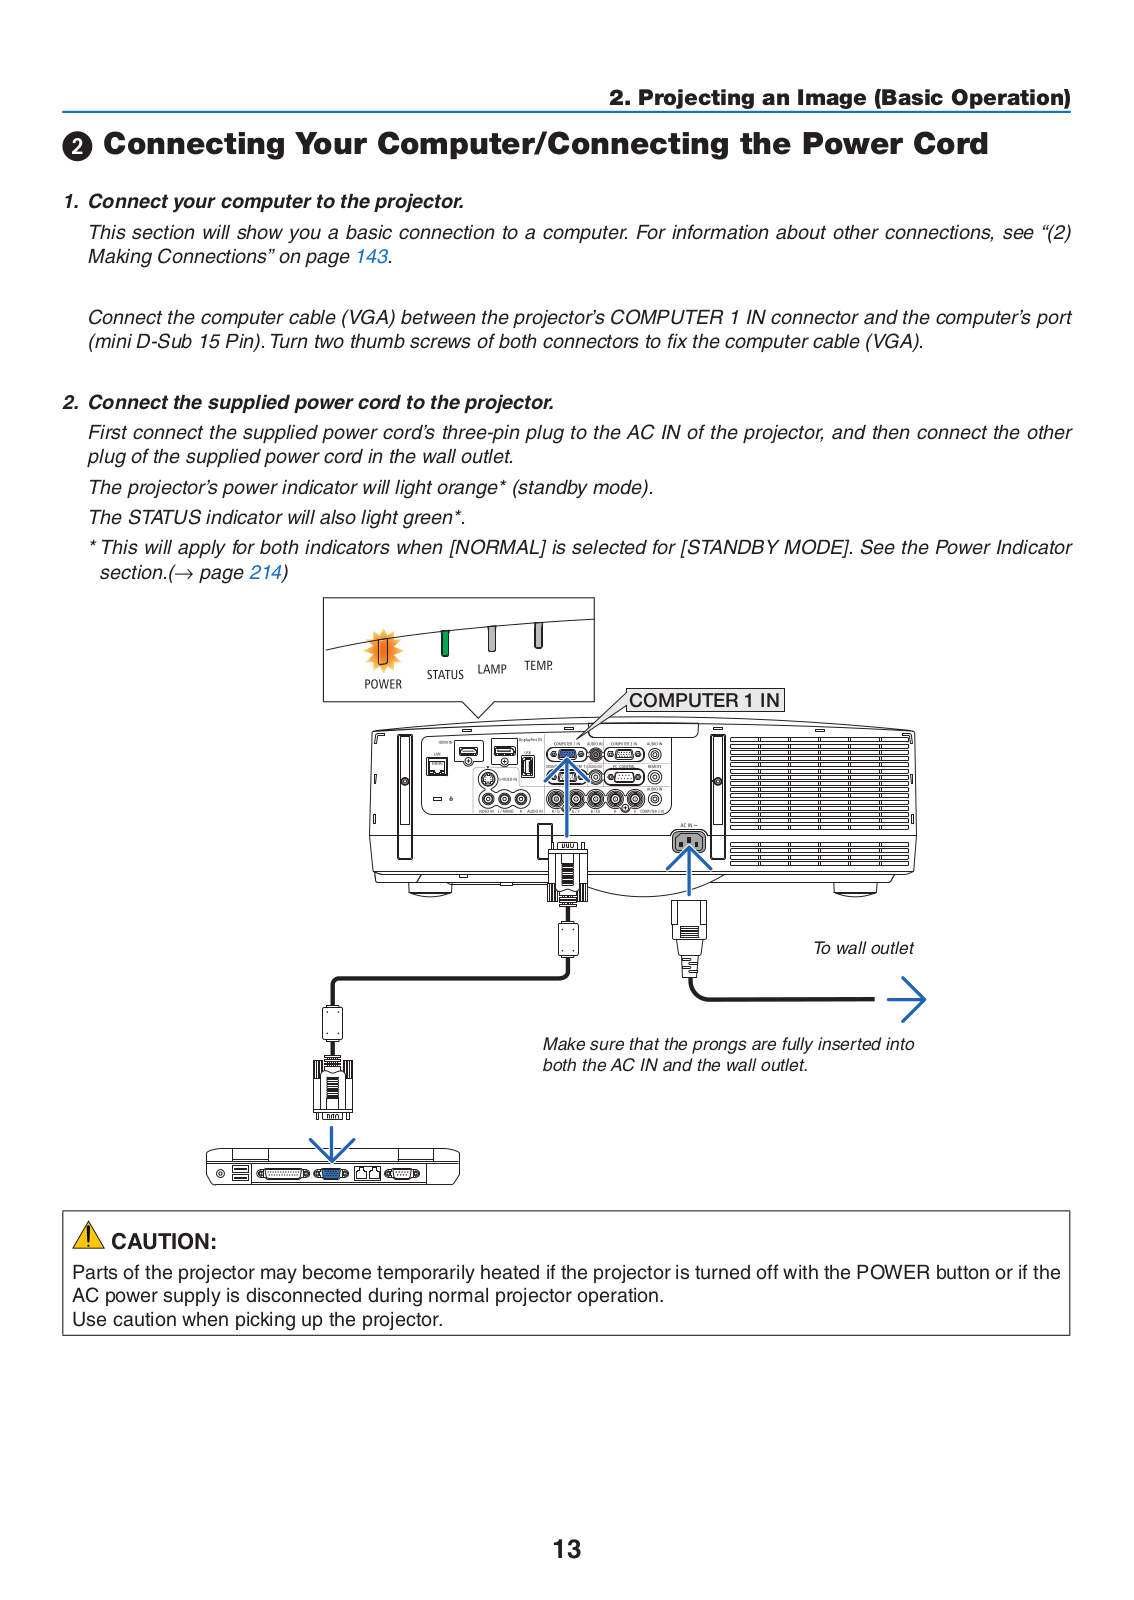
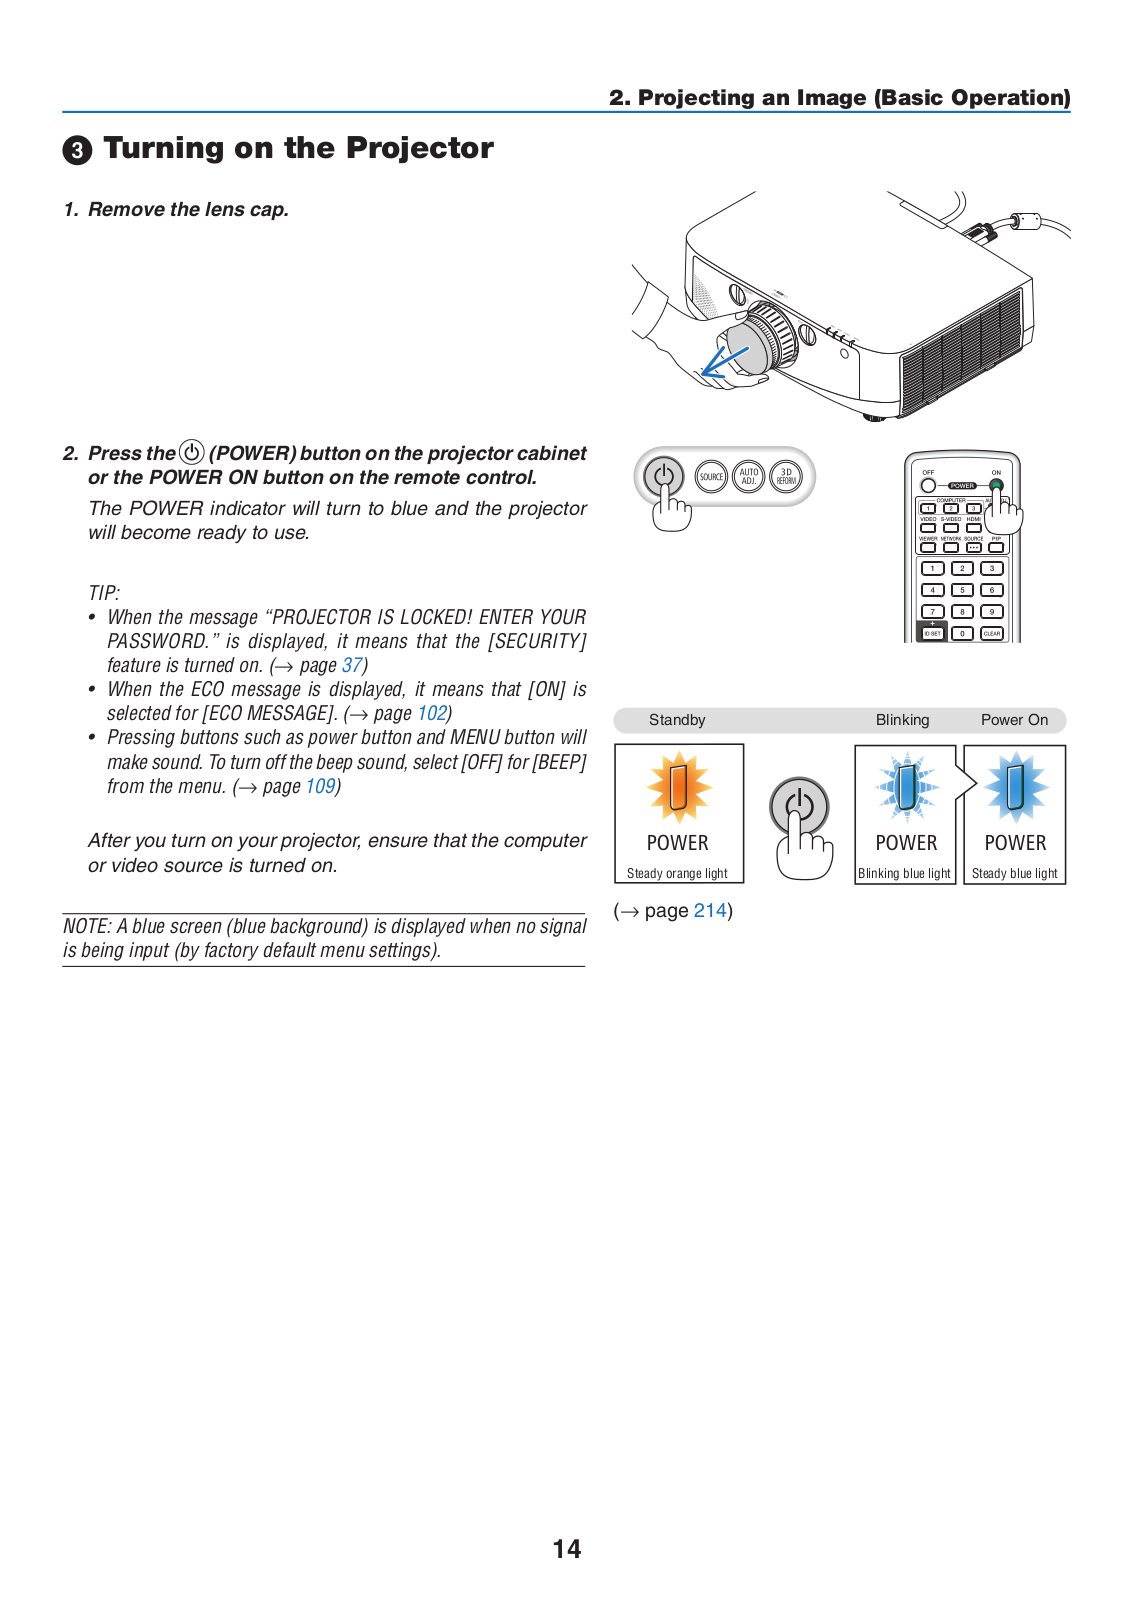
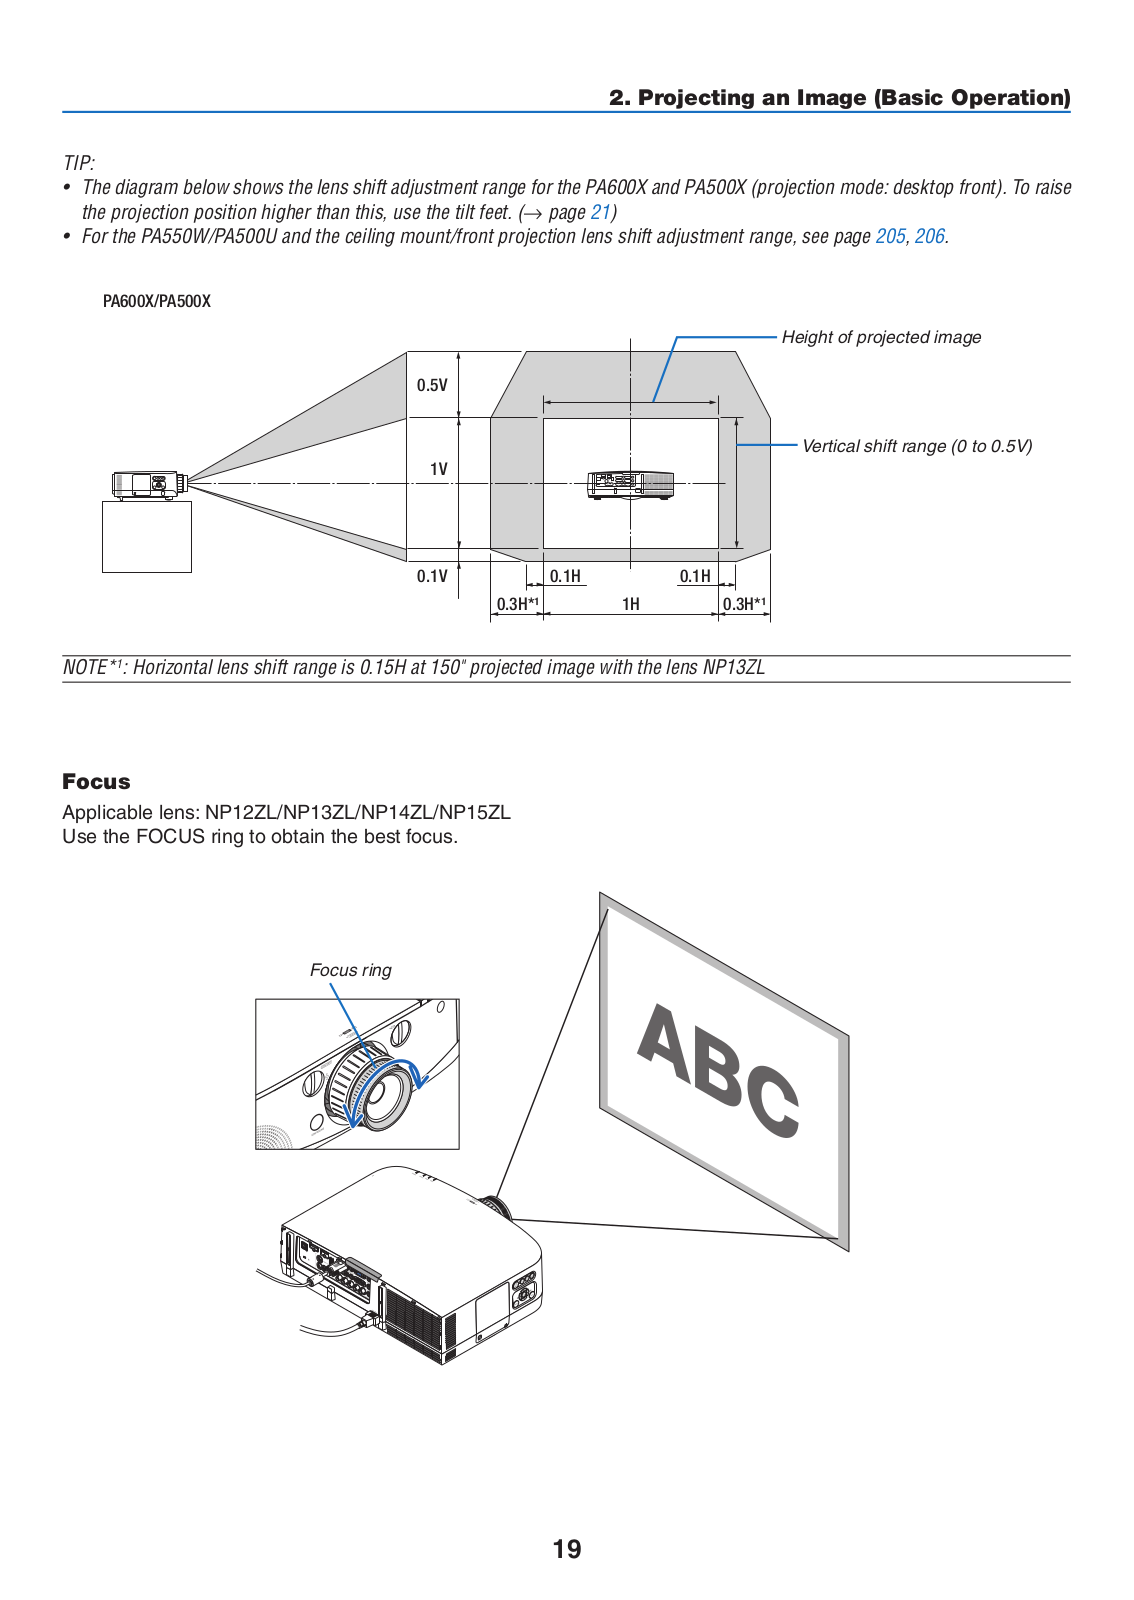
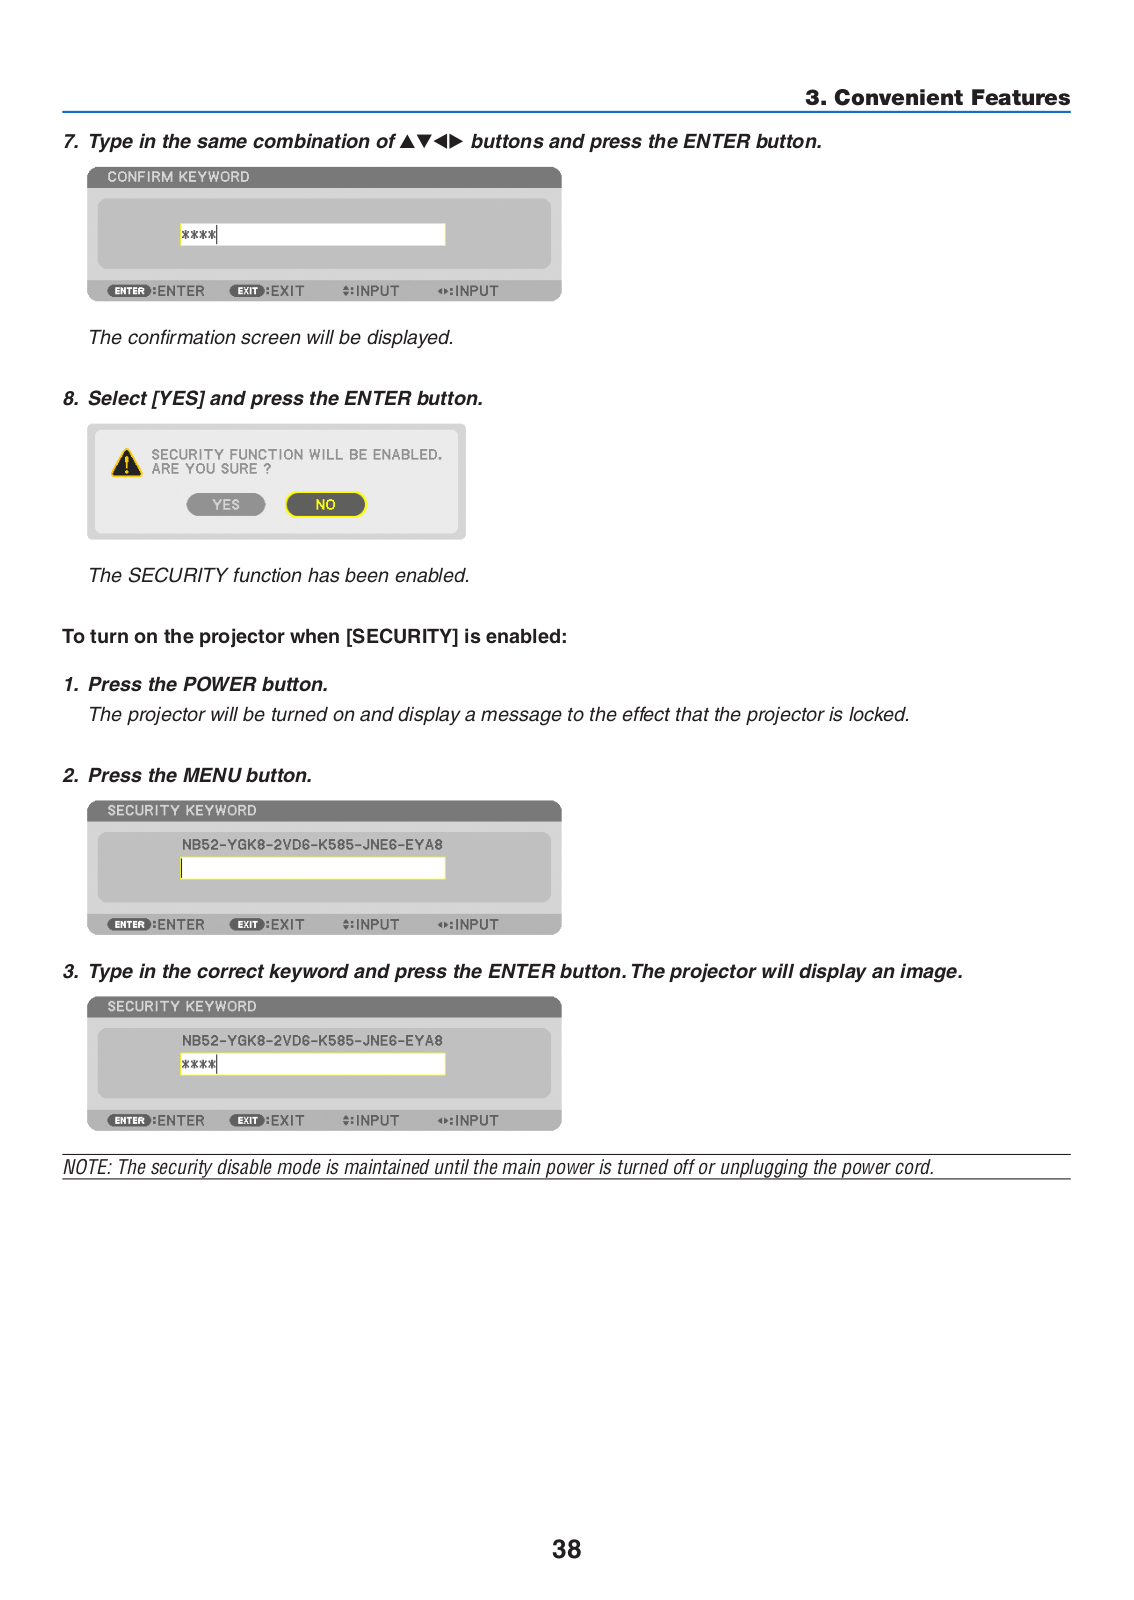
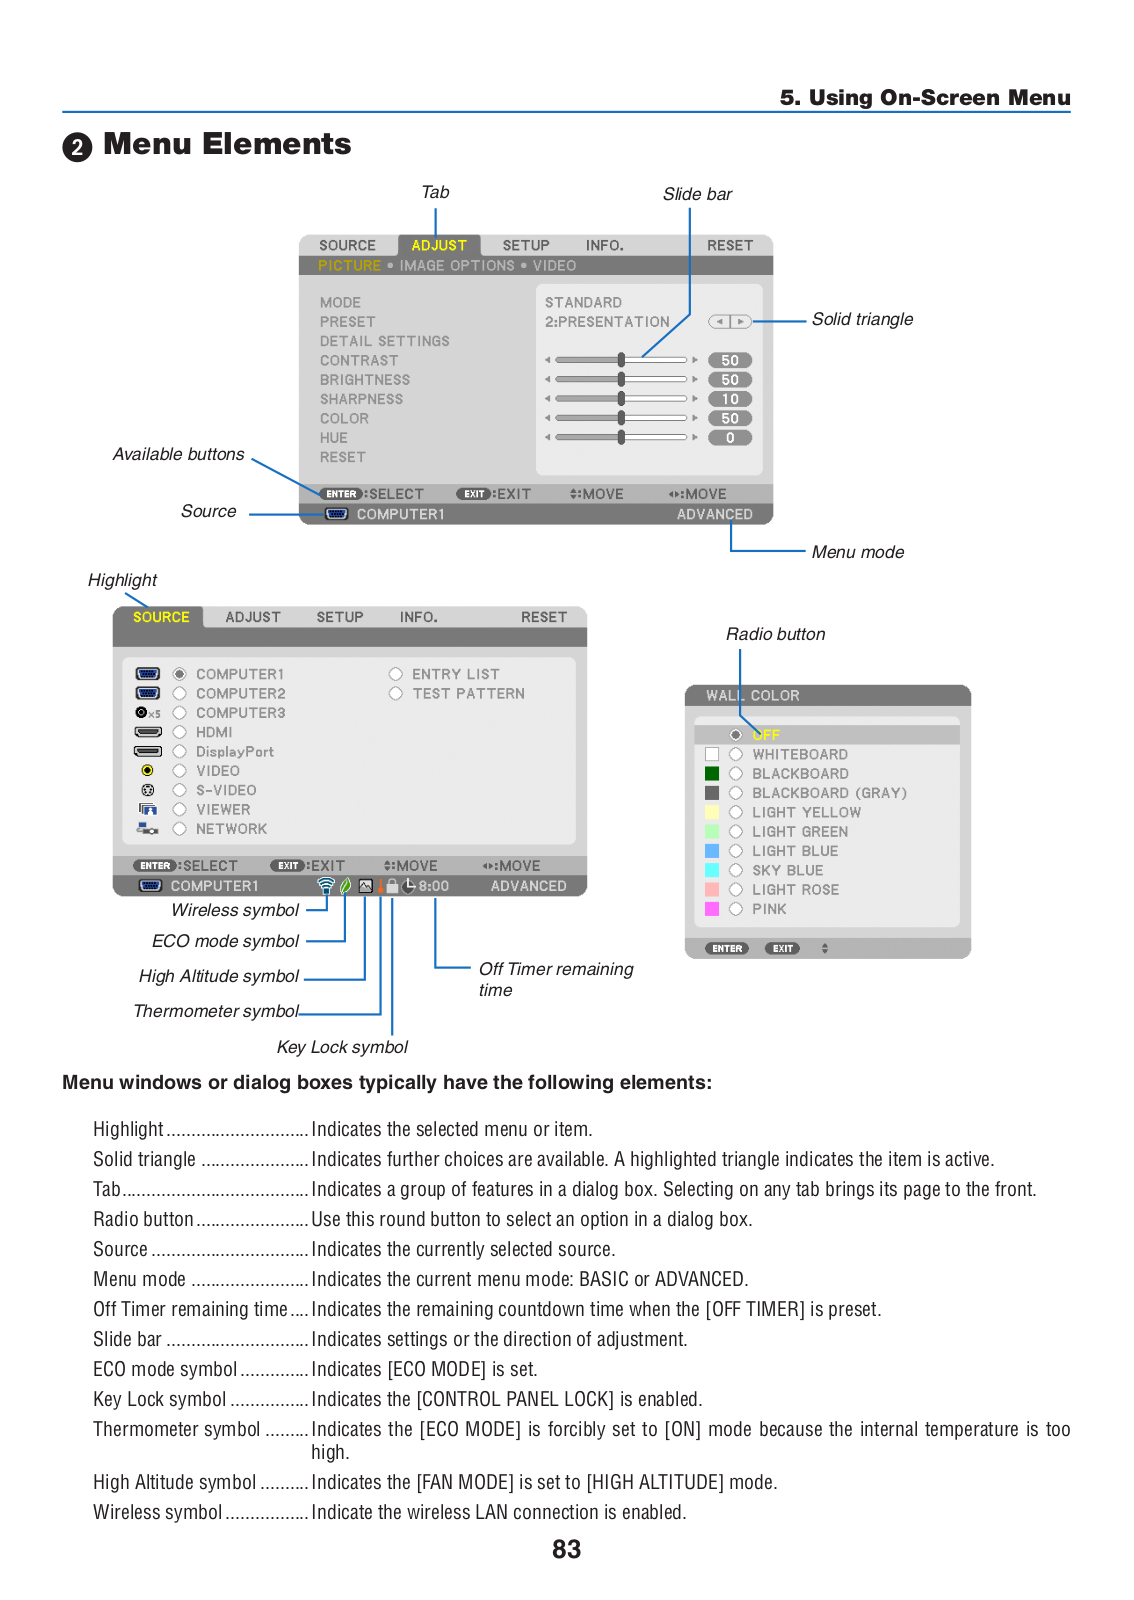
NEC PA600X, PA550W, PA500X, PA500U User Manual
...
NEC User Manual
Download
Specifications and Main Features
Frequently Asked Questions
User Manual
Download
Loading...
+
hidden pages
Unhide
You need points to download manuals.
1 point = 1 manual.
You can buy points or you can get point for every manual you upload.
Buy points
Upload your manuals
 Loading...