

MSI MS-7028 Installation Manual
Micro-Star International Co., Ltd.
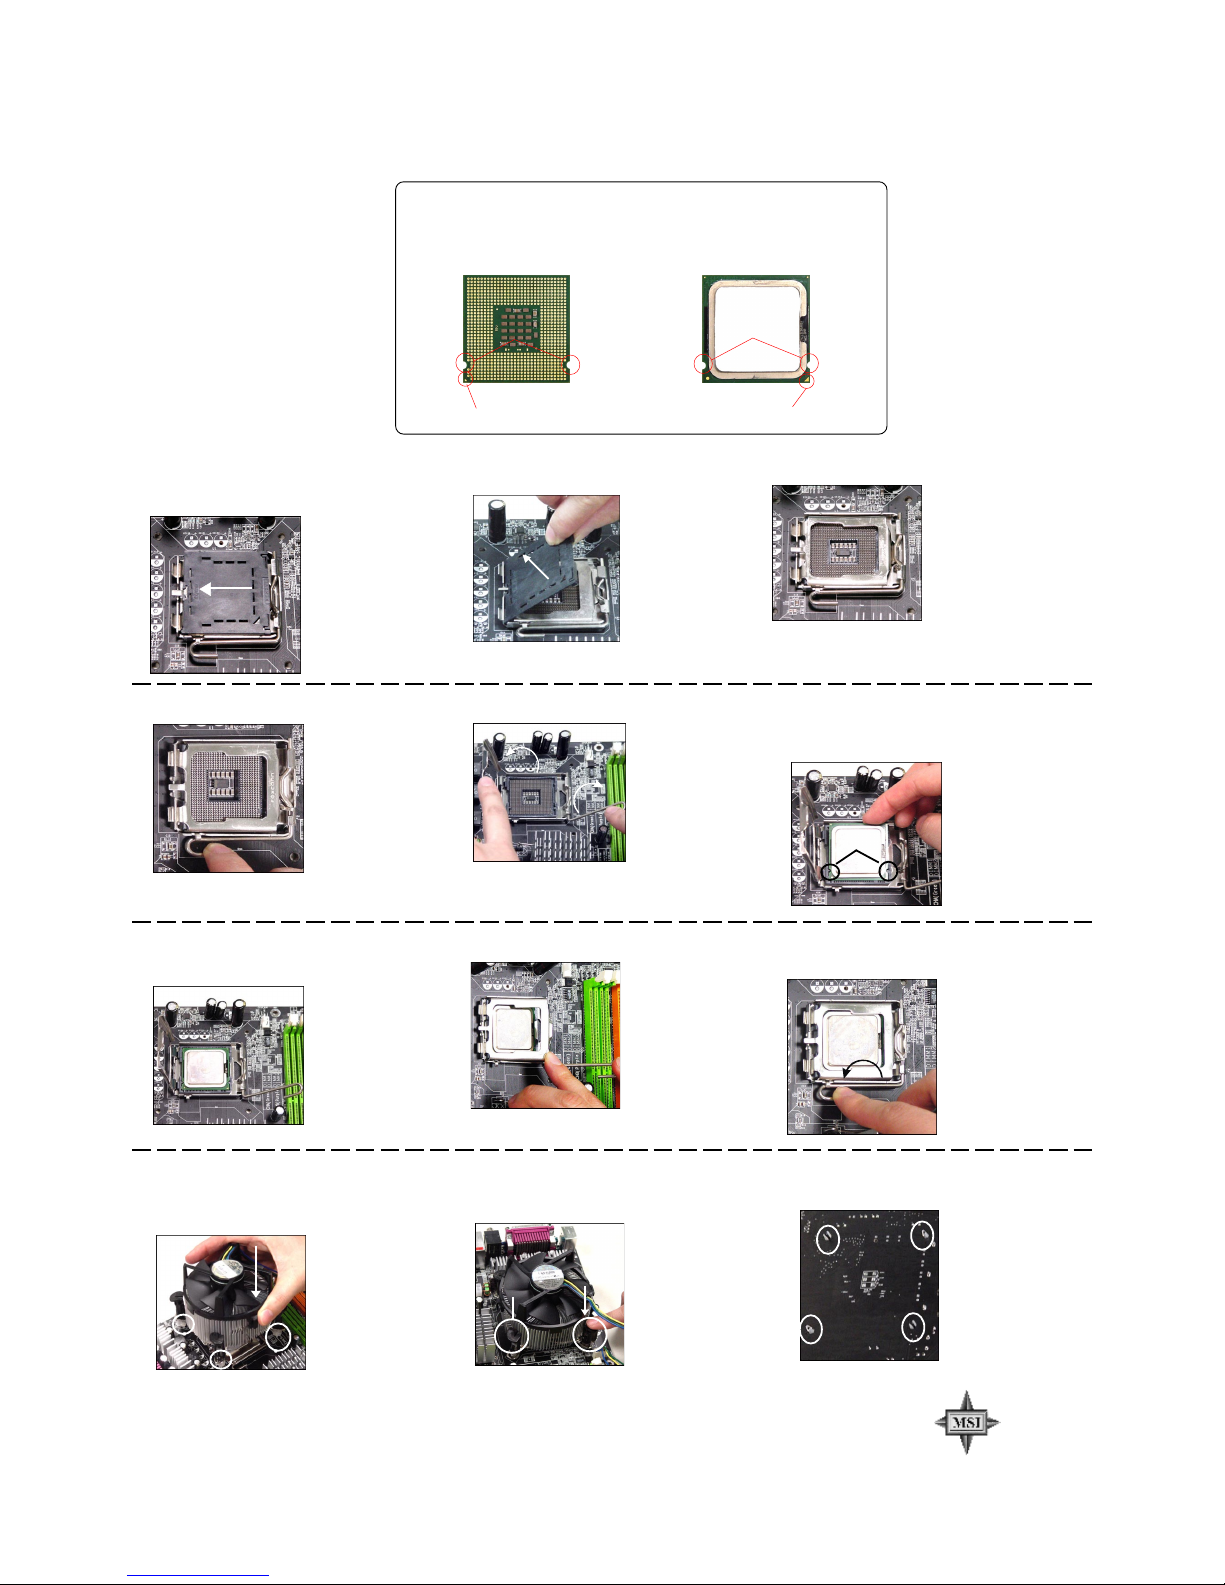
The Installation of LGA 775 CPU & CPU Cooler
MICRO-STAR
INTERNATIONAL
PN. G52-M7028X4
PRN. 2004/05
2. Remove the cap from lever hinge side (as the
arrow shows).
1. The CPU has a plastic cap on it to protect the
contact from damage. Before you have installed
the CPU, always cover it to protect the socket
pin.
4. Open the load lever.
3. The pins of socket reveal.
5. Lift the load lever up and open the load plate.
6. After confirming the CPU direction for correct mating,
put down the CPU in the socket housing frame. Be
sure to grasp on the edge of the CPU base. Note that
the alignment keys are matched.
7. Visually inspect if the CPU is seated well into
the socket. If not, take out the CPU with pure
vertical motion and reinstall.
alignment
key
8. Cover the load plate onto the package. 9. Press down the load lever lightly onto the load plate,
and then secure the lever with the hook under retention tab.
10. Align the holes on the mainboard with the
heatsink first. Push down the fan/heatsink until its four clips get wedged into the holes of
the mainboard.
12. Turn over the mainboard to confirm that the clipends are correctly inserted.
11. Press the four hooks down to fasten the fan.
Then rotate the locking switch (refer to the correct direction marked on it) to lock the hooks.
locking
switch
MSI Reminds You...
1.Confirm if your CPU cooler is firmly installed before turning on your system.
2.Do not touch the CPU socket pins to avoid damaging.
3. Whenever CPU is not installed, always protect your CPU socket pin with the plastic cap covered (shown in
Figure 1) to avoid damaging.
4. Please note that the mating/unmating durability of the CPU is 20 cycles. Therefore we suggest you do not
plug/unplug the CPU too often.
The surface of LGA 775 CPU.
Remember to apply some silicone
heat transfer compound on it for
better heat dispersion.
The pin-pad side of LGA 775 CPU.
Yellow triangle is the Pin 1 indicator
Alignment Key
Yellow triangle is the Pin 1 indicator
Alignment Key
 Loading...