

Motorola V820 Owner's Manual

Welcome! Software Copyright Notice
Welcom to the world of Motorola digital wireless communication!
We are pleased that you have chosen the Motorola V820 wireless phone.
Personal Communications Sector
600 North U.S Highway 45
Libertyville, Illinois 60048
1-800-331-6456(United States)
1-888-390-6456(TTY/TDD United States)
10800-461-4575(Canada)
www.motorola.com
MOTOROLA, the Stylized M Logo and all other trademarks indicated as such herein are trademarks of
Motorola, INC. Ⓡ Reg. U.S Pat. & Tm. Off. TrueSync, Sidekick, Starfish and the Stylized Starfish Logo are
registered tradmarks of Starfish Software, Inc., a wholly owned independent subsidiary of Motorola, Inc. All
other product or service names are the property of their respective owners.
◎ 2003 Motorola, Inc.All rights reserved. Printed in the U.S.A
The Motorola prouducts described in this manual may include copyrighted Motorola and third party software
stored in semiconductor memories or other media. Laws inthe United States and other countries preserve for
Motorola and third party software, such as the exclusive rights to distribute or reproduce the copyrighted
software. Accordingly, any copyrighted software contained in the Motorola products may not be modified,
reverse-engineered, distributed, or reproduced i any manner to the extent allowed by law. Furthemore, the
purchase of the Motorola products shall not be deemed to Motorola or any third party software provider,
except for the normal, non-exclusive, royalty-free license to use that arises by operation of law in the sale of
a product.
Manual number :
Cover number :

Safety and General Information
IMPORTANT INFORMATION ON SAFE AND EFFICIENT OPERATION.READ THIS INFORMATION BEFORE USING YOUR PHONE.
The information provided in this document supersedes the general safety information in user guides published
prior to December 1, 2002.
Exposure To Radio Frequency(RF) Energy
Your phone contains a transmitter and a receiver. When it is ON, it receives and transmits RF energy.
When you communicate with your phone, the system handling your call controls the power level at
which your phone transmits.
Your Motorola phone is designed to comply with local regulatory requirements in
your country concerning exposure of human beings to RF energy.
●
Federal Communications Commission laws : the 2nd parts of J paragraph at 47 CFR
●
ANSI / IEEE C 95.1-1992
●
IEEE C 95.1-1999
●
NCRP Report 86, 1986
●
ICNIRP 1998
●
Canada, Department of Health & Human Services, safety regulation, 6th articclesFrequency 3KHz ~ 300GHz, Electromagnetic power radiation emission regulation 1999
●
Australia communication Associates, “Wireless communication(Electromagnatic radiation emission)
Standards 1999
Operational Precautions
To assure optimal phone performance and make sure human exposure to RF energy is within the guidelines set
forth in the relecant standards, always adhere to the following procedures.
External Antenna Care
Use only the supplied or Motorola-approved replacement antenna. Unauthorized antennas, modifications, or
attachments could damage the phone.
Do NOT hold the external antenna when the phone is IN USE. Holding the external antenna affects call quality
and may cause the phone to operate at a higher power level than needed. In addition, use of unauthorized
antennas may result in non-compliance with the local regulatory requirements in your country.
Phone Operation
When placing or receiving a phone call, hold your phone as you would a wireline telephone.
Body-Worn Operation
To maintain compliance with RF energy exposure guidelines, if you wear a phone on your body when transmitting,
always place the phone in a Motorola-supplied or approved clip, holder, holster, case, or body harness for this
phone, where available. Use of accessories not approved by
Motorola may exceed RF energy exposure guidelines. If you do not use one of the body-worm accessories
approved or supplied by Motorola, and are not using the phone held in the normal use position, ensure the phone
and its antenna are at least 1inch(2.5centimeters) from your body when
transmitting.
54

Responsible driving best practices may be found in the "Wireless Phone Safety Tips" at the end of this manual and
at the Motorola website : www.Motorola.com/callsmart.
Operational Warnings
For Vehicles With an Air Bag
Do not place a phone in the area over an air bag or in the air bag deployment area. Air bags inflate with great force.
If a phone is placed in the air bag deployment area and the air bag inflates, the phone may be propelled with great
force and cause serious injury to occupants of the vehicle.
Potentially Explosive Atmospheres
Turn off your phone prior to entering any area with a potentially explosive atmosphere, unless it is a phone type
especially qualified for use in such areas and certified as "Intrinsically Safe." Do not remove, install, or charge
batteries in such areas. Sparks in a potentially explosive atmosphere can cause an sxplosion or fire resulting in
bodily injury or even death.
Note : The areas with potentially explosive atmospheres referred to above include fueling areas such as below
decks on boats, fuel or chemical transfer or storage facilities, areas where the air contains chemicals or particles,
such as grain, dust, or metal powders. Areas with potentially
explosive atmospheres are often but not always posted.
Blasting Caps and Areas
To avoid possible interference with blasting operations, turn OFF your phone when your are near electrical blasting
caps, in a blasting area, or in
areas posted "Turn off electronic devices." Obey all signs and instructions.
6 7
Medical Devices
Pacemakers
Pacemaker manufacturers recommend that a minimun separation of 6 inches(15centimeters) be
maintained between a handheld wireless phone and pacemaker.
Persons with pacemakers should :
●
ALWAYS keep the phone more than 6inches(15centimeters) from your pacemaker when the
phone is turned ON.
●
NOT carry the phone in the breast pocket.
●
Use the ear opposite the pacemaker to minimize the potential for interference.
●
Turn OFF the phone immediately if you have any reason to suspect that interference is taking place.
Hearing Aids
Some digital wireless phones may interfere with some hearing aids. In the event of such interference,
you may want to consult your hearing aid manufacturer to discuss alternatives.
Other Medical Devices
If you use any other personal medical device, consult the manufacturer of your device to determine if it is
adequately shielded from RF energy. Your physician may be able to assist you in obtaining this information.
Use While Driving
Check the laws and regulations on the use of phones in the area where you drive. Always obey them.
When using your phone while driving, please :

●
Give full attention to driving and to the road.
●
Use hands-free operation, if available.
●
Pull off the road and park before making or answering a call if driving conditions so require.
Operational Warnings
For Vehicles With an Air Bag
Do not place a portable phone in the area over an air bag or in the air bag deployment area.
Air bags inflate with great force. If a portable phone is placed in the air bag deployment area
and the air bag inflates, the phone may be propelled with great force and cause serious injury
to occupants of the vehicle.
Potentially Explosive Atmospheres
Turn off your phone prior to entering any area with a potentially explosive atmosphere, unless the phone is a
model specifically identified as being “Intrinsically Safe.” Do not remove, install, or charge batteries in such
areas. Sparks in a potentially explosive atmosphere can cause an explosion or fire resulting in bodily injury
or even death.
Note : The areas with potentially explosive atmospheres referred to above include fueling areas such as below
decks on boats, fuel or chemical transfer or storage facilities, areas where the air contains chemicals or particles,
such as grain, dust, or metal powders, and any other area where you would normally be advised to turn off your
vehicle engine. Areas with potentially explosive atmospheres are aften but not always posted.
8 9
Batteries
Batteries can cause property damage and/or bodily injury such as burns if a conductive material such
as jewelry, keys, or beaded chains touch exposed terminals. The conductive material may complete an electrical
circuit(short circuit) and become quite hot. Exercise care in handling any charged battery, particularly when placing
it inside a pocket, purse, or other container with metal objects. Use only
Motorola original batteries and chargers.
Your battery or phone may contain symbols, defined as follows :
Symbol Definition
Important safety information will follow.
Your battery or phone should not be disposed of in a fire
Your battery or phone may require recycling in accordance
with local laws. Contact your local regulatory authorities for
more information.
Your battery or phone should not be thrown in the trash.
Your phone contains an internal lithium ion battery.
IV. Using Display
Contents
I. Before Using
Confirming Components 1 5
Name and Function of Each Part 1 5
Basic Keypad Operation 1 6
Menu Map 1 7
Display Icon Internal display screen 2 1
Sub-LCD menu 2 3
How to Use Battery Cell Phone and Battery Pack 2 4
Precautions When Using 2 8
Power ON and OFF Power ON 3 0
Placing a Call 3 0
External display screen 2 2
The Battery and UIM Card 2 4
Charging Battery Pack 2 5
Battery Pack Charging
Progress State 2 5
Battery Pack Charging Time 2 6
Battery Pack Operating Time 2 6
Low Voltage Alert 2 7
Battery Pack Care Information 2 7
II. Basic Operation
Power OFF 3 0
Placing a call from Phone Book 3 1
Turbo Dialing 3 1
contents
III. Using Bell Control
Placing a Call Electronic Dialing 3 1
Receiveing a call Receiveing a call Using
Unanswered Call 3 9
Emergency Dialing 3 2
Voice Dialing 3 3
E a r m i c r o p h o n e 3 5
Setting Call Receive Mode 3 5
Using Auto Answering 3 6
III. Using Bell Control
Changing Ring type Saving Recorded Sound 4 1
Changing Receive Mode 4 2
Changing Ring Volume 4 3
Selecting Ringer Option 4 4
Setting Alert Tone 4 4
Setting Sound Effect Power Sound 4 5
Setting Etiquette Mode 4 2
Connect Tone 4 5
1 Min Timer 4 5
Svc. Area Alert 4 5
Key Sound 4 6
Folder Sound 4 6
Sel. Alert Tone 4 6
10 11
Graphic Mode Internal screen 4 8
Back Light Time Main LCD Time 5 0
Change Banner 5 1
Setting Svc. Lamp 5 1
Setting Light Color 5 2
External screen 4 8
Deleting graphic 4 9
Keypad Time 5 0
Keypad Color 5 3
SVC. Lamp Color 5 3
V. Using PIM
S c h e d u l e Entering Schedule 5 5
Using To Do List Entering To do 5 7
Using Biz. Card 5 8
Using D-day Entering D-day 6 0
Using Bio Rhythm 6 1
Checking Schedule 5 6
Clearing Schedule 5 6
Checking To do 5 7
Clearing To do 5 8
Sending Biz. Card 5 9
Checking D-day 6 1
VI. Using Tool Box
Time Set Setting Timer 6 3
Alram Set Setting Alram 6 4
C a l e n d a r 6 7
Timer Off 6 3
Alram off 6 6
Setting Alarm Sound 6 6
World Time 6 7
C a l c u l a t o r 6 8
R e c o r d i n g R e c o r d i n g 6 9
Using Preview Taking a Picture 7 2
Managing a Picture Viewing picture 7 9
Sending Photos by e-mail 8 1
Photowallpaper Setting 8 1
Video Capture Taking a video 8 2
Video Play Using Options 8 8
Camera Setup 8 9
Call Waiting 9 1
Call Forward 9 1
Setting Auto Area Code 9 4
VI. Using Tool Box
Ending Recording 6 9
Playback of Recording 7 0
Deleting Recorded Dontent 7 0
VI. 타이머기능사용하기
VII. Using Camera
Taking self-photo 7 3
Using Options 1 7 4
Using Options 2 7 7
Using Option 8 0
Using Option 8 2
Taking self-video 8 3
Using Options 1 8 4
Using Options 2 8 5
VI. 타이머기능사용하기
VIII. Using Setting
Fwd All Calls 9 2
Fwd Default 9 2
Fwd if busy 9 3
Fwd if no ans 9 3

VI. 타이머기능사용하기
VI. Using Setting
Set Int’l Code 9 5
Change Language 9 5
Data Mode Data Rate 9 6
U-Mail Config 9 7
Browser Setup 9 8
My Menu 9 9
Data Profile 9 6
Use 1X Data 9 6
Common Port 9 7
IX. Using Security
Using Auto Lock One-Touch Lock Feature 1 0 1
Change Code 1 0 2
Call Restrict 1 0 2
PIN Set 1 0 3
Master Reset 1 0 3
S/W Version 1 0 4
X. Using Radio Comm.
Using Bluetooth H e a d s e t 1 0 6
Using IrDA Dial-up Network 1 1 4
N e t w o r k 1 0 9
OBEX Push 1 1 1
F T P 1 1 2
PC Sync 1 1 3
My Info 1 1 4
Phone Book data and
file transport 1 1 6
XI. Using Phone Book
Storing a Number Storing a Number from a Menu 1 1 9
Correcting Phone BookCorrecting Phone Book 1 2 3
Deleting Phone Book Deleting the whole Phone Book 1 2 5
Searching Phone Book 1 2 7
Storing a Number on idle Mode 1 2 0
Correcting Name and E-mail Adds 1 2 4
Correcting Group 1 2 4
Deleting Stored List 1 2 6
Deleting Individual Items 1 2 6
Deleting Group 1 2 7
View All 1 2 8
Recall By Loc 1 2 8
Recall By Group 1 2 9
Recall By Name 1 2 9
Using [OPTION] 1 3 0
Memory Status 1 3 1
View my Num 1 3 1
Copy Entries 1 3 2
XlI.Using Functions During a Call
Adjusting Tone Volume During a Call 1 3 4
Taking Note During a Call 1 3 4
Searching Menu During a Call 1 3 4
Sending My Number 1 3 5
M u t i n g 1 3 5
Using Speaker Phone 1 3 6
Viewing Call History Information 1 3 6
Using [PBOOK] 1 3 4
Using [MSG] 1 3 5
XlII. Using SMS Features
Checking Message Text Message 1 3 8
Sending Message 1 4 0
Setting Message Receive Function 1 4 3
Memory Status 1 4 4
Deleting Message Delete received message 1 4 5
Voice Message 1 4 0
Sending a New Message 1 4 1
Sending a Stored Message 1 4 1
Move to Message 1 4 2
Alert Freqency 1 4 3
View Msg 1 4 3
Msg Sound 1 4 4
Save To 1 4 4
Deleting saved message 1 4 5
XIV. Using E-mail
Sending E-mail New e-mail 1 4 7
Checking New E-mail Using the folder menu 1 5 2
Managing Data Folder 1 5 5
E-mail Setting Receiving & View Setting 1 5 7
Sending stored e-mail 1 5 0
Using the e-mail menu 1 5 3
Replaying/Forwarding e-mail 1 5 5
Data Folder 1 5 6
Send & New Mail Setting 1 5 8
Register Account Setting 1 5 8
O t h e r s 1 5 9
View Mail Setting 1 2 9
XV. Using Data Folder
Using Data Folder Display All 1 6 1
User Folder 1 6 4
My Data 1 6 6
P i c t u r e 1 6 8
R i n g 1 6 9
v C a r d 1 6 9
O t h e r s 1 7 0
XVI. Using U-Max
Accessing U-Info Accessing U-Info 1 7 2
Accessing J A V A Accessing J A V A 1 7 3
Accessing U-Map Accessing U-Map 1 7 6
U-Info MENU 1 7 2
J A V AM E N U 1 7 3
Key usage in J A V A 1 7 4
Download J A V Aa p p l i c a t i o n s 1 7 4
Execute J A V Aa p p l i c a t i o n s 1 7 5
U-Map Menu 1 7 6
XVIl. Appendix
T r o u b l e s h o o t i n g 1 7 8
Specific Absorption Rate data 1 7 9
Specification and Characteristics 1 8 1
12
13
Before Using
1. Confirming Components 1 5
2. Name and Function of Each Part1 5
3. Basic Keypad Operation 1 6
4. Menu Map 1 7
5. Display Icon 2 1
6. How to Use Battery 2 4
7. Precautions When Using 2 8
1. Confirming Components
■
P h o n e
■
B a t t e r y ( 5 5 0 m A h / 8 7 0 m A h )
■
U s e r’s Manual
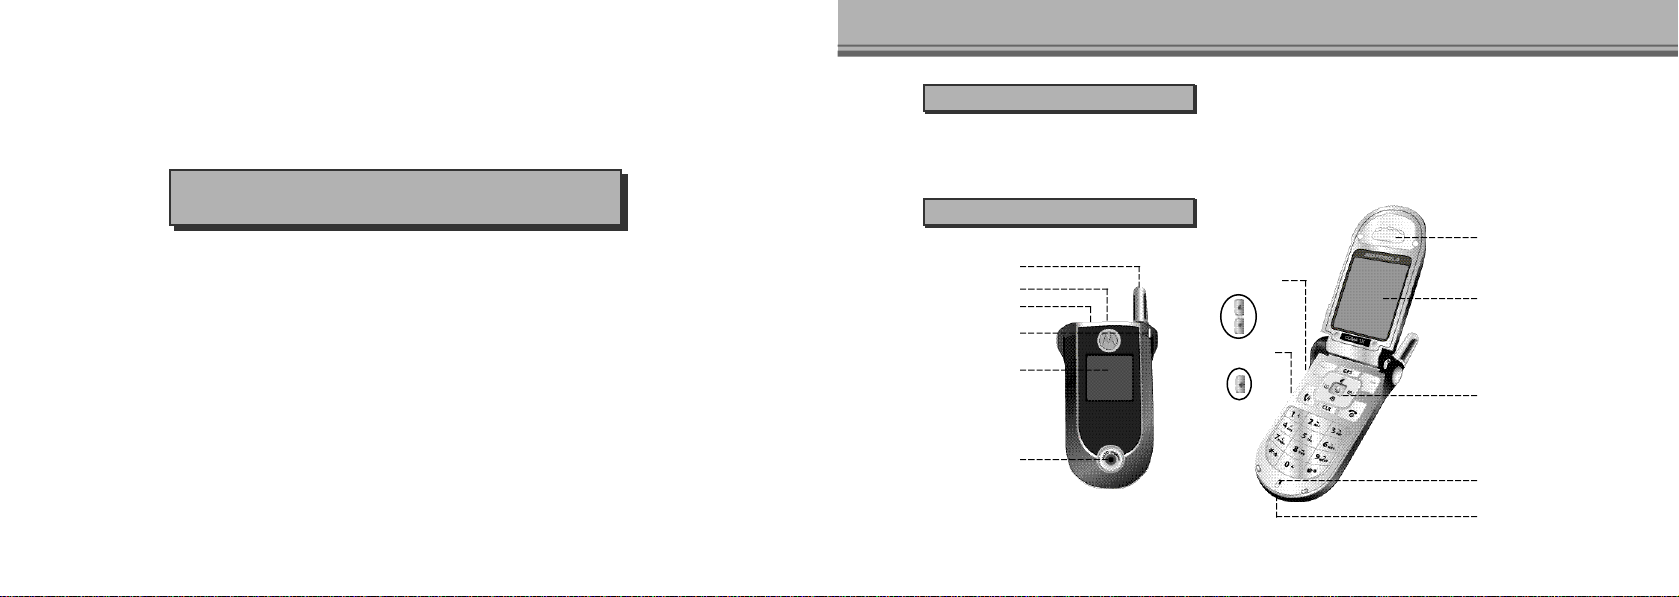
2. Name and Function of Each Part
A n t e n n a
Earpiece Terminal
I r D A
Service Lamp
External LCD
Camera lens
Volume Button
Camera Key
Before Using
R e c e i v e r
LCD Screen
Navigation Key
T r a n s m i t t e r
Wireless Data Communication
Cable Connection Port
15
Before Using Before Using
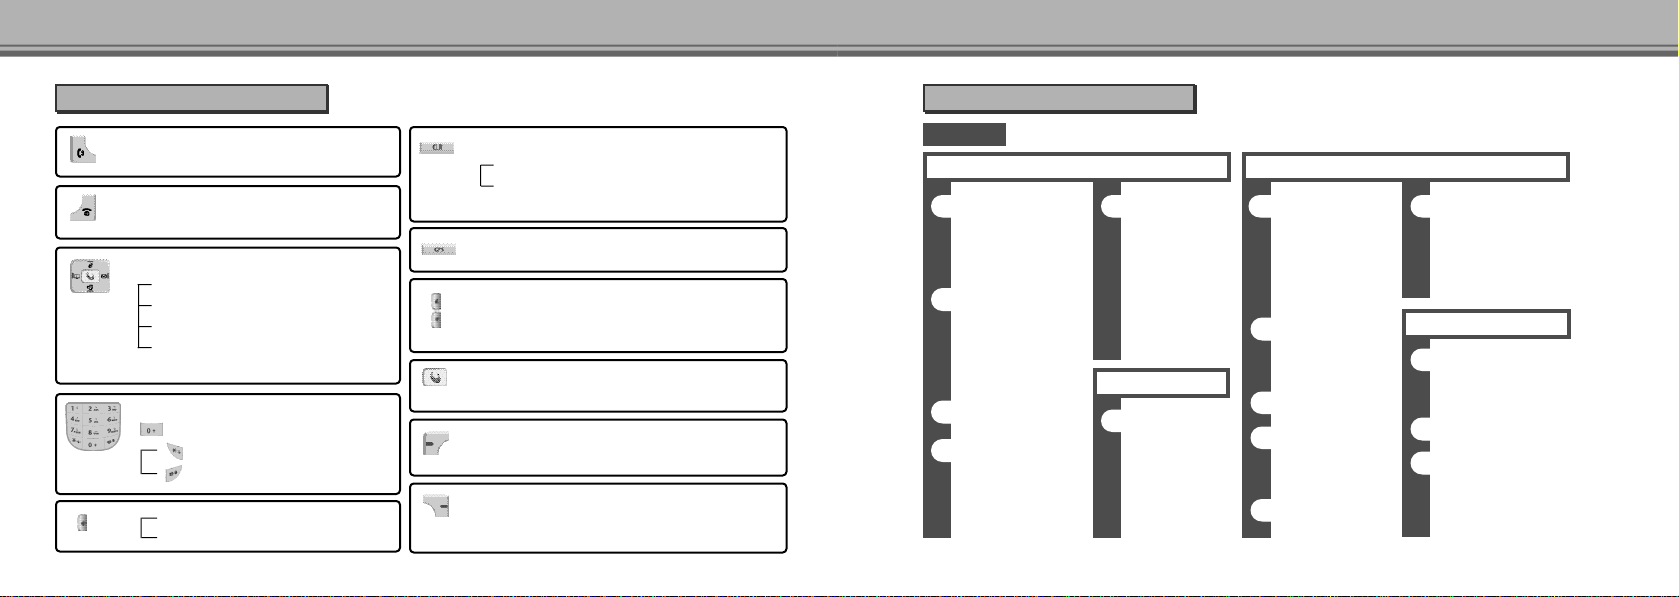
3. Basic Keypad Operation 4. Menu Map
■ To Place or receive a call.
■ Short press : To dispaly a calling number list
■ To turn the power ON/OFF and end a call
■ To end a selected feature to return to the idle screen
■ To use Idle screen feature
Left : One-touch for ‘Phone Book’
Right : One-touch for ‘M e s s a g e ’
Up : One-touch for ‘U - M a i l ’M e n u
Down : Short press : ‘Data Folder’
■ To use menu feature - Menu search feature
■ Dial buttons - To enter numbers and characters
■ Quick dialing for an international call
■ To set/reset Etiquette feature
To set/reset One-touch lock feature
■ One-touch for Camera menu
Camera Preview Preparng
■ To delete characters or number while entering them
Short press : To delete characters one by one
Long press : To delete the whole characters
■ To move to the upper menu or previous display screen
■ One-touch for ‘G P S’
■ To search lists and control volume during a call
■ If you press and hold the volume button as the folder
is shut, the sub LCD light becomes on.
■ U-Info, U-Mail, J A V A, U-Map, UNI-Info(U-Max)
■ To use menu and message features - [OK] feature
■ To move to the top menu in Idle screen
■ To use menu and message features - [OPTION] features
■ To move to the top ‘MY MENU’in Idle screen
■ To use menu and message features - [BACK] or
[CANCEL] features
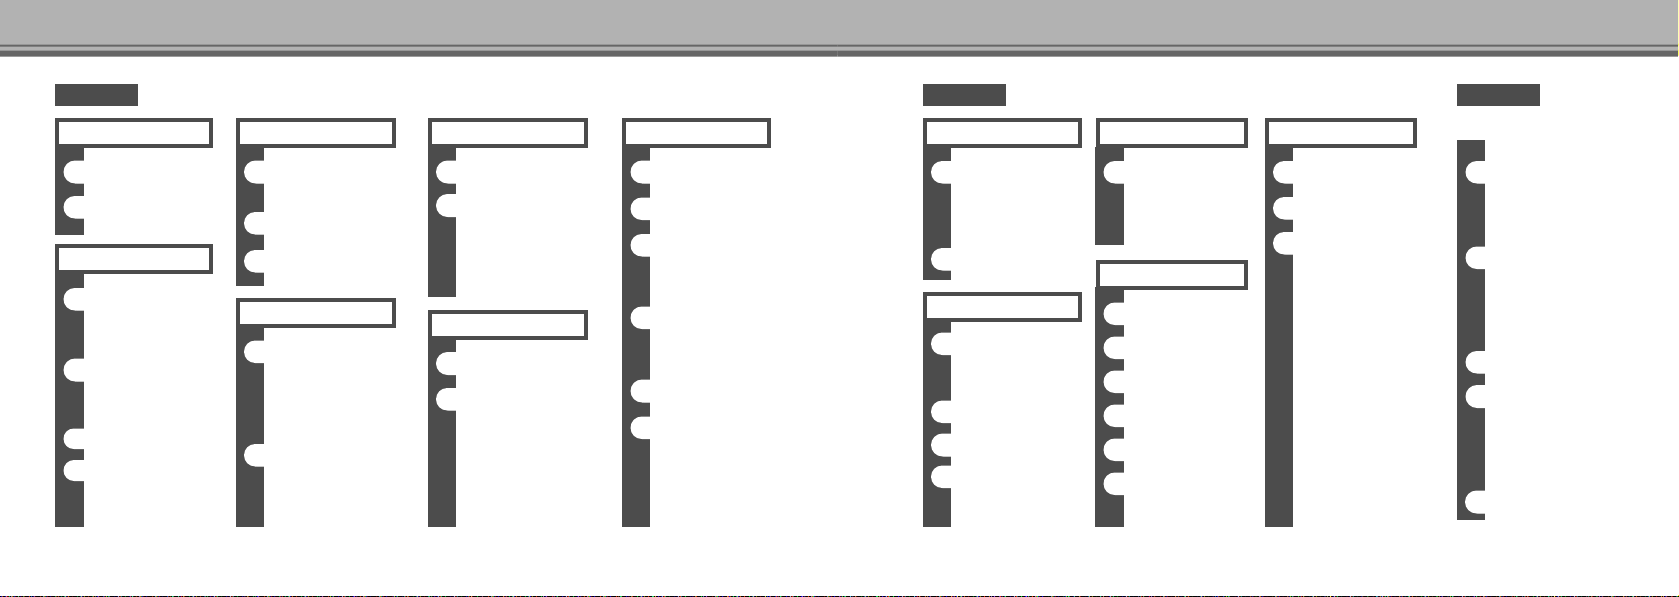
MENU
1. Ringer Style
1. Melody (1~26)
2. Natural Sound (1~4)
3. Ringer (1~9)
2. Ring/Vib
Bell Only
Vib. Only
Vib. Then Bell
L a m p
3. Volume
4. Alert Tone
1. Connect Tone
2. 1 Min Timer
3. Svc. Alert
1. Sound
5. Sound Effect
1. Power Sound
2. Key Sound
3. Folder Sound
4. Sel. Alert Tone
5. Ringer Option
To Set Volume
Low to Hight
2. Display
1. Graphic Mode
1. Main LCD
Idle Screen
Power On
Power Off
I n c a l l i n g
1. Graphic Mode
2. Sub LCD
Sub Idle
Sub Power On
Sub Power Off
Sub Incalling
2. Change Banner
1. Main Banner
2. Sub Banner
3. Menu Style
4. Back Light Time
1. Main LCD Time
2. Keypad Time
5. Svc. Lamp
2. Display
5. Light Color
1. Keypad Color
Blue, Amber
2. Svc. Lamp Color
Green, Amber
3. Scheduler
1. Schedule
1. Schedule
2. To do list
2. Calendar
3. Alarm Set
1. Choose Time
2. Set Time
3. Morning Call
1716
Before Using Before Using
3. Scheduler
4. Calculator
5. World Time
4. Multimedia
1. Camera
1. Preview
2. Photo Manager
2. Video Capture
1. Preview
2. Video Manager
3. Photo Mail
4. Camera Setup
1. Pre Shutter
2. Shutter Sound
4. Multimedia
4. Camera Setup
3. Deleted
5. Memory Info.
6. Help
5. Voice Wizard
1. Auto Answering
1. Auto Answering
2. Answer Ment
3. Answering Rec.
4. Answering Play
2. Recording Note
1. Record
2. Play
3. Delete All
3. Recorded Sound
4. Voice Dialing
1. Storing
2. View List
3. Auto Dialing
4. Delete All
6. Security(Enter Code)
1. Auto Lock
2. Privacy
Phone Book
M e s s a g e
C a m e r a - C a m
S c h e d u l e
Call History
C L I
6. Security(Enter Code)5. Voice Wizard
3. Emergency Call
4. Change Code
5. Call Restrict
1. Int’l Call
2. Outgoing Call
6. PIN Set
1. Require PIN
2. PIN Change
7. Master Reset
8. Clear List
1. Phone Book
2. Unans Call
3. Outgoing Call
4. Incoming Call
MENUMENU
6. Security(Enter Code)
8. Clear List
5. Schedule
6. To do list
7. Alarm Set
9. S/W Version
7. Setting
1. Call Answer
1. Flip Answer
2. Auto Answer
2. Call Waiting
3. Incoming Call
4. Call Timer
1. Individual
2. Outgoing Call
7. Setting
4. Call Timer
3. Incoming Call
4. Roaming Call
5. Cumulative
9. Phone Book
1. View All
2. Add Entry
3. Loc. Search
4. Group Search
5. Name Search
6. Group Bell
9. Phone Book
7. Memory Status
8. View My Num
9. Copy Entries
1. UIM To Phone
Select Copy
Singer Copy
2. Phone To UIM
Select Copy
Singer Copy
Message
1. Read Msgs
1. Inbox
2. UIM
3. Web Alert
2. Send a Msg
1. New Msg
2. SMS Outbox
3. UIM
4. UIM
3. Voice Msgs
4. Message Setup
1. Alert Frequency
2. View Msg
3. Msg Sound
4. Save To
5. Memory Status
1918
Before Using Before Using
U-Max
1. U-Info
2. U-Mail
1. New Mail
2. Inbox
3. Send Box
4. Check New Mail
5. Data Folder
6. Mail Settings
3. UNI-INFO
4. J A V A
1. Applet Info
2. Execute Applet
3. Delete Applet
4. Move Applet
5. Download
6. Wireless Setup
4. J A V A
7. New Folder
8. Edit Folder
9. Delete Folder
0. Memory Usage
4. U-Map
1. U_service
2. Setting
GPS on/off
Privacy set
Connect URL
MPC IP
Data Profile
Data Folder
1. Display All
2. User folder
3. My Data
1. My Photo
2. My Video
3. My Record
4. Picture
5. Ring
6. vCard
7. SMIL
8. Others
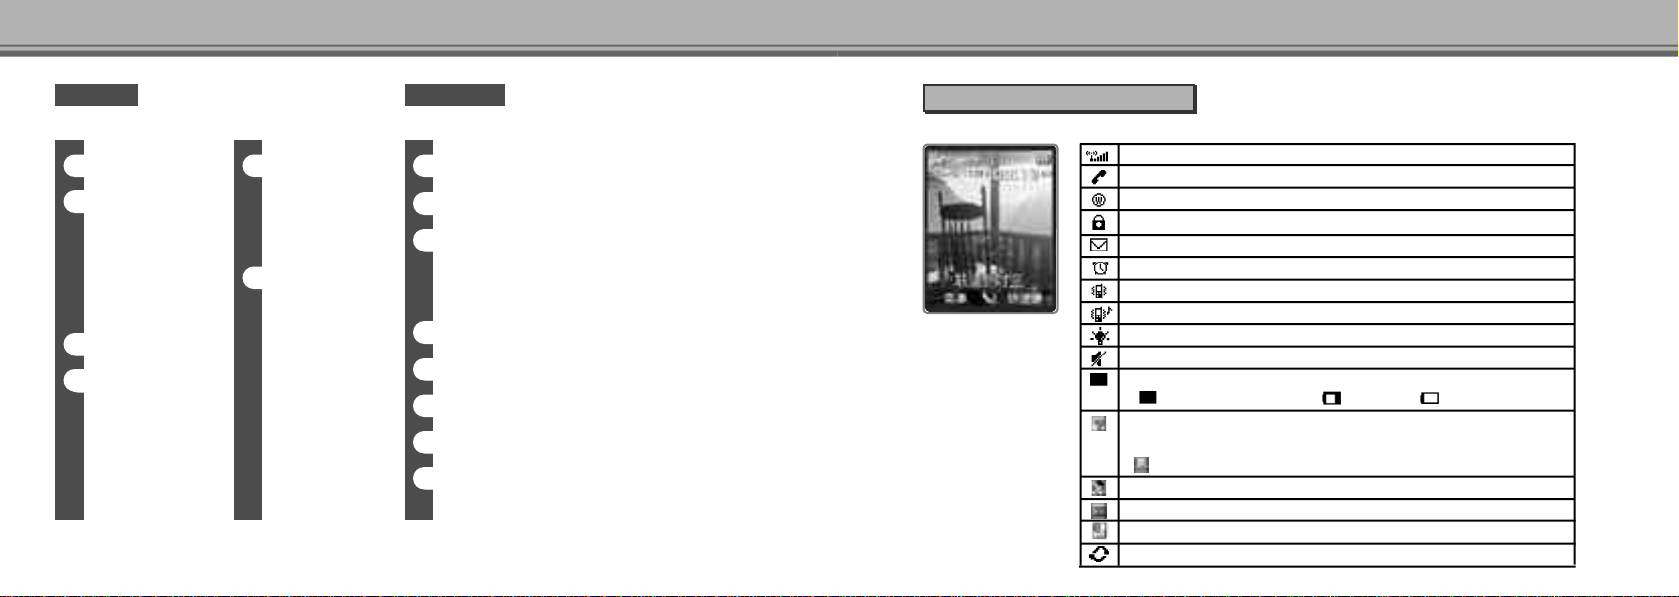
5. Dispaly Icon
Internal display screen
Current signal strength this indicated by the number of lines shown.
Indicates current calling status. This icon appears when a call is in process.
WAP connecting mode.
Phone Lock setting activated. Disappearing when it is inactivated.
Text or voice message received. It disappears when you retrieve new message.
Alarm setting activated. Disappearing when you discharge Alarm setting.
Indicates Ringer type is Vib Only.
Indicates Ringer type is Vib Then Bell.
Indicates Ringer type is Lamp.
Etiquette mode status. Disappearing when it is inactivated.
Indicates battery charge level
Fully charged status shown Low battery Low battery warnning
If you connect the data communication cable, it is displayed on the screen.
The display caries depending on the Rx mode you have selected at Data setup
Data Received
Displayed on screen when you use the earmicrophone.
Displayed on screen when Answer Machine is in activation.
E-mail received. It disappears when you retrieve new e-mail.
Web Alert message received. It disappears when you retrieve new message.
2120
Before Using Before Using
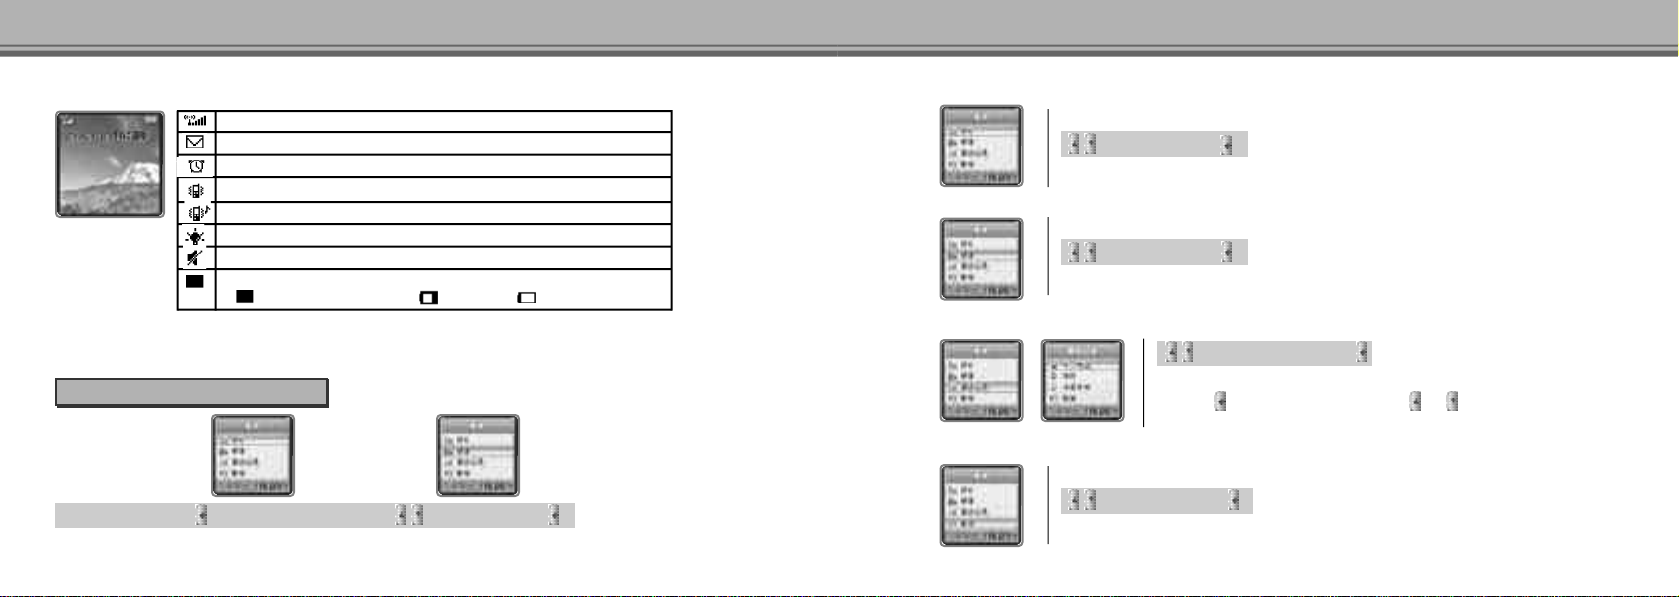
External display screen
Current signal strength this indicated by the number of lines shown.
Text or voice message received. It disappears when you retrieve new message.
Alarm setting activated. Disappearing when you discharge Alarm setting.
Indicates Ringer type is Vib Only.
Indicates Ringer type is Vib Then Bell.
Indicates Ringer type is Lamp.
Etiquette mode status. Disappearing when it is inactivated.
Indicates battery charge level
Fully charged status shown Low battery Low battery warnning
■ You can change graphic display of sub LCD after selecting ‘D i s p l a y ’-> ‘Graphic Mode’-> ‘Sub LCD’.
■ The lock function sign is not displayed on the sub LCD.
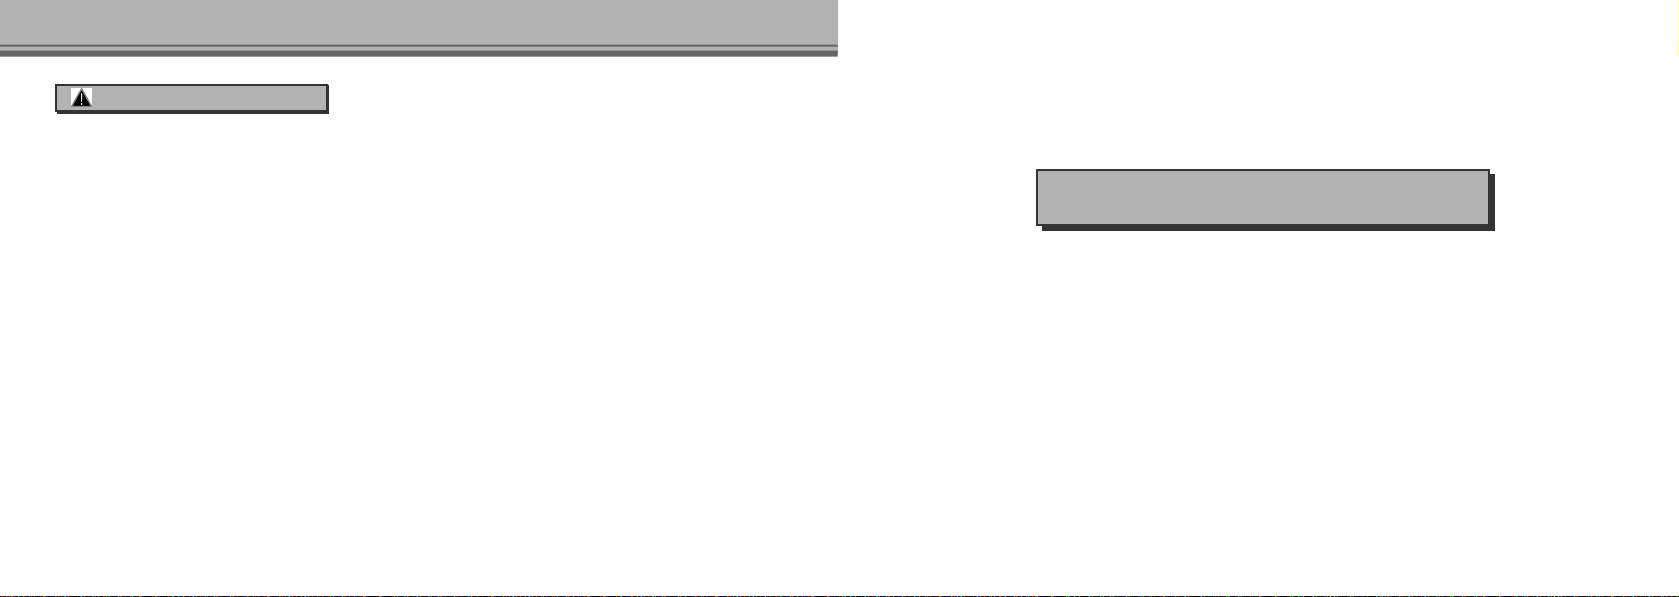
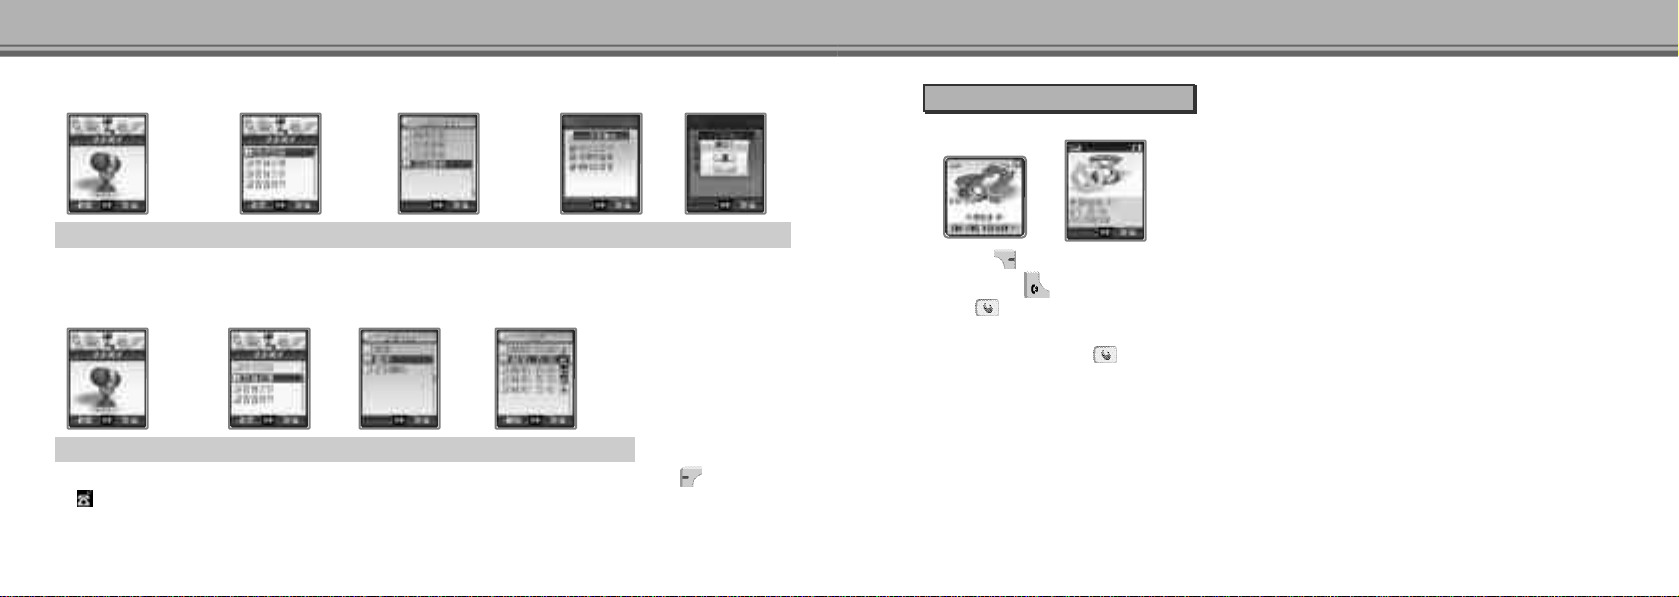
6. Sub-LCD menu
Hold down the press while the folder is closed ▶ Select Photo and
Select PHOTO
You can take the picture using sub-lcd display while the folder is shut. (Refer to P.73)
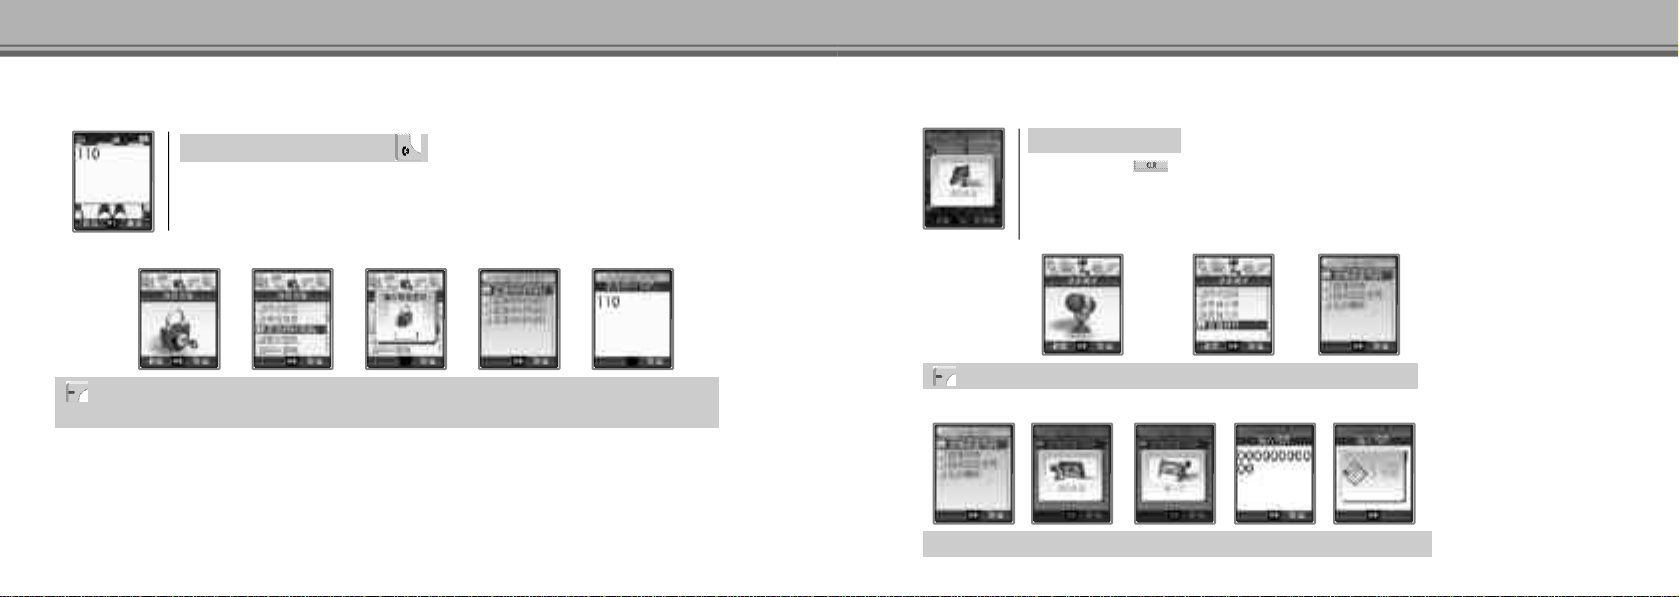
Select Photo and
Select VIEDO
You can take the video using sub-lcd display while the folder is shut. (Refer to P.83)
Select Video and
Select CALL H I S T O R Y
Select Call History and
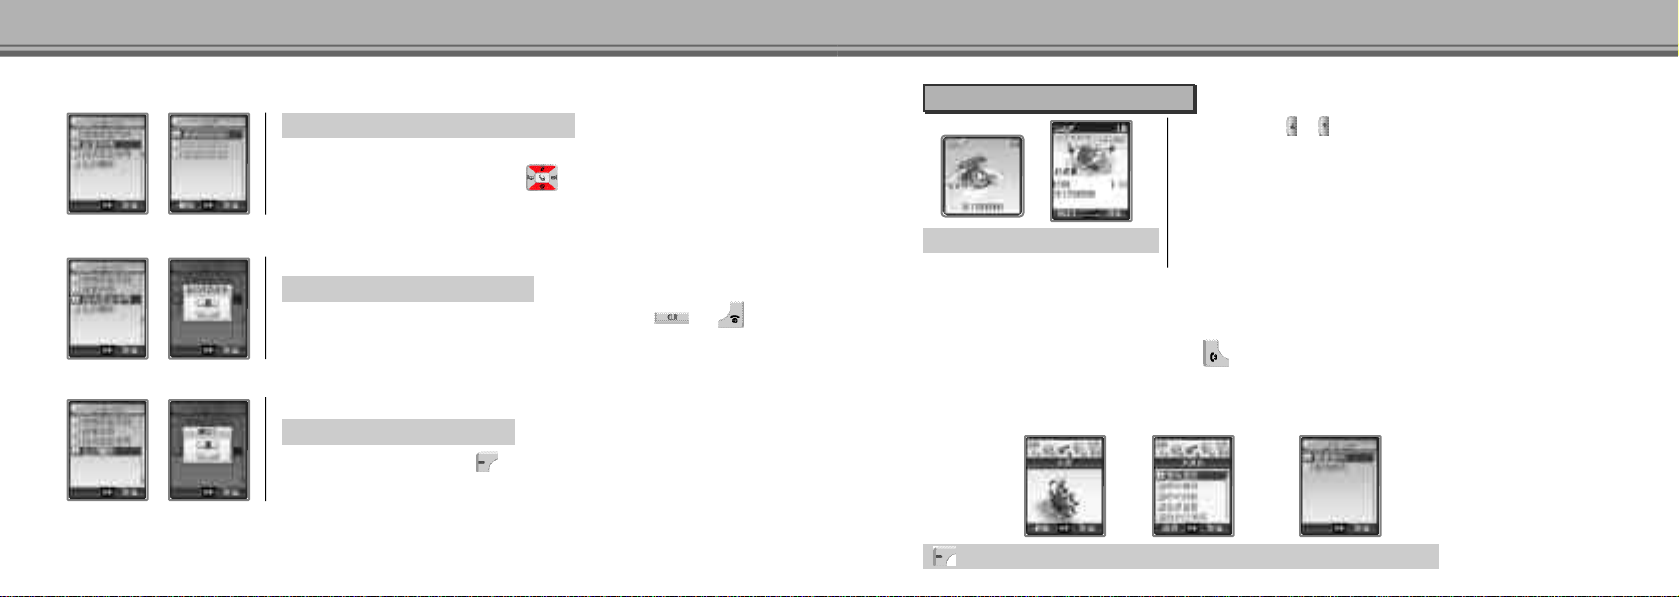
● The lamp is on for 1 minute in default. The lamp blinks after 55 seconds.
● P r e s s again to turn off the lamp. Press or to reset the time.
Select CANCEL
Move sub-lcd idle mode.
Select Cancel and
2322
Before Using Before Using
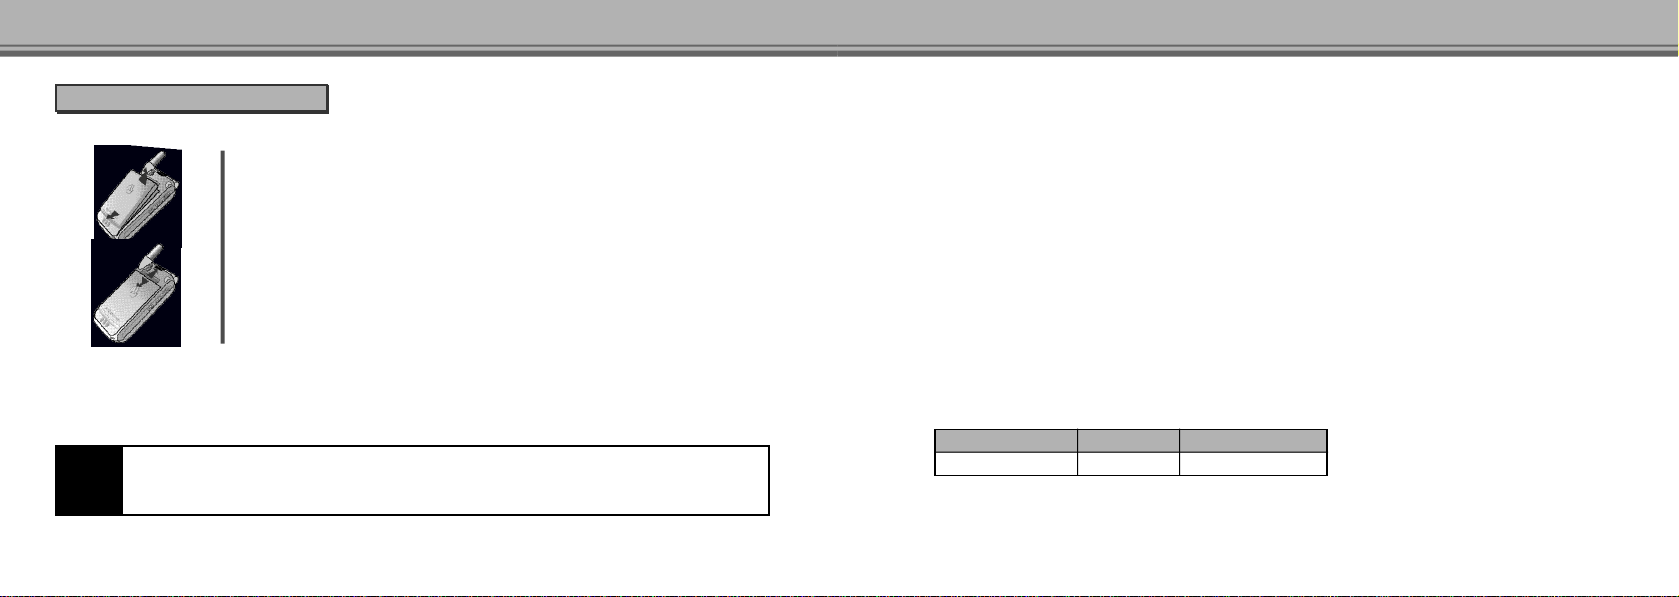
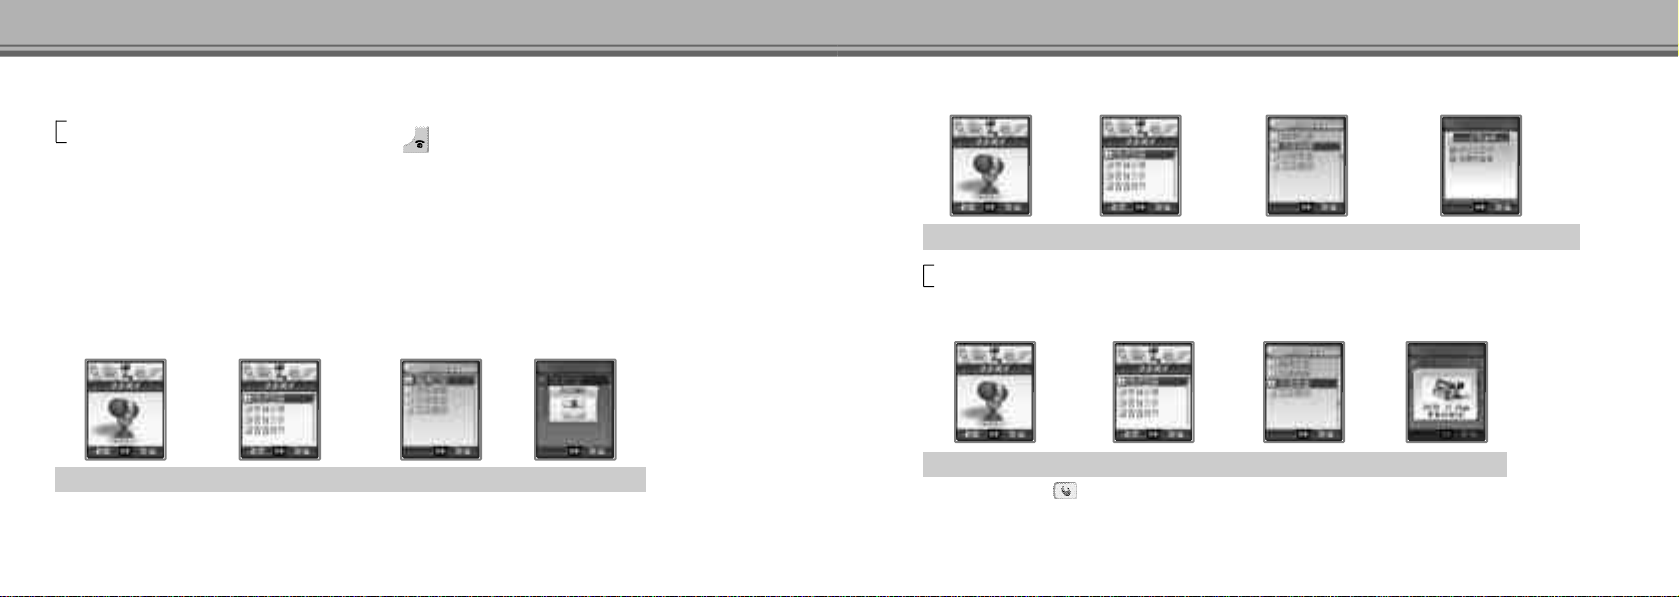
7. How to Use Battery
Cell Phone and Battery Pack
②
①
I . A s s e m b l y
①Fit the battery pack correctly into the groove provided on the lower side of the handset.
②Side it all the way in the arrow direction until a ‘c l i c k ’is heard.
①
②
I I .R e m o v a l
①Press the removal button upward.
②Remove the battery pack in the arrow direction from the handset.
The Battery and UIM Card
I . Installing UIM Card on the Phone
Disconnect the battery pack from the phone and side UIM Card into the rail on the back of the phone.
UIM Card ?
NOTE!!
UIM Card contains your Phone Number, service details, and phonebook/message memory,
Caution : Do not bend or scratch your UIM Card. Avoid exposing your UIM Card to static electricity, water, or dirt
Charging Battery Pack
I. Charging battery on the table dock
The battery is not fully charged when it is supplied. Be sure to charge the battery fully before you use the phone.
■ Connect the DC power cable to the wall outlet.
■ Check if the triangular lamp on the AC cable jack turns on in orange.
■ Connect the AC power cable to the port on the rear of the table dock.
■ Place the handset on the table dock. (There is only on hole on the dock, you cannot recharge two batteries together.)
■ You can recharge the battery without the handset if you mount the batter on the battery case.
■ Battery recharge status is on the triangular lamp on the AC power cable jack.
II. Recharging battery with the AC power cable
■ Connect the DC power cable to the wall outlet.
■ Be sure that the triangular lamp on the DC power cable jack turns on and flickers.
■ Connect the DC power cable jack to the port on the bottom of the handset.
■ Battery recharge status is on the triangular lamp on the AC power cable jack.
Battery Pack Charging Progress State
D e s c r i p t i o n
Cable jeck
<In the indicator lamp flickers in red>
■ The charging terminals are not contacted properly. Check to see if the battery pack is clean, and then mack another attempt.
■ The battery pack or any other component is defective. Contact the service center.
Being charged At completion of charging
R e d G r e e n
2524
Before Using Before Using
<If the indicator lamp lights up in orange>
■ The battery pack is on standby for charging or is being charged in a too hot of cold place.
■ If you place it in room temperature, the indicator lamp will charge into red and charging operation will be resumed.
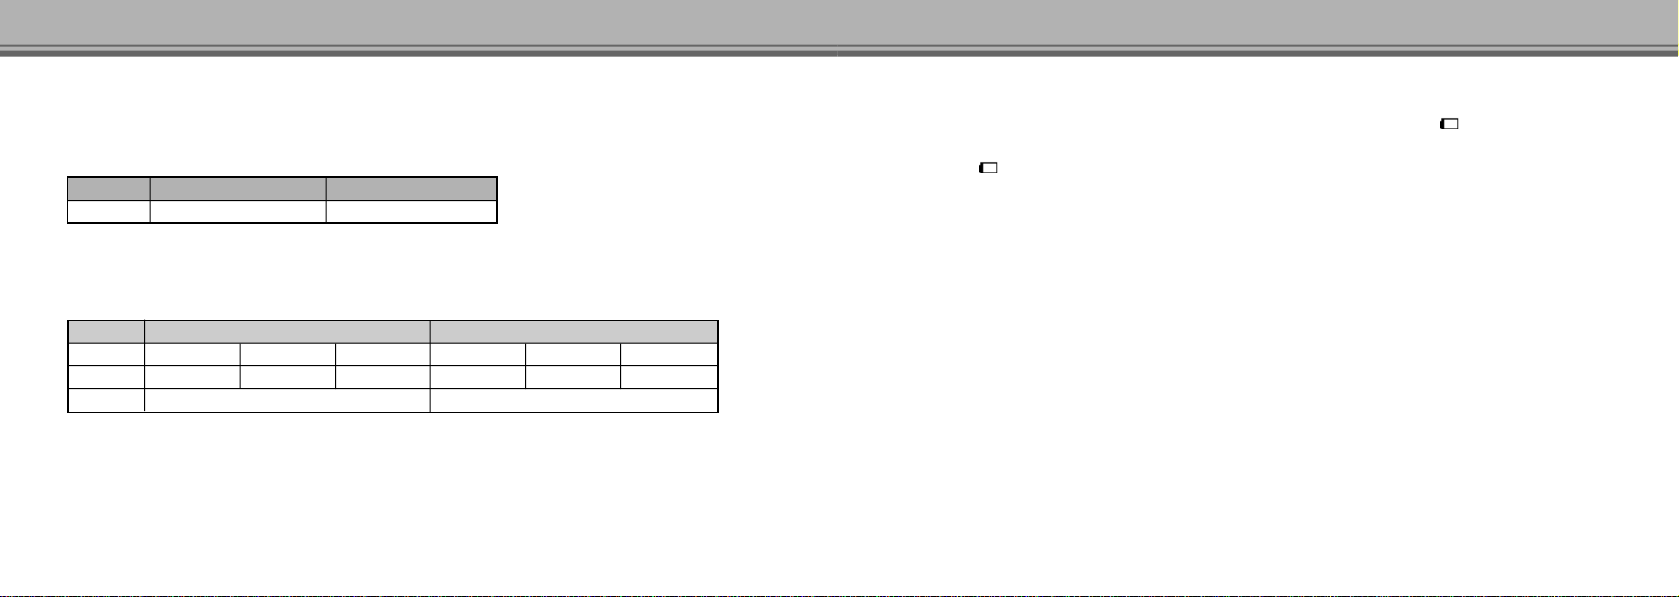
Battery Pack Charging Time
D e s c r i p t i o n 550mAh (V820) 870mAh (V820)
Required Time
■ Recharging time varies by the battery pack and charger status.
■ If AC power voltage applied to the power supply adapter is low, the charging time may become longer.
■ If ambient temperature is too high or low, charging may not be done sufficiently. Always charge the battery in room temperature.
About 110 Min About 120 Min
Battery Pack Operating Time
550mAh (V820) 870mAh (V820)
T i m e Slot Mode 2
About 30~50 hours
Standard Talk time
■ The slot mode varies according to service areas.
■ Electric currents are consumed more during a call or when using WAP or Game than in standby state, so the
the longer call time is, the shorter the standby time becomes.
■ Receiving a call requires the same amount of electric currents as when placing a call.
■ Standby time in ‘NO SERVICE’area becomes shorter.
■ The operating time varies accrding to charging state, temperature(low/high),radio wave condition in the area of use,
backlight status.
Slot Mode 1
About 60~80 hours
About 90~120 hoursStandard Standby Time
About 100 Min
Slot Mode 0 Slot Mode 1 Slot Mode 2Slot Mode 0
About 50~80 hoursAbout 100~130 hoursAbout 150~180 hours
About 150 Min
Low Voltage Alert
■ When the battery pack is almost used up, the phone sounds a ‘warning sound’and ‘ ‘ f l a s h e s .
■ If you continue to use your phone in this state, the power of the phone is turned off. lmmediately charge your phone.
■ If ‘ ‘flashes, although you press the button, backlight for display screen and buttons may not be On and the cell phone
features are not supported properly. Immediately charge your phone before using again.
Battery Pack Care Information
■ Always use the authorized, dedicated charger and battery pack. If an unauthorized battery pack is installed, a
‘Warning! Unauthorized Battery’message is displayed on the Idle display screen.
■ Using and unauthorized charger could cause damage to the battery pack or explosion may result. Never use such a product.
■ Never short-circuit the contact terminals of the battery pack. Explosion may result. Always store the battery pack
in the battery case.
■ Always charge or store the battery pack in room temperature. Charging would not be done sufficiently and the indicator lamp
changes into orange if you change the battery pack in a too hot place(in a car in summer or near open flames)or a too cold
place. If it is stored over an extended period of time, its capacity level becomes lower, shortening its operating time.
■ Never disassemble the battery pack or place it near open flames.
■ Store the charger and battery pack in the area out of children’s reach.
■ Never give a strong impact to your phone or let it drop. Malfunctions or short life may result.
■ Any foreign matters in contact with the metallic part of contact terminals on the charger and battery pack may interfere with
charging process. Always keep them clean.
■ The chargeable battery pack is a consumable item. Repeated switching between charging and discharging reducess its service
life slowly. If the battery operating time is reduced to a half level compared to that when purchased, replace it with a new one.
2726
Before Using
8. Precautions When Using
■ If the lamp flickers while you are charging your phone and battery, charging operation fails. If you leave it in such a state,
the charger may malfunction.
■ Always use authorized, dedicated battery pack and charger. Using an unauthorized battery pack or charger rejects the services
offered by Motorola.
■ Do not use the charger to charge phones and batteries of different models. Problems may result.
■ Never use them in a humid, hot atmosphere. If your phone becomes damp, malfunction may result. If submerged, it may
be beyond repair. Never turn the power ON with your phone wet. Instead, remove the battery pack and contact the nearest
service center for repair.
■ Never disassemble or alter your phone. Unauthorzed disassembly may reject free service offered by Motorola.
■ If you sit down with your phone stored in a hip pocket, use care not to give a strong impact to it. It may be broken.
■ Avoid cleaning your phone with chemical solutions such as solvent or thinner.
■ Use care not to give an impact or vibration to your phone. When not in use, it should be stored in a safe place.
■ Use the authorized handsfree kit. Otherwise, malfunction may result. Especially, products having strong magnetism may be a
direct cause for malfunction of cell phone, which will reject the free service offered by Motorola.
■ In order to prevent any harm to human body, do not hold the battery in the mouth and do not use the damaged battery.
■ Keep the handset away from any magetic product such as credit card, phone card that may be damaged by the electro magnetic
field of the handset.
■ Keep the handset away from any heating facility such as stove, microwave or oven.
■ Do not apply excessive force to the handset to protect appearance and internal parts of the handset.
■ Do not hold the strap and turn the handset round not to hurt anyone.
■ Be sure that the handset is not held between the automatic doors of a bus or subway train.
28
Basic Operation
1. Power ON and OFF 3 0
2. Placing a Call 3 0
3. Receiving a Call 3 5
4. Unanswered Call 3 9

Basic Operation Basic Operation
1. Power ON and OFF
Power ON
Press
■ The service lamp is on, displaying China Unicom and user-set graphic. And then, the initial
screen is displayed.
Power OFF
Press and hold
■ The graphic disappears and the power is turned off.
■ A graphic can be downloaded from WAP and changed in ‘Graphic Mode’under ’D i s p l a y ’.
Graphic may be displayed late depending upon the capacity of the downloaded graphic.
2. Placing a Call
Enter a desired area code and phone number ▶
■ The phone automatically redials if the call is not connected.
Placing a call from Phone Book
Use search to select a desired person to call. (see P.88~90 Searching Phone Number)
■ P r e s s i n g with a person to call selected connects
the call to the number set to ‘Representative Number’
among the items with phone numbers stored.
■ P r e s s from Standby display to select ‘View All’,
‘Loc. Search’, ‘Group Search’, ‘Name Search’in ‘P h o n e
Select a person to call ▶Select an item to call ▶
Turbo Dial
Press and hold a location to call on Idle Mode connects a call to the representative number of the appropriate
location number is 17, Press the dial button and press and hold . (see P.121)
i n g
B o o k’.
Electronic Dialing
You can use this function conveniently by entering a few numbers in advance according to the audio announcement
when using ARS(for telebanking service or voice message confirmation). To cancel electronic dial, press [ C A N C E L ] .
Enter Phone Number
Input key
P
T
The numbers after‘P’can be sent only if the
The numbers after‘T’are sent shortly after.
▶ E n t e r‘P’or ‘T’and then a number to be dialed electronically ▶
Operating Method
[NEXT]
is pressed.
3130
Basic Operation Basic Operation
Emergency Dialing
Even when the handset is in Lock, you can still make a call using the emergency number stored on the phone.
Enter an Emergency Number ▶
1. Viewing Emergency number
[MENU] ▶ Select Security ▶Select Emergency Call and Enter Lock Code ▶Select Emergency
1,2,3 or 4 ▶ Display the number
■ 4 emergency numbers are stored in the phone. The emergency numbers by the UIM Card.
Voice Dialing
If you speak a stored name, a call is connected to the appropriate number. If voice dial feature has been set up, opening.
Speak a stored name
■ Long press of on Idle Mode enables voice dialing. But in this case, there must be content
stored in voice list.
■ Origination may fail depending upon speech recognition.
■ If Lock mode has been set up, this function cannot be used. Clear Lock mode before using.
[MENU] ▶ Select Voice Wizard ▶Select Voice Dialing ▶Choose Menu
1. Storing Voice Dial
Select Storing ▶Say the name(Twice) ▶Enter number ▶ Voice Tag STATUS
3332
Basic Operation Basic Operation
2. Viewing Voice List
3. Setting Auto Dialing
4. Clear All
Select View List ▶The number is displayed
■ Number is displayed and a stored voice is heard.
■ To check voice lists tored in next, press .
If ‘Auto Dialing’is set up, opening the folder operates ‘Voice Dial’a u t o m a t i c a l l y .
Select Auto Dialing ▶Select a Value
■ When the folder is opened and Auto Dial is displayed, pressing or
switches the phone to Idle mode.
Selecting ‘Delete All’all the contents stored in Voice List.
Select Delete All ▶Select a Value
■ To delete individual list, press [DEL] when a list to be deleted is displayed in
‘View List’.
3. Receiving a Call
■ Press and hold or to suppress the ringer for incoming call.
■ The graphic appearing when a call is received can be download from ‘W A P’
and changed in ‘Graphic Mode’u n d e r‘D i s p l a y ’. If you set graphic to a download
graphic, when a call is received, the selected ringer tone or graphic may be
displayed late depending on the capacity of the downloaded graphic. (See P.46)
If a call is received, open the folder
■ Receiving a call graphic can be downloaded from WAP and changed in ‘Graphic Mode’under ‘D i s p l a y’. Graphic may be
displayed late depending upon the capacity of the downloaded graphic.
Receiveing a call Using Earmicrophone
When the earmicrophone is connected, press or the earmicrophone button to receive an incoming call.
When the folder is shut, press the earmicrophone button to receive an incoming call. After finishing the call,
press the earmicrophone button to release the call.
Setting Call Receive Mode
[MENU] ▶ Select Setting ▶Select Call Answer ▶Select a desired setting
■ You can change ringer style, call receive mode, reception status(Ring/Vib Set,
Set Graphic).
3534
Basic Operation Basic Operation
1. Flip Answer
YES : Open the folder to receive a call.
NO : Open the folder and press any keypad button except button to receive a call.
2. Auto Answer
If the folder is open or the earmicrophone is connected, connect tone is sounded for a given period of time and then the call is
connected automatically. When the folder is close, if the earmicrophone is not connected, you cannot use Auto Answer function.
■ If you select ‘Y E S’for ‘Auto Answer’, though you’ve selected ‘Y E S’for ‘Flip Answer’, the incoming call will be auto answered
in three seconds on opening the folder.
Using Auto Answering
This function switches incoming calls to the Answering Machine when you are unable to reach the phone.
1. Setting/Clearing
Select Voice Wizard ▶Select Auto Answering ▶Select Auto Answering ▶Select a Value
■ Select the value as ‘N O’to cancel the setting.
■ If the memory is full for ‘Auto Answering’, the “There are no spaces”message is displayed. Delete a recorded item from
the Play list, and set ‘Auto Answering’again. (Refer to P.38)
2. Selecting Auto Response Speech
Select Voice Wizard ▶Select Auto Answering ▶Select Answer Ment ▶Select a Answering Message
Default Ment : This is stored in the phone as a default setting.
User Rec. Ment : The user can record his own speech and recall it.
3. Recording Response Speech
Select Voice Wizard ▶Select Auto Answering ▶Select Answering Rec. ▶Record a Ment
■ To end recording : [ O K ]
■ You can replay the record by selecting ‘User Rec. Ment’of ‘Answering Play’.
3736
Basic Operation Basic Operation
4. Deleting Response Speech
Select Voice Wizard ▶Select Auto Answering ▶Select Answering Play ▶Select Del User Ment ▶Select a Value
■ The default Ment cannot be deleted.
5. Listening to content Recorded in Auto Answer Device
Select Voice Wizard ▶Select Recording Note ▶Select Play ▶Select a Message to play
■ In order to delete the recorded voice by selecting the content in ‘P l a y’of ‘Recording Note’, and then, press [ D E L ] .
■ is marked for the items recorded for Auto Answering.
38
4. Unanswered Call
If the user fails to receive a call, the following image is displayed on the display screen.
■ P r e s s i n g [CANCEL] moves the phone to Idle Mode.
■ Shortly press from Standby display to view ‘Unans Call’.
■ P r e s s [OK] to list up ‘Unans Call’when ‘Missed Call’message box is present.
However, the caller is restricted for call origination, ‘Restricted Num’will be displayed
on ‘Unans Call’list. Press [OK] to view the call date and time.
39
Using Sound
1. Changing Ring type 4 1
2. Changing Receive Mode 4 2
3. Changing Ring Volume 4 3
4. Selecting Ringer Option 4 3
5. Setting Alert Tone 4 4
6. Setting Sound Effect 4 5
Using Sound
1. Changing ring type
User can change the ring type when user get a call. Except the types of sound saved in the mobile phone, wap
user can convert the melody which the user recorded to the ring melody.
[MENU] ▶ Select Sound ▶Select Ringer Style ▶ Select Ringer Style ▶ Select Ringer Tone
■You can adjust volume with during the bell setting. (5 steps)
■The menu of Recorded Sound is displayed only when there is any recorded sound.
■ Melody : 1~26, Natural Sound : 1~4, Ringer Tone : 1~9
Saving Recorded Sound
You can record the sound you want and use it as ring sound.
[MENU] ▶ Select Voice Wizard ▶Recorded Sound ▶Select a list ▶ [OK] after recording
■In order to delete a recorded sound select the recorded sound, and then, press [ D E L ] .
41
Using Sound Using Sound
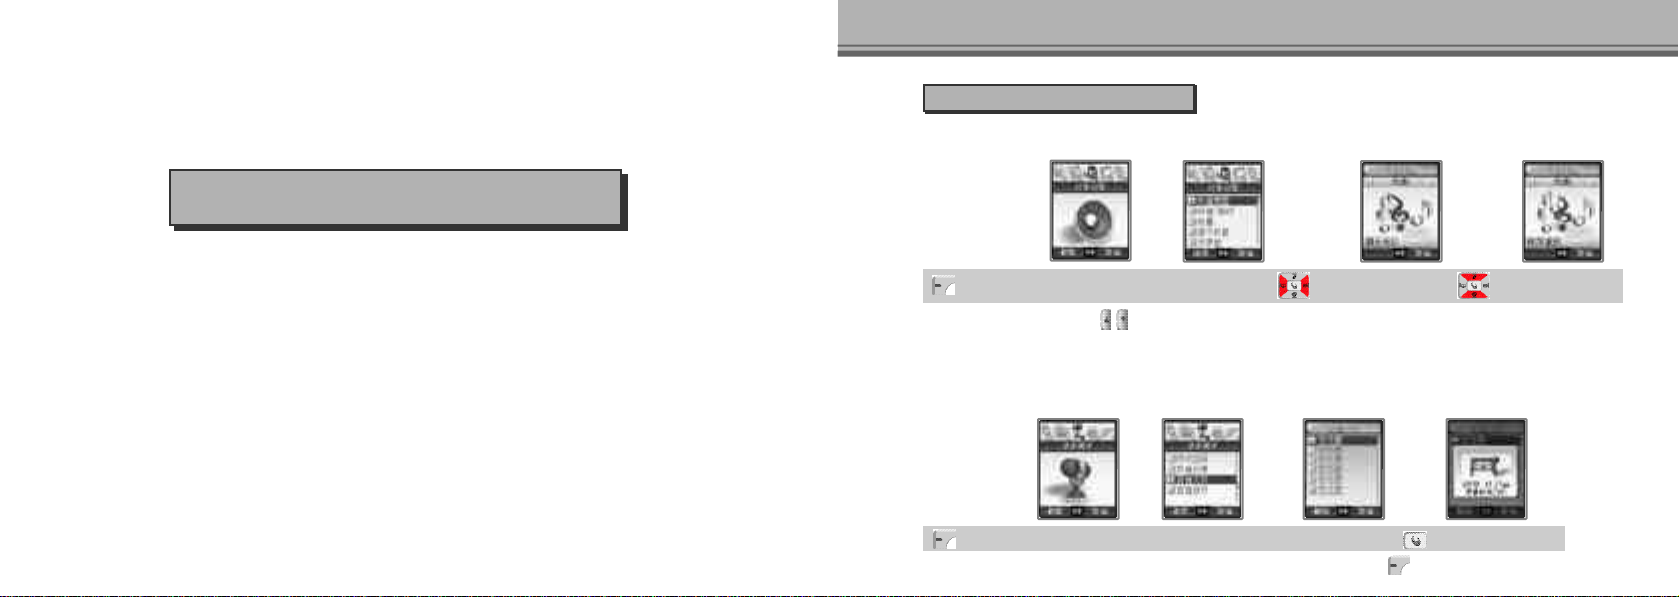
2. Changing Receive Mode
You can set a desired receive tone sounded when a call or message is received.
[MENU] ▶ Select Sound ▶ Select Ring/Vib ▶ Select a desired Receive Mode
■Bell Only, Vib. Only(‘ ’is displayed on the display screen), Vib. Then Bell(‘ ’is displayed on the display screen),
L a m p (‘ ’is displayed on the display screen)
Setting Etiquette Mode
You can switch the ring or alarm tone into vibration or mute not to damage others during the conference, class, or in public
place. If the earmic is connected, even in the etiquette mode, you can hear the ring on the earmic.
1. How to set
Press and hold
■A message ‘Etiquette Mode is On’is displayed and then the phone generates vibration and moves to Mode.
■ In Etiquette mode, the ringer will be replaced by vibration.
■Even if you turn OFF then ON your phone, it will remain in Etiquette mode.
2. How to reset
Press and hold
■A message ‘Etiquette Mode is Off’is displayed and then the phone moves to Idle Mode.
■ If Etiquette Mode is set
Ringer : Vib and lamp flashing Keypad tone : Muted
Alarm : Vib and lamp flashing Connect tone : Muted
1 Min Timer : Muted Message tone : Vib and lmap flashing
Power Off : Muted (If ‘Reset Alarm’is set in ‘Msg Sound’, the lamp flashes)(See P.144)
Shutter Sound : Muted Power On : Vib and lamp flashing
3. Changing Ring Volume
You can adjust the Ring Volume. (5 steps)
[MENU] ▶ Select Sound ▶Select Volume ▶ Select a desired menu ▶Set the Volume
■ Control the volume with o r .
4342
Using Sound Using Sound
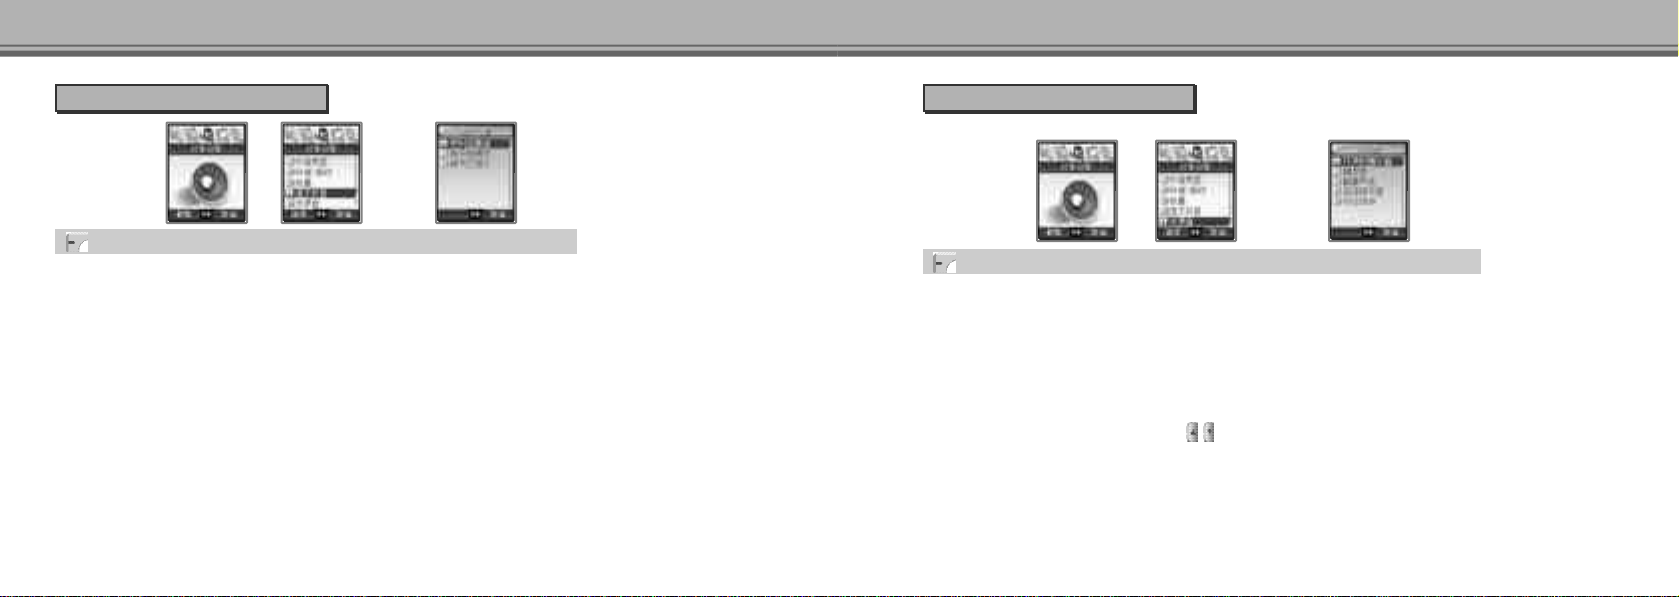
4. Setting Alert Tone
[MENU] ▶ Select Sound ▶ Select Alert Tone ▶ Select a desired alert tone
Connect Tone
You feature notifies you of call connecting when you place a call.
1 Min Timer
This function displays call time during a call and sounds an alert 10 seconds in advance at every 1 minute lapse
from the start of call connection.
Svc. Alert
You can set the alert tone made when the handset is out of the service area.
44
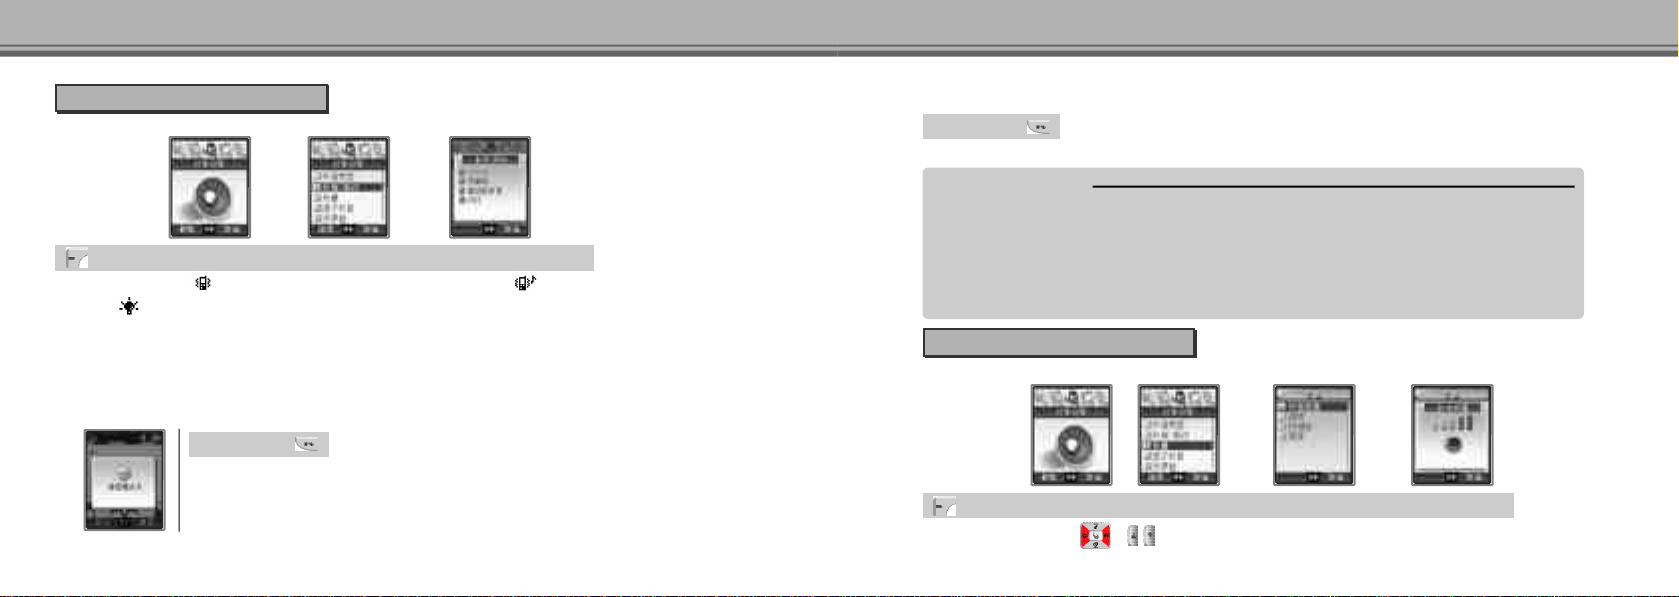
5. Setting Sound Effect
You can select various effect tones for the handset.
[MENU] ▶ Select Sound ▶Select Sound Effect ▶ Select a desired Sound Effect
Power Sound
You can set the tone sounded, when turning the power ON or OFF, to mute or sound.
■ If you select ‘N O’in this field, the initial screen is displayed after the vibration.
Key Sound
You can enable/disable the key tone.
■ Adult Voice, Bell, Dewdrop, Electronic, Beep.
■ You can adjust the key tone volume with in the Idle mode. (5 Steps)
Folder Sound
You can set or clear a tone for opening and closing and closing your folder.
■ Folder sound(1~3), Sound Off
45

Using Sound
Sel. Alert Tone
You can enable/disable the tone for the message box(popup menu) as it is displayed on the screen.
■ The message box tone(popup menu) varies by the situation.
Ringer Option
You can set a ringer sounding mode.
To Set Volume : Sounds as set in Ring Volume.
Low to High : Ring volume increases gradually from level 1 to 5. Once the ring volume increases, the phone
maintains the level 5 volume.
■ When a call is incoming, the ringer volume will escalate from level 1 to the level you’ve set, regardless of your preset
level with the folder open. To prevent eardrum damage, keep the phone away from your ear by the time you answer.
46
Using Display
1. Graphic Mode 4 8
2. Back Light Time 5 0
3. Change Banner 5 1
4. Setting Svc. Lamp 5 1
5. Setting Light Color 5 2
Using Display Using Display
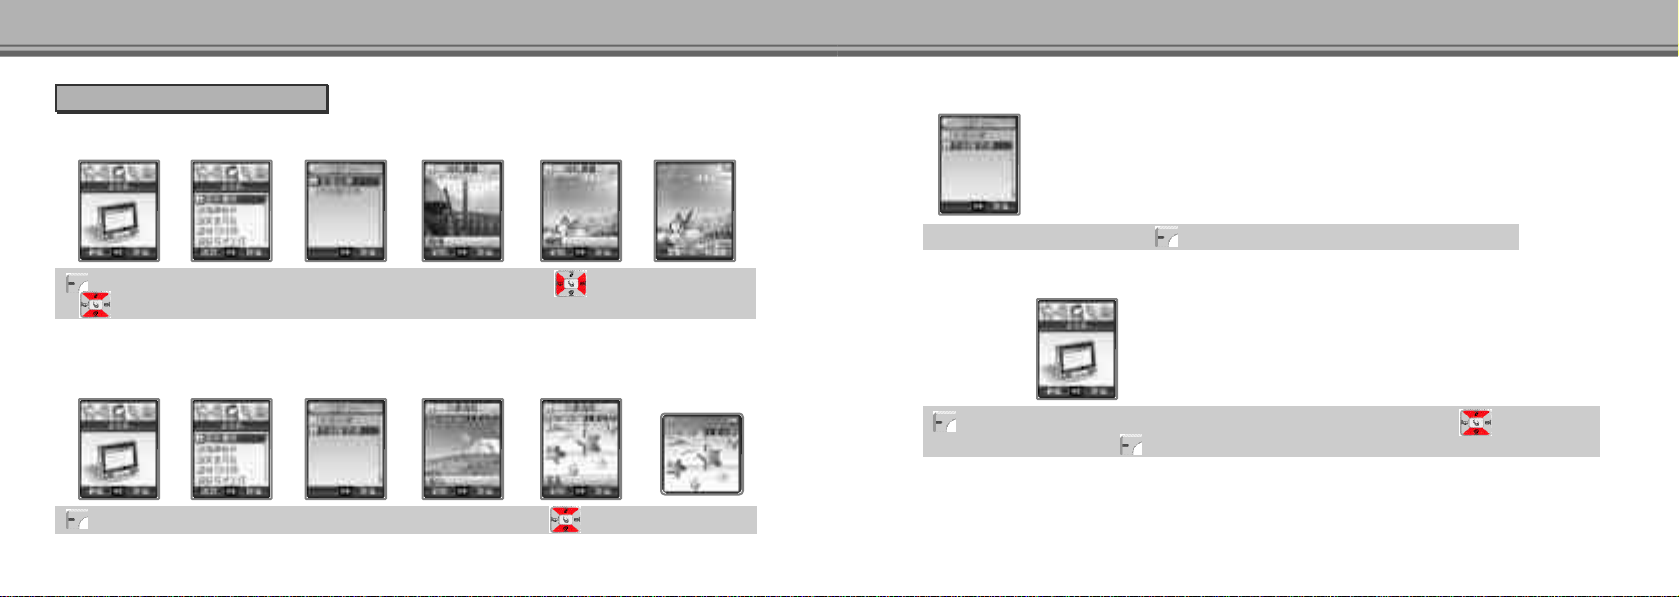
1. Graphic Mode
You can change graphics to be displayed according to the phone status.
Internal Screen
[MENU] ▶ Select Display ▶Select Graphic Mode ▶Select Main LCD ▶ Select a desired display
▶ Select a desired graphic
■ You can copy up to 10 photos or graphics to Graphic Mode.
■ Copy the photos from ‘Photo Manager’to ‘Graphic Mode’, and set the graphic for ‘Idle Mode, Power Off, In Calling’
External Screen
[MENU] ▶ Select Display ▶Select Graphic Mode ▶Select Sub LCD ▶ Select a desired graphic
1. Setting display with the stored photo
Select Sub LCD ▶Select Photo ▶ [SELECT] ▶ Select desired photo ▶View Sub LCD
Deleting graphic
[MENU] ▶ Select Display ▶Select Graphic Mode ▶Select desired display ▶ Select a
delete downloded graphic ▶ [OPTION] ▶ Select Delete ▶Select a value
4948
Using Display Using Display
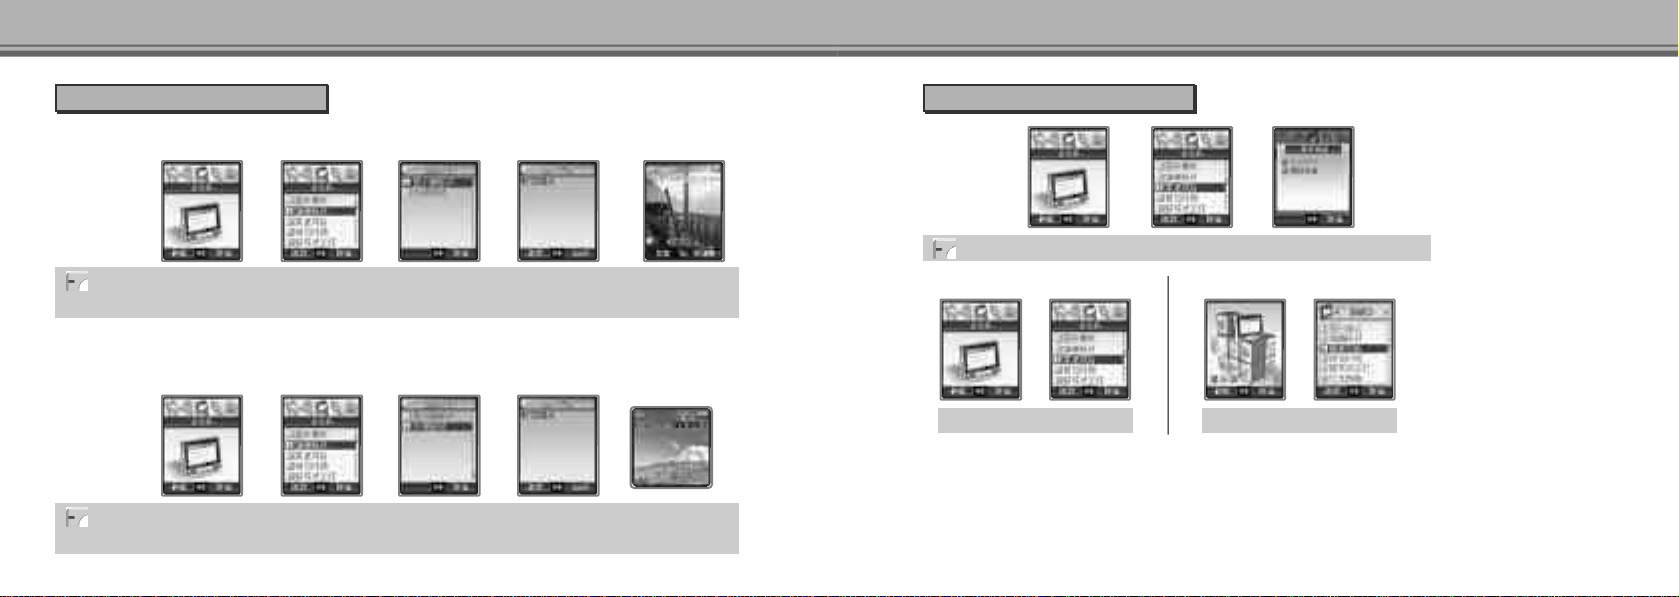
2. Change Banner
You can select the display on the initial screen.
Internal Screen
[MENU] ▶ Select Display ▶Select Change Banner ▶Select Main Banner ▶Enter a new Banner ▶
The content is displayed on the display screen
■ Banner may include up to 8 characters in Chinese and 18 in English, and will automatically be aligned to center.
■ If ‘Calendar bg’is selected for ‘Graphic Mode’of Idle Mode, the banner is not displayed.
External Screen
[MENU] ▶ Select Display ▶Select Change Banner ▶Select Sub Banner ▶Enter a new Banner ▶
The content is displayed on the display screen
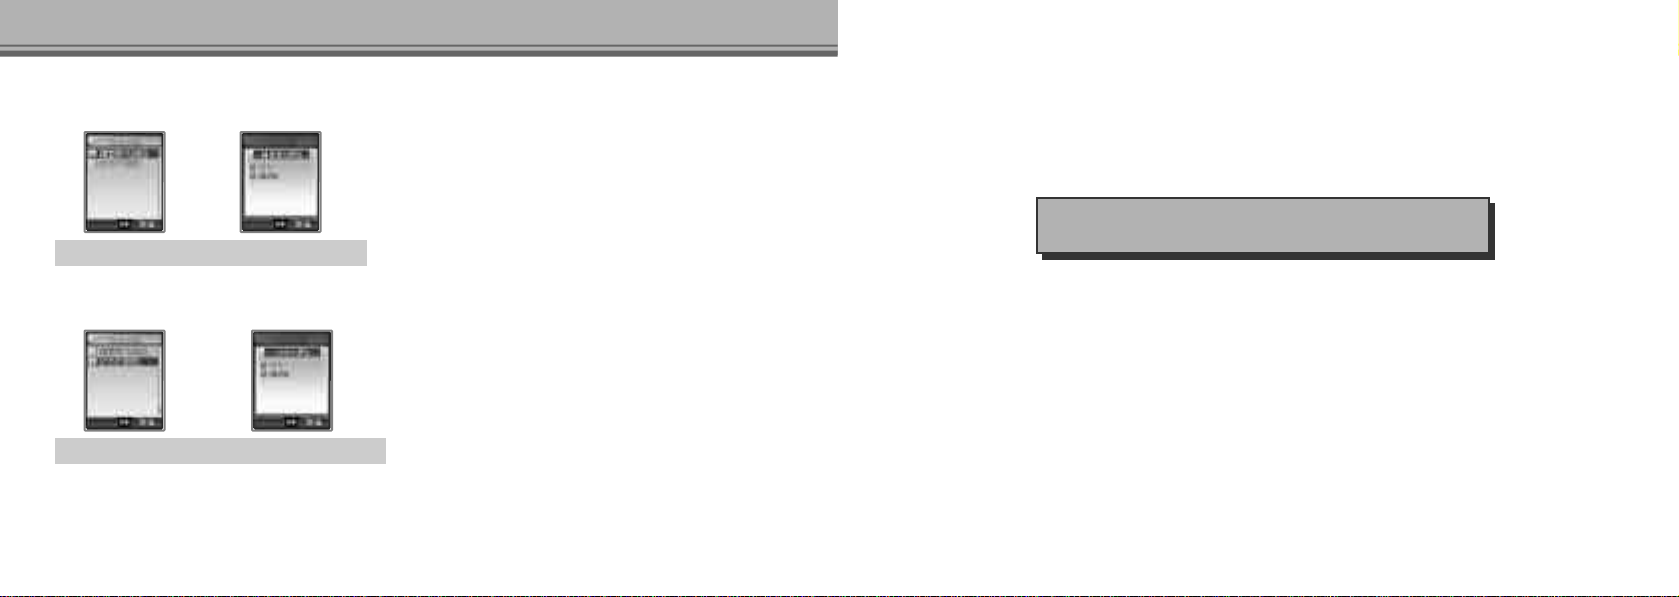
3. Menu Style
[MENU] ▶ Select Display ▶Select Menu Style ▶Select a desired setting
2 Level Menu
2 Level Menu Style
Icon Menu
Icon Menu Style
5150
Using Display Using Display
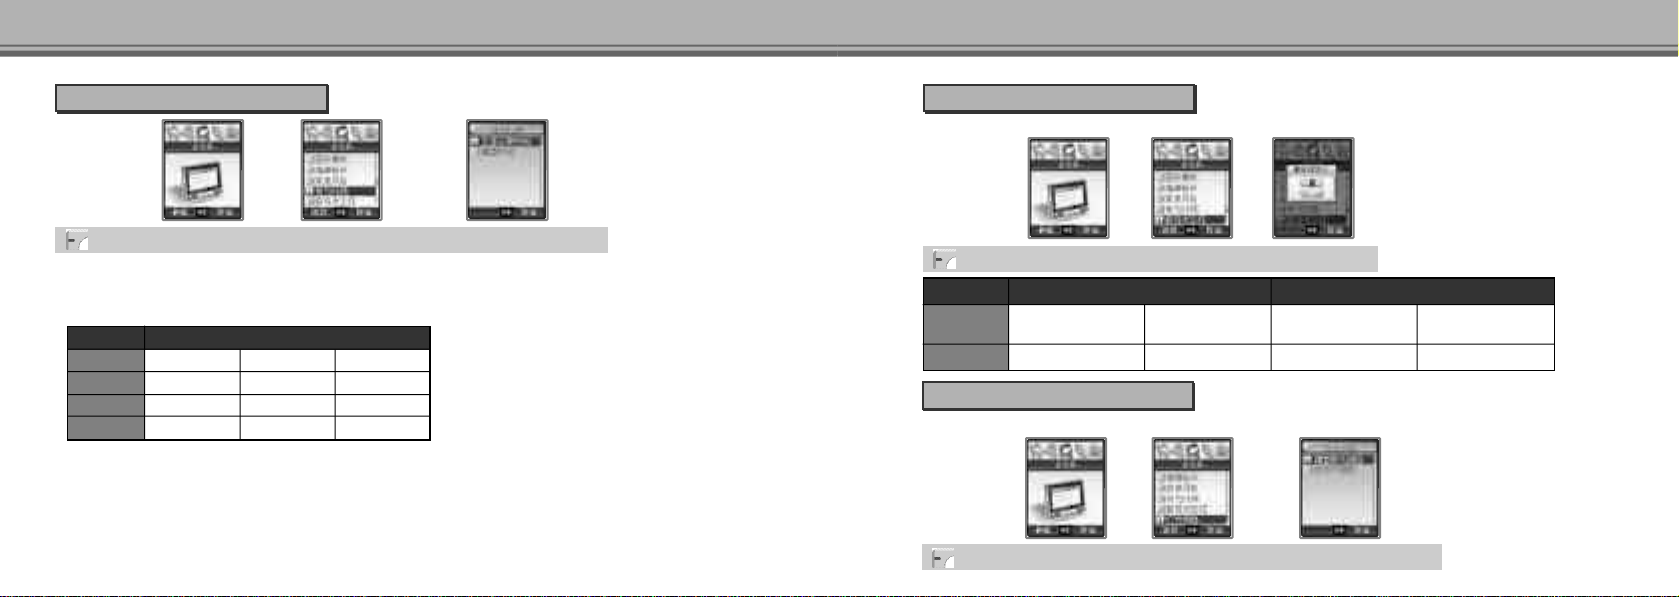
4. Backlit Time
5. Setting Svc. Lamp
With the phone in Idle mode, this function displays the service status using the color and status of service lamp.
[MENU] ▶ Select Display ▶Select Backlit Time ▶Select a desired setting
Main LCD Time
You can open the folder to set Back light Time.
■ 10 sec, 20 sec, 30 sec, Always Off
Light time
On for 10 sec10 sec
20 sec
30 sec
Always Off
■ If you do not use the mobile phone within the designated light time as the folder is open, the main screen switches
into the power saving mode, and the light becomes Off after a while.
On for 20 sec
On for 30 sec
-
S t a t u s
Dim for 30 sec
Dim for 30 sec
Dim continues
Dim for 60 sec
Light Off
Light Off
-
Light Off
[MENU] ▶ Select Display ▶Select Svc. Lamp ▶Select a Value
Lamp Status
Phone Status
Idle mode(When service lamp has been set)
Flashing in
Green, Amber
Service enabled
Flashing in red
Service disabled
Call mode(Always displayed)
The lamps of different
colors flicker by turns
A call is being received
5. Setting Light Color
You can select the lihgt color. (Keypad Color, Svc. Lamp Color)
No lamp color
d i s p l a y e d
During a call
Keypad Time
You can set key back ligt time.
■ 2 sec, 5 sec, 10 sec, Folder Open, Always Off
52 53
[MENU] ▶ Select Display ▶Select Light Color ▶Select a desired Setting
Using Display
Keypad Color
You can select the Keypad Color. (Blue, Amber)
Select Keypad Color ▶Select a desired Color
Using Scheduler
Svc. Lamp Color
You can select the Svc. Lamp Color. (Green, Amber)
Select Svc. Lamp Color ▶Select a desired Color
54
1. Schedule 5 5
2. Using To Do List 5 7
3. Using Biz. Card 5 8
4. Using D-day 6 0
5. Using Bio Rhythm 6 1
 Loading...