

Page 1

V173
GSM
English
motorola.com
Page 2

Page 3

Welcome
Welcome to the world of Motorola digital wireless
communications! We are pleased that you have chosen the
Motorola V173 wireless phone.
.
Ear Piece
Listen to your
voice calls &
messages.
Headset Jack
Insert headset
accessory for
hands-free use.
Lanyard
Attachment
Left Soft Key
Perform functions
identified by left
display prompt.
Send/Answer Key
Make & answer
calls. Press in idle
screen to see the
recently dialed
Note:
image above. However, all key locations, sequences, and
functions remain the same.
calls.
Your phone may not appear exactly as the phone
Power Connector Port
Insert charger.
Antenna
Exposed on the
top-back of the
phone.
Menu Key
Open a menu when
you see in the
display.
Right Soft Key
Perform functions
identified by right
display prompt.
Power/End Key
Press & hold to
turn on/off the
phone.
Press & release to
end phone calls,
exit menu system.
Navigation Key
Scroll through
lists, set volume.
1
Page 4

Motorola, Inc.
Consumer Advocacy Office
1307 East Algonquin Road
Schaumburg, IL 60196
www.hellomoto.com
1-800-331-6456 (United States)
1-888-390-6456 (TTY/TDD United States for hearing impaired)
1-800-461-4575 (Canada)
MOTOROLA and the Stylized M Logo are registered in the US Patent &
Trademark Office. All other product or service names are the property of
their respective owners.
©
Motorola, Inc. 2005.
Certain mobile phone features are dependent on the capabilities and
settings of your service provider’s network. Additionally, certain features
may not be activated by your service provider, and/or the provider’s
network settings may limit the features functionality. Always contact your
service provider about feature availability and functionality. All features,
functionality, and other product specifications, as well as the information
contained in the user’s guide are based upon the latest available
information and are believed to be accurate at the time of printing.
Motorola reserves the right to change or modify any information or
specifications without notice or obligation.
Manual number: 6809492A16-O
2
Page 5

Contents
Menu Map
Getting Started
Package Content . . . . . . . . . . . . . . . . . . . . . . . . . . . . . . . 9
About This Manual . . . . . . . . . . . . . . . . . . . . . . . . . . . . . . 9
Removing and Replacing the Battery Door . . . . . . . . . . 10
Changing Your SIM Card and Battery. . . . . . . . . . . . . . . 11
Battery Tips . . . . . . . . . . . . . . . . . . . . . . . . . . . . . . . . . . 12
Turning On/Off Your Phone. . . . . . . . . . . . . . . . . . . . . . . 13
Making and Answering Calls . . . . . . . . . . . . . . . . . . . . . 13
Adjusting the Volume . . . . . . . . . . . . . . . . . . . . . . . . . . . 14
Learning to Use Your Phone
Symbols on the Screen. . . . . . . . . . . . . . . . . . . . . . . . . . 16
Using the Menu. . . . . . . . . . . . . . . . . . . . . . . . . . . . . . . . 17
Entering Text. . . . . . . . . . . . . . . . . . . . . . . . . . . . . . . . . . 18
Folding Back the Phone . . . . . . . . . . . . . . . . . . . . . . . . . 20
Setting Up Your Phone
Setting the Time and Date . . . . . . . . . . . . . . . . . . . . . . . 21
Changing Personal Greetings. . . . . . . . . . . . . . . . . . . . . 21
Choosing Alert and Audio Tones . . . . . . . . . . . . . . . . . . 21
Setting Backlight . . . . . . . . . . . . . . . . . . . . . . . . . . . . . . . 22
Setting Contrast . . . . . . . . . . . . . . . . . . . . . . . . . . . . . . . 22
Setting Display Scrolling . . . . . . . . . . . . . . . . . . . . . . . . . 22
Setting Main Menu Animation. . . . . . . . . . . . . . . . . . . . . 22
Setting Battery Save . . . . . . . . . . . . . . . . . . . . . . . . . . . . 23
Resetting All Options . . . . . . . . . . . . . . . . . . . . . . . . . . . 23
Clearing All Information . . . . . . . . . . . . . . . . . . . . . . . . . 23
. . . . . . . . . . . . . . . . . . . . . . . . . . . . . . . . . . . . . . 7
. . . . . . . . . . . . . . . . . . . . . . . . . . . . . . . . . . 9
. . . . . . . . . . . . . . . . . . . . . . 16
. . . . . . . . . . . . . . . . . . . . . . . . . . . 21
3
Page 6

Setting Up Your Phone for Optional Handsfree Use . . . 24
Powering Off in Standby or Automatically Turn Off . . . . 24
Calling Features
Displaying Your Phone Number . . . . . . . . . . . . . . . . . . 26
Redialing a Number . . . . . . . . . . . . . . . . . . . . . . . . . . . 27
Using My Caller ID . . . . . . . . . . . . . . . . . . . . . . . . . . . . 27
Terminating an Incoming Call . . . . . . . . . . . . . . . . . . . . 28
Dialing an Emergency Number . . . . . . . . . . . . . . . . . . . 28
Dialing International Numbers. . . . . . . . . . . . . . . . . . . . 29
Inserting Special Characters
into Dialing Sequences . . . . . . . . . . . . . . . . . . . . . . . . . 29
Viewing the Received Calls, Dialed Calls, or Missed
Calls List . . . . . . . . . . . . . . . . . . . . . . . . . . . . . . . . . . . . 30
Returning a Missed Call . . . . . . . . . . . . . . . . . . . . . . . . 31
Entering Numbers in the Notepad. . . . . . . . . . . . . . . . . 32
Using Voicemail. . . . . . . . . . . . . . . . . . . . . . . . . . . . . . . 32
Speed Dialing . . . . . . . . . . . . . . . . . . . . . . . . . . . . . . . . 33
1-Touch Dialing . . . . . . . . . . . . . . . . . . . . . . . . . . . . . . . 34
Using Call Waiting. . . . . . . . . . . . . . . . . . . . . . . . . . . . . 34
Forwarding a Call . . . . . . . . . . . . . . . . . . . . . . . . . . . . . 35
Conference Calls. . . . . . . . . . . . . . . . . . . . . . . . . . . . . . 36
Putting a Call on Hold . . . . . . . . . . . . . . . . . . . . . . . . . . 37
Messages and Chat
Sending Messages, Pictures, and Sounds . . . . . . . . . . 38
Viewing Message Status. . . . . . . . . . . . . . . . . . . . . . . . 40
Receiving and Reading Messages . . . . . . . . . . . . . . . . 40
Using Browser Messages . . . . . . . . . . . . . . . . . . . . . . . 41
Sending Quick Notes . . . . . . . . . . . . . . . . . . . . . . . . . . 41
Using Instant Messaging. . . . . . . . . . . . . . . . . . . . . . . . 42
. . . . . . . . . . . . . . . . . . . . . . . . . . . . . . . 26
. . . . . . . . . . . . . . . . . . . . . . . . . . . . 38
4
Page 7

Logging into IM . . . . . . . . . . . . . . . . . . . . . . . . . . . . . . . . 42
Sending and Receiving Instant Messages . . . . . . . . . . . 44
Setting Your Online Status . . . . . . . . . . . . . . . . . . . . . . . 45
Setting Up IM . . . . . . . . . . . . . . . . . . . . . . . . . . . . . . . . . 46
Using Chat . . . . . . . . . . . . . . . . . . . . . . . . . . . . . . . . . . . 47
Start a Chat Session. . . . . . . . . . . . . . . . . . . . . . . . . . . . 47
Review Chat History . . . . . . . . . . . . . . . . . . . . . . . . . . . . 48
Respond to Chat. . . . . . . . . . . . . . . . . . . . . . . . . . . . . . . 49
End a Chat Session . . . . . . . . . . . . . . . . . . . . . . . . . . . . 49
Address Book
Storing an Address Book Entry . . . . . . . . . . . . . . . . . . . 50
Dialing a Address Book Entry . . . . . . . . . . . . . . . . . . . . . 52
Editing a Address Book Entry . . . . . . . . . . . . . . . . . . . . . 53
Sorting and Copying Address Book Entries . . . . . . . . . . 54
Checking Capacity . . . . . . . . . . . . . . . . . . . . . . . . . . . . . 55
Personalizing Your Phone
Customizing Menus . . . . . . . . . . . . . . . . . . . . . . . . . . . . 56
Redefining Soft Keys . . . . . . . . . . . . . . . . . . . . . . . . . . . 57
Selecting a Favorite Wallpaper . . . . . . . . . . . . . . . . . . . . 57
Selecting a Customized Screen Saver . . . . . . . . . . . . . . 58
Selecting a Different Language . . . . . . . . . . . . . . . . . . . 58
Selecting a Greeting . . . . . . . . . . . . . . . . . . . . . . . . . . . . 59
Selecting a Color Setting . . . . . . . . . . . . . . . . . . . . . . . . 59
Customizing a Banner . . . . . . . . . . . . . . . . . . . . . . . . . . 59
Using MyMenu . . . . . . . . . . . . . . . . . . . . . . . . . . . . . . . . 60
Downloading Ring Tones . . . . . . . . . . . . . . . . . . . . . . . . 61
Getting More Out of Your Phone
Dialing Options . . . . . . . . . . . . . . . . . . . . . . . . . . . . . . . . 62
Managing Your Calls. . . . . . . . . . . . . . . . . . . . . . . . . . . . 63
. . . . . . . . . . . . . . . . . . . . . . . . . . . . . . . . . . 50
. . . . . . . . . . . . . . . . . . . . . . . . 56
. . . . . . . . . . . . . . . . . . . 62
5
Page 8

Using DTMF Tones . . . . . . . . . . . . . . . . . . . . . . . . . . . . 64
Monitoring Phone Use. . . . . . . . . . . . . . . . . . . . . . . . . . 64
Network Features . . . . . . . . . . . . . . . . . . . . . . . . . . . . . 68
Personal Organizer Features
Alarm Clock. . . . . . . . . . . . . . . . . . . . . . . . . . . . . . . . . . 69
Calculator . . . . . . . . . . . . . . . . . . . . . . . . . . . . . . . . . . . 70
Converting Currency . . . . . . . . . . . . . . . . . . . . . . . . . . . 71
Using the Stop Watch . . . . . . . . . . . . . . . . . . . . . . . . . . 71
Security
News and Entertainment
Troubleshooting
Specific Absorption Rate Data
Index
. . . . . . . . . . . . . . . . . . . . . . . . . . . . . . . . . . . . . . 72
Locking and Unlocking Your Phone. . . . . . . . . . . . . . . . 72
Changing Your Unlock Code . . . . . . . . . . . . . . . . . . . . . 73
If You Forget A Code Or Password . . . . . . . . . . . . . . . . 74
Protecting the SIM Card . . . . . . . . . . . . . . . . . . . . . . . . 75
Mobile Internet . . . . . . . . . . . . . . . . . . . . . . . . . . . . . . . 76
Games. . . . . . . . . . . . . . . . . . . . . . . . . . . . . . . . . . . . . . 77
Using My Tones. . . . . . . . . . . . . . . . . . . . . . . . . . . . . . . 78
. . . . . . . . . . . . . . . . . . . . . . . . . . . . . . . 84
Check Here First . . . . . . . . . . . . . . . . . . . . . . . . . . . . . . 84
Service and Repairs . . . . . . . . . . . . . . . . . . . . . . . . . . . 87
. . . . . . . . . . . . . . . . . . . . . . . . . . . . . . . . . . . . . . . . 90
. . . . . . . . . . . . . . . . . . . . . 69
. . . . . . . . . . . . . . . . . . . . . . . . 76
. . . . . . . . . . . . . . . . . . . 88
6
Page 9
Menu Map
Main Menu
• Messages
• Recent Calls
•Games
•Quick Dial
•IM
•Chat
• Address Book
• Media Net
• Audio
•Alarm Clock
• MyMenu
• Settings
•More
•Calculator
•Fixed Dial
•Service Dial
• Stop Watch
Note:
The Main Menu above
represents the standard phone
menu layout. You or your
service provider may have
changed the order of the menu
layout or changed the feature
names.
Not all features may be
available for all users.
Shortcut
In idle, press up or
down to access
Address Book, right or
left to adjust volume.
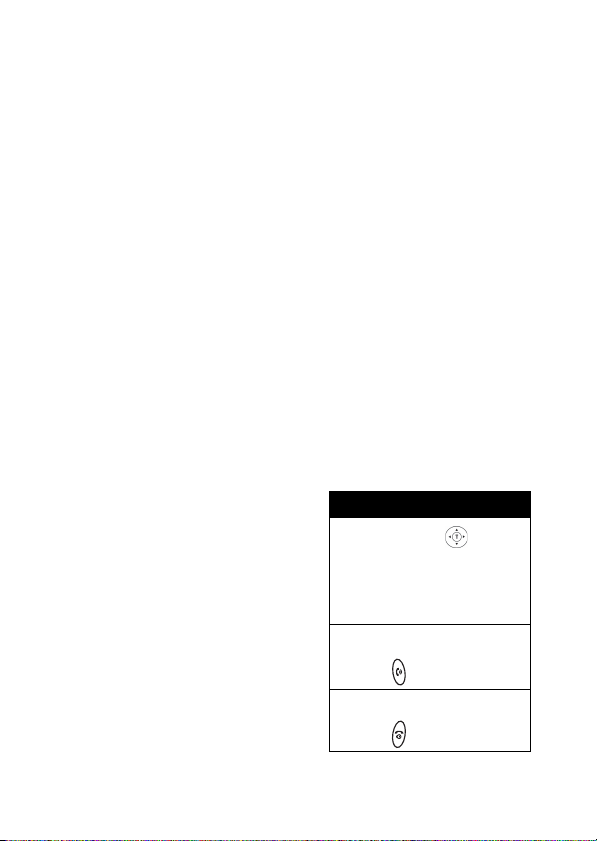
Go to Dialed Calls:
press .
Exit the menu system:
press .
7
Page 10

Settings Menu
• Call Forward *
•Voice Calls
•Cancel All
• Phone Status
•My Numbers *
• Battery Meter
• In Call Setup
• In-Call Timer
• My Caller ID
• Answer Options
• Call Waiting
•Security
• Phone Lock
• Fixed Dial*
• Call Barring*
• SIM PIN
•New Passwords
• Other Settings*
• Personalize
•Main Menu
•Keys
• Greeting *
• Banner
• Screen Saver
• Quick Dial *
• Wallpaper
• Color Setting
• Initial Setup
• Time and Date
• Power On/Off
•1-Touch Dial
• Backlight
•Scroll
• Main menu animation
• Language
• Battery Save
• Contrast
•DTMF
• TTY Setup
•Master Reset
• Master Clear
•Network
• New Network
• Service Tone
• Call Drop Tone
• Band Selection*
• Headset
• Auto Answer
+
* Optional Network, SIM card, or subscription-dependent features.
+ This function allows you to have your phone automatically turned
on and off at specified times, helping you save battery life.
8
Page 11

Getting Started
CAUTION:
first time, read the Important Safety and
Legal Information included in the
gray-edged pages at the back of this guide.
Before using the phone for the
032259o
Package Content
Your wireless phone comes with a replaceable internal
battery and is typically equipped with a charger. Other
accessories can customize your phone to its maximum
performance and portability.
About This Manual
Optional Features
Features marked with this label are optional
032380o
network, SIM card, and/or subscriptiondependent features. All service providers in all
geographical areas may not offer these features.
Contact your service provider for information about
availability.
Optional Accessories
Getting Started
Features marked with this label require the use of
TM
an optional Motorola Original
accessory.
9
Page 12
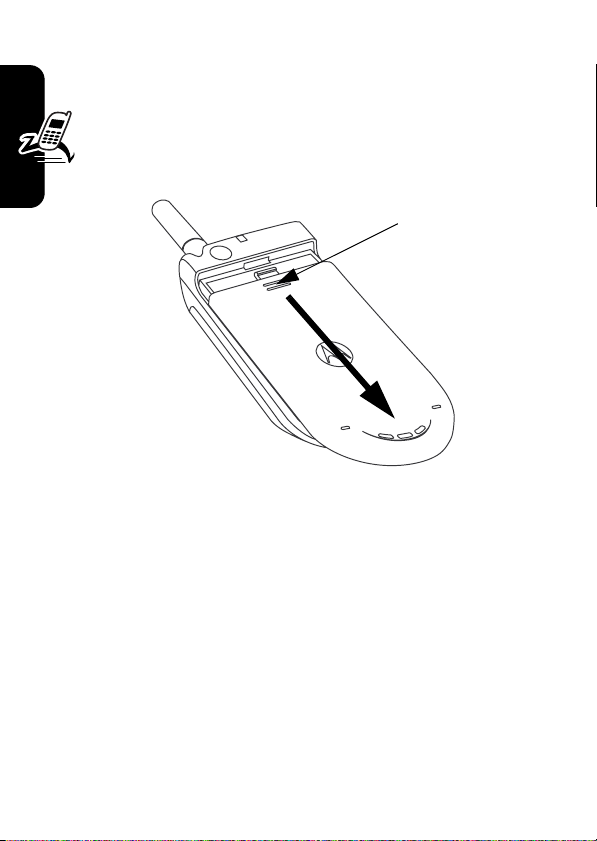
Removing and Replacing the
Battery Door
To remove the battery door, press down on the two
ridges at the top of the door, slide it down towards the
bottom of the phone and remove it completely.
Press Here
Getting Started
To replace the battery door, slide it on from the bottom of
the phone and up towards the top of the phone until it
snaps in place.
10
Page 13

Changing Your SIM Card and Battery
Your S I M (Subscriber Identity Module) card contains
your phone number, service details and Address Book/
message memory. Install it in your phone by placing it
in the SIM card slot located on the back of your phone
beneath the replaceable battery.
Getting Started
11
Page 14

Battery Tips
Battery life depends on the network, signal strength,
temperature, features, and accessories you use.
•
Always use Motorola Original™
batteries and chargers. The warranty
does not cover damage caused by nonMotorola batteries and/or chargers.
•
New batteries or batteries stored for a long time may
take more time to charge.
•
When charging your battery, keep it near room
temperature.
•
Getting Started
When storing your battery, keep it uncharged in a
cool, dark, dry place, such as a refrigerator.
•
Never expose batteries to temperatures below -10°C
(14°F) or above 45°C (113°F). Always take your
phone with you when you leave your vehicle.
•
It is normal for batteries to gradually wear down and
require longer charging times. If you notice a change
in your battery life, it is probably time to purchase a
new battery.
Contact your local recycling center for proper
battery disposal.
Warning:
may explode.
Before using your phone, read the battery safety
information in the “Safety and General Information” section
included in this guide.
12
Never dispose of batteries in a fire because they
Page 15

Turning On/Off Your Phone
To turn on/off your phone, press and hold the Power/
End key . If necessary, enter your SIM card PIN
code and press .
Note:
If you enter an incorrect code 3 times, your SIM card
is disabled and the phone displays
enter your 4-digit code and press to unlock your
phone. The default unlock code is set to 1234.
Note:
To automatically turn the phone on or off, see
“Powering Off in Standby or Automatically Turn Off” on
page 24.
SIM Blocked
. If necessary,
Making and Answering Calls
Getting Started
To make a call
then press to make the call. (Press
erase the last digit. Press and hold
digits.)
To make a call from the address book, see page 50.
To answer a call
You can also apply the
Find the Feature
Press to end a call.
, enter the number with the keypad keys,
, press .
Multi-Key
DELETE
( ) to
DELETE
( ) to erase all
answer function.
>
Settings > In Call Setup
>
Answer Options
>
Multi-Key On
13
Page 16

Adjusting the Volume
When you are in a call, you can adjust the earpiece
speaker volume by pressing right or left.
When the phone display is in idle, press right or left
to adjust the ring volume. Increase/decrease the
volume by pressing to the right/left.
Getting Started
14
Page 17
Learning to Use Your Phone
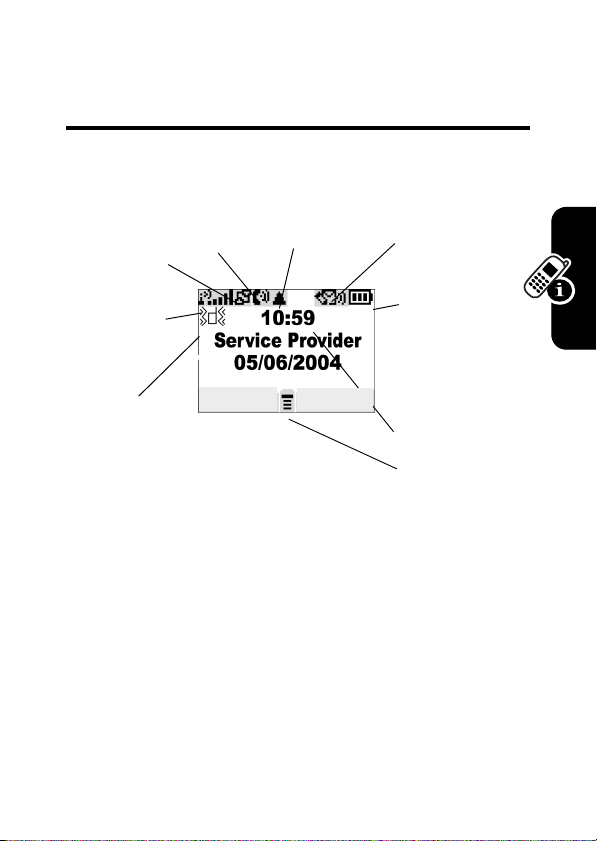
Symbols on the Screen
q
p
GPRS
Active
o
Signal
Strength
n
Alert
Type
In use
RECENT
r
Roam
IM
n
Alert Type
The default alert setting is loud ring.
o
Signal Strength
connection with the network.
Shows the current selected alert profile.
Shows the strength of your phone’s
]
Message
^
Battery
Level
_
Clock
`
Menu
Learning to Use Your Phone
p
GPRS Active
high-speed GPRS network connection. GPRS allows
faster data transfer speeds. The indicator does not mean
that you are in a call, only that you are registered on the
network via a GPRS connection.
Indicates that your phone is using a
16
Page 18

q
In use
you have a secure or insecure connection.
r
Roam
network system outside your home network.
]
Message
message waiting. An icon here can also indicate your text
entry mode, alphabet, numeric, symbol and etc.
`
Menu
open the system menu.
Indicates when a call is in progress and when
Appears when your phone uses another
Appears when you have a new voice or text
^
Battery Level
your battery. The more bars visible, the greater the
charge.
_
Clock
Displays the real time (see page 21).
Indicates that you can press the menu key to
Shows the amount of charge left in
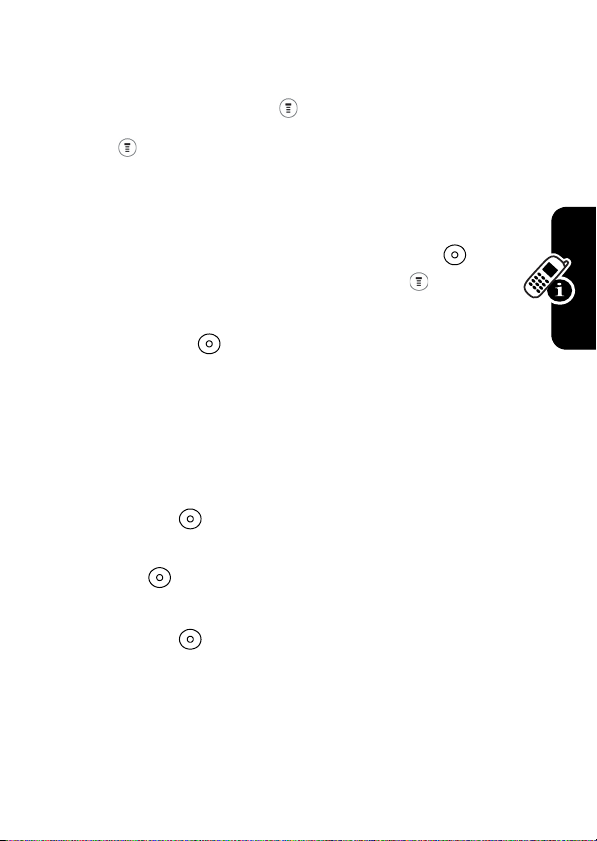
Using the Menu
Navigating to a Feature
Use these keys to move through your phone’s menu
system:
Apply the function identified by the right display prompt.
Apply the function identified by the left display prompt.
Learning to Use Your Phone
17
Make and answer calls, and view recent dialed calls.
Press and hold to turn on/off the phone. Press and
release to end calls and exit menus.
Scroll through menus/lists, and set feature values.
Page 19
The following demonstrates how to select a feature and
enter information:
Find the Feature
Press , scroll to
information of the last call.
Recent Calls
>
Recent Calls > Dialed Calls
, then select it to see the
Selecting a Feature
Scroll through numeric items. Press
see the details of a highlighted item. Press again to
enter the sub-menu.
Press
BACK/EXIT
( ) to return to a previous screen.
VIEW/SELECT
() to
Entering Feature Information
Features such as
enter detailed information.
Enter numbers or text with the keypad.
Press
CANCEL
changes.
Note: OK ( ) appears when you enter information. Press
it to save the information.
CHANGE
Press
scroll through numeric items.
Address Book
( ) to exit the menu without making
( ) to edit a selected item. Also, you can
and
Greeting
require you to
Learning to Use Your Phone
Entering Text
The default Tap Method makes it easy for you to enter
names, numbers and text messages on your phone. You
18
Page 20
can enter all characters (letters, numbers, and symbols)
using the standard Tap method.
To enter text with the Tap method
1 or more times to cycle through characters. Release the
key to enter the displayed character. Press
when you are finish editing.
To cycle through iTAP
to enter
you would like to apply.
®
, Tap and Numeric modes, press
Entry Method
, then scroll to the entry mode
, press a number key
OK/SEND
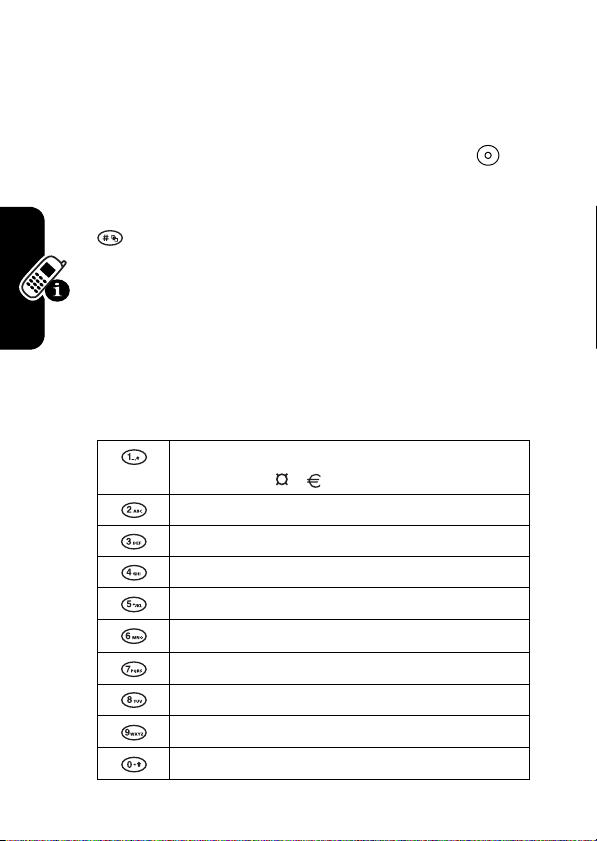
Character Chart
Use this chart as a guide for entering spaces, numbers,
letters, symbols, and other characters with the Tap Method
text mode. Press the same key repeatedly to cycle through
available characters.
. 1 ? ! , @ _ & ~ : ; " - ( ) ' ¿ ¡
% £ $ ¥
A B C 2
Learning to Use Your Phone
D E F 3
G H I 4
J K L 5
M N O 6
P Q R S 7
T U V 8
W X Y Z 9
+ - 0 x * / \ [ ] = > < #
§
()
19
Page 21
Note:
The Tap sequence could be different in different
language Tap input method.
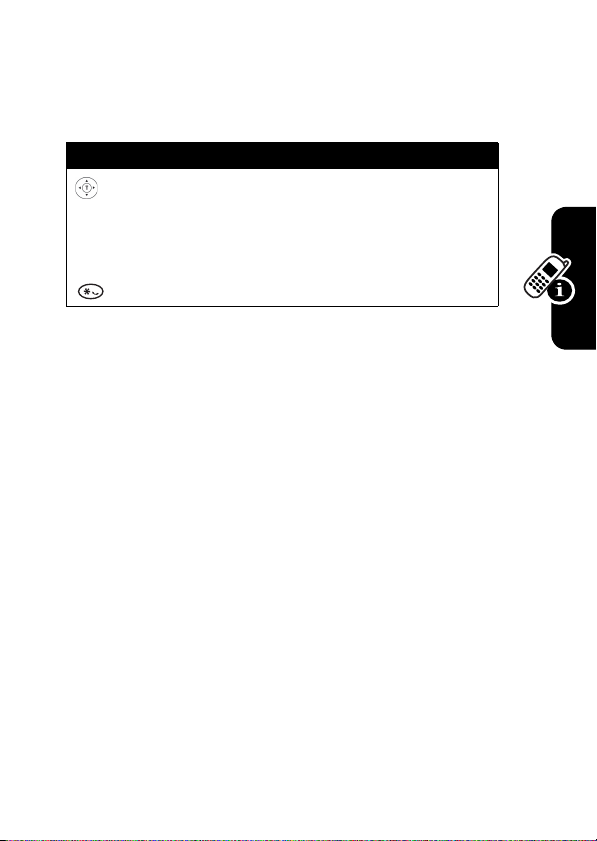
Capitalization
Press To
(up/down)
or
Note:
Sizes of characters may vary from 1 language to
another.
change the words to initial
character capitalized, all
uppercase characters
add a space
Learning to Use Your Phone
Folding Back the Phone
Whenever you fold back your cell phone, all ongoing
operations will be canceled and the screen displays the
original entrance screen content.
20
Page 22
Setting Up Your Phone
Setting the Time and Date
Find the Feature
>
Settings > Other Settings
>
Initial Setup > Time and Date
Changing Personal Greetings
Find the Feature
>
Settings > Other Settings
>
Personalize > Greeting
Choosing Alert and Audio Tones
Your phone rings and/or vibrates to notify you of an
incoming call, message, or other event. This ring and/or
vibration is called an alert. You can select 1 of 6 different
alert profiles:
Ring
, and
Each alert profile contains settings for ringer and keypad
volume. It also includes alert tone settings for different
events (incoming calls, text messages, voicemail and
messages). You can change the setting in each profile.
To choose an alert profile
Setting Up Your Phone
Find the Feature
Loud Ring, Soft Ring, Vibrate, Vibrate & Ring, Vibrate then
Silent
.
:
>
Audio > Ring Type
> desired profile
21
Page 23
To assign alert profiles to a specific alert for events (i.e.
incoming message, voicemail alert, etc.):
Find the Feature
>
Audio > Tone Details
> desired event
> alert for event
Setting Backlight
Find the Feature
>
Settings > Other Settings
>
Initial Setup > Backlight
> desired time span
Setting Contrast
Find the Feature
>
Settings > Other Settings
>
Initial Setup > Contrast
> desired amount
Setting Display Scrolling
To set the cursor to stop or to wrap around when it reaches
the top or end of a list:
Find the Feature
>
Settings > Other Settings
>
Initial Setup > Scroll
> desired scroll
Setting Main Menu Animation
Setting Up Your Phone
Find the Feature
>
Settings > Other Settings
>
Initial Setup
>
Main menu animation
> desired mode
22
Page 24
Setting Battery Save
To conserve the phone’s power:
Find the Feature
Note:
The screen saver does not come on if
set to
ON
.
>
Settings > Other Settings
>
Initial Setup > Battery Save
> desired mode
Battery Save
Resetting All Options
To restore all options to factory default values, except
unlock code, security code, and lifetime timer:
Find the Feature
To reset all options, you need to enter the
(000000).
>
Settings > Other Settings
>
Initial Setup > Master Reset
Security Code
Clearing All Information
To reset all options to their factory settings and clear all
user entries (such as downloaded wallpapers, Main menu
animation, and sounds):
Warning:
including address book entries and downloaded files.
Once you erase the information, it cannot be recovered. It
Setting Up Your Phone
This option erases all user-entered information,
is
23
Page 25
resets all options back to their factory settings except for
the unlock code, security code, and lifetime timer.
Find the Feature
To clear all information, you need to enter the
(000000).
>
Settings > Other Settings
>
Initial Setup > Master Clear
Security Code
Setting Up Your Phone for Optional Handsfree Use
Handsfree operation makes it possible for you to make and
receive calls without using your hands.
Note:
The use of wireless devices and their
accessories may be prohibited or restricted in certain
areas. Always obey the laws and regulations on the
use of these products.
Find the Feature
>
>
> desired mode
Settings > Other Settings
Headset
>
Auto Answer
Powering Off in Standby or Automatically Turn Off
Find the Feature
>
Settings > Other Settings
>
Initial Setup > Power On/Off
Setting Up Your Phone
24
Page 26
Calling Features
Displaying Your Phone Number
You must enter your phone number before you can
display it.
From the idle display:
Find the Feature
Press To
View
()
1
2
CHANGE
()
or
Calling Features
Note:
SIM card in order to use this feature (see page 50).
26
CANCEL
()
3Ok ()
or
DELETE
()
4
DONE
()
Your phone number must be programmed on your
>
Settings > Phone Status
>
My numbers
see the entry details
change
exit the screen
confirm the change
to make a change
confirm the change
NAME, No., or Speed No.
Page 27
Redialing a Number
You can redial a previously dialed phone number, whether
the call connected or was busy. From the idle display:
Press To
1
2
go directly to the dialed
calls list
redial the highlighted number
or
Find the Feature
Press To
1
2
>
Recent calls
Calls, Dialed Calls,
scroll to the entry you want to
call
redial the highlighted number
>
Received
or
NotePad
Using My Caller ID
The calling line identification (Caller ID)
032380o
feature lets you see who is calling before you
answer. If the caller’s name is stored in your
Address Book
name. Otherwise, the phone displays the caller’s phone
number.
If Caller ID information is not available, your phone
displays
Incoming Call Unknown
, the phone automatically displays the
.
Calling Features
27
Page 28
Terminating an Incoming Call
While the phone is ringing or vibrating:
Press To
or
IGNORE
()
Depending on your phone settings and the type
032380o
of subscription you have, the call may be
forwarded to another number or go directly to
voicemail, or the caller may hear a busy signal.
Note:
The Multi-Key answer function must be enabled (see
page 13).
cancel the incoming call
Dialing an Emergency Number
Your service provider programs 1 or more emergency
Calling Features
phone numbers (such as 911) that you can call under any
circumstances,
SIM card is not inserted
Note:
phone’s preprogrammed emergency number(s) may
not work in all locations, and sometimes an emergency
call cannot be placed due to network, environmental, or
interference issues.
To call the emergency number at any time:
1
28
even when your phone is locked or the
.
Emergency numbers vary by country. Your
Press To
keypad keys dial the emergency number
(such as 911)
Page 29
Press To
2
call the emergency number
Dialing International Numbers
To dial the local international access code:
Action
Press for 2 seconds to insert the international
access code
the country that you would like to connect to
(for example, +44 for the U.K., +33 for France),
then enter the rest of the phone number.
+, then enter in the country code for
Calling Features
Inserting Special Characters into Dialing Sequences
You can insert special characters into a phone number.
While dialing (with digits visible in the display), press
and hold to display a
w
to display a
Option Description
Insert Pause
(insert a
p
.
)
p
. Continue to press and hold
Your phone waits until the call
connects before it dials the next
digit(s) in the series.
29
Page 30
Option Description
Insert Wait
(insert a
w
)
Your phone waits until the call
connects, then prompts you for
confirmation before it dials the
next digit(s).
Viewing the Received Calls, Dialed Calls, or Missed Calls List
Your phone keeps lists of the numbers from calls you
recently received, dialed, and missed, even if the calls did
not connect. The lists are sorted from the newest to oldest
entries. The oldest entries are deleted as new ones are
added. Each entry tells you the person’s number (or name,
if available) and whether or not the call connected. You can
call, store, or delete the numbers on these lists.
Calling Features
Shortcut:
Press to go directly to the dialed calls list
from the idle display.
30
Find the Feature
Press To
1
2
SELECT
()
3
>
Recent Calls
scroll to
Calls
select
scroll to an entry you want
to call
Received Calls
Received Calls
, or
or
Dialed
Dialed Calls
Page 31

Press To
4
View
Back
Note:
or
()
or
( ) go back to the last menu list.
Go into
to store, delete, etc.
call the entry’s number
see the entry’s details
Returning a Missed Call
When powered on, your phone keeps a record of your
missed calls. When you cannot answer a call, your phone
displays the missed call.
Press To
VIEW
()
1
2
3
see the
beginning with the most
recent call
scroll through the list and
select a call you want to view
make the call
Missed Call
list,
Calling Features
Note:
If you have an unanswered call, the phone will
display
1 Missed Call
.
31
Page 32

Entering Numbers in the Notepad
Your phone stores the most recent string of digits entered
on the keypad in a temporary memory location called the
notepad. These digits can be the last phone number that
you called or a phone number that you simply entered but
did not call. These digits remain in the notepad even when
you turn off the phone.
To call the number, create a address book entry, or
perform other operations with the number stored in the
notepad:
Find the Feature
Using Voicemail
Calling Features
You can listen to your voicemail messages by
032380o
calling your network voicemail phone number.
Voicemail messages are stored on the network—
not on your phone. Contact your service provider
for more details.
>
Recent Calls
Storing/Changing Your Voicemail
Number
Store your voicemail number in your phone to make it
faster and easier to use voicemail. Your voicemail number
is provided by your service provider.
Find the Feature
32
>
Messages
>
Voicemail Setup
>
>
Notepad
Voicemail
Page 33

Press To
1
keypad keys enter the phone number for
your voicemail
or
CANCEL
()
2OK ()
or
DELETE
()
exit the screen
store the number
delete the number
Receiving a New Voicemail Message
When you receive a voicemail message, your phone
displays
networks only indicate when you have messages, whether
they are new or not.) If you delete all voicemail messages,
the voicemail indicator will disappear.
Listening to a Voicemail Message
To listen to your voicemail message at any time:
Your phone calls the voicemail phone number you
stored. If you do not have a voicemail number stored, the
phone guides you through storing a number.
New Voicemail
Find the Feature
and a voicemail indicator. (Some
>
Messages
>
Voicemail
Speed Dialing
Speed dial lets you dial any address book entry with a
minimal number of key presses.
When you store an entry in your address book, it is
Calling Features
33
Page 34

assigned a unique speed dial number. You can then use
the speed dial feature to call the entry. In the idle display:
Press To
1
keypad keys enter the speed dial number
for the entry you want to dial
2
3
Note:
dial, see “Editing a Address Book Entry” on page 53.
To edit phone numbers in the
submit the number
call the entry
Entry Details
of the speed
1-Touch Dialing
You can call address book entries 1 through 9 with the
push of a single key. The first 9 numbers from the SIM card
are stored in the 1-Touch Dialing locations 1-9. Press and
Calling Features
hold the 1-digit speed dial number for 1 second.
Find the Feature
Note:
To change 1-Touch numbers, go to
change the
Speed number
Using Call Waiting
If you subscribe to call waiting, an alert tone
032380o
sounds while you are on a call to indicate that
34
>
Settings
>
Other Settings
>
Initial Setup > 1-Touch Dial
>
SIM
or
Fixed Dial
Address Book
.
to
Page 35
you have received a 2nd call. To put the 1st call on hold
and answer the 2nd call.
Press To
1
2
Swap
()
To activate or deactivate call waiting:
answer the new call
return to the 1st call
Note:
You can press
SWAP
( ) at any time to
switch between calls.
Calling Features
Find the Feature
Forwarding a Call
Call forwarding sends your phone’s incoming
032380o
calls directly to another phone number. Use call
forwarding options to specify which calls your
phone should forward. Turn off call forwarding
when you are ready to accept calls on your phone
again.
>
Settings
>
Call Waiting
>
In Call Setup
35
Page 36

Set Up or Cancel Call Forwarding
Find the Feature
1
2
3
4
The
Calling Features
Call Forward
Note:
You can repeat this procedure to enter forwarding
information for other call types.
Conference Calls
032380o
>
Settings
>
Call Forward
> Voice C a lls
Press To
Select
or
Exit
Select
or
Back
select the desired mode
choose the entry
exit the entry
Status, On
select
confirm the choice
go back
to
Off
option includes
To talk to more than 1 person on a call, you can
make a conference call. Call the 1st person, then
the 2nd person, and link the 2 calls.
Voice Calls
and
Cancel All
.
36
Press To
1
keypad keys dial the 1st person’s number
Page 37

Press To
2
3
Hold
()
4
keypad keys dial the next person’s number
5
6
LINK
()
7
call the number
put the 1st call on hold
call the number
Your phone displays a new
active call indicator over the
call on hold.
connect the 2 calls
end the entire call
Putting a Call on Hold
Press
Hold
( ) (if available)
or
press >
Hold
Calling Features
.
37
Page 38

Messages and Chat
Sending Messages,
032380o
Pictures, and Sounds
You can send text messages and pictures or
sounds to one or more recipients. You can manually enter
each recipient's phone number, or select one or more
numbers from the address book or recent calls lists. When
the messages are sent, they will be saved to the outbox.
Note:
Files may not be compatible with some brands of
handsets.
Messages and Chat
38
Find the Feature
Press To
1
keypad keys enter the message
or
>
Messages
>
Create Message
to insert Quick Note or media
such as a picture, animation,
or sound file in the message,
press:
>
Insert
type > object
Note:
Message length is
limited. The counter at the top
of the display shows how
many characters are left.
Media > object
Page 39

Press To
2
OK
()
3
SEND
()
4
[NEW Entry]
keypad keys
5
DONE
REMOVE
6
SEND
7
YES
No
END
>
or
>
Address Book
()
or
()
()
()
or
()
or
()
select the Quick Note
insert the phone number(s)
enter 1 or more phone
numbers where you want to
send the message
select 1 or more phone
numbers from the address
book.
store the number(s)
delete the number(s)
finish the message
Your phone displays
Now?
.
send or store the message
exit without saving the
message
Send Msg
Messages and Chat
39
Page 40

Viewing Message Status
Text messages that you send are stored in the Outbox.
To view the content of your Outbox:
Find the Feature
Text messages are sorted from the newest to oldest.
Note:
Your Outbox includes 3 options:
>
Messages
Draft, Unsent
Receiving and Reading Messages
When you receive a new message (including Media Net
message), your phone displays
an alert. Press
You can press to view the
the following options:
Options Description
Delete
Call Back
Messages and Chat
Reply
Forward
40
READ
Open a new message. The
Open a copy of the text
( ) to open the message.
New Message
Text Msg Menu
Delete the message.
Call the number in the
message header or
embedded in the message.
phone will automatically use
the sender’s number as the
destination number.
message, with an empty
field.
and gives you
, which includes
>
Outbox
and
Sent
.
To
Page 41

Options Description
Chat
Lock
Lock the message so that
cleanup does not delete it.
Exact Address
Create Message
Move to SIM
Allows you to store the
number.
Create a new message.
Adds the address to the SIM
card.
Using Browser Messages
Your network server can send you browser messages.
Find the Feature
>
Messages
>
Sending Quick Notes
To insert a Quick Note:
Find the Feature
To edit a quick note:
Press To
1
READ
()
2OK ()
or
DELETE
()
>
Messages
>
select and create the desired
note
send the note
delete the note
Browser Msgs
Quick Notes
Messages and Chat
41
Page 42

Press To
or
keypad keys edit the note
3
[NEW ENTRY]
> keypad keys
or
4OK () or
5
DONE
() or
REMOVE
6
SEND
()
to enter phone number
select the number from
Book
confirm the number
ADD
address book selection
send message
Address
Using Instant Messaging
Use instant messaging to exchange messages in real time
with other wireless phone users. The messages you send
display immediately on the other users’ phones.
Logging into IM
Messages and Chat
42
Find the Feature
Press To
1
keypad keys enter your
2OK ()
3
keypad keys enter your
> IM >
submit your
sensitive)
Log In
IM ID
IM ID
Password
(case-
Page 43

Press To
4OK ()
5
up or down
6
Select
()
Yo u r
Contact List
•
Conversations
having active conversations with you. Press
( ) to open your conversation with them.
•
Online Contacts
send the person a message. A busy indicator shows
that someone is busy and unable to respond.
•
Offline Contacts
shows that you have set an alert for the person. You
can press
the person has logged in since you refreshed your list.
Note:
viewing the list.
is sorted by online status:
display 1st. These are online IM users
are logged in to IM. Press
SEND IM
To refresh your
submit your
Tip:
next time, scroll to
Settings
submit your password.
scroll to your
view the
are logged out of IM. An alert indicator
( ) to send a message, in case
Contact List
Password
To log in automatically
>
Auto Login
Contact list
, press
.
Offline
after you
Contact List
SEND IM
Refresh List
VIEW
( ) to
while
Messages and Chat
43
Page 44

Sending and Receiving Instant Messages
When you log into IM, you can exchange messages with
other IM users.
Press To
1
up or down
2
SEND IM
()
or
VIEW
()
3
keypad keys enter messages text
4
SEND
send the text message text
scroll to a name on the
List
start a conversation with the
person reopen a conversation
in progress
Contact
Your phone displays the conversation history, where you
can see the text you sent and the person’s replies as they
arrive. In the conversation display, you can:
Press To
1
Back
Messages and Chat
return to the
you can open more
conversations.
Contact List
, where
44
Page 45

Press To
2
3
>
Contact Info
4
>
Add Contact
5
>
End
Conversation
Note:
If you log out of IM, you can still view the
conversation text by pressing >
from the home screen. Turning off your phone erases the
conversation.
return to the home screen,
without logging out of IM or
closing the conversation.
Note:
Your phone displays
New IM
if you receive a
message while on the home
screen or in another
application
view the screen name and
online status of the person in
this conversation
add the screen name to your
Contact List
end the conversation
IM
>
Offline Convs.
Setting Your Online Status
Messages and Chat
When you log in to IM, your online status is visible to
other IM users. To set your online status:
Press To
1
up or down
scroll to
My Status
45
Page 46

Press To
2
3
4
SELECT
()
up or down
SELECT
select the status setting
select the option
scroll to
Available, Busy
Setting Up IM
Adding and Removing Contacts
, or
Invisible
To add a name, open your
press >
the new screen name and press
error if it cannot verify the name on the server.
To remove a name from your
and press >
Add Contact
Delete Contact
Contact List
. If you are not in a conversation, enter
.
or a conversation and
OK
( ). IM returns an
Contact List
, highlight the name
Setting an Alert for Offline Contacts
To receive notification when someone logs into IM,
highlight the name in your
Alert
.
Contact List
and press >
Setting Your Busy Message
Messages and Chat
If you are logged in to IM but not responding to new
messages, you can set the busy indicator to display next to
your name in everyone else’s
Online
menu, select
To create or edit a busy message that is automatically
sent to IM users attempting to contact you, select
Message
form the
46
IM Online
My Status
menu.
>
Busy
Contact List
.
. From the
Set Online
IM
Busy
Page 47

The
IM Online
menu displays when you log in, and when you
press
BACK
from your
Contact List
.
Setting Your IM Alert
IM can sound an alert when new messages arrive or when
a person for whom you have set an alert logs in to IM.
To turn the IM alert on or off, select
the
IM Online
menu.
Settings
>
Set Sounds
form
Logged Out of IM
Select
Log Out
from the
IM Online
menu.
Using Chat
You can exchange text messages in real time with another
wireless phone user in a chat session. The messages you
sent display immediately on your chat partner’s phone.
Start a Chat Session
Find the Feature
Press To
keypad keys enter your
1
2OK ()
3
keypad keys edit your first chat message
4OK ()
5
>
Chat
>
Start Chat
Nickname
Nickname
save your
save the message
scroll to
lookup
Phone Number Entry
or
PB
Messages and Chat
47
Page 48

Press To
6
keypad keys enter your chat partner’s
phone number
or
PB lookup
7OK ()
8
CHAT
()
9OK ()
10
SUSPEND
()
Note:
When your phone displays
delete some existing messages from your inbox, outbox, or
drafts folder to receive new chat messages.
Messages and Chat
Review Chat History
scroll to
number from the address
book
send the chat message
when your chat partner
replies, the reply appears
over your text.
enter a reply to your partner
send your reply
suspend this chat and
Chat
or
End Chat
selected again
Memory is Full
and select a
later when
, you must
Resume
Chat
is
48
You can see chat history from:
Find the Feature
>
Chat > History
Page 49

Respond to Chat
When you receive a chat message, your phone displays
Chat indicating the name of the person wanting to chat,
and gives an alert.
Press To
IGNORE
ACCEPT
()
()
1
2
If reminders are turned on, your phone sends a reminder
at regular intervals until you respond to the chat
notification or turn off your phone. If you receive another
chat request during a chat session, the new request
appears as an incoming text message, with the requester’s
chat name at the beginning of the message.
refuse the chat session
accept the chat session
End a Chat Session
A chat session also ends when you turn off the phone,
answer an incoming call, or start a new chat session.
Your chat partner is not notified when you end a chat
session. If your partner sends more chat text, the phone
treats it as an incoming text message, with your chat
partner’s chat name at the beginning of the message.
Messages and Chat
49
Page 50

Address Book
You can store a list of names and phone numbers in
your phone’s SIM card. You can view these entries and
call them directly from your phone.
To see the list of names stored in your address book,
press >
name and press
book entry.
Storing an Address Book Entry
Address Book
A phone number is required for a address book entry. All
other information is optional. You can store a address book
entry on your SIM card only.
Shortcut:
press
the number in the
following procedure to enter additional information and
store the entry.
Note:
fixed dial entry by scrolling to and selecting
address book
Enter a phone number in the idle display, then
STORE
( ) to create a address book entry with
You can also use the following procedure to store a
from the idle display. Scroll to a
View
( ) to view details of the address
NO
. field. Go directly to step 2 in the
Fixed Dial.
50
Page 51

Enter Information
Find the Feature
Press To
SELECT
1
2
3
4OK ()
5
6OK ()
7
8
9
()
CHANGE
()
keypad keys enter a name for the address
CHANGE
()
CHANGE
()
keypad keys enter a different speed
>
Address Book
Entry Details
go to
Name
select
book entry
store the name
enter the phone number
store the phone number
scroll to
to speed dial the entry
The next available speed dial
number is assigned to a new
address book number by
default.
select
change it
number if desired
Speed No.
Speed No.
>
screen
, the number
if you want to
New Entry
Address Book
51
Page 52

Press To
10OK ()
save the modified speed
number
If your chosen speed number
is already assigned to
another entry, you are asked
if you want to replace that
entry.
Complete Address Book Entry
When you finish entering information for a address book
entry:
Address Book
Press To
DONE
()
store the entry and return to
the address book list
Note:
Users can only store the phone numbers to the SIM
card but not into the phone memory.
Dialing a Address Book Entry
You can use the address book list, speed dial, or 1-touch
dial to call a number stored in your address book.
address book List
Find the Feature
52
>
Address Book
Page 53

Press To
1
2
scroll to the entry you want
call the entry
Editing a Address Book Entry
You can edit a address book entry stored on your SIM
card. If you change an entry’s speed dial number, the entry
is moved to the new speed dial location and the original
entry is deleted.
Find the Feature
Press To
1
2
VIEW
()
3
EDIT
()
>
Address Book
scroll to the entry you want to
edit
display the entry’s detailed
view
edit the address book entry
Deleting a Address Book Entry
Find the Feature
Press To
1
2
3
>
Address Book
scroll to the entry you want to
delete
open the address book menu
scroll to
Delete
Address Book
53
Page 54

Press To
select
Delete
4SELECT
5
()
YES
()
confirm the deletion
Sorting and Copying Address
Book Entries
You can copy a address book entry from a SIM card
location to another SIM card location.
Note:
This function copies the original entry to a new
location. It does not delete the original entry.
Address Book
Copy a Single Entry
54
Find the Feature
Press To
1
2
3
4
SELECT
()
5
YES
()
or
NO
()
>
Address Book
scroll to the entry you want to
copy
open the address book menu
scroll to
select
confirm that you want to copy
an entry
cancel the option
Copy Entry
Copy Entry
Page 55

Checking Capacity
To check how much space is left in your address book,
your phone displays the number of entries that are
used and the number available. To see how much
memory is left in your SIM card:
Press To
1
2
3
SELECT
()
open the address book menu
scroll to
select
Your phone displays the
number of SIM card address
book entries available.
Capacity
Capacity
Address Book
55
Page 56

Personalizing Your Phone
You can adjust your phone menus and features.
Customizing Menus
Your can customize the order of the items in your
phone's main menu, depending upon your usage.
Personalizing Your Phone
56
Find the Feature
Press To
1
2
3
4
GRAB
()
Insert
()
or
CANCEL
exit the screen
>
Settings
>
Other Settings
>
Personalize
scroll to the menu item you
want to move
select the menu item you
want to move
move the item up or down the
menu
insert the item in the new
location
>
Main Menu
Page 57

Redefining Soft Keys
Find the Feature
Press To
1
2
SELECT
()
3
4
SELECT
()
>
Settings
>
Other Settings
>
Personalize
scroll
open the key editor
scroll to the new key function
confirm the new function
>
Keys
Selecting a Favorite Wallpaper
Find the Feature
Setting Description
Set Layout
Picture
>
Settings
>
Other Settings
>
Personalize
select
Center
select the picture for the
background image in your
idle display
or
Tile
>
Wallpaper
Personalizing Your Phone
57
Page 58

Selecting a Customized Screen Saver
Find the Feature
Press To
Selecting a Different Language
Personalizing Your Phone
Find the Feature
>
Settings
>
Other Settings
>
Personalize
select the
appears when your phone is
idle
or
select
Idle Time to set how long
your phone must be idle
before the screen saver
appears
Note:
If this setting is longer
than your
then your display will turn off
before you see the screen
saver.
>
Settings
>
Initial Setup
>
Animation
that
Display Timeout
>
Other Settings
>
Screen Saver
setting,
Language
58
Page 59

Selecting a Greeting
Find the Feature
>
Settings
>
Personalize
>
Other Settings
>
Greeting
Selecting a Color Setting
Find the Feature
>
Settings
>
Personalize
>
Other Settings
>
Color Setting
Customizing a Banner
Your can customize your banner so that it will display
under the name of your service provider on the phone’s
screen.
Find the Feature
Press To
1
keypad keys enter the wording you would
2OK ()
or
DELETE
()
>
Settings
>
Other Settings
>
Personalize
like to display for your banner
confirm your entry
cancel the entry
>
Banner
Personalizing Your Phone
59
Page 60

Using MyMenu
MyMenu
enables you to quickly access your favorite menu
features.
Using MyMenu Shortcut
You can use
while scrolling through a menu.
Note:
MyMenu
from the idle display, while on a call, or
Not all features can set
MyMenu Shortcut
.
Use a MyMenu Key Command
If you know the
1
2
MyMenu
key number:
Press To
the
MyMenu
number
key
open the menu
go to the menu item, or
perform the menu action
Select a Feature From the MyMenu list
To select a feature from the
Personalizing Your Phone
Find the Feature
Note:
To edit or delete a
list and press to open a menu of options for the feature.
MyMenu
list:
>
MyMenu
> desired feature
MyMenu
feature, highlight it in the
60
Page 61

Adding a MyMenu Shortcut
Press To
1
2
3
press and hold open the
enter the menu system
highlight the menu item
MyMenu
editor
The phone displays
MyMenu for: “
is the name of the item you
selected.
4
Yes
()
5
CHANGE
()
or
view your options
change the
number, if necessary
Item”?, where Item
MyMenu
Assign
key
DONE
()
select the
and close the editor
Downloading Ring Tones
You can download ring tones from the Media Net (see
page 76).
MyMenu
key number
Personalizing Your Phone
61
Page 62

Getting More Out of Your Phone
Dialing Options
Fixed Dialing
When you activate the Fixed Dial feature, your phone can
place calls only to the numbers in the Fixed Dial list.
Note:
Employers can use Fixed Dial to limit employees’
phones to a predefined list of numbers, country codes, or
other prefixes.
Activating Fixed Dial
Fixed Dial list entries can be any length. You must enter
your SIM PIN2 code, which you receive from your network
service provider.
Getting More Out of Your
62
Find the Feature
Phone
>
Settings
>
Fixed Dial
>
Security
Page 63

Service Dialing
You can dial preprogrammed numbers stored on your SIM
card. Your service provider can program your SIM card
with phone numbers for services such as taxi companies,
restaurants, and hospitals.
Find the Feature
>
More
>
Service Dial
Managing Your Calls
Calling a Number in a Text Message
If you receive a text message with an embedded phone
number, you can dial the number directly.
Find the Feature
Press To
1
2
READ
()
3
4
>
Messages
>
Inbox
scroll to the message with the
desired number
open the message
open the menu options of the
desired number
scroll to
Call Back
Getting More Out of Your
Phone
63
Page 64

Press To
5
CALL
()
or
CANCEL
()
If the message contains more than 1 phone number, scroll
to the desired number and press
call the number
return to the previous menu
CALL
to dial.
Using DTMF Tones
You can send numbers to the network as Dual Tone MultiFrequency (DTMF) tones during a call. Use DTMF tones to
communicate with automated systems that require you to
submit a PIN code or credit card number.
To set the tones to be Long DTMF or Short DTMF:
Find the Feature
>
Settings
>
Initial Setup
>
Monitoring Phone Use
Phone
Viewing and Resetting Call Timers
Your phone tracks and records call times. Use the
Calls
menu to view and reset a call timer.
Network connection time is the elapsed time from the
moment you connect to your service provider’s network to
the moment you end the call by pressing . This time
Getting More Out of Your
includes busy signals and ringing.
64
Other Settings
>
DTMF
Recent
Page 65

The amount of network connection time you track on
your resettable timer may not be equal the amount of
time for which you are billed by your service provider.
For billing information, please contact your service
provider directly.
To view a call timer:
Find the Feature
Press To
1
2
SELECT
()
To reset a call timer:
Press To
RESET
1
2
You can view the approximate network connection time
elapsed during the following calls:
Timer Description
Last Call
Dialed Calls
()
YES
()
Time of the last call dialed or
received. You cannot reset this
timer.
Total time of dialed calls since the
last time you reset this timer.
>
Recent Calls
scroll to the timer you want to
view
view the recorded time
>
Call Times
reset the time if available
confirm the reset
Getting More Out of Your
Phone
65
Page 66

Timer Description
Received Calls
All Calls
Life Time
Total time spent on calls received
since the last time you reset this
timer.
Total time of dialed and received
calls since the last time you reset
this timer.
Total time of all calls on this
phone. You cannot reset this
timer.
Viewing and Resetting Call Costs
Find the Feature
Press To
1
2
SELECT
To reset the call tracker:
Phone
Press To
1
RESET
2OK ()
Getting More Out of Your
66
()
()
>
Recent Calls
scroll to the cost tracker you
want to view
view the recorded cost
reset all the cost (if available)
enter your PIN2 code to
confirm the reset
>
Call Cost
Page 67

Your phone network can provide the following call cost
information:
Cost Tracker Description
Credit Available
Last Call Cost
All Calls Cost
Reset All Cost
Amount of your credit remaining.
For GSM advice-of-charge, this is
only available if you set a credit
limit.
Note:
your phone receives cost
information form the advice-ofcharge feature or third-party
prepay software.
Amount for the last call you dialed
or received. You cannot reset this
cost tracker.
Amount for all dialed and received
Reset all call cost records.
calls since the last time you reset
this cost tracker.
You can reset this value
separately from
Received Calls
Received Call
Dialed Calls
, so
Dialed Calls
s may not equal
plus
and
All Calls
.
Getting More Out of Your
Phone
67
Page 68

Network Features
Network Selection
Find the Feature
Your service provider registers your phone to a network.
You can view information about the current network,
change how your phone searches for a network, specify
your preferred networks, and activate alerts that indicate
when a call is dropped or network registration changes.
>
Settings
>
Network
>
Other Settings
Phone
Getting More Out of Your
68
Page 69

Personal Organizer Features
Alarm Clock
You can create a
profile. To create a new alarm profile:
Find the Feature
Action Description
>
1
2
3
4
5
SELECT
()
Alarm]
CHANGE
OK
()
DONE
()
New Alarm
create/edit alarm details:
[New
()
Name :
Time :
Alert:
Volume:
scroll to the item you want to edit
change details for the selected
item
confirm the item and repeat above
method for other items.
save this alarm entry
or activate a predefined alarm
>
Alarm Clock
Personal Organizer Features
69
Page 70

Note:
The alarm clock in your phone must be set while
your phone is on. You can then power your phone off to
conserve your phone’s battery. Although your phone is
powered off, the alarm clock will play an audible alert at the
time you have set.
To enable/disable a predefined alarm profile:
Press To
1
2
ENABLE/DISABLE
()
Note:
To edit the predefined alarm profile, refer to the
steps above.
go to the desired predefined
alarm profile
activate or cancel the alarm
clock
Calculator
Personal Organizer Features
Find the Feature
Press To
1
number keys enter a number in the
2
3
SELECT
()
4
keypad keys enter another number to
5
>
More
>
Calculator
calculator
highlight a calculator function
perform the highlighted
function
calculate with the first one
scroll to
=
to see the result
70
Page 71

Converting Currency
Find the Feature
Press To
1
number keys enter the exchange rate
2OK ()
3
number keys enter the number you want to
4
5
SELECT
()
>
More
>
Calculator
Exchange Rate
>
store the exchange rate
convert
$
scroll to
convert the currency.
to see the result.
Using the Stop Watch
Find the Feature
Press To
START
1
2
3
Note:
()
After stopping the
left to navigate through the
()
STOP
()
RESET
()
After
Stop Watch
to keep track of the time elapsed for later reference.
>
More
>
Stop Watch
start counting the time
stop counting the time
reset the
is activated, you can press
Stop Watch
Stop Watch
, you can press right and
SNAPSHOT
time 1, 2, 3..., etc.
SNAPSHOT
Personal Organizer Features
71
Page 72
Security
Locking and Unlocking Your Phone
You can lock your phone manually or set your phone to
lock automatically whenever you turn it off.
When you try to use a locked phone, it prompts you to
enter the unlock code. (The default unlock code is 1234.) A
locked phone still rings or vibrates for incoming calls or
messages, but you must unlock it to answer.
You can make emergency call on your phone even when it
is locked.
Lock Your Phone Manually
Security
72
Find the Feature
Press To
1
keypad keys enter your 4-digit unlock code
2OK ()
>
Settings
>
Phone Lock
lock the phone
>
Security
>
Lock Now
Set Your Phone to Lock Automatically
Find the Feature
>
Settings
Phone Lock
>
>
Automatic Lock
>
Security
> On
Page 73

Press To
1
keypad keys enter your 4-digit unlock code
2OK ()
set the phone to lock
automatically
Unlock Your Phone
Press To
1
keypad keys enter your 4-digit unlock code
The unlock code is originally
set to 1234.
2OK ()
unlock your phone
Changing Your Unlock Code
Your phone’s 4-digit unlock code is originally set to 1234,
and the 6-digit security code is originally set to 000000.
Your service provider may reset these numbers before you
receive your phone.
If your service provider has not reset these numbers, we
recommend that you change them to prevent other users
from accessing your personal information or modifying
your phone settings. The unlock code must contain 4
digits, and the security code must contain 6 digits. Be sure
to make a note of the new numbers.
Security
Find the Feature
>
Settings
>
New Passwords
>
Security
73
Page 74

Press To
1
2
SELECT
()
3
keypad keys enter your old code
4OK ()
5
keypad keys enter the new code
6OK ()
7
keypad keys re-enter the new code
8OK ()
scroll to the code or password
you want to change
select the
submit your old code
assign the new code
confirm the new code
code
or
password
If You Forget A Code Or Password
If you forget your security code (originally set to 000000),
SIM PIN, or SIM PIN2, contact your service provider.
If you forget your unlock code, try entering 1234 or the last
4 digits of your phone number. If that does not work, do the
following:
Security
74
Press To
1
2
keypad keys enter your security code
3OK ()
go to the unlock code bypass
screen
submit your security code
Page 75

Protecting the SIM Card
Your P I N (Personal Identification Number) code protects
the information stored on your SIM card. When the SIM
PIN feature is activated, you must enter your SIM card PIN
code each time you turn on the phone or insert a SIM card.
Your SIM card PIN code is given to you by your service
provider.
Find the Feature
Press To
1
2
SELECT
()
3
keypad keys enter your SIM card PIN code
4OK ()
>
Settings
>
Security
>
SIM PIN
scroll to
switch protection on or off
submit your code
On
or
Off
Security
75
Page 76

News and
Entertainment
Mobile Internet
The Web micro-MEdia Net lets you access Web pages
and Web-based applications (such as online banking,
shopping, and games) on your phone. Contact your
service provider to set up access, if necessary.
Cingular offers MEdia Net. With MEdia Net you have
access to Web sites, messaging, downloads, and more to
your wireless phone. Please contact Cingular Wireless for
further information on MEdia Net or log on to
www.cingular.com
News and Entertainment
Downloading Pictures, Animation and Ring
Tones
You can download a file such as ring tone, wallpaper, or
screensaver to your phone. To download files with the
MEdia Net on a desktop computer or your phone:
Action
In the MEdia Net, go to the Web site and locate
1
the file you want.
.
76
Page 77

Action
2
Follow the directions on the Web site to
purchase the file (payment details vary). The site
sends a text message to your phone, containing
the attached file or a URL link to the file.
Note:
Normal airtime and/or carrier usage
charges apply.
3
Open the message and store the file.
Note:
When your phone runs out of memory for
downloaded files, new files overwrite the old ones.
Downloaded files share your phone’s memory, so you can
make room for a picture, for example, by deleting ring
tones.
News and Entertainment
Games
Your phone comes with 3 games. If you receive an
incoming call, message, alarm, or alert while playing a
game, the game pauses.
When the game is over, you can purchase more advanced
game levels.
Find the Feature
Press To
SELECT
()
>
Games
> game
start the game
77
Page 78

When the game is over, you can play again or return to the
Games
menu, depending on the game.
Press To
or
pause the game session
end the game session and
return to the game menu
Using My Tones
You can create custom alert tones for your phone. The
tones you create appear in the list of available alerts.
Creating a Tone
78
News and Entertainment
Find the Feature
Press To
up or down scroll to
1
2
EDIT
()
3
CHANGE
()
4
keypad keys enter notes for the tone
5OK ()
6
CHANGE
()
7
keypad keys enter the name for the tone
8OK ()
9
DONE
()
>
Audio > My Tones
[New Tone]
Tone Details
go to
Notes:
select
store the notes
Name:
select
store the name
store the tone
Page 79

Entering Notes
To create a new tone, use the keypad keys to enter each
note. Press a key multiple times to cycle through its
available notes or options (pitch, octave, or length).
The default setting for a new tone is a quarter note in
octave 2.
Key Display Description
1
2
3
A
B
C
2
D
E
F
3
G
R
#
B
Q
H
W
set octave 1
set octave 2
set octave 3
note A
note B
note C
set octave 2
note D
note E
note F
set octave 3
note G
rest
sharp
flat
quarter note or quarter rest
half note of half rest
whole note or whole rest
News and Entertainment
79
Page 80

News and Entertainment
Key Display Description
move cursor left
move cursor right
Enter a note as follows:
Task Action
Change the octave Set the new octave (1, 2 or 3)
before selecting the note.
The new octave applies to
the note and all following
notes until you change it
again.
Select the note
(required)
Change a note to a
sharp or flat
Press a keypad key to enter
a note.
Enter a sharp or flat (
after selecting the note.
Some sharps and flats are
played as standard notes.
For example,
C
. Press up or down
as
to scroll to valid notes when
entering a new note.
B#
is the same
#
or b)
80
Page 81

Task Action
Change a note’s
length
Add a rest Enter 1 or more rests (
Set the new length (
after selecting the note. The
new length applies to the
note and all following notes
until you change it again.
characters) as needed in the
tone sequence. You can set
the length of the rest by
entering
rest, just as you can for a
note.
h, w
h, w
, or q)
R
, or q after the
Example
Press these keys to play this sequence of notes and rests
in octave 3:
rest
, and G (whole note):
Press To Display
C
(quarter note),
E flat
(quarter note),
set octave 3
half
3
News and Entertainment
enter a
quarter
note
C
enter a
quarter note
E flat
C
Eb
81
Page 82

Press To Display
enter a
rest
enter a whole
note G
half
Playing a Note
Rh
Gw
News and Entertainment
Find the Feature
Press To
up or down
1
2
3
up or down
4
SELECT
()
5
Play
()
or
CANCEL
()
>
Audio > My Tones
scroll to the tone you want to
play
open
My Tones Menu
scroll to
select
The phone displays the
playback meter and plays the
tone.
play the tone again
return to the my tones list
Play
Play
Editing a Tone
You cannot edit the standard alert tones included with your
phone. To edit a custom tone that you created:
Find the Feature
82
>
Audio > My Tones
Page 83

Press To
up or down
1
2
EDIT
()
3
up or down
4
CHANGE
()
5
keypad keys
6OK ()
scroll to the tone you want to
edit
open the tone details
scroll to the details you want
Name
or
Notes
to edit (
select the details you want to
edit
enter new text or notes
store the details
)
Deleting a Tone
You cannot delete the standard alert tones included with
your phone. To delete a custom tone that you created:
Find the Feature
Press To
up or down
1
2
3
up or down
4
SELECT
()
5
YES
()
>
Audio > My Tones
scroll to the tone you want to
delete
open
My Tones Menu
scroll to
select
confirm the deletion
Delete
Delete
News and Entertainment
83
Page 84

Troubleshooting
Check Here First
If your phone does not seem to work properly, look here
first. If you still need help, see “Service and Repairs” on
page 87.
Phone Automatic Power On/Off
Question:
standby mode. What should I do when this happens?
Answer:
feature that automatically turns on/off the phone’s power at
specific times. To access this feature:
My phone powers off automatically while in
This phone has an automatic power on/off
Find the Feature
Troubleshooting
Changing the Time on the Phone’s Clock
Question:
use. How can I change it?
Answer:
remove the battery. This will cause the clock to display the
incorrect time the next time you turn on the phone’s power.
84
My phone’s clock is incorrect during normal
The phone’s system clock is reset whenever you
>
Settings>Other Settings
>
Initial Setup
>
Power On/Off
Page 85

Whenever you replace the battery and turn on the phone’s
power, be sure to enter the correct time and date:
Find the Feature
>
Settings>Other Settings
>
Initial Setup
>
Time and Date
Storing Phone Numbers in Phone Memory
Question:
memory?
Answer:
not a feature of this phone. You can store phone
numbers only on your SIM card.
Why can’t I store phone numbers in phone
Storing phone numbers in phone memory is
Using the End/Send Key on the Headset
Question:
happens when I press the
Why?
Answer:
function on the headset.
When I use the headset with my phone, nothing
The phone does not support the
Send/End
key on the headset.
Send/End
key
No Backlight on the Display
Question:
backlight on the display?
Answer:
change the backlight setting:
During phone operation, why don’t I see a
The
Backlight
may be set to
Off
. To view and/or
Troubleshooting
Find the Feature
>
Settings>Other Settings
>
Initial Setup
>
Backlight
85
Page 86

No Incoming Call Ring Tone
Question:
or messages?
Answer:
volume setting by pressing to scroll left or right.
Why don’t I hear a ring tone for incoming calls
The volume may be set to level 0 (silent). Check
Screen Saver Does Not Appear
Question:
has been set?
Answer:
not appear and the backlight turns off by default after 5
seconds, regardless of the settings. To check the
Save
setting:
Find the Feature
Why doesn’t the screen saver appear after it
If
Battery Save
is set to On, the screen saver does
>
Settings>Other Settings
>
Initial Setup >Battery Save
No Service
Troubleshooting
Question:
when I turn it on while traveling to another country, my
phone displays
Answer: Each operator has its own operation frequency
band. Make sure your phone’s band selection setting
matches the operator’s frequency band:
When I turn on my phone for the first time, or
No Service
. Why?
Battery
86
Find the Feature
>
Settings>Other Settings
>
Network >Band Selection
Page 87

Service and Repairs
If you have questions or need assistance, we’re here to
help. Go to
where you can select from a number of customer care
options. You can also contact the Motorola Customer
Support Center at 1-800-331-6456 (United States),
1-888-390-6456 (TTY/TDD United States for hearing
impaired), or 1-800-461-4575 (Canada).
www.motorola.com/consumer/support
,
Troubleshooting
87
Page 88

Specific Absorption Rate Data
SAR Data
The model wireless phone meets the government’s
requirements for exposure to radio waves.
Your wireless phone is a radio transmitter and receiver. It is designed and
manufactured not to exceed limits for exposure to radio frequency (RF)
energy set by the Federal Communications Commission (FCC) of the U.S.
Government and by the Canadian regulatory authorities. These limits are
part of comprehensive guidelines and establish permitted levels of RF
energy for the general population. The guidelines are based on standards
that were developed by independent scientific organizations through
periodic and thorough evaluation of scientific studies. The standards
include a substantial safety margin designed to assure the safety of all
persons, regardless of age or health.
The exposure standard for wireless mobile phones employs a unit of
measurement known as the Specific Absorption Rate, or SAR. The SAR
limit set by the FCC and by the Canadian regulatory authorities is
1.6 W/kg.
positions accepted by the FCC and by Industry Canada with the phone
transmitting at its highest certified power level in all tested frequency
bands. Although the SAR is determined at the highest certified power
level, the actual SAR level of the phone while operating can be well below
the maximum value. This is because the phone is designed to operate at
multiple power levels so as to use only the power required to reach the
network. In general, the closer you are to a wireless base station, the
lower the power output.
Before a phone model is available for sale to the public in the U.S. and
Canada, it must be tested and certified to the FCC and Industry Canada
that it does not exceed the limit established by each government for safe
exposure. The tests are performed in positions and locations (e.g., at the
ear and worn on the body) reported to the FCC and available for review by
Industry Canada. The highest SAR value for this model phone when
1
Tests for SAR are conducted using standard operating
88
Page 89

tested for use at the ear is 1.2 W/kg, and when worn on the body, as
described in this user guide, is 0.56 W/kg. (Body-worn measurements
differ among phone models, depending upon available accessories and
regulatory requirements).
2
While there may be differences between the SAR levels of various phones
and at various positions, they all meet the governmental requirements for
safe exposure. Please note that improvements to this product model
could cause differences in the SAR value for later products; in all cases,
products are designed to be within the guidelines.
Additional information on Specific Absorption Rates (SAR) can be found
on the Cellular Telecommunications & Internet Association (CTIA) Web
site:
http://www.phonefacts.net
or the Canadian Wireless Telecommunications Association (CWTA) Web
site:
http://www.cwta.ca
1. In the United States and Canada, the SAR limit for mobile
phones used by the public is 1.6 watts/kg (W/kg) averaged over
one gram of tissue. The standard incorporates a substantial
margin of safety to give additional protection for the public and
to account for any variations in measurements.
2. The SAR information includes the Motorola testing protocol,
assessment procedure, and measurement uncertainty range for
this product.
89
Page 90

Index
A
accessories 9, 24
address book 50
alert 21, 34
animation 8
B
backlight 22
battery 11
extending battery life 12
browser 41
C
calculator 70
call
making and answering
13
call cost information 67
call timers 64
call waiting 34
caller ID 27
chat 47
clock 69
codes 73, 74
cost tracker 66
credit information 67
currency converter 71
cursor 22
customizing the menu 56
D
date
setting 21
default password 74
Dialed calls list 28
display 26
DTMF tones 64
defined 64
E
earpiece 14
emergency number 28
Entry Method 19
event alert 21
exchange rate 71
F
factory setting 23
I
ignoring a call 30
incoming call 28
90
Page 91

indicators 16
iTAP 19
K
key
left soft key 1
keypad volume 21
L
language
setting 58
Last Call menu 62
left soft key
functions 1
lock 72
loud right alert 16
M
Master Clear 23
Master Reset 23
menu indicator 17
menu key 1
message 38
message indicator 17
micro-MEdia Net 76
microphone 1
missed call indicator 31
my telephone number 26
MyMenu 60
N
navigation key 1
notepad 32
numeric text mode 19
O
optional accessory 9
optional feature 9
outbox 40
P
picture 57
PIN code 75
profile 16
R
received calls list 66
recent calls 64
redial 27
reminders 49
resetting 64, 66
S
soft keys
illustration 1
storing a call 33
symbol 19
91
Page 92

T
tap method text entry 19
text 18
text mode
changing 19
time
setting 21
timers 23
U
unlock code 13, 73
V
Viewing 40
viewing 30
voicemail 32
volume 14
W
wallpaper 57
U.S. patent Re. 34,976
92
Page 93

Modelo(s) V173
GSM
Español
IMPORTANTE: Leer las instrucciones antes
de utilizar el producto.
motorola.com
Page 94

Page 95

Bienvenido
¡Bienvenido al mundo de las comunicaciones inalámbricas
digitales de Motorola! Nos complace que haya elegido el
teléfono inalámbrico V173 de Motorola.
.
Anexo para correa
Tecla programable
Ejecutar funciones
Realizar y contestar
llamadas. Oprímala
reposo para ver las
Nota:
como la imagen que se muestra más arriba. Sin embargo,
todas las ubicaciones de teclas, secuencias y funciones
son las mismas.
DR
Audífono
Escuchar las
llamadas y
mensajes de voz.
Conector para
audífonos
Insertar audífonos
para uso a
manos libres.
AFT
izquierda
identificadas por
la instrucción a
la izquierda de
la pantalla.
Tecla enviar/
contestar
en la pantalla en
llamadas hechas
recientemente.
Puede que su teléfono no aparezca exactamente
Puerto de conexión
de alimentación
Insertar cargador.
Antena
Expuesto en el
reverso superior
del teléfono.
Tecla de menú
Abrir un menú
cuando ve
en la pantalla
Tecla programable
derecha
Ejecutar funciones
identificadas por
la instrucción a la
derecha de la pantalla
Tecla de
encendido/fin
Manténgala oprimida
para encender y
apagar el teléfono.
Presione y suelte para
terminar llamadas
telefónicas y salir del
sistema de menús.
Tecla de navegación
Desplazarse por listas;
programar el volumen.
1
Page 96

Motorola, Inc.
Consumer Advocacy Office
1307 East Algonquin Road
Schaumburg, IL 60196
www.hellomoto.com
1-800-331-6456 (Estados Unidos)
1-888-390-6456 (TTY/TDD Estados Unidos para personas con
problemas de audición)
1-800-461-4575 (Canadá)
MOTOROLA y el logotipo de la M estilizada son marcas registradas en
la Oficina de Patentes y Marcas de los EE.UU. Todos los demás nombres
de productos o de servicios pertenecen a sus respectivos propietarios.
©
Motorola, Inc. 2005.
Algunas funciones del teléfono móvil dependen de las capacidades y
programación de la red de su proveedor de servicio. Además, es posible
que su proveedor de servicio no active algunas funciones, y/o que la
programación de la red del proveedor pueda limitar la funcionalidad de
las funciones. Siempre comuníquese con su proveedor de servicio para
conocer la funcionalidad y disponibilidad de las funciones. Todas las
funciones, funcionalidad y otras especificaciones del producto, así como
la información incluida en la guía del usuario, se basan en la información
más reciente disponible, la que se considera precisa en el momento
de la impresión. Motorola se reserva el derecho de cambiar o modificar
cualquier información o especificación sin previo aviso ni obligación.
Número de manual: 6809492A16-O
DR
AFT
2
Page 97

Contenido
Mapa de menús
Inicio
Cómo usar el teléfono
Programación del teléfono
DR
. . . . . . . . . . . . . . . . . . . . . . . . . . . . . . . . . . . . . . . . . . 9
Contenido del paquete . . . . . . . . . . . . . . . . . . . . . . . . . . . 9
Acerca de este manual. . . . . . . . . . . . . . . . . . . . . . . . . . . 9
Extracción y reposición de la tapa de la batería . . . . . . . 10
Cambio de la tarjeta SIM y la batería . . . . . . . . . . . . . . . 11
Consejos acerca de la batería . . . . . . . . . . . . . . . . . . . . 12
Encendido y apagado del teléfono . . . . . . . . . . . . . . . . . 13
Realización y contestación de llamadas. . . . . . . . . . . . . 13
Ajuste del volumen . . . . . . . . . . . . . . . . . . . . . . . . . . . . . 14
Símbolos en la pantalla . . . . . . . . . . . . . . . . . . . . . . . . . 15
Uso del menú . . . . . . . . . . . . . . . . . . . . . . . . . . . . . . . . . 16
Ingreso de texto . . . . . . . . . . . . . . . . . . . . . . . . . . . . . . . 18
Cierre del teléfono . . . . . . . . . . . . . . . . . . . . . . . . . . . . . 19
Programación de la hora y fecha . . . . . . . . . . . . . . . . . . 20
Cambio del saludo personal . . . . . . . . . . . . . . . . . . . . . . 20
Elección de tonos de alerta y audio . . . . . . . . . . . . . . . . 20
Programación de la luz de fondo . . . . . . . . . . . . . . . . . . 21
Programación del contraste . . . . . . . . . . . . . . . . . . . . . . 21
Programación del desplazamiento en pantalla. . . . . . . . 22
Configuración de animación de menú principal . . . . . . . 22
Programación del ahorro de batería . . . . . . . . . . . . . . . 22
Reinicio de todas las opciones . . . . . . . . . . . . . . . . . . . . 23
Borrado de toda la información. . . . . . . . . . . . . . . . . . . . 23
. . . . . . . . . . . . . . . . . . . . . . . . . . . . . . . . . 7
. . . . . . . . . . . . . . . . . . . . . . . . . . . 15
AFT
. . . . . . . . . . . . . . . . . . . . . . . 20
3
Page 98

Programación del teléfono para uso del
manos libres opcional . . . . . . . . . . . . . . . . . . . . . . . . . . 24
Apagado en espera o apagado automático . . . . . . . . . 24
Funciones de llamada
Visualización de su número telefónico . . . . . . . . . . . . . 25
Remarcación de un número . . . . . . . . . . . . . . . . . . . . . 26
Uso de mi ID de llamada. . . . . . . . . . . . . . . . . . . . . . . . 26
Terminación de una llamada entrante . . . . . . . . . . . . . . 27
Marcación de un número de emergencia . . . . . . . . . . . 27
Marcación de números internacionales . . . . . . . . . . . . 28
Ingreso de caracteres especiales en las
secuencias de marcación . . . . . . . . . . . . . . . . . . . . . . . 29
Visualización de la lista de llamadas recibidas,
llamadas hechas o Llams perdidas. . . . . . . . . . . . . . . . 29
Devolución de una llamada perdida . . . . . . . . . . . . . . . 31
Ingreso de números en los Apuntes . . . . . . . . . . . . . . . 31
Uso de Correo de voz . . . . . . . . . . . . . . . . . . . . . . . . . . 32
Marcado rápido . . . . . . . . . . . . . . . . . . . . . . . . . . . . . . . 33
Marcado 1 tecla. . . . . . . . . . . . . . . . . . . . . . . . . . . . . . . 34
Uso de Llamada en espera . . . . . . . . . . . . . . . . . . . . . . 35
Desvío de llamadas. . . . . . . . . . . . . . . . . . . . . . . . . . . . 35
Conferencias . . . . . . . . . . . . . . . . . . . . . . . . . . . . . . . . . 36
Puesta en espera de una llamada . . . . . . . . . . . . . . . . 37
Mensajes y chat
Envío de mensajes, imágenes y sonidos . . . . . . . . . . . 38
Visualización de estado de mensaje. . . . . . . . . . . . . . . 40
Recepción y lectura de mensajes . . . . . . . . . . . . . . . . . 40
Uso de mensajes de browser . . . . . . . . . . . . . . . . . . . . 41
Envío de notas rápidas . . . . . . . . . . . . . . . . . . . . . . . . . 42
Uso de mensajería instantánea . . . . . . . . . . . . . . . . . . 43
DR
. . . . . . . . . . . . . . . . . . . . . . . . . . 25
AFT
. . . . . . . . . . . . . . . . . . . . . . . . . . . . . . . 38
4
Page 99

Conexión a IM. . . . . . . . . . . . . . . . . . . . . . . . . . . . . . . . . 43
Envío y recepción de mensajes instantáneos . . . . . . . . 44
Configuración del estado de conexión . . . . . . . . . . . . . . 46
Configuración de IM . . . . . . . . . . . . . . . . . . . . . . . . . . . . 47
DR
Uso de chat. . . . . . . . . . . . . . . . . . . . . . . . . . . . . . . . . . . 48
Inicio de una sesión de chat . . . . . . . . . . . . . . . . . . . . . . 48
Revisar historial de chat . . . . . . . . . . . . . . . . . . . . . . . . . 50
Responder al chat. . . . . . . . . . . . . . . . . . . . . . . . . . . . . . 50
Fin de una sesión de chat. . . . . . . . . . . . . . . . . . . . . . . . 50
Libreta de direcciones
Almacenamiento de un ingreso en la libreta
de direcciones. . . . . . . . . . . . . . . . . . . . . . . . . . . . . . . . . 51
Marcado de un ingreso de la libreta de direcciones . . . . 53
Modificar un ingreso de la libreta de direcciones . . . . . . 54
Orden y copia de los ingresos de la libreta
de direcciones. . . . . . . . . . . . . . . . . . . . . . . . . . . . . . . . . 55
Verificación de la capacidad . . . . . . . . . . . . . . . . . . . . . . 56
Personalización del teléfono
Personalización de menús . . . . . . . . . . . . . . . . . . . . . . . 57
Redefinición de teclas programables . . . . . . . . . . . . . . . 58
Selección de un fondo de pantalla favorito. . . . . . . . . . . 58
Selección de un Protector de pantalla
personalizado . . . . . . . . . . . . . . . . . . . . . . . . . . . . . . . . . 59
Selección de un idioma diferente . . . . . . . . . . . . . . . . . . 59
Selección de un saludo. . . . . . . . . . . . . . . . . . . . . . . . . . 60
Selección de una programación de color . . . . . . . . . . . . 60
Personalización de un titular. . . . . . . . . . . . . . . . . . . . . . 60
Uso de MiMenú. . . . . . . . . . . . . . . . . . . . . . . . . . . . . . . . 61
Descarga de tonos de timbre . . . . . . . . . . . . . . . . . . . . . 62
. . . . . . . . . . . . . . . . . . . . . . . . . . . 51
AFT
. . . . . . . . . . . . . . . . . . . . . . 57
5
Page 100

Aproveche al máximo su teléfono
Opciones de marcación . . . . . . . . . . . . . . . . . . . . . . . . 63
Administración de las llamadas. . . . . . . . . . . . . . . . . . . 64
Uso de los tonos DTMF . . . . . . . . . . . . . . . . . . . . . . . . 65
Monitoreo del uso del teléfono . . . . . . . . . . . . . . . . . . . 65
Funciones de red . . . . . . . . . . . . . . . . . . . . . . . . . . . . . 69
Funciones del organizador personal
Despertador . . . . . . . . . . . . . . . . . . . . . . . . . . . . . . . . . 70
Calculadora . . . . . . . . . . . . . . . . . . . . . . . . . . . . . . . . . . 71
Conversión de moneda . . . . . . . . . . . . . . . . . . . . . . . . . 72
Uso del cronómetro. . . . . . . . . . . . . . . . . . . . . . . . . . . . 72
Seguridad
Bloqueo y desbloqueo del teléfono . . . . . . . . . . . . . . . . 73
Cambio del código de desbloqueo . . . . . . . . . . . . . . . . 74
En caso de olvidar un código o contraseña . . . . . . . . . 76
Protección de la tarjeta SIM . . . . . . . . . . . . . . . . . . . . . 76
Noticias y diversión
Internet móvil . . . . . . . . . . . . . . . . . . . . . . . . . . . . . . . . 78
Juegos. . . . . . . . . . . . . . . . . . . . . . . . . . . . . . . . . . . . . . 79
Uso de Mis timbres . . . . . . . . . . . . . . . . . . . . . . . . . . . . 80
Solución
de problemas
Revise aquí primero . . . . . . . . . . . . . . . . . . . . . . . . . . . 87
Servicio y reparaciones. . . . . . . . . . . . . . . . . . . . . . . . . 90
Datos de índice de absorción específico
para Estados Unidos
Índice
DR
. . . . . . . . . . . . . . . . . . . . . . . . . . . . . . . . . . . . 73
AFT
. . . . . . . . . . . . . . . . . . . . . . . . . . . . 78
. . . . . . . . . . . . . . . . . . . . . . . . . . . . . . . . . 87
. . . . . . . . . . . . . . . . . . . . . . . . . . . 91
. . . . . . . . . . . . . . . . . . . . . . . . . . . . . . . . . . . . . . . . 93
. . . . . . . . . . . . . . . . . 63
. . . . . . . . . . . . . . 70
6
 Loading...