

Motorola MPX220 User Manual [es]

MPx220
GSM
START HERE >

Welcome
Welcome to the world of Motorola MOTOPro™ devices. Your
selection, the Motorola MPx220 GSM wireless phone,
delivers to you simplified communications, increased
productivity and the control to develop a superior mobile
experience whether at work, at home, on the road or at play.
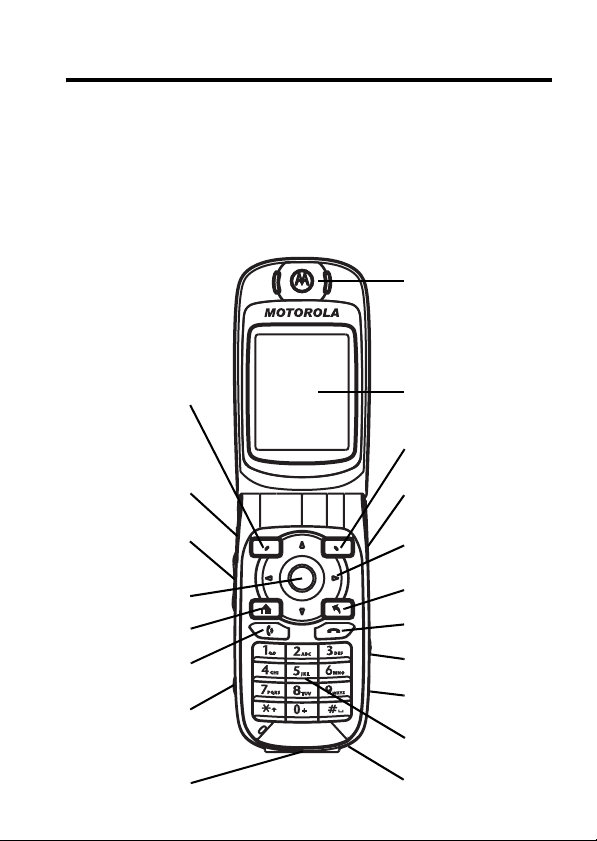
Earpiece
Left Soft Key
Headset Jack
Volume Key
Action Button
Home Key
Send Key
Power Button
Sync/Charger
Port
Main Display
Right Soft Key
Mini SD Slot
4-way
Navigation Key
Back Key
End Key
Camera Button
Infrared Port
Keypad
Microphone
1

Motorola, Inc.
Consumer Advocacy Office
1307 East Algonquin Road
Schamburg, IL 60196
www.motorola.com
1-800-331-6456 (United States)
1-888-390-6456 (TTY/TDD United States for hearing impaired)
1-800-461-4575 (Canada)
MOTOROLA and the Stylized M Logo are registered in the US Patent &
Trademark Office. The Bluetooth trademarks are owned by their proprietor and
used by Motorola, Inc., under license. Java and all other Java-based marks are
trademarks or registered trademarks of Sun Microsystems, Inc. in the U.S. and
other countries. Microsoft, Windows, ActiveSync, Window Media, and MSN are
registered trademarks of Microsoft Corporation; and Windows XP, Windows
Mobile, and Microsoft.net are trademarks of Microsoft Corporation. All other
product or service names are the property of their respective owners.
© Motorola, Inc. 2004.
Caution:
expressly approved by Motorola, will void the user's authority to operate
the equipment.
The information contained in Motorola's user's guides is believed to be correct
at the time of printing. Motorola reserves the right to change or modify any
information or specifications without notice. The contents of Motorola’s user's
guides are provided “as is.” Except as required by applicable law, no warranties
of any kind, either express or implied, including, but not limited to, the implied
warranties of merchantability and fitness for a particular purpose, are made in
relation to the accuracy, reliability, or contents of this guide.
Manual number: 6809489A75-A
Changes or modifications made in the radio phone, not
2

Contents
Getting Started
What’s in the Box? . . . . . . . . . . . . . . . . . . . . . . . . . . . . . . 5
About This Guide . . . . . . . . . . . . . . . . . . . . . . . . . . . . . . . 5
Installing the SIM Card . . . . . . . . . . . . . . . . . . . . . . . . . . . 6
Installing the Battery. . . . . . . . . . . . . . . . . . . . . . . . . . . . . 8
Charging the Battery. . . . . . . . . . . . . . . . . . . . . . . . . . . . . 9
Battery Tips . . . . . . . . . . . . . . . . . . . . . . . . . . . . . . . . . . 10
Turning Your Phone On/Off. . . . . . . . . . . . . . . . . . . . . . . 11
Adjusting Volume . . . . . . . . . . . . . . . . . . . . . . . . . . . . . . 11
Making a Call . . . . . . . . . . . . . . . . . . . . . . . . . . . . . . . . . 12
Answering a Call. . . . . . . . . . . . . . . . . . . . . . . . . . . . . . . 13
Learning to Use Your Phone
Using the Internal Display. . . . . . . . . . . . . . . . . . . . . . . . 14
Using the External Display . . . . . . . . . . . . . . . . . . . . . . . 16
Using the Home Key. . . . . . . . . . . . . . . . . . . . . . . . . . . . 17
Using the 4-Way Navigation Key. . . . . . . . . . . . . . . . . . . 18
Using the Action Button . . . . . . . . . . . . . . . . . . . . . . . . . 19
Using the Soft Keys . . . . . . . . . . . . . . . . . . . . . . . . . . . . 19
Using the Back Button . . . . . . . . . . . . . . . . . . . . . . . . . . 21
Using Menus. . . . . . . . . . . . . . . . . . . . . . . . . . . . . . . . . . 21
Entering Text and Numbers . . . . . . . . . . . . . . . . . . . . . . 22
Viewing Phone Information. . . . . . . . . . . . . . . . . . . . . . . 26
Setting Up Your Phone
Setting the Time and Date . . . . . . . . . . . . . . . . . . . . . . . 27
Entering Owner Information . . . . . . . . . . . . . . . . . . . . . . 27
Configuring Power Management . . . . . . . . . . . . . . . . . . 28
Entering Call Forwarding Numbers. . . . . . . . . . . . . . . . . 28
. . . . . . . . . . . . . . . . . . . . . . . . . . . . . . . . . . 5
. . . . . . . . . . . . . . . . . . . . . . 14
. . . . . . . . . . . . . . . . . . . . . . . . . . . 27
3

Calling Features
Redialing a Number . . . . . . . . . . . . . . . . . . . . . . . . . . . 29
Calling a Contacts Entry . . . . . . . . . . . . . . . . . . . . . . . . 29
Making a Call with Voice Dialing . . . . . . . . . . . . . . . . . . 31
Making a Call from the Call History List . . . . . . . . . . . . 38
Calling a Number in a Message . . . . . . . . . . . . . . . . . . 38
Calling an Emergency Number . . . . . . . . . . . . . . . . . . . 38
Managing Call History. . . . . . . . . . . . . . . . . . . . . . . . . . 39
Calling with Speed Dial . . . . . . . . . . . . . . . . . . . . . . . . . 41
Using Voicemail. . . . . . . . . . . . . . . . . . . . . . . . . . . . . . . 42
Using Call Waiting. . . . . . . . . . . . . . . . . . . . . . . . . . . . . 42
Putting a Call on Hold . . . . . . . . . . . . . . . . . . . . . . . . . . 43
Muting a Call . . . . . . . . . . . . . . . . . . . . . . . . . . . . . . . . . 44
Turning the Speaker On/Off . . . . . . . . . . . . . . . . . . . . . 44
Phone Features
Main Menu . . . . . . . . . . . . . . . . . . . . . . . . . . . . . . . . . . 46
Messages . . . . . . . . . . . . . . . . . . . . . . . . . . . . . . . . . . . 48
Chat with MSN
Phone Customization . . . . . . . . . . . . . . . . . . . . . . . . . . 59
Advanced Features. . . . . . . . . . . . . . . . . . . . . . . . . . . . 64
Synchronization with ActiveSync
Bluetooth
Phone Modem. . . . . . . . . . . . . . . . . . . . . . . . . . . . . . . . 81
Personal Organizer . . . . . . . . . . . . . . . . . . . . . . . . . . . . 85
Security . . . . . . . . . . . . . . . . . . . . . . . . . . . . . . . . . . . . . 89
News and Entertainment. . . . . . . . . . . . . . . . . . . . . . . . 90
Specific Absorption Rate Data
Microsoft End User License Agreement
Index
. . . . . . . . . . . . . . . . . . . . . . . . . . . . . . . . . . . . . . . 119
. . . . . . . . . . . . . . . . . . . . . . . . . . . . . . . 29
. . . . . . . . . . . . . . . . . . . . . . . . . . . . . . . . 46
®
Messenger . . . . . . . . . . . . . . . . . . . . . 57
®
®
Connection . . . . . . . . . . . . . . . . . . . . . . . . . 80
. . . . . . . . . . . . . . . . 76
. . . . . . . . . . . . . . . . . . 111
. . . . . . . . . . . 113
4

Getting Started
CAUTION:
first time, read the
Legal Information
gray-edged pages at the back of this guide.
Before using the phone for the
Important Safety and
included in the
032259o
What’s in the Box?
Your wireless mobile phone comes with a battery, travel
charger, companion CD, user’s guide, and cables*. You
can purchase other accessories to customize your phone
for maximum performance and portability.
To purchase Motorola Original™ accessories, contact the
Motorola Customer Call Center at 1-800-331-6456 in the
United States or 1-800-461-4575 in Canada.
Note:
Additional accessories may be available depending
on product promotions.
*In-box content may vary by Regions.
About This Guide
This user guide describes how to use your phone to its
maximum potential.
Getting Started
Note:
In this user’s guide, “Find the Feature” always
indicates the feature's position from the Home screen.
5

Optional Features
This label identifies an optional network, SIM
card, or subscription-dependent feature that
may not be offered by all service providers in
all geographical areas.
Optional Accessories
This label identifies a feature that requires an
optional Motorola Original accessory.
Installing the SIM Card
Getting Started
Your Subscriber Identity Module (SIM) card contains your
phone number, service details, and phonebook/message
information. It is stored in a recess in the battery
compartment.
Caution:
exposing your SIM card to static electricity, water, or dirt.
Do not bend or scratch your SIM card. Avoid
6
Action
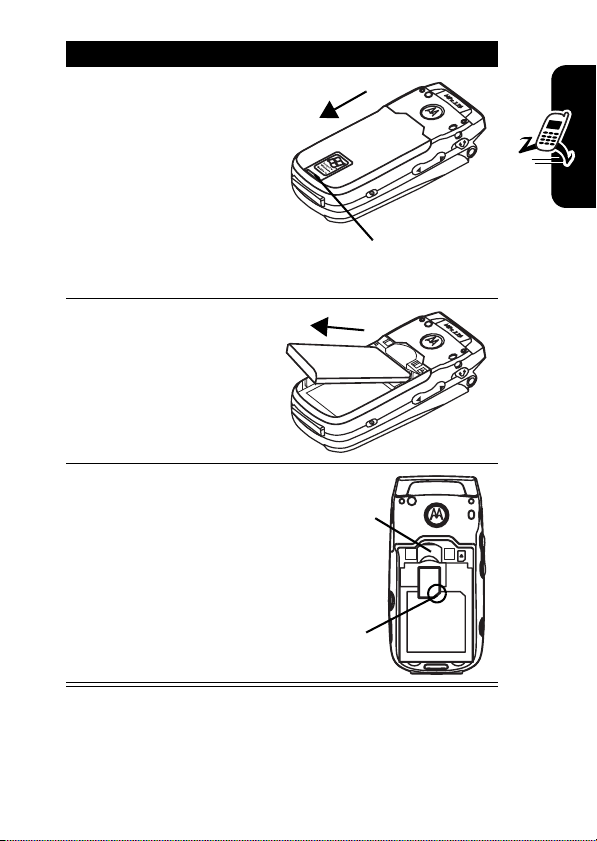
1
If the phone’s battery
door is already in
place, push down the
battery door release
latch and lift the battery
door off the phone.
Note:
Turn off your
phone every time when
you remove/insert the SIM card.
2
Lift the battery up from
the bottom end and
remove it from the
phone.
3
Hold the SIM card
with the gold contact
side facing down and
the cut corner on the
bottom right. Slide the
SIM card all the way
into the SIM card
holder.
Getting Started
Latch
MPx220
SIM Card
Holder
Cut Corner
7
Installing the Battery
You must install and charge the battery to use your
phone.
Your phone is designed to use only
Motorola Original batteries and accessories.
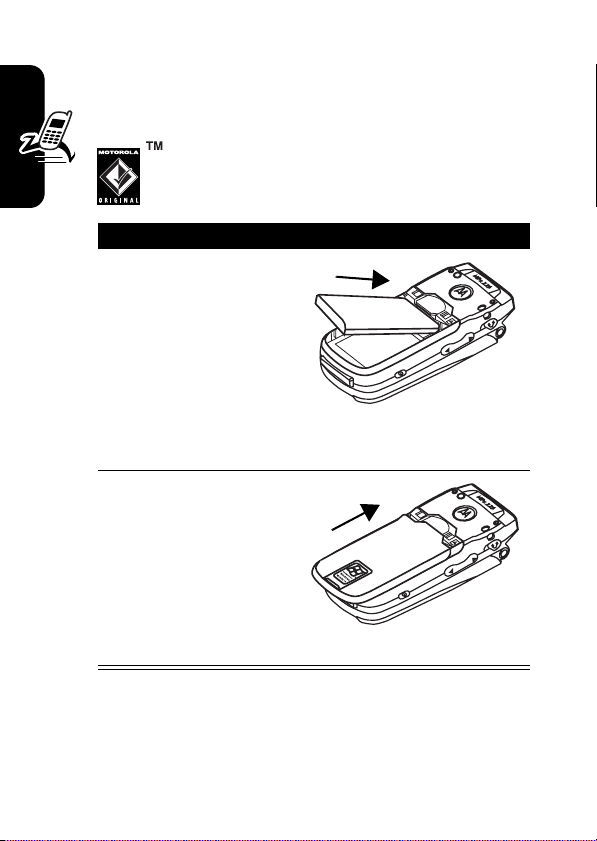
Action
1
Insert the battery into
the back of the
phone, with the
Getting Started
contacts on the top
end of the battery in
alignment with the
contacts on the
phone. Push the bottom end of the battery into
the phone until it clicks into the compartment.
2
Place the battery
cover back on the
phone, aligning the
tabs on the cover with
the groove on the
phone. Slide the
battery cover in the
direction shown until it locks into place.
8
Charging the Battery
New batteries are partially charged. Before using your
phone, charge the battery as described below. Some
batteries perform best after several full charge/
discharge cycles.
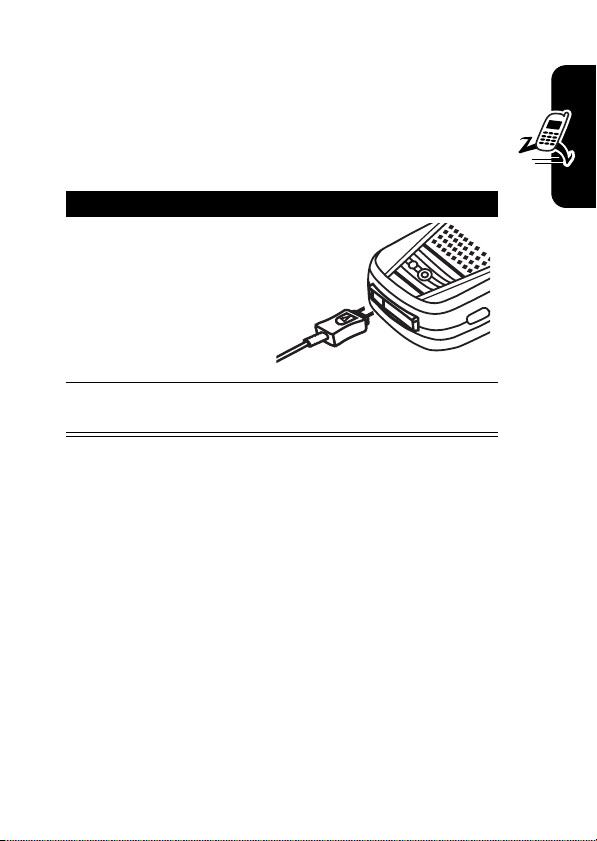
Action
1
Plug battery charger
connector into the
sync/charger port.
Note:
The connector
is keyed and can only
be inserted 1 way.
2
Plug the other end of the charger into the
electrical outlet.
Notes:
•
When you charge the battery, the battery power level
indicator in the external display shows how much of
the charging process is complete. At least 1 segment
of the battery power level indicator must be visible to
ensure full phone functionality while charging. You can
use the phone during the charging process. However,
the battery will take longer to fully charge.
•
Your phone will indicate a full charge before 24 hours
have passed, however, allow your phone to charge for
the full 24 hours before 1st use.
•
When battery power is low, a low battery message
displays. Charge the battery immediately.
Getting Started
9

•
If battery power is completely drained, the phone
turns off automatically.
•
The charging indicator may take several
minutes before appearing in the external
display.
Battery Tips
Battery life depends on the network, signal strength,
temperature, features, and accessories you use.
•
Always use Motorola Originall batteries
and chargers. The warranty does not cover
Getting Started
damage caused by non-Motorola batteries
and/or chargers.
•
New batteries or batteries stored for a long time may
take more time to charge.
•
When charging your battery, keep it near room
temperature.
•
When storing your battery, keep it uncharged in a
cool, dark, dry place, such as a refrigerator.
•
Never expose batteries to temperatures below -10°C
(14°F) or above 45°C (113°F). Always take your
phone with you when you leave your vehicle.
•
It is normal for batteries to gradually wear down and
require longer charging times. If you notice a change
in your battery life, it is probably time to purchase a
new battery.
10
Contact your local recycling center for proper
battery disposal.
Warning:
because they may explode.
Before using your phone, read the battery safety
information in the “Safety and General Information” section
included in this guide.
Never dispose of batteries in a fire
Turning Your Phone On/Off
Press To
Power
(p)
turn on or off your phone
Adjusting Volume
Press To
increase/decrease earpiece
1
up/down
volume in idle or during a call
Note:
You can adjust the
volume only when the phone
flip is opened.
Getting Started
Tip:
When a call is ringing/incoming, press to mute
the ring.
11
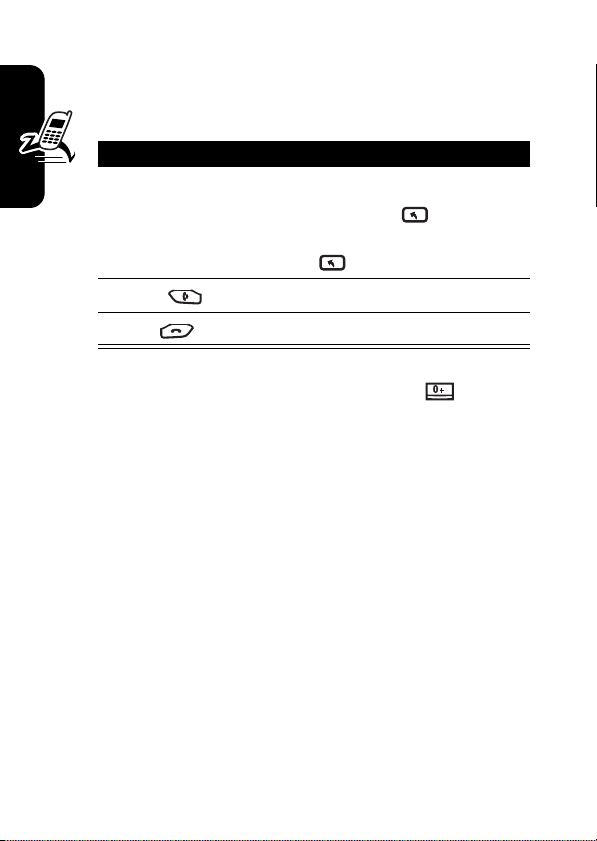
Making a Call
There are several ways to make a call. The easiest way
is to dial a phone number from the Home screen.
Press To
1
keypad keys enter the phone number
Tip:
Press
Back
the last digit; press and hold
Back
2
Send
3
Getting Started
To make an international call, press and hold to insert
a “+”; then enter the country code, area code (omitting the
starting 0), and phone number following it.
End
make the call
end the call
to delete all digits.
to delete
12
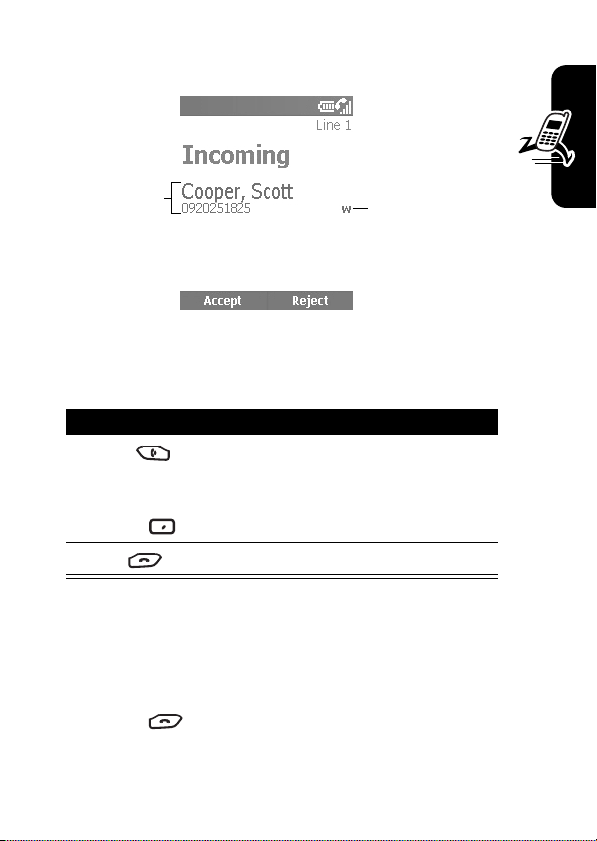
Answering a Call
Caller ID
information is
matched to a
contact.
When you receive a call, your phone rings and/or vibrates
and displays an incoming call message.
Press To
1
Send
or
Accept
2
End
Tip:
When
Flip Answer
call. (To activate, see “Use Advanced Phone Setting” on
page 63.)
Tip:
When
Any key answer
except
End
Phone Setting” on page 59.)
to answer the call. (To activate, see “Use
answer the call
end the call
is active, open the flip to answer the
is active, press any of the keys
Phone number
is identified as
Work
number in
Contacts
.
Getting Started
13
Learning to Use Your
e
Phone
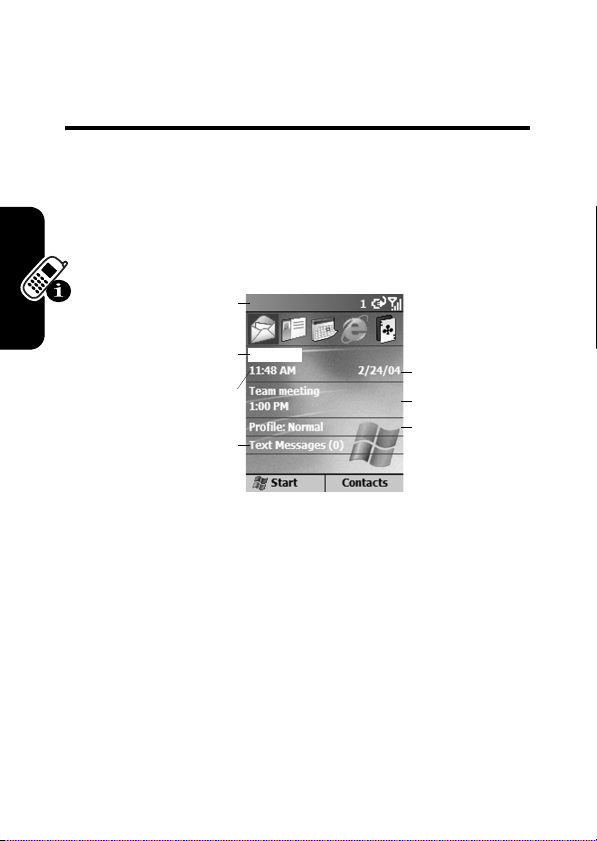
Using the Internal Display
The Home screen (shown) is the standard display when
you are not on a call or using the menu.
Status Indicators
Service Provider
Current Time
Number of Unread
Messages
On the Home screen, you will find:
•
The top of the display shows status indicators about
Learning to Use Your Phone
14
your phone’s current mode.
•
The center of the display shows the Home screen, as
well as
icons, appointments, other types of
information, and
•
The bottom of the display shows the soft key
commands.
messages.
Current date
Next Appointm
Ring Type or
Volume Profile
Note:
The display shown may be different based on the
specific Home screen configuration chosen.
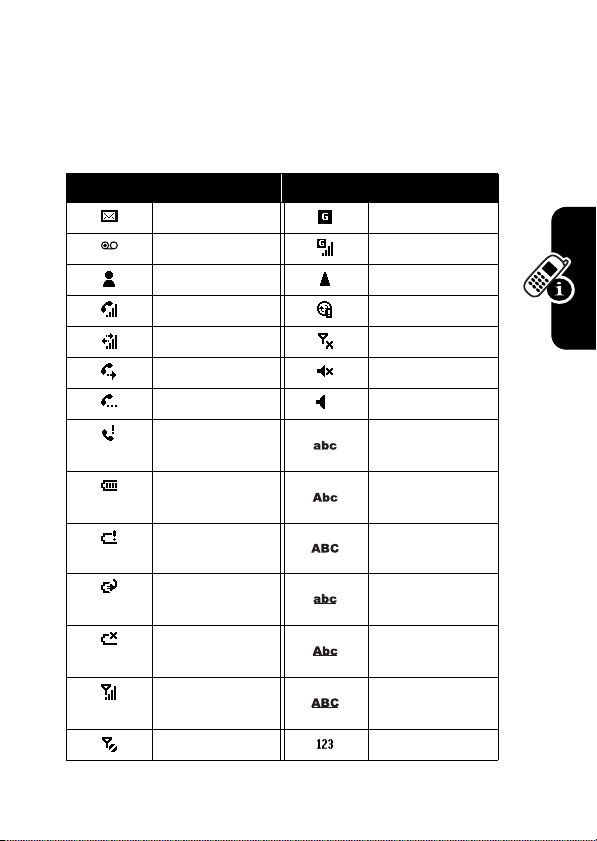
Status indicators display at the top of your phone’s internal
screen. The following table lists common status indicators
and their meanings.
Icon Meaning Icon Meaning
New email or SMS GPRS available
New voicemail GPRS in use
New instant message Roaming
Voice call active Sync error
Data call active Radio off
Call forwarding Ringer off
Call on hold Speaker
Missed call Multi-Tap text input
mode, lowercase
Battery level Multi-Tap text input
mode, uppercase
Low battery Multi-Tap text input
Battery charging iTAP text input mode,
No battery iTAP text input mode,
Signal strength iTAP text input mode,
No signal Numeric input mode
mode, caps lock
lowercase
uppercase
caps lock
Learning to Use Your Phone
15
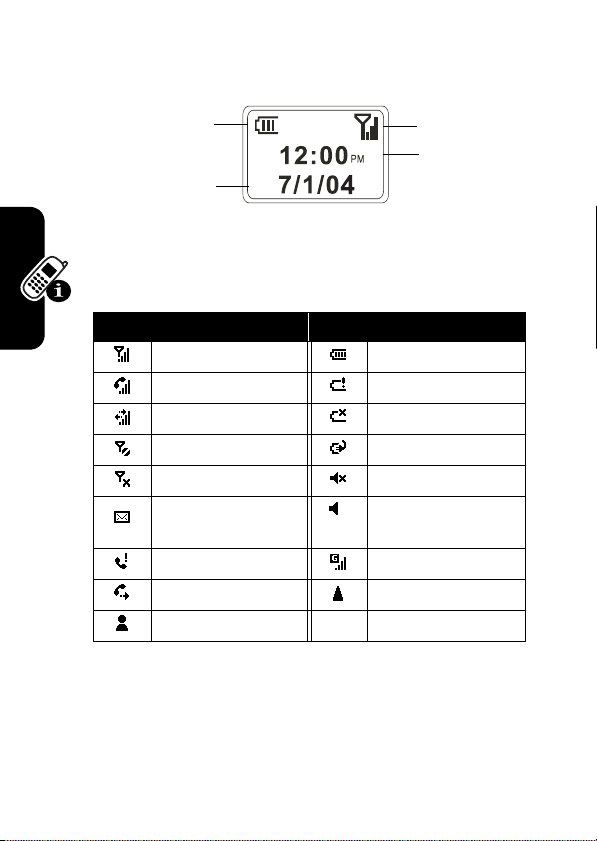
Using the External Display
Battery level
Signal strength
Current time
Current date
The following table lists the icons and their meanings
that appear on the external display.
Icon Meaning Icon Meaning
Signal strength Battery level
Call in progress Battery low
Data call active No battery
No signal Charging
Radio off Ringer off
You have unread new
message(s)
You have missed call(s) GPRS in use
Learning to Use Your Phone
Call forwarding Roaming
New instant message
Speaker
When enabled, the external display shows the incoming
photo Caller ID (see “
Take Picture Using Normal Mode
page 90).
” on
16
Your phone’s display may differ based on the specific
external LCD style chosen (see “
Use Advanced Phone Setting
on page 63).
Using the Home Key
Use the Home key to do the following:
•
Quickly press and release
Quick List
. The
Quick List
profile types and commands, such as turn off your
phone, turn on/off the
phone’s keypad, and lock your phone.
Note:
Be aware that when the
turned on, then your phone cannot receive and make
a call, including an emergency call. In order to receive
and make a call, you must turn off the
and re-engage your phone’s RF capability. Always
obey the instructions of your airline crew.
•
Display the Home screen to dial a number.
•
The Home screen is your starting place for most
tasks. You can easily navigate to any program or
setting from this screen. The top of the Home screen
displays the last 10 icons you browsed. Just select a
program and press
can also press
Start
Start list. The Home screen also displays the current
time and date, your next appointment, your current
profile, and the number of unread messages in
Messaging
(
. Select your next appointment and press
) to open
A
Calendar
, and you can see all of your
Power
(p) to show the
displays a list of available
Flight mode
Action
feature, lock your
Flight mode
feature is
Flight mode
(A) to open the program. You
to enter the programs on the
feature
Action
”
Learning to Use Your Phone
17
appointments for the day. To view
messaging status showing the number of unread
messages you have, and press
Contacts
, press
•
The Home screen automatically displays when you
turn on the phone or leave the phone idle, but you can
navigate to it at any time by pressing
•
To change Home screen settings, see “
Home Screen
Contacts
” on page 61.
.
Messaging
Action
(A). To view
Home
Using the 4-Way Navigation
Key
Use the 4-Way Navigation key to navigate the menu
system, change feature settings and play games.
Tip:
Down and up are your primary movements within
menus and navigation through contacts. Move left and
right to change feature settings and edit text.
From the Home screen, press to do the following:
•
Select a program at the top of the screen, and then
press
Action
Learning to Use Your Phone
•
Select an item in the center of the Home screen, such
as your next appointment, your profile type, or your
messaging information, and then press
open the program or access the settings associated
with the item selected.
(A) to open the program.
Action
, select the
.
Customize
(A) to
18
Using the Action Button
The Action button confirms your selection. Pressing
Action
(A) is similar to pressing “Enter” on a keyboard. In
some cases, confirming your selection accesses a
program or setting. You can also press
or uncheck a feature.
Action
(A) to check
Using the Soft Keys
The 2 Soft keys on your phone are located directly
below the display screen. Each soft key performs the
command displayed immediately above it on the
screen. Both soft keys are context sensitive — their
function changes according to the phone’s status, for
example, when in a particular application or making a
phone call.
On the Home screen:
Press To
1
Left soft
key
(
Start
access programs in the Start
list
)
Tip:
The phone comes preinstalled with programs that
you can start using
immediately.
Learning to Use Your Phone
19
Press To
2
Right soft key
access the following during
normal use:
•
Contacts
: displays to open
your contacts list.
•
Voicemail
: displays to play a
received voicemail.
•
Messages
: displays to read
new messages in
Messaging
.
You can also use numbers to navigate quickly to programs
and settings on the phone. Press the number on the
keypad that corresponds to the number of the program or
setting you want. For example, in the Start list,
press to open
Calendar
.
You can also use numbers to select menu options by
pressing the number that corresponds to the menu option
in descending order. For example, to select
of
Contacts
menu options, press .
Filter
in the list
Learning to Use Your Phone
20
Using the Back Button
Press the Back button to navigate to the previous screen,
or move the cursor back to delete 1 or more characters in a
text field.
Press To
1
Back
2
Back
while
for a
backspace and remove
1 character in a text field
backspace and remove
multiple characters in a text
field
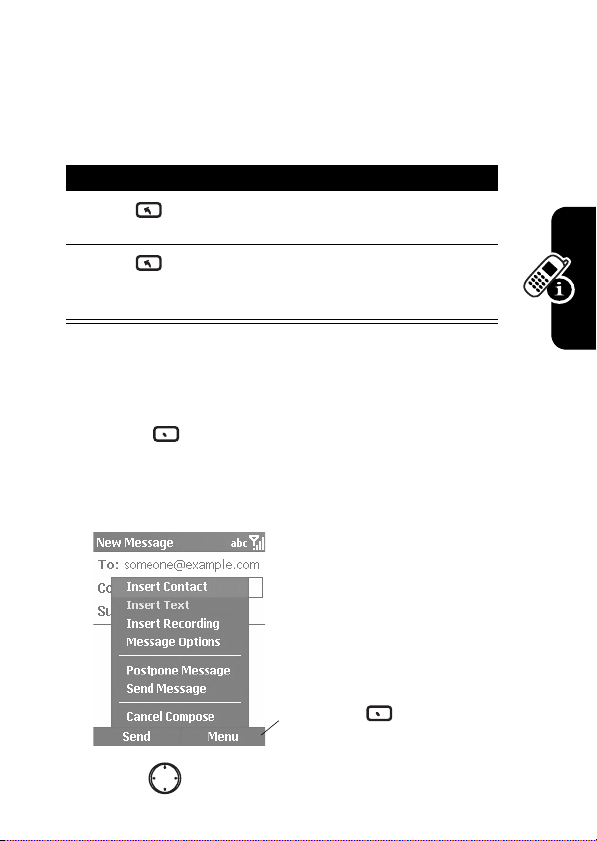
Using Menus
On many screens, the Menu soft key is the right soft key.
Menu
Press
to the screen you are viewing. Selecting a menu option will
either perform the command or take you to another part of
the user interface where you can perform the command.
Tip:
Press up to move to the bottom of the menu.
to display a list of options that are relevant
Press
Menu
menu options
to display
Learning to Use Your Phone
21
Entering Text and Numbers
You can enter text and numbers on the phone using the
keypad. The phone supports 3 input modes for entering
text and numbers:
iTAP
modes are used for entering text, and the
is used for entering numbers. When you select a field that
requires text or numeric entry, the phone automatically
defaults to the appropriate input mode. The status
indicator on the top of the display shows the input
mode you are currently using.
Changing Input Modes
Action
When entering a text message, press and hold
until the status indicator for the input mode you want
is shown at the top of the display.
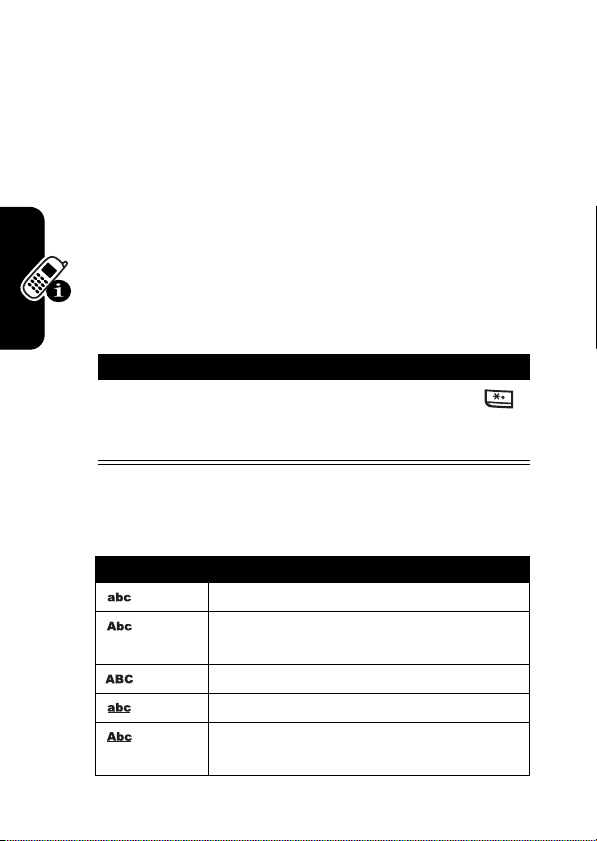
The following table shows the complete list of input mode
status indicators.
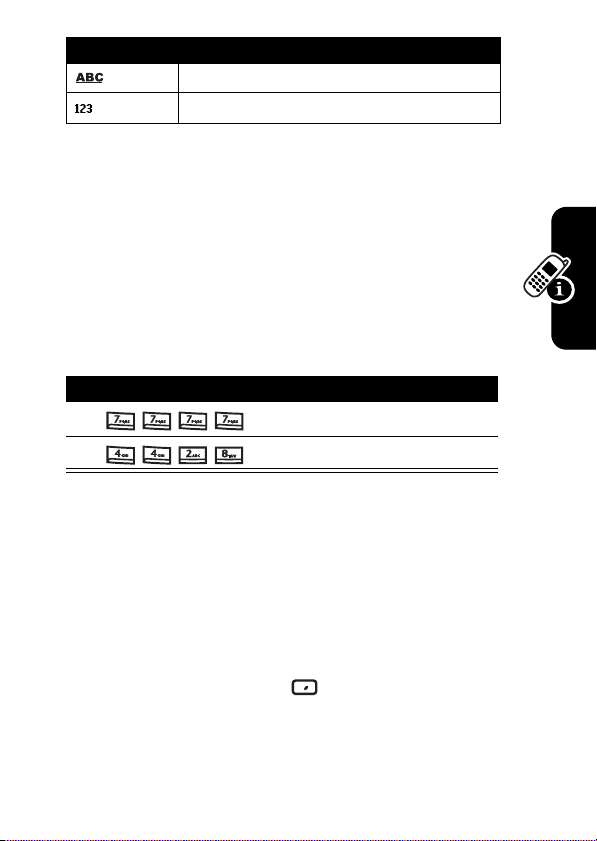
Indicator Mode
Learning to Use Your Phone
Multi-Tap, iTAP
Multi-Tap
Multi-Tap
upper case
Multi-Tap
iTAP
iTAP
case
, and
Numeric
. The
Multi-Tap
Numeric
text input mode, lower case
text input mode, temporarily
text input mode, caps lock
text input mode, lower case
text input mode, temporarily upper
and
mode
22
Indicator Mode
iTAP
text input mode, caps lock
Numeric
input mode
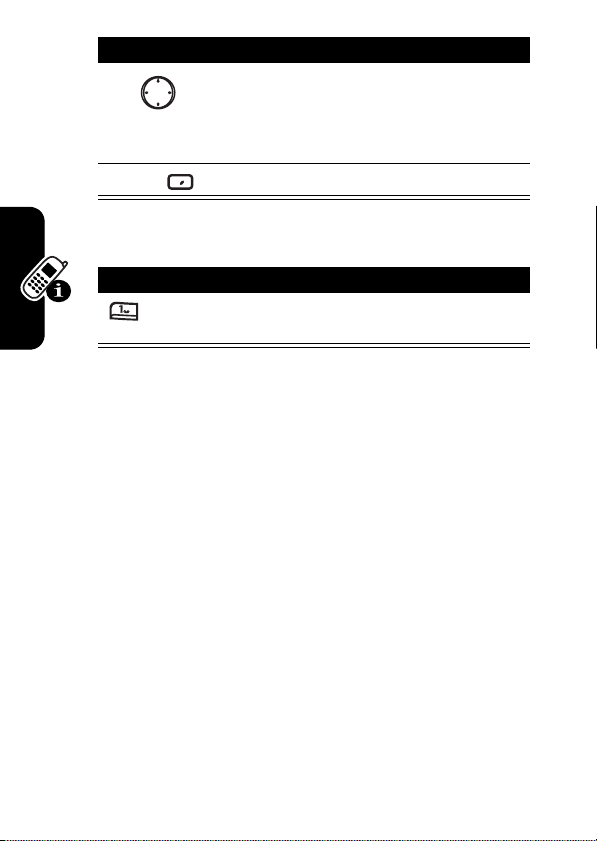
Entering Text in Multi-Tap Mode
You can enter a letter in
Multi-Tap
mode by pressing the
number key on which the letter appears. To enter the 1st
letter on the number key, press the key once. To enter
the 2nd letter, press the key twice, and so on. The letter
entered remains underlined until you complete the
keypresses and the cursor moves to the next position.
For example:
Press To
1
2
enter the letter
enter the word
s
hat
When you enter letters that are on the same number key,
wait until the underline disappears before entering the next
letter so that your phone can process the 1st letter. This
pause is called the
Multi-Tap
time out, and you can adjust the
length of the pause between keypresses.
To change the
Find the Feature
Multi-Tap
time out:
Start
>
Settings > Accessibility
Learning to Use Your Phone
23
Press To
1
2
left/right
Done
select the time interval you
want for the pause between
keypresses under
time out
save the setting
Multipress
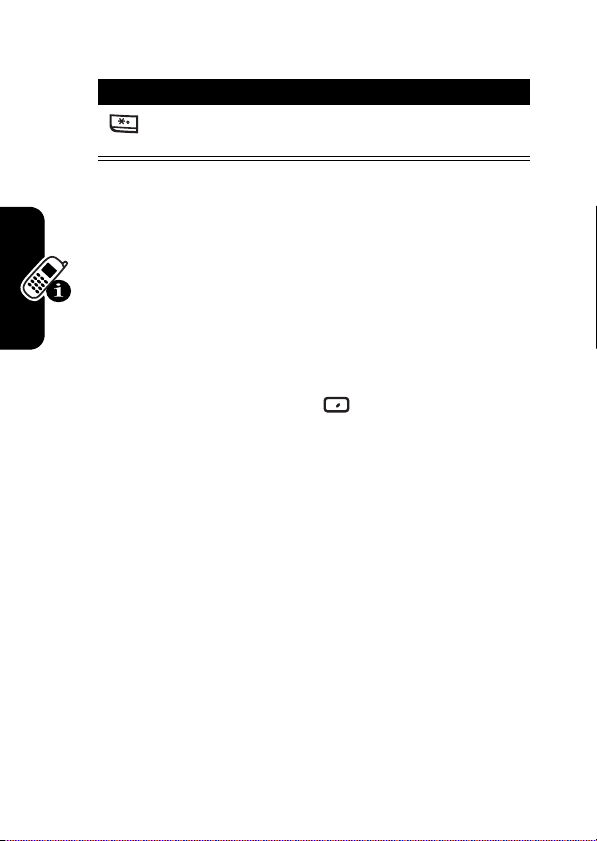
Entering Punctuation in Multi-Tap Mode
Press To
repetitively
scroll through common
punctuation:
.,?! -@:1
Entering Numbers in Numeric Mode
When you are in
you want to enter on the keypad. If a field permits a
numerical entry only, such as the
Contacts
, the input mode will automatically default to
mode. To enter an asterisk (
the corresponding key on the keypad.
Learning to Use Your Phone
24
Numeric
mode (123), press the number(s)
Work
phone field in
*
) or a hash sign (#), press
Numeric

Inserting Symbol
Press To
1
2
for a while
open the
scroll to a symbol
Pick a symbol
list
3
Done
Tip:
You can also press to select and enter a
symbol.
select and enter the symbol
Using Special Key Functions
The following is a list of the keys and their corresponding
functions in input mode.
To enter a space in
Press To
To start a new line:
Press To
Action
(A)
Multi-Tap
mode:
enter a space
start a new line
Learning to Use Your Phone
25
To change among uppercase, lowercase, and caps lock:
Press To
change among uppercase,
lowercase, and caps lock
Tip:
In text mode, the 1st letter of a sentence is
automatically capitalized.
Viewing Phone Information
Use
About
settings to display information about your
phone’s operating system, including version numbers,
copyright information and available storage.
26
Find the Feature
Learning to Use Your Phone
Start
>
Settings > About
Setting Up Your Phone
Setting the Time and Date
Use
Date and Time
the current date and time, and to set the alarm.
settings to change the local time zone and
Find the Feature
Press To
1
2
Action
(A)
Start
scroll to
set
typing in the new date and/or
time
>
Settings > More
Date and Time
Date and Time
settings by
Entering Owner Information
Use
Owner Information
information, such as your name, phone number, and email
address. In the event that you lose your phone and it is
found, you can be contacted.
Find the Feature
Press To
1
2
Action
(A)
settings to enter and display personal
Start
scroll to
set
>
Settings > More
Owner Information
Owner Information
settings
Setting Up Your Phone
27
Configuring Power Management
Use
Power Management
display time-outs, and to check the battery level.
settings to change the backlight and
Find the Feature
Press To
1
2
Action
(A)
Start
scroll to
set
>
Settings > More
Power Management
Power Management
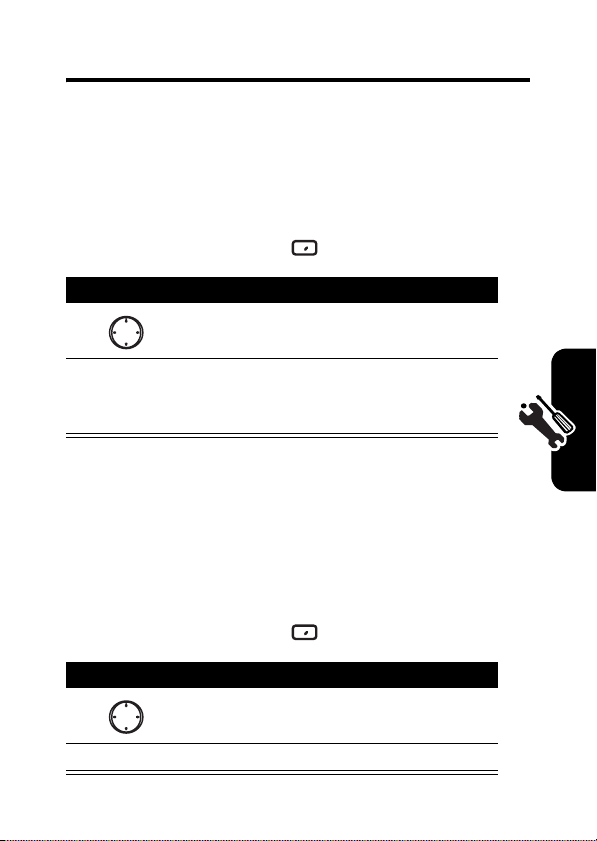
Entering Call Forwarding Numbers
To use the Cingular FastForward feature, you must
enter the appropriate call forwarding numbers on your
phone’s SIM card.
Find the Feature
1
2
3
Setting Up Your Phone
4
5
Start
Action
Select
Menu
.
Select
New SIM Contact
In the
Name
field, enter
Enter the call forwarding number.
Select
Done
.
.
CF1, CF2
>
Contacts
, or
CF3
.
settings
28
 Loading...