

Mobiblu DAH-900 Product Information
Warning
To reduce the risk of fire or electric shocks, do not expose the product to rain or
other moist environment.
It is an illegal act to distribute any music file, of WMA or MP3 format, to others
without permission, violating copyright laws. The use of software in the CD-ROM
provided is limited to personal purpose only.
In order to maintain optimal performance
Do not use this product under extremely hot or cold, or excessively dusty or moist
environment.
Do not place the product in the following places: in a bathroom, near heater or on
a dashboard of a car where it is exposed to direct sunlight.
When carrying the product in a pocket with batteries in place, do not keep together
metal items such as coins or keys. Contact or friction between metals and the
battery may cause fire.
We are not responsible for the loss of data stored on the product due to user
carelessness (please backup important data)
Avoid impact on the product
Do not drop the product or do avoid any act of giving great impact on the product.
It may cause serious damage to the product.
caution when using headphones
To listen to music at high volume for a long time using headphones may cause
hearing problems.
Do not use headphones when driving a car, or riding a bicycle or motorcycle.
Pay extra caution or stop using headphones under potentially dangerous
situations, as when walking or jogging.
The earbud-type headphones must be attached to a long string, and when
using such headphones, the string must be let behind your neck.
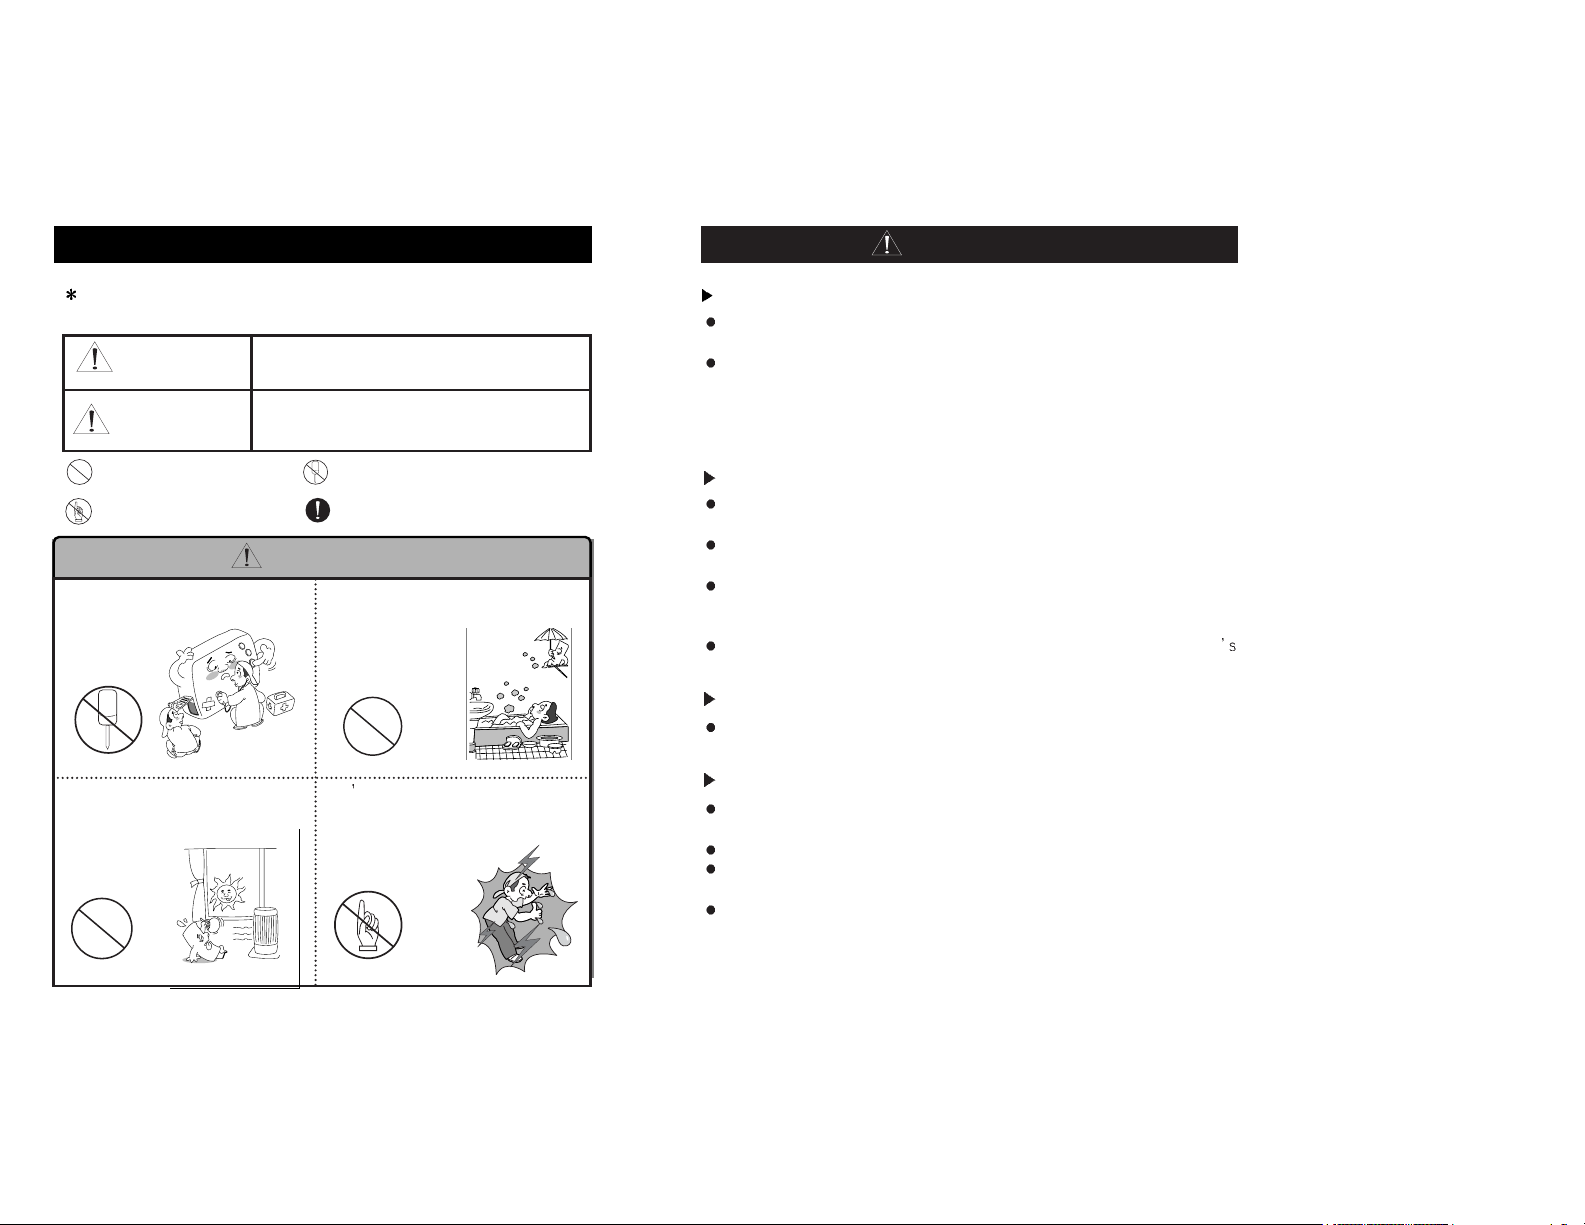
Cautions
Safety Warnings and Cautions
Please be aware of these safety instructions and use the product
properly in order to prevent risks of injury or damages to the property.
subject to cause death or severe injury
subject to cause minor injury or damages to
the property
indicates prohibitions to
be disassemble
Indicates prohibitions
indicates strict obligations
Indicates prohibitions
to touch
Warnings
Never disassemble, repair nor rebuild
(It becomes cause for troubles.)
Avoid places with high moisture or dust
level (It can cause damage to the
product.)
Don t connect the product to the power
nor touch the product with wet hands
(There is a risk of an electric shock.)
Avoid exposure to direct sunlight (High
heat applied to the product can
damage it.)
warning
Cautions
Welcome to the World of Player
1
Note: The copyright of this product belongs to Hyun-Won Inc.
therefore, anyone who wishes to utilize illustrations, pictures, software, and
other documents related to this product shall have a prior approval by
Hyun-Won Inc. Anyone violating this regulation will be subject to legal charges.
The content of this manual may change without prior notification.
Thank you for purchasing the DHA-900, a portable digital audio player.
Player is an MP3 player that is simple and thin in design with built-in FM Radio.
Player is equipped with internal memories, 64/96/128/256/512MB. It supports
the latest music file formats and is designed to conform to intellectual properties
issues. You can now enjoy various contents ranging from digital music to
conversations using the most advanced digital audio player on market.
Table of Contents
1
2
3
4
5
6
7
8
10
12
13
14
15
17
18
19
20
21
22
24
25
26
27
28
29
30
31
32
34
35
36
37
39
40
41
Welcome to the World of Player
What is a Digital Audio Player?
The Product Specifications
PC System Requirements and Accessories
Hardware Descriptions
About Power Supply
Remaining Battery Indicator
Software Installation
Connecting the Player to a PC using a USB Cable
File Download/Upload
USB cable Separating
Formatting
OS Update
LCD DISPLAY Illustration
Power On/Play
Power Off/Stop
Setting Volume/Lock Functions
Mode Changing
Voice Recording
Searching a Music/Voice File
FM Mode
FM Recording
Setting Range Repeat
Selecting Menu
Display (Screen Setting)
Timer
Setting PLAY MODE
Setting USER EQ
Setting SRSDeleting Files
About
Menu Catalog
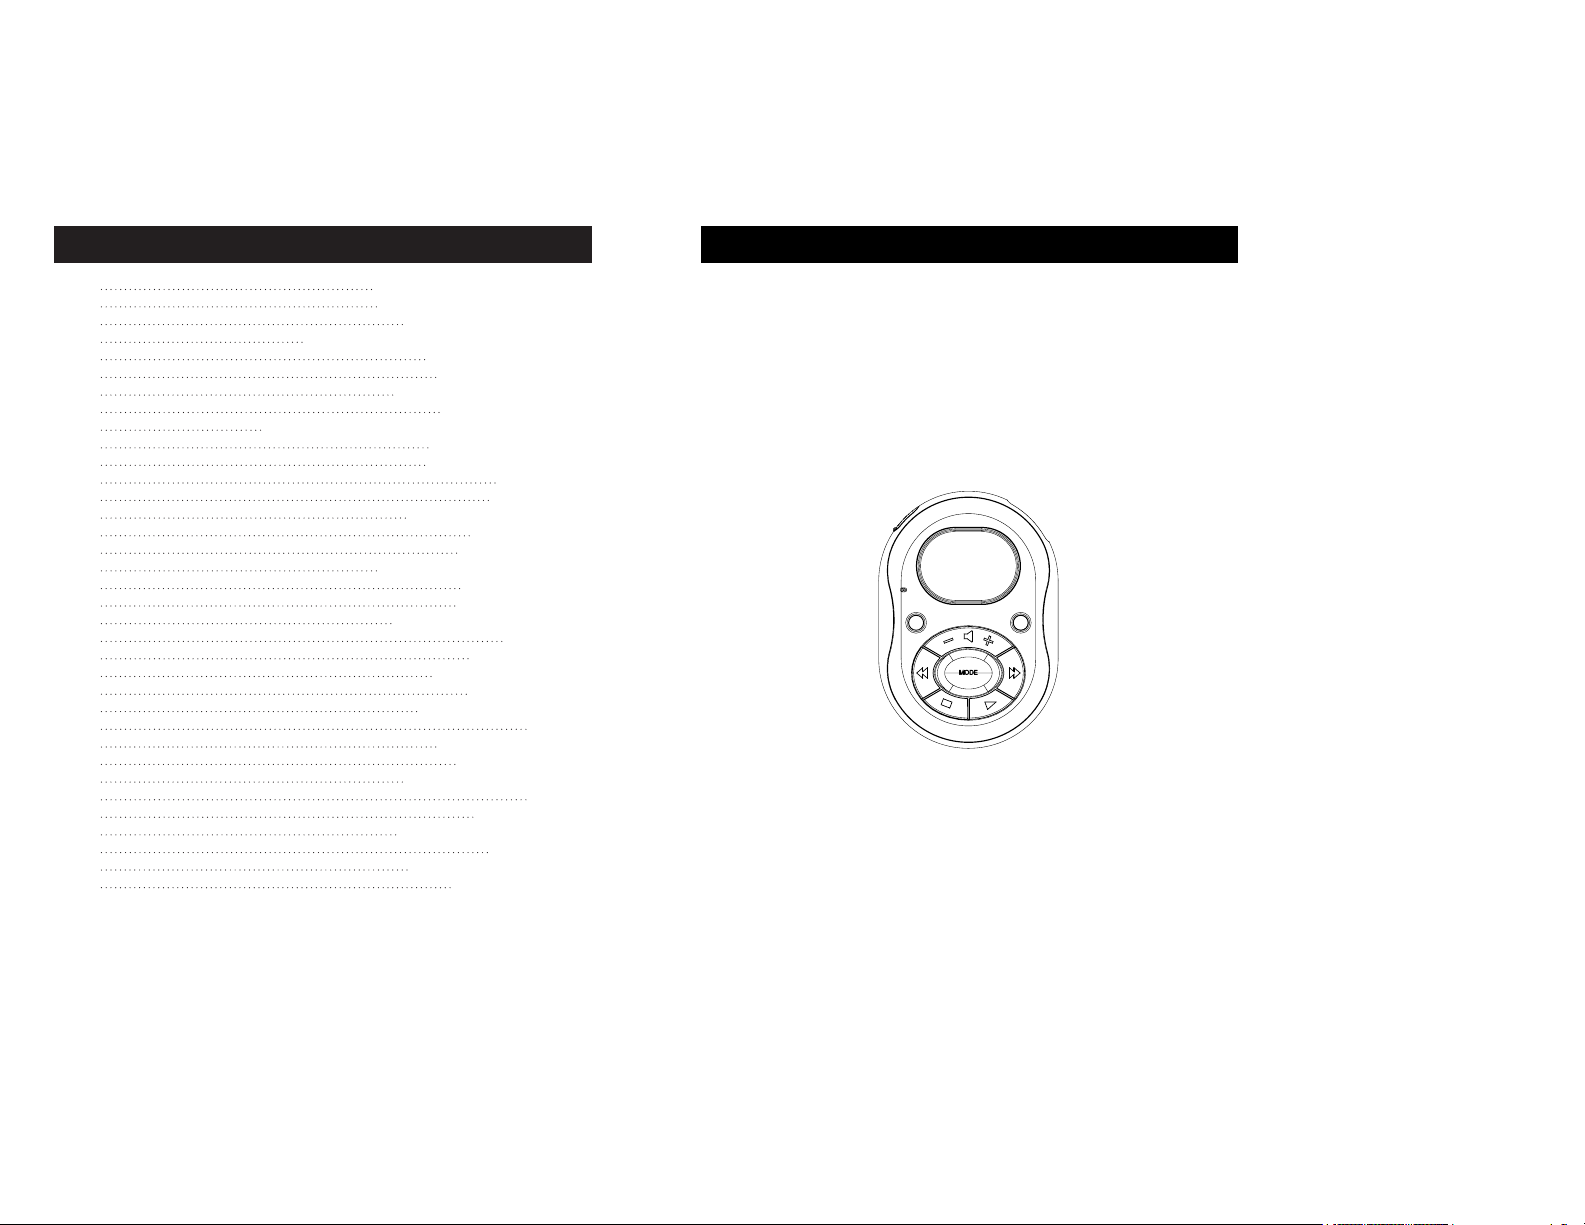
Remote Control Instructions
User’s Guide
It May Not be a Trouble If
Warranty Services
The Product Specifications
3
What is a Digital Audio Player?
2
What is the MP3 file?
MP3 stands for MPEG1-Layer3 and it uses a compression technology that
converts conventional CD music data into an MP3 file format that is used on a
PC, at 1/12 compression ratio. It provides CD-quality music.
What is the WMA file?
It is a multimedia compression method from Microsoft. The technology
specifically compresses music data from the “
indow Media Technologies”. As it
provides sound quality equivalent to 128Kbps using only 64Kbps format, it takes
only half as much space as MP3 file format for compressing music data.
What is a Portable Digital Audio Player?
It is a portable device that stores and plays digital audio files, which once were
only playable on a PC.
Note
1. Accessories and option products may change depending on the product
characteristics.
2. For the latest accessories and software for Player, please refer to
http://www.mobiBLU.com
3. For WMA file type, only 32Kbps or higher bit rates are supported.
CD Data MP3 Data
1/12
Internat PC
Communication
Digital
Audio File
Digital
Audio File
Digital Audio Player
1/2
WMA Data
FM TUNER
Category
Item
Specification
Audio
File support
Recording time
Maximum play time
Battery
Size
60 86 15mm
(2.36” 3.38” 0.59”)
(W H D)
(except battery)
37g ( without battery )
Weight
LCD
Graphic LCD
Operational temperature range
USB
File type MP3, WMA, ADPCM
MP3: over 8Kbps, WMA: over 32Kbps
Bit Rate
Download speed
4Mbps(USB Version 1.1)
Voice recording 1040 min.
(based on 256MB)
-5
~70
Alkaline 1.5V AAA
1,
AAA
2
Minimum 26hours
(Alkaline AAA 2EA)
FM Frequency Range
87.5MHz ~ 108.0MHz
20Hz ~ 20KHz
(L) 7mW+(R) 7mW
at max. volume
(L)7
+(R)7 (16 )
at max. volume
50
90
Headphone/earphonecord antenna
Headphone output
S/N
Antenna
Frequency
Characteristics
Headphone output
S/N
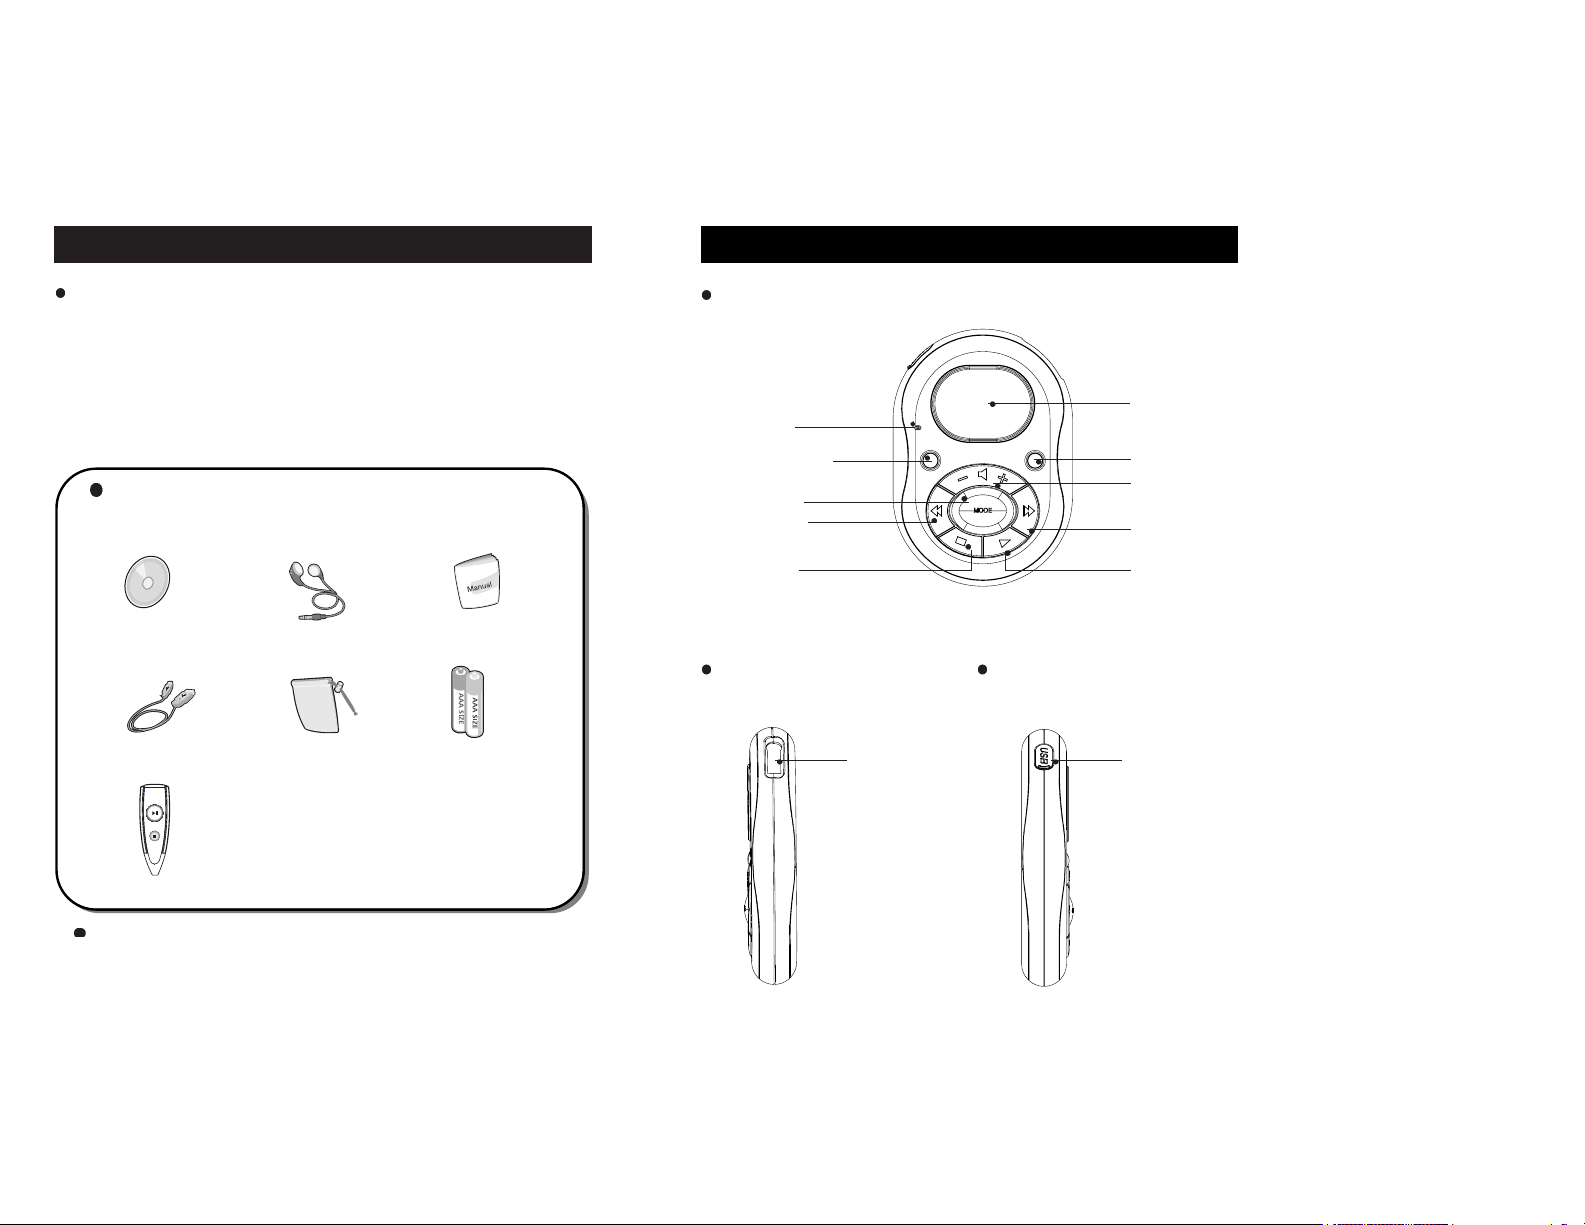
Hardware Descriptions
5
Front Side
PC System Requirements and Accessories
4
+
+
A. software CD
Player Items in the Package
B. earphone
C. User’s manual
D. USB cable
E. Portable Case
F. AAA battery
G. Remote control(option)
Accessories and product options may change depending on the product specifications. Contact
customer service (1588-3949) to purchase additional items.
LCD window
Next Song Select
(FF)
REC button/
Repeat A-B button
Right Side
PC system requirements for Player are as follows:
Microsoft OS (Windows 98, ME, 2000, XP)
CD_ROM Drive
Pentium 200MHz or higher CPU
32MB (64MB for Windows ME or 2000) or higher RAM
Available hard disk space of more than 128 MB
(additional hard disk space is need for storing music files)
may use USB port
Volume
Up/Down
MODE button
MENU button/
Hold button
Microphone
STOP button
Previous Song
Select (REW)
Power On/EQ
Setting/play/pause
Connection port for
earphones/remote
control
Left Side
Connection port
for USB cable

Remaining Battery Indicator
7
About Power Supply
6
Using cylindrical AAA type batteries
Remaining Battery Indicator
At its initial start-up, remaining battery indicator may fluctuate.
After 5 or 6 seconds, the display will show the actual reading.
Due to the characteristics of regular batteries, there can be situations
when the product dose not operate even when the battery level indicator
shows above medium level. When this happens, please exchange the
batteries with new ones.
(alkaline batteries last longer than manganese batteries)
* Exchange to new batteries when the following happens:
The indicator displays “ ow battery” sign.
The player stops or does not respond to pushing buttons.
LCD light does not turn on when buttons on the main body are pushed.
1. continuous play time
using 2: 26hours, using 1:12hours(AAA alkaline dry cell)
MP3 128kbps
At Vol 20
2. conditions for usage time
output: 7mV(L)+7mV(R)
above values were measured using commercially available alkaline
batteries, and actual usage time depends on the type of batteries,
manufacturer, and usage conditions.
Type MP3 play
Alkaline battery
26 hours(alkaline 1.5V AAAx2)
Inserting batteries in wrong polarity
positions may cause damage to the product
Open the battery cover on the
back by pushing it in the direction
of arrow.
Insert AAA batteries with correct
polarity positions as shown in the
picture.
After fitting the cover to the groove, push it
in the direction of arrow to close it.
One or two 1.5V AAA-type batteries are needed
(based on battery usage)
(full) (medium) (Low)
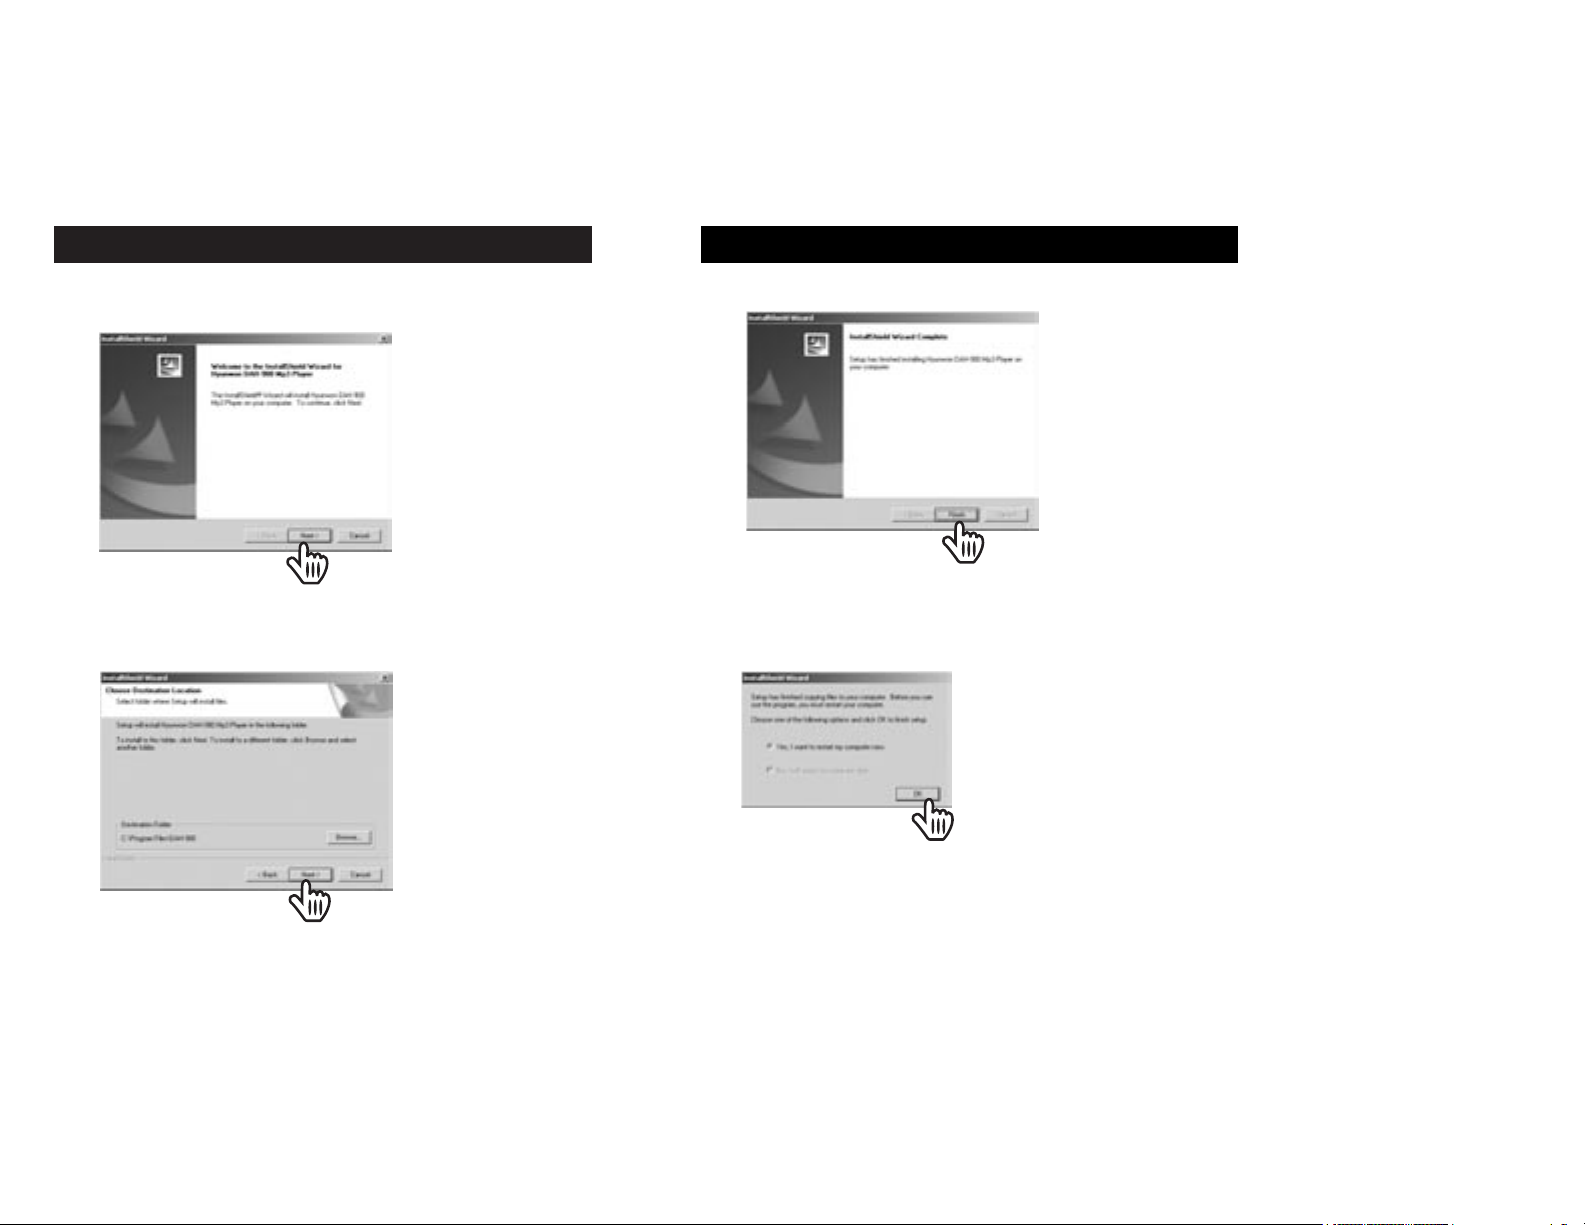
Software Installation
9
3. Click [Finish] button to complete installation.
Software Installation
8
1. When you insert the installation CD in the CD-ROM drive, the following screen
appears. [Click]
2. When the following screen appears, select the folder you wish the
program to be installed in and click [next] button.
Click!
Click!
Click!
Click!
Finish!
Finish!
4. When the following screen appears, click [OK] in order to reboot the
system.
OK!
OK!
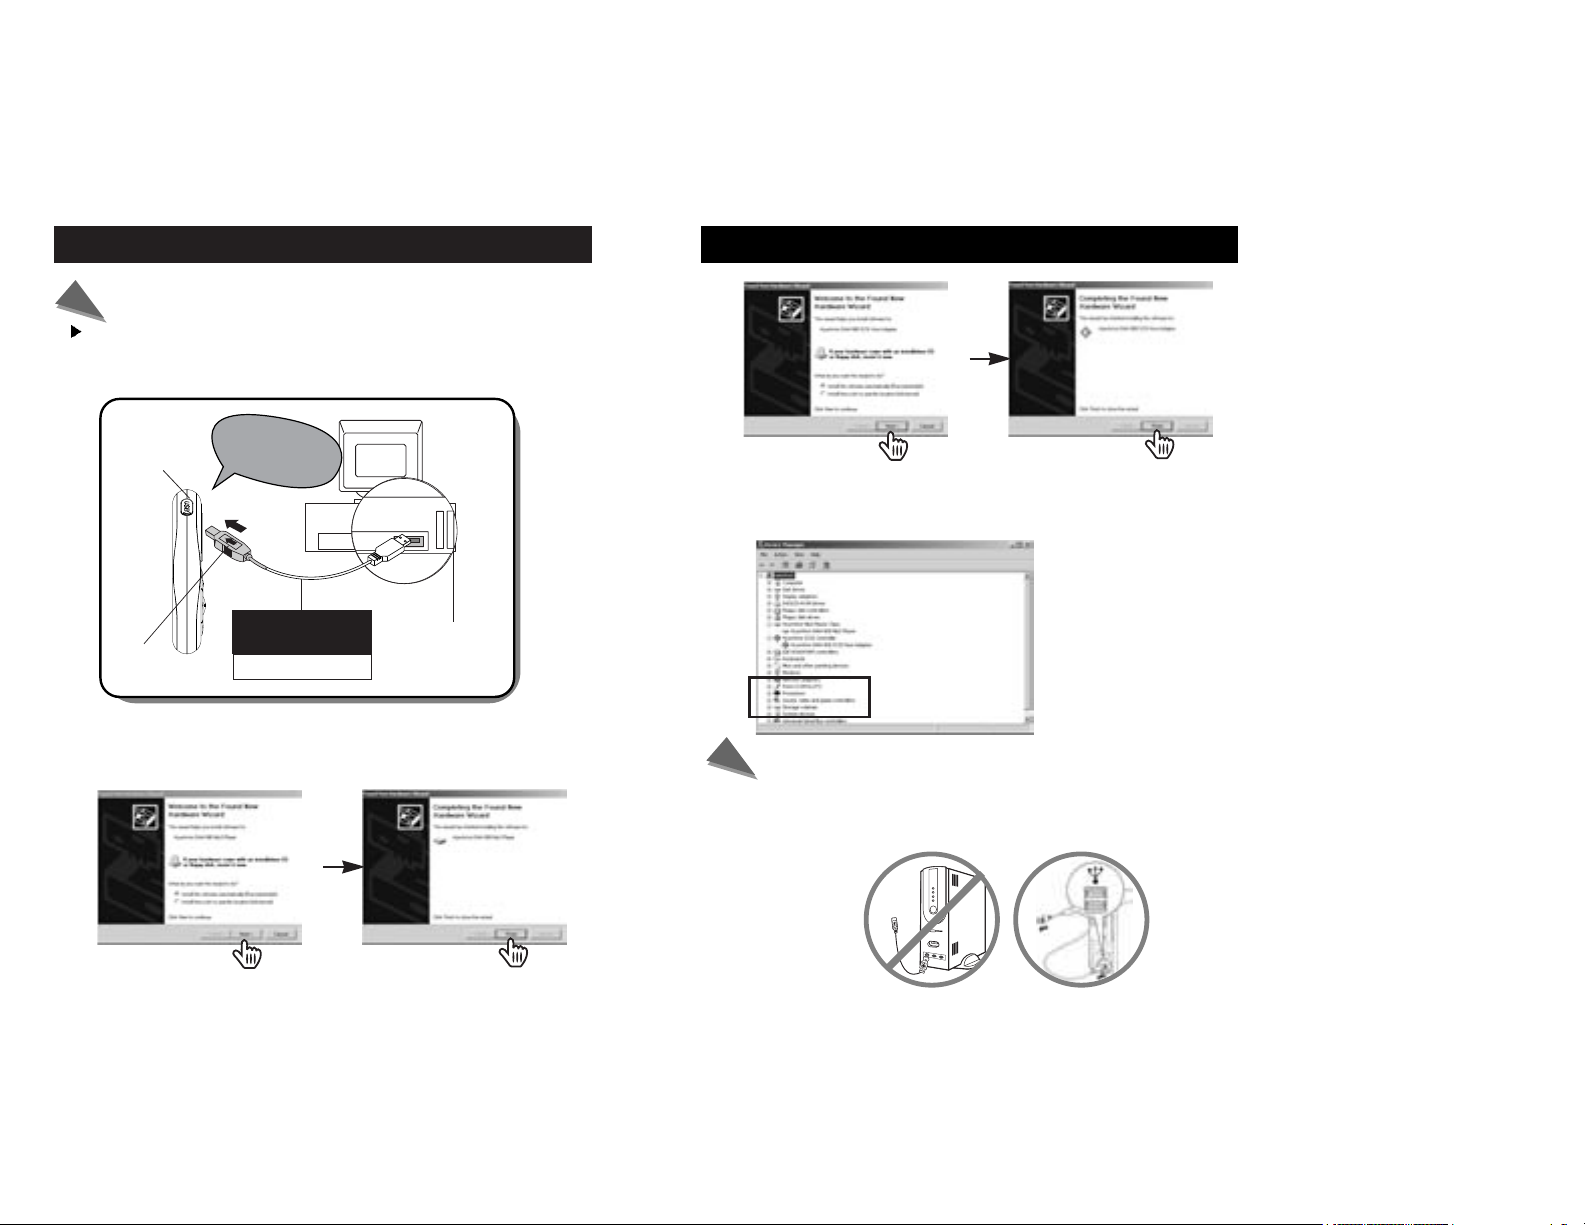
Connecting the Player to a PC using a USB Cable
11
Connecting the Player to a PC using a USB Cable
10
1. Connect one end of a USB cable to one of the USB ports on the back
of the PC, and connect the other end to the player.
Tthe digital audio turns on when connect USB USB port.
Note
In order to assure smooth operation of the product, connect the USB cable directly to the
USB port behind the PC.
Connecting the USB cable to the frond-side USB port or through USB hub may cause
connection problems.
Note
Player
DATA In/Out
port (USB
PORT)
USB cable
Be careful with the
direction of insertion
USB PORT
note:
The LCD displays
USB Connected Ready”
2. The system will automatically install the required driver with a message
saying it is searching for new device. In Windows XP, click as shown in
the following picture.
Click!
Click!
Click!
Click!
Click!
Click!
Click!
Click!
3. After installation is completed, the device information shows as follows.
Please refer to “start -> setting -> control panel -> system -> device
manager”

USB cable separation
13
File Download/Upload
12
1. Connect Player to the PC.
2. Execute Windows Explorer.
3. Select the file you wish to download/upload, then store the file in the
folder selected using “Copy -> Paste” or Drag & Drop.
USB cable separation
1. Before separating the USB cable from the PC, double click on the
“Unplug or Eject Hardware” icon on the toolbar located at the bottom
right of the Windows screen.
Separating the USB cable from the Player
After completing file transfer, please remove the USB cable
using the following method:
Dubble Click!
Dubble Click!
2. Select the USB device to be separated, then select the [Stop] button.
Click!
Click!
Click!
Click!
Note
LCD display shows “ RITING” during file downloading.
Unplugging the cable while still downloading/uploading may cause
malfunction of the product.
At one s discretion, don t amend or delete the file settings.dat
from the memory as it is a system file.
Caution
 Loading...