

Page 1
Version 1.0 | August 2005
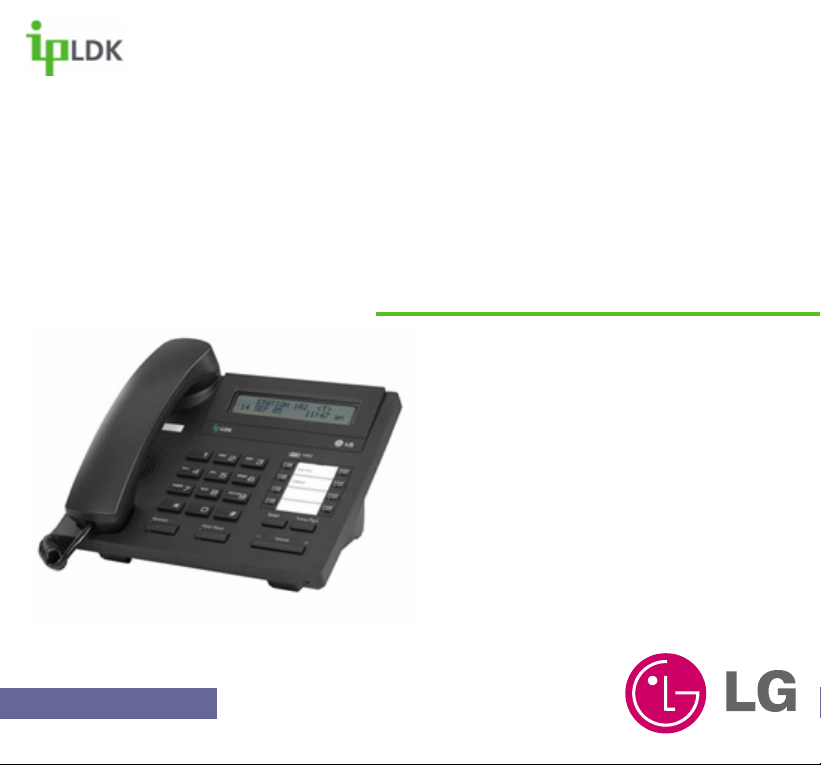
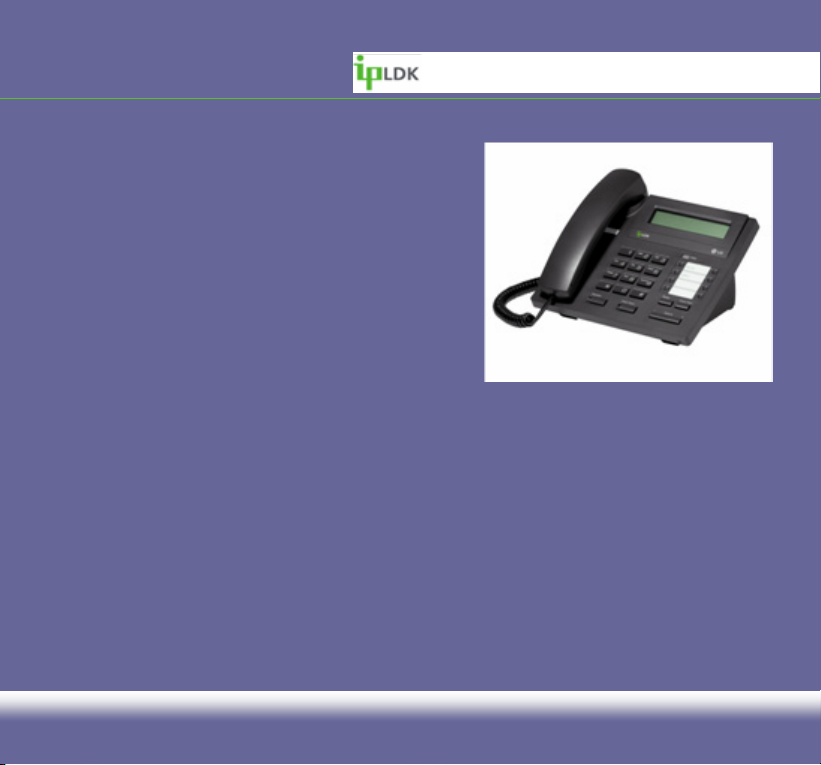
LDP7008D Digital Telephone
User Guide
Page 2

Table of Contents
Emergency Services and Safety Precautions…………..2
Getting to know your 7000 Series handset……………..3
Familiarise yourself with its features…………………....3
Handset keys…………………………….............................4
General Functions…………………………………………...5
Making and Answering Calls……………….....................6
Making and Answering an External Call……………….....6
Making and Answering an Internal Call……………….......7
Placing an external/internal call on hold…………………...8
Retrieving and external/internal call on hold………………..8
Parking a call………………………………………………..…9
Retrieving a parked call……………………………...............9
Call Forward………………………………………………….10
DDI Call Waiting……………………………………………12
Call Wait (Camp On)………………………………………...13
Answering a Call Wait……………………………………….13
Call Pick up (Directed)………………………………………14
Call Pick up (Group)…………………………………………14
Transfer (Screened)…………………………………………15
Transfer (Unscreened)………………………………………15
Using speed dial numbers…………………………………..16
Queuing for an outside line…………………………...........17
Making a Page……………………………………………….18
Conference Call………………………………………………19
Last Number Redial……………………………………….…20
Saved Number Redial…………………………………….…21
Messaging……………………………………………………22
Leaving a Message Wait Notification………………………22
Answering a Message Wait Notification………………..…23
User Programming…………………………………………24
Saving your name to your phone……………………....25
Storing personal speed dials…………………………….26
Character Chart……………………………………………..27
Storing information under flexible buttons…………...28
Menu Tree……………………………………………………29
[1] Ring……………………………………………………….30
[2] COS (Class Of Service)………………………………35
[3] Authorisation Code/Mobile-Ext………………………38
[4] Wake Up/Conference Room………………………….41
[5] Message………………………………………………….44
[6] Announcement…………………………………………46
[7] Supplementary…………………………………………50
[*] System (Engineering Use Only)
User Programming Codes………………………….........56
Pre-Set Messages…………………………………………57
Glossary……………………………………………………58
Index…………………………………………………………60
7008D User Guide | Table of Contents 01
Page 3
Servicing and Safety Precautions
• Do not drop or subject the phone to physical shock
• Do not immerse in water
• Do not disassemble or attempt to modify the phone in any way
• Use a damp or anti-static cloth to clean the phone. Do not use a dry or electrostatically
charged cloth. Do not use chemical or abrasive cleaners as these could damage the phone.
• Retain the cardboard packaging supplied with this handset. It should be used if the phone
has to be returned for service. The packaging can be recycled when no longer required.
• Do not place the phone in direct sunlight for prolonged periods
Disclaimer
Crane Telecommunications Ltd and LG Electronics Inc. cannot be held responsible for any
damage caused to your system through the improper installation of this phone and/or the
failure to use the handset as described in this user guide.
Service
The 7008D digital telephone contains no user-serviceable parts. LG recommend that your
7008D digital telephone is serviced or repaired by an LG authorised service centre
Note: Information contained within this document is subject to change without prior notice. E&OE
If you find any errors please email: lgmarketing@cranetel.co.uk
7008D User Guide | Servicing and Safety Precautions 02
Page 4
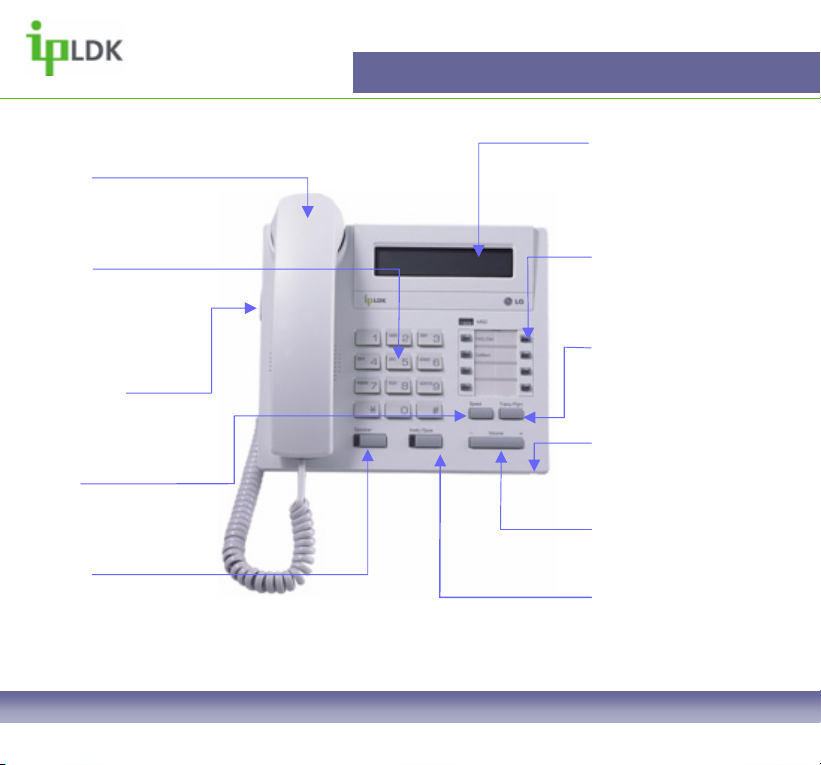
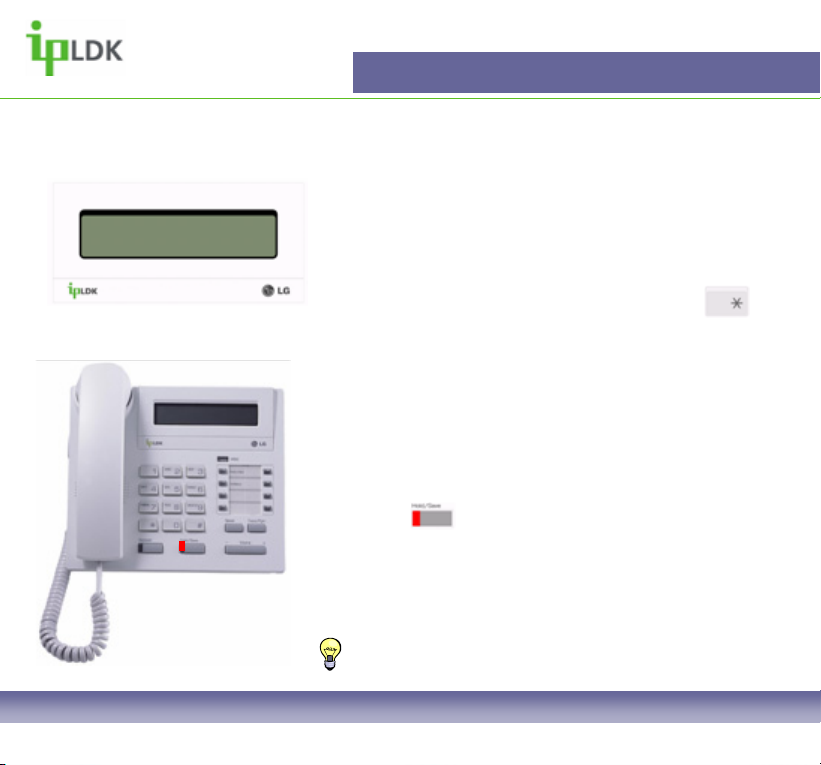
Getting to know your 7008D Digital Telephone
Familiarise yourself with its features
Handset
Contains a microphone and
speaker to allow the user to
speak to another party
Dial Pad
Alpha-numeric keypad
used to dial numbers and
when storing speed dial
numbers and names to
memory
Headset Port
Used for connection of a
headset that has a 2.5mm jack
type connector
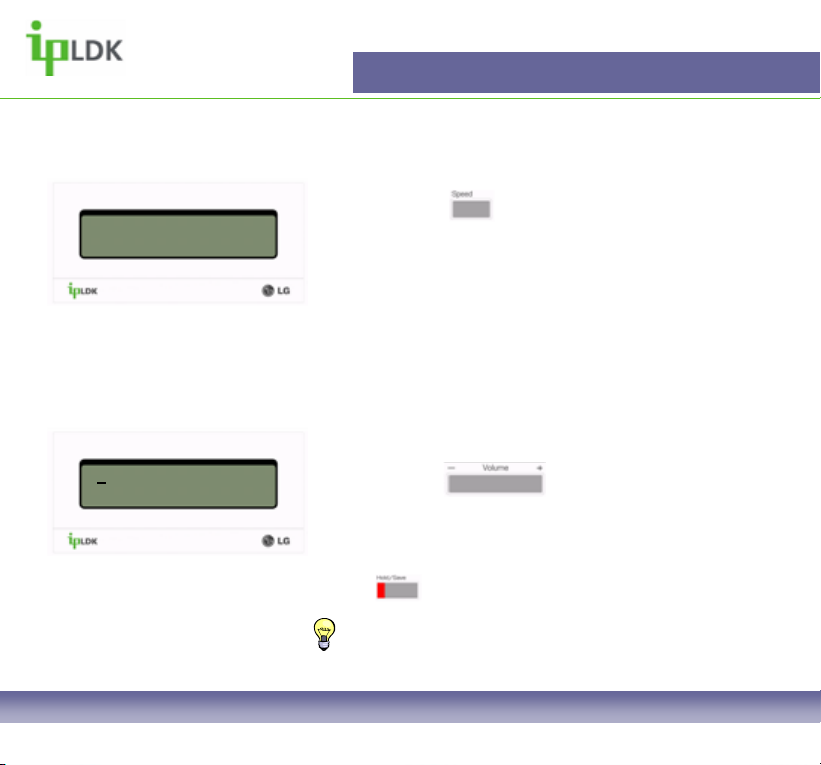
Speed
Used when accessing or
storing personal or system
speed dial numbers
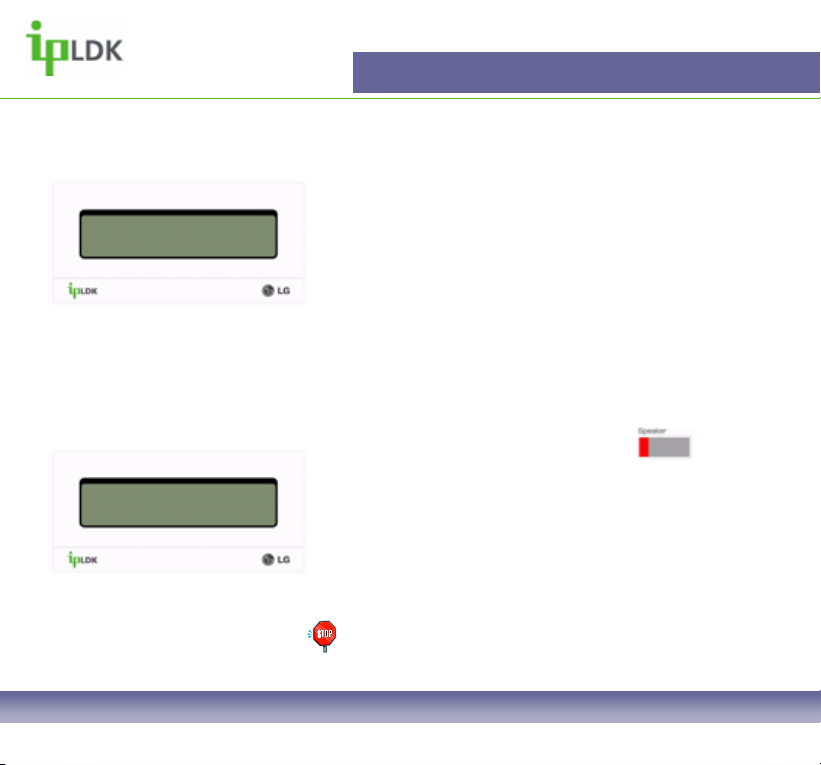
Speaker
Used to answer ‘handsfree’
and activate the speaker.
Speaker is located under
the handset
7008D User Guide | Getting to know your 7008D Digital Telephone 03
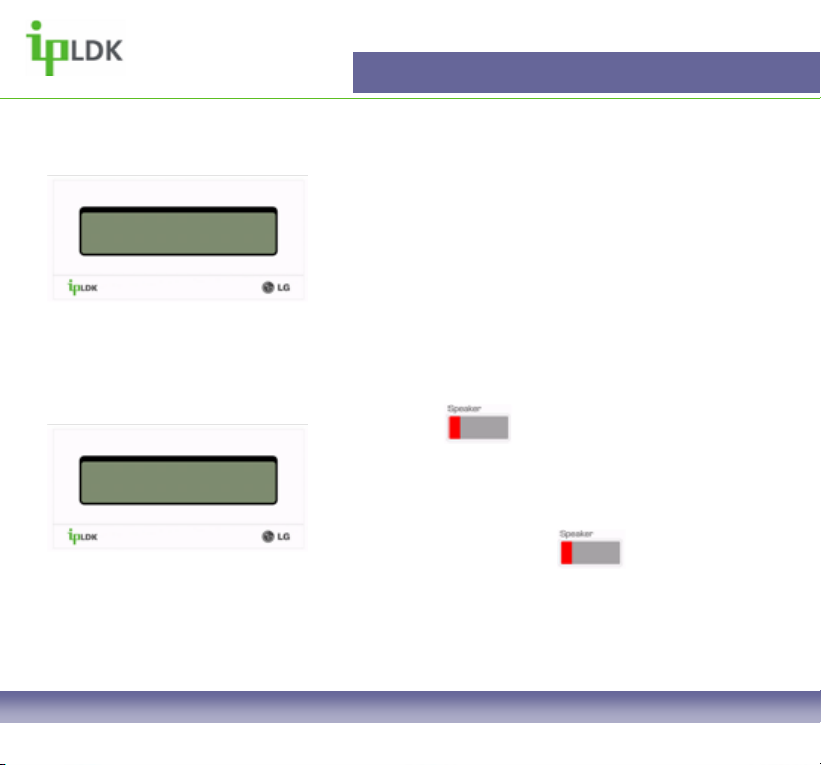
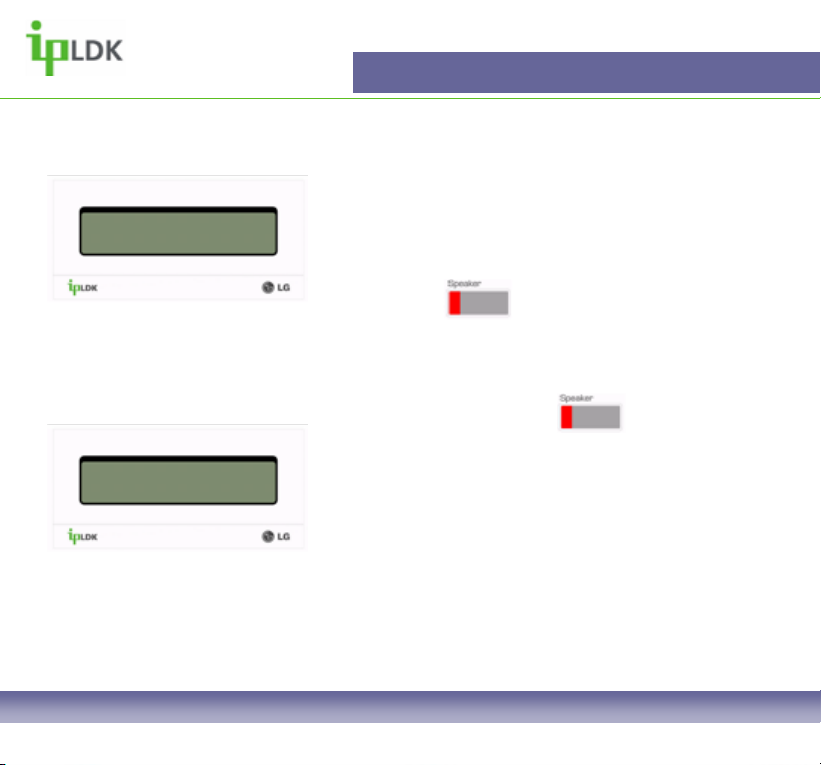
LCD
2 Line, 48 Characters
Displays inbound/outbound
call information. Displays
information based on user
actions
Flexible Buttons
Used for storing speed
dials and features as well
as accessing lines
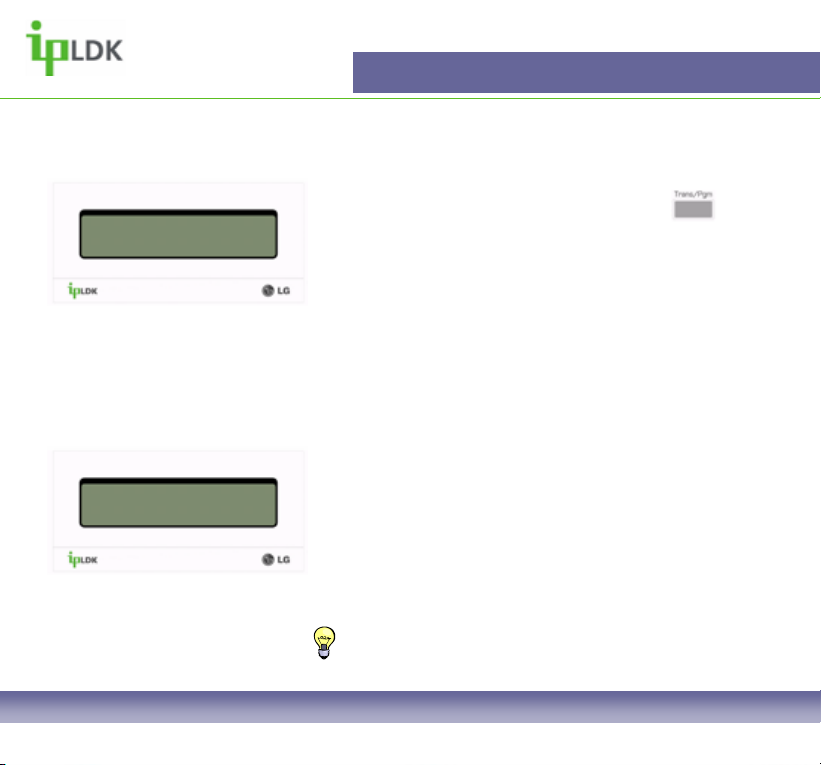
Transfer/Pgm
Used for performing a
transfer or user
programming
Microphone
For conversing with
external parties when
handsfree
Volume +/ - Used for
adjusting speaker, ring and
in-call volume
Hold/Save
For placing external callers
on hold and to confirm
programming changes
Page 5
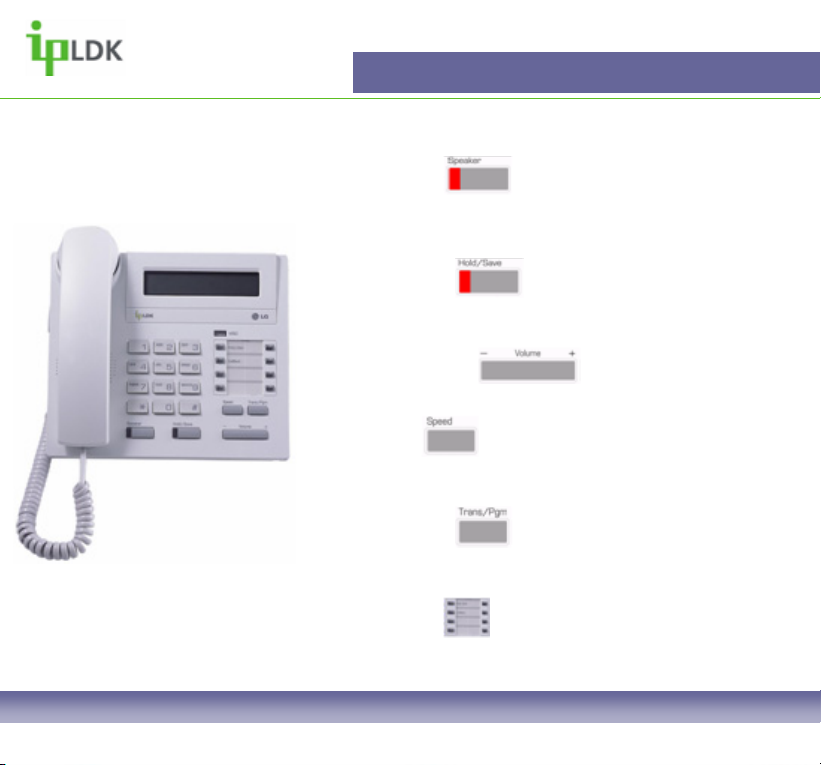
Your digital telephone’s keys
(1) Speaker Key
This is for activating the phone’s speaker whilst on hook. Useful when using a
headset or if you wish to speak hands free. Red LED illuminated if off-hook
without lifting the receiver.
(2) Hold/Save Key
Dual purpose key. When in a call it is used to place a caller on hold. When
programming it is for permanently updating changes to the system memory
Getting to know your 7008D Digital Telephone
(6)
(4) (5)
(1) (2) (3)
(3) Volume (+ / -) Key
Used for adjusting speaker, ringing and in-call volume
(4) Speed Key
This key is used to access System and Personal speed dial numbers and the
internal directory
(5) Trans/Pgm Key
Dual purpose key. When in a call with an external party it is used to transfer.
When programming features, speed dial numbers it is a programme key
(6) Flexible Keys
These keys are for use as line keys or for storing regularly used features or
speed dials under
7008D User Guide | Getting to know your 7008D Digital Telephone 04
Page 6
GENERAL FUNCTIONS
• Making and Answering External Calls
• Making and Answering Internal Calls
• Placing an Internal/External Call on Hold
• Retrieving an Internal/External Call on Hold
• Parking a Call
• Retrieving a Parked Call
• Call Forward
• DDI Call Wait
• Call Wait (Camp On)
• Answering a Call Wait (Camp On)
• Call Pick Up (Directed/Group)
• Transfer (Screened/Unscreened)
• Using Speed Dial Numbers
• Queuing for an Outside Line
• Making A Page
• Flexible Button Programming
• Leaving a Message Wait
• Answering a Message Wait
7008D User Guide | Menu Tree 05
Page 7
01321876543
LINE 6 00:02:26
Fig.1
LINE RINGING
01234 567890 10:55am
Fig.2
General Functions
Making and Answering calls
Always ensure that external parties are informed if you
intend to record a call.
Making and Answering an external call
You can make an external call in the following ways:
1. Lift the receiver and dial 9
2. Dial 9
3. Press the button and dial 9
Once you have dialled a desired number the screen
will look as in Fig.1
To answer a call press the button or lift the
receiver.
Fig.2 shows how your display will appear if you are
receiving an inbound external call.
7008D User Guide | General Functions 06
Page 8
CALL TO STA 103
16 NOV 04 00:02:26
Fig.3
CALL FROM STA 103
16 NOV 04 10:55am
Fig.4
General Functions
Making and Answering an internal call
You can make an internal call in the following ways:
1. Lift the receiver and dial an extension number.
2. Dial an extension number.
3. Press the button an extension number.
Once you have dialled a desired number the screen
will look as in Fig.3
To answer a call press the button or lift the
receiver.
Fig.4 shows how your display will appear if you are
receiving an inbound internal call.
7008D User Guide | General Functions 07
Page 9
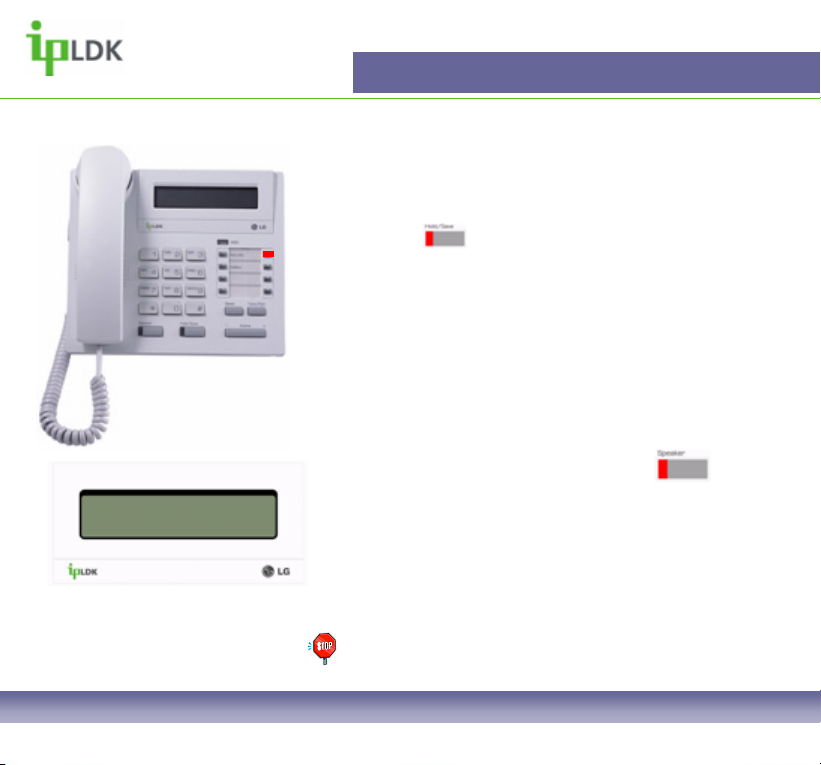
Fig.5
HOLDING : STA 103
NOV 11 04 10:55am
Fig.6
General Functions
Placing and External/Internal Call on hold
Whilst connected to another party (internal or external)
press the button.
Fig.5 shows that the relevant line on your 7008D
digital telephone will be flashing to indicate that a
caller is on hold.
Fig.6 shows how your display will look when you have
an internal caller on hold.
Retrieving an External/Internal Call on hold
If you are ‘hands free’ simply press the button
and the station that you placed on hold will recall to
your phone.
If you are ‘Off-Hook’ (holding the handset) simply hang
up (replace the handset) or dial the extension number
of the station that you placed on hold and you will be
reconnected.
NOTE: Calls will ‘Recall’ to your station after a pre-set
time if you forget about them.
7008D User Guide | General Functions 08
Page 10
General Functions
Parking a Call
Line 5 Recalling
NOV 11 04 10:55am
Fig.7
1. Whilst connected to an external party press the
button, dial a Park Location (601-619) or press a
flexible button labelled as Park and hang up.
2. Once you have parked the caller you can contact
another party to inform them that they have a caller
waiting. Alternatively, make a page (See page 18 later
in the user guide for information on paging).
Retrieving a Parked Call
1. If retrieving a call that you have parked, dial the
relevant digits for the parking bay used (601-619)
2. If responding to a page, dial the relevant digits (601-
619) from the nearest available telephone.
NOTE: Calls will recall to the original station after a preset timer if a call is left parked. In this circumstance the
screen of your 7008D Digital Handset will appear as in
Fig.7
7008D User Guide | General Functions 09
Page 11

General Functions
Call Forward
It is possible to forward you phone in a number of ways. The options available are:
0 – Follow-Me (To forward calls from your extension to a temporary location. The forward is
activated at the temporary location).
1 – Unconditional (This option allows you to forward all calls immediately to a Station, Hunt
Group or the integral Voice Messaging card).
2 – Busy (Destination options are as per option 2. Calls will only forward when you are busy
– on the phone).
3 – No Answer (Destination options as per option 1. Calls will only forward when a ‘NoAnswer’ timer expires. The length of the time is determined by a qualified System
Administrator).
4 – Busy/No Answer (Combines options 2 & 3. Most popular, especially where Voicemail is
used).
5 – Off-Net (This allows you to forward your phone unconditionally to a remote location such
as Mobile or home phone).
6 – No Answer Off-Net (As per option 6 but only after a no-answer timer)
7 – Access Not Permitted
# - Allows you to cancel any call forward.
7008D User Guide | General Functions 10
Page 12
General Functions
Call Forward
BUSY/NO ANSWER FORWARD
ENTER STA/HUNT/#(VMIB)
Fig.8
FORWARD TO VMIB (BN)
16 NOV 04 1 4.43
Fig.9
1. Press the button and then press the
button.
2. Alternatively dial 554 from your handset.
3. Select a forward option as per page 9. (Example:
Select option 4, Busy/No Answer, and your display will
look as per Fig.8)
4. Once you have selected an option such as # (As
shown in Fig.8), your display will change as per Fig.9.
5. To cancel the call forward press the flashing
button or dial 554, .
7008D User Guide | General Functions 11
Page 13
General Functions
DDI Call Waiting
Call to John
01234 222222 10:55am
Fig.10
If enabled, you will be able to see if you have a DDI
call waiting whilst engaged in another call.
Fig.10 shows what is displayed when a call is waiting.
The top line shows current call status, the bottom line
informs you that there is a waiting call.
1. To speak to the waiting caller hang up to finish your
current conversation, press the button or park
the existing caller.
2. You will then be connected to the waiting party.
TIP: You can assign a flexible button to turn this feature
on and off. (See user flexible key programming codes on
page 56).
Note: This feature must be enabled for you to use it.
Speak to your system administrator if you are not able to
do what is described above.
7008D User Guide | General Functions 12
Page 14
General Functions
Call Wait (Camp On)
BUSY : STA 102
[CALL BK] CAMP* STEP
Fig.11
Fig.12
1. Dial an internal number
2. Get busy notification (Fig.11 shows what you will
see in the display of your 7008D digital telephone).
3. From the on-screen instructions press the
button.
4. If the called party answers you can speak with them
or simply transfer a call to them.
Answer a Call Wait (Camp On)
1. After hearing Call Wait (Camp On) tone press the
flashing button. (Fig.12)
2. Your existing caller is placed on hold.
3. When you have finished speaking you will return to
the original caller when the second caller hangs up
TIP: It is possible to assign a flexible button as CAMP
ON. See Page 56 for Flexible Key programming codes.
7008D User Guide | General Functions 13
Page 15
General Functions
Call Pickup (Directed)
CALL TO STATION 100
FROM 103 00:03:41
Fig.13
CALL TO 100 PICKED UP
LINE 6 00:03:41
Fig.14
1. Dial 7 followed by the extension number of the
station that is ringing
2. You will then be connected to the calling party.
3. Fig.13 shows that the display of your 7008D Digital
Telephone will display the number of the calling party
and the station that the call was originally intended for
Call Pickup (Group)
1. Pick up your handset or press the button
2. Dial 566.
3. You will be connected to the caller
4. Fig.14 shows what you will see on the display of
your 7008D Digital Telephone
Note: You must be part of a Pickup Group to use this
feature and it must be set up by you system
administrator
7008D User Guide | General Functions 14
Page 16
General Functions
Transfer (Screened)
HOLDING : STA 102
14 NOV 2004 11:58am
Fig.15
RECALL FROM STA 102
LINE 6 00:03:41
Fig.16
1. Whilst connected to a caller press the button.
2. If you are transferring an internal call your display
will look as in Fig.15
3. Dial the appropriate extension number or press a
flexible button that has been assigned with a station
number
4. Wait for the called party to answer, announce the
call and Hang Up
Transfer (Unscreened)
1. Repeat steps 1 to 3 as described above
2. Hang up without announcing the call
3. Calls will ‘recall’ to your station after a pre-set timer
for both types of transfer. See Fig.16
TIP: Pre-set timer can be determined by a system
administrator. By default this timer will be 30 secs
7008D User Guide | General Functions 15
Page 17
General Functions
Using Speed Dial Numbers
DIAL BY NAME
ICM:1 U_SPD:2 S_SPD:3
Fig.17
1:Supplier A
2:Supplier B
Fig.18
1. Press the button twice
2. Your display will appear as in Fig.17
3. Select the option you require:
1. Intercom Directory
2. User (Personal) Speed Dials
3. System Speed Dials
4. After you have made your selection your display will
appear as in Fig.18
5. Use your button to scroll through the
list of available numbers. A cursor ‘_’ will highlight the
current selected choice.
6. When you have found the number you want press
the button.
Tip: Use your keypad to navigate around the speed dial
list more quickly. See character chart on page 27 of this
guide for help on how to use the keypad
7008D User Guide | General Functions 16
.
Page 18
General Functions
Queuing for an Outside Line
CO LINE 05 BUSY
QUEUING [CALL BACK]
Fig.19
QUEUE CALLBACK
LINE 05 11:05am
Fig.20
1. If no external lines are available when you attempt
to make an outside line you will receive busy tone
and your display will appear as in Fig.19
2. Press the pre-assigned flexible key
3. When a line becomes available your handset will
recall and your display will appear as in Fig.20
4. At this point, lift the receiver to get an outside line
7008D User Guide | General Functions 17
Page 19
LIFT HANDSET TO PAGE
25 DEC 04 10:23am
Fig.21
Page Codes:
501-535 – Internal Page Zone
543 – Internal All Call
544 – Meet Me
545 – External Zone 1
546 – External Zone 2
547 – External Zone 3
548 – External All Call
549 – All Call
General Functions
Making a Page
1. Dial the required paging code (see the list of codes
on page 55)
2. Your display will look as in Fig.21
3. Hang up once you have finished the page.
TIP: It is possible to assign a flexible button as a PAGE
Key.
Note: You must have permission to make a page that
must be set up in programming by a qualified system
administrator.
7008D User Guide | General Functions 18
Page 20

CONFERENCE
25 DEC 04 10:23am
Fig.22
General Functions
Conference Call
It is possible whilst on a call to set up a conference
consisting of up to 6 parties. You will need a flexible
button assigned as CONFERENCE.
1. Press the CONFERENCE button.
2. Your display will look as in Fig.22
3. Dial another extension or external number.
4. When the party answers press the CONFERENCE
button once to enable you to add another party or
twice to set up the conference and allow all parties to
converse.
Note: You must have a flexible key set up as a
conference button.
7008D User Guide | General Functions 19
Page 21

901234567890
PRESS VOL UP/DOWN, HOLD
Fig.23
General Functions
Last Number Redial/Redial
To redial the last external number you called you will
need a flexible button labelled as REDIAL.
1. Press the REDIAL button.
a) The display of you 7008D Digital Handset will
appear as in Fig.23
2. Use the button to find the number you
require. The first in the list is the last dialled number.
a) By the REDIAL button you can access up to 10
previously dialled numbers.
3. Press the button and the number you
selected will be dialled.
4. To access the last dialled number you can
alternatively press the button followed by the
button followed by .
7008D User Guide | General Functions 20
Page 22

901234567890
LINE 6 00:00:02
Fig.24
General Functions
Saved Number Redial
It is possible to save a number that you have dialled
whilst connected to the external party.
1. Press the button twice whilst connected to the
called party.
2. To dial the number when you have hung up press
the button followed by the button.
3. Your screen will appear as in Fig.24
7008D User Guide | General Functions 21
Page 23

BUSY : STA 102
[CALLBK] CAMP (*) STEP
General Functions
Messaging
Leaving a Message Wait Notification
It is possible to inform a called party (Internal) that you
have tried to contact them).
Fig.25
CALL BACK FROM STA 102
15 NOV 2004 11:54am
Fig.26
Calling a Busy Station
1. Your screen will appear as in Fig.25.
2. Press the button.
3. When the busy part hangs up you will be notified
with intermittent bursts of tone, a display as in Fig.26 a
flashing button and light.
Calling an Unanswered Station
Simply press your button and hang up
when you call a station that does not answer.
They will see from their display that you have tried to
call.
Note: If voicemail is present for either scenario you will
be invited to leave a message.
7008D User Guide | General Functions 22
Page 24

MSG: STA 102
Fig.27
General Functions
Answering a Message Wait Notification
When somebody has left you a notification as
described on the previous page your display will
appear as in Fig.27.
If a Voice Message has been left the display will show
VMIB or HUNT 620 instead.
The light and button will also be
flashing.
1. Press the button or dial the extension
number shown in the display.
7008D User Guide | General Functions 23
Page 25

USER PROGRAMMING
SAVING YOUR NAME TO YOU PHONE
STORING PERSONAL SPEED DIALS
CHARACTER ENTRY CHART
7008D User Guide | User Programming 24
Page 26

CALL FROM ANDY
15 NOV 04 11:03am
User Programming
Saving your name to your phone
This enables colleagues to identify you by your name
instead of you extension number (Fig.28). You can
store your name as follows:
Fig.28
1. Press the button and dial 74.
2. You will then be prompted to enter your name. (See
the character entry chart on page 27).
3. Press the button to save your name to the
system memory
7008D User Guide | User Programming 25
Page 27

User Programming
Storing Personal Speed Dials
It is possible for you to store numbers that you use regularly to your personal speed dial
directory.
• Press the button.
• Press the button.
• The screen will show the next available speed dial that can be programmed (Dial 001 for
example)
• Enter the required speed dial number (You do not need to enter 9 for an outside line).
• Enter the name as per the character entry chart on page 23.
• Press the button.
7008D User Guide | User Programming 26
Page 28

User Programming
Character Entry Chart
Please follow the chart below when entering characters.
. - 13
1 – 10
G - 41
H - 42
I - 43
4 - 40
P - 71
Q - 72
R - 73
S - 74
7 – 70
Space - *1
: - *2
, -*3
A - 21
B - 22
C - 23
2 - 20
J - 51
K - 52
L - 53
5 - 50
T - 81
U - 82
V - 83
8 - 80
0-00 #
W - 91
D - 31
E - 32
F - 33
3 - 30
M - 61
N - 62
O - 63
6 - 60
X - 92
Y - 93
Z - 94
9 - 90
7008D User Guide | User Programming 27
Page 29

EMPTY
ENTER A NEW FEATURE
User Programming
Storing information under a flexible button
Flexible buttons can be programmed as line,
extension, feature or speed dial buttons.
To assign a feature to a flexible button follow the
instructions below:
Fig.29
Note: Users do not have
permission to over write
a flexible key that is
assigned as a line key.
See page 56 for details of
all user programming
codes.
1. Press the button and select the button you
wish to assign.
2. The display of you 7008D Digital Telephone will
then display what is already programmed or if it is
empty as per Fig.29
3. You may then assign the button in on of the
following ways:
a. Press the button followed by a user
programming code
b. Press the button followed a speed dial
number.
c. Enter the relevant extension number.
4. Press the button.
7008D User Guide | User Programming 28
Page 30

Menu Tree
[1] RING
1.1 TYPE
1.2 ANSWER MODE
1.2.1 HANDSFREE (H)
1.2.2 TONE (T)
1.2.3 PRIVACY (P)
1.3 SMS MSG DISPLAY
1.4 ENBLOCK MODE
1.5 SMS/NOTICE DISPLAY
1.6 SCROLL SPEED
1.7 EAR-MIC HEADSET
1.8 ICM RING
1.9 CO RING
[2] COS
2.1 COS DOWN
2.2 COS RESTORE
2.3 WALKING COS
2.4 COS CHANGE
[3] AUTH / MOBILE EXTN
3.1 AUTH REGISTER
3.2 AUTH CHANGE
3.3 REG MOBILE-EXT
3.4 ACTIVE MOBILE-EXT
[4] TIME / CONF-ROOM
4.1 SET WAKE-UP TIME
4.2 WAKE-UP DISABLE
4.3 ACTIVE CONF-ROOM
4.4 DEACTIVE-CONF ROOM
[5] MESSAGE
5.1 SET PRESELECTED MSG
5.2 SET CUSTOM MSG
[6] ANNOUNCEMENT
6.1 REC USER GREETING
6.2 LISTEN TIME/DATE
6.3 LISTEN STA NUMBER
6.4 LISTEN STA STATUS
6.5 REC PAGE MSG
6.6 ERASE USER GREETING
6.7 ERASE PAGE MESSAGE
[7] SUPPLEMENTARY
7.1 LCD DISPLAY LANGUAGE
7.2 MPB VERSION DISPLAY
7.3 BGM
7.4 REGISTER STA NAME
7.5 SPK/HEADSET
7.6 HEADSET RING MODE
7.7 WTU STA NUM RCVR
7.8 SERIAL NUMBER
7.9 PC-PHONE LOCK KEY
[*] SYSTEM (DO NOT USE)
7008D User Guide | Menu Tree 29
Page 31

1. RING
1.1 TYPE
1.2 ANSWER MODE
1.3 SMS MSG DISPLAY
1.4 ENBLOCK MODE
1.5 SMS/NOTICE DISPLAY
1.6 SCROLL SPEED
1.7 EAR-MIC HEADSET
1.8 ICM RING
1.9 CO RING
7008D User Guide | Menu Tree 30
Page 32

RING TONE
DIAL 1-4: 01
Fig.30
ENTER ICM ANS MODE
H(1) T(2) P (3)
Fig.31
Ring
Type
1. Press the button and select option [1] RING followed
by option [1] TYPE. (Your display should look as per Fig.30).
2. The screen shows the current active ring
3. Choose options 1-4 to change to general ring cadence for
your 7008D Digital Telephone.
4. Press the button to confirm the change.
Answer Mode
Press the button and select option [1] RING followed by
option [2] ANSWER MODE. (See Fig.32)
(1) Handsfree – In this mode you will receive 3 short bursts of
tone from your handset for intercom calls before being
connected in a full handsfree conversation.
(2) Tone – This is the default answer mode for intercom calls
to your handset. You will receive normal ringing.
(3) Privacy – In this mode you will receive 3 short bursts of
tone from your handset for intercom calls. The caller will then
be able to announce themselves to you but will not be able to
hear anything at your end of the call
7008D User Guide | Ring 31
Page 33

[1] RING
[2] COS
Ring
SMS MSG Display
This will display short text-based messages that have been
sent from users of the EVOLUTION Call Manager Advanced
and EVOLUTION Call Manager Attendant applications.
Press the button and select option [1] RING followed by
option [3] SMS MSG DISPLAY.
Note: You are not able to reply to these messages from your
telephone
Enblock Mode
Reserved for future development
SMS/Notice Display
Reserved for future development
7008D User Guide | Ring 32
Page 34

EAR-MIC HEADSET
(1: ON/0:OFF) : OFF
Fig.32
RING TONE
DIAL 01-15: 01
Fig.33
Ring
Ear-Mic Headset
This feature allows you to plug a standard DECT-type headset
into the 2.5mm jack socket on your 7008D Digital Telephone.
1. Press the button and select option [1] RING followed
by option [7] EAR-MIC HEADSET. (Your display should look
as per Fig.32)
2. Select 1 for ON, 2 for OFF (Display shows current setting)
ICM Ring
This feature allows you to differentiate the way that your phone
rings on intercom calls to the way it rings on inbound external
calls.
1. Press the button and select option [1] RING followed
by option [8] ICM RING. (Your display should look as per
Fig.33)
2. Select options 1-15 (Display shows current setting).
7008D User Guide | Ring 33
Page 35

RING TONE
DIAL 01-15: 03
Fig.34
Ring
CO Ring
This feature allows you to differentiate the way that your phone
rings on intercom calls to the way it rings on inbound external
calls
1. Press the button and select option [1] RING followed
by option [9] CO RING. (Your display should look as per
Fig.34
2. Select options 1-15 (Display shows current settings).
7008D User Guide | Ring 34
Page 36

1.2. COS (Class Of Service)
2.1 COS DOWN
2.2 COS RESTORE
2.3 WALKING COS
2.4 COS CHANGE
7008D User Guide | Menu Tree 35
Page 37

ICM ONLY MODE
Press HOLD Key
Fig.35
ENTER CURRENT PASSWORD
Fig.36
ORIGINAL COS RESTORED
Press HOLD Key
Fig.37
COS – Class Of Service
COS Down
This option allows you to ‘lock’ your phone, preventing
unauthorised external calls.
1. Press the button and select option [2] COS followed by
option [1] COS DOWN. (Your screen should look as per
Fig.35)
2. Press the button.
COS Restore
This option returns your phone to normal service, taking off the
lock applied above.
1. Press the button and select option [2] COS followed by
option [2] COS RESTORE. (Your screen should look as per
Fig.36)
2. Enter your password and the screen should change as per
Fig.37.
3. Press the button.
Note: You will need a valid Authorisation Code to use both of
these features. Setting up your Authorisation Code is described
on page 39 of this user guide.
7008D User Guide | Class Of Service 36
Page 38

ENTER COS OVERRIDE CODE
Fig.38
COS – Class Of Service
Walking COS
This option allows another user to override a COS that is
applied to you extension. You may only be allowed to dial local
and national where as they may be able to dial international
numbers.
1. Press the button and select option [2] COS followed by
option [3] WALKING COS. (Your screen should look as per
Fig.38)
2. Enter a valid authorisation code and press the button.
COS Change
Reserved for future development.
7008D User Guide | Class Of Service 37
Page 39

3. AUTH CODE MOBILE EXTENSION
3.1
AUTH CODE REGISTER
3.2 AUTH CODE CHANGE
3.3 REGISTER MOBILE EXTENSION
3.4 ACTIVATE MOBILE EXTENSION
7008D User Guide | Menu Tree 38
Page 40

ENTER PASSWORD:
Fig.39
ENTER CURRENT PASSWORD
Fig.40
Authorisation Code/Mobile Extension
Auth Code Register
You can register a valid authorisation code with this option. A
valid authorisation code is required for many features that you
may wish to access.
1. Press the button and select option [3] AUTH/MOBILE-
EXT followed by option [1] AUTH REGISTER. (Your screen
should look as per Fig.39)
2. Enter a 5 digit authorisation code and press the
button.
Auth Code Change
You can change your authorisation code with this option. A
valid authorisation code is required for many features that you
may wish to access.
1. Press the button and select option [3] AUTH/MOBILE-
EXT followed by option [2] AUTH CHANGE. (Your screen
should look as per Fig.40)
2. Enter your current 5 digit authorisation code and the screen
will then appear as per Fig.39.
3. Enter a new code and press the button.
7008D User Guide | Authorisation Code/Mobile Extension 39
Page 41

MOBILE EXT TEL NO.
Fig.41
MOBLE EXT. USAGE
(1:ON/0:OFF) : OFF
Fig.42
Authorisation Code/Mobile Extension
Register Mobile Extension
This feature allows to set your mobile or other valid telephone
number to receive DDI calls simultaneously to your desk
phone.
1. Press the button and select option [3] AUTH/MOBILE-
EXT followed by option [3] REG MOBILE-EXT. (Your screen
should look as per Fig.41)
2. Enter your mobile number and press the button.
Activate Mobile Extension
This allows you to activate the feature that you have set up
above.
1. Press the button and select option [3] AUTH/MOBILE-
EXT followed by option [4] ACTIVE MOBILE-EXT. (Your
screen should look as per Fig.42)
2. Dial 1and press the button.
Note: Permission to use this feature must be set up by a qualified
system administrator in order for you to access this user
programming.
7008D User Guide | Authorisation Code/Mobile Extension 40
Page 42

4. WAKE UP TIME / CONFERENCE ROOM
4.1 SET WAKE UP TIME
4.2 WAKE UP DISABLE
4.3 ACTIVE CONF-ROOM
4.4 DEACTIVE CONF-ROOM
7008D User Guide | Menu Tree 41
Page 43

ENTER YOUR WAKEUP TIME
HH:MM 12:31 pm
Fig.43
ERASED WAKEUP TIME
12:25-S 12:23pm
Fig.44
Wake Up Time/Conference Room
Set Wake Up Time
With this feature you can set an alarm to ensure you do not
miss an important meeting.
1. Press the button and select option [4] TIME/CONF
ROOM followed by option [1] SET WAKE UP TIME. (Your
screen should look as per Fig.43)
2. Enter the time that you wish the alarm to go off and press
the button.
3. To stop the alarm when it sounds simply go off hook and
hang up.
Wake Up Disable
This allows you to deactivate an alarm that has been set.
1. Press the button and select option [4] TIME/CONF
ROOM followed by option [1] SET WAKE UP TIME. (Your
screen should look as per Fig.44)
2. Press the button.
7008D User Guide | Wake Up Time/Conference Room 42
Page 44

DIAL NO(1-9) and PASSWD
Fig.45
Wake Up Time/Conference Room
Activate Conference Room
Conference Room allows external callers to dial into a multiparty conference. As a user you can set up and deactivate a
conference room.
1. Press the button and select option [4] TIME/CONF
ROOM followed by option [3] ACTIVE CONF-ROOM. (Your
screen should look as per Fig.45)
2. Enter the number of the conference room you wish to
activate, followed by your authorisation code and press the
button.
3. Callers can now dial into this conference (Internal or external
via DDI, transfer from reception or auto-attendant).
Deactivate Conference Room
A conference room, as set up above, will stay active until you
deactivate it.
1. Press the button and select option [4] TIME/CONF
ROOM followed by option [4] DEACTIVATE CONF-ROOM.
(Your screen should look as per Fig.45)
2. Enter the relevant number and press the button.
7008D User Guide | Wake Up Time/Conference Room 43
Page 45

5. MESSAGE
5.1 SET PRE-SELECTED MESSAGE
5.2 SET CUSTOM MESSAGE
7008D User Guide | Menu Tree 44
Page 46

ENTER MESSAGE NO
Fig.46
MESSAGE : 00
Fig.47
Message
Set Pre-Set Message
There are 10 pre-set , 10 Custom and 1 personal text-based
messages that you can chose to leave on the display of you
7008D Digital Telephone when you are away from your desk.
(See page xx of this user guide for a list of the pre-set
messages).
1. Press the button and select option [5] TIME/CONF
ROOM followed by option [1] ACTIVE CONF-ROOM. (Your
screen should look as per Fig.46)
2. Enter the relevant message number and follow any onscreen prompts and press the button.
Set Custom Message
By selecting option 00 above you will chose your own personal
message. You set you own message as below:
1. Press the button and select option [5] TIME/CONF
ROOM followed by option [2] SET CUSTOM MSG. (Your
screen should look as per Fig.47)
2. Enter the relevant text as per the character entry chart on
page 22 and press the button.
7008D User Guide | Message 45
Page 47

6. ANNOUNCEMENT
6.1 RECORD USER GREETING
6.2 LISTEN TO TIME/DATE
6.3 LISTEN TO STATION NUMBER
6.4 LISTEN TO STATION STATUS
6.5 RECORD PAGE MESSAGE
6.6 ERASE USER GREETING
6.7 ERASE PAGE MESSAGE
7008D User Guide | Menu Tree 46
Page 48

Announcement
Record User Greeting
If you have permission you may record a greeting that users will hear based on a forward
type set on your extension. (See page 9 for Call Forward Settings).
1. Press the button and select option [6] ANNOUNCEMENT followed by option [1]
REC USER GREETING.
2. You will prompted to press to start recording.
3. When you have finished recording press
4. Record a message appropriate to the type of forward on your Digital Telephone.
Listen to Time/Date
To check the time and date:
1. Press the button and select option [6] ANNOUNCEMENT followed by option [2]
LISTEN TIME/DATE.
2. The date and time will then be heard. (Integral messaging must be present to use this
feature).
7008D User Guide | Announcement 47
Page 49

Announcement
Listen to Station Number
To check your station number:
1. Press the button and select option [6] ANNOUNCEMENT followed by option [3]
LISTEN STA NUMBER.
2. You will then hear a system message telling you the number of your station.
Listen to Station Status
To listen to your current status (Station Number, COS, Call Forwards):
1. Press the button and select option [6] ANNOUNCEMENT followed by option [4]
LISTEN STA STATUS.
2. You will then hear the current status of your extension.
Record Page Message
It is possible to record a page that you may use on a regular basis. This can be stored,
together with a page code, under a flexible button
1. Press the button and select option [6] ANNOUNCEMENT followed by option [5]
REC PAGE MSG.
2. You will prompted to press to start recording.
When you have finished recording press
7008D User Guide | Announcement 48
Page 50

Announcement
Erase User Greeting
To erase your personal greeting:
1. Press the button and select option [6] ANNOUNCEMENT followed by option [6]
ERASE USER GREETING.
2. Your personal greeting will be erased.
Erase Page Message
To erase your page message:
1. Press the button and select option [6] ANNOUNCEMENT followed by option [7]
ERASE PAGE MESSAGE
2. Your page message will be erased.
7008D User Guide | Announcement 49
Page 51

7. SUPPLEMENTARY
7.1 LCD LANGUAGE DISPLAY
7.2 MPB VERSION DISPLAY
7.3 BGM
7.4 REGISTER STATION NAME
7.5 SPEAKER/HEADSET
7.6 HEADSET RING MODE
7.7 WTU STA NUM RCVR
7.8 SERIAL NUMBER
7.9 PC-PHONE LOCK KEY
7008D User Guide | Menu Tree 50
Page 52

LGE/UK90P-C.0Bb OCT/04
UNITED KINGDOM 1 RACK
Fig.48
Supplementary
LCD Display Language
If a qualified system administrator has set this feature up you
may toggle between a first and second language in your
display.
1. Press the button and select option [7]
SUPPLEMENTARY followed by option [1] LCD DISPLAY
LANGUAGE.
2. Your LCD language will change to the second language
option.
MPB Version Display
This allows you to the level of software that your system is
running.
1. Press the button and select option [7]
SUPPLEMENTARY followed by option [2] MPB VERSION
DISPLAY. (Your screen should look as per Fig.48)
7008D User Guide | Supplementary 51
Page 53

SELECT BGM SRC (00-11)
00
Fig.49
ENTER NAME ( )
Fig.50
Supplementary
BGM
You can chose to listen to background music through your
handset. There are 11 possible music sources. You should
check with a qualified system administrator for details of which
sources are active.
1. Press the button and select option [7]
SUPPLEMENTARY followed by option [3] BGM. (Your screen
should appear as in Fig.49).
2. Select the appropriate source (00-11).
3. Press the button.
4. Music will then be heard through the handset.
5. Repeat steps 1 to 4 to cancel the background music.
Register Station Name
To register your name to your station:
1.Press the button and select option [7]
SUPPLEMENTARY followed by option [4] REGISTER STA
NAME. (Your screen should look as per Fig.50)
2. Enter your name and press the button.
7008D User Guide | Supplementary 52
Page 54

SELECT SPEAKER/HEADSET
(1:SPK 0:HEADSET) : 1
Fig.51
SELECT HEADSET RING TYPE
(1:S/2:H/3:BOTH) : 1
Fig.52
Supplementary
Speaker/Headset Mode
If you wish to connect a headset other than to the headset jack
follow the instructions below:
1. Press the button and select option [7]
SUPPLEMENTARY followed by option [5] SPK/HEADSET.
(Your screen should appear as in Fig.51).
2. Dial 1 for Speaker, 0 for Headset (Your display will show the
current setting).
3. Press the button.
Headset Ring Mode
To complement the above setting you can chose whether your
headset, your phone or both devices ring on inbound calls.
1.Press the button and select option [7]
SUPPLEMENTARY followed by option [6] HEADSET RING
MODE. (Your screen should look as per Fig.52)
2. Dial 1 for Speaker, 2 for Headset, 3 for Both. (Your display
will show the current active setting.
3. Press the button.
7008D User Guide | Supplementary 53
Page 55

KEY:020D14F800060402
PCK:…………………………
Fig.47
PC-PHONE LICENSE
E:000/D:000
Fig.50
Supplementary
WTU Station Number RCVR
Do not use. Reserved for future development.
Serial Number
This is only required when advanced features need to be
activated (VoIP, CTI, IP Phones, PC Attendant)
1.Press the button and select option [7]
SUPPLEMENTARY followed by option [8] SERIAL NUMBER.
(Your screen should look as per Fig.49)
PC Phone Lock Key
This option is used to determine how many PC Phone licences
are on the system
1.Press the button and select option [7]
SUPPLEMENTARY followed by option [9] SERIAL NUMBER.
(Your screen should look as per Fig.50)
7008D User Guide | Supplementary 54
Page 56

USER PROGRAMMING CODES
PRE SET MESSAGES
GLOSSARY
INDEX
7008D User Guide | Menu Tree 55
Page 57

User Programming Codes
Codes for programming Flexible Buttons
Precede all of these codes by pressing the button.
Differential Ring: 11
Enblock Mode: 14
SMS Notice/Display: 15
Headset Port On/Off: 17
ICM Ring Tone: 18
CO Ring Tone: 19
COS Down: 21
Walking COS: 23
Authorisation Code Register: 31
Authorisation Code Change: 32
Set Wakeup Time: 41
Conference Room Activate: 43
Conference Room Deactivate: 44
Preset Message Activation: 51
Set Custom Message: 52
Record User Greeting: 61
Play Date and Time: 62
Play Station Number: 63
Listen to Station Status: 64
Record Paging Message: 65
Erase User Greeting: 66
Erase Paging Message: 67
LCD Language Change: 71
BGM (Background Music): 73
Station Name Register: 74
Headset Setup: 75
Headset/Telephone Ring Mode: 76
Account Code: 80
DDI Call Wait Activate: 81
Intercom (ICM) Hold: 83
Camp On: 85
UCD (Call Centre) DND: 87
Conference: 91
DND: 93
Flash: 94
Mute: 95
Redial: 97
7008D User Guide | User Programming Codes 56
Page 58

Preset Messages
Preset Messages
Preset messages that can be left in the display of your handset are as follows:
00 PERSONAL/CUSTOMISABLE Message.
01 LUNCH, RTN HH:MM – Use this message if you are away from your desk at lunch. The internal
calling party will see this message on their display when the call you.
02 ON VACATION/RTN DATE (MM:DD) – This message will inform internal callers that your are on
holiday and your expected return date.
03 OUT OF OFFICE/RTN TIME (HH:DD) – If you are out of the office for a period of the day internal
callers can see your expected return time.
04 OUT OF OFFICE/RTN DATE (MM:DD) – As per message 03 but you should use this if you are away
from the office for a day or more.
05 OUT OF OFFICE/RTN UNKNOWN – This message should really be used in emergencies where you
have been called away from the office unexpectedly.
06 CALL: XX…..(17 DIGITS) – If you are away from your desk/office and cannot take calls this is a way
of informing internal callers that they should ring an alternative number.
07 IN OFFICE/STA XXXX – You may have to work at another colleagues station. This informs internal
callers where to redirect their call to.
08 IN A MEETING/RTN TIME (HH:MM) – If you are not contactable in a meeting you should use this
message.
09 AT HOME – If you are to be working from home for a day leave this message on you phone before
leaving the office.
10 AT BRANCH OFFICE
11-20 – These options are available to be custom set to your organisation’s requirements.
7008D User Guide | Preset Messages 57
Page 59

Glossary
Glossary
LCD
Liquid Crystal Display
DDI
Direct Dial Inward – Allows an external callers to be routed directly to your extension,
bypassing reception
Hunt Group
Feature to allow a number of extension to be group together to answer inbound calls. Used in
call centres.
Handset
The part of the phone that you pick up to answer calls. Also commonly know as the receiver.
CTI
Computer Telephony Integration. This is the ability to move call handling and general
telephony functions onto the PC.
ISDN
Integrated Services Digital Network. Available as ISDN2e or ISDN30. Higher Speed more
flexible medium of carrying voice traffic than traditional Analogue lines.
COS
Class Of Service. Your COS determines the types of numbers you may dial such as National,
Local or International.
7008D User Guide | Glossary 58
Page 60

Glossary
IPLDK
IP enabled, LG Digital Keysystem
BGM
Background Music. You may select a number of different music sources to play through your
handset.
MPB
Main Processor Board. The ‘brains’ of the phone system. MPB contains all system software
and controls all system functions.
CO
Central Office. American term now widely adopted in the telecommunications industry to
describe the local telephone exchange.
VMIB
Voice Mail Interface Board. Integral Voice Messaging application for the IPLDK telephone
system.
Flexible Button
This is a button that can be assigned as a Line, Feature, Speed Dial or Extension button.
7008D User Guide | Glossary 59
Page 61

Index
A
A……………………………..…27
Announcement……………..…46
Answer Mode…………….......31
Answering Calls………...……6,7
Answering Message Wait.......23
Authorisation Code…………..39
B
B…………………………..……27
BGM……………………....52, 58
Busy Station…………………..22
C
C………………………………..27
Call Forward……………...10, 11
Call Wait (Camp On)…………13
Character Entry…………….…27
CO……………………………...59
CO Ring……………………….34
Conference Call………………19
Conference Room……………43
COS…………………..36, 37, 58
Custom Message…………….45
D
D…………………………….……27
DDI…...…………………..…12, 58
Dial Pad………...…………….......3
E
E………….………………………27
Ear-Mic Headset…...….........…33
Enblock Mode…..……………....32
F
F……………………………….…27
Flexible Button......3, 4, 28, 56, 59
G
G……………………………….…27
H
H……………………………….…27
Handset................................3, 58
Headset……………………..33, 53
Hold………………………….3, 4, 8
Hunt Group……………………...58
I
I….…………………………….…27
ICM Ring………………………...33
IPLDK……………………………59
J
J……………………….……27
K
K…....………………………27
L
L………………………….…27
LCD...………………….51, 58
M
M…..…………………….…27
Making Calls…………..…6, 7
Menu Tree…………………29
Message Wait………….....22
Microphone…………………3
Mobile Extension………….40
MPB…………………...51, 59
N
N...……………………….…27
O
O…...…………………….…27
7008D User Guide | Index 60
Page 62

Index
P
P……………………………..…27
Page……………………………18
Page Message………......48, 49
Park……………………………...9
PC Phone……………………..54
Pickup………………………….14
Preset Message……….....45, 57
Programme Codes………......56
Q
Q…………………………..……27
Queuing……………………….17
R
R………………………………..27
Redial……………………..20, 21
Ring…………….………………30
S
S………………………………..27
Serial Number………………...54
SMS (Short Messaging)……..32
Speaker……..…………..3, 4, 53
Speed…....………….3, 4, 16, 26
Station Name……………..25, 52
S
Station Number…………………48
Station Status…………………..48
T
T………….………………………27
Transfer…..……………….3, 4, 15
Time/Date……………………….47
U
U……………………………….…27
Unanswered Station……………22
User Programming………...24, 55
User Greeting……...……….47, 49
V
V……………………………….…27
VMIB……………………………..59
Volume.………………………..3, 4
W
W...…………………………….…27
Wakeup Time…………………...42
Walking COS…………………...37
7008D User Guide | Index 61
 Loading...