

Page 1
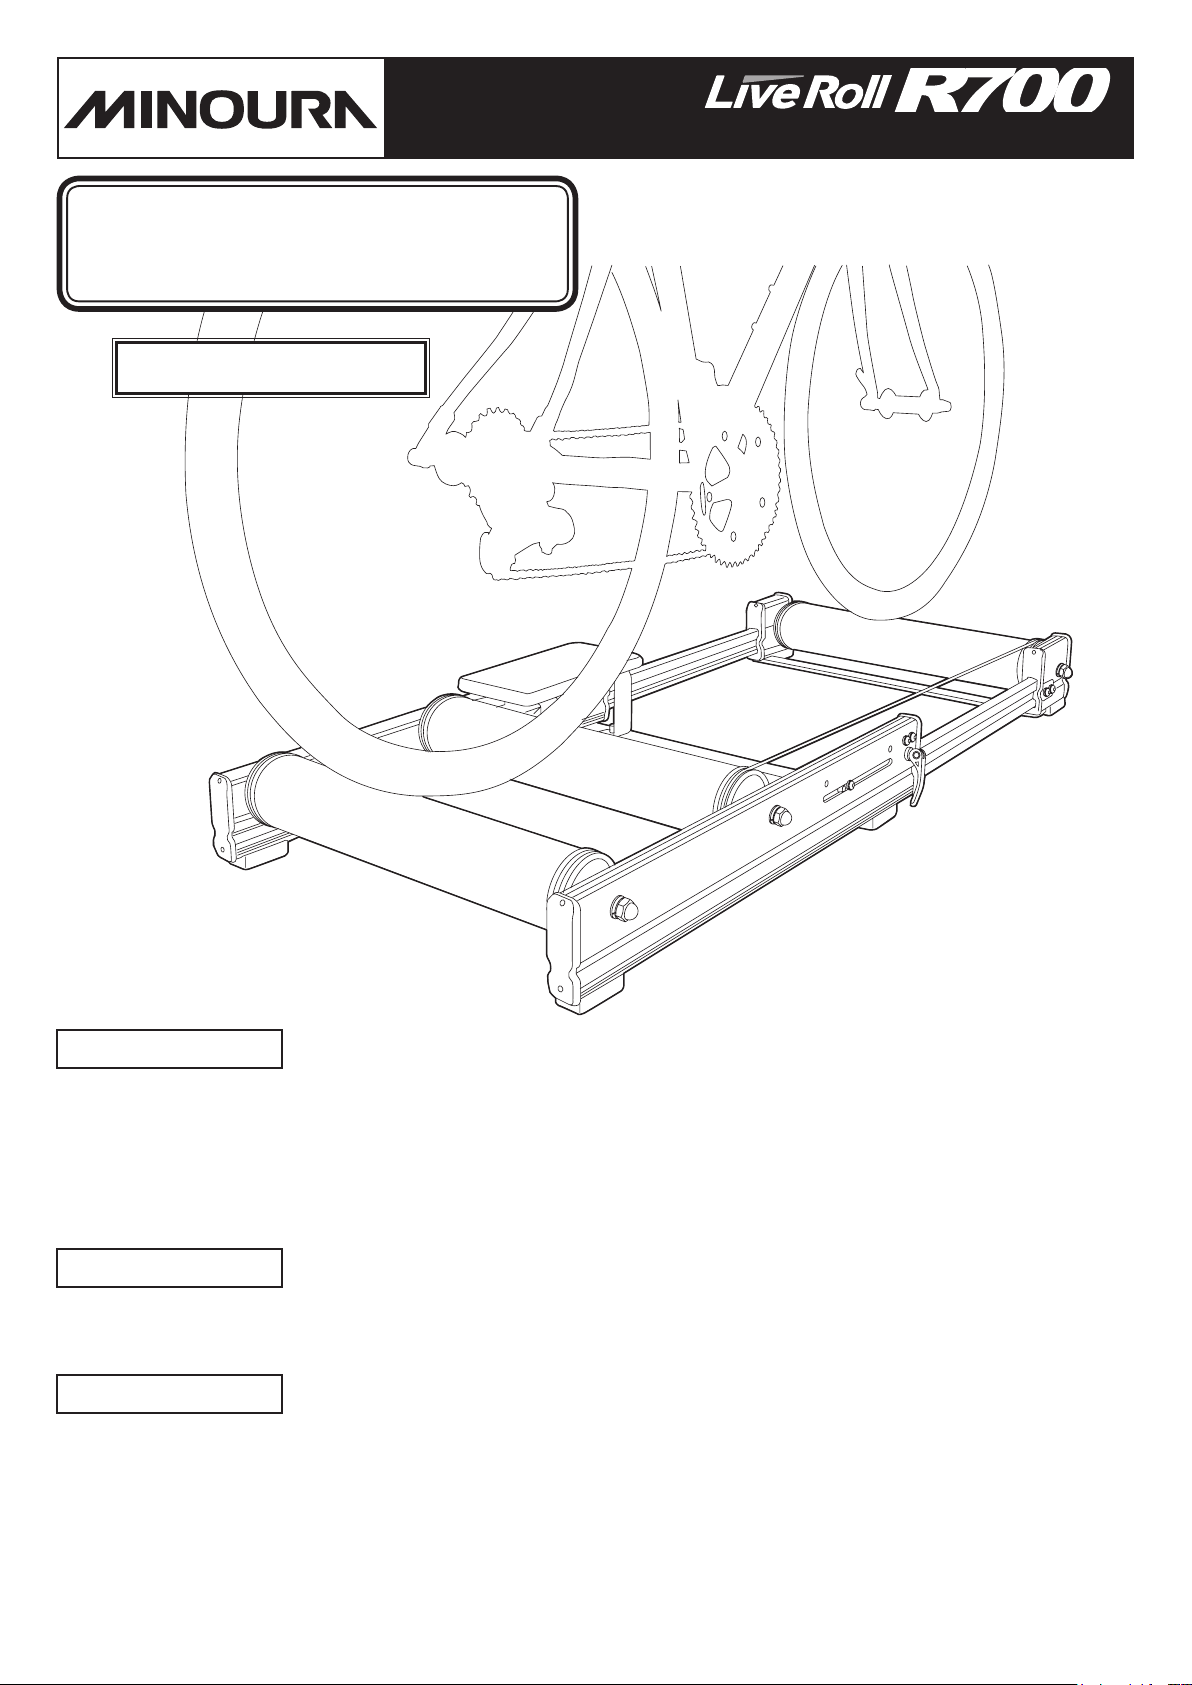
Triple Roller Trainer
[Applicable Wheelbase Size]
950mm – 1,080mm
Warranty Period : 1 year
instructions manual
(ver.1.1 2014/3)
Features
• Completely newly designed alloy frame. Sliding frame system is good for adjusting various wheelbase sizes easily.
• Frames breaks down into a compact package for easy storage and utilizes quick releases to bring the unit back to
desired length.
• Specially designed roller layout provides a natural riding experience in a comfortable, level position.
• High quality wooden foot step is available as an option.
Caution
Contact
[for U.S. customers] [for ALL customers]
MINOURA NORTH AMERICA MINOURA JAPAN
Hayward, California, U.S.A. 1197-1 Godo, Anpachi, Gifu 503-2305 Japan
Phone 1-510-538-8599 / Fax 1-510-538-5899 Phone +81-584-27-3131 / Fax +81-584-27-7505
support@minourausa.com minoura@minoura.jp
www.minoura.jp
Triple roller trainers require the rider to maintain their balance without the help of any
accessory or device.
Make sure you can balance yourself on rollers before attempting to ride.
If you have any question or request, please read the supplied "Minoura Limited Warranty Policy" card
and contact the shop where you originally purhased this product or the distributor in your country first.
The distributor list can be found in our web site.
Made in Japan
Page 2

Important Notes
• For a standard 2-wheel bike with the wheelbase size between 950mm and 1,080mm only.
Any other bikes such as tandems, recumbent, folding bike or the bike with out of the applicable wheelbase
range cannot be used on R700.
• Triple roller trainers require the rider to be balanced at all times. If you are new to rollers it is strongly
recommended that you set the R700 next to a wall or handrail so you can use either to regain your balance
should the need arise.
Falling off can cause injury. Keep the ground around the R700 free from clutter.
• R700 is not height adjustable to compensate for uneven or slanted oors. The rollers should be on a at
surface with the rollers making contact completely with the oor. Riding on a slanted oor may cause
imbalance issues and could result in damage or injury.
• Requies some assembling. Use correct tools (10mm & 17mm spanner, M4 hex wrench). Any tools other than
M4 hex wrench are not included in the kit.
• Be careful not to pinch your ngers in the frame while adjusting the roller belt.
• Make sure both side frame stoppers are set in the exact same position. Failure to do so means the rollers will
be uneven causing undo wear, noise, and decreased bike stability.
Please read carefully before use
• Keep both hands on your handlebars at all times while on R700.
Do not brake while on the rollers. Doing so may cause a serious accident. Simply stop pedaling and wait for
the bike to stop.
• Hi RPM's are generated on rollers. Keep children and pets away from your wheels. Use R700 on a bare or
tile oor if possible.
• Indoor training traps more heat than when you train outdoors. Be sure you are healthy enough to attempt
exercise indoors and on a roller. Consult a professional before attempting any workout regime.
• Any rubber roller parts and your sweat can cause stains. It is recommended to use a mat between the rollers
and your oor.
• If you feel any strange noise or smell while using R700, stop exercise immedialtely and ask to the shop you
purchased R700. Do not try to disassemble or modify the product without prior approval by Minoura.
• Minoura shall offer 1-year limited warranty to this product from the date of purchase for the owner who
originally pruchased it in brand-new condition at Minoura authorized dealer. Any other problems than the
things caused by manufacturer's defect such as natural wear will not be covered by this program. For more
detail, please refer the attached "Minoura Limited Warranty Policy" card and Minoura web site.
• Note: Accessories designed for other Minoura rollers are not compatible with R700. This includes other foot
steps, front wheel guards, mag units, or carrying bags.
- 2 -
Page 3
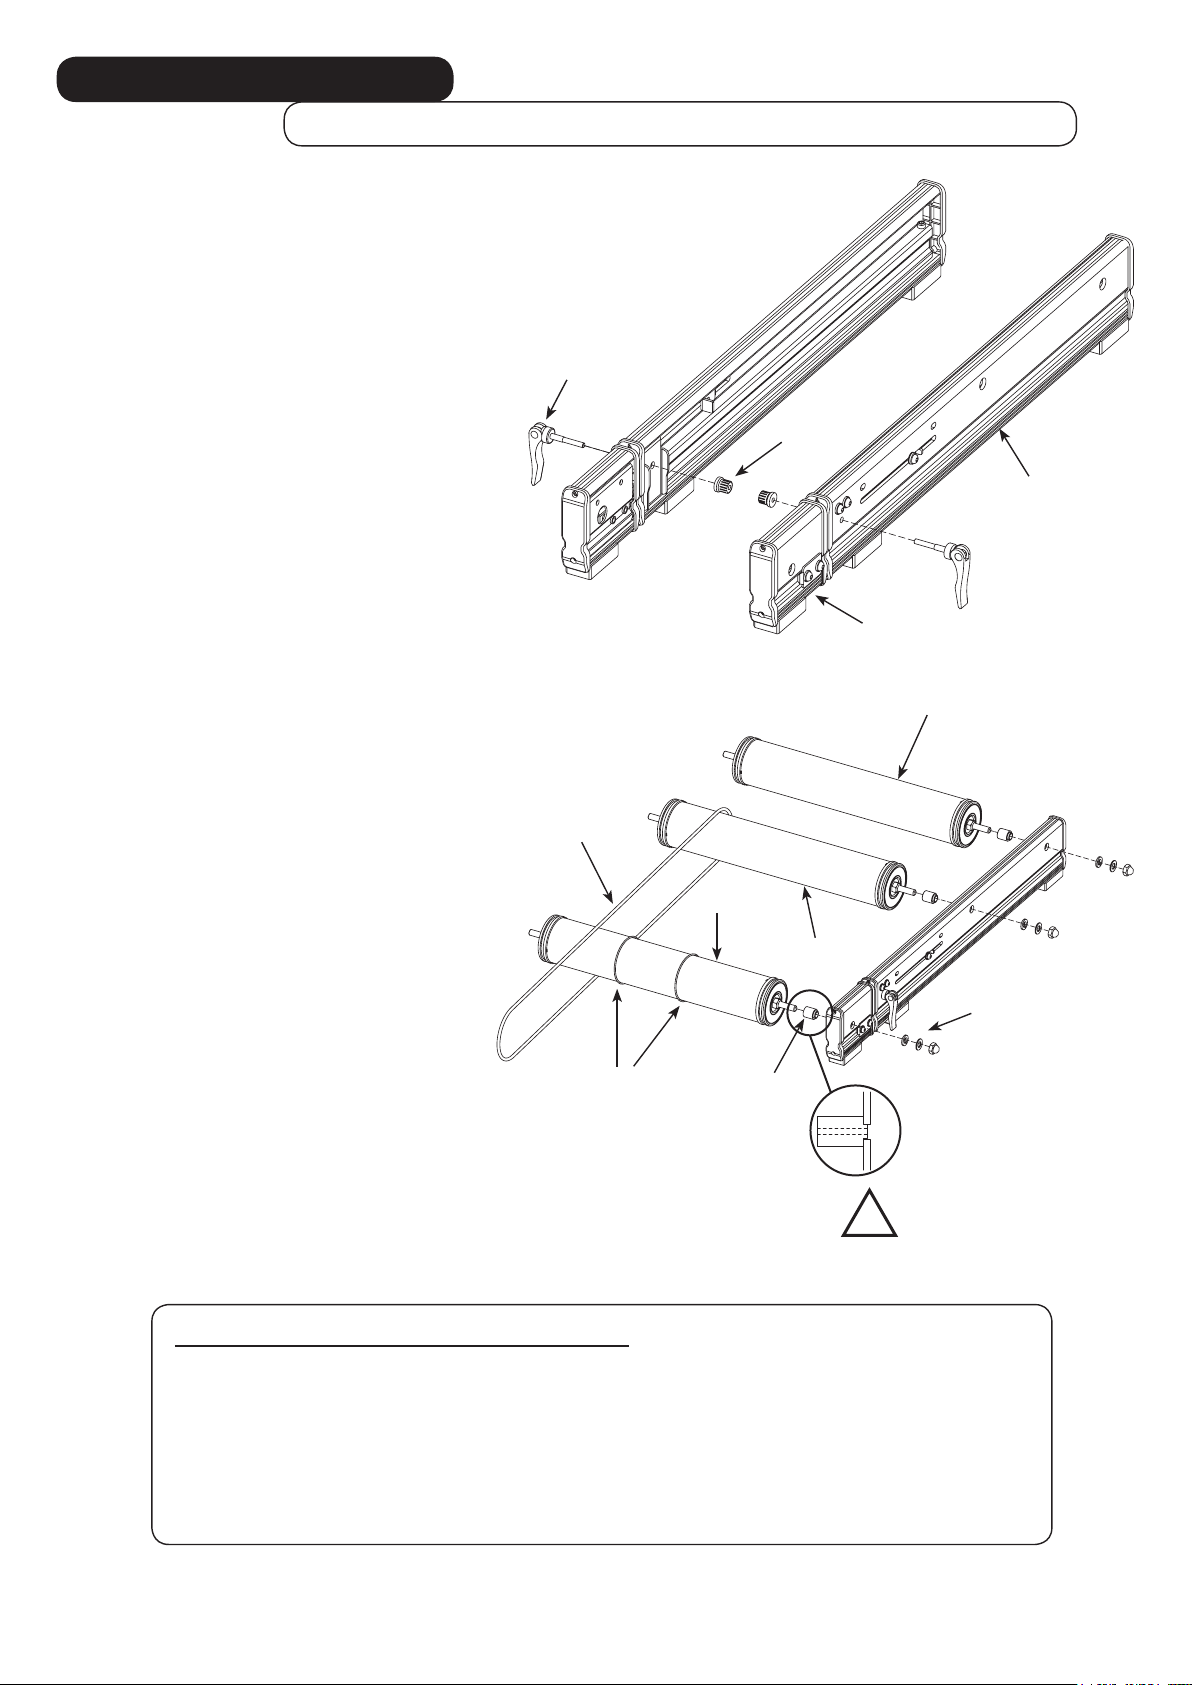
How To Setup R700
Required Tools: 17mm Spanner
Take out the pre-assembled frames from the box.
1.
Please note the longer one is the rear frame and shorter one is the
front frame. Flat side is outside and the horrow side is inside.
Install the Quick Lever and nut to the
long hole on the Rear Frame. This quick
release holds the Front Frame to adjust
the length. Quick Lever must be located
on outside.
Shorten the frame to minimum size and
tighten the quick temporally.
The tightening the quick level should
not be so tight, it's OK the Front Frame
won't come out even if you have the
frame vertically.
Install the roller drums to the left side
2.
frame first.
The roller drums are exactly same and
symmetric. No desired direction nor
position.
Quick Lever
[ Right Side Frame ]
Roller Belt
(not included)
Nut for
Quick
Release
[ Left Side Frame ]
, M4 Hex Wrench
Rear Frame
Front Frame
Rear Roller
Put the Alloy Sleeve through the roller
axle. Make sure the narrower diameter
end of the alloy sleeve must be facing
to the frame.
Insert the narrower end to the hole on
the frame correctly. Put the flat washer,
spring washer and dome nut to the
Silicon Ring
axle.
You don't need to tighten the nut firmly
yet.
Install the Roller Belt to both center and front rollers.
What's The Purpose Of The Silicon Rings?
R700 comes with two white silicon rings.
This will work as an position adjutable indicator on the front roller that coaches you to ride as
smooth and straight as possible.
If you wish to use, install the rings to the front roller at this step. You won't be able to install it later
without disassembling R700.
If you don't wish using the rings, leave them or use tape as another at indicator. It's your choice.
Front Roller
Alloy
Sleeve
Center Roller
(from bottom)
Flat Washer
Spring Washer
Dome Nut
Make sure the narrower
end must t to the hole
!
correctly.
- 3 -
Page 4

Next, install the rollers to the right side
3.
frame with the same method of Step-2.
Make sure the Alloy Sleeve direction is
correct.
Make sure all Alloy Sleeves
!
are correctly inserted to
the holes on the frame.
If not, the Alloy Sleeve or
frame will be broken when
tightening the nut strongly
in Step-5.
Stand the assembled R700 on flat and
4.
level floor.
You will remove both hands so select
the ideal area to stand R700 safely.
Face the bottom side (with rubber
foot) toward you.
Roller Belt must go to the back side.
Alloy Bar
Install the Alloy Bar between the
frame with M6 bolt and spring
washer.
Both bars are exactly same. Each one
connects the frame as a reinforcement
bridge.
To make this job easy, you had set both
!
frames at same length in Step-1.
Do NOT put the Alloy Bar through the
!
roller belt.
The bar will impede the belt line and will
cause damage.
Lay down R700 on the floor, and tighten
5.
all dome nuts firmly.
(from bottom)
Spring Washer
M6 Bolt
Do not try to tighten the nut at
your maximum power. It will cause
!
serious damage on the frame, axle
thread and alloy sleeves.
The desired tightening torque is
20 N.m.
It's much lighter than you expect.
- 4 -
Page 5

How To Install Foot-Step
(option)
Required Tools: 10mm Spanner
A convenient wooden Foot-Step is available as an option.
Your position on the R700 may be higher than you expected
and reaching the floor may be difficult. If this happens you
may not be able to come off the rollers safely.
Be aware of this fact at all times you ride on rollers.
Foot-Step provides a safe area for you to touch down on
when on R700.
(not included)
Foot-Step
Nut
, M4 Hex Wrench
This guide show installing the step
on inside of the left side frame.
(from bottom)
Spring Washer
M6 Bolt
Installing Foot-Step on the inside is recommended to minimize any possible damage during storage or
transportation. However Foot-Step may be set up inside or outside depending on your need.
[ To Install On Inside Of The Frame ]
Put the step over the frame in the direction that the step legs are facing inward. Attach the shorter legs onto the
frame from outside. Put the bolt and tighten the nut from inside.
[ To Install On Outside Of The Frame ]
Attach the step to the outside of the frame in the direction that the step legs are facing outward. Attach the shorter
legs onto the frame and put the bolt then tighten the nut from inside.
Be sure that you must set the Roller Belt on the opposite side of the step
!
because the step disturbs the belt line.
Dropping, bumping into things, or otherwise abusing the frame will cause damage.
!
Be careful during transport.
- 5 -
Page 6

Set The Front Roller Position
Required Tool : M4 Hex Wrench
On triple roller trainer, the rear wheel
1.
position has been fixed by the position of
both center and rear rollers. So you will
change the front roller position to adjust
to various wheelbase sizes.
R700 has a bracket in the long hole on
each rear frame. It works to set the Front
Frame at the ideal position easily.
By fixing the bracket position, you simply
pull out the Front Frame until it hits the
bracket. That's all.
This also allows to repeat the same
position automatically.
The tip of the bracket in the long hole works as the wheelbase size indicator.
2.
Loosen the bolt (do not remove), slide it to the position where the tip inidicates the desired wheelbase size,
then tighten the bolt to fix.
Wheelbase Setting Gauge (min. 950mm / max. 1,080mm)
Left Side Frame
Right Side Frame
For example, if you use a bike with 980mm wheelbase size, just set the indicator at "980" position. This will
set the front roller 10mm ahead from the front wheel axle. This should be the ideal position for most riders.
By setting both side indicators, you simply pull out the Front Frame until it reaches the stopper to setup R700
perfectly.
If you have set the indicators at different positions, the front roller will be angled and
!
!
make riding straight difcult.
The available wheelbase size of R700 is between 950mm and 1,080mm.
If your bike is shorter than 950mm, the Front Roller will be located too far that should
disturb the handling performance.
If your bike is longer than 1,080mm, you may fall off forward.
Tips About Front Roller Position
The front roller position is important as it is a major factor in bike stability and overall performance.
R700's front roller is 10mm further than the front wheel axle by design for safety and stability.
The shorter the distance, bike handling becomes quicker. This setting is for more advanced riders.
Minimum position is zero and this replicates your wheelbase exactly. If this distance is 20mm or
more, handling may be sluggish and feel heavy.
Adjust the front roller position to precisely match your skill and handling abilities.
- 6 -
Page 7

1.
Preparing R700 For Use
At first, adjust the quick release properly that you
can tightely fix the Front Frame by just bending
the lever.
This step shoud be done while the frame is
retracted.
Adjust the backside nut precisely that you will feel
resistance on your palm when the lever comes in
horizontal.
Do it on both sides.
Do not use the lever to tighten.
!
Use the nut ONLY.
Adjust the quick
release properly
as the 1st step
2.
Make sure the belt is not on the frame (resting
on rollers) so it does not get caught when you are
extending the frame.
Pull out the Front Frame until it reaches the stopper,
and tighten the quick lever firmly.
The lever should be directed to the floor.
Hook the roller belt to the groove on rollers. Rotating
the roller can finish this work easily.
Be careful not to pinch your finger.
Confirm the roller belt is hooked properly between
the center and front rollers.
It's not recommended to
!
hook the roller belt to the
rollers BEFORE extending
the front frame.
To do so, you need to hold
R700 by pressing the rear
roller with your foot. Keep a
steady pressure with your
toe so R700 doesn't snap
back from belt tension and
possibly cause injury.
Tighten
rmly
Extend
Tighten
rmly
Tighten the quick levers
!
rmly.
If you ride on R700 roughly,
the quick release may come
loose and the front frame will
be retracted, then you may
fall off forward.
- 7 -
Page 8

Other Languages / Andere Sprachen / Autres Langues / Otros Idiomas
If you need the instructions manual written in different language(s) such as
GB
German, French or Spanish, check out the following web page.
Wenn Sie deutsches Versionsanweisungen-Handbuch brauchen, überprüfen Sie die
G
folgende Webseite bitte.
Pour télécharger les instructions en français, veuillez vous rendre sur la page Web
F
dont l'adresse figure ci-bas.
Si necesita el manual de instrucciones de versión español, compruebe la página web
ES
siguiente.
http://www.minourausa.com/_userdata/r700.pdf
- 8 -
 Loading...