

Page 1
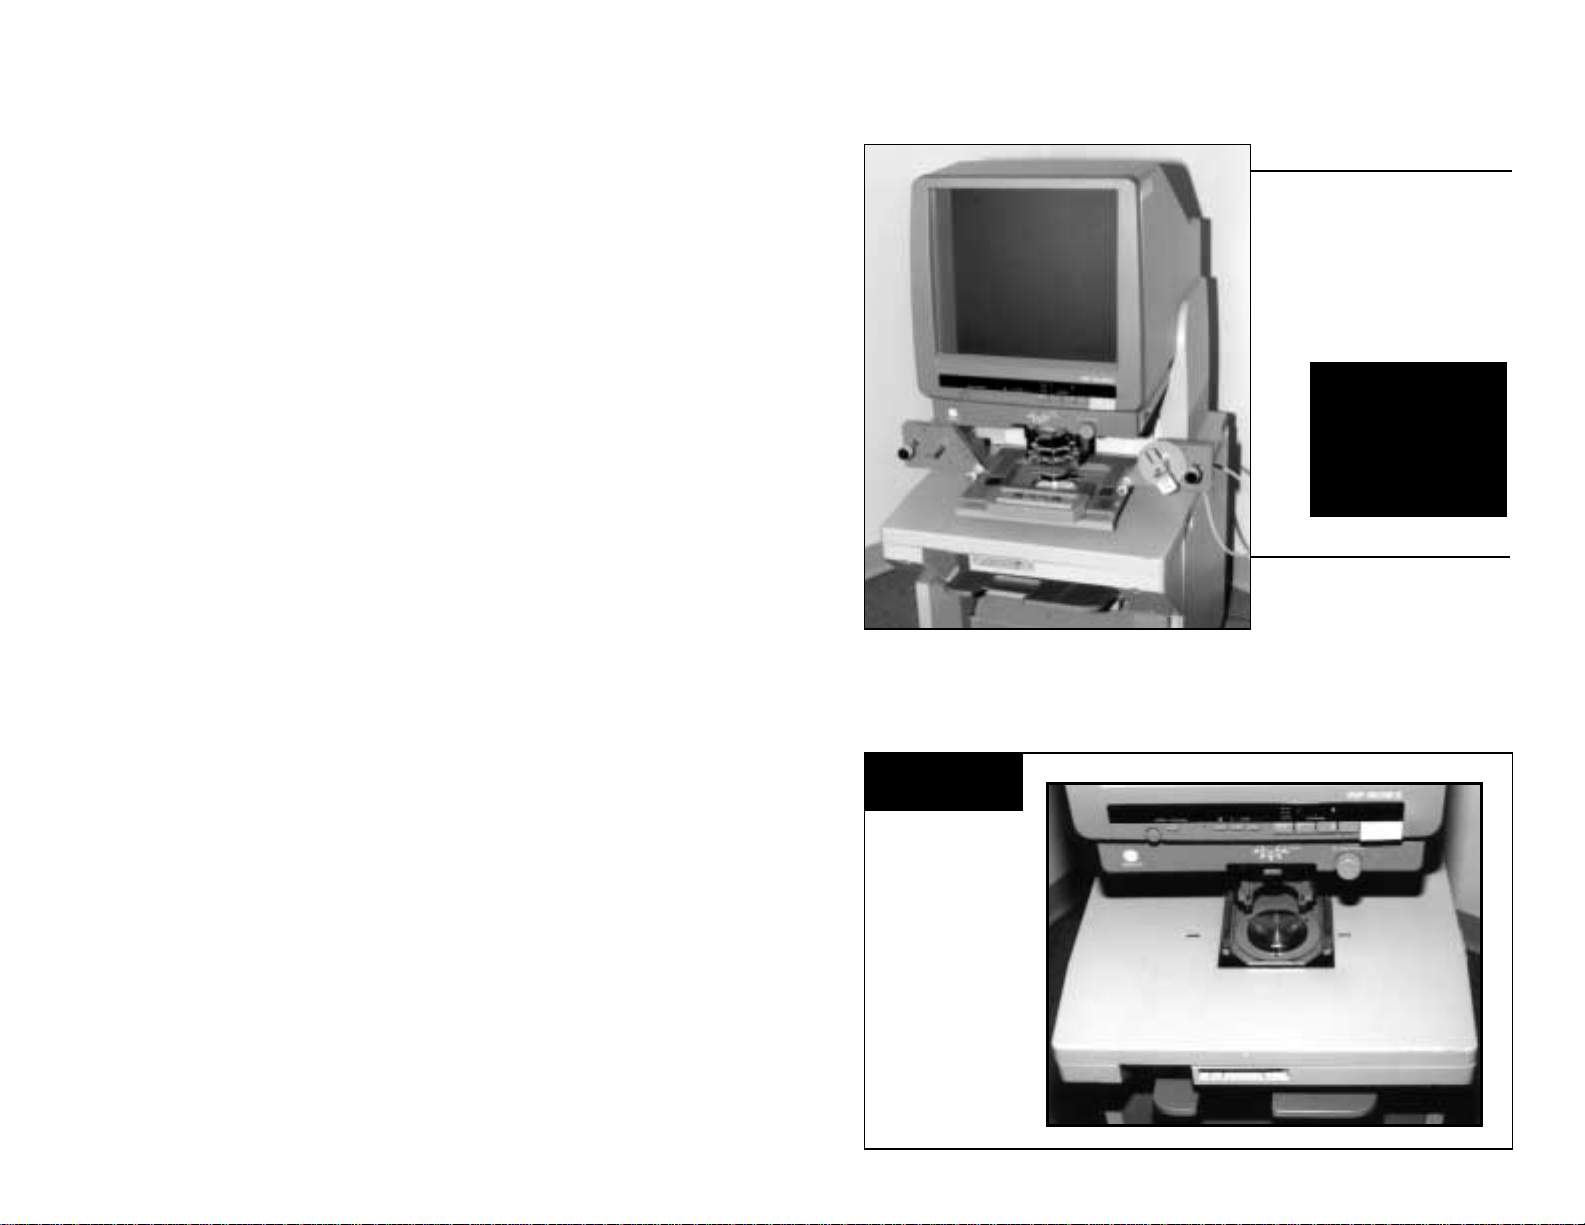
MINOLTA READER/PRINTERS
MOUNTING
INSTRUCTIONS
& USER’S MANUAL
For UC-6
Universal
Carrier
First, remove
the zoom
lens from
the unit.
Step 1
Page 2
Rotate the
carrier base
mount 90
degrees as
shown in
photo at right.
Step 2
R
otate 90°
Position the
UC-6 Carrier as
shown. Pull out
the lower base
plate of the UC-6
Carrier and pull
handle to open
glass flat.
Step 3
P
u
l
l
O
u
t
L
o
w
e
r
B
a
s
e
P
l
a
t
e
Next, guide the
UC-6 Carrier
onto the base
mount of the
reader/printer
by sliding the
lower plate onto
the carrier base
mount.
Step 4
S
l
i
d
e
L
o
w
e
r
P
l
a
t
e
P
u
l
l
H
a
n
d
l
e
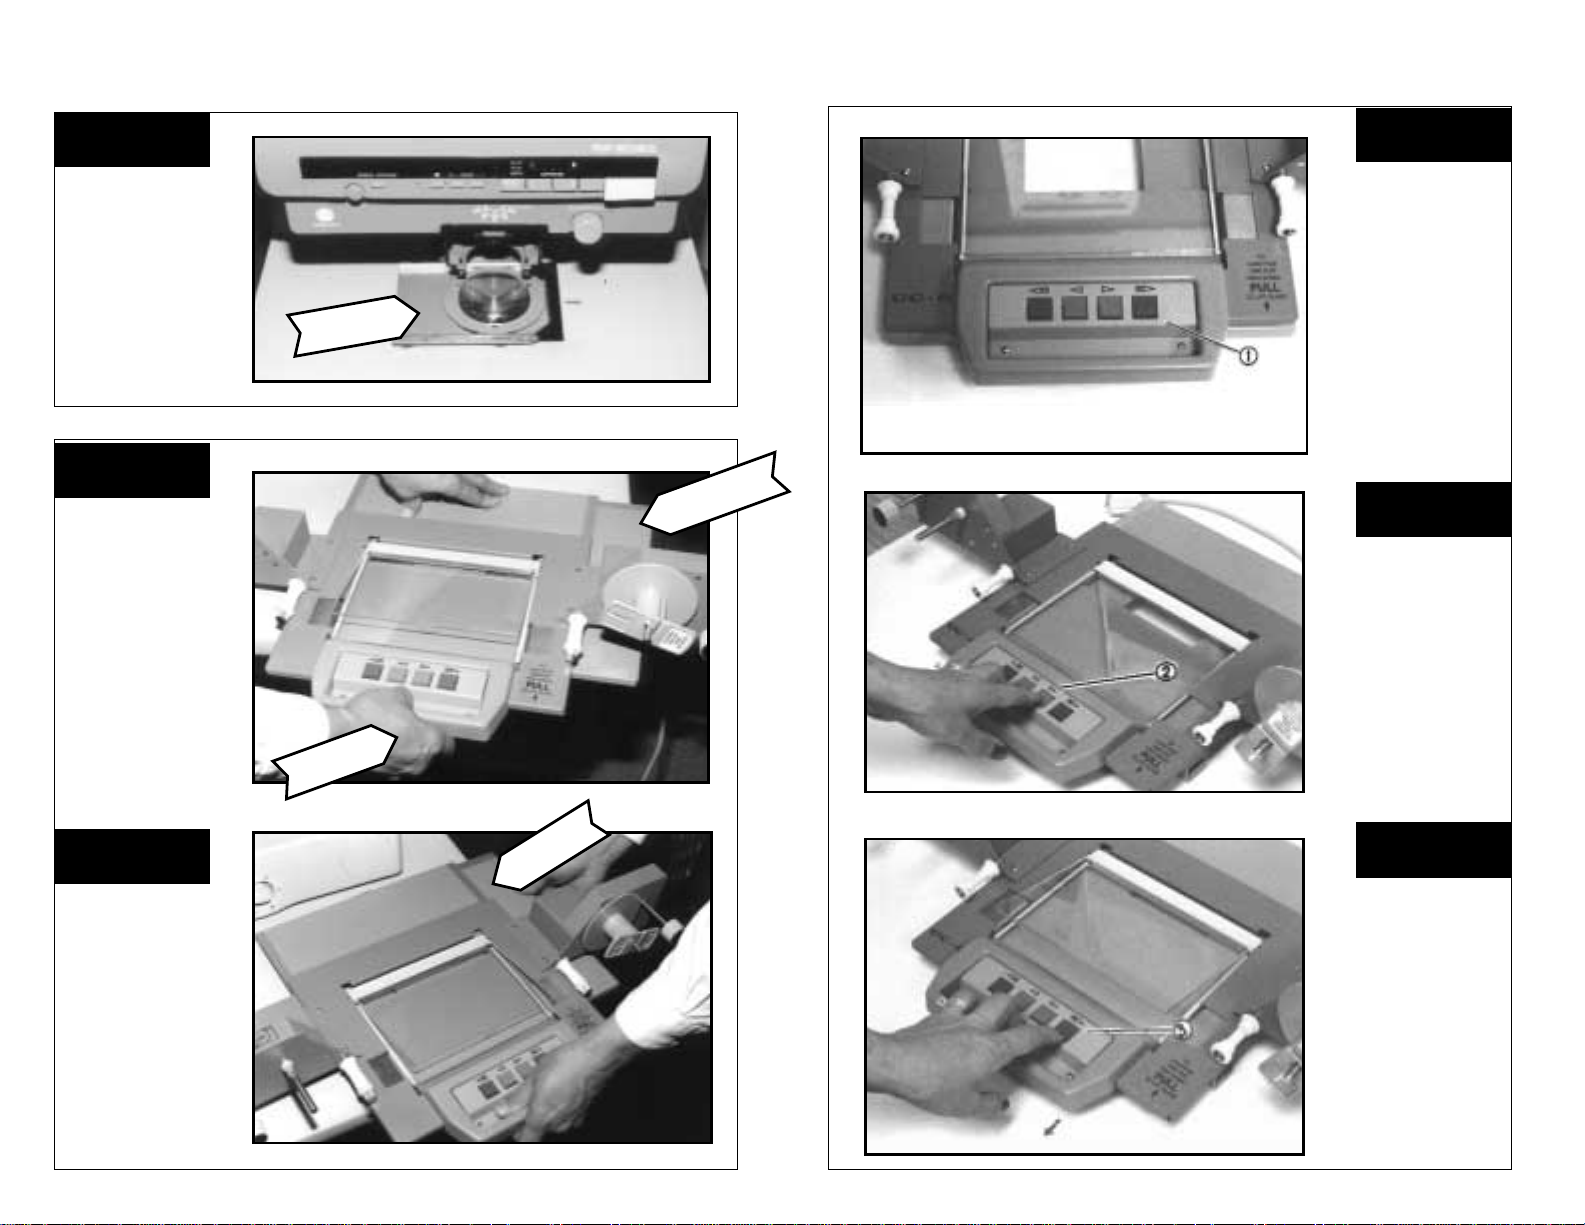
MOUNTING INSTRUCTIONS USER’S MANUAL – Speed Control Functions
① Speed
Control Pad
3 SPEEDS:
Slow/Medium/High
GREY BUTTONS
Slow Speed
RED BUTTONS
Medium Speed &
*High Speed
Step 1
②
Press down
on GREY
BUTTON to
SLOWLY
advance or
rewind film.
Step 2
Press down RED
BUTTON for
MEDIUM Speed.
To increase speed,
hold down button
and pull handle
out to open glass
flats to engage
HIGH Speed.
Step 3
*Hold down RED B UT TON and pull handle out
to open glass flats to engage High Speed.
Page 3

Step 5
After lower
plate of UC-6
Carrier is in
position on
the base
mount, push
the lower
plate until
it stops.
Step 6
Once the
UC-6 Carrier is
securely
attached to
the base
mount, install
zoom lens
and plug
carrier into
unit.
USER’S MANUAL – Film Loading MOUNTING INSTRUCTIONS
Thread film under the white guide rollers, between
the glass flats to the quick take up reel.
The Carrier has two manual knobs which are
used to manually advance or rewind the film.
Step 5
Step 6
Page 4

USER’S MANUAL – Film Guide Settings USER’S MANUAL – Film Loading
TO THREAD FILM:
Pull handle to open top glass.
LOAD FILM ON LEFT SPINDLE:
Feed film from over the top of reel.
Adjustable Film
Guides
PULL OUT for
35mm Setting
35mm setting
shown
Step 1
Adjustable Film
Guides
PUSH IN for
16mm Setting
16mm setting
shown
Step 2
16MM SETTING
35MM SETTING
Step 3
Step 4
 Loading...