

Operating and installation
instructions
Washing machine
To avoid the risk of accidents or damage to the machine, it is essen-
tial to read these instructions before it is installed and used for the
first time.
en-GB M.-Nr. 11 713 010

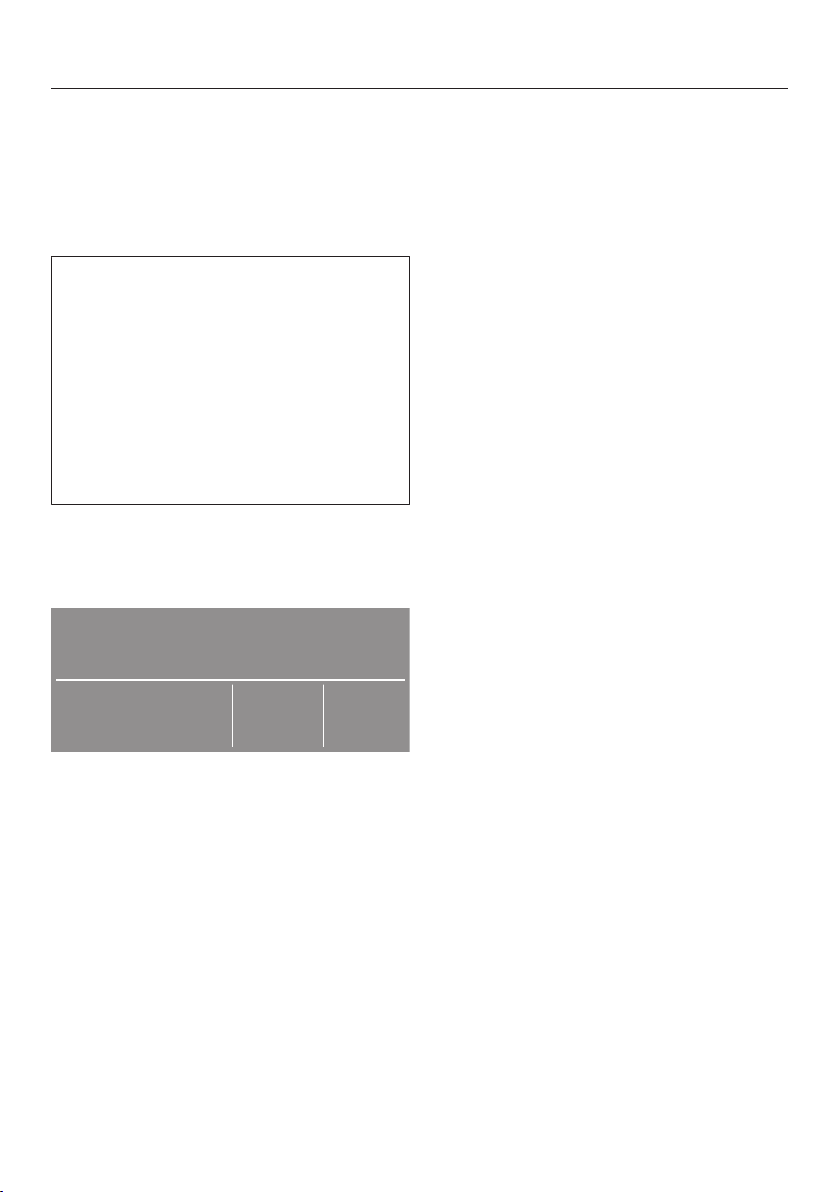
Contents
Caring for the environment .............................................................................. 6
Warning and safety instructions ...................................................................... 7
Operating the washing machine ...................................................................... 15
Control panel....................................................................................................... 15
Symbols on the control panel ............................................................................. 16
Symbols in the display ........................................................................................ 17
Sensor controls and touch display with sensor controls .................................... 18
Standard menu.................................................................................................... 18
Examples of how to operate the appliance......................................................... 19
Before using for the first time .......................................................................... 20
Washing environmentally and economically .................................................. 24
Detergent............................................................................................................. 24
1. Preparing the laundry.................................................................................... 25
2. Loading the washing machine ..................................................................... 26
3. Selecting a programme and settings .......................................................... 27
4. Adding detergent........................................................................................... 29
5. Starting the programme – end of the programme ..................................... 31
Delay start .......................................................................................................... 32
Programme chart .............................................................................................. 33
Special features in the programme sequence................................................ 35
Spinning .............................................................................................................. 35
Anti-crease .......................................................................................................... 35
Changing the programme sequence............................................................... 36
Changing a programme....................................................................................... 36
Cancelling a programme ..................................................................................... 36
Switching on the washing machine after an interruption to the power supply ... 36
Adding or removing laundry ................................................................................ 37
Detergent ........................................................................................................... 38
The correct detergent.......................................................................................... 38
Recommended detergents in accordance with Directive (EU) No.
1015/2010 ...................................................................................................... 38
2

Contents
Cleaning and care ............................................................................................. 39
Cleaning the casing and fascia panel ................................................................. 39
Cleaning the detergent drawer............................................................................ 39
Cleaning the drum, suds container and drainage system................................... 41
Cleaning the water inlet filters ............................................................................. 41
Problem solving guide ...................................................................................... 42
The wash programme does not start .................................................................. 42
Programme cancellation and error message....................................................... 43
A fault message appears in the display .............................................................. 44
An unsatisfactory wash result ............................................................................. 45
General problems................................................................................................ 46
The door will not open......................................................................................... 48
Opening the door in the event of a blocked drain outlet and/or power cut ........ 49
Miele Service ..................................................................................................... 51
Contact in case of malfunction ........................................................................... 51
EPREL database ................................................................................................. 51
Optional accessories........................................................................................... 51
Installation.......................................................................................................... 52
Front view............................................................................................................ 52
Rear view............................................................................................................. 53
Installation locations............................................................................................ 54
Installation notes ................................................................................................. 54
Transporting the washing machine to its installation site.................................... 55
Installation surface .............................................................................................. 56
Removal of transit bars ....................................................................................... 56
Fitting the transit bars ......................................................................................... 58
Levelling the washing machine ........................................................................... 59
Holding bracket for plinth .............................................................................. 60
External control equipment ................................................................................. 62
Payment system............................................................................................. 62
Water connection ................................................................................................ 63
Cold water connection .................................................................................. 63
Drainage .............................................................................................................. 64
Drain pump..................................................................................................... 64
Electrical connection ........................................................................................... 65
Technical data.................................................................................................... 67
Conformity declaration........................................................................................ 68
3

Contents
Consumption data............................................................................................. 69
Supervisor level ................................................................................................. 70
Code-based access ............................................................................................ 70
Changing the code.............................................................................................. 70
Opening the Supervisor level .............................................................................. 70
Exiting the Supervisor level ................................................................................. 70
Language............................................................................................................. 71
Brightness ........................................................................................................... 71
Clock display....................................................................................................... 71
Finish tone volume .............................................................................................. 71
Keypad tone volume ........................................................................................... 71
Welcome tone volume......................................................................................... 71
Fault alarm........................................................................................................... 71
Memory ............................................................................................................... 71
Anti-crease .......................................................................................................... 72
Suds cooling........................................................................................................ 72
"Display" switch-off status.................................................................................. 72
Delay start ........................................................................................................... 73
Programme name................................................................................................ 73
Visibility parameters ............................................................................................ 73
Pre-wash water ................................................................................................... 74
Main wash water ................................................................................................. 74
First rinse water................................................................................................... 74
Final rinse water .................................................................................................. 74
Low water pressure............................................................................................. 75
Water level Cottons............................................................................................. 75
Water level Minimum iron.................................................................................... 75
Cottons Pre-wash temp ...................................................................................... 75
Wash time Pre-wash ........................................................................................... 75
Wash time Cottons.............................................................................................. 76
Wash time Minimum iron..................................................................................... 76
Pre-rinse Cottons ................................................................................................ 76
Pre-rinse Minimum iron ....................................................................................... 76
Pre-wash Cottons/Min. iron ................................................................................ 76
Cottons rinses ..................................................................................................... 76
Min. iron rinses .................................................................................................... 76
Temp reduction.................................................................................................... 77
Auto load control................................................................................................. 77
COM module selection........................................................................................ 77
WiFi/LAN ............................................................................................................. 77
Network time ....................................................................................................... 78
4

Contents
Remote................................................................................................................ 78
RemoteUpdate .................................................................................................... 79
SmartGrid ............................................................................................................ 79
Alternating current............................................................................................... 79
Heating ................................................................................................................ 79
Legal information................................................................................................. 80
Copyrights and licences for operator and control software ........................... 80
Payment system.................................................................................................. 80
Settings for payment systems........................................................................ 80
Feedback signal to pay system...................................................................... 81
Payment system lock ..................................................................................... 81
FOC programmes........................................................................................... 82
Delete paid signal........................................................................................... 82
Debounce time ............................................................................................... 82
5
Caring for the environment
Disposal of the packing material
The packaging is designed to protect
the appliance from damage during
transportation. The packaging materials
used are selected from materials which
are environmentally friendly for disposal
and should be recycled.
Recycling the packaging reduces the
use of raw materials in the manufacturing process and also reduces the
amount of waste in landfill sites.
Disposing of your old appliance
Electrical and electronic appliances often contain valuable materials. They
also contain specific materials, compounds and components, which were
essential for their correct function and
safety. These could be hazardous to human health and to the environment if
disposed of with your domestic waste
or if handled incorrectly. Please do not,
therefore, dispose of your old appliance
with your household waste.
Please dispose of it at your local community waste collection / recycling
centre for electrical and electronic appliances, or contact your dealer or
Miele for advice. You are also responsible for deleting any personal data that
may be stored on the appliance being
disposed of. Please ensure that your
old appliance poses no risk to children
while being stored prior to disposal.
6

Warning and safety instructions
This washing machine complies with all current local and national
safety requirements. However, inappropriate use can lead to personal injury and damage to property.
Read the operating instructions carefully before using the washing
machine. They contain important information on safety, installation, use and maintenance. This prevents both personal injury and
damage to the washing machine.
In accordance with standard IEC60335-1, Miele expressly and
strongly advises that you read and follow the instructions in the
chapter on installing the washing machine as well as the safety instructions and warnings.
Miele cannot be held liable for damage caused by non-compliance
with these instructions.
Keep these operating instructions in a safe place and pass them
on to any future owner.
When instructing other people how to use the washing machine,
they must be made aware of these safety and warning instructions.
Appropriate use
The washing machine is only suitable for washing fabrics with a
care label stating that they are suitable for machine washing. Any
other applications may be dangerous. The manufacturer cannot be
held liable for damage resulting from incorrect or improper use or
operation of the machine.
This washing machine must be used as described in the operating
instructions and must be checked on a regular basis to make sure it
is functioning correctly. Maintenance must be carried out when necessary.
The washing machine is not suitable for outdoor use.
This washing machine may also be operated in public areas.
7

Warning and safety instructions
This washing machine can only be used by people with reduced
physical, sensory or mental capabilities, or lack of experience or
knowledge, if they are supervised whilst using it or have been shown
how to use it in a safe way and understand and recognise the consequences of incorrect operation.
Children under the age of 8 must not be allowed near the washing
machine unless they are constantly supervised.
Children over the age of 8 may only use the washing machine
without supervision if its operation has been clearly explained to
them and they are able to use it safely. Children must be able to understand and recognise the possible dangers caused by incorrect
operation.
Children may not carry out cleaning or maintenance on the wash-
ing machine unsupervised.
Always supervise any children in the vicinity of the washing ma-
chine. Never allow children to play with the washing machine.
8

Warning and safety instructions
Technical safety
Before setting up the washing machine, check it for any externally
visible damage. Do not set up or use a damaged washing machine.
The electrical safety of the washing machine can only be guaran-
teed when correctly earthed.
It is most important that this basic safety requirement is tested and
in case of any doubt the on-site wiring system should be inspected
by a qualified electrician.
Miele cannot be held liable for the consequences of an inadequate
earthing system.
Unauthorised repairs could result in unforeseen dangers for the
user, for which the manufacturer cannot accept liability. Repairs
should only be undertaken by a Miele approved service technician,
otherwise any subsequent damage will not be covered by the warranty.
Do not make any alterations to the machine, unless authorised to
do so by Miele.
The machine must be isolated from the electricity supply when
cleaning and maintaining the machine and in the event of a fault:
- switch off at the wall and disconnect the plug from the socket, or
- disconnect the fuse at the mains circuit board, or
- unscrew the on-site screw-in fuse.
See “Installation – Electrical connection”.
9

Warning and safety instructions
If the electrical connection cable is faulty it must only be replaced
by a Miele authorised service technician to protect the user from
danger.
The washing machine must only be connected to the on-site wa-
ter supply using a new hose kit. Old hoses must not be re-used.
Check the hose regularly for signs of wear. Replace it in good time to
avoid the risk of leaks and subsequent damage.
Faulty components must only be replaced by genuine Miele ori-
ginal spare parts. Miele can only guarantee the safety standards of
the machine when Miele replacement parts are used.
For reasons of safety, do not connect the machine to the mains
electricity supply by an extension lead, multi-socket adapter, or similar. These can overheat and are a fire hazard.
In the case of commercial use, all relevant national provisions and
regulations (DGUV in Germany) relating to accident insurance are applicable to this machine. It is recommended to carry out testing in
accordance with national regulations (e.g. the regulatory framework
described in DGUV100-500/Chapter 2.6/Section 4). The test book
required for the documentation is available from Miele.
The machine must not be used in a non-stationary location (e.g.
on a ship).
Please observe the instructions in “Installation” and “Technical
data”.
If the washing machine is equipped with an electrical plug con-
nection, it must be easily accessible after installation so that the machine can be disconnected from the electricity supply if necessary.
10

Warning and safety instructions
If the appliance is hard wired, an on-site all pole circuit breaker
must always be accessible to disconnect the washing machine from
the mains.
Reliable and safe operation of this washing machine can only be
assured if it has been correctly connected to the mains electricity
supply.
While the washing machine is under warranty, repairs should only
be undertaken by a Miele authorised service technician. Otherwise
the warranty will be invalidated.
Correct use
The maximum dry laundry weight is 7.0kg. The maximum recom-
mended loads for individual programmes are given in the Programme
chart.
Do not install your washing machine in a room where temperat-
ures below freezing may occur. Frozen hoses may burst or split. The
reliability of the electronic control unit may be impaired at temperatures below freezing point.
Before using the machine for the first time, check that the transit
bars at the rear of the washing machine have been removed (see “Installation – Removing transit bars”). During spinning, transit bars
which are still in place may result in damage to both the machine
and adjacent furniture or appliances.
Close the stopcock if the machine is to be left for any length of
time (e.g. while on holiday), especially if there is no floor drain (gully)
in the immediate vicinity.
11

Warning and safety instructions
Danger of flooding! If hooking the drain hose into a wash basin,
check that the water can drain off quickly enough to prevent the sink
from overflowing. Hook the hose over the edge and secure. If the
hose is unsecured, the force of the water flowing out of it can dislodge it from the basin.
Take care to ensure that foreign objects (e.g. nails, pins, coins, pa-
per clips) do not find their way into the machine with the laundry.
These may damage components of the machine (e.g. suds container, drum). Damaged components can damage the laundry.
If the correct amount of detergent is dispensed, the machine
should not need to be descaled. If, however, you do wish to descale
it, only use special non-corrosive descaling agents and strictly observe the instructions on the packaging. Special descaling agent is
available from your Miele dealer or from Miele Service. Strictly observe the instructions for the descaling agent.
For textiles that have been treated with solvent-based detergents,
always check whether they can be washed in a washing machine. To
check whether this is possible, refer to safety notes, information concerning the product's environmental properties, and other information.
Never use solvent based detergents, e.g. those containing ben-
zine, in this machine. Doing so may result in damage to component
parts and create toxic fumes. Risk of fire and explosion.
Benzine, petrol, paraffin, or any easily flammable liquid must not
be stored or used near the machine. Risk of fire and explosion
12

Warning and safety instructions
Only use dyes suitable for use in a washing machine. Always ob-
serve the manufacturer's instructions carefully.
Colour run and dye removers contain sulphur compounds which
can cause damage such as corrosion. Do not use these products in
this washing machine.
Avoid contact between stainless steel surfaces (front, lid, casing)
and liquid detergents or disinfecting agents which contain chlorine or
sodium hypochlorite. These agents can have a corrosive effect on
stainless steel. Aggressive vapours containing chlorine can also be
corrosive. Do not store open containers of these agents near the machine.
Do not use a pressure washer or hose to clean the washing ma-
chine.
It is particularly important to observe manufacturer's instructions
when using a combination of cleaning agents and special application
products. Products must only be used for applications approved by
the manufacturer to avoid any material damage or the occurrence of
strong chemical reactions.
If detergent has come into contact with the eyes, rinse out imme-
diately with plenty of lukewarm water. If detergent has accidentally
been ingested, seek medical advice immediately. People with damaged or sensitive skin should avoid contact with detergent.
When adding or removing laundry during the main wash, your skin
may come into contact with detergent, particularly if the detergent is
dispensed externally. Take care when placing your hands inside the
drum. If suds have come into contact with the skin, rinse off immediately with lukewarm water.
13

Warning and safety instructions
Accessories
Only use original Miele accessories. If other parts are used, war-
ranty, performance and product liability claims will be invalidated.
Miele tumble dryers and Miele washing machines can be installed
as a washer-dryer stack. This requires a Miele washer-dryer stacking
kit which can be purchased separately. Please ensure that the
washer-dryer connection kit is suitable for the Miele tumble dryer
and the Miele washing machine.
If installing the machine on a Miele plinth (available as an optional
accessory), please make sure you order the correct one for this
washing machine.
Miele will guarantee to supply functional spare parts for a min-
imum of 10years and up to 15years following the discontinuation of
your washing machine.
Miele cannot be held liable for damage caused by non-compliance
with these warning and safety instructions.
14
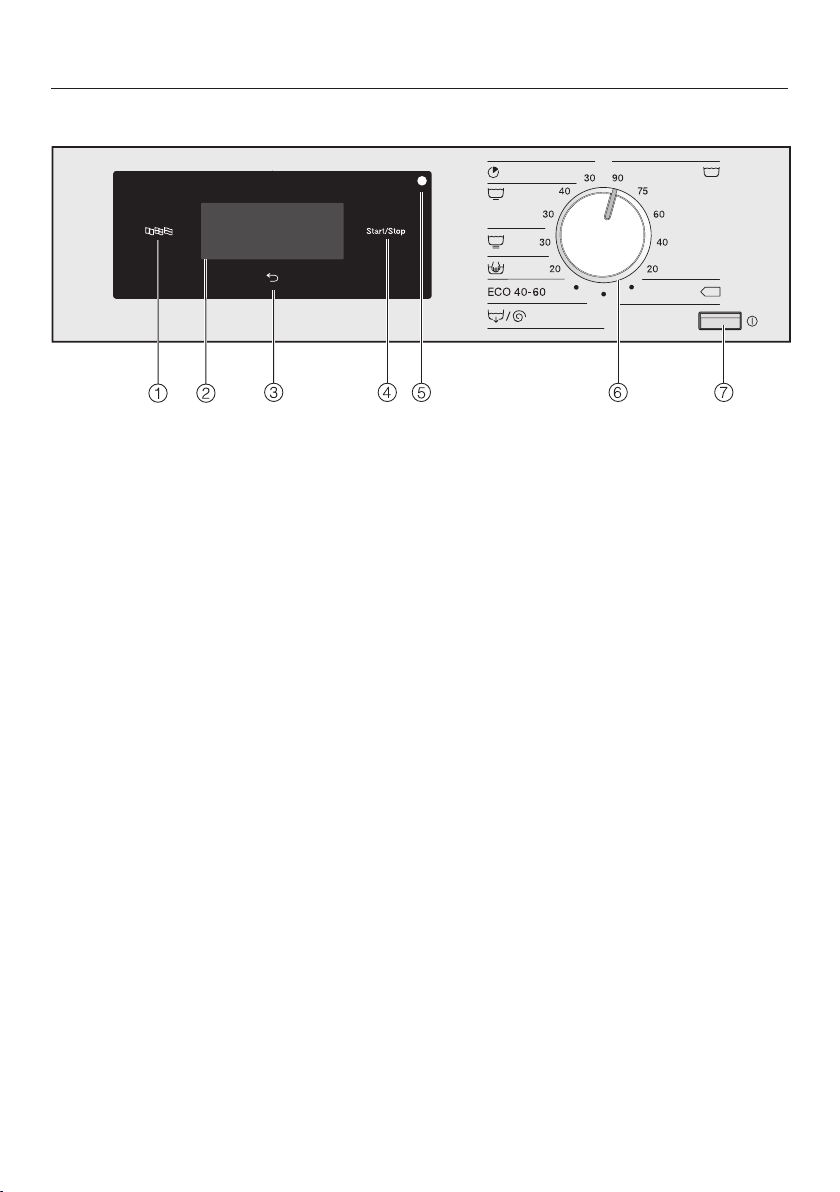
Control panel
Operating the washing machine
a
Language sensor control
For selecting the current user language.
The system language is displayed
again at the end of the programme.
b
Touch display with sensor controls
Displays the selected programme.
The programme settings are selected using the sensor controls in the
touch display.
c
Back sensor control
Takes you back one level in the
menu.
d
Start/Stop sensor control
Starts the selected programme and
cancels a programme once it has
started.
e
Optical interface
For the Customer Service Department.
f
Programme selector
For selecting the wash programme.
The programme selector can be
turned clockwise or anticlockwise.
g
button
For switching the washing machine
on and off.
The washing machine switches itself
off automatically to save energy. It is
switched off 15minutes after the
end of the programme/Anti-crease
phase, or after being switched on if
no further selection is made.
15
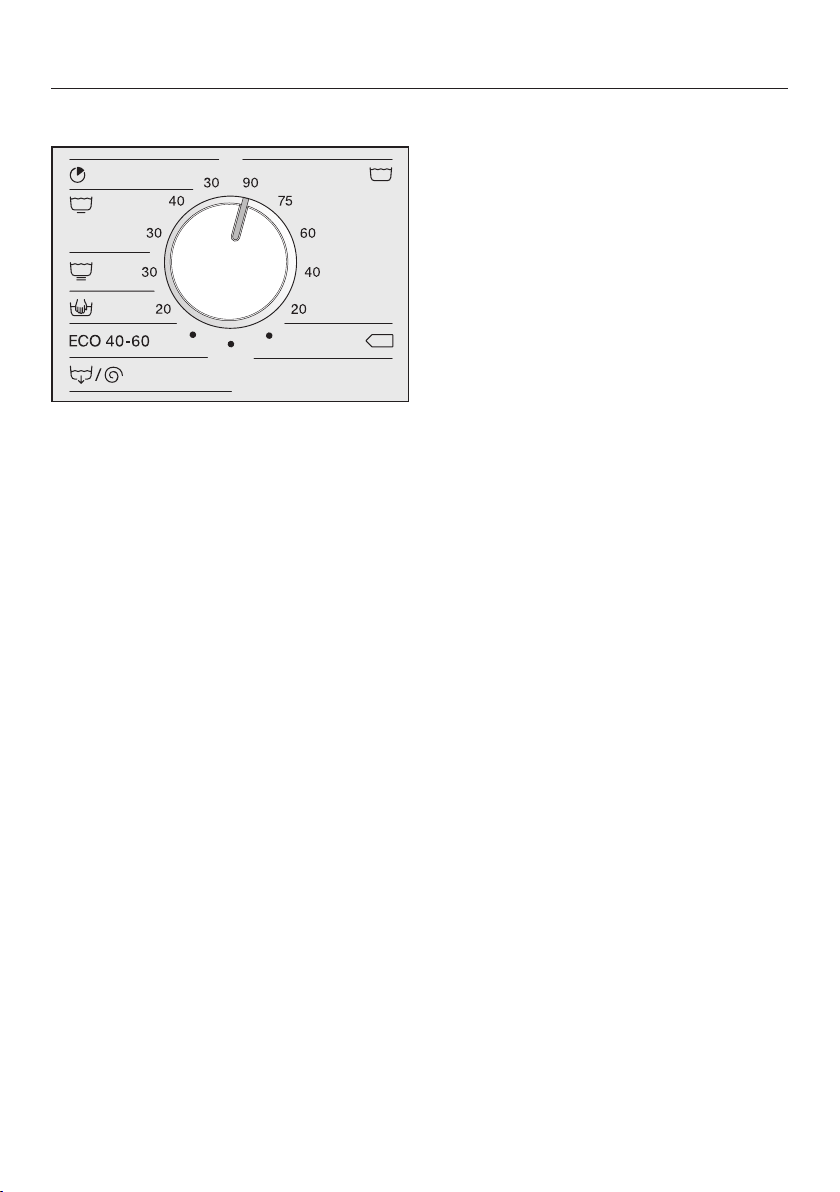
Operating the washing machine
Symbols on the control panel
Cottons
Cottons /
Express
Minimum iron
Delicates
Woollens
ECO40-60 Cottons ECO40-60
/ Drain/Spin
16

Symbols in the display
Temperature: use the Temperaturesensor control to set the temperature
of the wash programme.
Spin speed: use the Spin speedsensor control to set the spin speed of
the wash programme.
Pre-wash: use the Pre-washsensor control to select the Pre-washExtra
for a wash programme.
Rinse plus: use the Rinse plussensor control to add an extra rinse cycle
to a wash programme.
Further choices: use the Further choicessensor control to set further op-
tions.
Supervisor level: use the Supervisor levelsensor control to alter the
washing machine’s settings.
Delay start: use the Delay startsensor control to set the start time of a
wash programme...
...or the finish time
Operating the washing machine
...or the time until the programme starts.
17

Operating the washing machine
1600
Coloured items
60°C
h
0:59
1600
Cottons
2:59
h
Sensor controls and touch display with sensor controls
The sensor controls , and
Start/Stop and the sensor controls in
the display respond to finger tip contact. Every touch of a sensor is confirmed with an audible tone. You can
adjust the volume of the keypad tone or
switch it off (see information on “Supervisor level”).
The control panel with sensor controls and the touch display can be
scratched by pointed or sharp objects, e.g. pens.
Only touch the display with your fingers.
Standard menu
The standard menu of a wash programme displays different values depending on the programme.
For programmes with a fixed temperature setting:
- Selected programme with the set
temperature
- Programme running time
- Spin speed set
- Selectable Extras
- Further available options and the settings on the Supervisor level
For programmes with a variable temperature setting:
18
- Selected programme
- Programme running time
- Temperature set
- Spin speed set
- Selectable Extras
- Further available options and the settings on the Supervisor level
Operating the washing machine
Language
deutsch
čeština
english
(AU)
dansk
Spin speed
800
1000
400
0
1200
1600
Finish
(today)
10
OK
25:
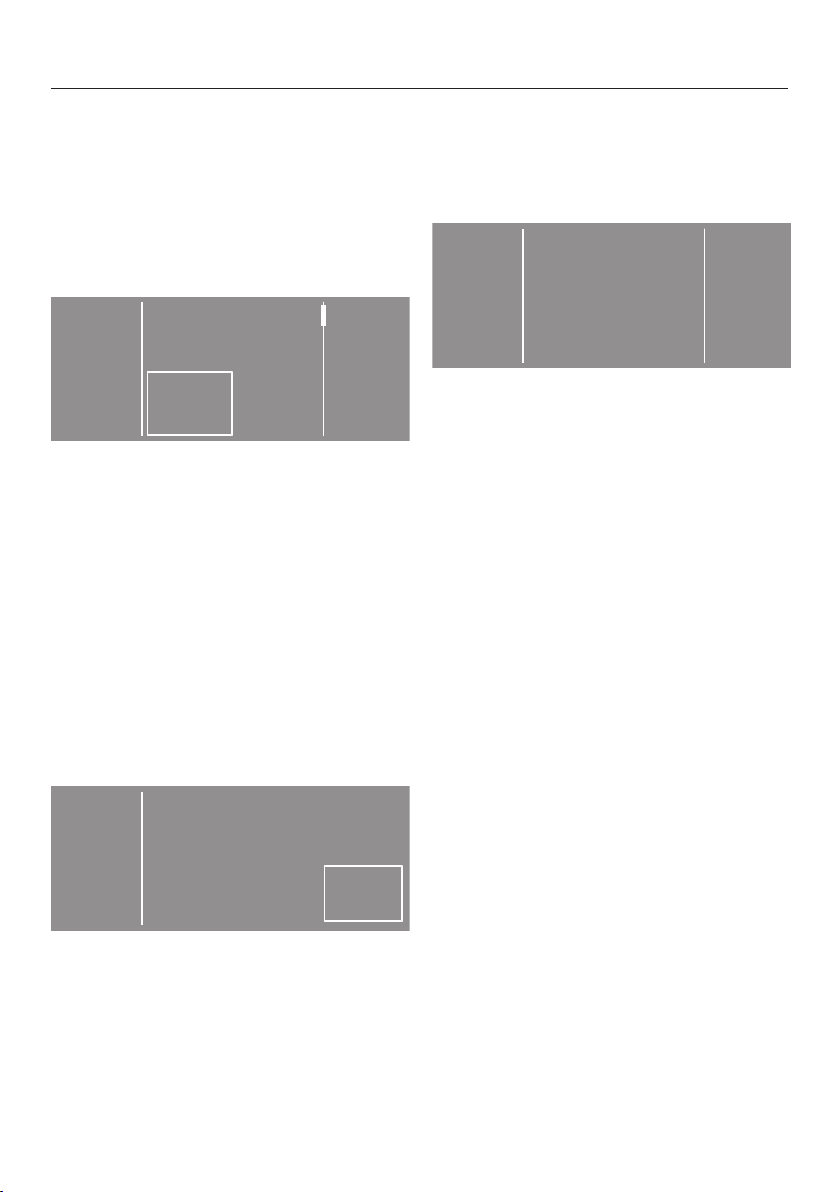
Examples of how to operate the appliance
Option lists
The andarrows on the right of the
display indicate that choices are available.
The list scrolls down when the
sensor is touched. The list scrolls up
when the sensor is touched.
The scroll bar indicates that further options follow.
The currently selected value is marked
with a frame.
Touch the required value to select it.
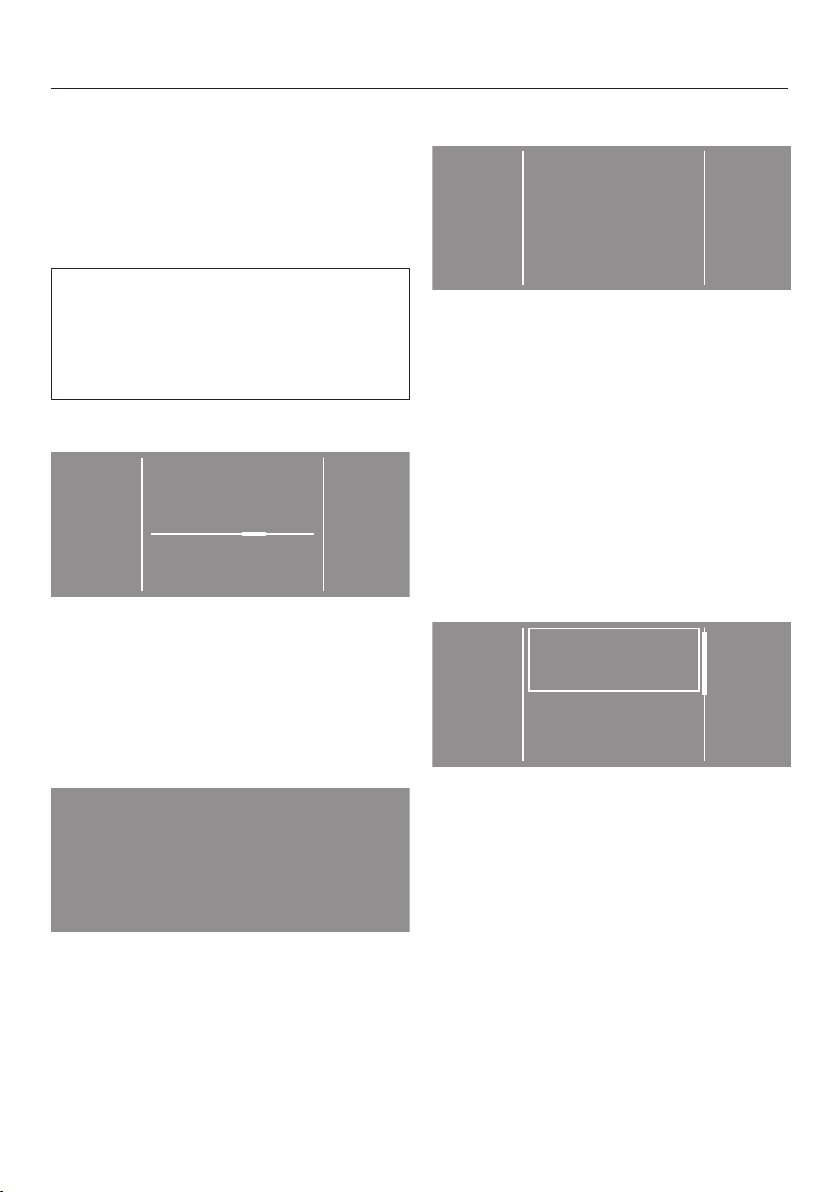
Setting numerical values
To change a numerical value, use the
andarrows above or below the
numbers you want to change.
Touch theandarrows and confirm
with the OK sensor.
Exiting a sub-menu
Select the Backsensor to exit a submenu.
If you select a value in a sub-menu, but
do not confirm with OK, you can discard this value by touching the
sensor.
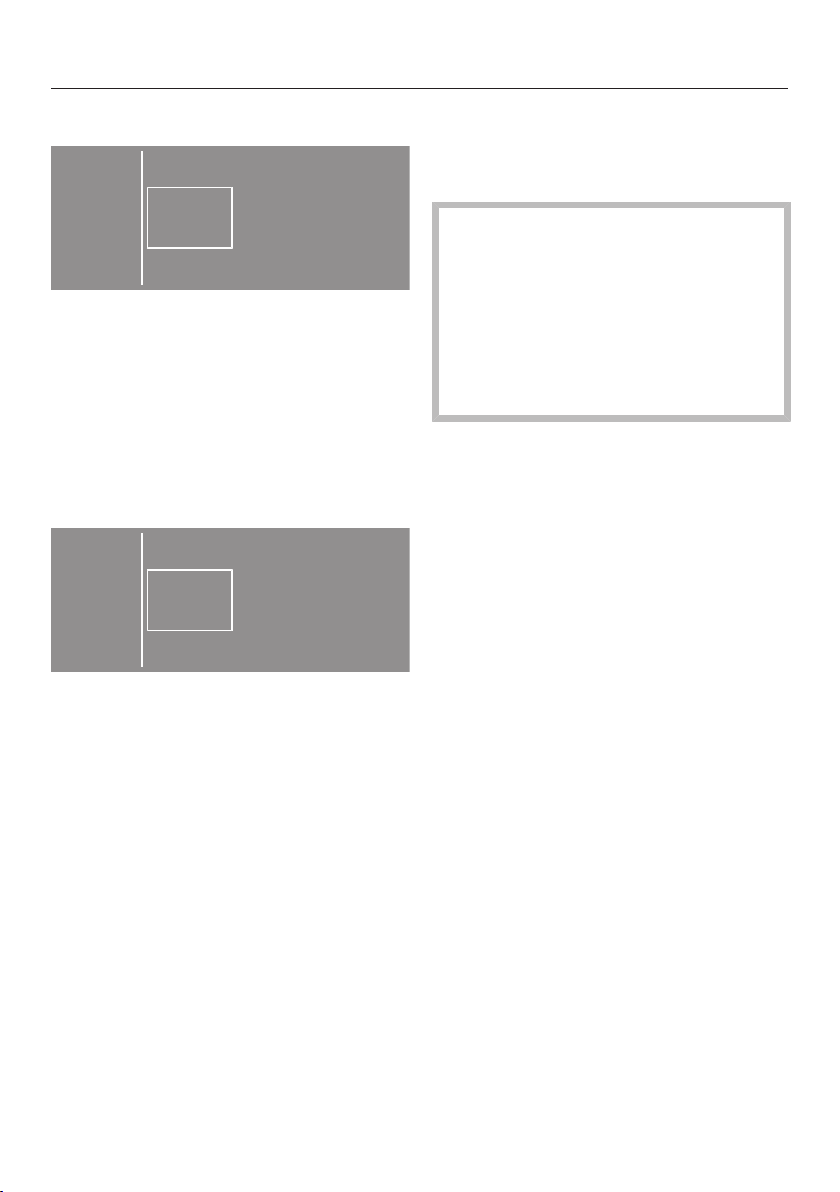
Easy selection
If there are no arrows, the selection is
limited to the displayed values.
The currently selected value is marked
with a frame.
Touch the required value to select it.
19
Before using for the first time
Language
deutsch
čeština
english
(AU)
dansk
Damage resulting from incorrect
installation and connection.
Installing and connecting the wash-
ing machine incorrectly will cause
serious property damage.
See “Installation”.
Emptying the drum
A swivel elbow for the drain hose and/
or assembly material may be stored in
the drum.
When commissioning the washing
machine for the first time, you will
have to define settings for daily use
of the appliance. Some settings can
only be configured during the initial
commissioning process. After that,
they must be changed by Miele Service.
Complete the initial commissioning
process.
These settings are also described under
“Supervisor level”.
Setting the language
You will be asked to select the language
you require for the display. You can
change the language at any time (see
“Language” under “Supervisor level”).
Pull open the door.
Remove the swivel elbow and as-
sembly material.
Shut the door with a gentle swing.
Switching on the washing machine
Press the control.
The welcome screen will light up.
20
Touch the orsensor until the
language you want appears in the
display.
Touch the sensor for the language
you want.
The selected language is marked with a
frame and the display will change to
next setting.
Before using for the first time
Brightness
–
70
OK
+
%
Yes No
Should the clock display not
be shown?
Time
12
OK
05:
Payment
system
No payment
system
Programme
control
Reference to external appliances
A reference to external hardware appears.
Confirm with the OKsensor control.
Connect the XCI box or adapter before
initial commissioning. The washing
machine must be disconnected from
the mains. Then start the commissioning process.
Setting the display brightness
Set the brightness you want with the
– and + sensors and confirm your selection with the OKsensor.
The display will change to the next setting.
Setting the time of day
Use the andsensors to enter the
time and confirm your entry with the
OKsensor.
The display will change to the next setting.
Setting up a payment system
If you wish to set up a payment system,
read “Payment system” under “Supervisor level”.
If you do not wish to set up a payment
system, you can skip this stage.
Confirm time request
Touch the yes or nosensor.
If you select yes, the system will skip
the Clock displaysetting.
If you select no, the display will switch
to the Clock displaysetting.
Touch the No payment systemsensor.
The display will change to the next setting.
21
Before using for the first time
Pre-wash
water
Cold Hot
Main wash
water
Cold Hot
Select pre-wash water
Touch the coldsensor if the washing
machine is only connected to a cold
water supply, or touch hotif the
washing machine is connected to
cold and hot water.
The display will change to the next setting.
Select main wash water
Touch the coldsensor if the washing
machine is only connected to a cold
water supply, or touch hotif the
washing machine is connected to
cold and hot water.
Removing the transit bars
The display will remind you to remove
the transit bars.
Damage resulting from failure to
remove the transit bars.
Failure to remove the transit bars can
result in damage to the washing machine and to adjacent furniture or appliances.
Remove the transit bars as described
in “Installation and connection”.
Confirm that the transit bars have
been removed with the OKsensor.
Continue setting up as described in the Operating Instructionsappears in the dis-
play.
Confirm the message with the
OKsensor.
Further information will appear on the
display.
22
Completing the commissioning
1600
Coloured items
60°C
h
0:59
process
To complete commissioning, the Cottons 60°Cprogramme must be run
without laundry and without detergent.
If the power is interrupted prior to the
start of the first wash programme (e.g.
if the machine is switched off with the
sensor control), the initial commissioning process can be completed
again.
Once a wash programme has been
running for over 20minutes, the initial
commissioning process does not have
to be performed again.
Open the stopcock.
Turn the programme selector
toCottons 60°C.
Before using for the first time
Touch the Start/Stopsensor control.
When the programme has finished, your
machine is ready for use.
23

Washing environmentally and economically
Energy and water consumption
- To get the most out of your machine,
load the maximum dry load size for
the wash programme you are using.
This will keep the energy and water
consumption to a minimum in relation
to the size of the load.
- Programmes that are more efficient
with regard to energy and water consumption generally have a longer
programme running time. By extending the programme running time, the
wash temperature that is actually
reached can be reduced while still
providing the same wash results.
For example, the ECO40-60 programme has a longer running time
than the Cottons40°C or 60°C programme. The ECO40-60 programme
is more efficient in terms of energy
and water consumption.
- Use the Express programme for
small, lightly soiled loads.
- Modern detergents make it possible
to wash laundry at lower temperatures (e.g. 20°C). Using lower temperature settings will save energy.
Detergent
- Do not exceed the amounts of detergent recommended by the manufacturer on the packaging.
- Adjust the dosage to the degree of
soiling of the laundry.
- Reduce the amount of detergent with
smaller loads (approx. ⅓ less than
the amount recommended can be
used when washing a half load).
Information about subsequent tumble drying
The spin speed selected affects the residual moisture in the laundry and the
sound emissions of the washing machine.
The higher the spin speed, the lower
the residual moisture in the laundry.
However, the sound emissions of the
washing machine will increase.
Select the highest possible spin speed
for the wash programme to save energy
in the subsequent tumble dryer cycle.
- Washing at low temperatures and/or
using liquid detergents can cause
bacteria and odours to build up in the
washing machine. To maintain the
hygiene of the washing machine,
carry out a hot wash above 60°C at
regular intervals.
24
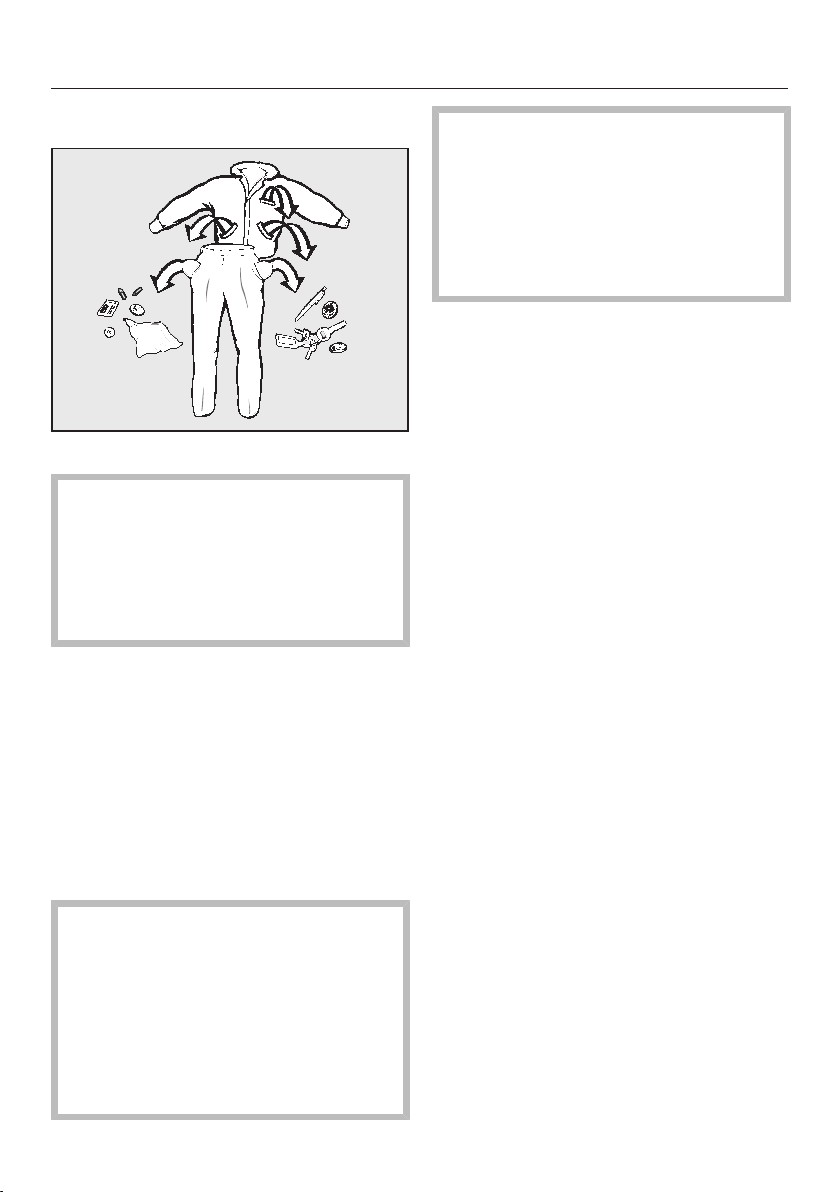
1. Preparing the laundry
Emptying pockets
Empty all pockets.
Damage due to foreign objects.
Nails, coins, paper clips, and so on
can cause damage to garments and
components in the machine.
Check the laundry before washing
and remove any foreign objects.
Sorting the laundry
Sort the laundry according to colour
and the garment care label.
Pre-treating stains
Badly soiled areas and stains should
be cleaned as soon as possible.
Spillages should be carefully dabbed
off using a soft, colourfast cloth.
Risk of explosion due to solvent-
based detergents.
When using solvent-based deter-
gents, an explosive mixture may develop.
Never use solvent-based detergents
in the washing machine.
General tips
- Do not machine wash items which
are specified by the manufacturer as
not washable on the care label ().
- Curtains: remove rollers and lead
weights or place in a laundry bag.
- Sew in or remove any loose underwiring in bras.
- Turn garments inside out, if recommended by the manufacturer.
- Zip up or close any jackets with Velcro or hook and eye fastenings before
washing.
- Fasten duvet covers and pillow cases
to prevent small items from becoming
rolled up inside them.
- Please refer to the Programme chart
for more tips and tricks.
Damage due to solvent-based
detergents.
Detergents containing benzine, stain
remover, etc., can damage plastic
parts.
When pre-treating textiles, make sure
that any plastic parts do not come
into contact with the detergent.
25

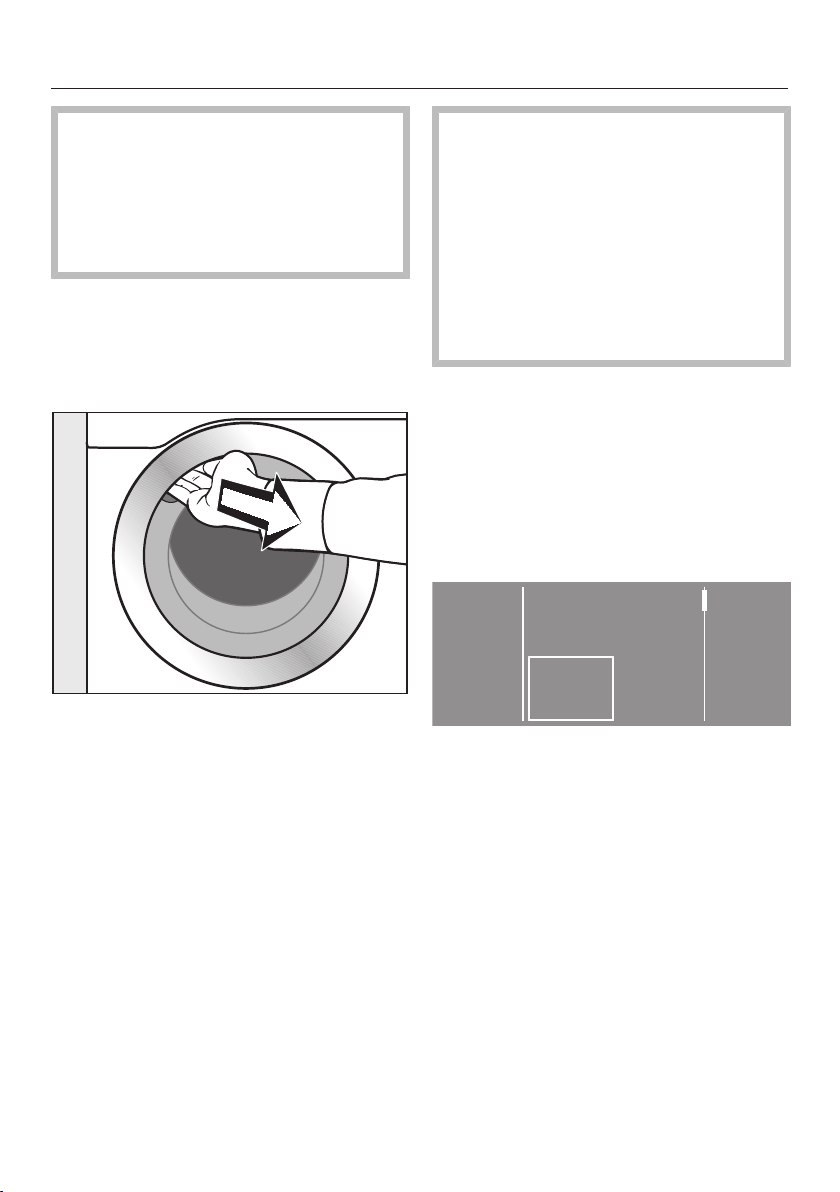
2. Loading the washing machine
Opening the door
Reach under the door grip and pull
the door open.
Check the drum for foreign objects
before loading it with laundry.
Unfold the laundry and load loosely
into the drum.
Mixing both large and small items gives
better wash results and also helps to
distribute the load evenly during spinning.
Closing the door
Make sure that no items are caught
between the door and the seal.
The most efficient use of energy and
water is achieved when a full load is
washed. However, do not overload as
this reduces cleaning efficiency and
causes creasing.
26
Shut the door with a gentle swing.

3. Selecting a programme and settings
Spin speed
800
1000
400
0
1200
1600
Switching on the washing machine
Press the control.
Selecting a programme
Turn the programme selector to the
required programme.
The selected programme will be shown
in the display. The display will then
change to the standard menu for that
programme.
Selecting a temperature
You can alter the preset temperature of
certain programmes.
Touch the Temperaturesensor con-
trol.
Select the desired temperature.
The selected temperature is marked
with a frame.
Selecting the spin speed
You can alter the preset spin speed.
Touch the Spin speedsensor.
The following will appear in the display:
Select the spin speed you want.
The selected spin speed is marked with
a frame.
27

3. Selecting a programme and settings
Further
choices
Finish at
Supervisor level
Selecting Extras
You can select Extras for a wash programme.
Selecting Pre-wash
The Pre-wash Extra is offered for
certain programmes.
For laundry that is heavily soiled.
Coarse soiling is loosened and removed
before the main wash.
Touch the sensor control.
Pre-wash is activated.
Selecting Rinse plus
The Rinse plus Extra is offered for
certain programmes.
An extra rinse is carried out to achieve a
better wash result.
Touch the sensor control.
Rinse plus is activated.
Selecting further options
You can select a delay start period or
change the settings of the washing machine.
Touch the Further choicessensor
control.
The following will appear in the display:
Select the option you want.
The display will change to the submenu for that option.
Delay start is not possible for some
programmes.
28

4. Adding detergent
You can use any detergent that is suitable for washing machines.
Detergent dispensing
Please follow the detergent manufacturer's instructions in relation to
dosage.
Adding too much detergent will lead
to excessive foaming.
Avoid adding excess detergent.
The amount to dispense will depend on:
- the amount of laundry
- the amount of soiling in the laundry
- the water hardness
Hardness
range
I (soft) 0-1.5 0-8.4
II (medium) 1.5-2.5 8.4-14
III (hard) above 2.5 above 14
Check with your local water supplier if
you do not know the water hardness in
your area.
Hardness
inmmol/l
Degree of
German hardness
°dH
Adding detergent
Pull out the detergent drawer and add
detergent to the compartments.
Detergent for the pre-wash (di-
vide the total recommended
amount as follows: ⅓ to compartment and ⅔ to compartment)
Detergent for the main wash
Fabric conditioner or liquid
starch
For disinfection programmes, the
andcompartments can be
filled with detergent for the main wash
if you have not selected pre-wash.
29

4. Adding detergent
Automatic dispensing of fabric softener or liquid starch
Add fabric conditioner or liquid starch
to the compartment. Do not ex-
ceed the maximum level mark.
This will be automatically dispensed in
the final rinse. At the end of the wash
programme a small amount of water remains in the compartment.
Tip: If starching frequently, thoroughly
clean the detergent drawer, especially
the siphon tube, regularly.
Dye removers and dyes
Damage due to colour run/dye
removers.
Colour run and dye removers can
cause corrosion in the washing machine.
Do not use colour run or dye removers in this washing machine.
Only use dyes suitable for use in a
washing machine. The manufacturer's
instructions on the packaging must be
observed.
30

5. Starting the programme – end of the programme
Payment system
If your machine is connected to a payment system, the amount of payment
required will appear in the display.
Do not cancel the programme once it
has started. Depending on the settings, money may be lost in the payment system.
Starting the programme
The programme can be started as soon
as the Start/Stopsensor is flashing on
and off.
Touch the Start/Stopsensor.
The door will lock (symbol) and the
programme will start.
If a delay start period has been selected, this will appear in the display.
Once the delay start period has elapsed
(if applied), the programme duration will
appear in the display; otherwise, the
duration will appear straight away. The
programme sequence is also shown in
the display.
End of programme
The door remains locked during the
anti-crease phase. However, the washing machine door can be unlocked at
any time by touching the Start/Stop
sensor.
Unloading the drum
Pull open the door.
Remove the laundry.
Items left in the drum could discolour
other items in the next wash or become discoloured themselves.
Remove all items from the drum.
Tip: Touch the sensor to display the
set temperature, spin speed and any
set Extras.
Check the door seal for any foreign
objects.
Tip: Leave the door slightly open to allow the drum to dry.
Switch the washing machine off with
the button.
Tip: Leave the detergent drawer slightly
open to allow it to dry.
31

Delay start
Add laundry
Cancel
programme
Start programme
immediately
The Delay start function can be used to
set the time until the programme starts
or the programme finish time (see
“Delay start” under “Supervisor level”).
Selecting the Delay start function
Touch the Further choicessensor
control.
Select the Finish at, Start at or
Start inoption.
Use the andsensors to enter the
hours and minutes and confirm your
entry with the OKsensor.
The minutes entry moves to the next
“full quarter of an hour” and can then
be adjusted in 15-minute increments.
Starting Delay start
Touch the Start/Stopsensor.
The door will lock and the time until the
programme starts will appear in the display.
Cancelling or changing Delay start
Touch the Start/Stopsensor.
The following will appear in the display:
Touch the Start programme immedi-
atelysensor.
The wash programmes starts immediately.
or
Touch the Cancel programmesensor.
The programme start is cancelled and
the Start/Stopbutton flashes on and
off.
32

Programme chart
Cottons 20°C to 90°C Max. load 7.0kg
Use for Cotton, linen and mixed fibre textiles
Tip - Select the temperature according to the instructions on the care
label, the detergent, the type of soiling and the hygiene requirements.
- For dark-coloured fabric, use a colour detergent or liquid detergent.
1600rpm Extras: Pre-wash Rinses: 1–5*
Cottons / Max. load 7.0kg
Items Normally soiled cotton garments
Tip - These settings are the most efficient in terms of energy and wa-
ter consumption for washing cottons.
- With, the wash temperature reached is below 60°C.
1600rpm Extras: Pre-wash Rinses: 2
The test programme conforms to EN60456 and energy labelling to Directive1061/2010.
Express 30°C Max. load3.5kg
Use for Cotton garments that have hardly been worn or are only very
lightly soiled
1400rpm Extras: Rinse plus Rinses: 1
Minimum iron 30°C to 40°C Max. load 3.5kg
Use for Synthetic and mixed fibre textiles as well as easy care cotton
Tip - Reduce the final spin speed for fabric that creases easily.
1200rpm Extras: Pre-wash Rinses: 2–4*
*You can alter the number of rinses carried out via the Supervisor level.
33

Programme chart
Delicates 30°C Max. load 2.5kg
Use for Delicate garments made from synthetic fibres, mixed fibres and
viscose
Tip - Deselect the final spin speed for fabric that creases easily.
600rpm Extras: Pre-wash Rinses: 2
Woollens 20°C Max. load 2.5kg
Use for Machine-washable woollens and woollen blends
Tip - Use detergent formulated for delicates/woollens.
1200rpm Rinses: 2
ECO40-60 Max. load 7.0kg
Items Normally soiled cotton garments
Tip - A laundry load consisting of mixed cottons that are intended for
washing at 40°C or 60°C can be washed in the same wash
cycle.
- This programme is the most efficient in terms of energy and water consumption for washing cottons.
1600rpm Rinses: 2
/Drain/Spin Max. load7.0kg
Tip - Make sure you select the appropriate spin speed.
- Select the Rinse plusExtra for an additional rinse.
- Drain only: select 0rpm for the spin speed.
1600rpm Extras: Rinse plus
34

Special features in the programme sequence
Spinning
Final spin speed
When a programme is selected, the
maximum spin speed for this wash programme is shown in the display.
You can reduce the final spin speed.
However, you cannot select a final spin
speed higher than that shown in the
chart.
Interim spin
There is a spin cycle after the main
wash and between the rinses. A reduction in the final spin speed will also reduce the interim spin speed as appropriate.
Omitting the interim spin and the final spin
Select the programme setting Spin
speed 0.
After the last rinse, the water will be
pumped away and the anti-crease
phase will switch on.
Anti-crease
At the end of the programme, the drum
continues to turn at intervals for up to
30minutes to help prevent creasing.
The washing machine can be opened at
any time.
There is no anti-crease phase at the
end of some programmes.
35

Changing the programme sequence
A programme cannot be cancelled or
changed when operating a payment
system.
If the washing machine is switched off
during active programme operation,
the standby function does not switch
the washing machine off completely
after 15minutes. Safety functions
continue to be active because there
may still be water inside the drum.
Changing a programme
After the start of a programme, it is no
longer possible to select a different programme.
You will need to cancel the current programme before you can select a new
one.
Programme cannot be changedappears
in the display if the programme selector has been moved. The text disappears when the programme selector
is set to the original programme.
Cancelling a programme
You can cancel a wash programme at
any time after it has started.
Touch the Start/Stopsensor control.
Select Cancel programme.
If you want to select a different programme:
Close the door.
Select the programme you want.
Add detergent to the detergent
drawer.
Touch the Start/Stopsensor control.
The new programme will begin.
Switching on the washing machine after an interruption to
the power supply
If the washing machine is switched off
with the button during a wash programme, the programme will be interrupted.
Switch the washing machine back on
with the button.
Note the message in the display.
Touch the Start/Stopsensor.
The programme will also be interrupted
if power is interrupted by a power cut.
When power is resumed, confirm the
message in the display with OK.
Touch the Start/Stopsensor.
The programme continues.
The suds are pumped away. The programme is cancelled. The door lock is
released.
Pull open the door.
Remove the laundry.
36

Changing the programme sequence
Add laundry
Cancel
programme
Adding or removing laundry
You can add or remove items during the
first few minutes after the programme
has started.
Touch the Start/Stopsensor.
The following will appear in the display:
Touch the Add laundrysensor.
The programme will stop and the door
will unlock.
Risk of chemical burns from de-
tergent.
When adding or removing laundry,
your skin may come into contact
with detergent, particularly if the detergent is dispensed externally.
Take care when placing your hands
inside the drum.
If suds have come into contact with
the skin, rinse off immediately with
plenty of lukewarm water.
Once a programme has started successfully, the washing machine cannot
recognise any adjustment to the load.
For this reason, if laundry is added or
removed after the start of a programme, the machine will always
complete the programme cycle assuming a full load.
The door cannot be opened, if:
- The suds temperature is above 55°C.
The safety lock will remain activated if
the temperature in the drum is above
55°C. The lock will not deactivate until the temperature has dropped to below 55°C.
Pull open the door.
Add laundry or remove individual
items.
Close the door.
Touch the Start/Stopsensor.
The programme will continue.
37

Detergent
The correct detergent
You can use any detergent that is suitable for washing machines. Instructions for
use and recommended amounts are given on the detergent packaging.
Recommended detergents in accordance with Directive (EU) No. 1015/2010
The recommendations apply to the temperature ranges given in the section “Programme chart”.
Universal Colour Delicates and
Special
woollens
detergent
Cottons – –
Cottons – –
Express –
1
– –
Minimum iron – – –
Delicates – – –
Woollens – –
ECO40-60 – –
Recommended
– Not recommended
1
Liquid detergent
38

Cleaning and care
Risk of electric shock.
Only ever perform cleaning and
maintenance work when the appliance is disconnected from the
power.
Disconnect the washing machine
from the mains electricity supply.
Cleaning the casing and fascia panel
Damage caused by detergents.
Solvent-based cleaning agents, abrasive cleaners, glass cleaners or
multi-purpose cleaning agents can
cause damage to plastic surfaces
and other parts.
Do not use any of these cleaning
agents.
Risk of damage due to ingress of
water.
The pressure of a water jet can
cause water to get into the washing
machine, resulting in damage to
components.
Do not spray the washing machine
with a water jet.
Cleaning the detergent drawer
Washing at low temperatures and the
use of liquid detergent can lead to a
build-up of mould and bacteria in the
detergent drawer.
For hygiene reasons, clean the entire
detergent drawer at regular intervals.
Pull out the detergent drawer until
resistance is felt. Press down the release button and at the same time
pull the drawer right out of the machine.
Clean the detergent drawer with
warm water.
Clean the casing and fascia panel
with a mild cleaning agent or soap
and water and dry both with a soft
cloth.
The drum and any other stainless
steel components can be cleaned using a suitable stainless-steel cleaning
agent.
39

Cleaning and care
Cleaning the siphon and the channel
Pull the siphon out of the compart-
ment .
Clean the siphon under warm running
water.
Refit the siphon.
Clean the fabric conditioner channel
using a brush and warm water.
Cleaning the detergent drawer
Use a bottle brush to remove deter-
gent residues and limescale from the
jets inside the detergent drawer.
Replace the detergent drawer.
Tip: Leave the detergent drawer slightly
open to allow it to dry.
40

Cleaning and care
Cleaning the drum, suds container and drainage system
The drum, suds container and drainage
system can be cleaned if necessary.
Start the Cottons90°C programme.
Add powder detergent to the
compartment in the detergent
drawer.
At the end of the programme, check
the inner drum and remove any
coarse residues.
Cleaning the water inlet filters
The washing machine has filters to protect the water intake valves. You should
inspect the filters approximately every
6months. Perform this check more often if there are frequent interruptions to
the external water supply.
Cleaning the filter in the water intake valve
Using pliers, carefully loosen the
ribbed plastic nut on the intake valve
and unscrew.
Use pointed pliers to withdraw the fil-
ter by the bar.
Clean the filter.
Reassemble in reverse order.
The filters are used to protect the
water intake valve.
The filters must be put back in place
after cleaning.
41

Problem solving guide
You are able to correct the majority of faults and problems that arise during day-today use without external assistance. You can save time and money in many cases,
as you do not need to call Miele Service.
The following tables are designed to help you to find the cause of a malfunction or
a fault and to resolve it.
The wash programme does not start
Problem Cause and remedy
The display remains
dark, and the Start/Stop
sensor control does not
light up or flash.
The following appears
in the display:
Door will not lock. Call Ser-
vice.
The programme does
not start when Spin has
been selected.
The display is dark and
the Start/Stop sensor
control is flashing
slowly.
There is no power to the machine.
Check whether the washing machine is switched
on.
Check whether the washing machine is connected
to the power supply.
Check whether the main fuse or circuit breaker has
tripped.
The washing machine has switched off automatically
to save energy.
Switch the washing machine back on with the
button.
The door is not closed properly. The door lock could
not engage.
Close the door again.
Start the programme again.
If the fault message appears again, contact Miele
Service.
You have not yet completed the initial commissioning
process.
Perform the Initial commissioning process as de-
scribed in these instructions.
The display has switched off automatically to save
energy.
Touch any of the controls. The display switches
back on.
42

Problem solving guide
Programme cancellation and error message
Problem Cause and remedy
Drainage fault. Clean
drain filter and pump.
Check the drain
hose.
Water intake fault.
Open stopcock.
Waterproof system
activated
Fault F . If restart
fails, call Service
The drain is blocked or restricted.
The drain hose has been fixed too high.
Clean the drain filter and the drain pump.
The maximum drain height is 1m.
The water inlet is blocked or restricted.
Check whether the stopcock has been properly
opened.
Check whether the inlet hose is kinked.
The water pressure is too low.
Switch on the Low water pressuresetting (see “Low
water pressure” under “Supervisor level”).
The filters in the water inlet are blocked.
Clean the filters (see “Cleaning the filters” under
“Cleaning and care”).
The water protection system has reacted.
Close the stopcock.
Call Miele Service.
There is a fault.
Disconnect the washing machine from the electri-
city supply.
Wait at least 2minutes before reconnecting the
washing machine to the electricity supply.
Switch the washing machine on again.
Start the programme again.
If the fault message appears again, contact Miele
Service.
43

Problem solving guide
A fault message appears in the display
1)
Problem Cause and remedy
Align machine. Laun-
dry not properly spun
The selected spin speed was not reached during the
final spin due to excessive imbalance.
Check that the washing machine is level.
Start the spin cycle again.
Machine is leaking
The washing machine or drain valve is leaking.
Close the stopcock.
Call Miele Service.
1
The messages will appear at the end of the programme and when the washing
machine is switched on and must be acknowledged with the OK sensor control.
44

An unsatisfactory wash result
Problem Cause and remedy
Liquid detergent does
not give the required
result.
White residues which
look like powder detergent are seen on dark
textiles after washing.
Textiles with particularly
greasy soiling are not
properly clean.
Liquid detergents usually contain no bleaching
agents. They do not remove fruit, coffee, and tea
stains.
Use a general purpose powder detergent contain-
ing a bleaching agent.
Pour stain removers into the drawer in the dis-
penser compartment and liquid detergent into a
dispenser ball.
Never put stain removers and liquid detergent to-
gether in the dispenser drawer.
The detergent contained compounds (zeolites) to aid
water softening which are not soluble in water. These
have ended up on the laundry.
Try to brush off the residues with a soft brush once
the laundry is dry.
In future, wash dark textiles using a detergent
which contains no zeolites. Liquid detergents usually contain no zeolites.
Select a programme with pre-wash. Use liquid de-
tergent for the pre-wash.
Continue to use universal powder detergent for the
main wash.
Problem solving guide
Grey, greasy particles
cling to washed laundry.
The use of heavy-duty detergent is recommended in
the main wash for very heavily soiled work clothing.
Please seek advice from the detergent manufacturer.
Insufficient amounts of detergent were used. The
laundry was heavily soiled with grease (oils, ointments).
Use more detergent or use liquid detergent with
this type of soiled laundry.
Before washing the next load, run a 60°C pro-
gramme with liquid detergent but without a load.
45

Problem solving guide
General problems
Problem Cause and remedy
The machine shakes
during the spin cycle.
Strange pump noises
can be heard.
Large amounts of detergent residue remain in
the detergent dispenser
drawer.
Fabric softener is not
completely dispensed
or too much water remains in the compartment.
The display is in a different language.
The laundry has not
been spun properly. The
laundry is still wet.
The machine feet are not level and not secured.
Level the machine and adjust the feet correctly.
This is not a fault. These slurping noises occur at
the start and end of a pump sequence as a normal
part of the operation.
The water pressure is too low.
Clean the filters in the water inlet.
Powder detergent used in conjunction with water
softeners tends to become sticky.
Clean the detergent dispenser drawer and, in fu-
ture, add detergent into the drawer first, and then
add the water softener.
The siphon tube is not correctly positioned or is
clogged.
Clean the siphon, see “Cleaning and care – Clean-
ing the detergent dispenser compartment”.
A different language has been selected.
Switch the washing machine off and on again.
The selected operator language appears in the display.
The operator language has been changed.
Select the language you require (see “Language”
under “Supervisor level”).
The machine detected a high level of imbalance during the final spin and reduced the spin speed automatically.
Include both large and small items in the load as
this will achieve better distribution.
46

Problem Cause and remedy
The drum remains stationary but the programme keeps running.
Switch the washing machine off and then back on
with the button.
Note the message in the display.
Touch the Start/Stopsensor control.
The drum continues to spin and the programme continues.
Problem solving guide
47

Problem solving guide
The door will not open
Problem Cause and remedy
The door cannot be
pulled open during a
programme.
Programme cancelled
appears in the display
at the end of a programme or after a programme has been cancelled.
The following appears
in the display:
Door lock jammed. Call
Service.
The door is locked during the wash programme.
Touch the Start/Stop sensor control.
Select Cancel programme or Add laundry.
The door will unlock and you will be able to pull it
open.
There is still water in the drum and the machine is unable to drain.
Clean the drainage system as described under
“Opening the door in the event of a blocked drain
outlet and/or power cut”.
To protect the user against scalding, the door cannot
be opened if the suds temperature is higher than
55°C.
Wait until the temperature in the drum has de-
creased and the message has gone out in the display.
The door lock has jammed.
Call Miele Service.
48

Problem solving guide
Opening the door in the event of a blocked drain outlet and/ or power cut
Risk of electric shock.
Only ever perform cleaning and
maintenance work when the appliance is disconnected from the
power.
Disconnect the washing machine
from the mains electricity supply.
Open the access panel to the drain
system.
Emptying the drum
....For machines with a drain pump
Place a suitable container under the
access flap.
Remove the drain filter, though not
completely.
Slowly unscrew the drain filter to let
the water out.
Tighten the drain filter back up again
if you need to interrupt the flow of
water.
Blocked drain outlet
If the drain outlet is blocked, there may
be a large quantity of water (max. 30l)
left behind in the washing machine.
Risk of scalding due to hot suds.
Escaping suds will be hot if laundry
has been washed at high temperatures.
Carefully allow all suds to drain off.
49

Problem solving guide
Cleaning the drain filter
Once the flow of water ceases:
Remove the drain filter completely.
Clean the drain filter thoroughly.
Water damage.
Water will escape from the machine
if you forget to replace the drain filter.
Replace the drain filter correctly and
tighten it securely.
Opening the door
Danger of injury due to rotating
drum.
Reaching into a moving drum is ex-
tremely dangerous.
Always make sure that the drum is
stationary before reaching in to remove laundry.
Check the drain pump impellers to
make sure they can rotate freely.
Remove any foreign objects (e.g. but-
tons, coins, etc.) and clean the interior.
Put the drain filter back in place and
secure it.
50
Use a screwdriver to unlock the door.
Pull open the door.

Miele Service
Made in xxx
Mod.: XXXxxx
M-Nr.: xxxxxxxx
Type: XXxx-X
Nr.:/ xxxxxxxxx
Contact in case of malfunction
In the event of any faults which you
cannot remedy yourself, please contact
your Miele Dealer or Miele Service.
Contact information for Miele Service
can be found at the end of this document.
Please quote the model and serial number of your appliance when contacting
Miele Service. This information can be
found on the data plate.
The data plate is found above the
porthole glass when the washing machine door is opened:
EPREL database
From 1 March 2021, information on energy labelling and ecodesign requirements will be available in the European
Product Database (EPREL). You can
find the product database at the following link https://eprel.ec.europa.eu/. You
will be asked to enter the model identifier.
The model identifier can be found on
the data plate.
Optional accessories
Optional spare parts and accessories
for this washing machine are available
from Miele.
51

*INSTALLATION*
Installation
Front view
a
Inlet hose (cold water)
b
Electrical connection
c
Control panel
d
Detergent drawer
52
e
Door
f
Access flap to drain filter and drain
pump
g
Height-adjustable feet

*INSTALLATION*
Installation
Rear view
a
Protruding lid for holding when moving the appliance
b
Electrical connection
c
Interface for communicating with external appliances
d
Drain hose
e
Water inlet hose (cold water)
f
Safety caps for transit bars
g
Transport clips for hoses
h
Holder for removed transit bars
53

*INSTALLATION*
1132
850
>1000
714
min. 300
1702
Installation
Installation locations
Side view
Washer-dryer stack
Installation on a plinth
The washing machine can be installed
on a steel plinth (open or closed, available as an optional Miele accessory) or
on a concrete plinth.
Injury can occur if the washing
machine has not been adequately
secured.
When installing the machine on a
plinth, there is the danger of the
washing machine falling off the plinth
during spinning.
Secure the washing machine using
the clamps supplied.
Installation notes
The distances between the machine
and the wall are recommendations to
help make it easier to carry out service
work. If installation space is limited,
the machine can also be pushed up
against the wall.
The washing machine can be installed
as a washer-dryer stack together with a
Miele tumble dryer. This requires a
Miele washer-dryer stacking kit which
can be purchased separately.
54
This washing machine is not suitable
for building under.
Risk of damage due to moisture
ingress.
Moisture can damage electrical com-
ponents.
Do not install the machine near or
directly above an open gully or floor
drain.

*INSTALLATION*
Installation
Transporting the washing machine to its installation site
Danger of injury from incorrect
transport.
If the washing machine tips up there
is a danger of injury to people and
damage to property.
Make sure the washing machine is
stable during transportation.
Transporting the washing machine with a sack truck
Transporting the washing machine to its installation site
The protruding lid at the back can be
used to hold the machine when transporting.
Danger of injury due to unsecure
lid.
The fixings at the back of the lid
could break as a result of external
forces. There is a danger of the lid
being pulled off when carrying the
machine.
Before carrying the machine, check
that the lid is secure where it protrudes at the back of the machine.
If transporting the washing machine
with a sack truck, make sure its left or
right side is resting on the truck.
Risk of damage from incorrect
transport.
The front or back of the washing ma-
chine may be damaged if the machine is transported with a sack
truck.
Always insert the sack truck under
one of the sides of the washing machine.
Carry the washing machine by the
front feet and by the lid where it protrudes at the back of the appliance.
55

*INSTALLATION*
Installation
Installation surface
A concrete floor is the most suitable installation surface, being far less prone
to vibration during the spin cycle than
wooden floorboards or a carpeted surface.
The machine must be level and se-
curely positioned.
To avoid vibrations during spinning,
the machine should not be installed
on soft floor coverings.
If installing on a wooden joist floor:
Install the machine on a plywood
base (at least 70x60x3cm). The
base should span several joists and
be bolted to the joists and not only to
the floorboards.
Tip: If possible, install the machine in a
corner of the room. This is usually the
most stable part of the floor.
Removal of transit bars
Removing the left-hand transit bar
Push the cover out and turn the
transit bar 90° using the open spanner supplied.
56
Pull out the transit bar.

*INSTALLATION*
Installation
Removing the right-hand transit bar
Push the cover out and turn the
transit bar 90° using the open spanner supplied.
Covering holes
Danger of injury from sharp
edges.
There is a danger of injury from
reaching into holes that are not
covered.
Cover the holes for the transit bars
after they have been removed.
Push the covers in firmly until they
engage in position.
Pull out the transit bar.
57

*INSTALLATION*
Installation
Securing the transit bars
Secure the transit bars to the back of
the washing machine.
Tip: Make sure that the holes are fit-
ted over the retainers .
Risk of damage from incorrect
transport.
The washing machine may become
damaged if moved without the transit
bars in place.
Keep the transit bars in a safe place.
Fit them again if the washing machine is to be moved (e.g. when
moving house).
Fitting the transit bars
Opening the covers
Press against the retainer with a
sharp object (a narrow screwdriver,
for example).
The cover opens.
Fitting the transit bars
To fit the bars, follow the instructions
for removing them in reverse order.
Tip: The bars will slide in more easily if
you lift the drum slightly.
58

*INSTALLATION*
Levelling the washing machine
The washing machine must stand perfectly level on all four feet to ensure
safe and proper operation.
Incorrect installation may increase electric and water consumption and may
cause the machine to move about.
Screwing out and adjusting the feet
The 4 adjustable screw feet are used for
levelling the washing machine. The machine is supplied with all four feet
screwed in.
Installation
Use a level to check that the washing
machine is standing level.
Hold foot 1 securely with a pipe
wrench. Turn counter nut 2 again using the spanner supplied until it sits
firmly up against the housing.
Using the spanner supplied, turn
counter nut 2 in a clockwise direction.
Then turn counter nut 2 together with
foot 1 to unscrew.
Risk of damage due to incor-
rectly aligned washing machine.
There is a danger of the washing ma-
chine moving about if the feet are not
secured.
Turn all 4 counter nuts for the feet
until they sit firmly up against the
housing. Please also check this for
the feet which did not need adjustment.
59

*INSTALLATION*
Installation
Holding bracket for plinth
The holding bracket prevents the washing machine from falling off the plinth
during operation.
Fastening with the holding bracket is
only intended for plinths made from
concrete. The plinth must be flat and
level. The surface below the plinth must
be able to withstand the physical loads.
Prior to installation, check whether the
plinth complies with the minimum dimensions.
Height: 6cm
Width: 60cm
Depth: 65cm
Positioning the holding bracket
Risk of injury from sharp edges.
The holding bracket has sharp
edges. You could cut yourself on the
edges.
Take care when handling the holding
bracket.
Wear gloves while installing the holding bracket.
Place the holding bracket on the front
appliance feet.
Mark the position of the front edge of
the holding bracket with a pencil.
Remove the holding bracket from the
feet.
Carefully move the washing machine
until you have enough space to install
the holding bracket.
The front appliance feet must protrude
by at least 3mm. The washing machine must already be aligned (see
“Installation – Aligning the washing
machine”)
60

*INSTALLATION*
Installation
Installing the holding bracket
Place the holding bracket on the
marking on the plinth.
In the middle of the two outer slotted
holes, mark a point for each drill hole.
Drill 2holes (8mm) with a depth of
approx. 55mm.
Insert the plugs in the holes.
Install the holding bracket with the
hexagon screws and the washers.
Do not tighten the screws yet – this
will allow the holding bracket to be
moved sideways.
Securing the washing machine with the holding bracket
Push the washing machine back on
to the installed holding bracket.
Insert the appliance feet (the part
between the foot and the locknut)
into the openings in the holding
bracket.
Push the holding bracket to the right
as far as it will go.
Tighten the hexagon screws using a
spanner.
The washing machine is secured in the
holding bracket.
61

*INSTALLATION*
Installation
External control equipment
The XCI box accessory is needed to
connect external control equipment,
such as payment systems.
Payment system
This washing machine can be fitted with
a payment system (optional accessory).
The necessary reprogramming must always be carried out by Miele Service or
a Miele Service Dealer.
Coins/tokens must be removed from
the coin box regularly. Otherwise, the
payment system will become blocked.
62

*INSTALLATION*
Installation
Water connection
Cold water connection
The washing machine should be connected to a mains water supply in accordance with current local and national
safety regulations. The German authorities do not require it to have a non-return valve as the washing machine has
been designed to comply with DIN regulations.
In the U.K. both the hot and cold water supplies must be connected to
the mains water connection with the
provided double check valve. Hot
water temperature must not exceed
60 °C.
The flow pressure must amount to a
minimum of 100kPa and must not exceed 1000kPa. If the pressure exceeds
1000kPa, a pressure reducing valve
must be installed.
For the connection, a stopcock with a
¾" screw thread is required. If this type
of stopcock is not available, only a
qualified installer may connect the
washing machine to the mains water
supply.
The connection point is subject to
mains water pressure.
Turn on the stopcock slowly and
check for leaks. Correct the position
of the washer and screw thread if appropriate.
Maintenance
Only use genuine Miele hoses that have
been tested to withstand pressure of at
least 7000kPa should you ever need a
replacement.
A filter is located in the open end of
the inlet hose and another in the intake point to protect the water inlet
valve.
Neither filter may be removed.
Hose extension
Longer hoses of 2.5m or 4.0m in
length are available from Miele or from
your Miele dealer as accessories.
Hot water connection
The washing machine can be connected to a hot water connection (up to a
maximum of 70°C).
This requires a special water inlet hose.
The hose can be ordered from a Miele
dealer or the Miele Customer Service
Department.
If the washing machine is connected to
a hot water point, you must configure
the settings Main wash water, Pre-wash
water and Rinse water to hot (see “Supervisor level”).
The inlet hose for cold water is not
suitable for connection to a hot water
supply.
63

*INSTALLATION*
Installation
Drainage
Drain pump
The suds are drained through a drain
pump with a 1m delivery head. For the
water to drain freely, the hose must be
free of kinks. The elbow piece (accessory) can be hooked onto the end of the
hose.
Drainage options
1. Connected securely to a plastic drain
pipe with a rubber nipple (there is no
need to use a siphon).
2. Connected securely to a washbasin
with a plastic nipple.
3. Connected securely to a floor drain
(gully).
If required, the hose can be extended to
a length of up to 5m. Accessories are
available from Miele or from your Miele
dealer.
For a drain height of more than 1m (up
to a max. of 1.6m), a replacement drain
pump is available from Miele or from
your Miele dealer.
64

*INSTALLATION*
Installation
Electrical connection
This description applies to washing
machines both with and without a
mains plug.
The following applies to washing machines with a mains plug:
- The washing machine is ready to be
connected.
- The electrical socket must be easily
accessible after installation so that
the machine can be disconnected
from the electricity supply if necessary.
Damage caused by incorrect
supply voltage.
The data plate indicates the nominal
power consumption and the appropriate fuse rating.
Compare the specifications on the
data plate with those of the mains
electricity supply and make sure that
they match.
The washing machine may only be connected to a permanent electrical system
that conforms to the national and local
codes and regulations.
Do not connect the machine to an extension lead or multi-socket adapter as
they do not guarantee the required
safety of the appliance (e.g. danger of
overheating).
relays according to IEC/EN60947). This
connection process must be performed
by a qualified electrician.
The plug connector or isolator switch
should be easily accessible at all times.
Risk of electric shock.
If the washing machine is disconnected from the mains, protective measures must be taken to ensure that the
point of disconnection cannot accidentally be switched on again.
Make sure the isolator is lockable or
the point of disconnection is monitored at all times.
New connections, modifications to the
system, or servicing of the earthing
conductor, including determining the
correct fuse amperage, must be carried
out by a qualified electrician, as they
are familiar with the pertinent regulations and the specific requirements of
the electric utility company.
If converting the washing machine to
an alternative voltage, observe the
instructions in the wiring diagram.
Conversion must be performed by
Miele Service or by an authorised
Miele dealer.
If the machine is hard wired, an all pole
circuit breaker must be provided onsite. When switched off there must be
an all-pole contact gap of at least 3mm
in the isolator switch (including miniature circuit breaker, switch, fuses and
65

*INSTALLATION*
Installation
Single phase AC 230 V – country variant 230V 25A
This device is intended for connection
to a power supply system where the
maximum value of external phase neutral loop impedance Zmax of 0.38 Ohms
at the point of distributor supply connection is not exceeded.
The user has to ensure that this device
is connected only to a power supply
system which fulfils the requirement
above. If in doubt, please ask your electrical distributor for actual impedance
value.
66

Height 850mm
Width 596mm
Technical data
Width (for appliances with a stainless steel
lid)
Depth 714mm
Depth with door open 1132mm
Weight Approx. 100kg
Maximum floor load in operation 3000newtons
Capacity 7.0kg dry laundry
Supply voltage See data plate on back of appli-
Rated load See data plate on back of appli-
Fuse rating See data plate on back of appli-
A-rated sound emissions LpA in accordance
with ENISO11204/11203
Minimum water flow pressure 100kPa (1bar)
Maximum water flow pressure 1000kPa (10bar)
Water inlet hose length 1.55m
Connection cable length 1.80m
605mm
ance
ance
ance
<70dB re 20µPa
Maximum delivery head (drain pump) 1.00m
LEDs Class1
Product safety standard EN50571, EN60335
Test certifications awarded See data plate
Power rating in off mode 0.50W
Networked standby 0.90W
Frequency band of the WiFi module 2.4000GHz–2.4835GHz
Maximum transmission power of the WiFi
module
<100mW
67

Technical data
Conformity declaration
Miele hereby declares that this washing machine complies with Directive 2014/53/
EU.
The complete text of the EU declaration of conformity is available from one of the
following internet addresses:
- Products, Download from www.miele.co.uk
- For service, information, operating instructions etc: go to www.miele.co.uk/domestic/customer-information-385.htm and enter the name of the product or the
serial number
68

Residual
moisture Speed
1
ure
Temperat-
Programme
running time
Consumption data
kg kWh Litres h:min °C % rpm
3.5 0.45 38 2:39 31 44 1600
2.0 0.23 26 2:39 24 44 1600
Programme Load Energy Water
13 A variant (See data plate on back of machine)
ECO40-60* 7.0 0.60 45 3:19 34 44 1600
Cottons 60 7.0 0.98 49 1:09 48 48 1600
20 7.0 0.20 49 1:09 20 48 1600
Minimum iron 30 3.5 0.30 50 0:45 28 38 1200
Test programme for compliance with EU legislation regarding ecodesign 2019/2023 and energy labelling in accordance with Regulation
No. 2019/2014
Express 30 3.5 0.30 30 0:20 30 60 1400
Maximum laundry temperature reached in main wash.
*
1
Consumption data can vary from the nominal values given depending on water pressure, water hardness, water
inlet temperature, room temperature, type and volume of load, fluctuations in the mains voltage and any extra
options selected.
69

Supervisor level
Supervisor
level
Access via code
Change code
Enter code
OK
0
Supervisor
level
Language
Brightness
The settings menu in the Supervisor level is locked against unauthorised access. The menu can be unlocked with a code.
Code-based access
Supervisor level is accessed using a
code.
The code is 000 (factory default).
Changing the code
You can alter the Supervisor level access code to protect the washing machine from unauthorised access.
Enter the individual numbers and
confirm each selection with OK.
The Supervisor level settings are
opened.
Please inform Miele Service if you
have forgotten your new code. Miele
Service will have to reset the code.
Make a note of your new code and
store it in a safe place.
Opening the Supervisor level
Touch the sensor.
The symbol appears in the display
if e.g. you turn the programme selector to the Drain/Spinprogramme.
SelectAccess via code.
70
Select the setting you want.
Some settings are only visible if external devices are connected via the
XCI box.
Exiting the Supervisor level
Touch the sensor or switch off the
washing machine.

Supervisor level
Language
The display can be set to appear in
one of several different languages. To
select the permanent operator language you want, go to the Languages
sub-menu.
When a programme is running, you can
change the user language using the
sensor.
Brightness
The brightness of the display can be
set in intervals of ten from 10% to
100%.
Factory default: 70%
Clock display
After selecting the clock format, you
can set the time of day.
Clock format
- 24h clock (factory default)
Keypad tone volume
The volume of the tone that sounds
when a sensor is touched can also be
changed.
It can be set to one of 7 different levels
or switched off altogether.
Factory default setting: normal
Welcome tone volume
The volume of the welcome tone that
sounds when the washing machine is
switched on can be changed.
It can be set to one of 7 different levels
or switched off altogether.
Factory default setting: normal
Fault alarm
The tone that sounds in the event of a
fault can be switched on or off.
Factory default: Off
- 12h clock
- Clock off
Set
- The time of day can be set.
Finish tone volume
The volume can be changed for the
buzzer that sounds at the end of the
programme.
It can be set to one of 7 different levels
or switched off altogether.
Factory default: Off
Memory
The washing machine will save the
settings (temperature, spin speed and
some of the options) which have been
selected for a programme after the
programme has started.
When the programme is chosen again,
the saved settings will appear in the
display.
Factory default: Off
71

Supervisor level
Anti-crease
The Anti-crease function reduces
creasing after the end of the programme.
At the end of the programme, the drum
continues to turn at intervals for up to
30minutes. The washing machine door
can be opened at any time.
Factory default: On
Suds cooling
Additional water flows into the drum at
the end of the main wash to cool the
suds down.
Suds cooling takes place when a programme with a temperature of 70°C or
higher is selected.
Suds cooling should be activated:
- To prevent the danger of scalding if
the drain hose is hooked over the
edge of a sink or basin.
- Where the drainage pipes do not
comply with DIN1986.
Factory default: On
"Display" switch-off status
To save energy, the display goes out
and the Start/Stopbutton flashes
slowly.
Changing this setting leads to increased
energy consumption.
- Off
The display will remain on.
- On after 10min, not in current programme (factory default)
The display will remain on while the
programme is running but will go out
10minutes after the end of the programme.
- On after 30min, not in current programme
The display will remain on while the
programme is running but will go out
30minutes after the end of the programme.
- On after 10min
The display will go out after
10minutes.
- On after 30min
The display will go out after
30minutes.
72

Supervisor level
Delay start
The type of time input for the Delay
start function can be changed or
switched off.
- Off
The Delay start function is not available for selection.
- End of programme (factory default)
With the Delay start function, you
specify at what time the wash programme should end.
- Beginning of programme
With the Delay start function, you
specify at what time the wash programme should begin.
- Time until start
With the Delay start function, you
specify after how many hours a programme should begin.
SmartStart
The function of the sensor control
changes when the SmartGrid setting
is activated and the Time until start
option is selected in the Delay start
setting. The period of time in which
the wash programme will start automatically is then shown in the display:
SmartStart
Programme name
When selecting a standard programme, the name of the selected
programme is shown in the display.
- On (factory default)
When a programme is selected, the
programme name is displayed for a
few seconds before the display
shows the main menu.
- Off
The main menu is displayed immediately.
Visibility parameters
Various parameters are offered/displayed when a programme is selected.
You can decide which parameters
should not be displayed. These parameters can then not be edited during
programme selection.
Factory default: all parameters are visible.
The programme is started via an external signal.
The time period can be defined up to
24hours. During this period, the washing machine waits for the external signal. If no signal is sent during the
defined period, the washing machine
starts the drying programme once the
defined period of time has elapsed.
73

Supervisor level
Pre-wash water
You can select the water type for the
pre-wash.
- Cold
Only cold water is used for the prewash.
- Hot
Hot water is also added for the prewash.
Hot water can only be added if the
wash temperature is above 30°C.
Main wash water
You can select the water type for the
main wash.
- Cold
Only cold water is used for the main
wash.
- Hot
Hot water is also added for the main
wash.
Hot water can only be added if the
wash temperature is above 30°C.
First rinse water
You can select the water type for the
first rinse in some programmes.
- Cold (factory default)
Only cold water is used for the first
rinse.
- Hot
Hot water is also added for the first
rinse.
Final rinse water
You can select the water type for the
last rinse in some programmes.
- Cold (factory default)
Only cold water is used for the final
rinse.
- Hot
Hot water is also added for the final
rinse (only possible for programmes
with a temperature of at least 60°C).
Programme durations will be longer if
the machine is not connected for hot
water; this may mean that the “Time
left” display is incorrect.
74

Supervisor level
Low water pressure
If the water pressure is below 100kPa
(1bar), the programme will be cancelled and the fault message Check
water inlet will appear.
If the on-site water pressure cannot be
increased, activating the setting Low wa-
ter pressurewill prevent the programme
from being cancelled.
Factory default: On
Water level Cottons
You can increase the water level for
the main wash in the Cottonsprogramme.
- + 0mm wc (factory default)
- + 10mm wc
- + 20mm wc
- + 30mm wc
Water level Minimum iron
You can increase the water level for
the main wash in the Minimum
ironprogramme.
- + 0mm wc (factory default)
- + 10mm wc
- + 20mm wc
- + 30mm wc
Cottons Pre-wash temp
You can select the temperature for the
pre-wash in the Cottonsprogramme.
- 30°C (factory default)
- 35°C
- 40°C
- 45°C
Wash time Pre-wash
You can increase the duration for the
pre-wash in the Cottonsprogramme.
- + 0min (factory default)
- + 6min
- + 9min
- + 12min
75

Supervisor level
Wash time Cottons
You can increase the duration for the
main wash in the Cottonsprogramme.
- + 0min (factory default)
- + 10min
- + 20min
- + 30min
- + 40min
Wash time Minimum iron
You can increase the duration for the
main wash in the Minimum ironprogramme.
- + 0min (factory default)
- + 5min
- + 10min
- + 15min
- + 20min
Pre-rinse Cottons
A pre-rinse can be activated in the
Cottonsprogramme.
Factory default: Off
Pre-rinse Minimum iron
A pre-rinse can be activated in the
Minimum ironprogramme.
Factory default: Off
Pre-wash Cottons/Min. iron
In the programmes Cottons and Minimum iron, you can choose whether a
pre-wash is permanently activated or
whether it can be selected during programme selection.
Factory default: Menu selection
Cottons rinses
You can alter the number of rinse
cycles in the Cottonsprogramme.
- 1rinse cycles
- 2rinse cycles (factory default)
- 3rinse cycles
- 4rinse cycles
- 5rinse cycles
Min. iron rinses
You can alter the number of rinses
carried out in the Minimum ironprogramme.
76
- 2 rinses (factory default)
- 3 rinses
- 4 rinses

Supervisor level
Temp reduction
The suds temperature can be reduced
to prevent the suds from boiling too
early in high-altitude locations.
Factory default: Off
Auto load control
This washing machine comes with
automatic load control. In some programmes, the water levels and the
programme cycle times are adapted to
the load. If the auto load control is deactivated, the machine will always
carry out the programme sequence
based on a full load.
Factory default: On
COM module selection
This washing machine is equipped
with an integrated WiFi module.
- Off (factory default setting)
- Internal module
WiFi/LAN
Control the networking of your washing machine.
- Setup
This message only appears if the
washing machine has not yet been
connected to a WiFi network.
- Deactivate (visible if the network is
activated).
The network remains set up; the WiFi
function is switched off.
- Activate (visible if the network is deactivated).
The WiFi function is reactivated.
- Connection status (visible if the network is activated)
– The quality of WiFi reception
– The network name
– The IP address
- Set up again (visible if already set
up).
The internal WiFi module is used.
Resets the WiFi login (network) to immediately re-establish a new connection.
- Reset (visible if already set up)
The network is no longer set up. A
new connection has to be established in order to use the network
again.
– The WiFi is switched off.
– The WiFi connection will be reset
to the factory default setting.
77

Supervisor level
WiFi setup
There are 2 possible connection methods.
WPS
Activate the WPS function on your
router within 2minutes.
Tip: If the connection has not been set
up when the timeout has finished
counting down, repeat the process.
Soft AP
Activate the function with the Miele
app on your smart device within
10minutes.
Tip: The app will guide you through the
remaining steps.
Network time
The date and time can be synchronised over the network.
- Off
The date and time are not synchronised over the network.
- As master
The machines are in a network but
are not connected to the Internet. A
machine is declared as the master
and sends data to the slave devices.
- As slave
The machines are in a network and
are connected to the Internet. All machines are configured as slaves. Data
is synchronised over the Internet.
Remote
Operating data relating to the washing
machine (e.g. fault messages or notifications) is communicated externally.
78
Factory default: On

Supervisor level
RemoteUpdate
The RemoteUpdate function is used to
update the software in your washing
machine.
RemoteUpdate is activated by default.
If you do not install a RemoteUpdate,
you can continue to use your washing
machine in the usual way. However,
Miele recommends installing RemoteUpdates.
Running a RemoteUpdate
If a RemoteUpdate is available for your
washing machine, it will be displayed
automatically when the operator level is
open.
You can choose to start the RemoteUpdate immediately or wait until later. If
you select “Start later”, the prompt to
run the RemoteUpdate will be displayed
again the next time you switch on your
washing machine.
SmartGrid
You can use the SmartGrid setting to
integrate your washing machine into
building energy management systems.
Factory default: Off
Alternating current
The time left display depends on the
electrical connection. If a single-phase
connection is used, the setting must
be switched to No.
Factory default: Yes
Heating
The heating can be switched off and
the Thermostop step is skipped. In addition, heater fault monitoring is deactivated.
Factory default: On
The RemoteUpdate can take a few
minutes.
Please note the following information
about the RemoteUpdate function:
- You will only receive a message when
a RemoteUpdate is available.
- Once a RemoteUpdate has been installed, it cannot be undone.
- Do not switch off the washing machine during a RemoteUpdate. Otherwise, the RemoteUpdate will be aborted and will not be installed.
79

Supervisor level
Legal information
Open source licences
You can view information here.
Copyrights and licences for operator and control software
Miele uses their own and third party
software which is not subject to any socalled open source licence for the operation and control of the machine. This
software/these software components
are protected by copyright. The copyright powers of Miele and third parties
have to be respected.
Furthermore, this machine contains
software components which are distributed under open source licence conditions. Please refer to the menu item Set-
tings| Machine parameters| Legal information| Open source licences in the machine
for the Open Source components contained therein, together with the corresponding copyright notices, copies of
the licencing conditions valid at the
time, and any further information. The liability and warranty provisions of the
Open Source licence terms and conditions as stated therein apply only in relation to the respective rights holders.
Payment system
If you wish to change the settings after
the commissioning process, please
contact the Miele Customer Service Department.
The XCI-AD or XCI box accessory unit
is required to connect a payment system.
Settings for payment systems
You would like to connect a payment
system.
- No payment system
The next settings are skipped and initial commissioning can be completed.
- Programme operation
The machine is operated using a coin
box. The user purchases a wash programme.
- Timed operation
The machine is operated using a coin
box. The user purchases a time-managed programme.
80

Supervisor level
Feedback signal to pay system
Setting the feedback signal for the
coin box.
- Factory default: Off
- End of programme
The feedback signal is sent at the
end of the programme.
- Release of the start button
The feedback signal is sent when the
start button is released.
- Start and programme end
The feedback signal is sent at the
start and end of the programme.
- Programme running
The feedback signal is sent constantly between the start and end of
the programme.
Payment system lock
To avoid tampering, a programme lock
can be set up in programme control. If
the lock is applied, the programme is
interrupted and payment credit is lost
as soon as the door is opened.
The time for the lock to be applied can
be adjusted to enable laundry to be added.
- Off
- As soon as the programme starts
- 1minute after the start of the programme
- 2minutes after the start of the programme
- 3minutes after the start of the programme (factory default)
- 4minutes after the start of the programme
- 5minutes after the start of the programme
81

Supervisor level
FOC programmes
In coin mode, you can decide whether
the Drain/Spin programme can be used
for free.
Factory default: Off
Delete paid signal
The “Paid” signal in coin box mode
can be applied until the end of the
programme or discarded if the programme is not started after 5minutes.
Factory default: Off
Debounce time
In coin mode, the debounce time for
the minimum payment signal that
must be applied can be adjusted.
- Factory setting: Short
For coin boxes where the falling coin
generates the paid pulse.
- Long
For central control units on a 230V
basis.
82

Malaysia
Miele Sdn Bhd
Suite 12-2, Level 12
Menara Sapura Kencana Petroleum
Solaris Dutamas No. 1, Jalan Dutamas 1
50480 Kuala Lumpur, Malaysia
Phone: +603-6209-0288
Fax: +603-6205-3768
Miele New Zealand Limited
IRD 98 463 631
8 College Hill
Freemans Bay, Auckland 1011, NZ
Tel: 0800 464 353
Internet: www.miele.com.au/professional
E-mail: sales@miele-professional.com.au
New Zealand
Miele Pte. Ltd.
29 Media Circle, #11-04 ALICE@Mediapolis
Singapore 138565
Tel: +65 6735 1191, Fax: +65 6735 1161
E-Mail: info@miele.com.sg
Internet: www.miele.sg
Singapore
Miele (Pty) Ltd
63 Peter Place, Bryanston 2194
P.O. Box 69434, Bryanston 2021
Tel: (011) 875 9000, Fax: (011) 875 9035
E-mail: info@miele.co.za
Internet: www.miele.co.za
South Africa
Miele Appliances Ltd.
Showroom 1, Eiffel 1 Building
Sheikh Zayed Road, Umm Al Sheif
P.O. Box 114782 - Dubai
Tel. +971 4 3044 999, Fax. +971 4 3418 852
800-MIELE (64353)
E-Mail: info@miele.ae, Website: www.miele.ae
United Arab Emirates
United Kingdom
Miele Co. Ltd., Fairacres, Marcham Road
Abingdon, Oxon, OX14 1TW
Professional Sales, Tel: 0845 365 6608
E-mail: professional@miele.co.uk
Internet: www.miele.co.uk/professional
Miele Australia Pty. Ltd.
ACN 005 635 398, ABN 96 005 635 398
1 Gilbert Park Drive, Knoxfield, VIC 3180
Tel: 1300 731 411
Internet: www.miele.com.au/professional
E-mail: sales@miele-professional.com.au
Australia
Miele Electrical Appliances Co., Ltd.
1-3 Floor, No. 82 Shi Men Yi Road
Jing' an District, 200040 Shanghai, PRC
Tel: +86 21 6157 3500, Fax: +86 21 6157 3511
E-mail: info@miele.cn, Internet: www.miele.cn
China Mainland
Miele (Hong Kong) Ltd.
41/F - 4101, Manhattan Place
23 Wang Tai Road, Kowloon Bay, Hong Kong
Tel: (852) 2610 1025, Fax: (852) 3579 1404
Email: customerservices@miele.com.hk
Website: www.miele.hk
Hong Kong, China
Miele India Pvt. Ltd.
1st Floor, Copia Corporate Suites,
Commercial Plot 9, Mathura Road, Jasola,
New Delhi - 110025
E-mail: customercare@miele.in, Website: www.miele.in
India
Miele Ireland Ltd.
2024 Bianconi Ave., Citywest Business Campus, Dublin 24
Tel: (01) 461 07 10, Fax: (01) 461 07 97
E-Mail: info@miele.ie, Internet: www.miele.ie
Ireland
Manufacturer: Miele & Cie. KG
Carl-Miele-Straße 29, 33332 Gütersloh, Germany

PWM 307 CC
M.-Nr. 11 713 010 / 01en-GB
 Loading...