How it Works
Log In / Sign Up
Buy Points
How it Works
FAQ
Contact Us
Questions and Suggestions
Users
Miele
Loading...
K
KTN12720
KTN 12720 SD ed-1
4
KTN 12720 SD edt
4
KTN14840
KTN 14840 SD cs
5
KTN 14840 SD ED
9
KTN 2450 S
KTN4252
KTN 4252 SD
8
KTN4352
KTN 4352 SD ed
6
KTN 4452 SD
3
KTN 4552 SD ED
3
KTN 4582 SD
5
KTN 4582 SD ED
8
KTN 4582 SD ED-1
4
KTS 600 L
KTS 600 R
KUBS 50
KWF 7510 SNE ED-3
6
KWFN8705SED
KWFN 8705 SE ED
8
KWFN8706
KWFN 8706 SE
KWFN 8706 SE ED
11
KWFN 8706 SE ED-1
9
KWL 1090 S
9
KWL 1630 S
10
KWL 1900 S
10
KWL 4612 S
10
KWL4712
KWL 4712 S ed
6
KWL 4712 SG
KWL 4712 SG ed
10
KWL 4812 S
12
KWL4912
KWL 4912 S
KWL 4912 S ed
7
KWL 4912 S ED-1
8
KWL 4912 SG
2
KWL 4912 SG ed
12
KWNS 28462 E
2
KWNS 28462 E cs
11
KWNS 28462 E ed
11
KWNS 28462 E ed/cs
KWT 16
KWT 1601 SF
3
KWT1601Vi
15
KWT 1602 Vi
33
KWT1603SF
7
KWT 1603 Vi
8
KWT 1612 Vi
34
KWT 2601 Vi
7
KWT 2602 SF
KWT 2602 Vi
8
KWT 2611 SF
3
KWT 2611 Vi
10
KWT 2612 SF
KWT 2612 Vi
10
KWT 2661 SFS
3
KWT 2661 ViS
21
KWT 2662 ViS
17
KWT 2671 ViS
22
KWT 2672 ViS
21
KWT 4154 UG
15
KWT 4974 SG
2
KWT 4974 SG ed
16
KWT 6112 IG
8
KWT 6112 iG cs
19
KWT 6112 iG ed
19
KWT 6112 iG ed/cs
KWT 6112 iG grgr
20
KWT 6112 iG obsw
20
KWT 6312
KWT 6312 UGS
15
KWT 6312 UGS C
KWT 6321 UG
11
KWT 6321 UG C
KWT 6321 UG CH
3
KWT 6322 UG
34
KWT 6322 UG C
KWT 6322 UG cs
KWT 6322 UG ed
KWT 6422 i
13
KWT 6422 iG
22
KWT 6422 iG grgr
6
KWT 6722 iGS
18
KWT 6722iGS OBSW
KWT 6722 iS
3
KWT 6831 SG
12
KWT 6831 SG CH
3
KWT 6832 SGS
24
KWT 6833 SG
11
KWT 6834 SGS
25
KWT 6843 SGS C
KWT 7112 iG
5
KWT 7112 iG cs
15
KWT 7112 iG ed
15
KWT 7112 iG grgr
15
KWT 7112 iG obsw
15
Loading...
Loading...
Nothing found
KWT 2601 Vi
assembly instructions
96 pgs
4.64 Mb
0
assembly instructions
100 pgs
4.63 Mb
0
Installation Manual [zh]
88 pgs
4.77 Mb
0
Operating instructions
100 pgs
4.87 Mb
0
Operating instructions
96 pgs
4.62 Mb
0
Specifications
12 pgs
6.63 Mb
0
User manual [pt]
96 pgs
4.63 Mb
0
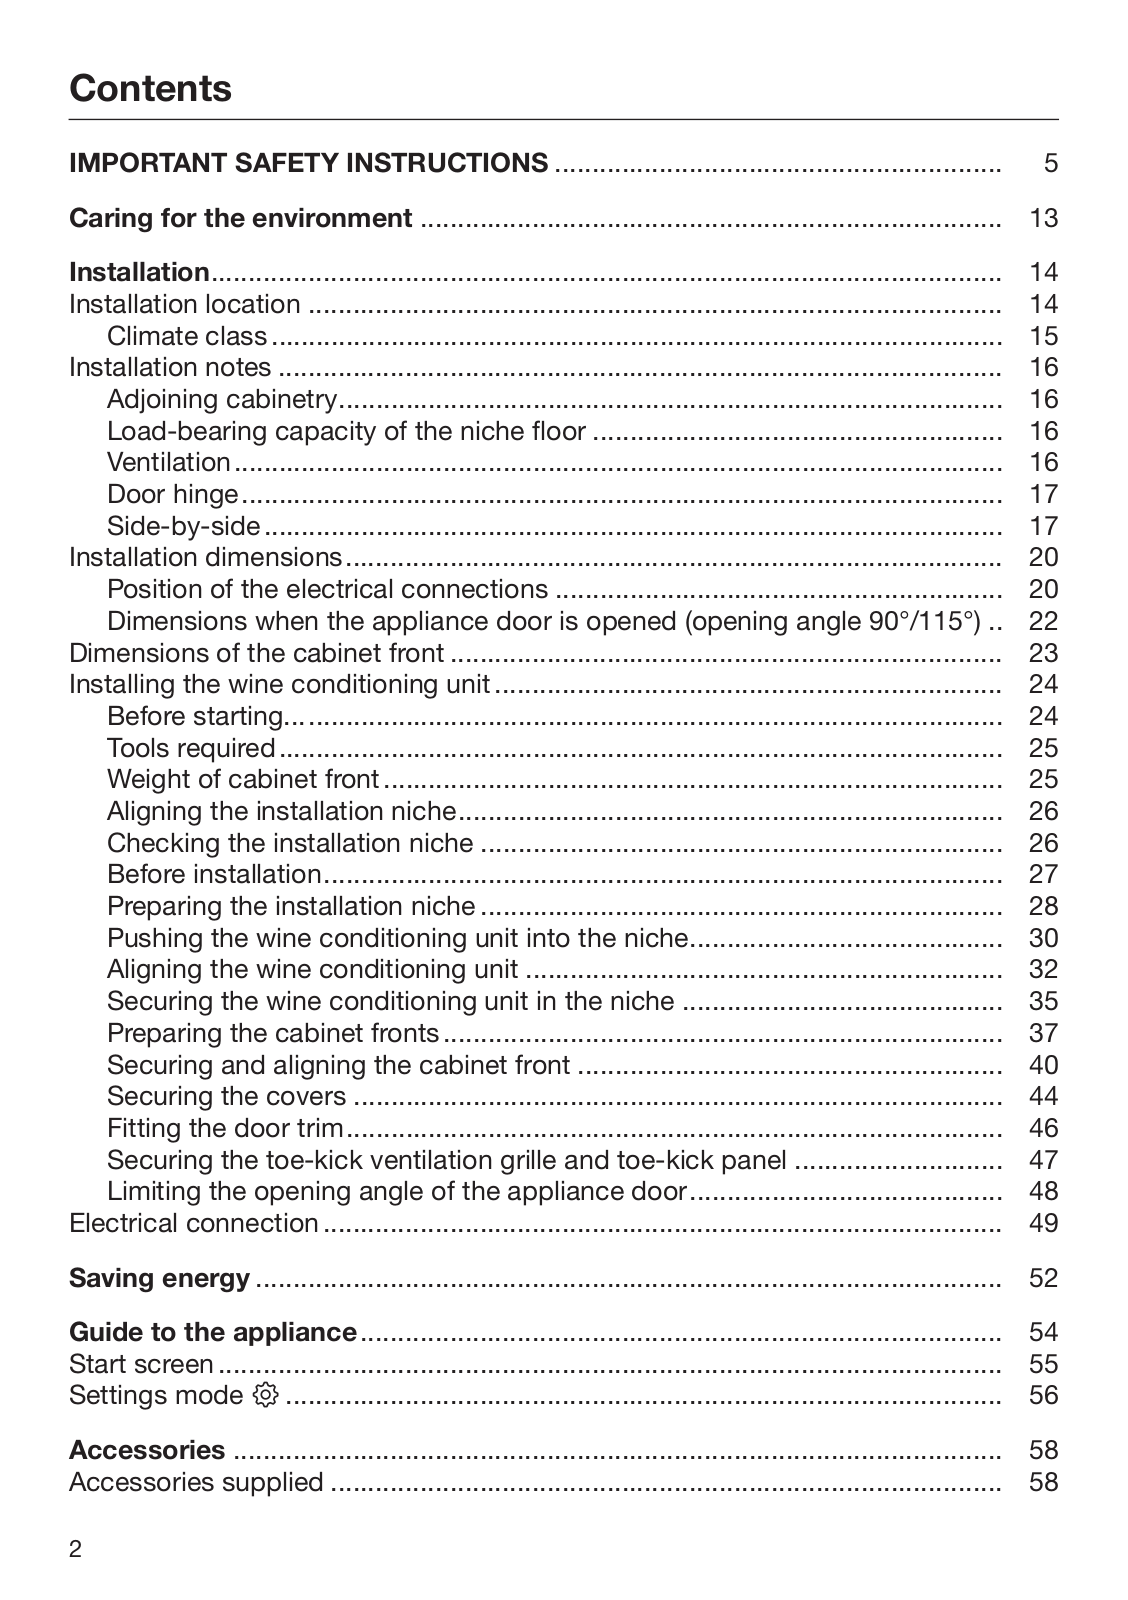
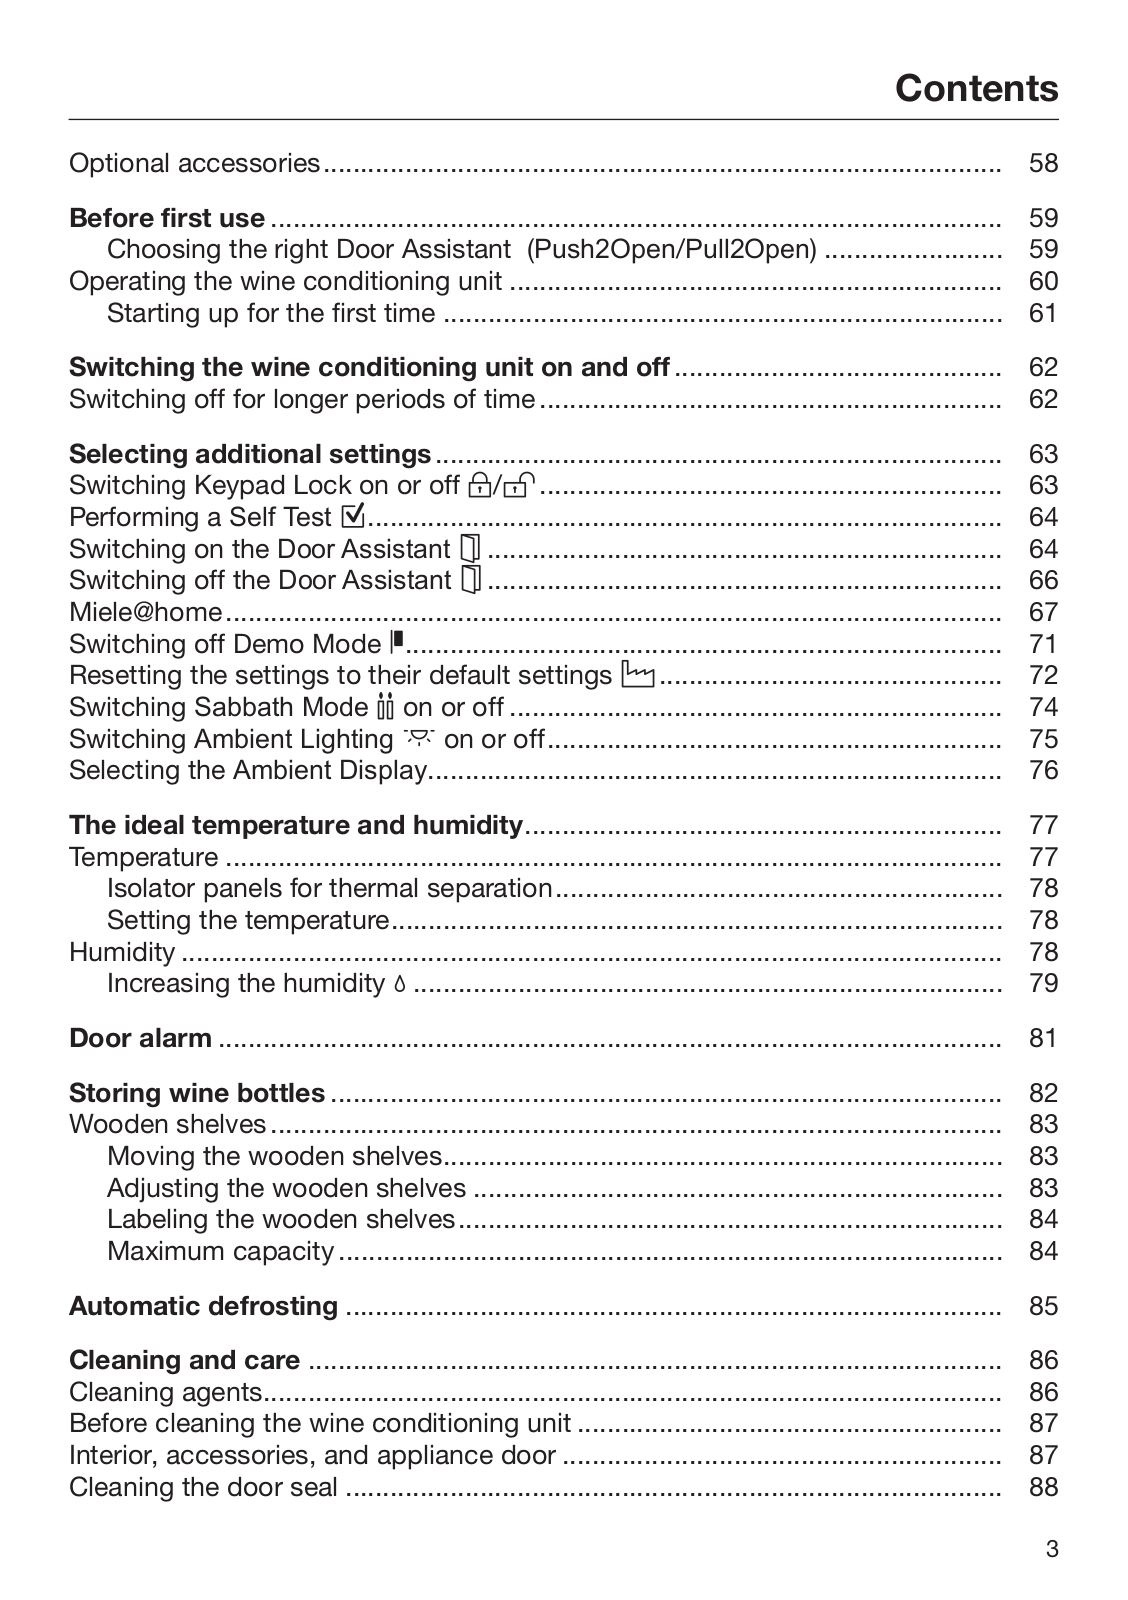
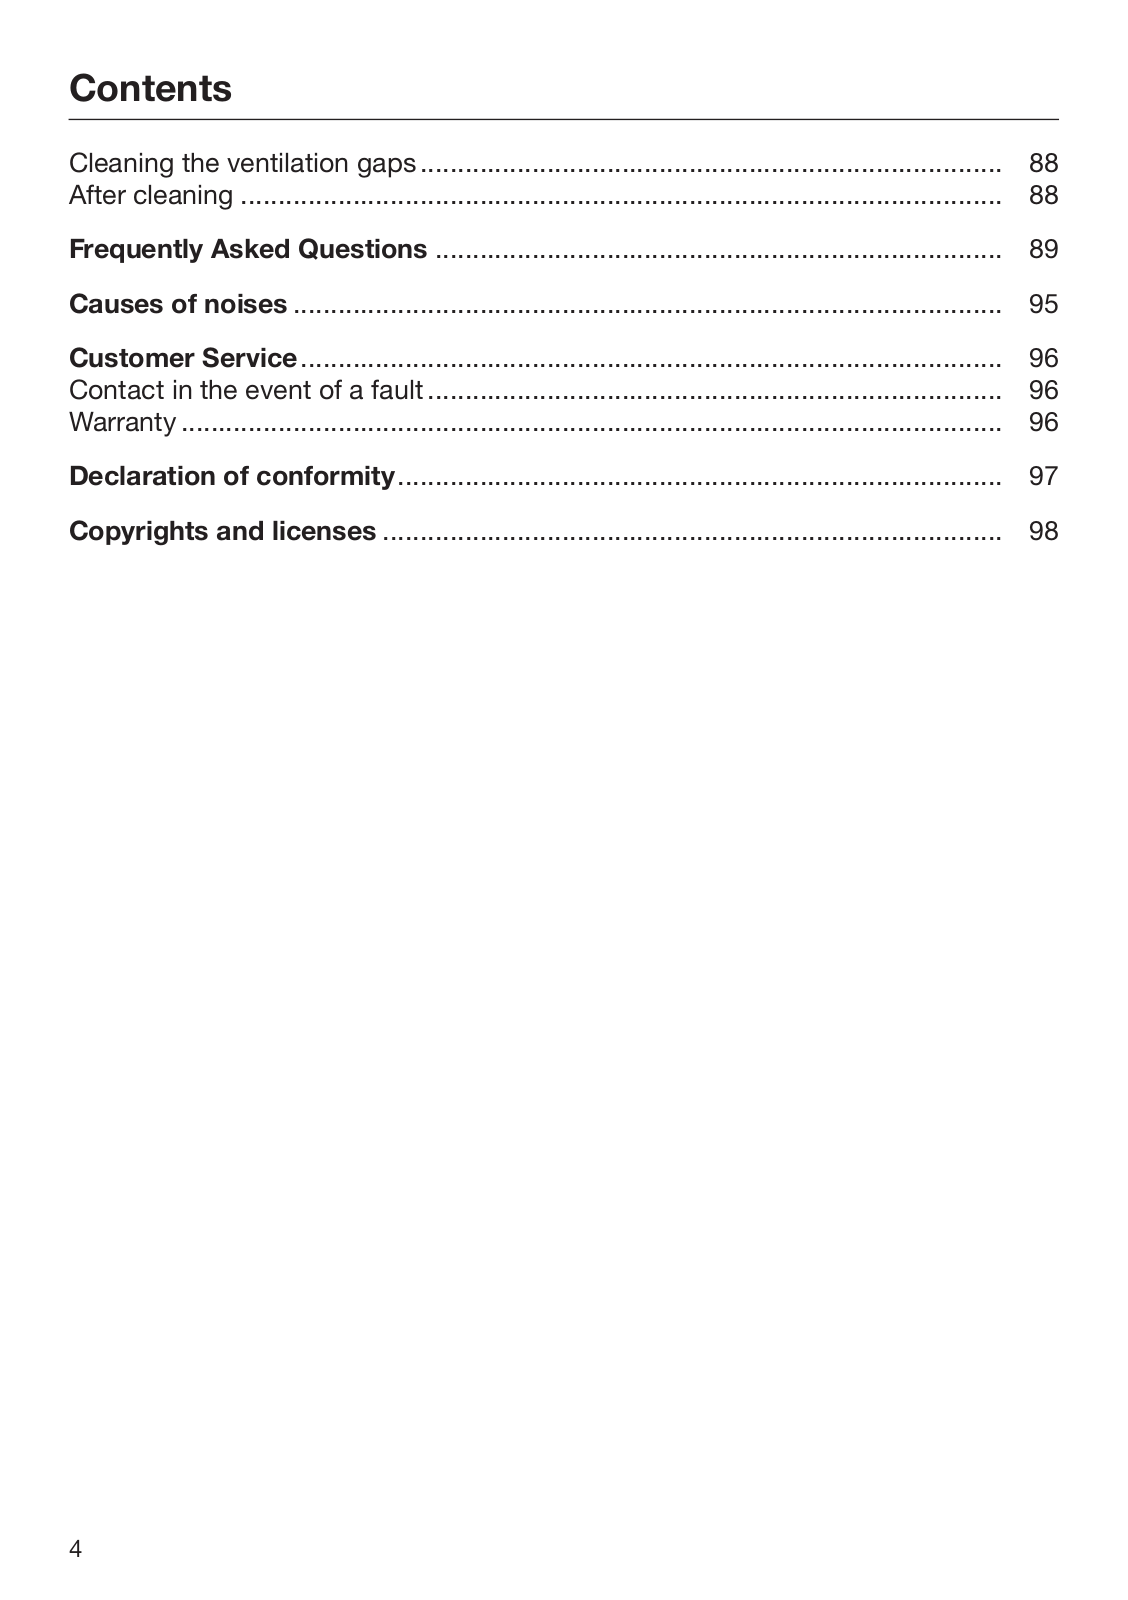
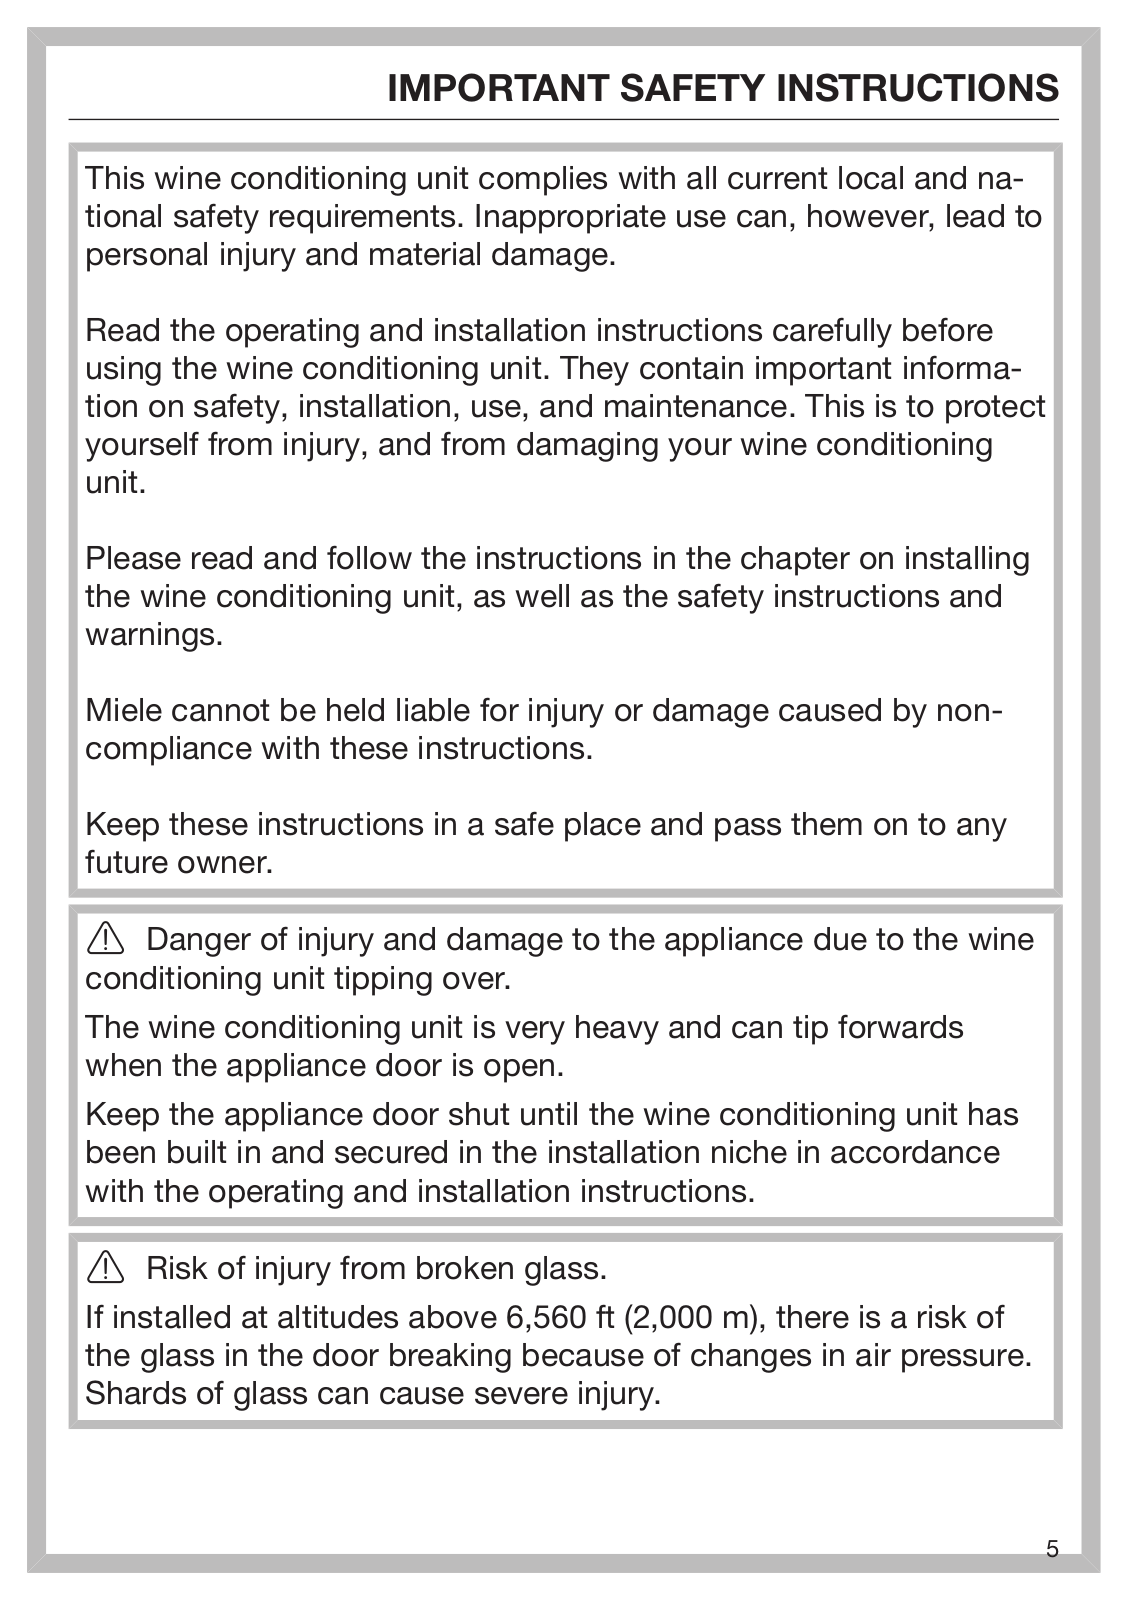
Table of contents
Loading...
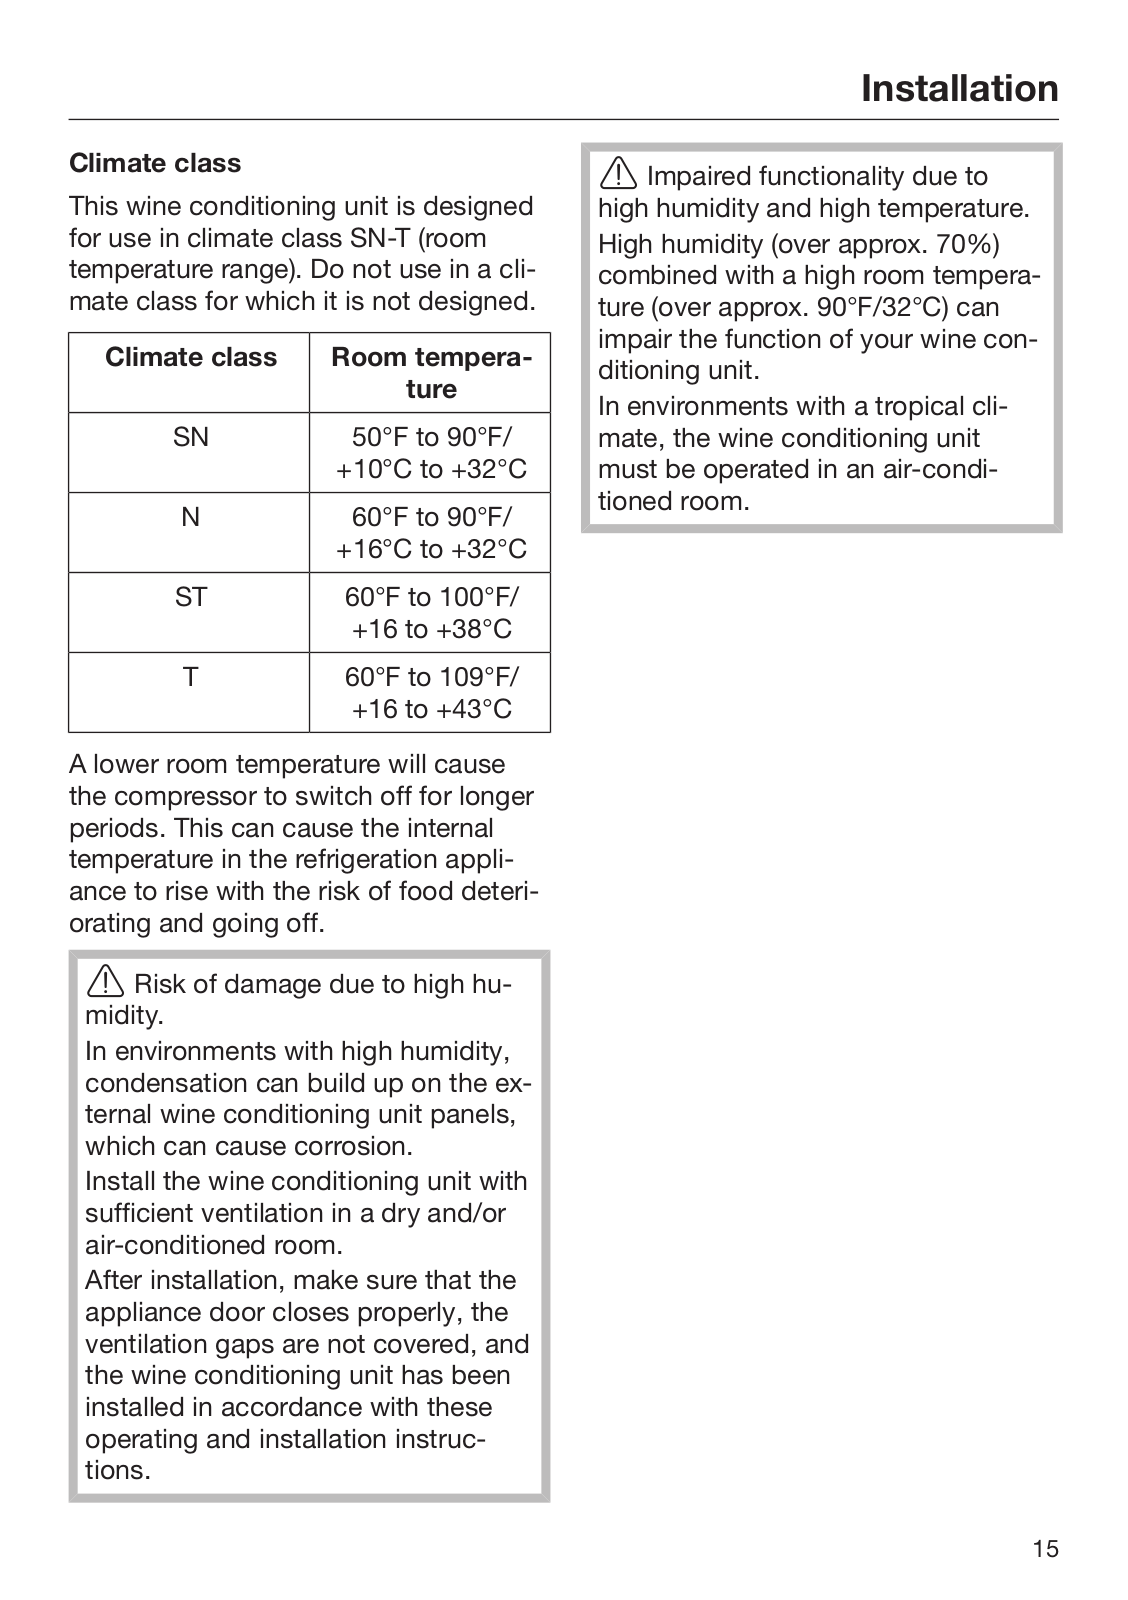
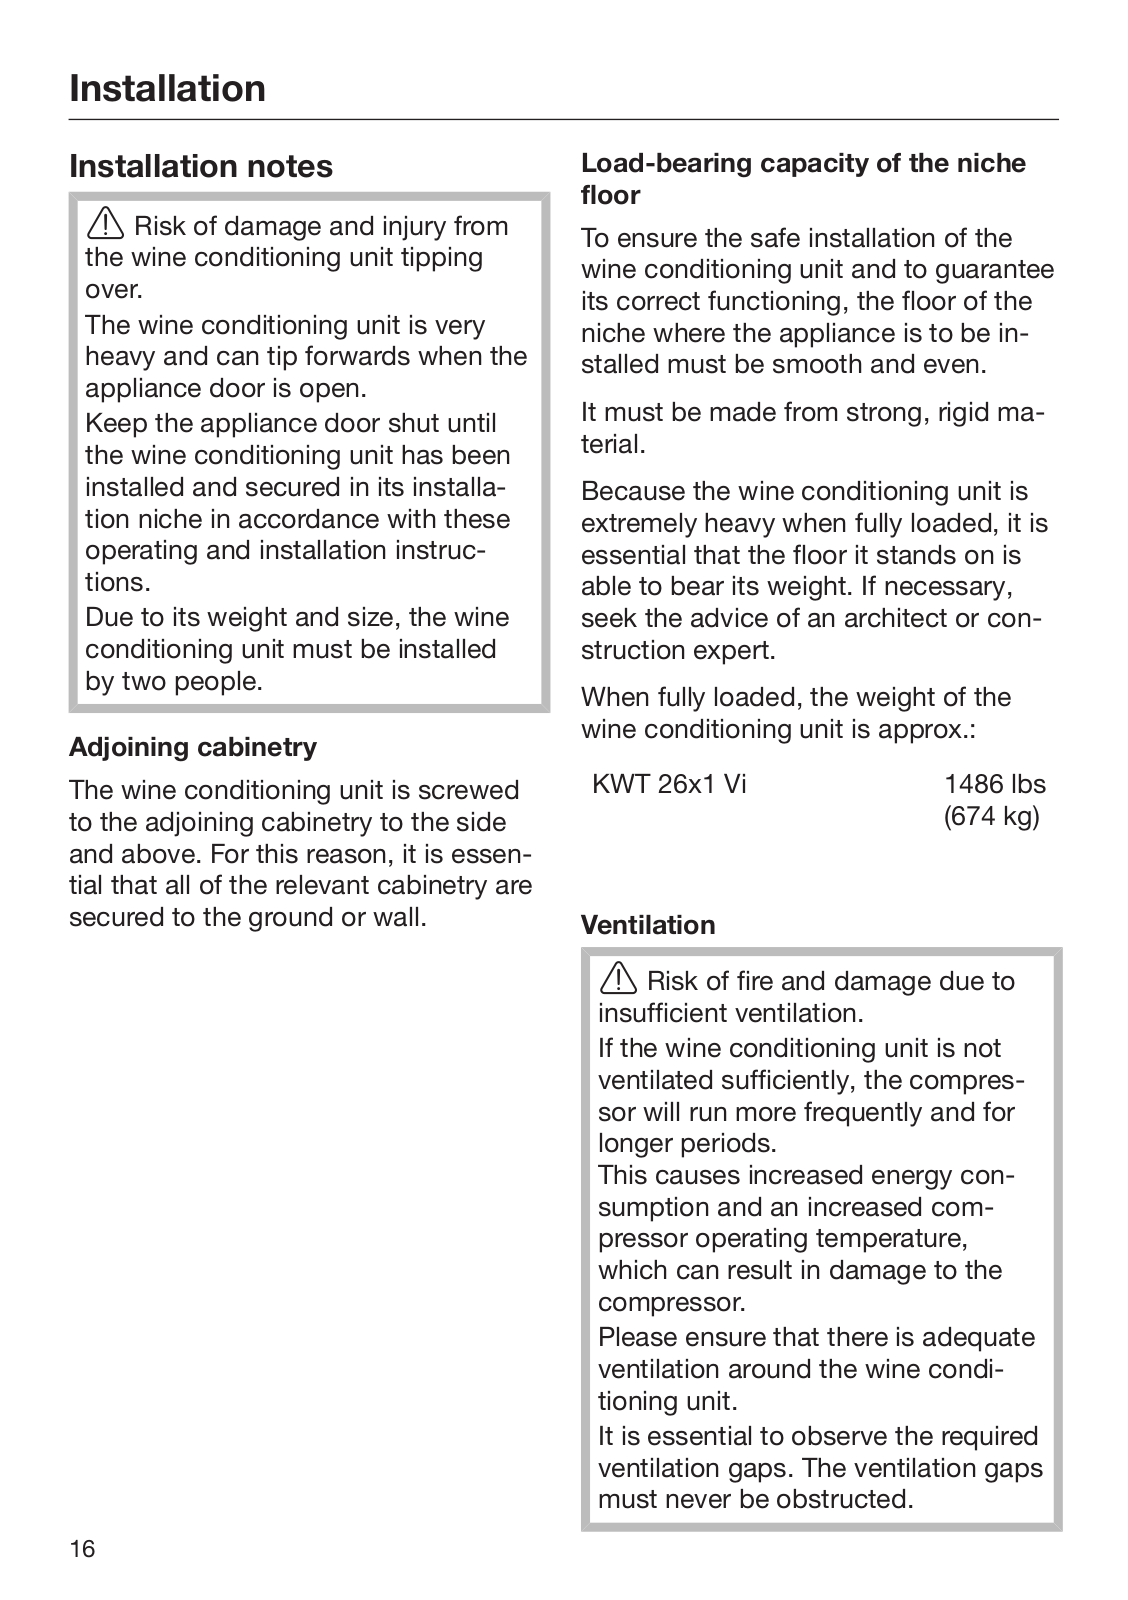
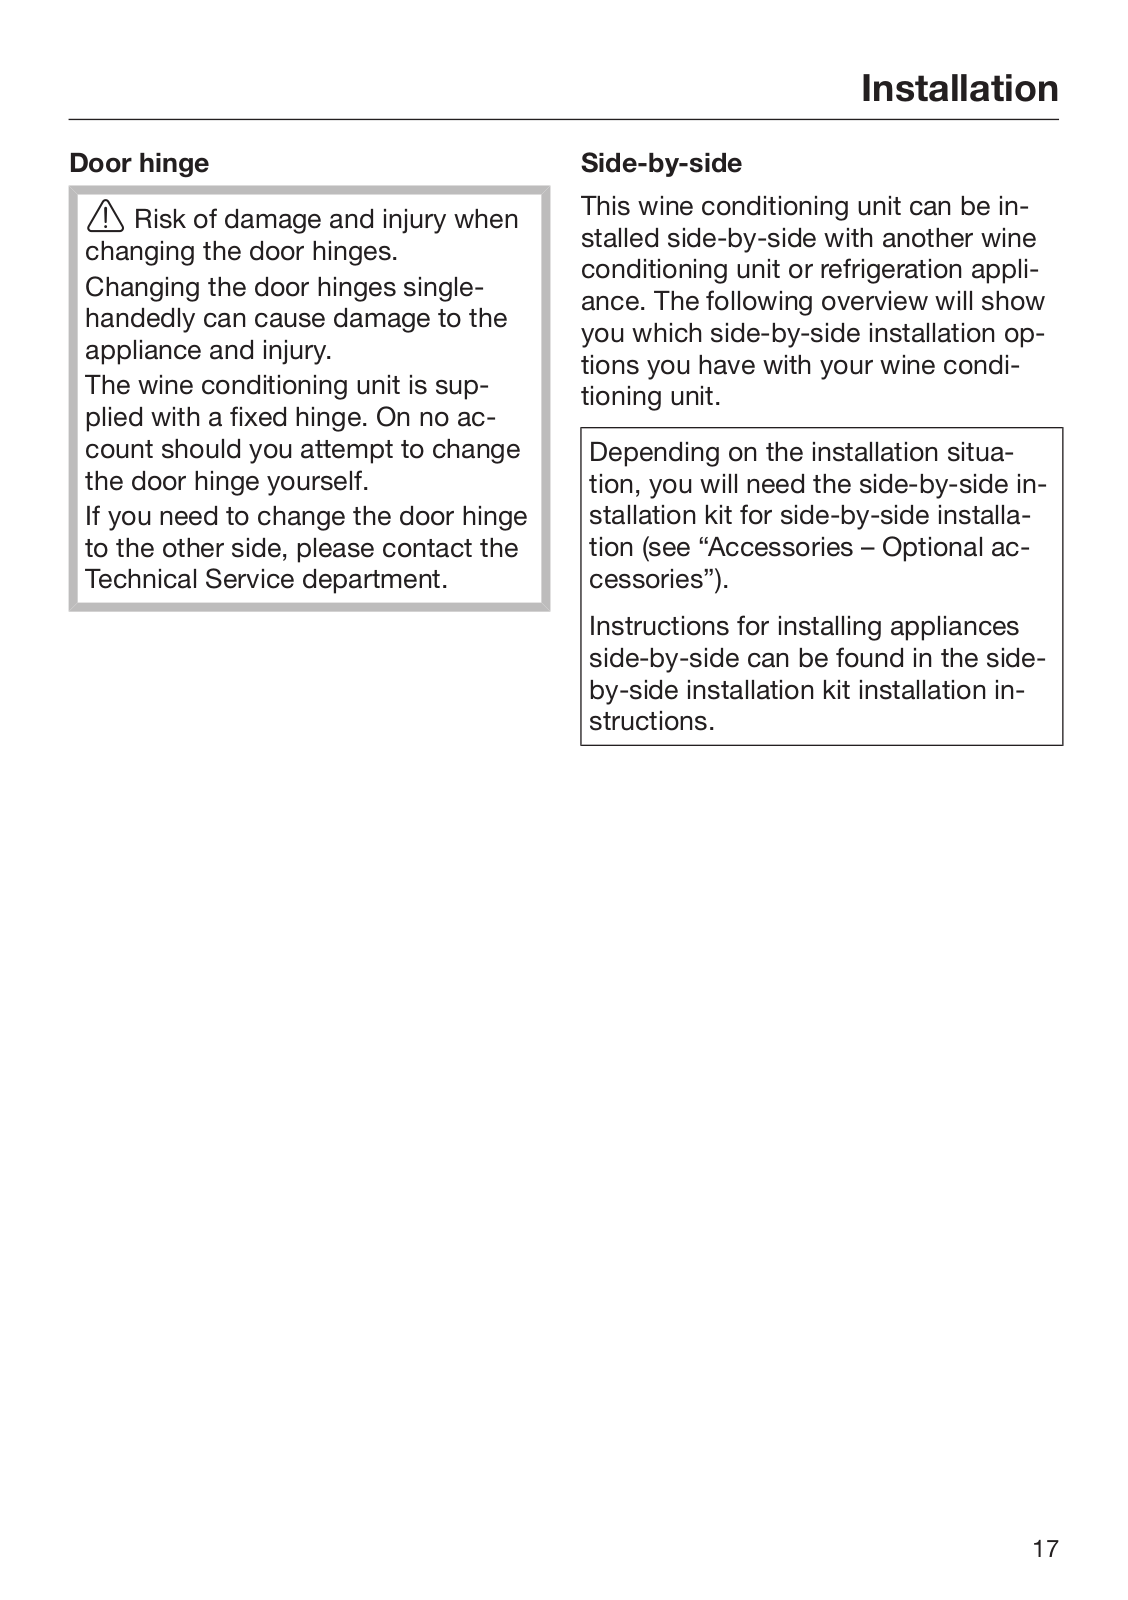
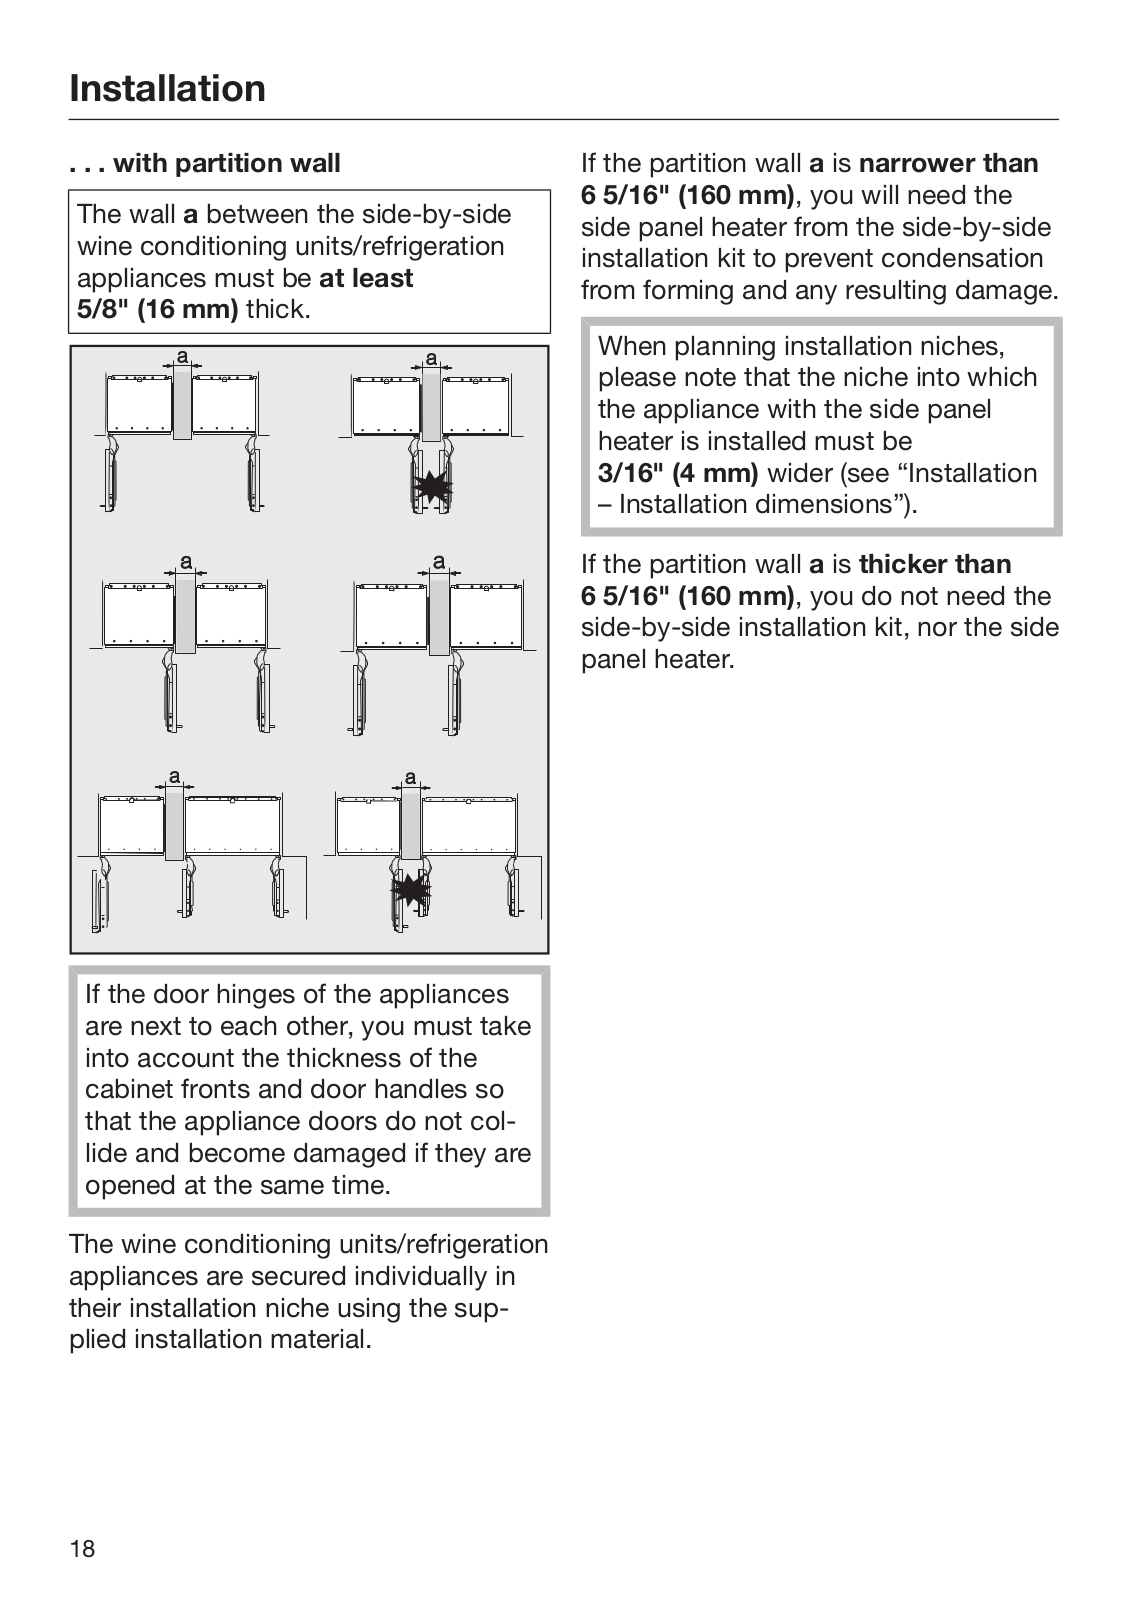
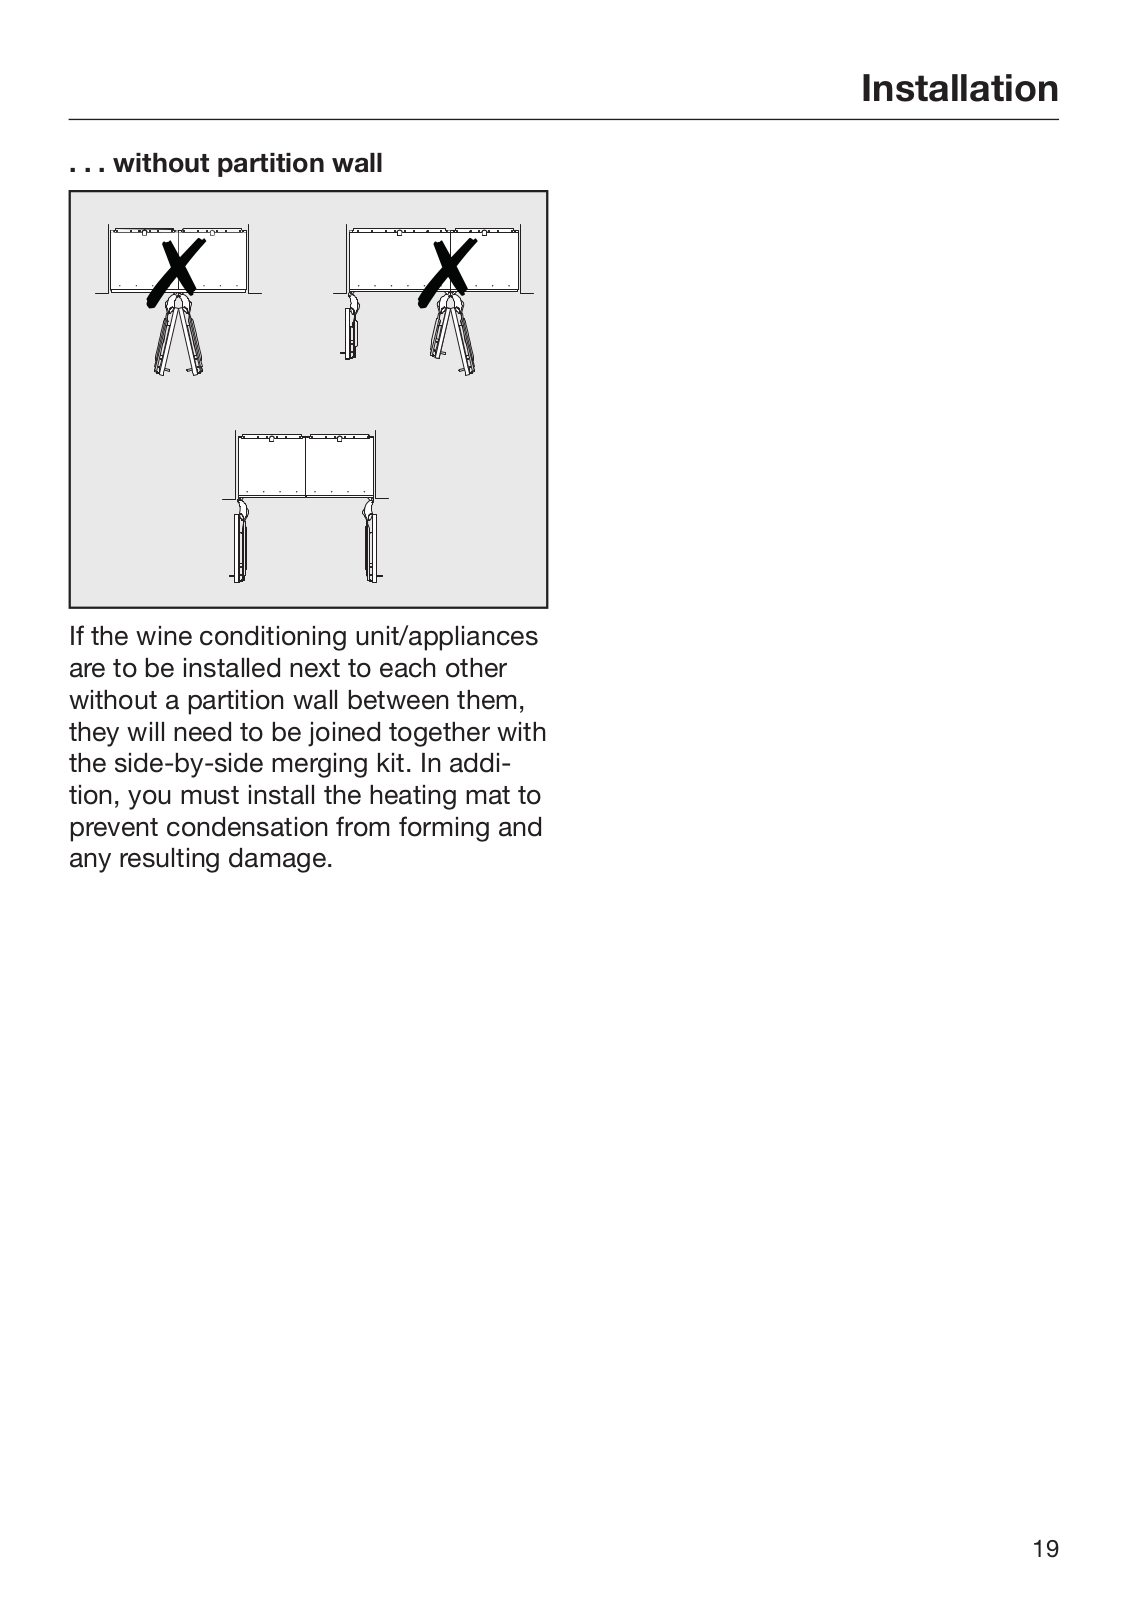
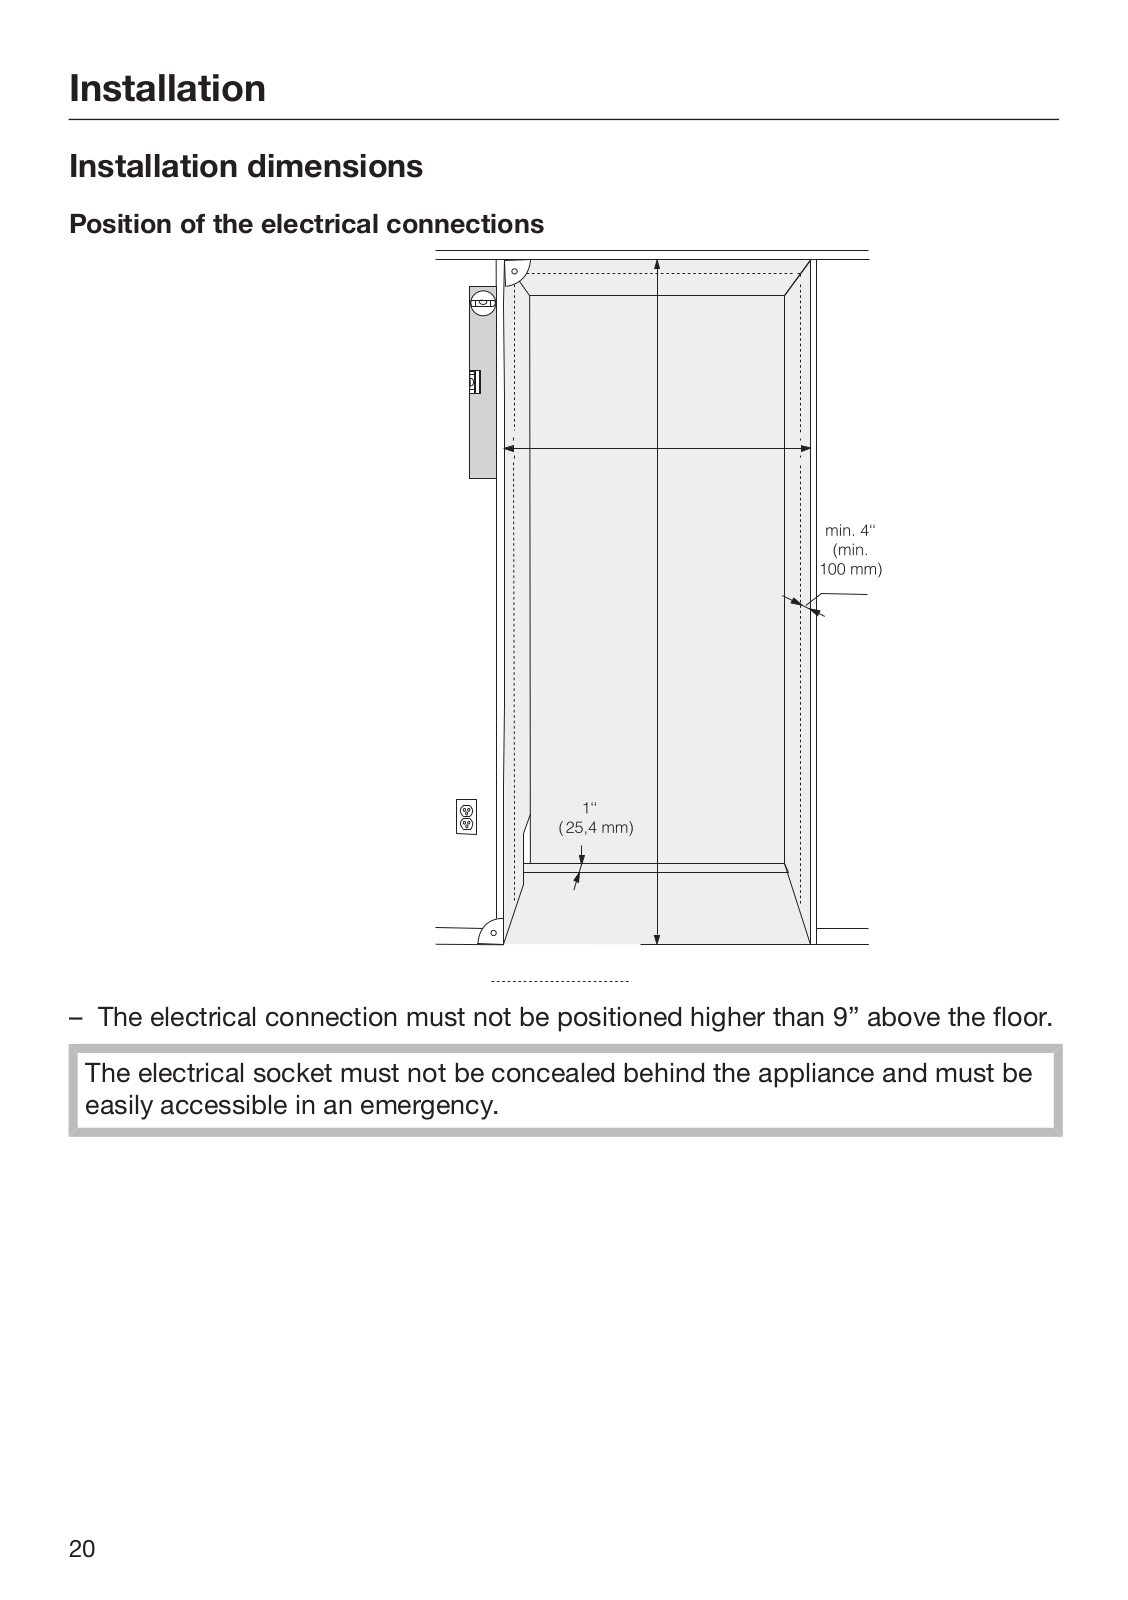
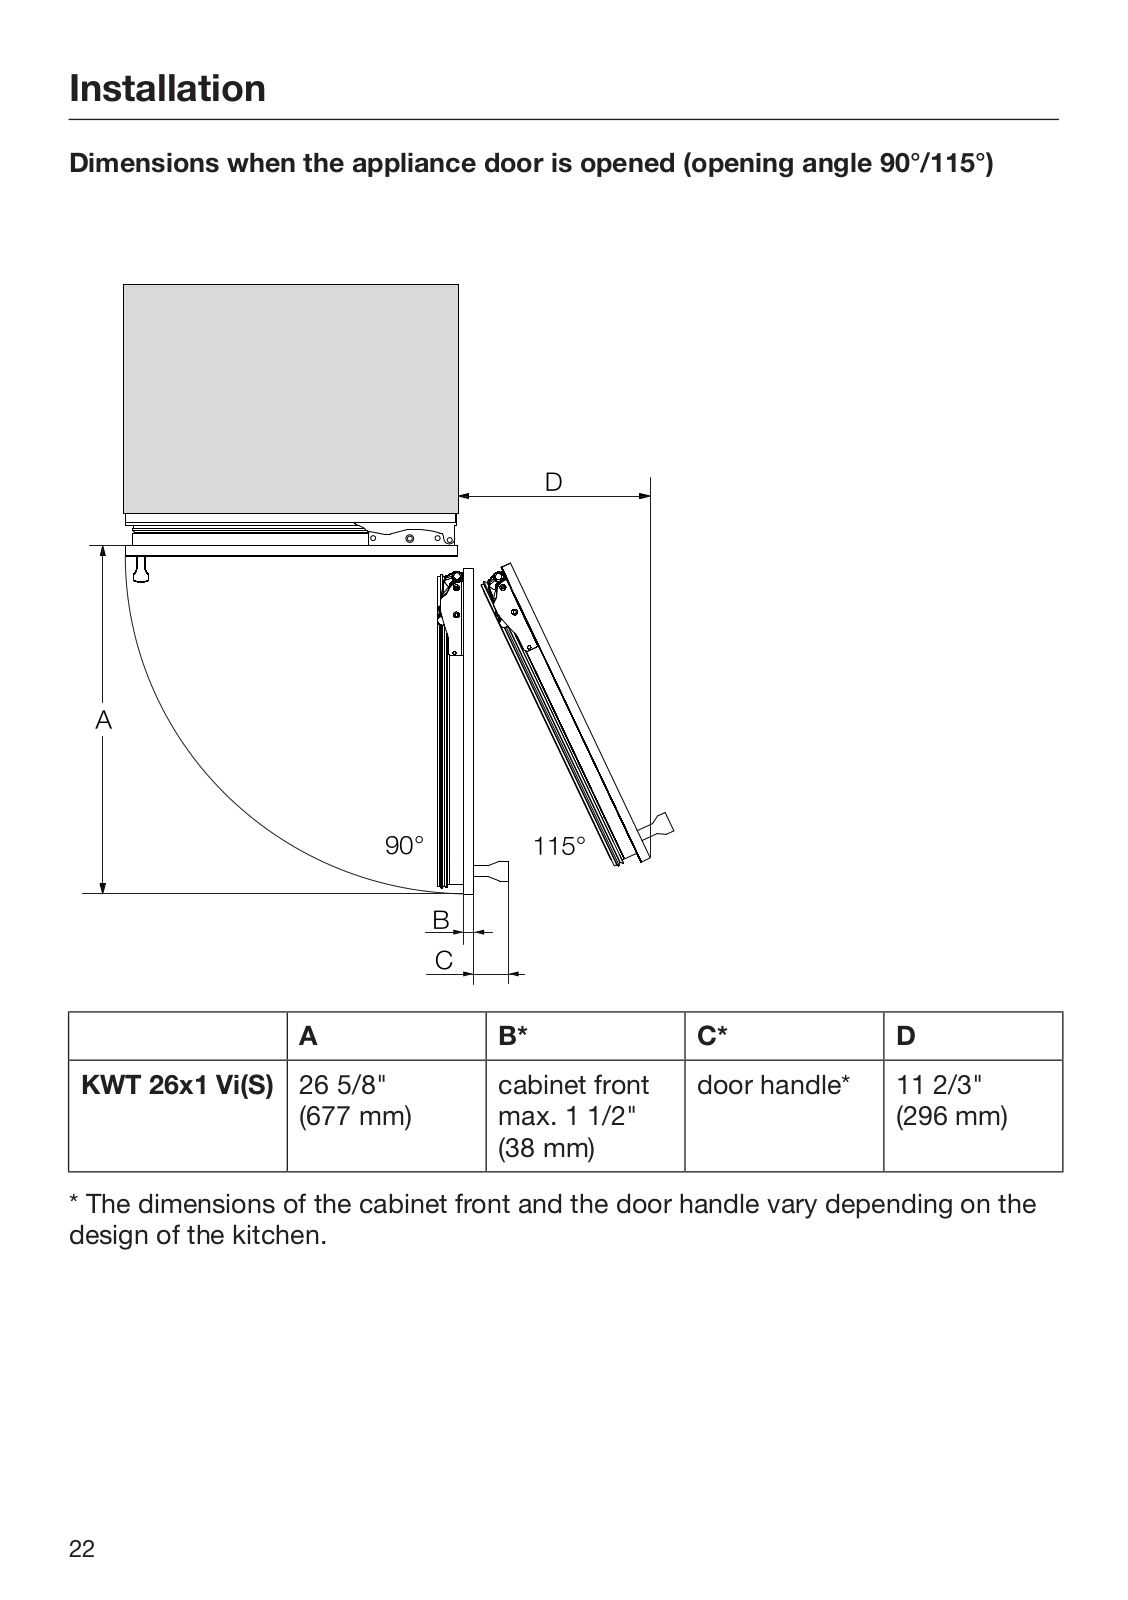
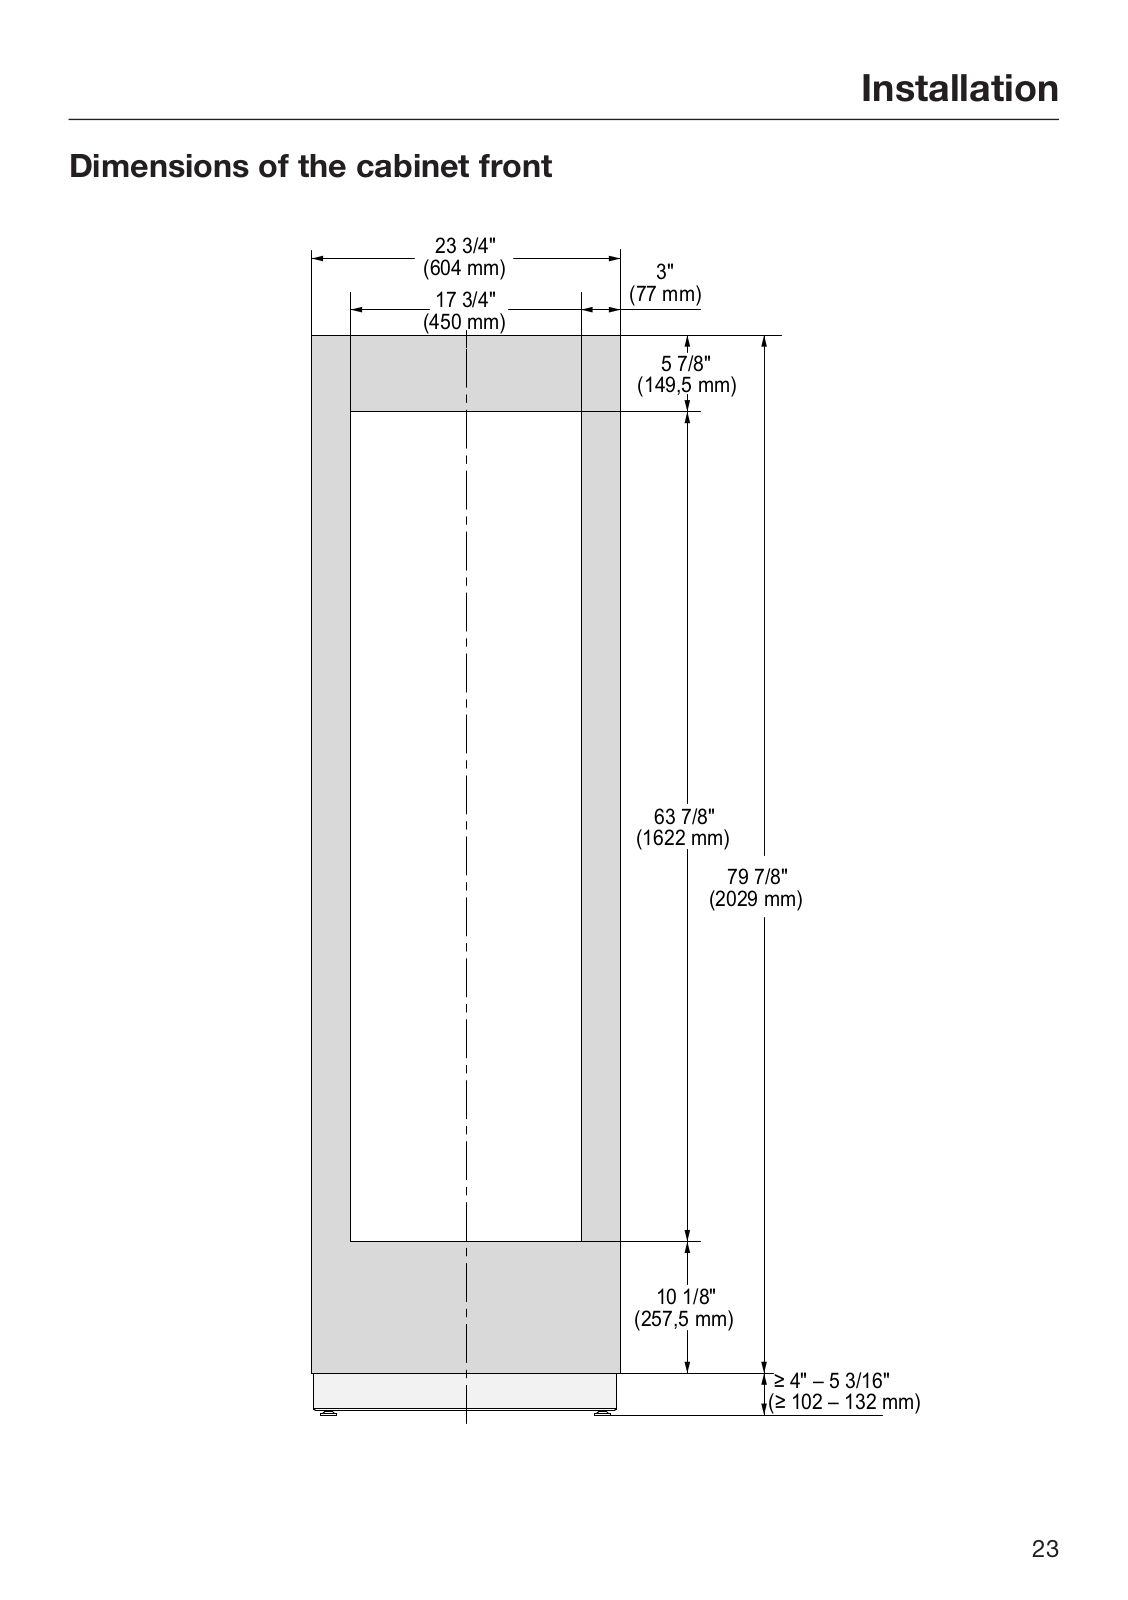
Miele KWT 2601 Vi, KWT 2611 Vi Operating instructions
...
Miele Operating instructions
Download
Specifications and Main Features
Frequently Asked Questions
User Manual
Download
Loading...
+
70
hidden pages
Unhide
You need points to download manuals.
1 point = 1 manual.
You can buy points or you can get point for every manual you upload.
Buy points
Upload your manuals