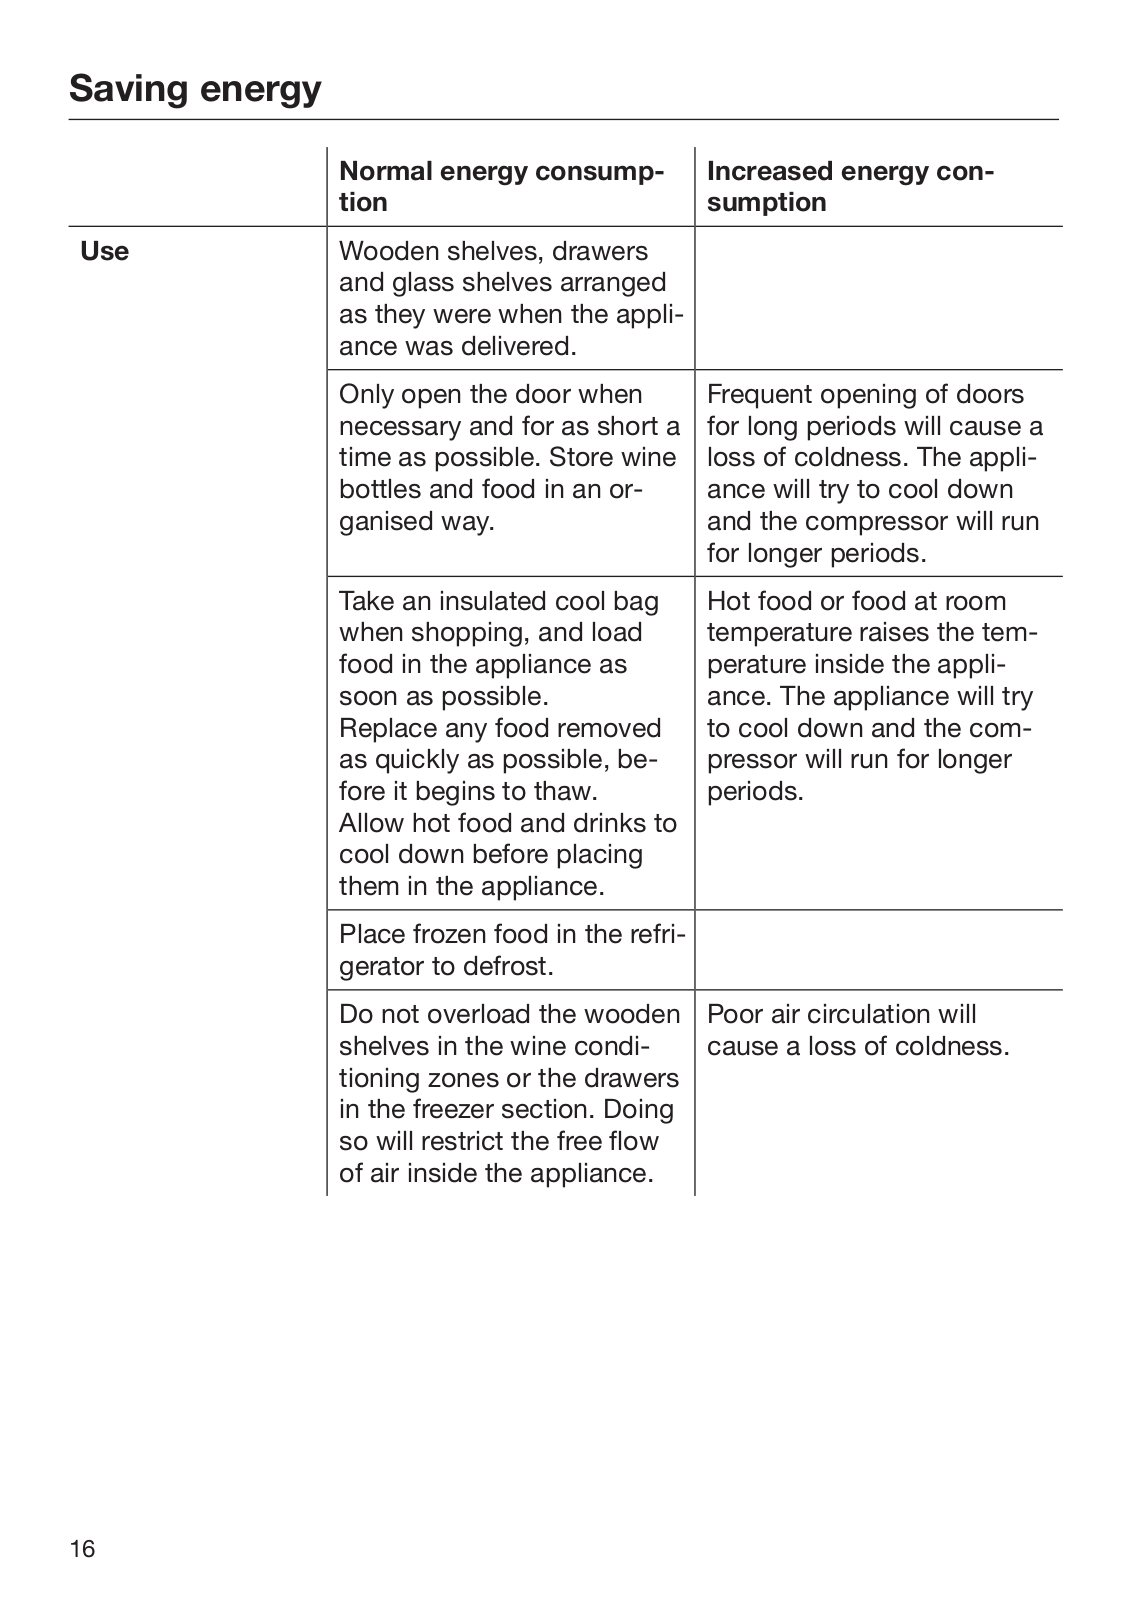
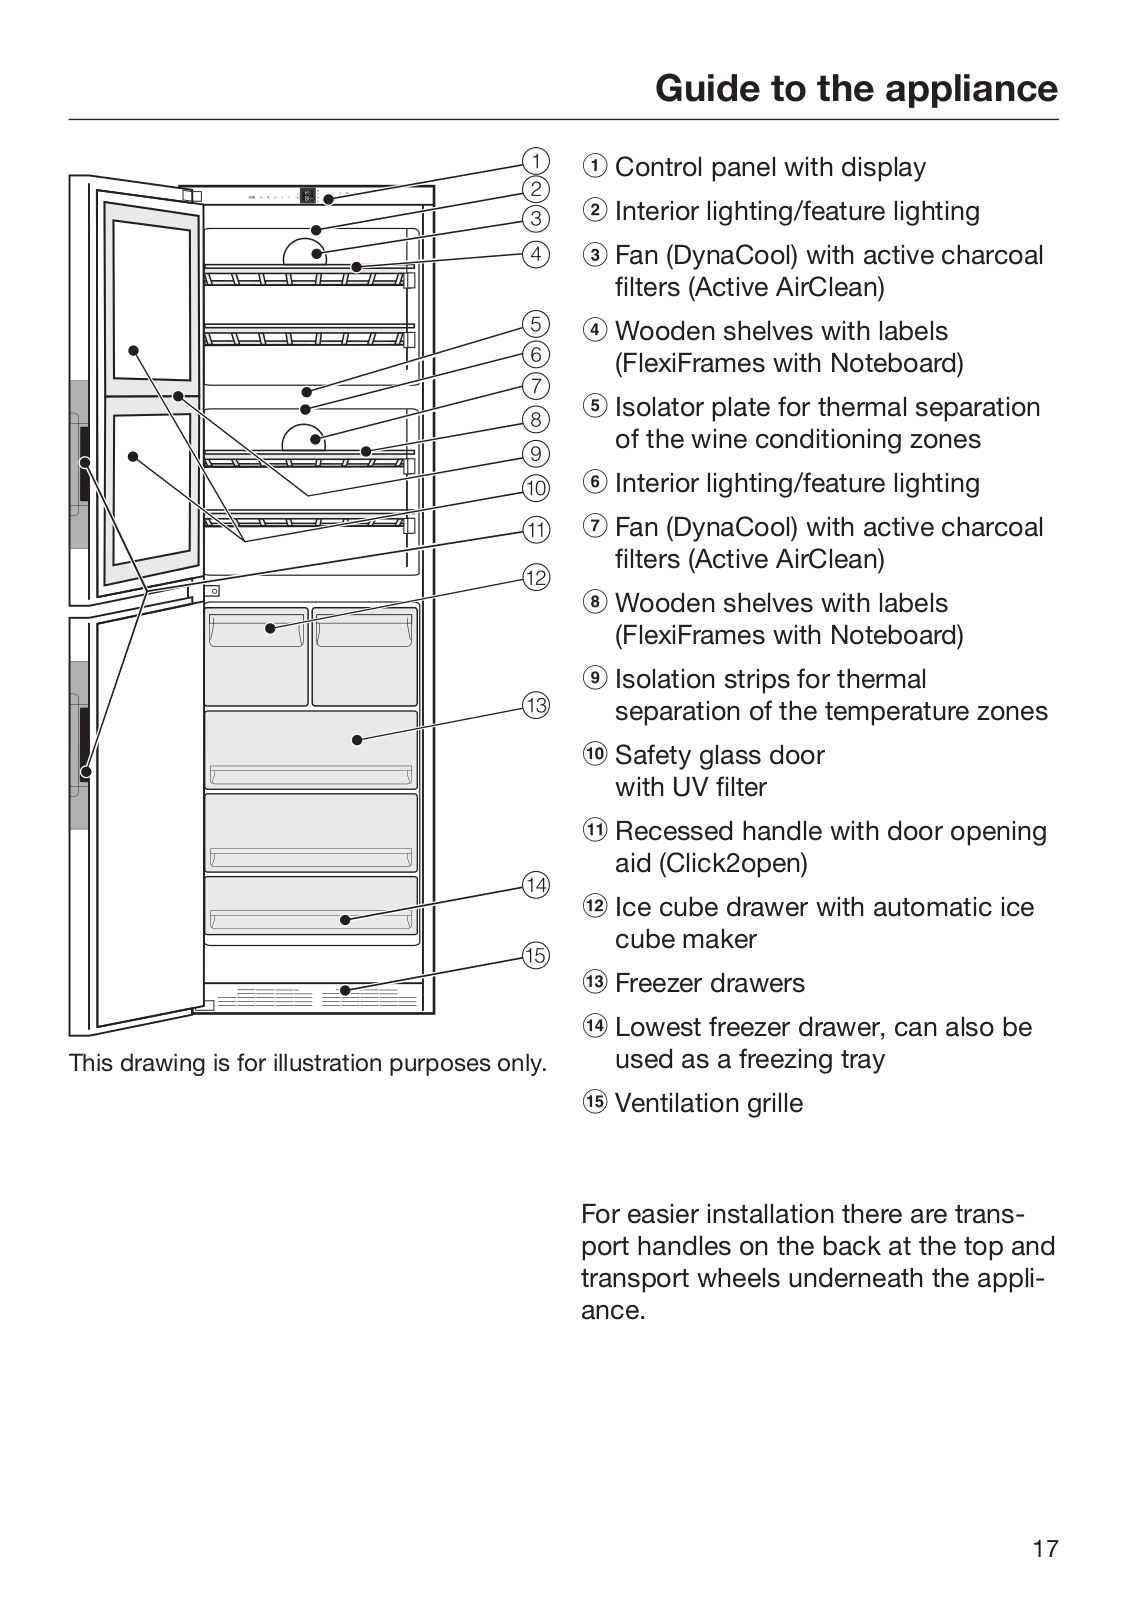
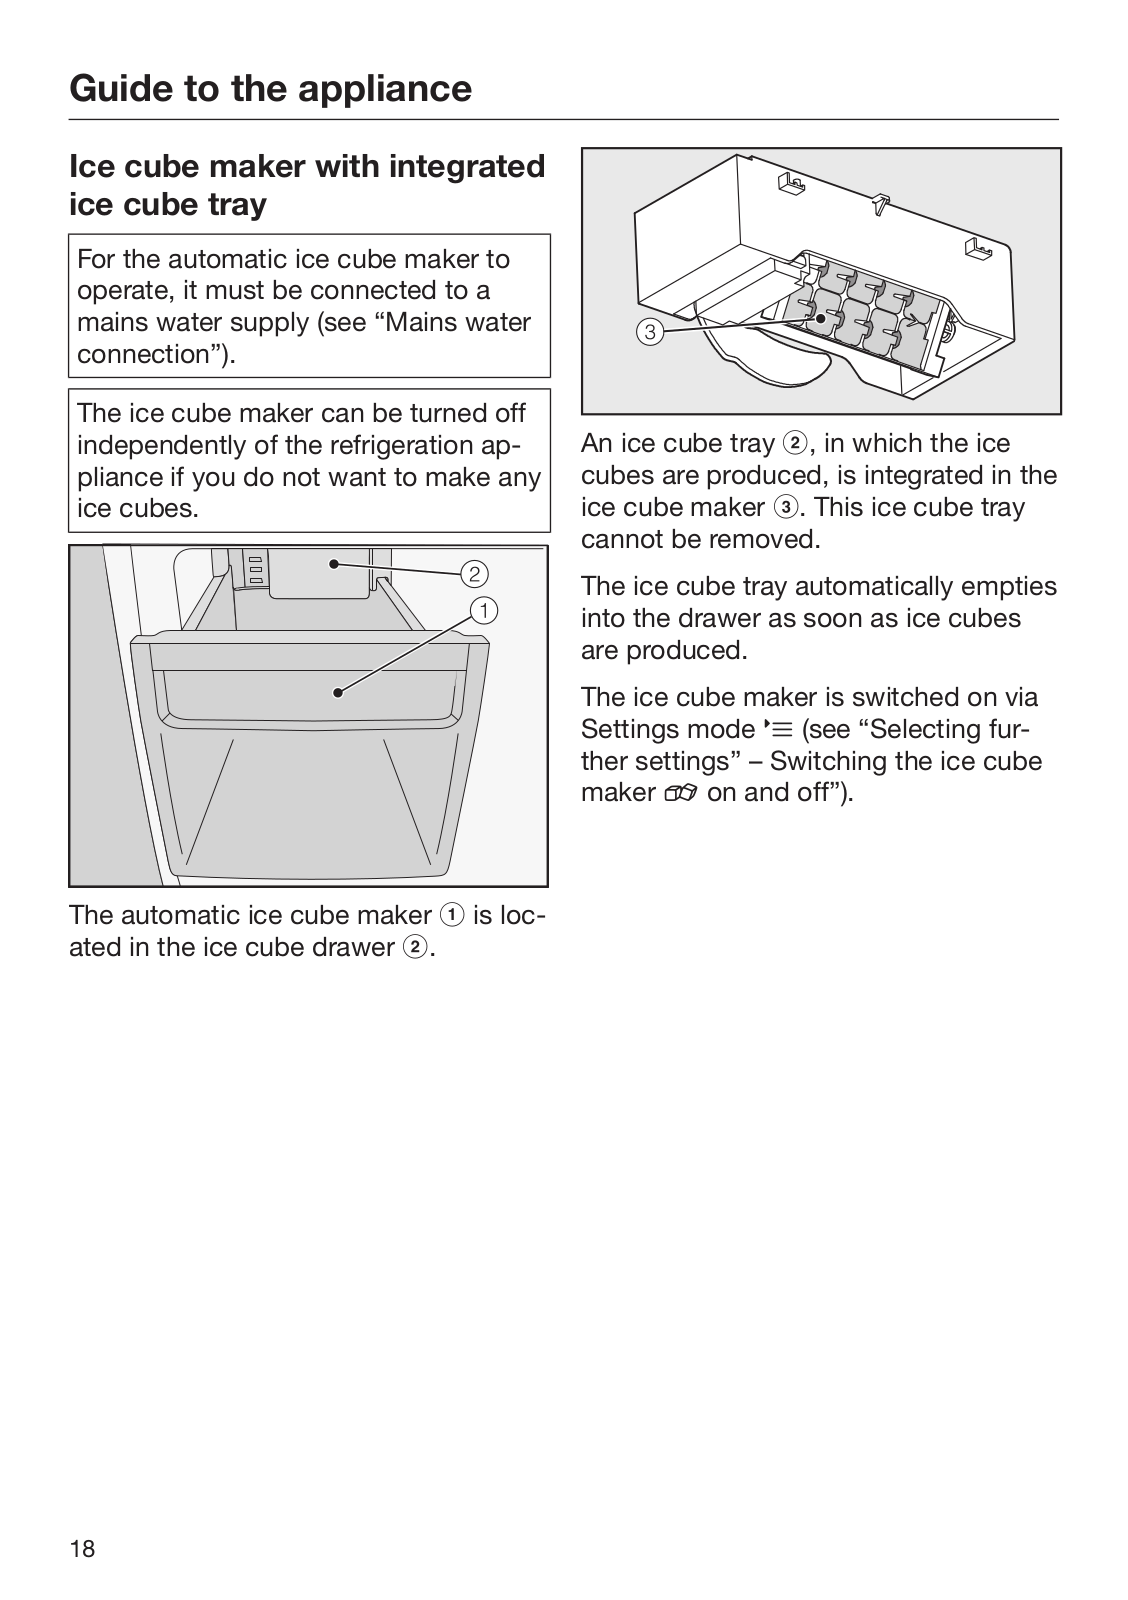
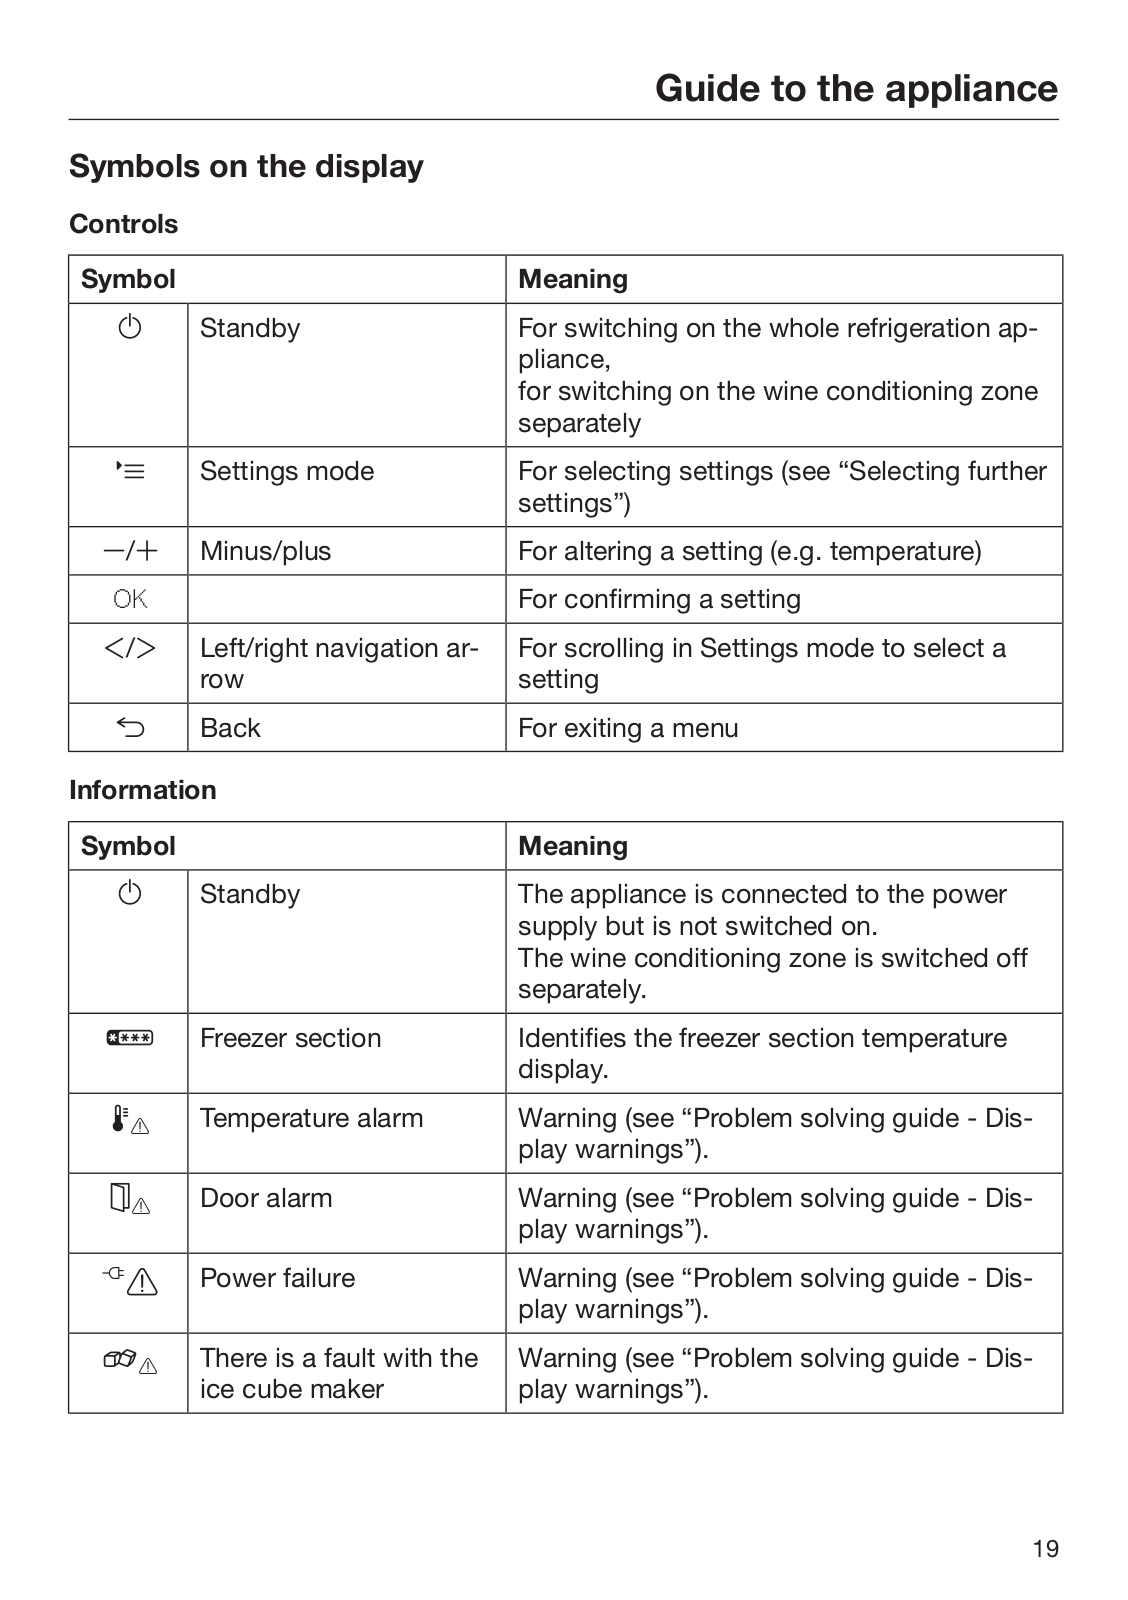
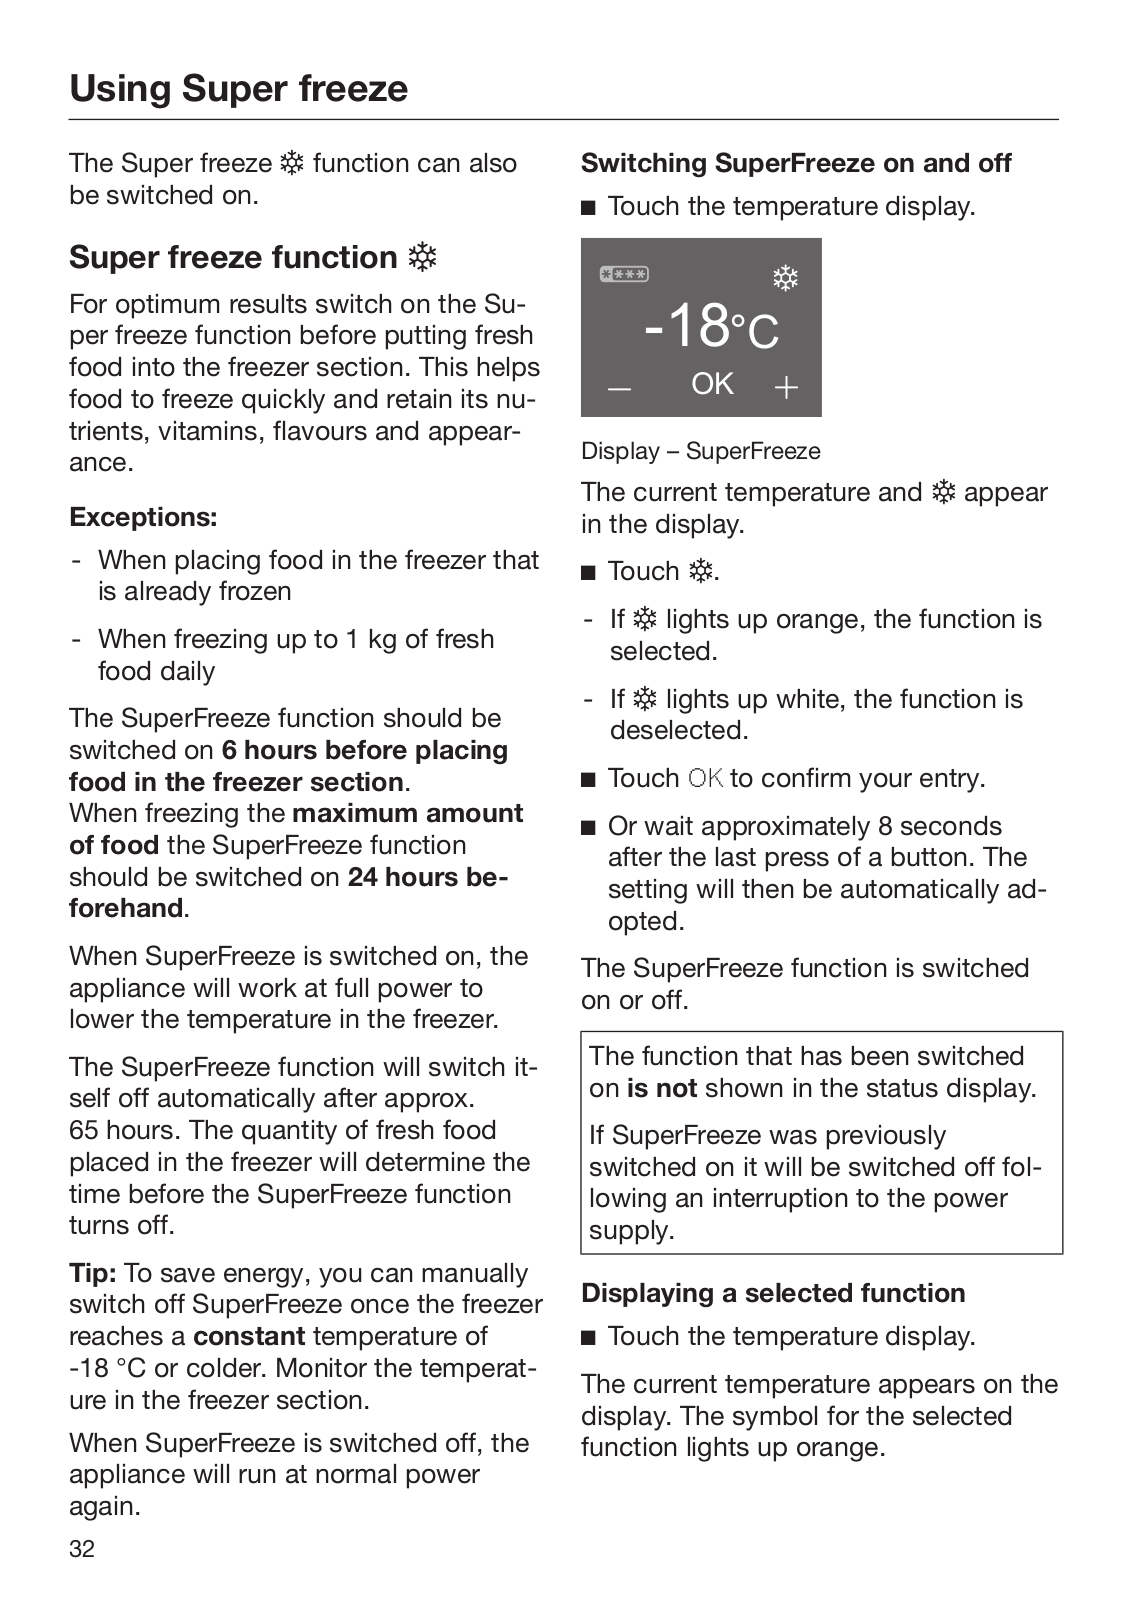
How it Works
Log In / Sign Up
Buy Points
How it Works
FAQ
Contact Us
Questions and Suggestions
Users
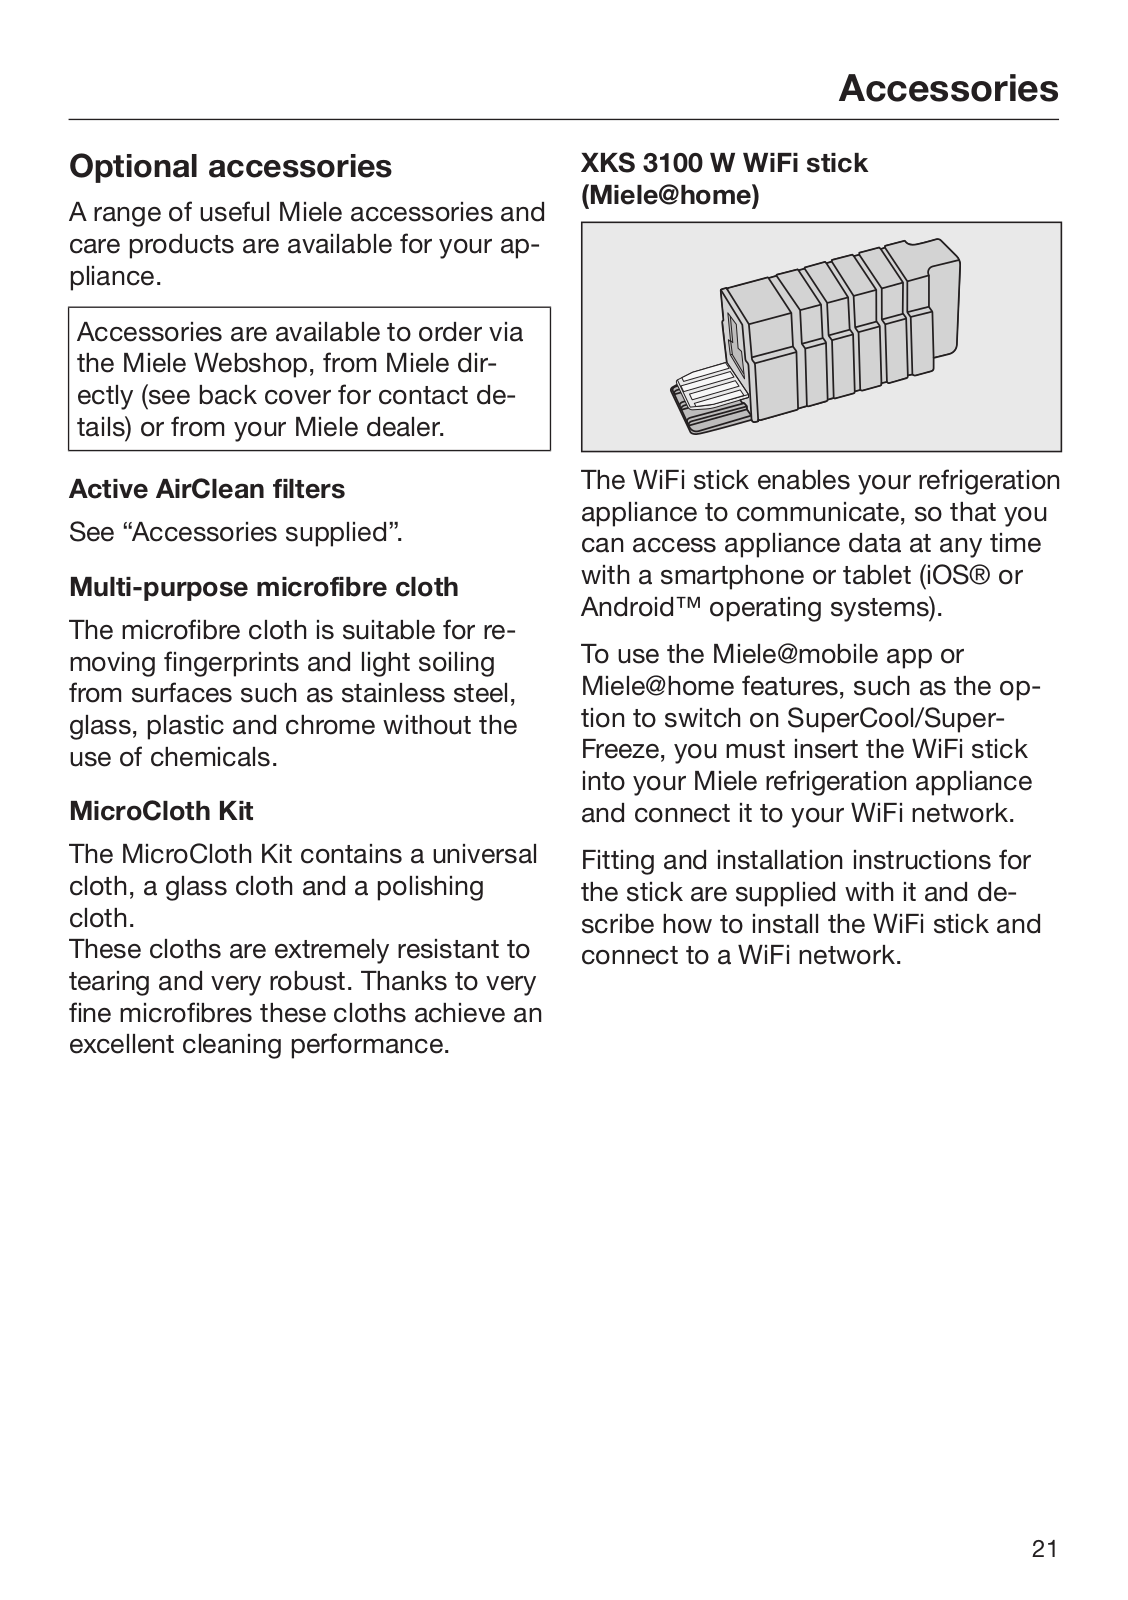
Miele
Loading...
K
KT3540
KT4053
KT4053S
6
KT4241
KTN12720
KTN 12720 SD
3
KTN 12720 SD -1
4
KTN 12720 SD ed
5
KTN 12720 SD ed-1
4
KTN 12720 SD edt
4
KTN14840
KTN 14840 SD cs
5
KTN 14840 SD ED
9
KTN 2450 S
KTN4252
KTN 4252 SD
8
KTN4352
KTN 4352 SD ed
6
KTN 4452 SD
3
KTN 4552 SD ED
3
KTN 4582 SD
5
KTN 4582 SD ED
8
KTN 4582 SD ED-1
4
KTS 600 L
KTS 600 R
KUBS 50
KWF 7510 SNE ED-3
6
KWFN8705SED
KWFN 8705 SE ED
8
KWFN8706
KWFN 8706 SE
KWFN 8706 SE ED
11
KWFN 8706 SE ED-1
9
KWL 1090 S
9
KWL 1630 S
10
KWL 1900 S
10
KWL 4612 S
10
KWL4712
KWL 4712 S ed
6
KWL 4712 SG
KWL 4712 SG ed
10
KWL 4812 S
12
KWL4912
KWL 4912 S
KWL 4912 S ed
7
KWL 4912 S ED-1
8
KWL 4912 SG
2
KWL 4912 SG ed
12
KWNS 28462 E
2
KWNS 28462 E cs
11
KWNS 28462 E ed
11
KWNS 28462 E ed/cs
KWNS 28462 E EDT/CS
KWT 16
KWT 1601 SF
3
KWT 1602 Vi
33
KWT 1603 Vi
8
KWT 1612 Vi
34
KWT 2601 Vi
7
KWT 2602 SF
KWT 2602 Vi
8
KWT 2611 SF
3
KWT 2611 Vi
10
KWT 2612 SF
KWT 2612 Vi
10
KWT 2661 SFS
3
KWT 2661 ViS
21
KWT 2662 ViS
18
KWT 2671 ViS
22
KWT 2672 ViS
22
KWT 4154 UG
15
KWT 4974 SG
2
KWT 4974 SG ed
16
KWT 6112 IG
8
KWT 6112 iG cs
19
KWT 6112 iG ed
19
KWT 6112 iG ed/cs
KWT 6112 iG grgr
20
KWT 6112 iG obsw
20
KWT 6312
KWT 6312 UGS
14
KWT 6312 UGS C
KWT 6321 UG
11
KWT 6321 UG C
KWT 6321 UG CH
3
KWT 6322 UG
34
KWT 6322 UG C
KWT 6322 UG cs
KWT 6322 UG ed
KWT 6422 i
13
KWT 6422 iG
23
KWT 6422 iG grgr
6
KWT 6722 iGS
18
KWT 6722iGS OBSW
KWT 6722 iS
3
KWT 6831 SG
12
KWT 6831 SG CH
3
KWT 6832 SGS
24
KWT 6833 SG
11
KWT 6834 SGS
25
Loading...
Loading...
Nothing found
KWNS 28462 E ed
assembly instructions
120 pgs
5.53 Mb
0
assembly instructions
124 pgs
5.78 Mb
0
assembly instructions
124 pgs
5.63 Mb
0
assembly instructions
120 pgs
5.62 Mb
0
assembly instructions
124 pgs
5.56 Mb
0
Instructions Manual
120 pgs
5.67 Mb
0
Instructions Manual [cs]
116 pgs
5.68 Mb
0
Instructions Manual [de]
124 pgs
5.62 Mb
0
Operating instructions
120 pgs
5.52 Mb
0
User manual [no]
116 pgs
5.51 Mb
0
User manual [pt]
128 pgs
5.69 Mb
0
Table of contents
Loading...
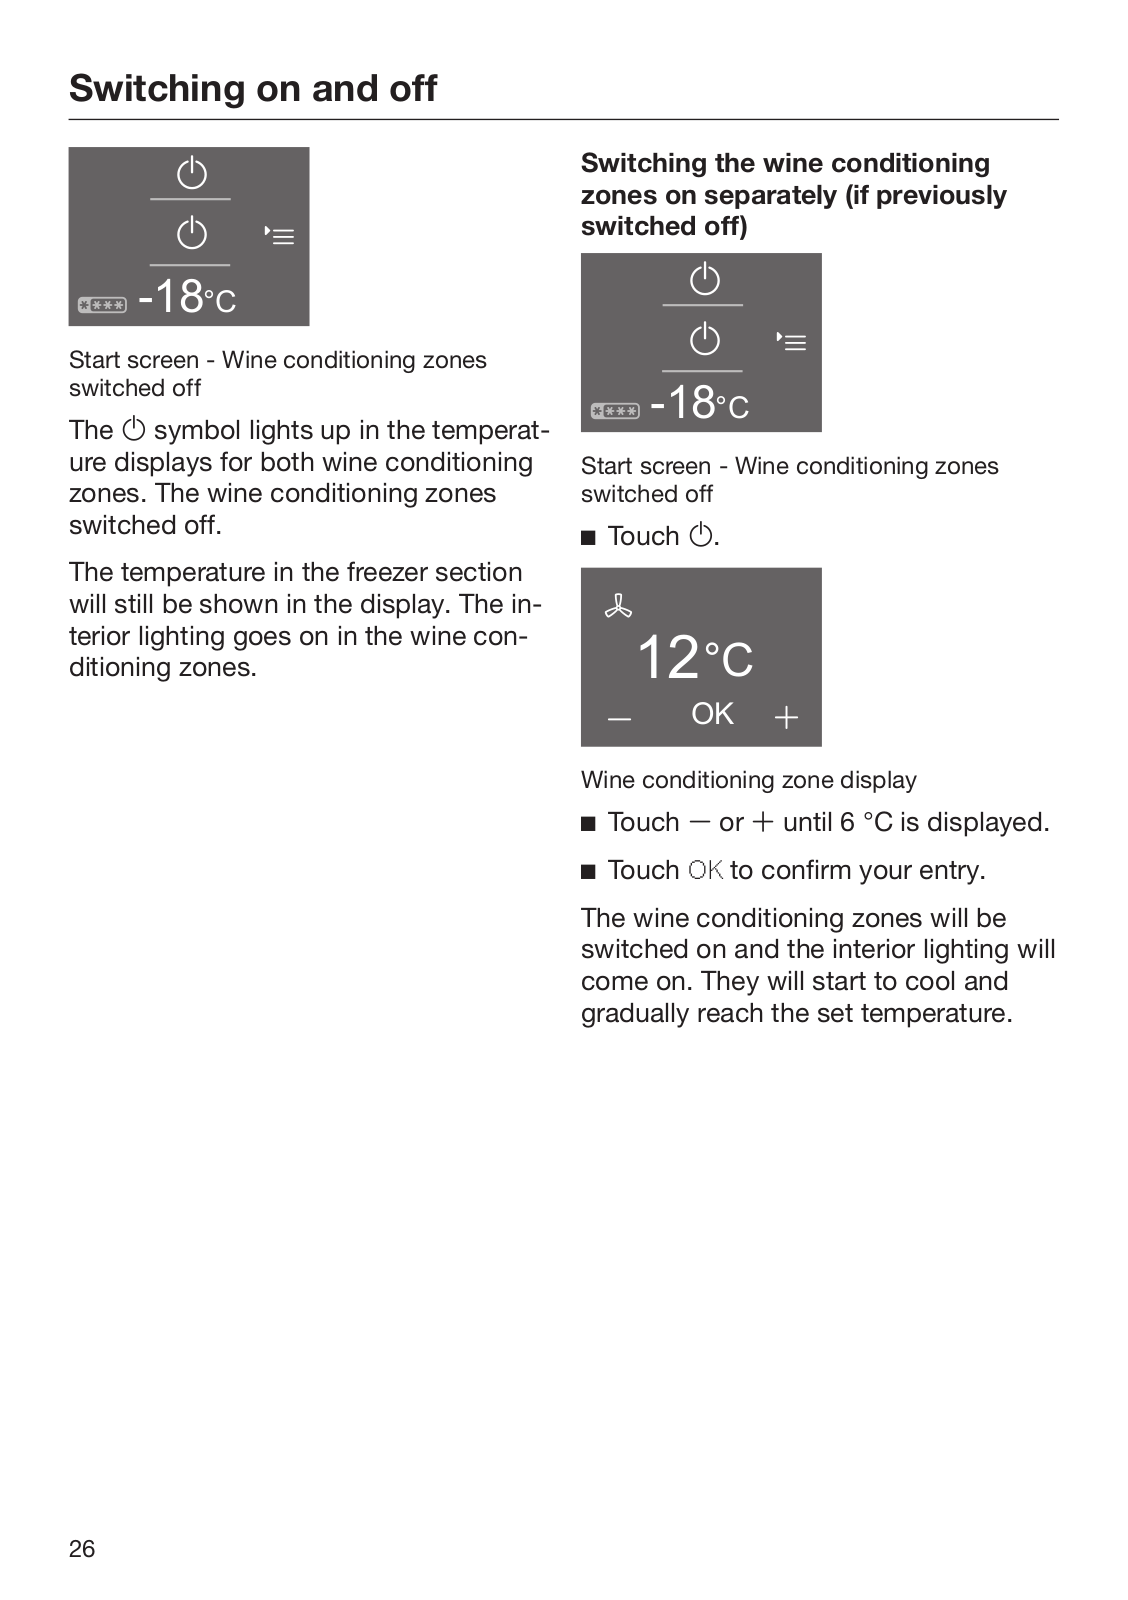
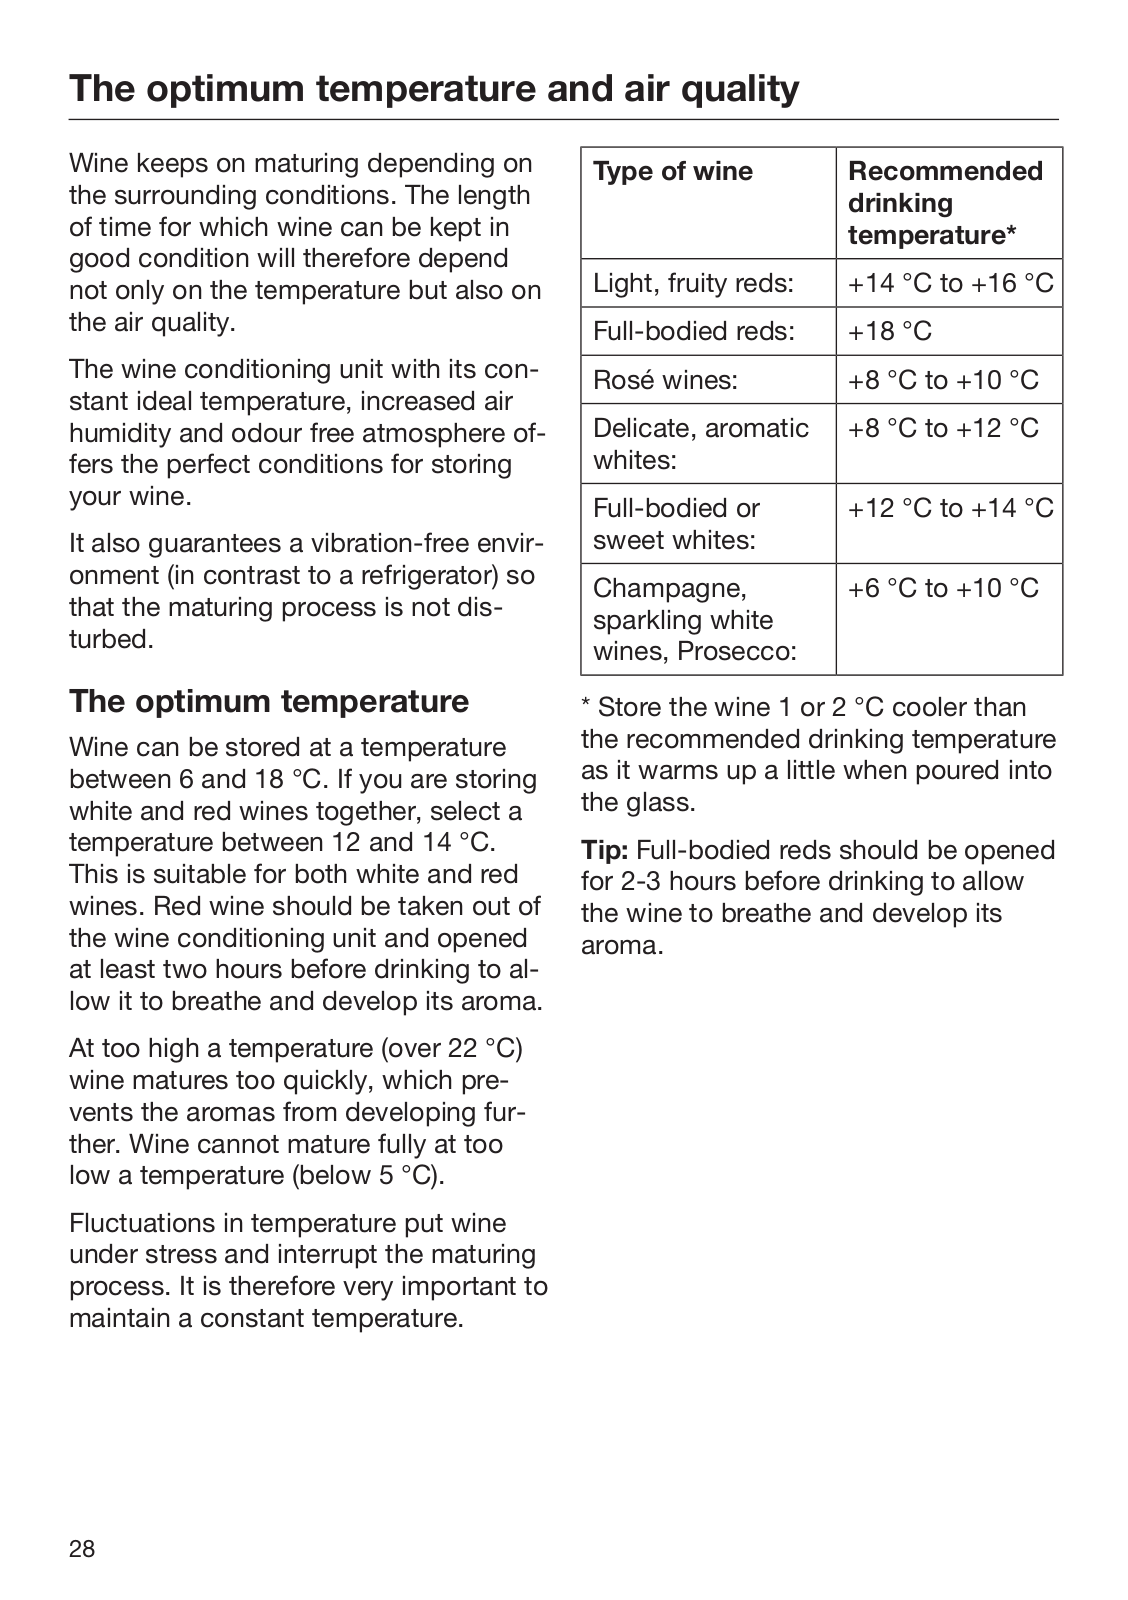
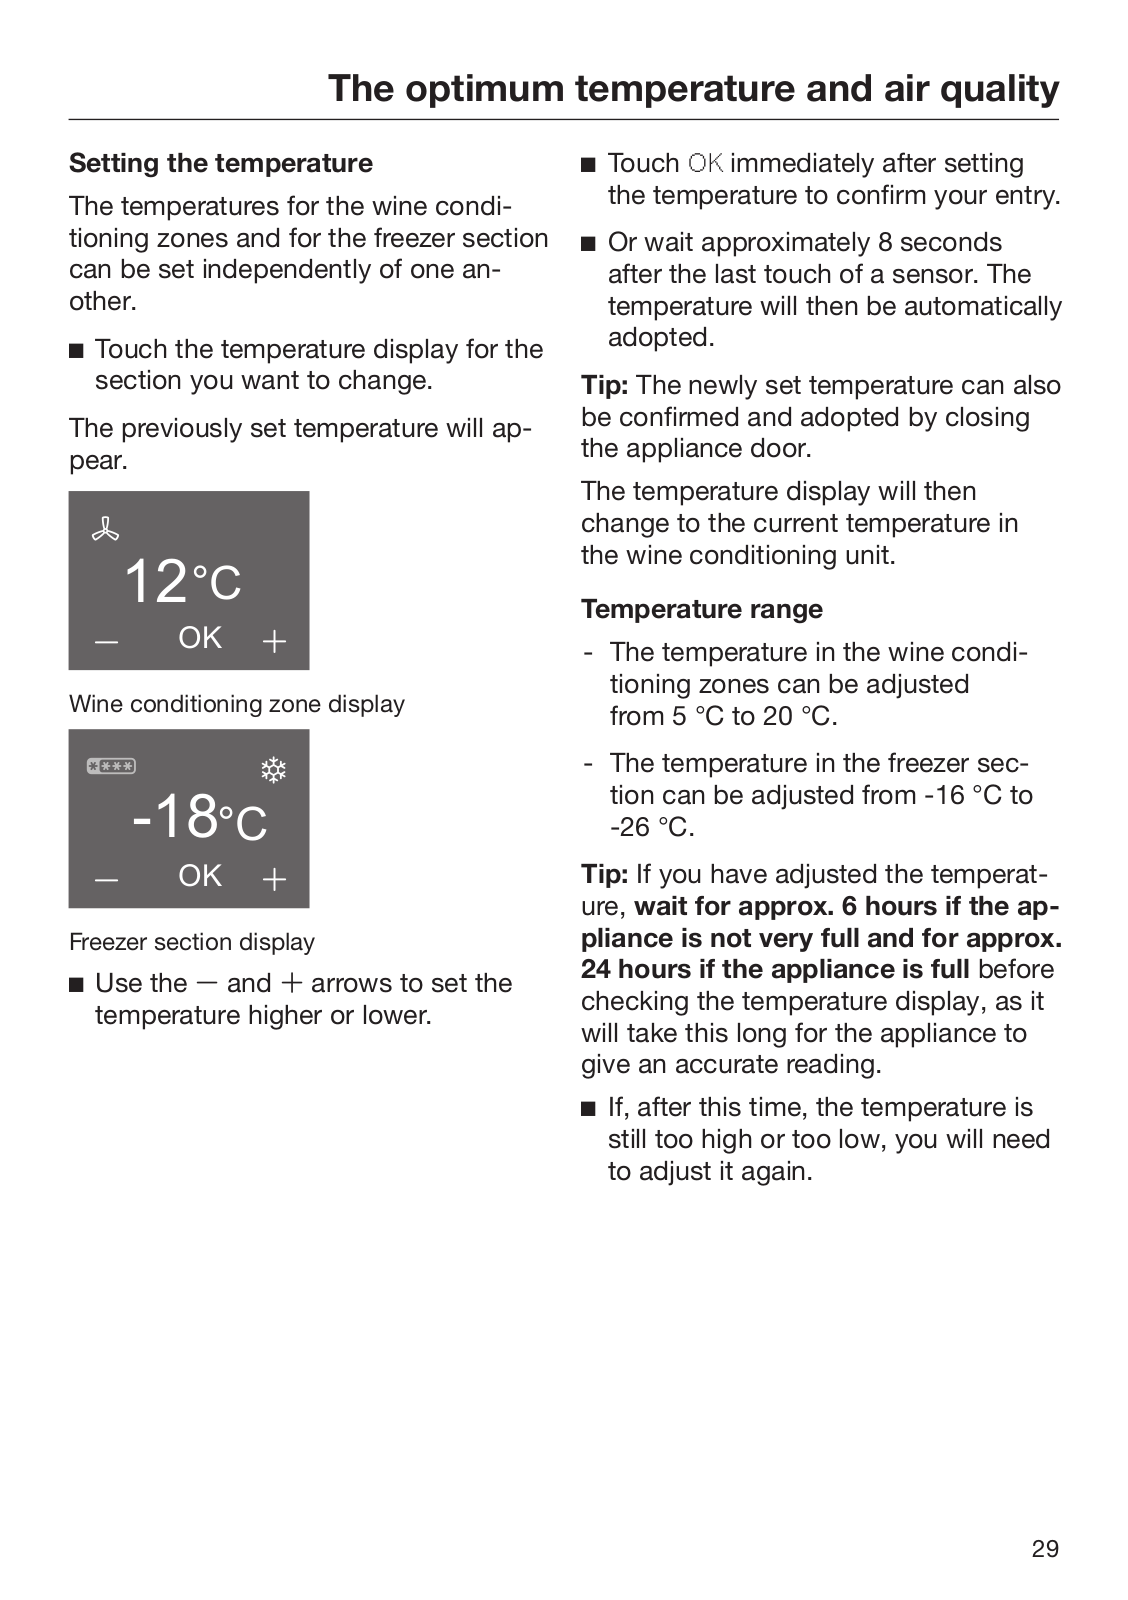
Miele KWNS 28462 E ed, KWNS 28462 E cs Operating instructions
...
Miele Operating instructions
Download
Specifications and Main Features
Frequently Asked Questions
User Manual
Download
Loading...
+
hidden pages
Unhide
You need points to download manuals.
1 point = 1 manual.
You can buy points or you can get point for every manual you upload.
Buy points
Upload your manuals